Chats
Chats Calendar
 Meetings
 Contacts
 Mail
Mail Docs
Docs Drive
Drive AI Table
 AI Minutes
 Attendance
 Approval
 YiDA
YiDA Admin Console
1. Get to know DingTalk OA Approval
DingTalk OA Approval is an out-of-the-box, one-stop approval platform that solves complex management challenges with simple operations. Through pre-installed templates, it helps organizations quickly build a collaborative platform and digitize attendance, HR, finance, legal, and other business approvals. Combined with DingTalk’s native capabilities, it improves efficiency, connects business management, and ultimately brings the entire business online.1. Differentiated value
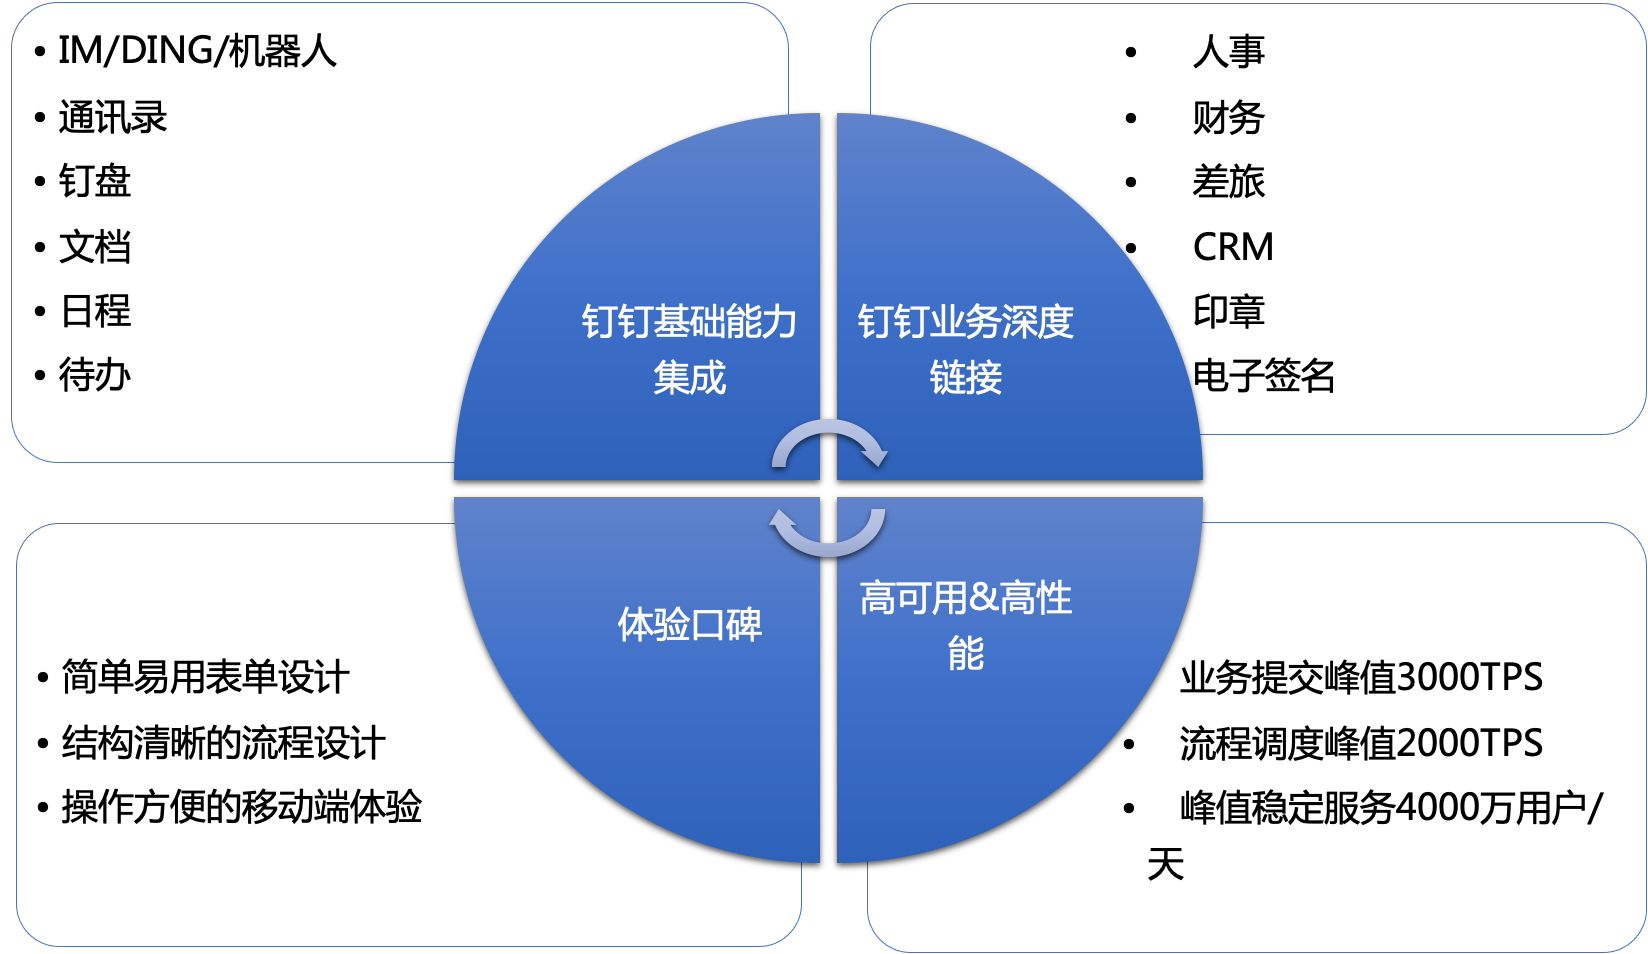
DingTalk basic integration capabilities
Deeply integrated with DingTalk’s built-in capabilities such as Group Chat, Direct Message, Event, To-Do, Drive, and Document to boost work efficiency.
Deep linking with DingTalk business
Deeply integrated with management suites such as attendance, Smart HR, Smart Finance, Smart Business Travel, and Smart Contract. Approval and business systems are connected, unifying task flow, data flow, and cash flow to break down data silos.
Experience and reputation
Forms and processes are simple to operate and easy to learn, keeping management and usage costs low.
High availability and high performance
Backed by proven experience handling large traffic and high-concurrency events, delivering stable and reliable service.
2. Internal value for the organization
Organization head
Complete approvals quickly, even while traveling — no more spending a whole day each week working through stacks of paper Approval forms. When questions arise during the approval process, reach the Submitter and other approvers directly through the form to communicate and resolve issues efficiently.
HR
leave request, out-of-office, business travel, and other attendance approvals sync to attendance statistics, cutting attendance-based payroll from 5 days to 1. Onboarding, transfers, role changes, and offboarding sync to the employee roster, eliminating manual work and keeping department User information accurate.
Finance
Common Approval forms such as payment, reimbursement, petty cash, and invoice are preset within the Organization. Fill in forms online with standardized Data, and cash flow is tallied automatically — no more tedious, low-efficiency work.
Business departments
Previously paper-based business processes can be brought online quickly, boosting business efficiency by 50%.
IT
Preset industry Templates let you Use this template with one click and cover business departments’ various Form and Approval needs. Diverse APIs and integration options connect with the Organization’s internal business systems and break down business and Data silos.
Employee
Quickly Find, initiate with one click, fill out anytime, auto-route, and track Progress online — no more chasing people down or hunting for signatures.
2. Core roles and corresponding actions
1. Core roles
Approval Admin
Has operation Permissions in the Approval Admin Console, and can Create, Edit, and manage Forms they have Permissions for within the Organization.In the Admin Console, can query, Export, and Delete Form Data they have management Permissions over.The Admin is typically a User in the Organization responsible for business process management, such as an HR, administrative head, or IT head.
Approval initiator
Based on the settings of a specific Form, can initiate applications from entry points such as the Approval app, Organization Workbench, and Group Chat Plugins.Within the Approval app, can view Data within the Form’s scope.The Submitter is usually every User in the Organization, but based on the actual scenario, only some Users can be selected as Submitters.
Approval handler
Based on the handlers set in the process, can handle approvals from entry points such as To-Do, Approval Center, Direct Message, and Work Notifications.Within the Approval app, can view Data within the set scope.Handlers are typically department managers in the Organization, or the person in charge of, executing, or collaborating on a specific matter.
Data manager
Can perform Data management according to the Permissions set for a specific Form.Within the Approval app, can query, Export, Delete, and perform other actions on specific Forms.The data manager is typically the executor of a specific matter within the Organization who, in daily work, needs to run statistics and aggregation on specific approval Data.
2. Core actions
Create/Edit form
The Approval Admin must first configure the approver for the Form or Create a new Approval form as needed.
Initiate approval
The Approval initiator can find and initiate the Approval from the Approval Home, Workbench, Group Chat Plugins, and other entry points.
Handle approval
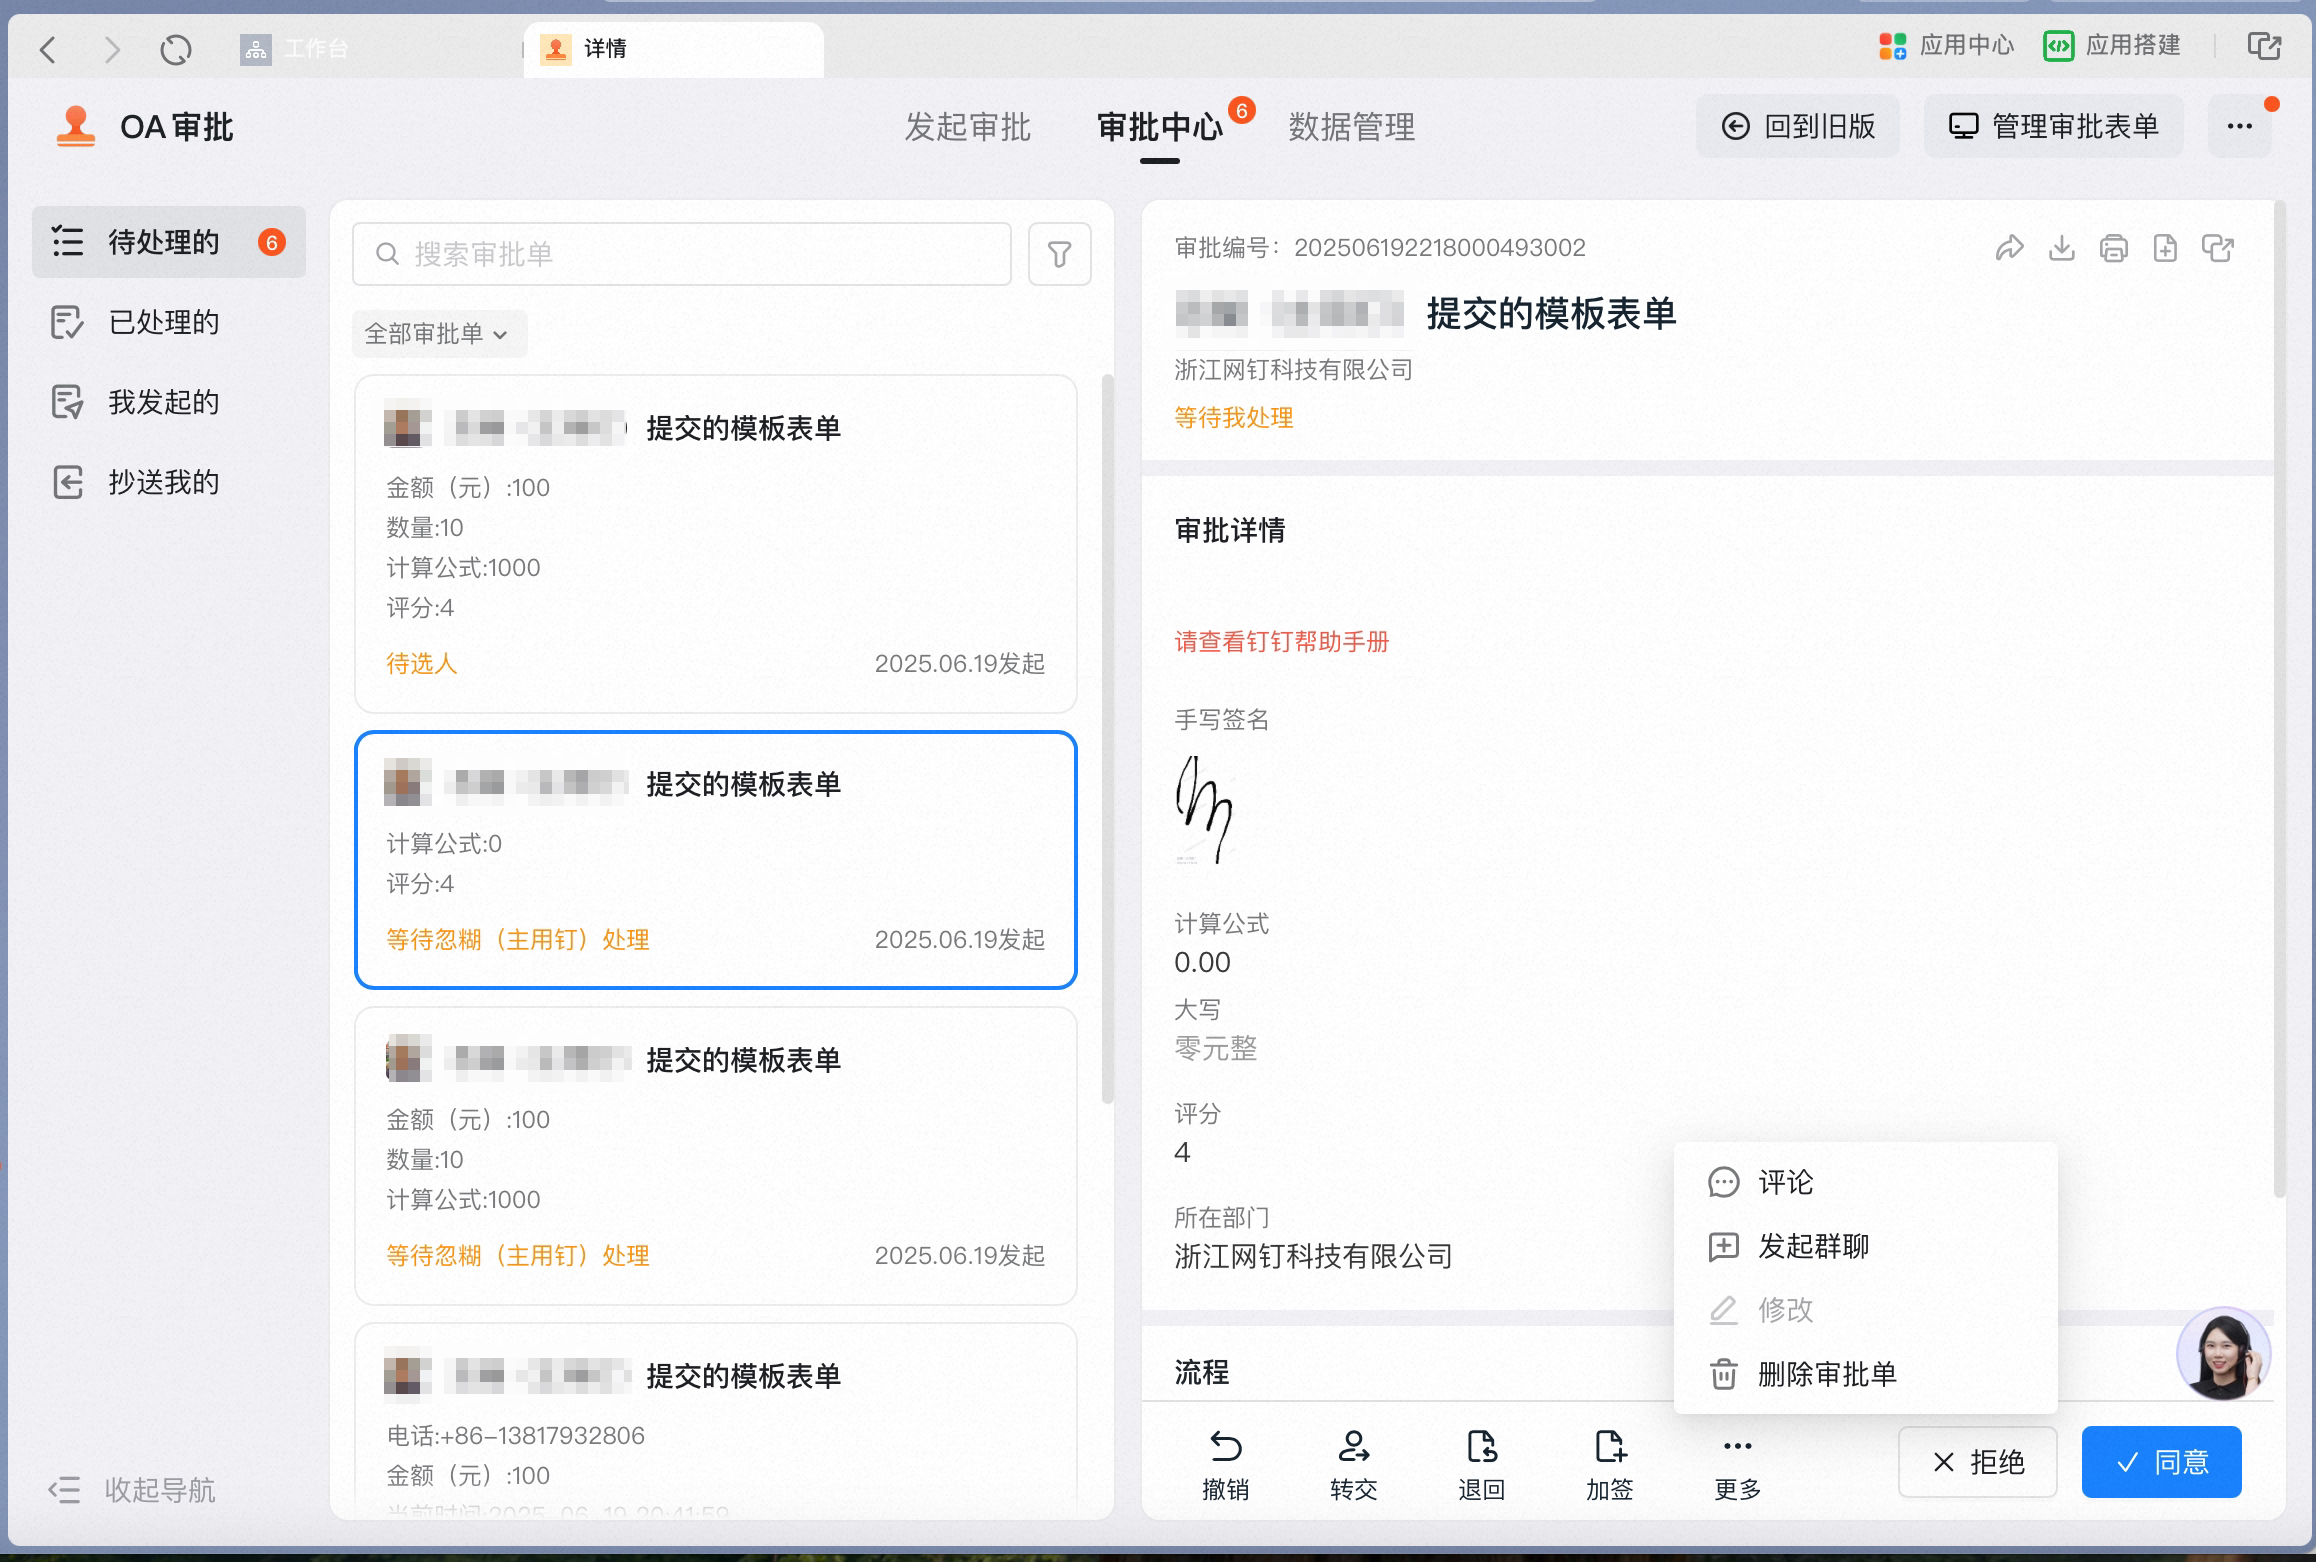
The Approval handler can quickly handle approvals from entry points such as To-Do, Approval Center, and Direct Message.
Manage data
The data manager can Filter, query, and Export Data by conditions.
2.1 Edit/Create Approval form
- Edit an Approval form:
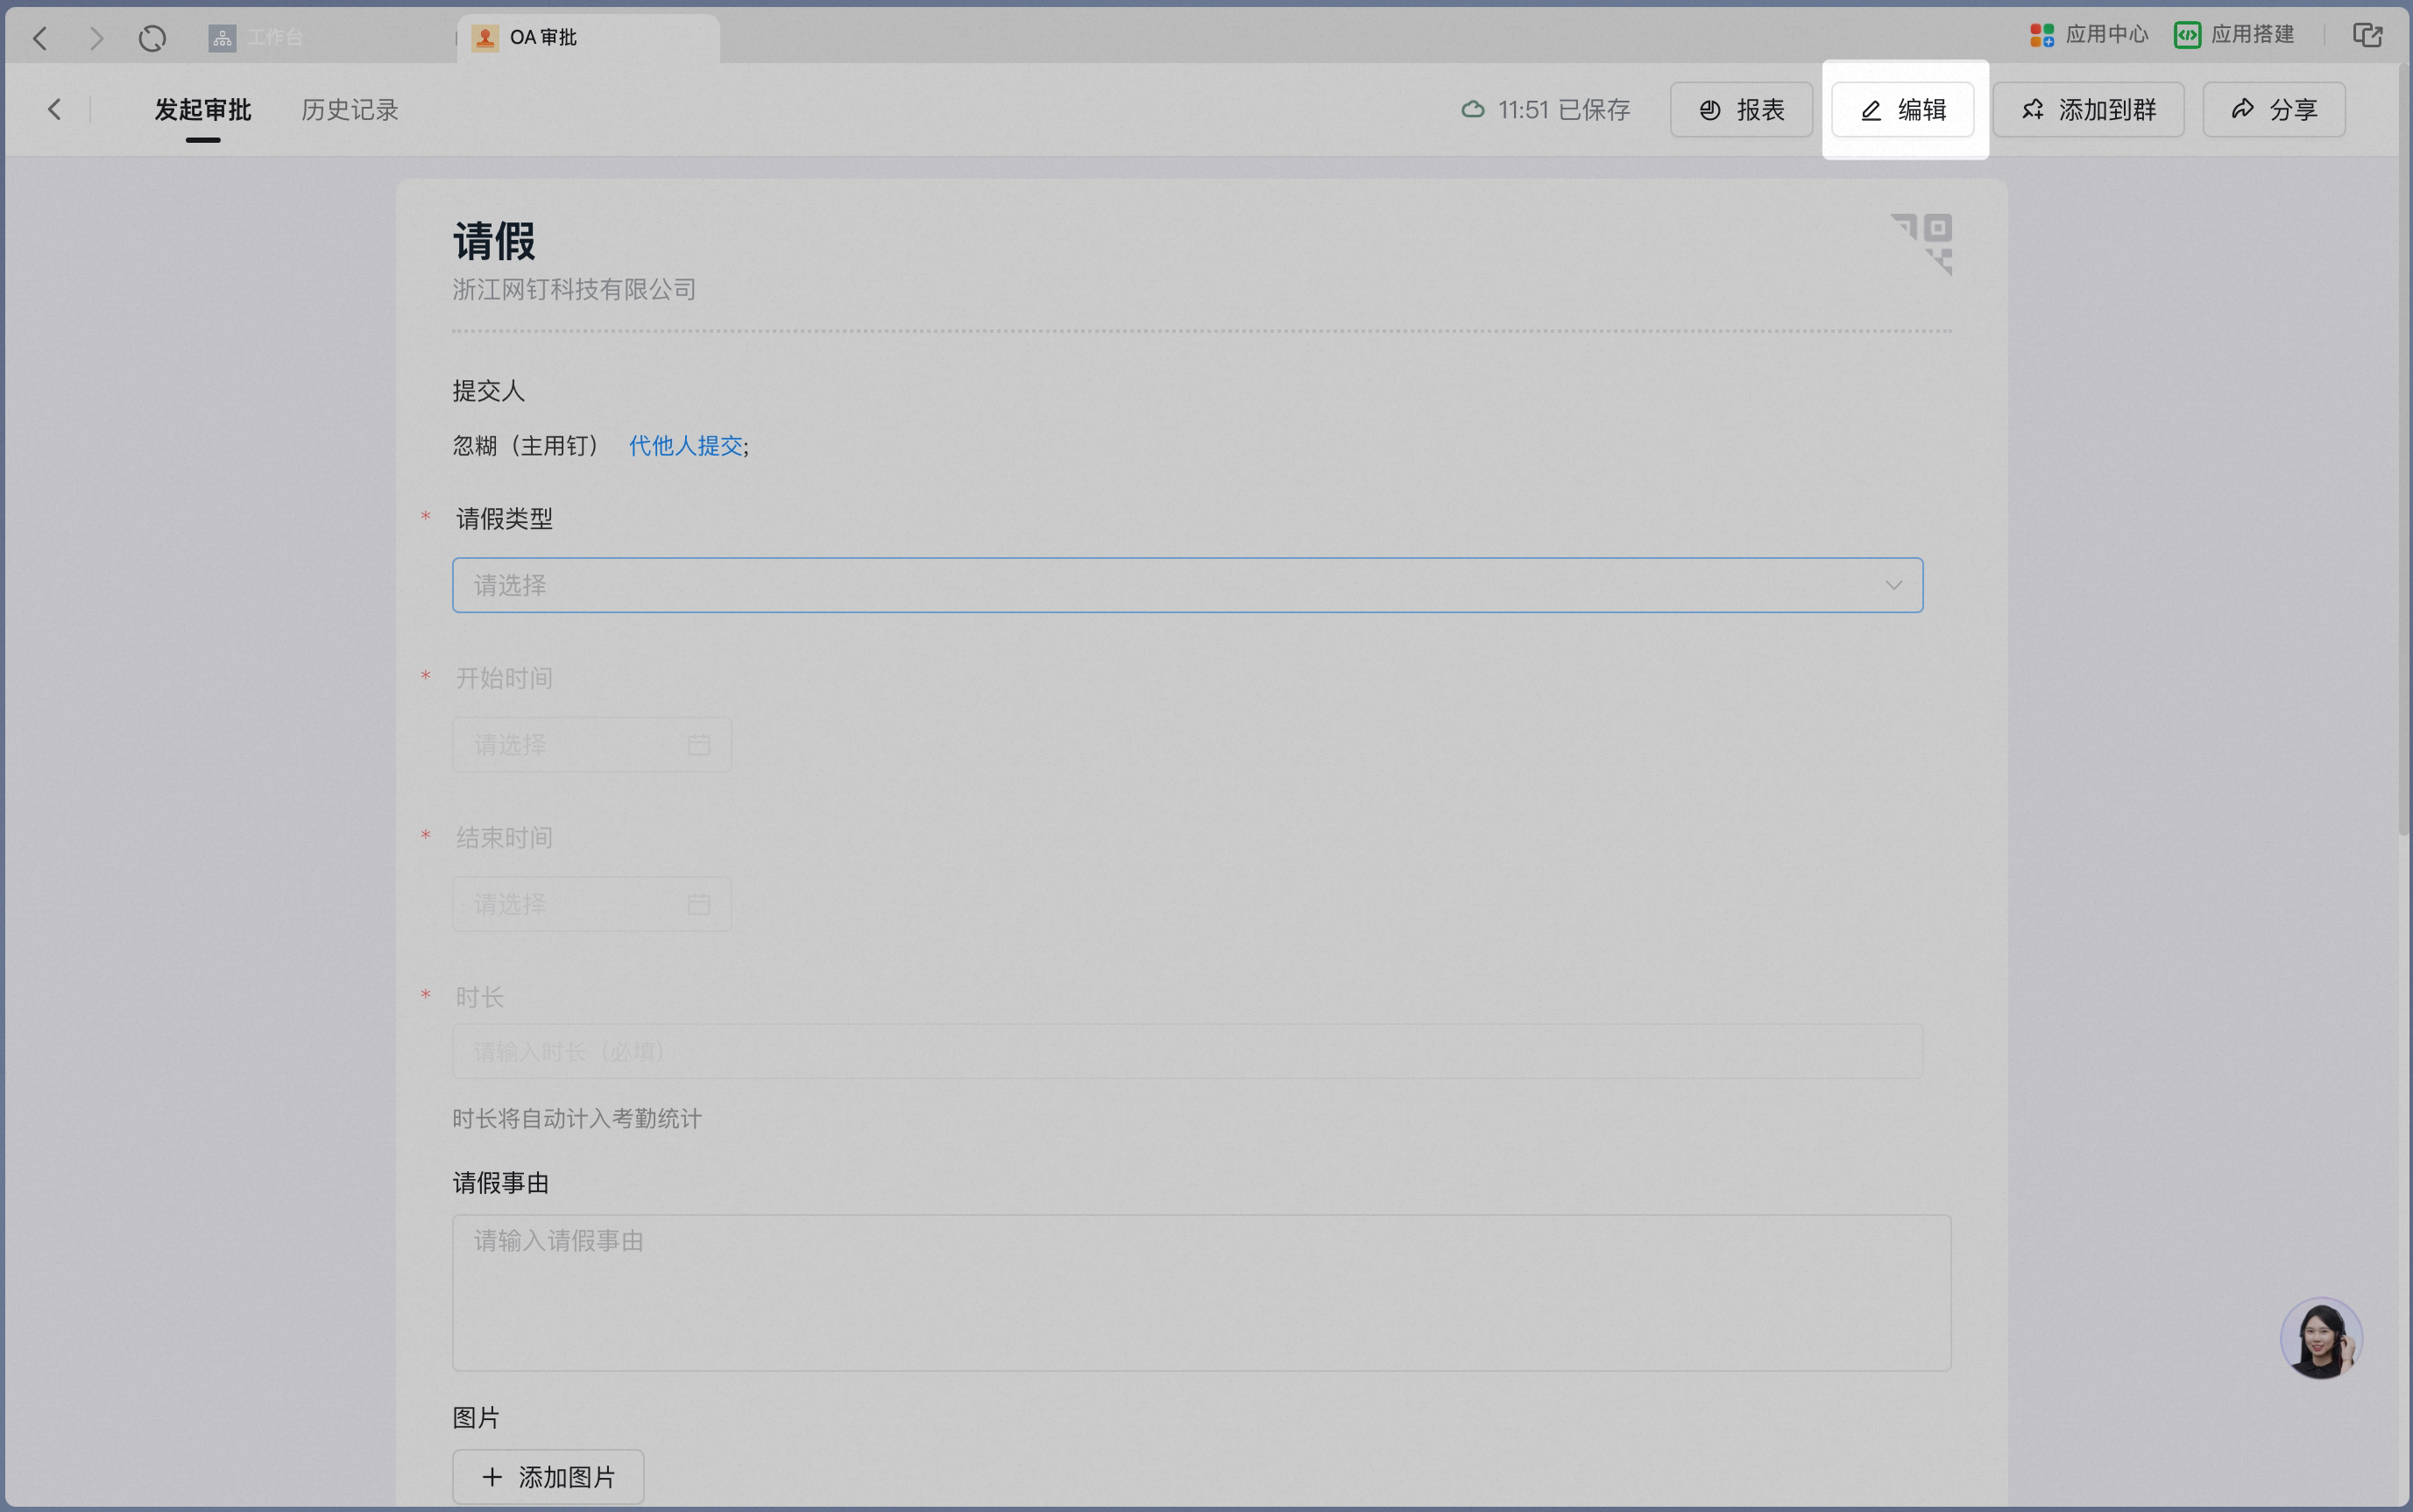
- On the DingTalk official website, after downloading and installing the desktop client, the Approval Admin can go to [Workbench] - [OA Approval], locate the Approval form to configure, and click [Edit] in the upper-right corner.
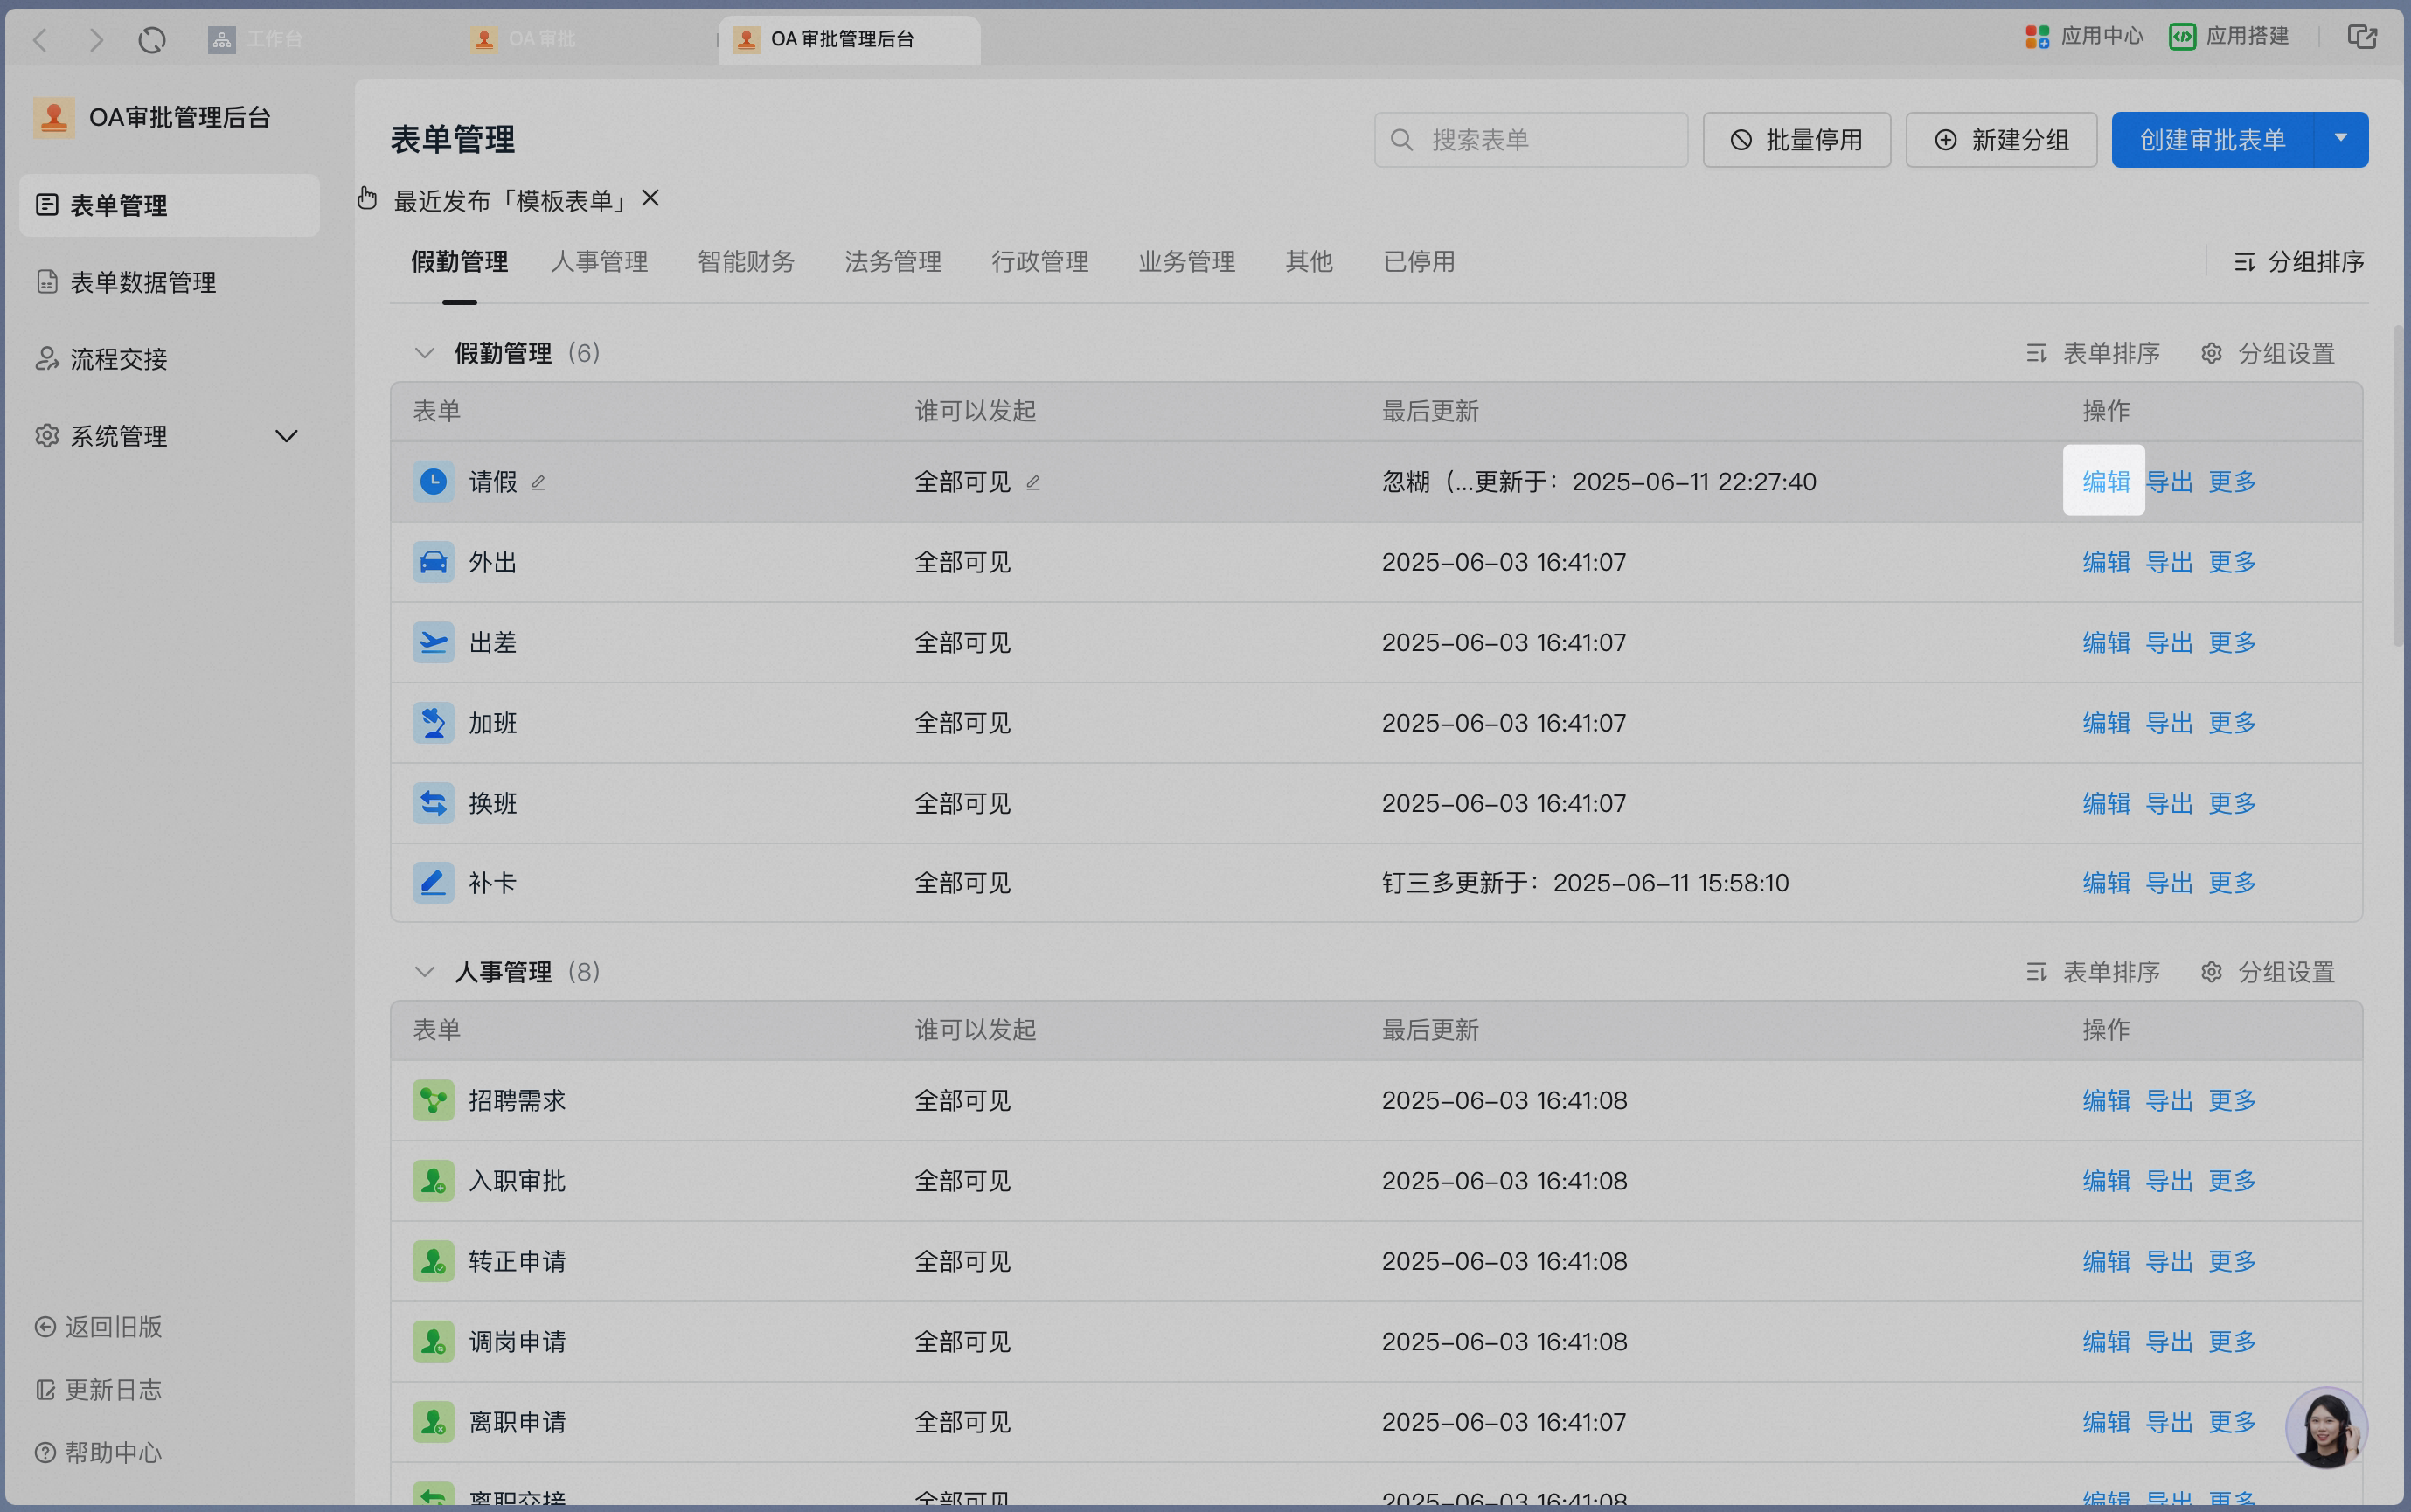
- The Approval Admin can also Sign in to the DingTalk Admin Console, go to [Approval] - [Form Management] on the Home page, locate the Approval form to configure, and click [Edit].
- Create an Approval form:
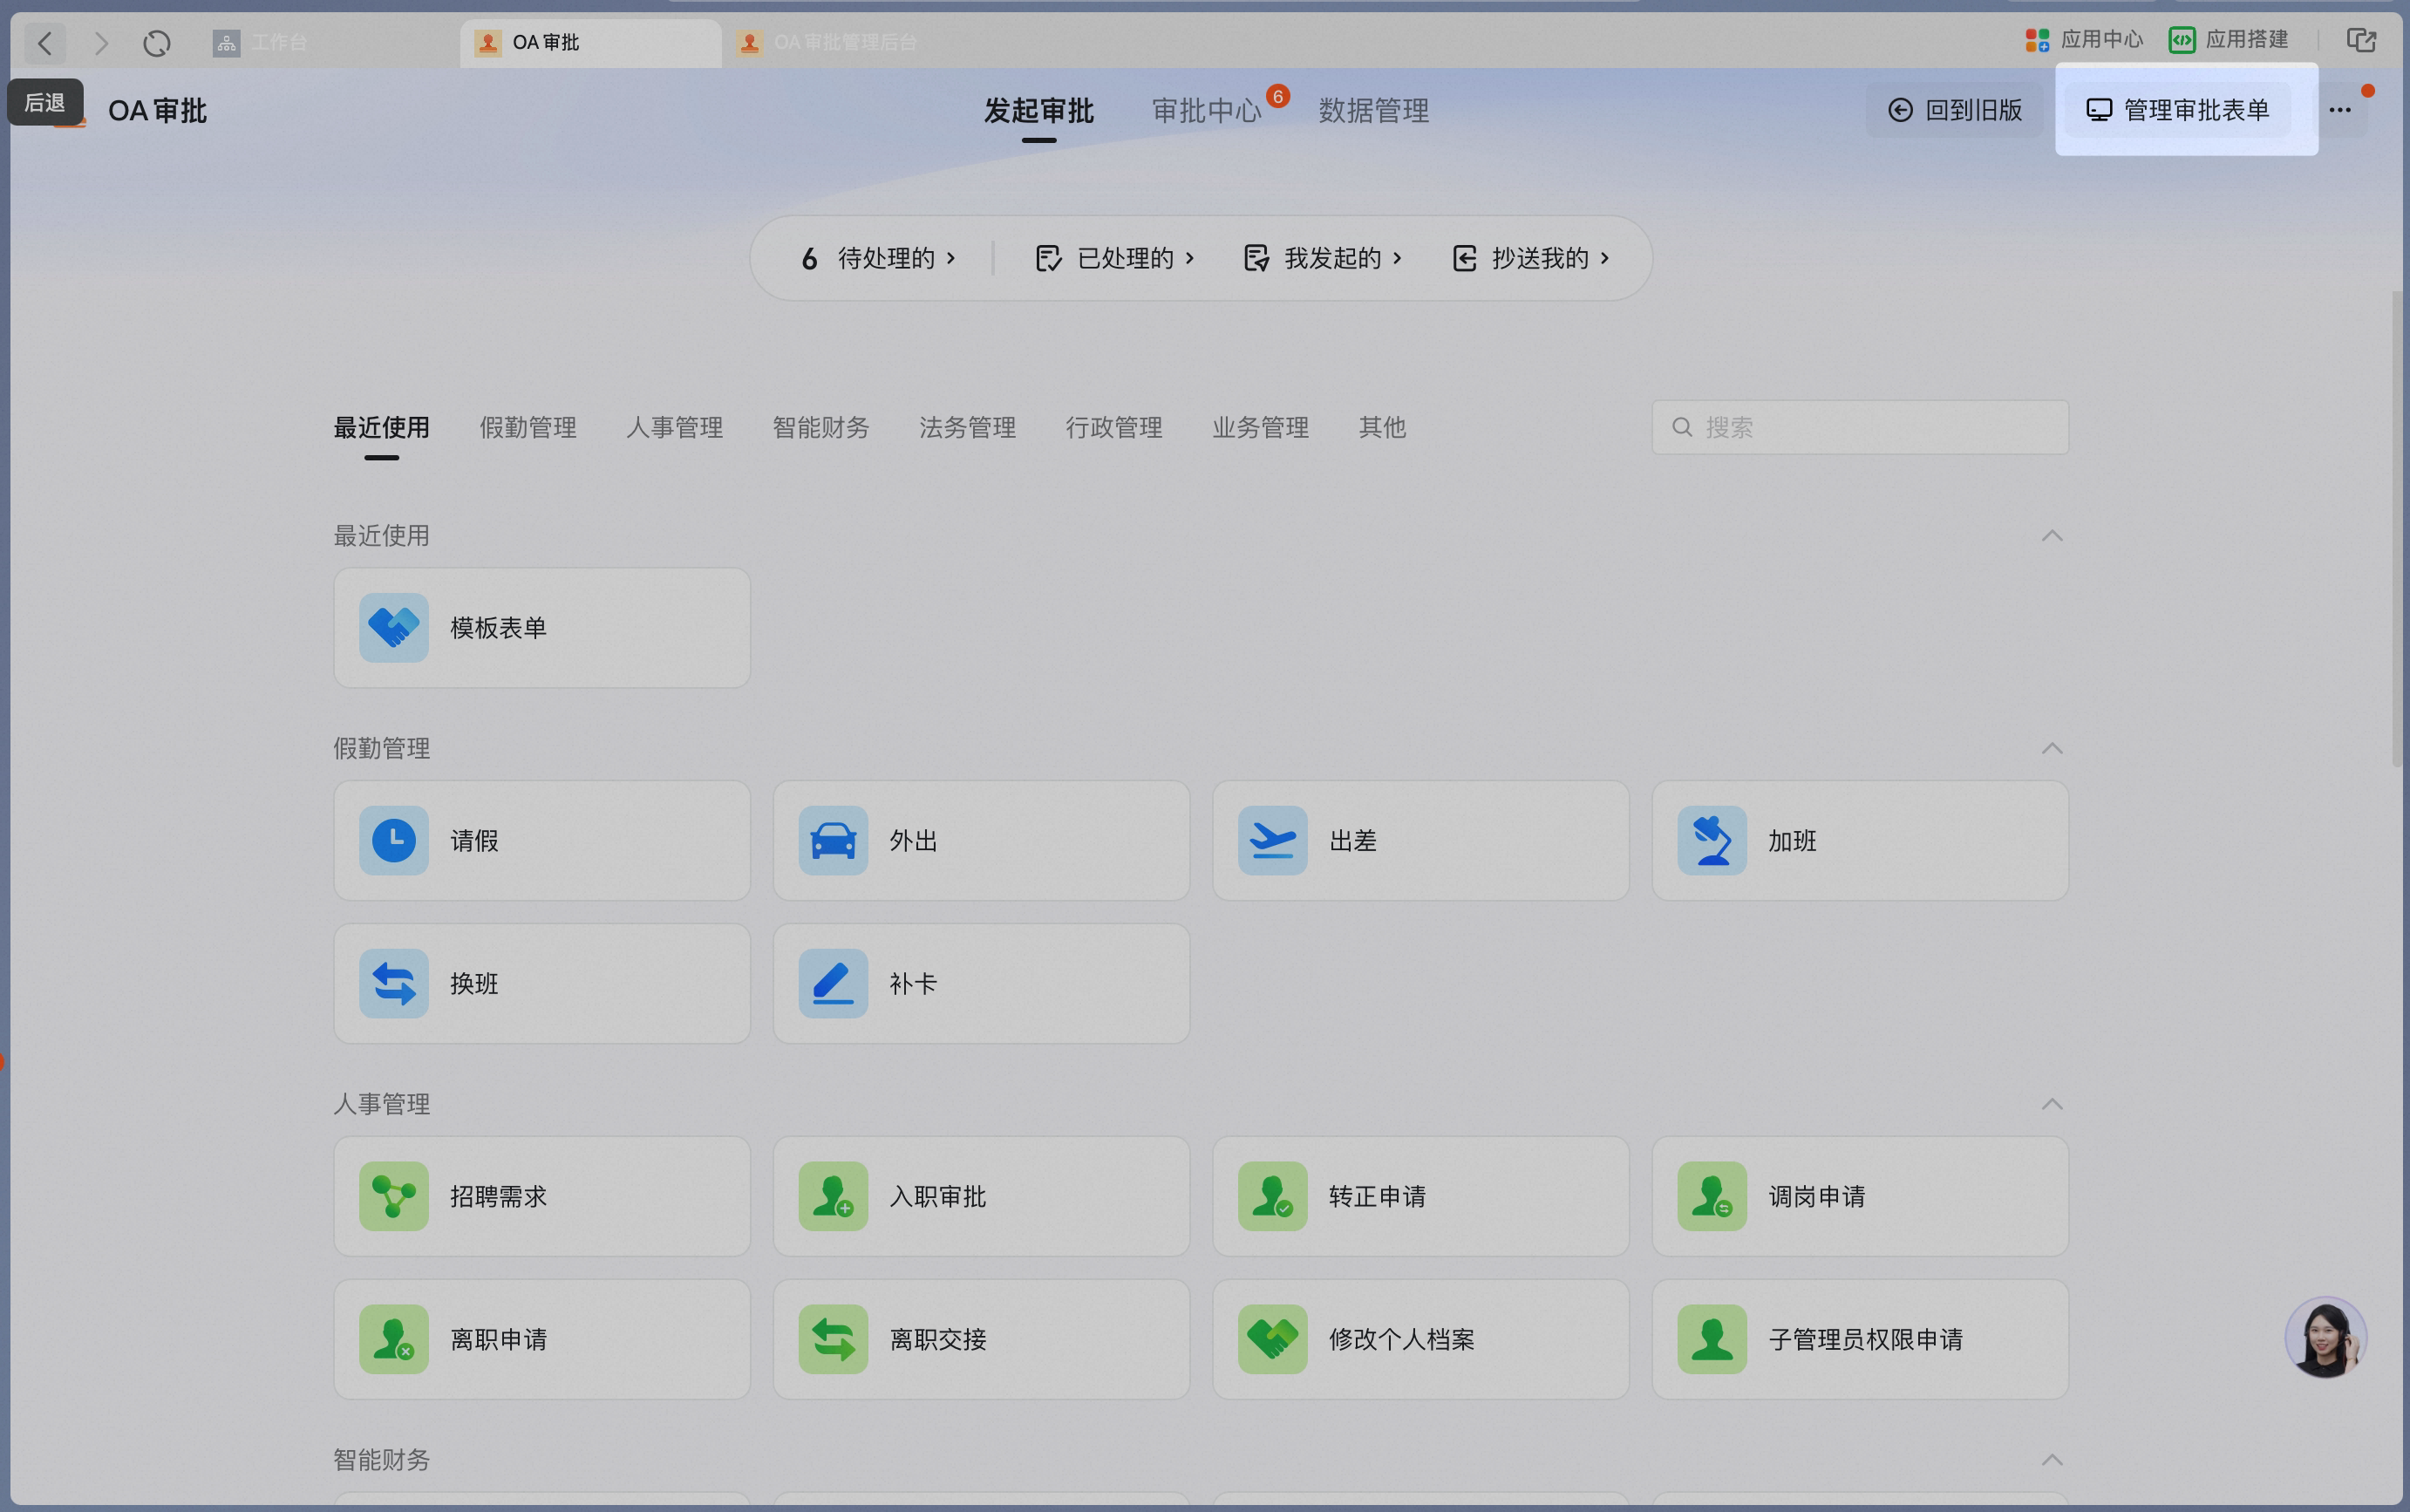
- On the DingTalk official website, after downloading and installing the desktop client, the Approval Admin can go to [Workbench] - [OA Approval], click [Manage Approval Forms] in the upper-right corner, and then click [Create Approval Form].
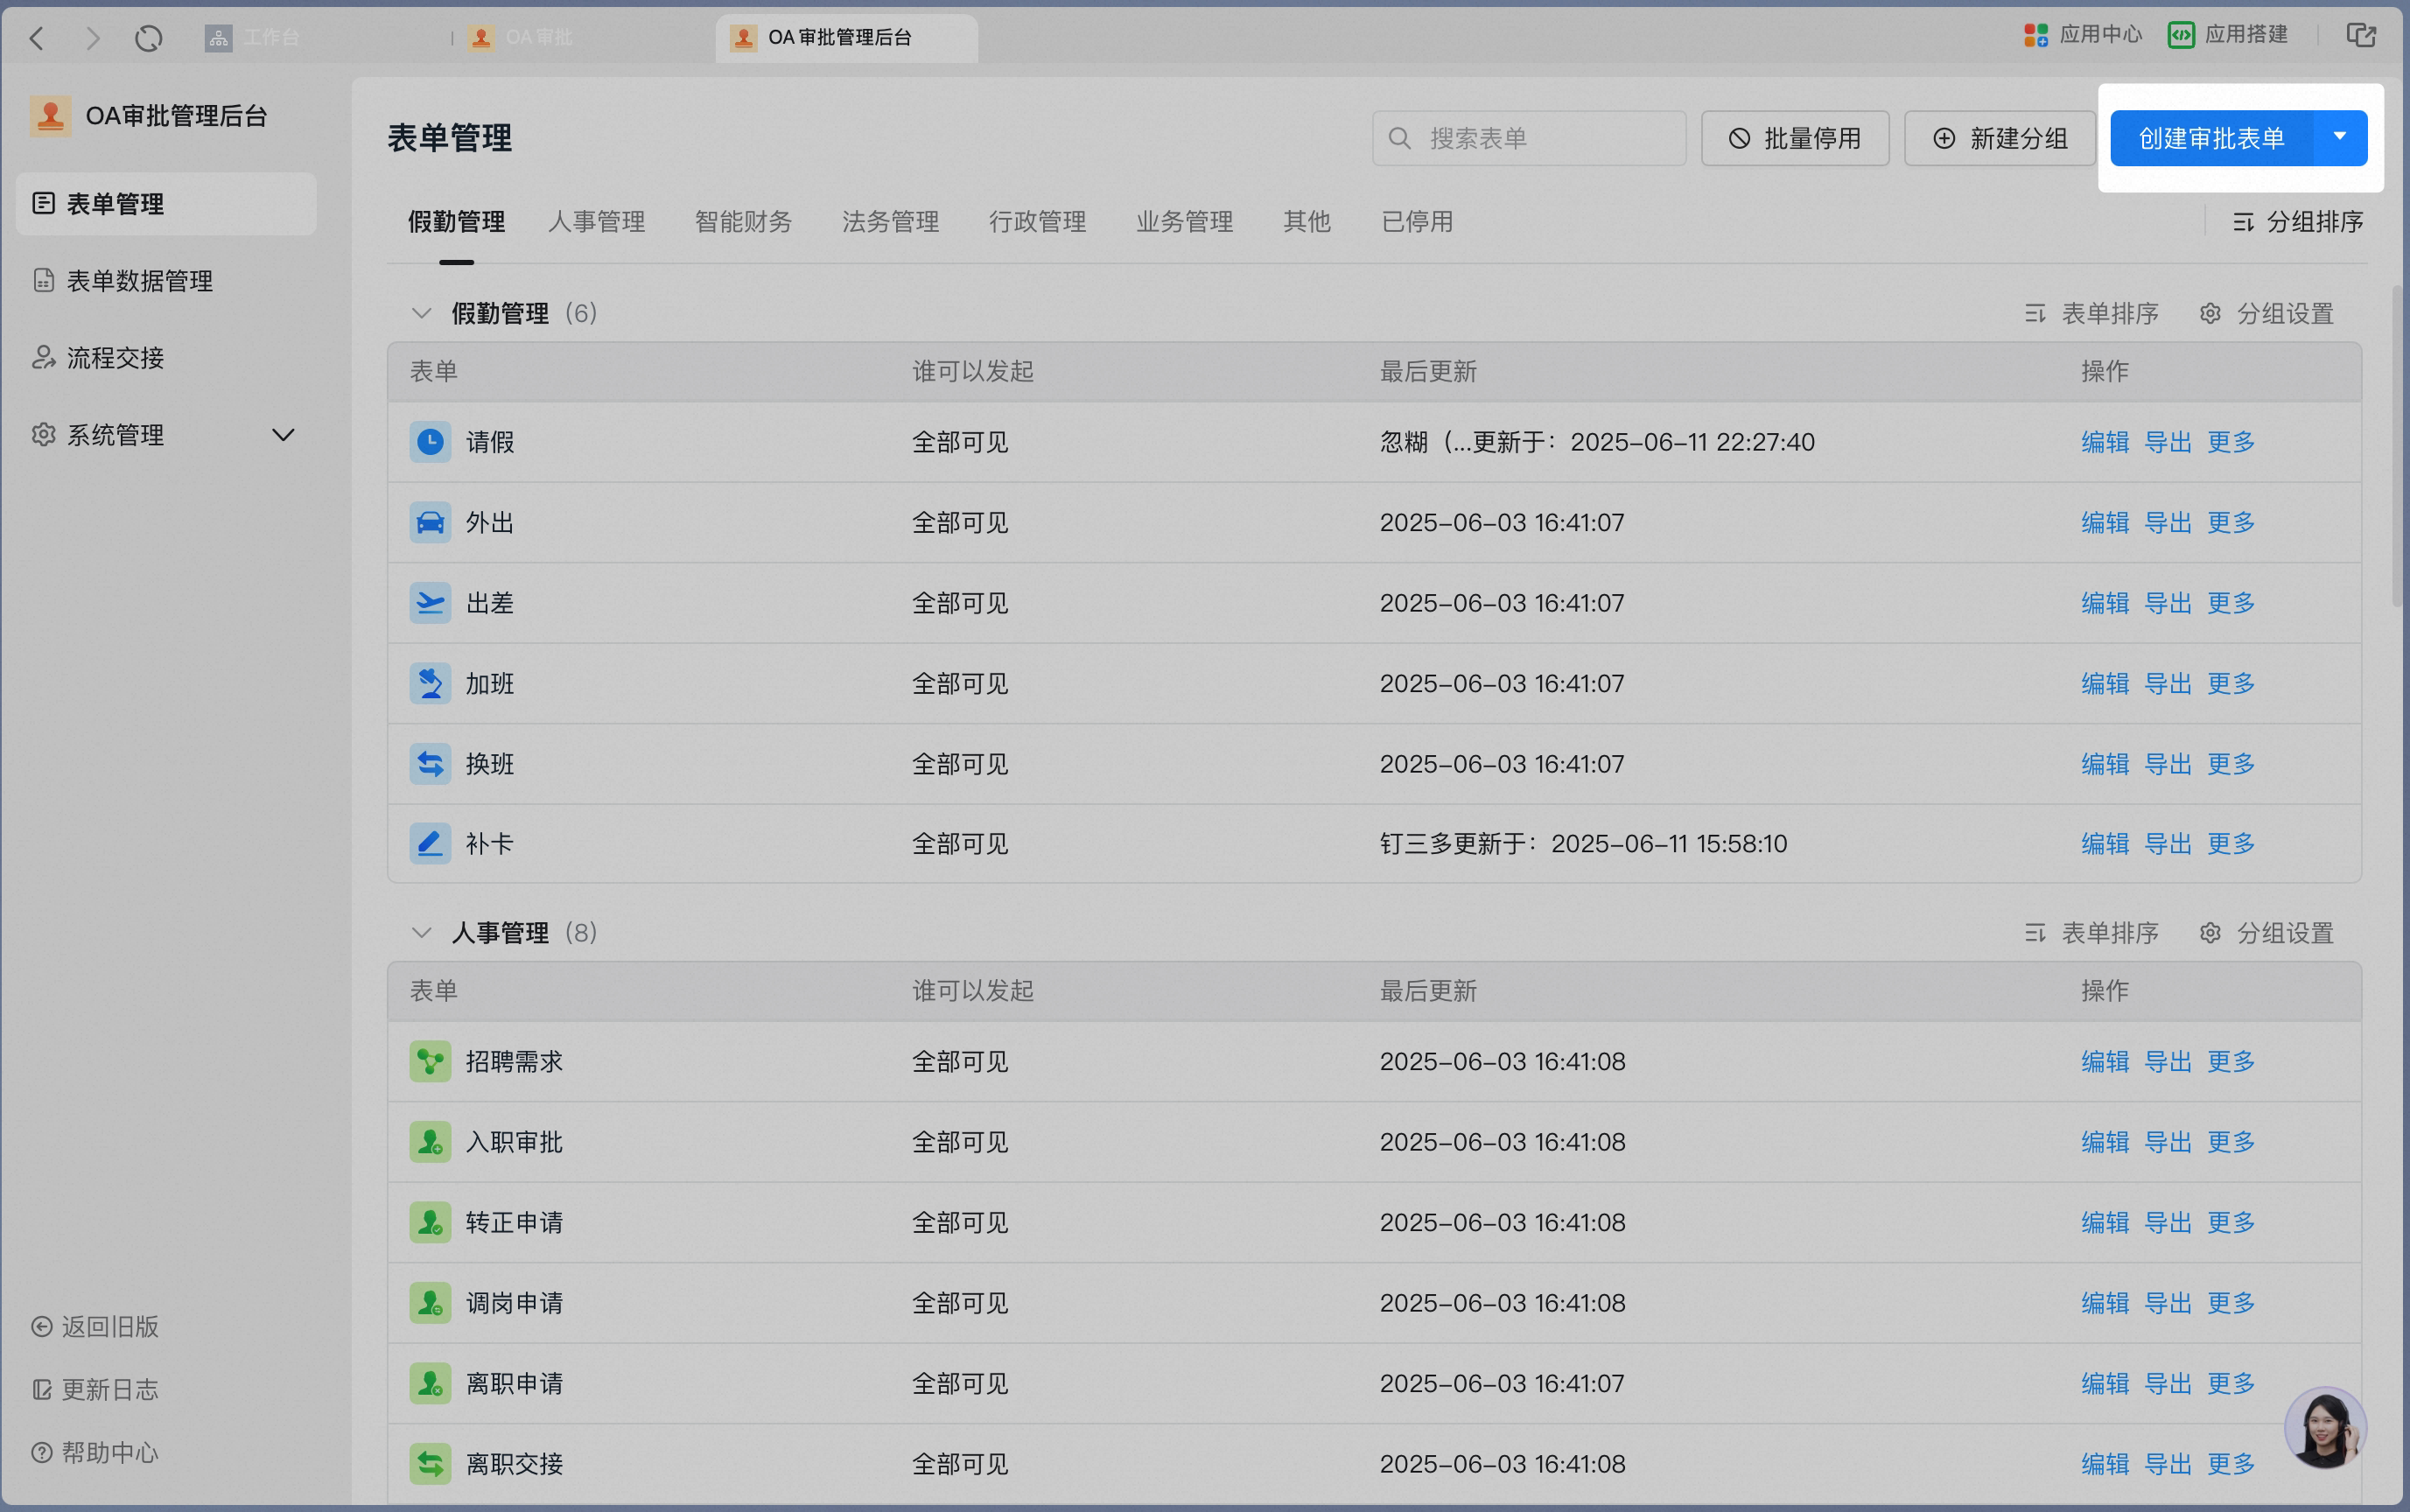
- The Approval Admin can also Sign in to the DingTalk Admin Console and, on the Home page, go to [Approval] - [Form Management] - [Create Approval Form].
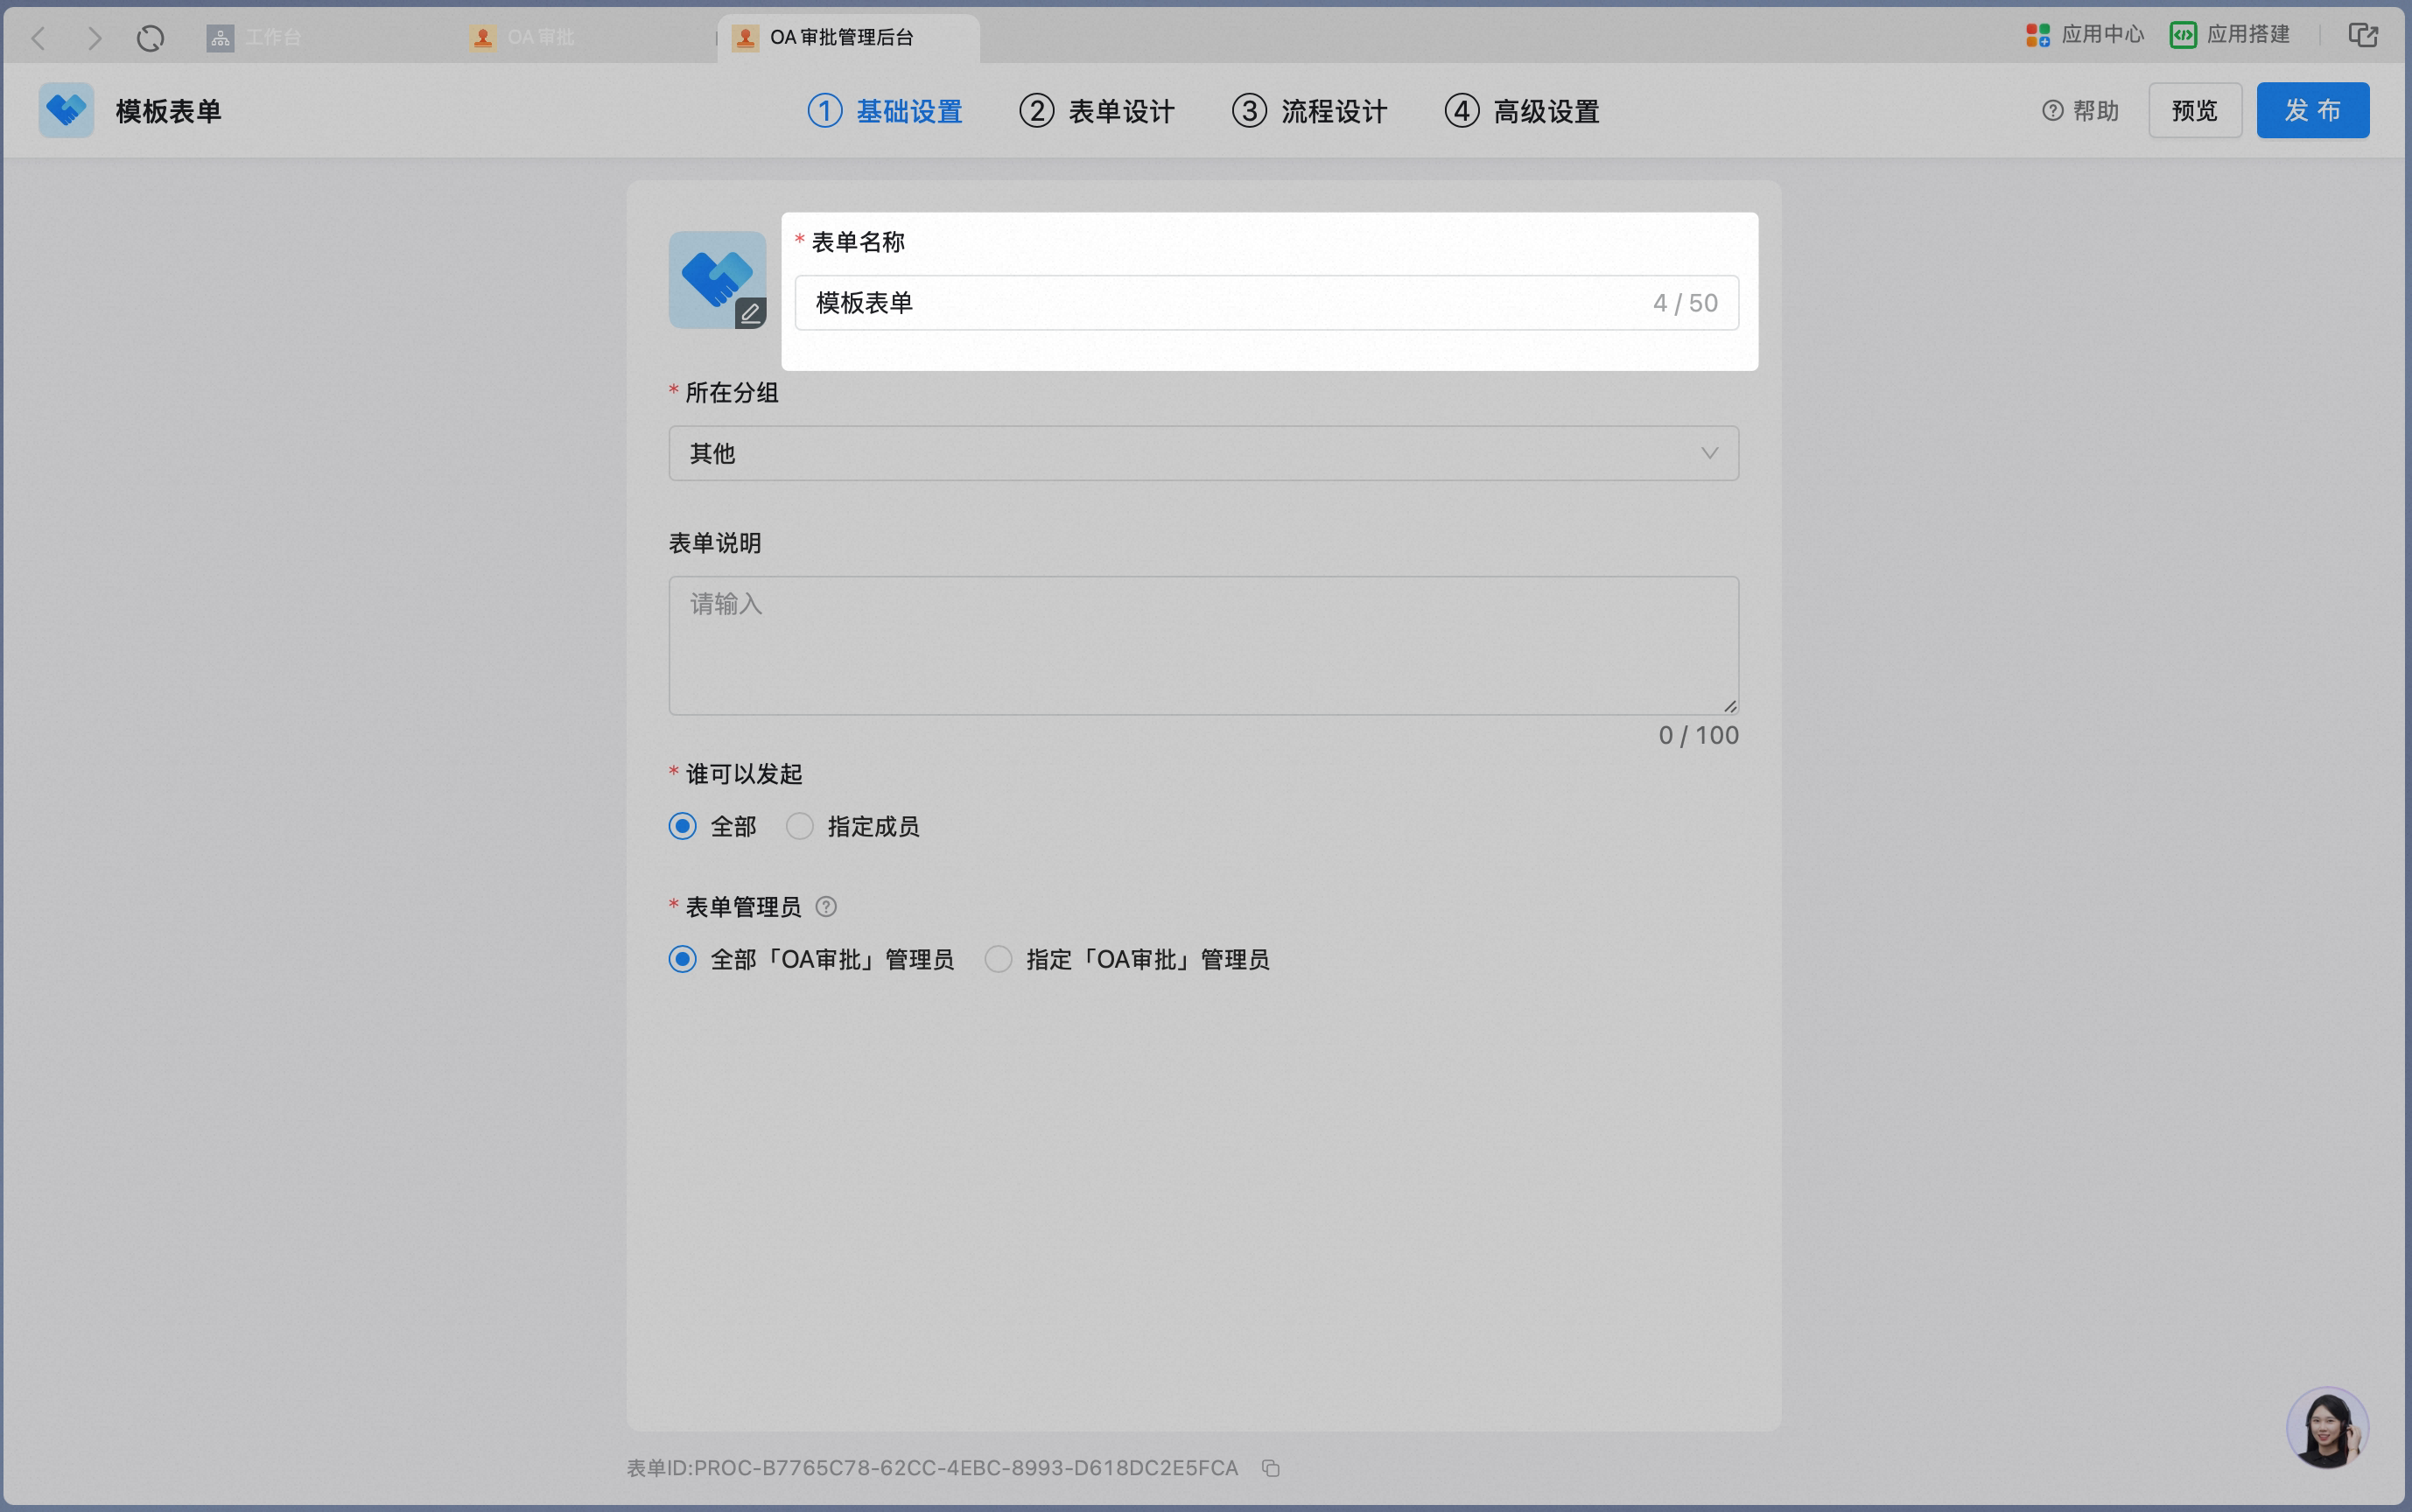
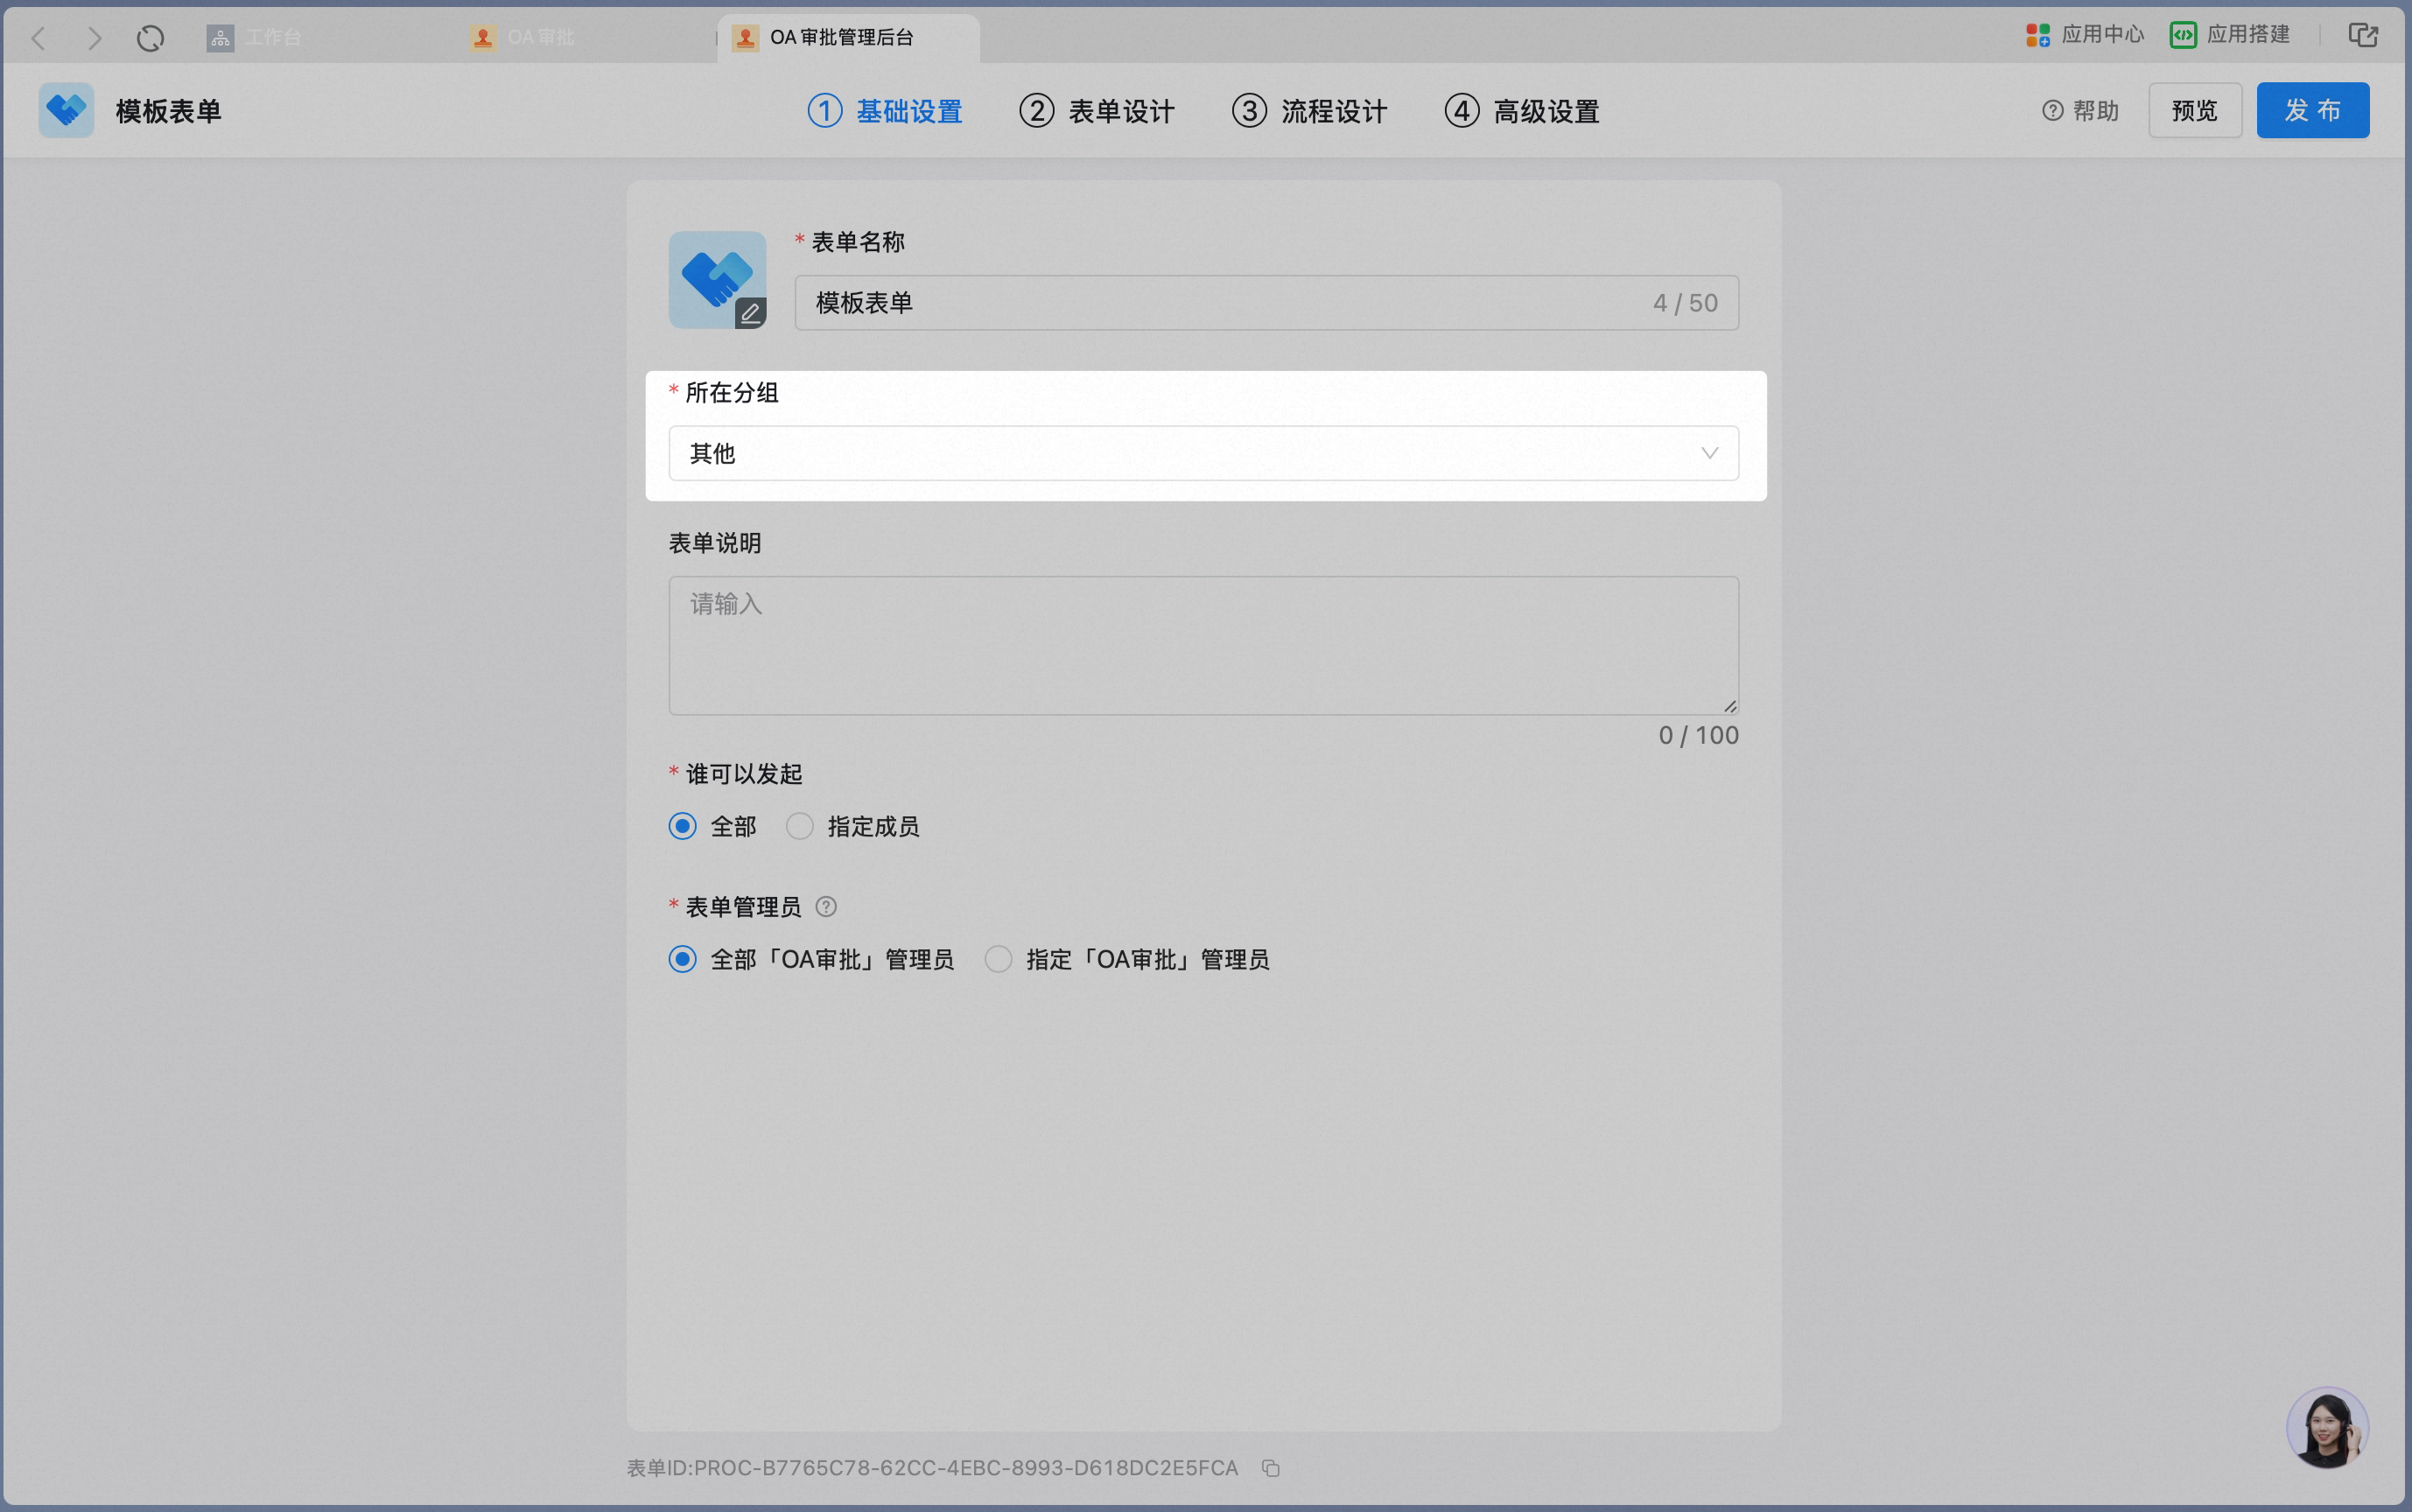
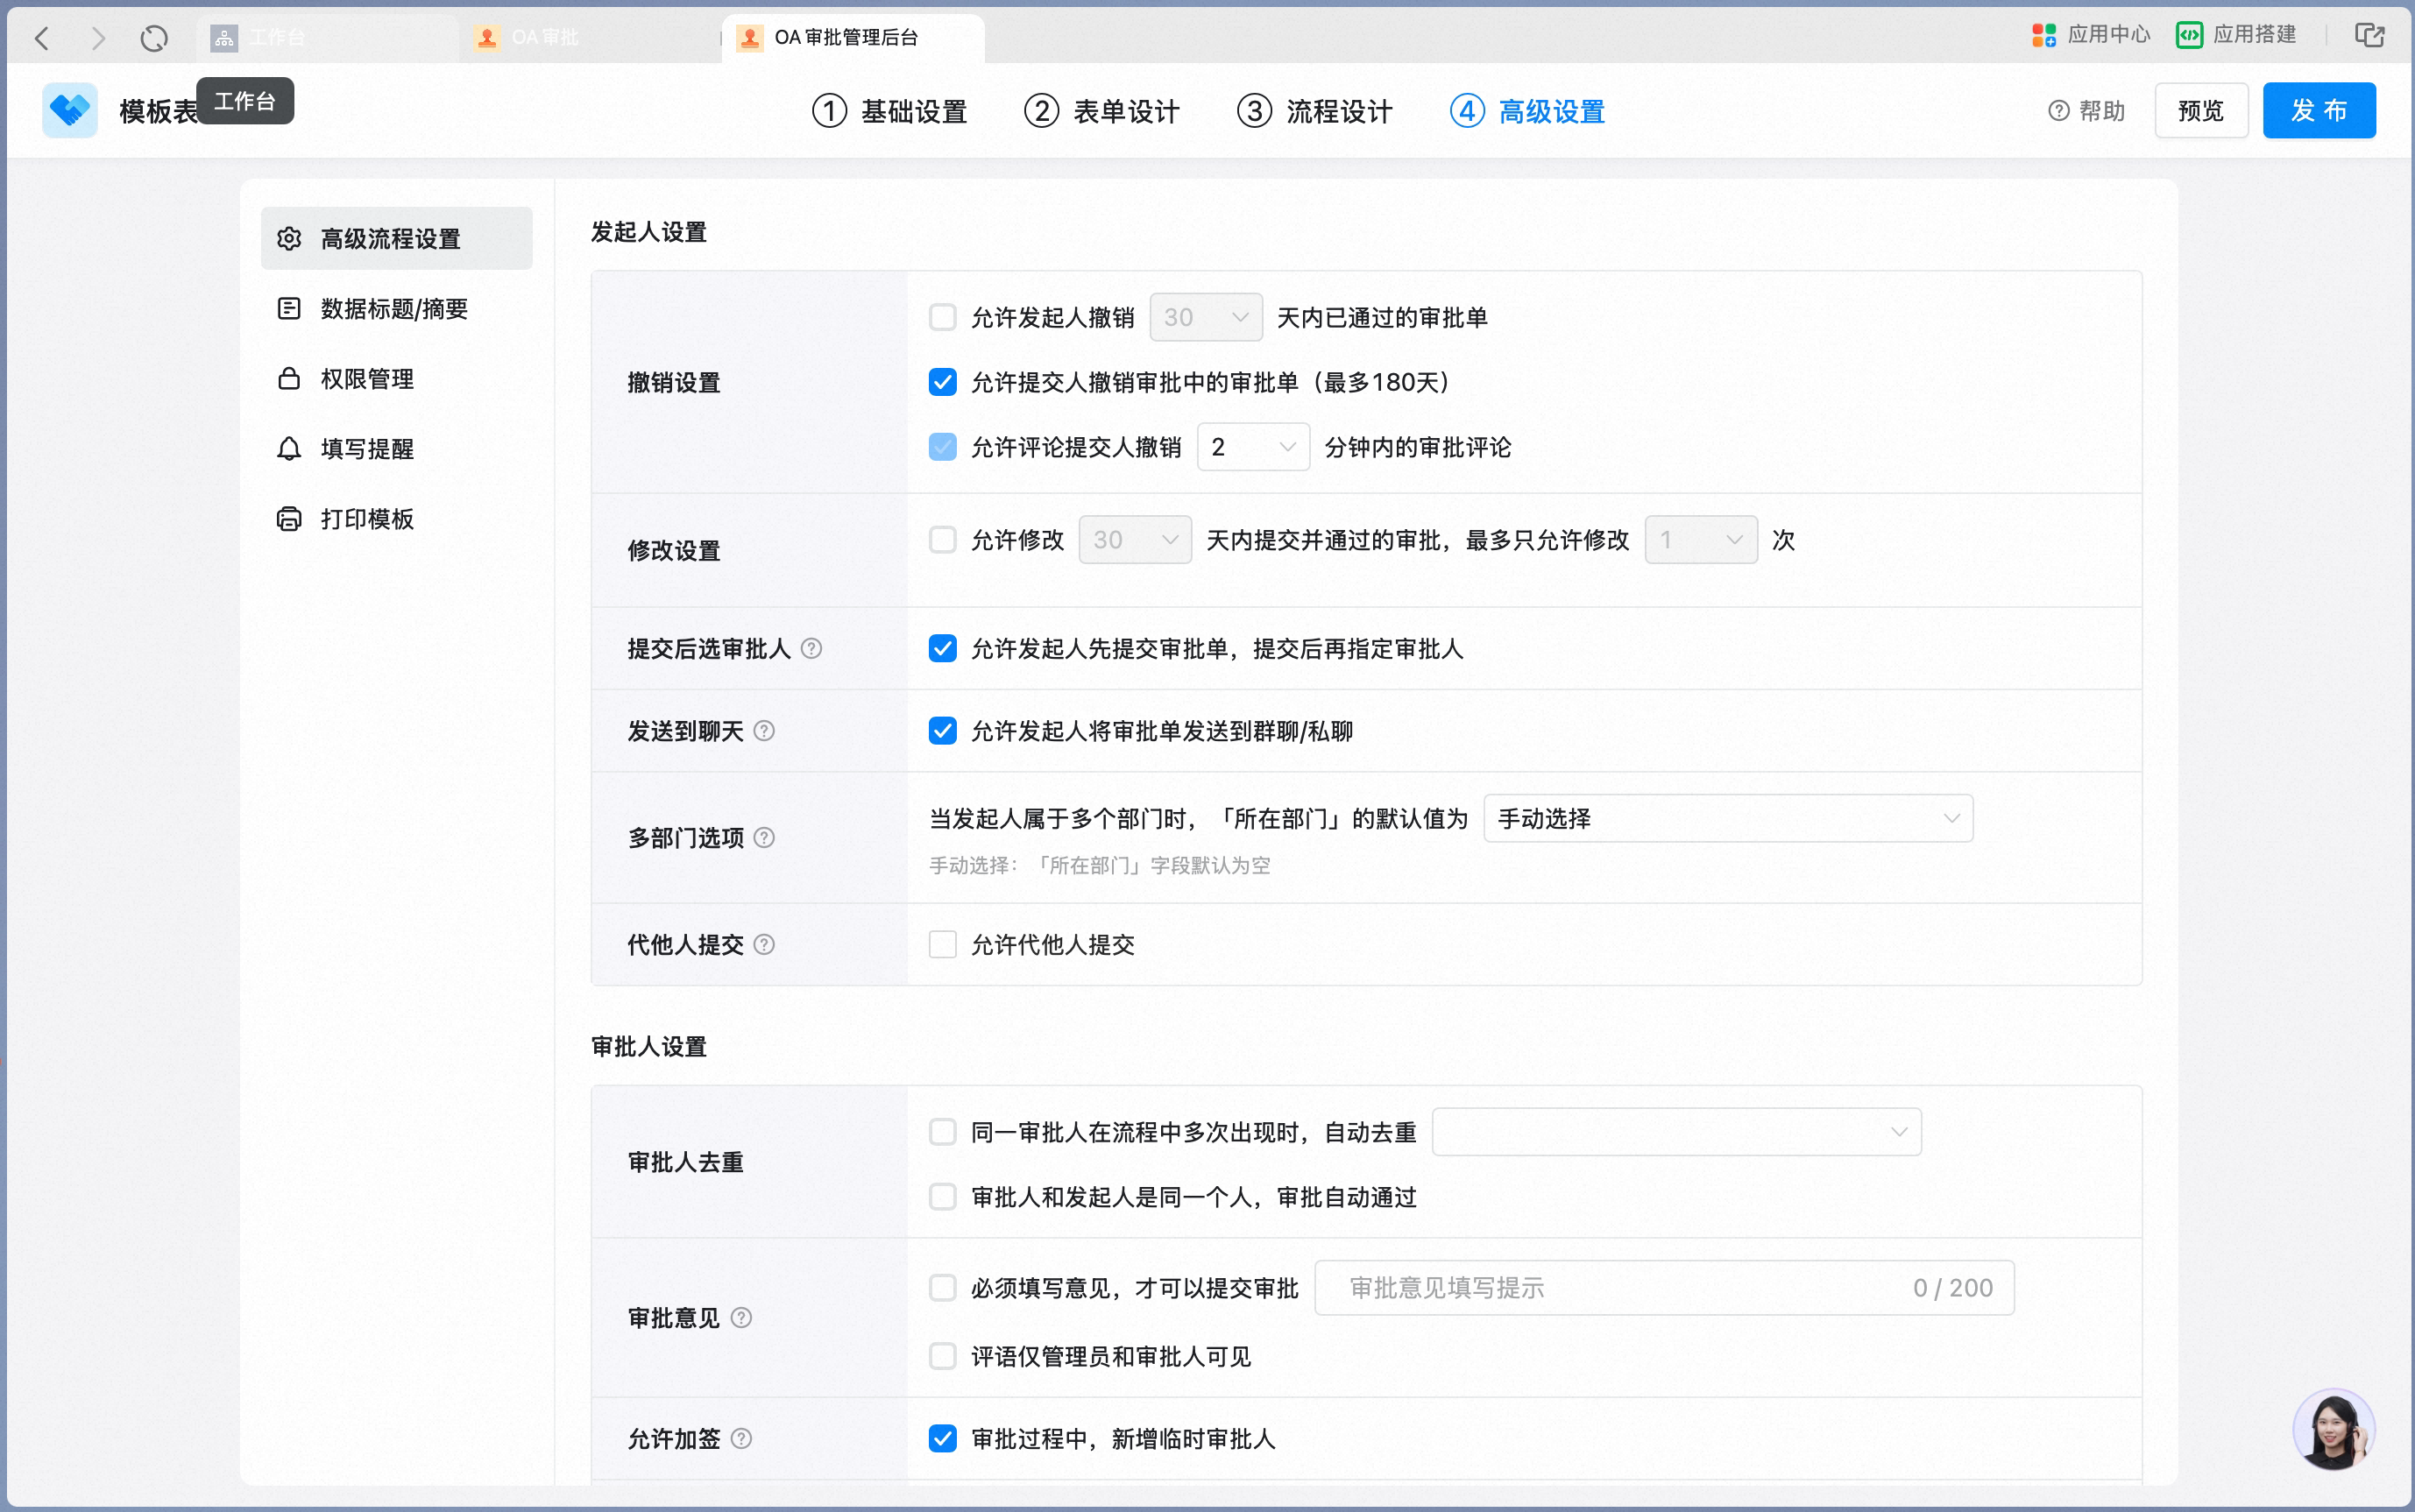
- Basic operations for Approval form settings
- Form name
- Form Group
- Select widget
- Enter widget name
- Decide whether to enable Required
- Add Step
- Configure approver
- Initiator settings
- Approver settings
- Basic Settings
- form design
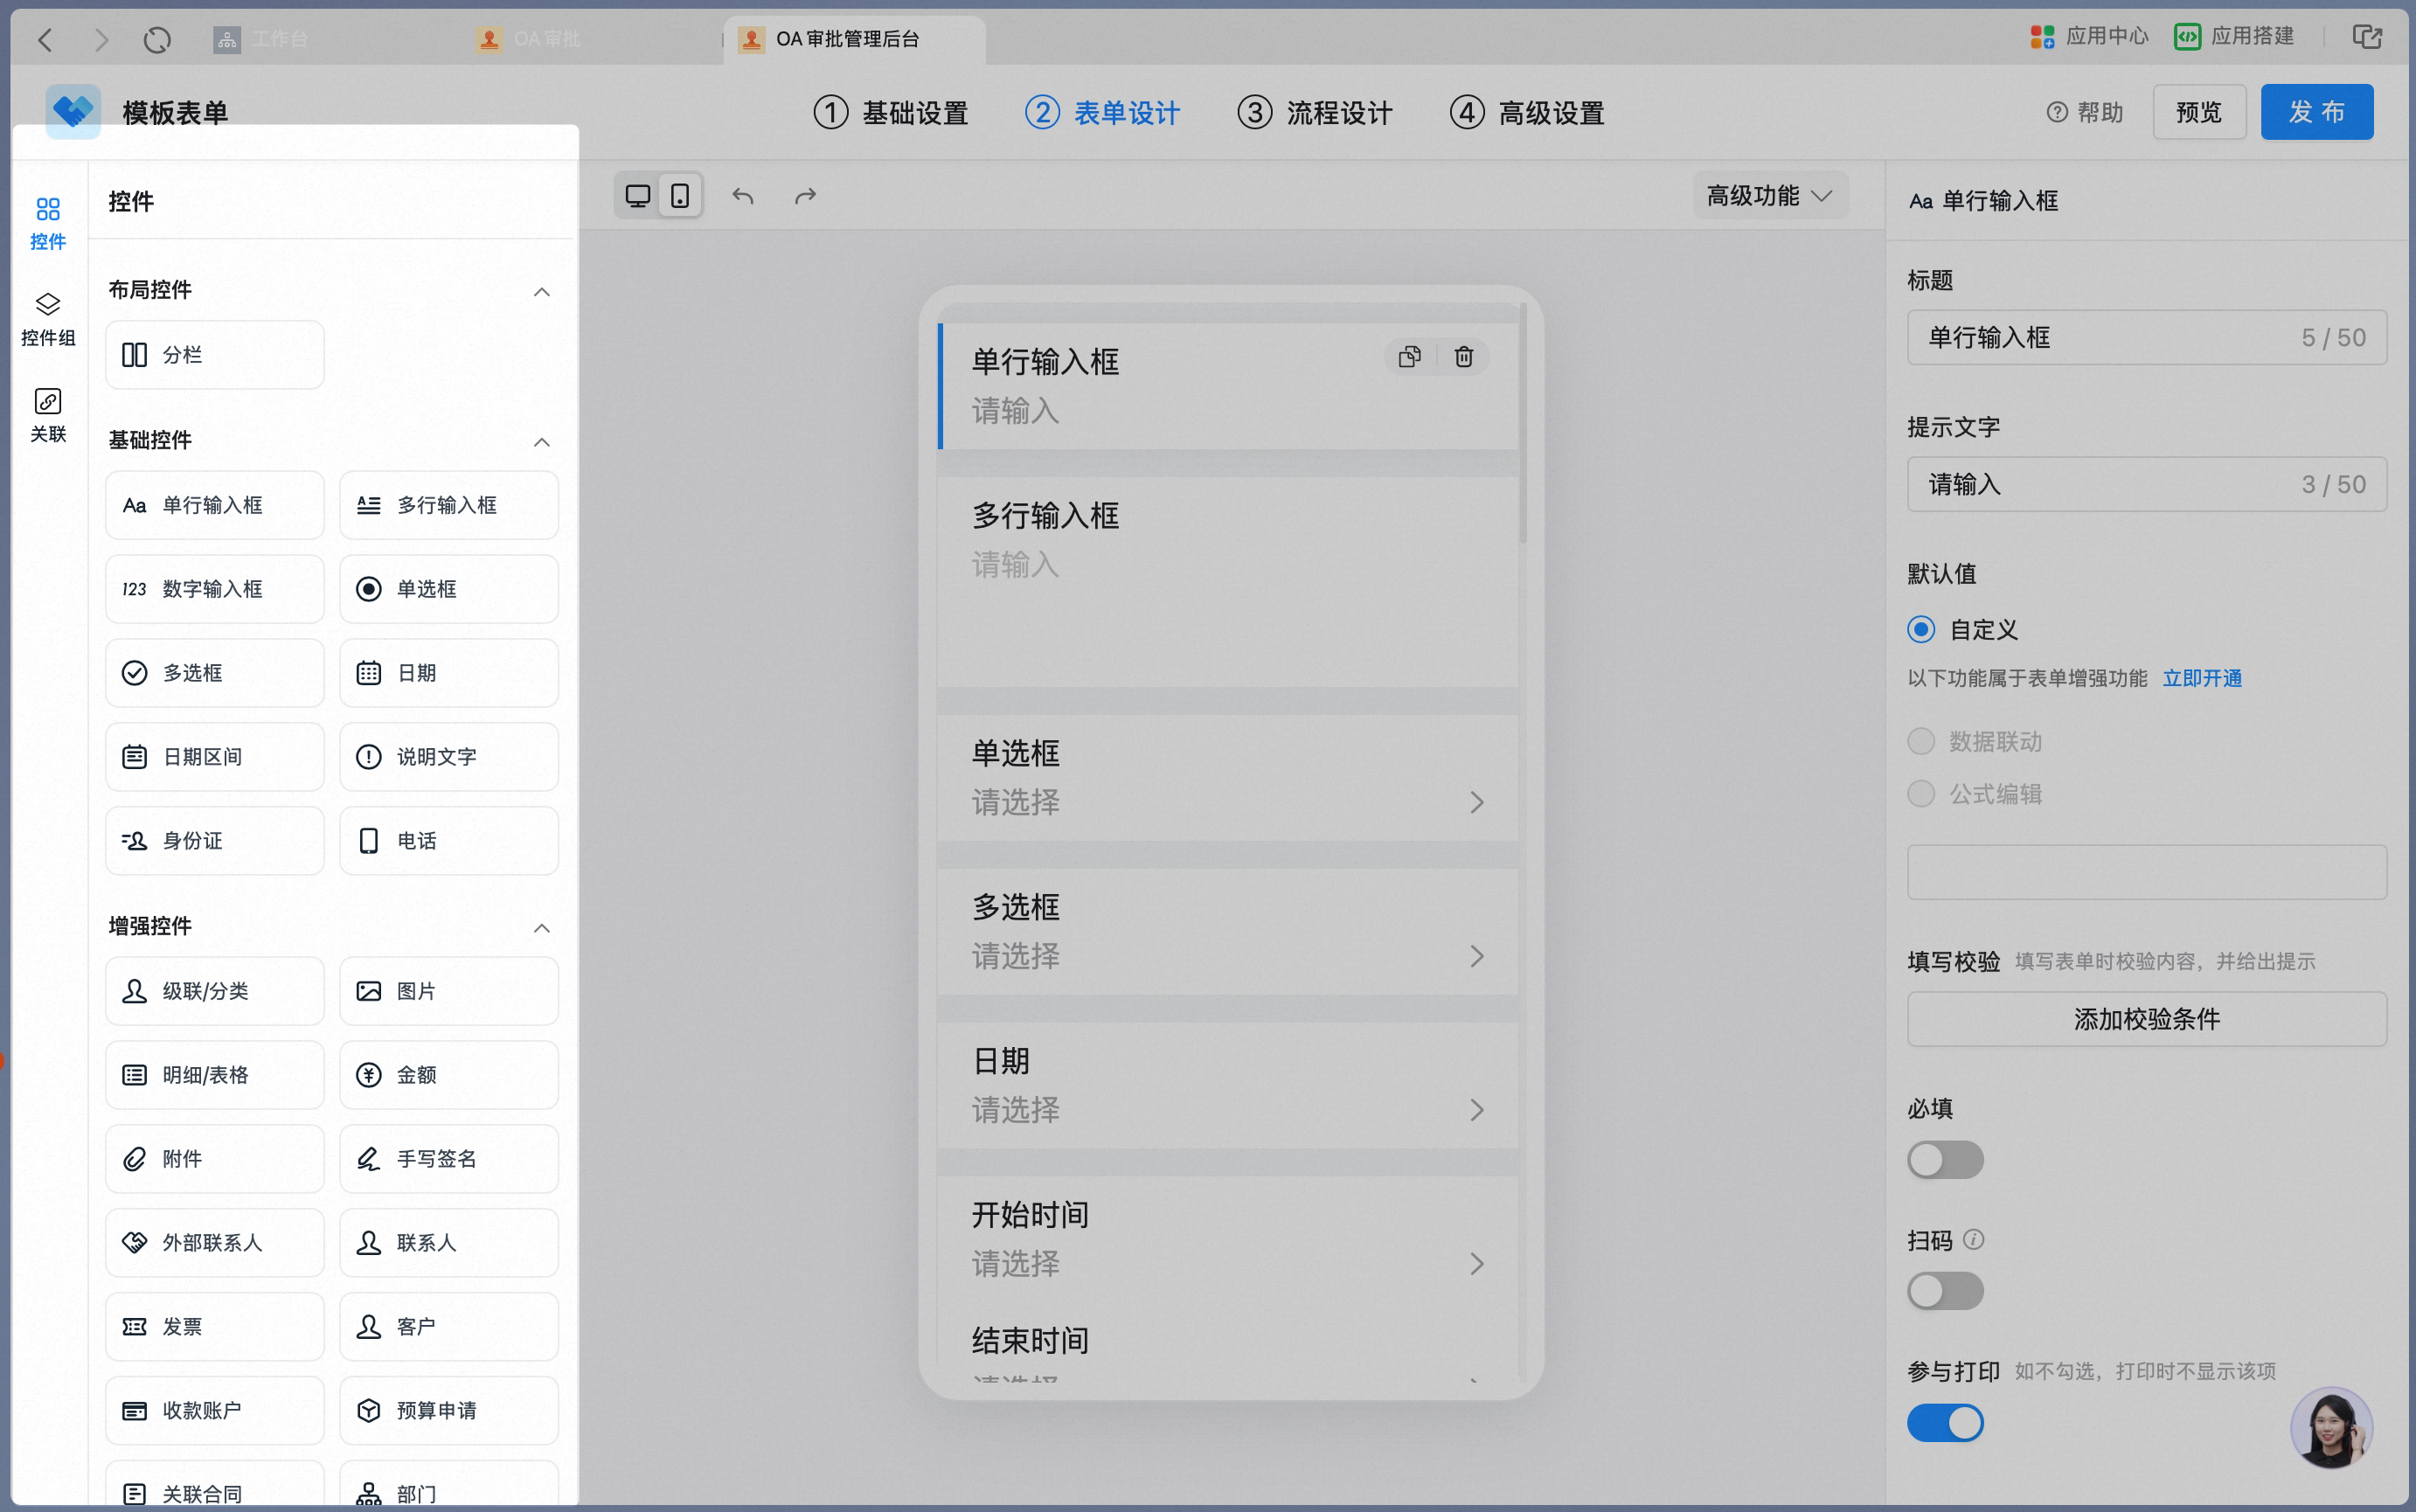
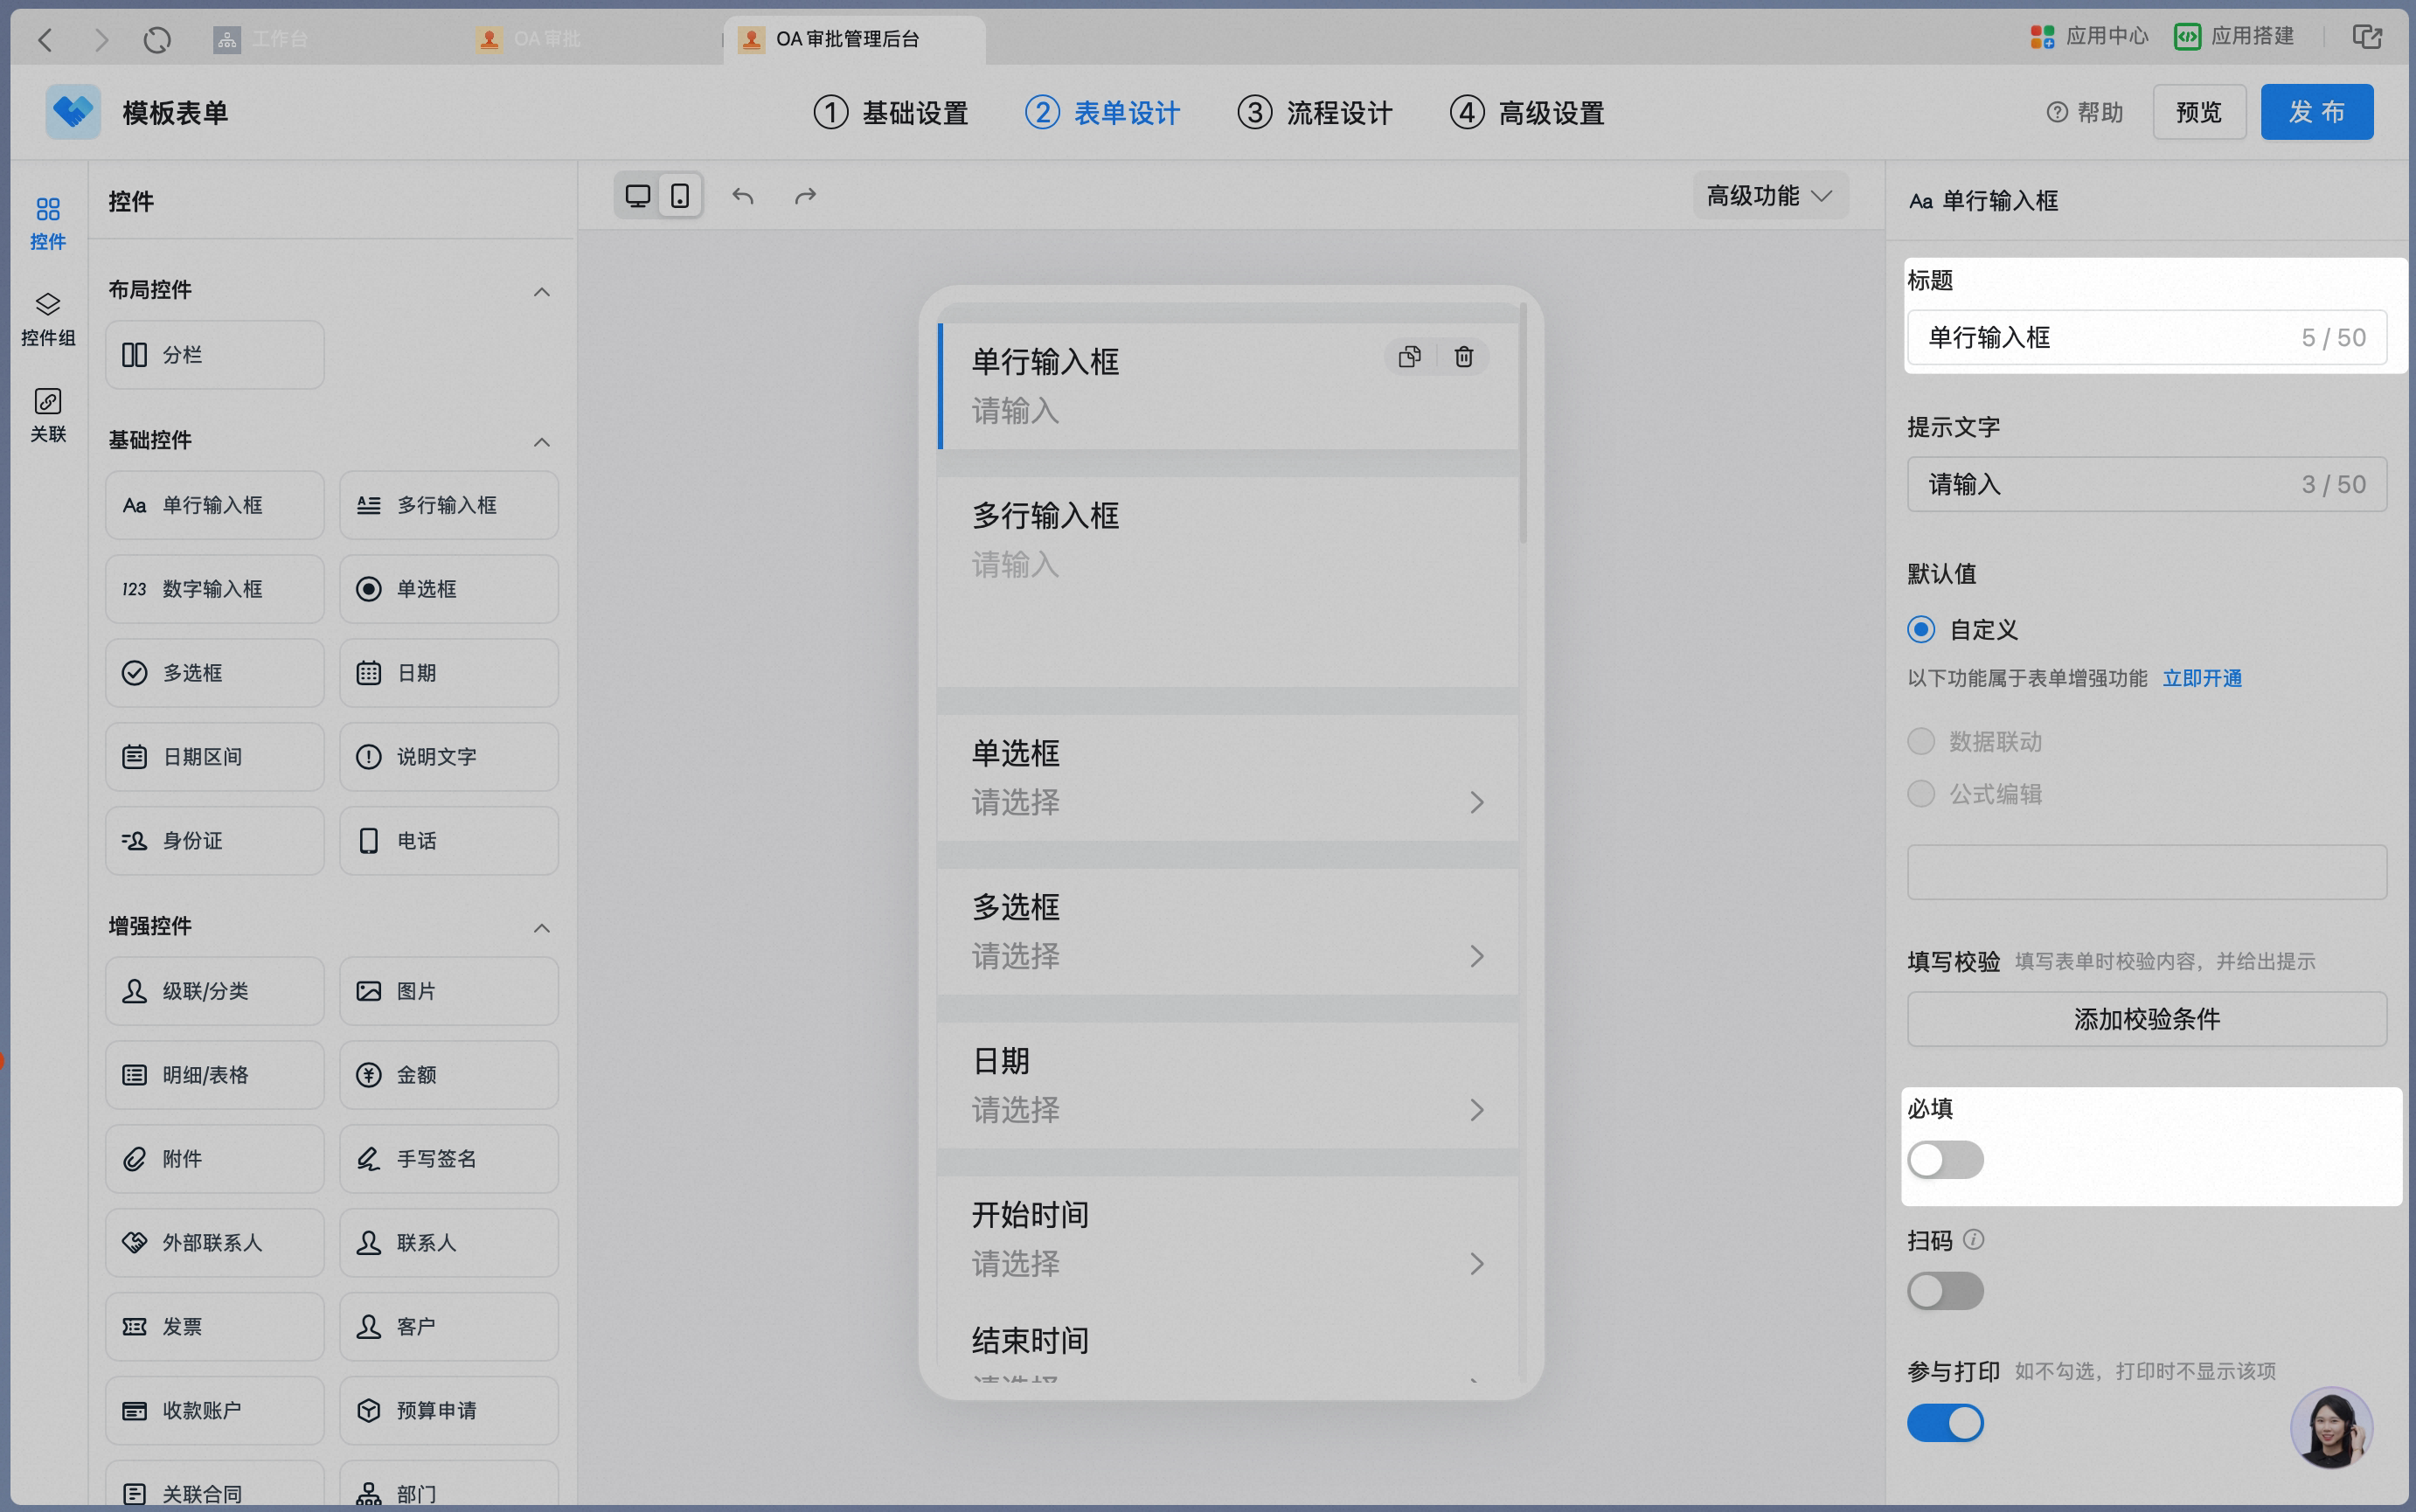
- process design
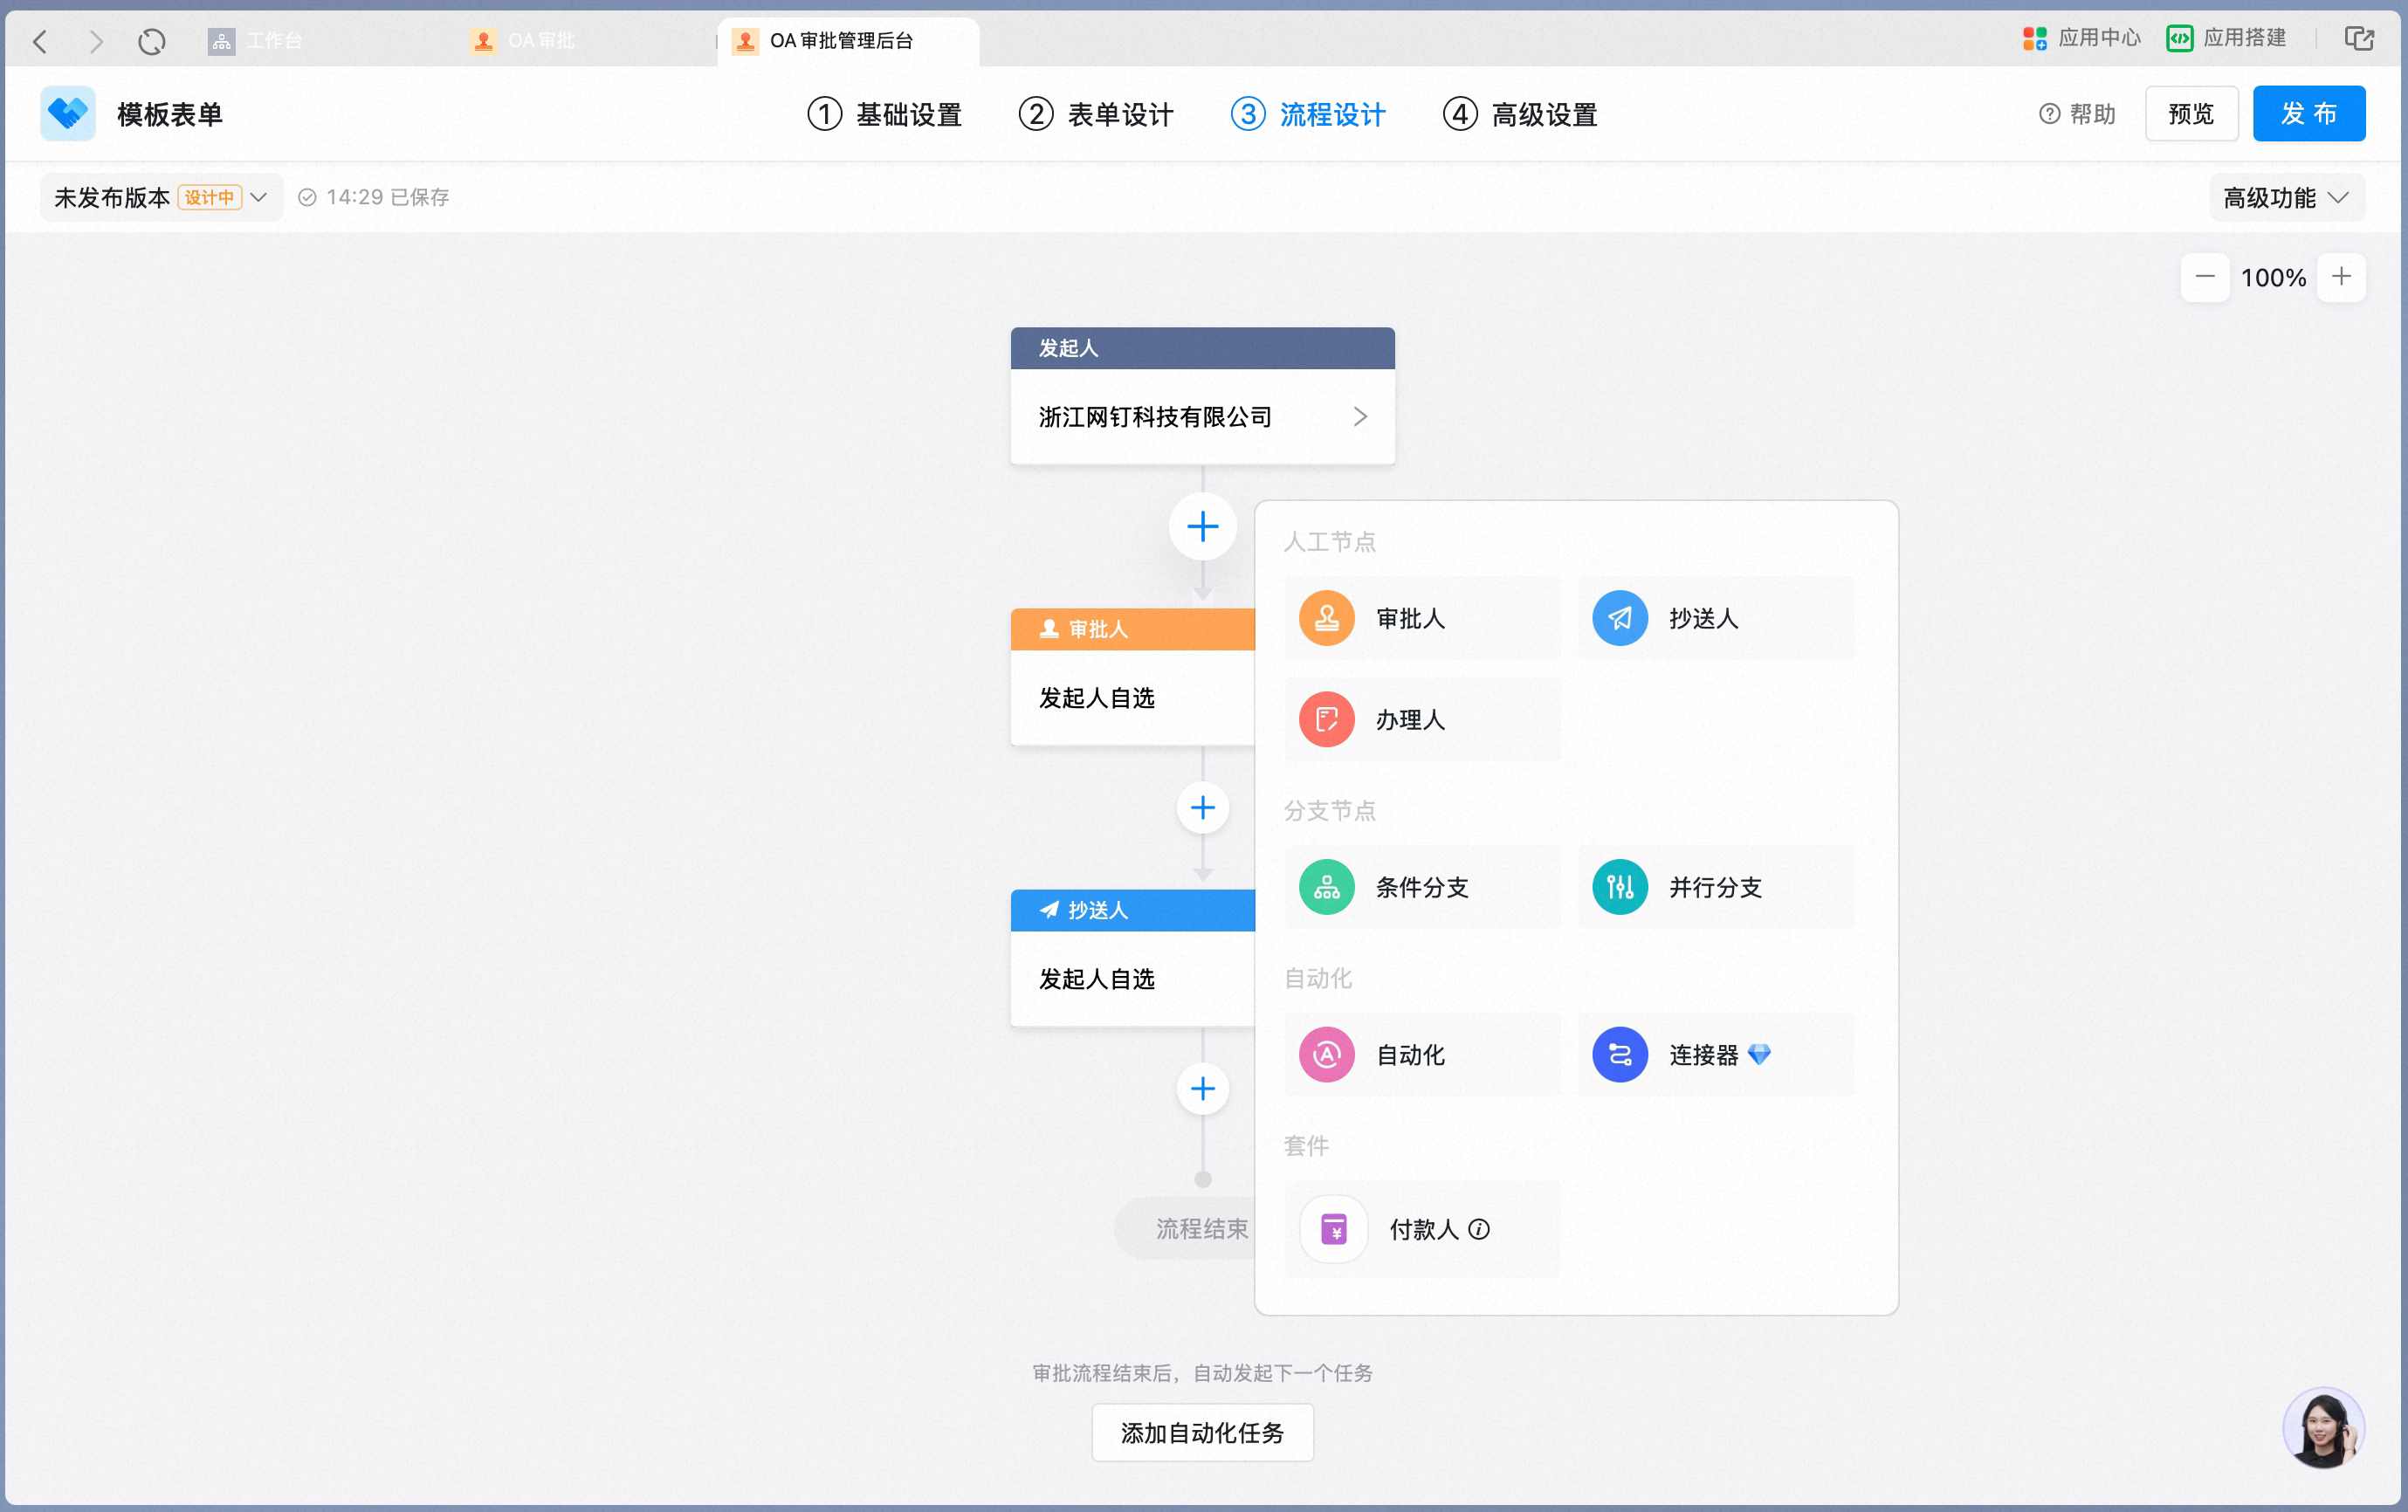
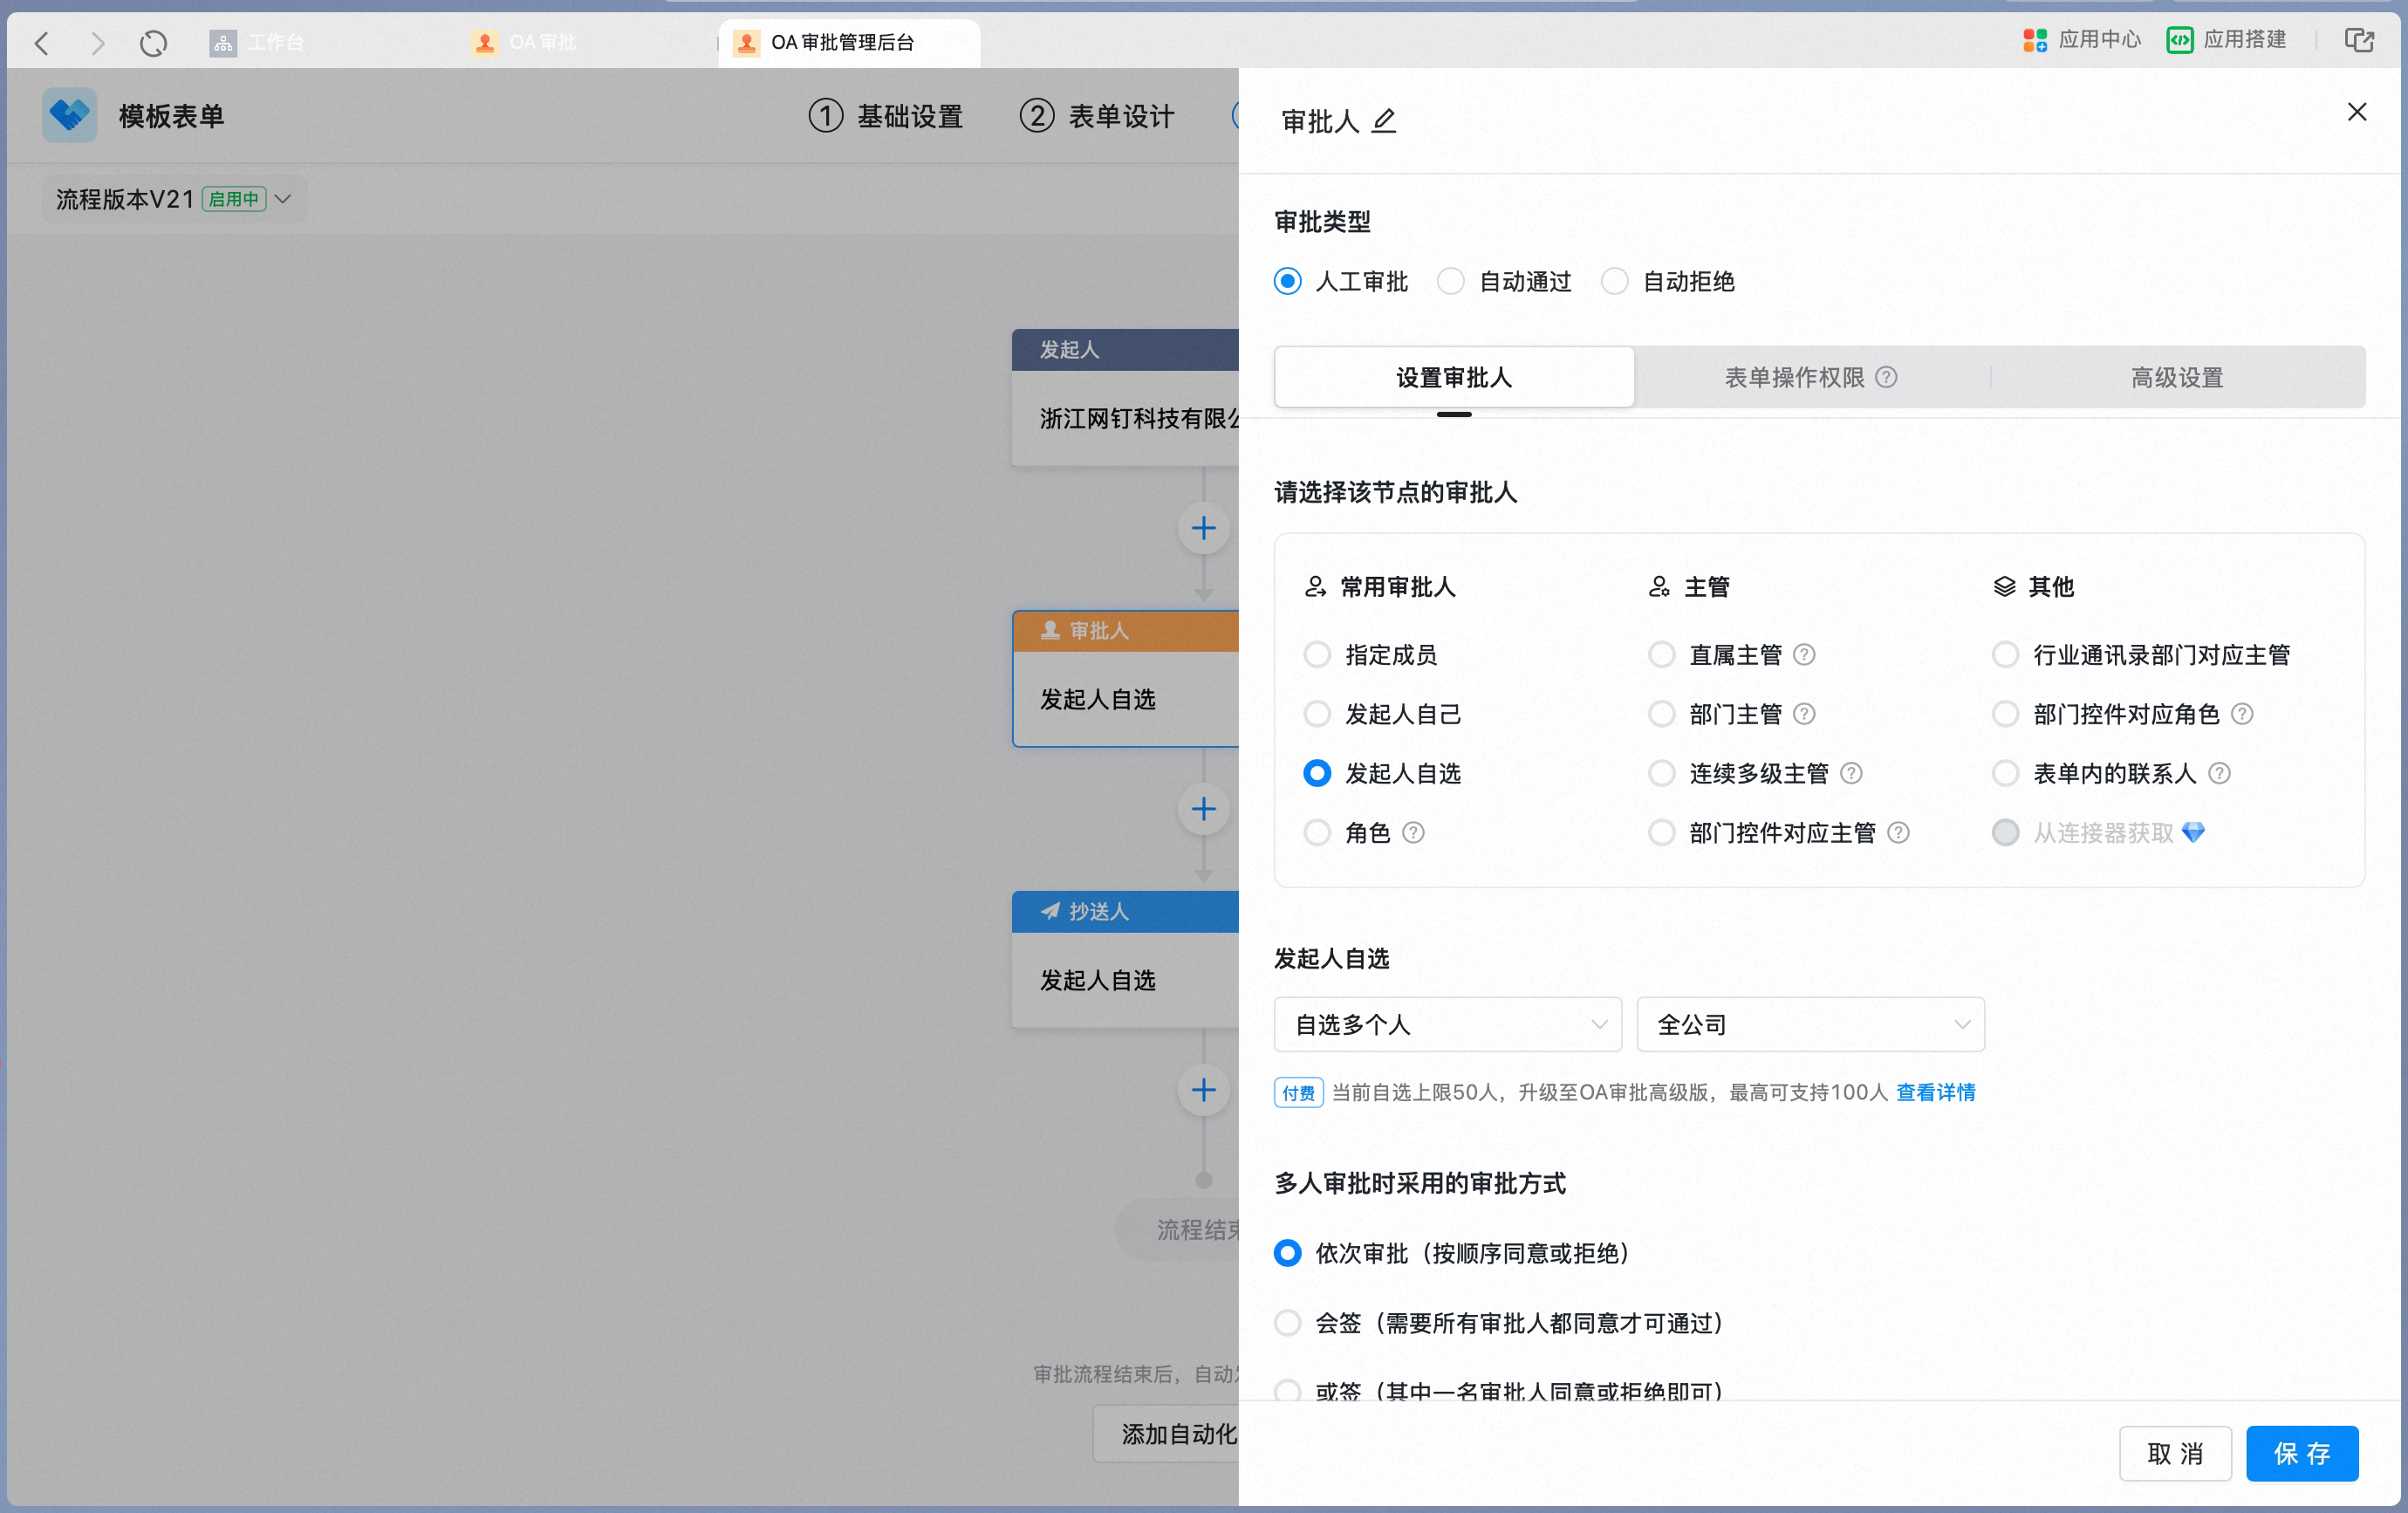
- Premium Settings
2.2 Initiate an approval
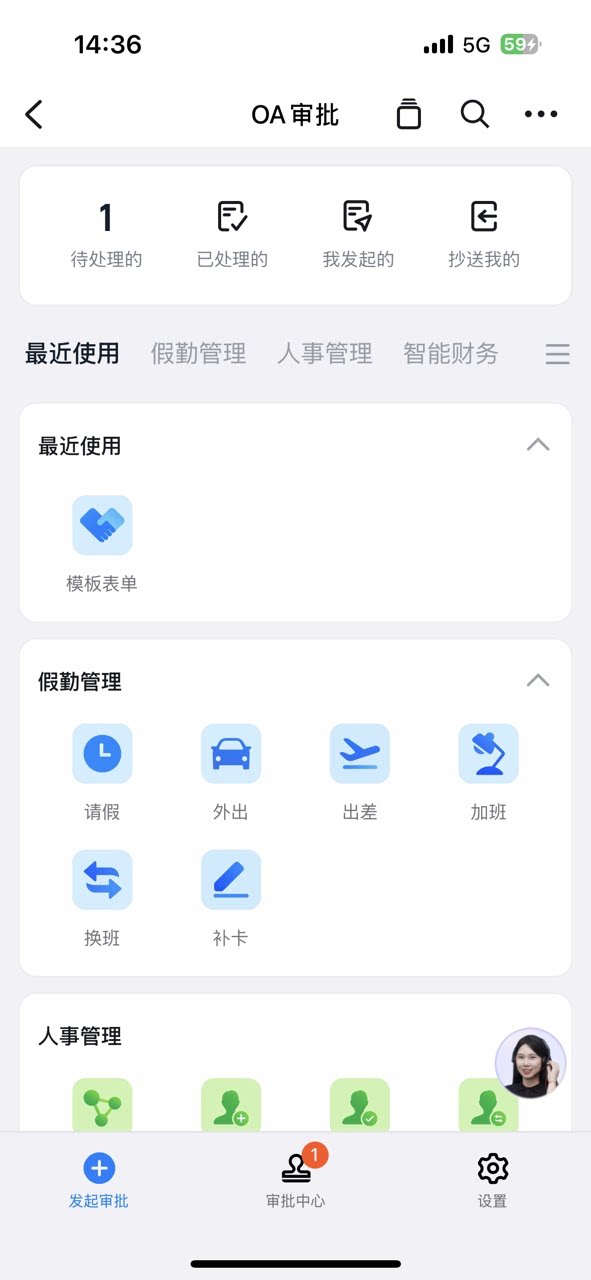
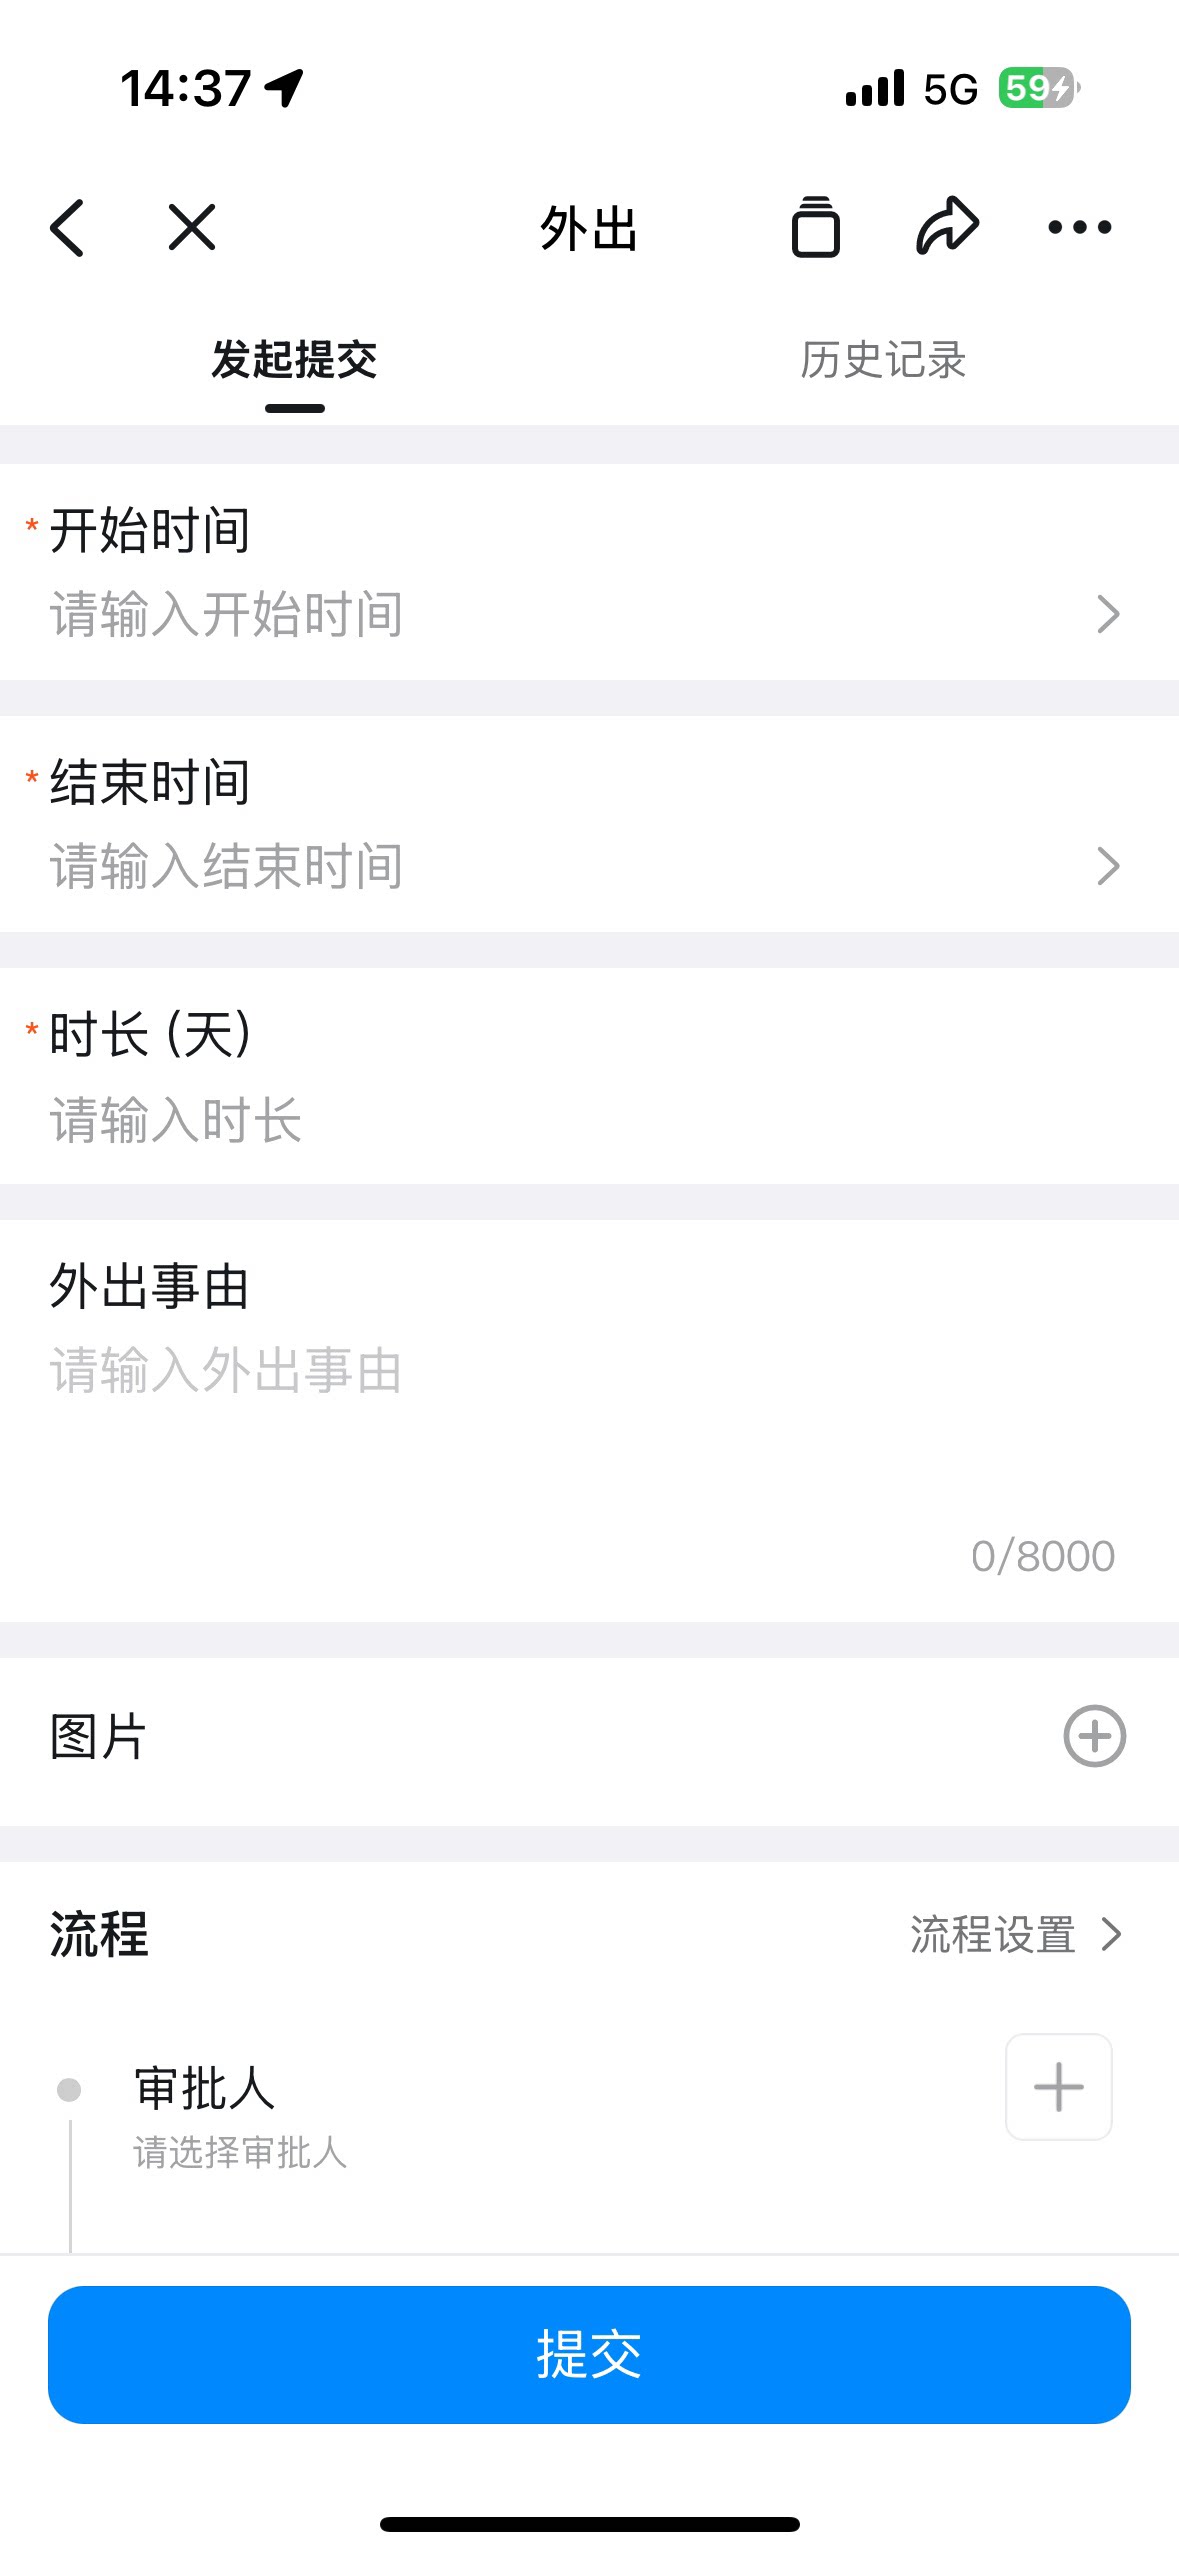
- On mobile
- Find the Form
- Fill out the Form
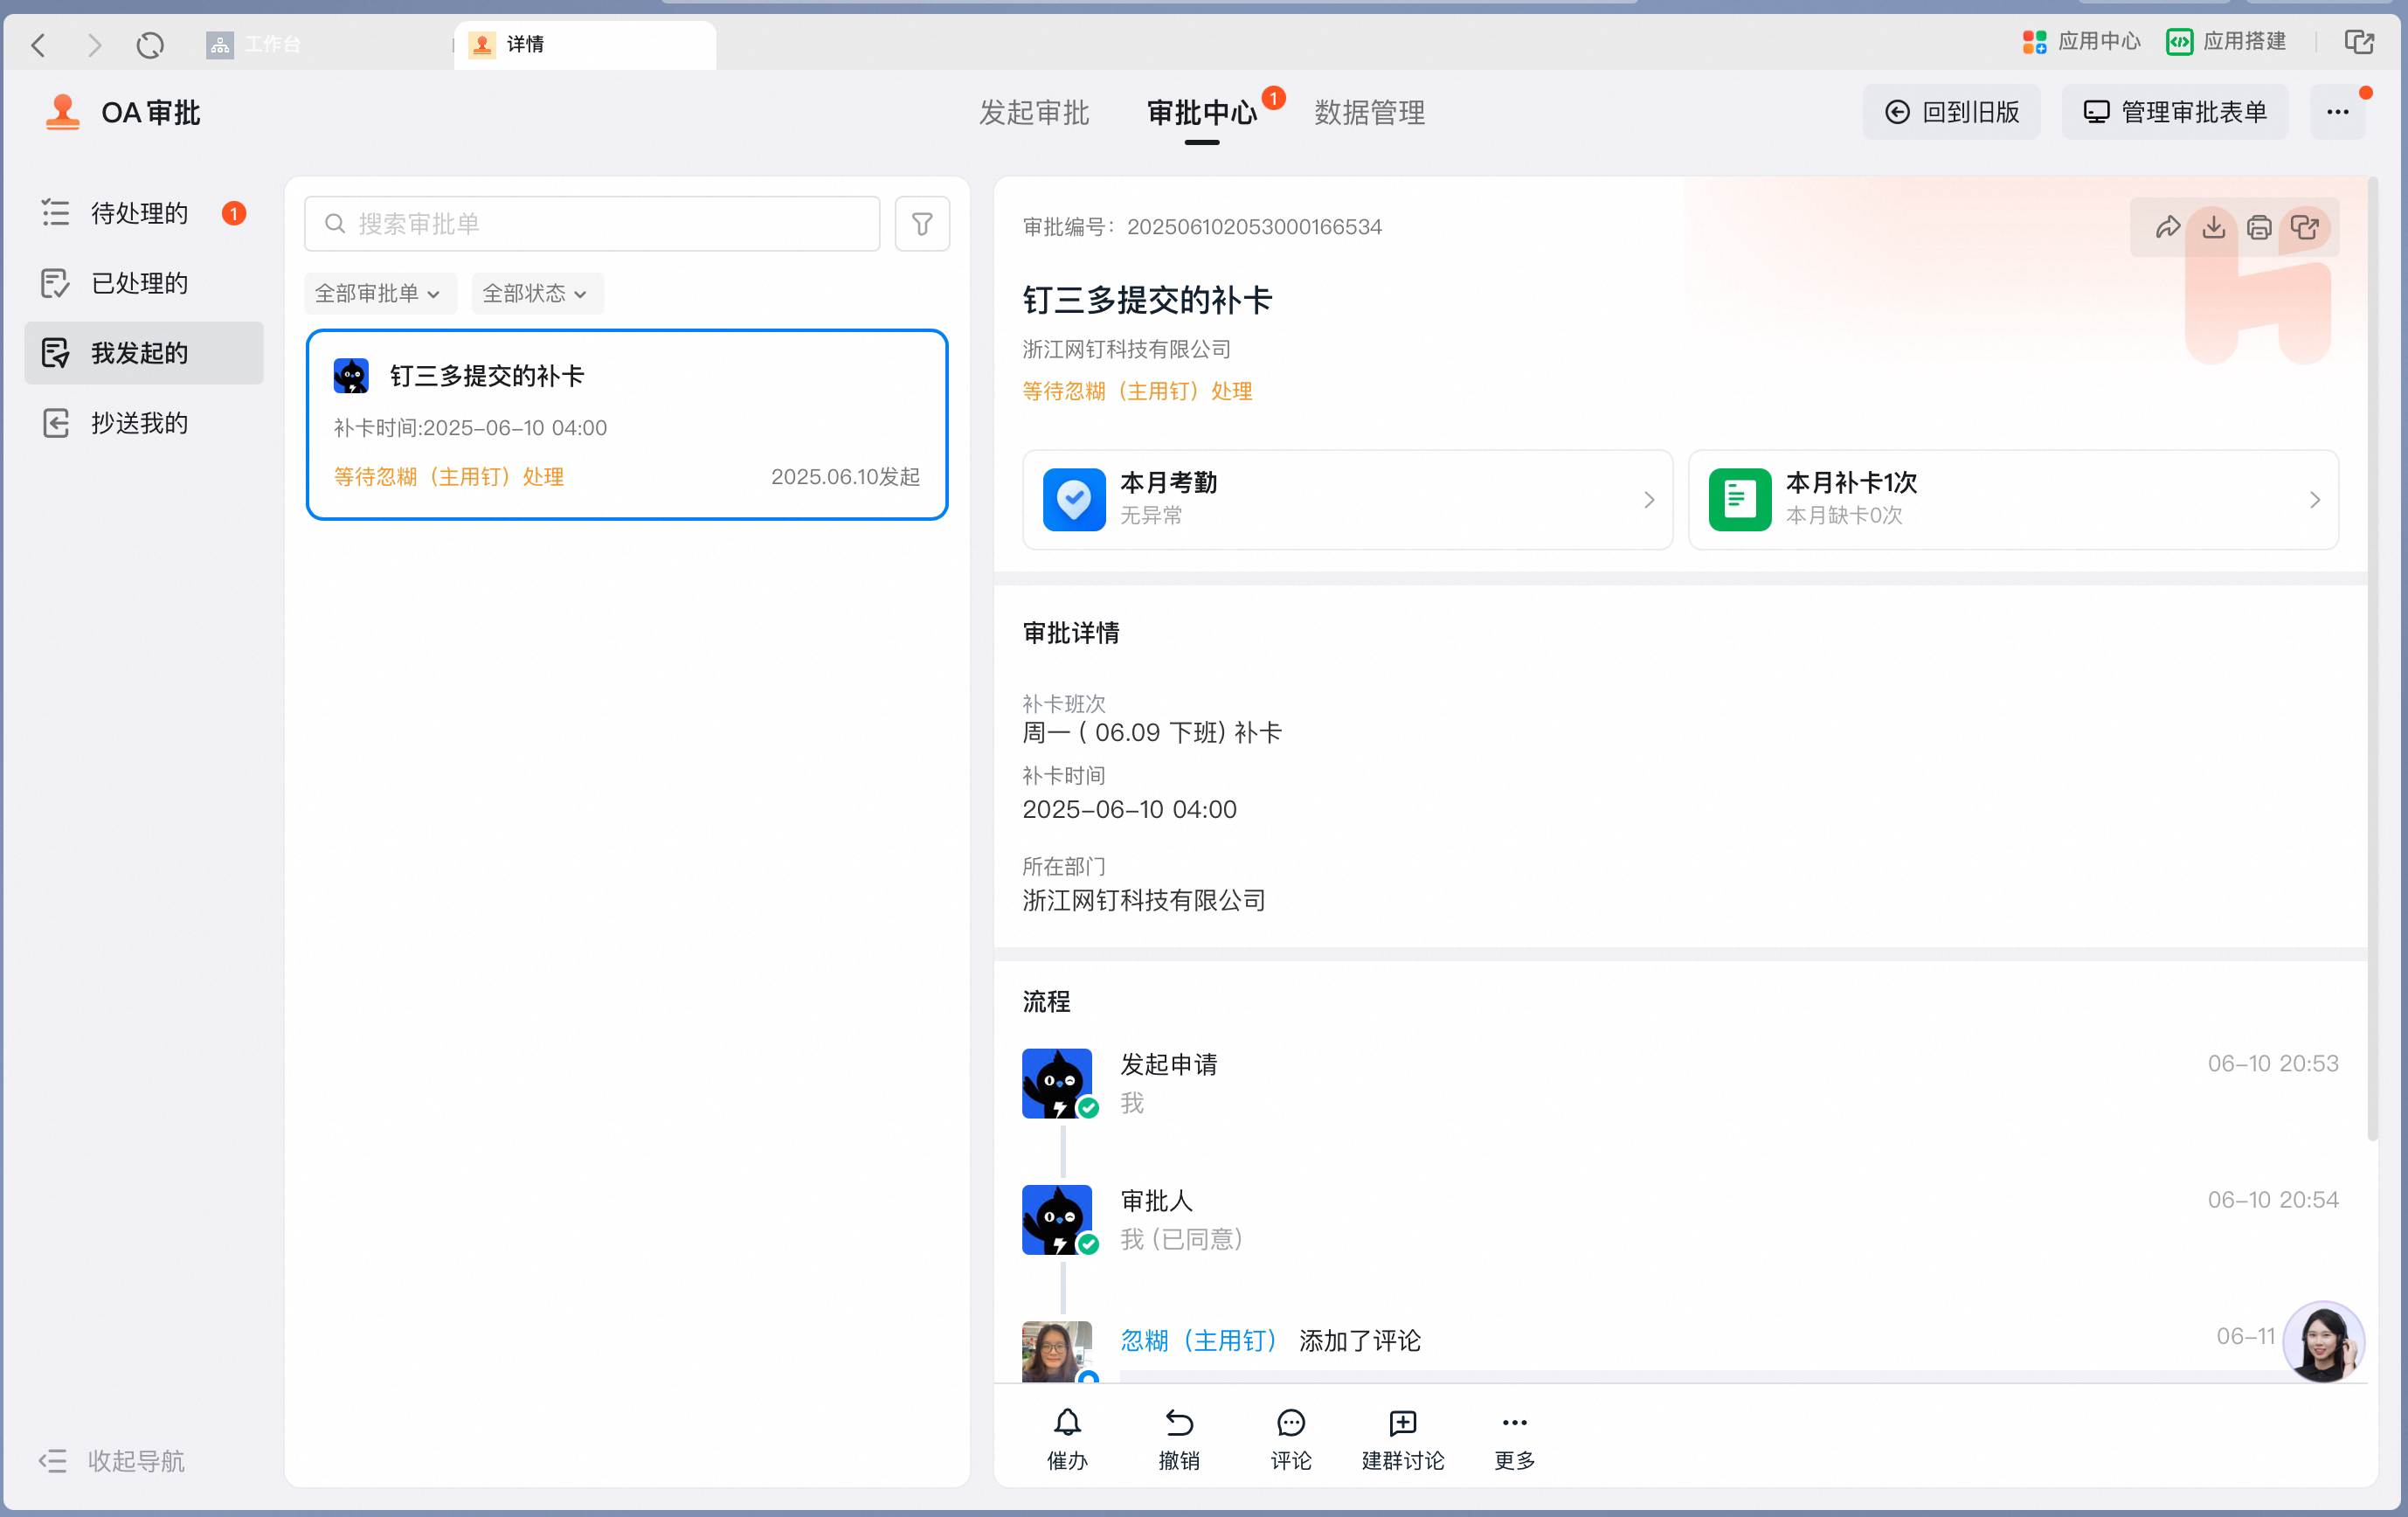
- View Progress

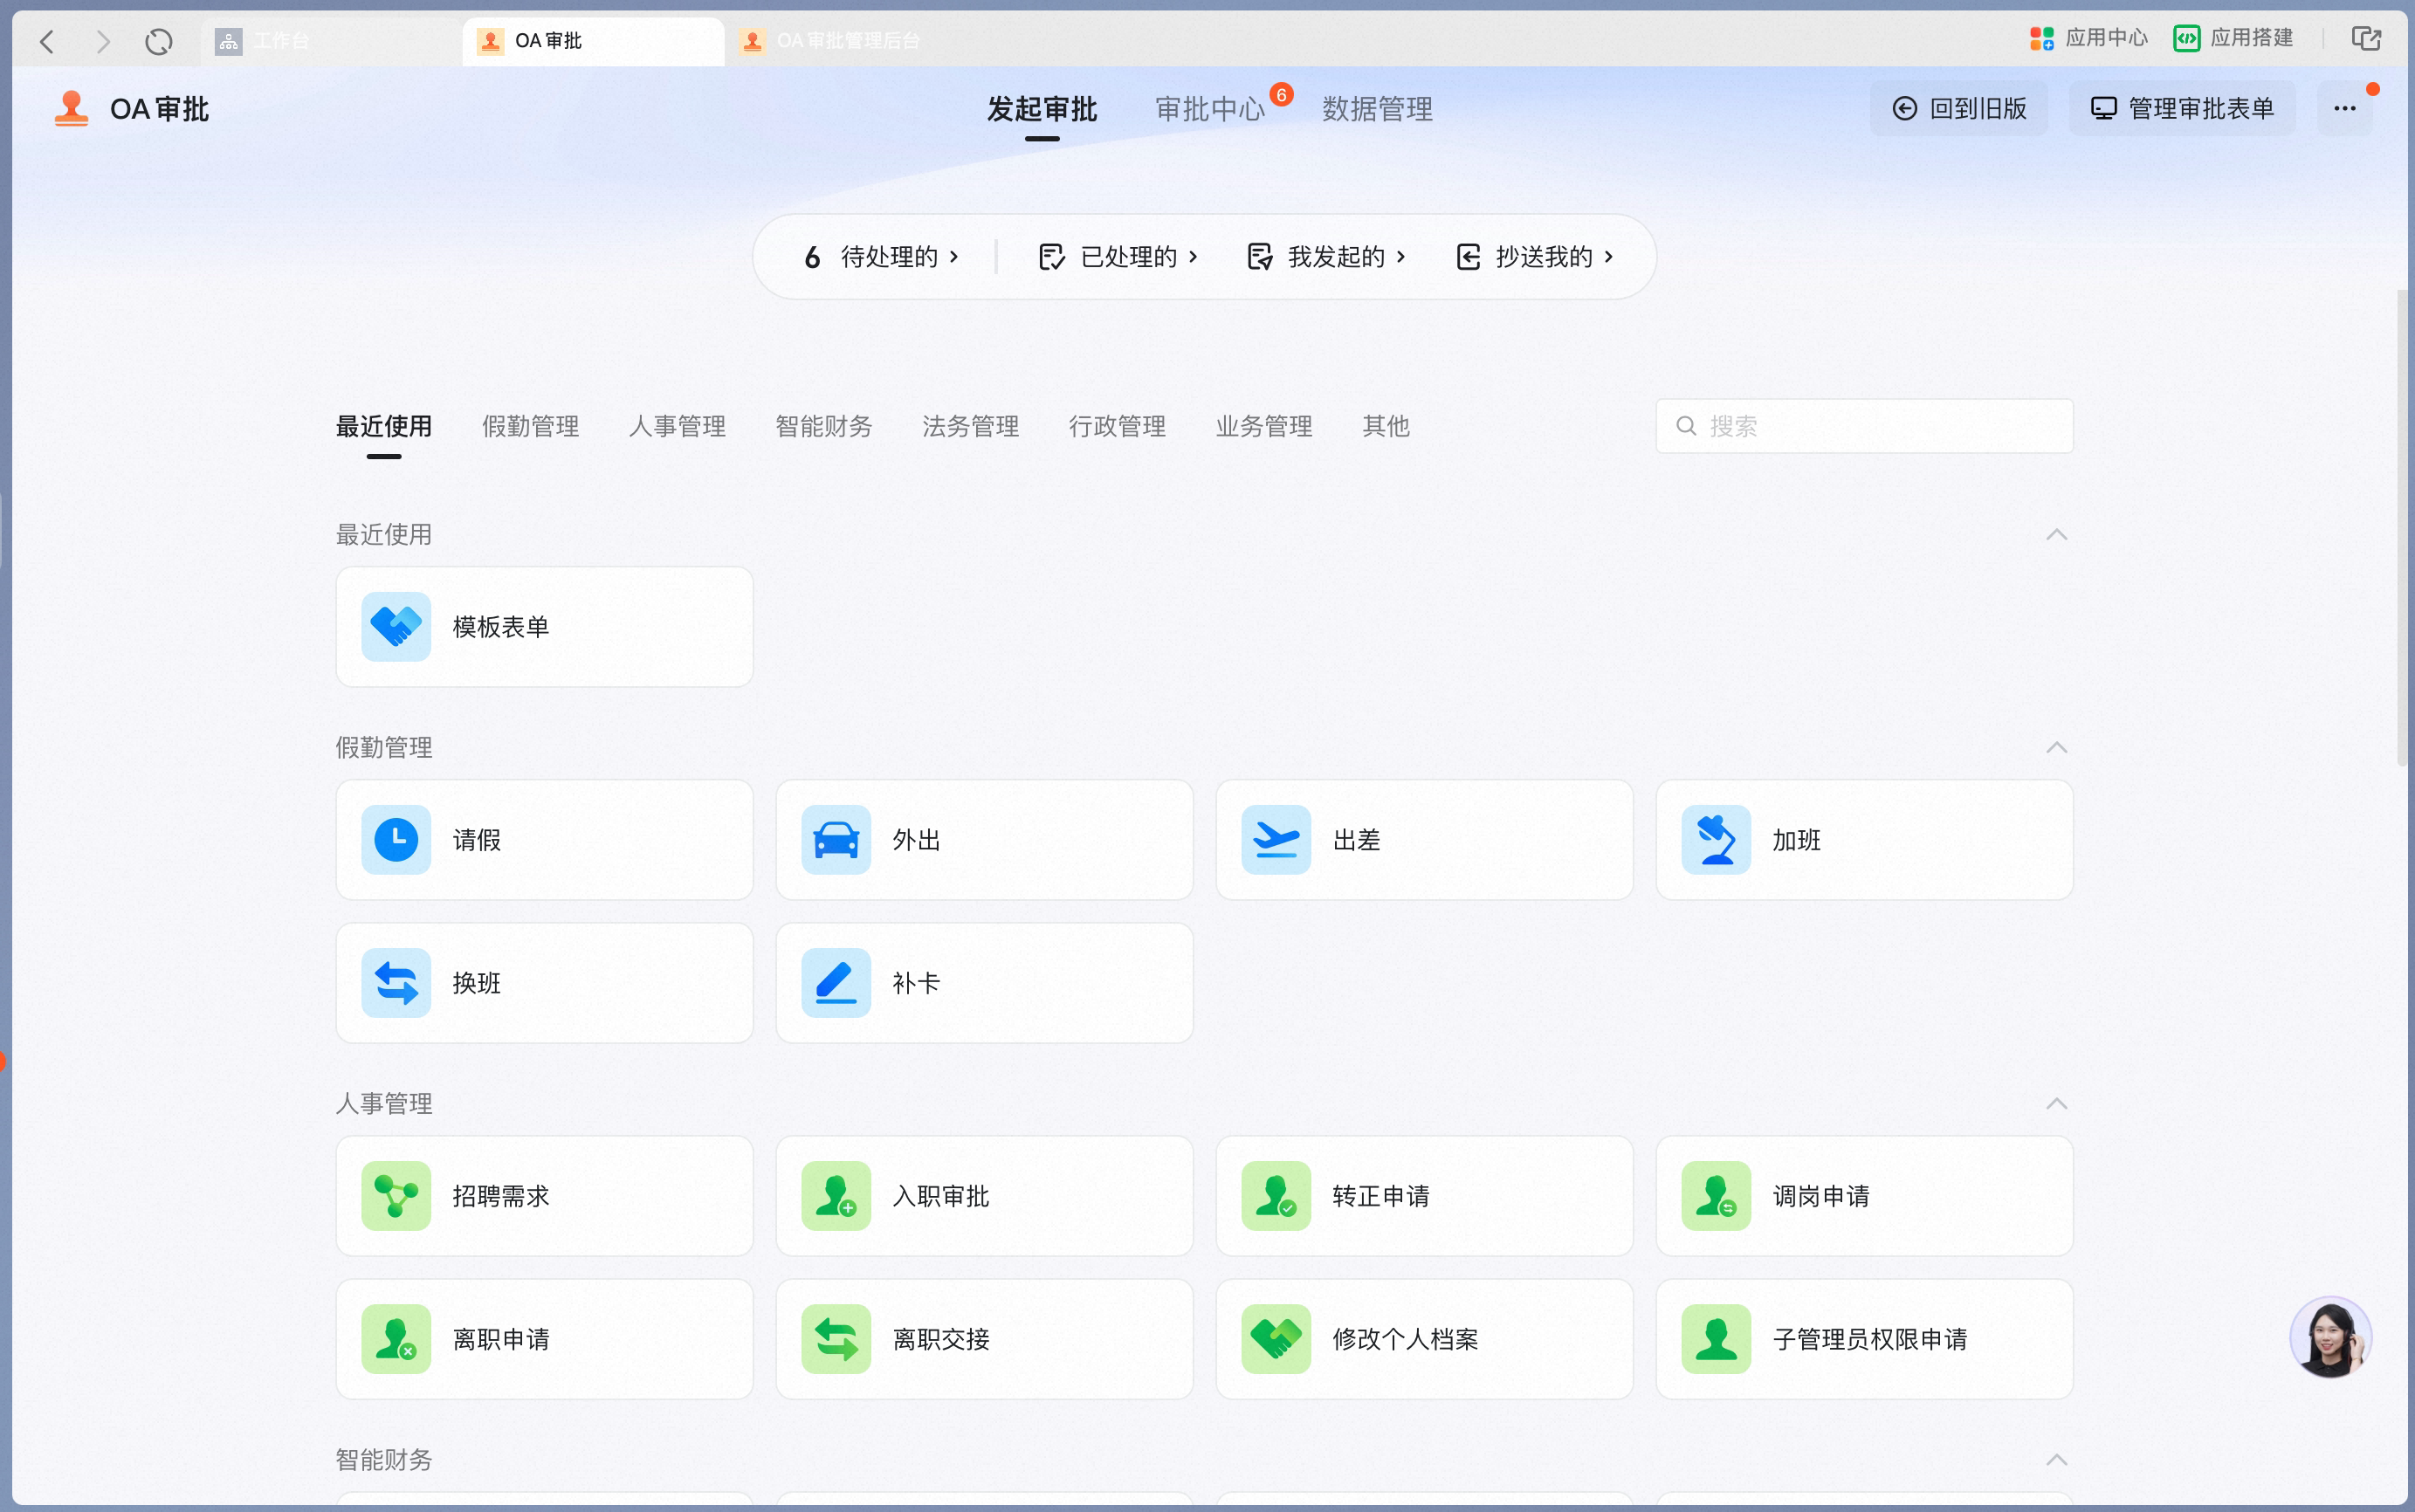
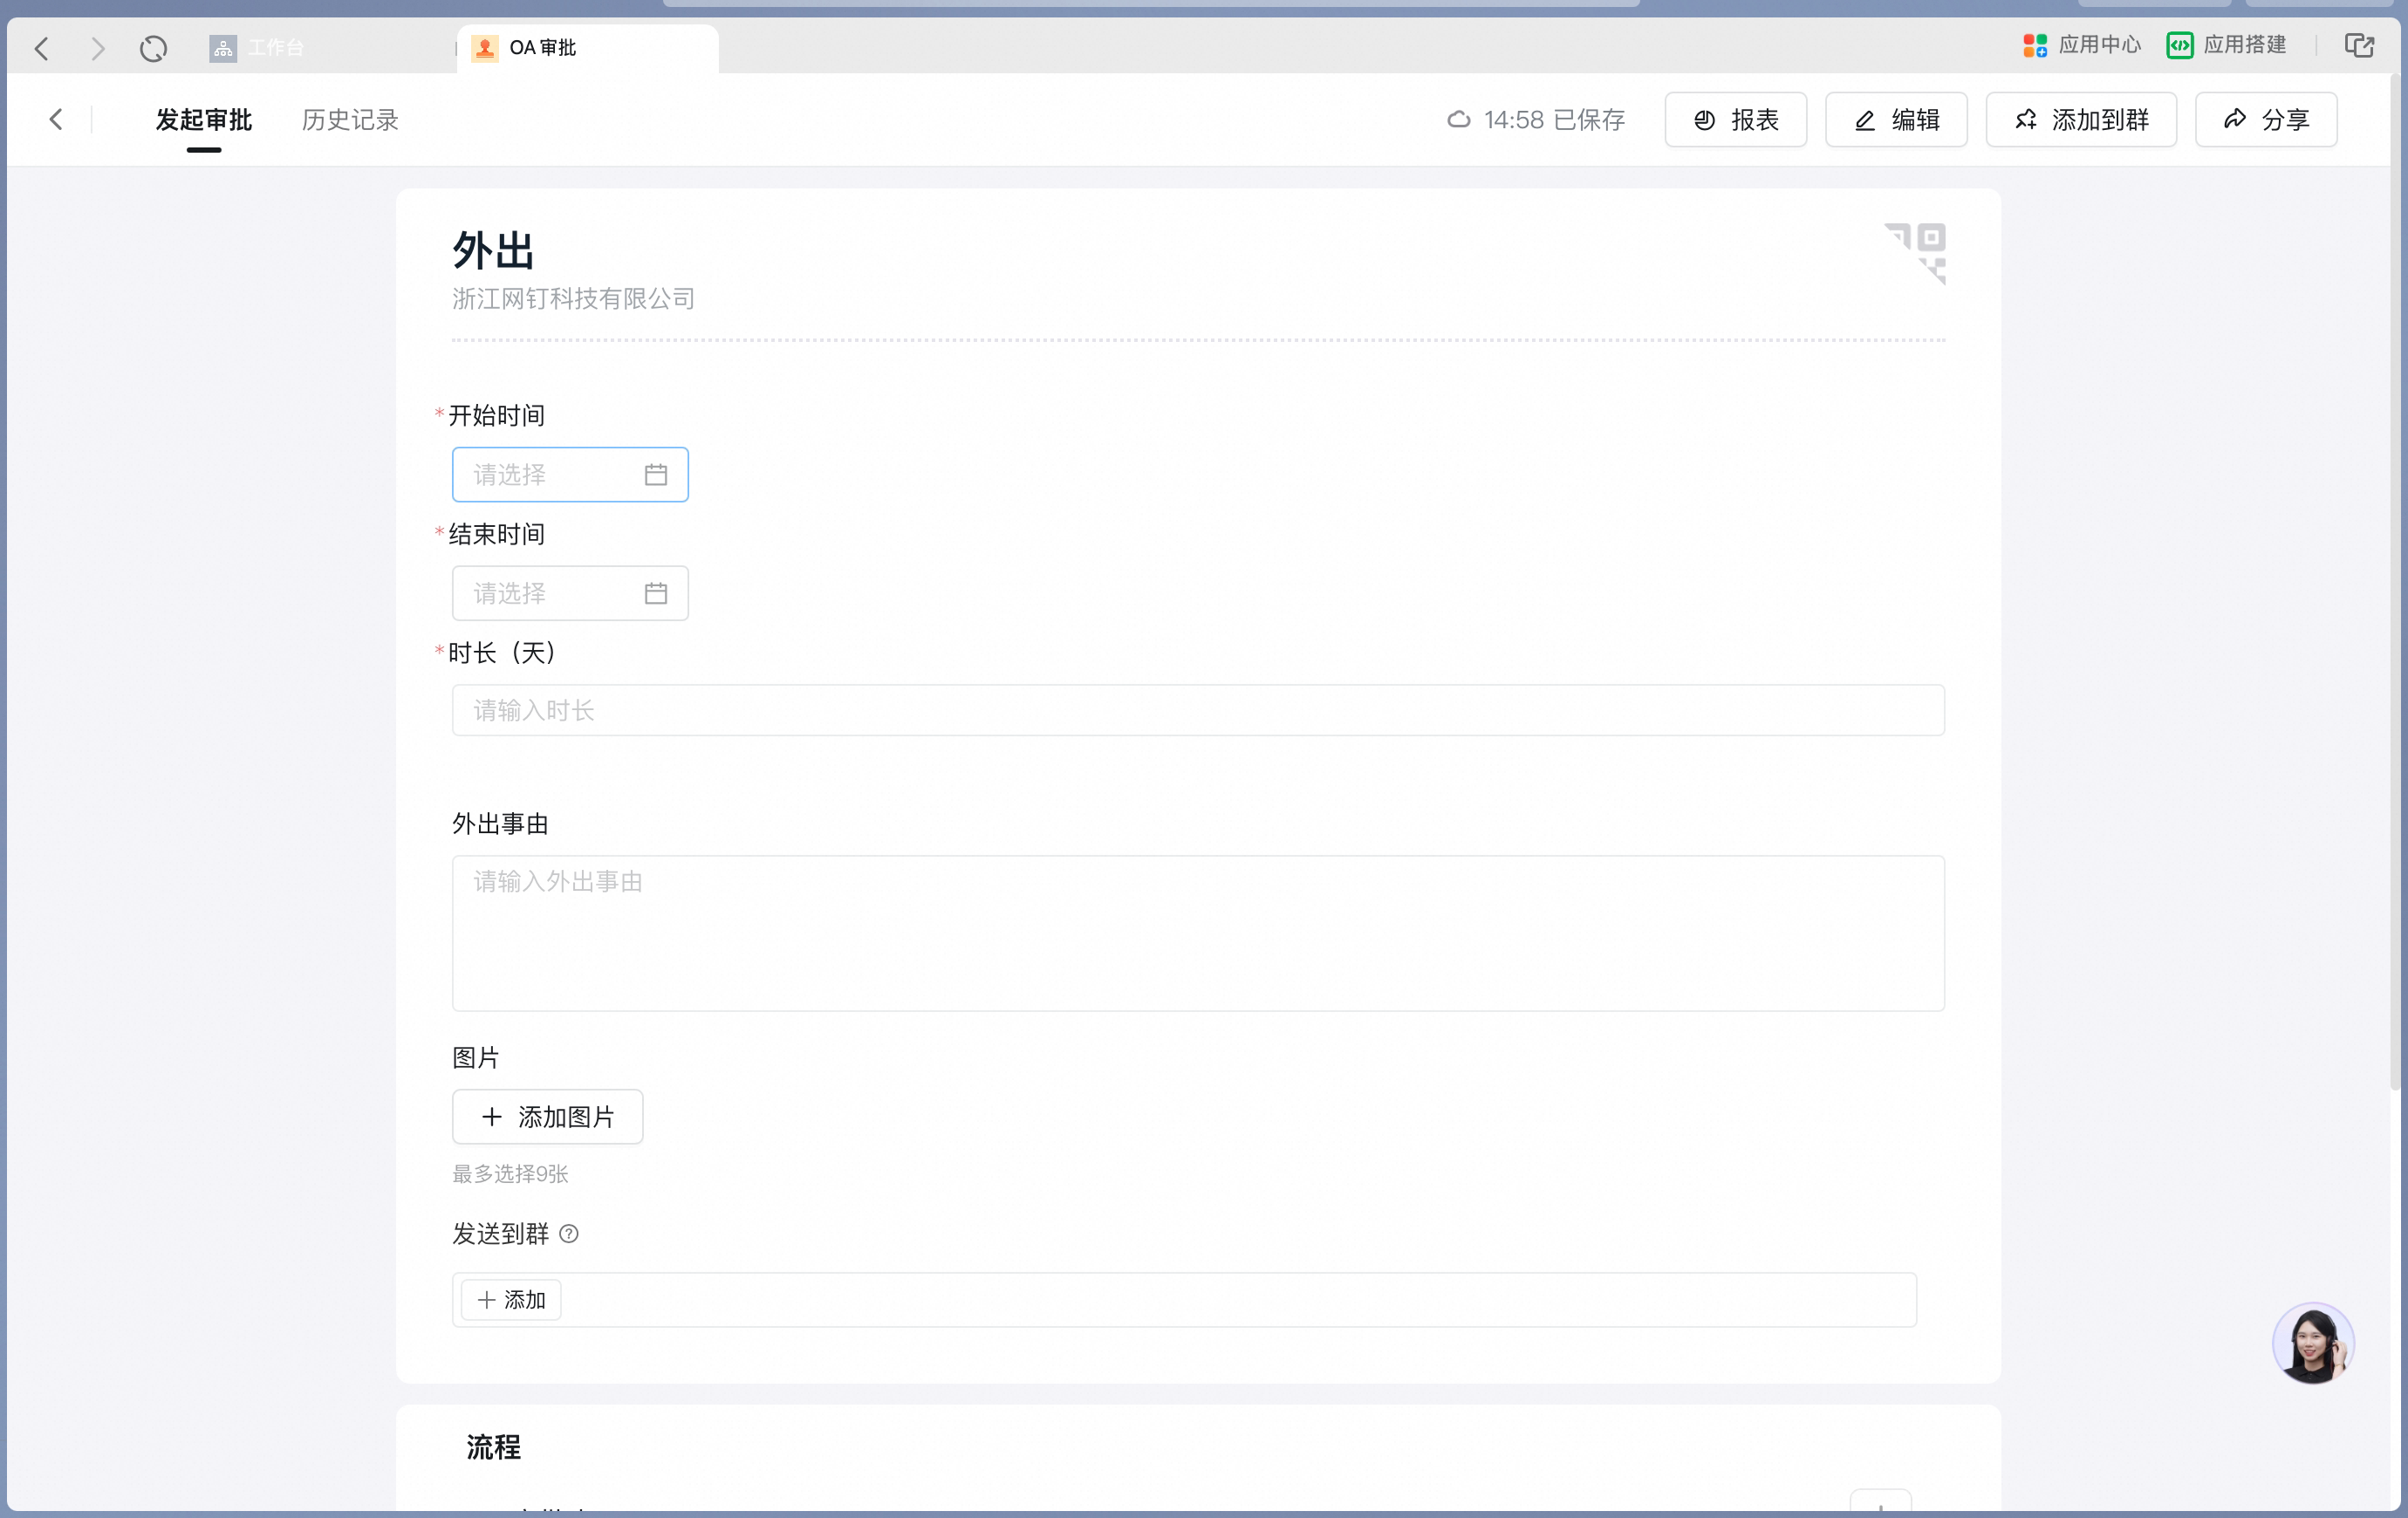
- On desktop
- Find the Form
- Fill out the Form
- View Progress
2.3 Handle approvals
- On mobile
- Find the pending Form
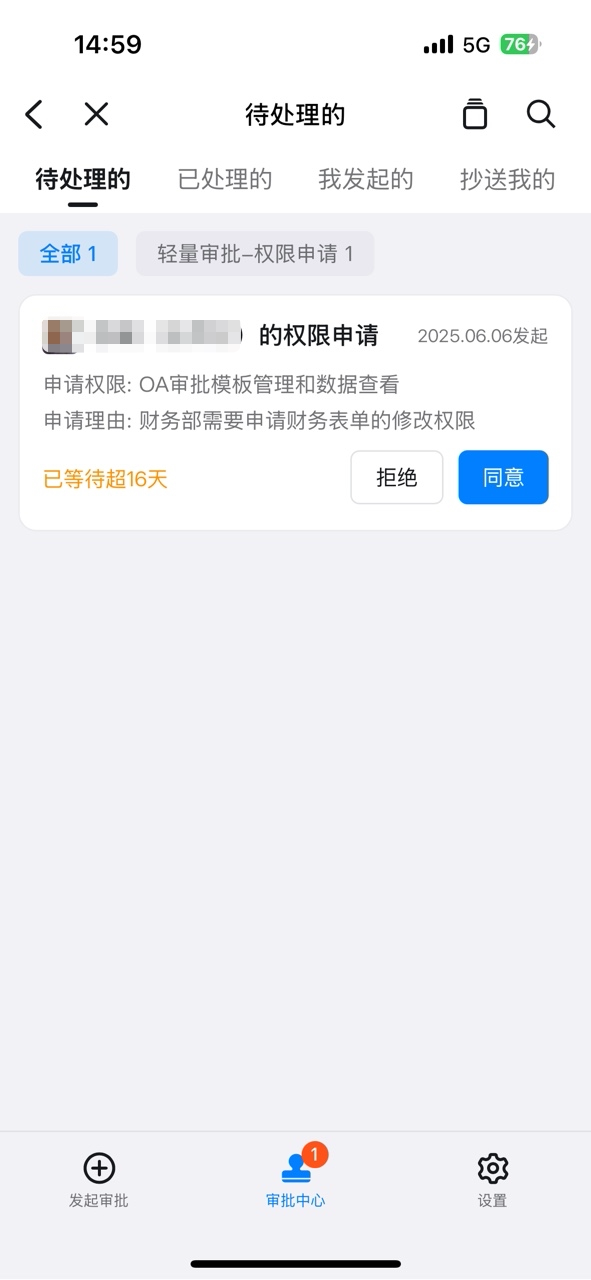
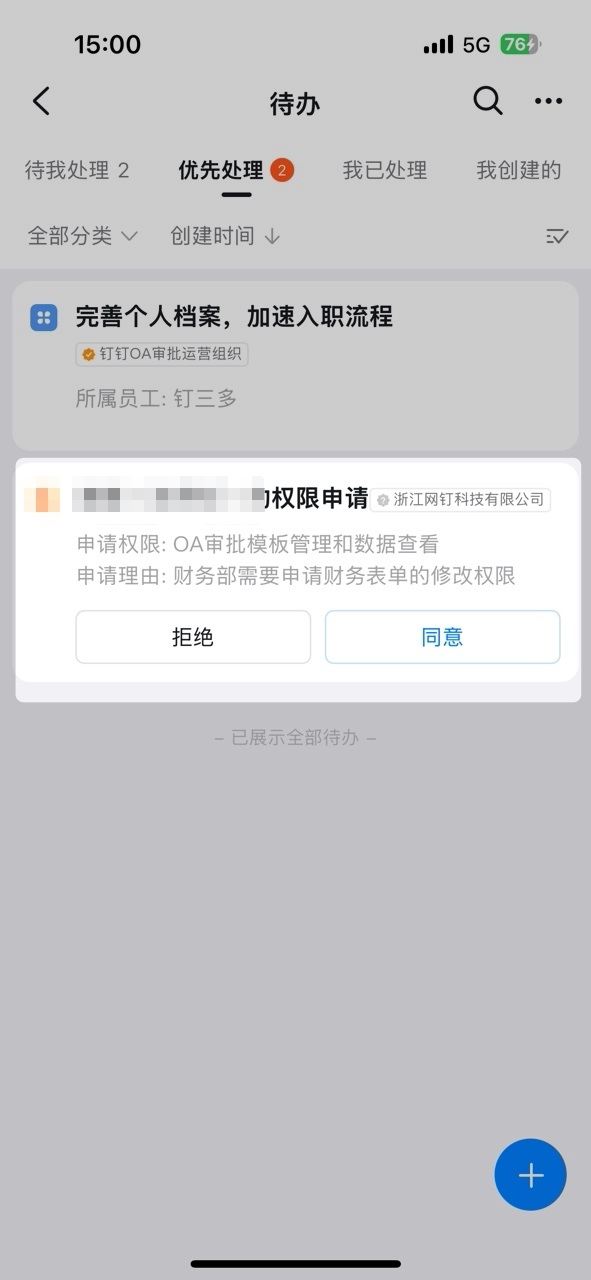
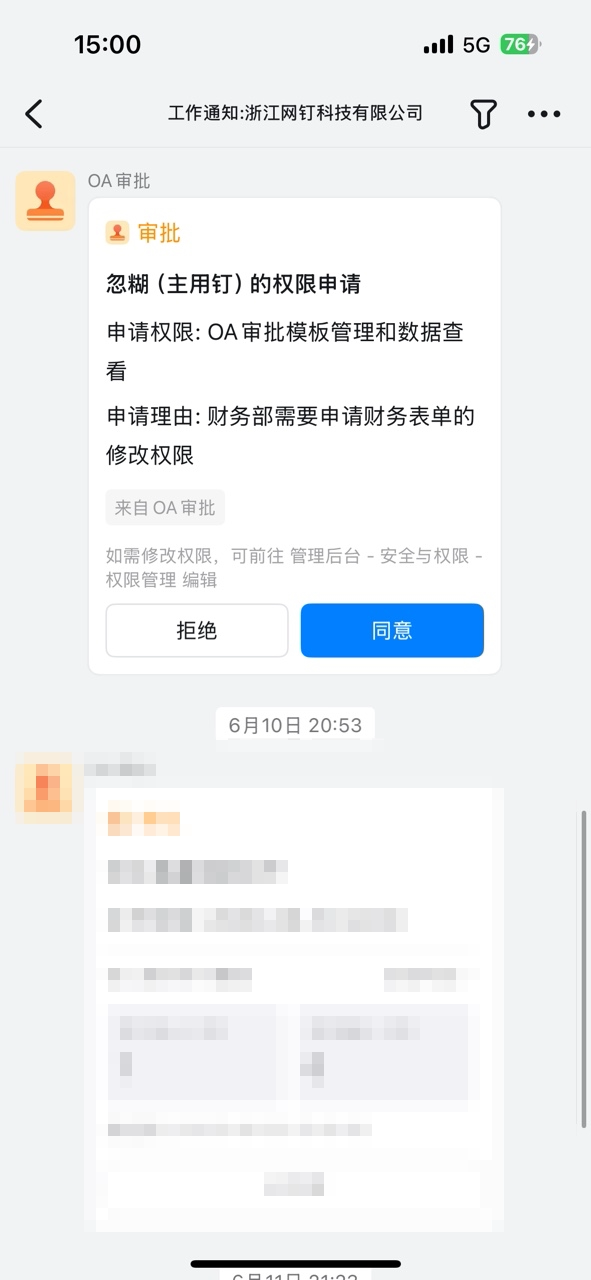
- Handle the Approval
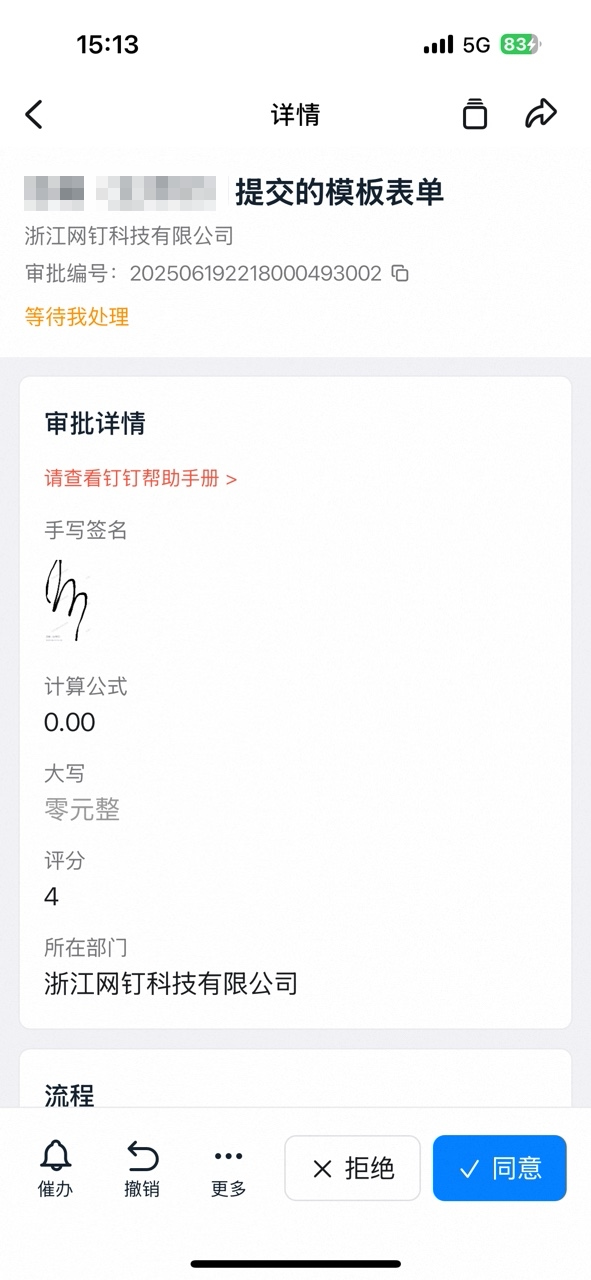
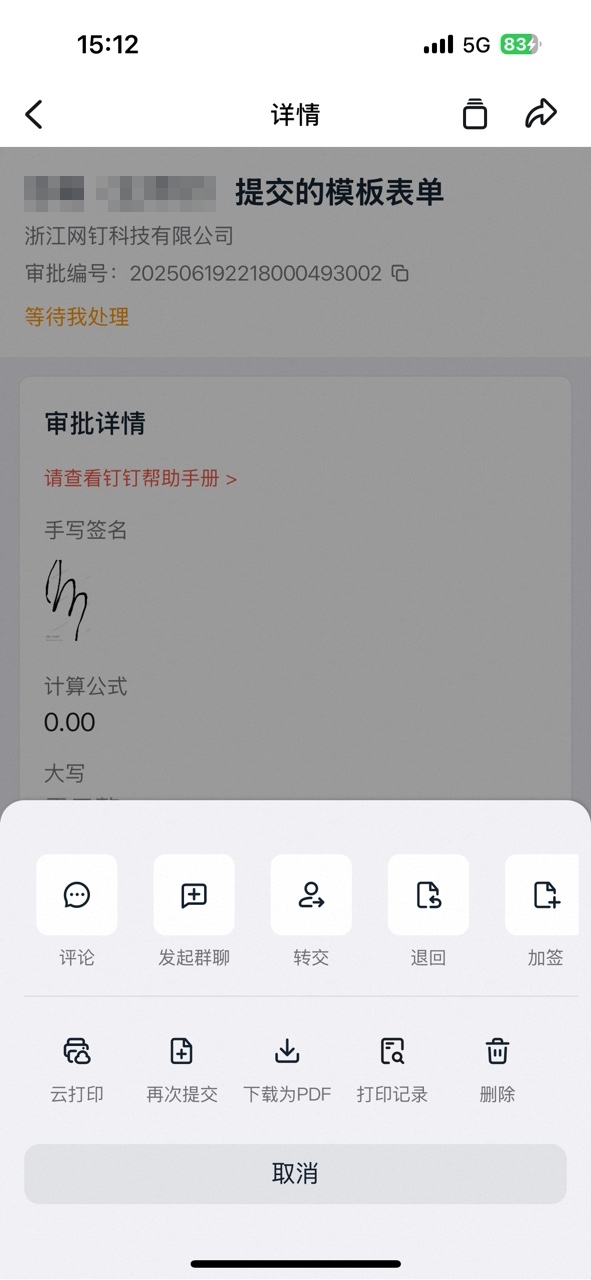
- On desktop
- Find the pending Form
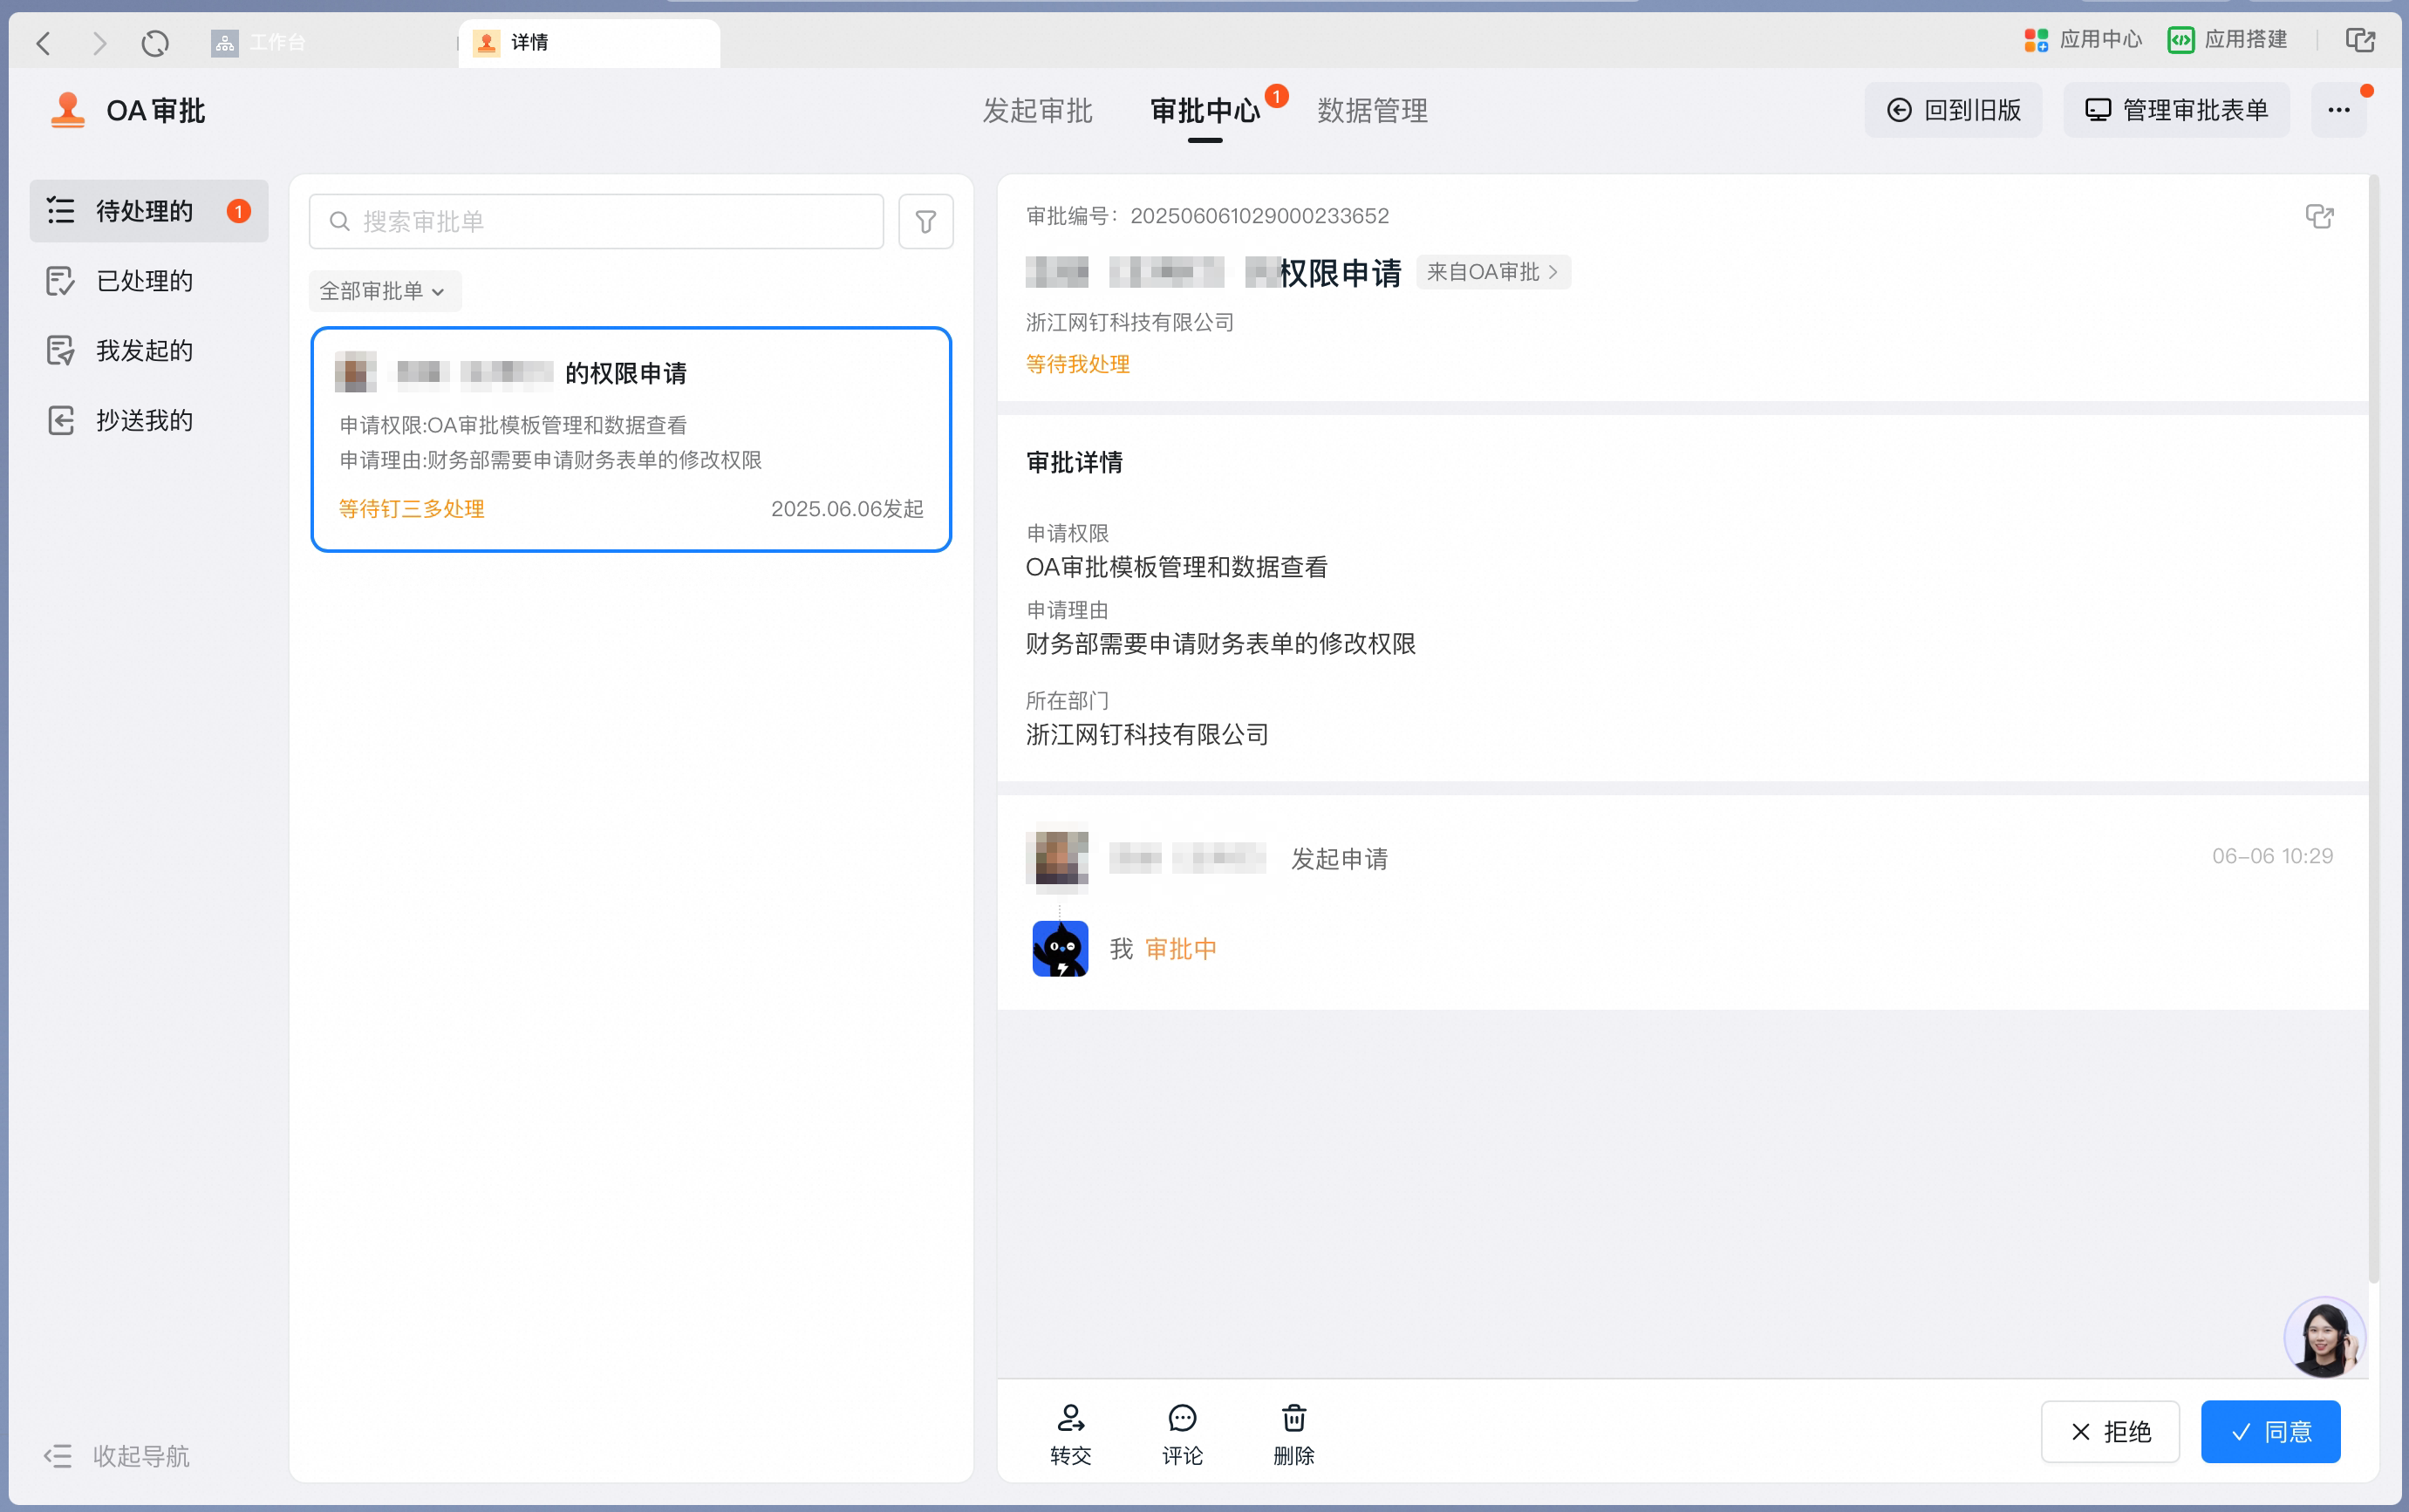
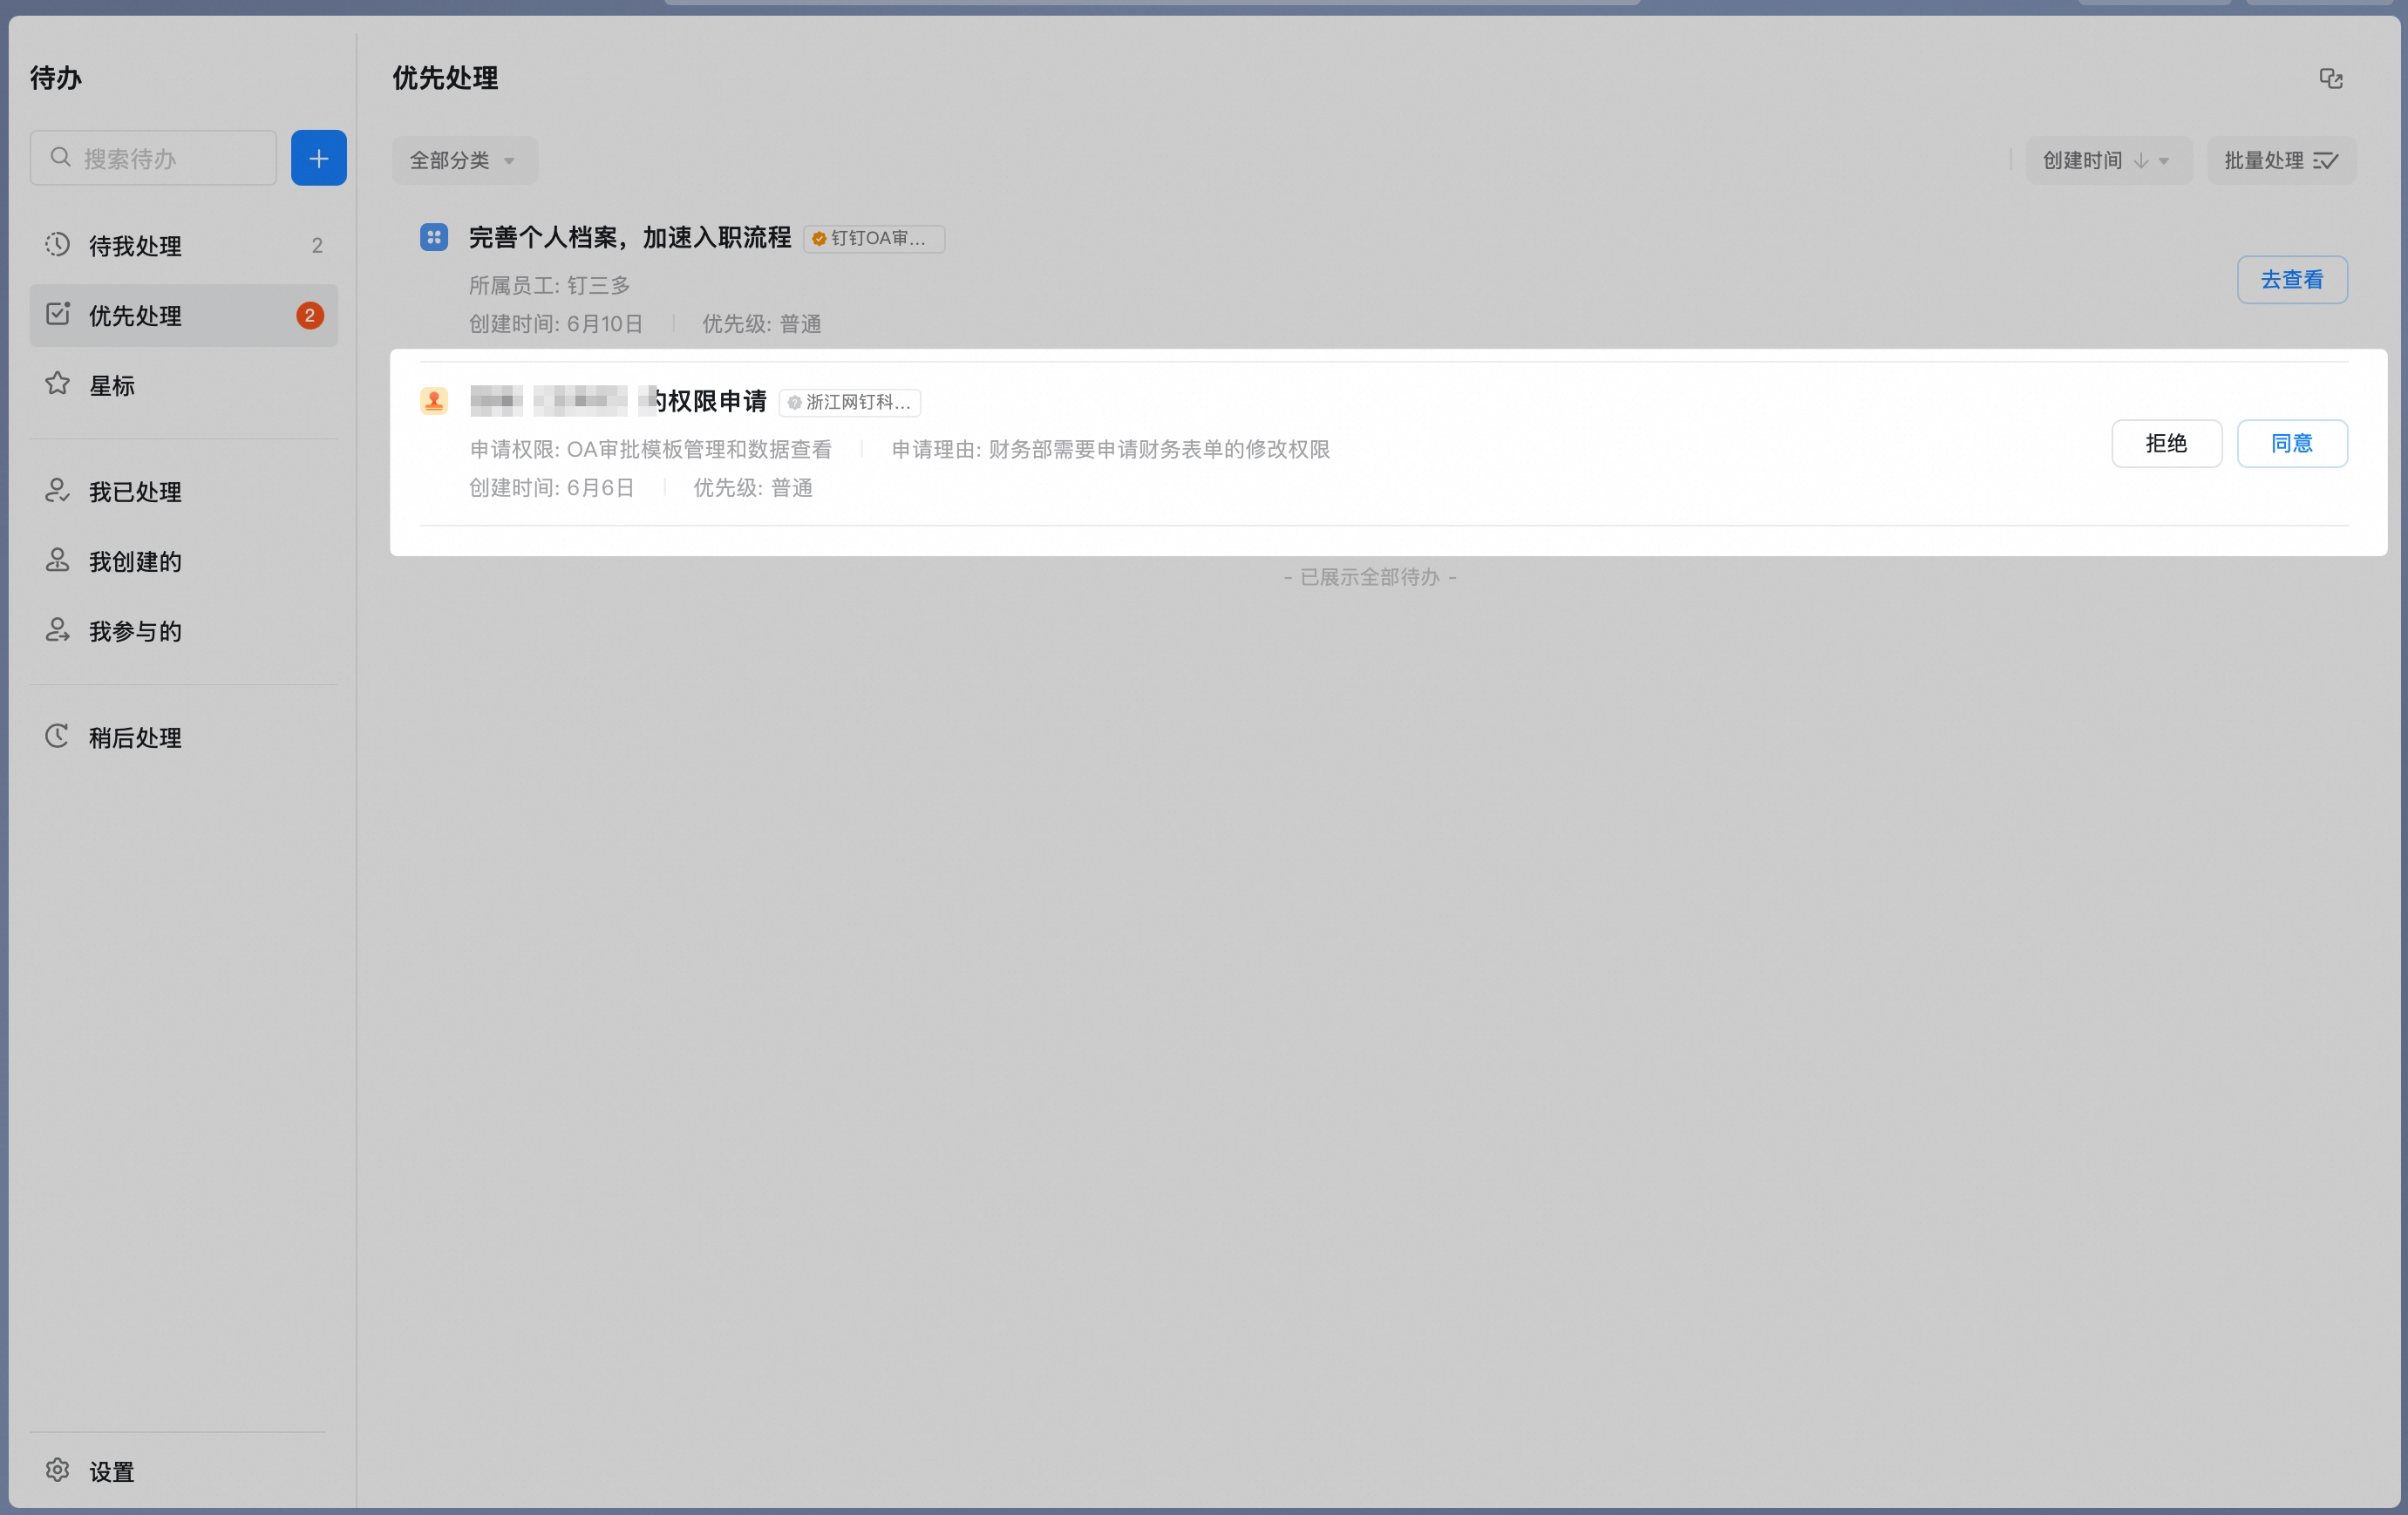
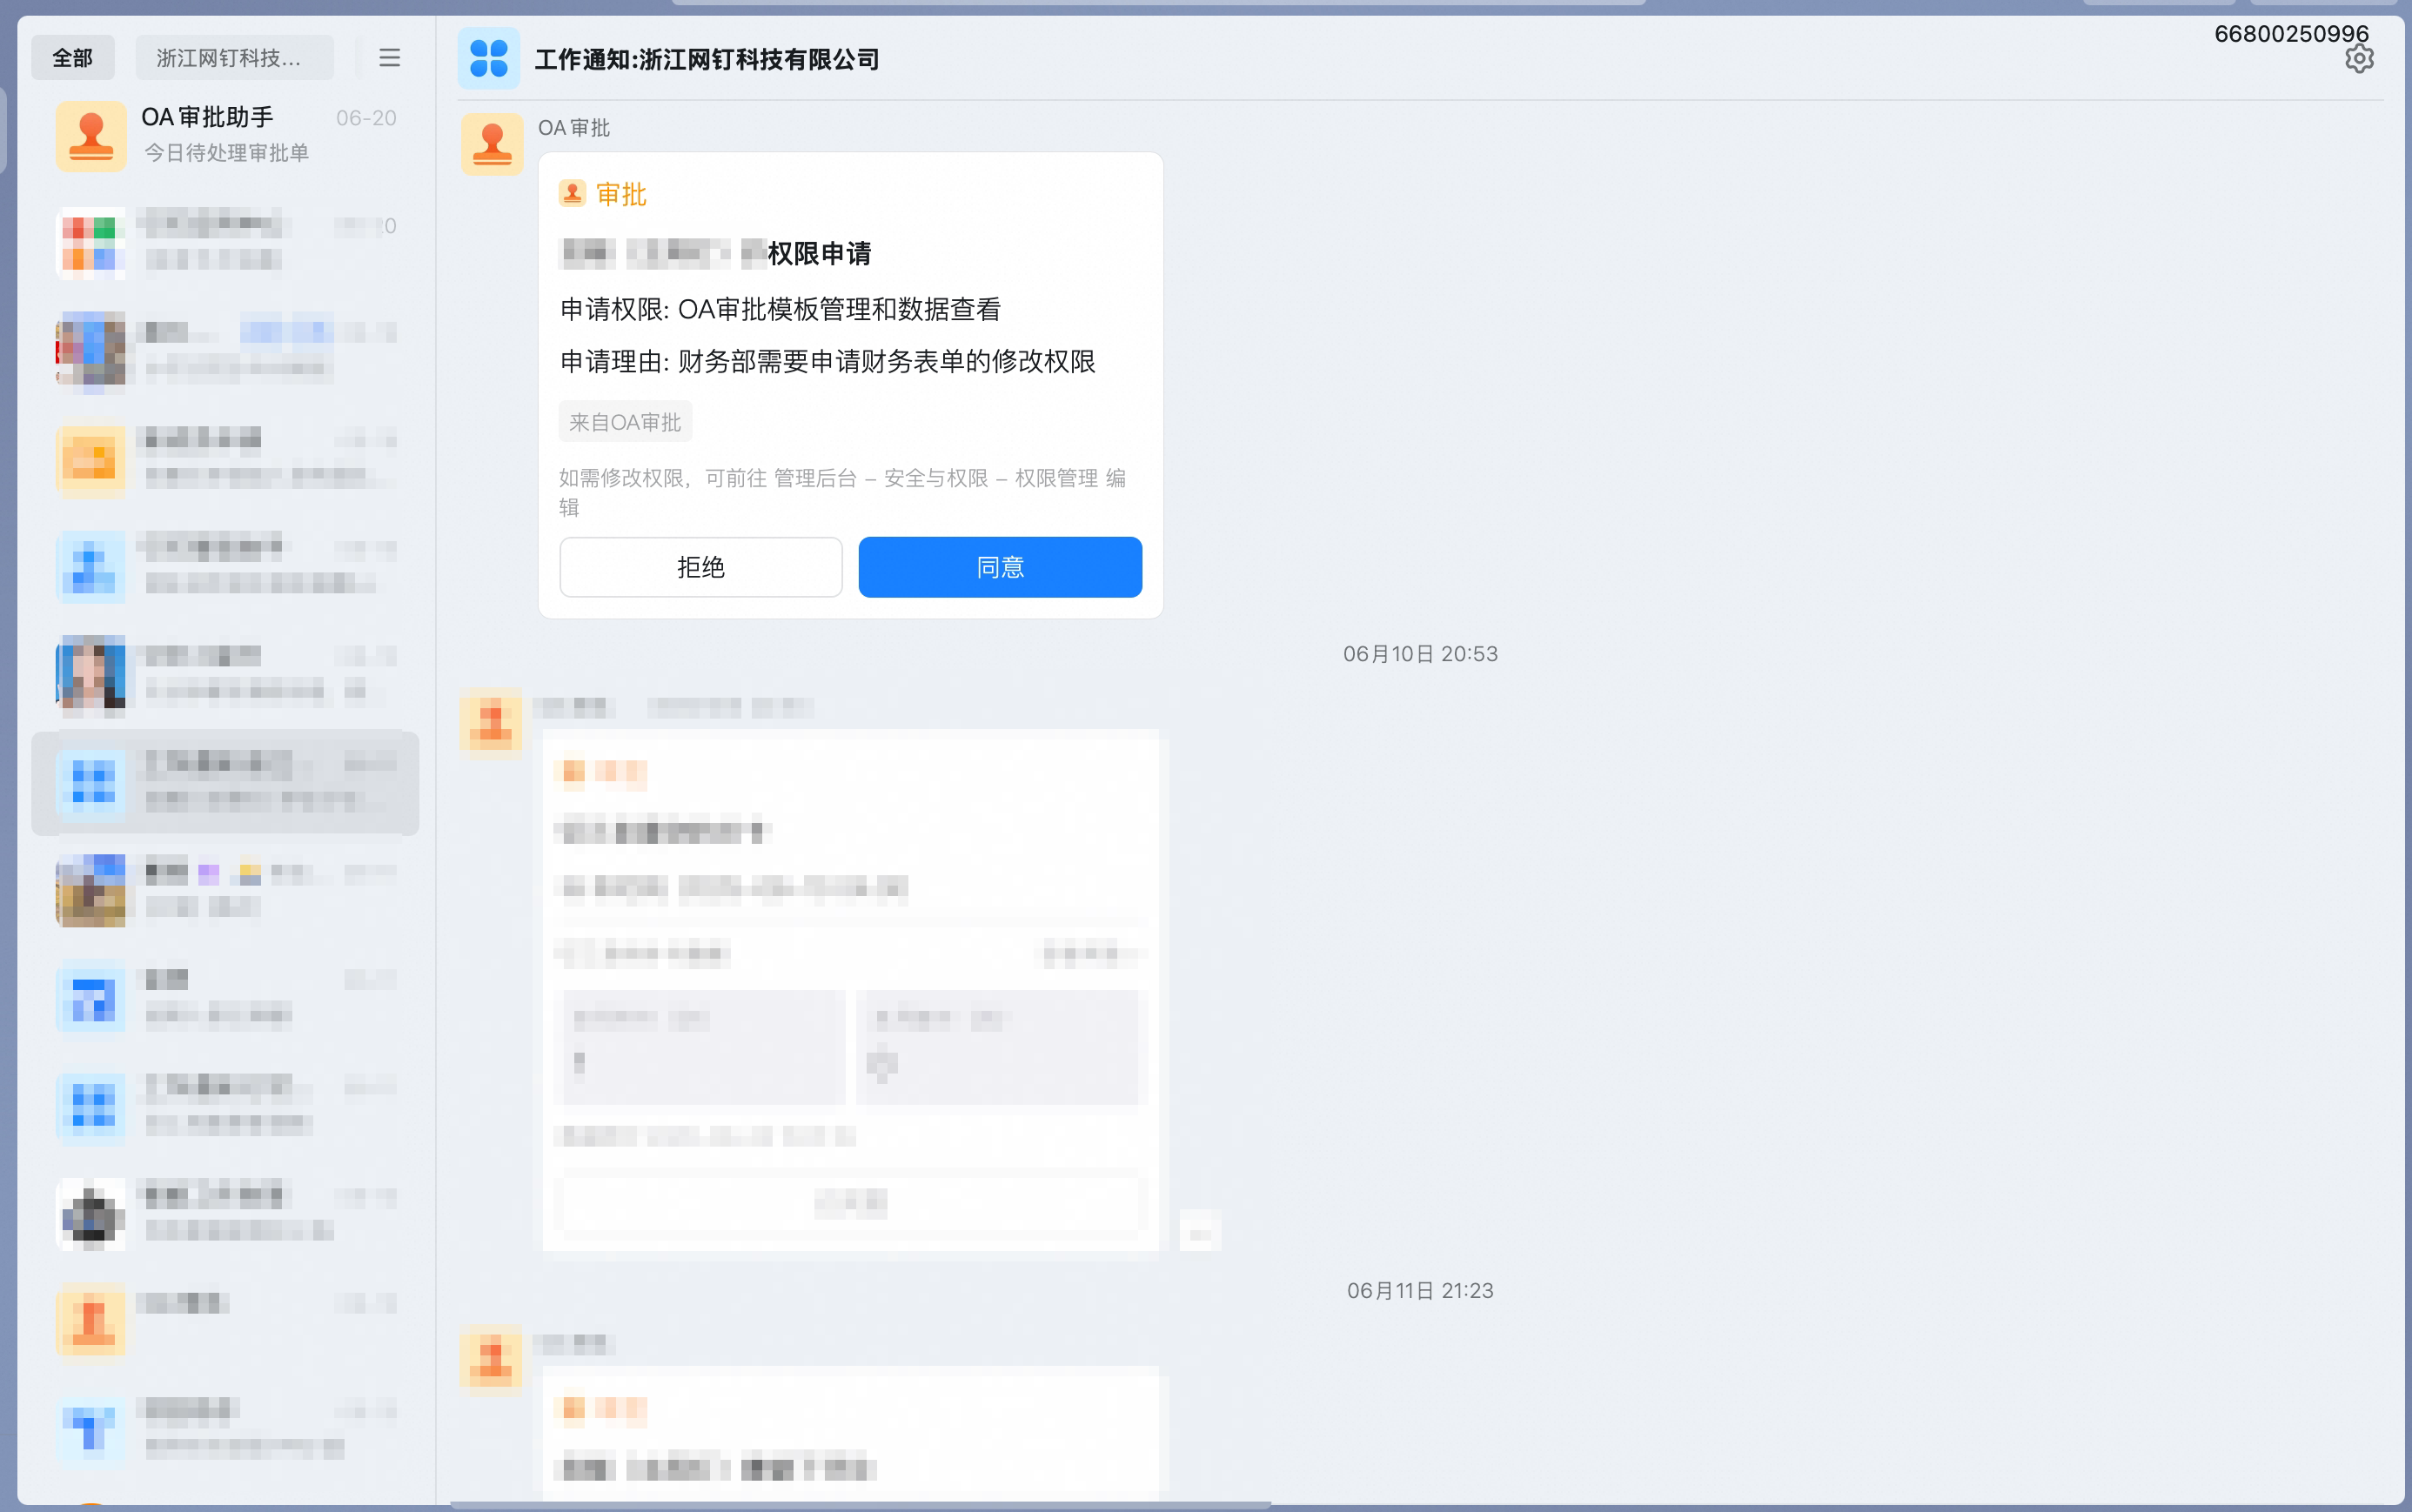
- Handle the Approval
2.4 Manage data
- DingTalk Admin Console operations
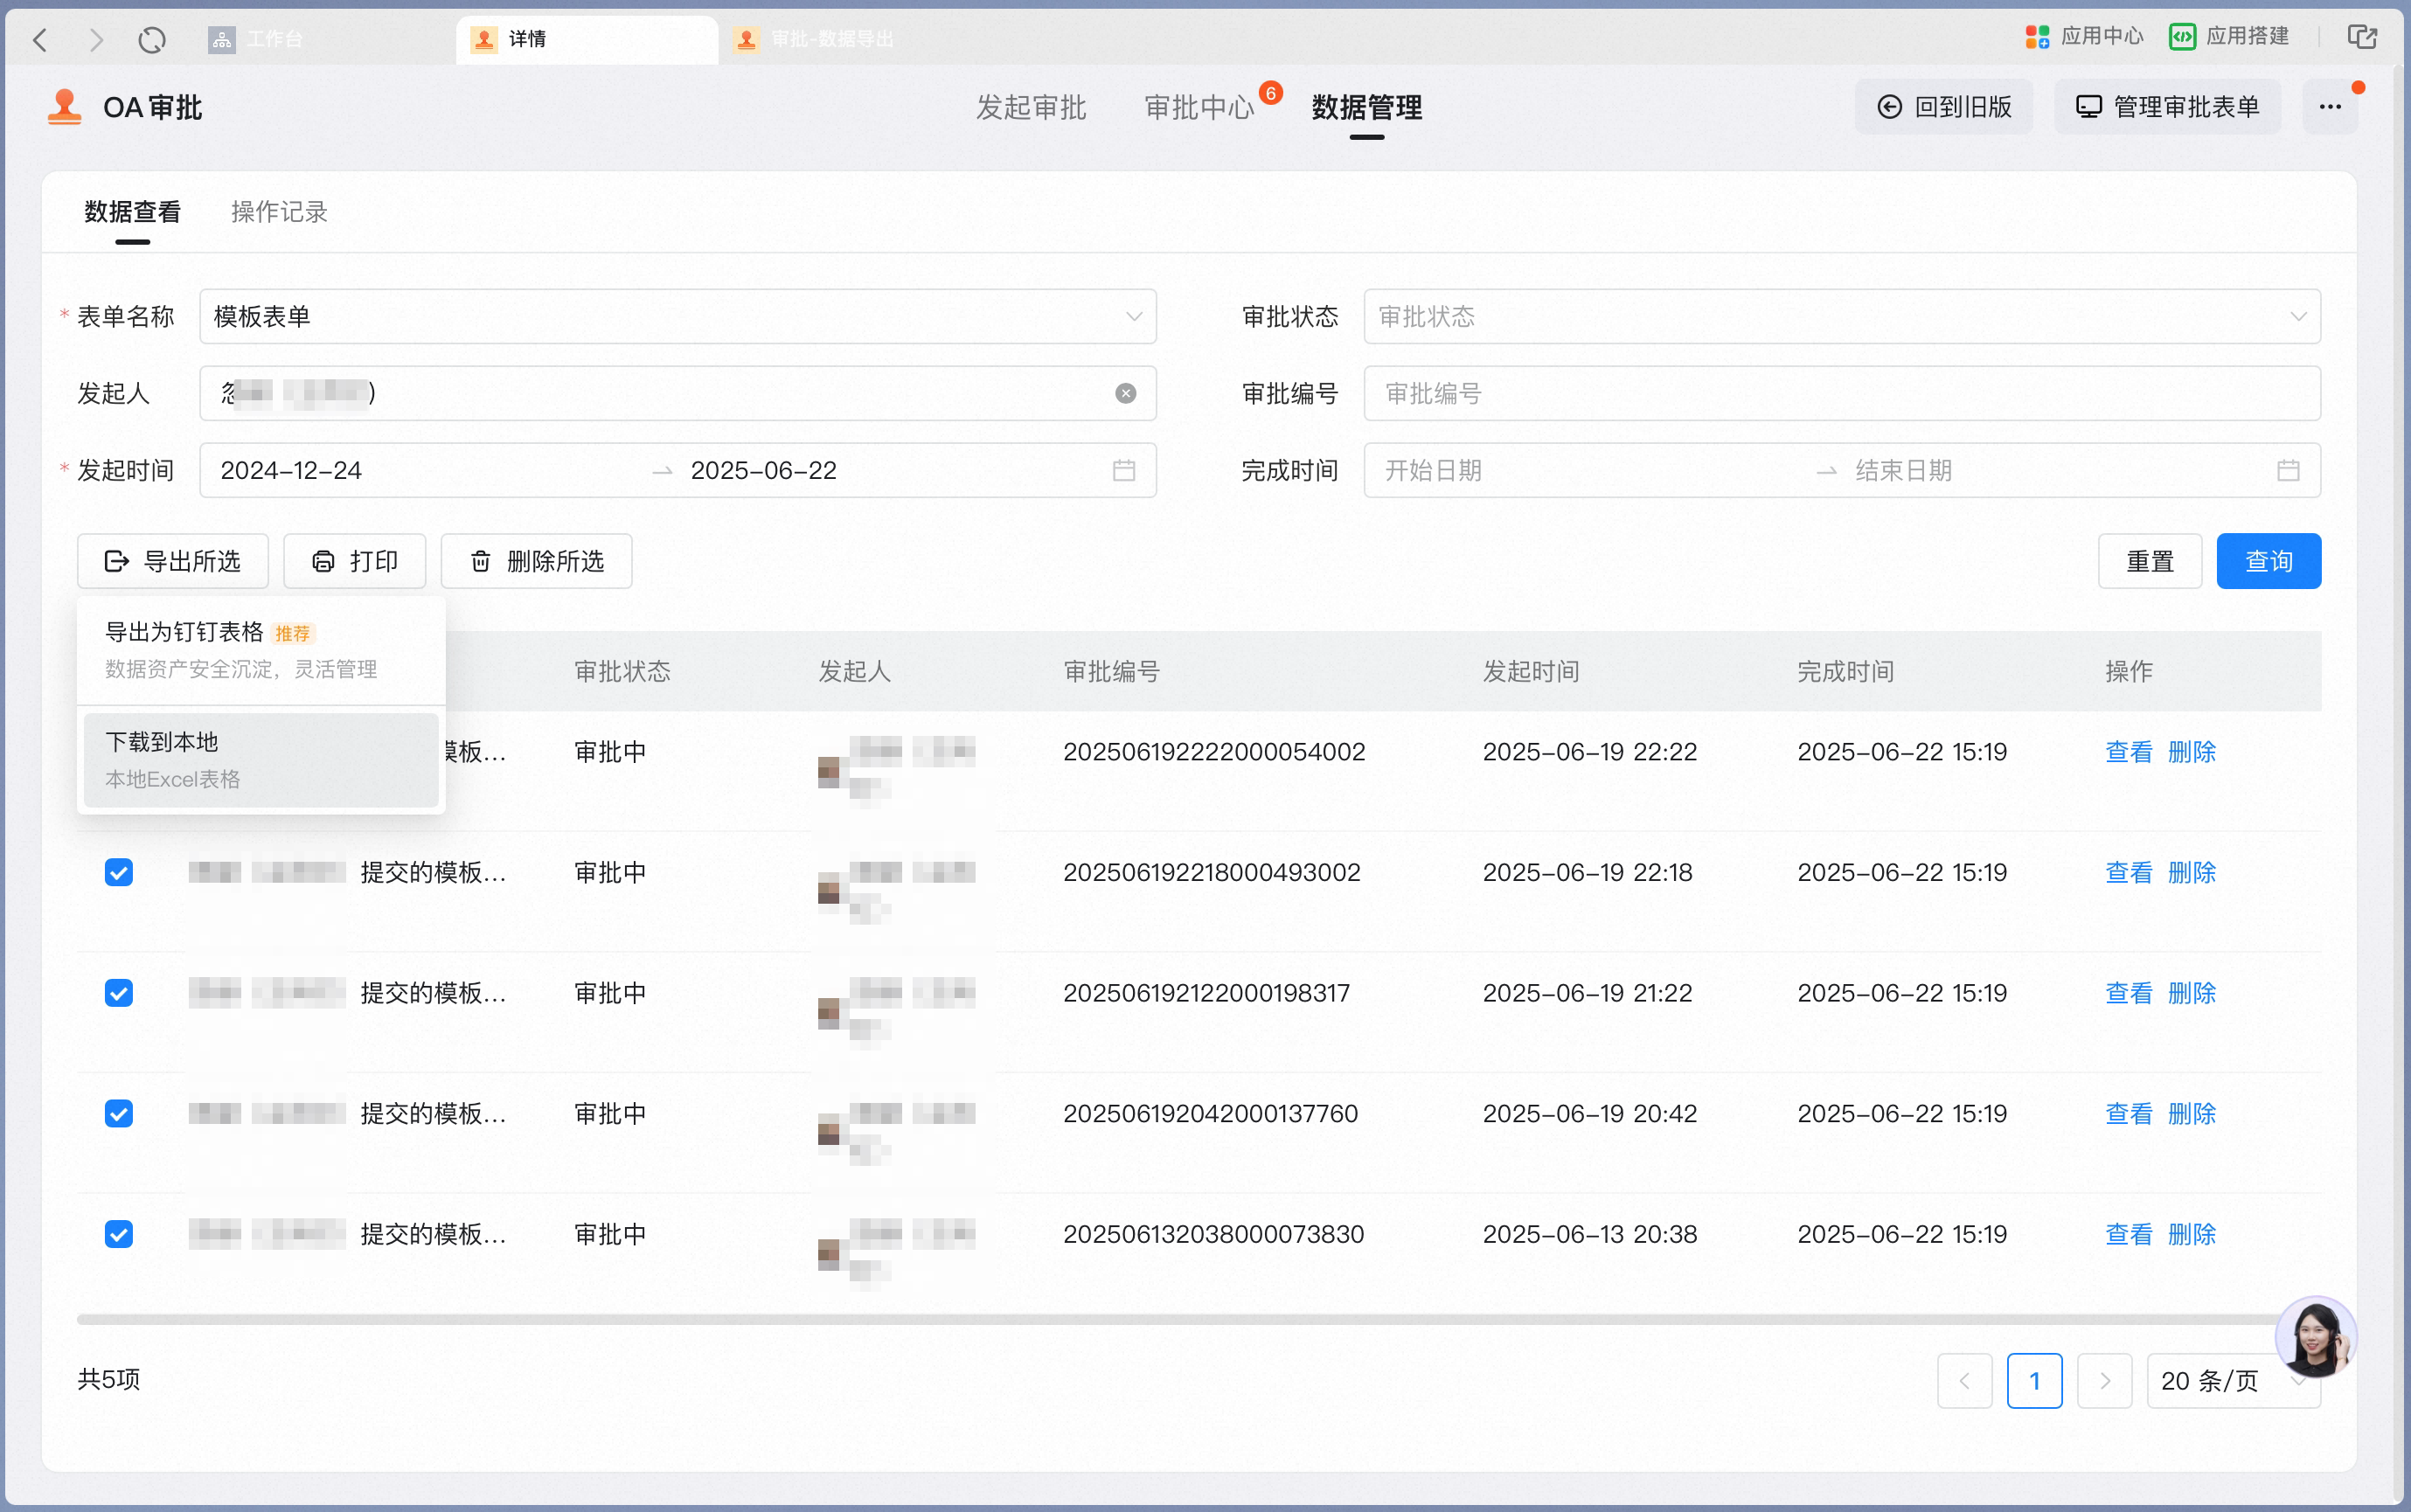
- On the DingTalk official website, after downloading and installing the desktop client, go to [Workbench] - [OA Approval], click [Manage Approval Forms] in the upper-right corner, and then click [Form Data Management].
- The Approval Admin can also Sign in to the DingTalk Admin Console and, on the Home page, go to [Approval] - [Form Data Management].
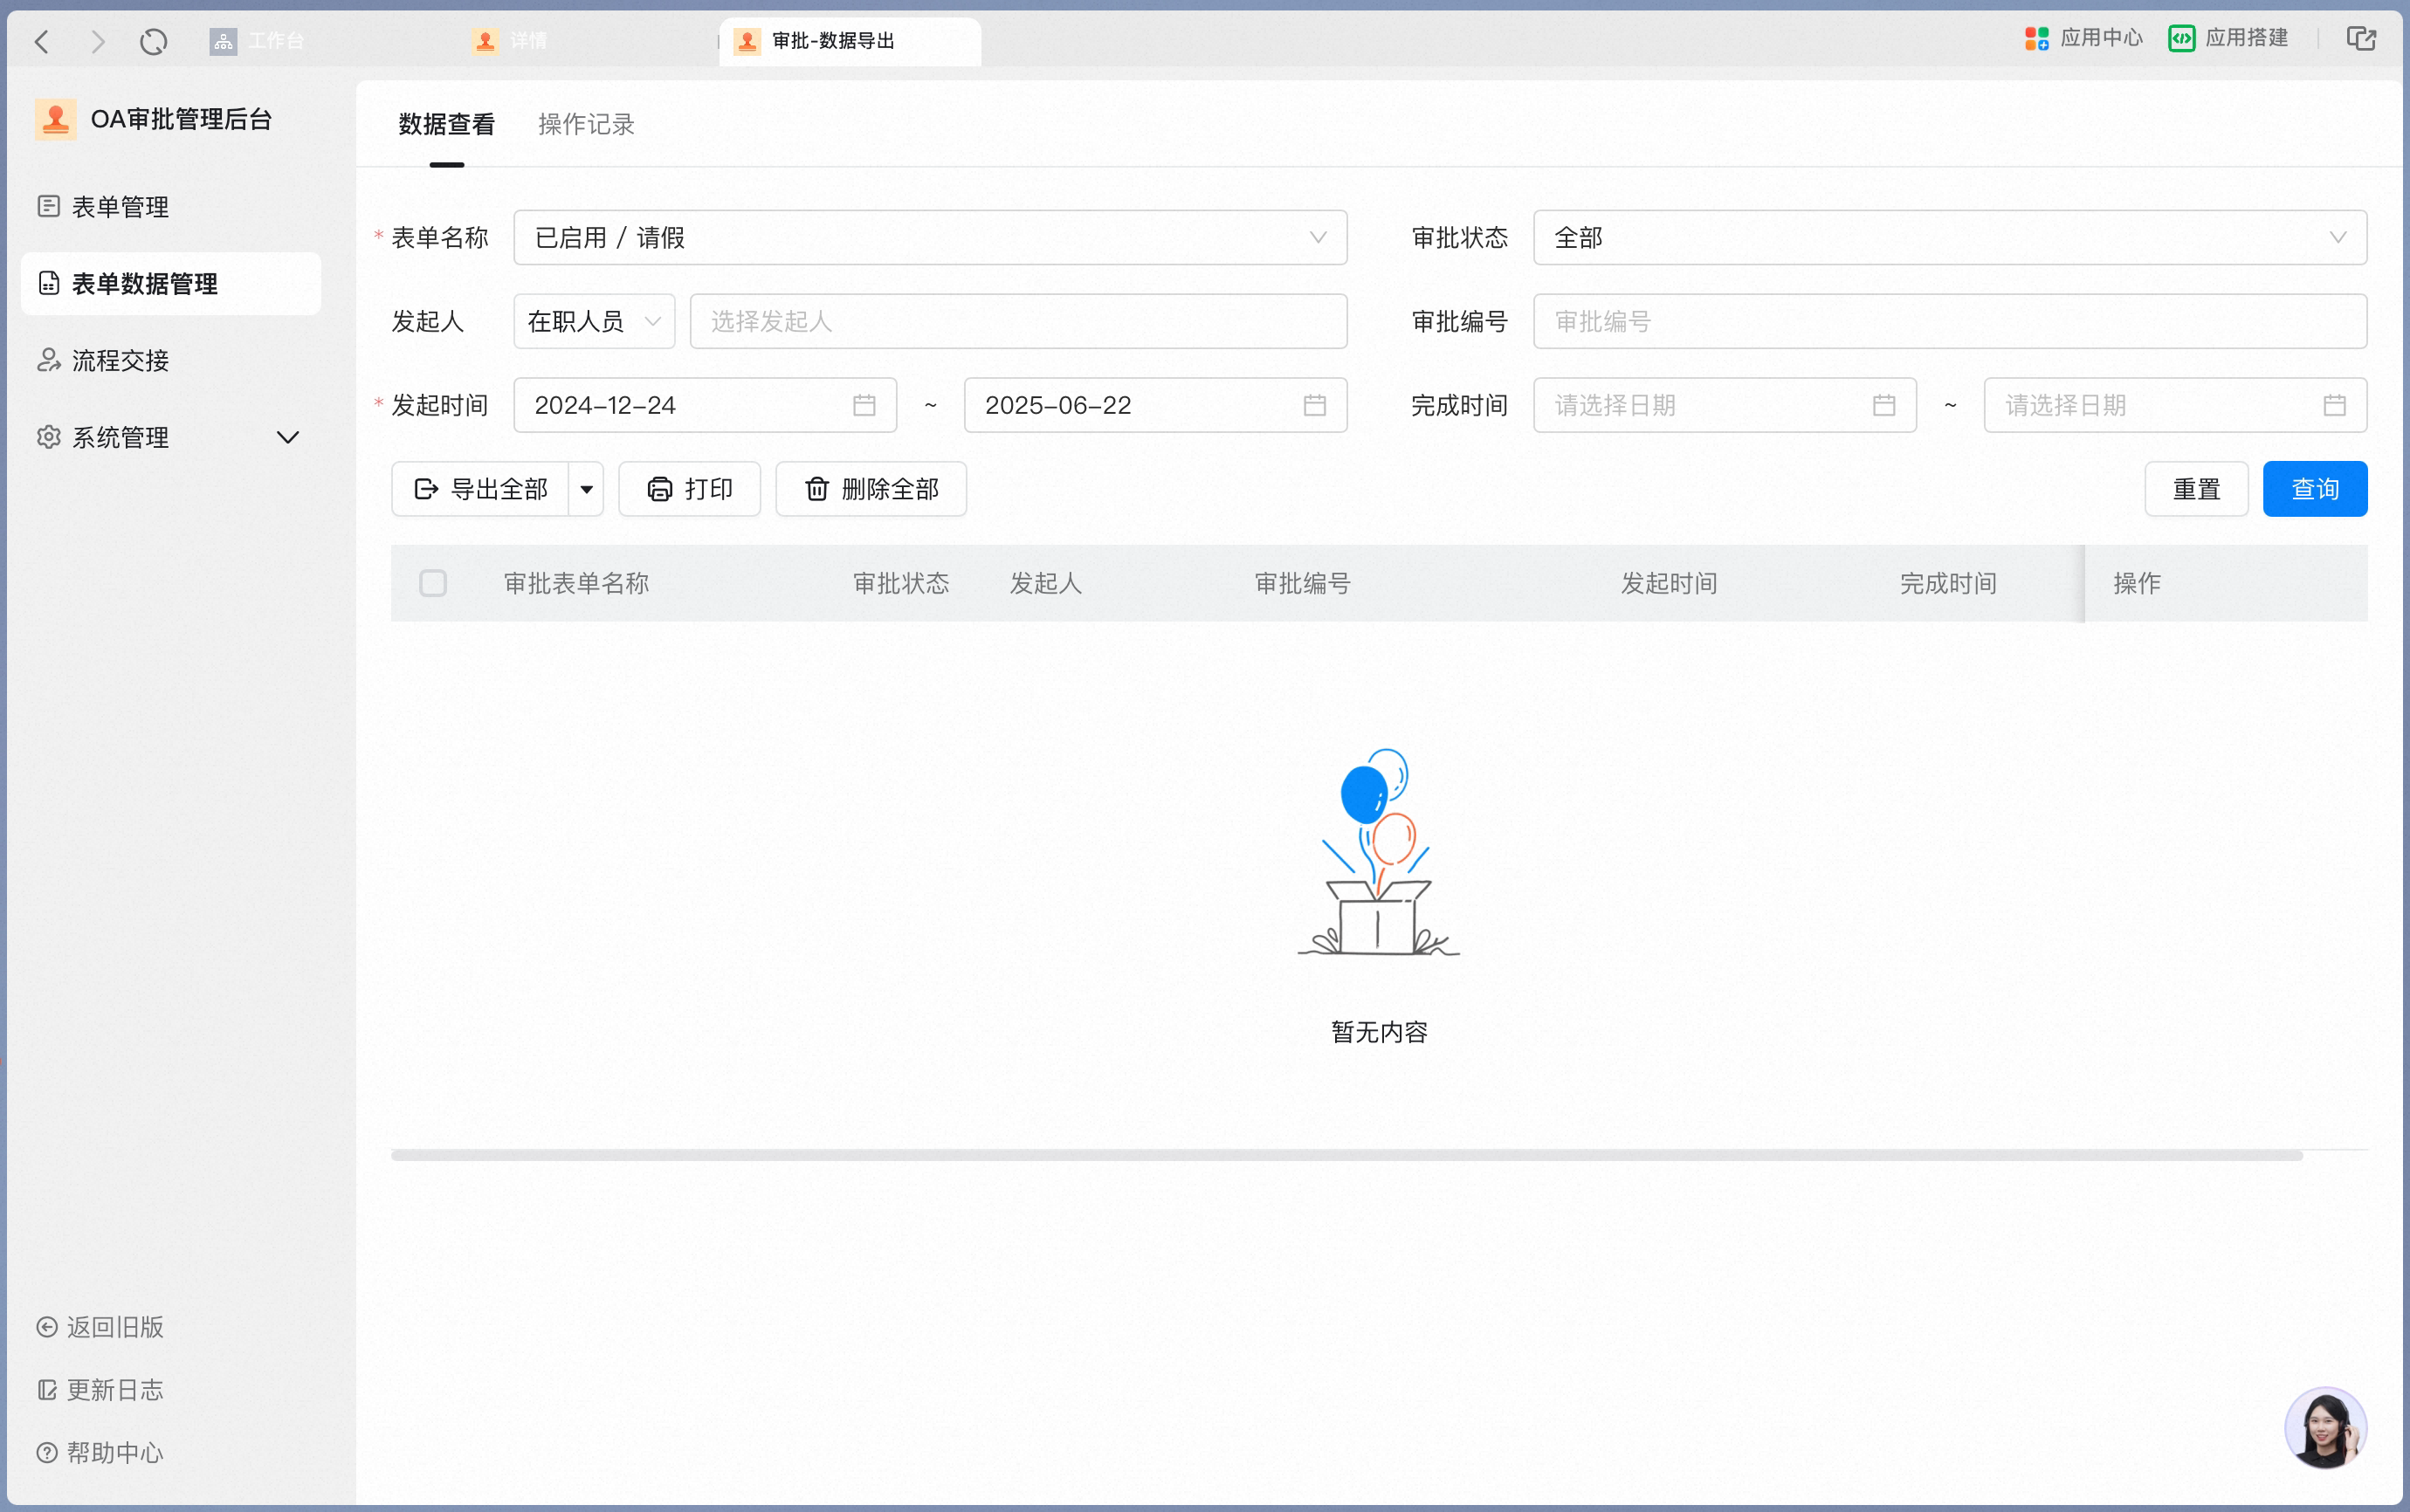
- You can query Data by form name, approval status, initiator, approval Number, initiation time, and completion time. The time range can span at most half a year.
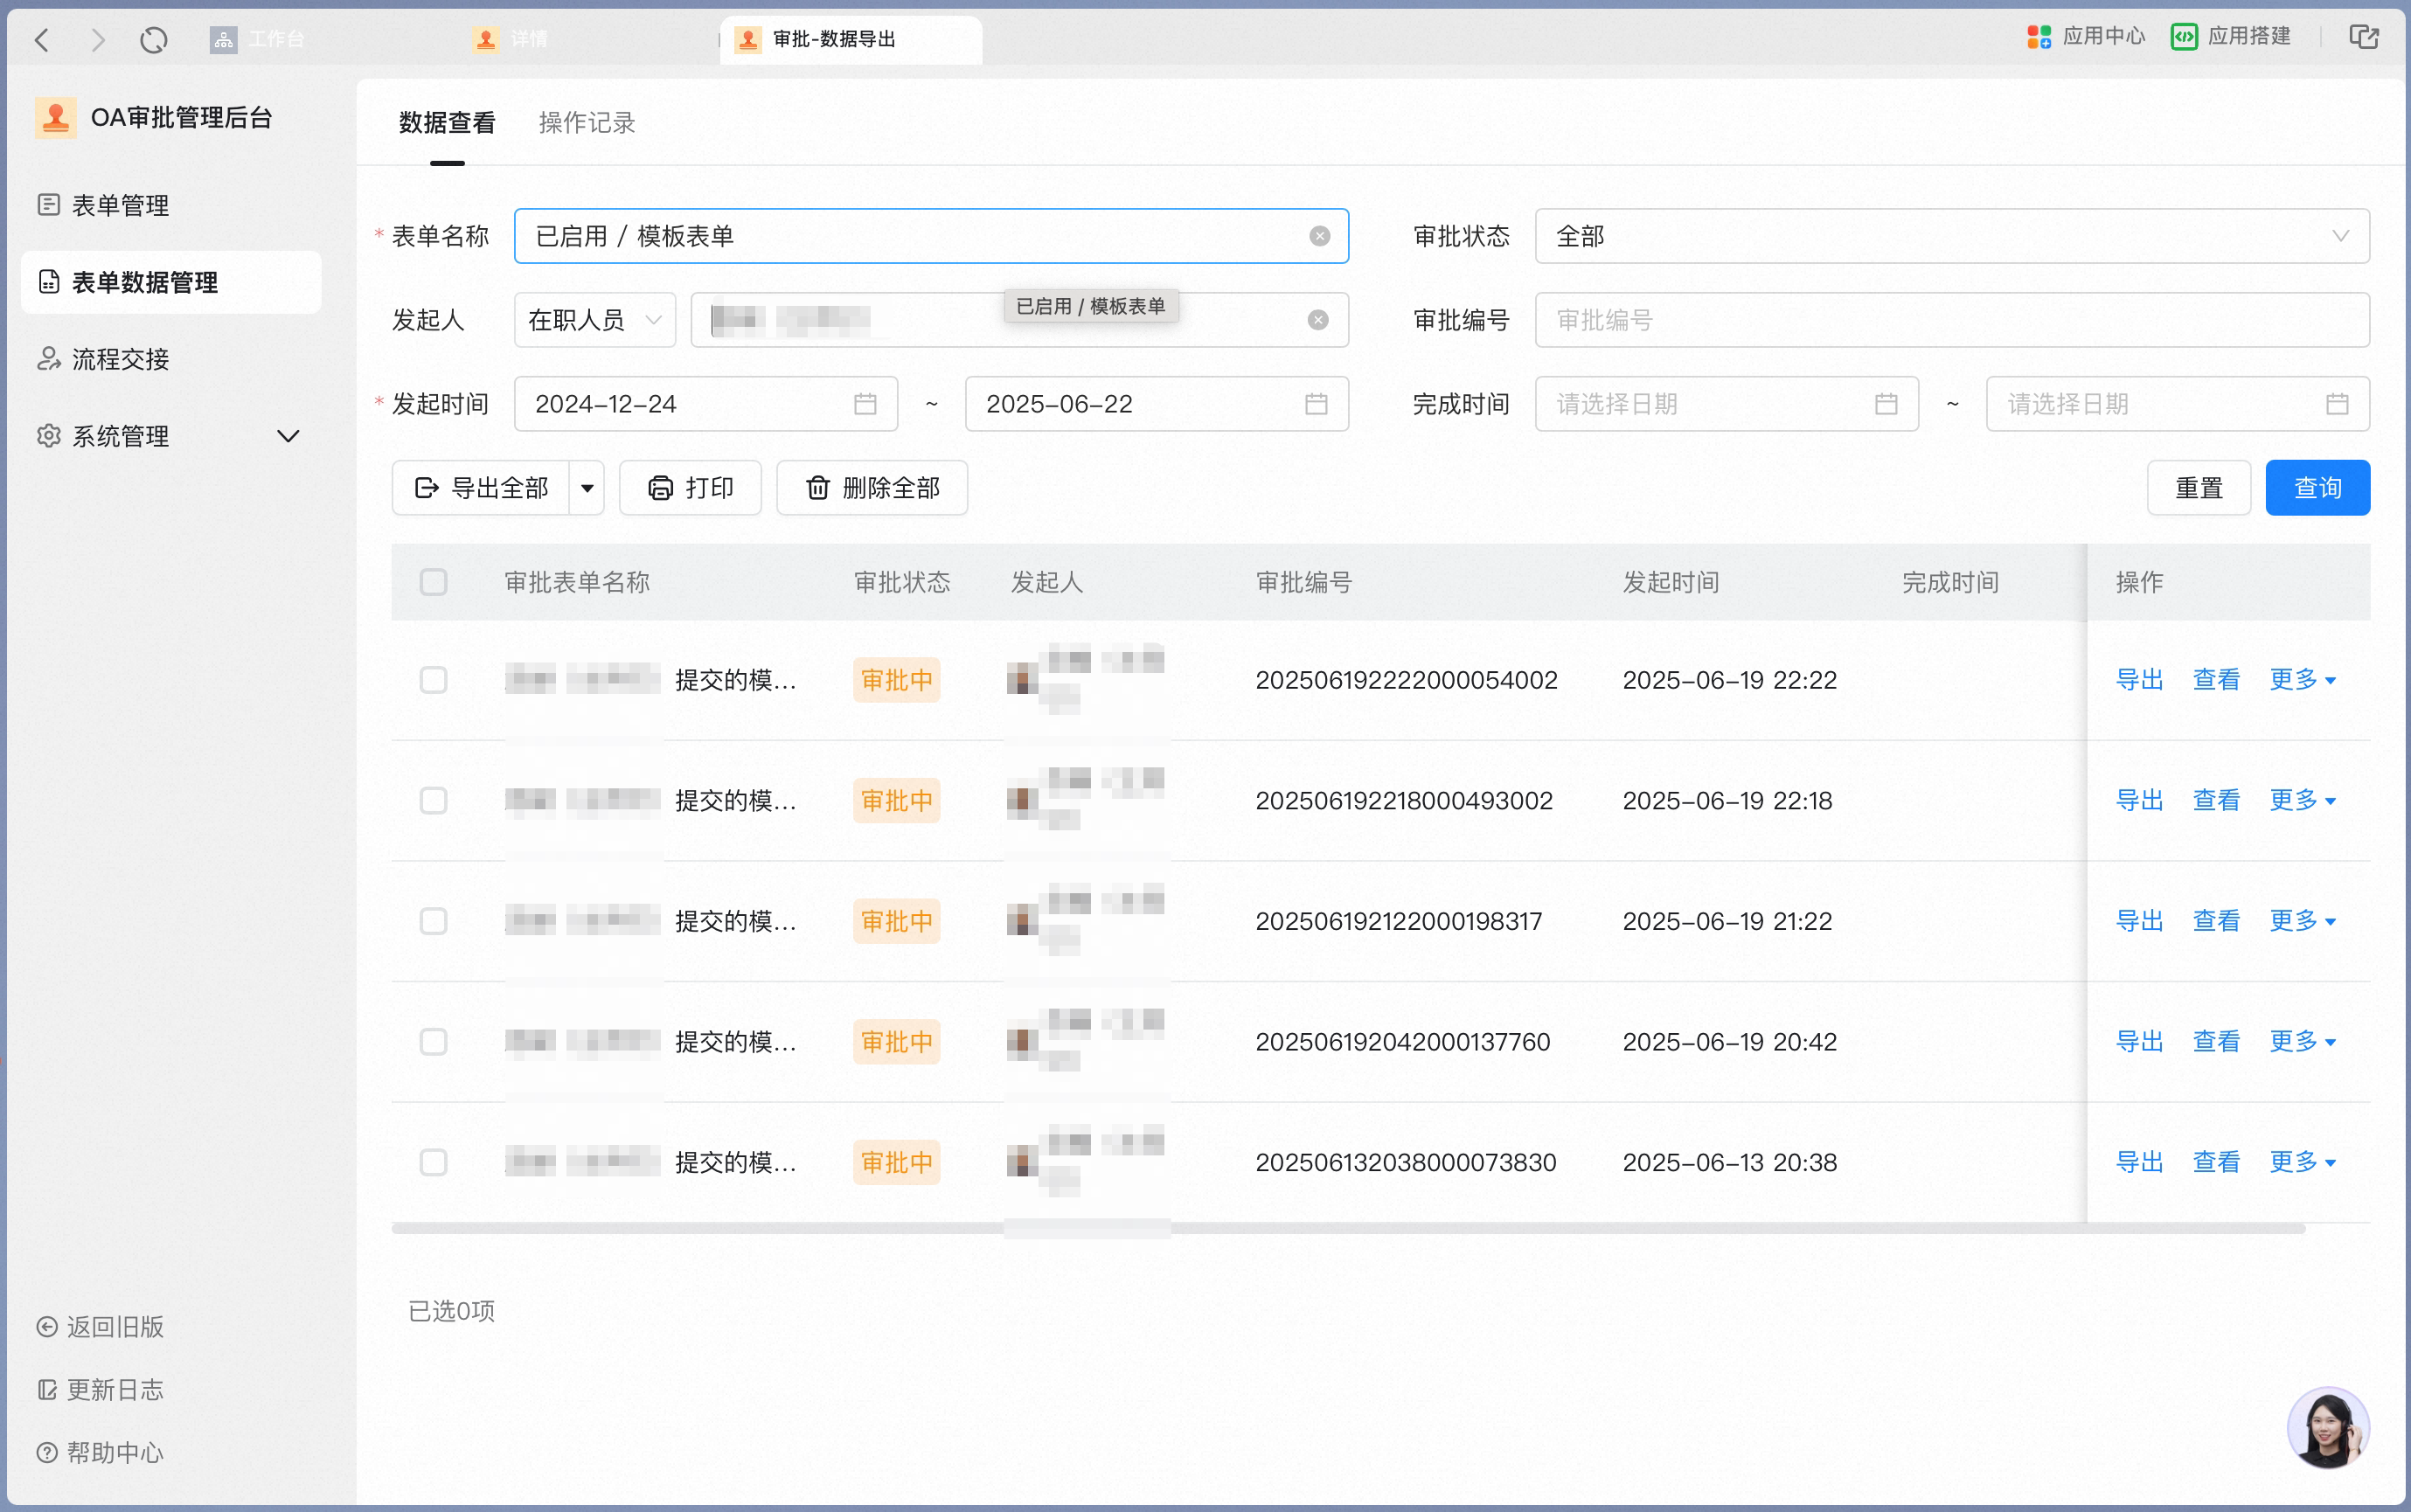
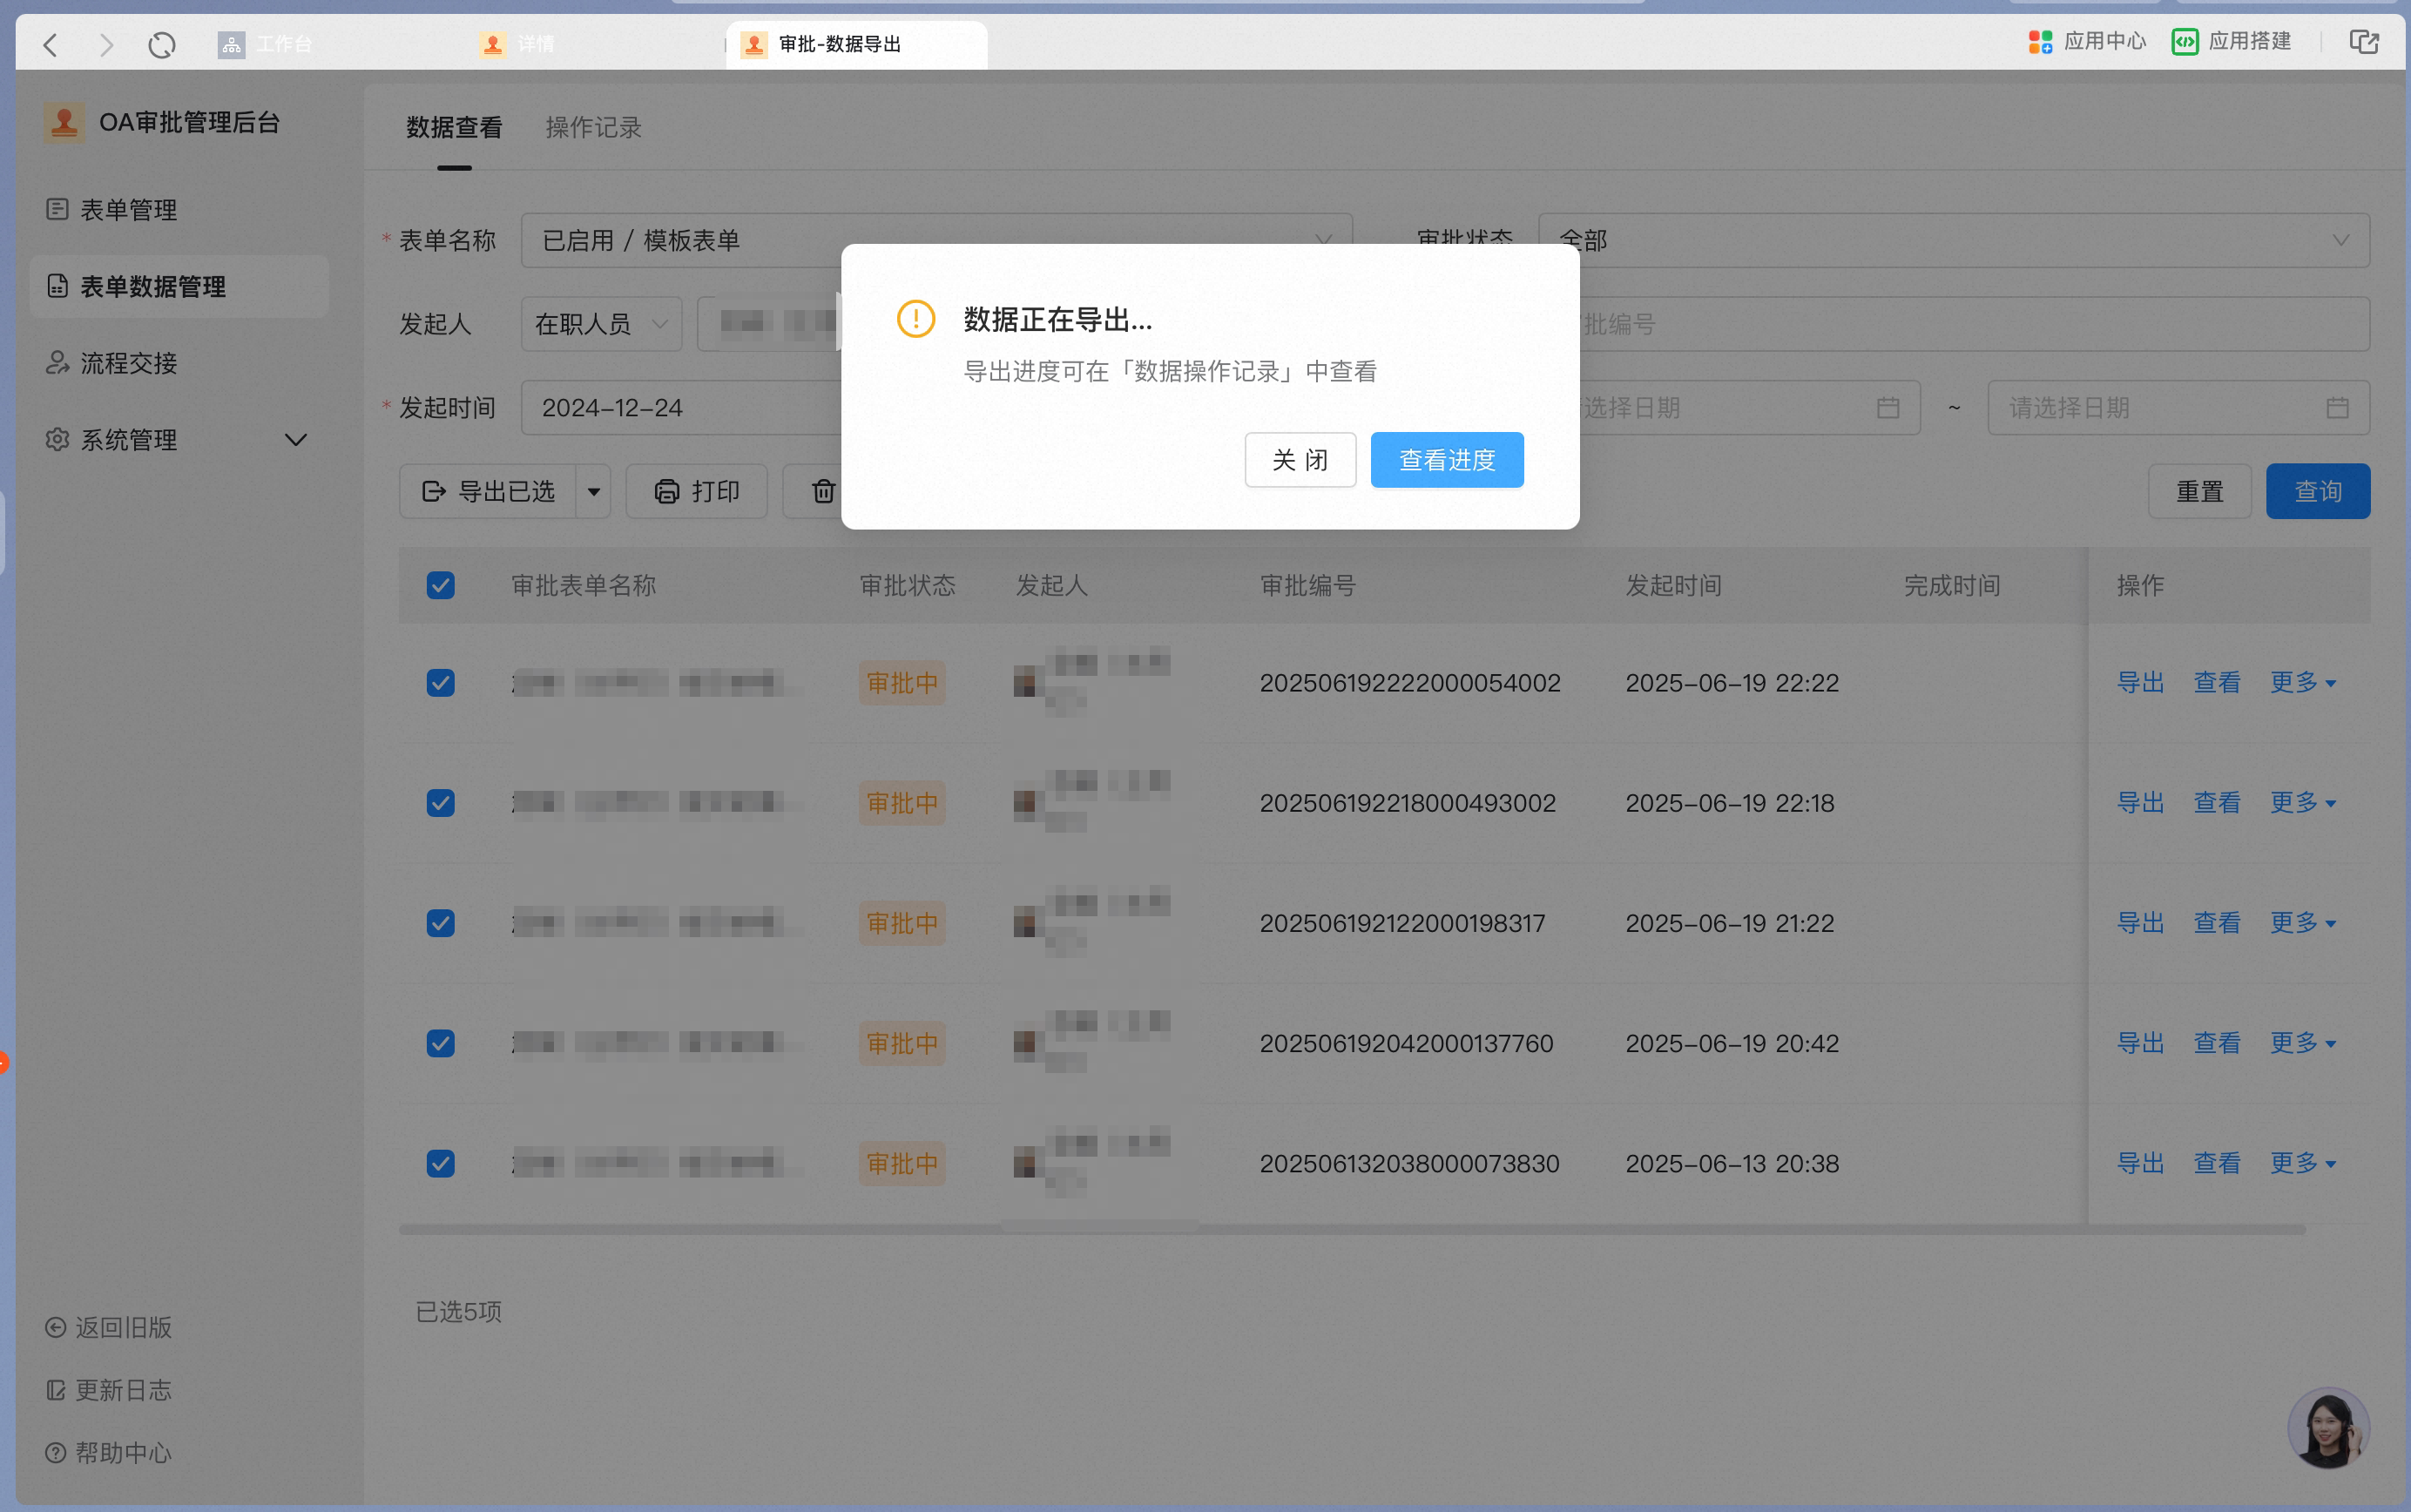
- Review the query results — you can Select multiple Records or Select all — and then click “Export all”.
- Desktop client operations
- On the DingTalk official website, after downloading and installing the desktop client, the approval data manager (not the Approval Admin) operates in [Workbench] - [OA Approval] - [Data Center].
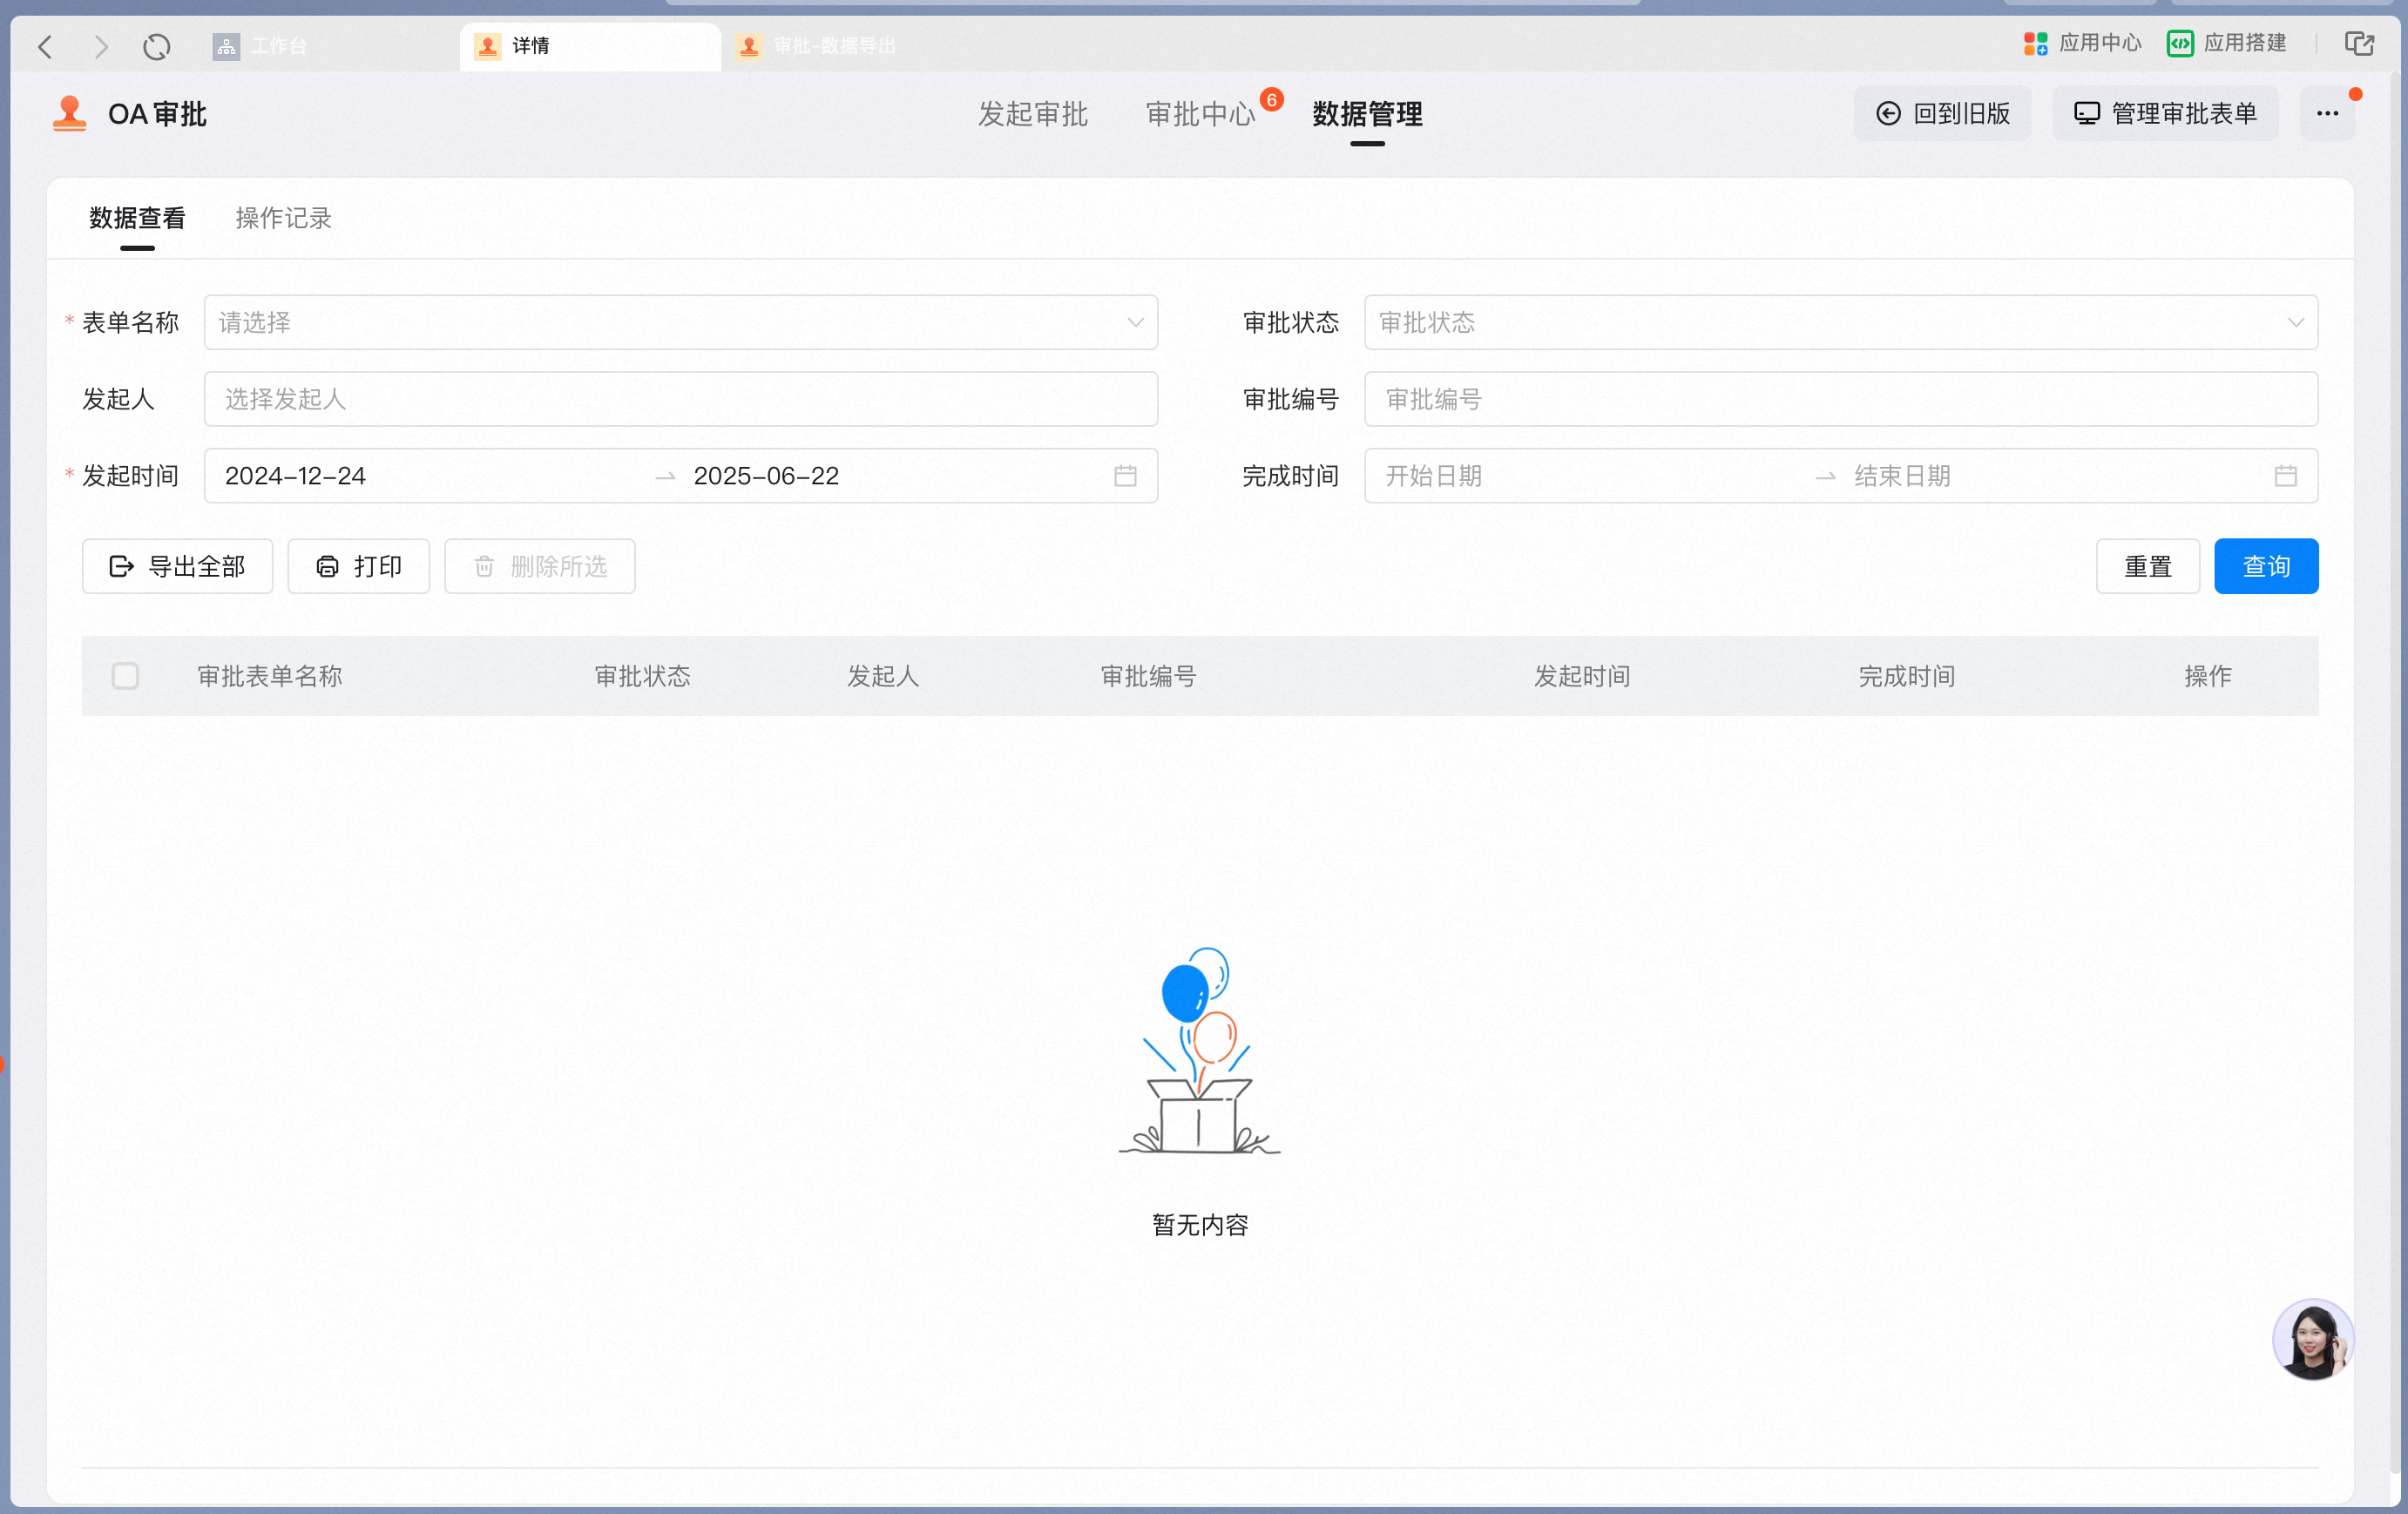
- You can query Data by form name, approval status, initiator, approval Number, initiation time, and completion time. The time range can span at most half a year.
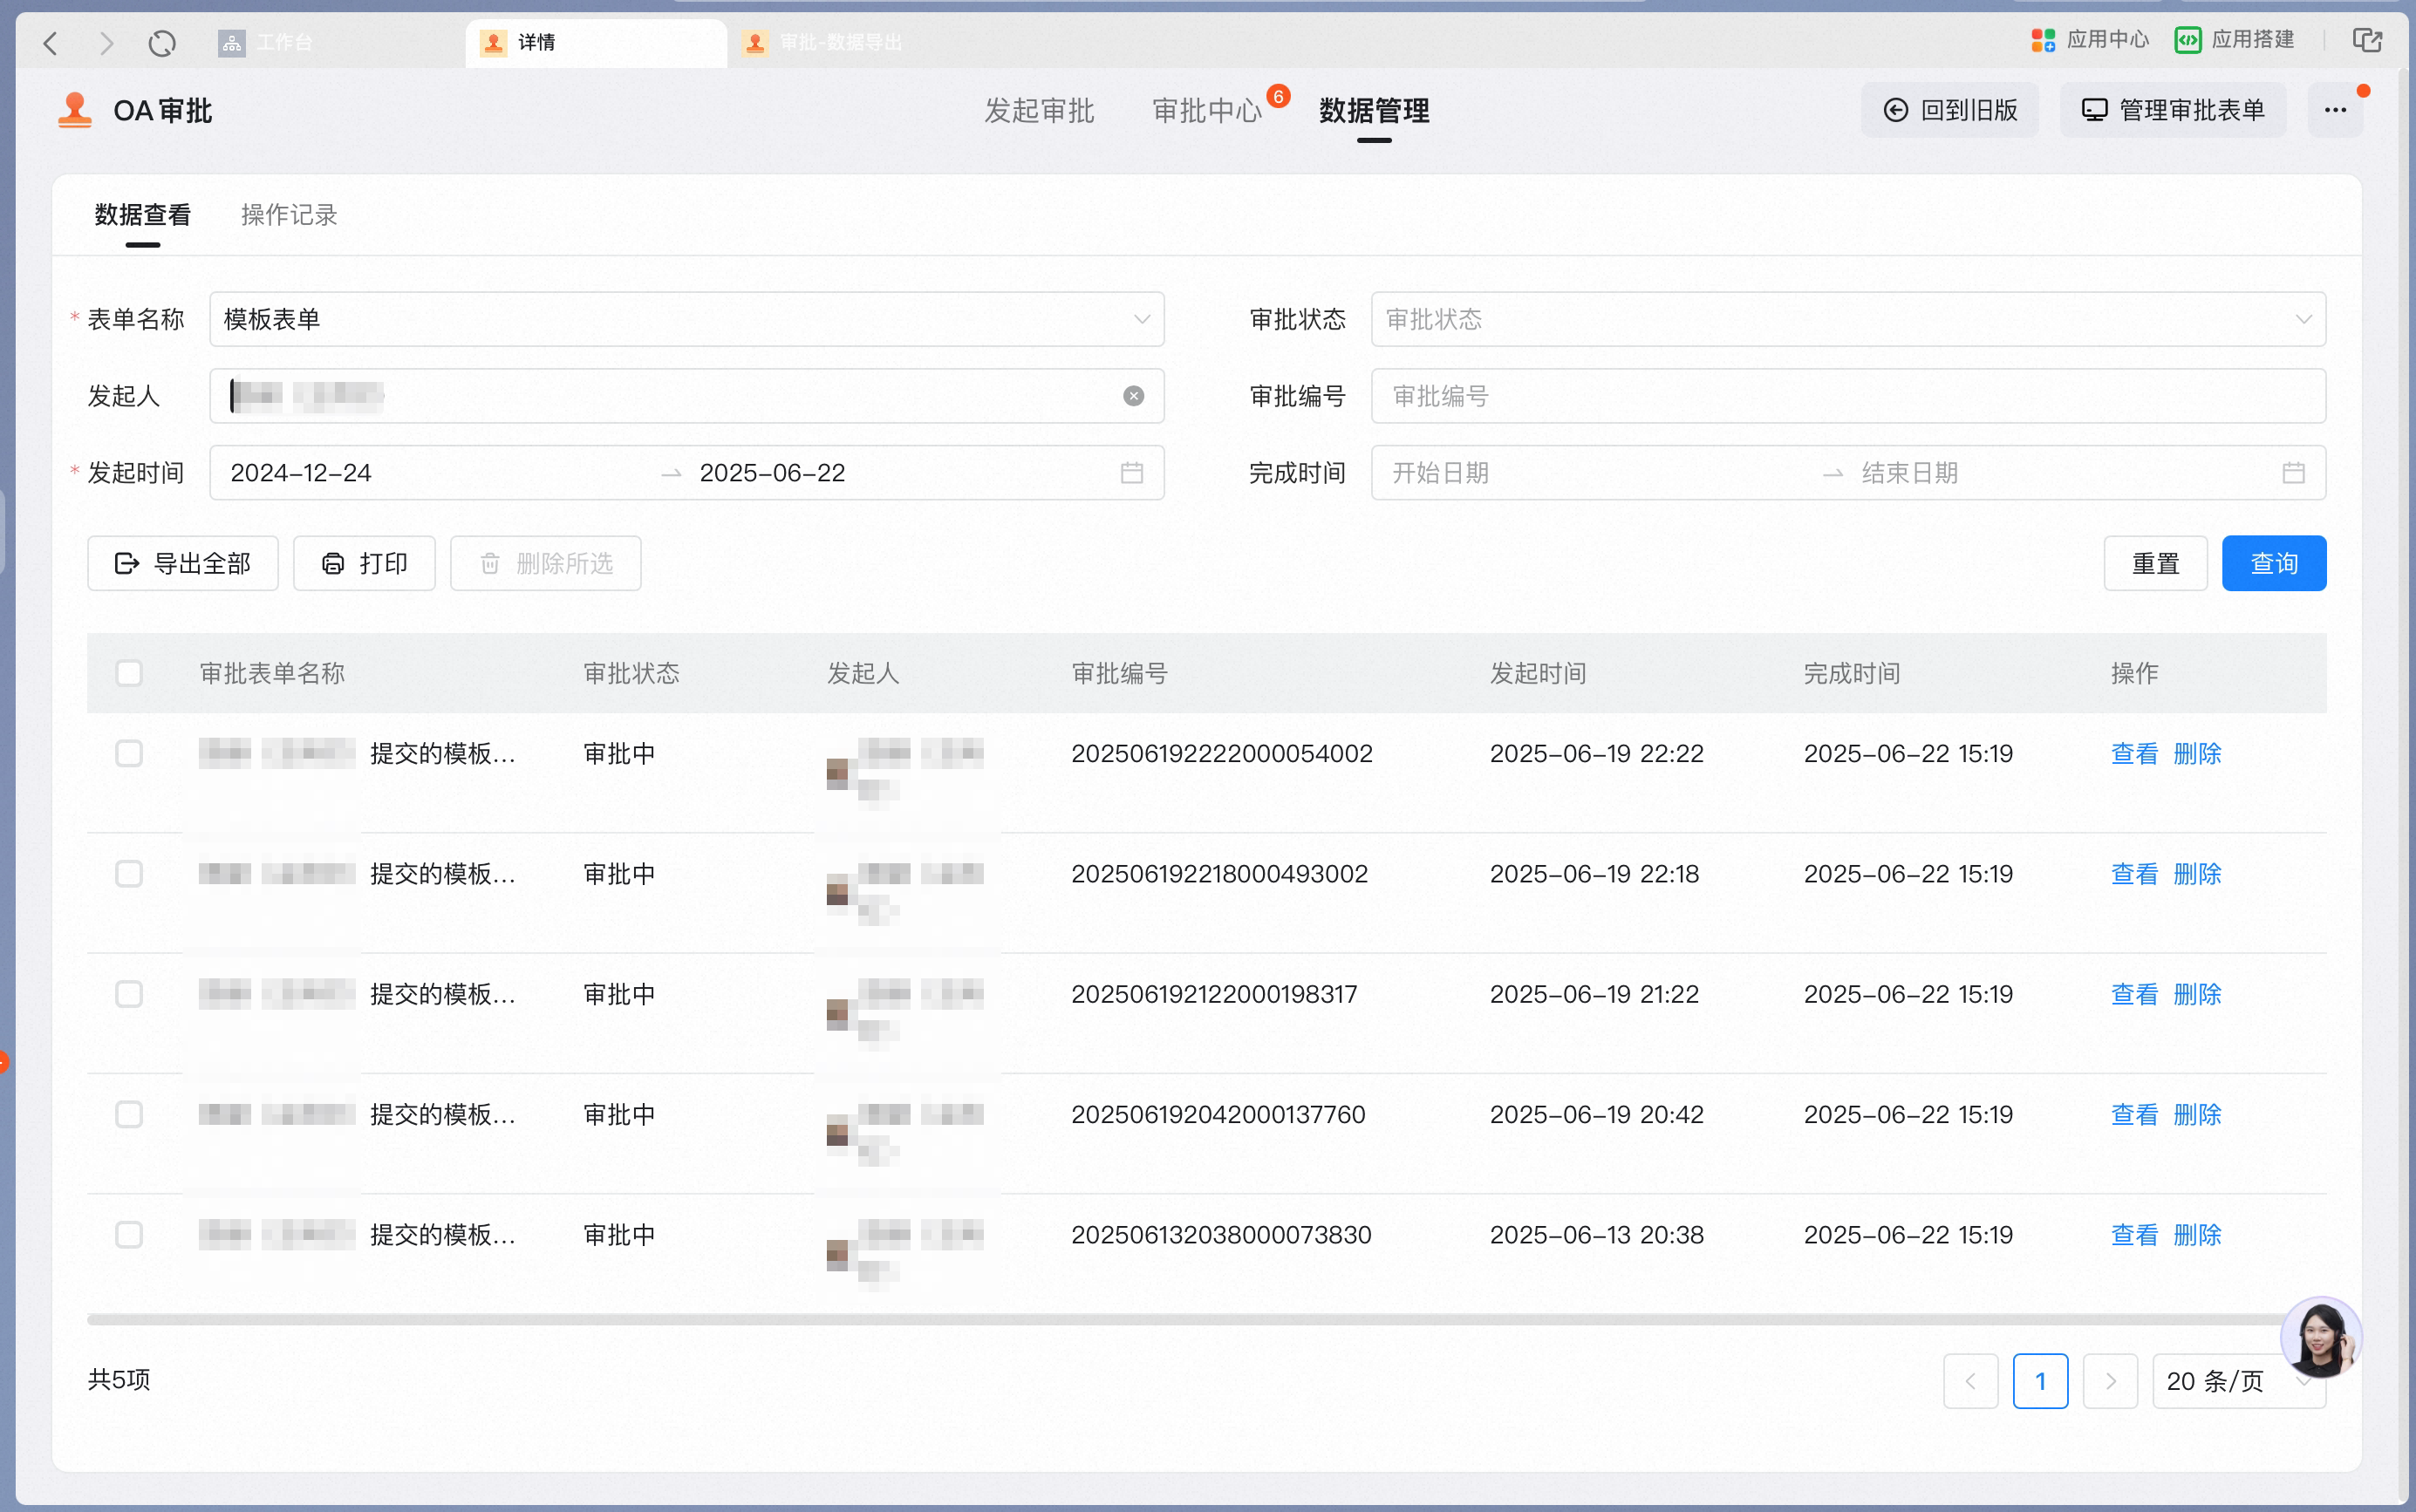
- Review the query results — you can Select multiple Records or Select all — and then click “Export all”.