1. Product Introduction

DingTalk OA Approval is an official DingTalk app that delivers an out-of-the-box OA Approval product. With simple configuration, it flexibly meets an organization’s day-to-day approval needs, improves team management and business efficiency, helps enforce management policies, and reduces operational risk.

2. Usage Instructions

1) Becoming an Approval Admin

The DingTalk Super Admin has all Approval operation permissions by default. Any non-Super Admin who needs permissions such as editing forms, creating forms, or exporting all data must first obtain Approval Sub Admin permissions. There are two ways to become an Approval Sub Admin:

1. The Super Admin sets an Approval Sub Admin

1.1 On mobile
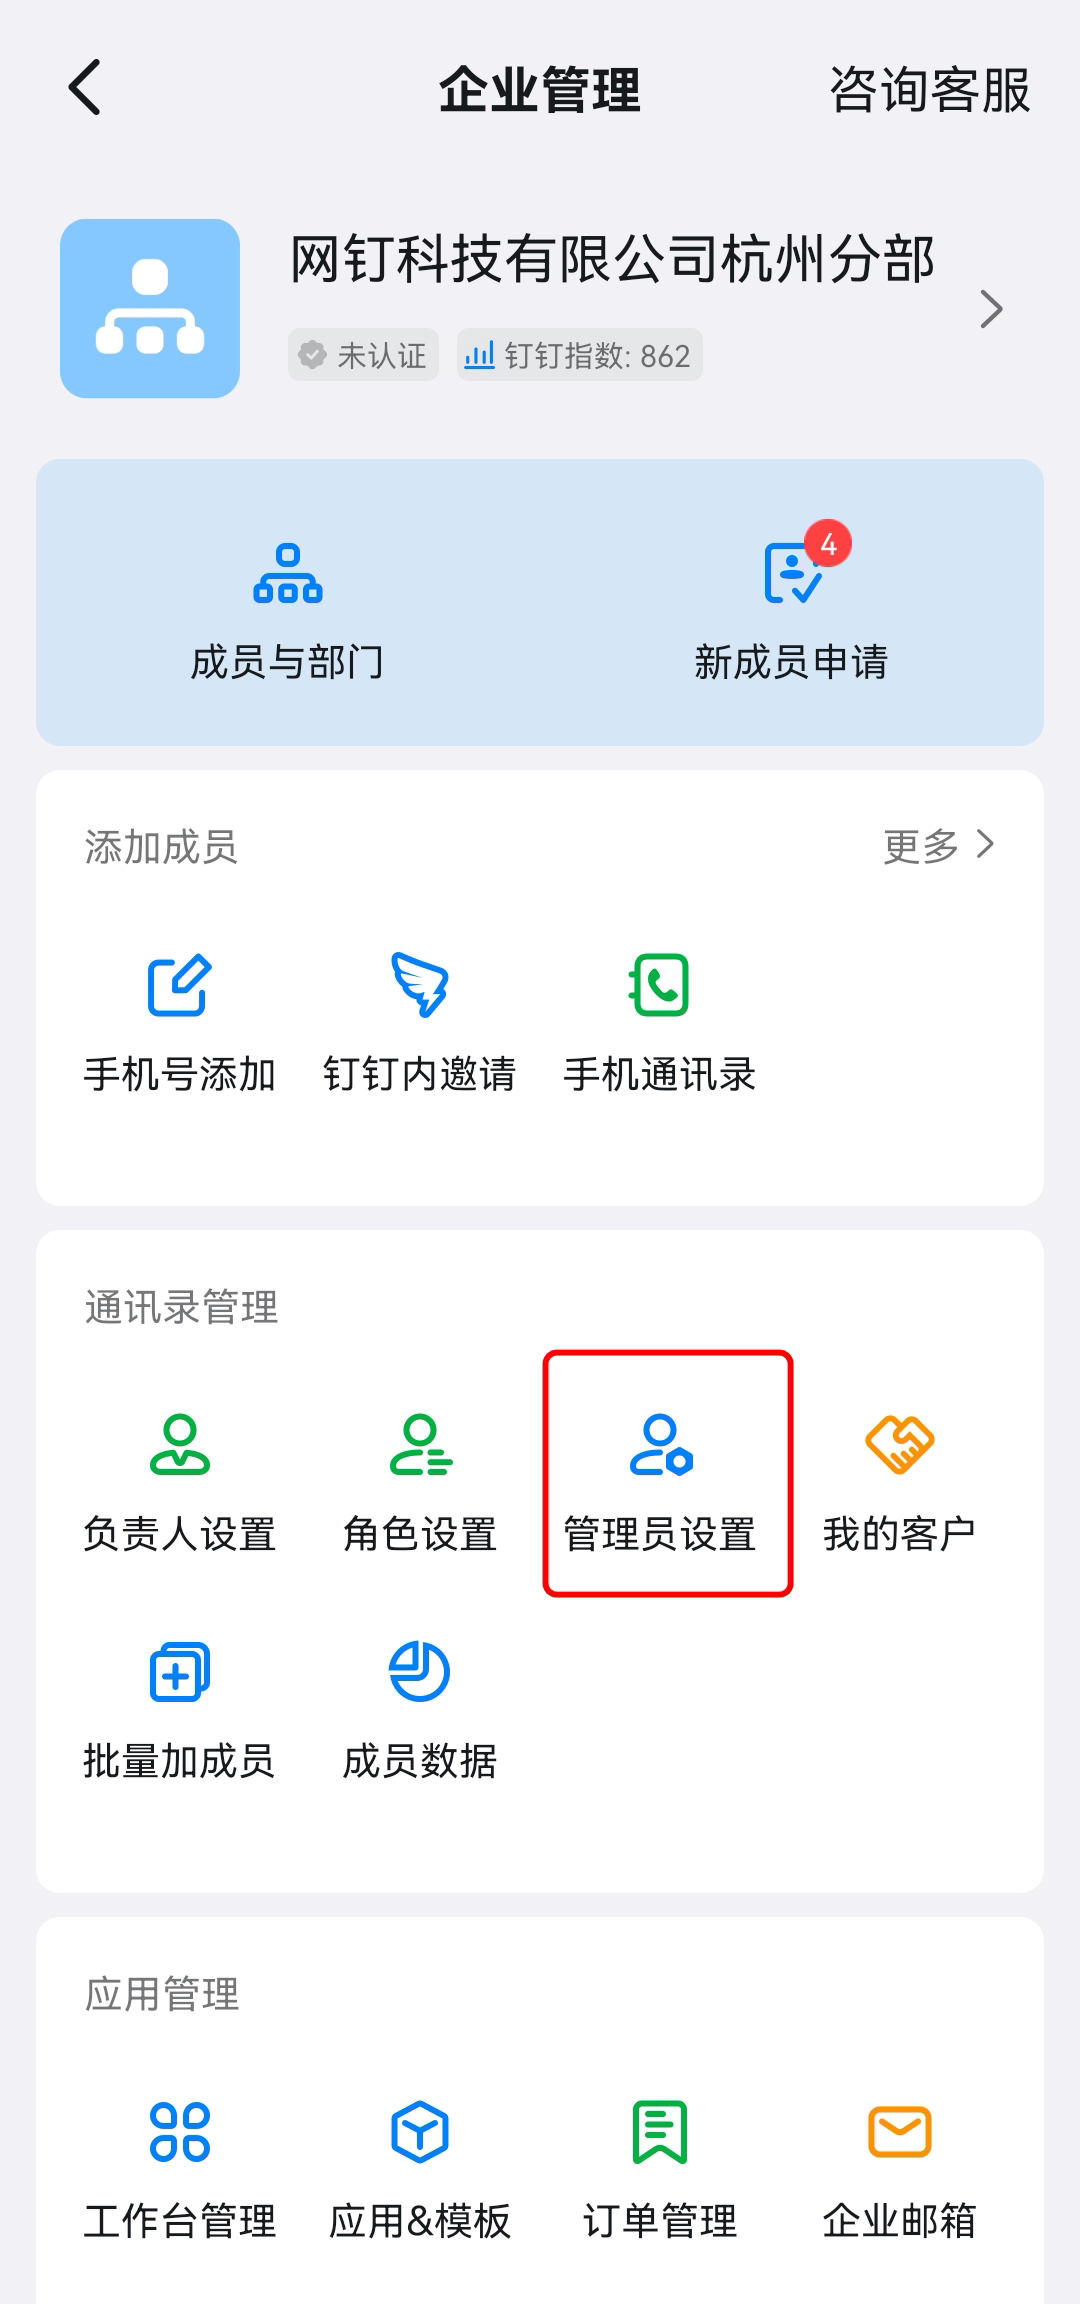
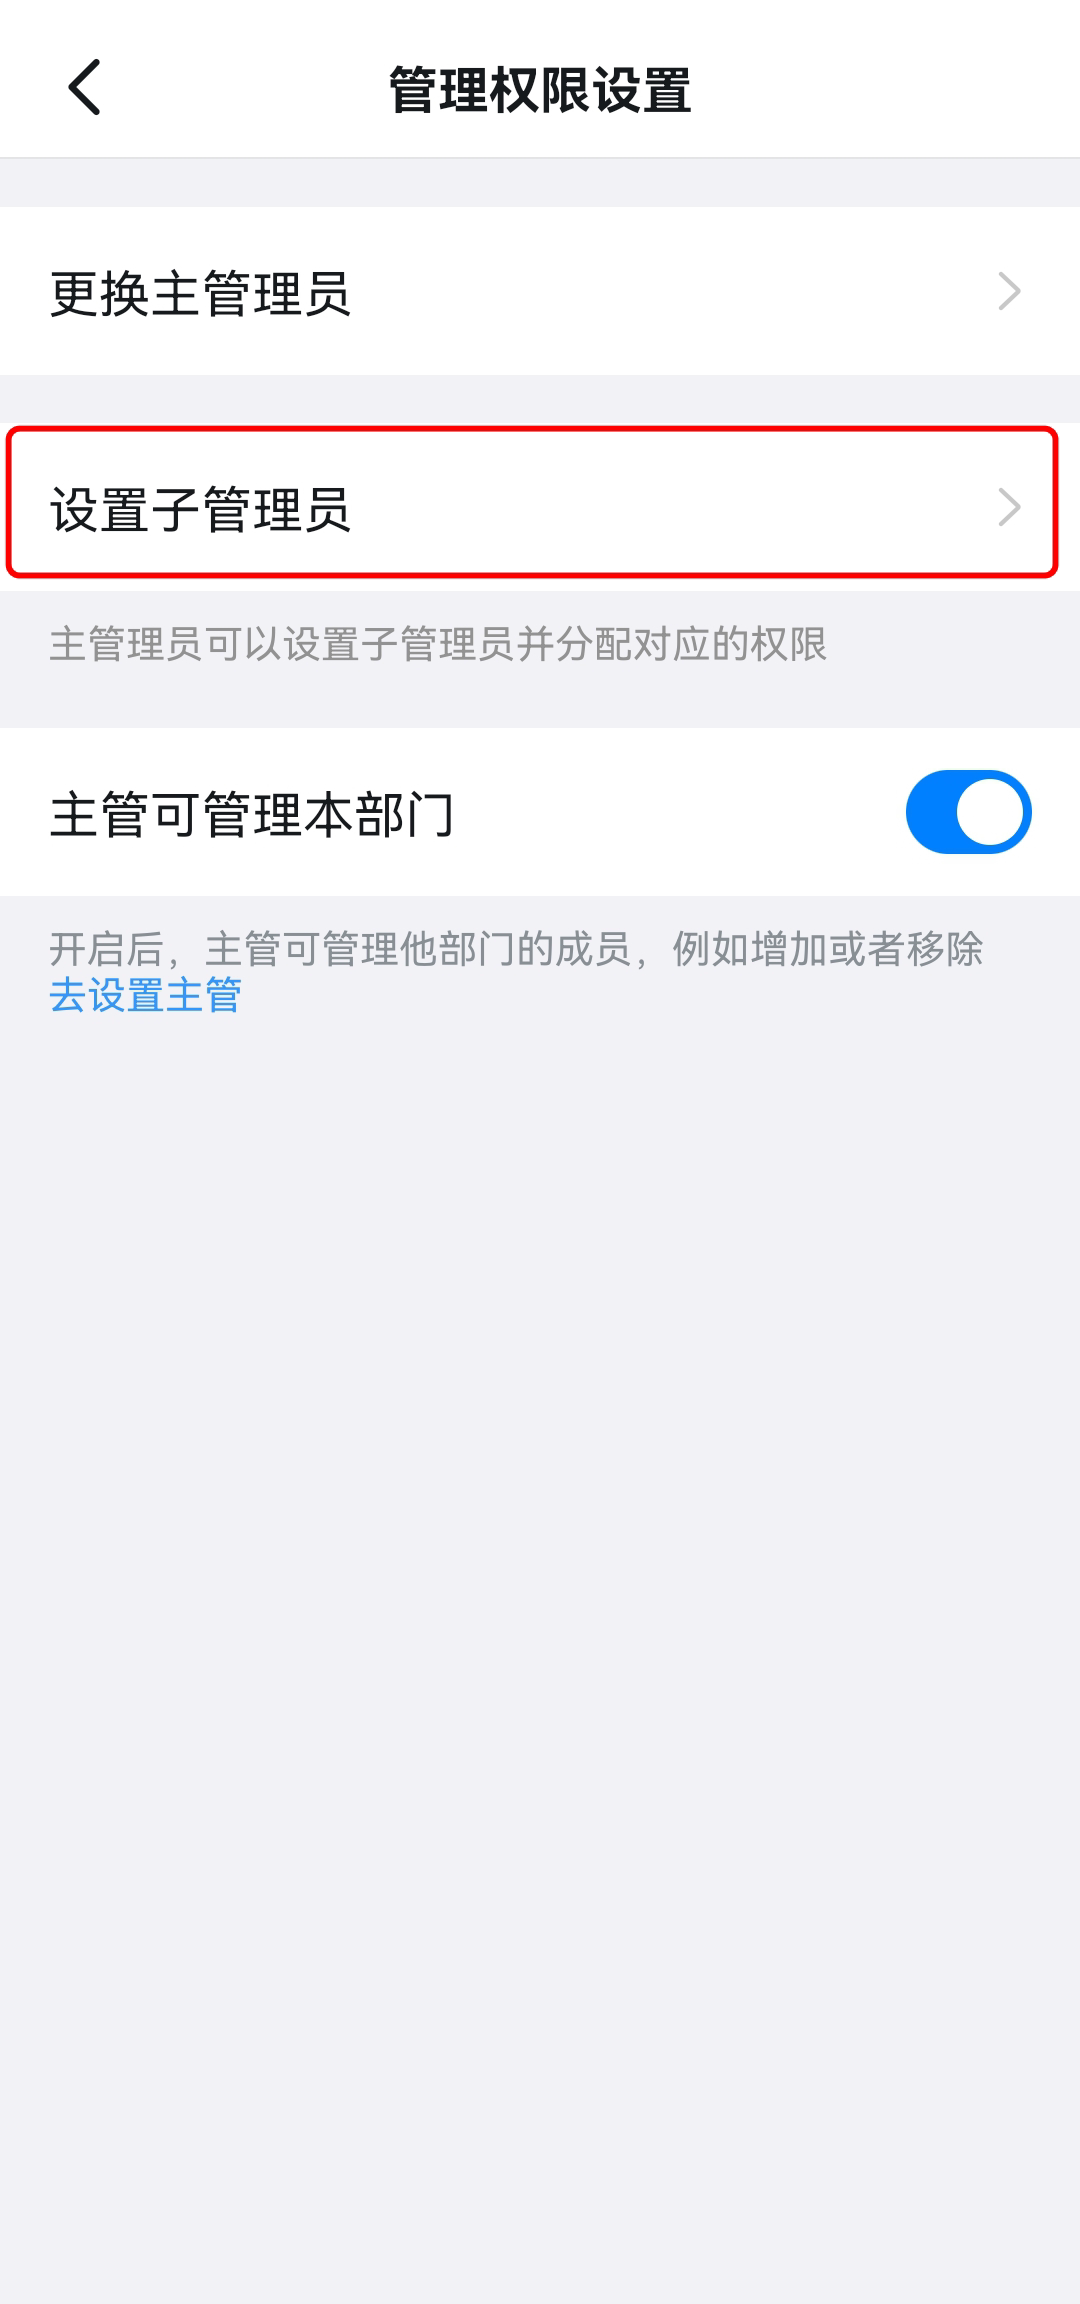
In Contacts, find the Organization you belong to and tap “Manage” to open the organization management page. Tap “Admin Settings” → “Set Sub Admin”.
Tap Manage in Contacts to open the organization management page
Tap Admin Settings
Tap Set Sub Admin
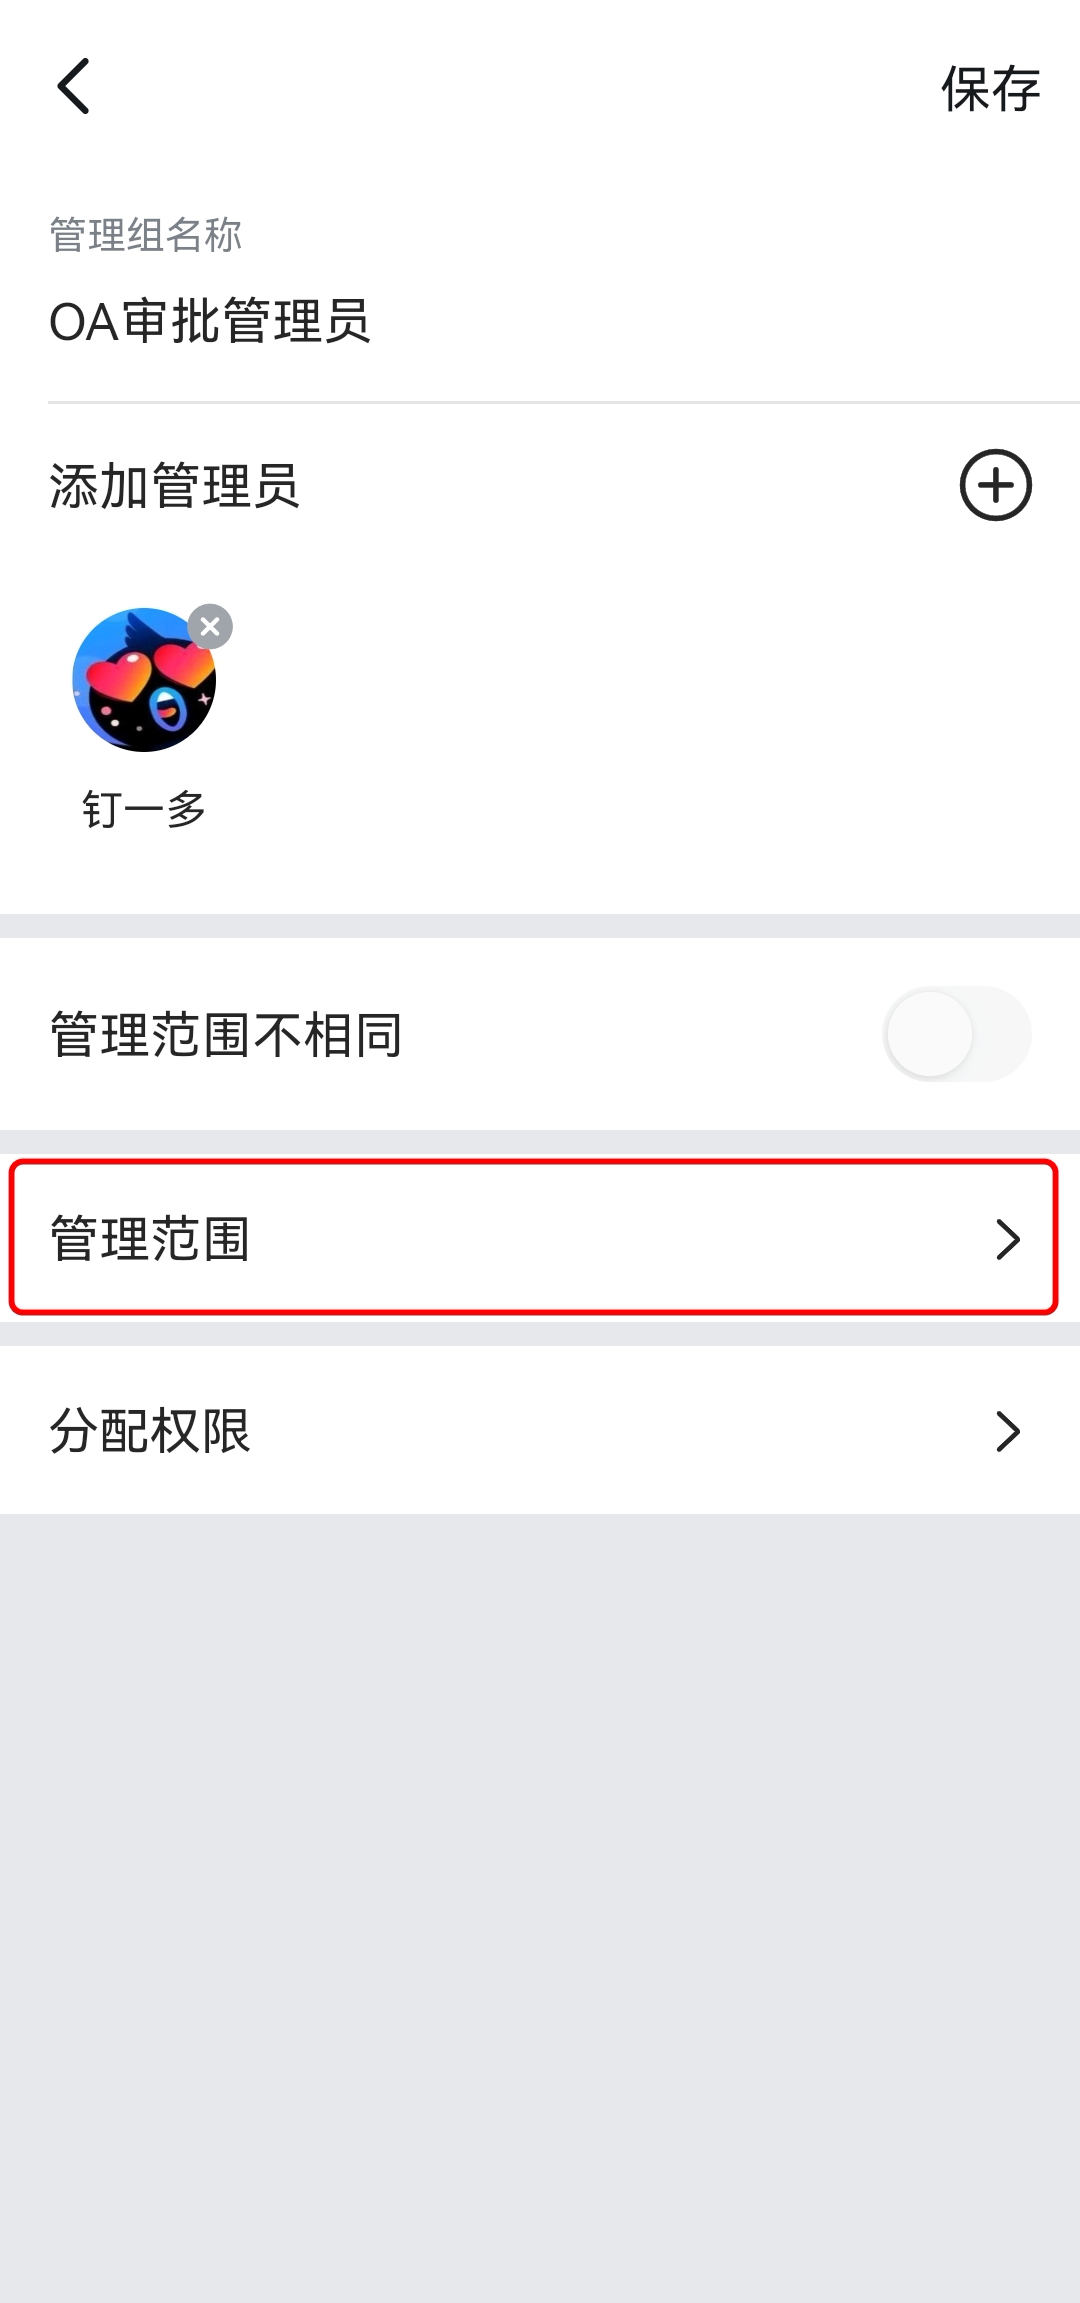
Enter an admin group name, add the users to be granted permissions, and set the management scope.
Enter the admin group name and add users
Set the management scope
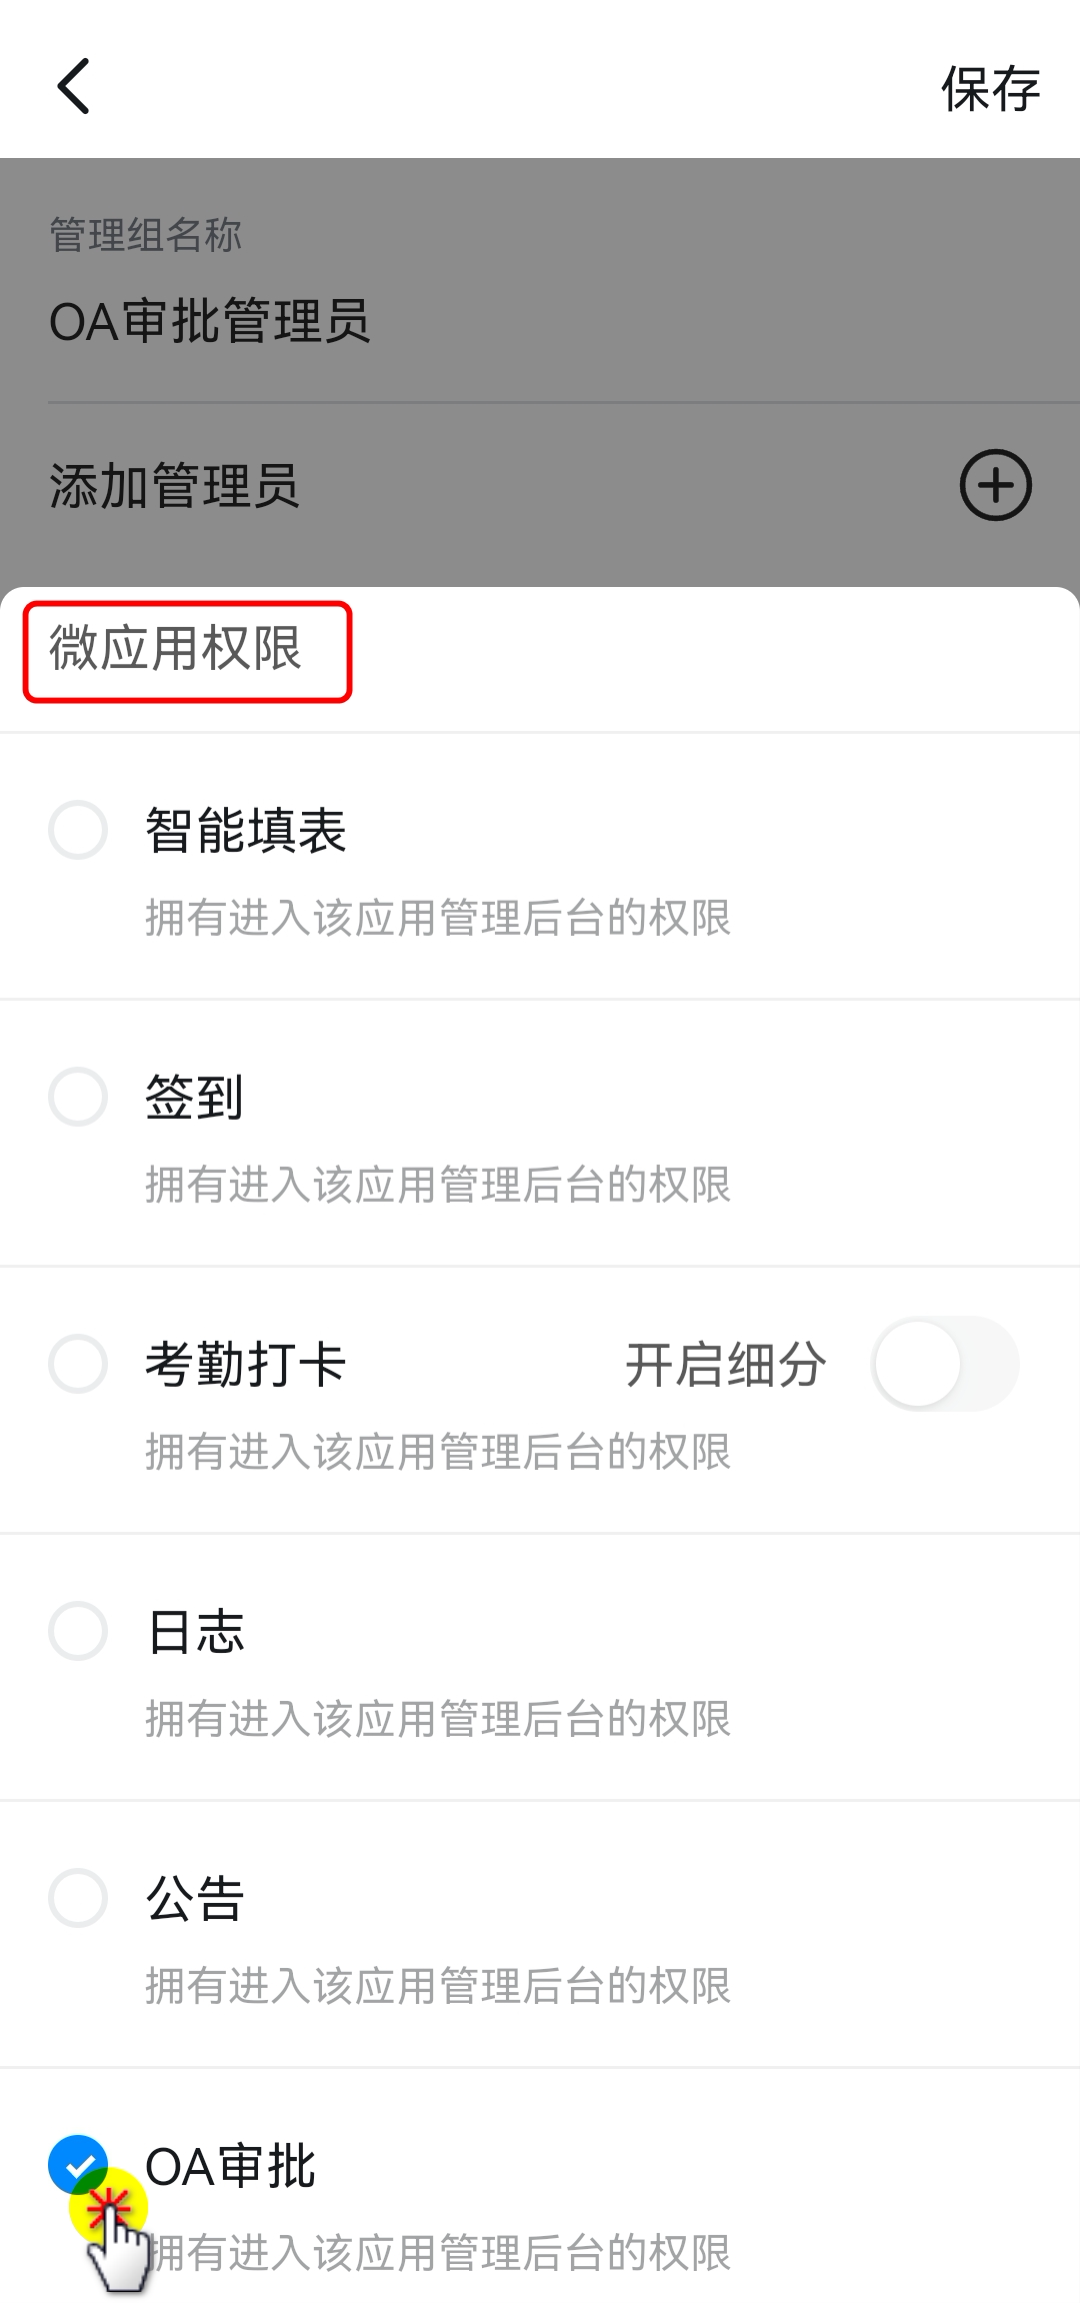
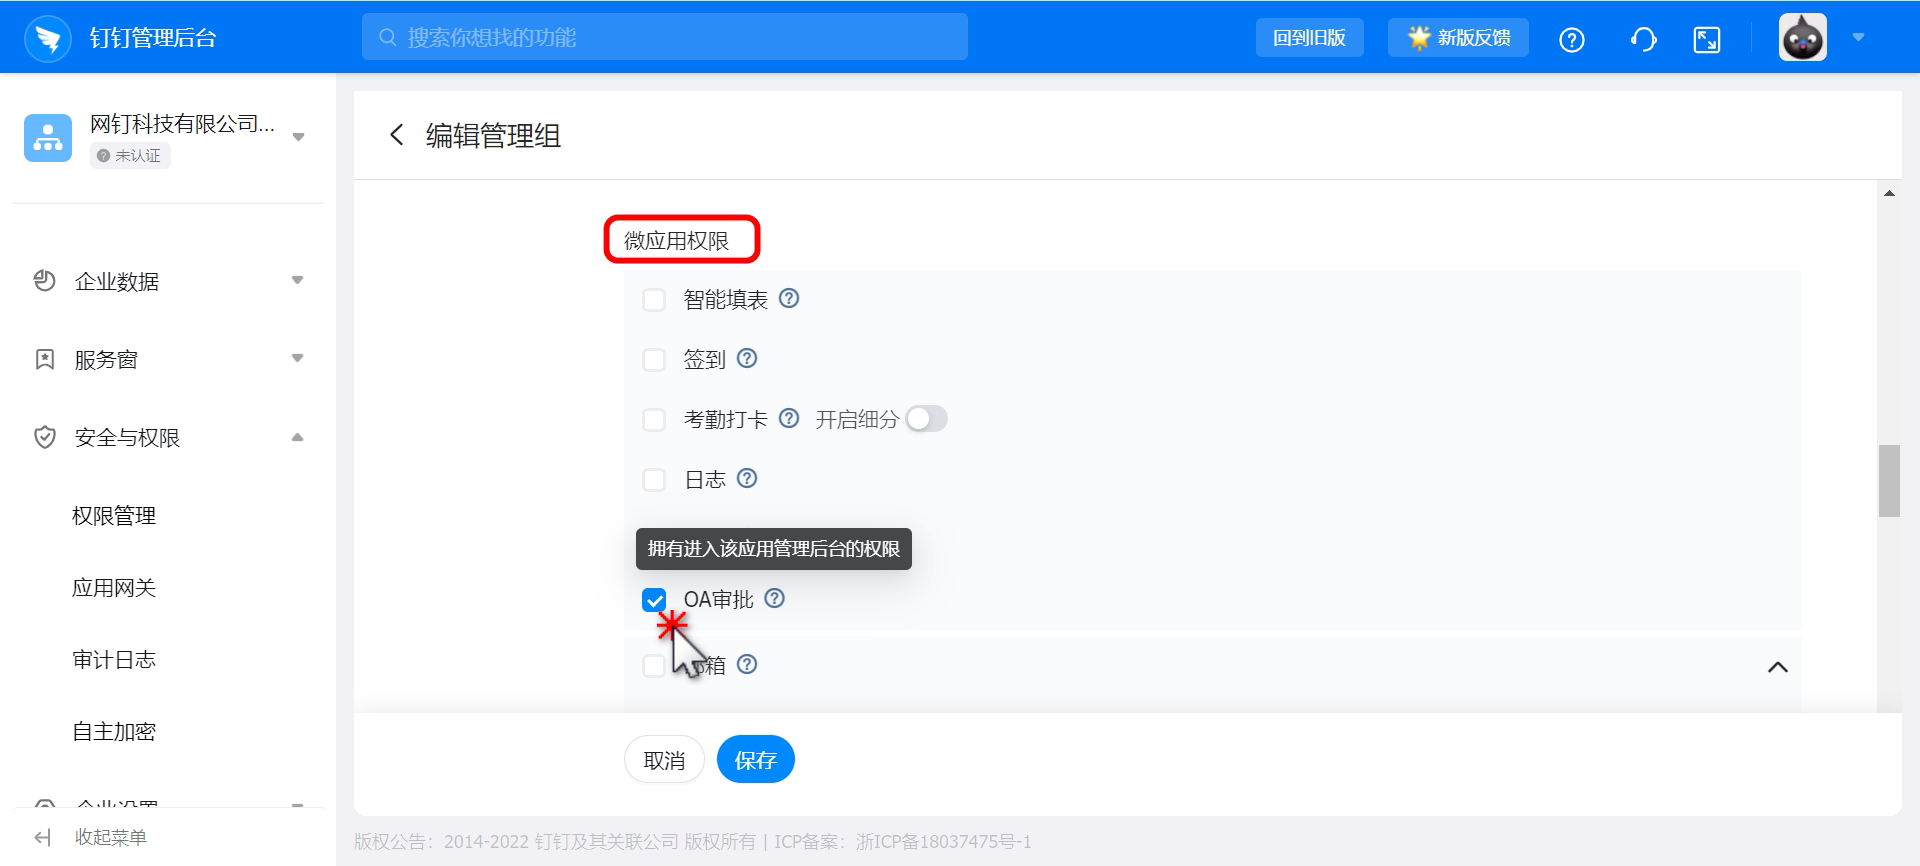
Assign permissions and select OA Approval under Micro app permissions.
Open the assign permissions page
Select OA Approval under Micro app permissions
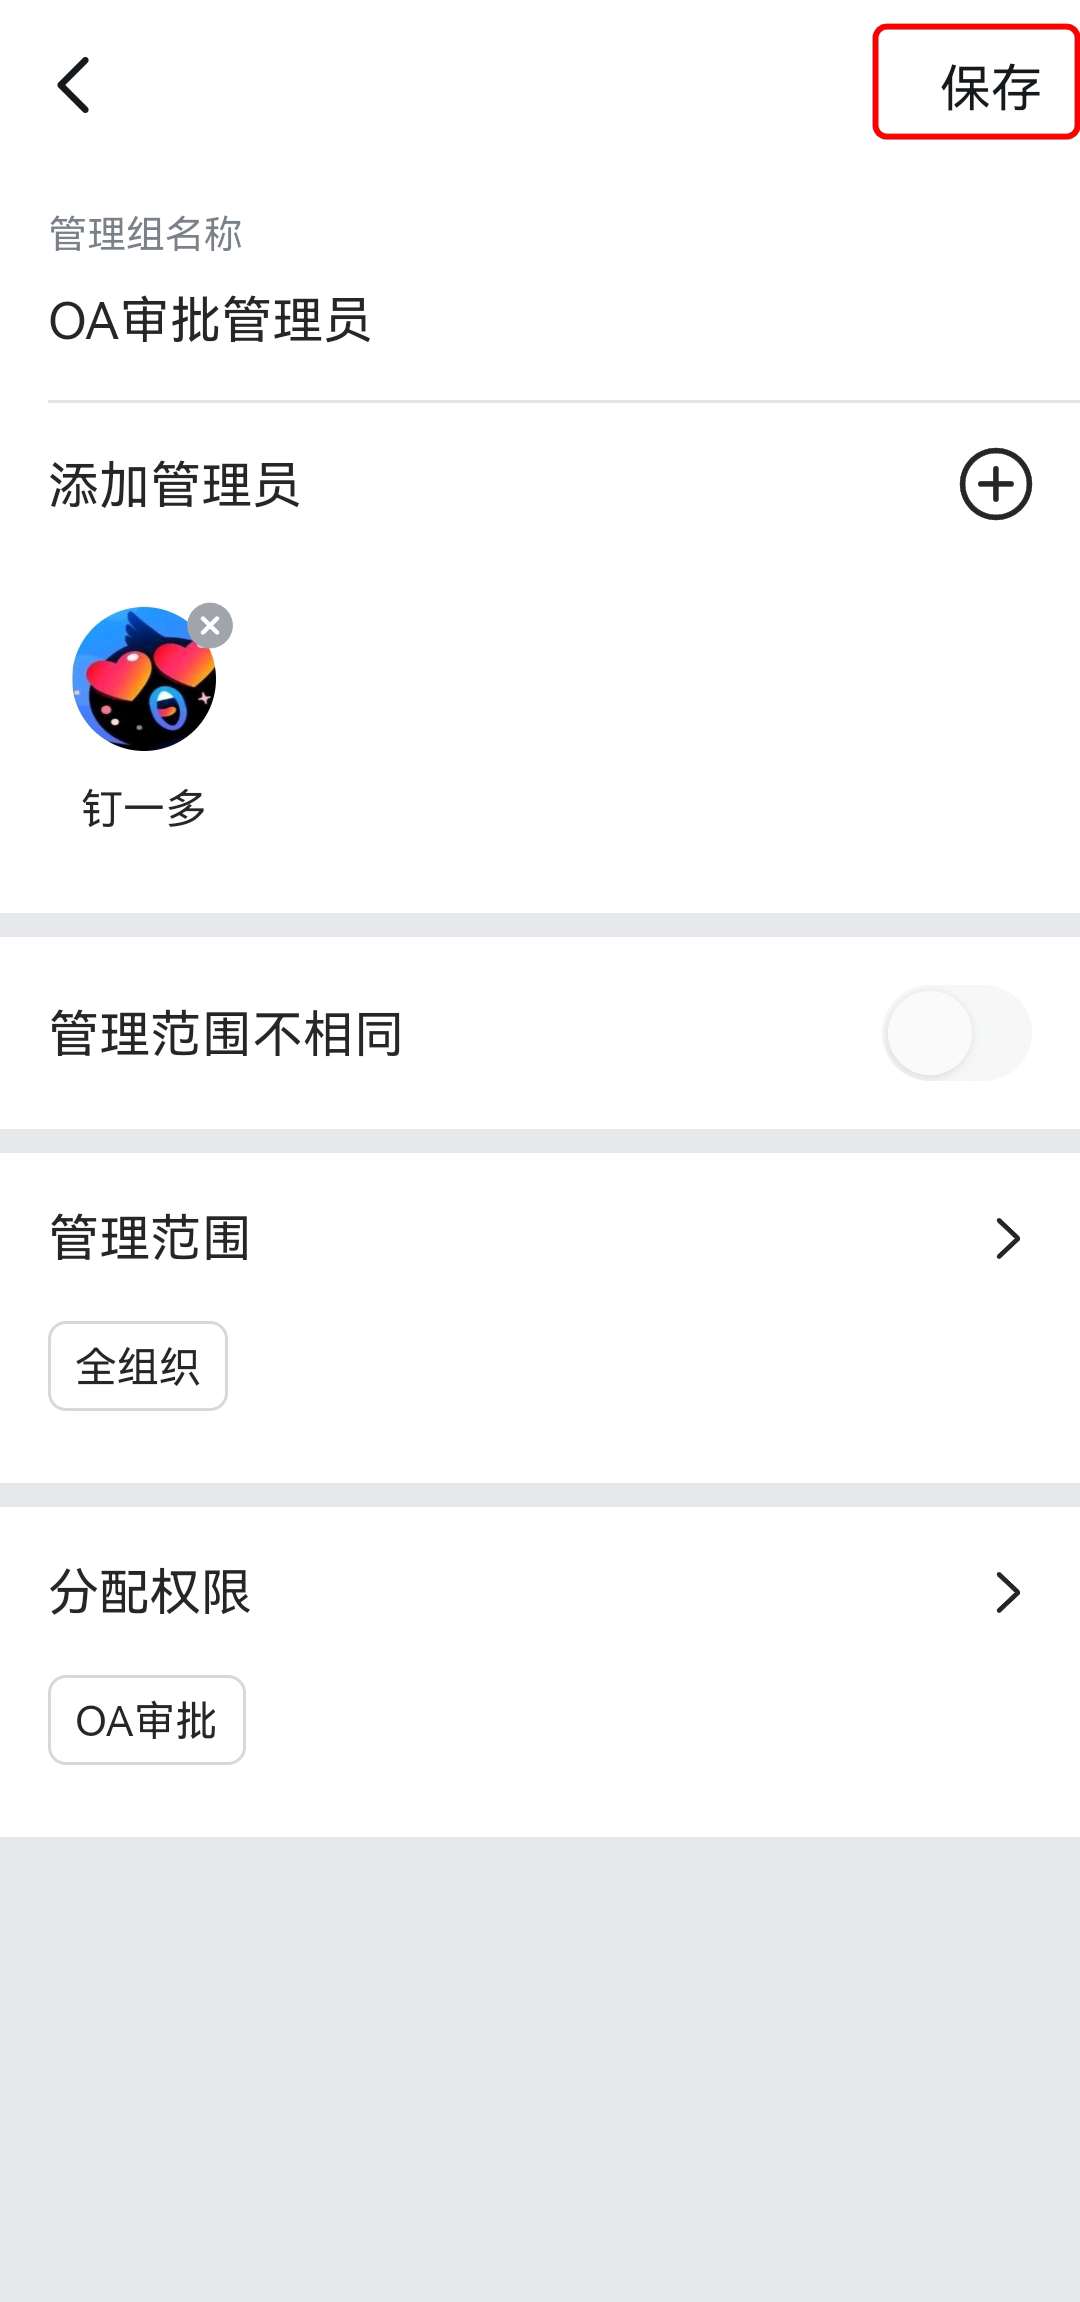
Finally, tap “Save” to finish.
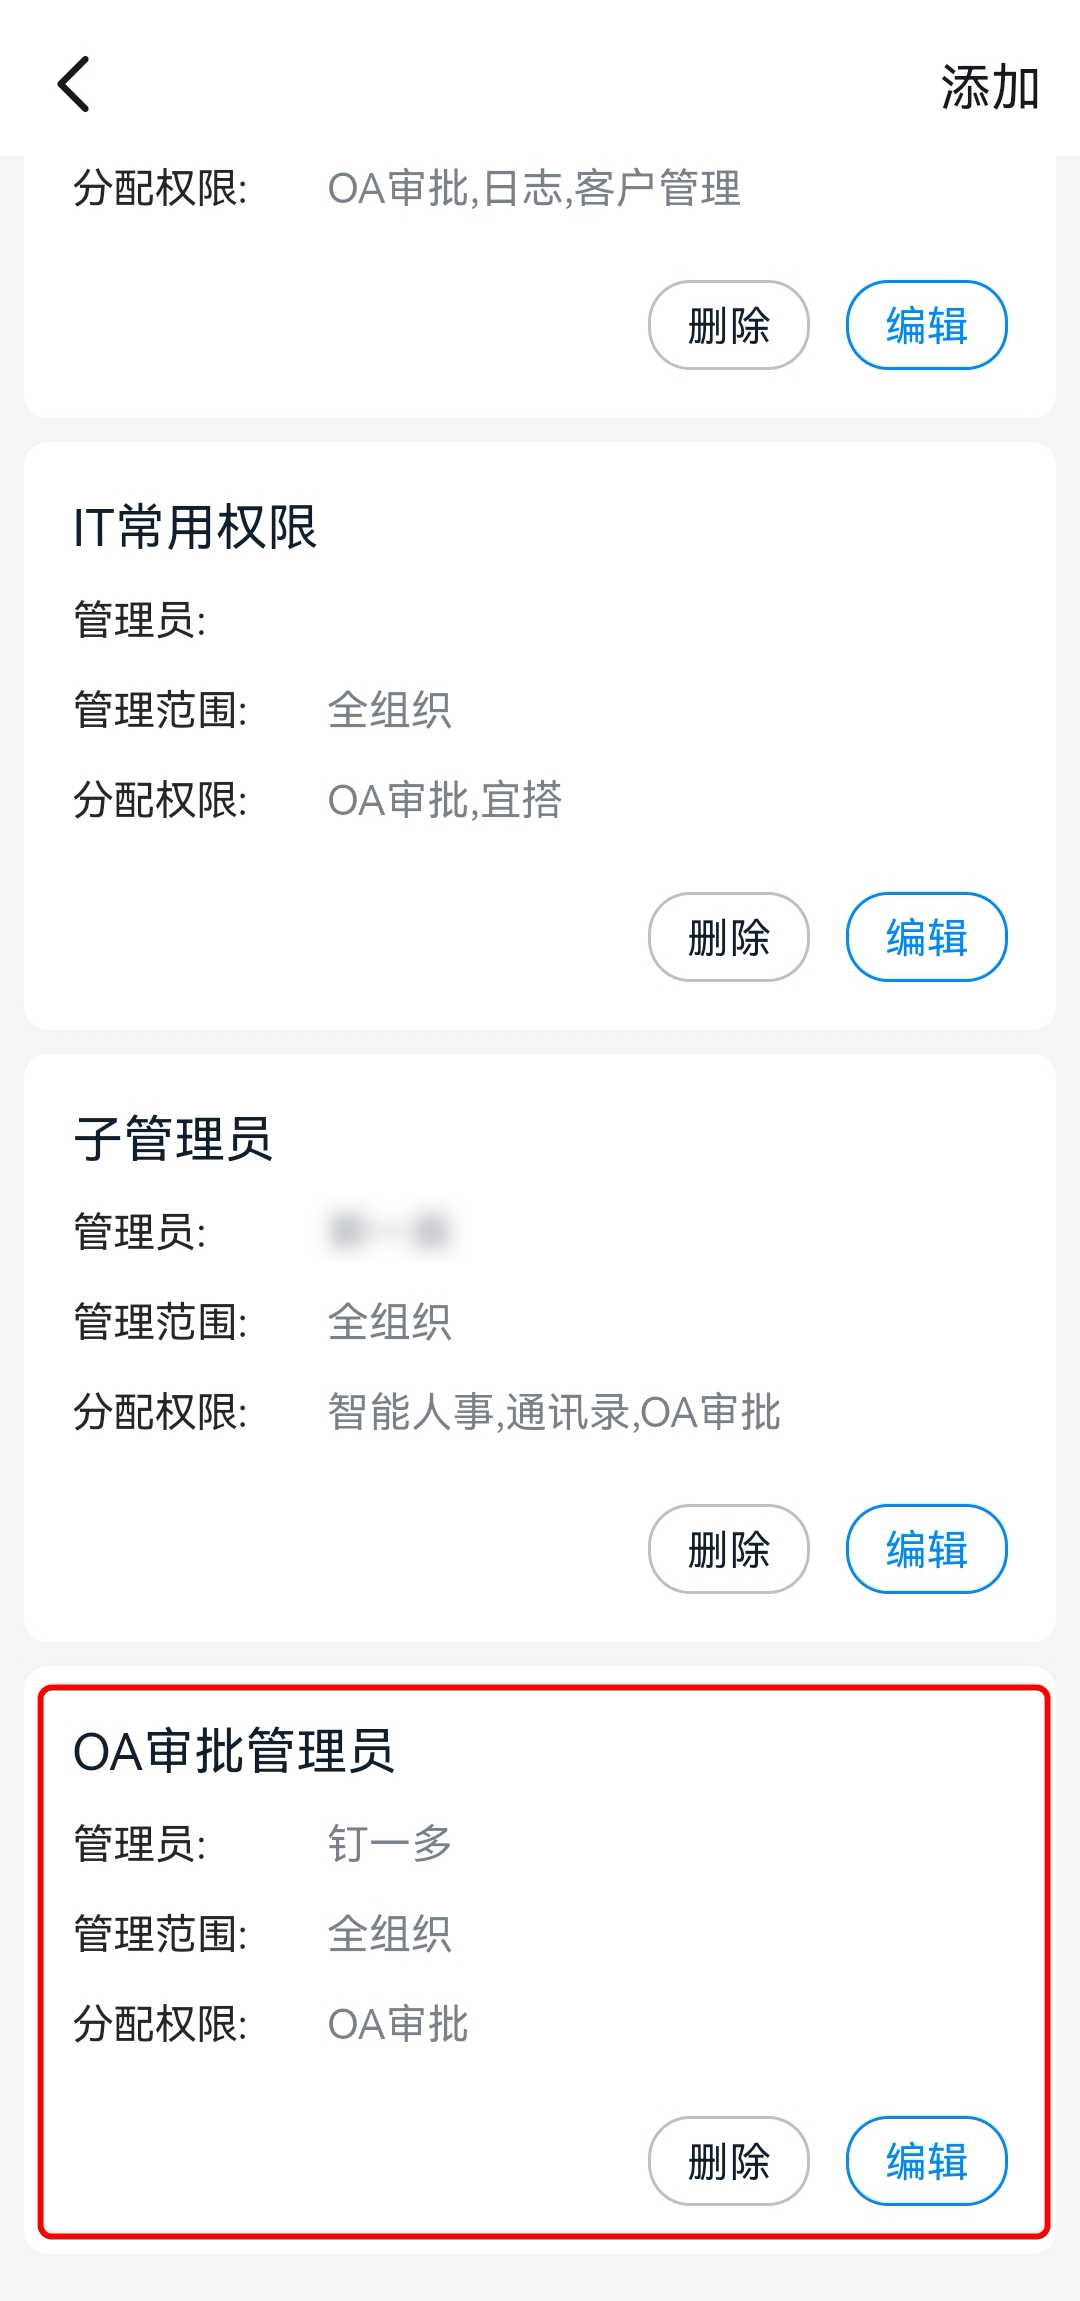
Confirm permission settings
Tap Save to complete the setup
1.2 On desktop
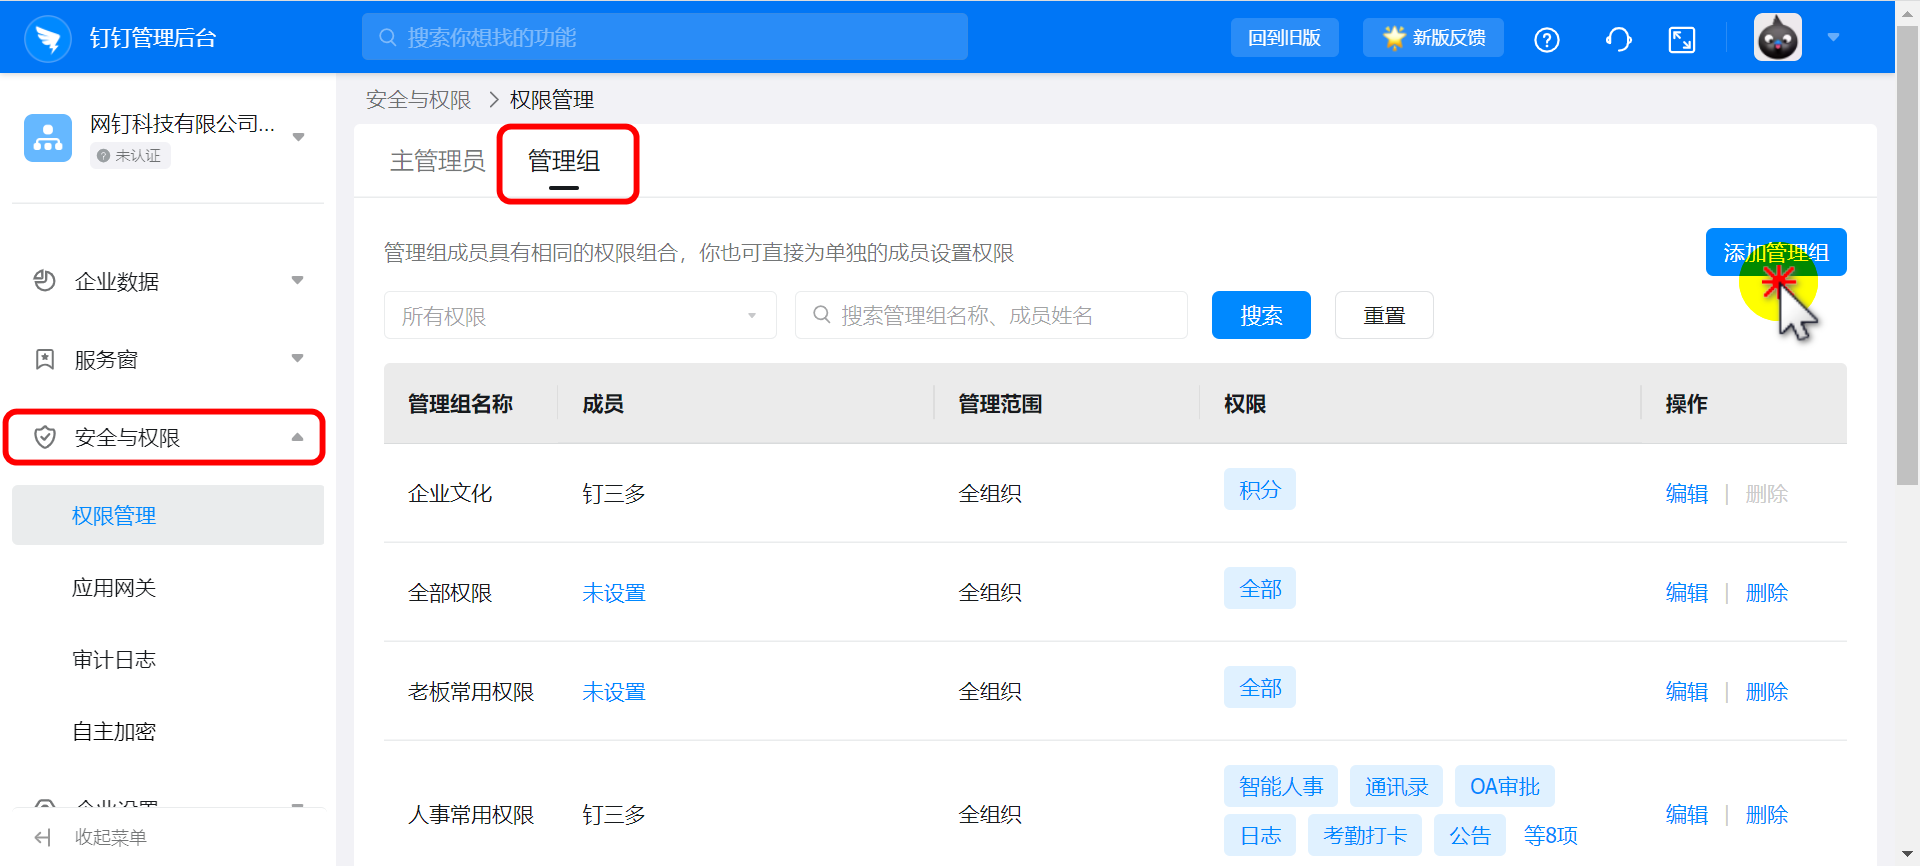
Enter the DingTalk Admin Console URL in your browser, or download and install the desktop client from the DingTalk website and click ”···” in the lower-left corner of the desktop Home to open the Admin Console. From the left-hand navigation bar, go to [Security & Permissions] → Manage permissions, open the admin groups page, and click “Add admin group”.
Add admin group page in the Admin Console
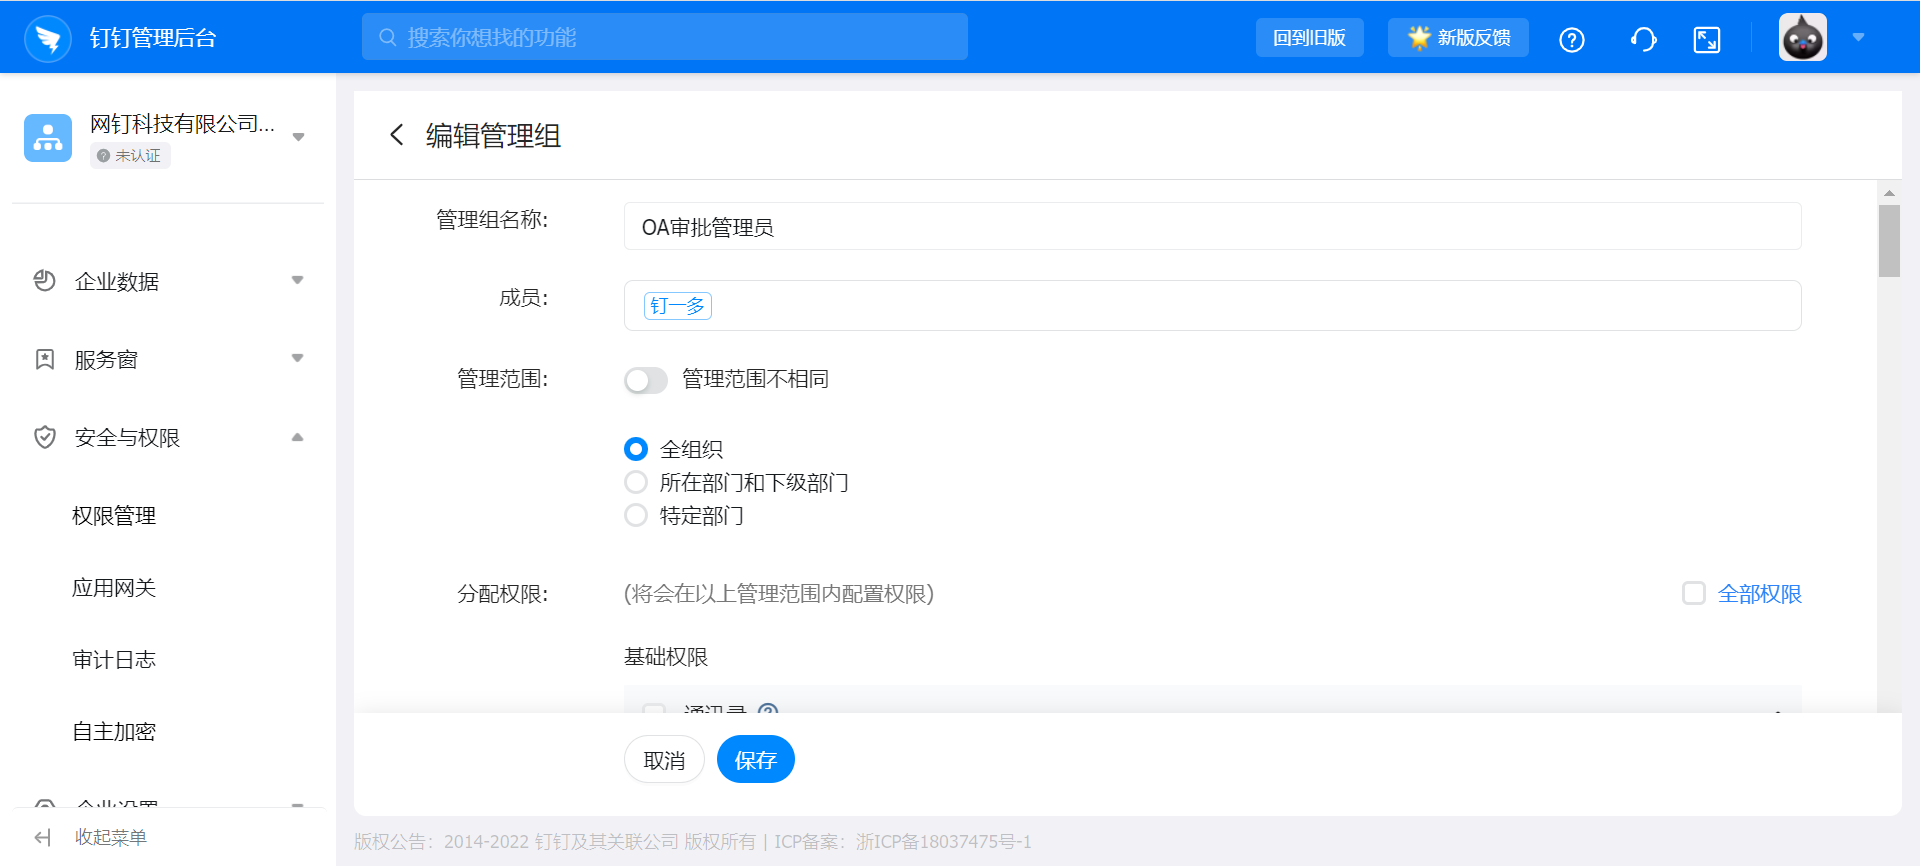
Enter the admin group name, select the users to be granted permissions, and set the management scope as needed.
Enter the admin group name and set the management scope
When assigning permissions, select OA Approval under Micro app permissions, then click “Save”.
Select OA Approval under Micro app permissions when assigning permissions
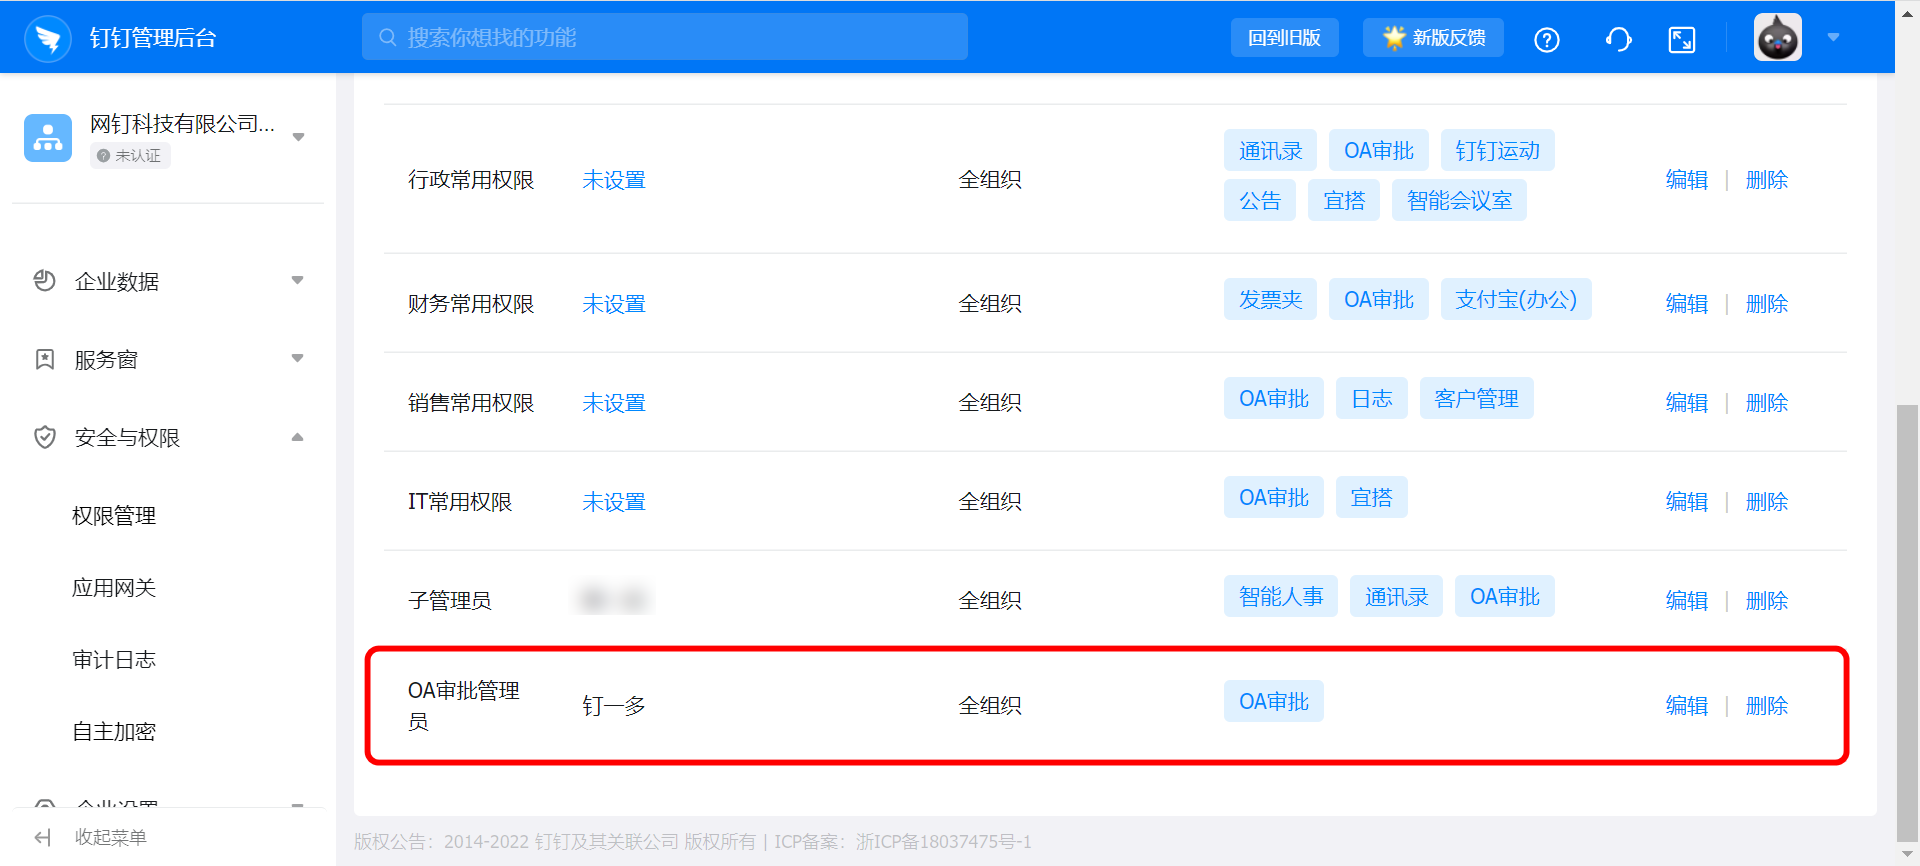
Click Save to finish Sub Admin setup

2. Apply to become an Approval Sub Admin

2.1 On mobile
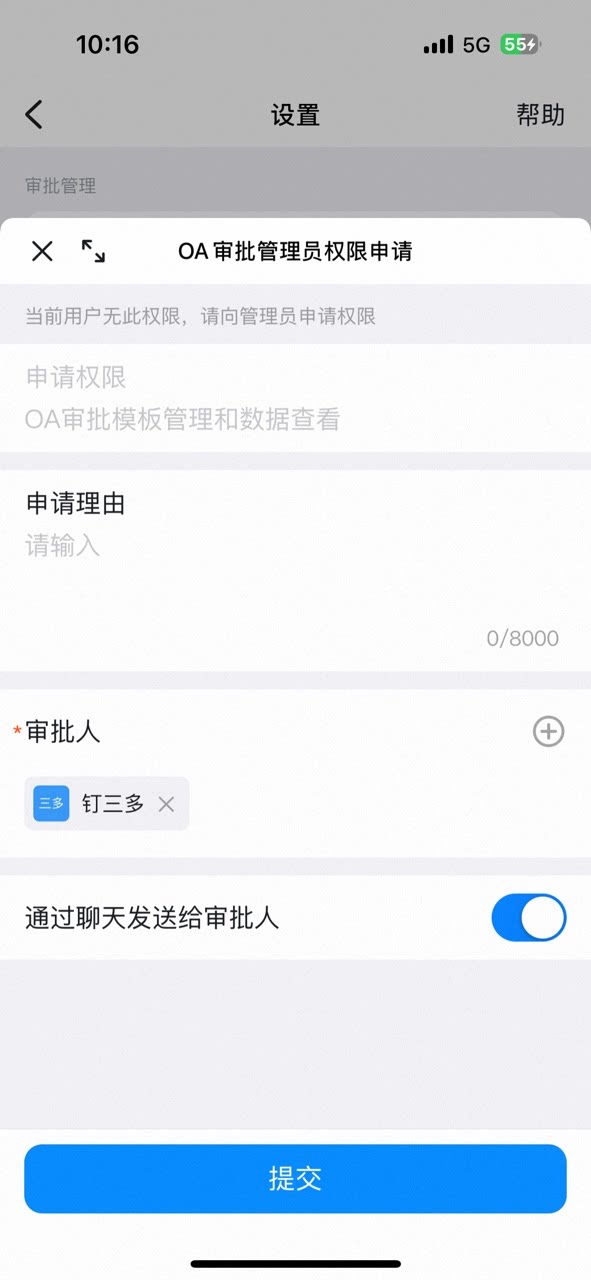
As a non-Approval Admin, open DingTalk OA Approval, tap “Settings”, tap “Create Approval form”, tap “Apply for admin permissions”, and tap Submit.
Open OA Approval and tap Settings
Tap Create Approval form
Tap Apply for admin permissions and submit
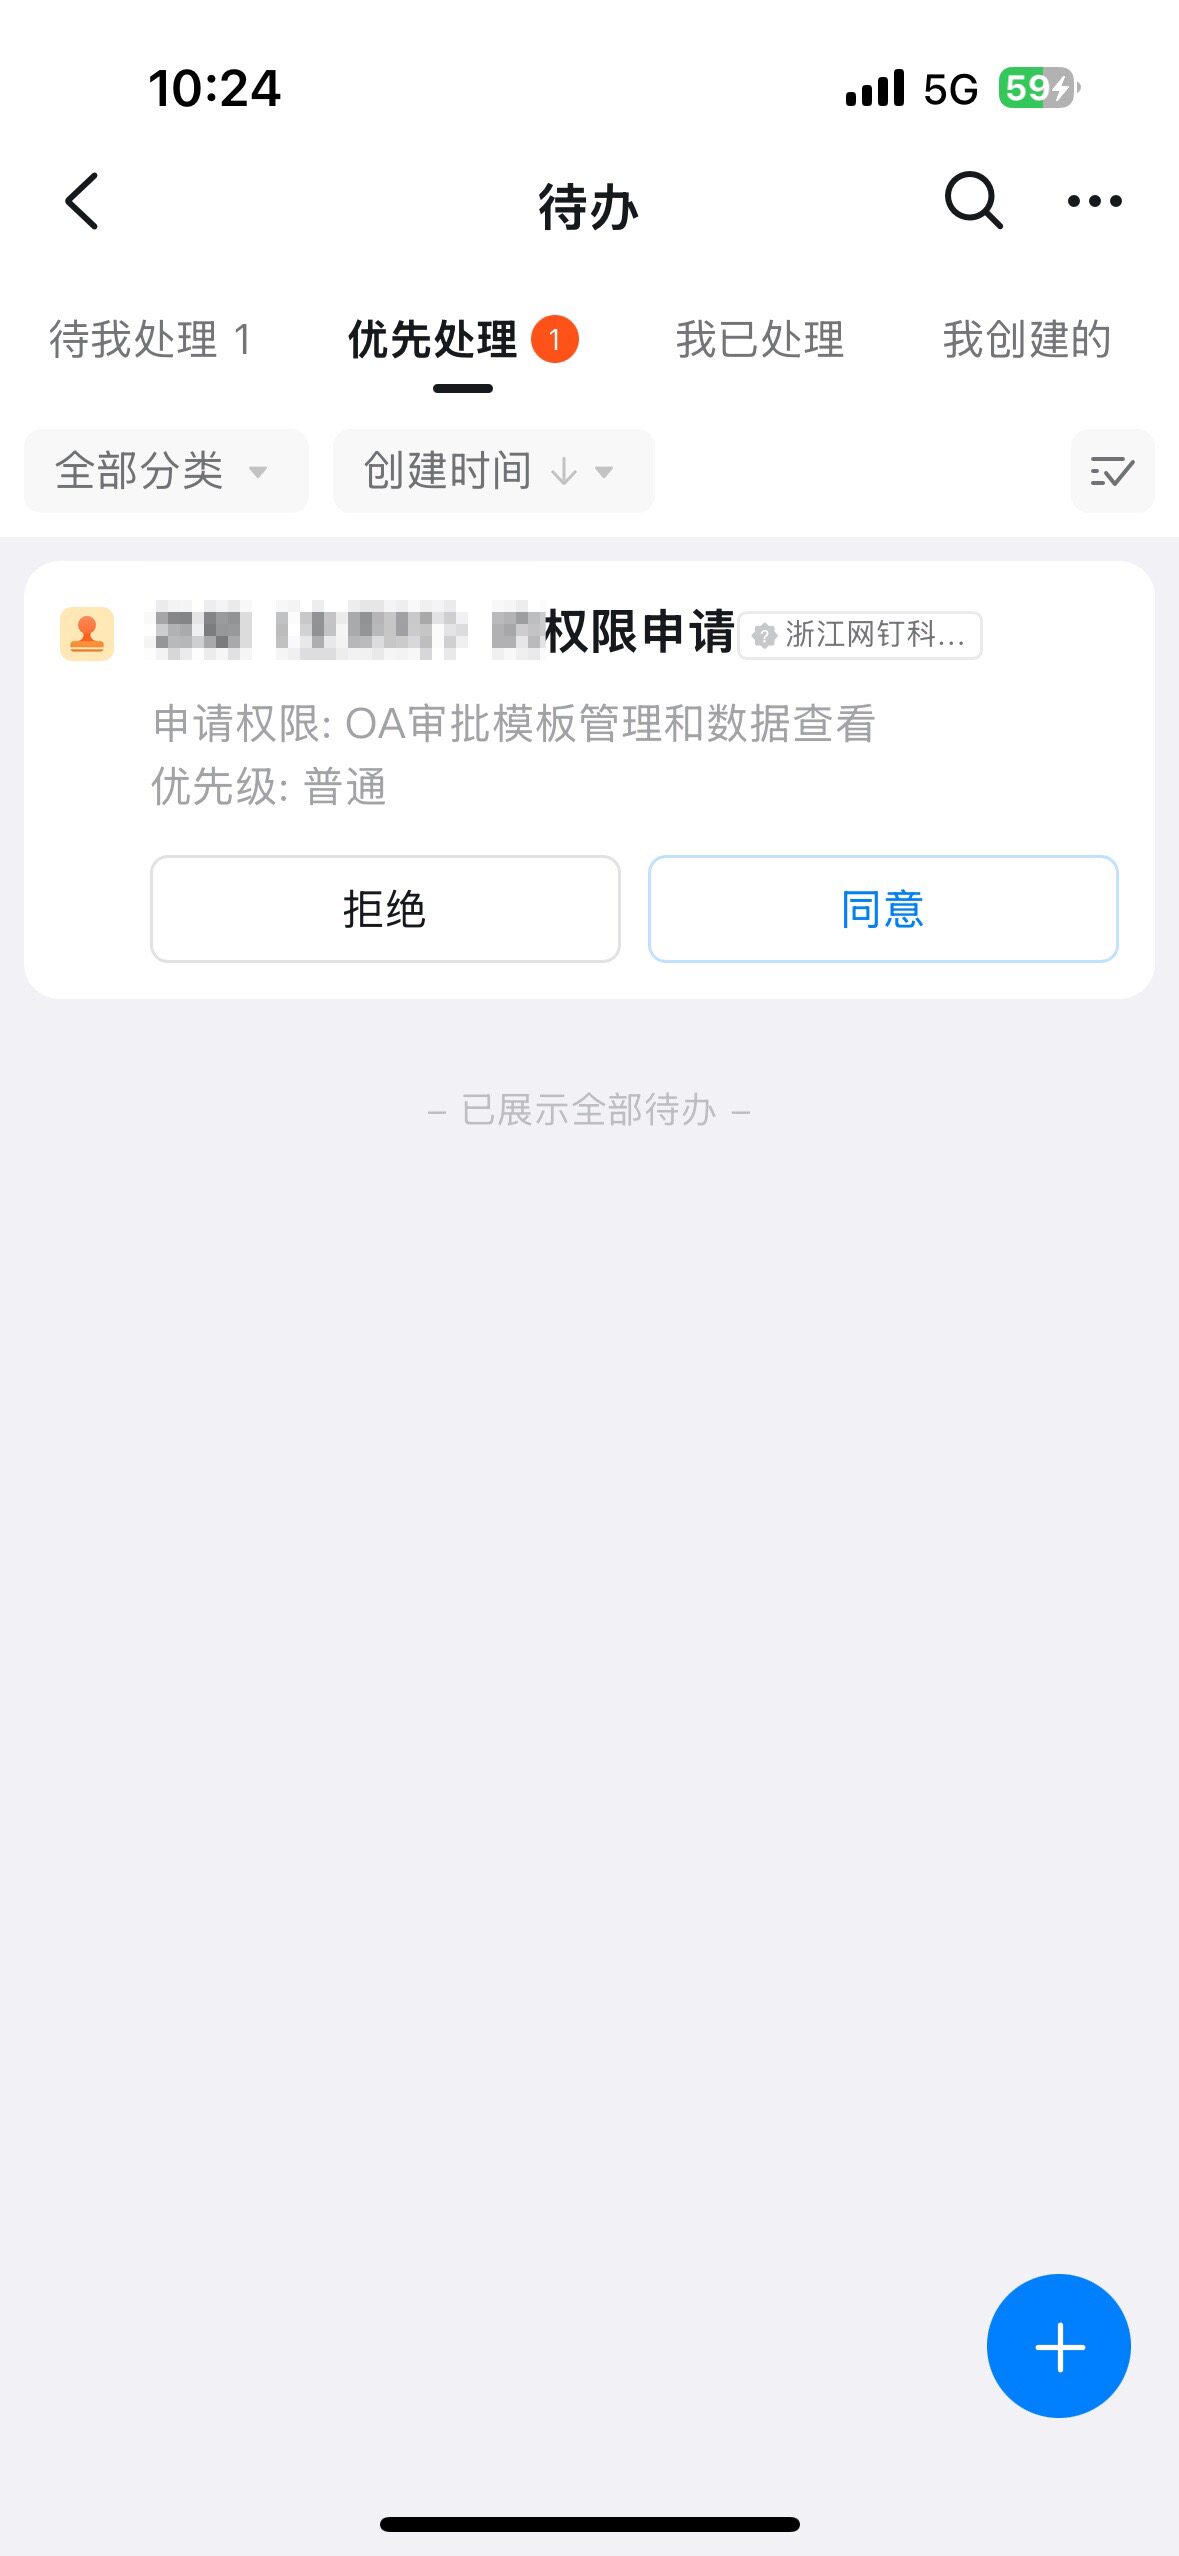
Once the Admin receives the pending Approval notification and approves it, the corresponding employee is automatically granted Approval admin permissions.
Pending Approval notification received by the Admin on mobile
2.2 On desktop
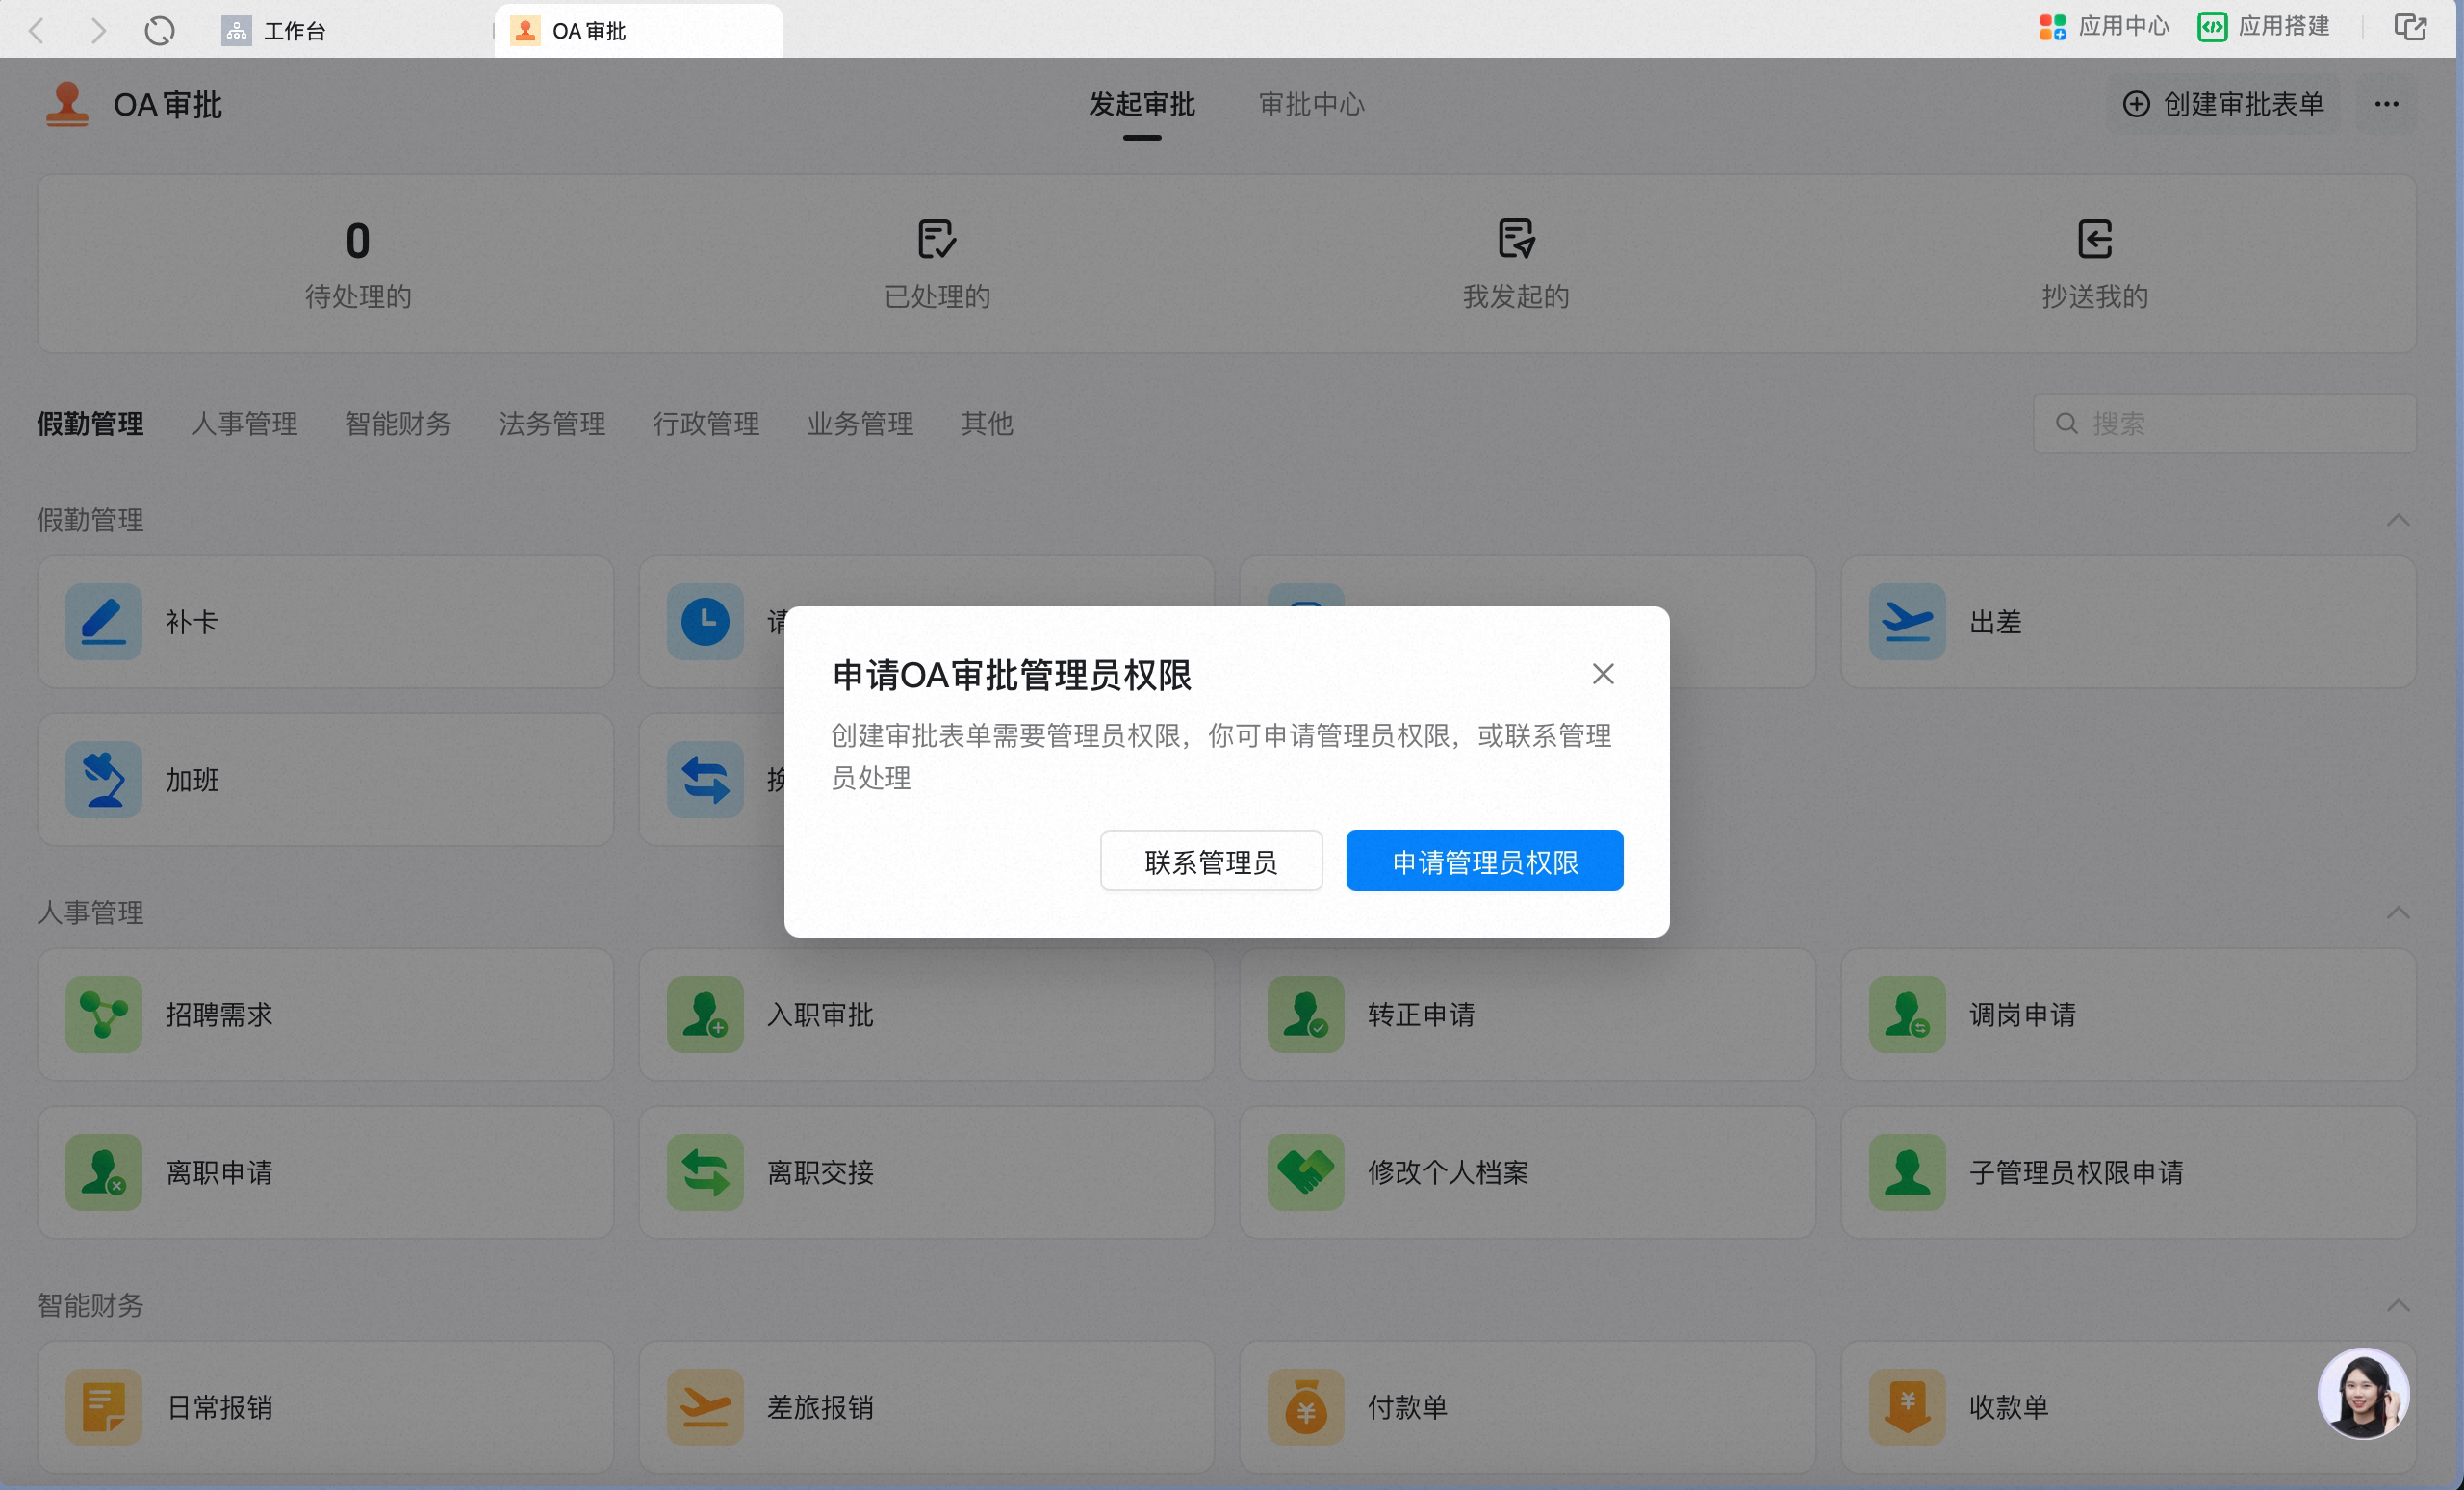
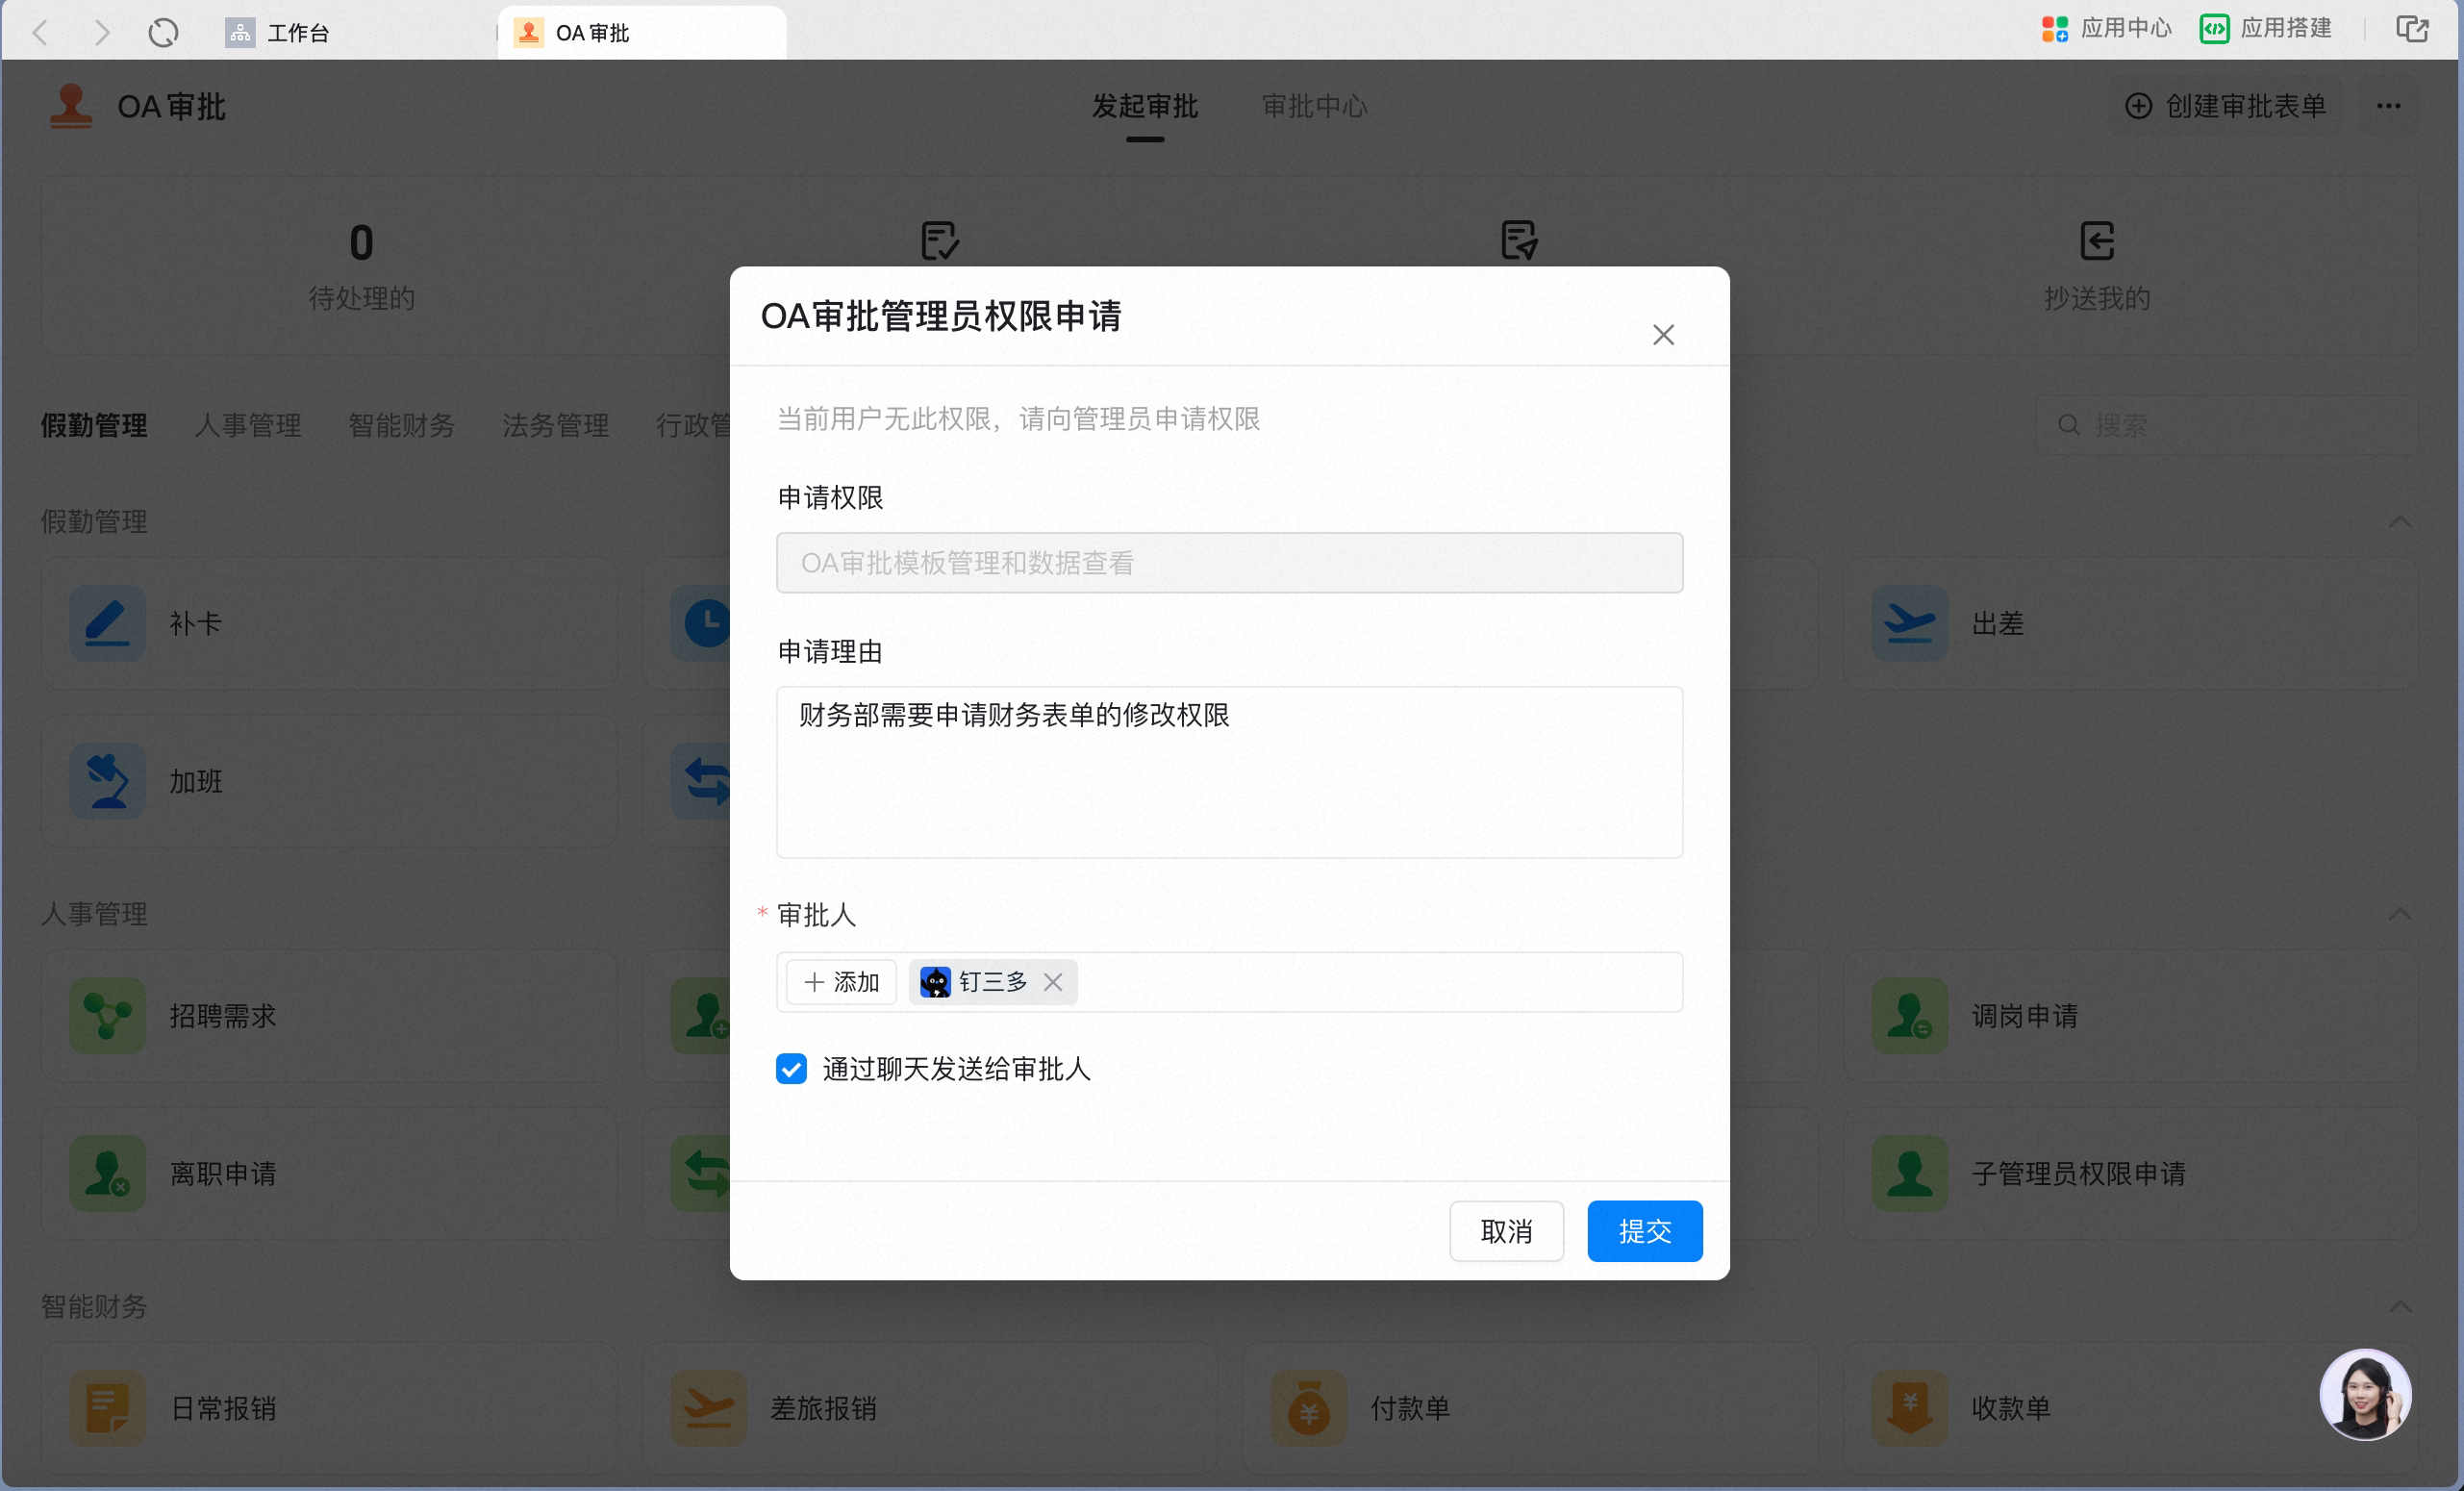
Open DingTalk OA Approval, click “Create Approval form” in the upper-right corner, click “Apply for admin permissions”, then click “Submit”.
Click Create Approval form on the desktop
Click Apply for admin permissions and submit on the desktop
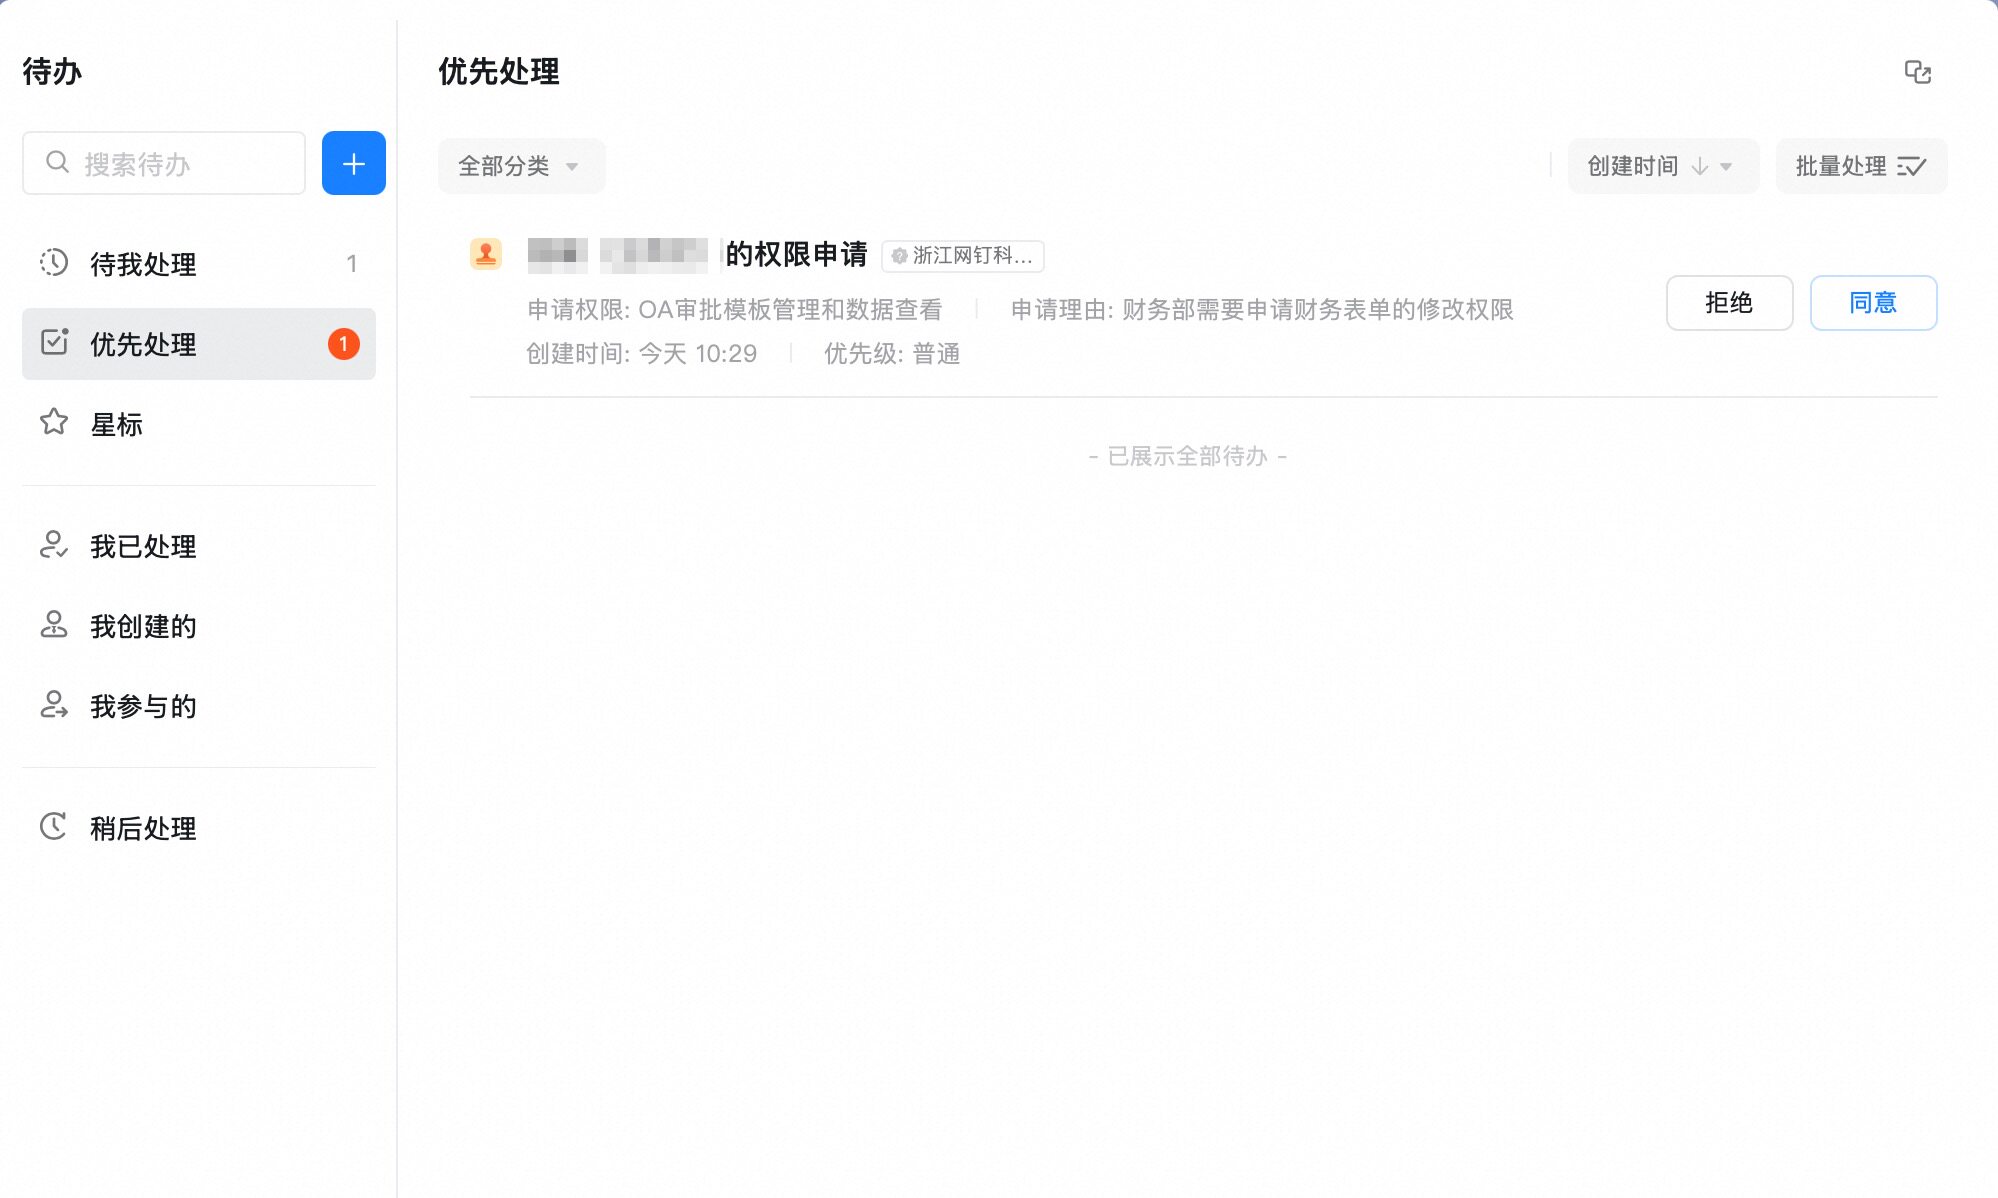
Once the Admin receives the pending Approval notification and approves it, the corresponding employee is automatically granted Approval admin permissions.
Pending Approval notification for granting Sub Admin permissions

2) Approval Form Setup and Management

1. Open the Admin Console
1.1 From a browser
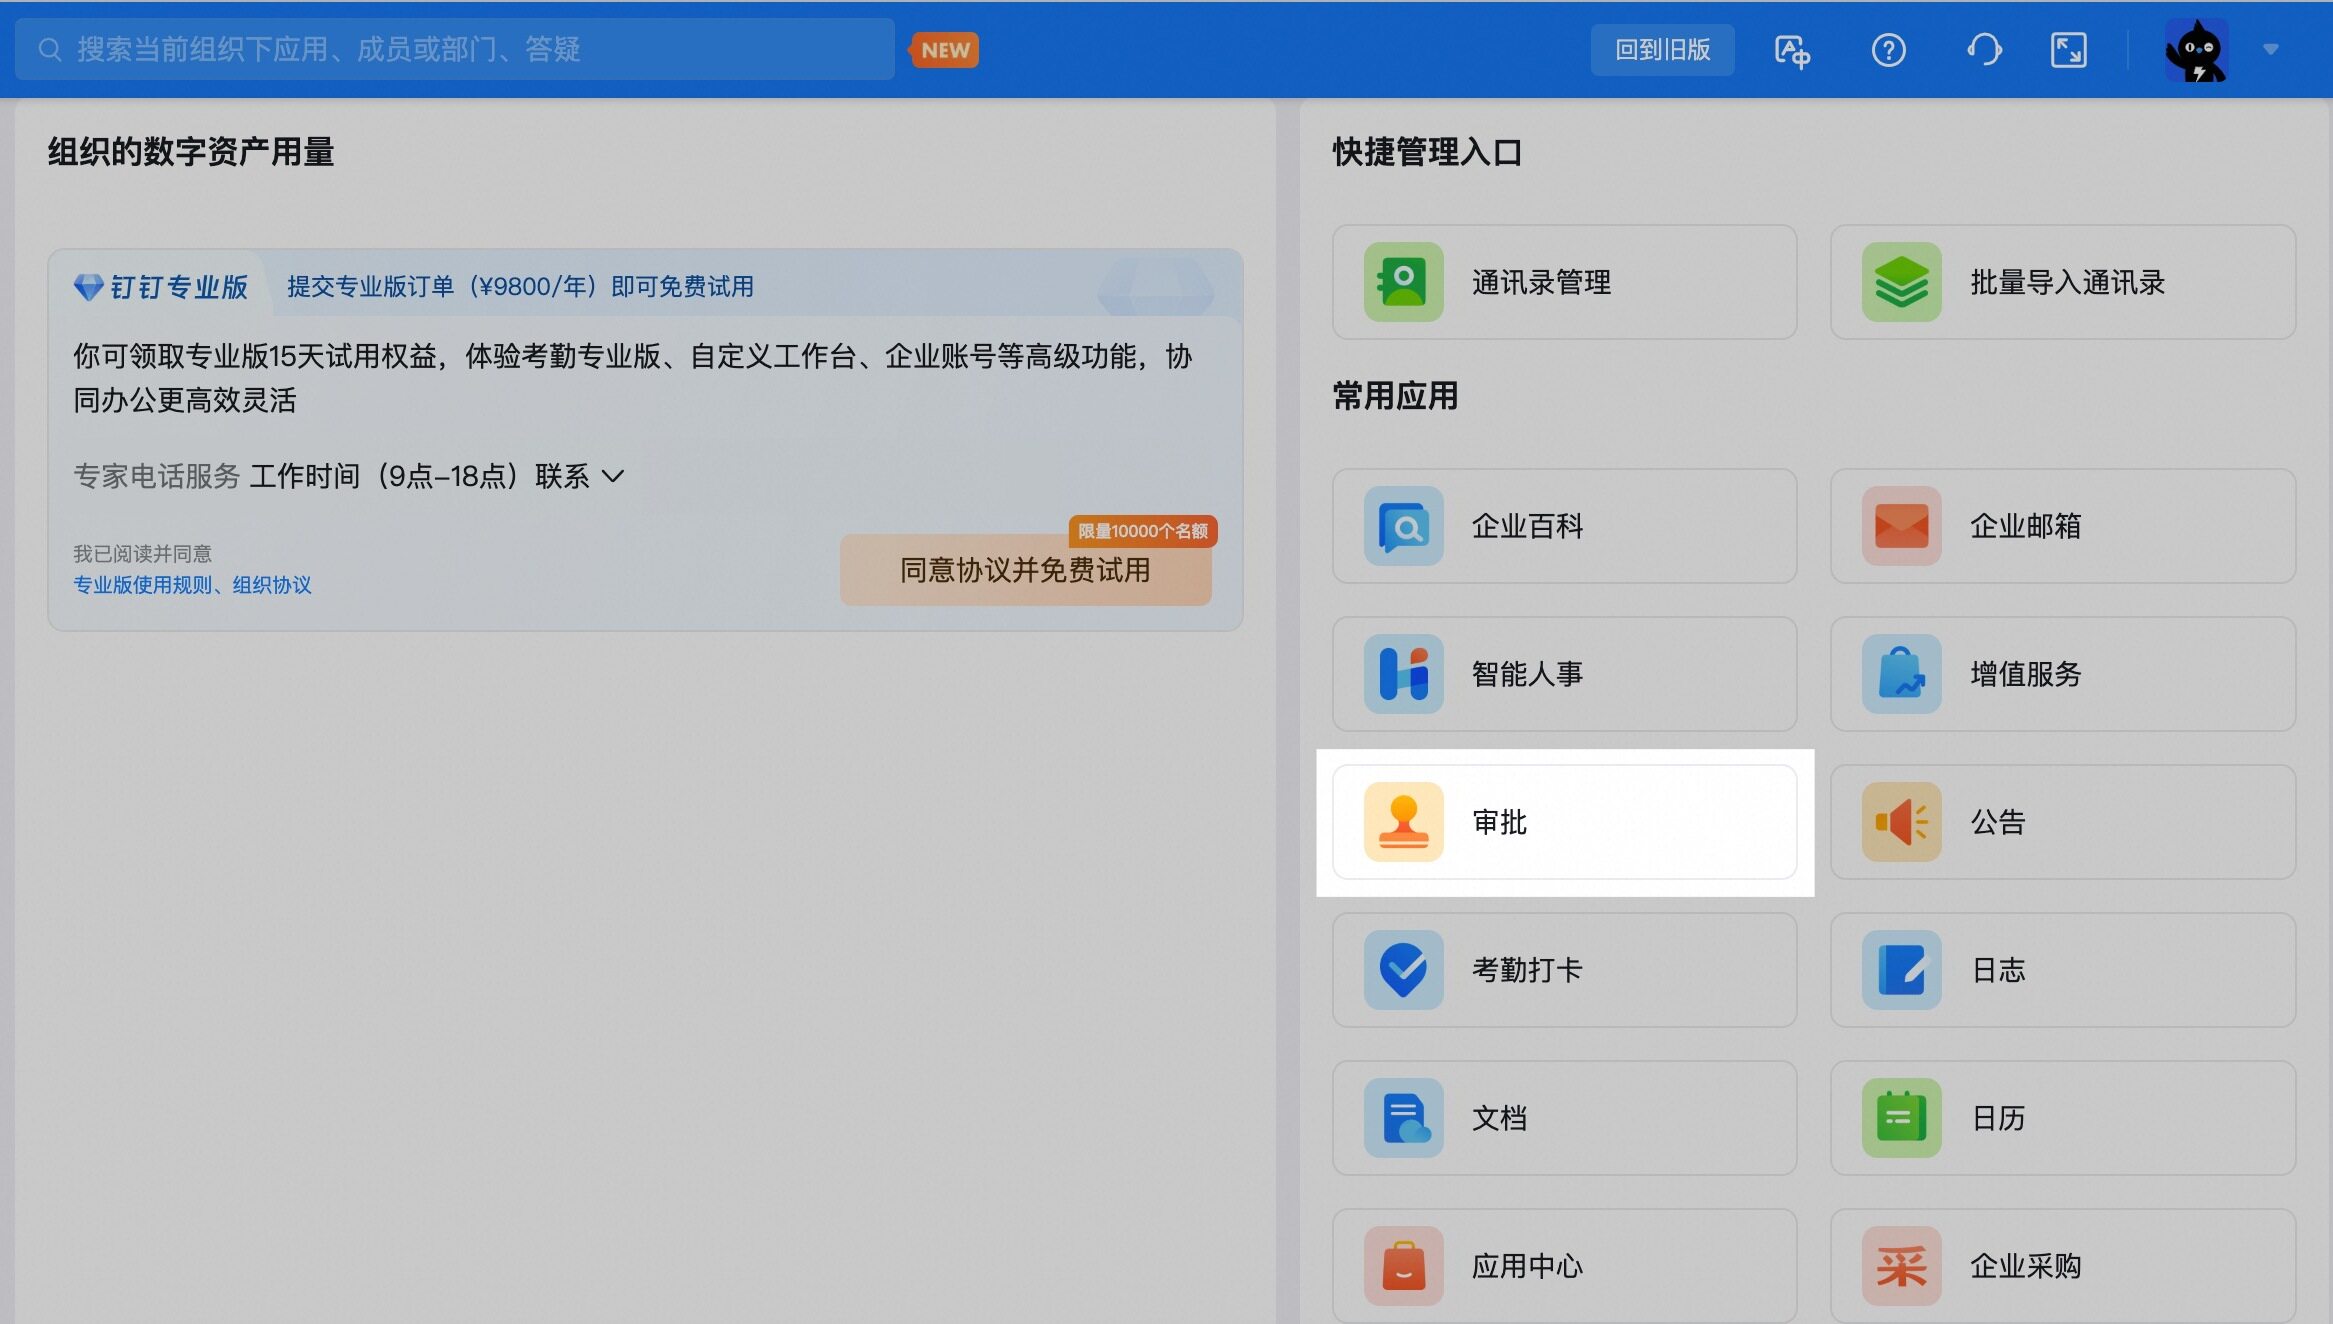
Approval Admins can sign in to the DingTalk Admin Console and click [Approval] on the Home page.
Click Approval on the Admin Console Home page
1.2 From DingTalk on desktop
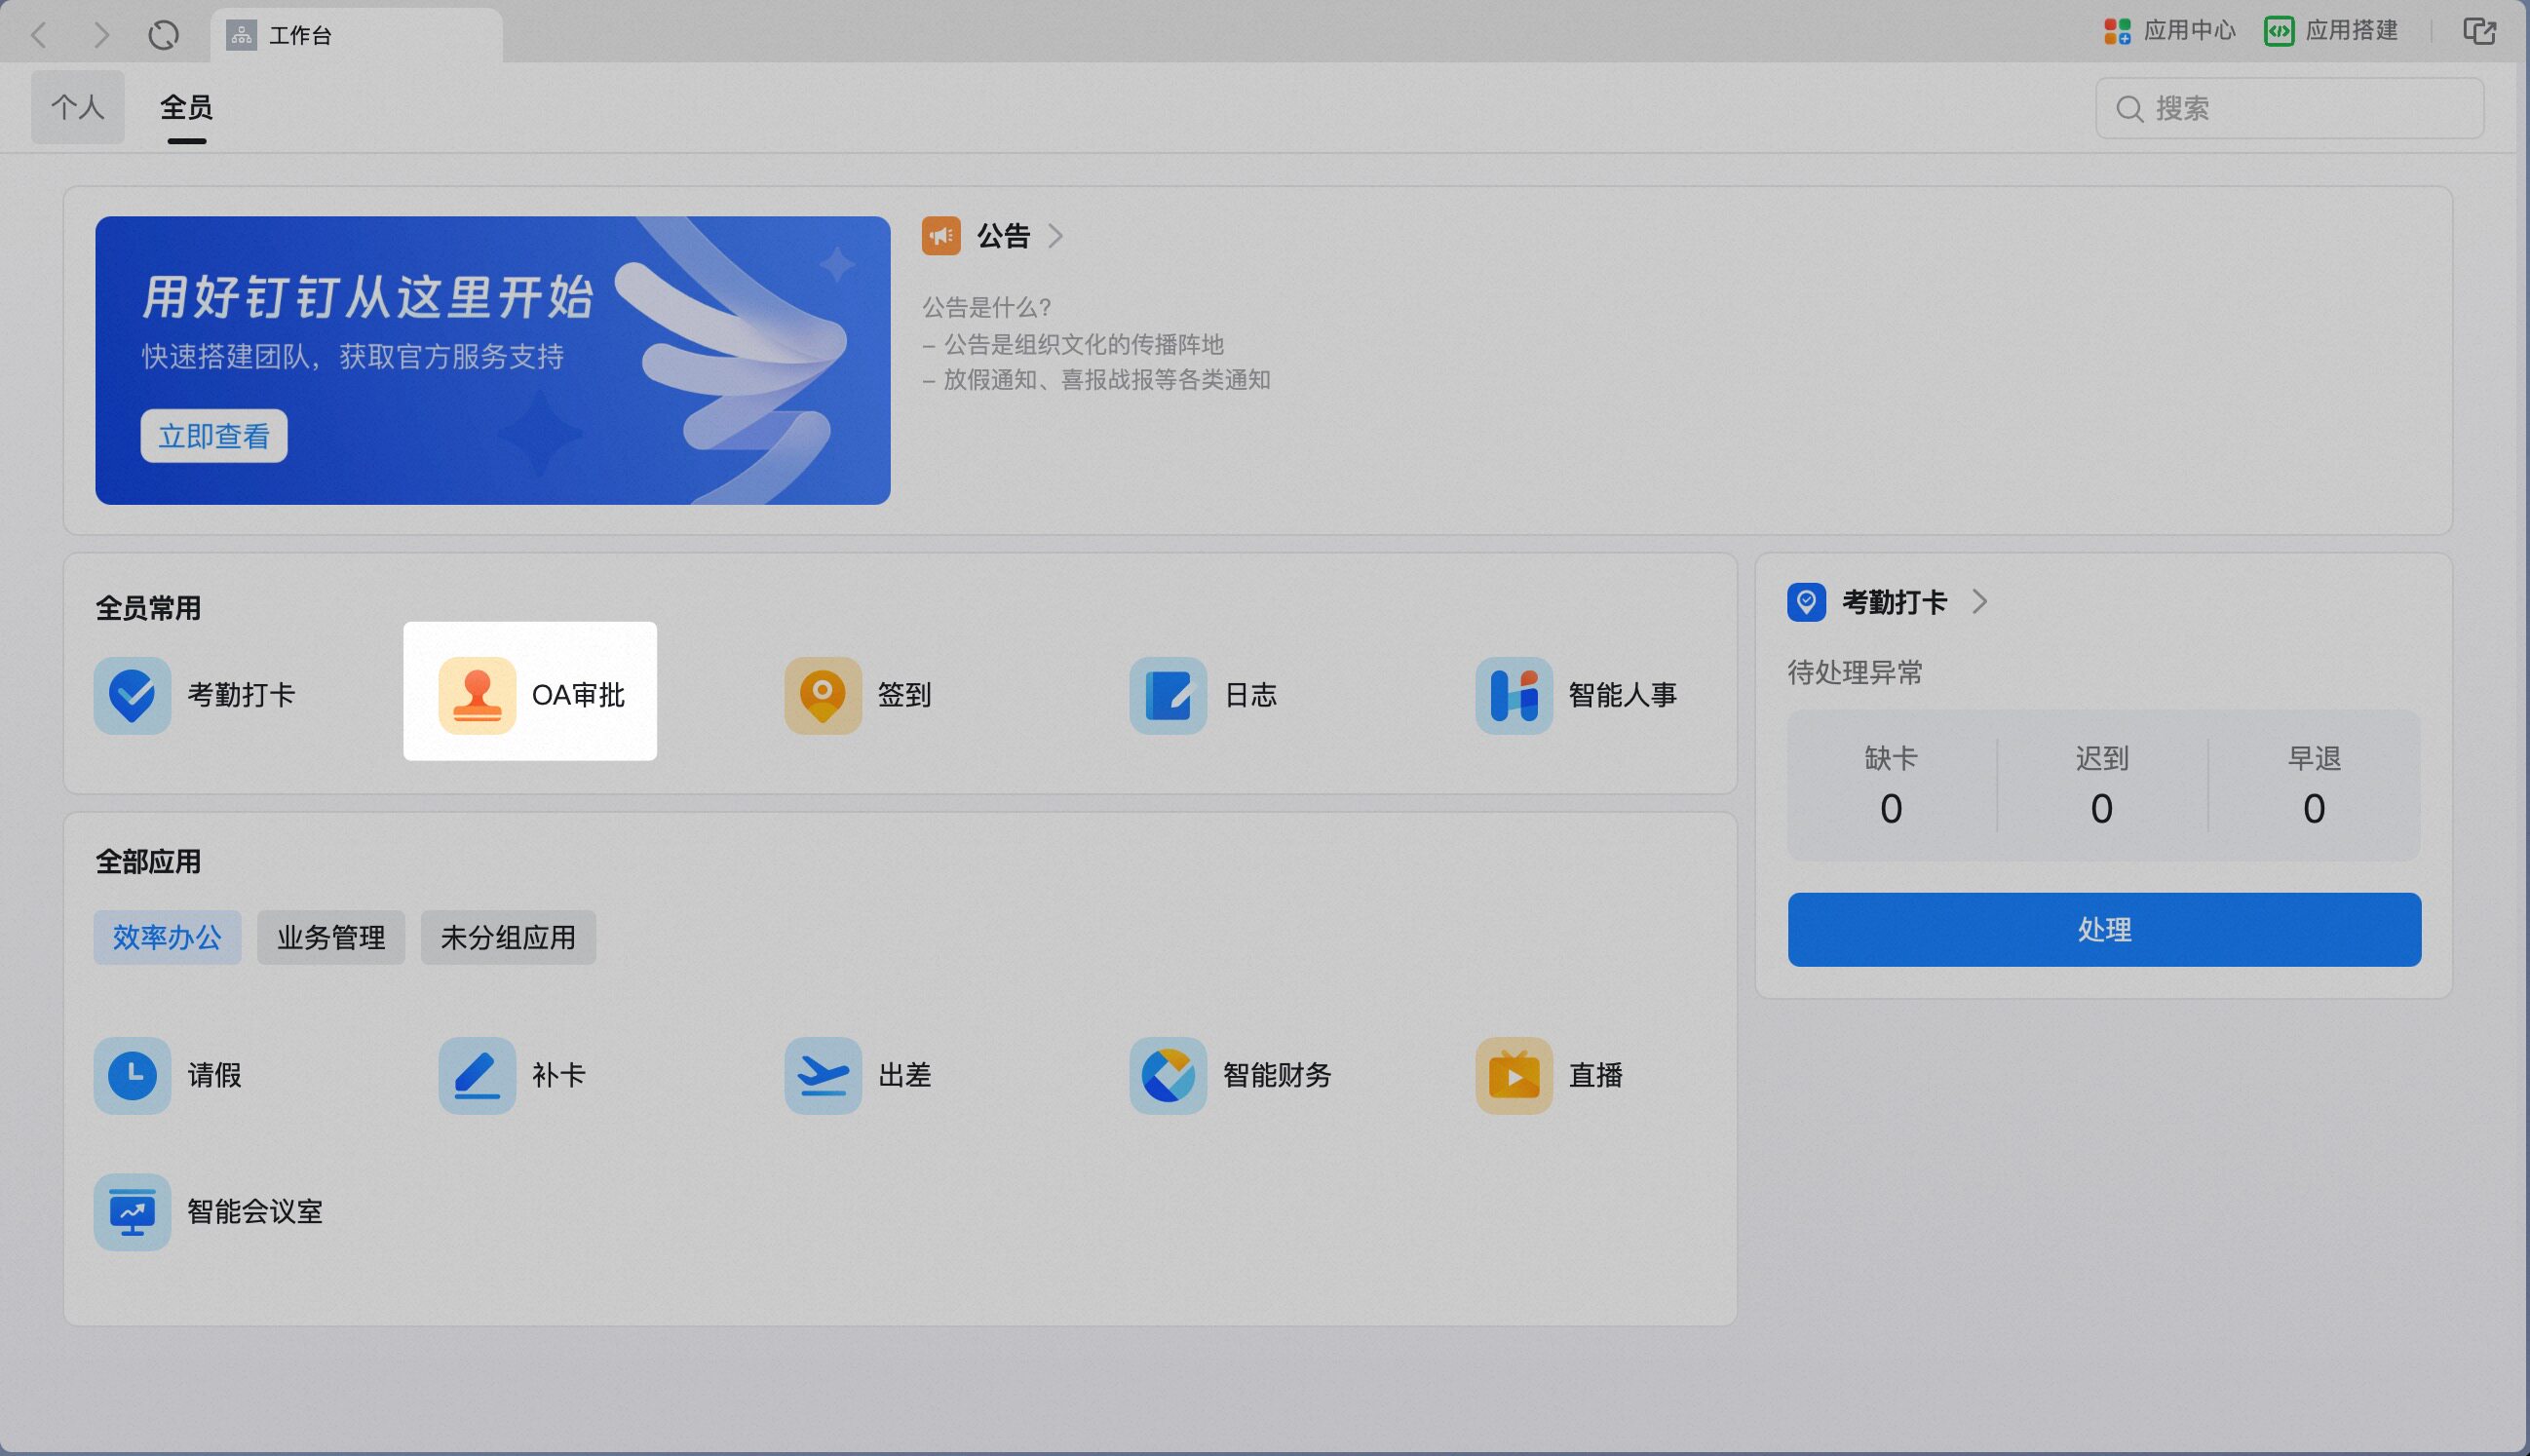
Alternatively, download and install the desktop client from the DingTalk website, click “Workbench”, and locate the “OA Approval” app.
Locate the OA Approval app on the Workbench
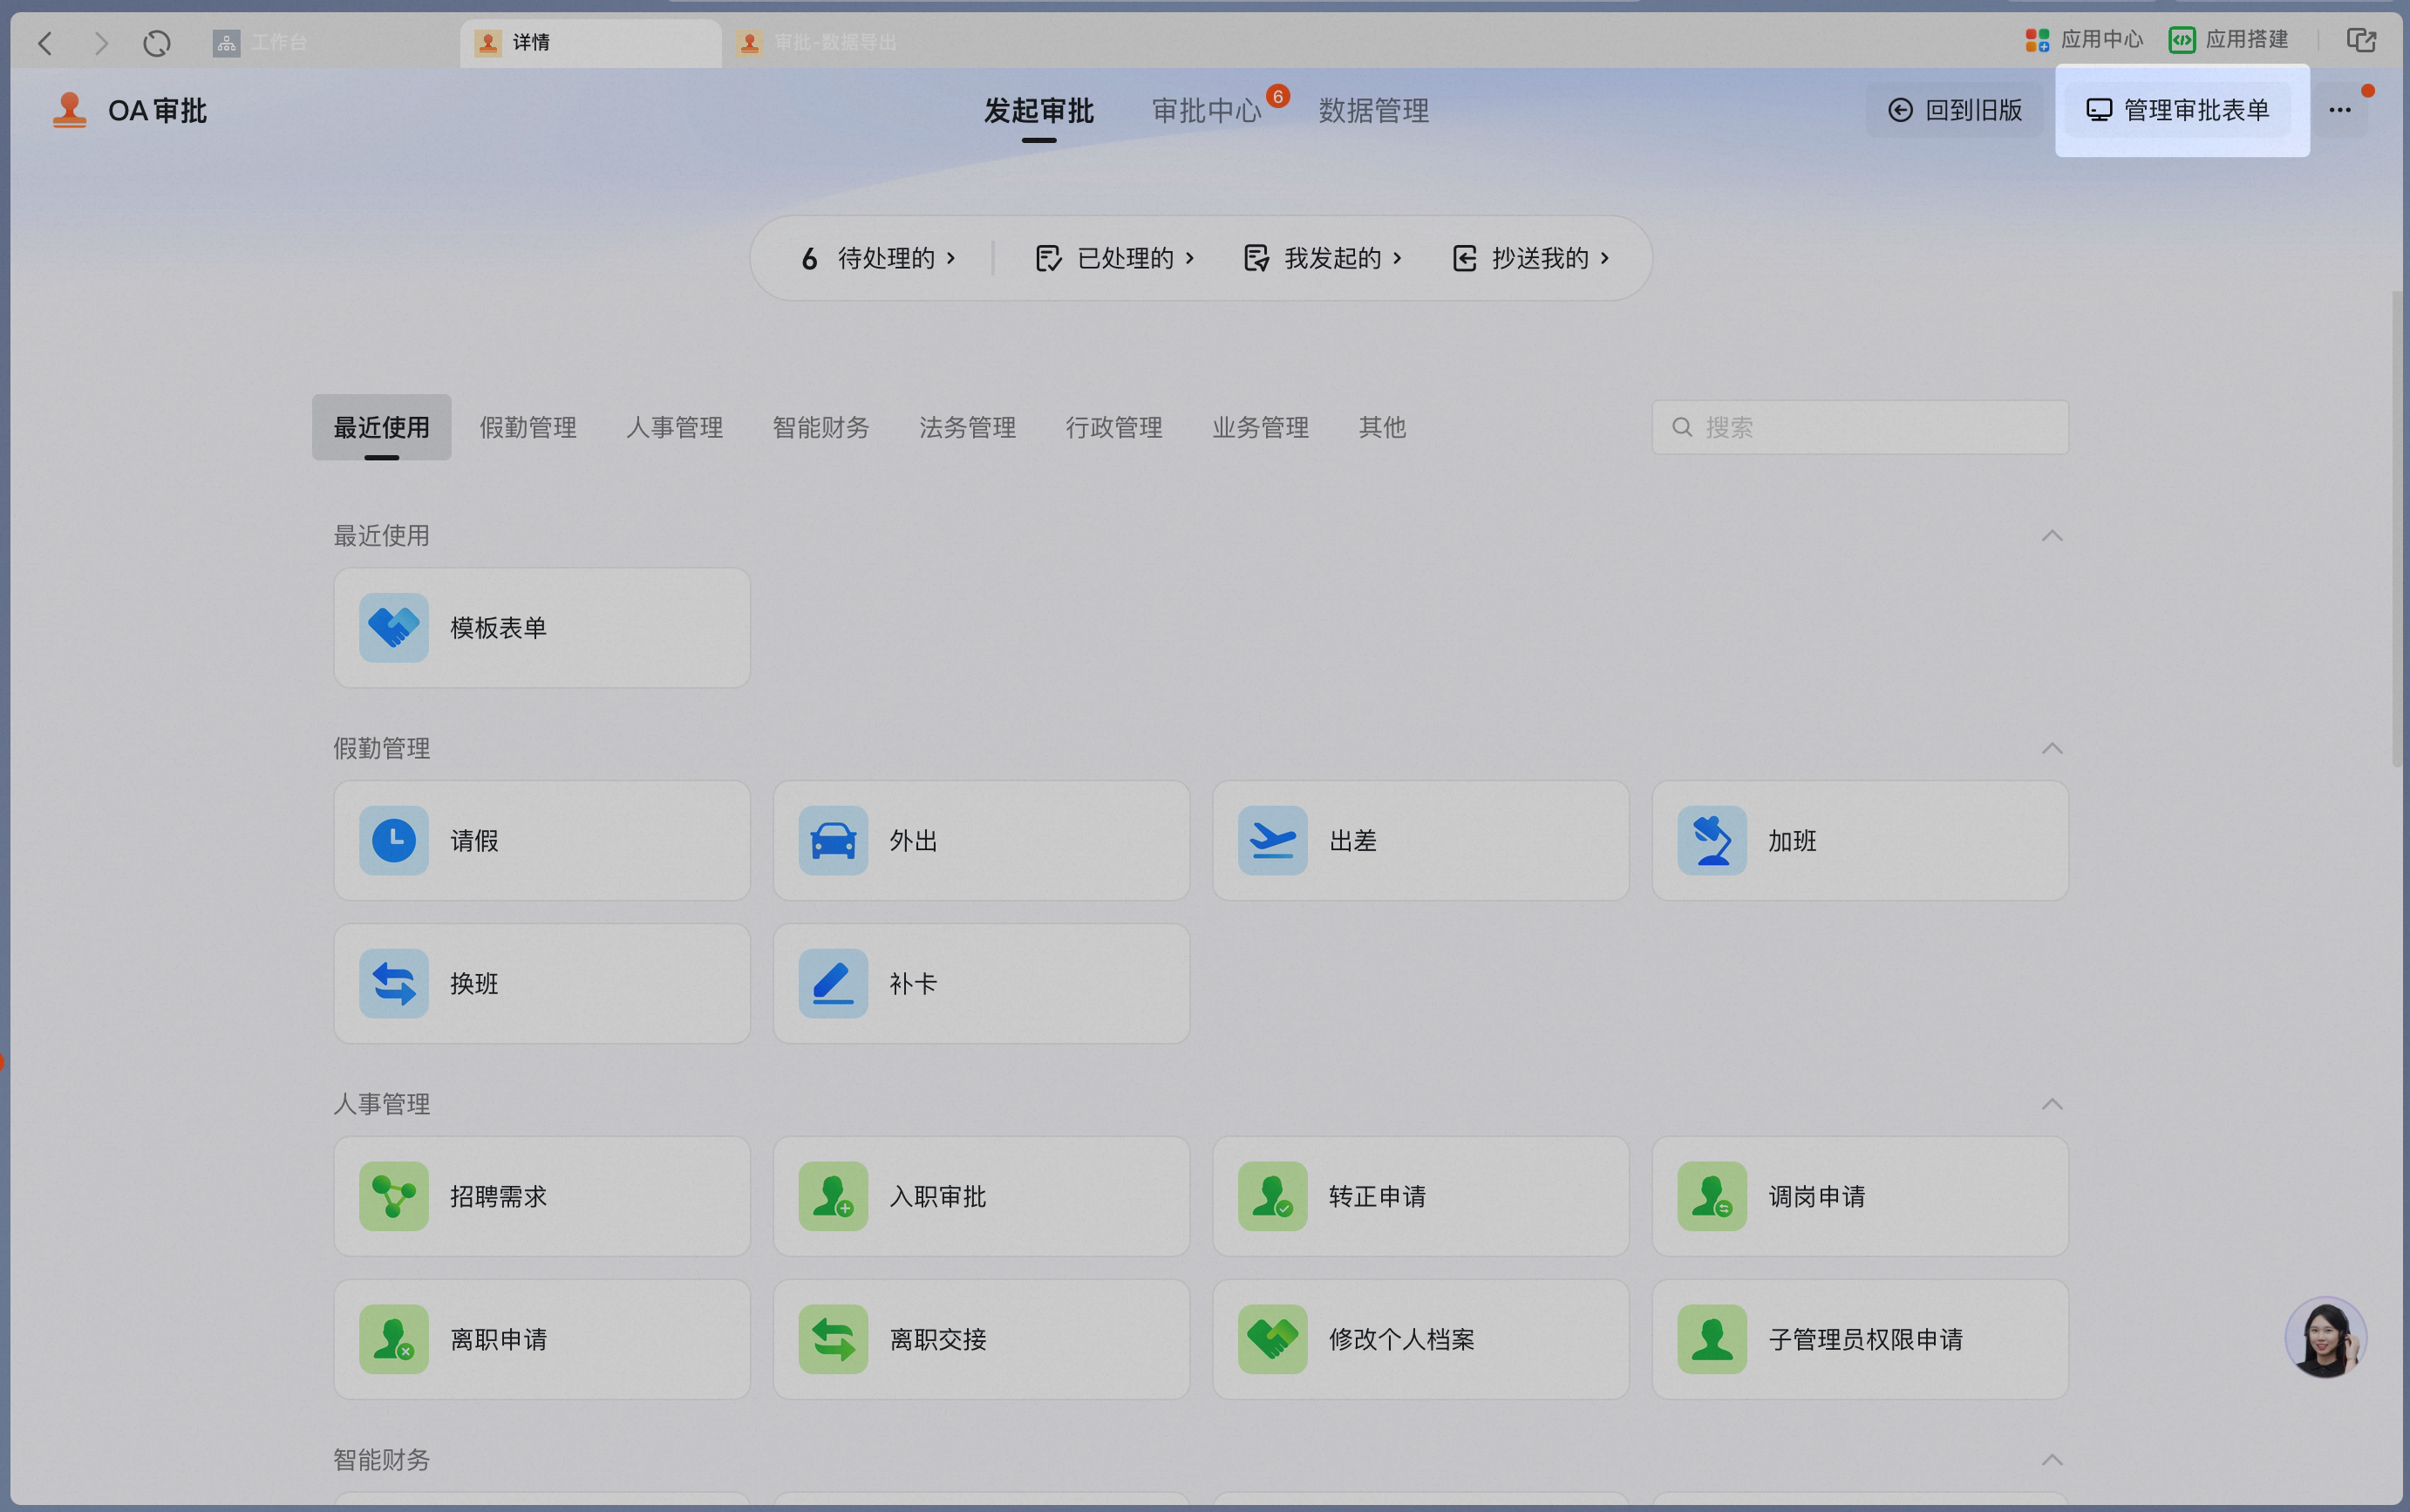
Click “Manage Approval Forms” in the upper-right corner to open it (only users with Approval management permissions can see this entry).
Click Manage Approval Forms in the upper-right corner

2. Create an Approval Form

2.1 Create an Approval form
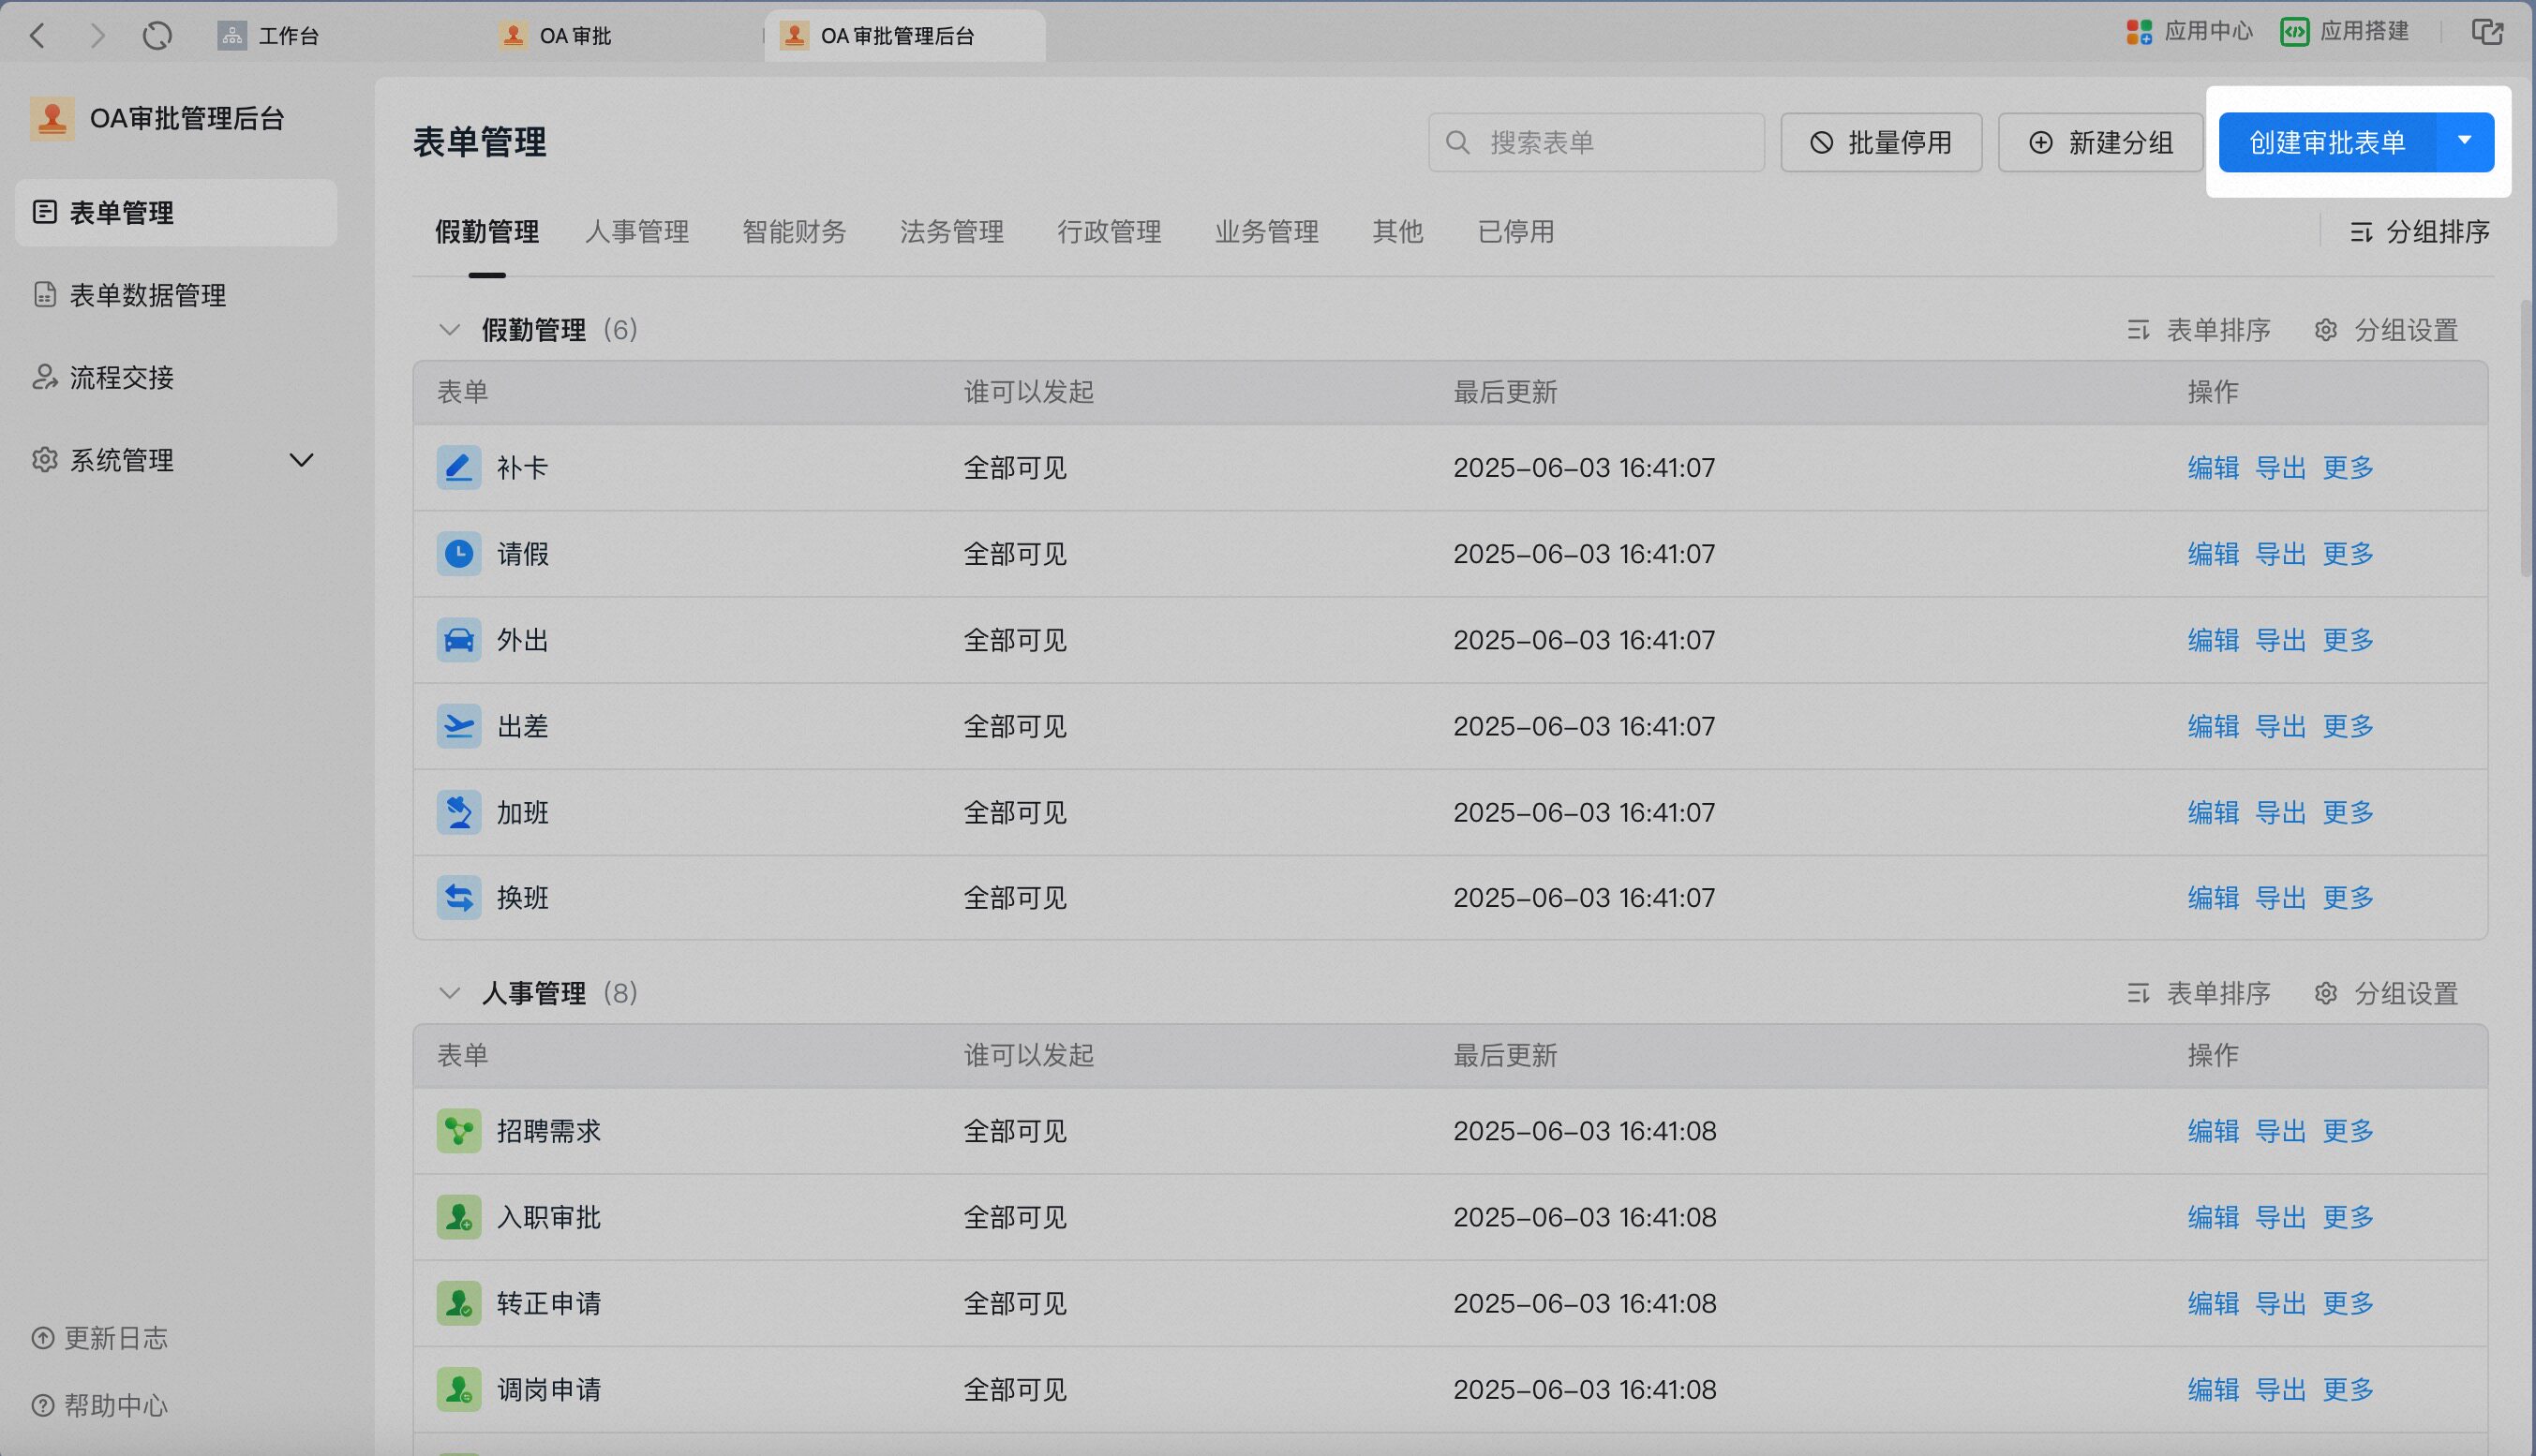
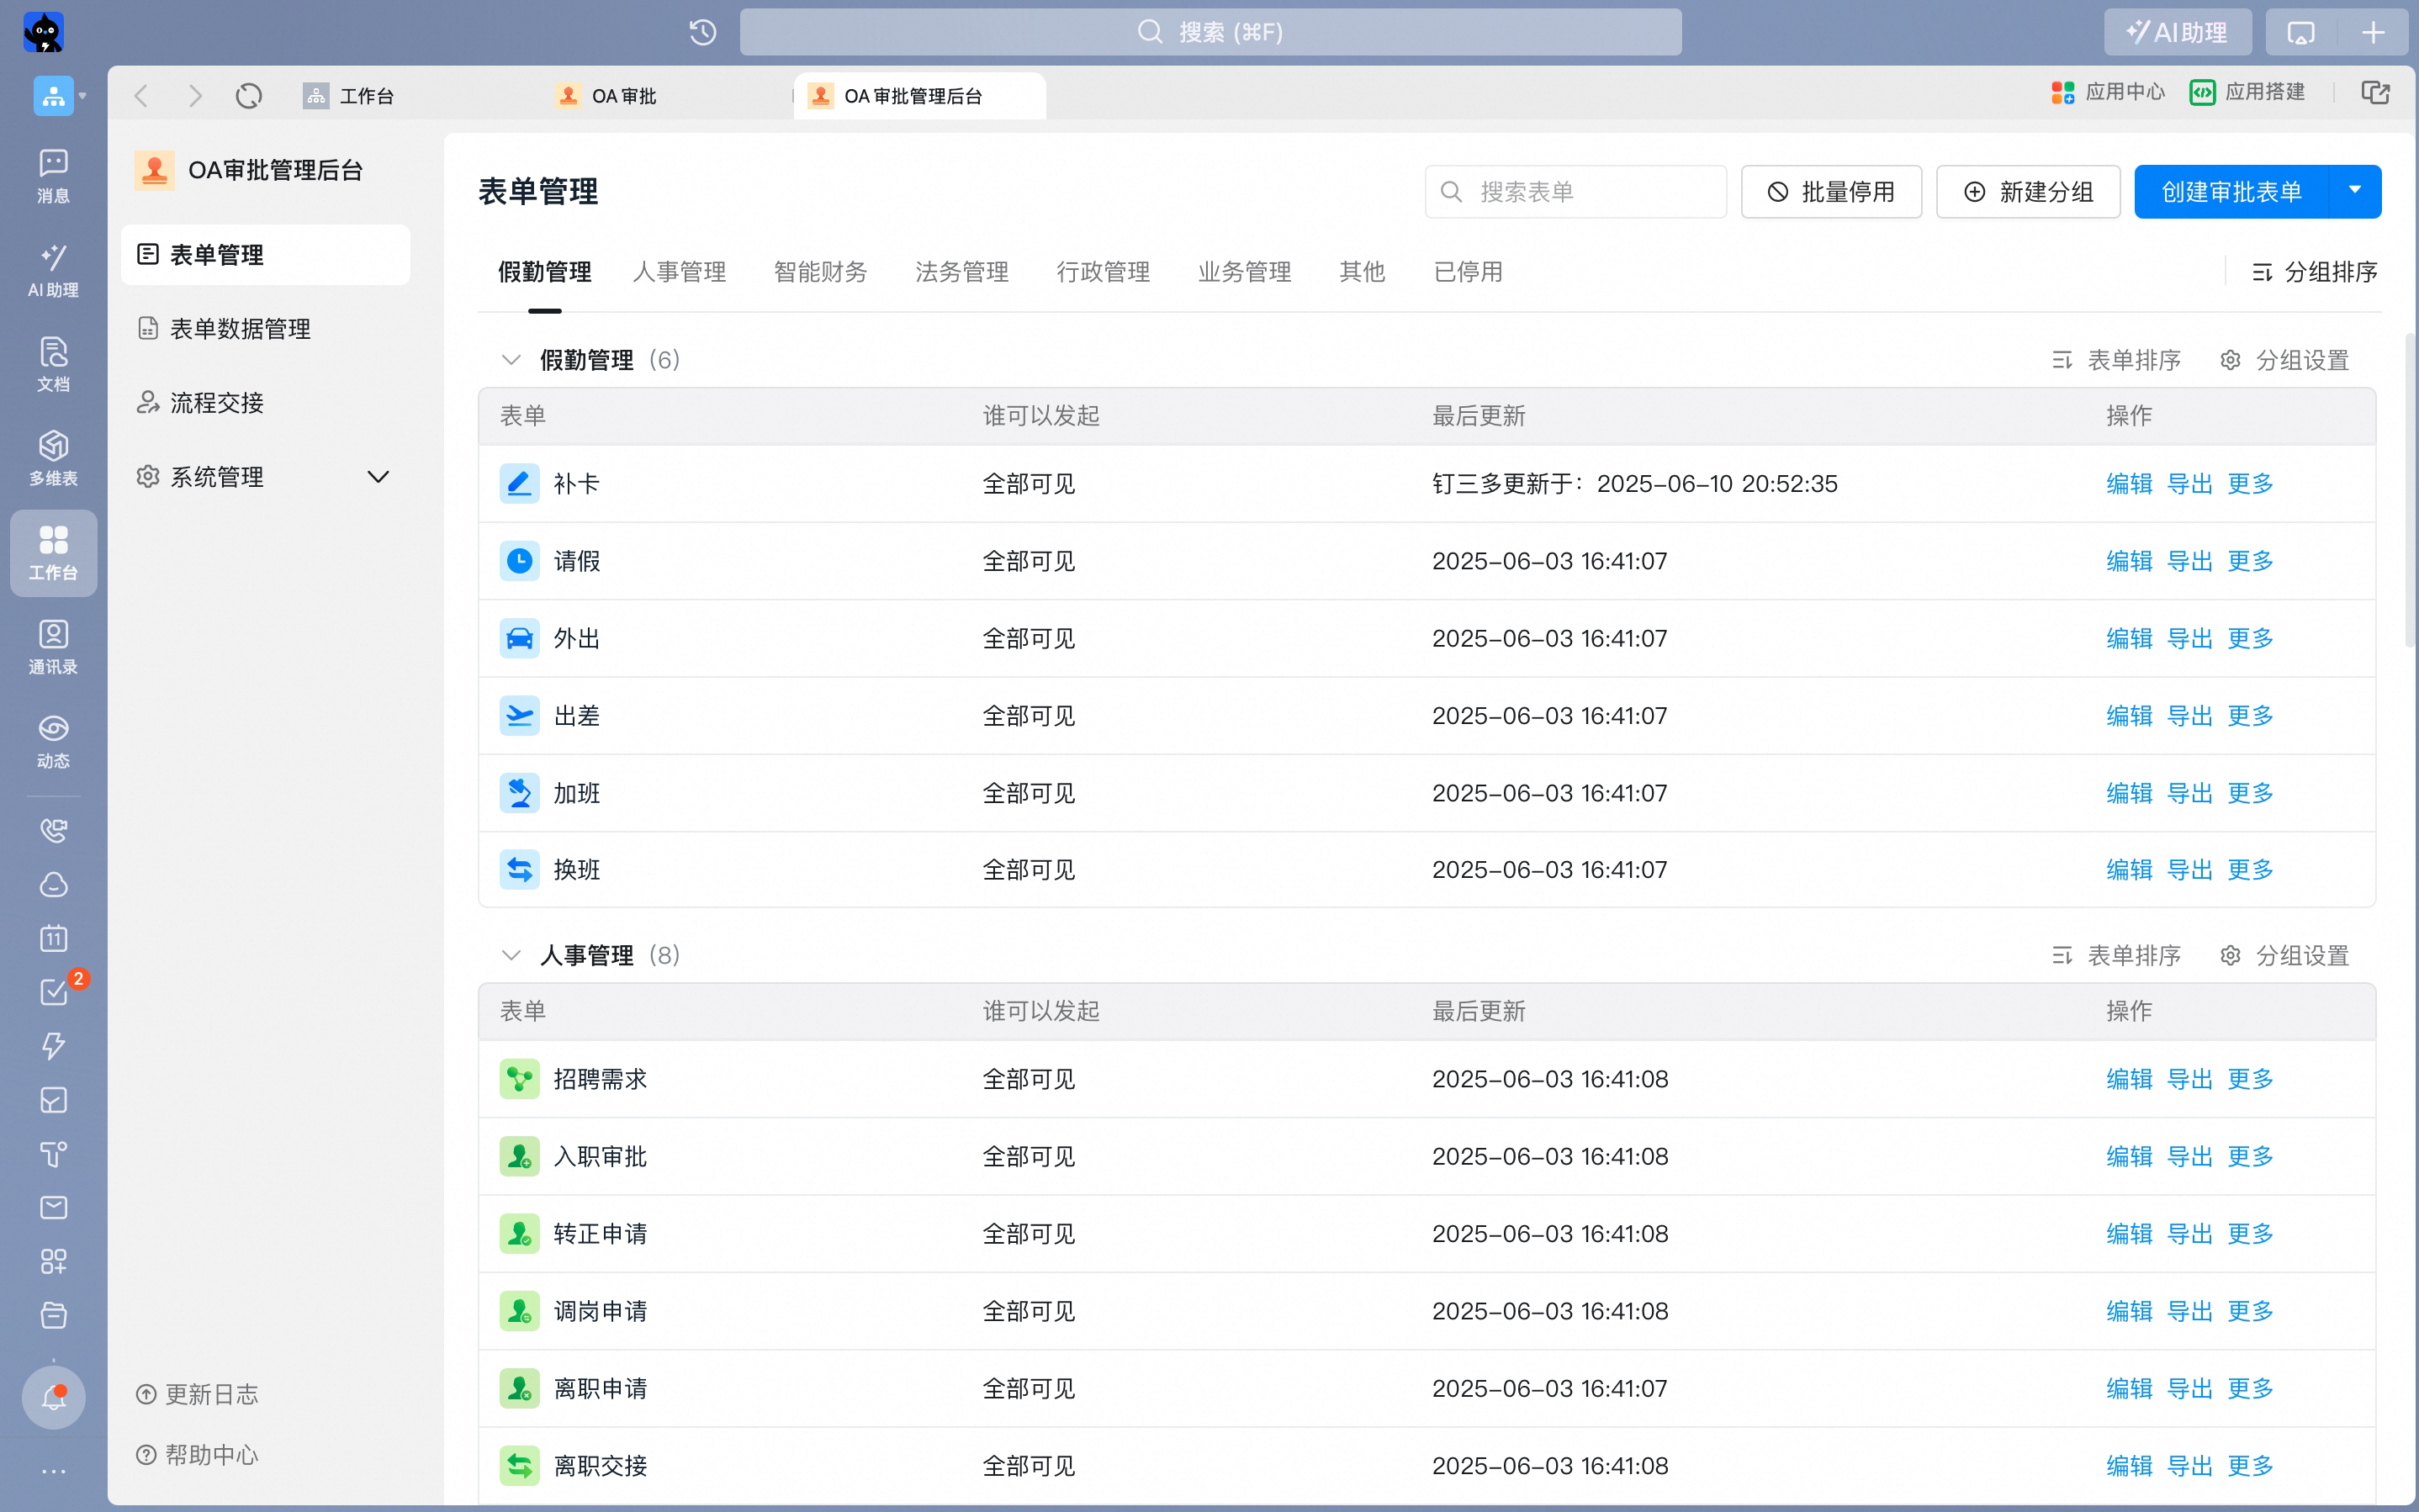
On the “Approval Admin Console” → “Form Management” page, click “Create Approval Form”.
Click Create Approval Form on the Form Management page
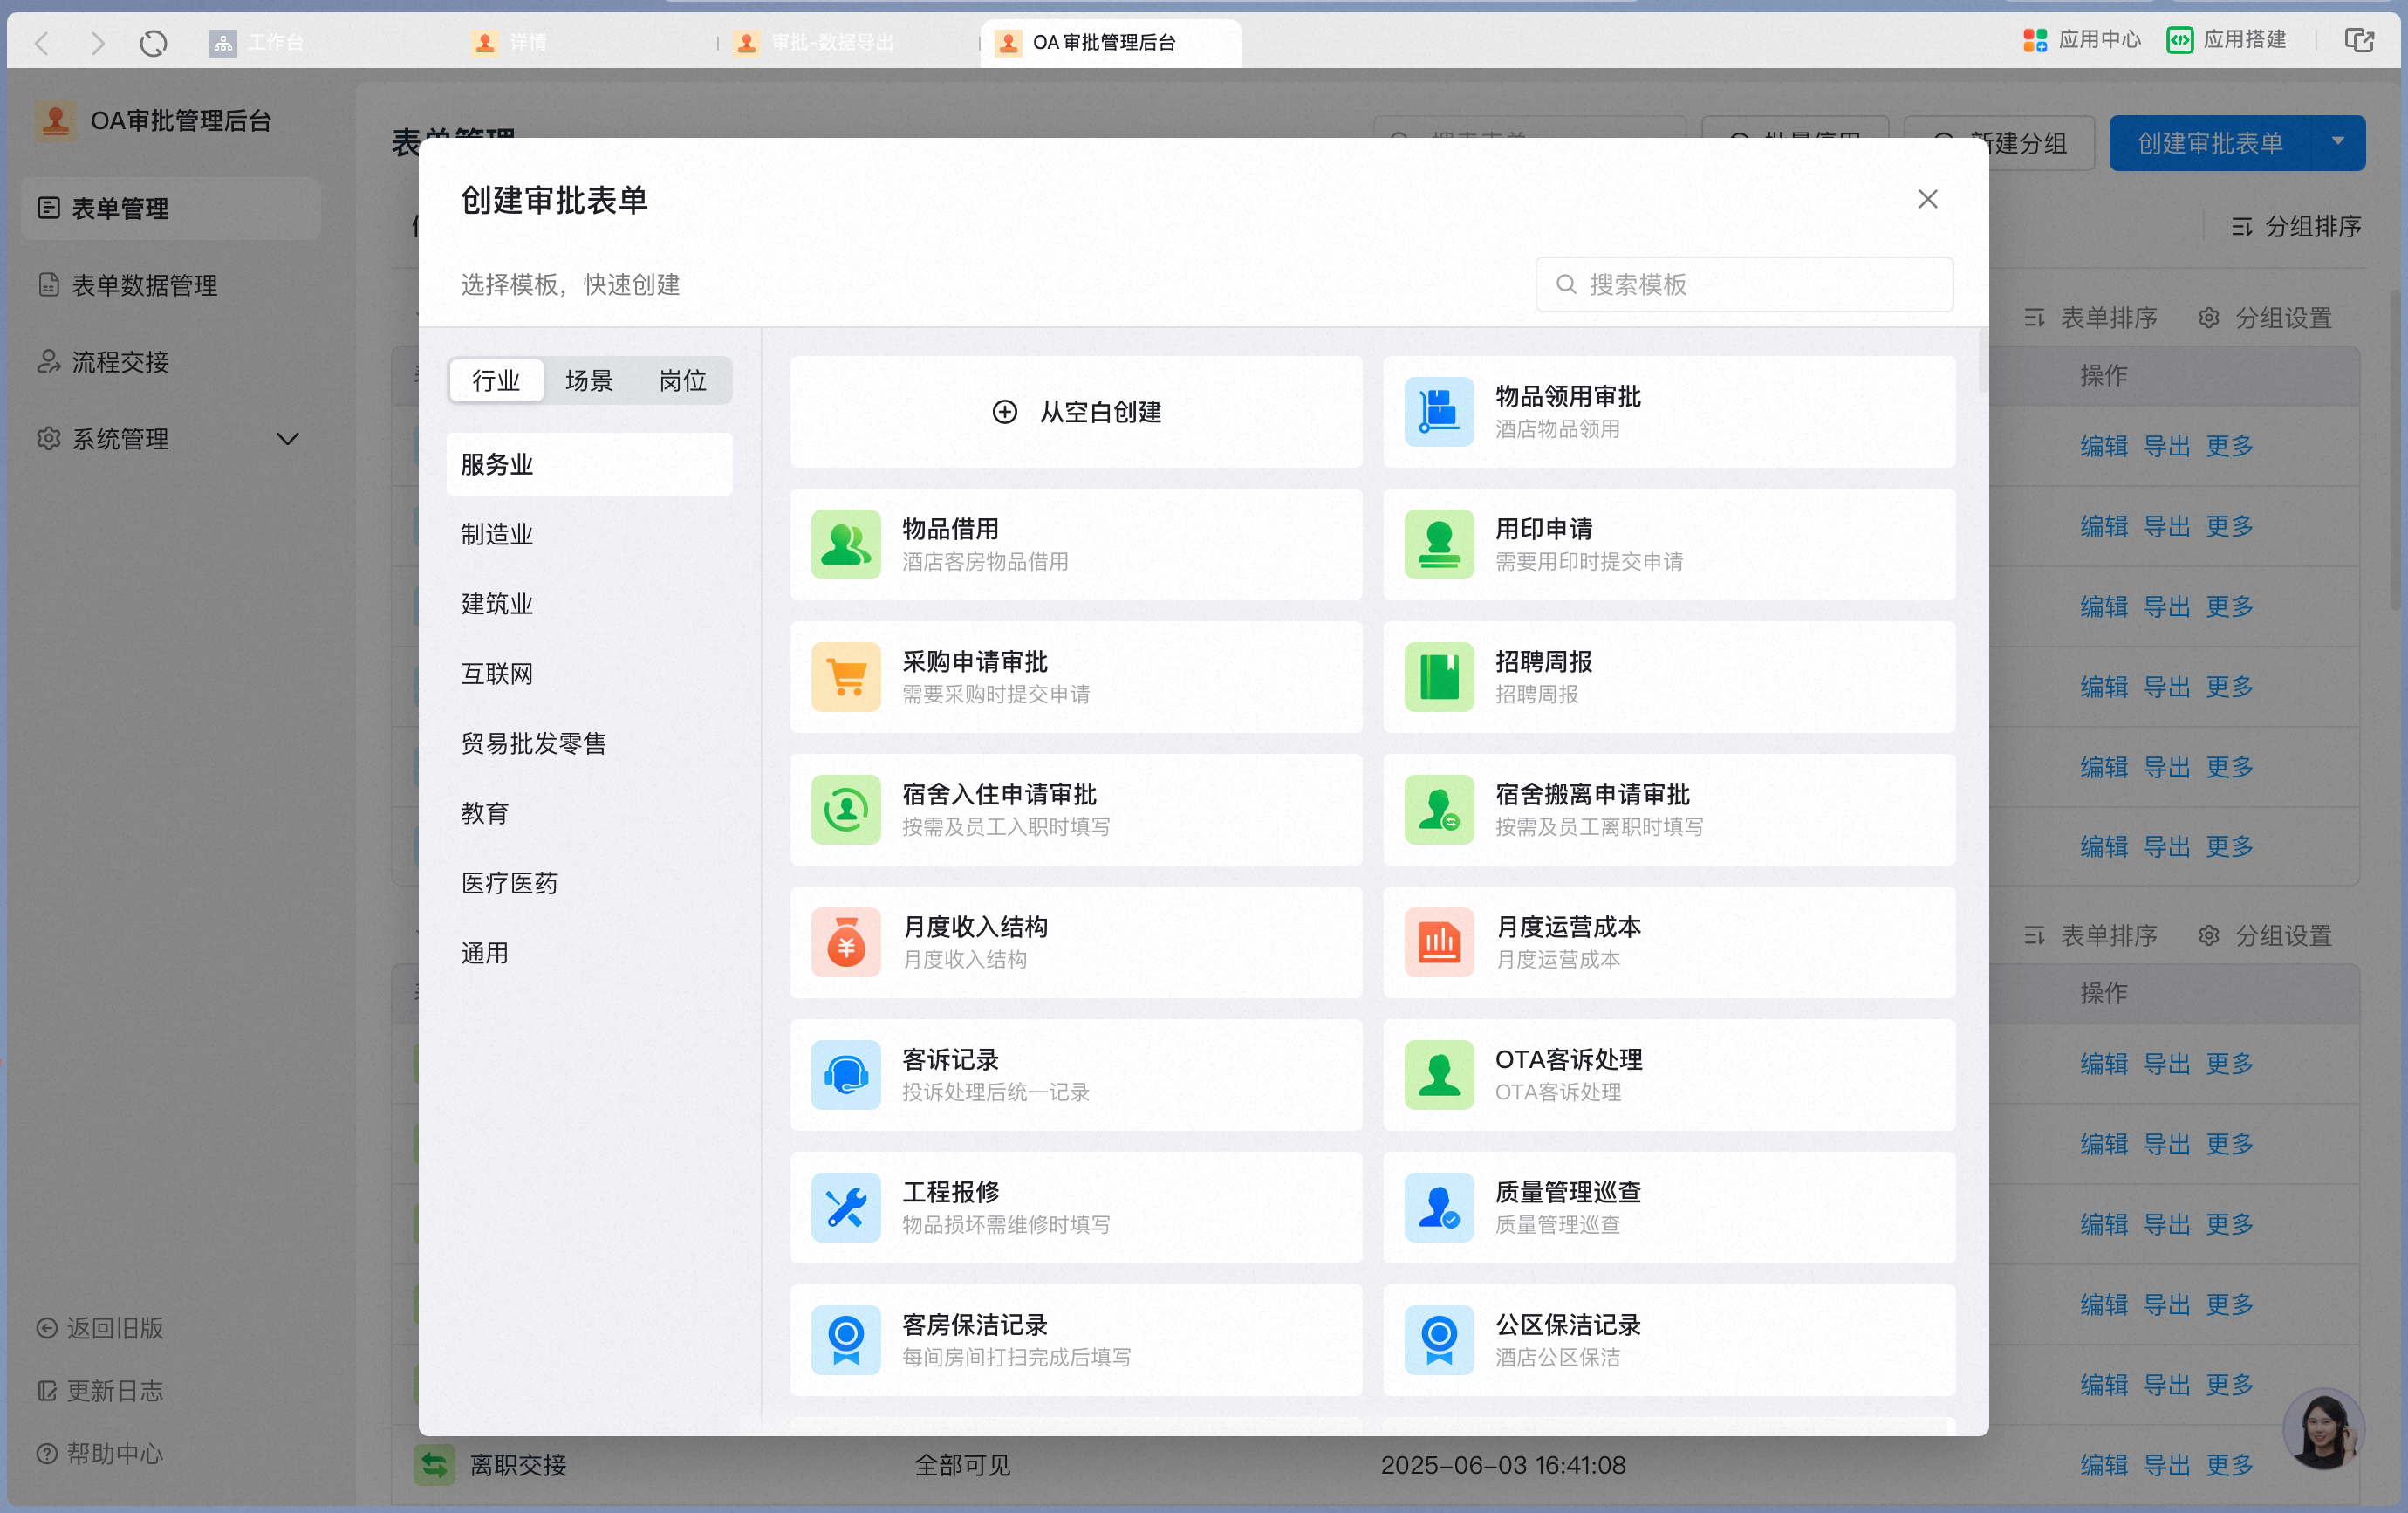
You can select a Template and one-click “Preview” and “Enable”, or “Create from blank”.
Select a Template or Create from blank
2.2 Edit an Approval form
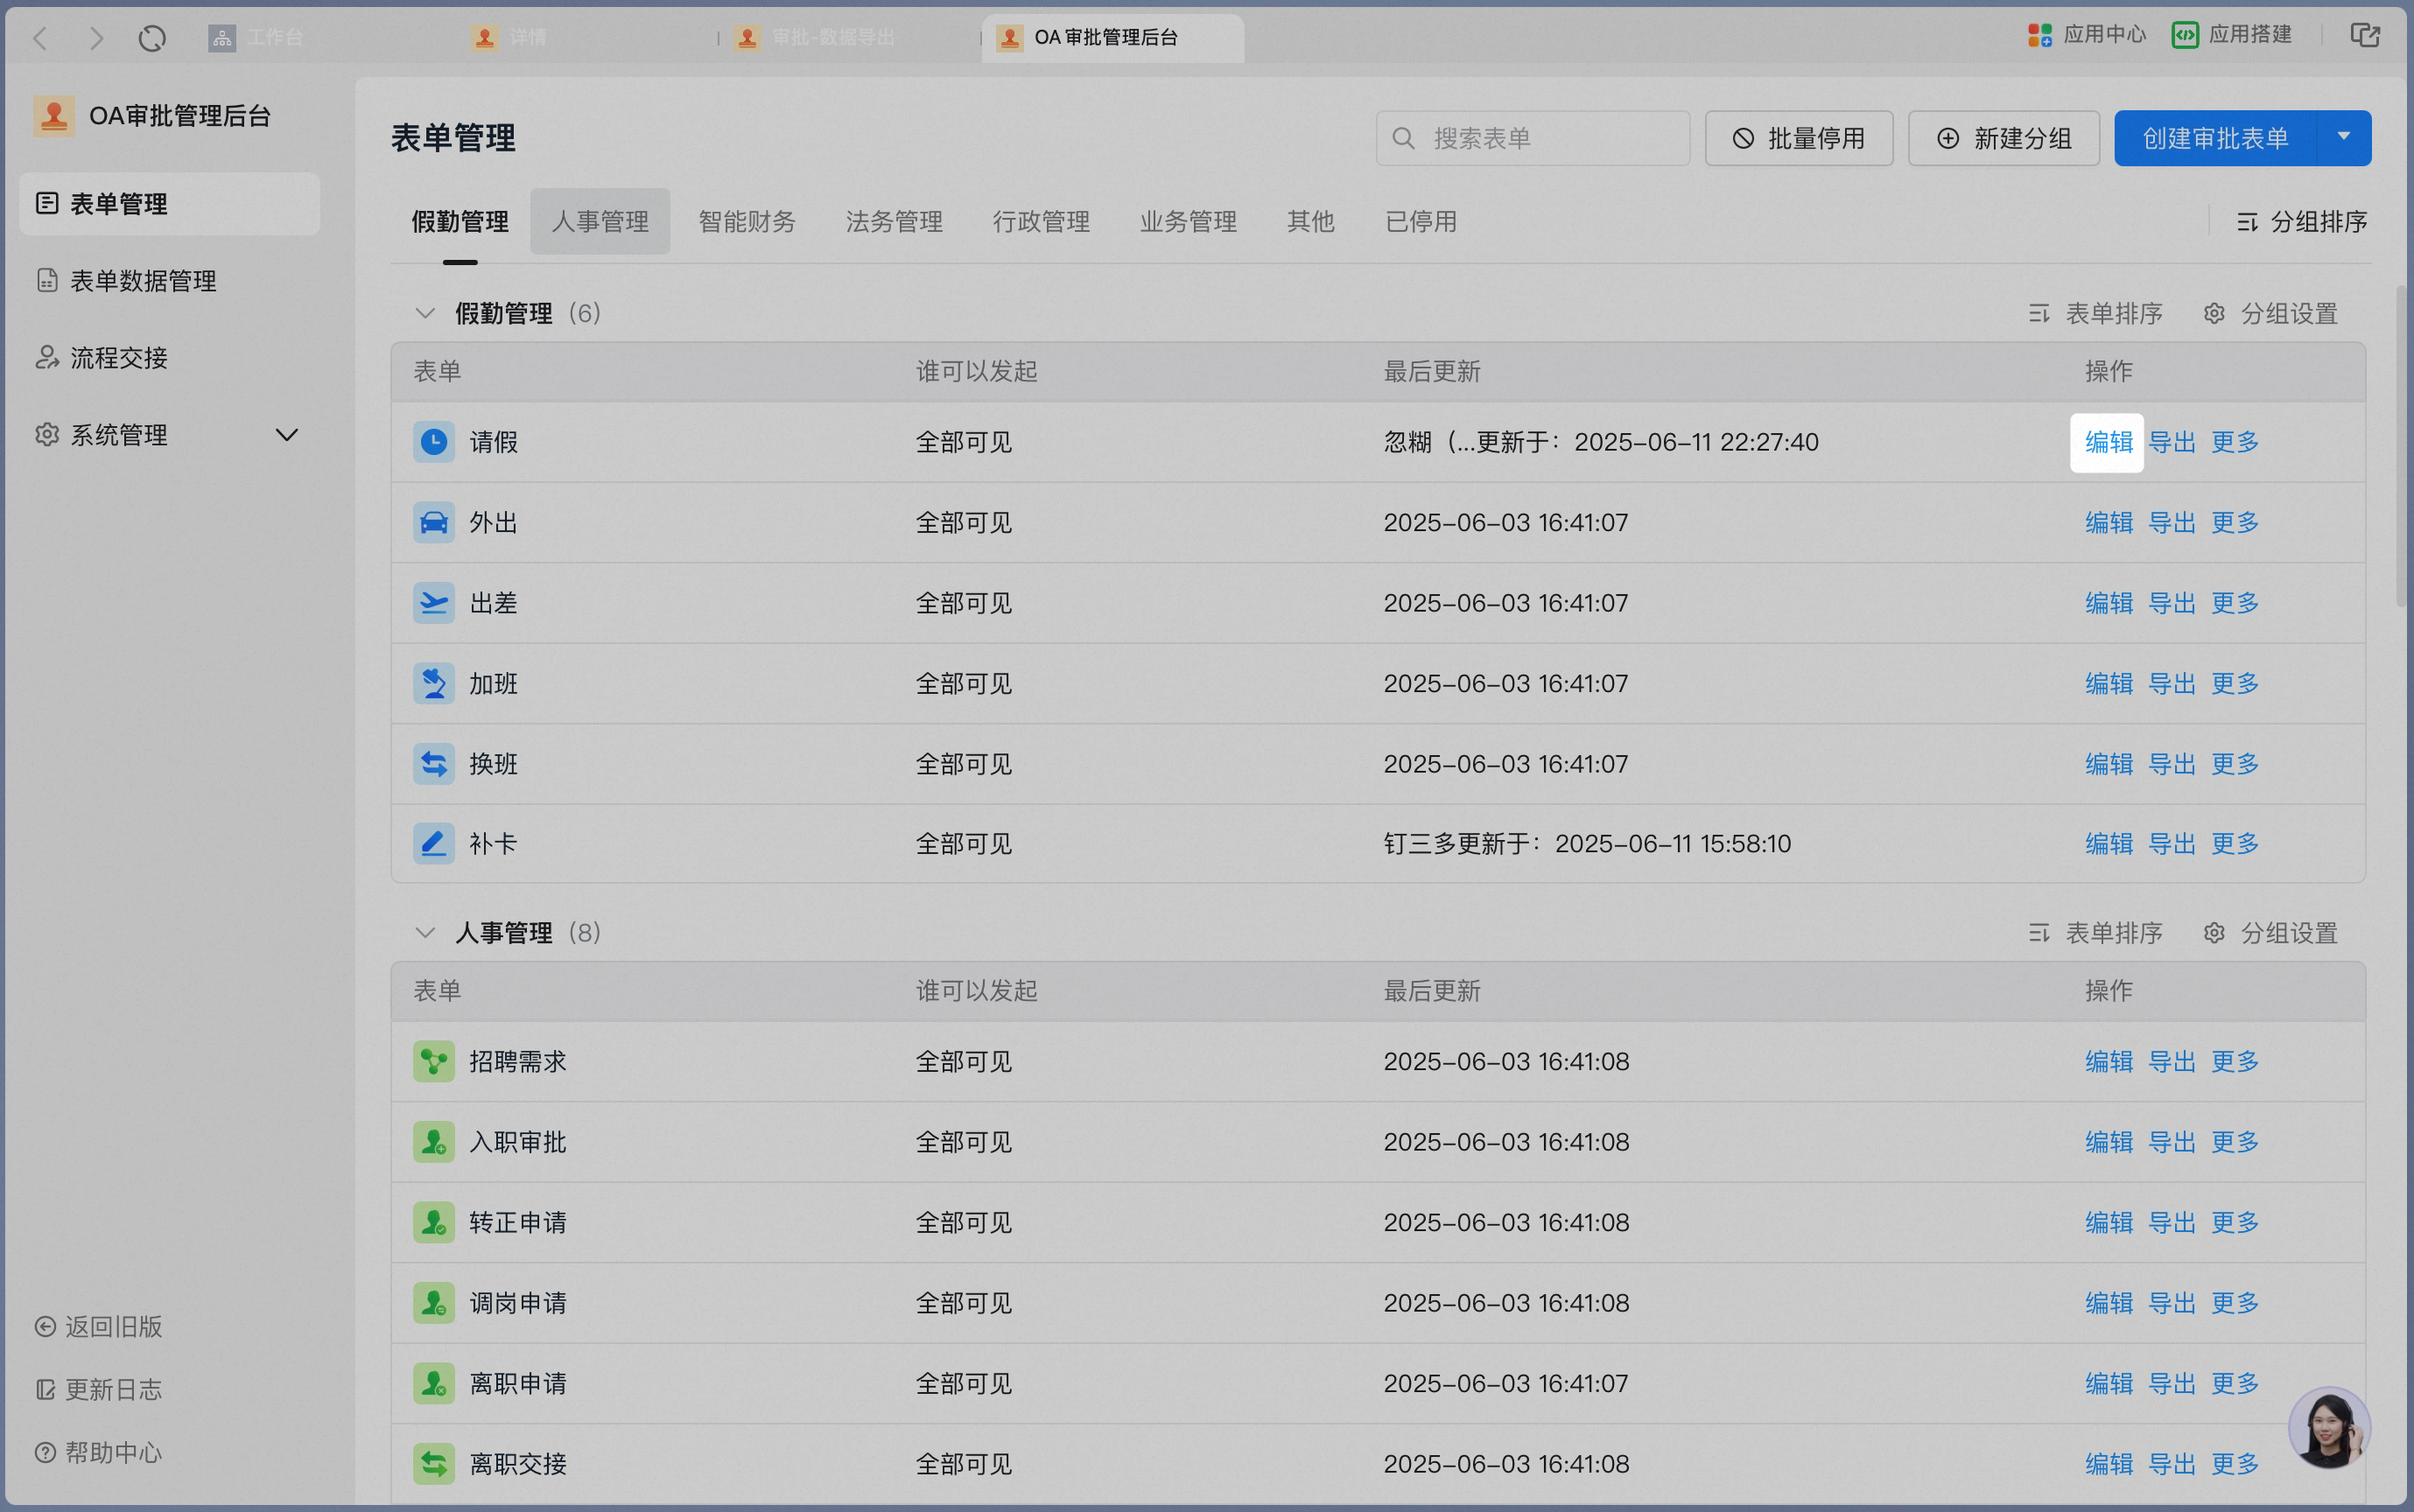
On the “Approval Admin Console” → “Form Management” page, click “Edit” in the form’s Action column.
Click Edit in the Action column

3. Configure the Approval Form

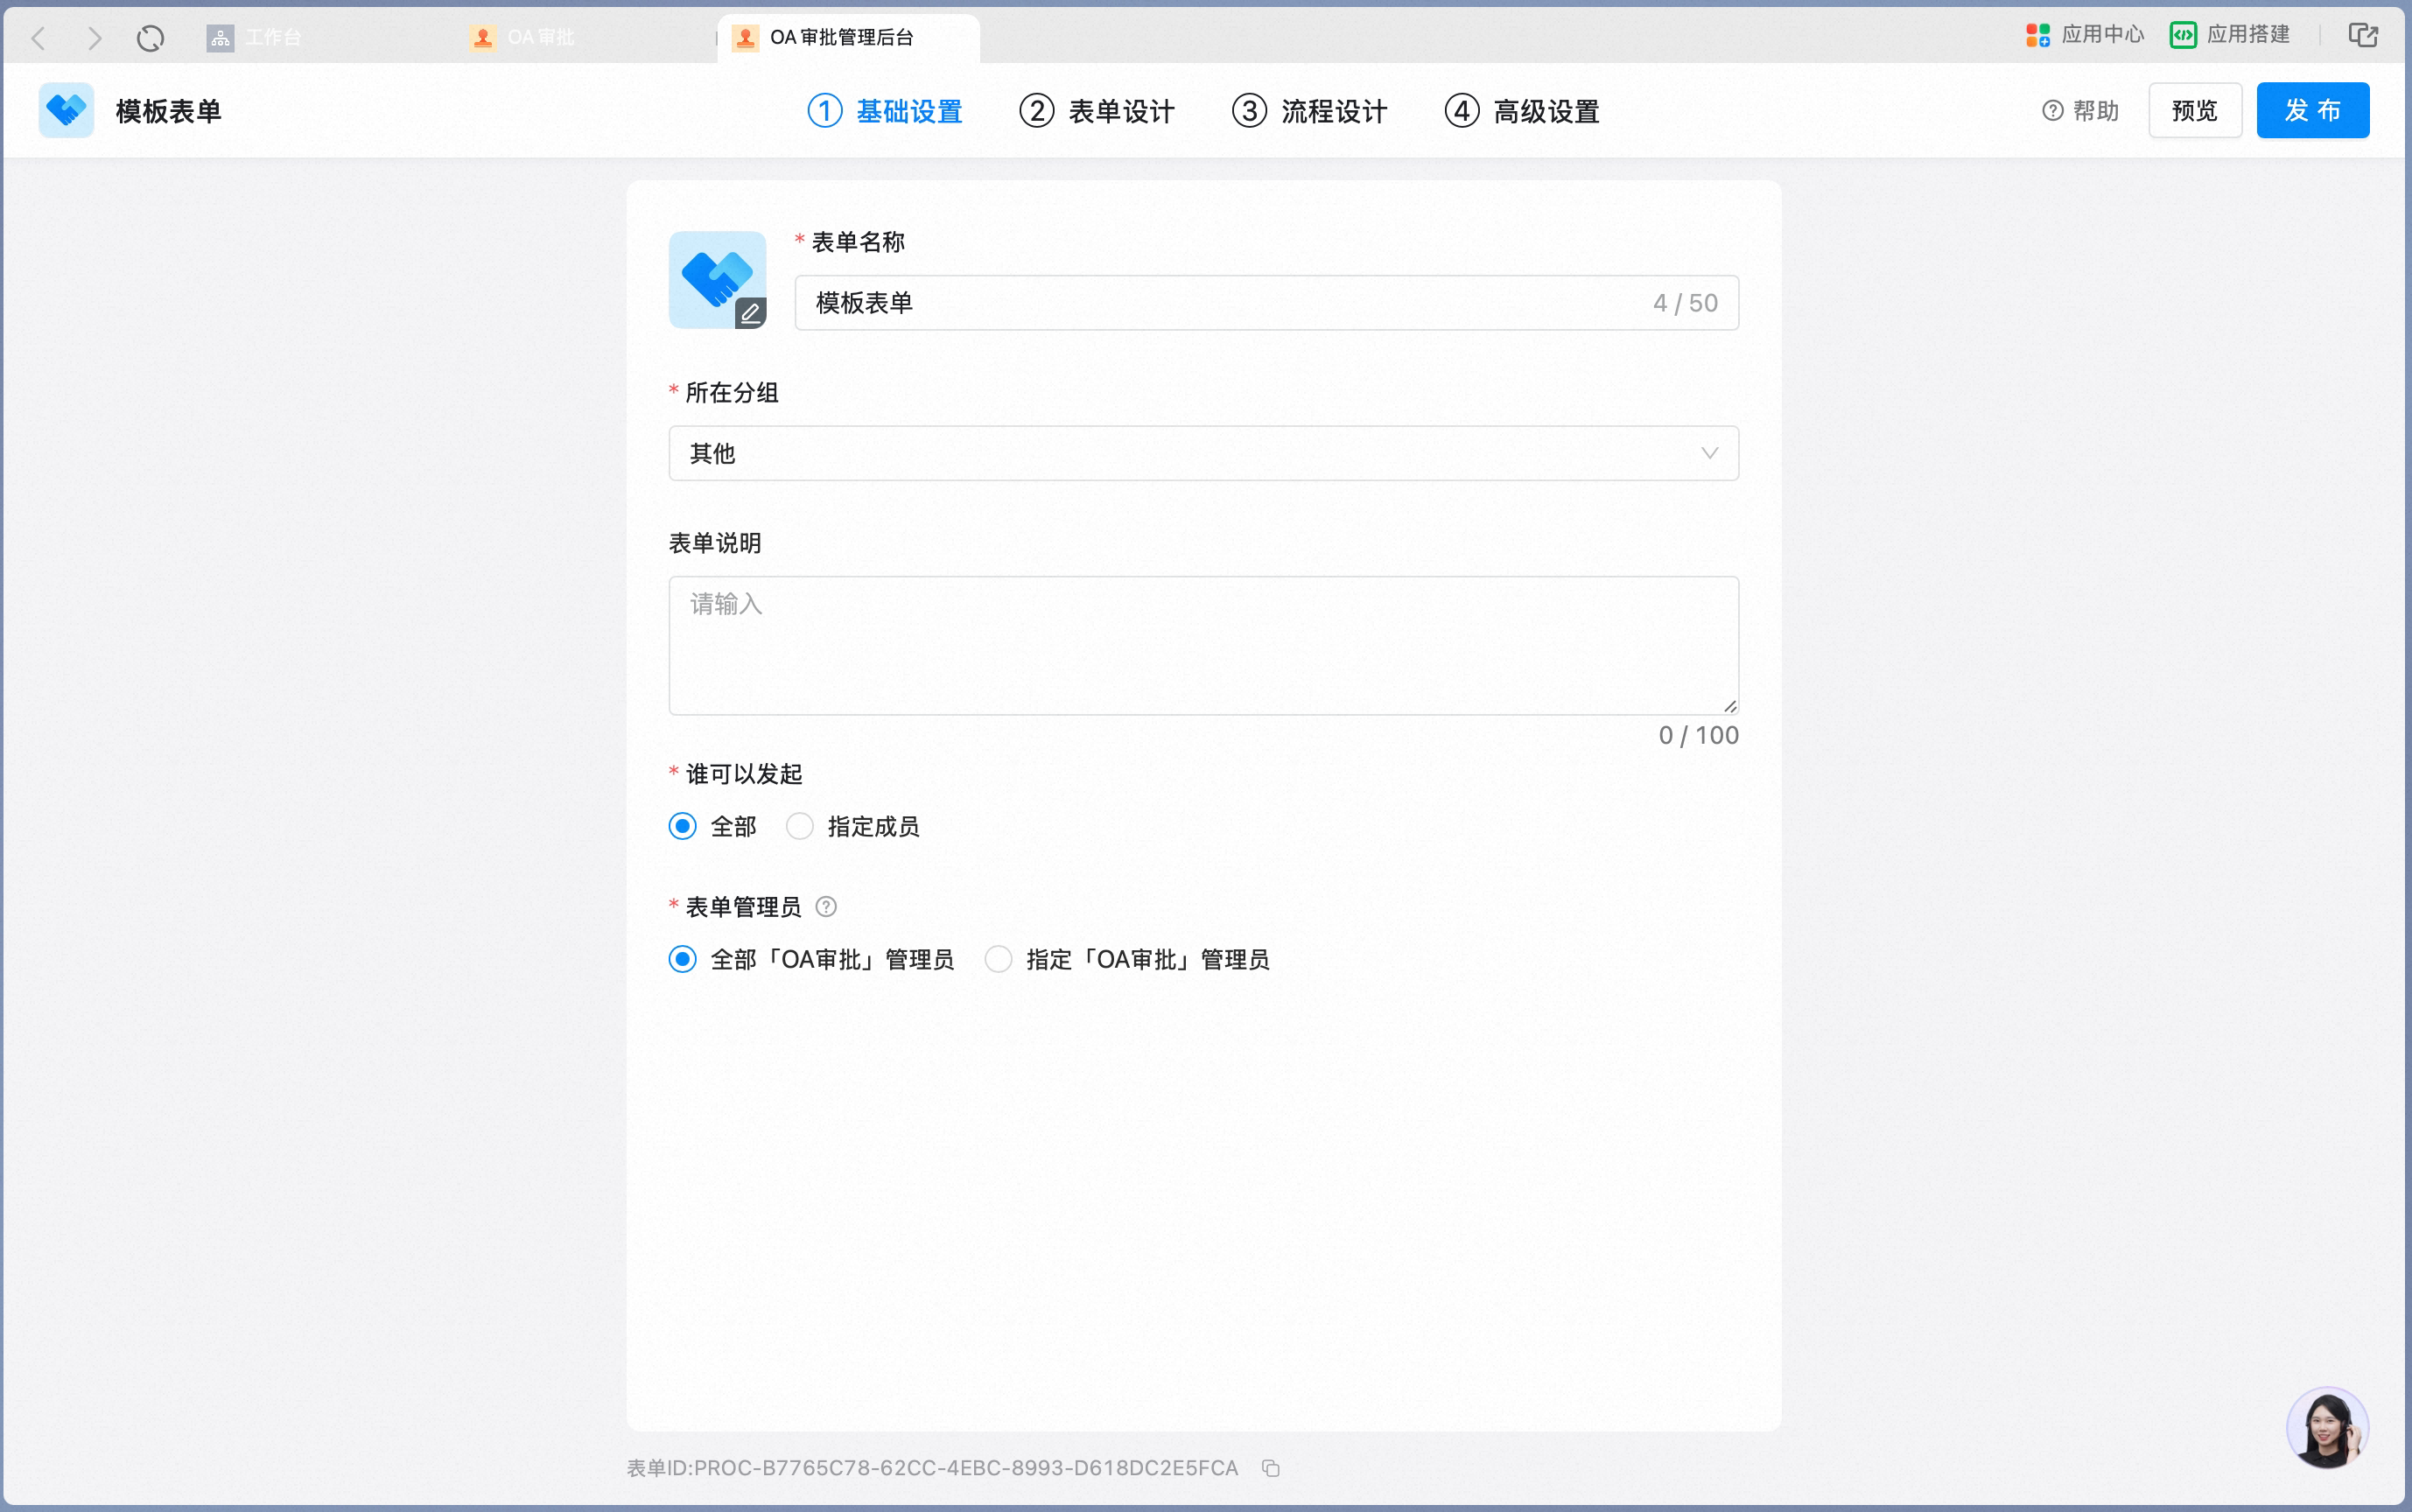
3.1 Basic Settings
Basic Settings cover the icon, form name, who can submit, and other basic information.
Basic Settings for the Approval form
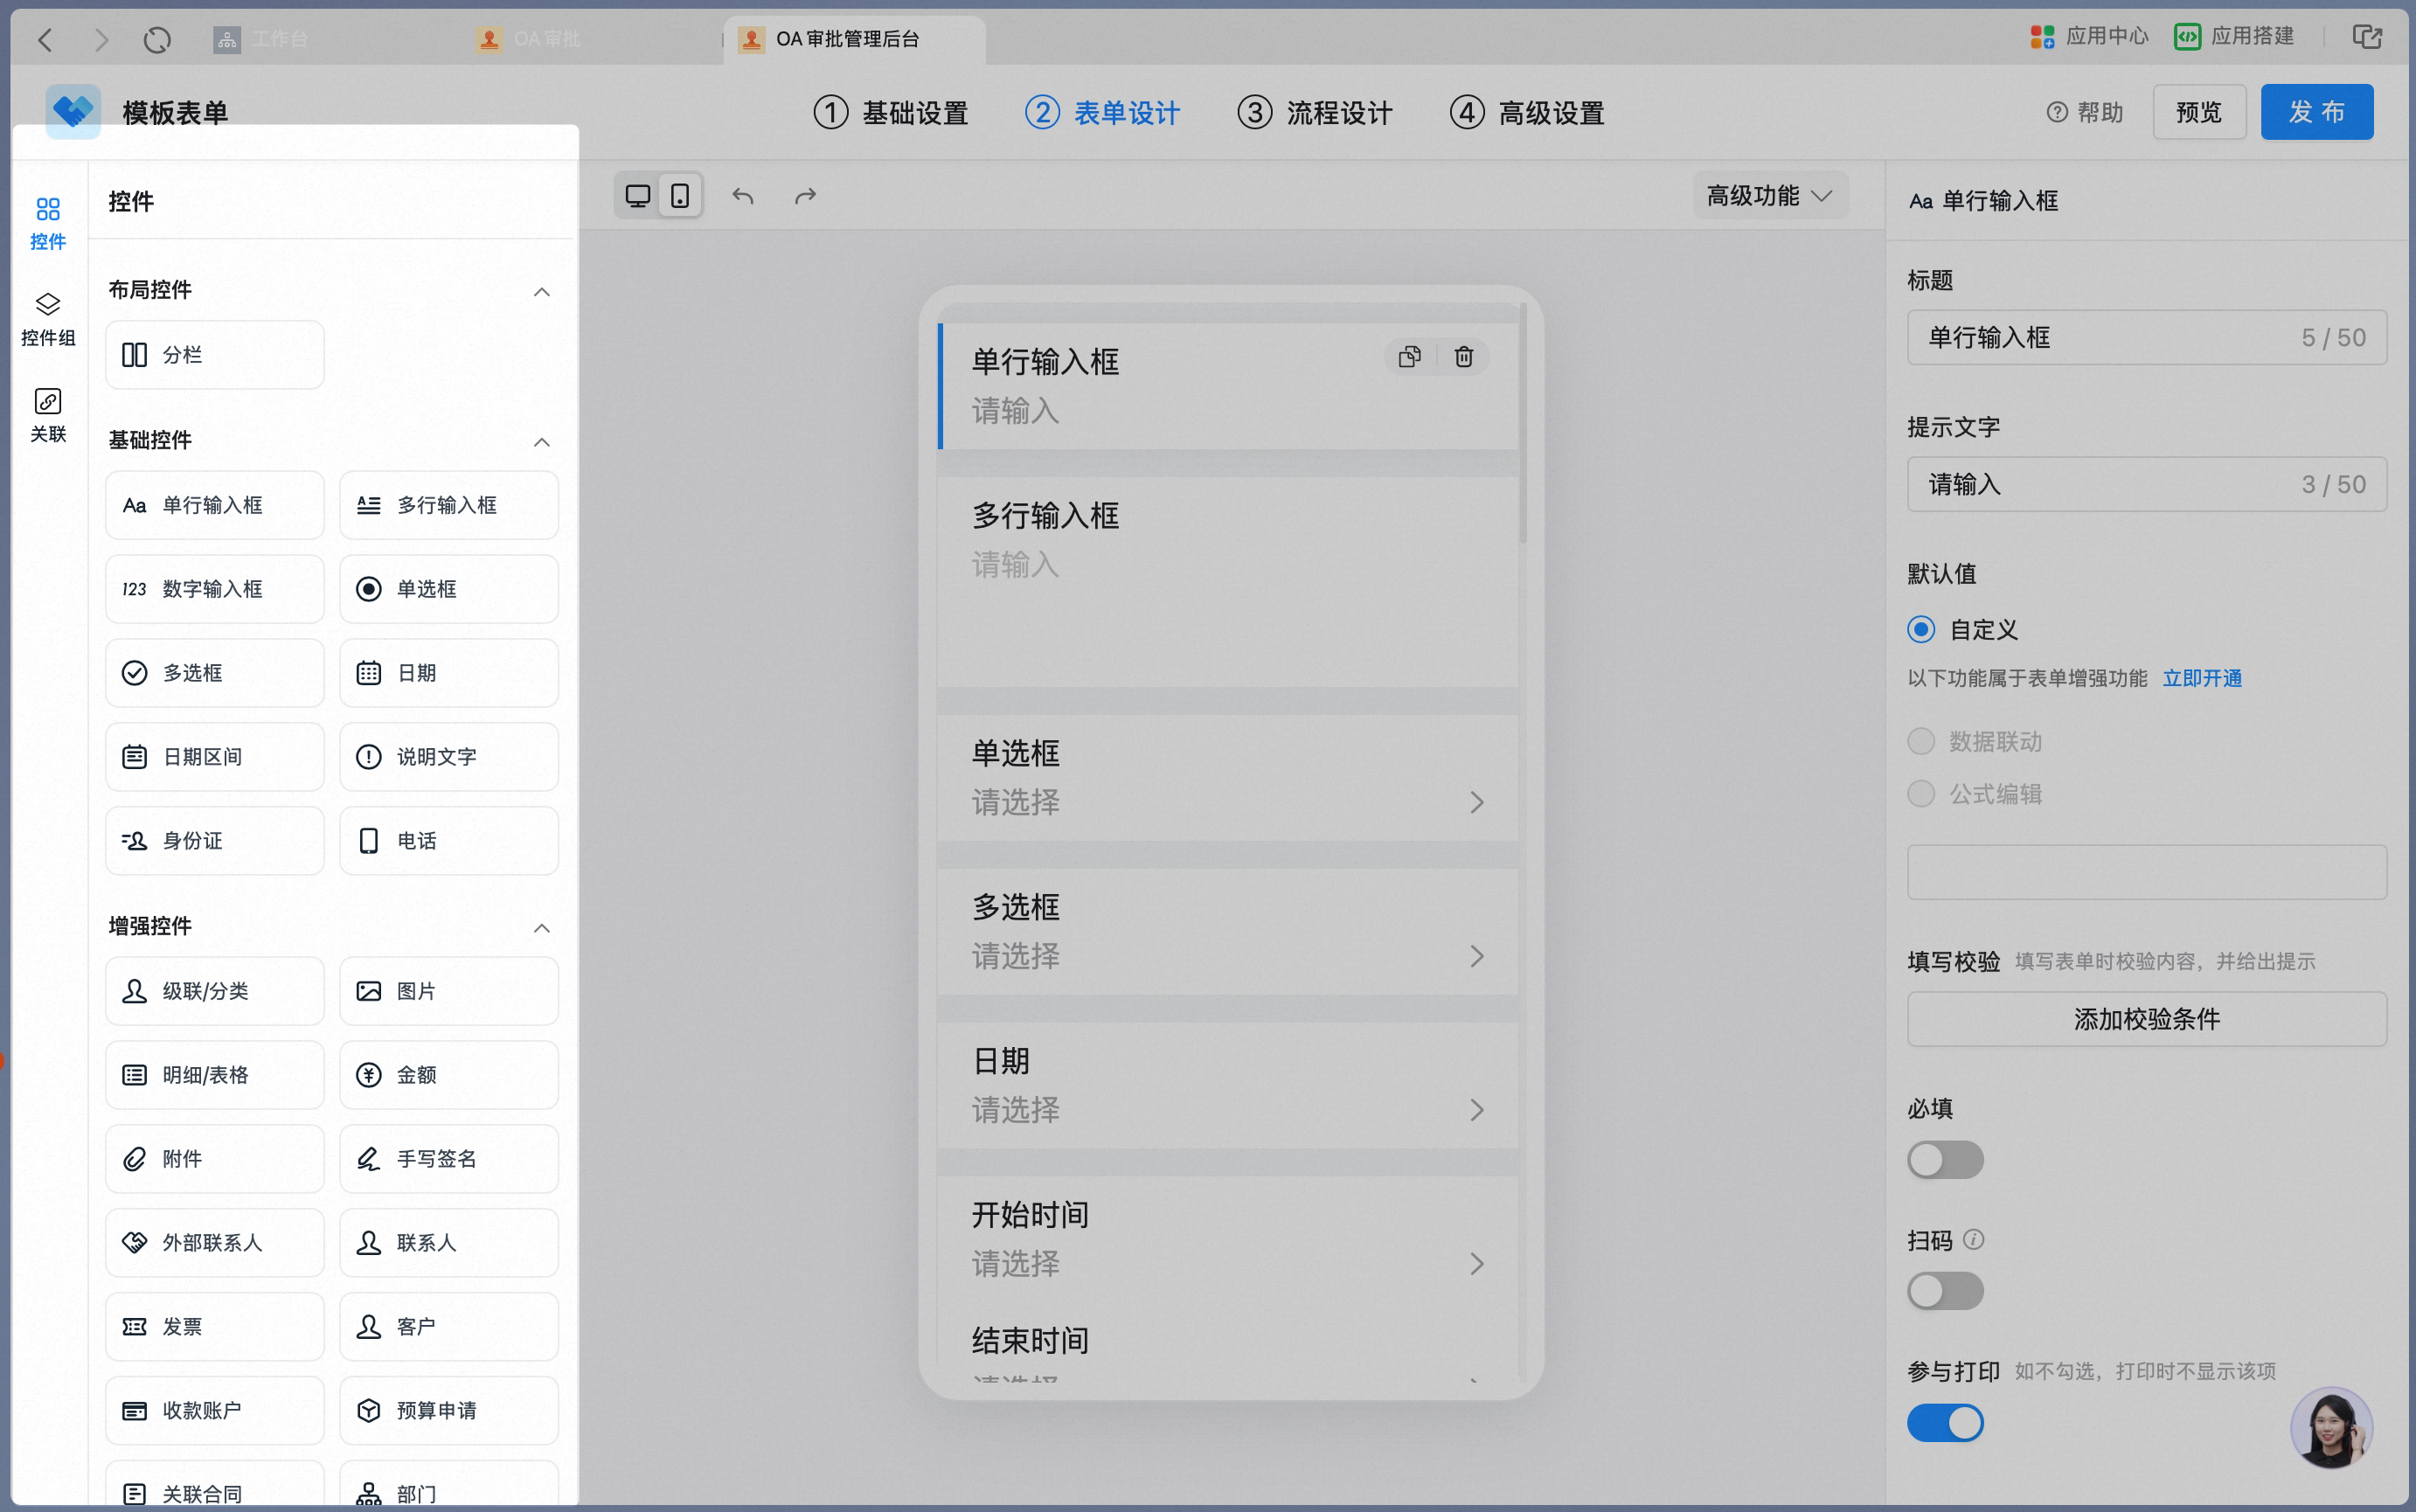
3.2 Form Settings
Configure the Approval form Content — that is, what submitters see and fill out when submitting an Approval.
  1. Available control library
Includes multiple controls such as options, Number, Text, and Date. Click or drag a control from the left panel to add it to the form; long-press and drag a control to reorder it freely.
Available control library panel
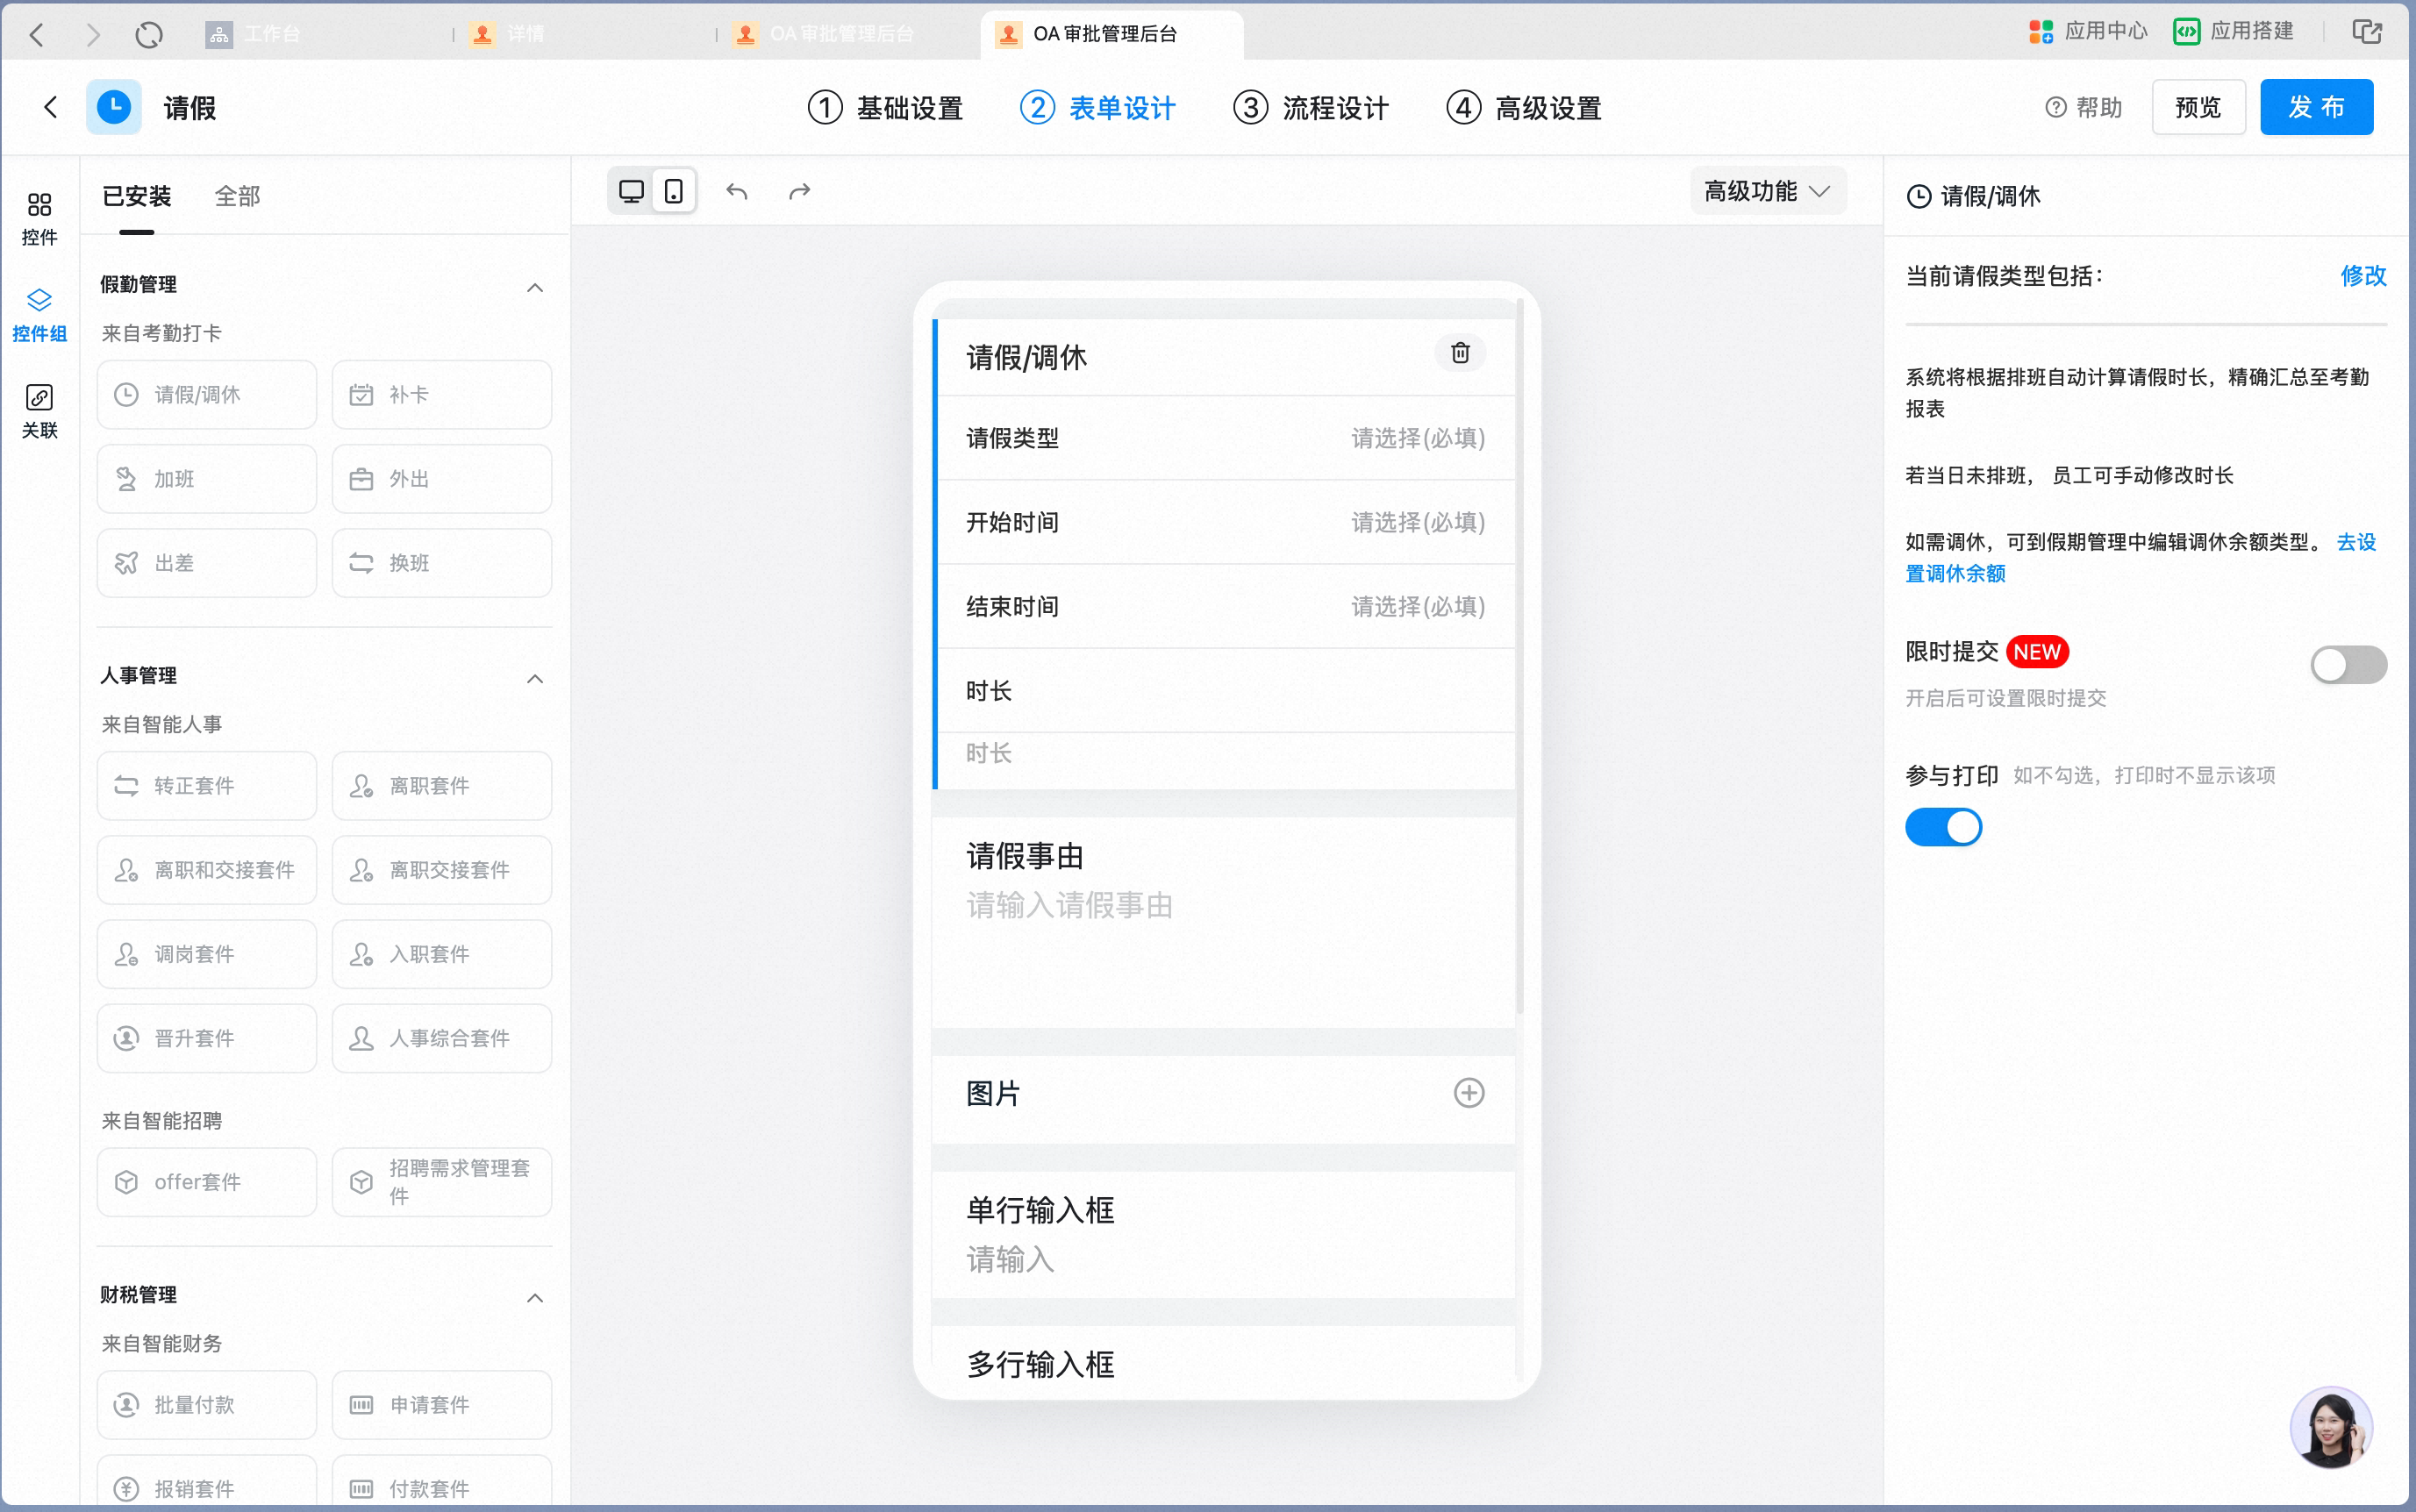
  1. Available control groups
DingTalk Approval also provides attendance/HR control groups such as leave request, overtime, hiring, and offboarding; finance control groups such as reimbursement and payment; and legal control groups such as contract and seal use. These control groups are linked with Attendance clock-in / Smart HR / Smart Finance / Smart Contract, so when an Approval containing a control group is used, the employee’s attendance, on/offboarding, reimbursement/payment, and contract/seal-use data are synchronized automatically to the Attendance clock-in / Smart HR / Smart Finance / Smart Contract systems. You can click or drag the desired control group to add it, then configure it on the right. Each form can contain at most one control group.
Available control groups panel
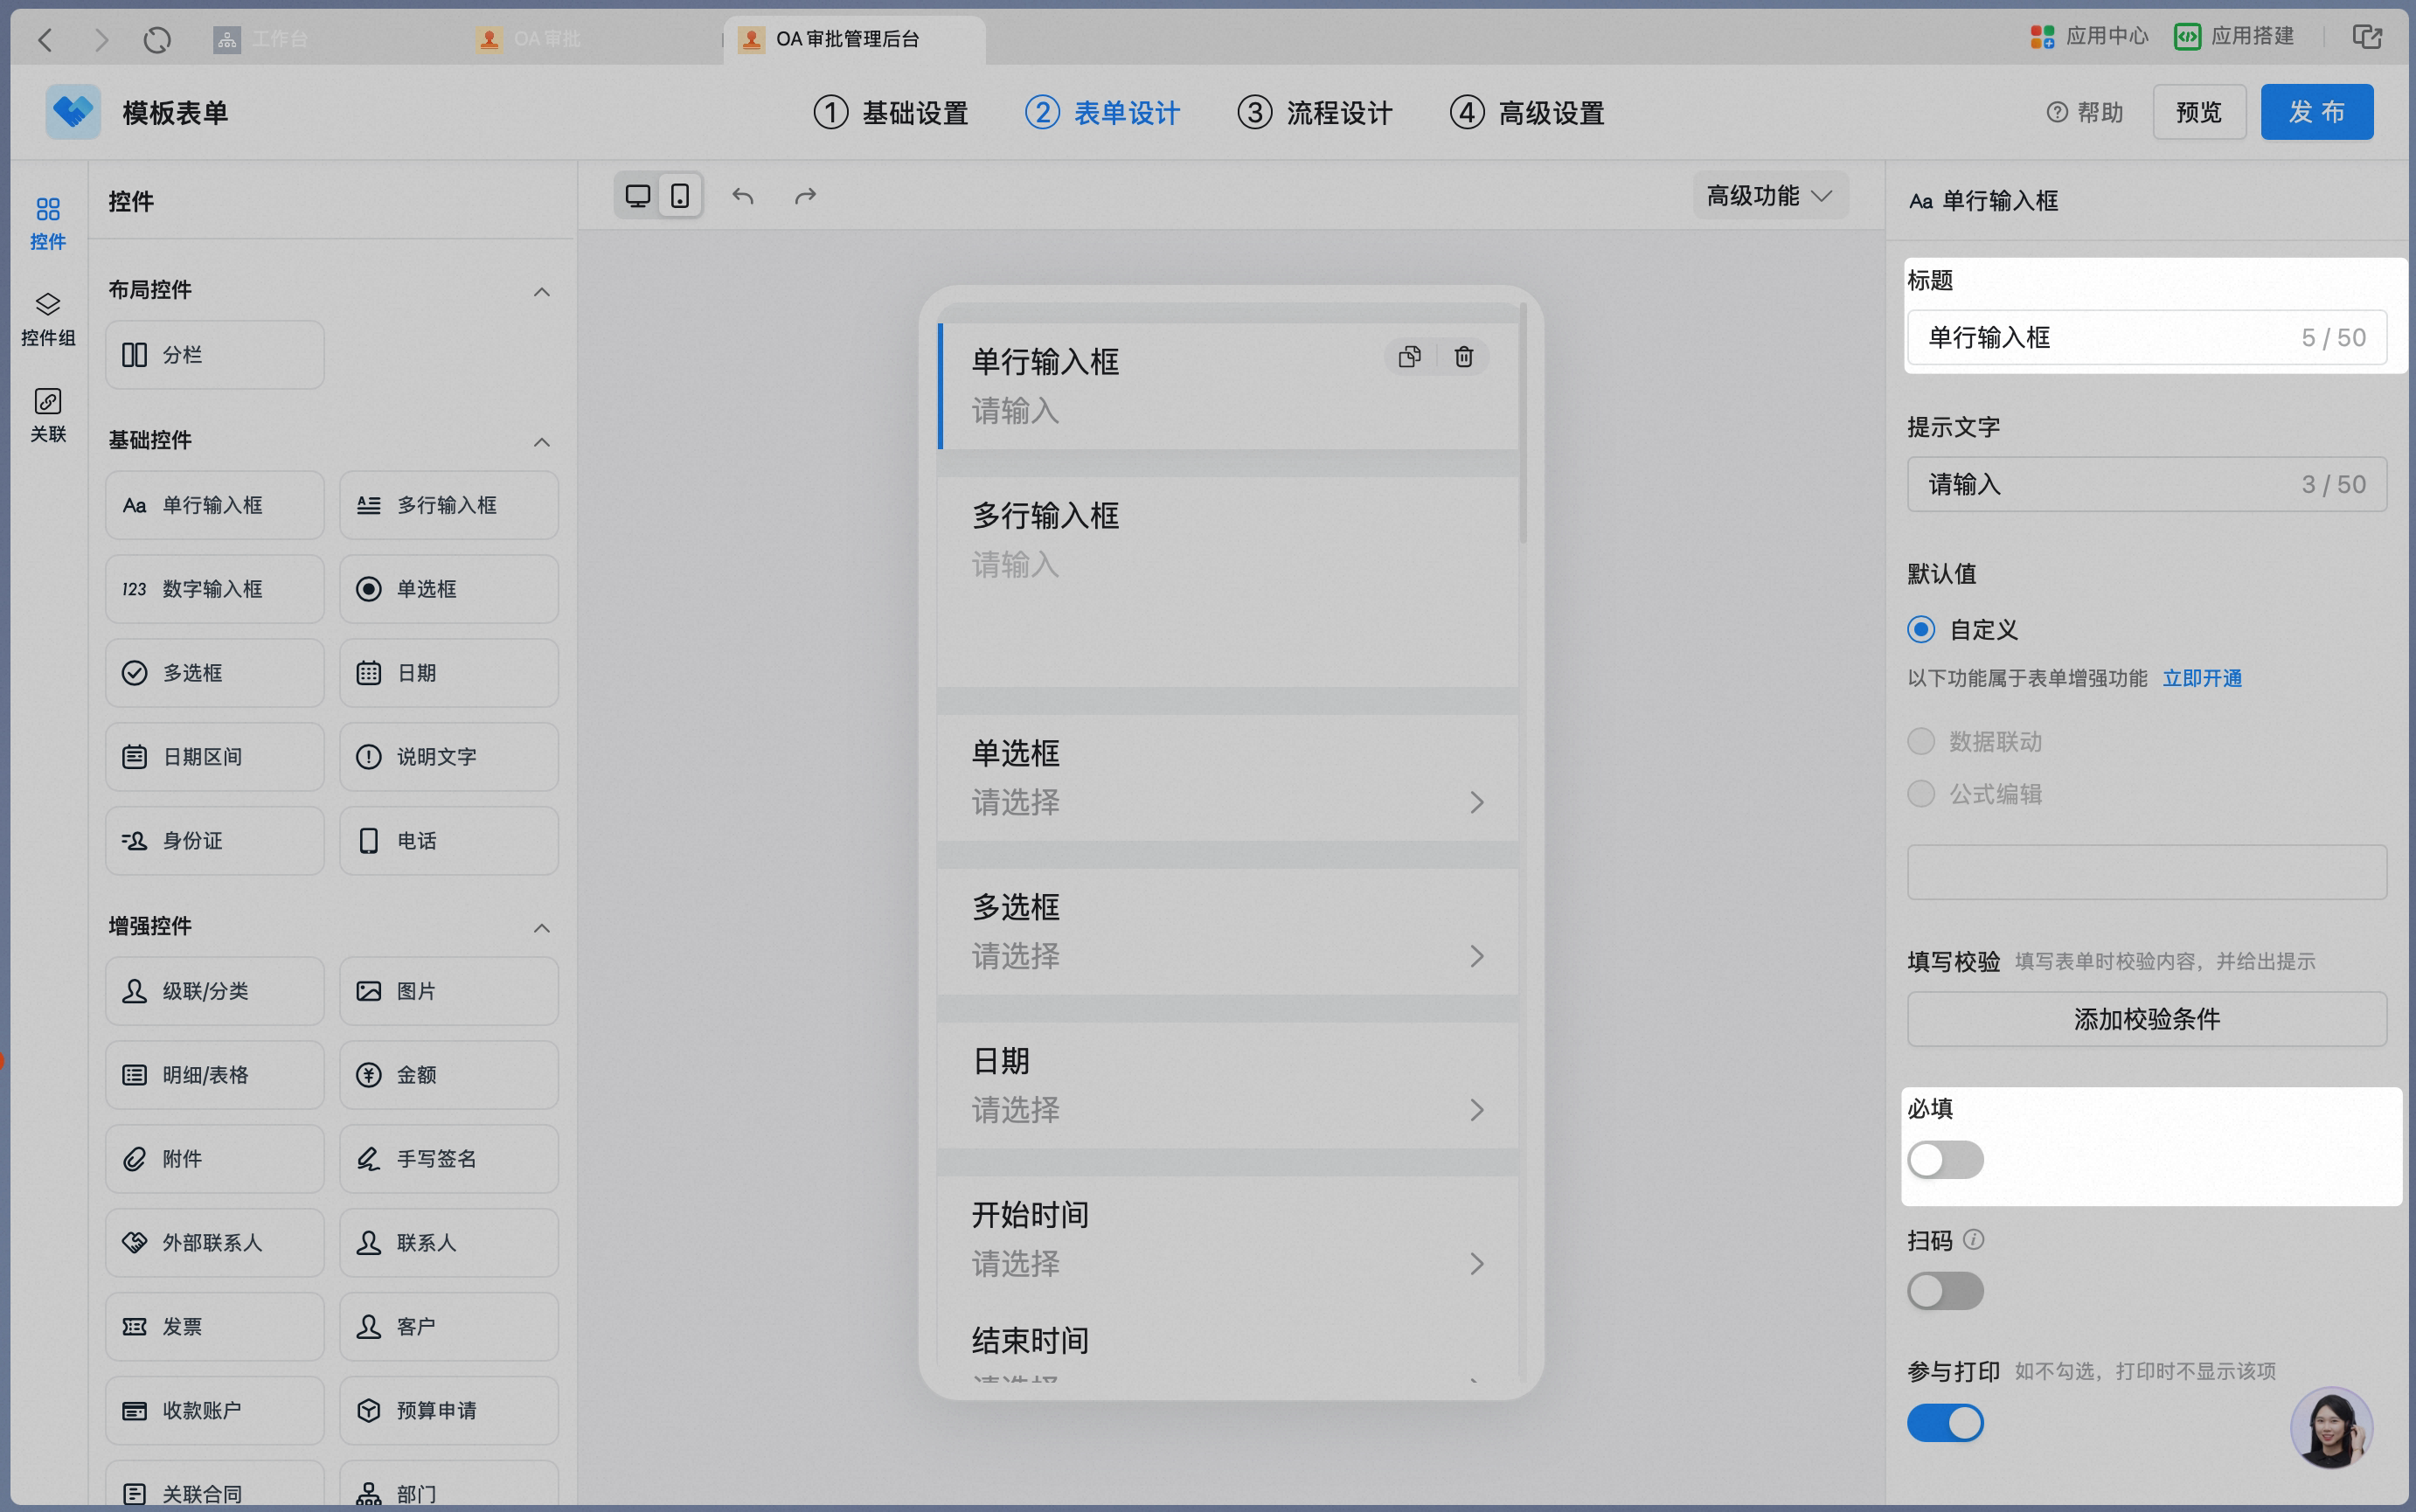
  1. Basic Settings
Basic Settings typically include: control title, hint text, control rules (such as option settings for a Select control or Type settings for a Date control), and whether the control is printable and Required. Basic Settings panel for a control
3.3 Process Settings
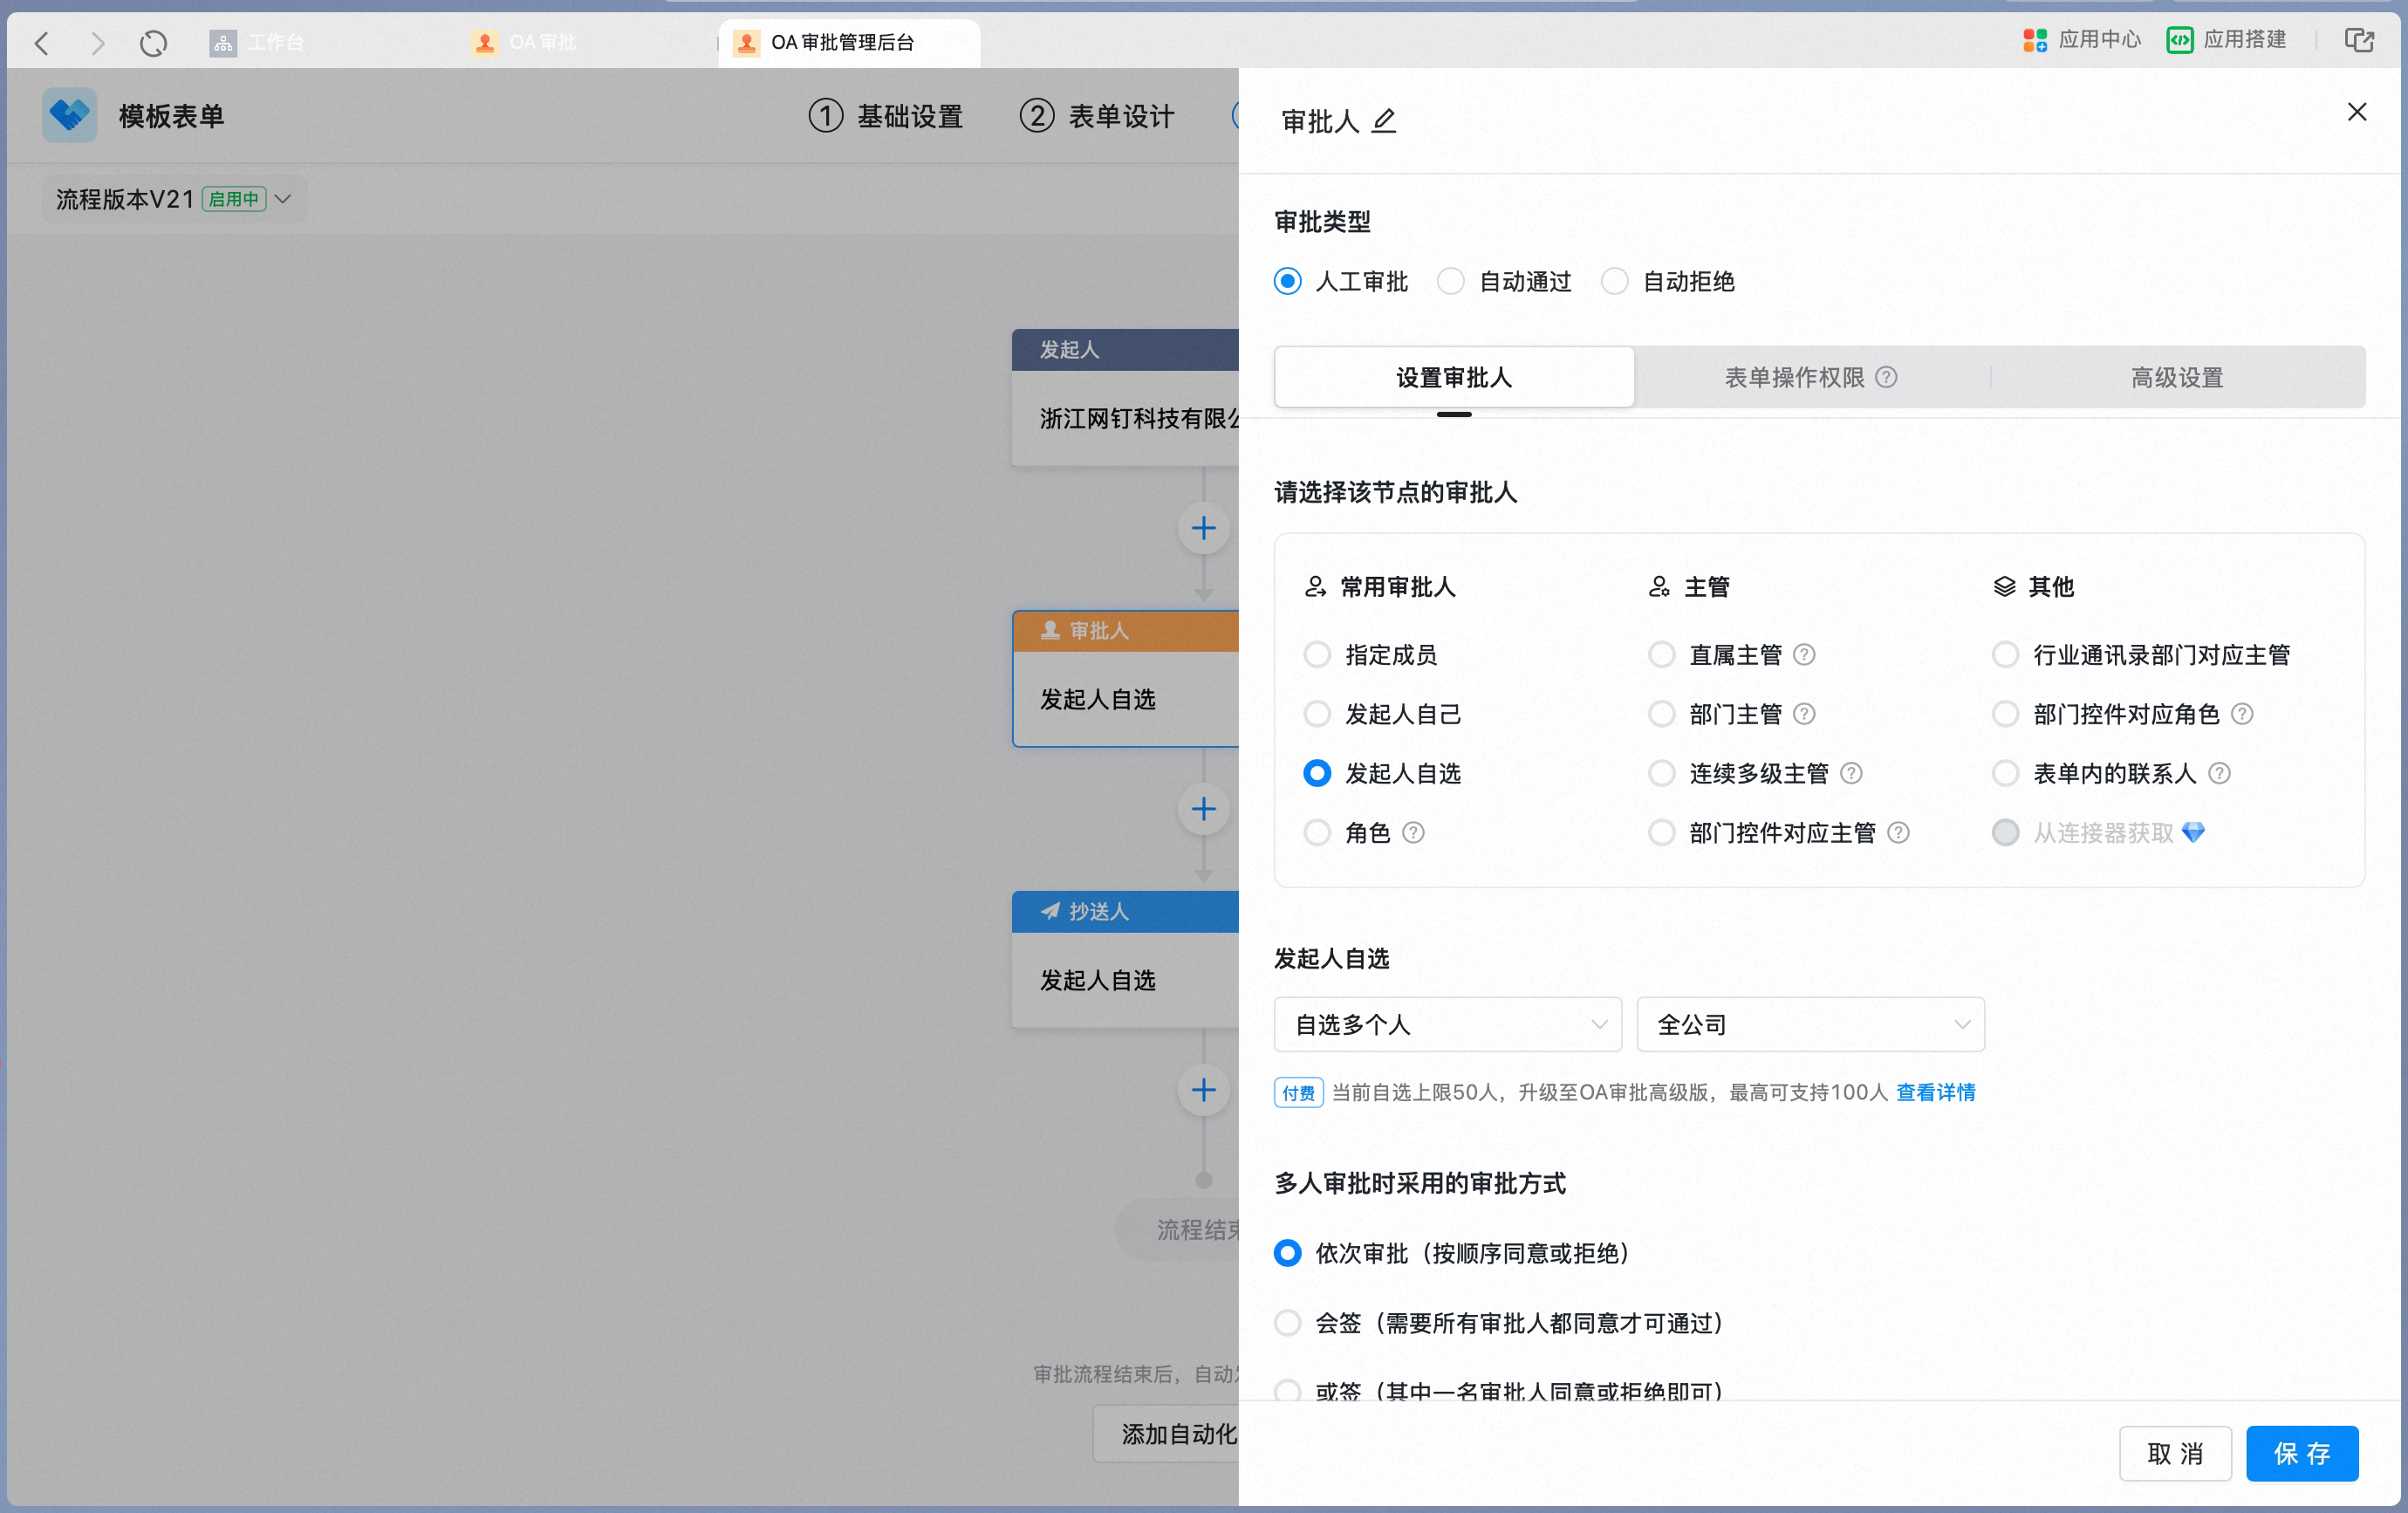
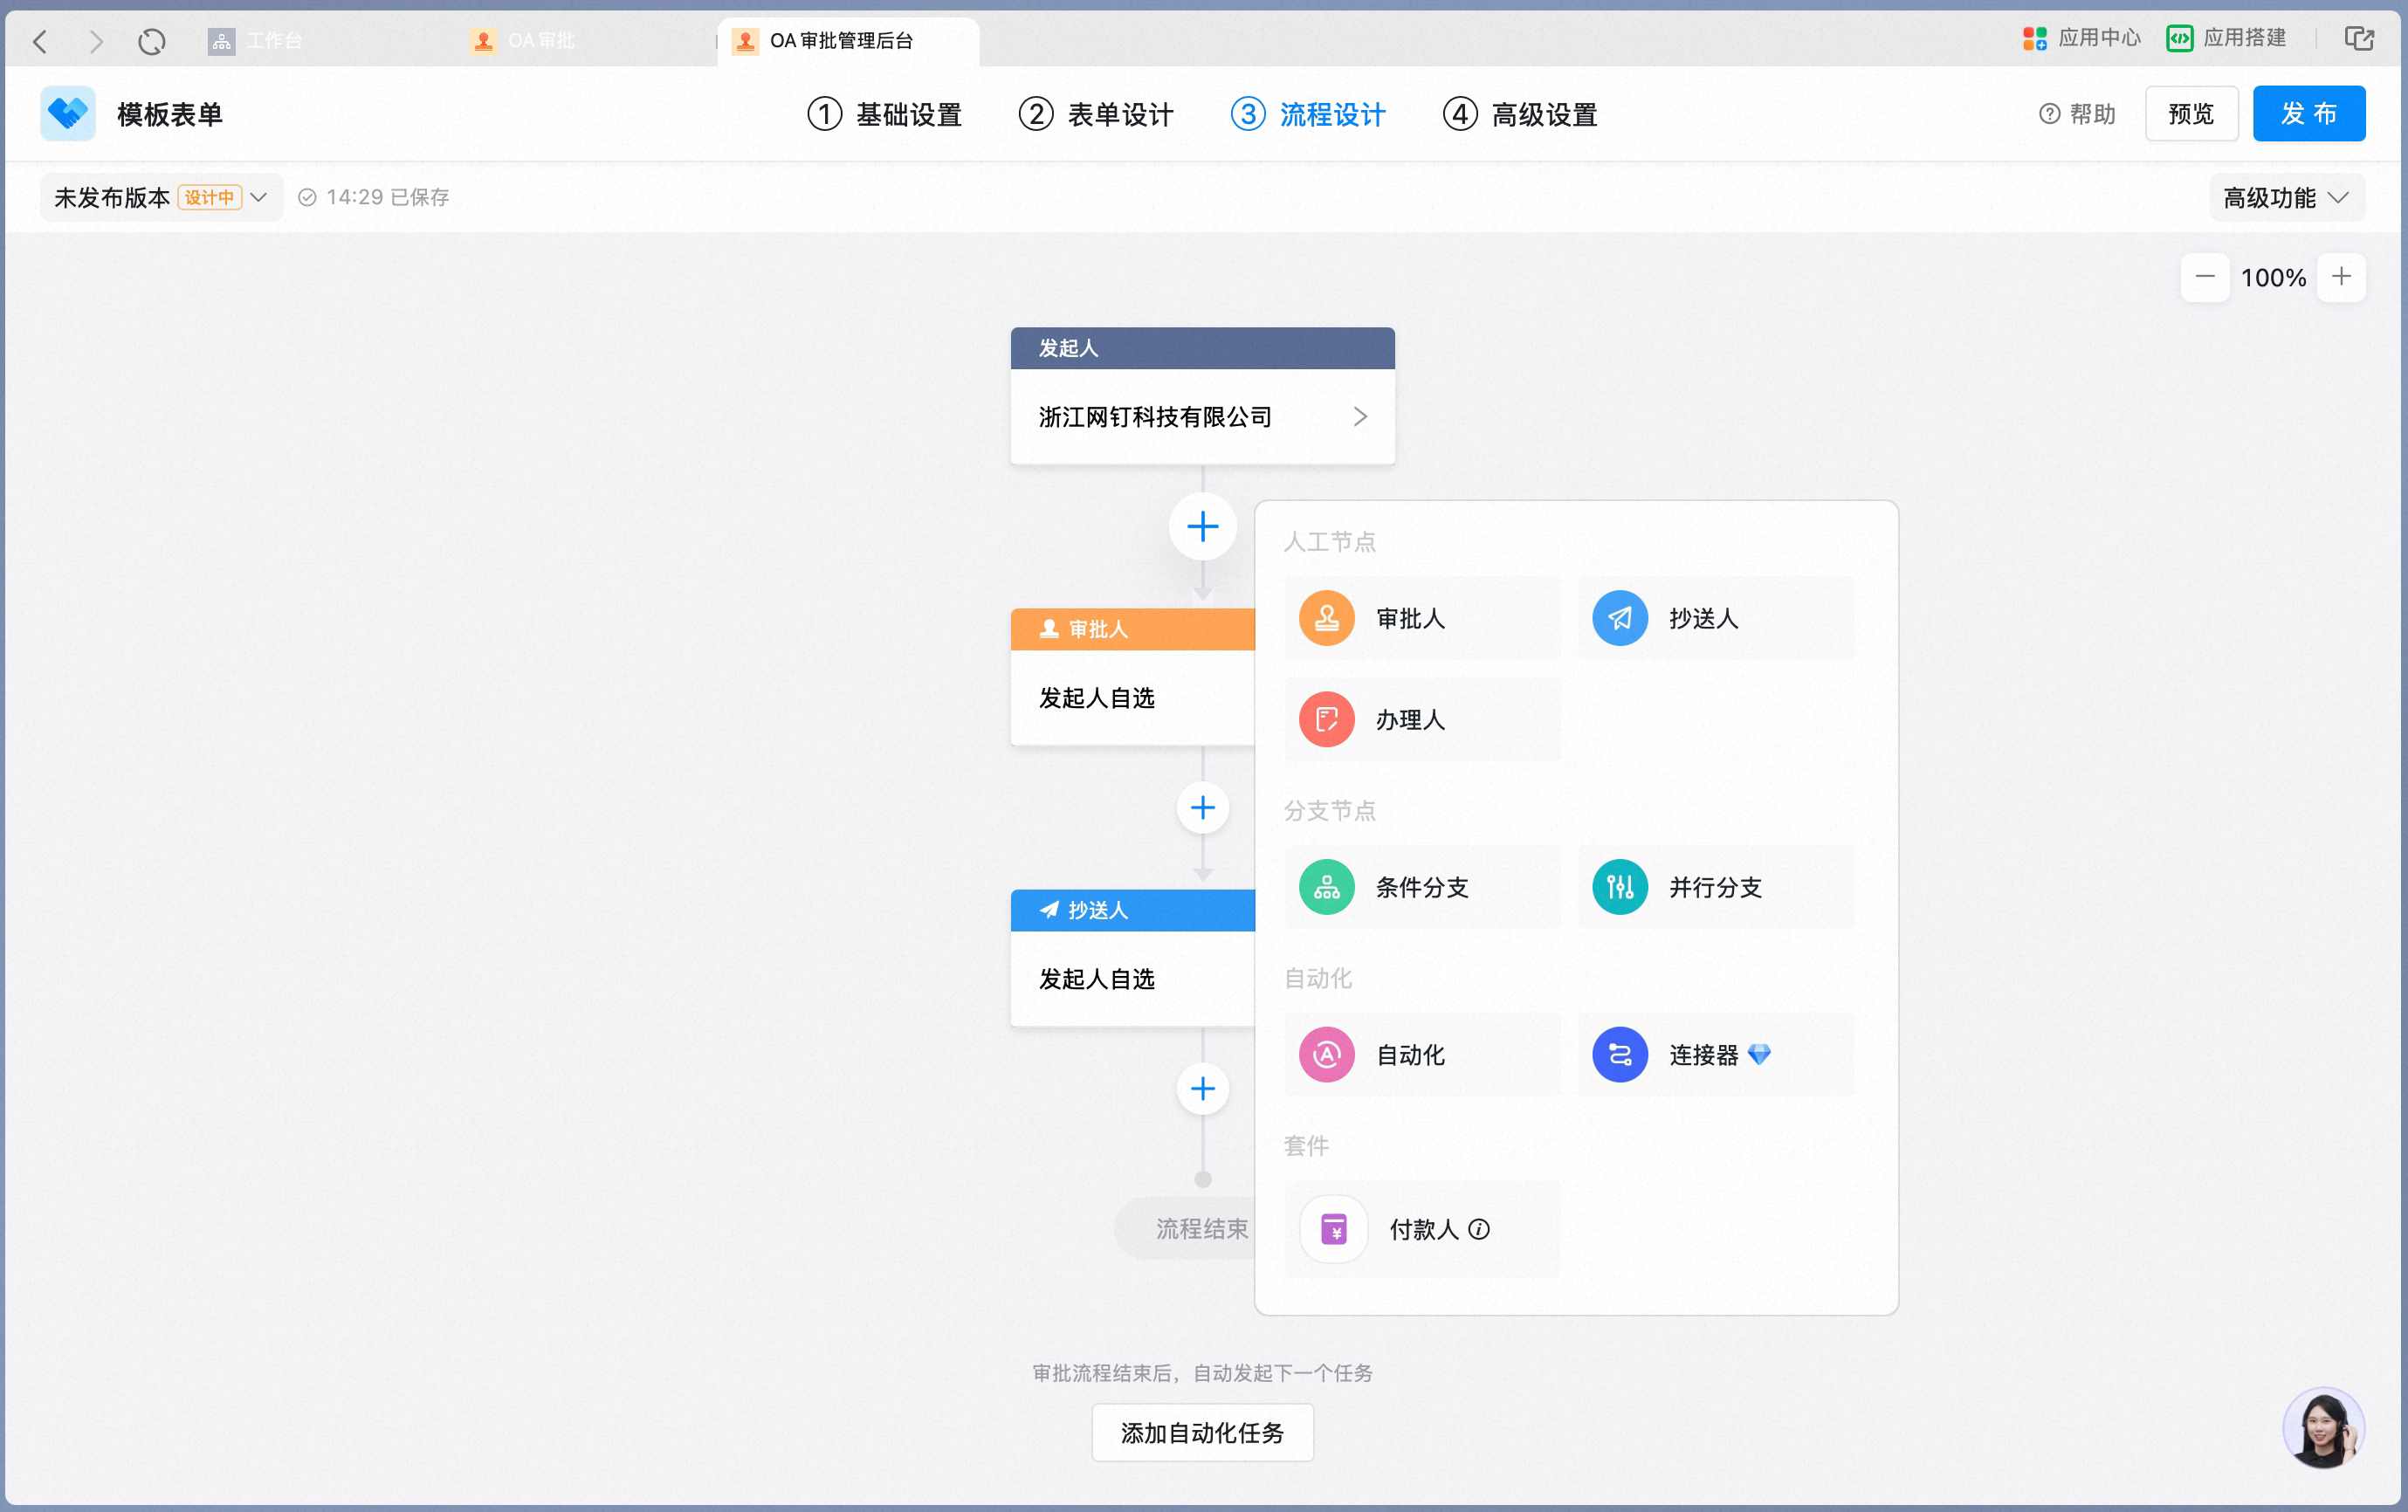
  1. The middle area is the process design canvas, which shows the Steps of the process visually. Click + to add an approver, CC recipient, handler, conditional branch, and so on. Click a Step to configure it on the right. Configuring an approver means specifying who approves at that Step, along with the routing rules for situations such as multiple approvers or an empty approver.
Add a Step in the process design canvas
Click a Step to configure the approver on the right
  1. Approval Step types
  1. The approver, CC recipient, and handler can each be one of several types, flexibly meeting different Approval routing needs.
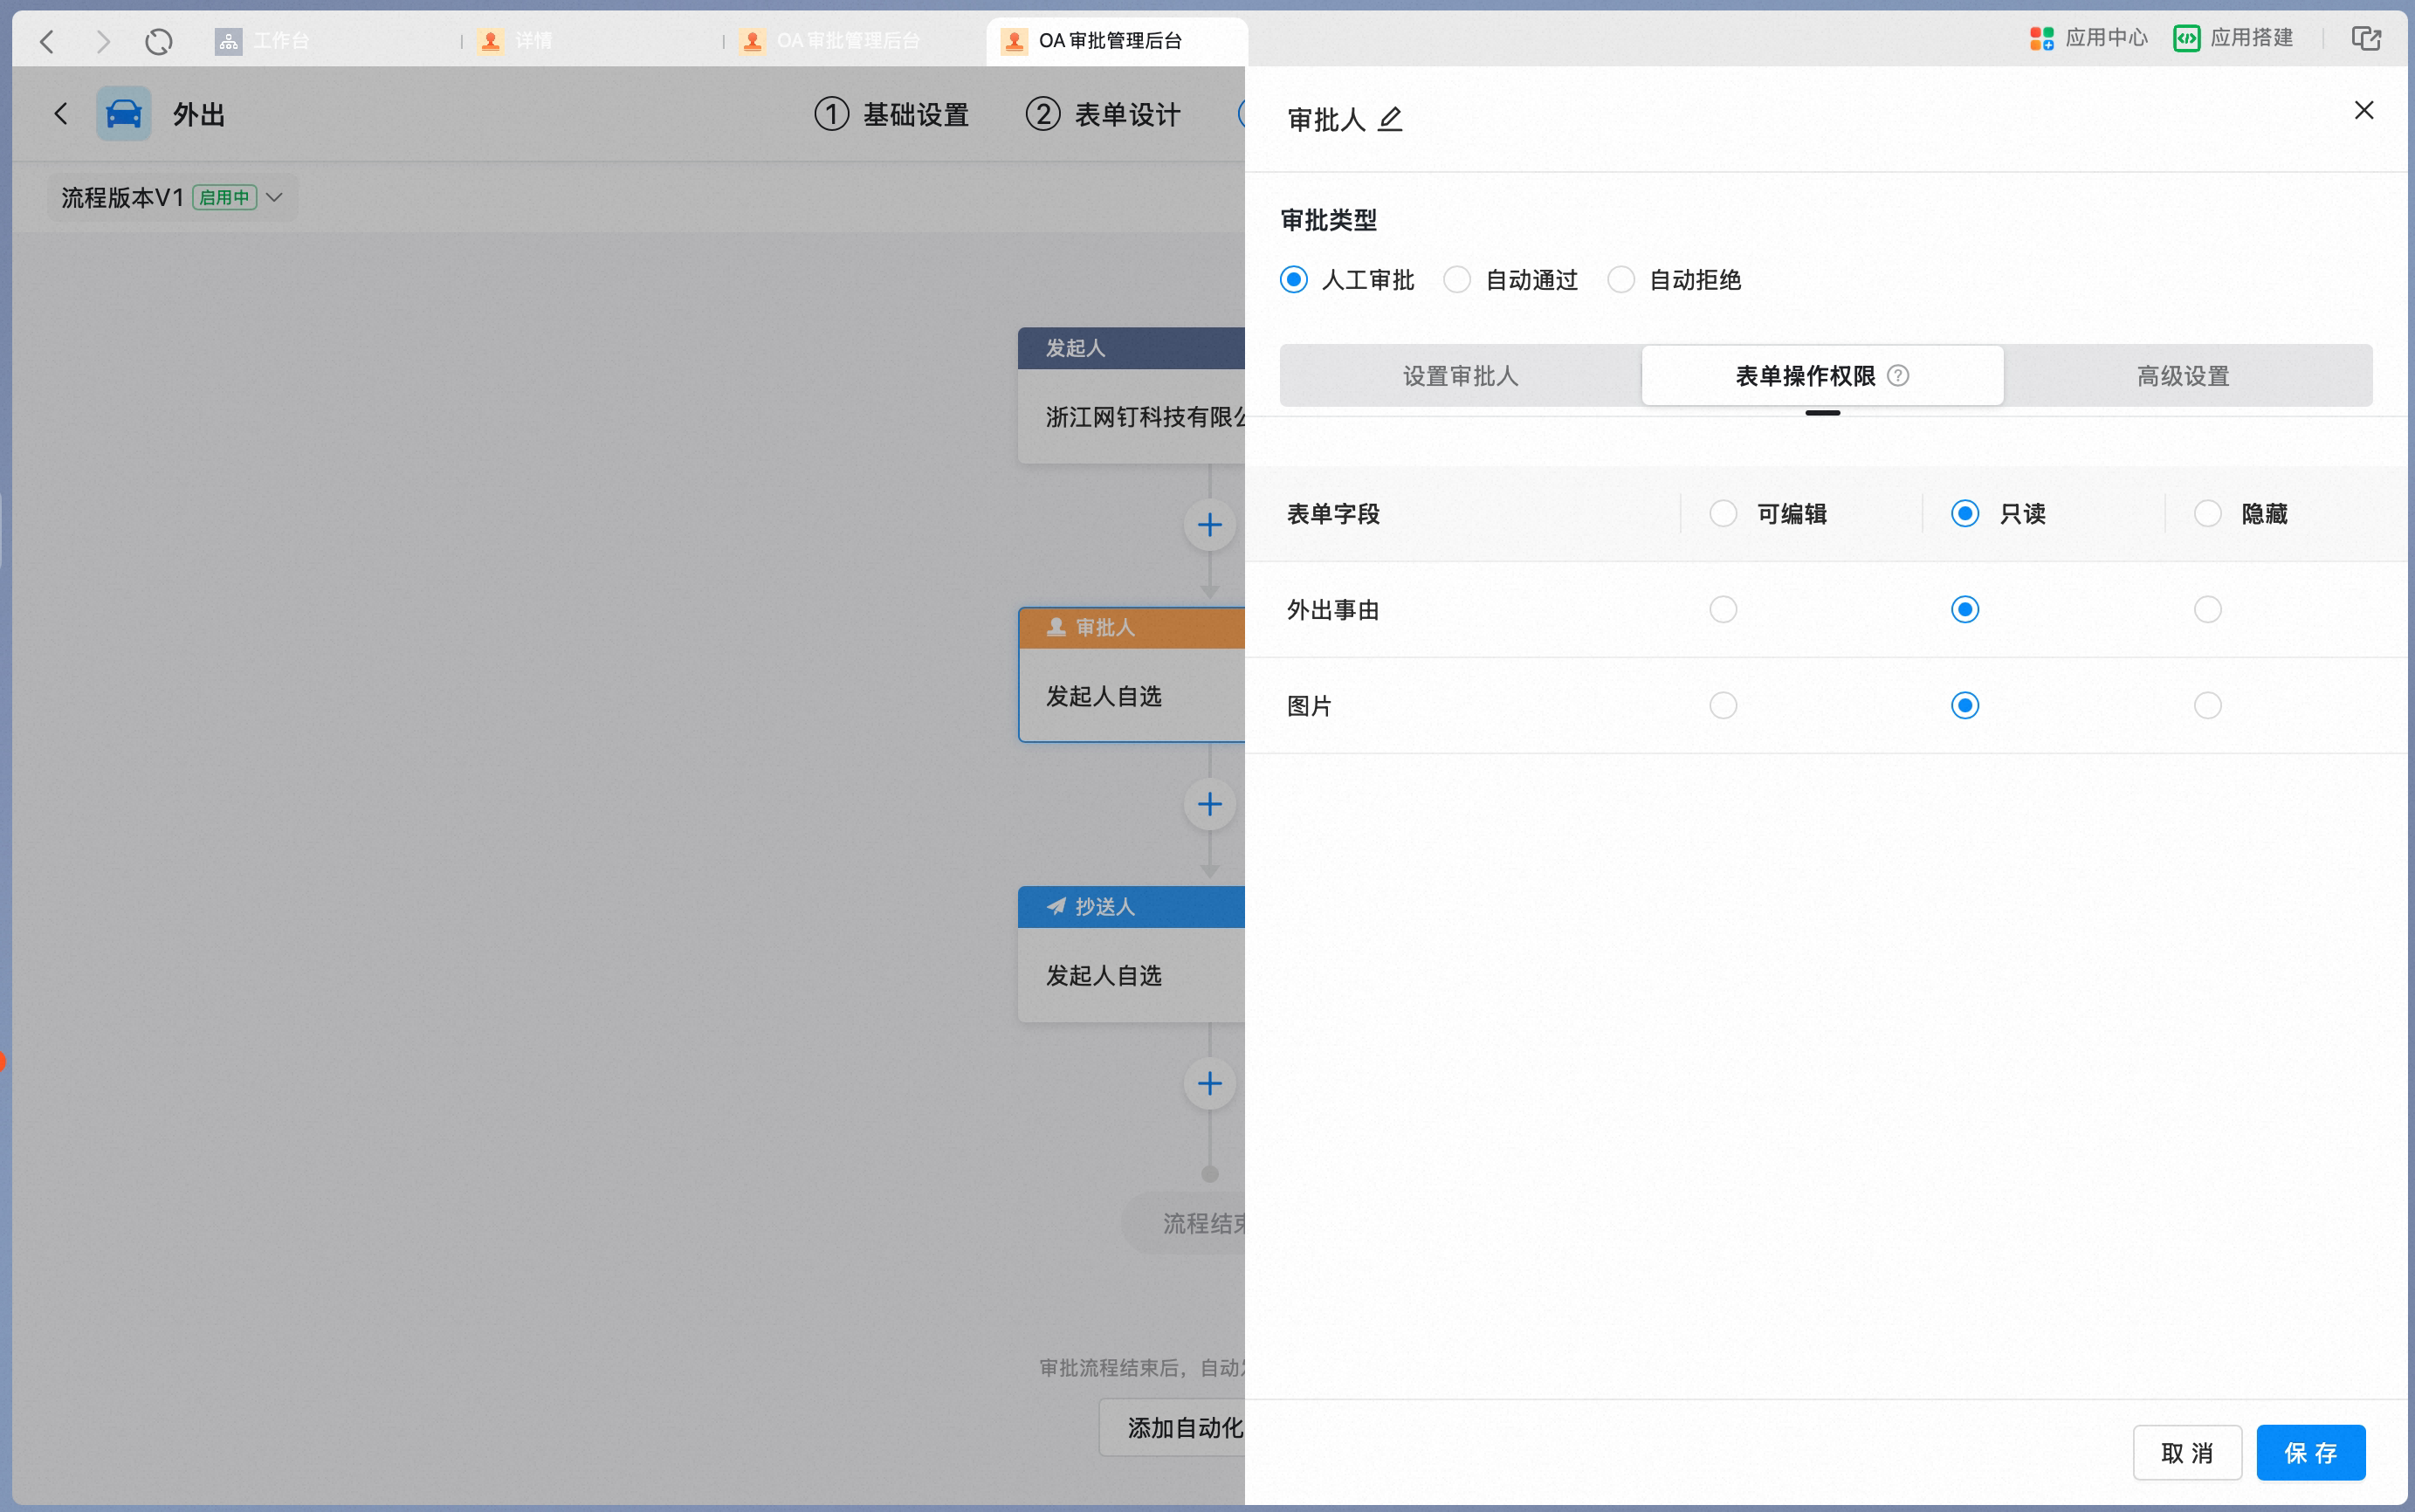
  1. The initiator, approver, CC recipient, and handler can each be assigned form action permissions.
Configure form action permissions for each Step
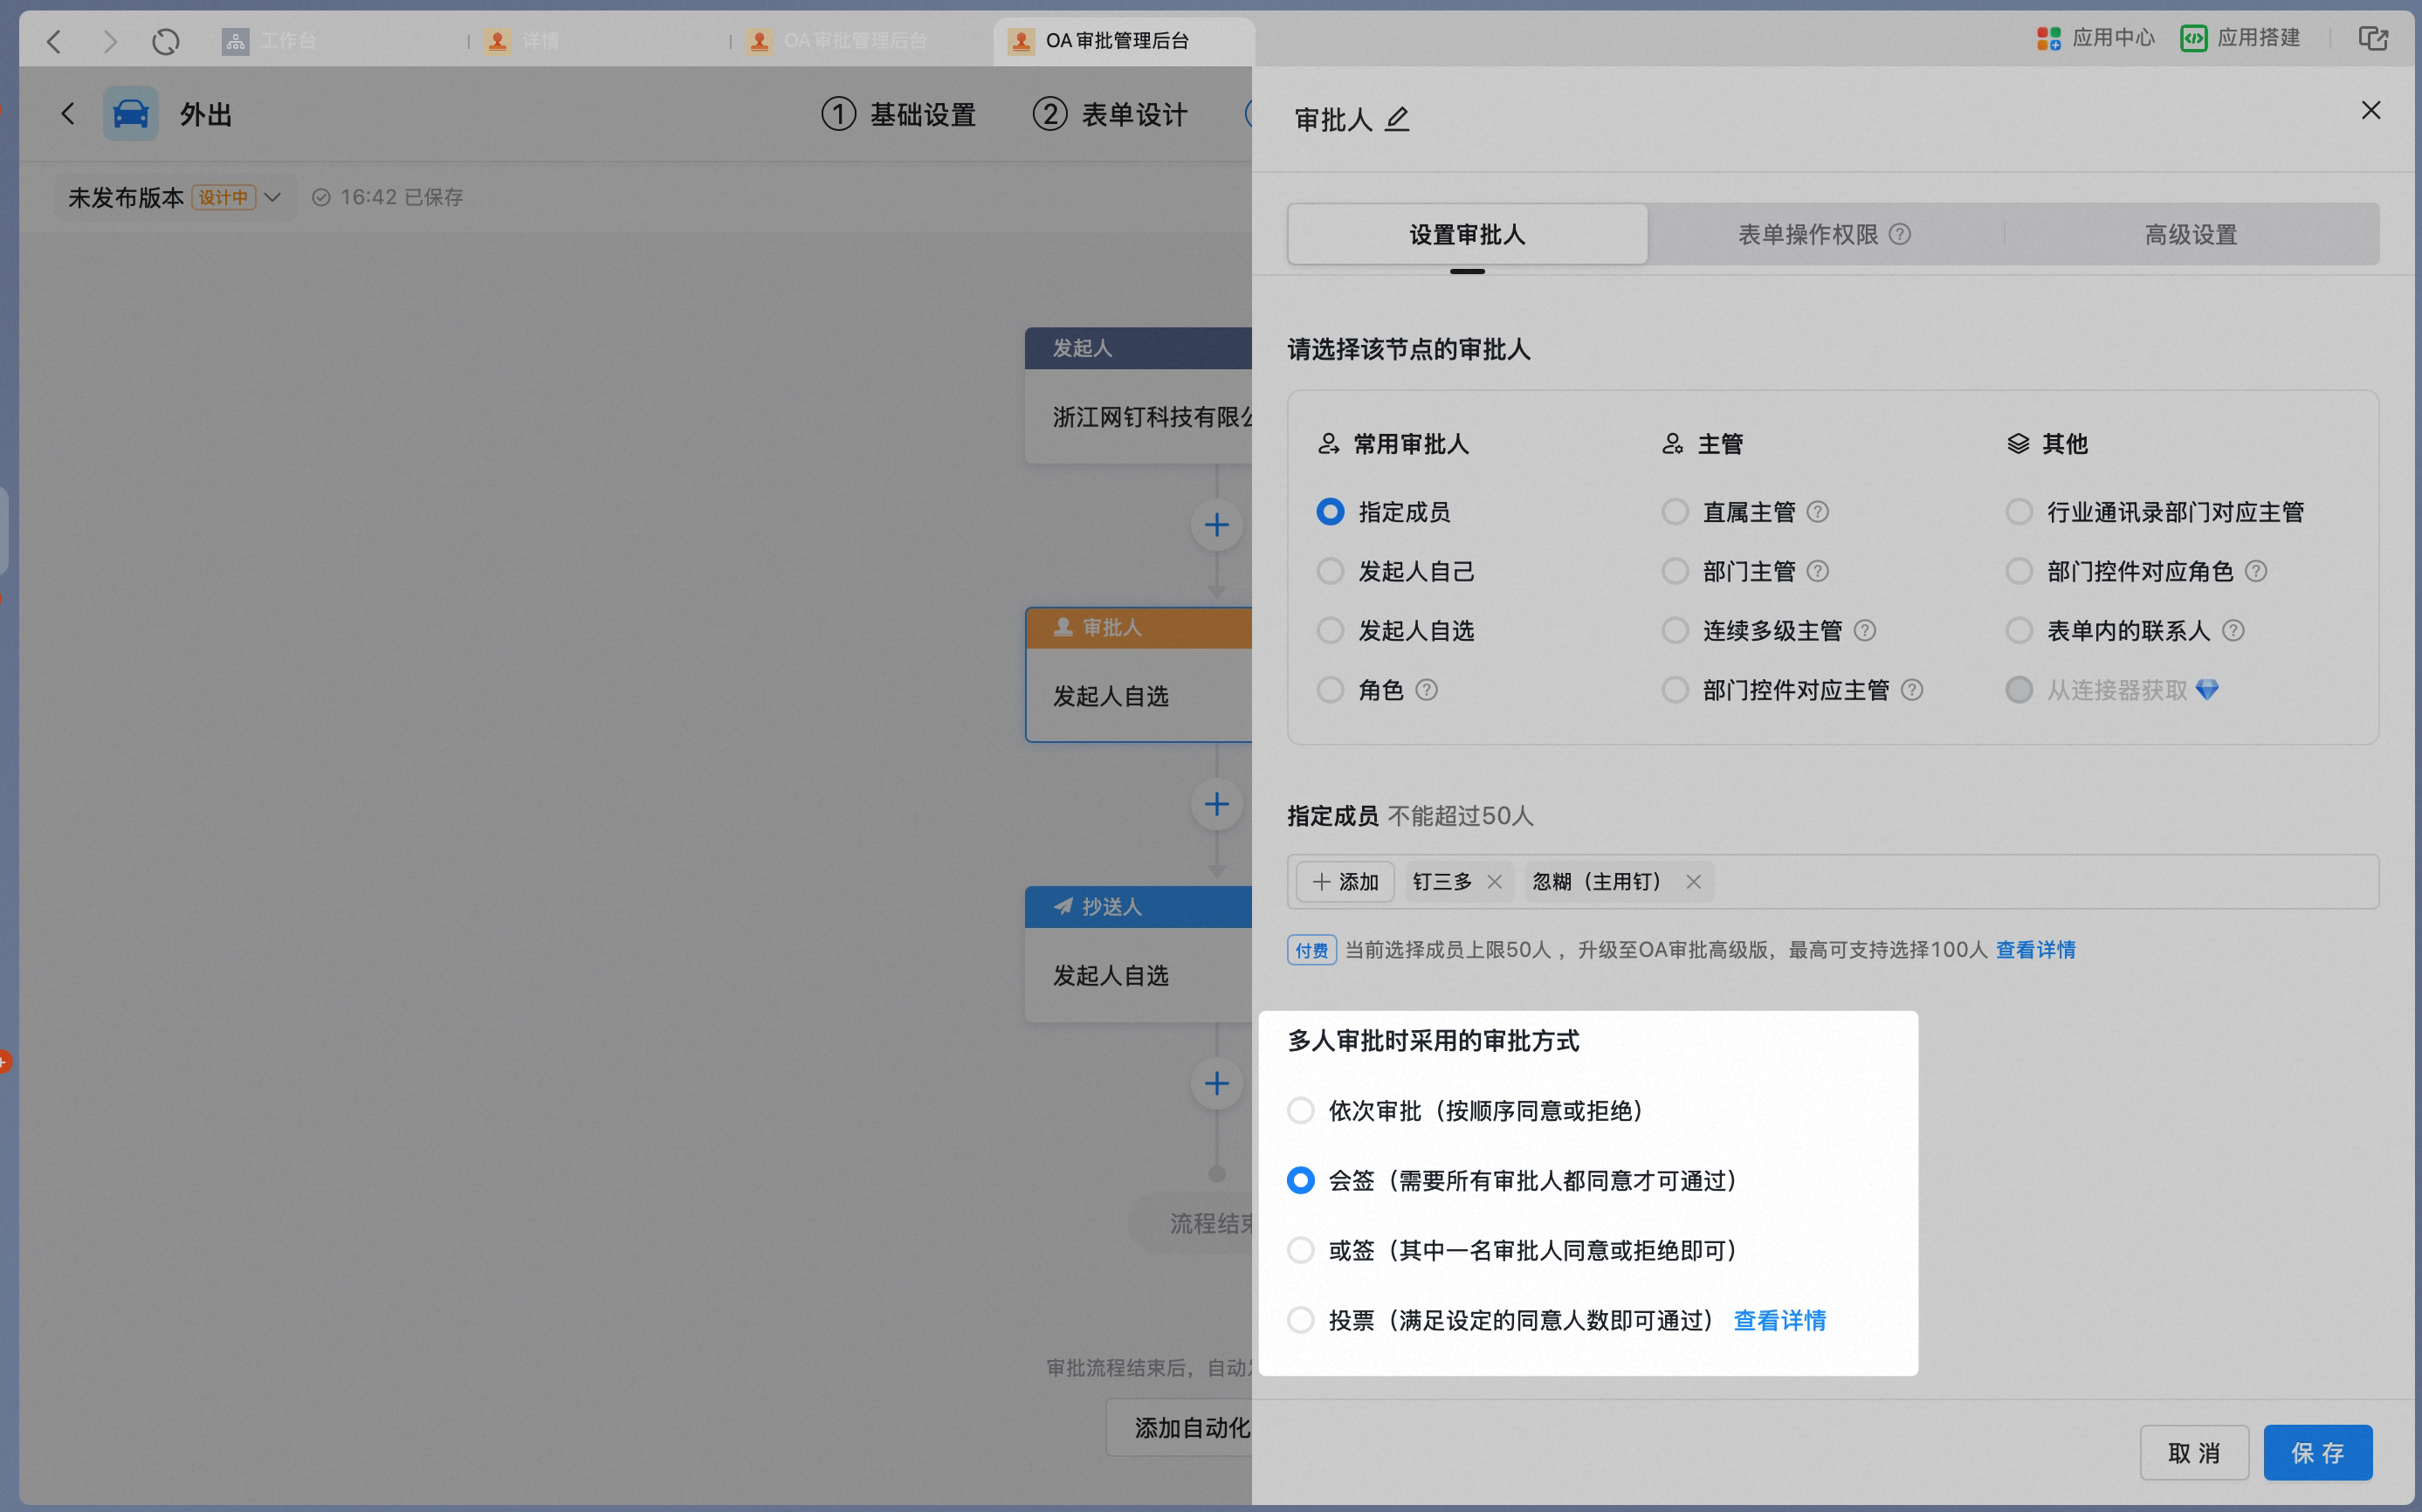
  1. When multiple people participate in the same Step, sequential approval, joint sign-off, single sign-off, and Vote are supported.
Multi-approver modes for a single Step
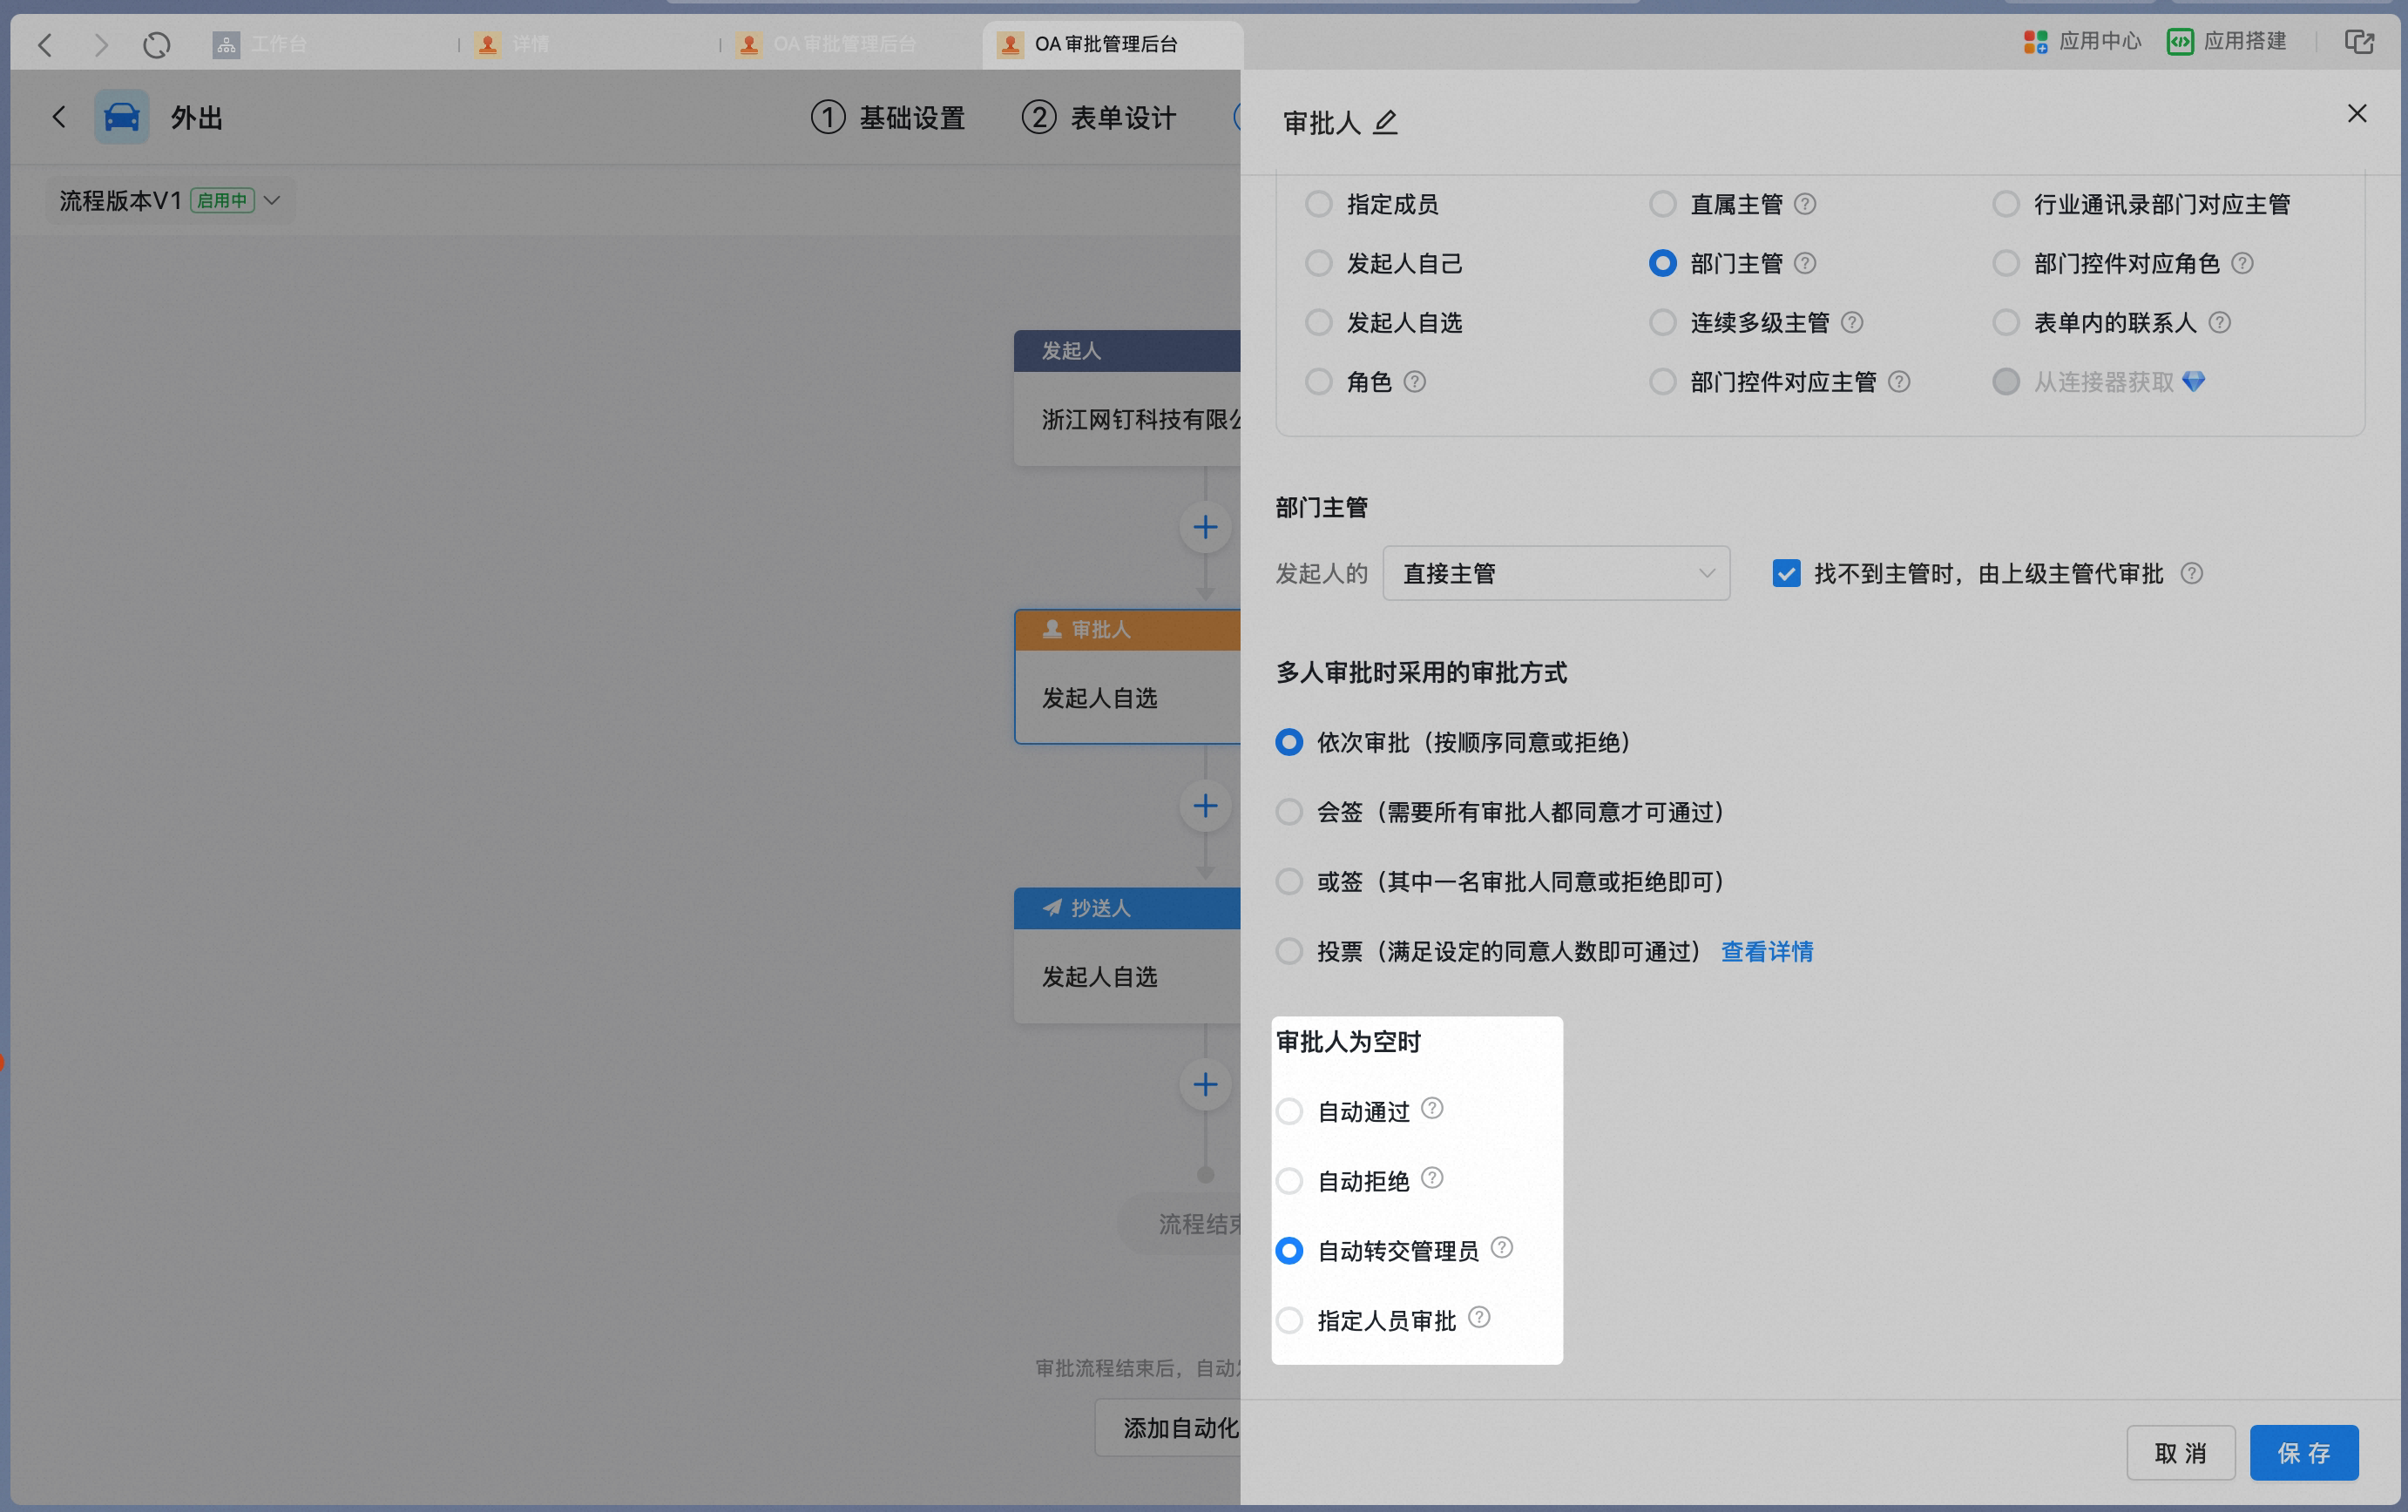
  1. When the approver is set to a type such as manager, department head, or Role, Contacts may be incompletely configured — for example, no matching user can be found. In such cases, configure the routing rule for an empty approver.
Configure the routing rule for an empty approver
3.4 Premium Settings
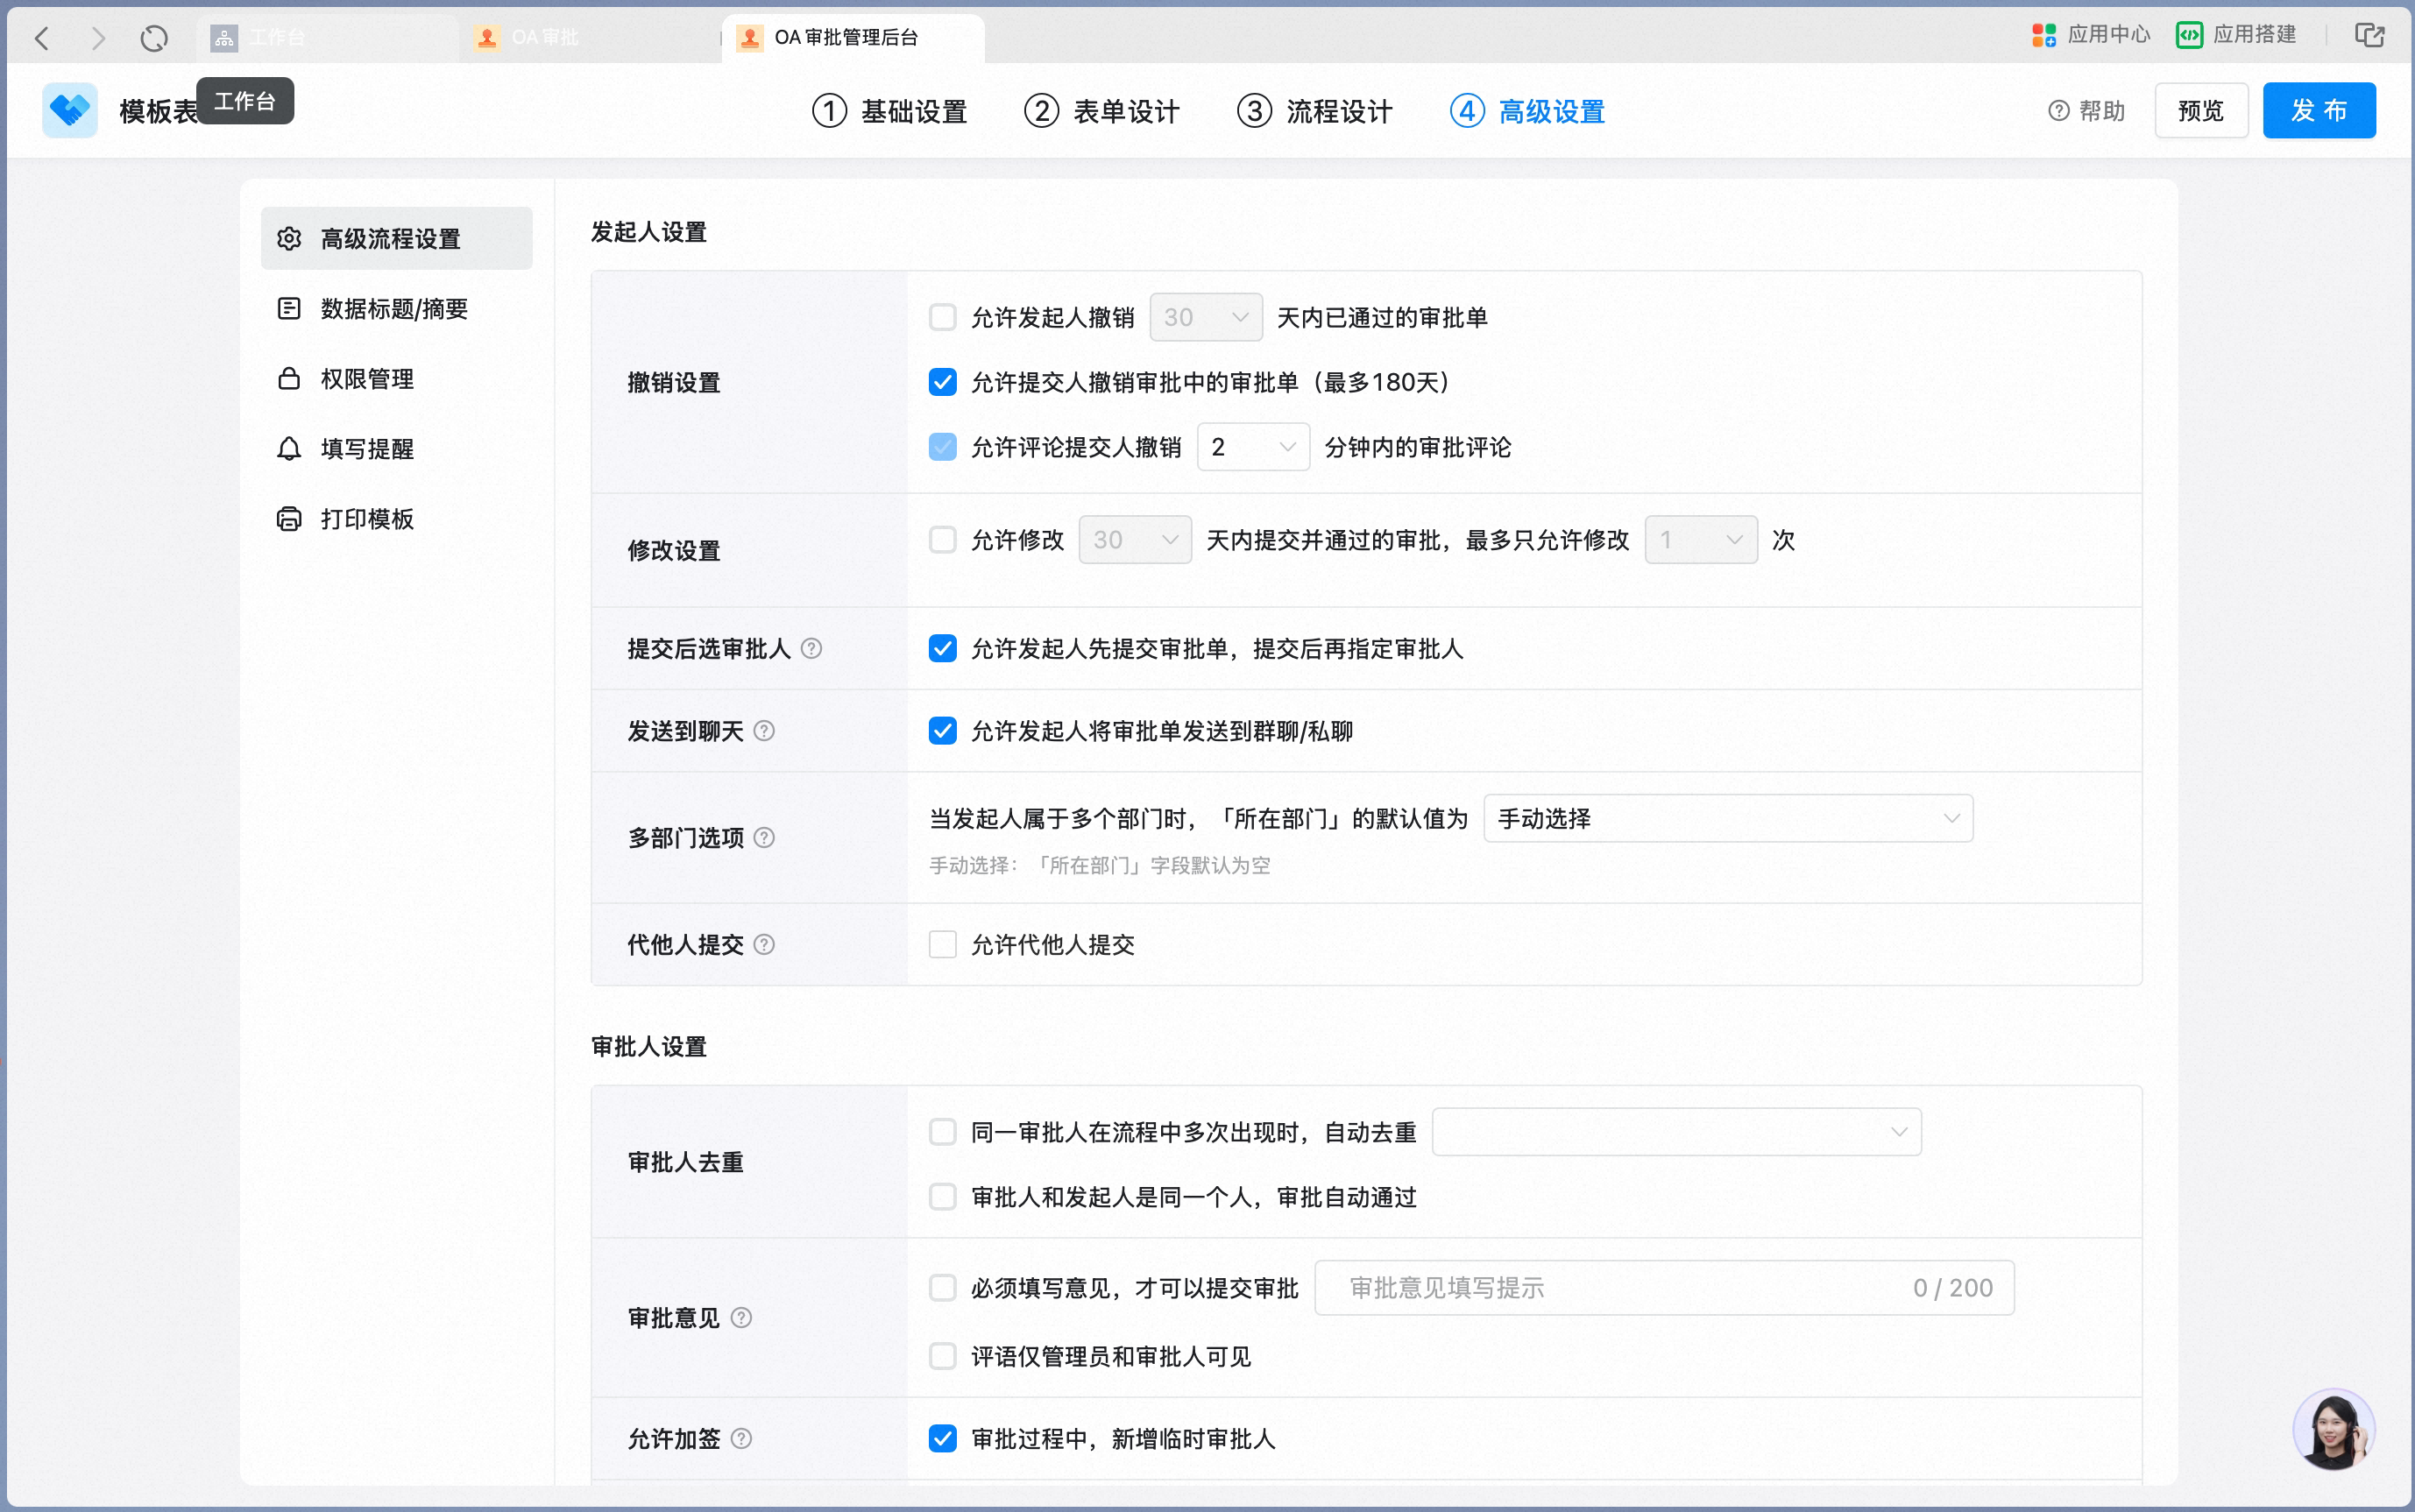
Premium Settings include usage rules for initiators and approvers, along with rules for form display and Permissions. Adjust them to fit your specific business scenarios.
Premium Settings for the Approval form
See >>> Admin — going into Premium Settings
3.5 Preview & Publish
  1. Preview the Approval form
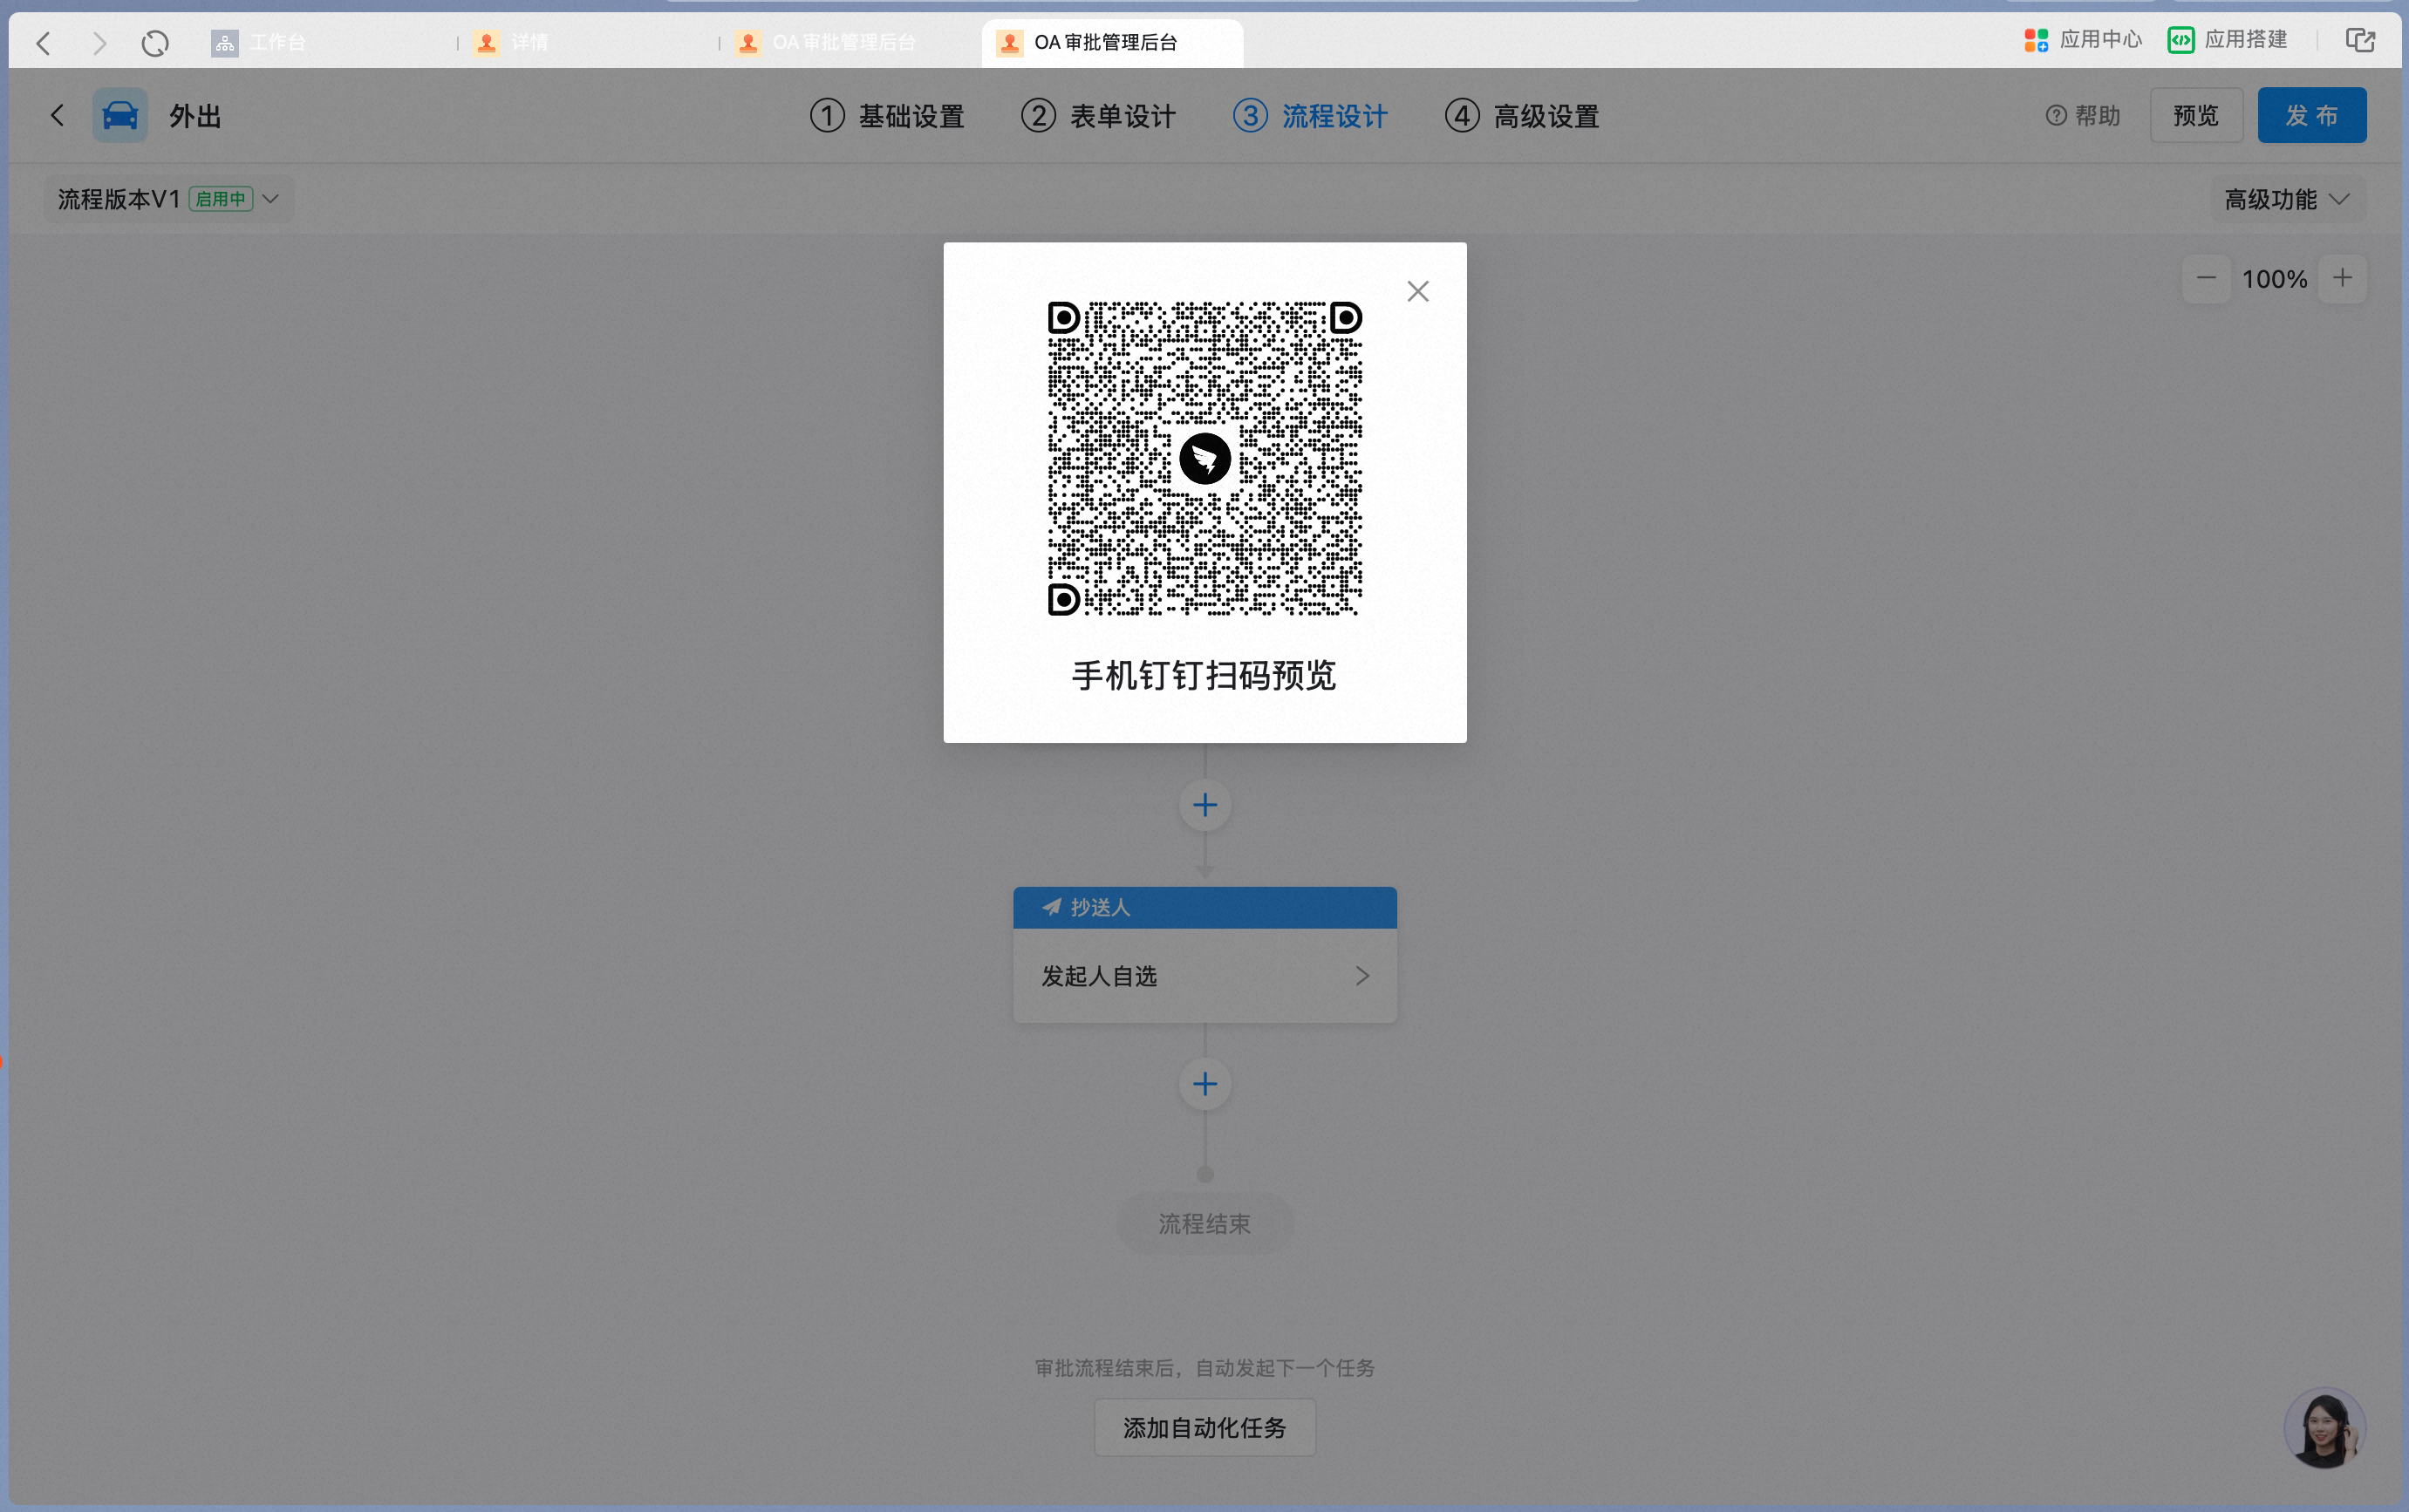
Once setup is complete, click [Preview] in the upper-right corner to display a QR Code.
Click Preview to display a QR Code
After scanning the QR Code with a phone, you can simulate switching between different roles and selecting different conditions to verify that the Approval process routes as expected.
Simulate previewing the Approval process on mobile
  1. Publish the Approval form
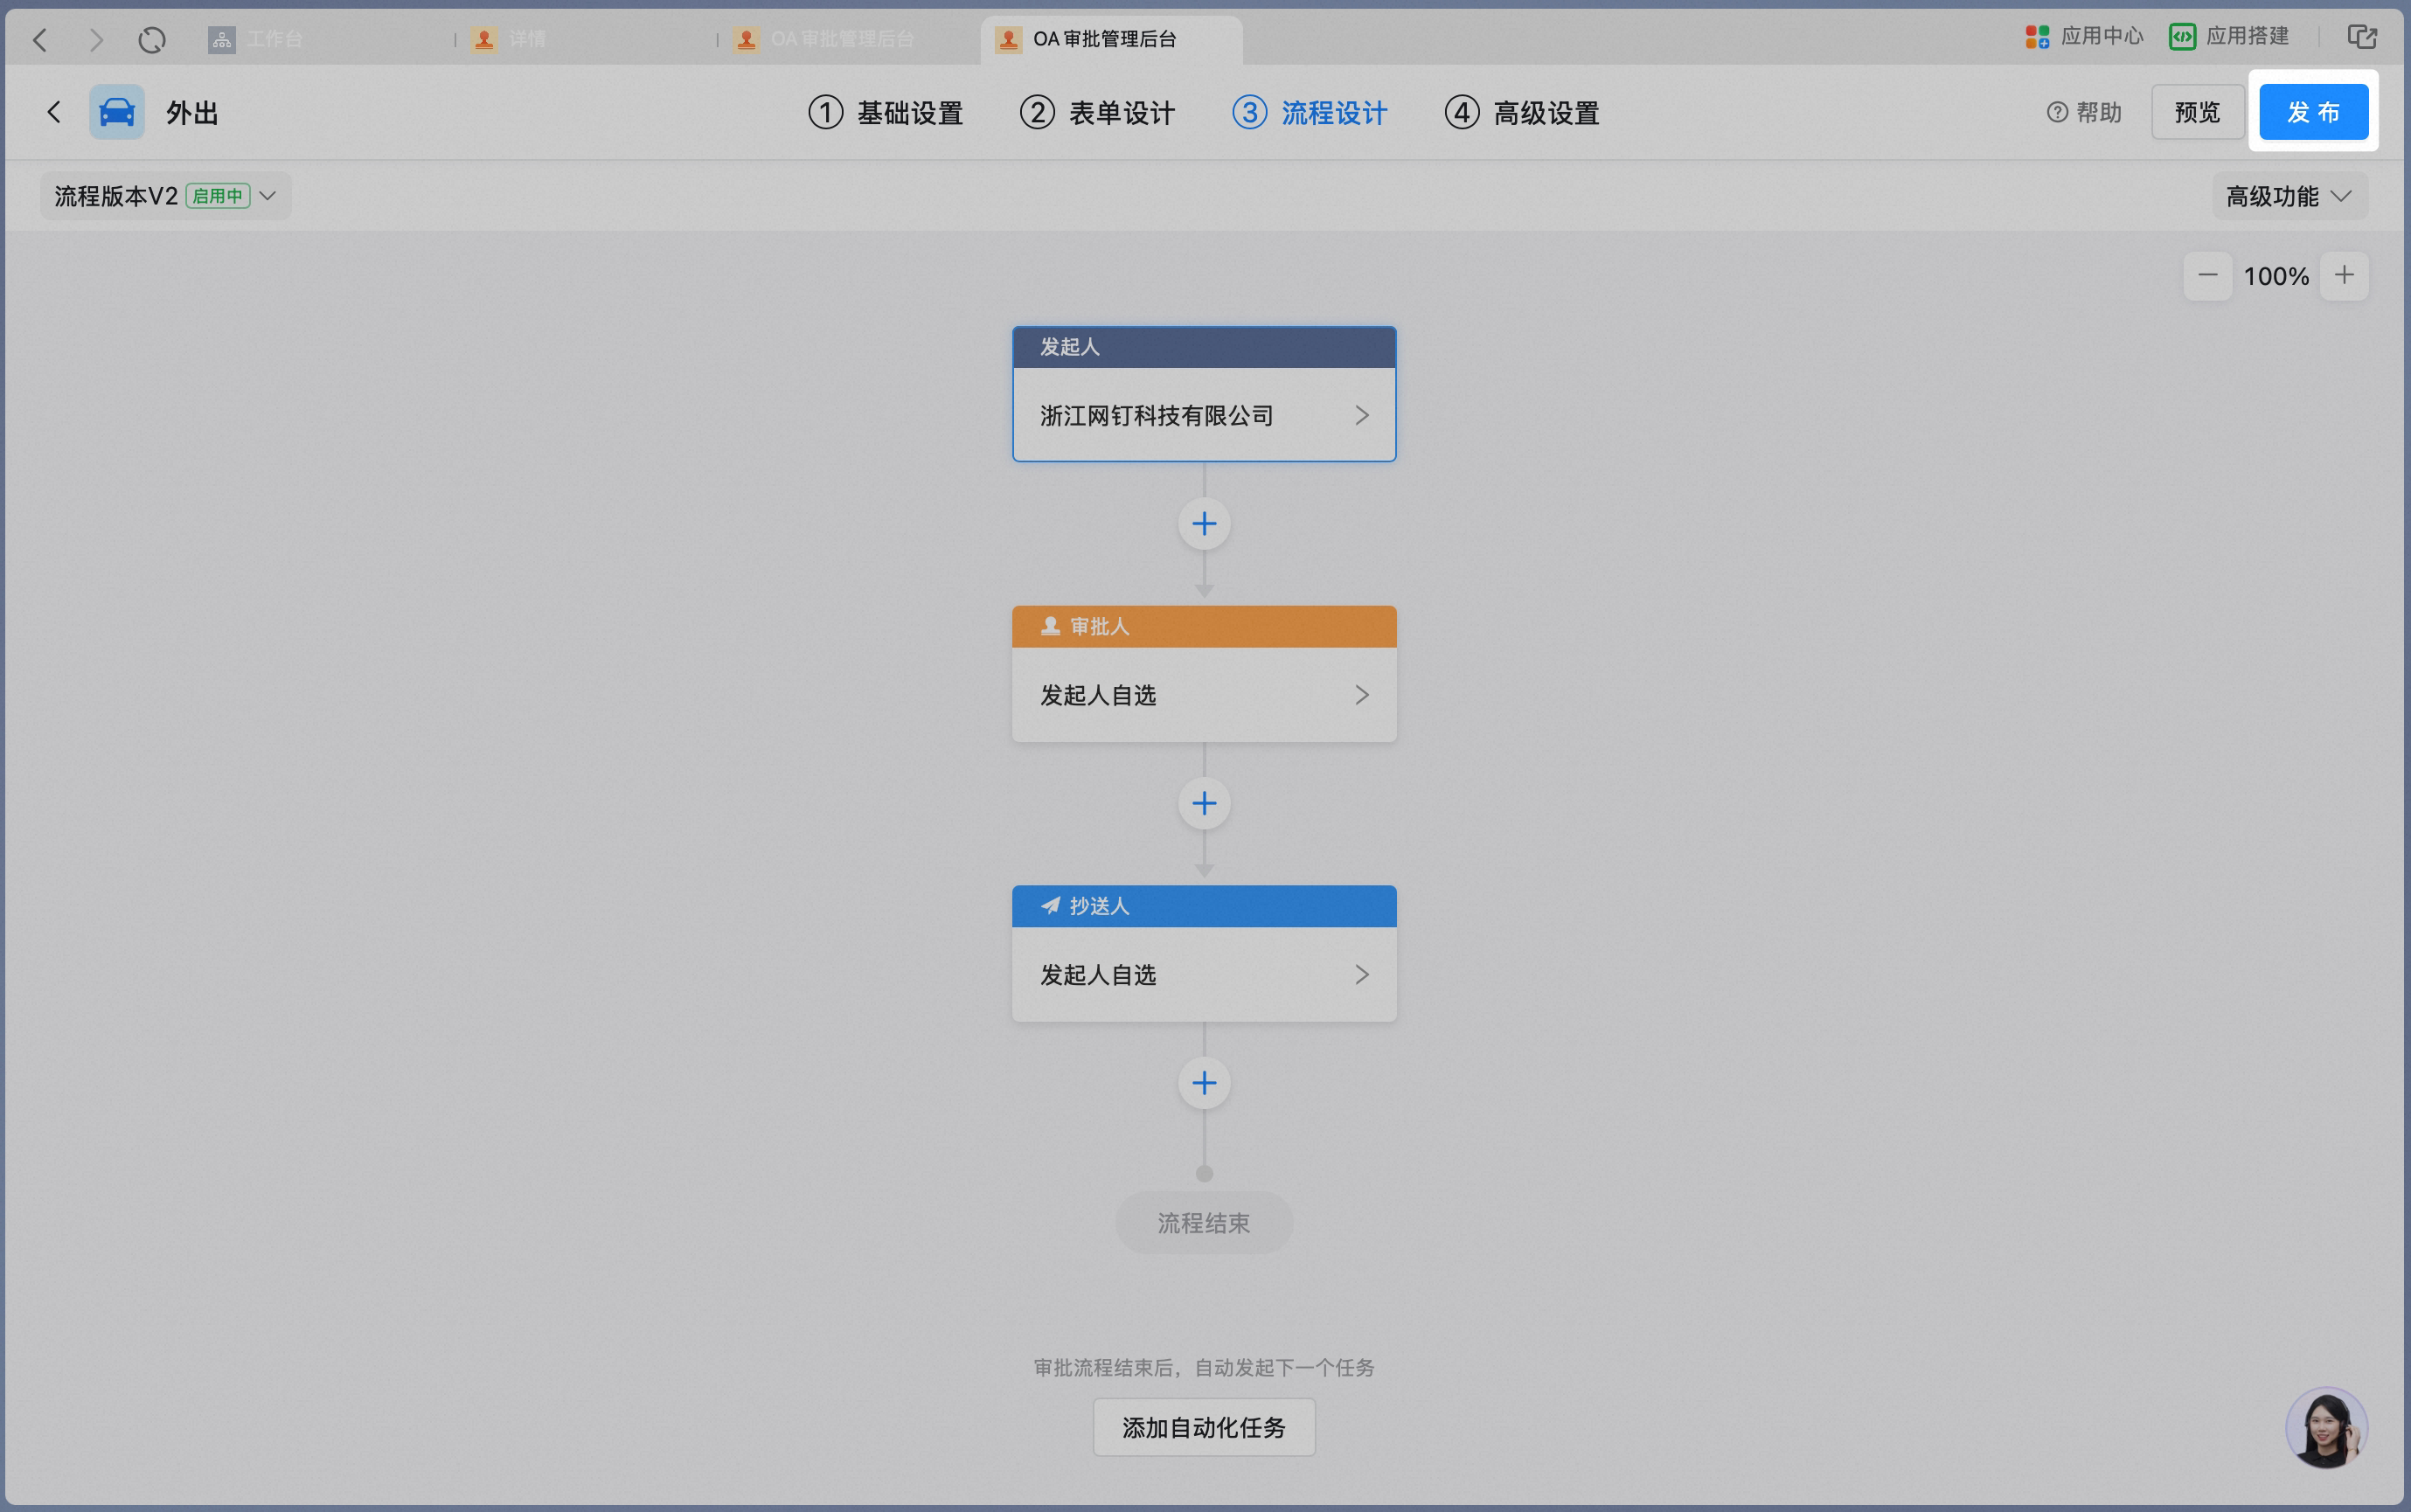
After verifying that the settings are as expected, publish the Approval form by clicking [Publish] in the upper-right corner.
Click Publish to release the Approval form
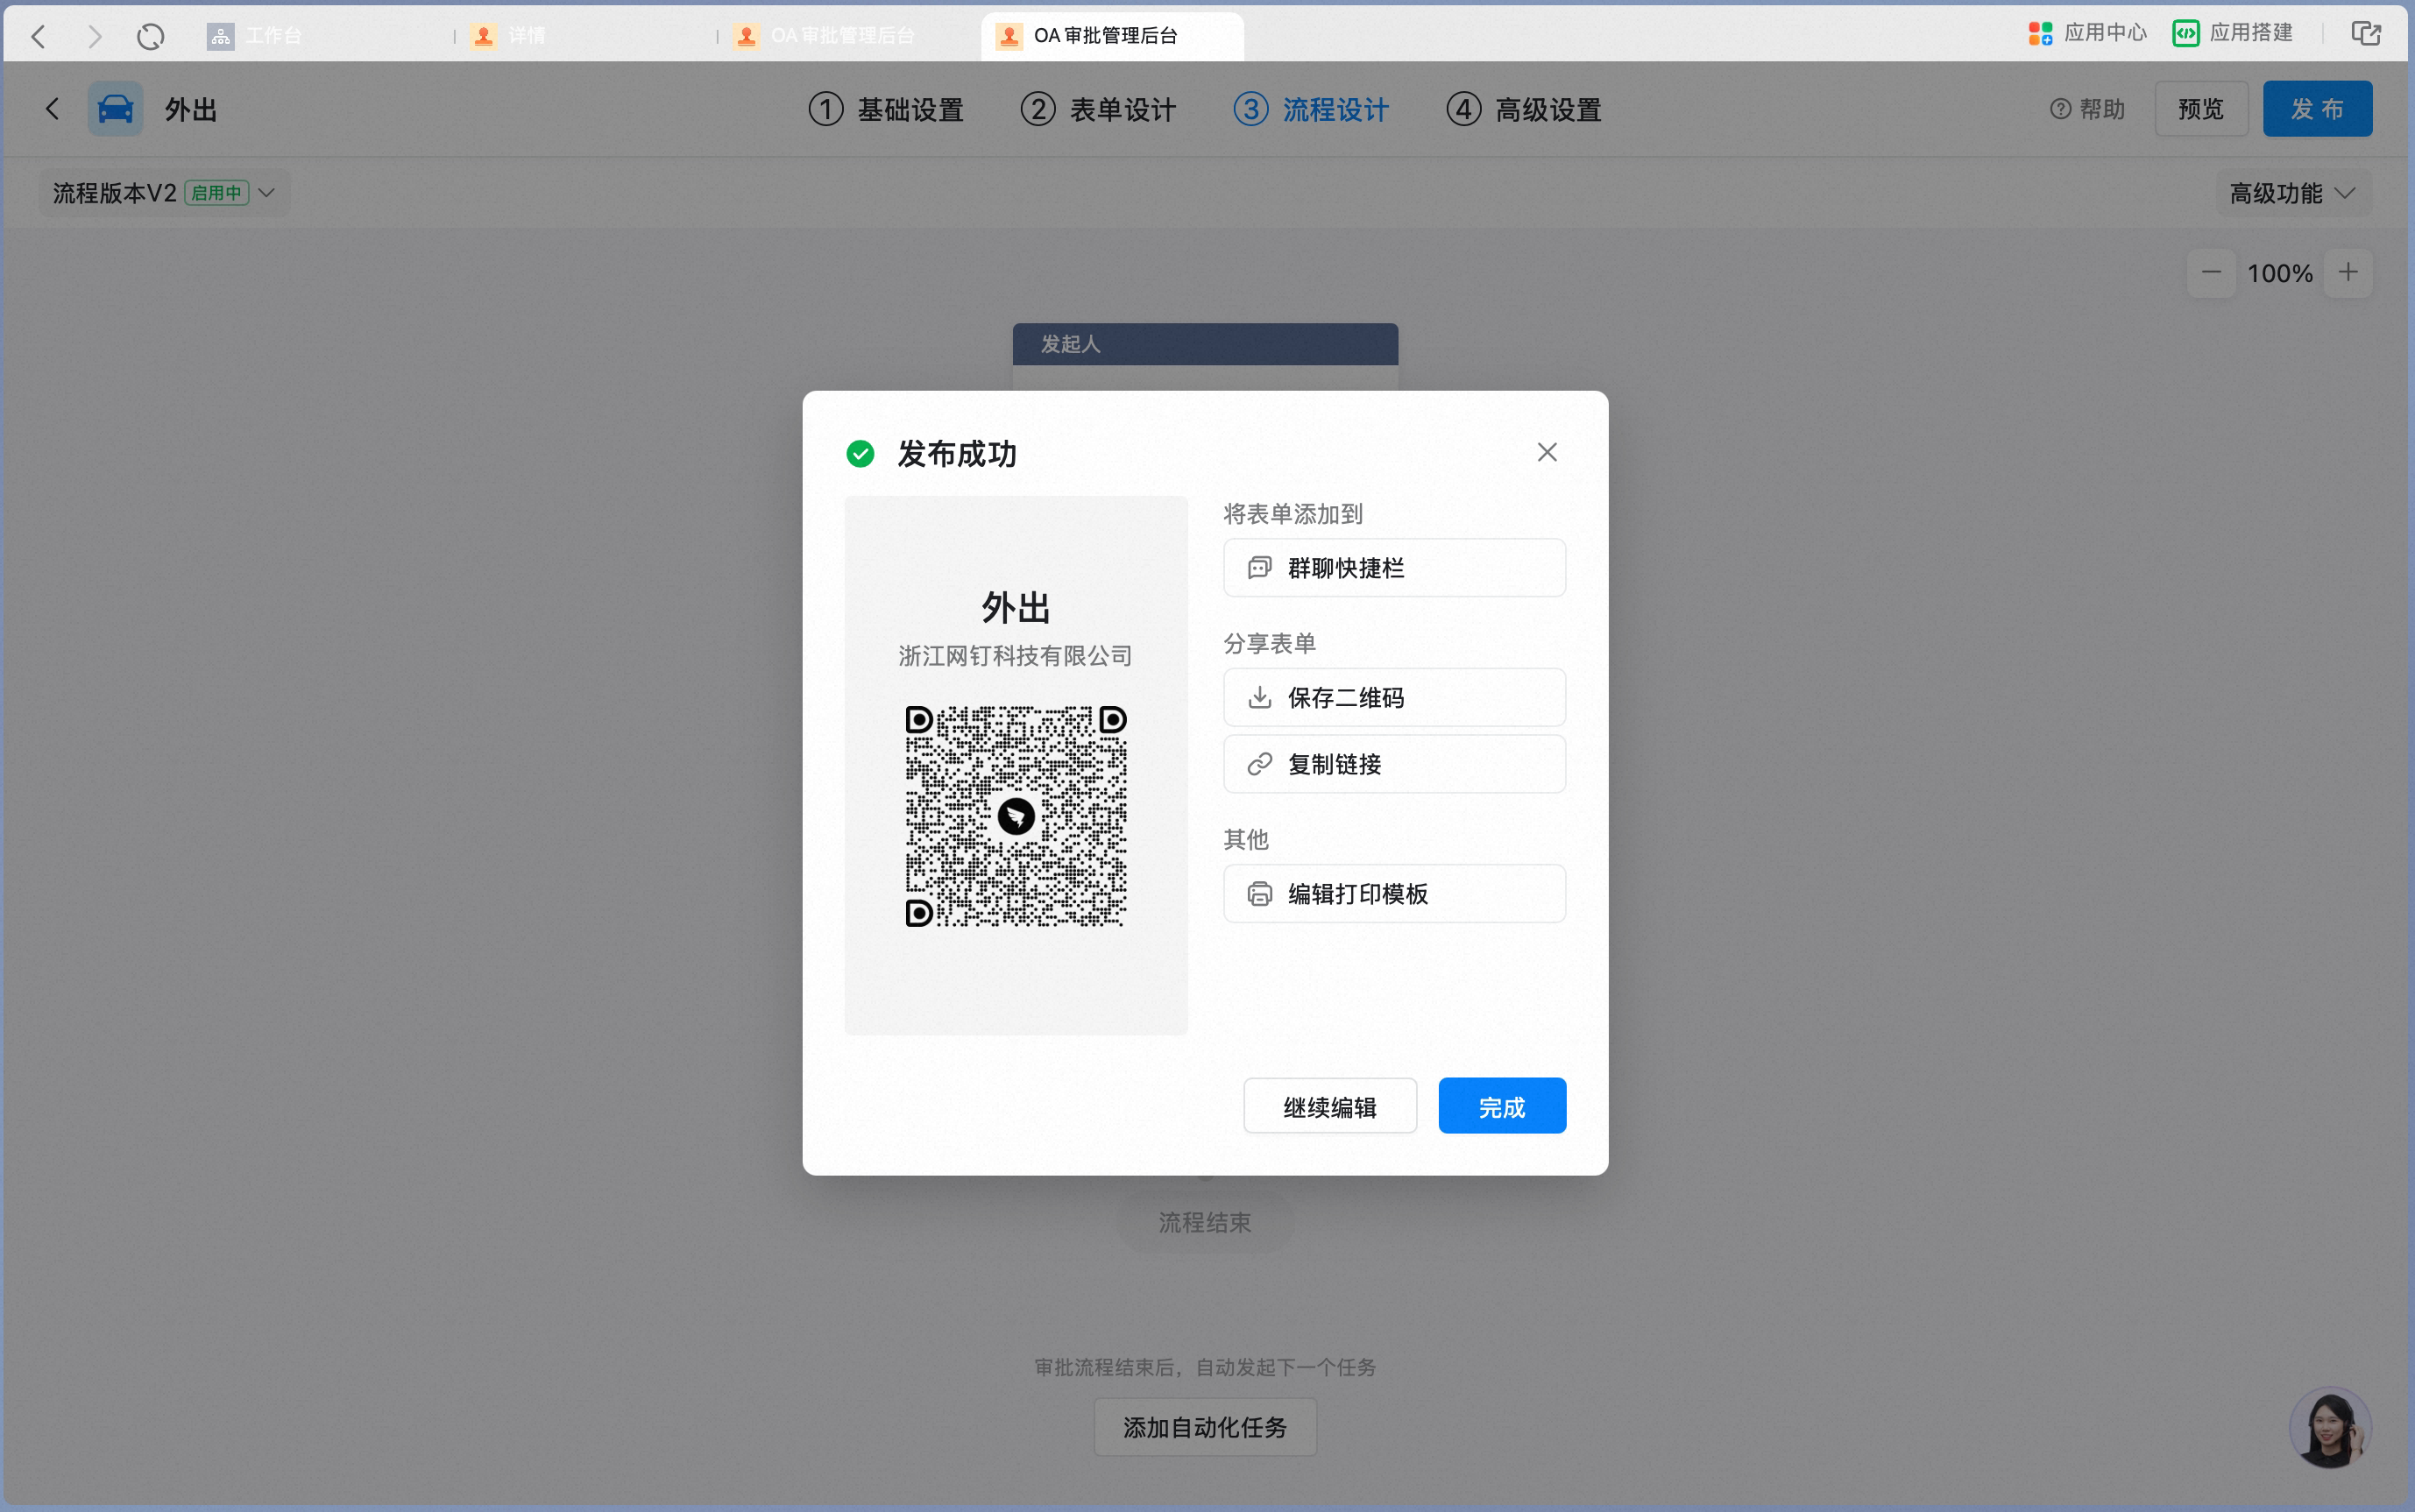
You can save the QR Code, Copy the Link, add it to the Workbench, add it to a group, and so on — making it easier for initiators to use the Approval form.
Options after publishing the Approval form

4. Other Form Actions

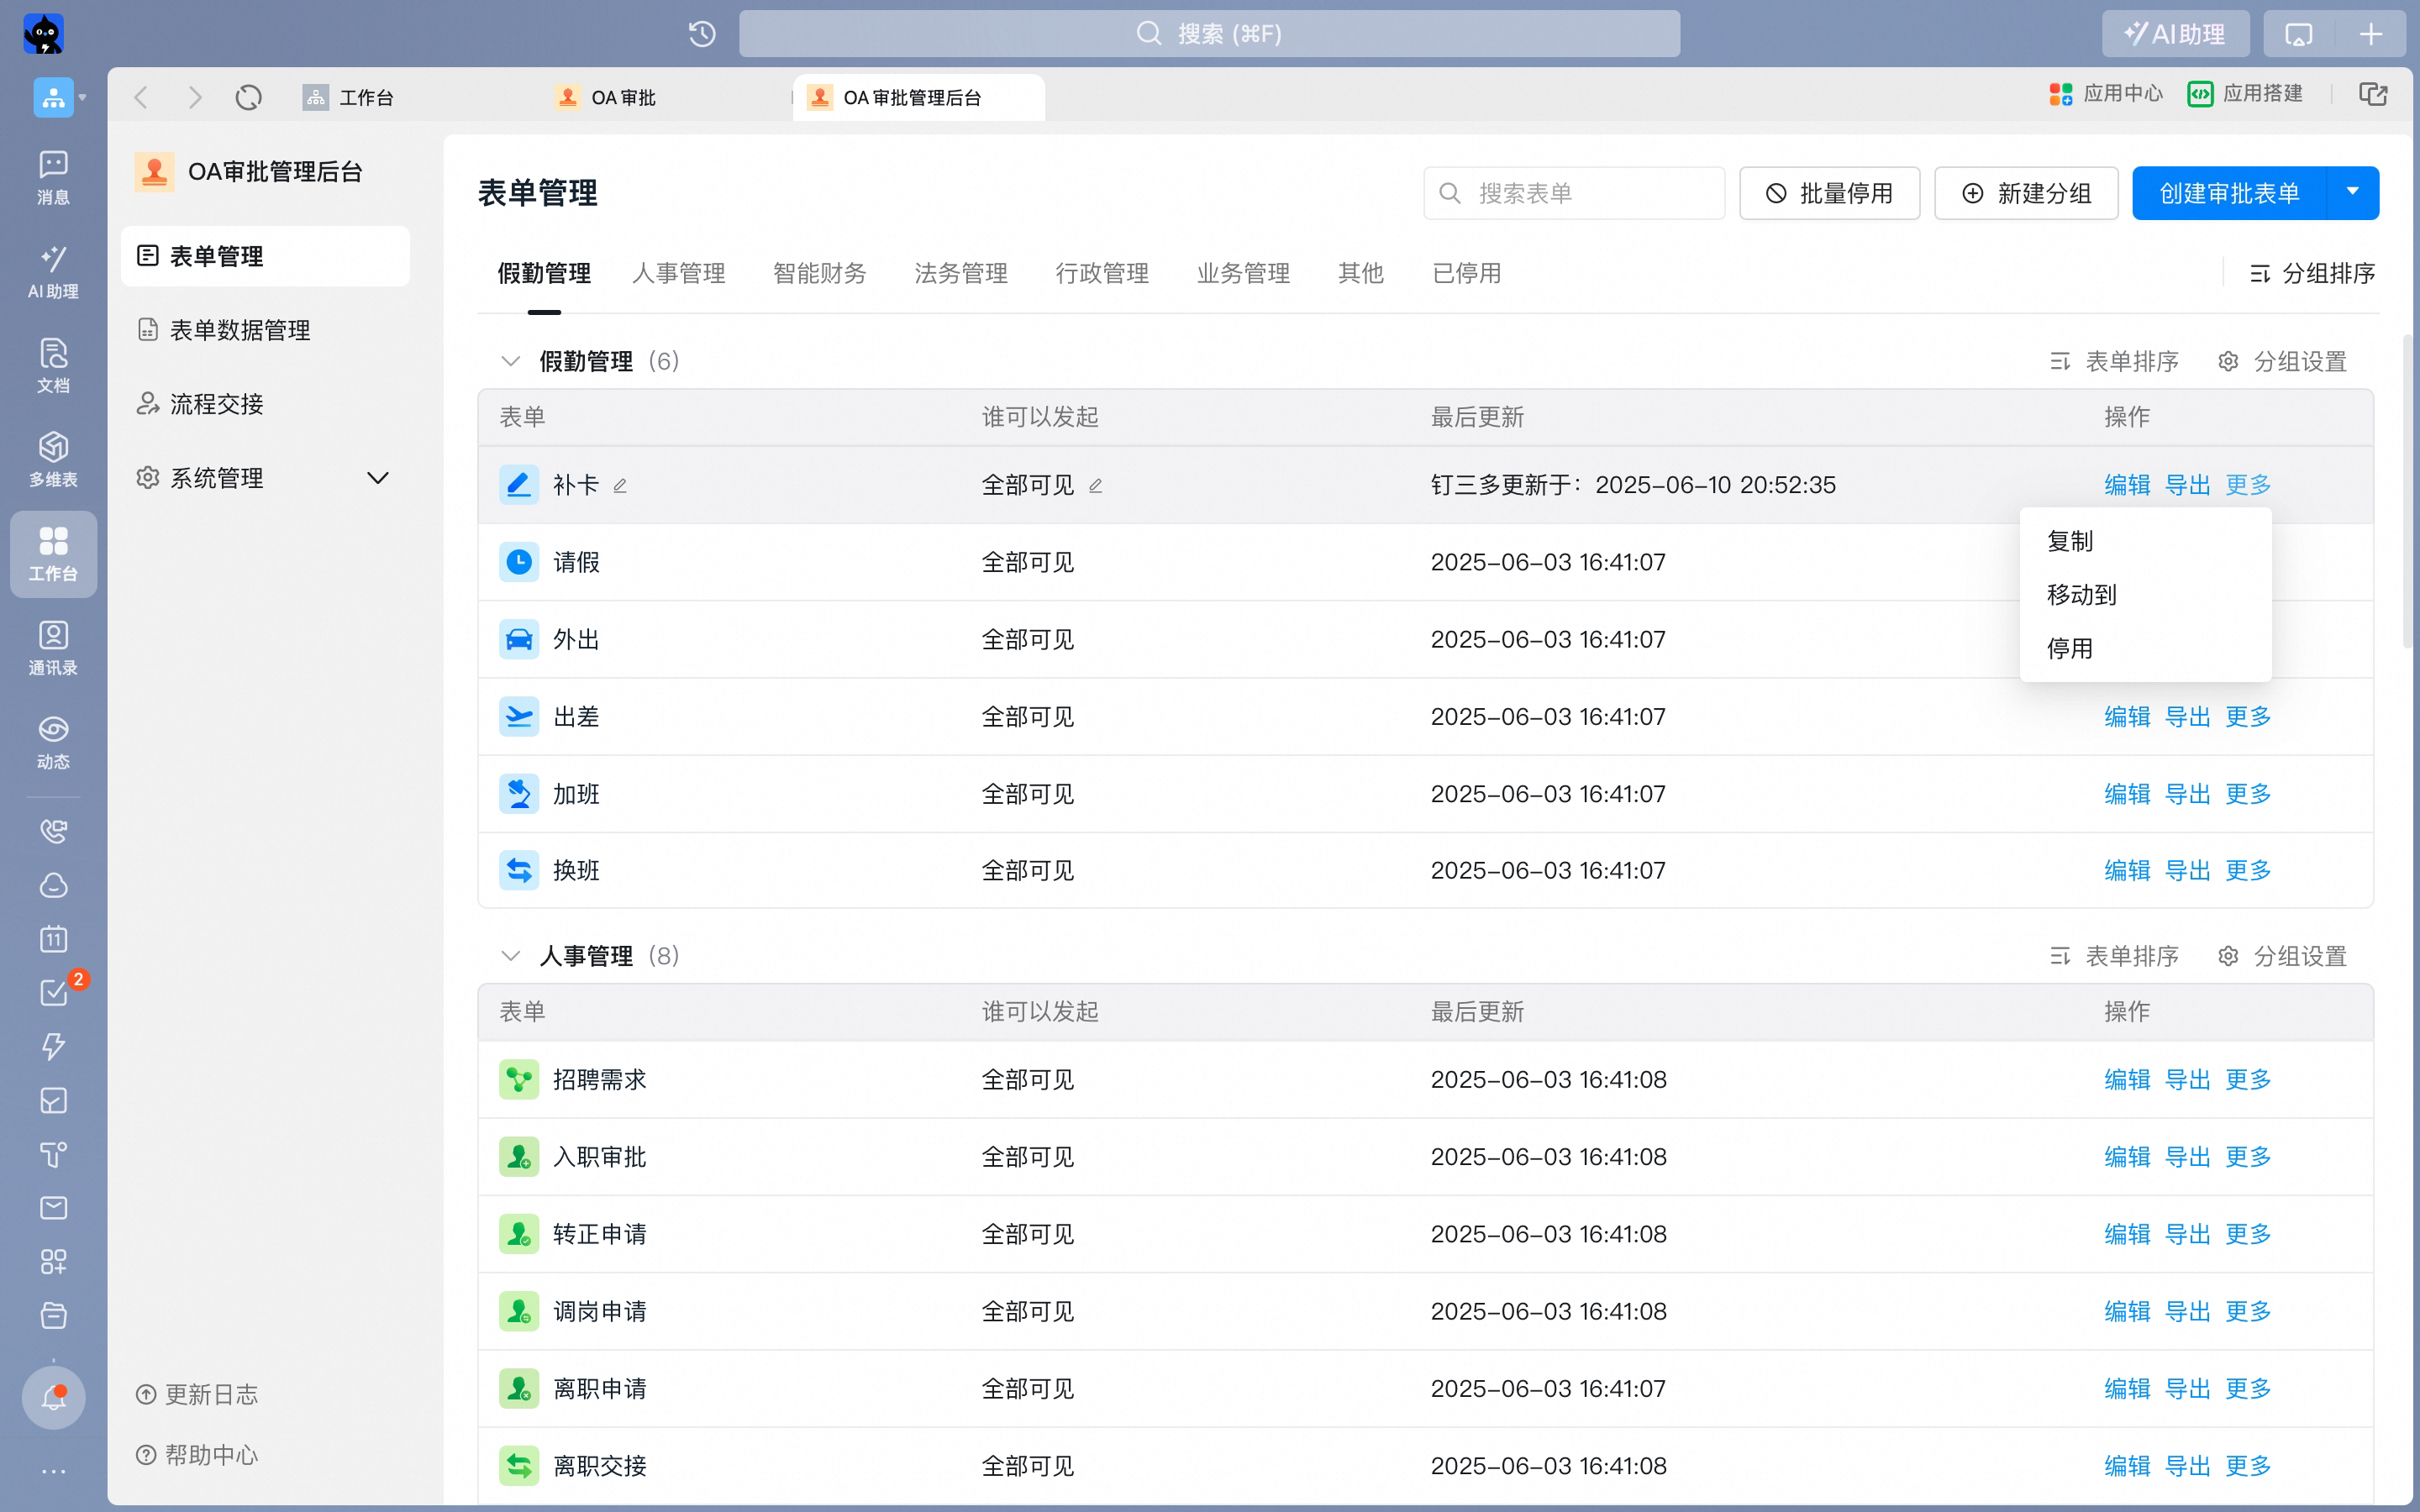
  1. In addition to Create and Edit, you can Copy, Move to, disable, Delete, and Sort individual Approval forms.
Other actions available for an individual Approval form

5. Group Management

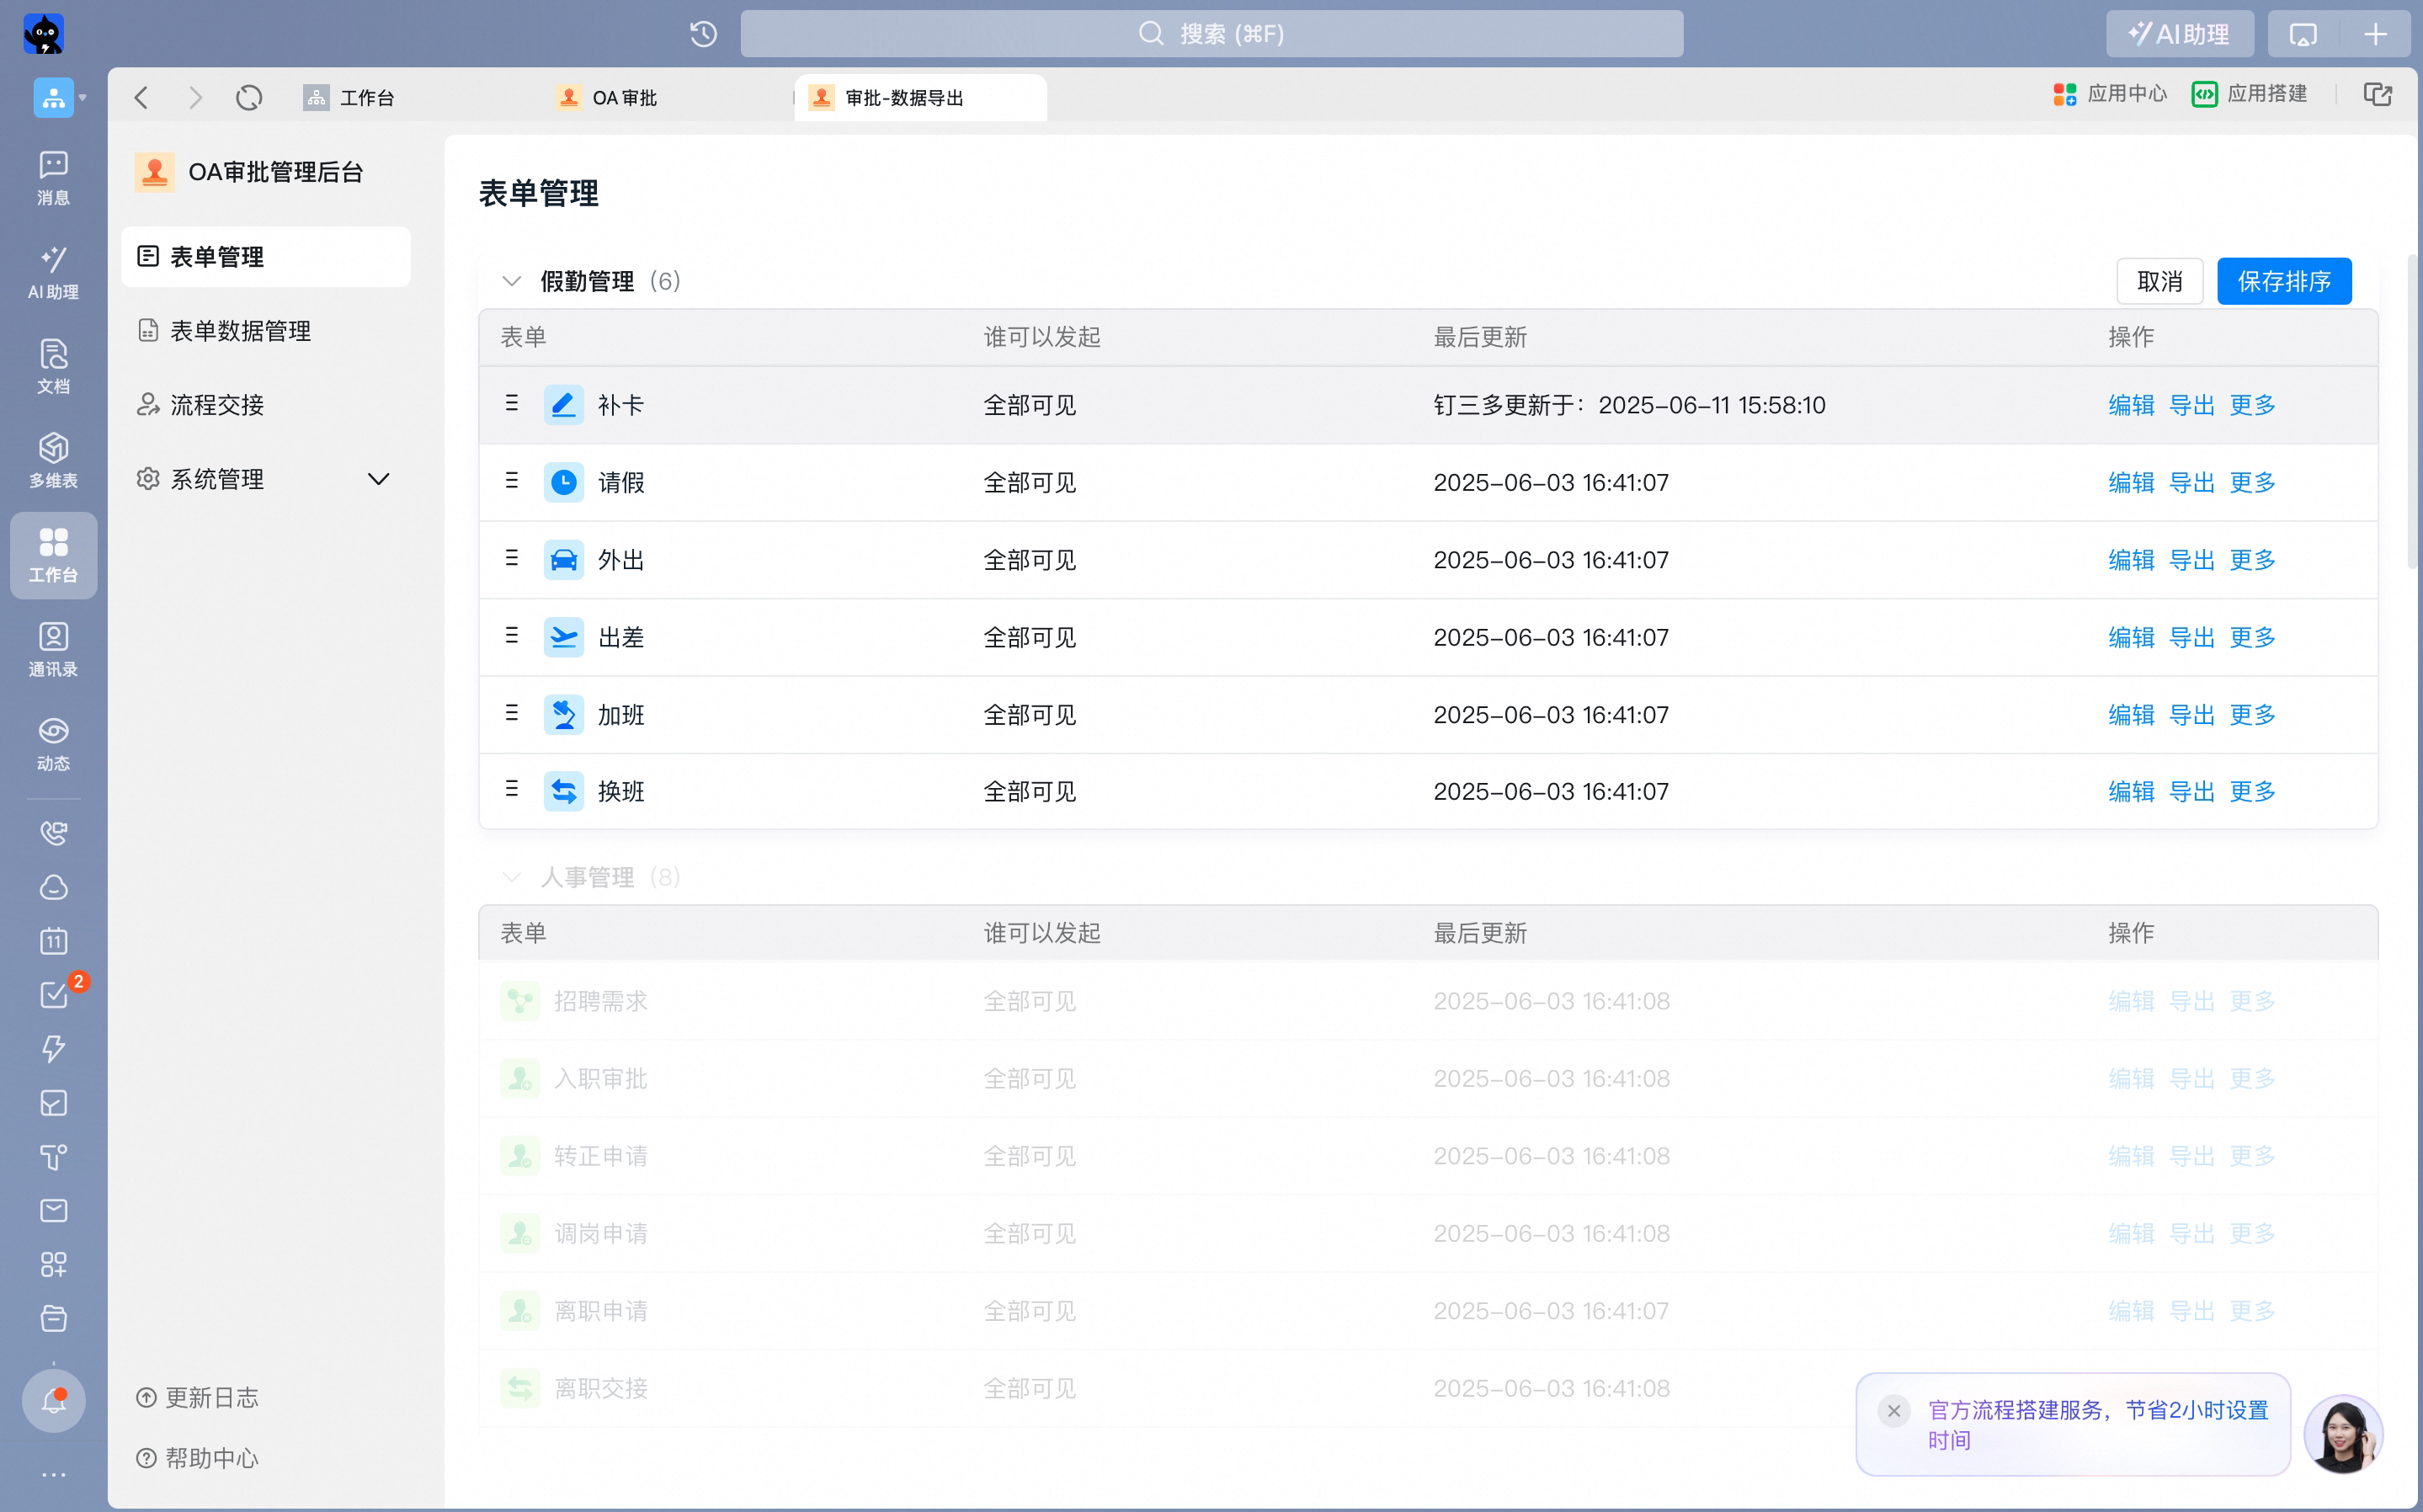
  1. Sort forms within a Group
Click [Sort forms] in the upper-right corner of the Group.
Click Sort forms in the upper-right corner of the Group
Hover over the "drag to Sort icon" icon in front of a form and drag it up or down to sort. When done, click [Save Sort].
Drag forms to reorder them, then click Save Sort
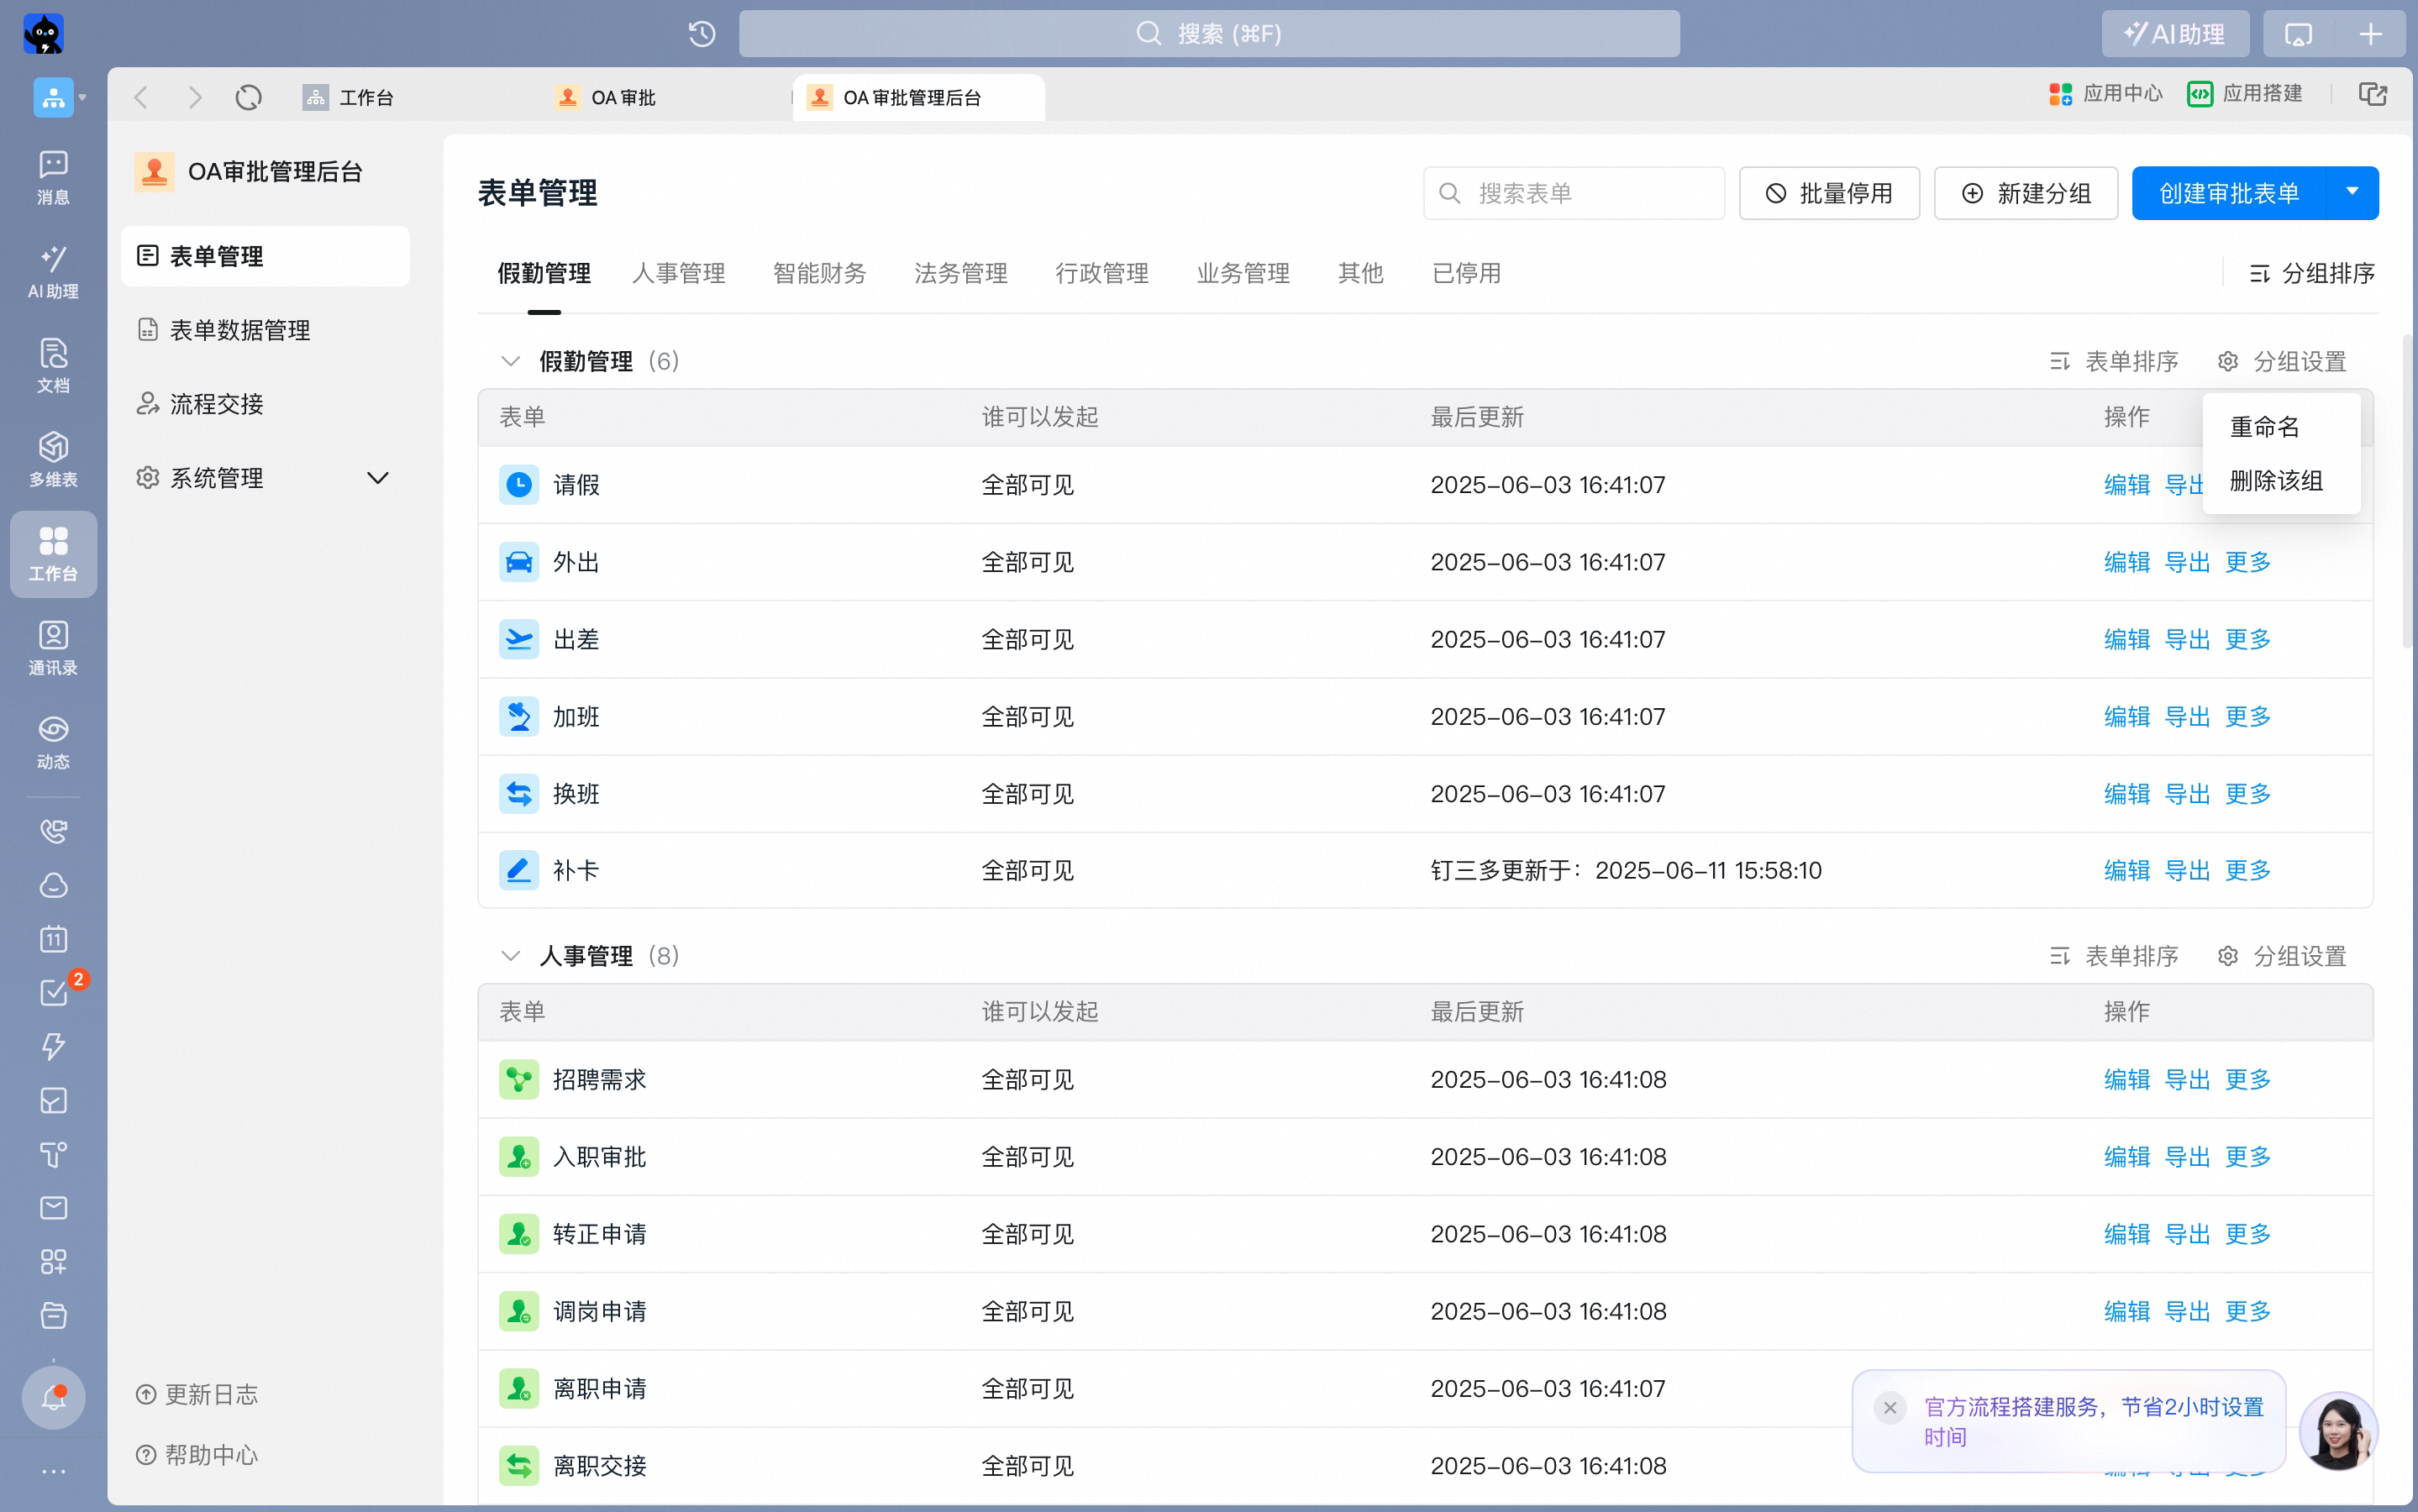
  1. Other Group actions
Groups can also be renamed, deleted, and sorted.
Other actions available for a Group

3) Data Management

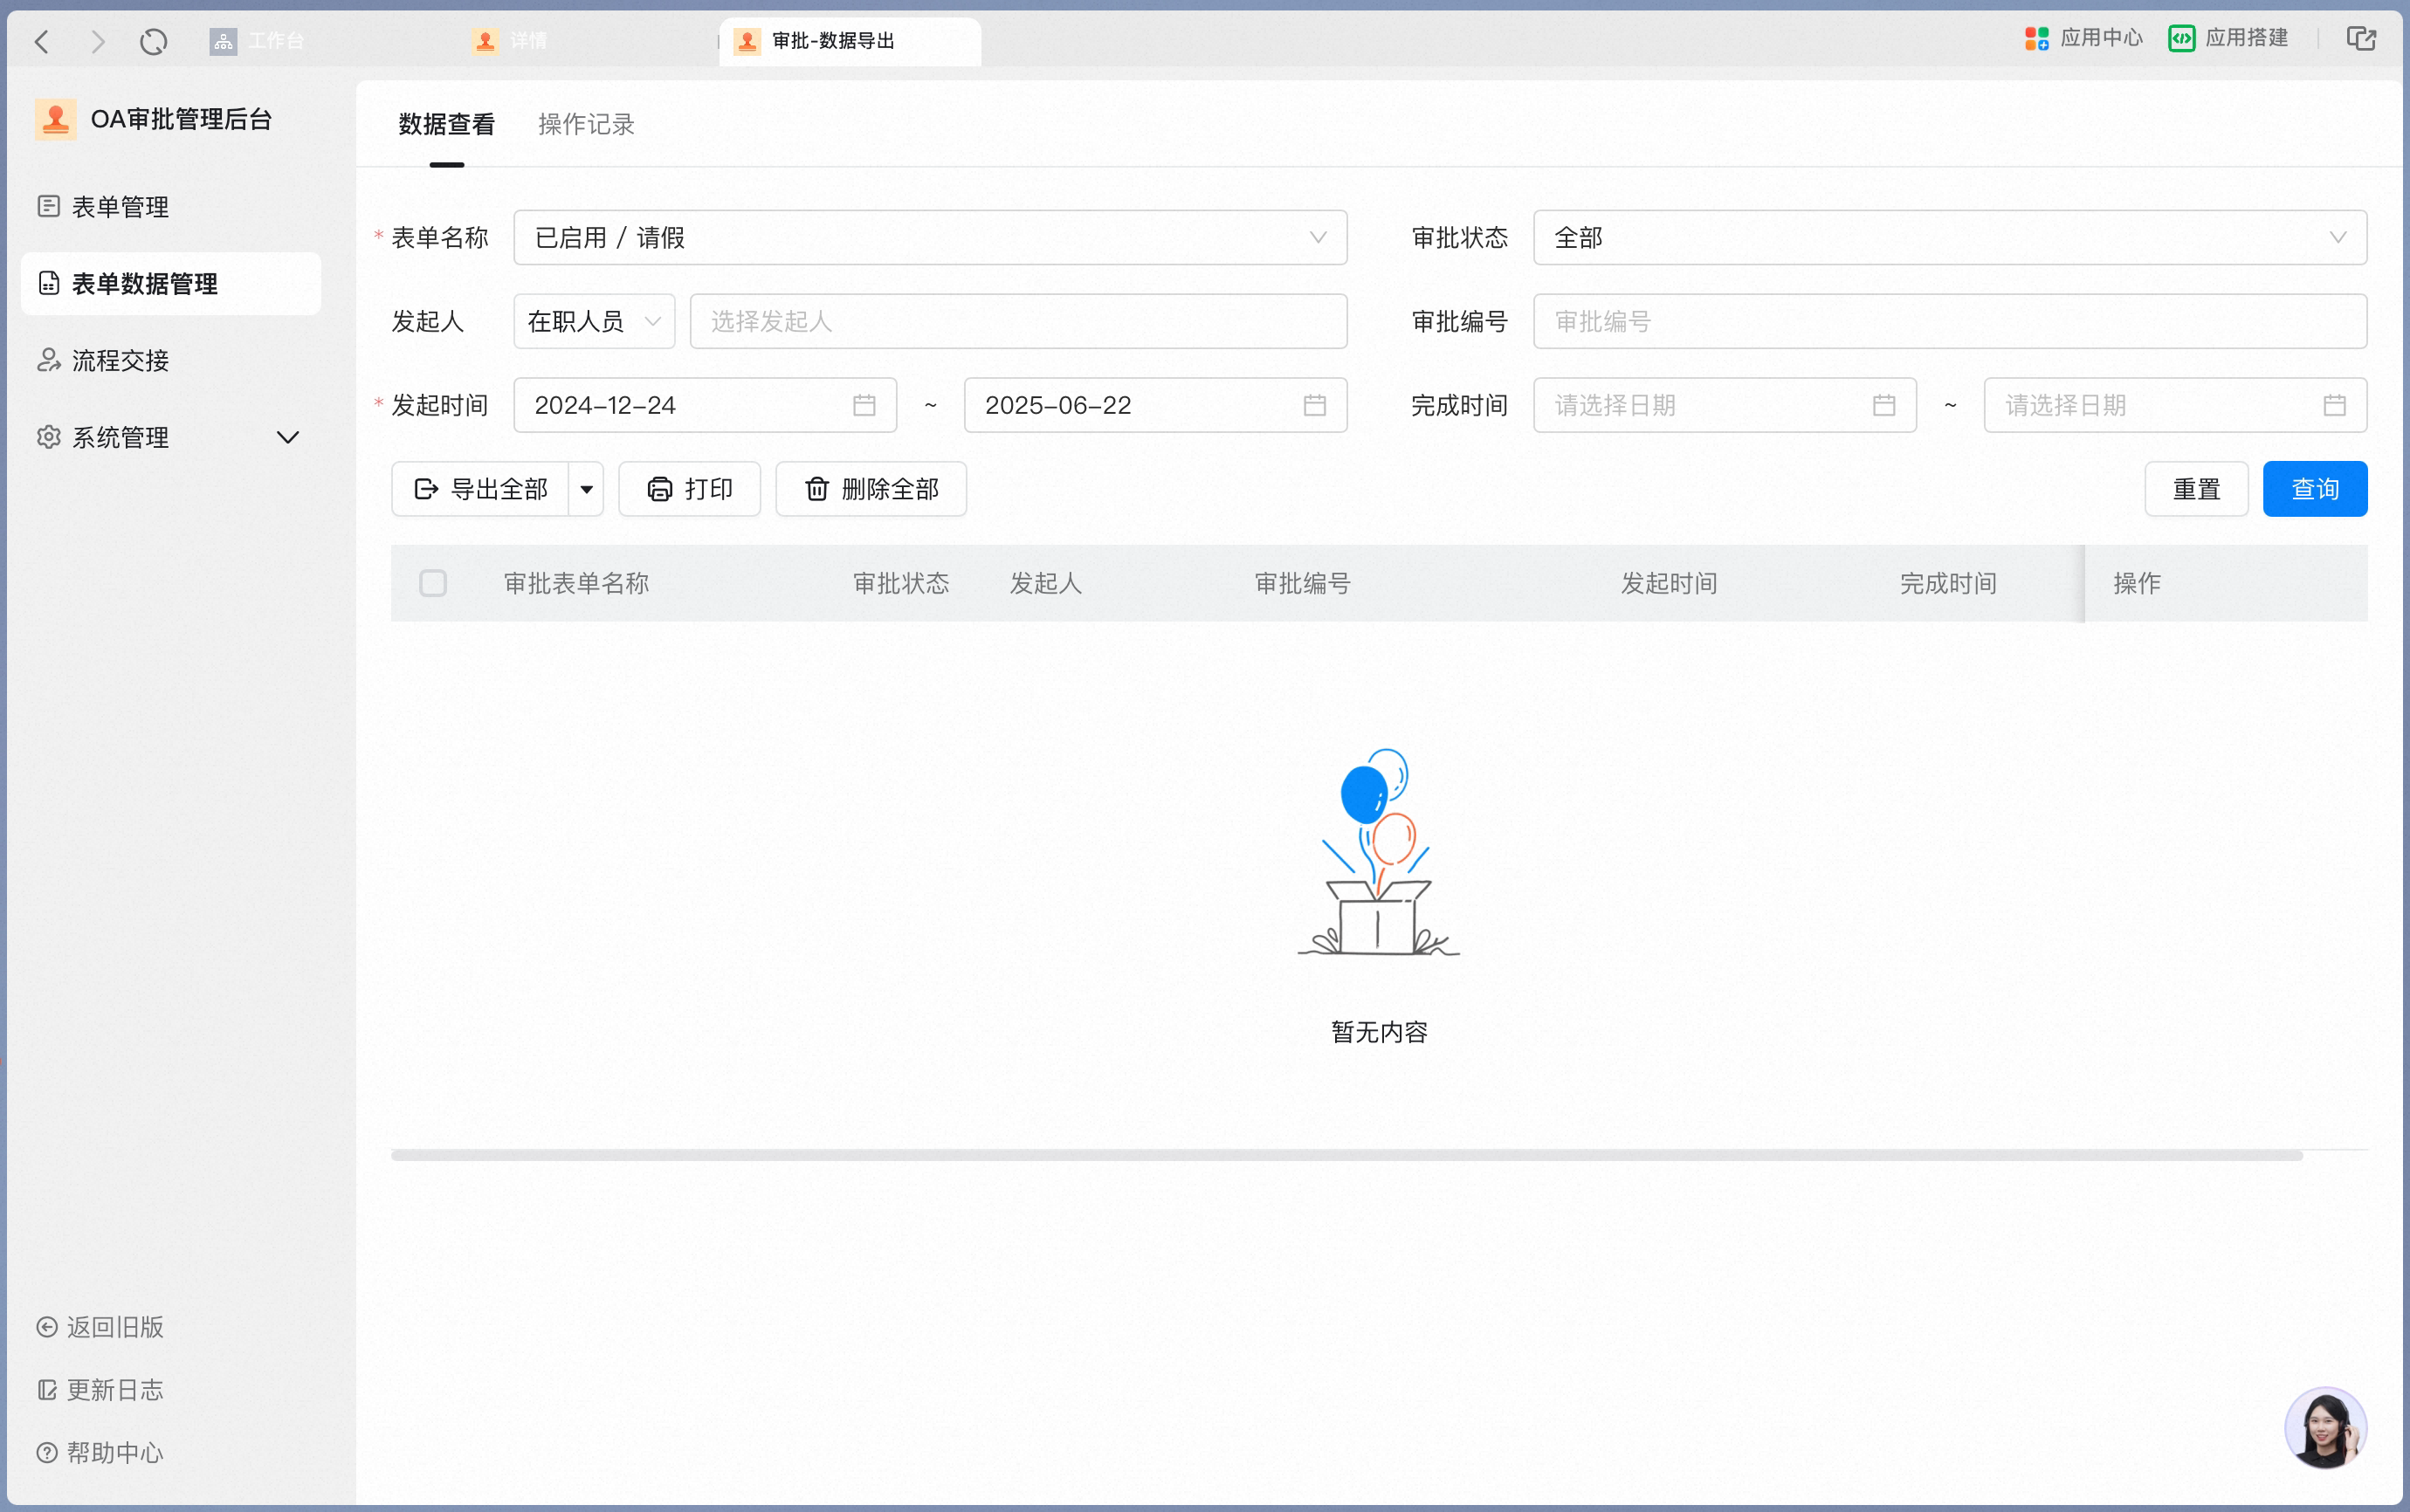
1. Data Query and Export

  • Click [Manage Approval Forms] in the upper-right corner, then [Form Data Management] to manage data.
Open Form Data Management from Manage Approval Forms
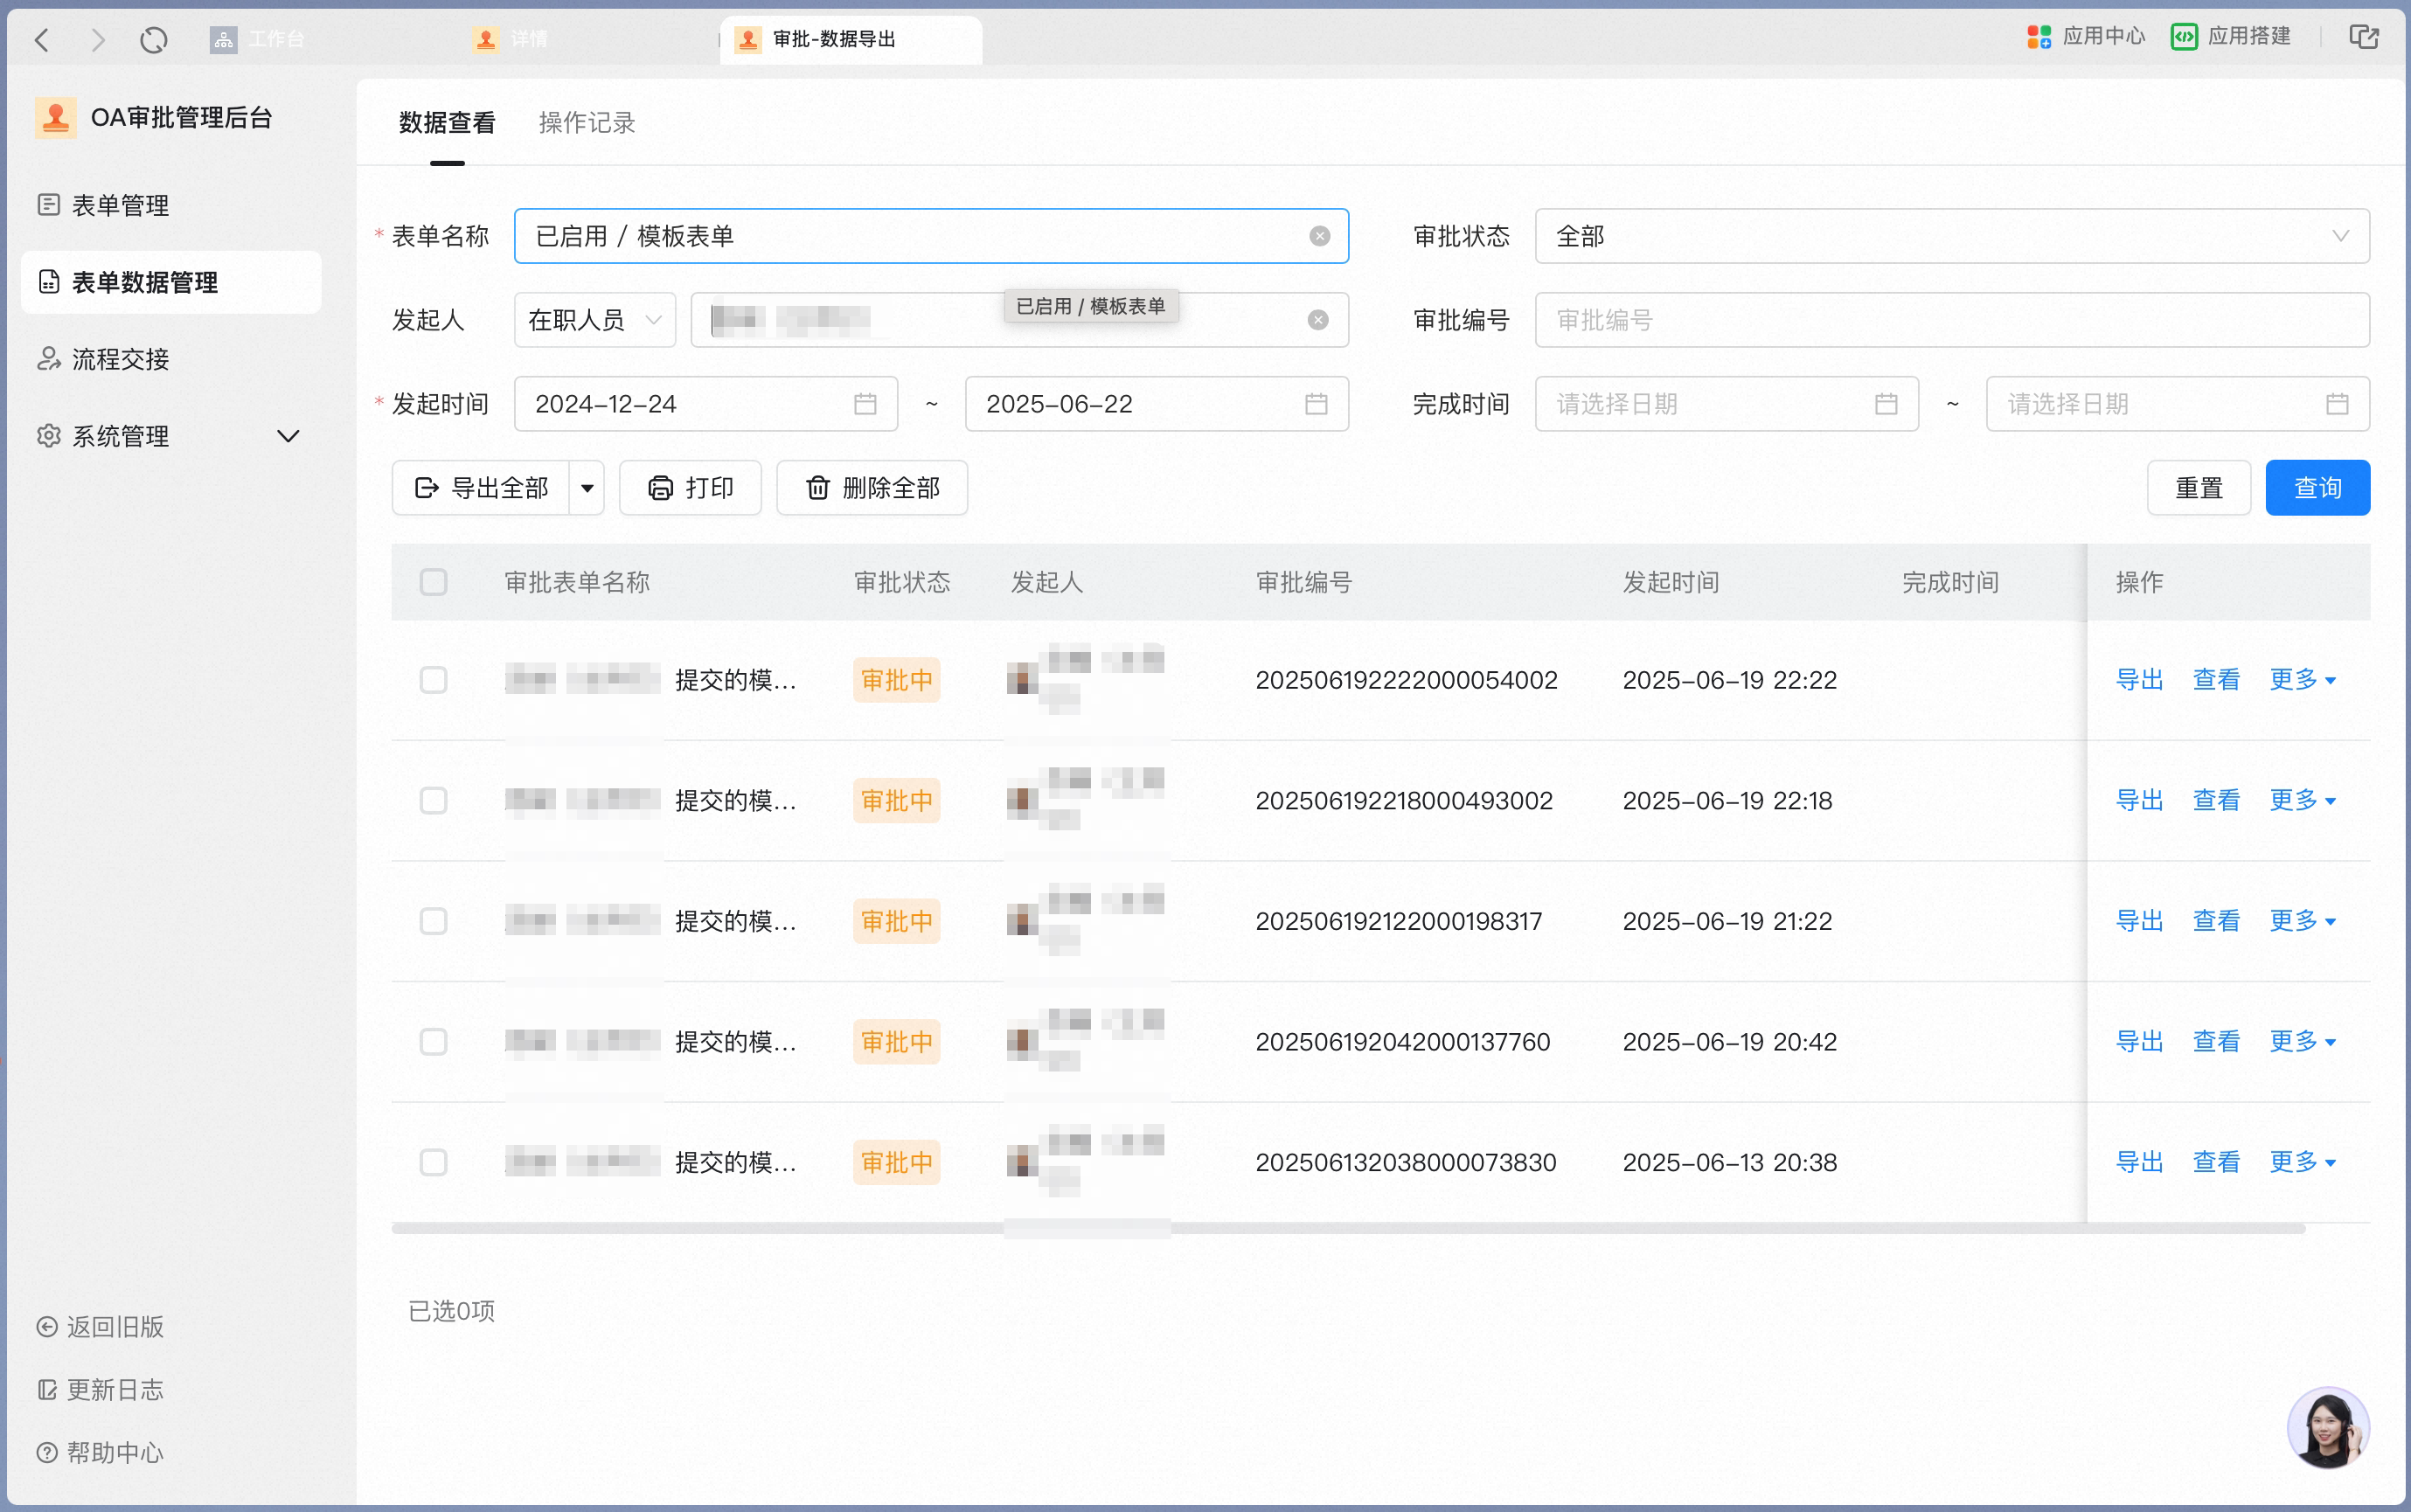
  • Query data by form name, Approval status, initiator, Approval Number, submission time, and completion time. The time range can span up to six months.
Query data by multiple conditions
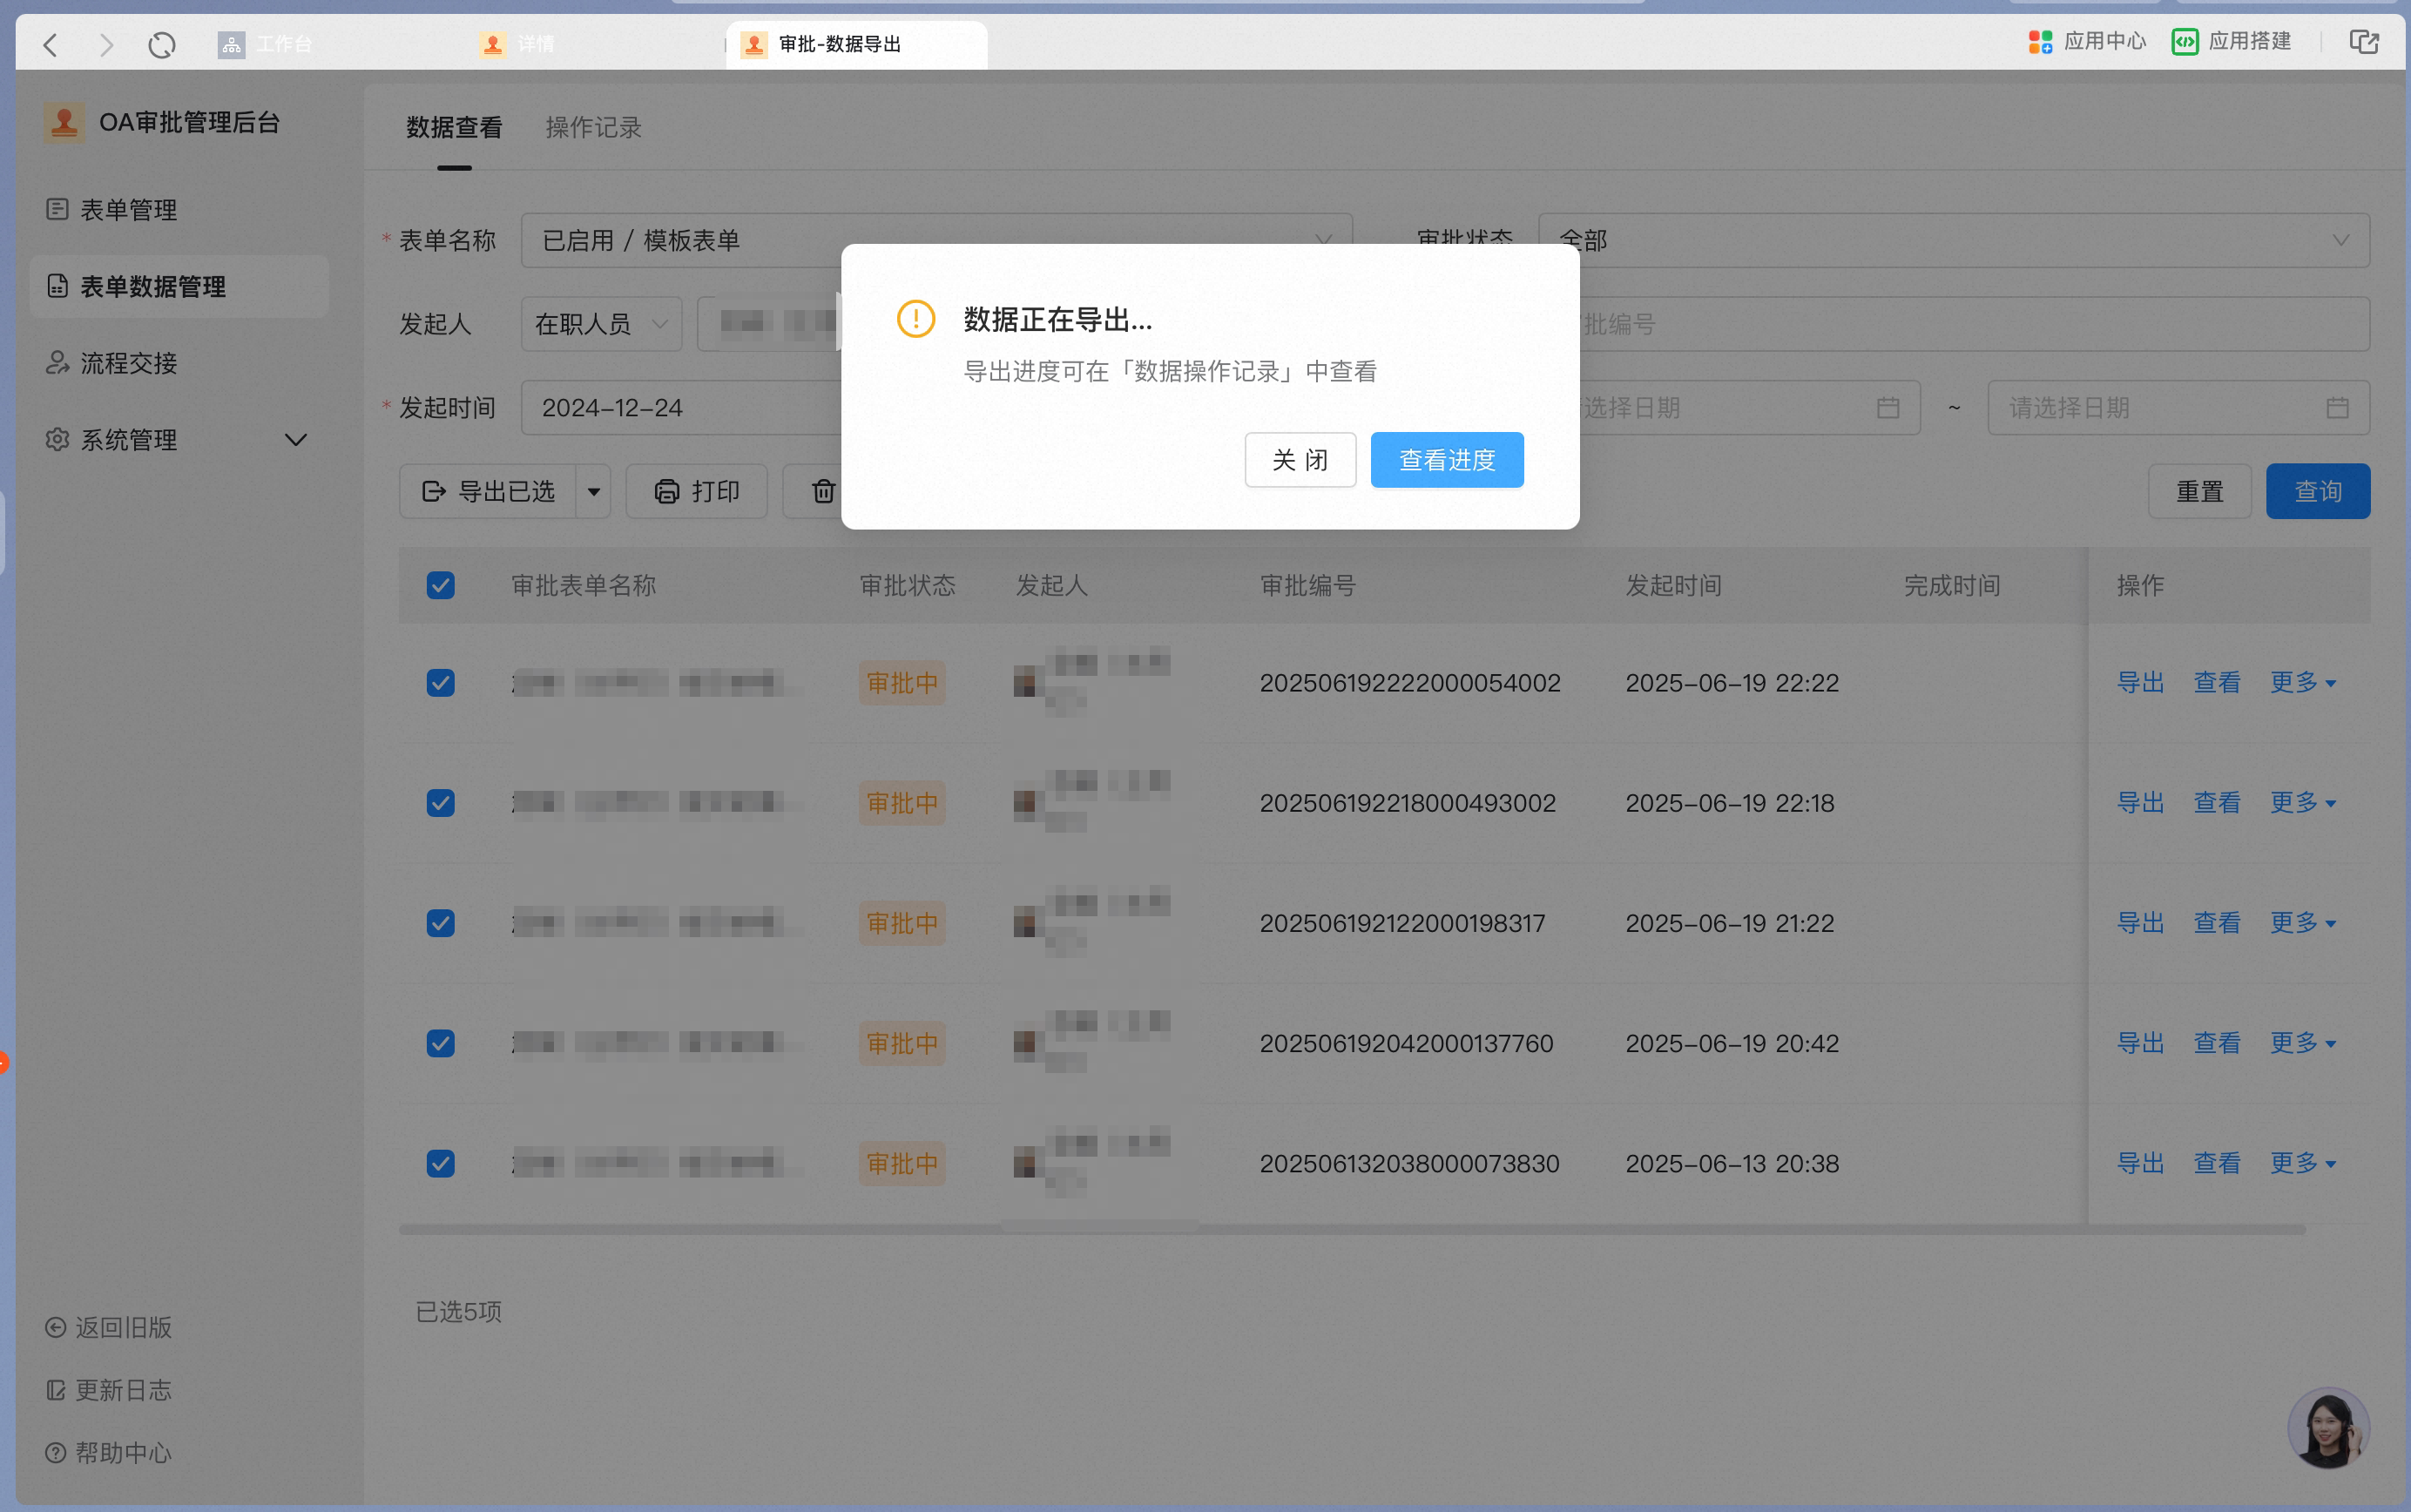
  • Select the query results — multiple Records or Select all — then click “Export all”.
Select query results and click Export all

2. Attachment Management

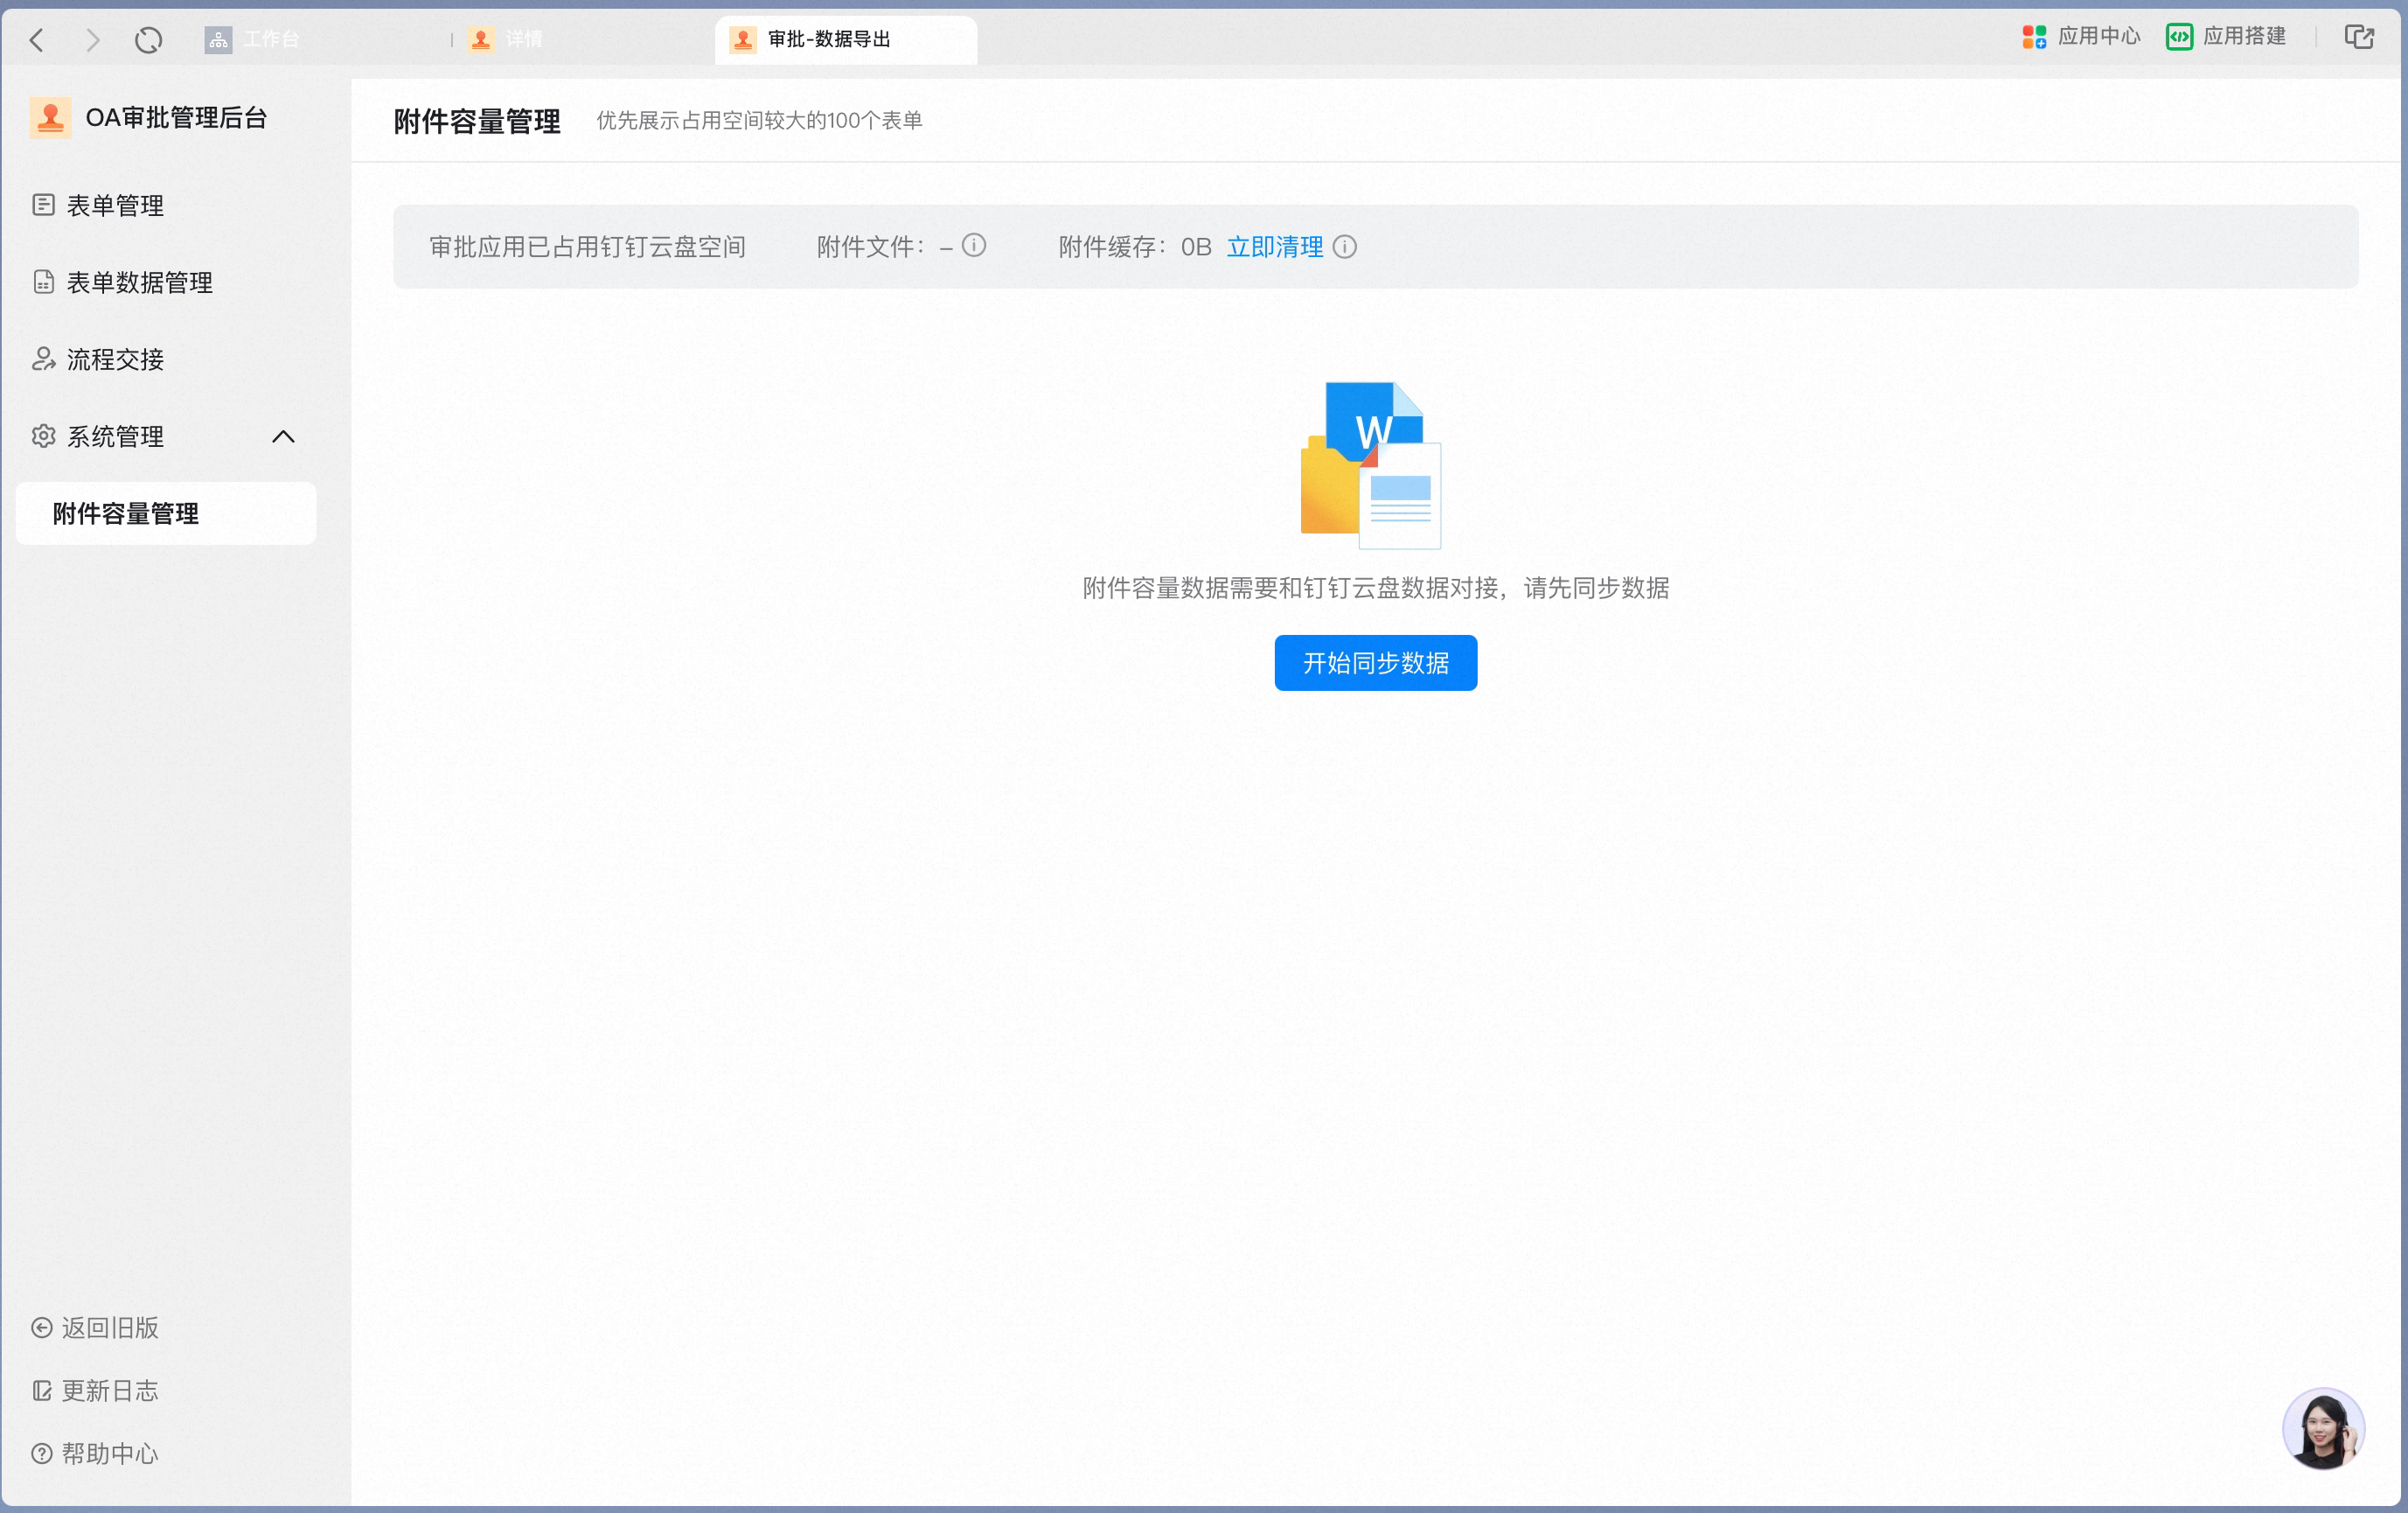
Click [Attachment storage management]. Data must be synced first when you open it for the first time.
Open Attachment storage management

3. Activity Log

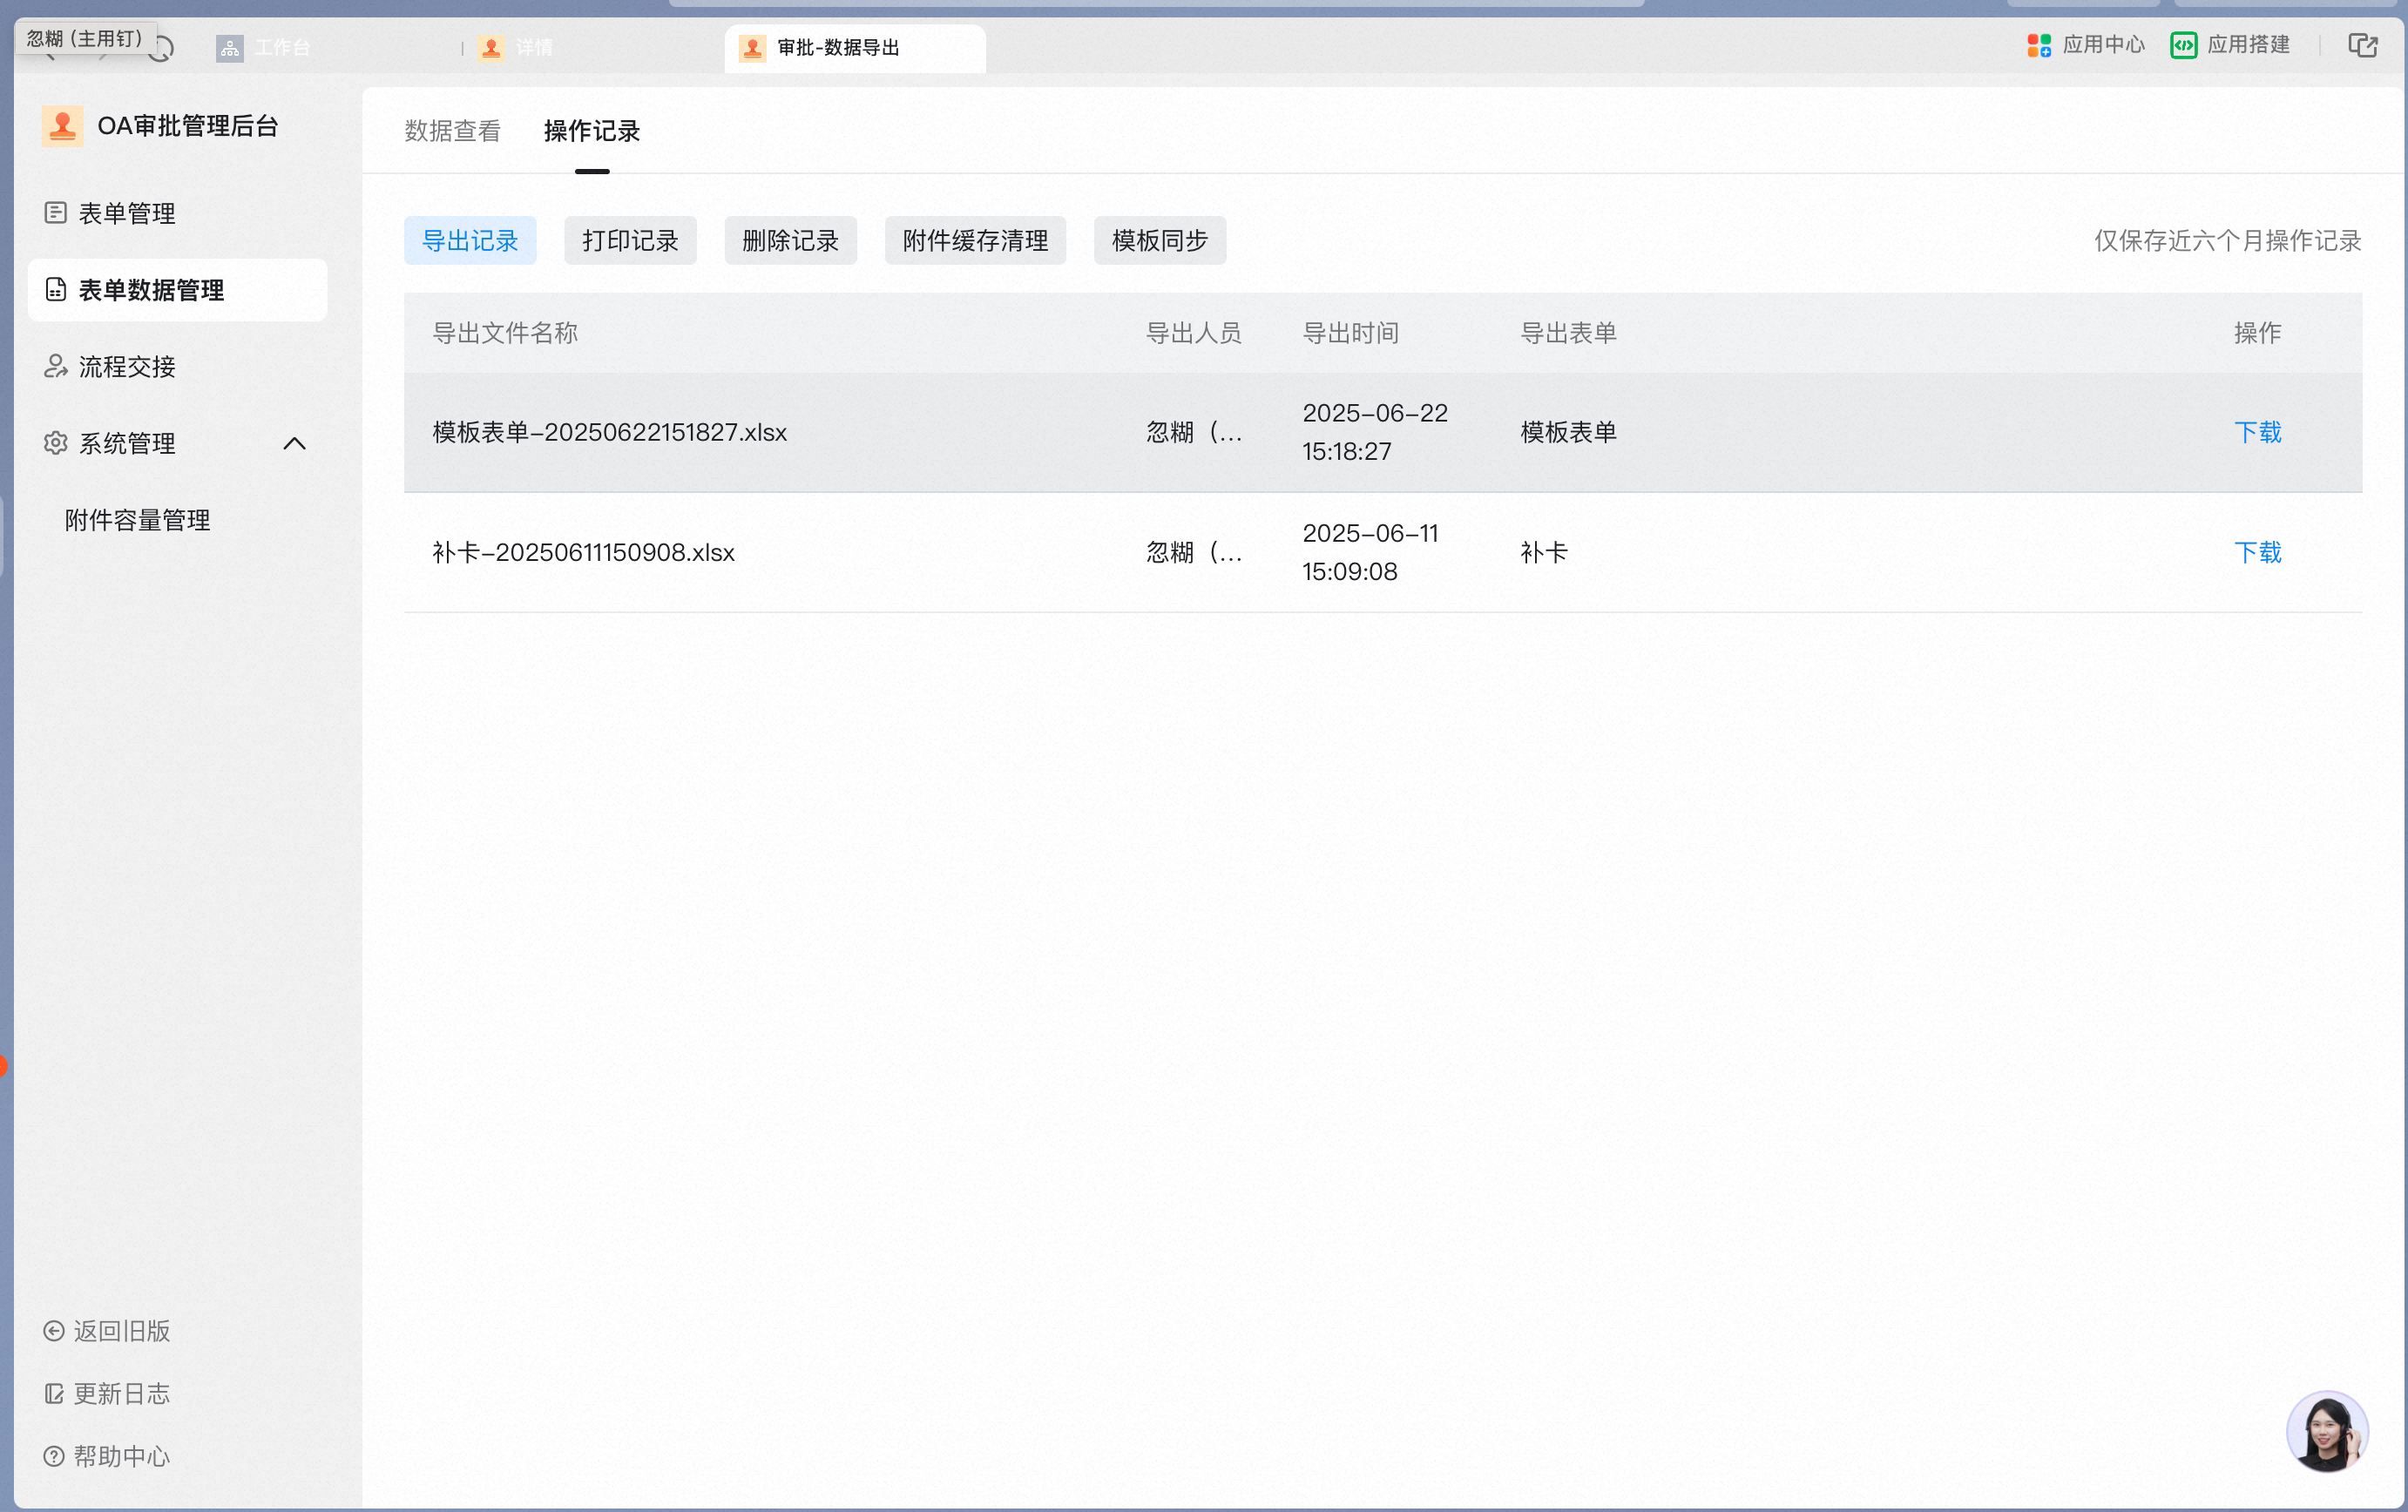
Under [Data Management] → [Activity log] in the Admin Console, you can view Records of “Export”, “Print”, “Delete”, “Attachment cache cleanup”, “Template sync”, and other actions.
View the Activity log in the Admin Console
4. Process Handover

  1. Approval process handover
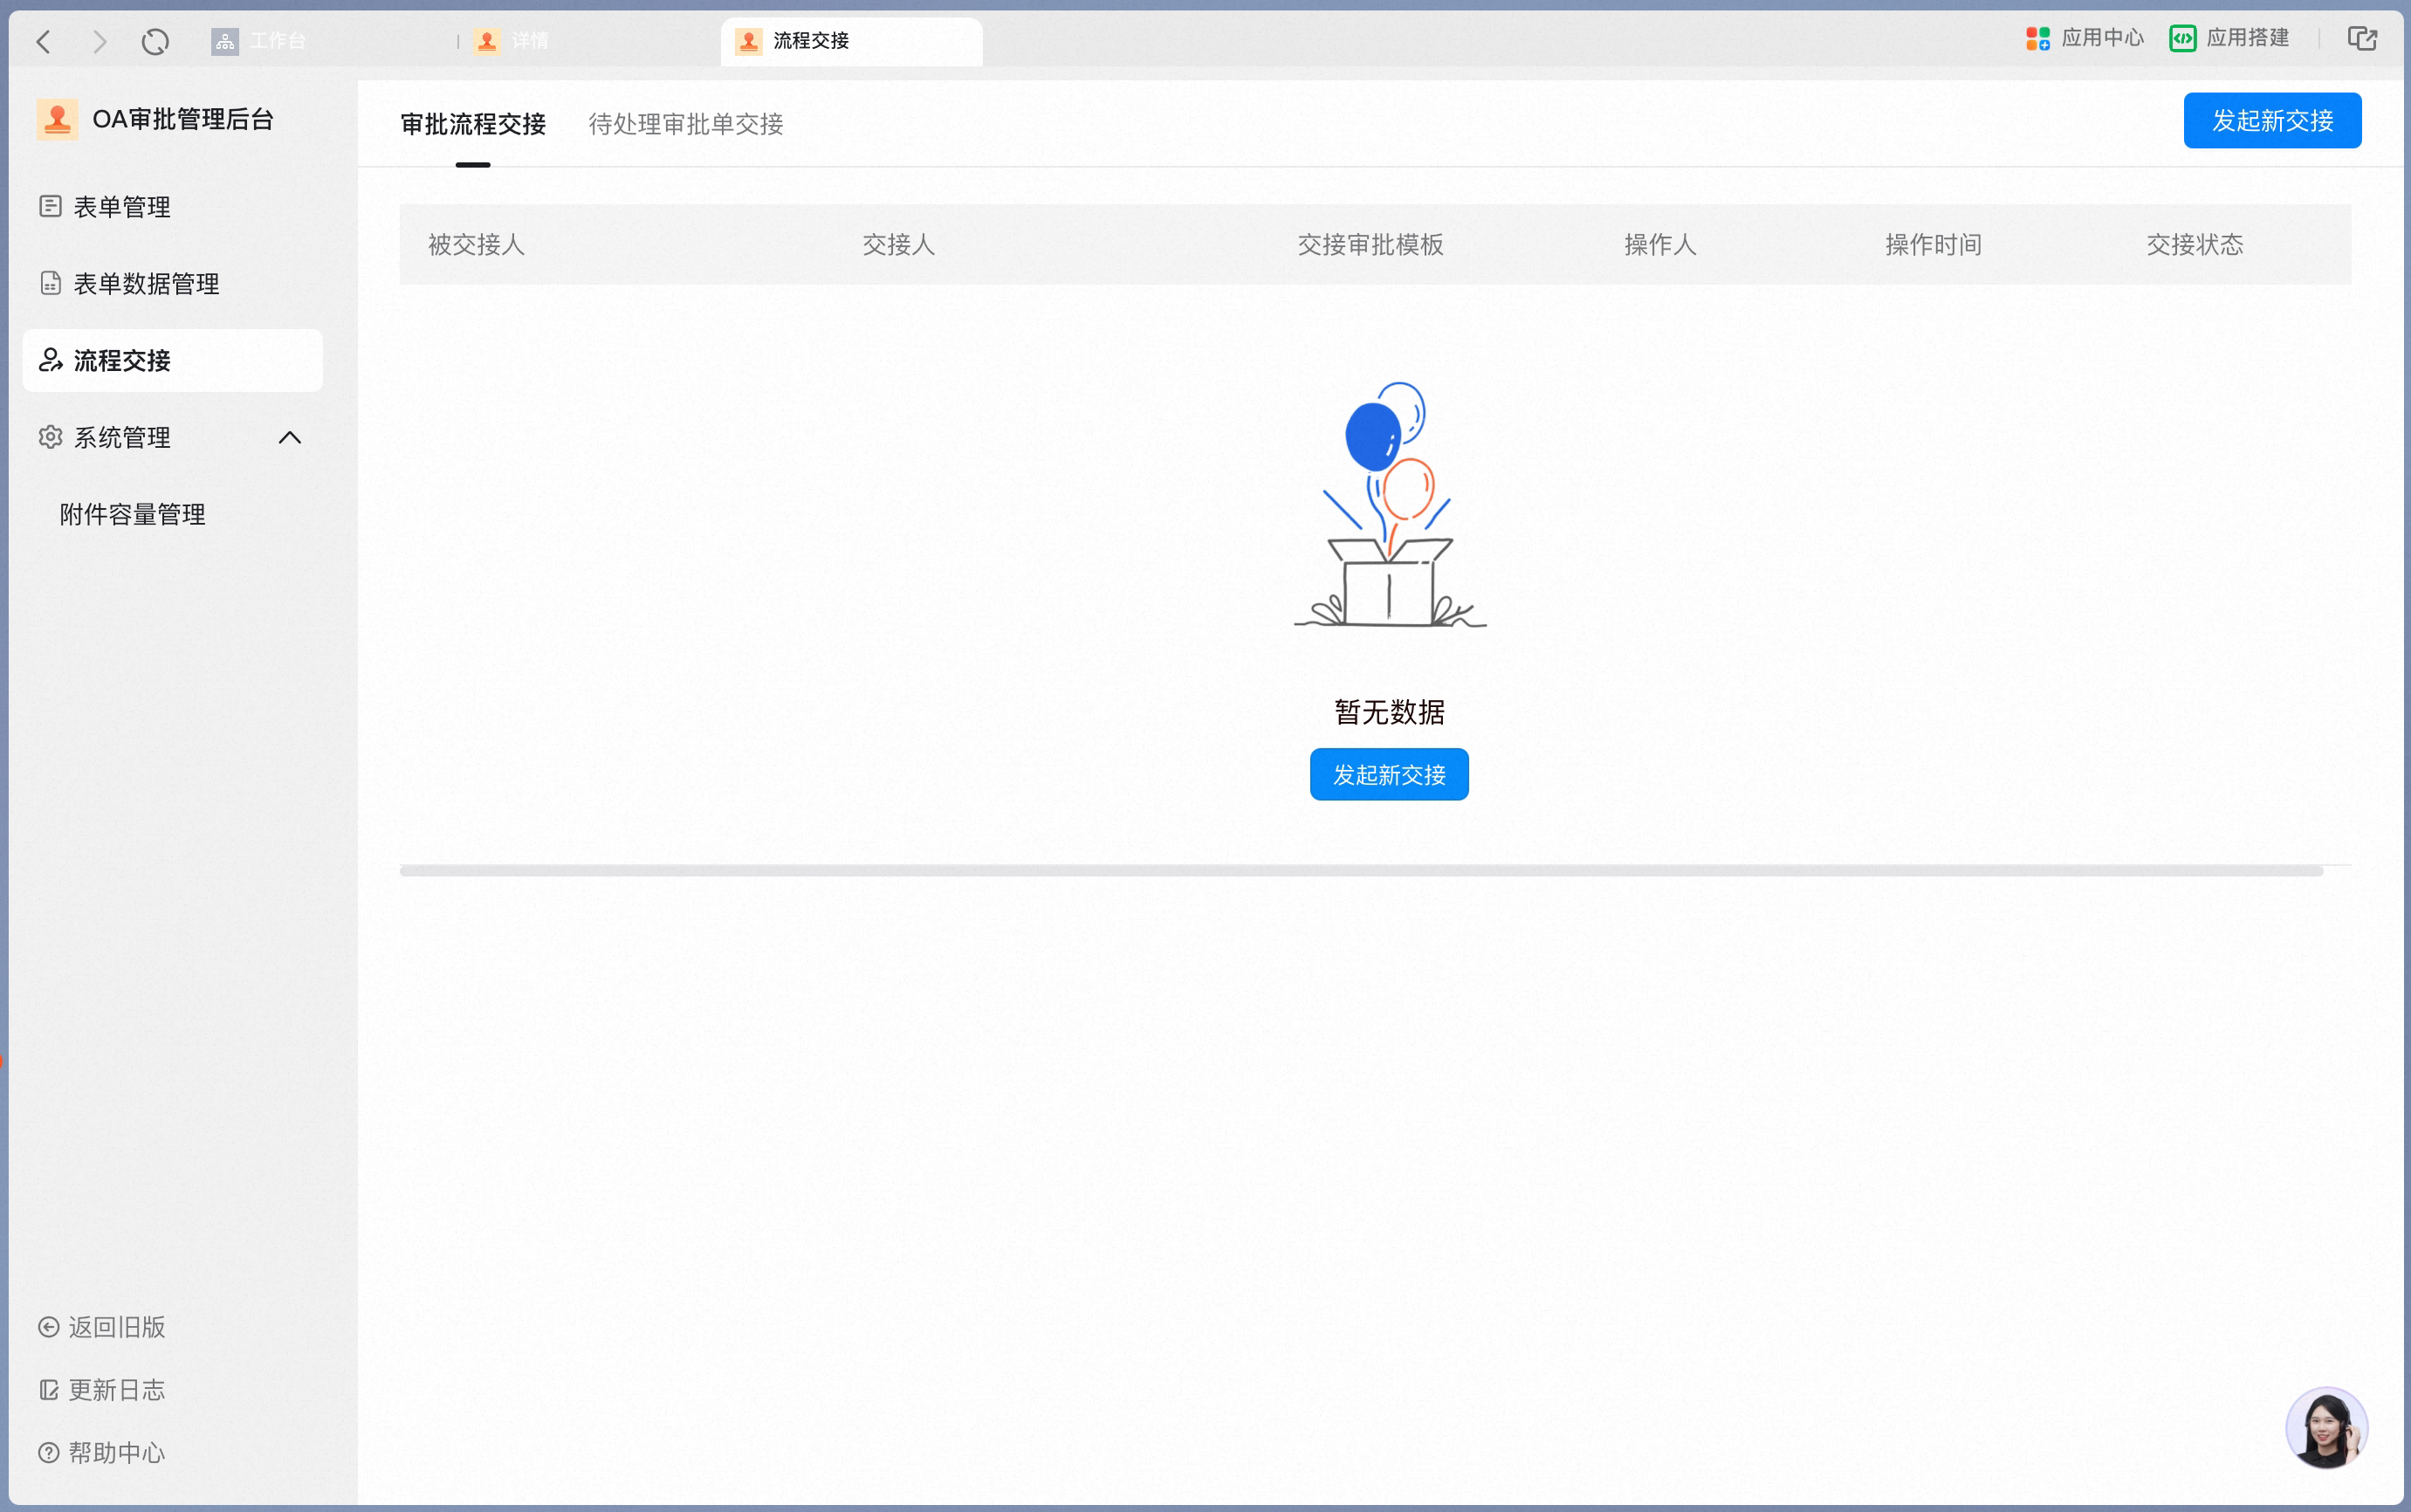
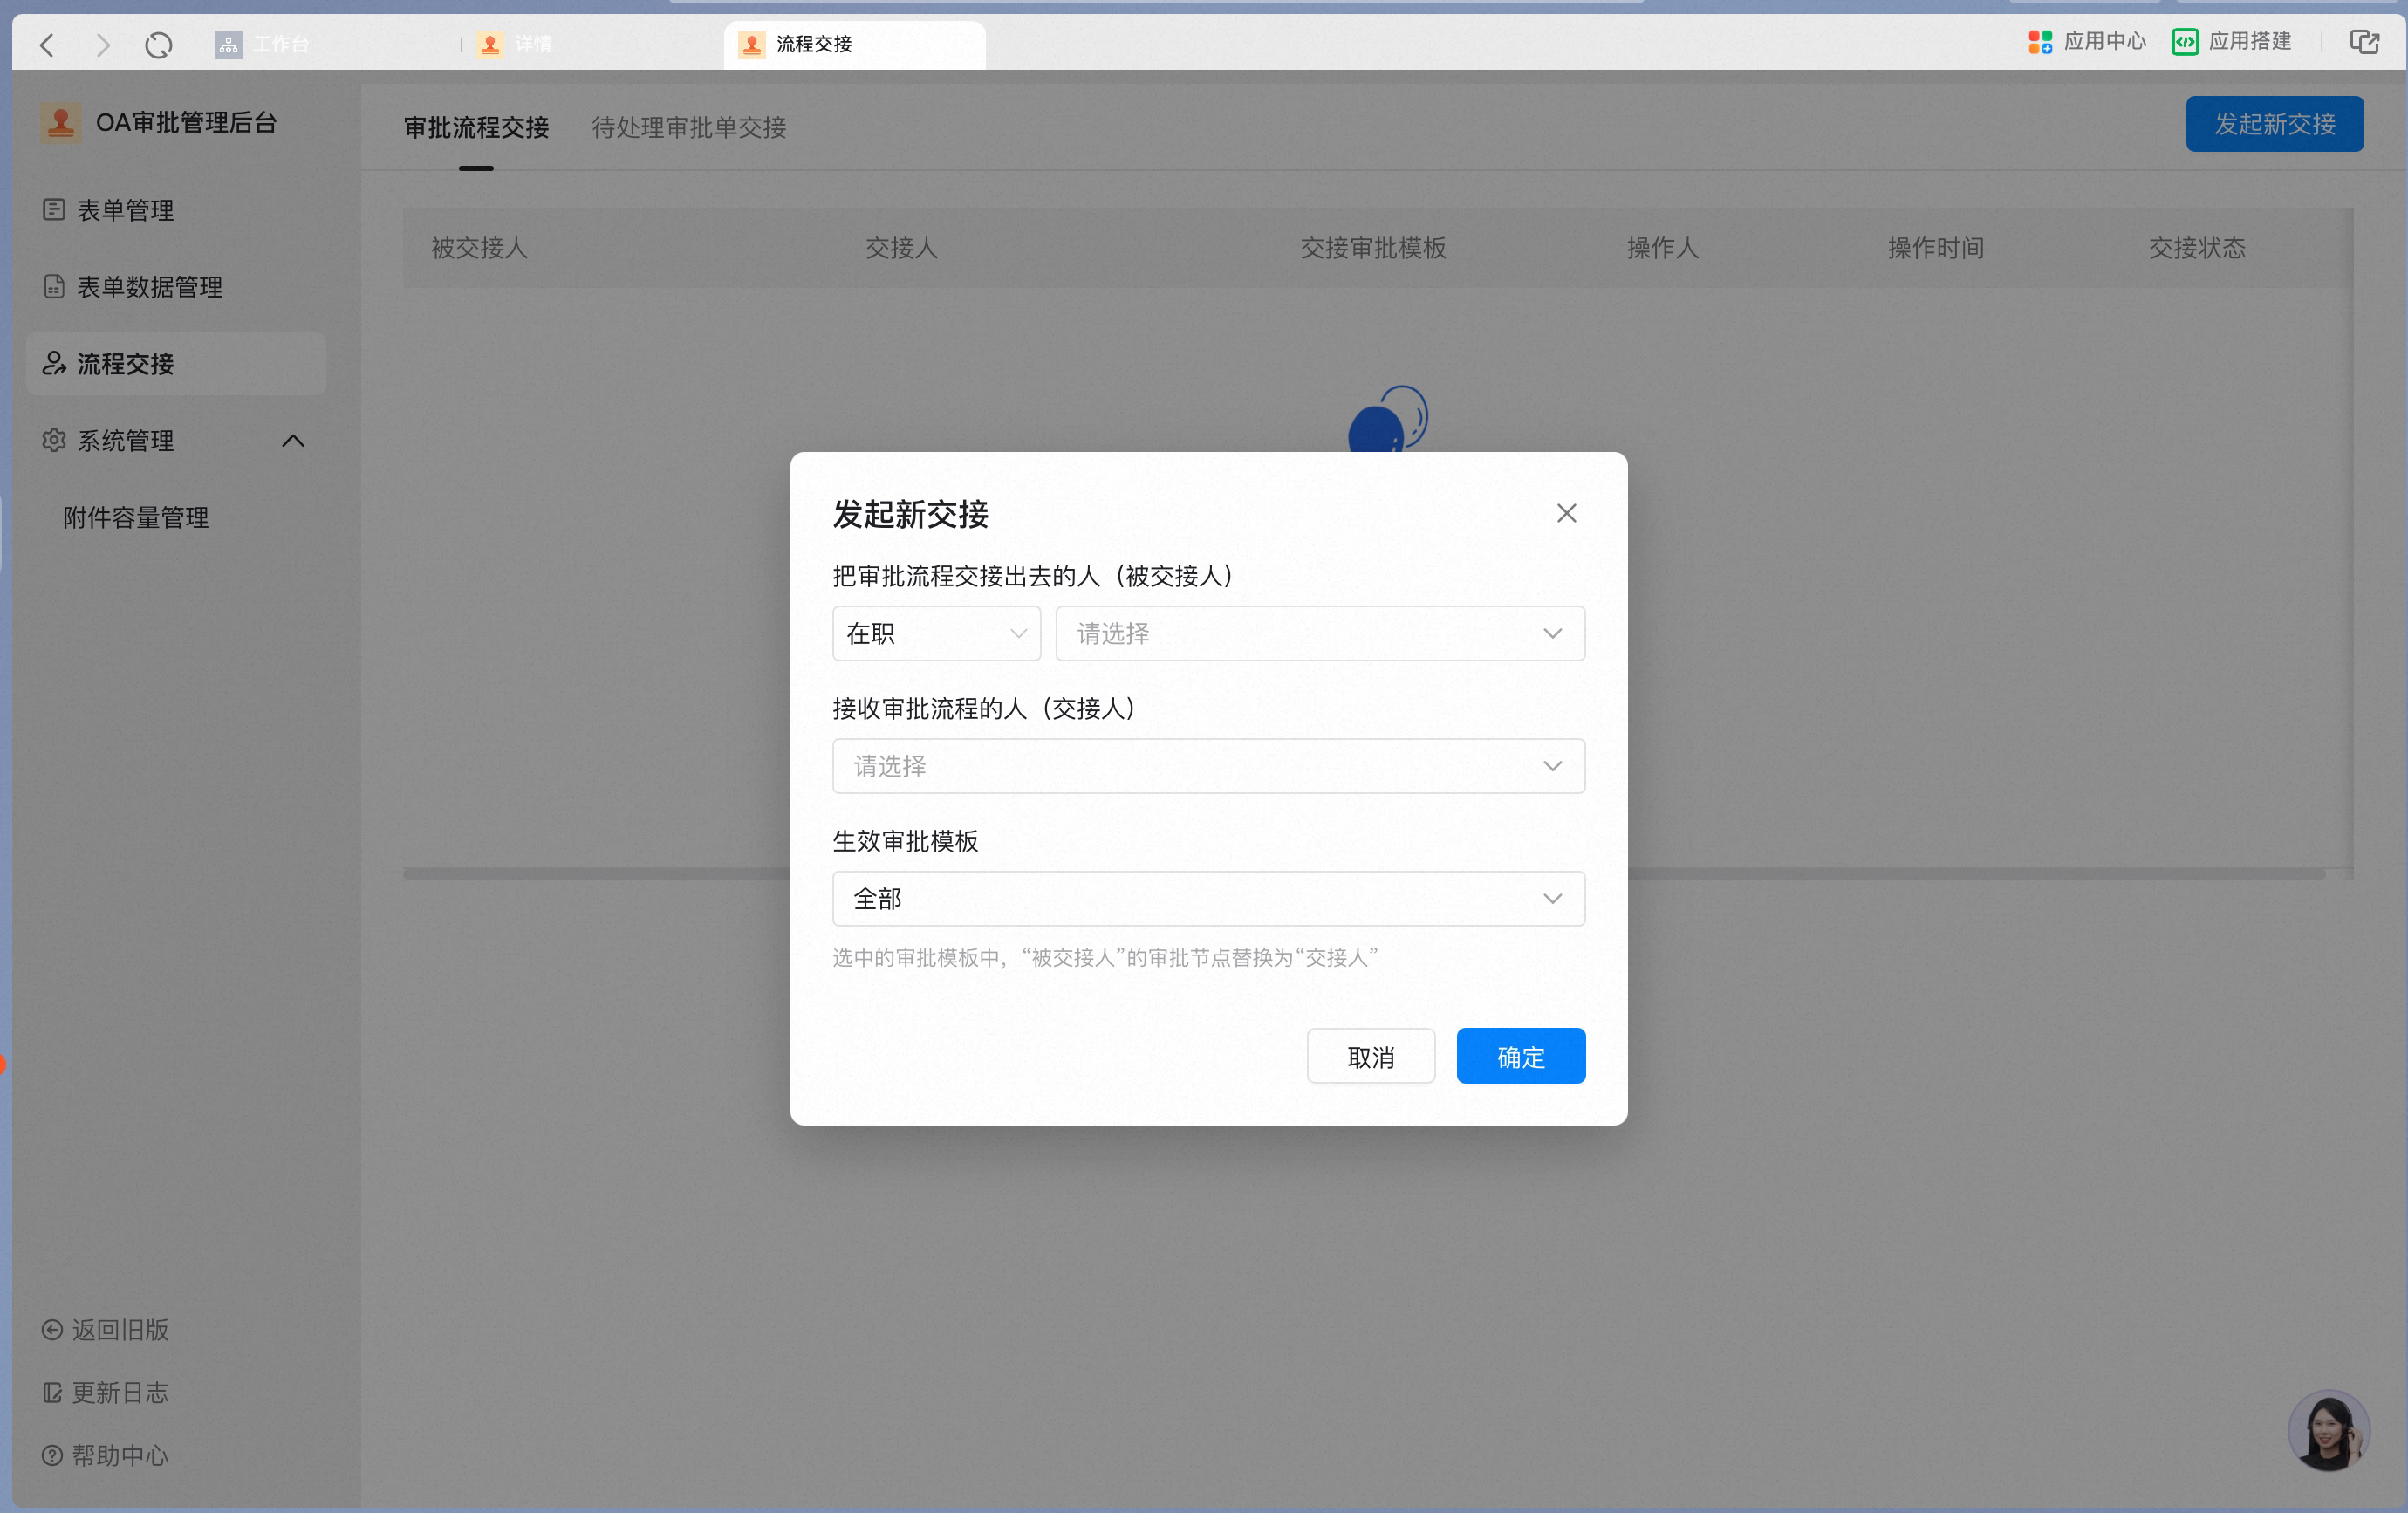
When a user’s position changes or a user leaves, go to [Process Handover] in the Admin Console to bulk-replace the “Specific users” set as approvers in the Approval process with other “Specific users”, quickly completing the approver change. Selecting another type — such as manager or Role — replaces the manager or Role settings, and the approvers in the Approval process are then replaced automatically.

In Process Handover, select the approver to replace
Bulk-replace the specific approvers in the Approval process
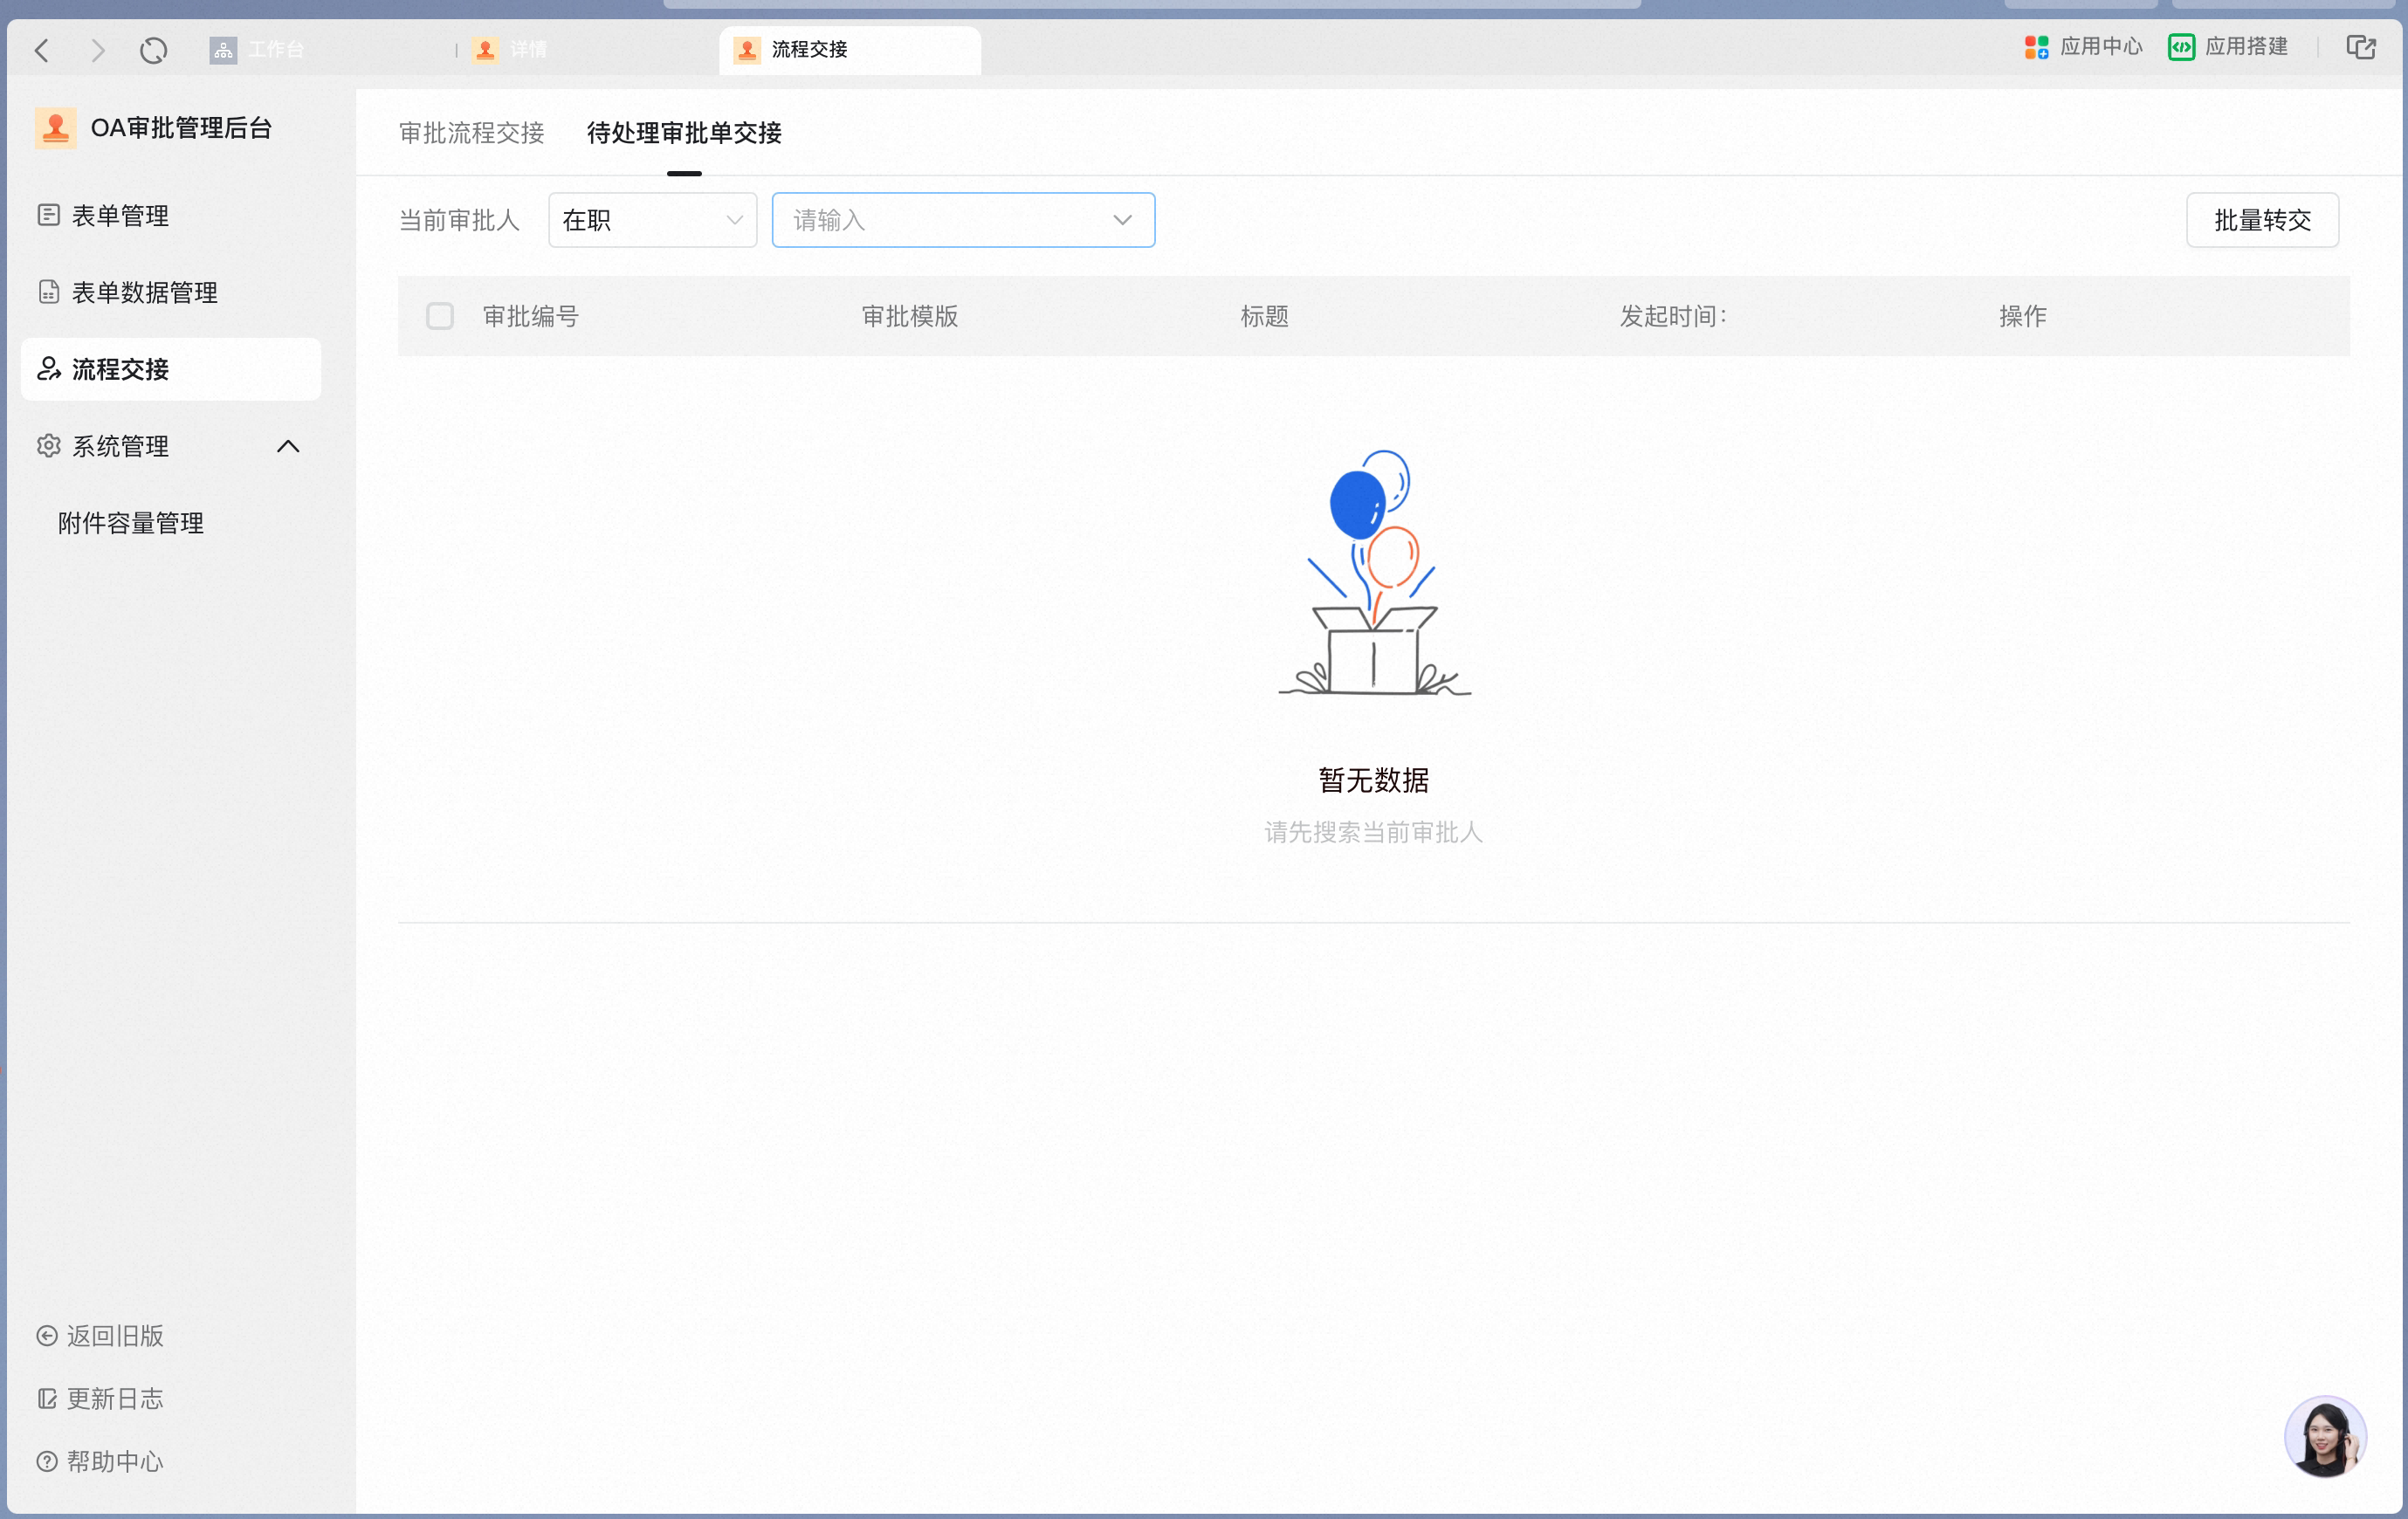
  1. Pending Approval form handover
Approval forms that have already been submitted and are in progress must be bulk-transferred via [Pending Approval form handover]. Note:
  • Handover is only possible for Approval forms that have already reached the Step to be handed over — Approval forms that have not yet reached that Step do not appear in the pending list;
  • For Approval forms set to use a Role or manager as approver that have already been submitted and are in progress, you must also perform a Pending Approval form handover. Adjusting the Role or department manager does not automatically replace the current approver;
Pending Approval form handover page

5. Download Approval Form Details

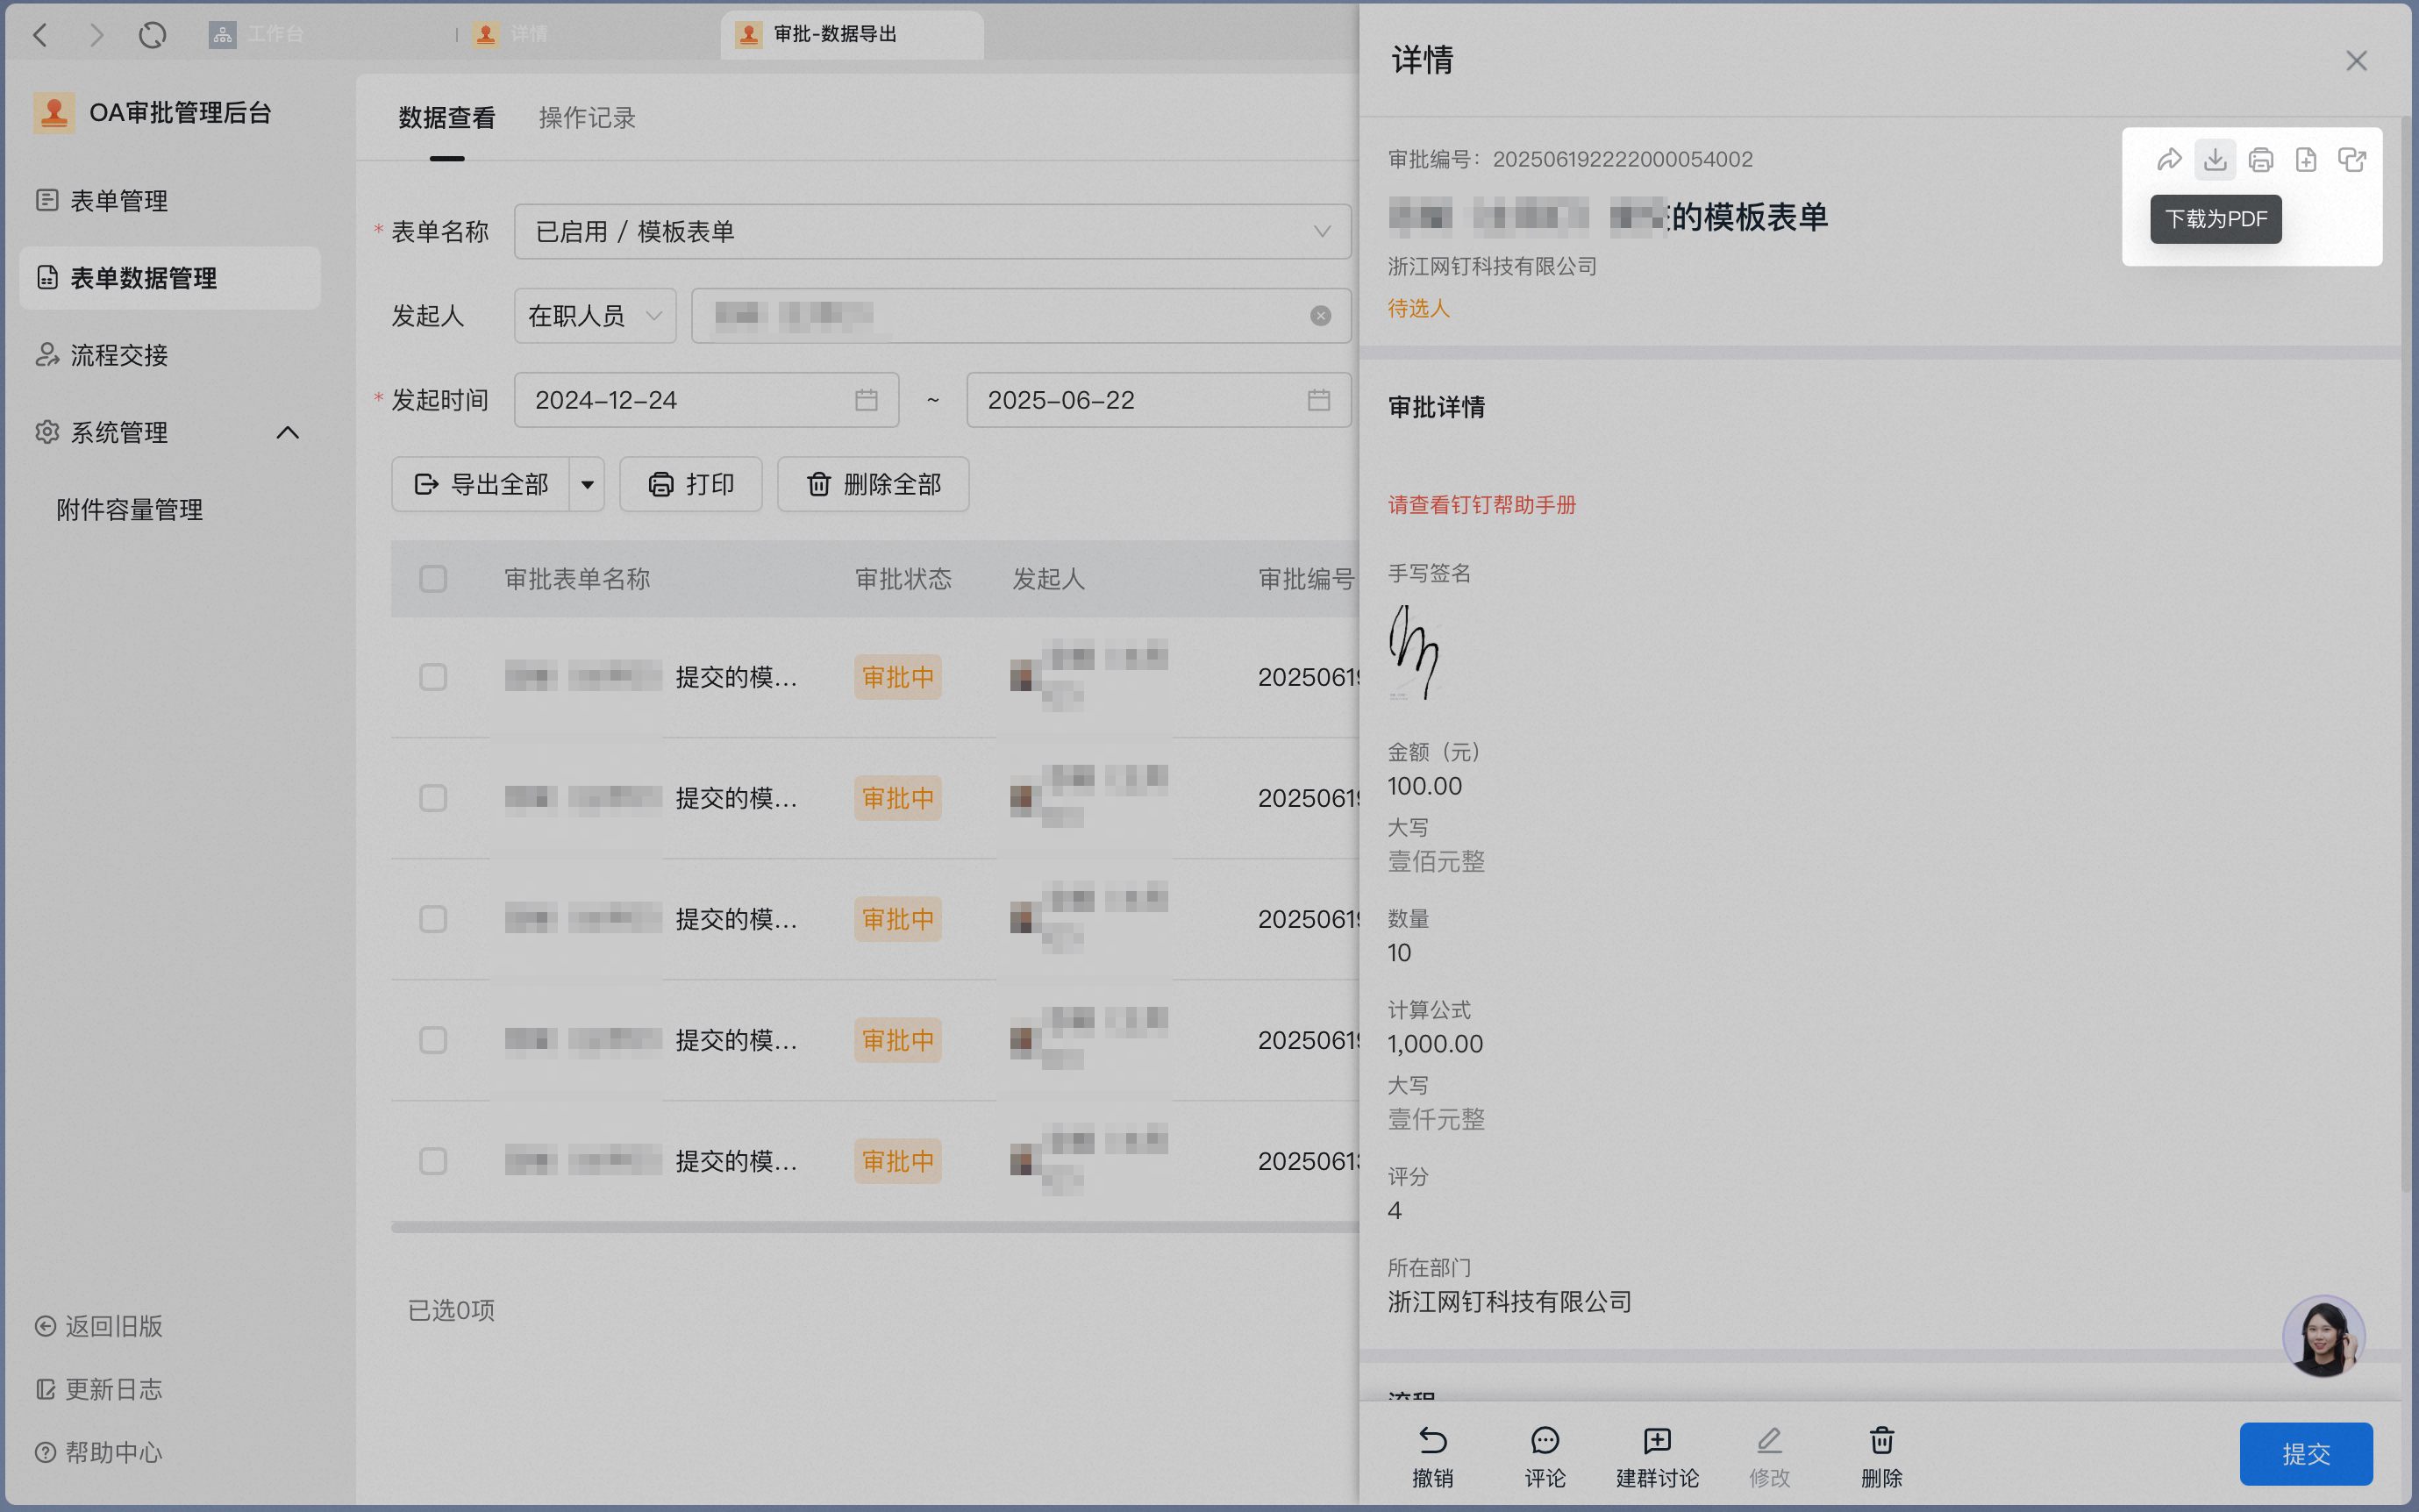
Click View to open the form details, then click “Download” in the upper-right corner to download the current form’s PDF locally for archiving.
Click Download in the upper-right corner of the form details