Chats
Chats Calendar
 Meetings
 Contacts
 Mail
Mail Docs
Docs Drive
Drive AI Table
 AI Minutes
 Attendance
 Approval
 YiDA
YiDA Admin Console
1. Overview
Admins can set up conditional approval.A conditional branch is not a Step in the traditional sense — it is used to split the flow under complex conditions. A conditional branch runs only when its specific rules are met. Based on the process design diagram, conditional branches at the same Tier are evaluated from left to right by priority. As soon as one branch’s rules pass, the remaining branches are skipped. Exactly one conditional branch will ultimately pass.Use cases:When an Approval is initiated and different selections lead to different approval Steps, conditional approval is required (leave requests of 3 days or less go to the manager for approval; requests longer than 3 days require approval from both the manager and the responsible executive).When the initiator’s Department or Role differs and the approval Steps differ accordingly, conditional approval is required (Approvals initiated by an Employee are approved by the department manager, while Approvals initiated by a department head are approved by the responsible executive).
2. Prerequisites
- Only an Approval Admin can perform process design, so you must first become an Approval Admin.




3. Steps
1. Enter Approval settings
On the Approval Admin Console — Form management page, click [Edit] under Form Actions.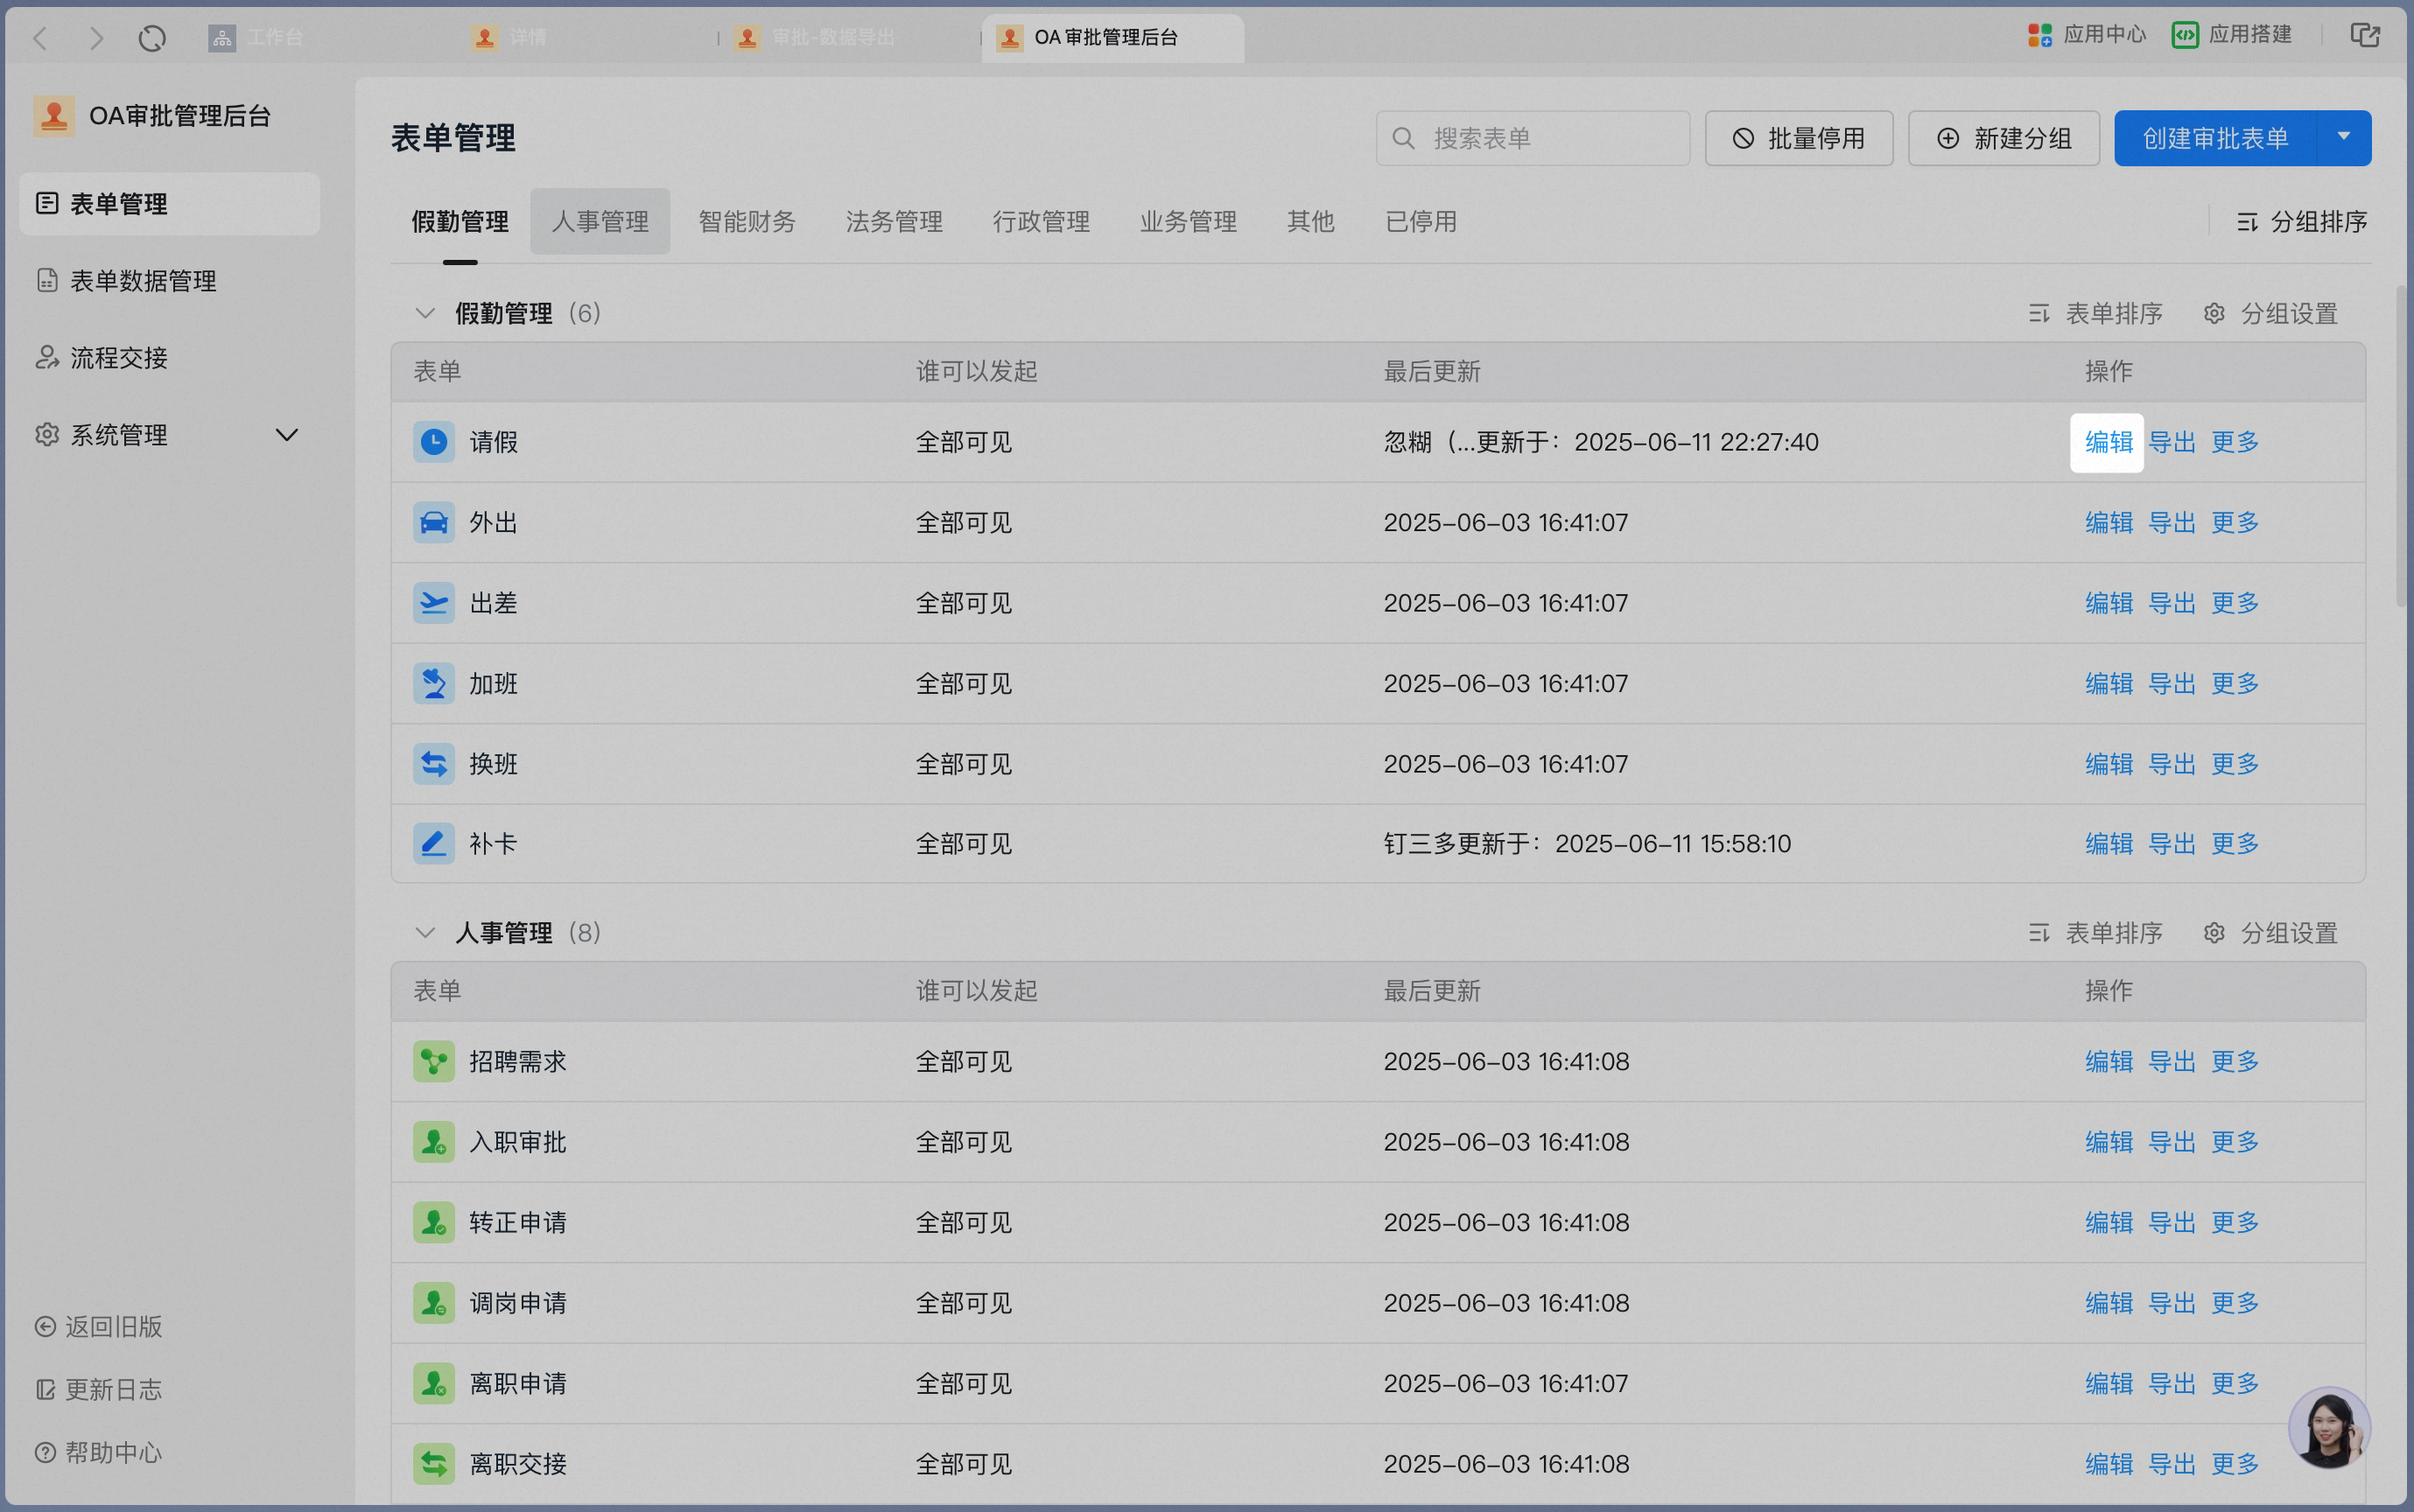

2. Add a conditional branch
Click the ”+” icon and select “conditional branch”.
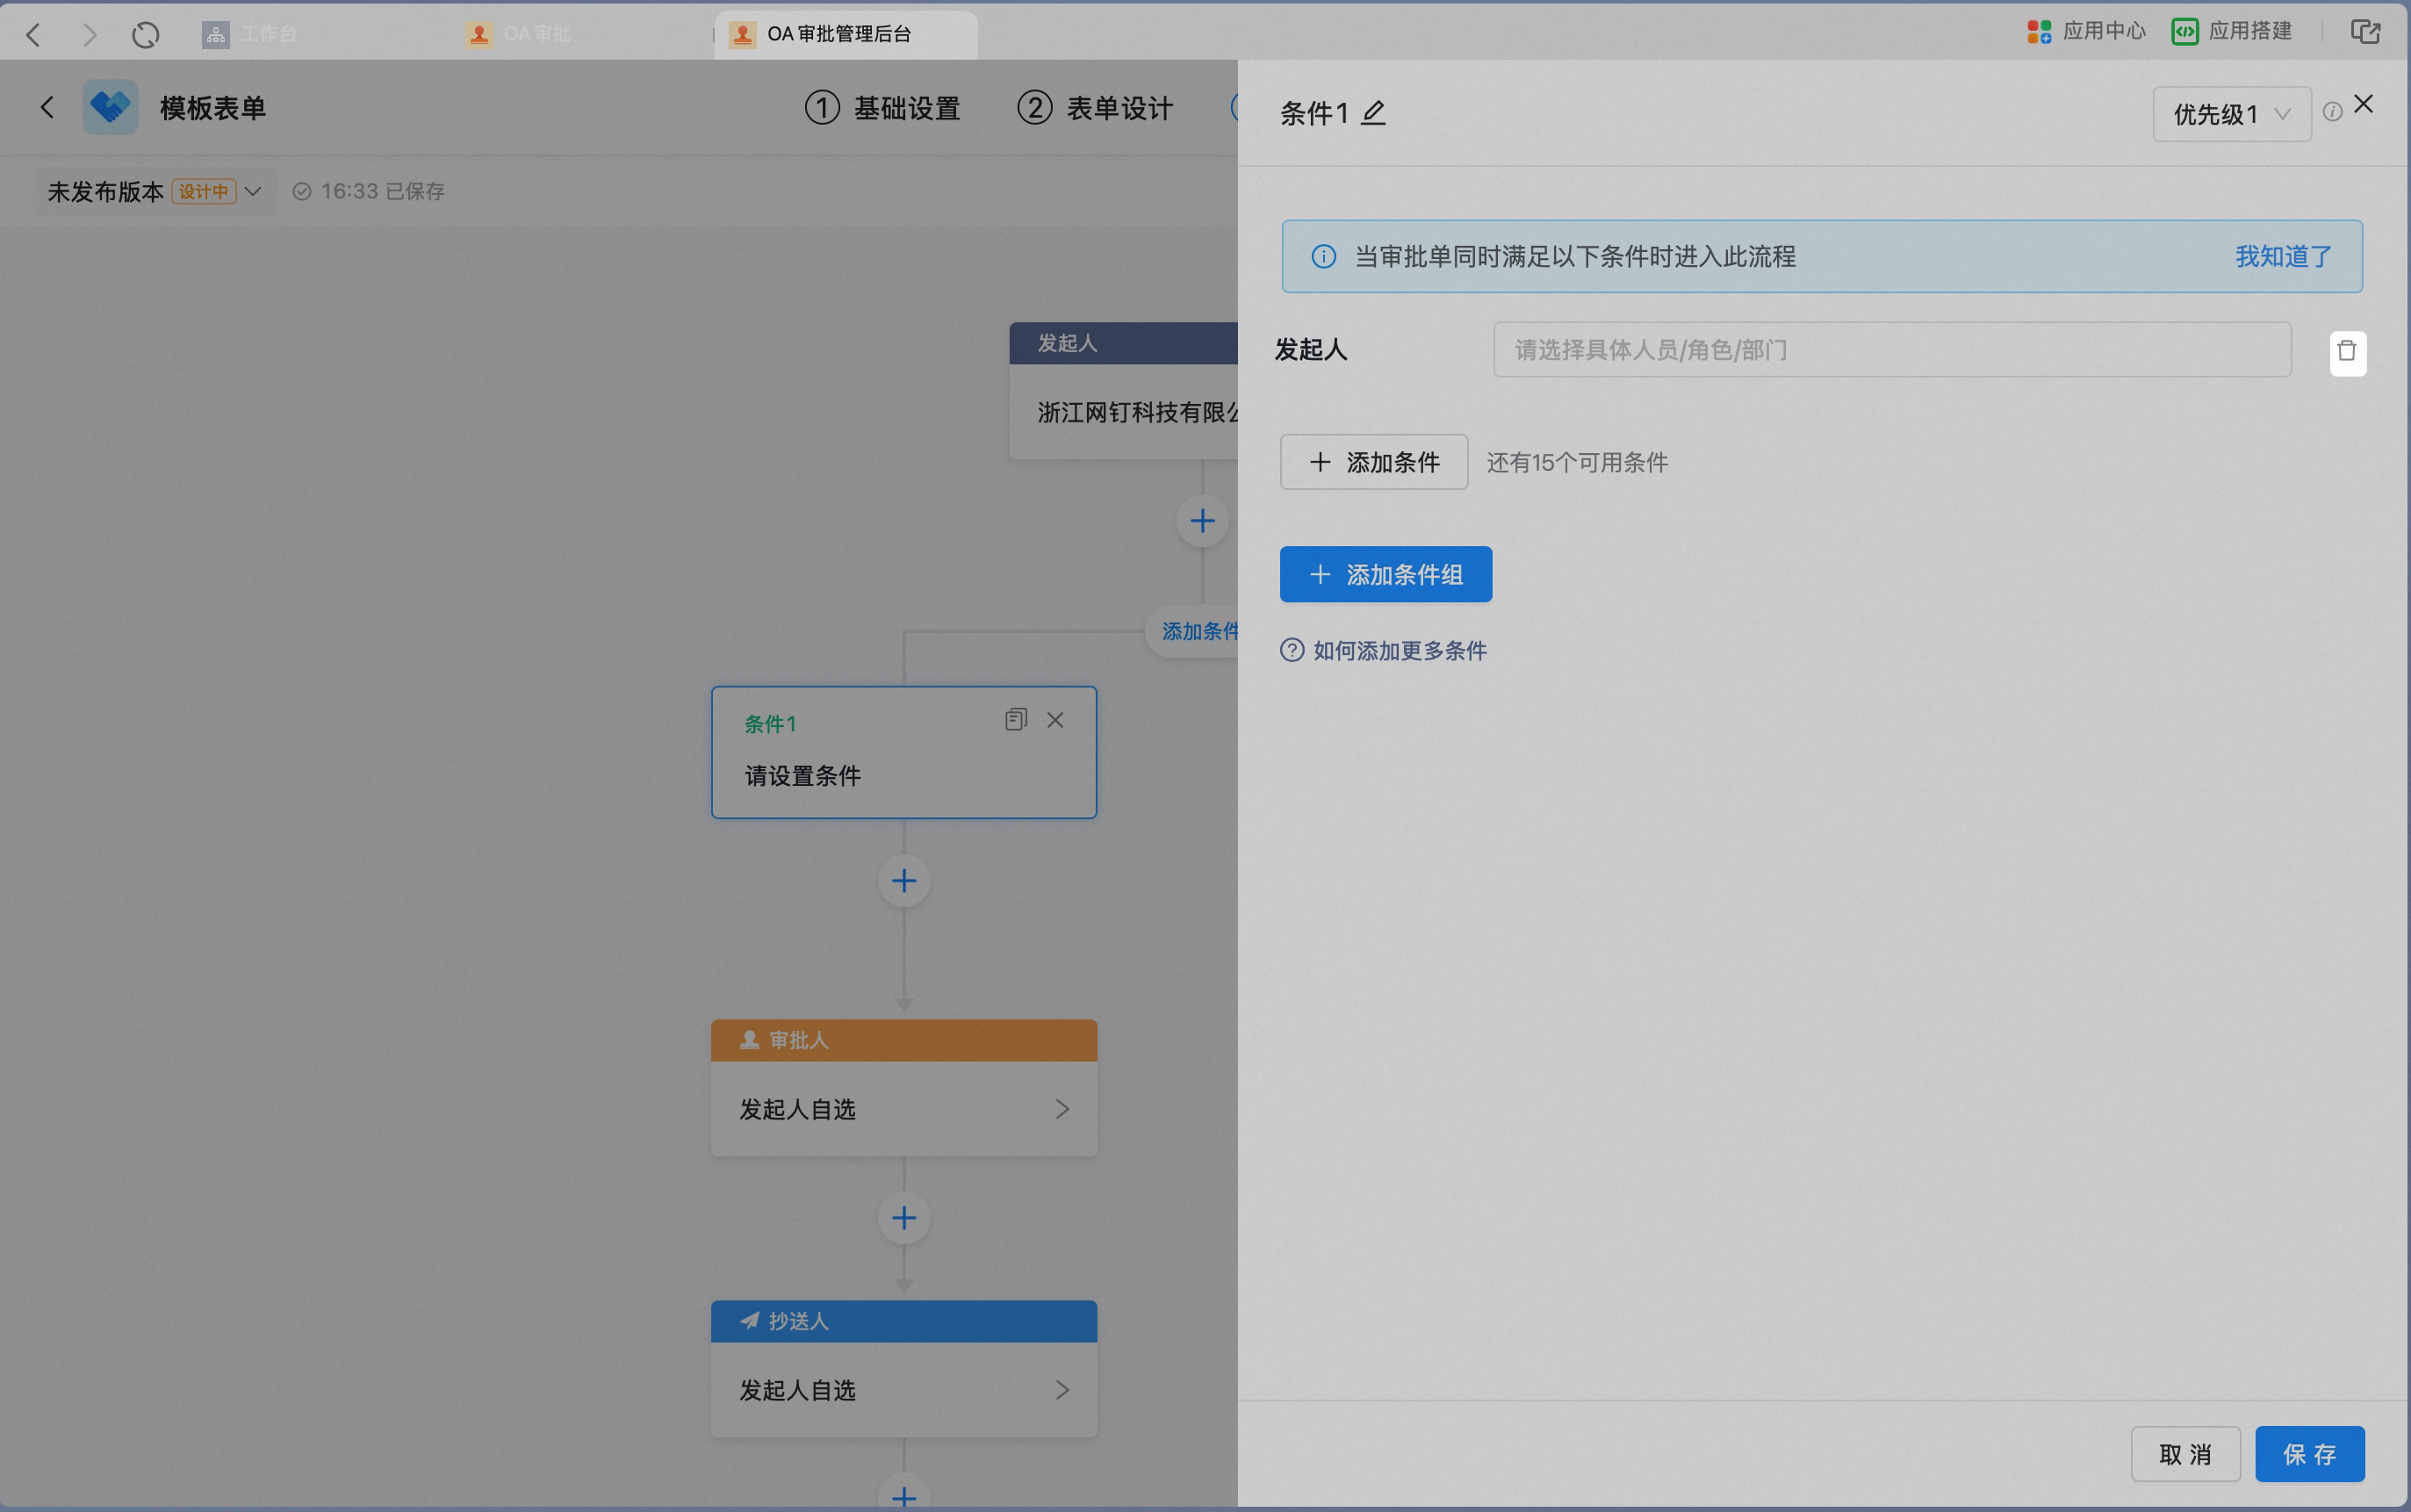
3. Set a single condition
Click the condition Card to open the side panel and start configuring the condition.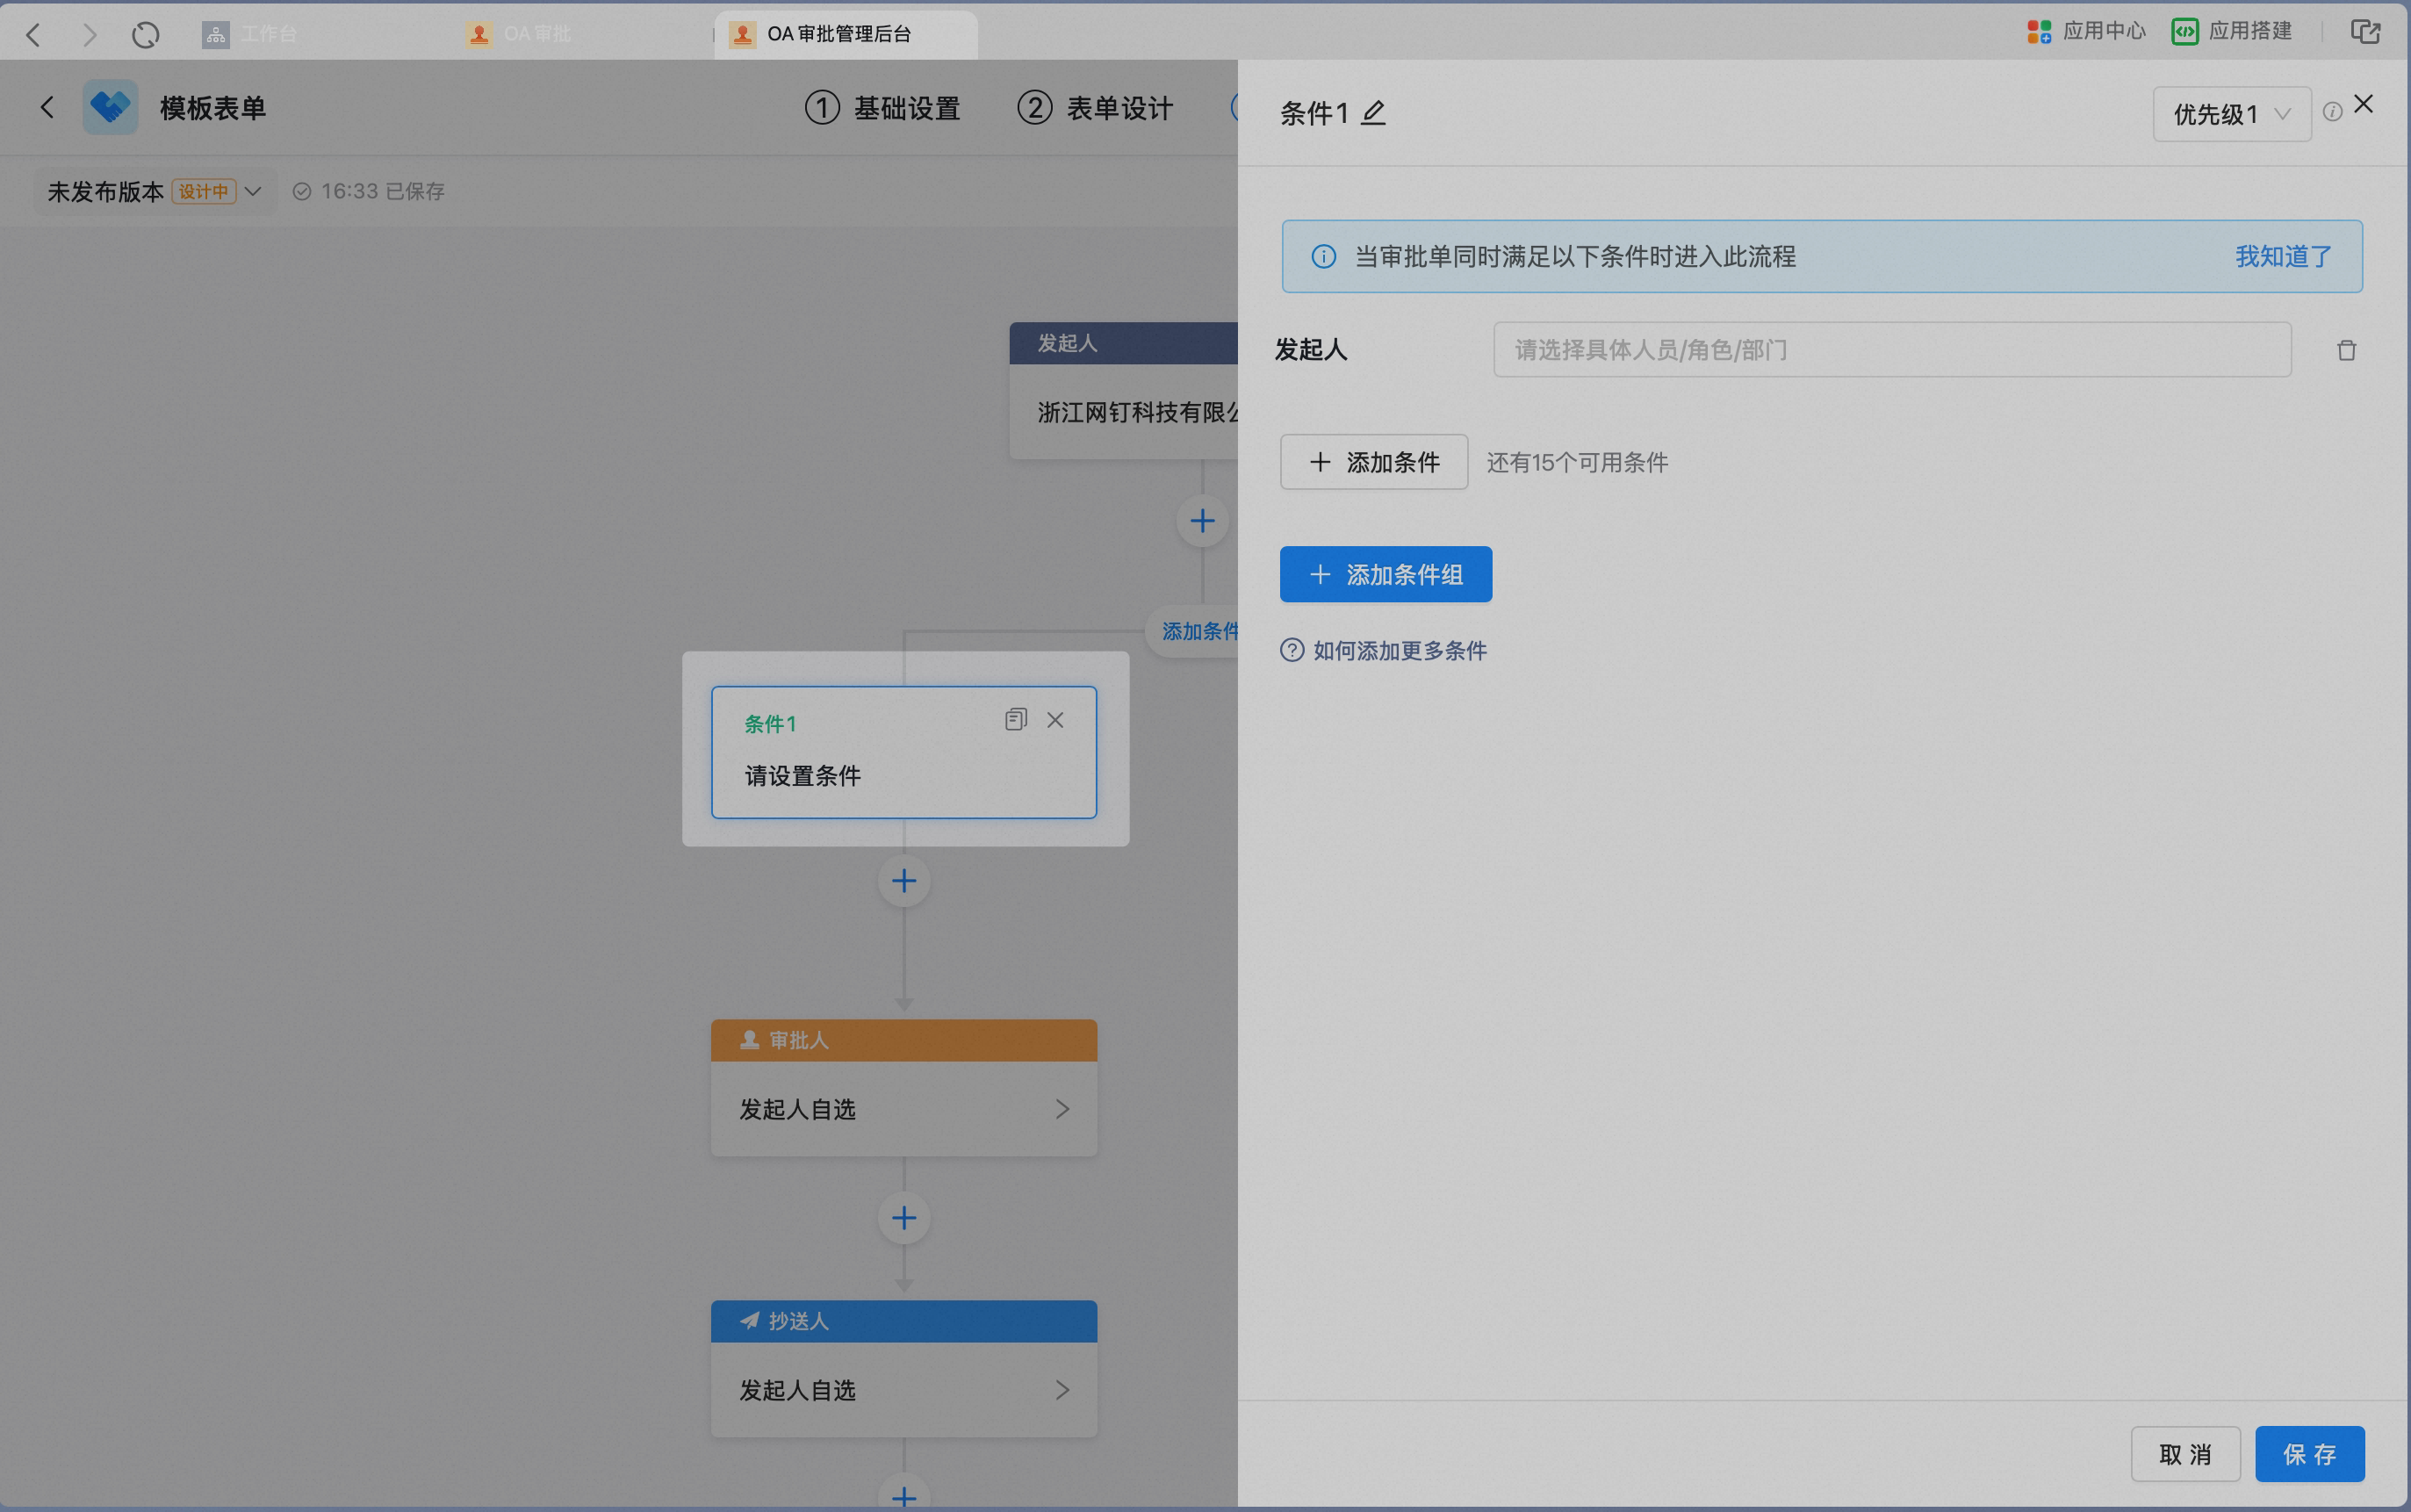
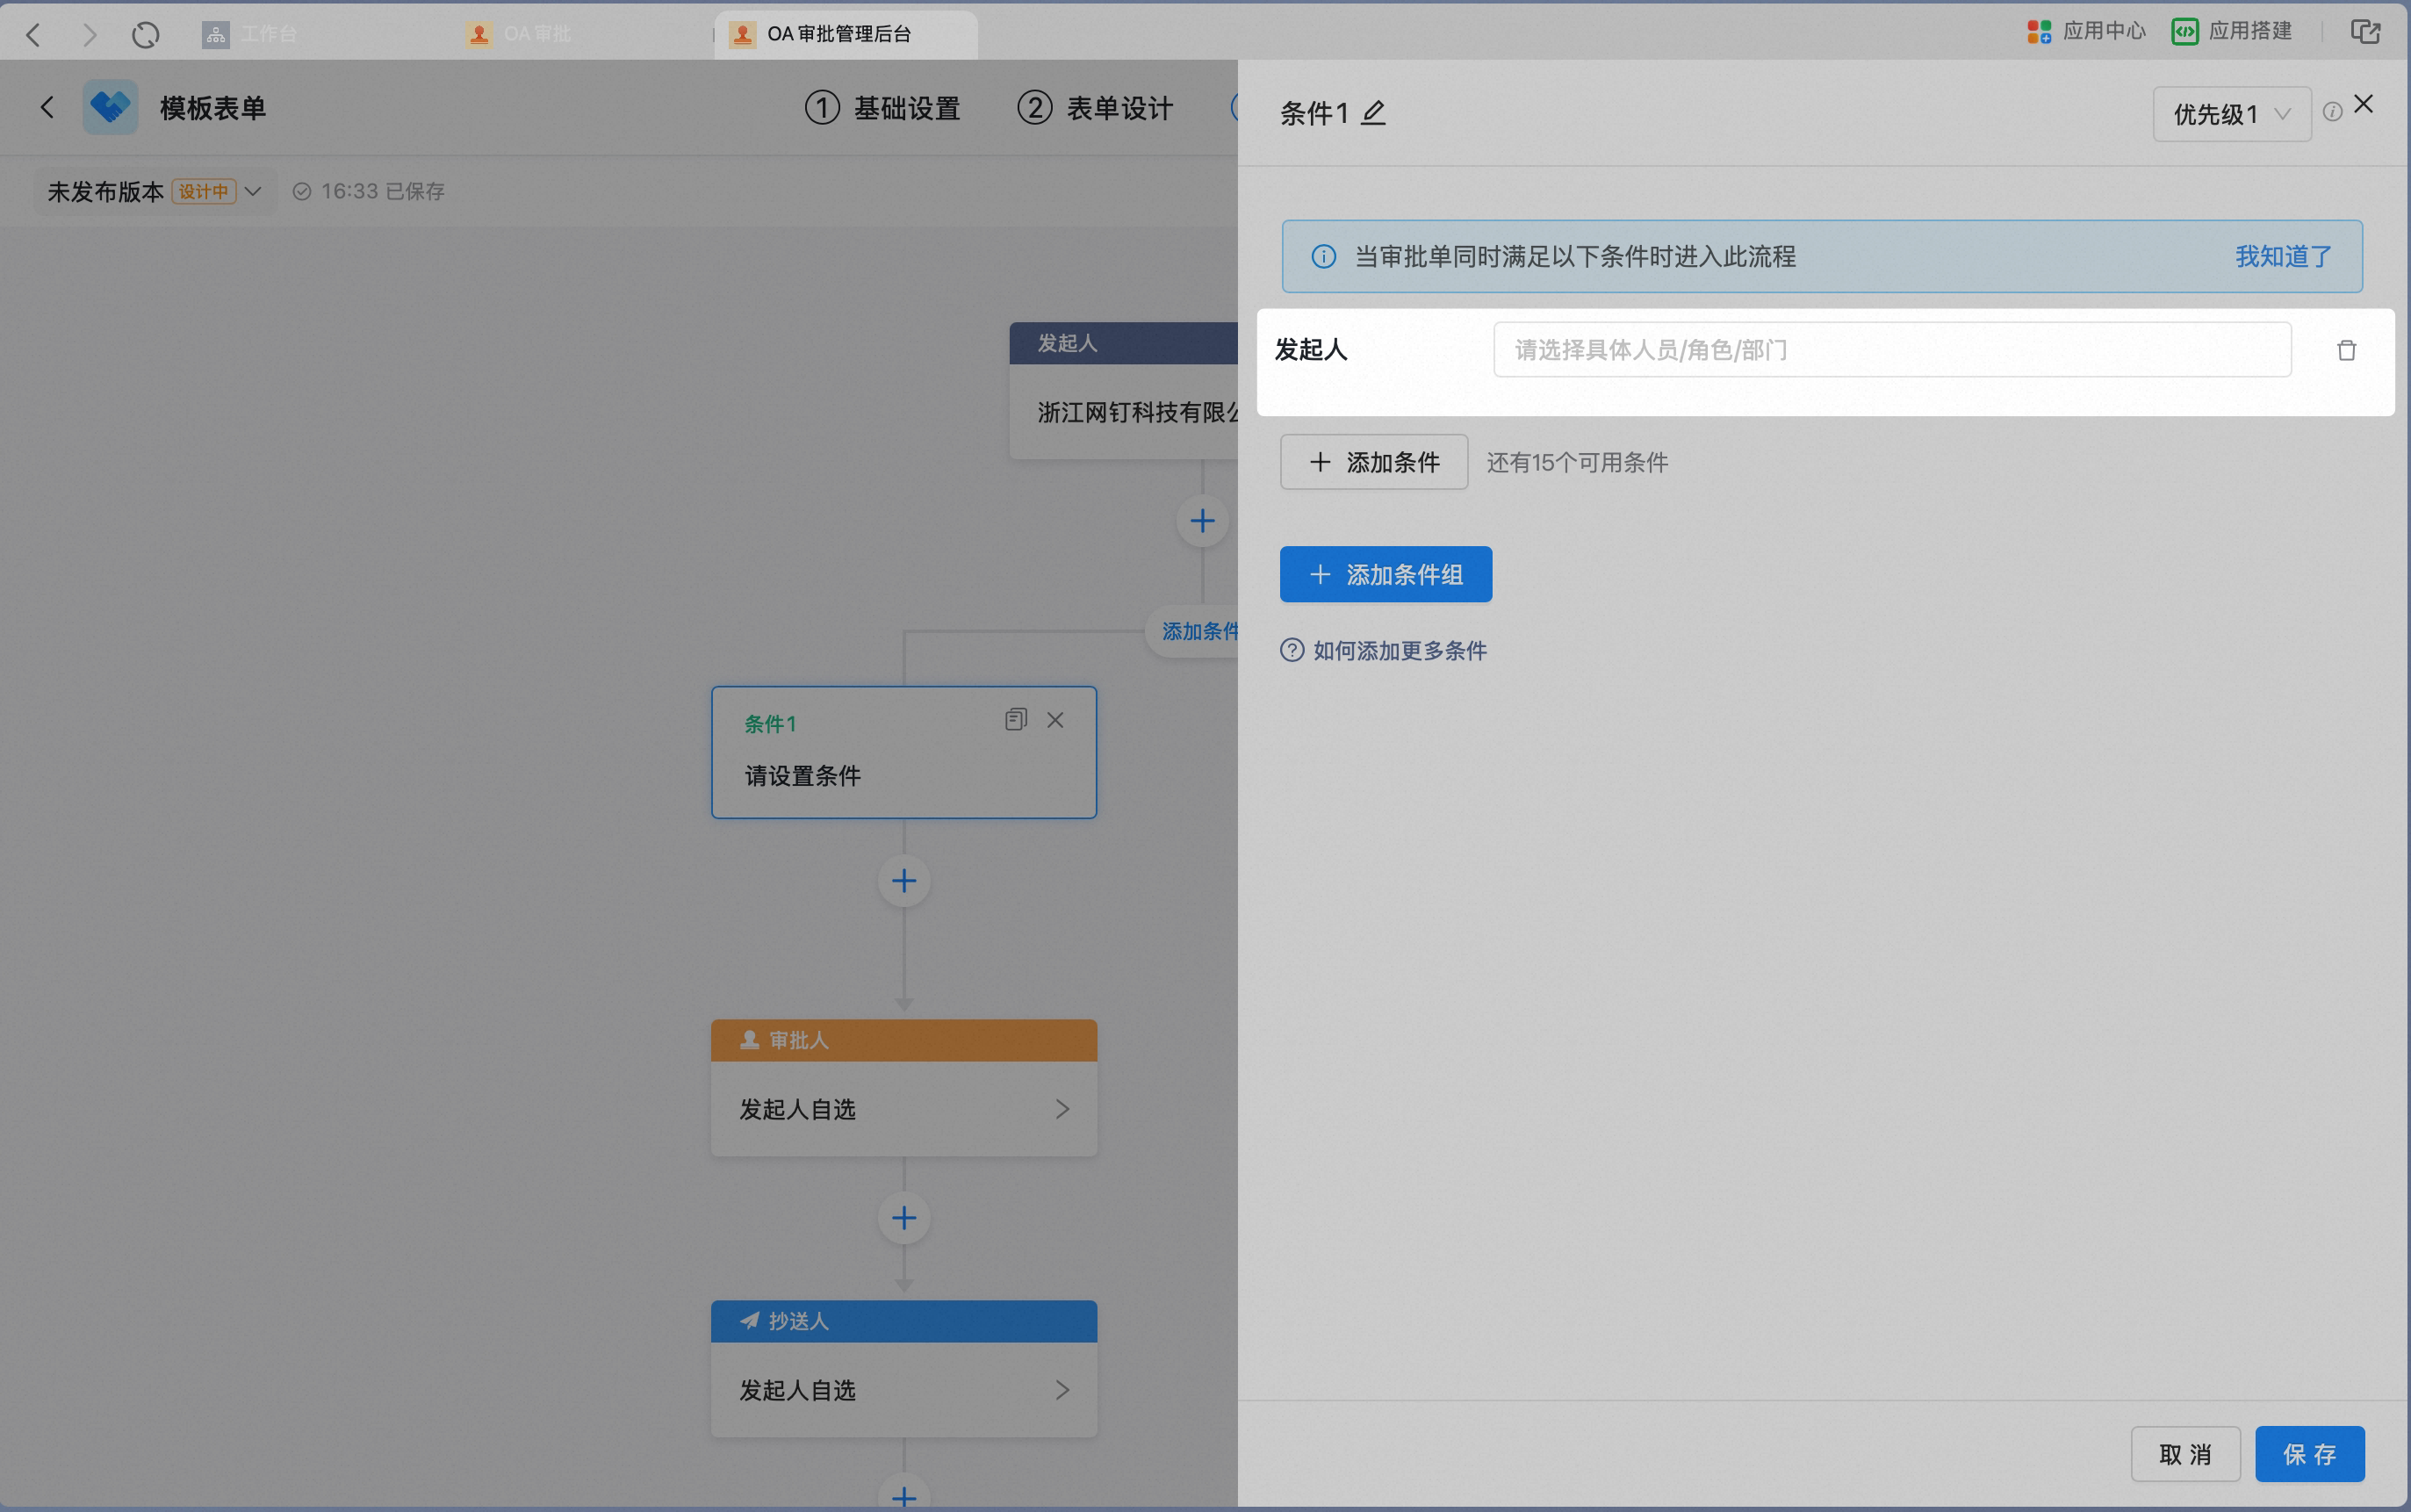
4. Require multiple conditions to be met simultaneously
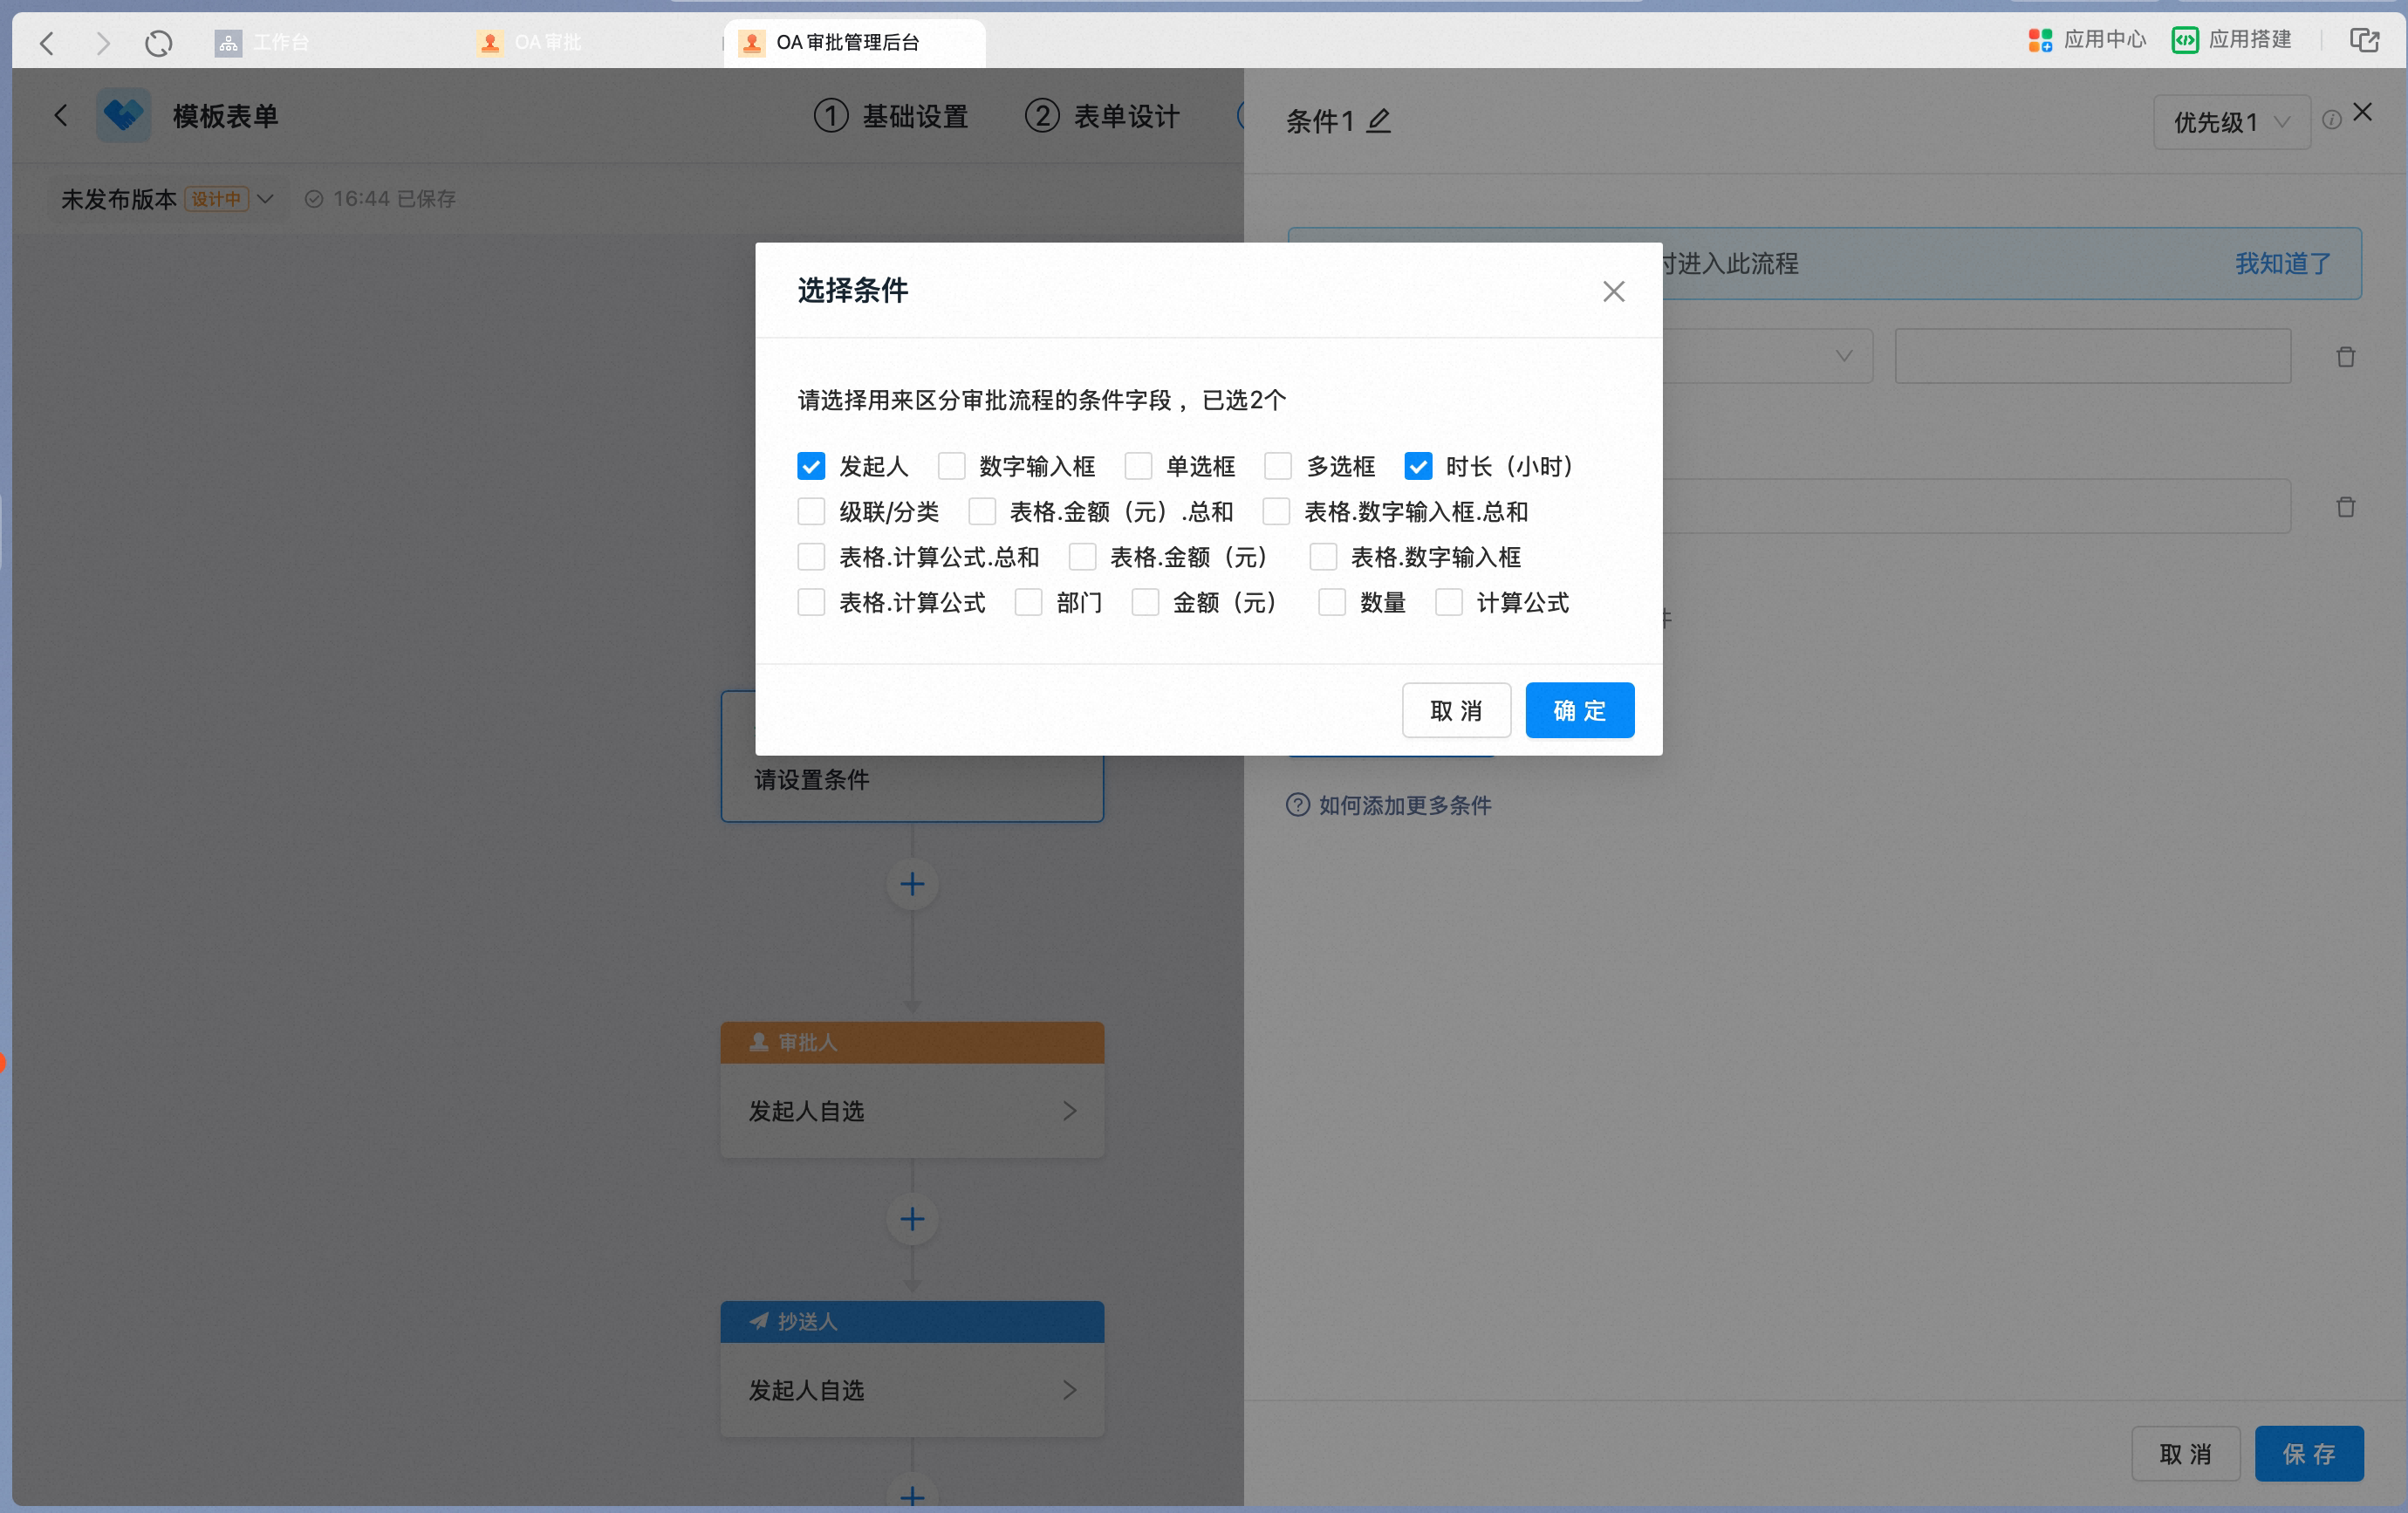
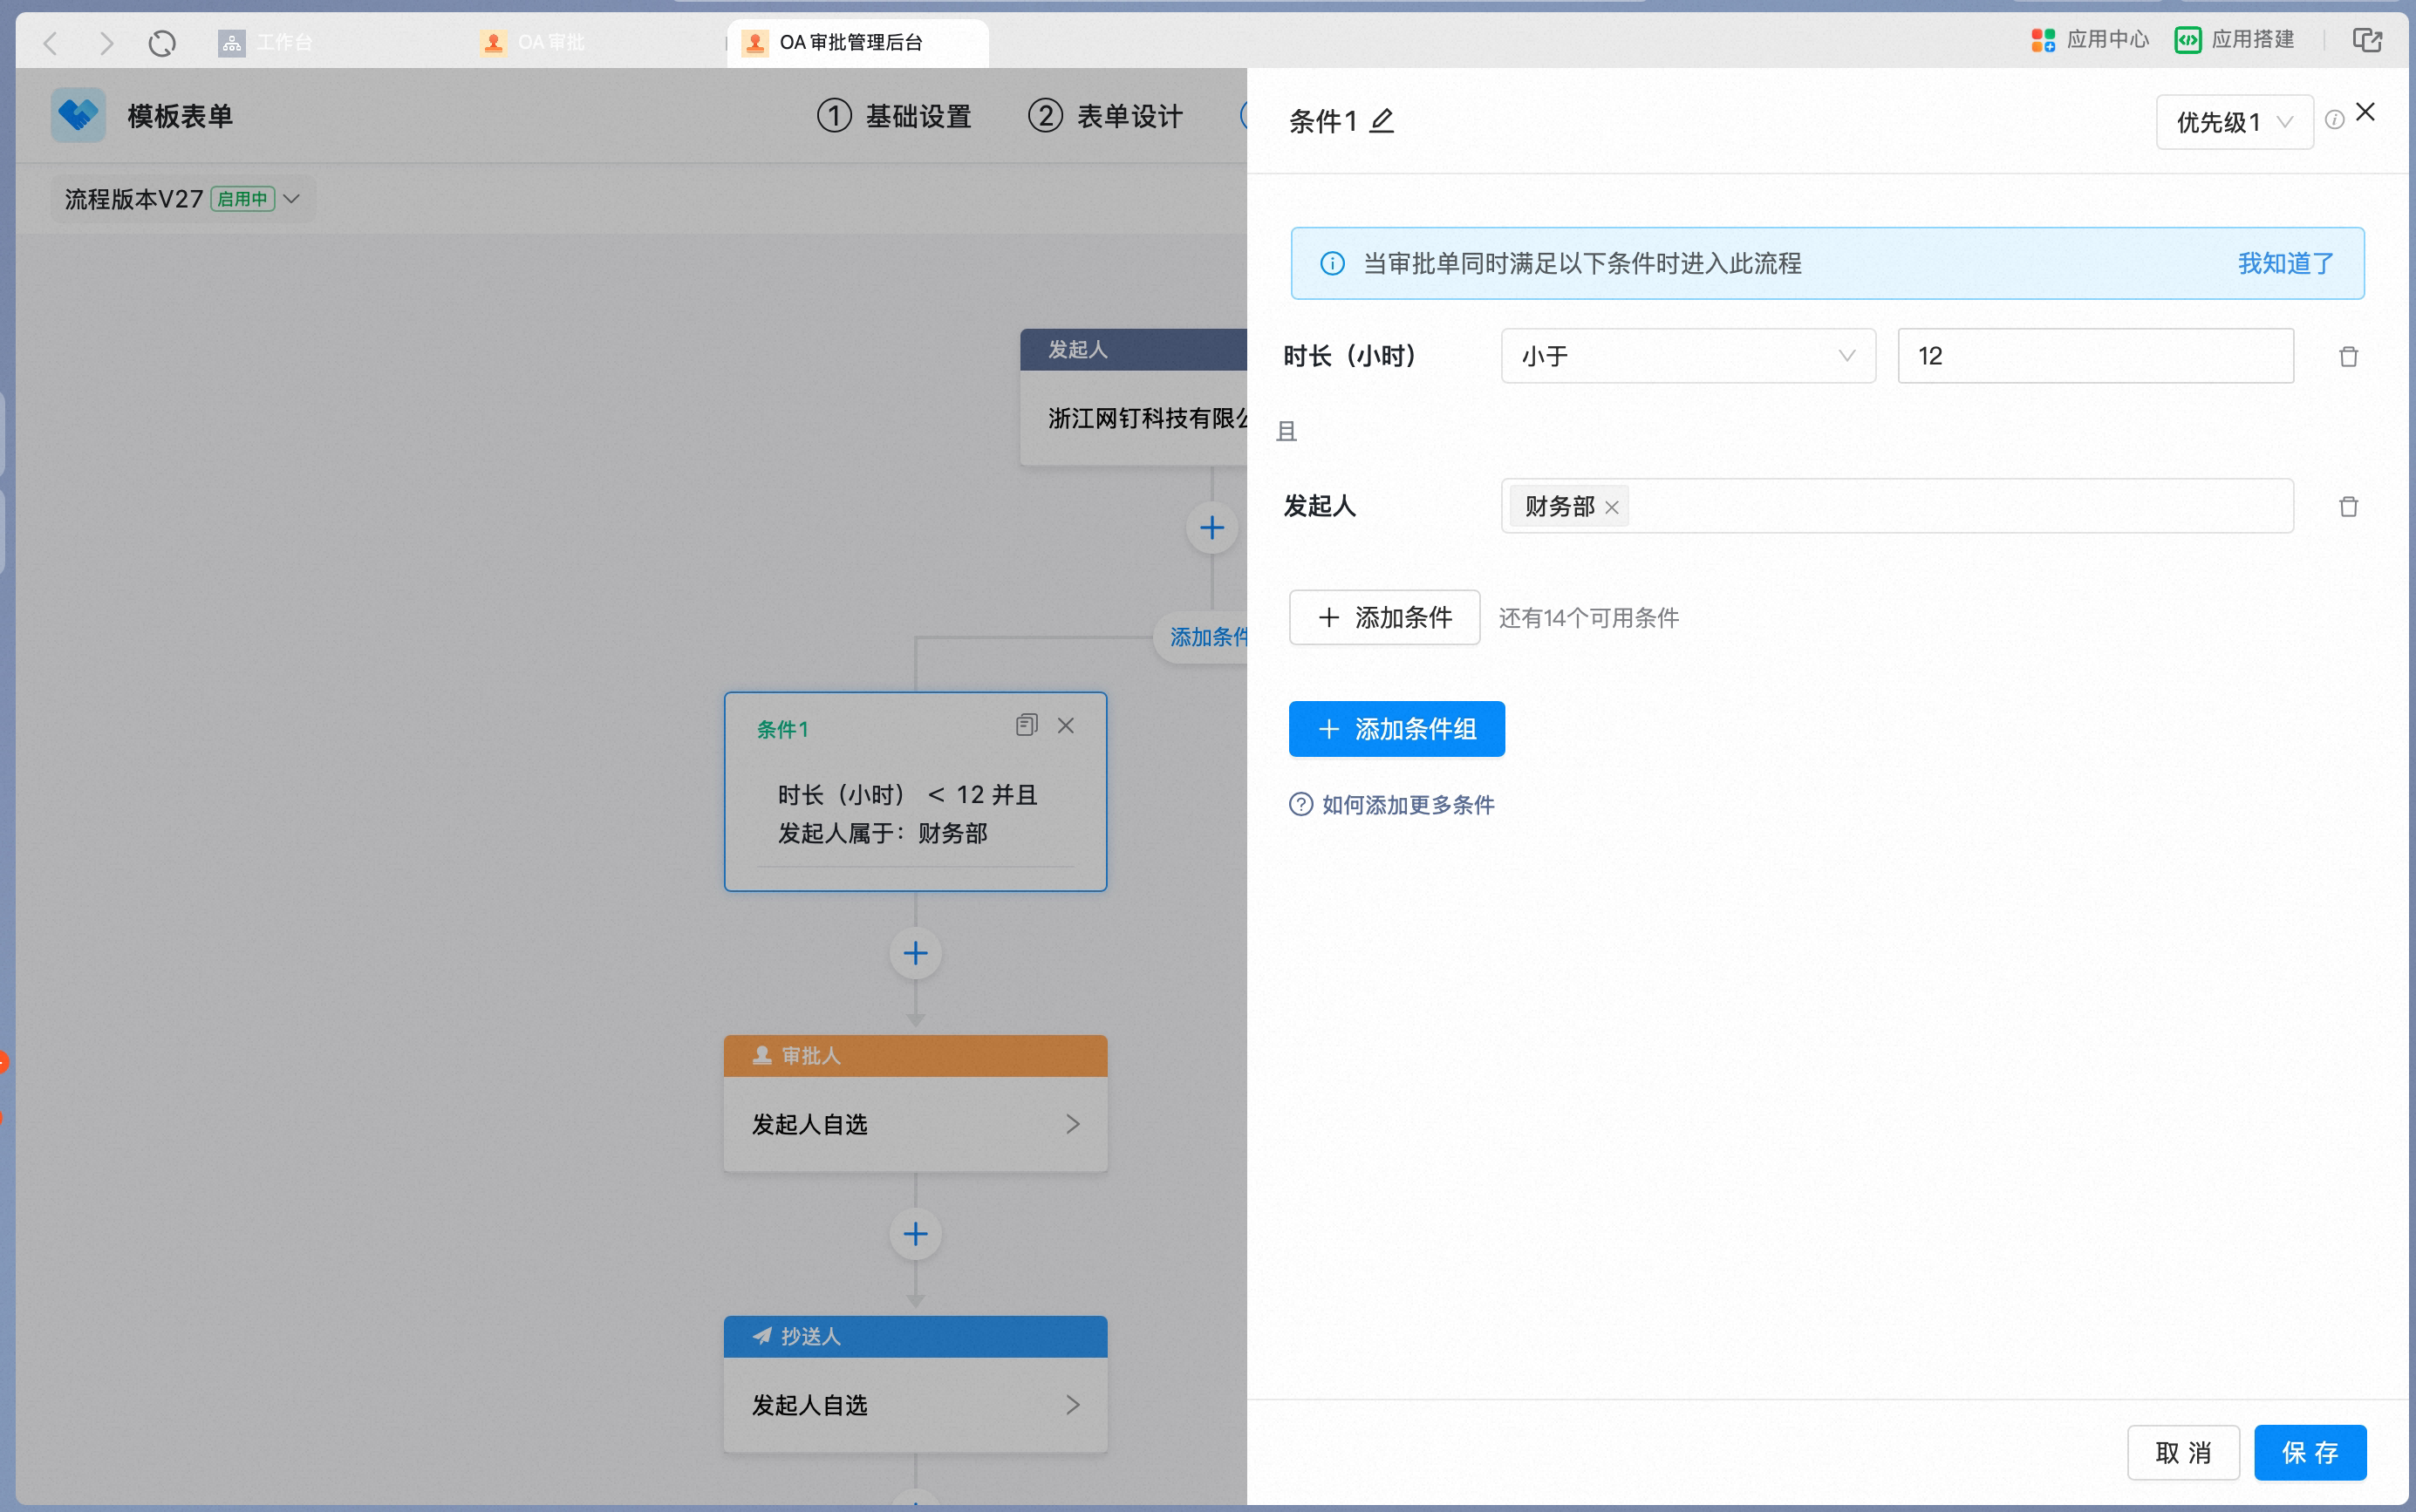
Click [Add condition] to require multiple conditions to be met at the same time. The relationship between conditions is “AND”. In the condition Settings side panel, click [Add condition]: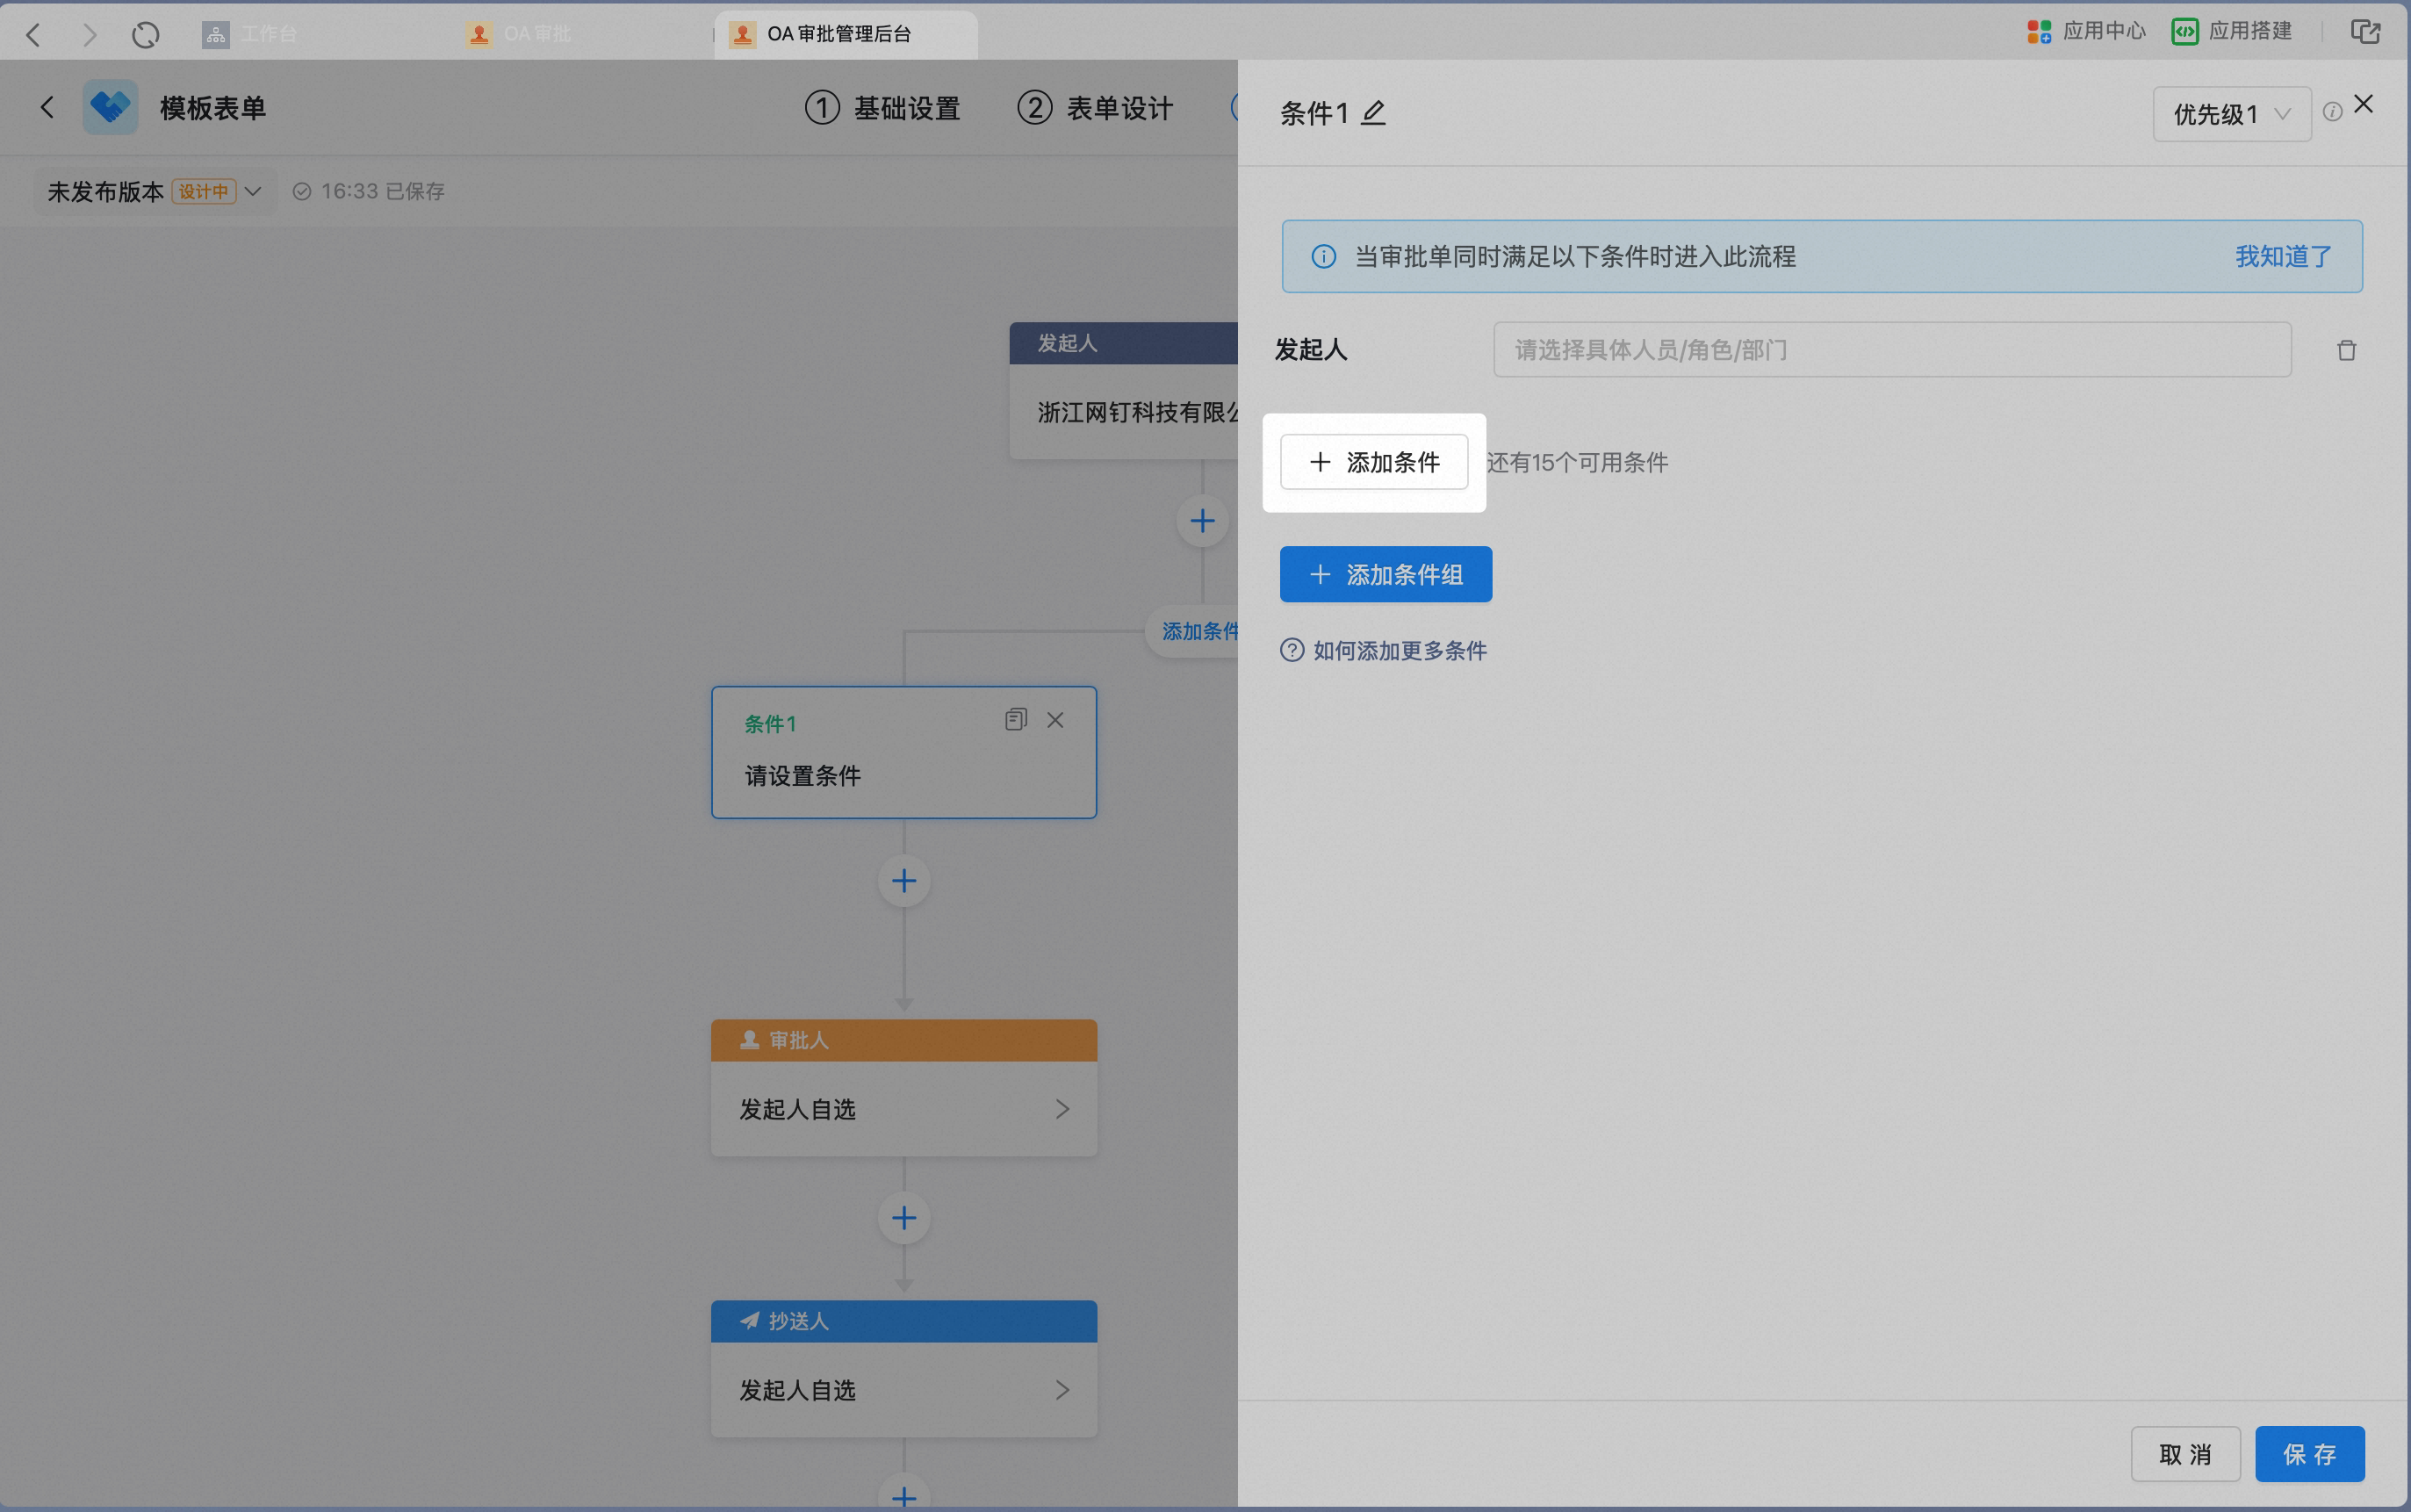
5. Require any one of multiple conditions to be met
Click [Add Condition group] to require any one of multiple conditions to be met. The relationship between Condition groups is “OR”. In the condition Settings side panel, click [Add Condition group]: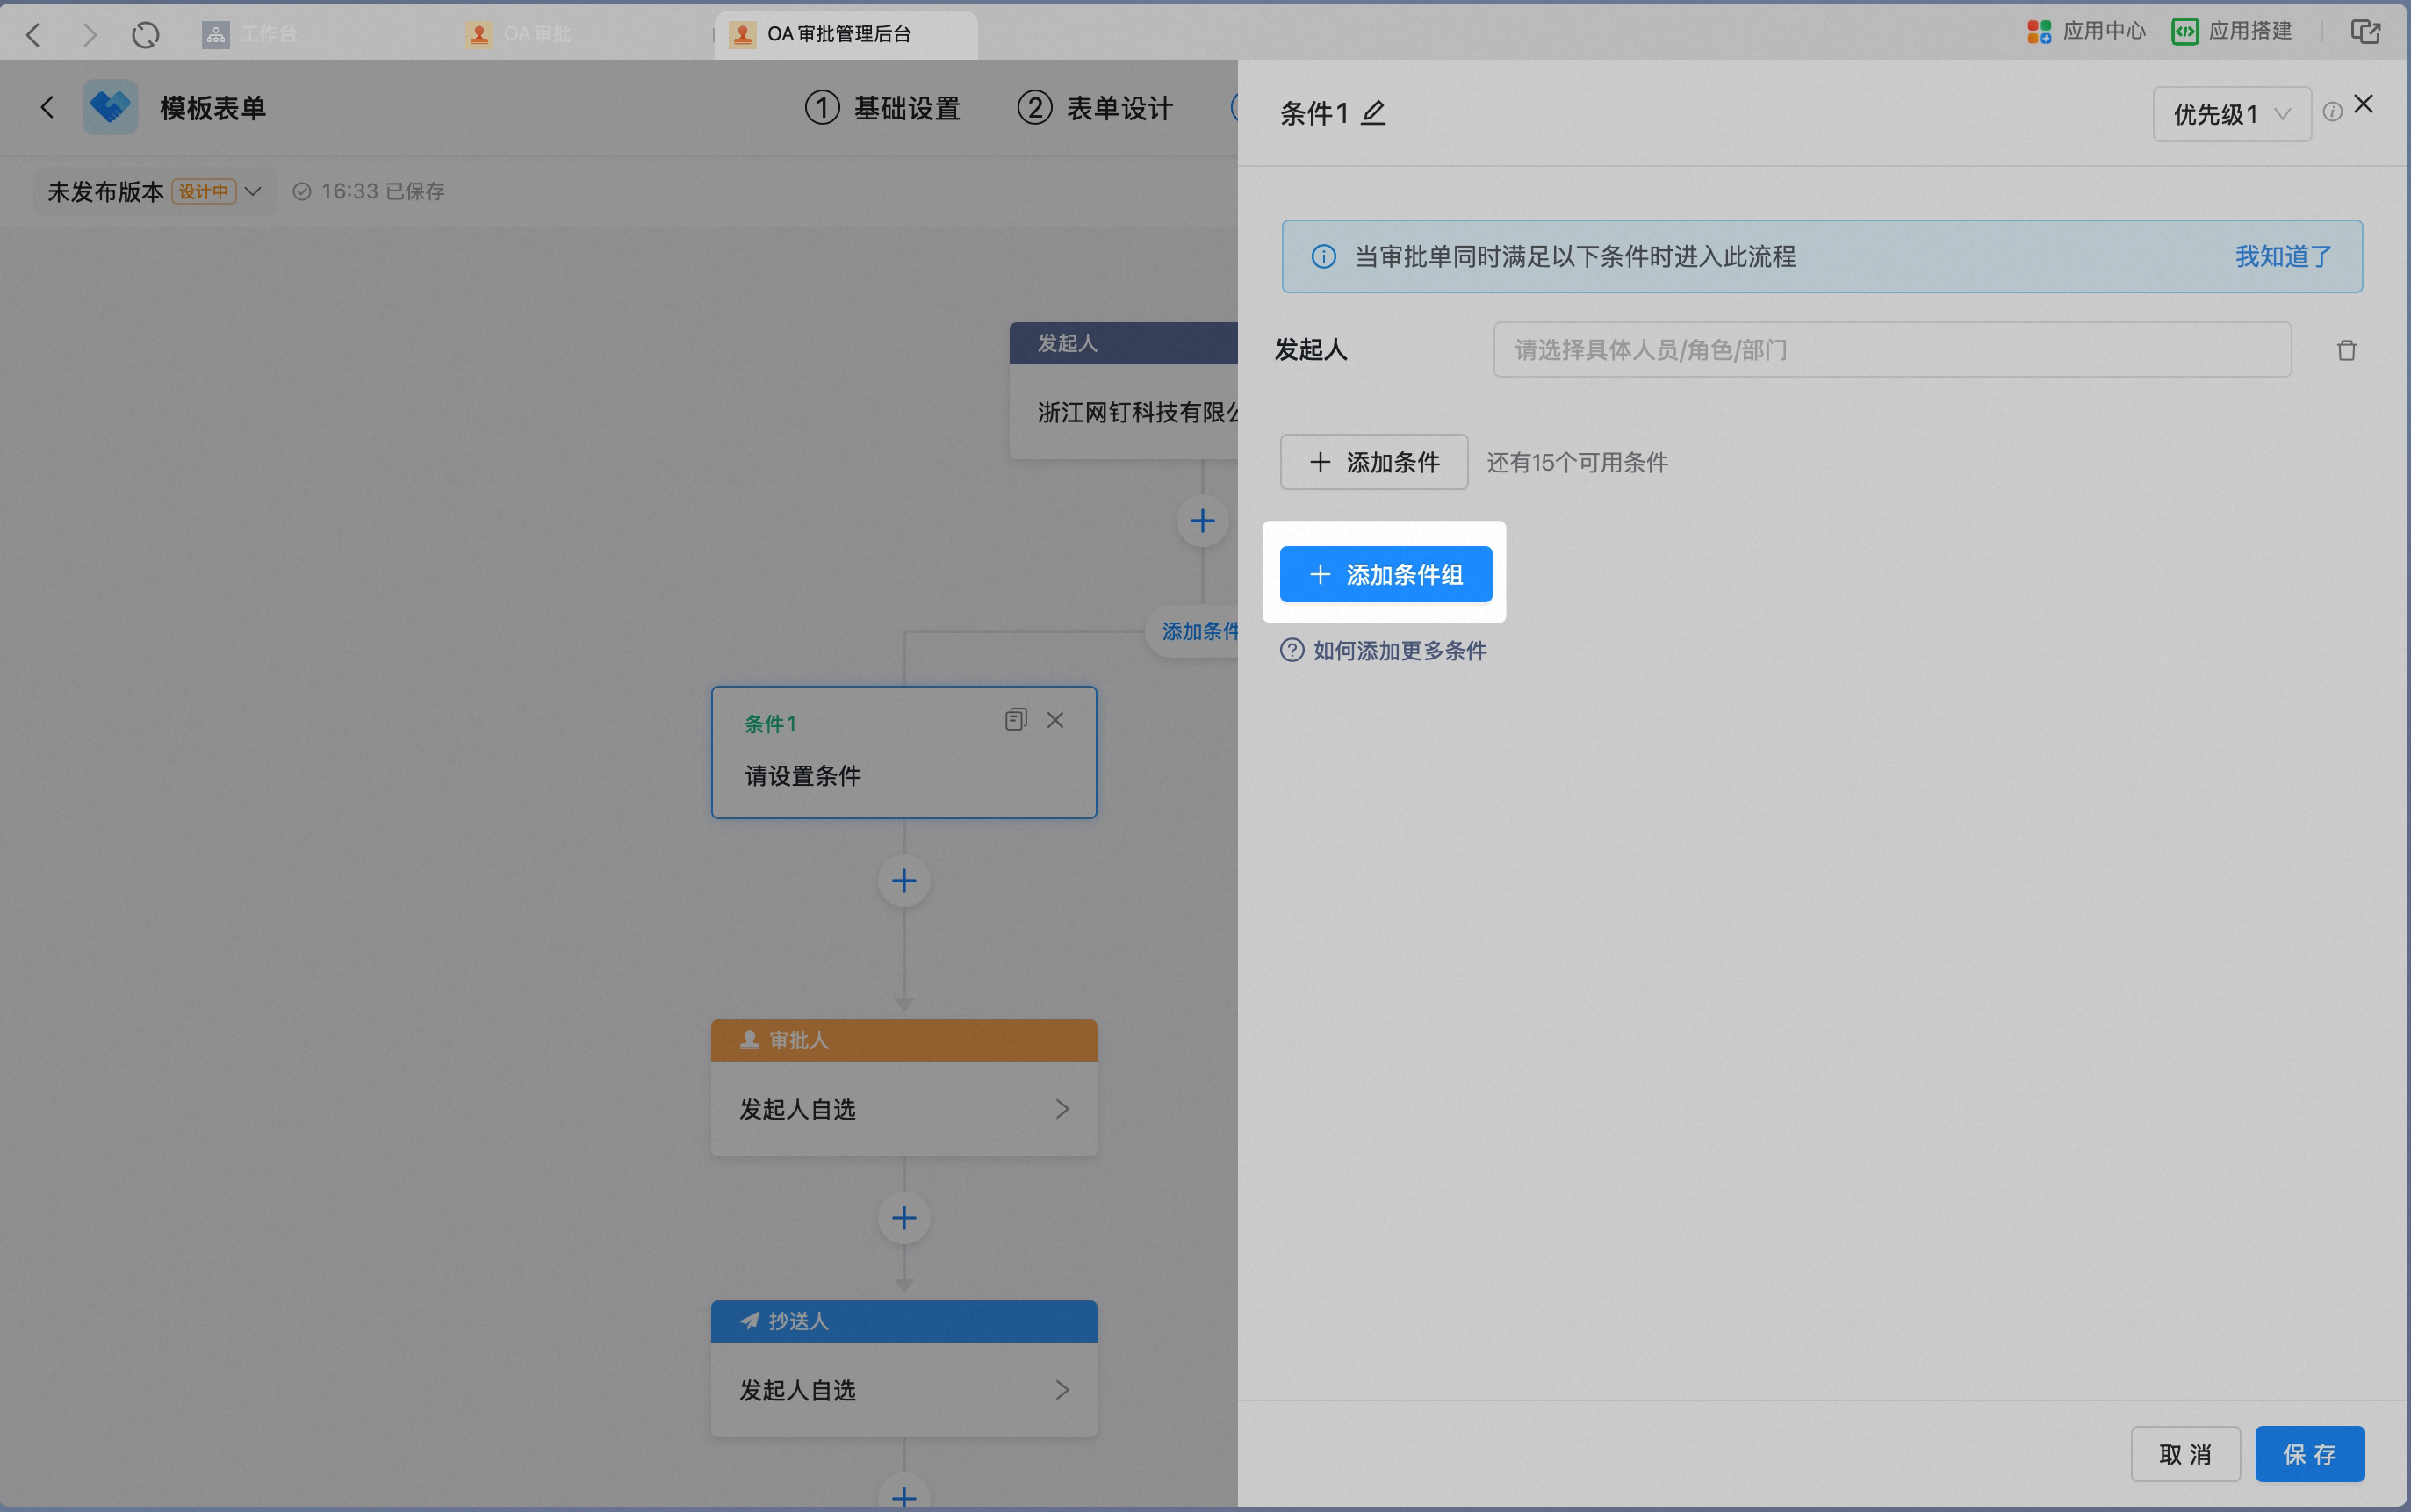
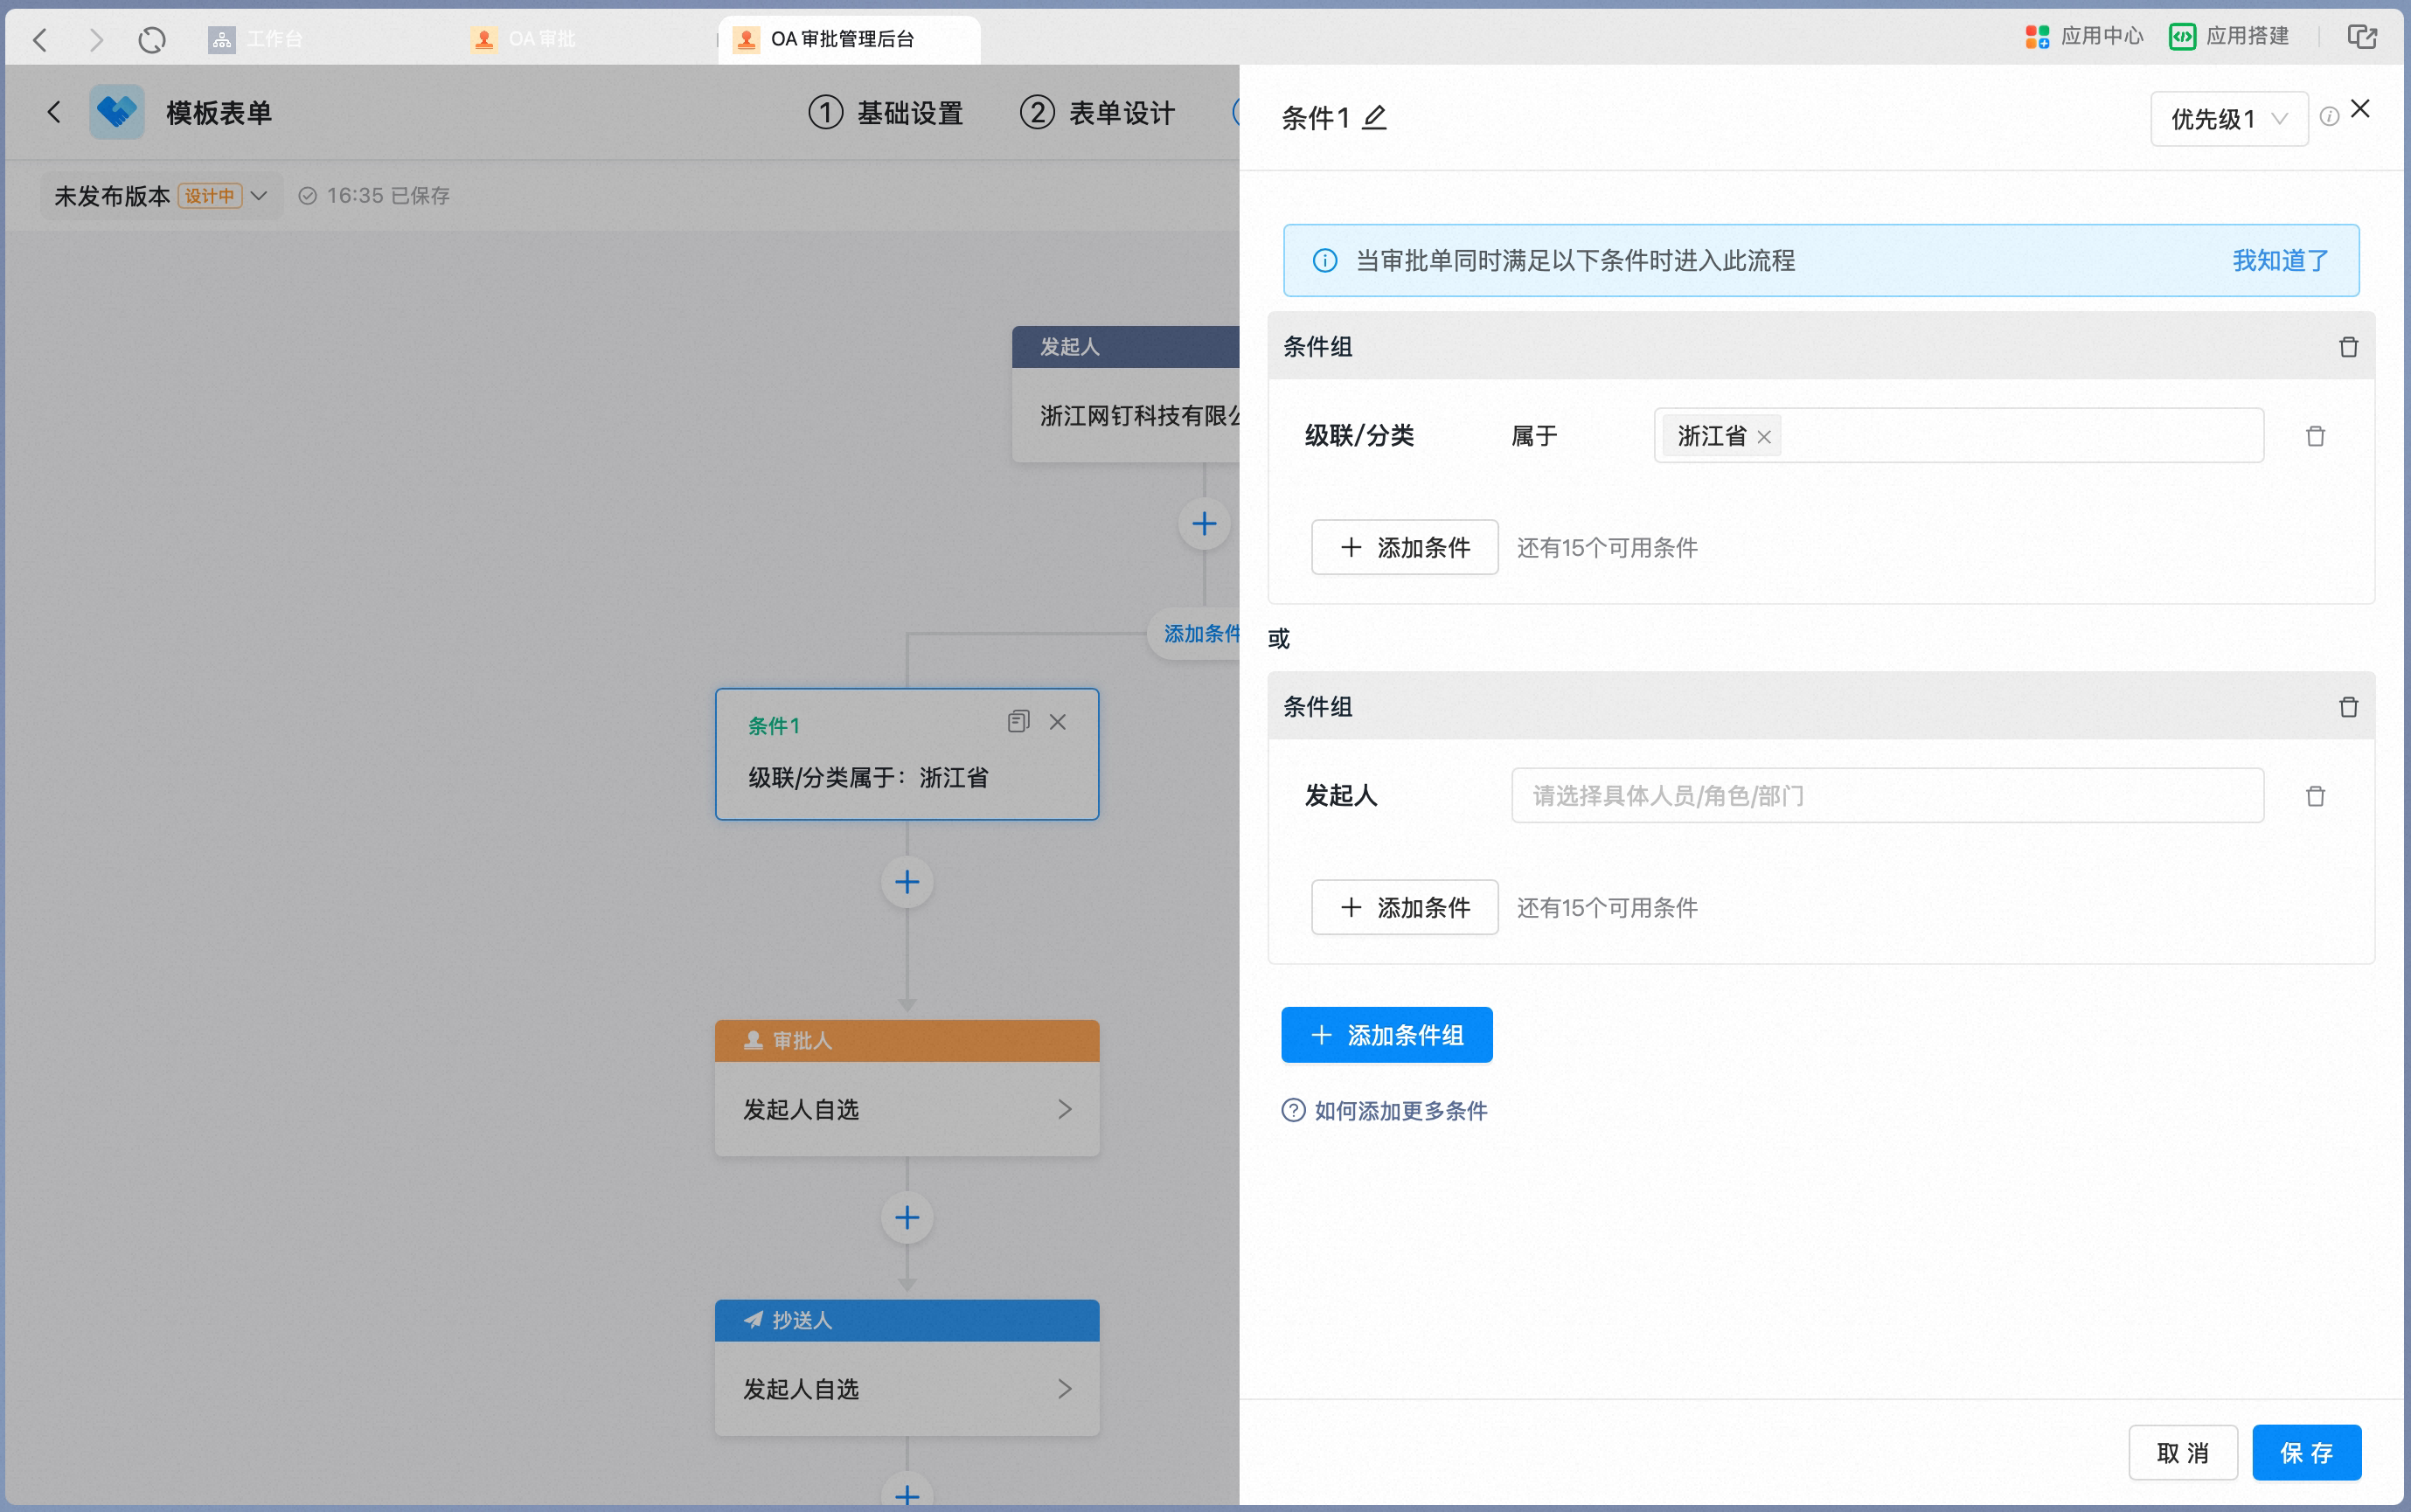
6. Copy a condition
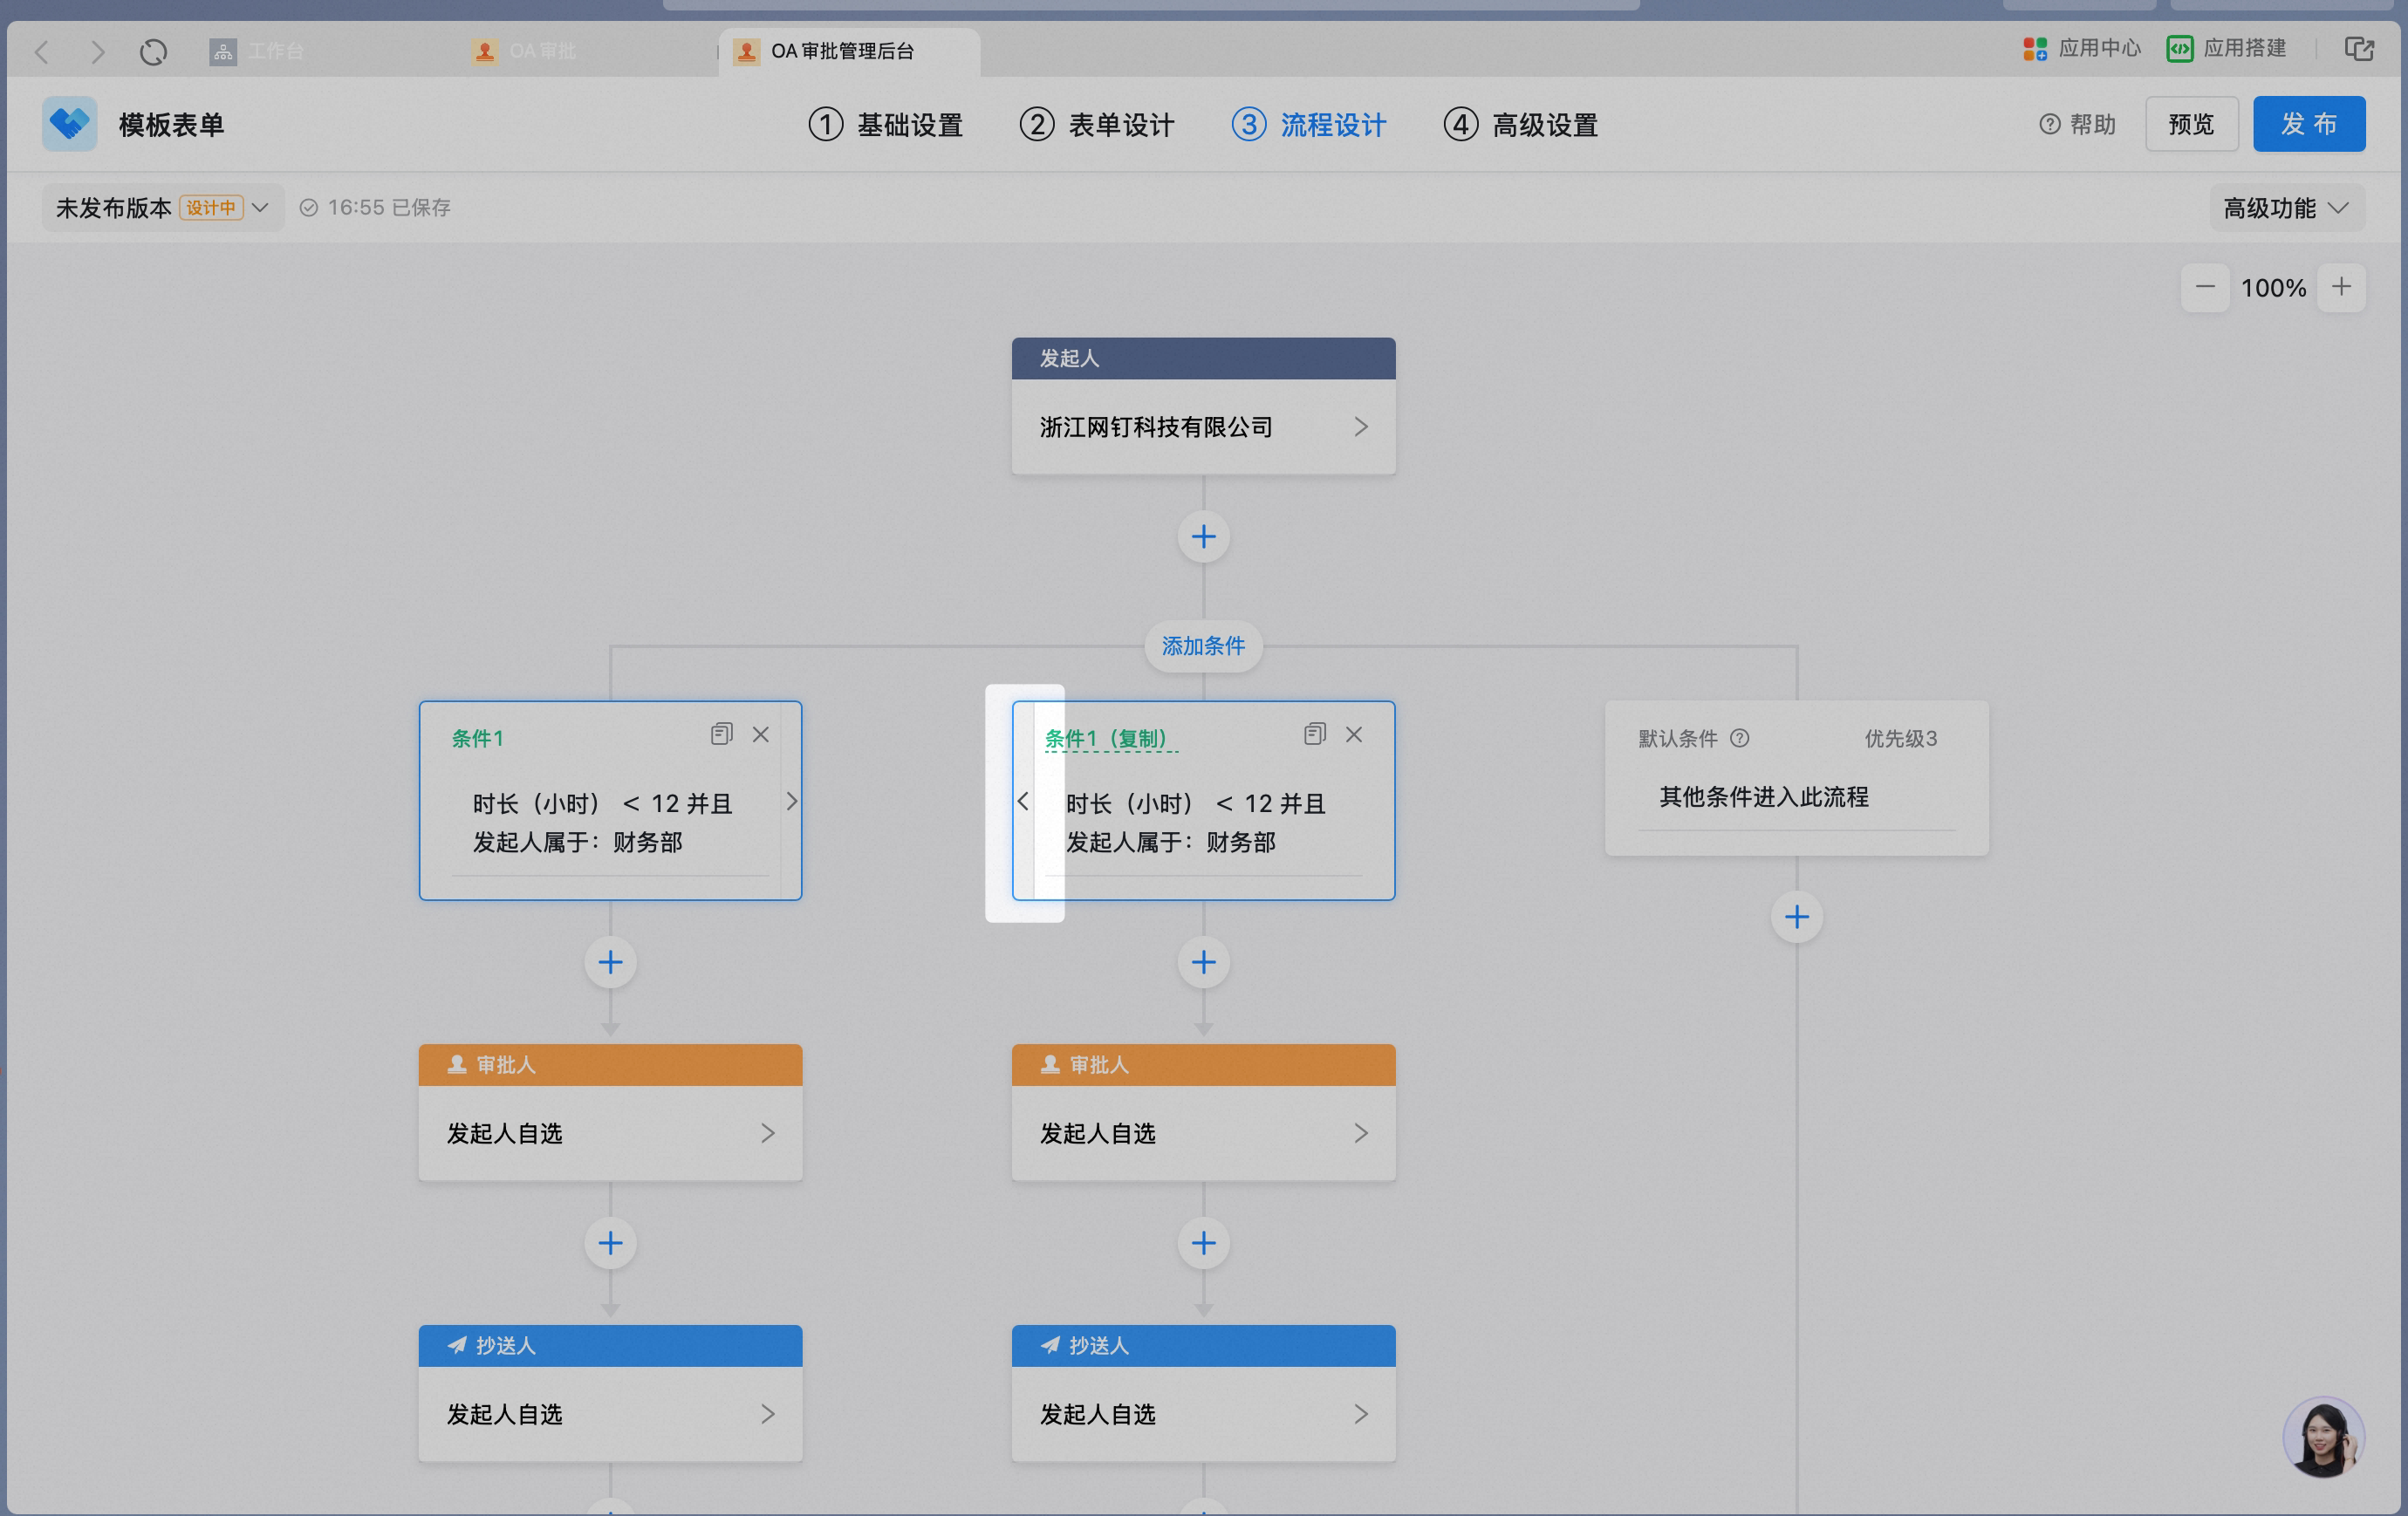
Click the Copy icon on the condition Card to copy the condition together with the Steps beneath it.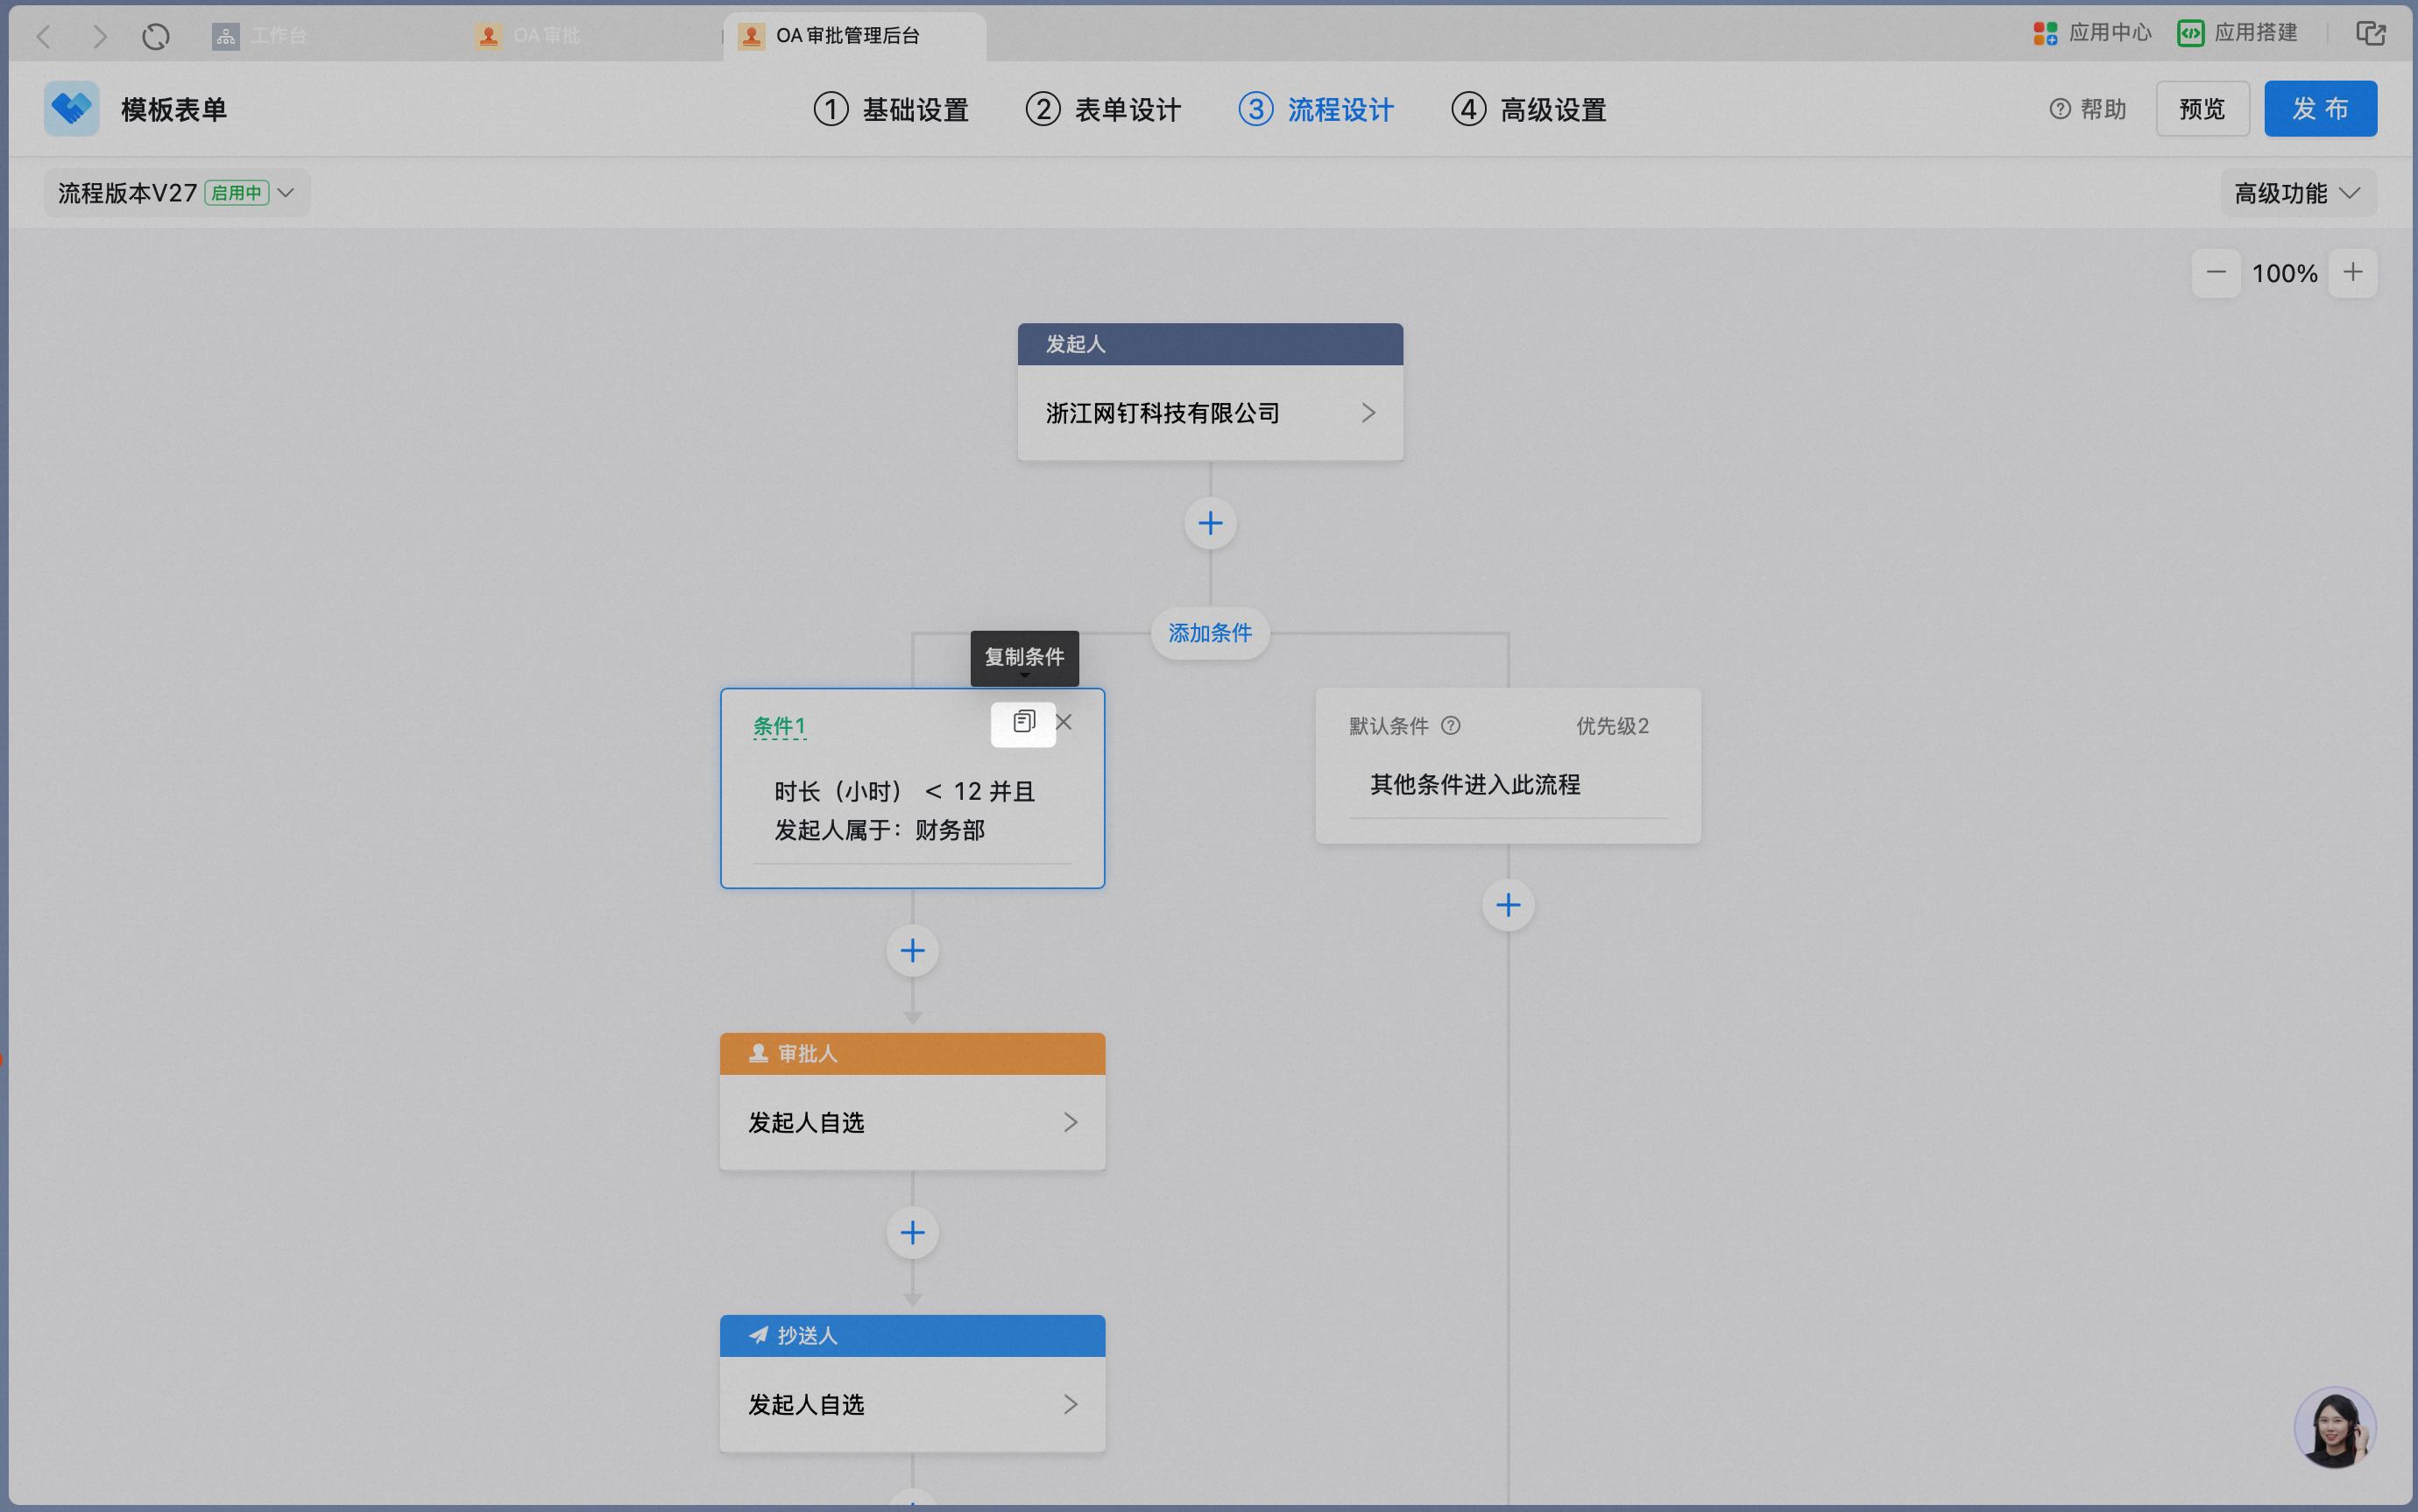
7. Adjust condition priority
Click the Move arrow on the Card to reorder the condition Cards. Because conditions are evaluated from left to right, reordering the condition Cards adjusts the execution priority of the branches.