

 Chats
Chats Calendar
 Meetings
 Contacts
 Mail
Mail Docs
Docs Drive
Drive AI Table
 AI Minutes
 Attendance
 Approval
 YiDA
YiDA Admin Console
1. Prerequisites
Only approval Admins can design processes, so you must first become an approval Admin.

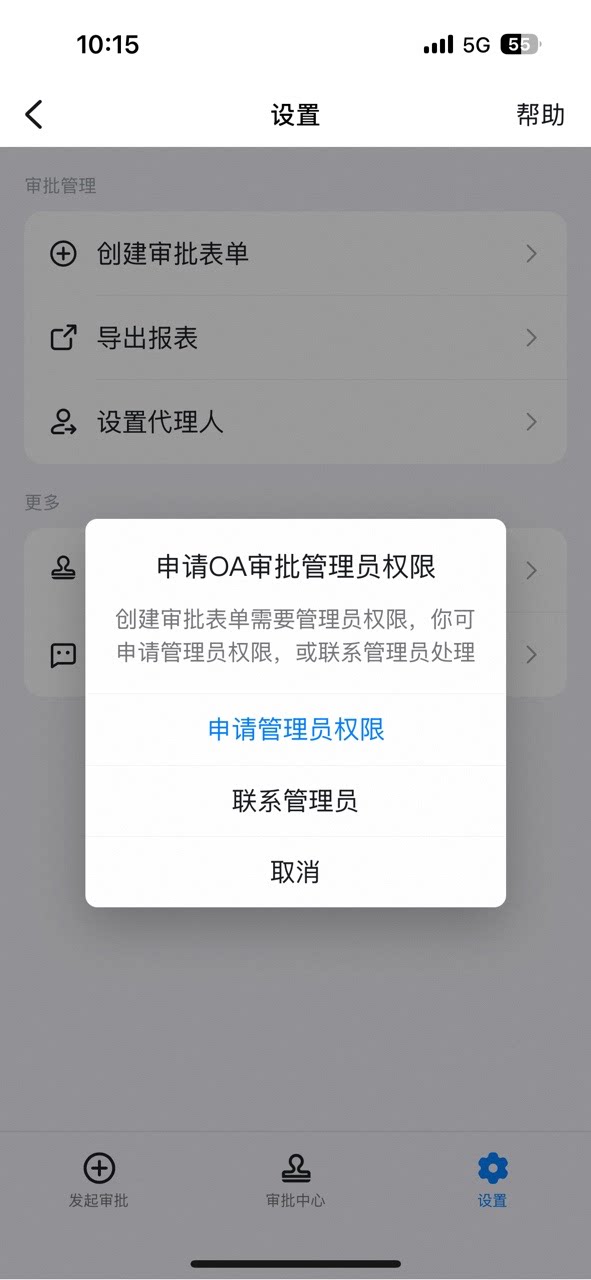
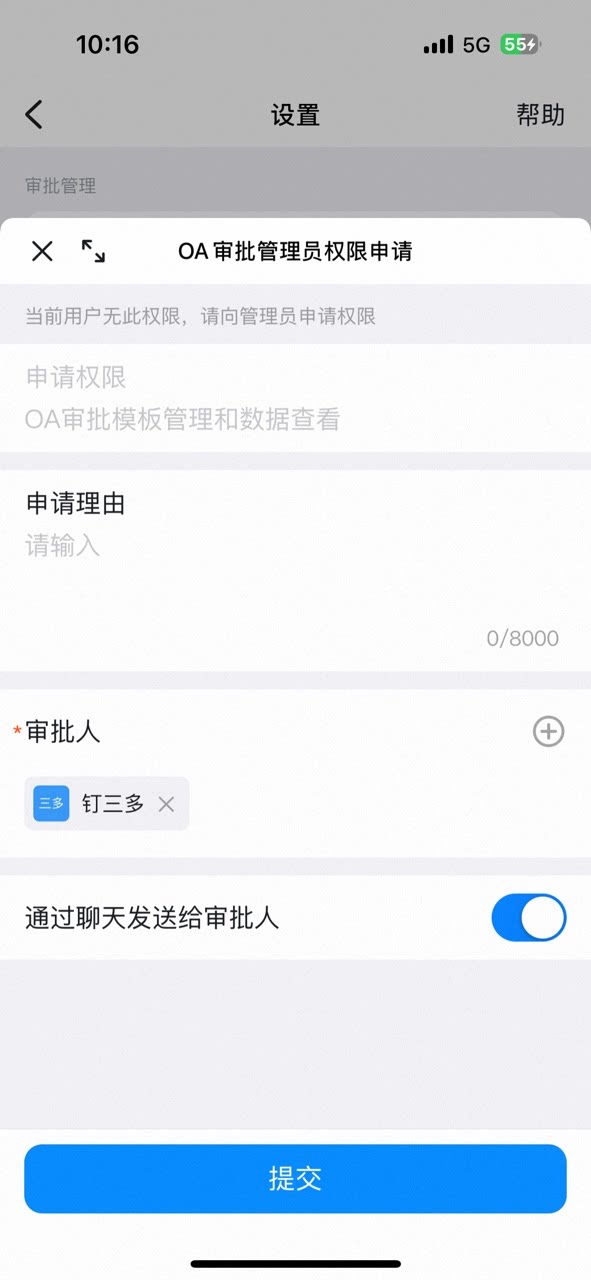
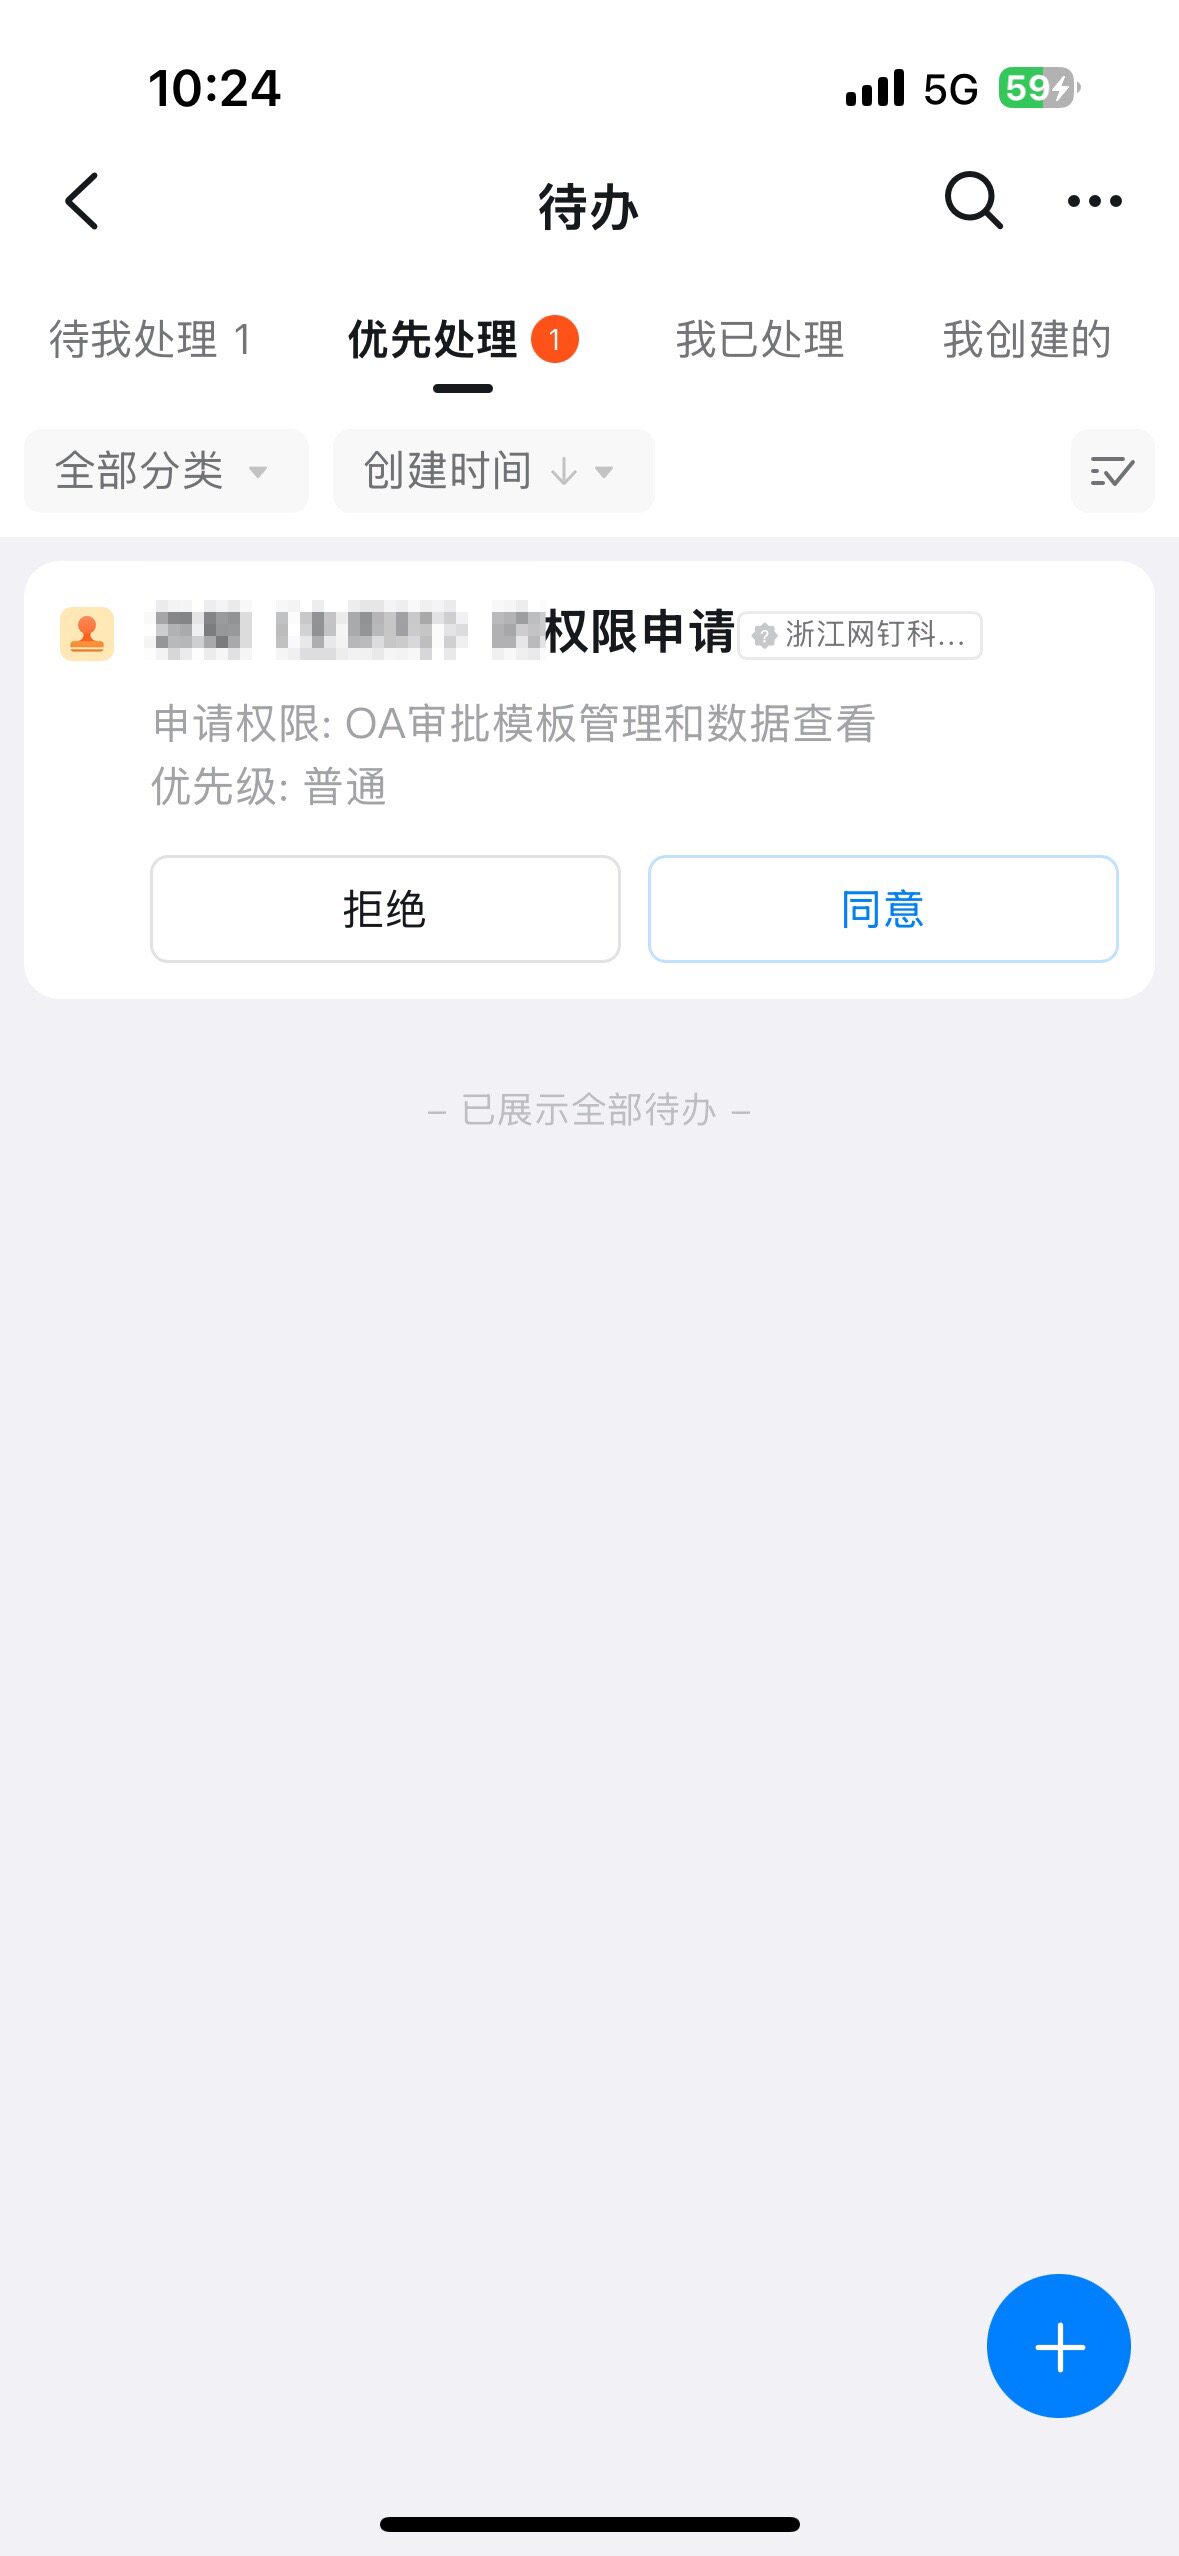
2. Entry point
1
Open form editing
On the Approval Admin Console > Form Management page, click Edit in the form’s Action column.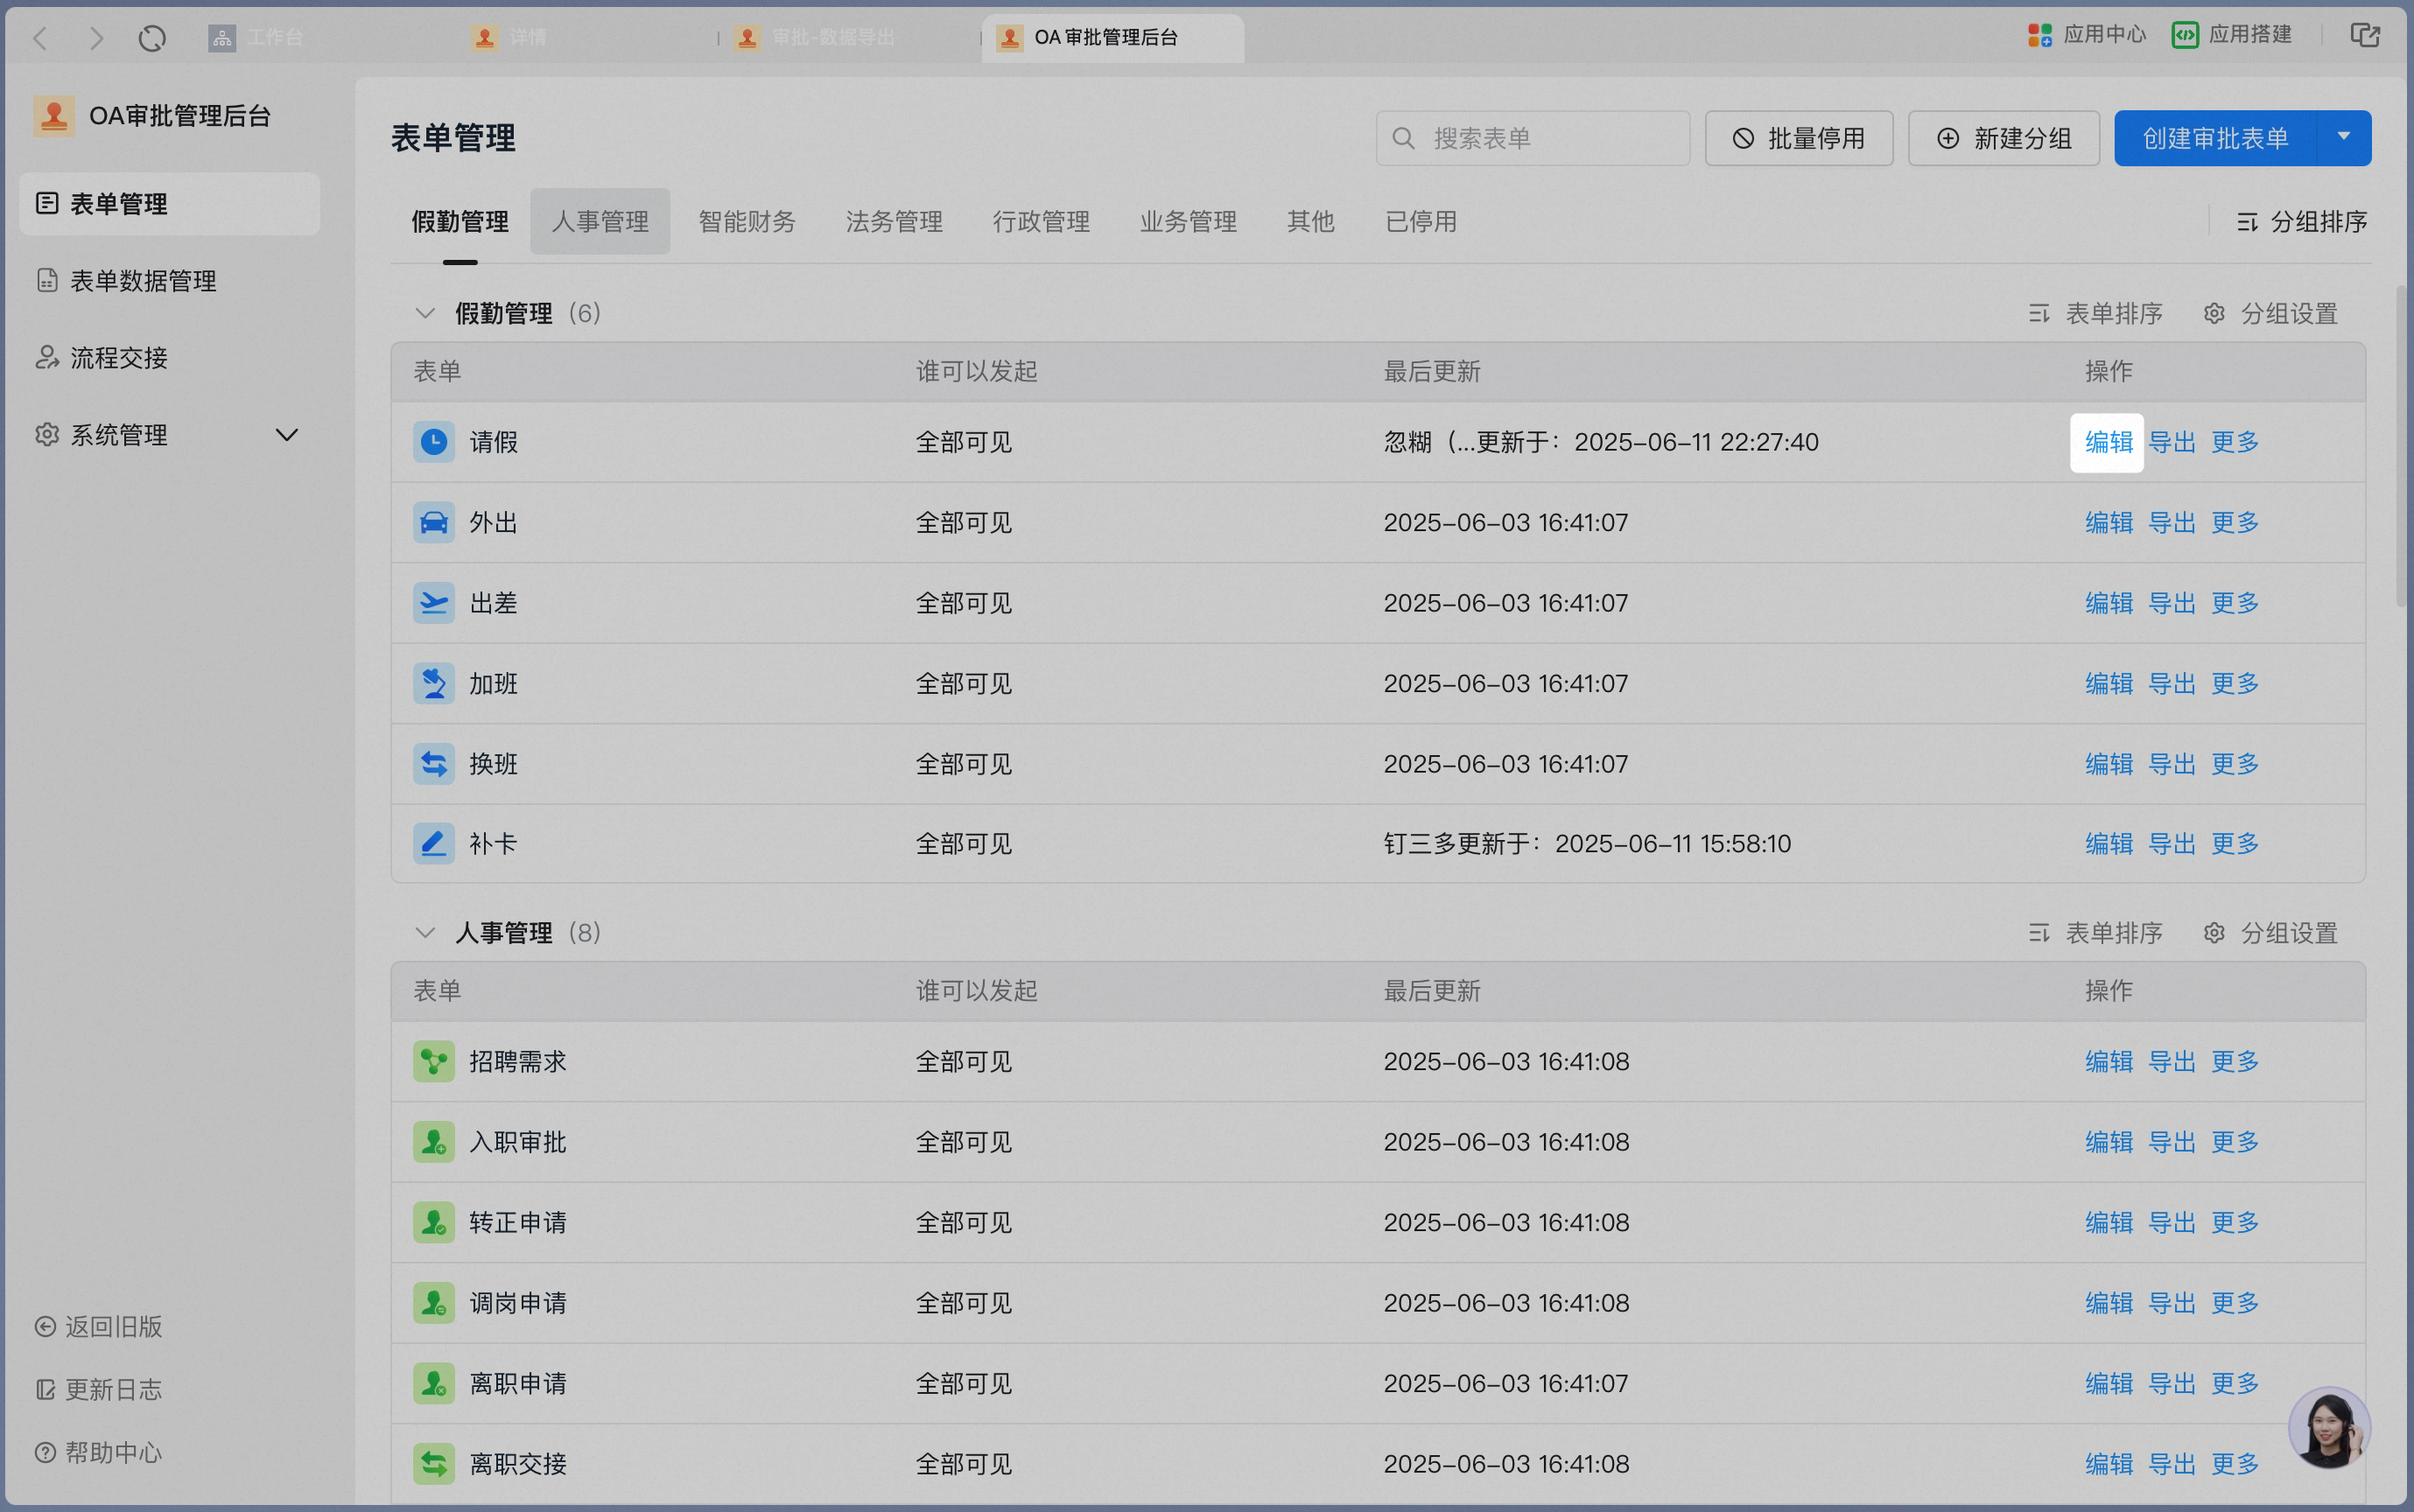
2
Open process design
Click Process design to open the main process design page.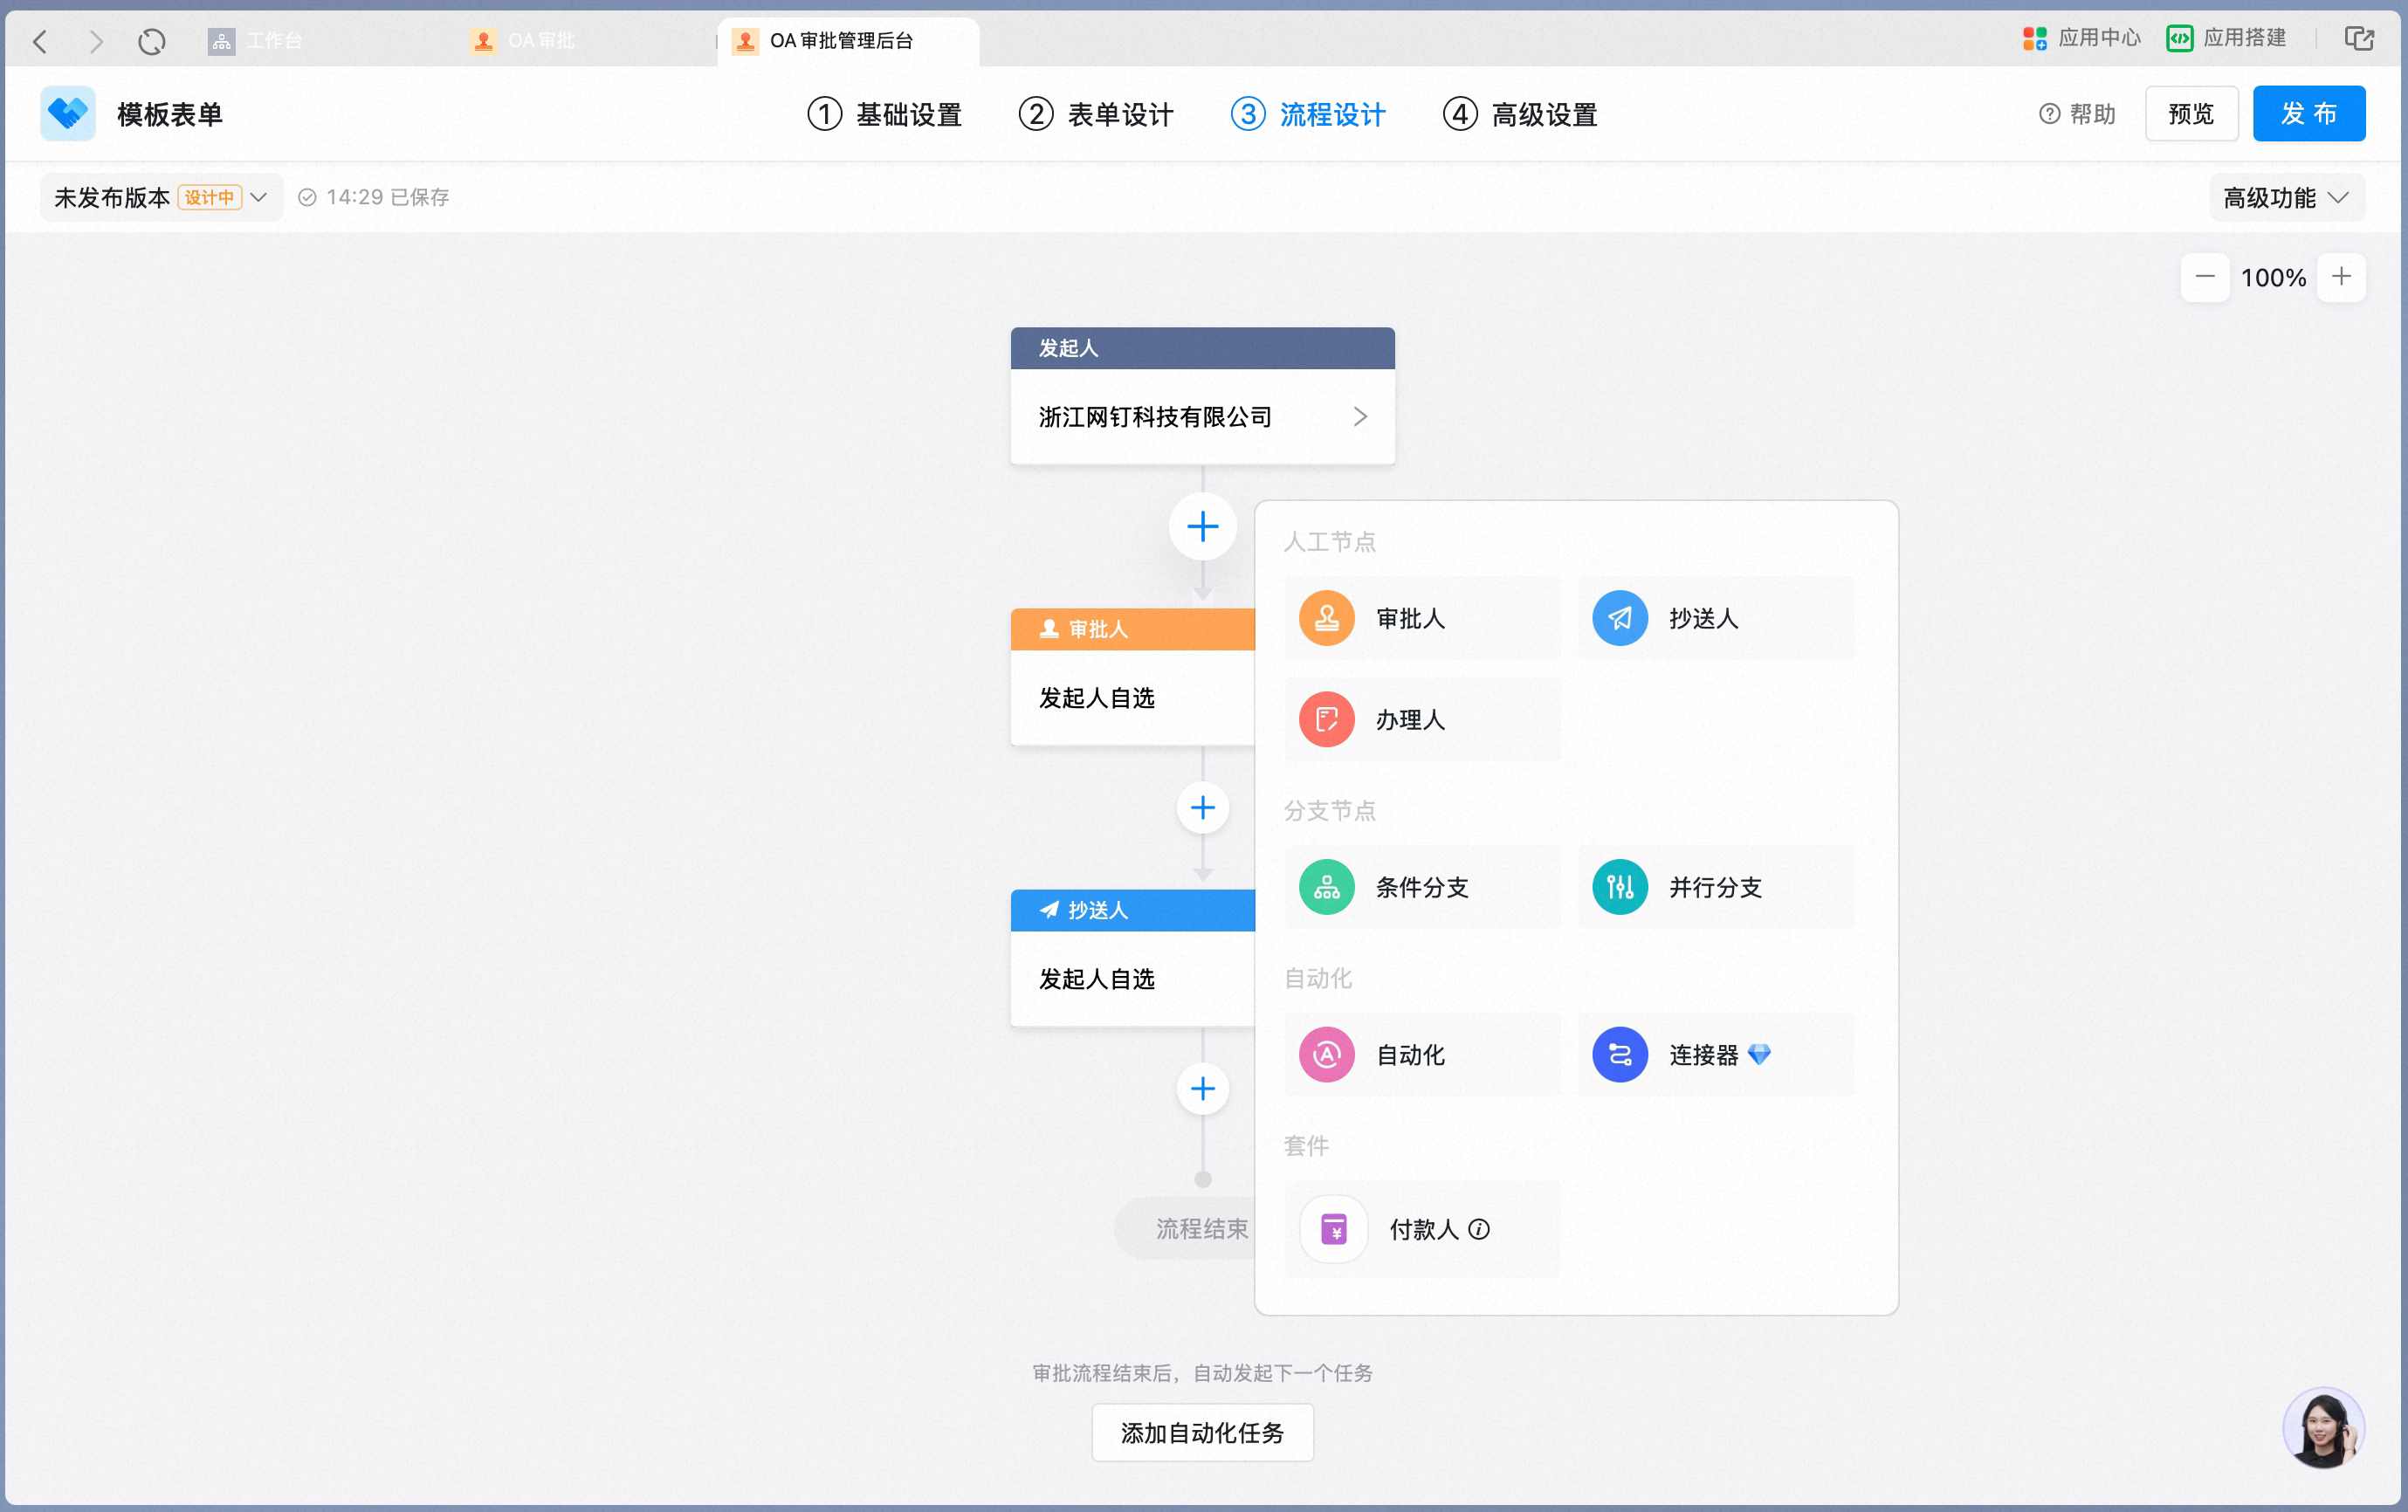
3. Basic actions
Process design includes the following four basic actions:3.1 Add a node
Click + to add an approver, CC recipient, handler, or conditional branch.3.2 Set node attributes
3.2.1 Initiator
The initiator is the person who requests the business action and marks the starting point of the approval process. The initiator fills in the form and submits it.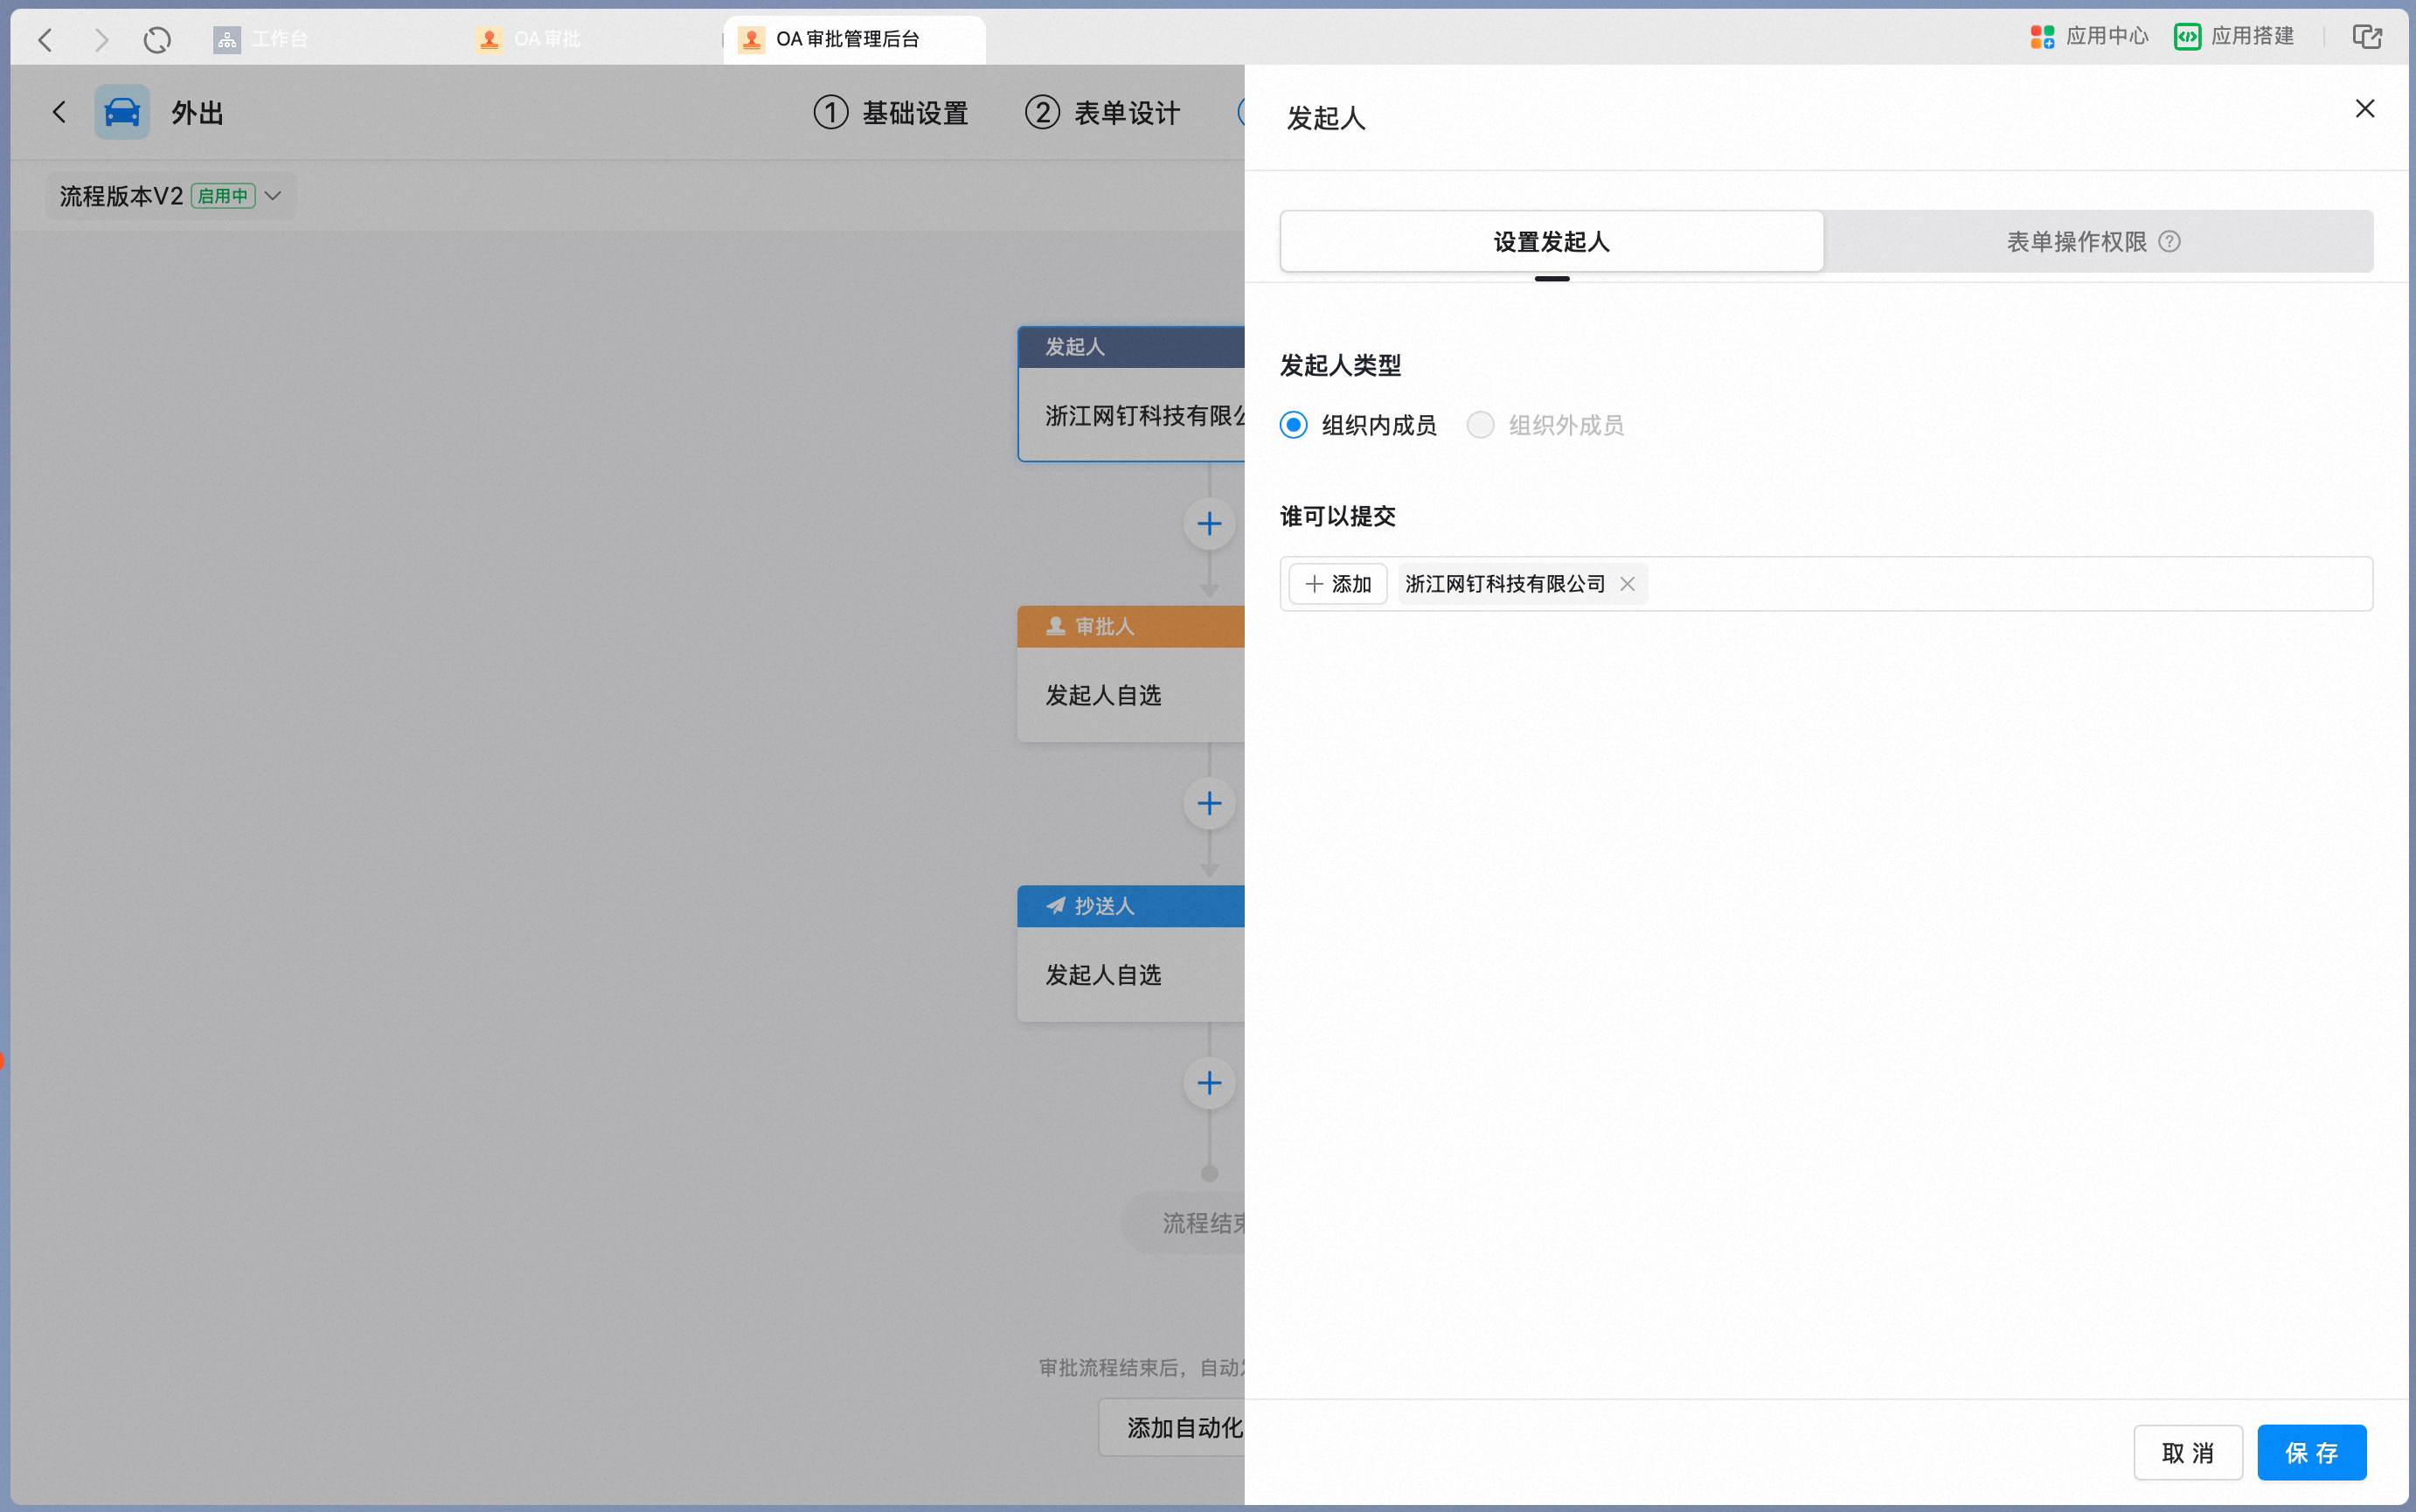
3.2.2 Approver
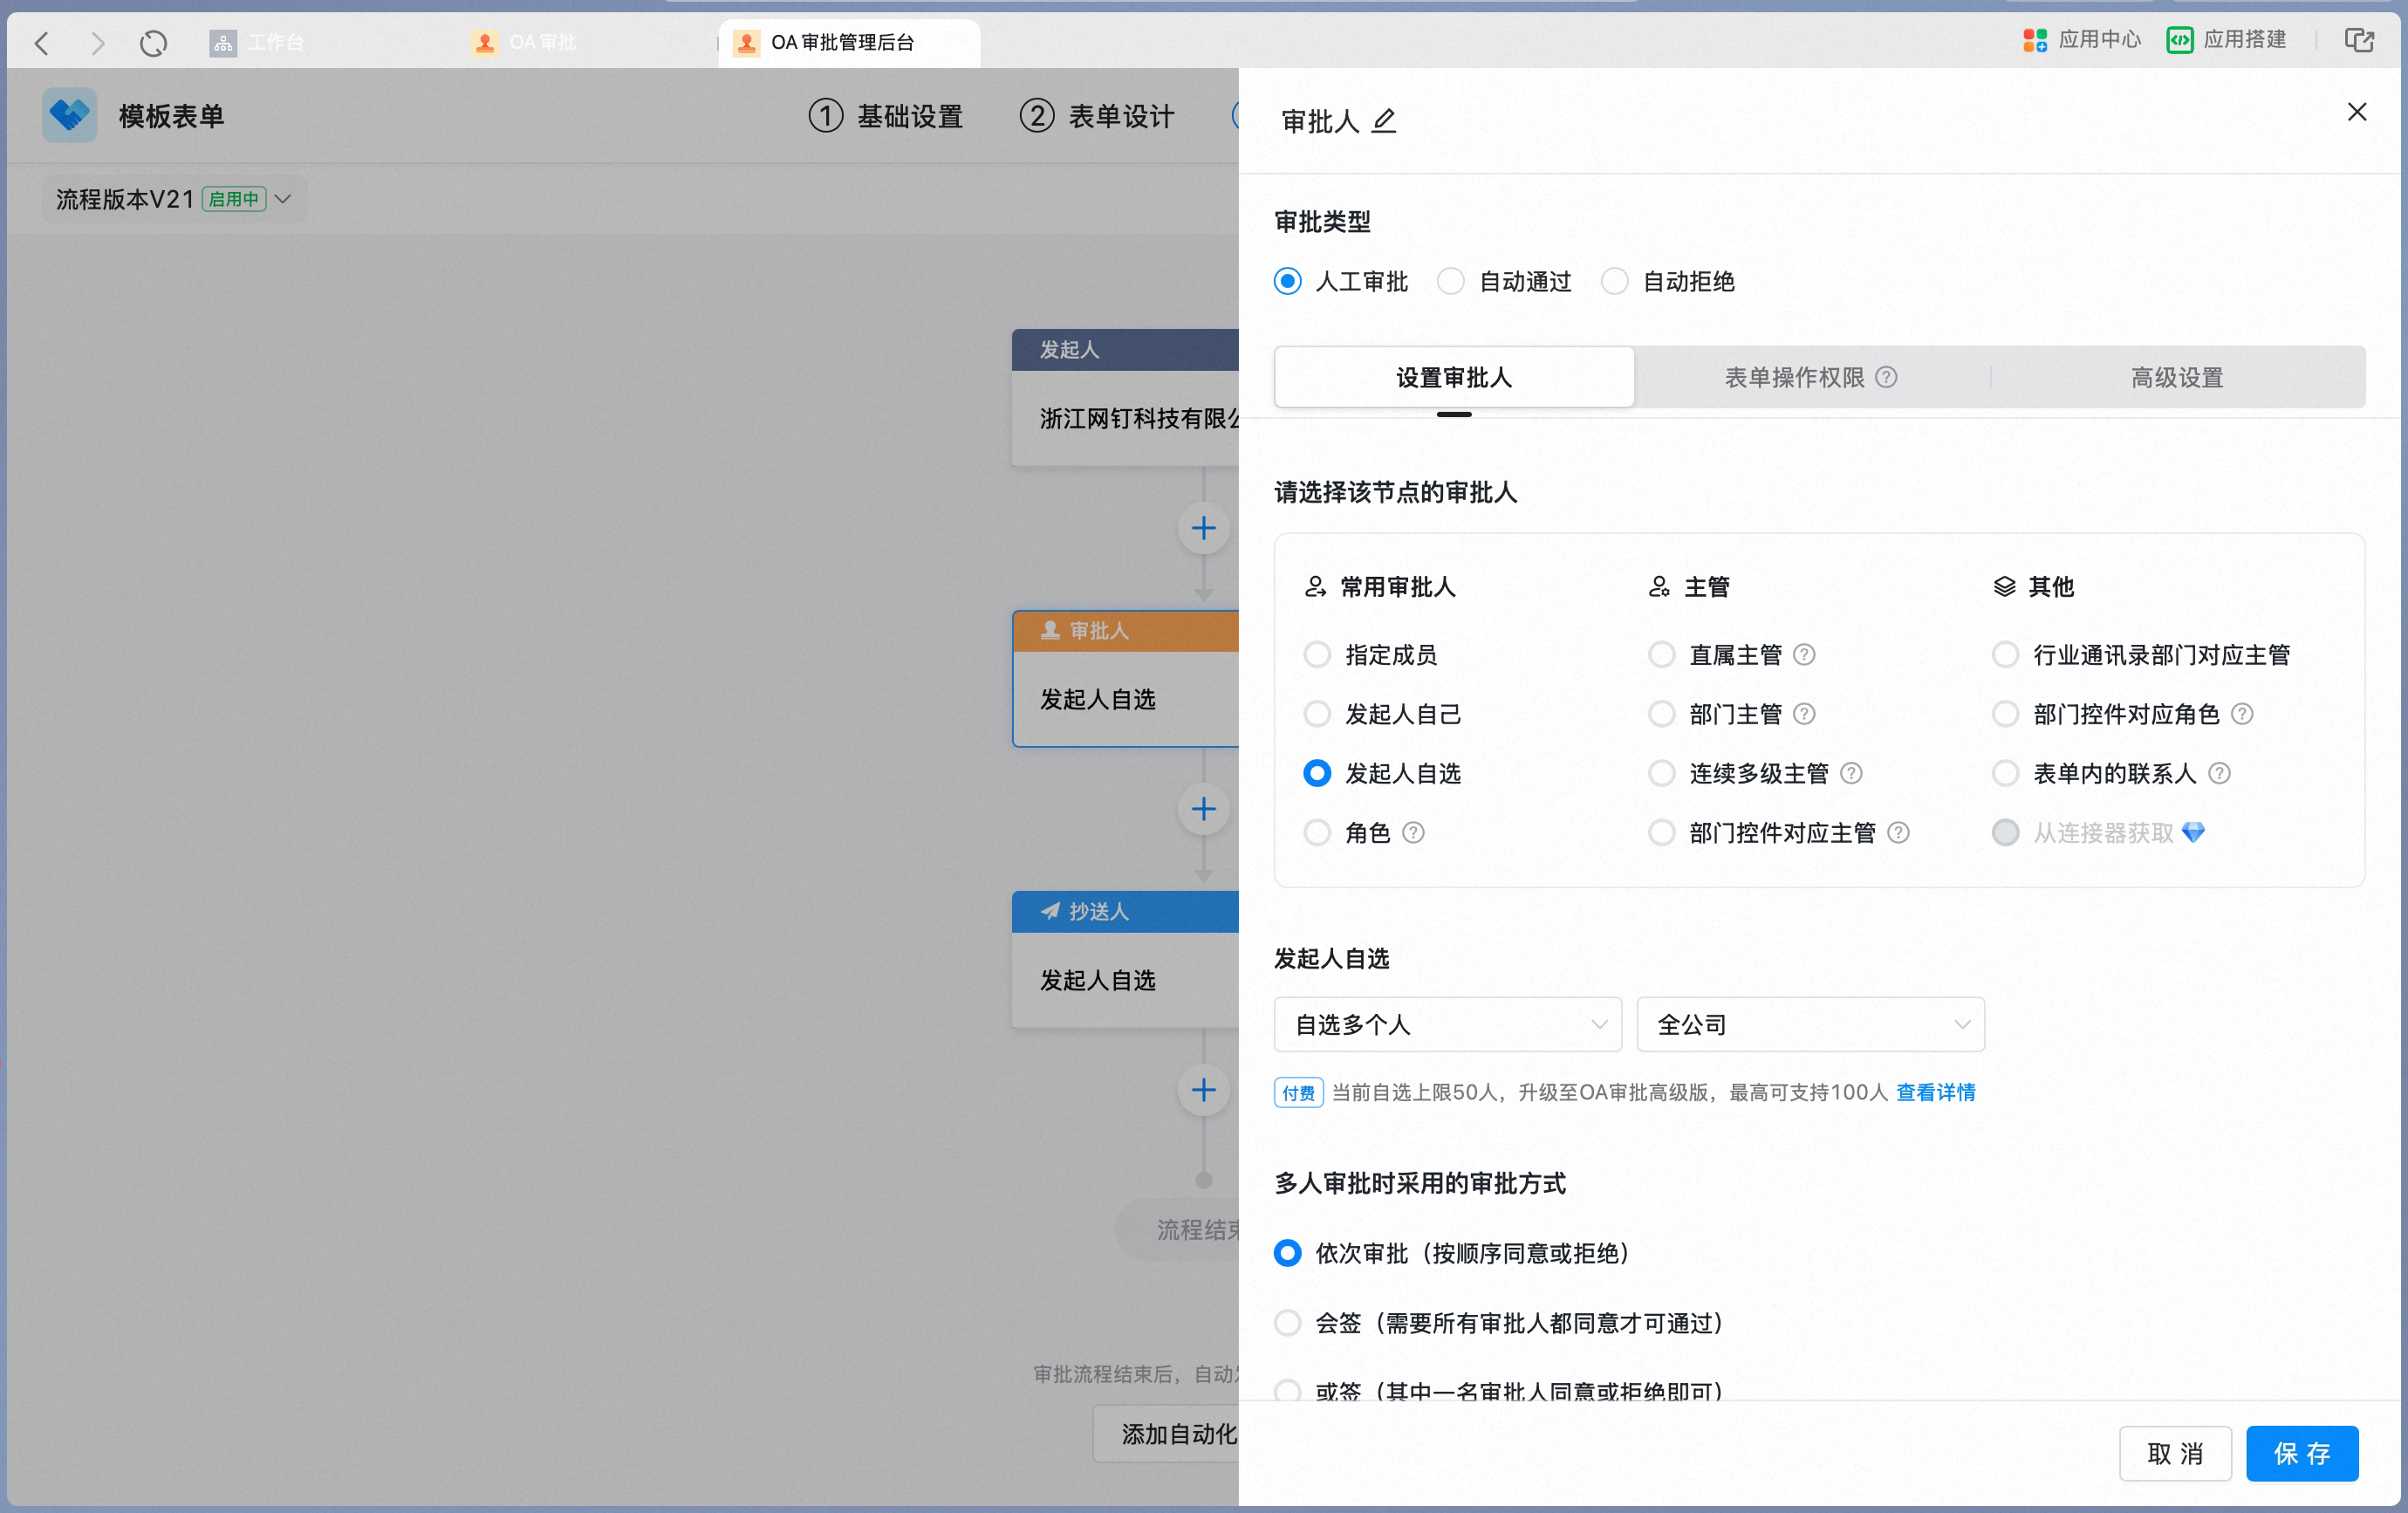
The approver reviews and approves the business action, and can Accept, Decline, transfer, return, or add an approver on the approval form. 1) Approver attributes
Approver node attribute panel:
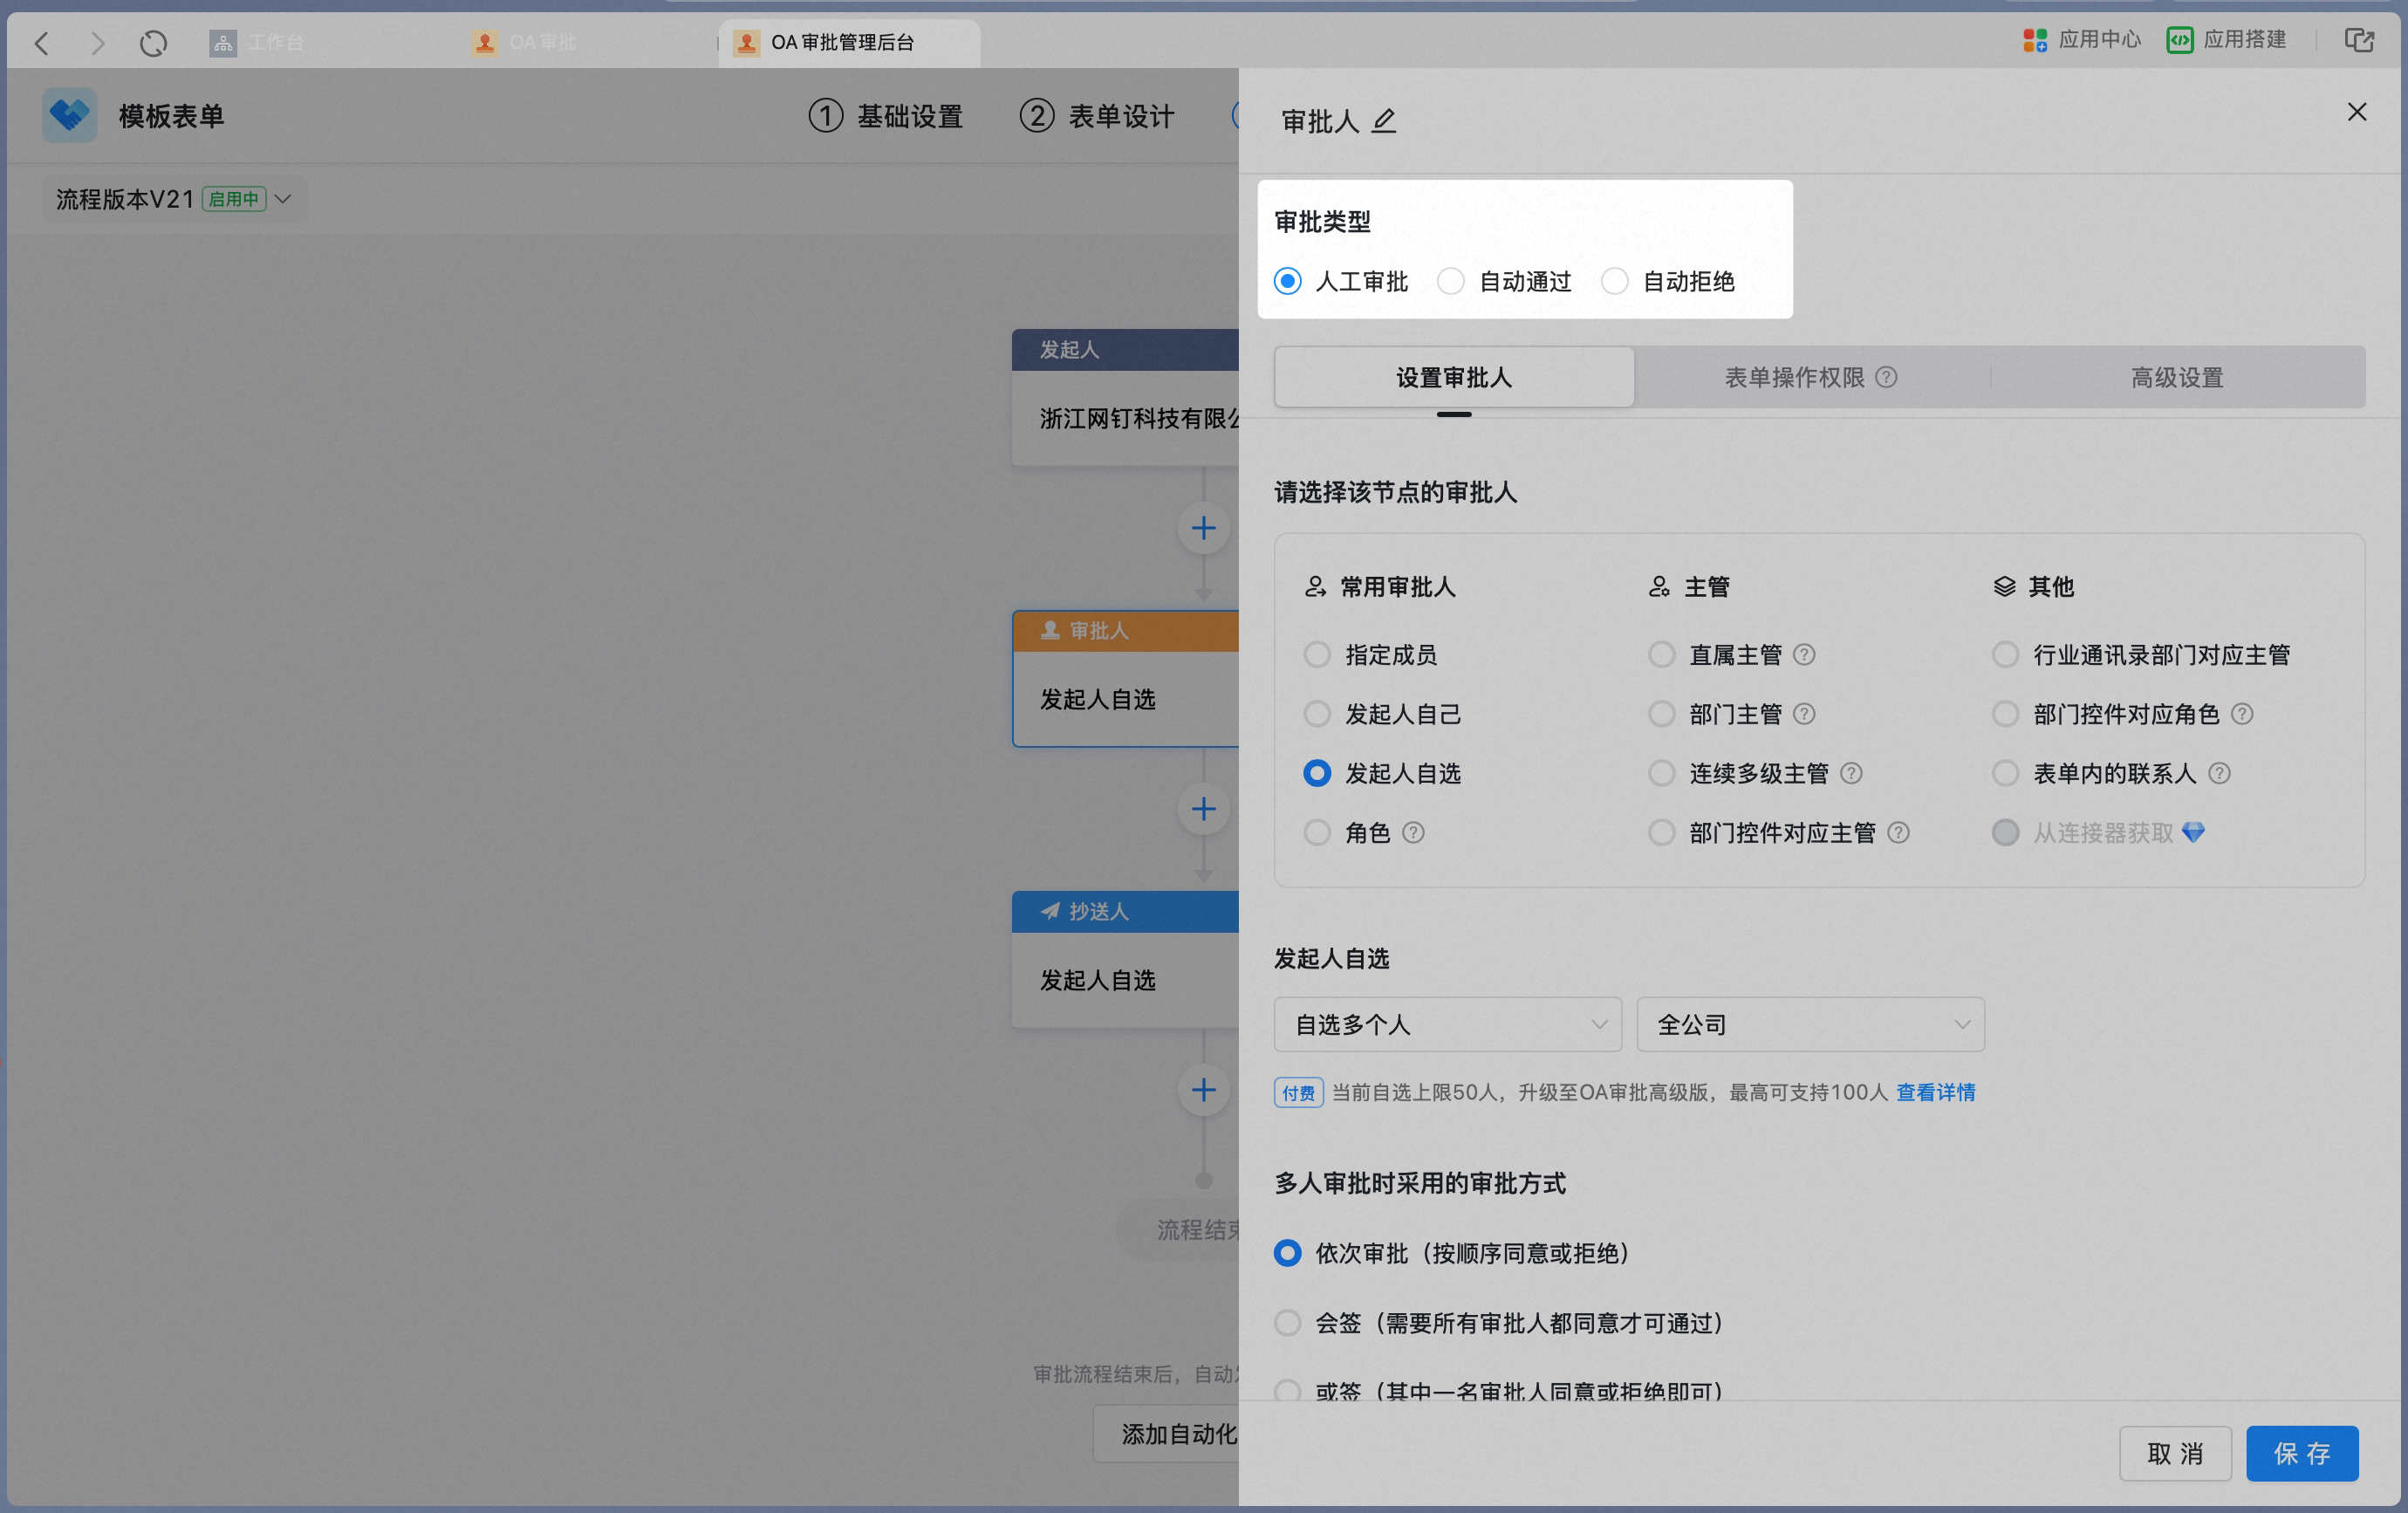
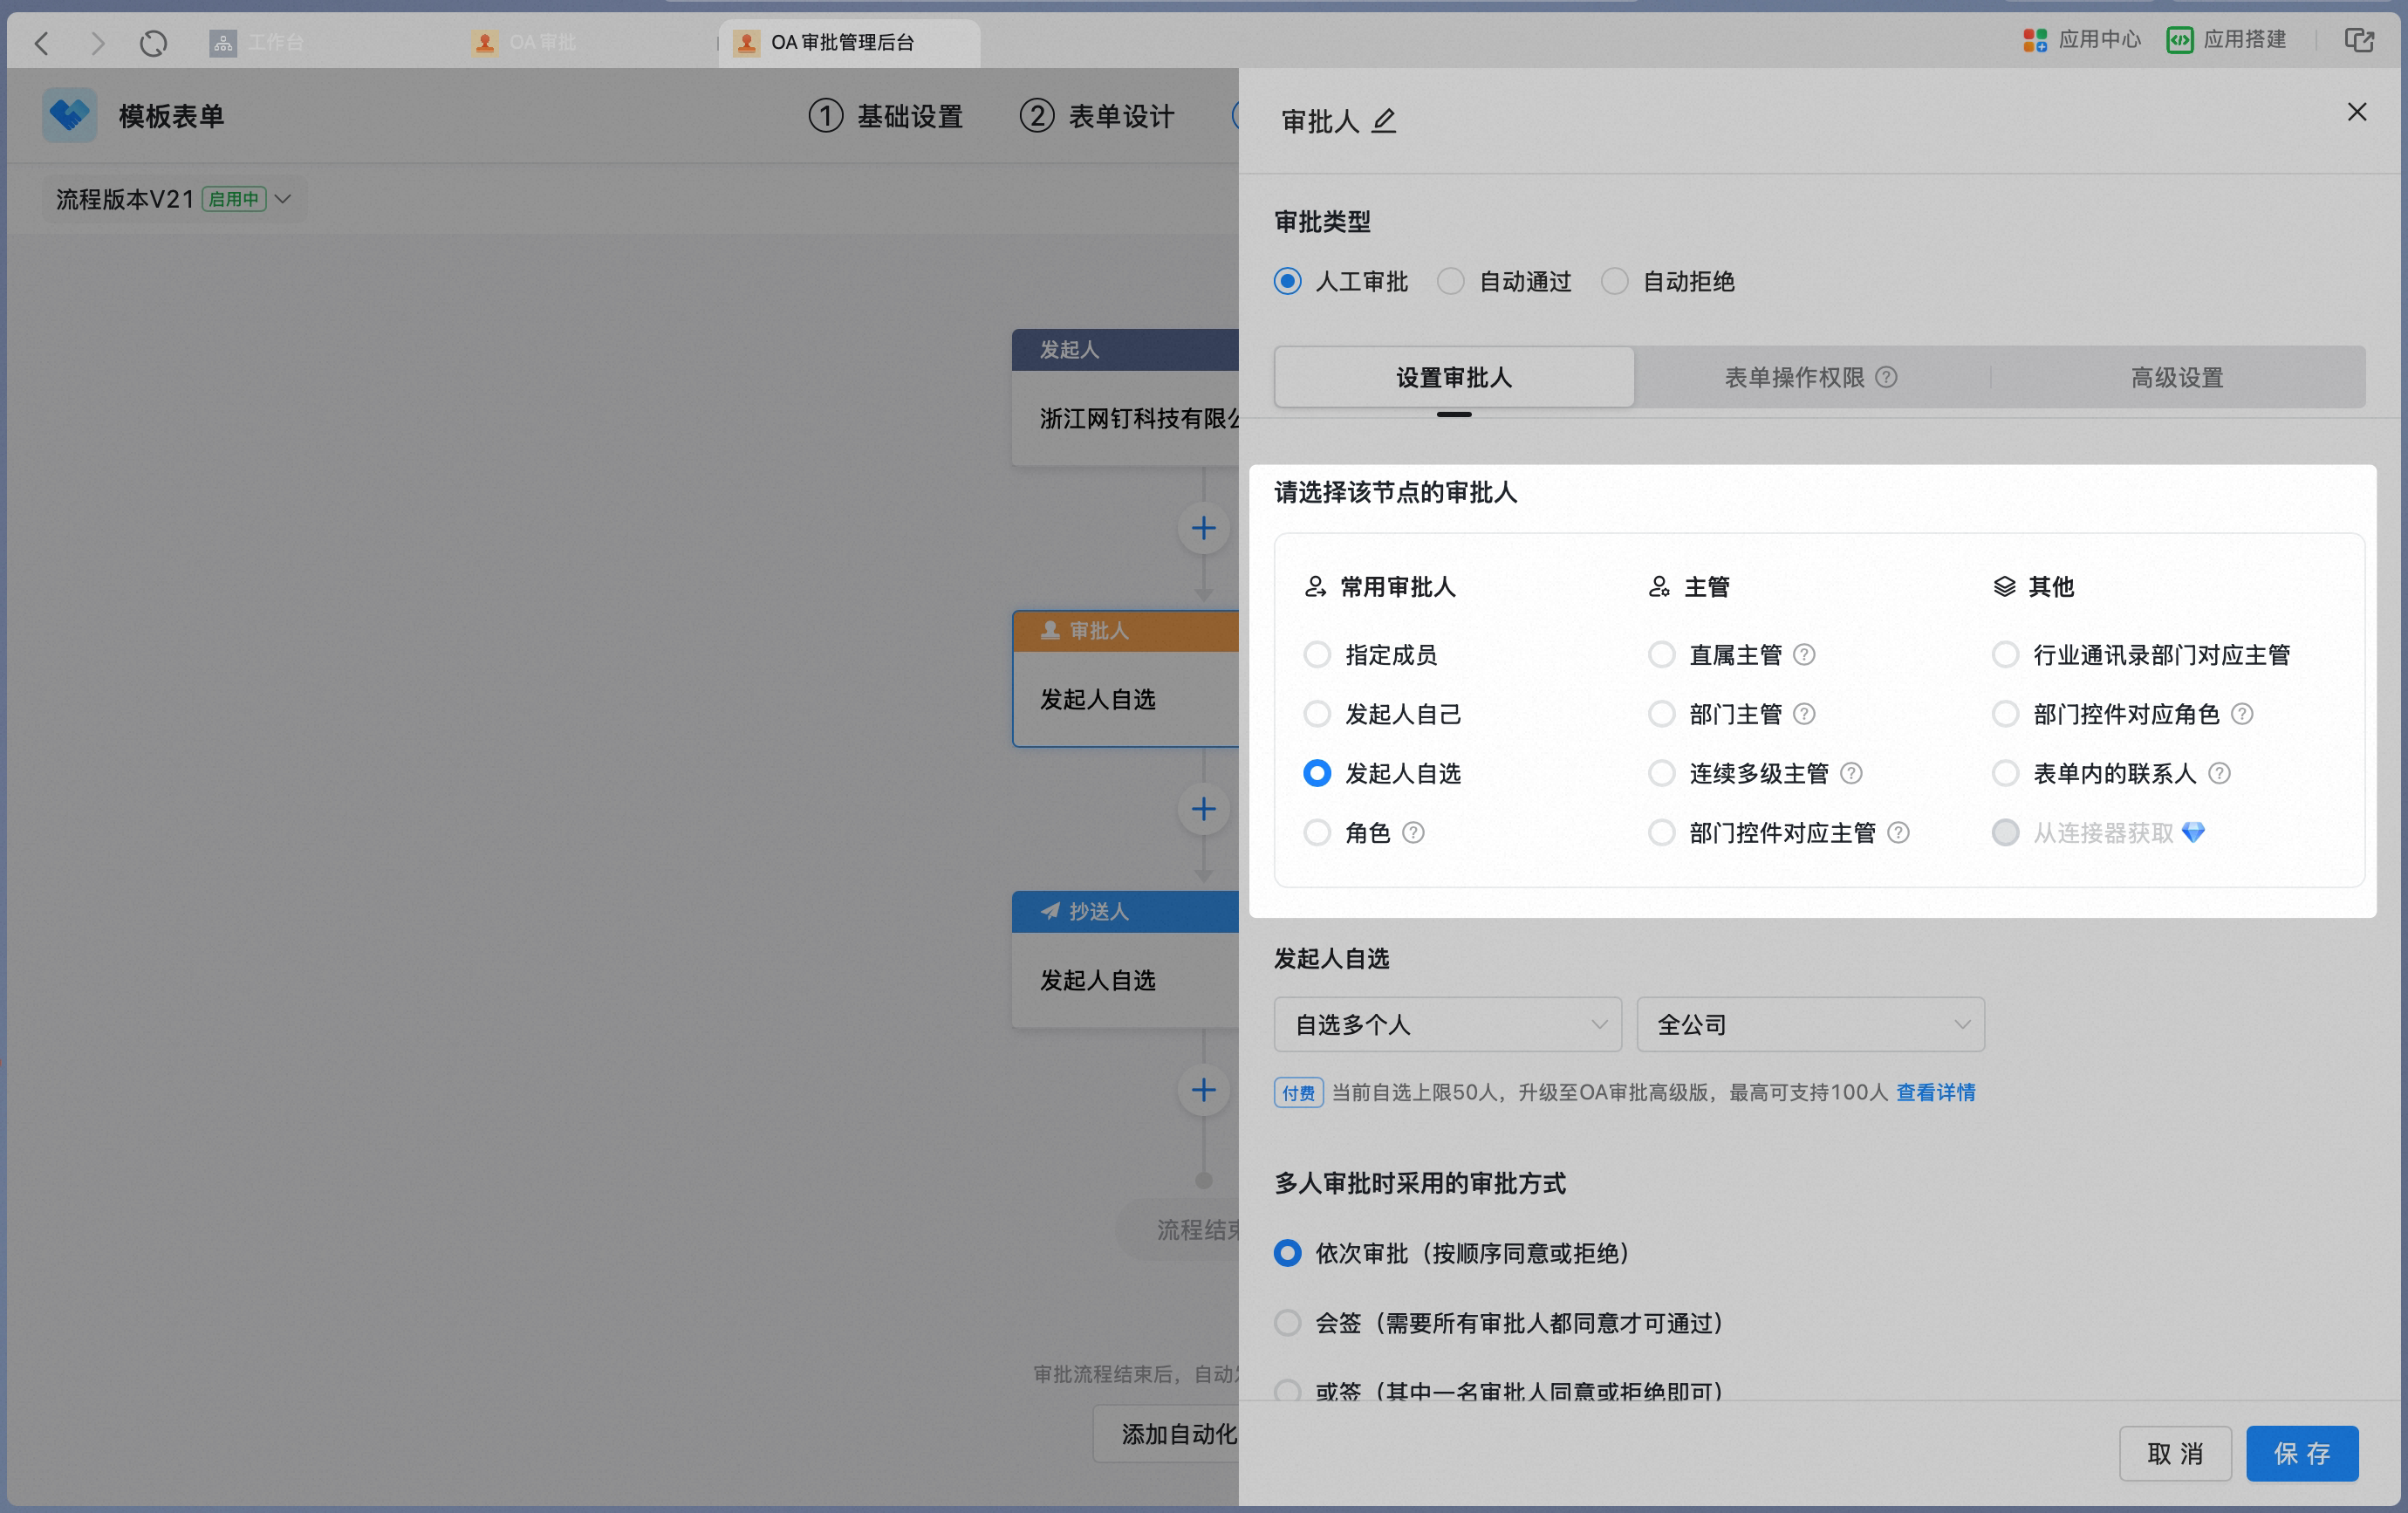
Specified users
Specified users
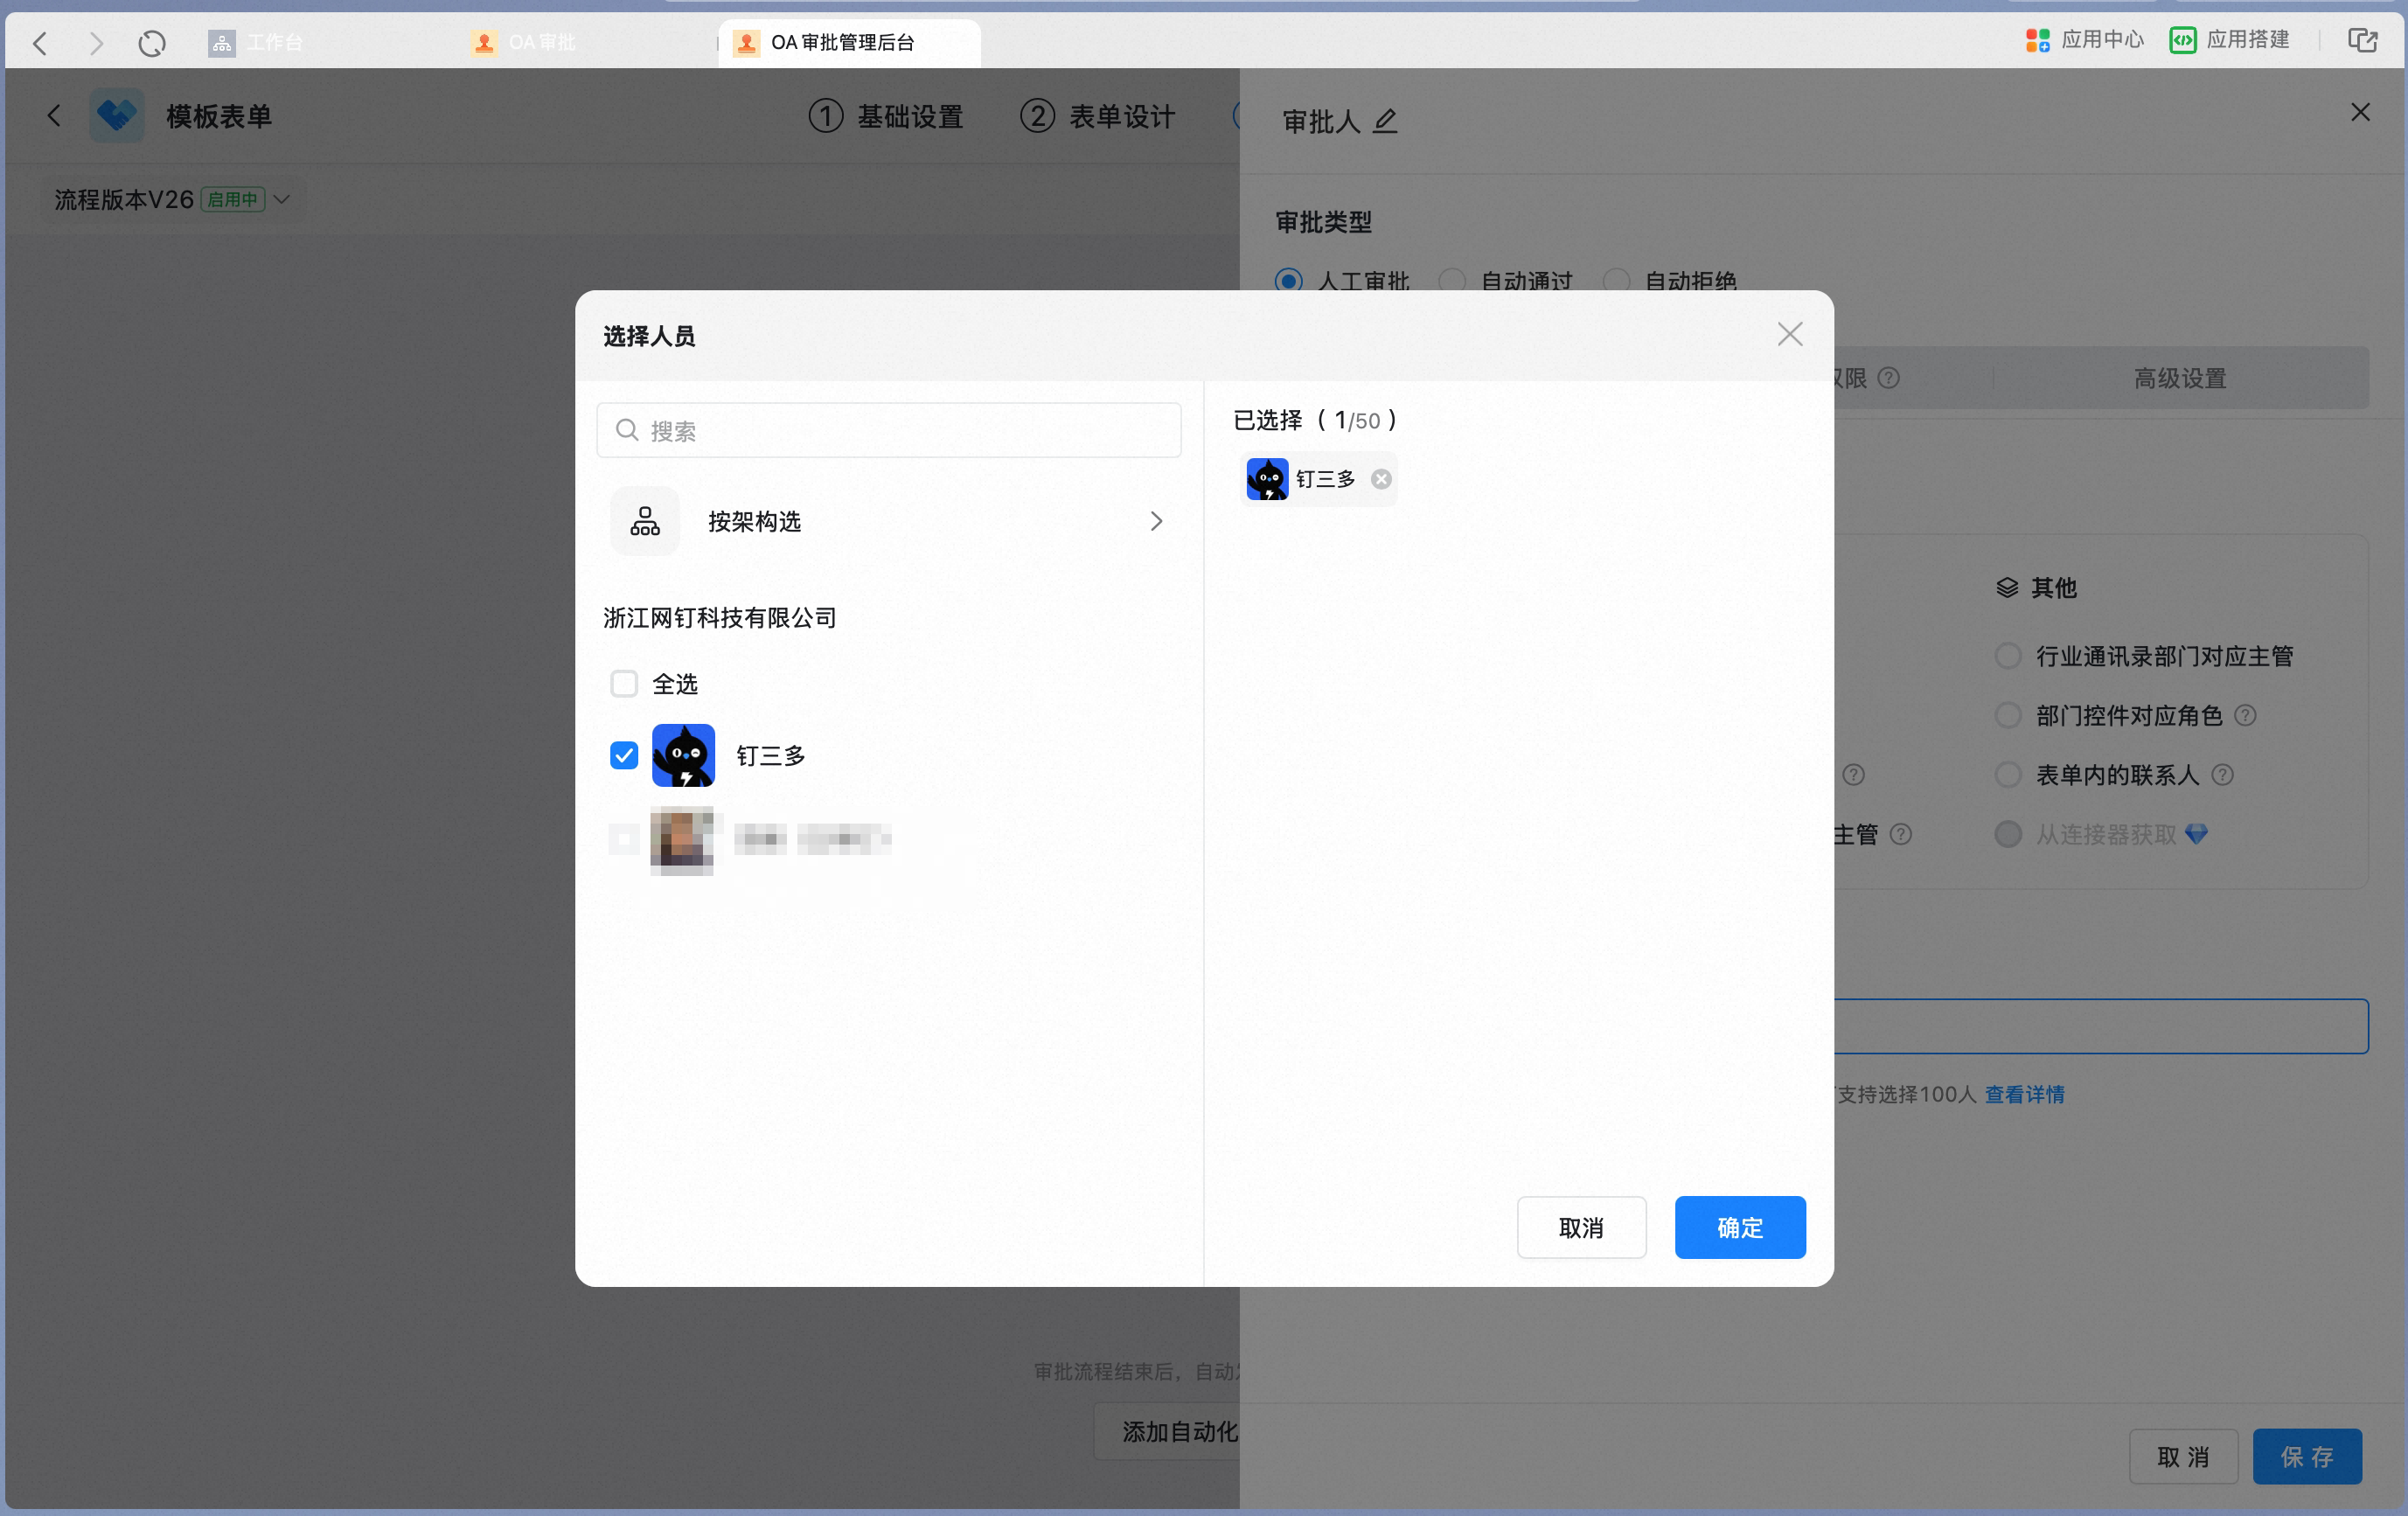
When you set the node approver to Specified users, add specified users as approvers.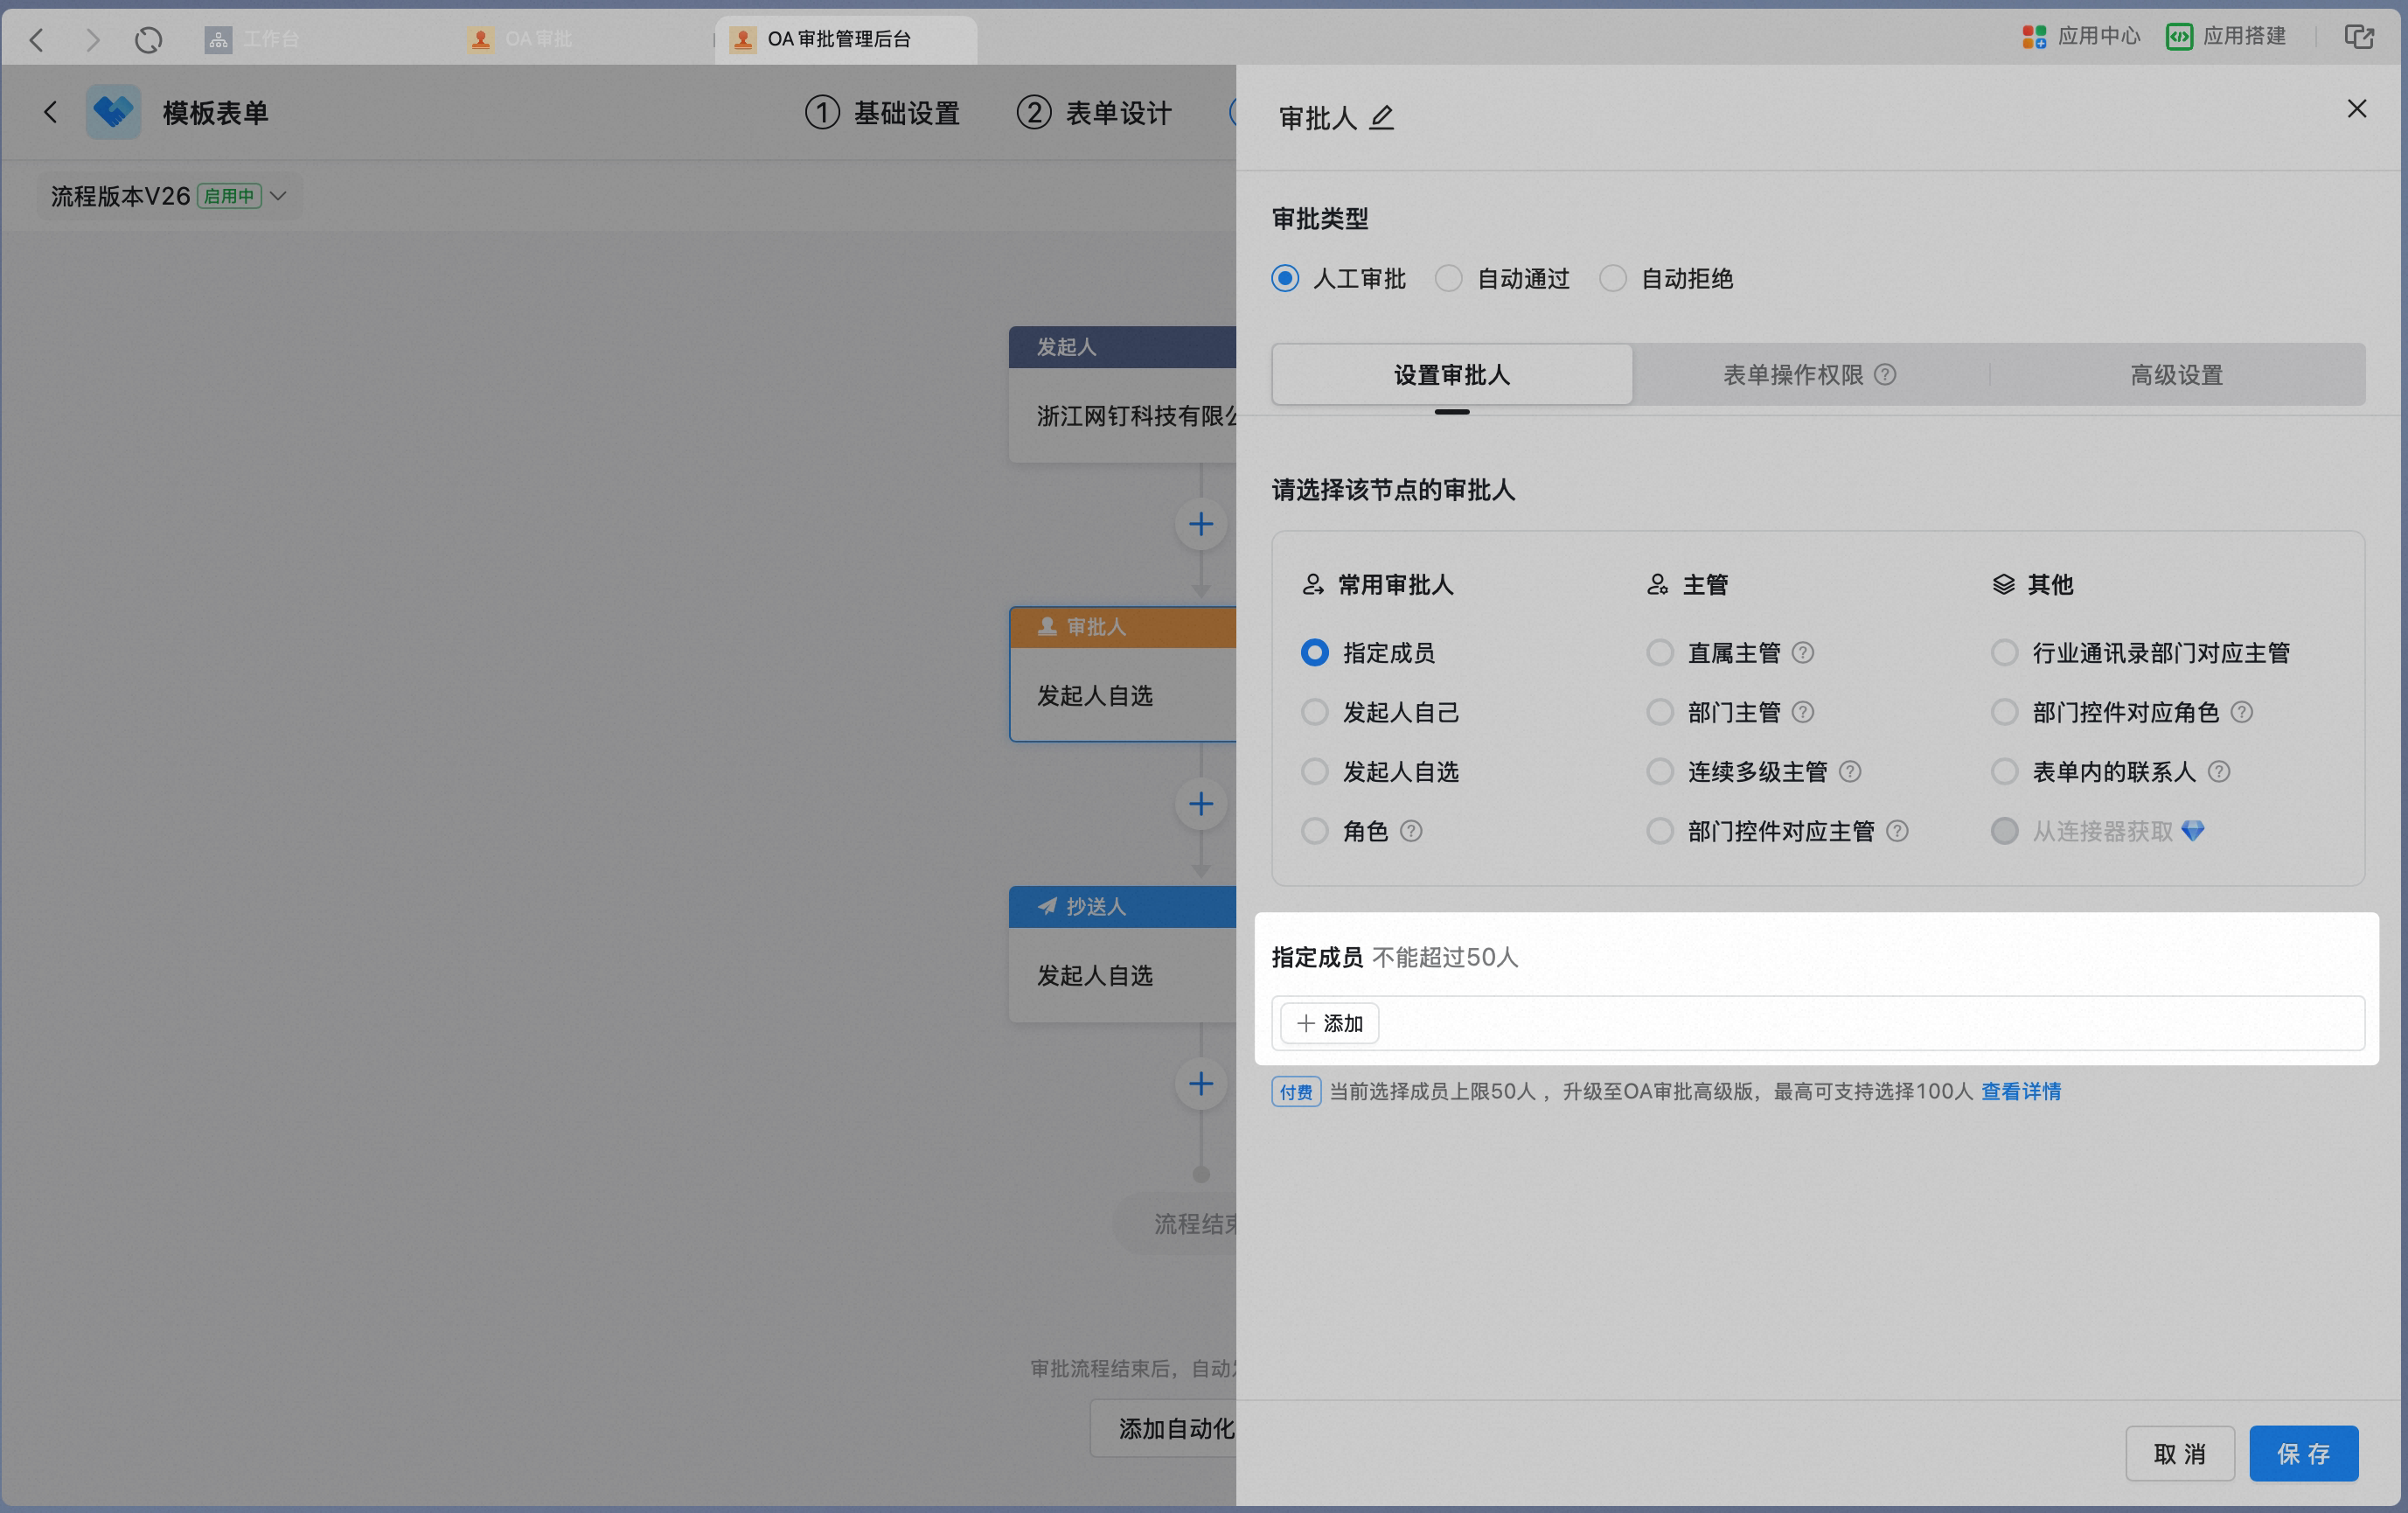 Pick users from Contacts:
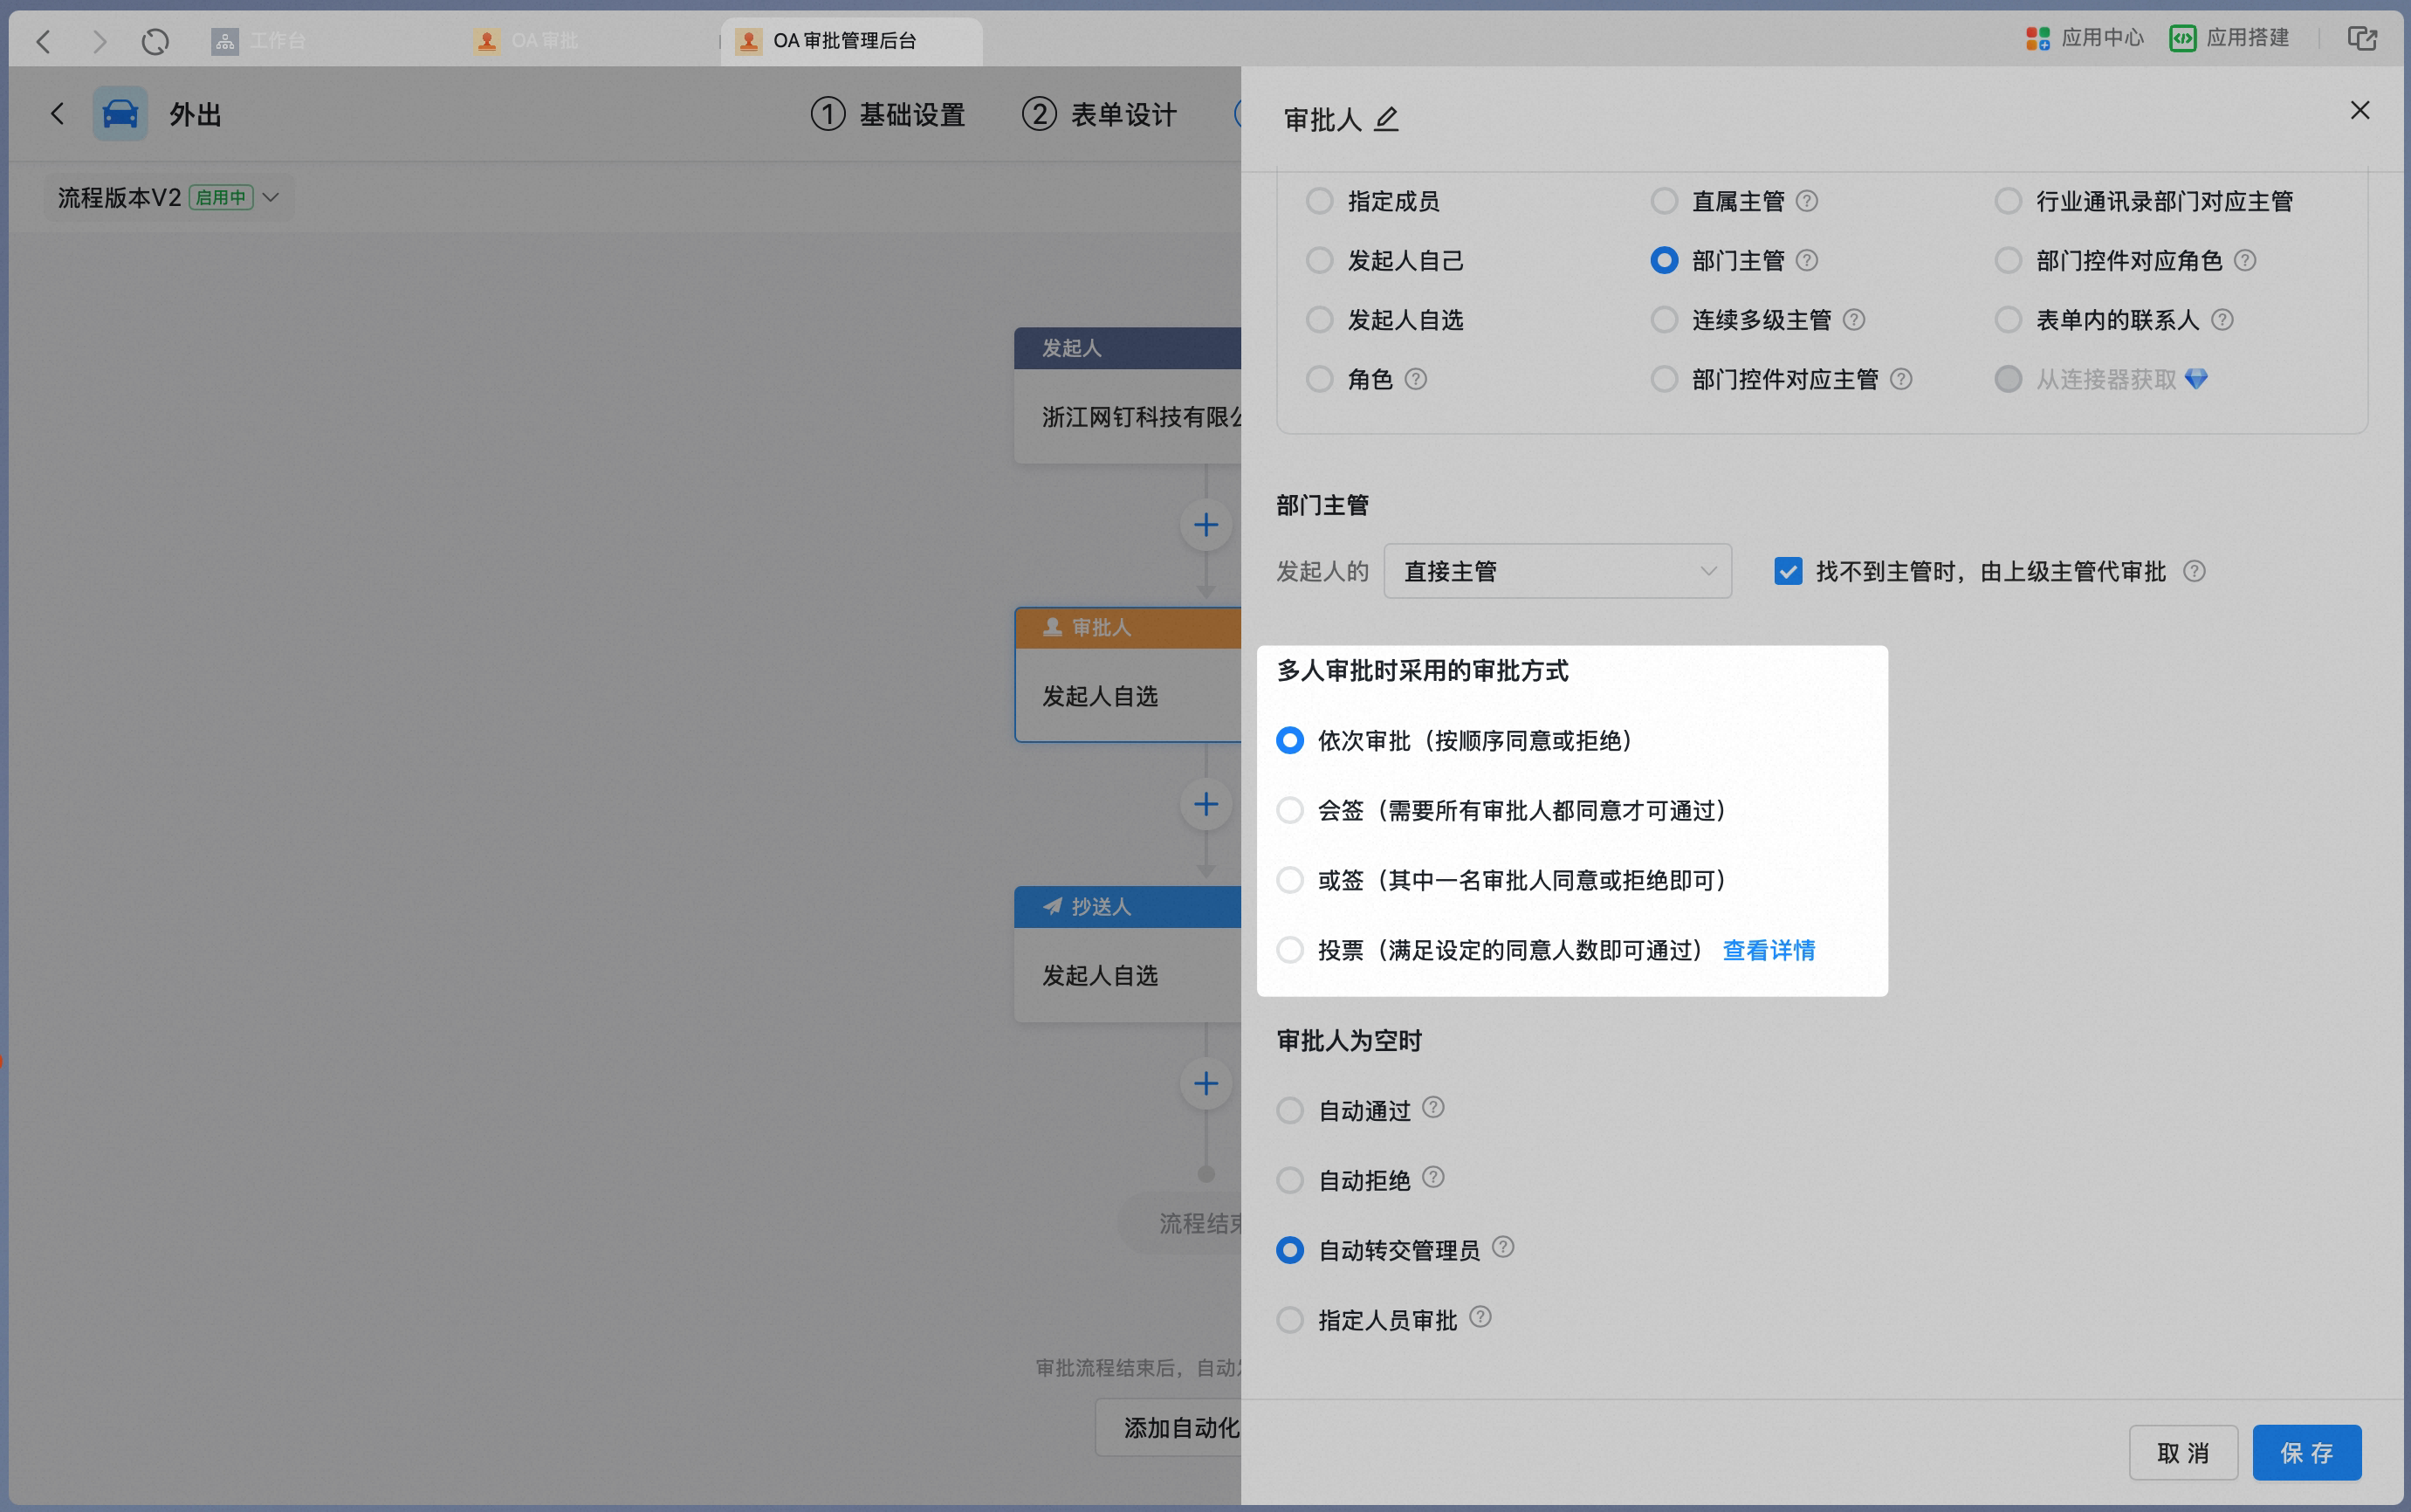
 Set the approval method when multiple users are picked: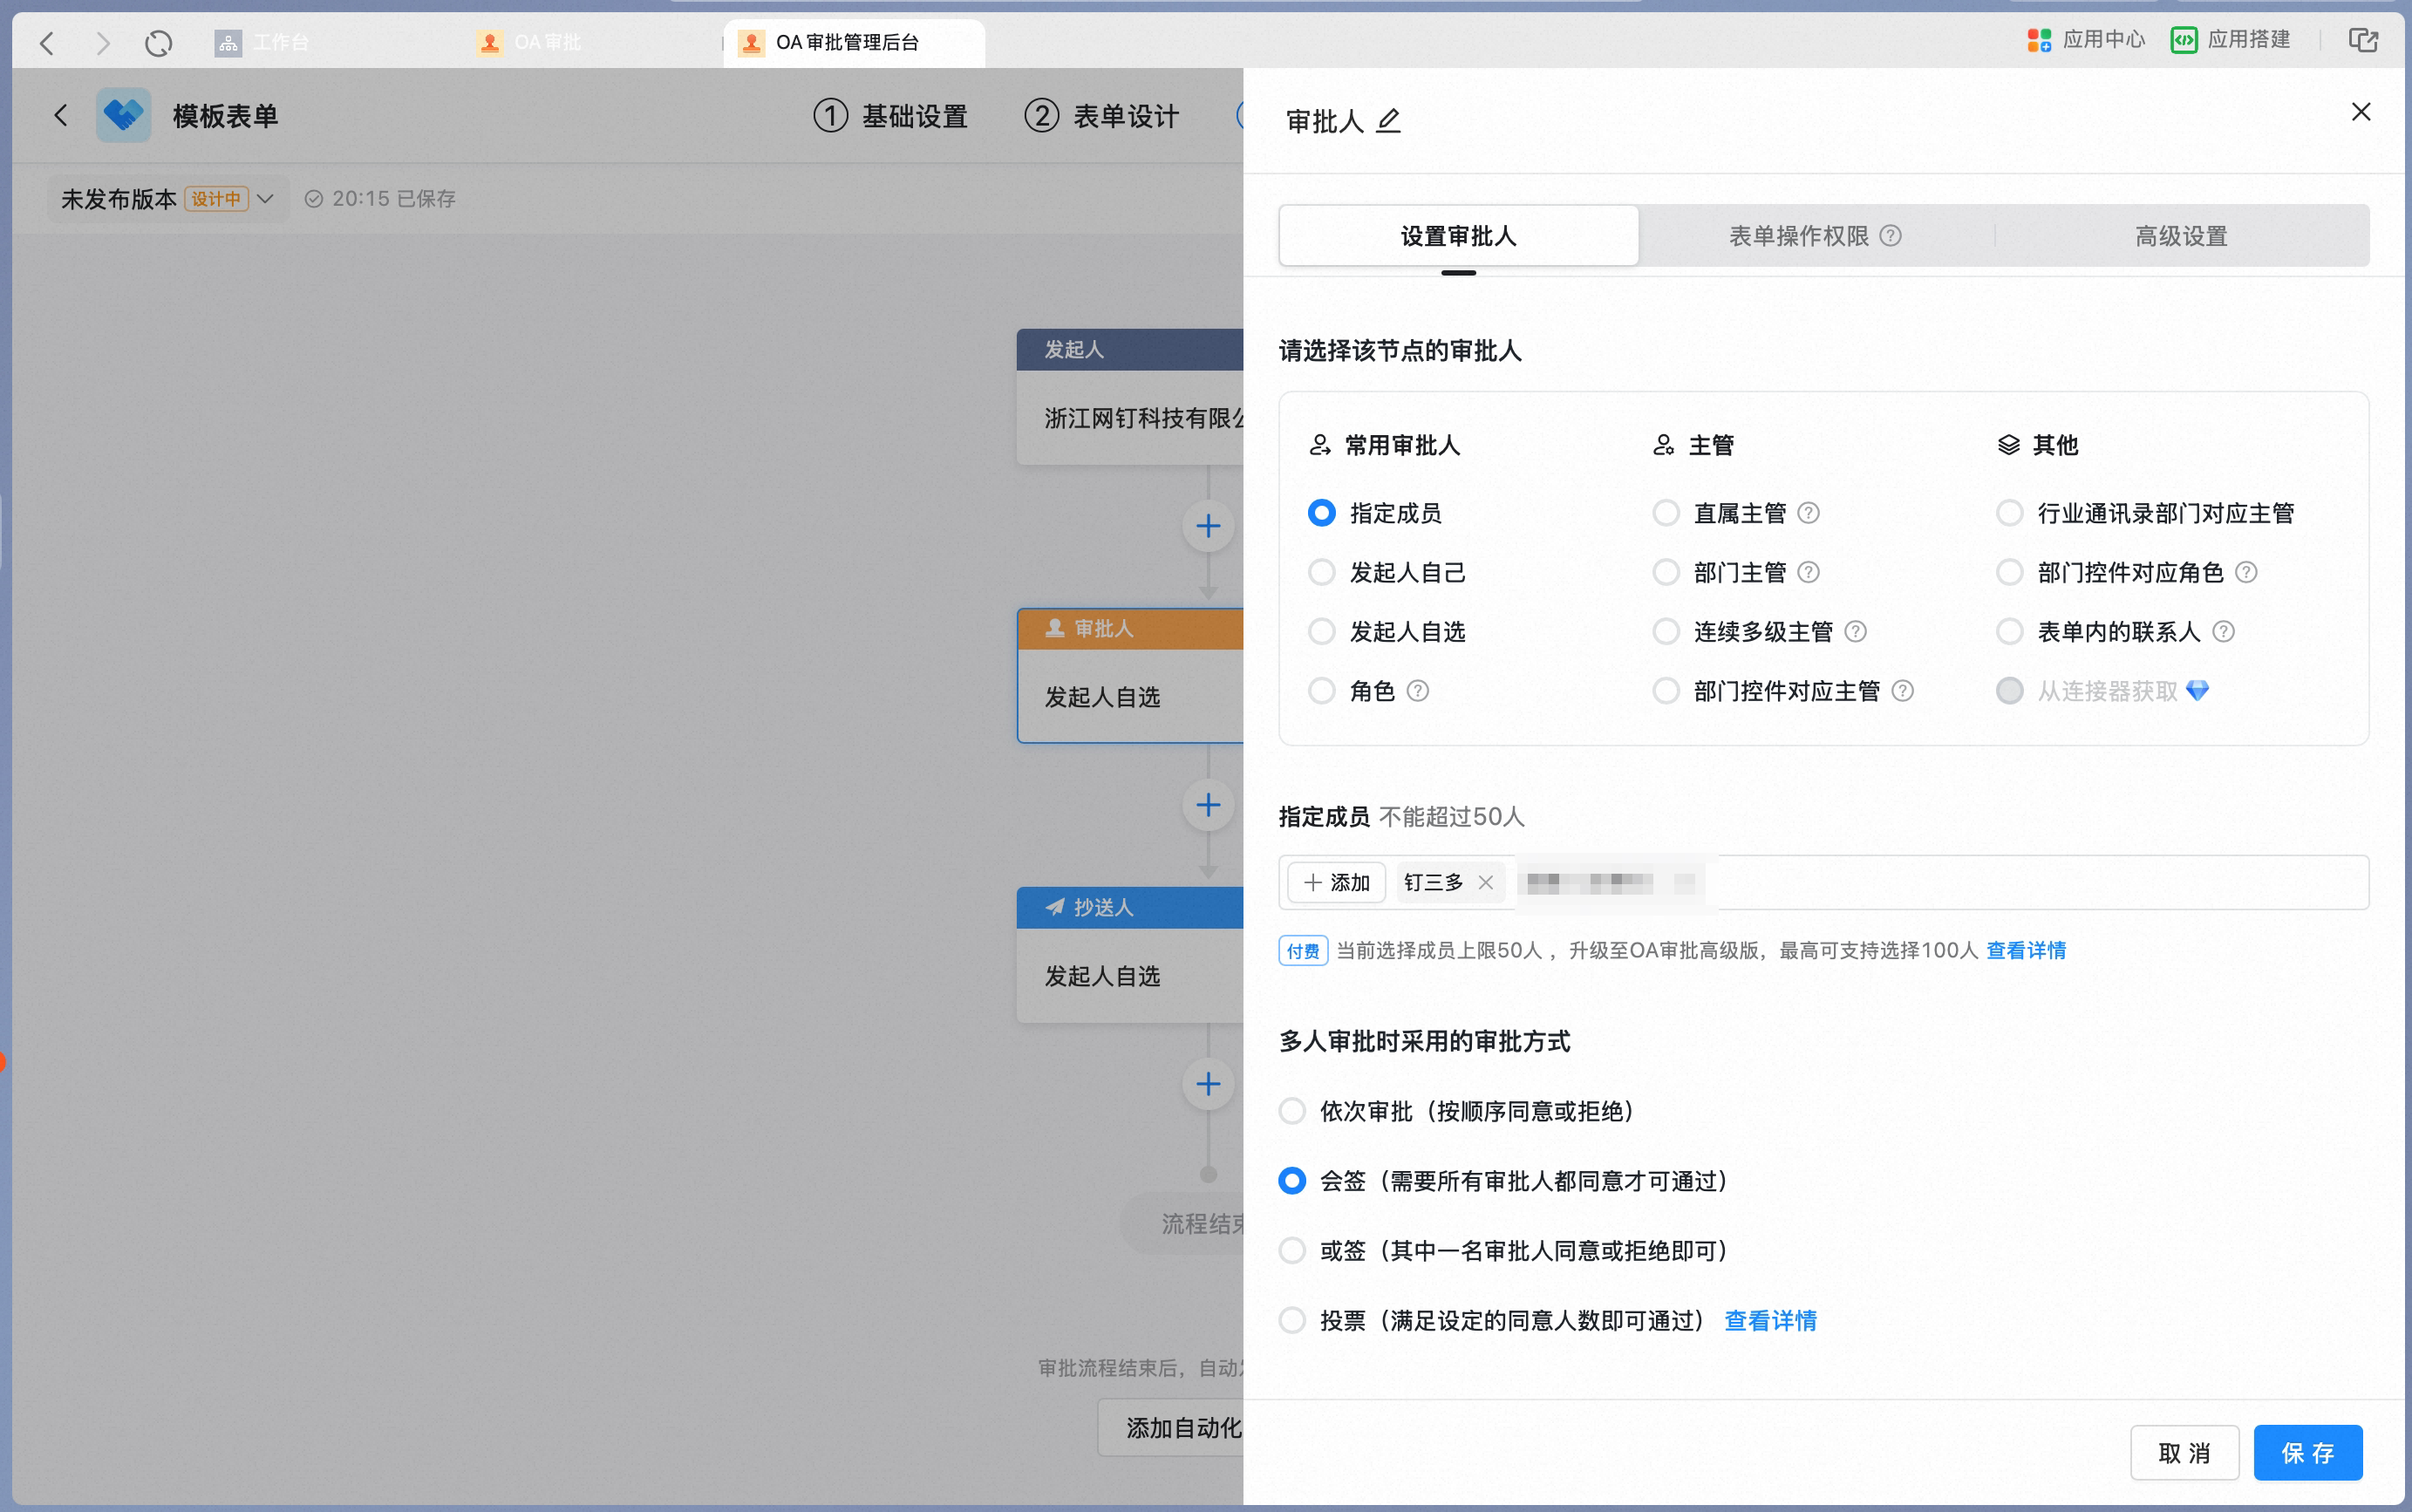
- Pick approvers from Contacts. The Standard edition allows up to 50 users per node; a paid plan raises this limit to 100.
- When you pick multiple users, set the approval method for multiple approvers. The default is joint approval.
Initiator themselves
Initiator themselves
When you set the node approver to Initiator themselves, the initiator acts as the approver for this node. This is typically used when the initiator must confirm the approval result.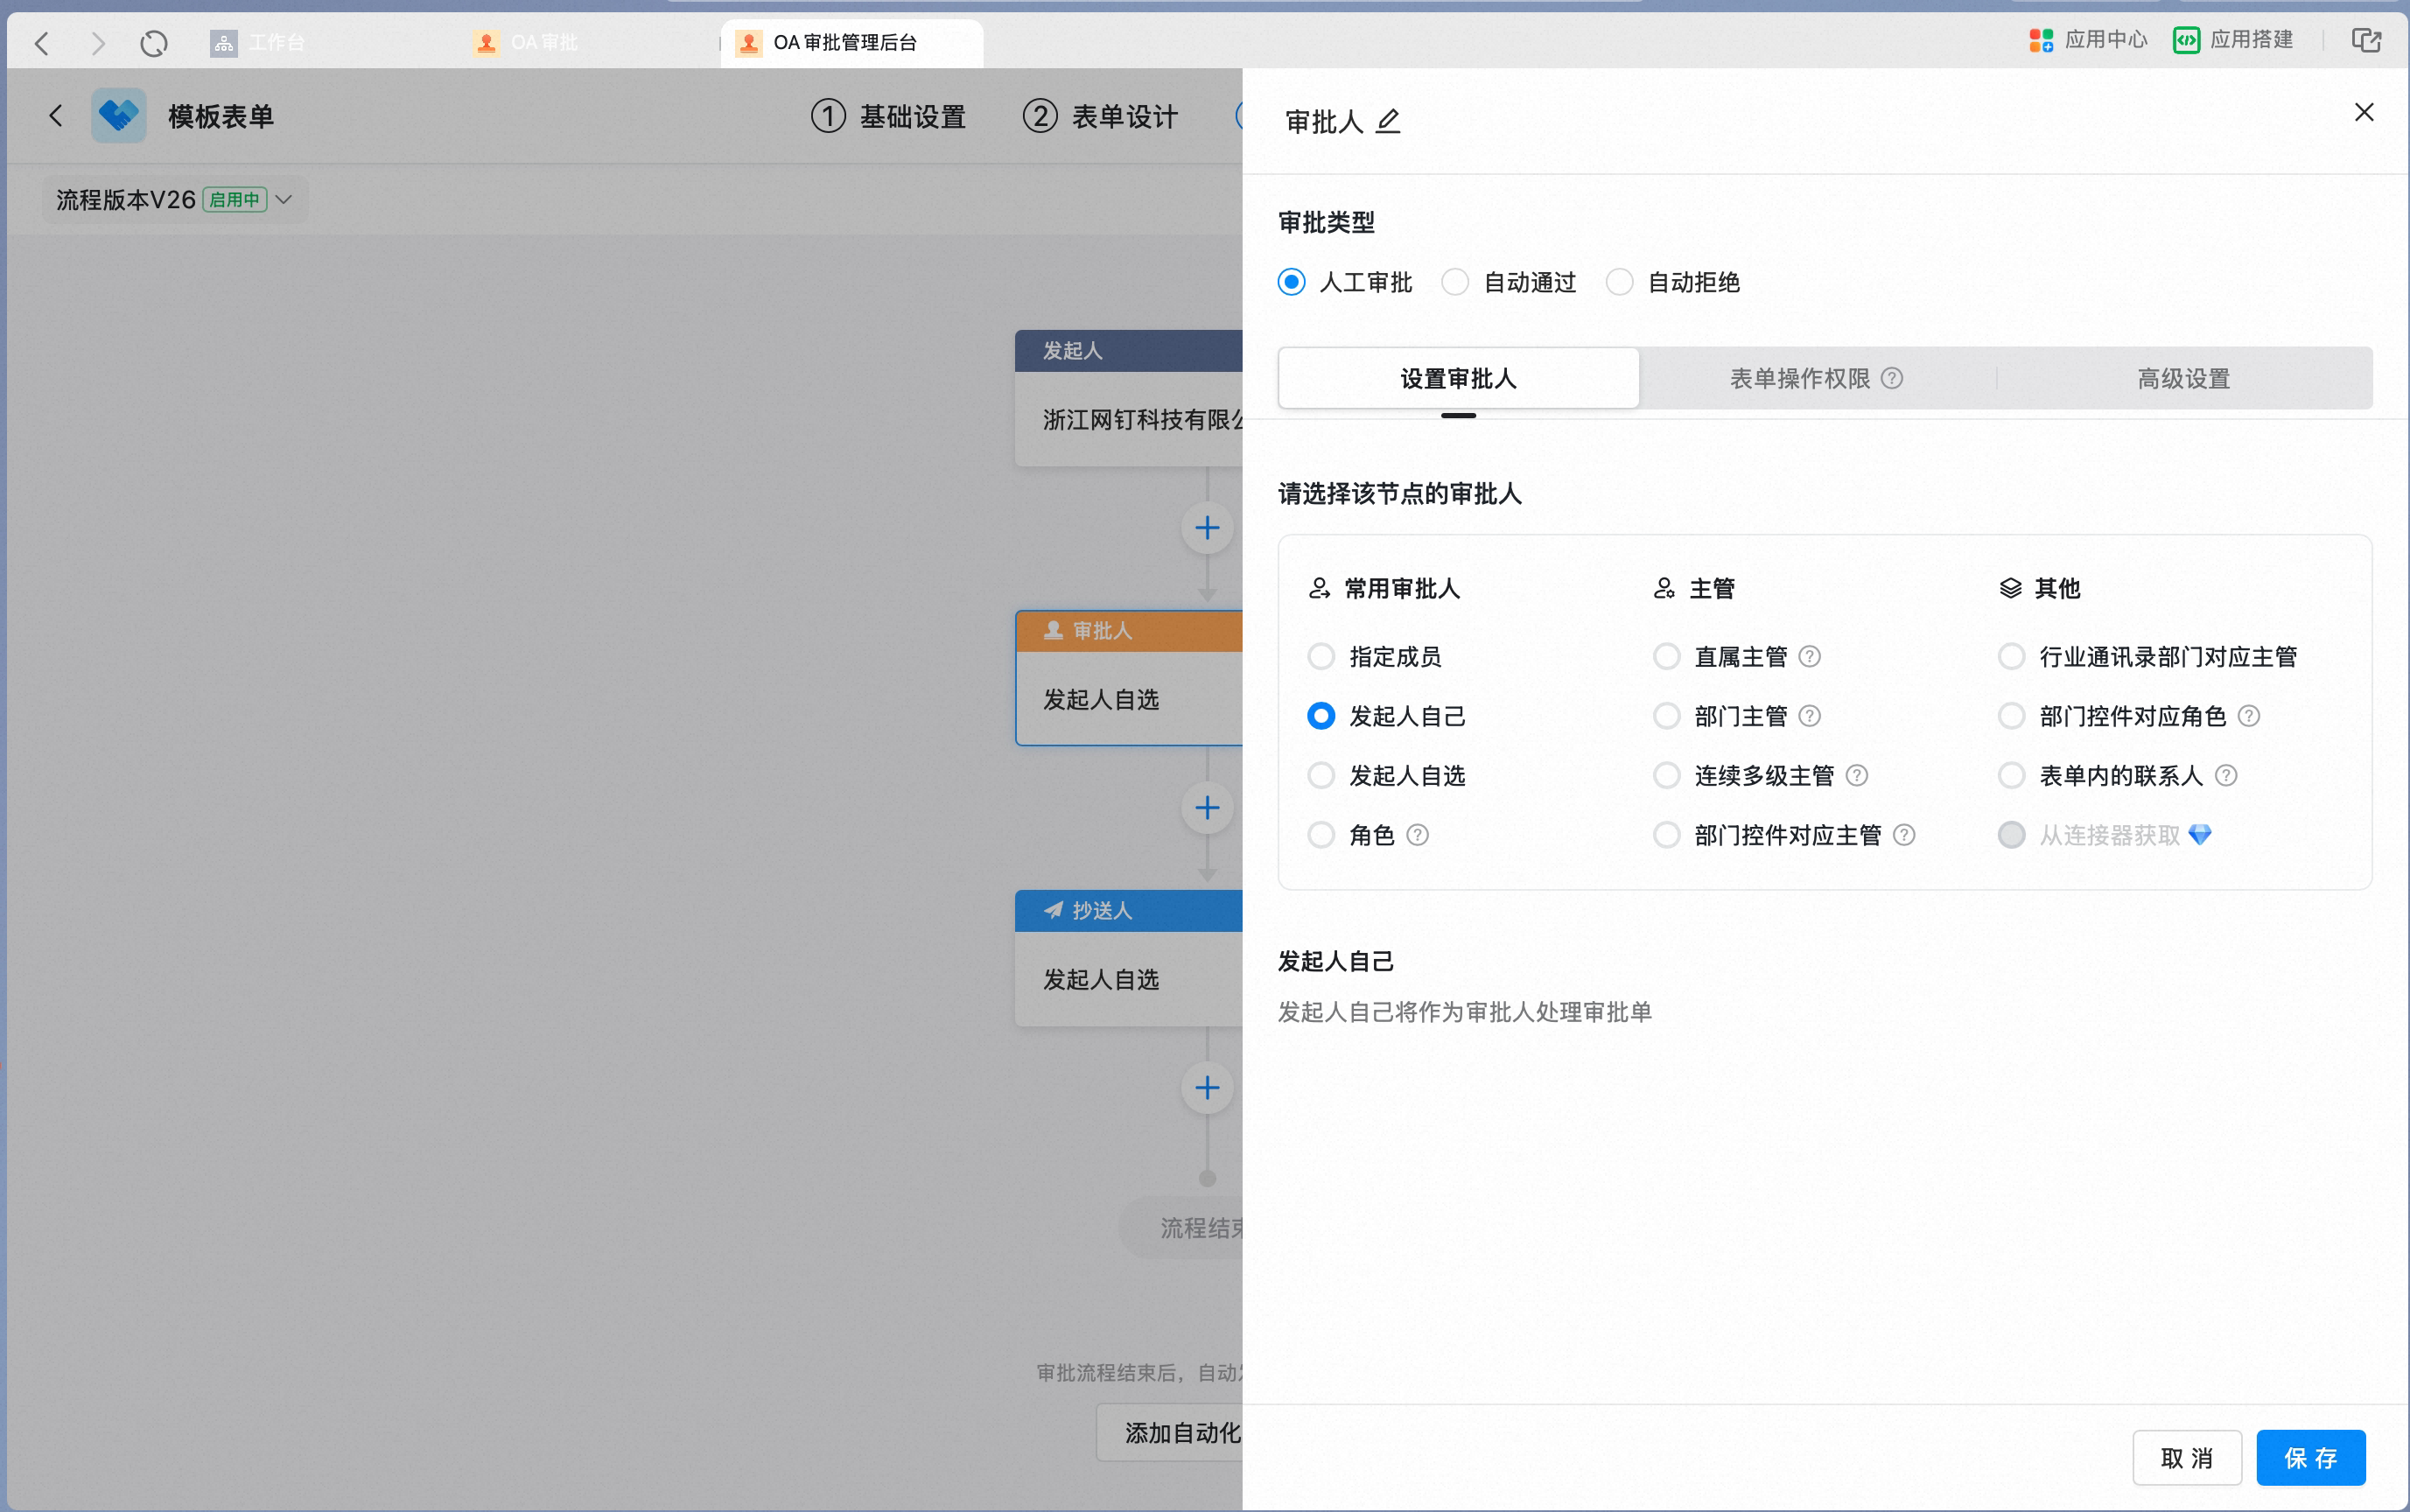
- For example, after a purchase request is submitted and the purchase is completed, the initiator confirms whether the outcome meets expectations.
- After a ticket is submitted and resolved, the initiator confirms whether the issue has been fixed.
Initiator picks
Initiator picks
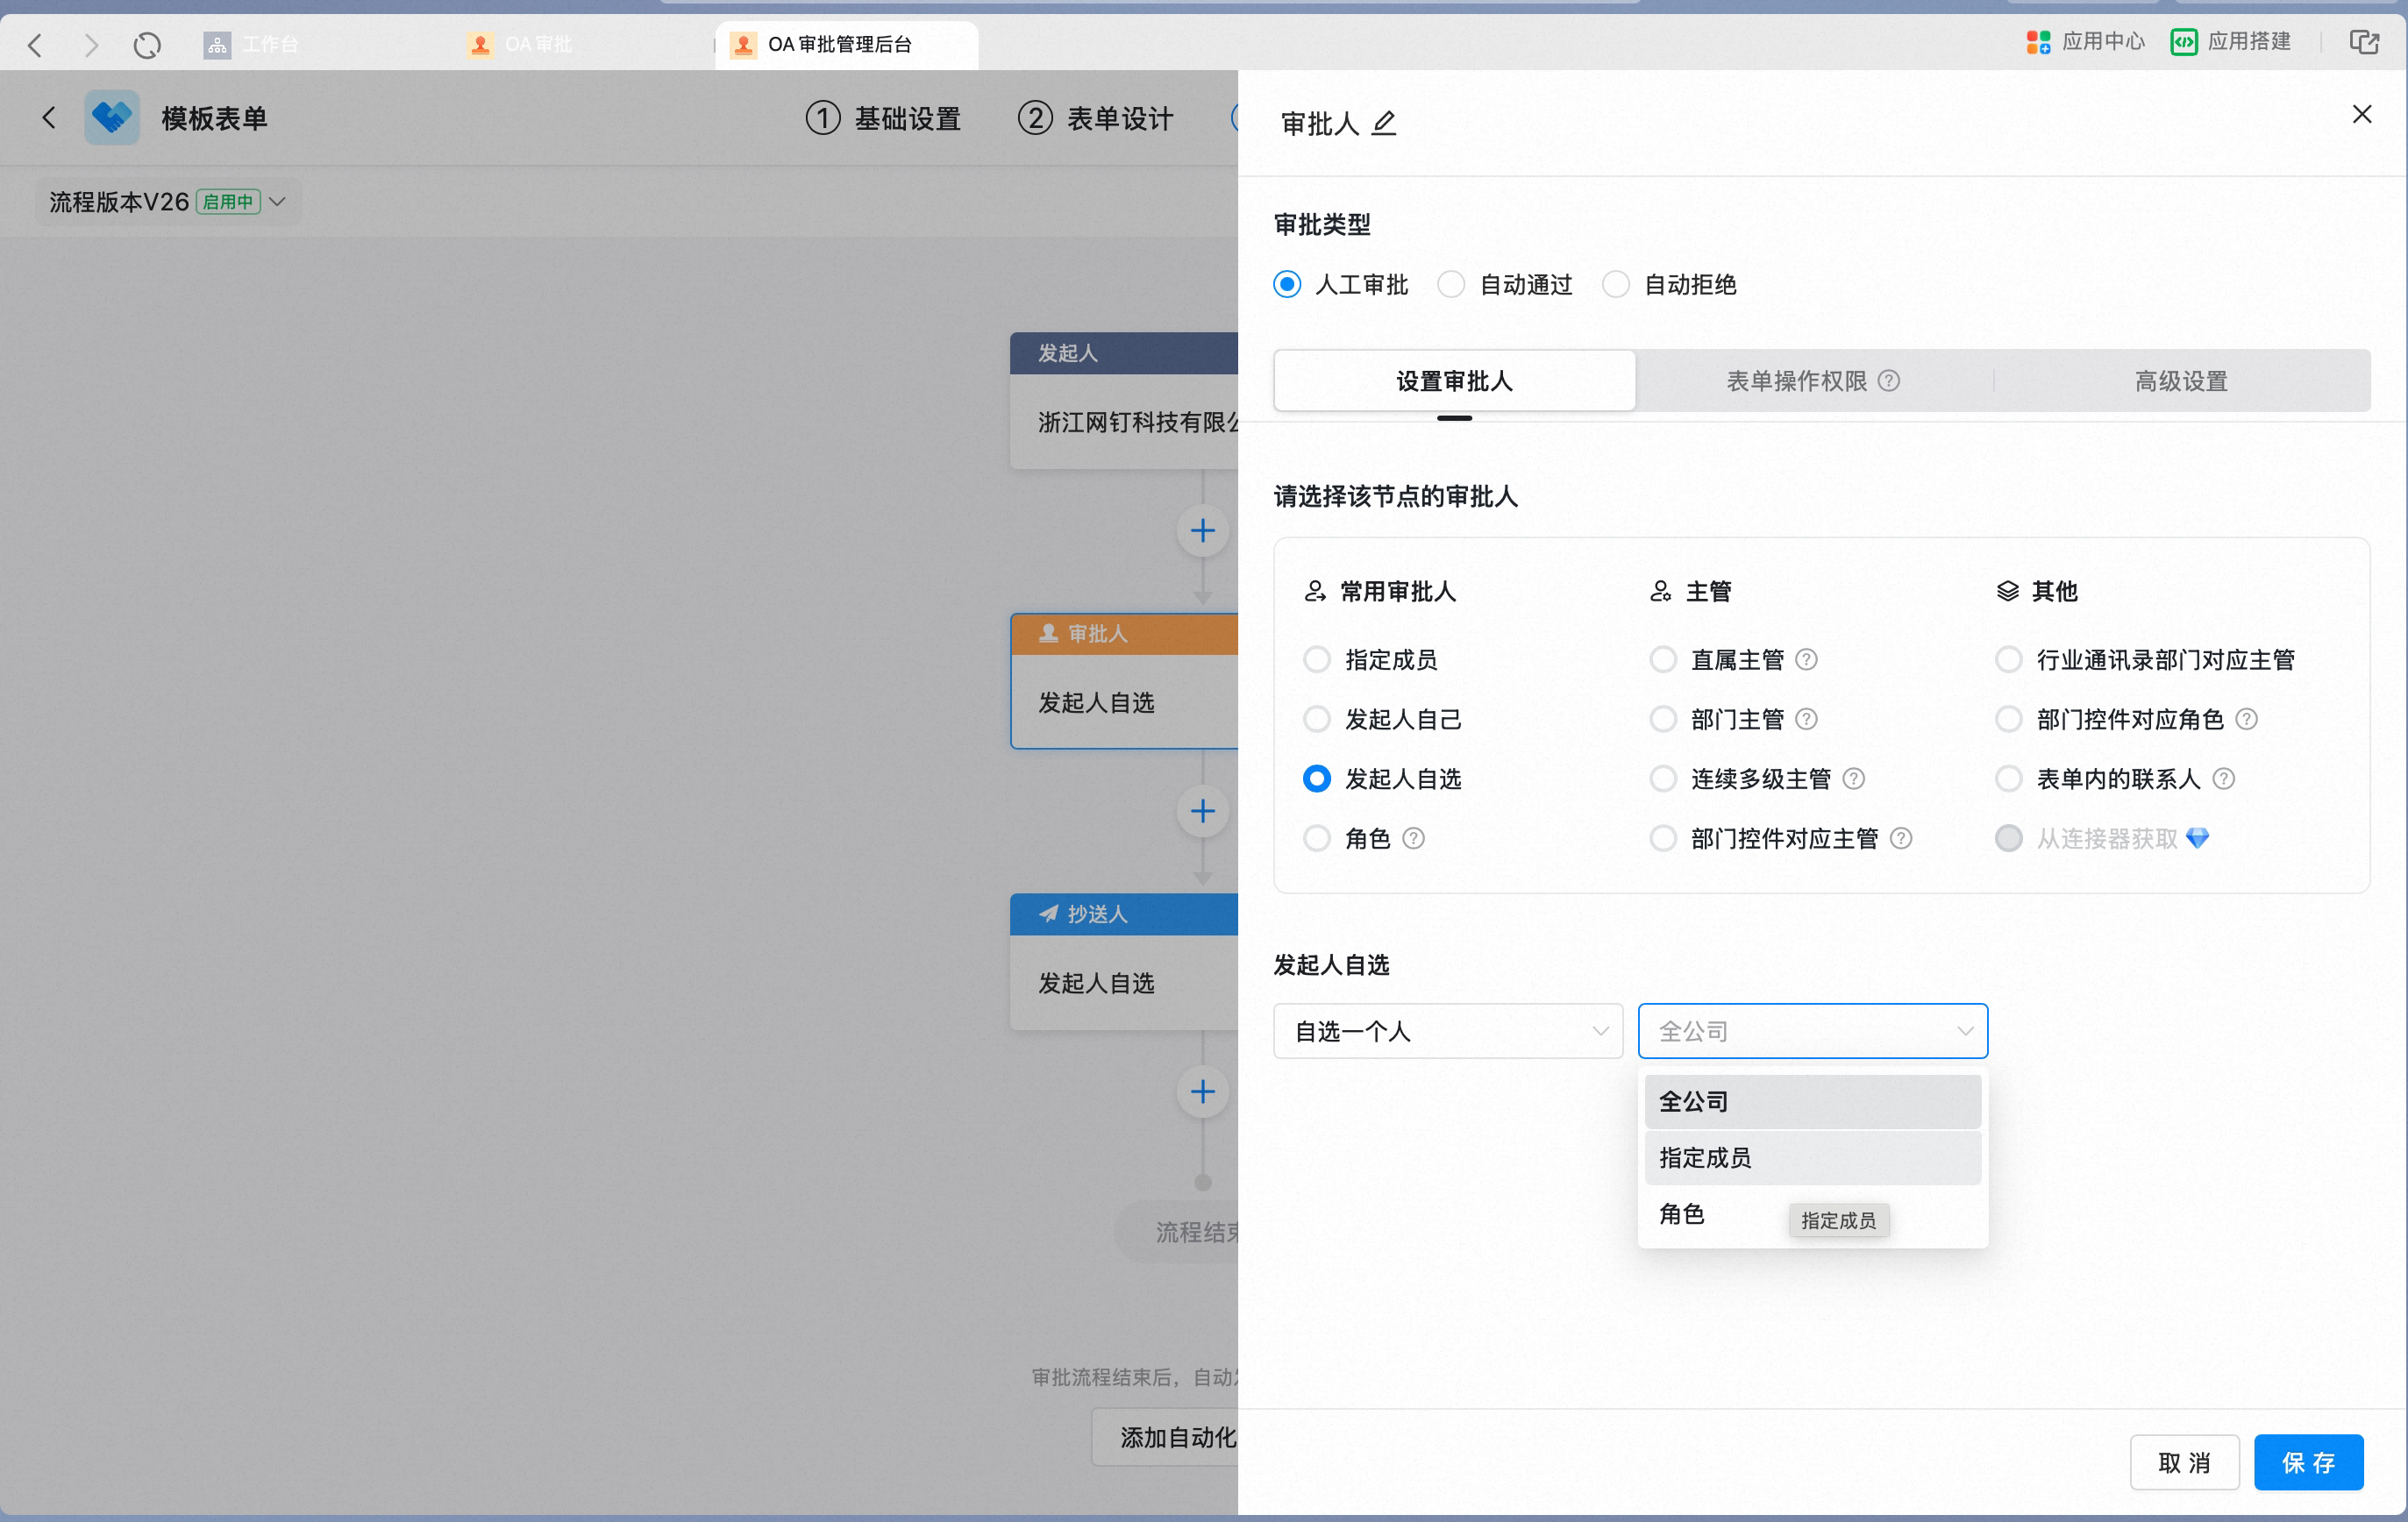
When you set the node approver to Initiator picks, the initiator can pick either a single user or multiple users.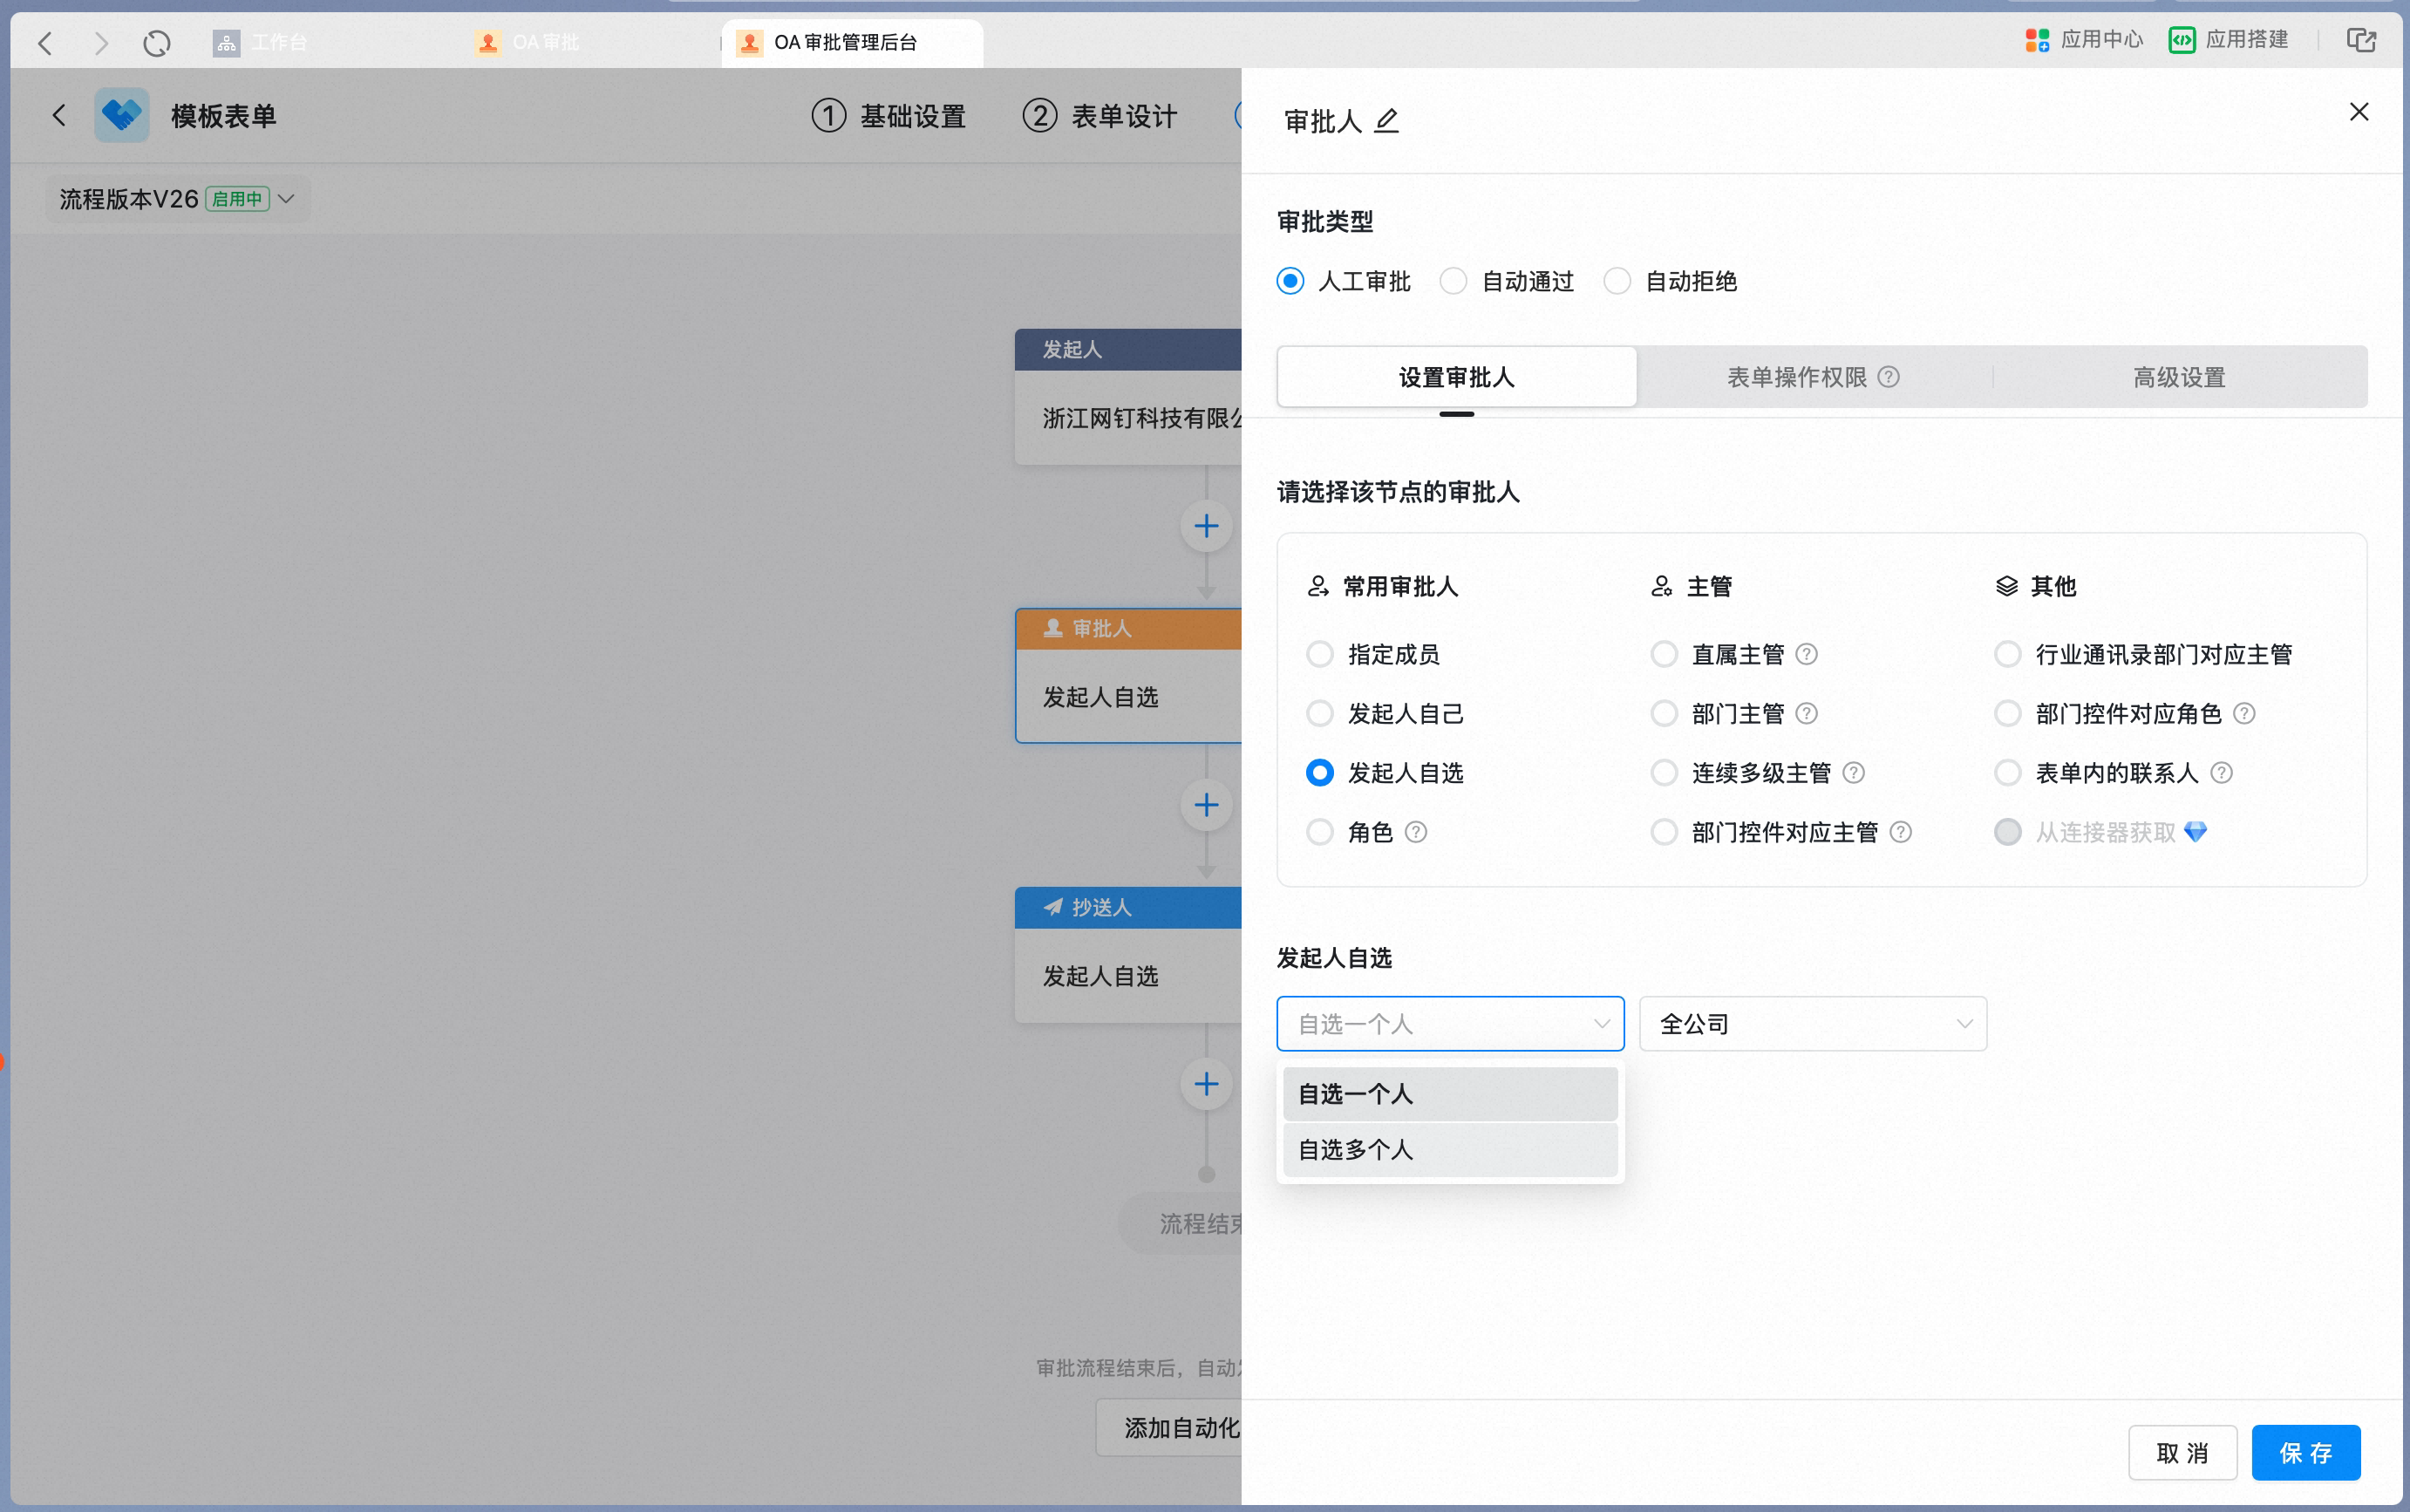 Set the range of pickable users. You can choose the entire Company, specified users, or roles:
 Set the approval method when the initiator picks multiple users: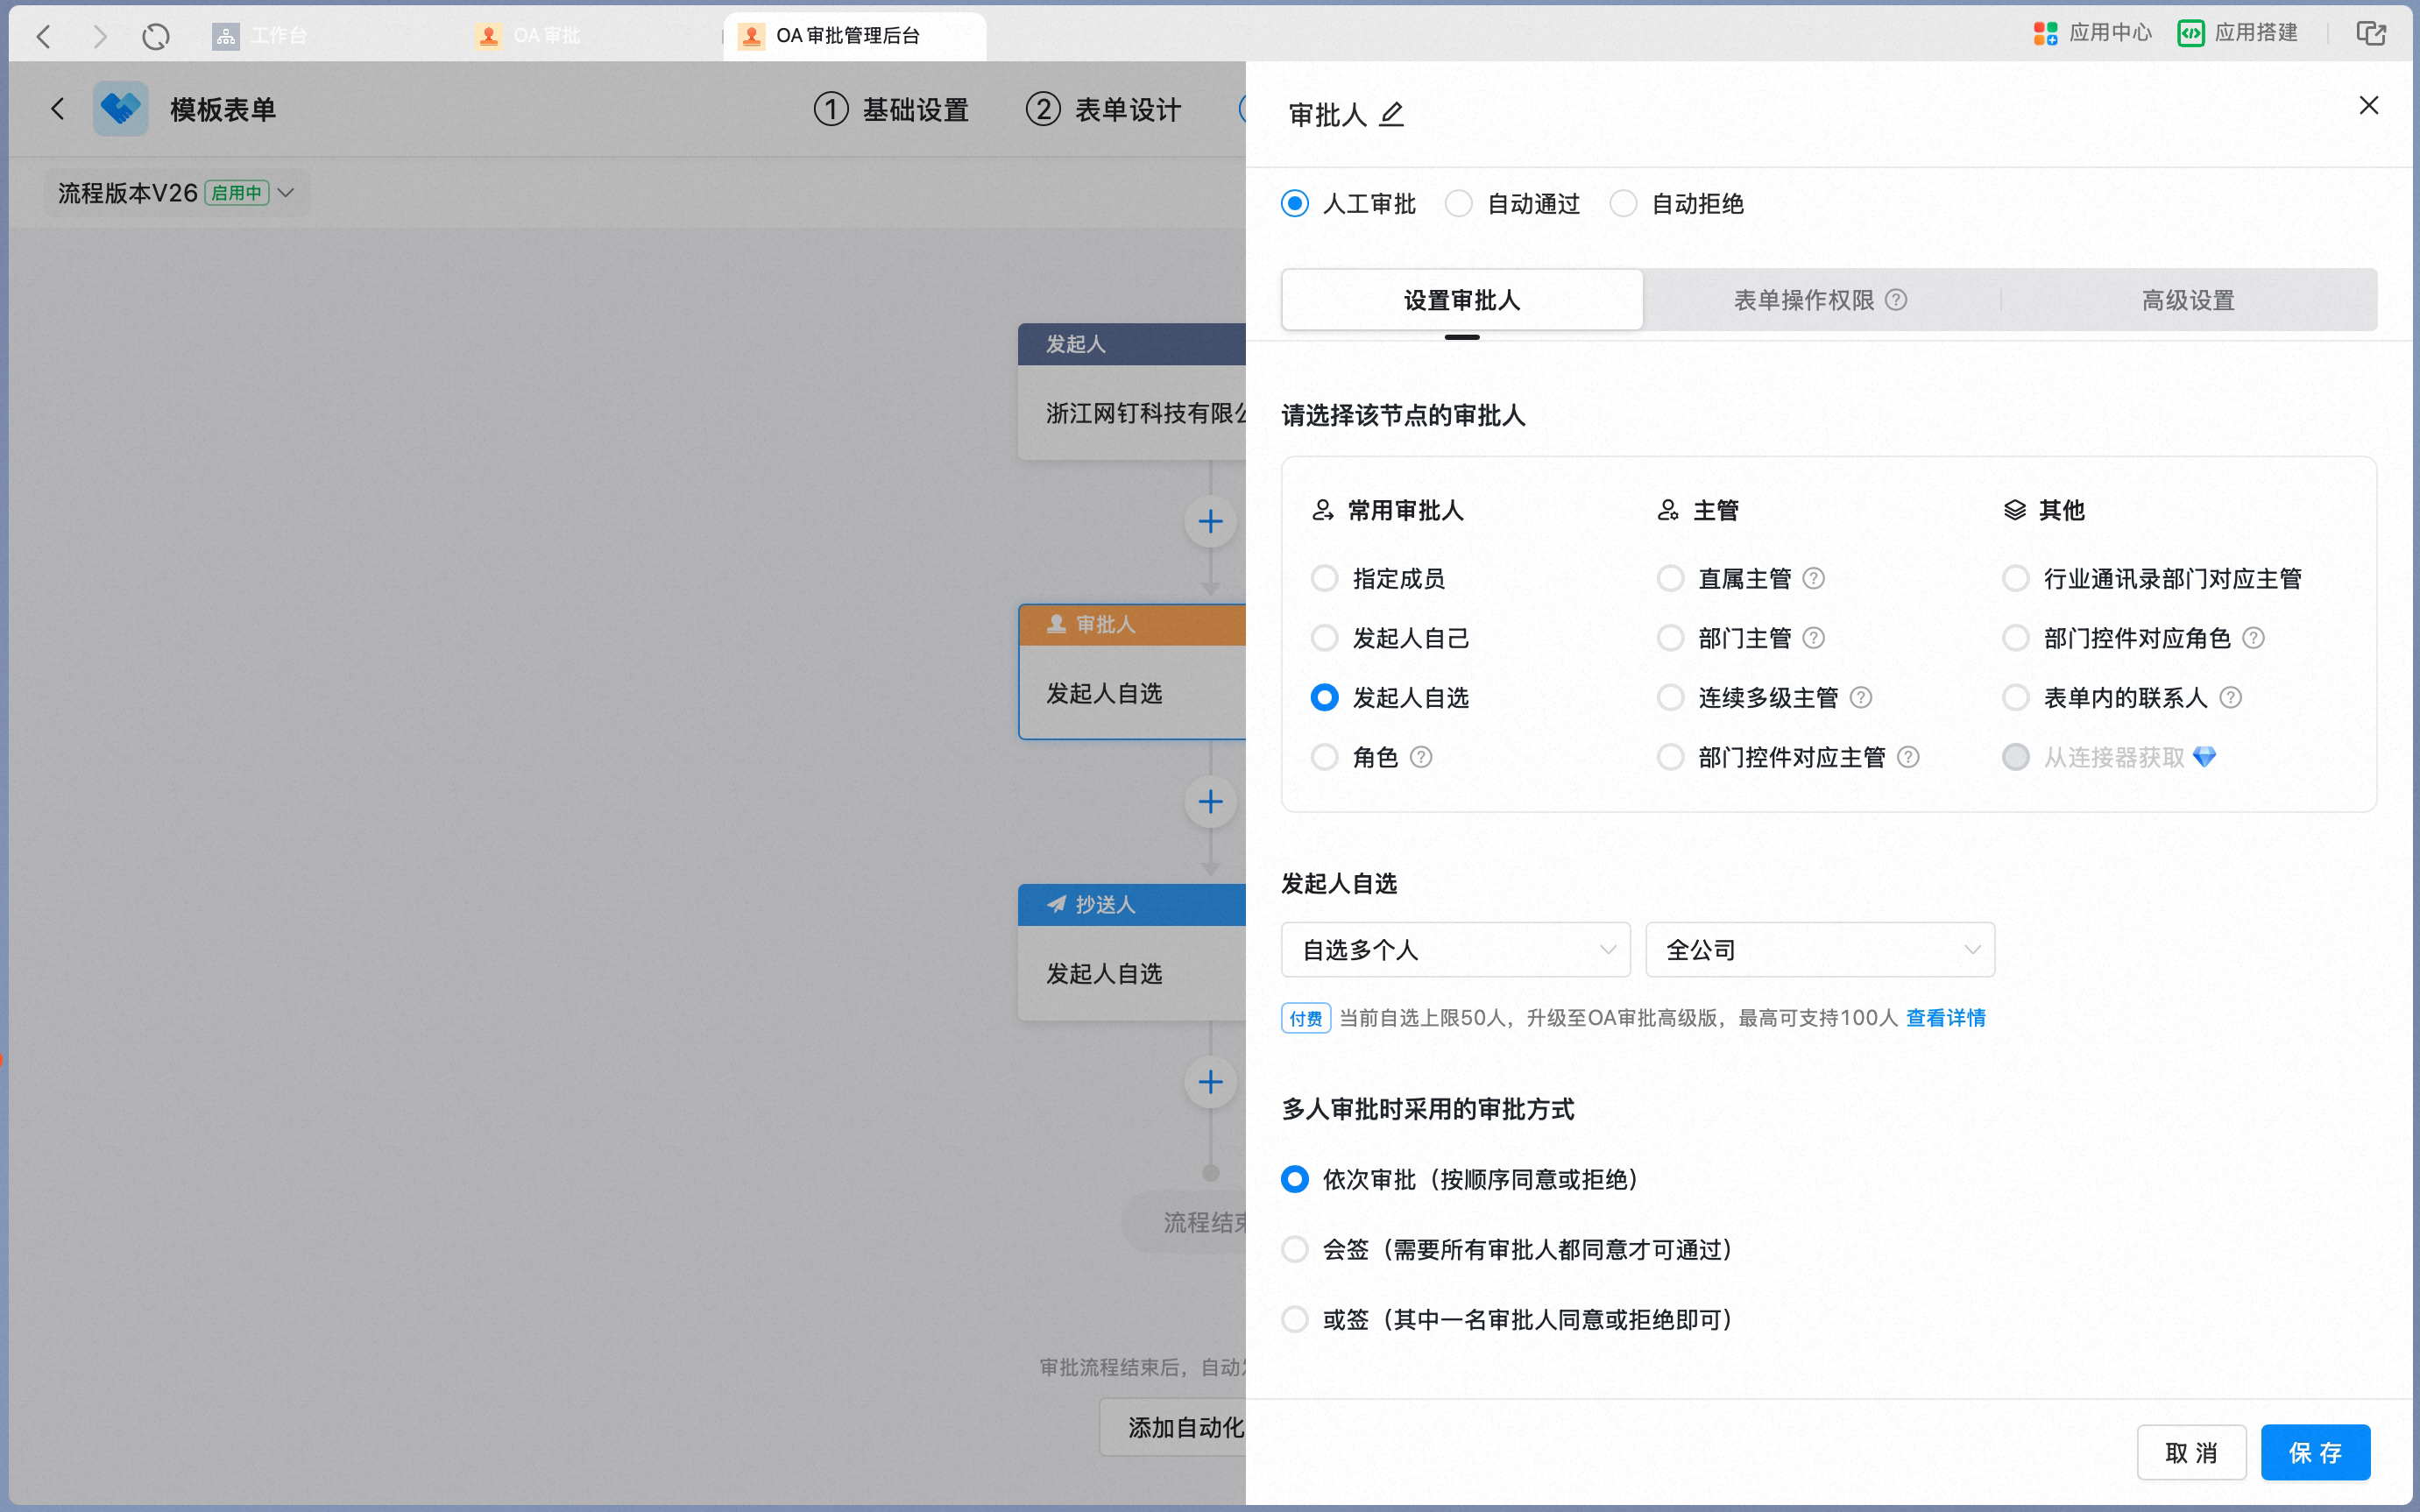
- Set the range of pickable users. The default is the entire Company; you can also restrict the range to roles or specified users. For example, in a rotating shift scenario where several cashiers or IT staff take turns, set these roles or specified users as the pickable range, and let the initiator pick based on that day’s scheduling.
- When the initiator picks multiple users, set the approval method for multiple approvers.
Role
Role
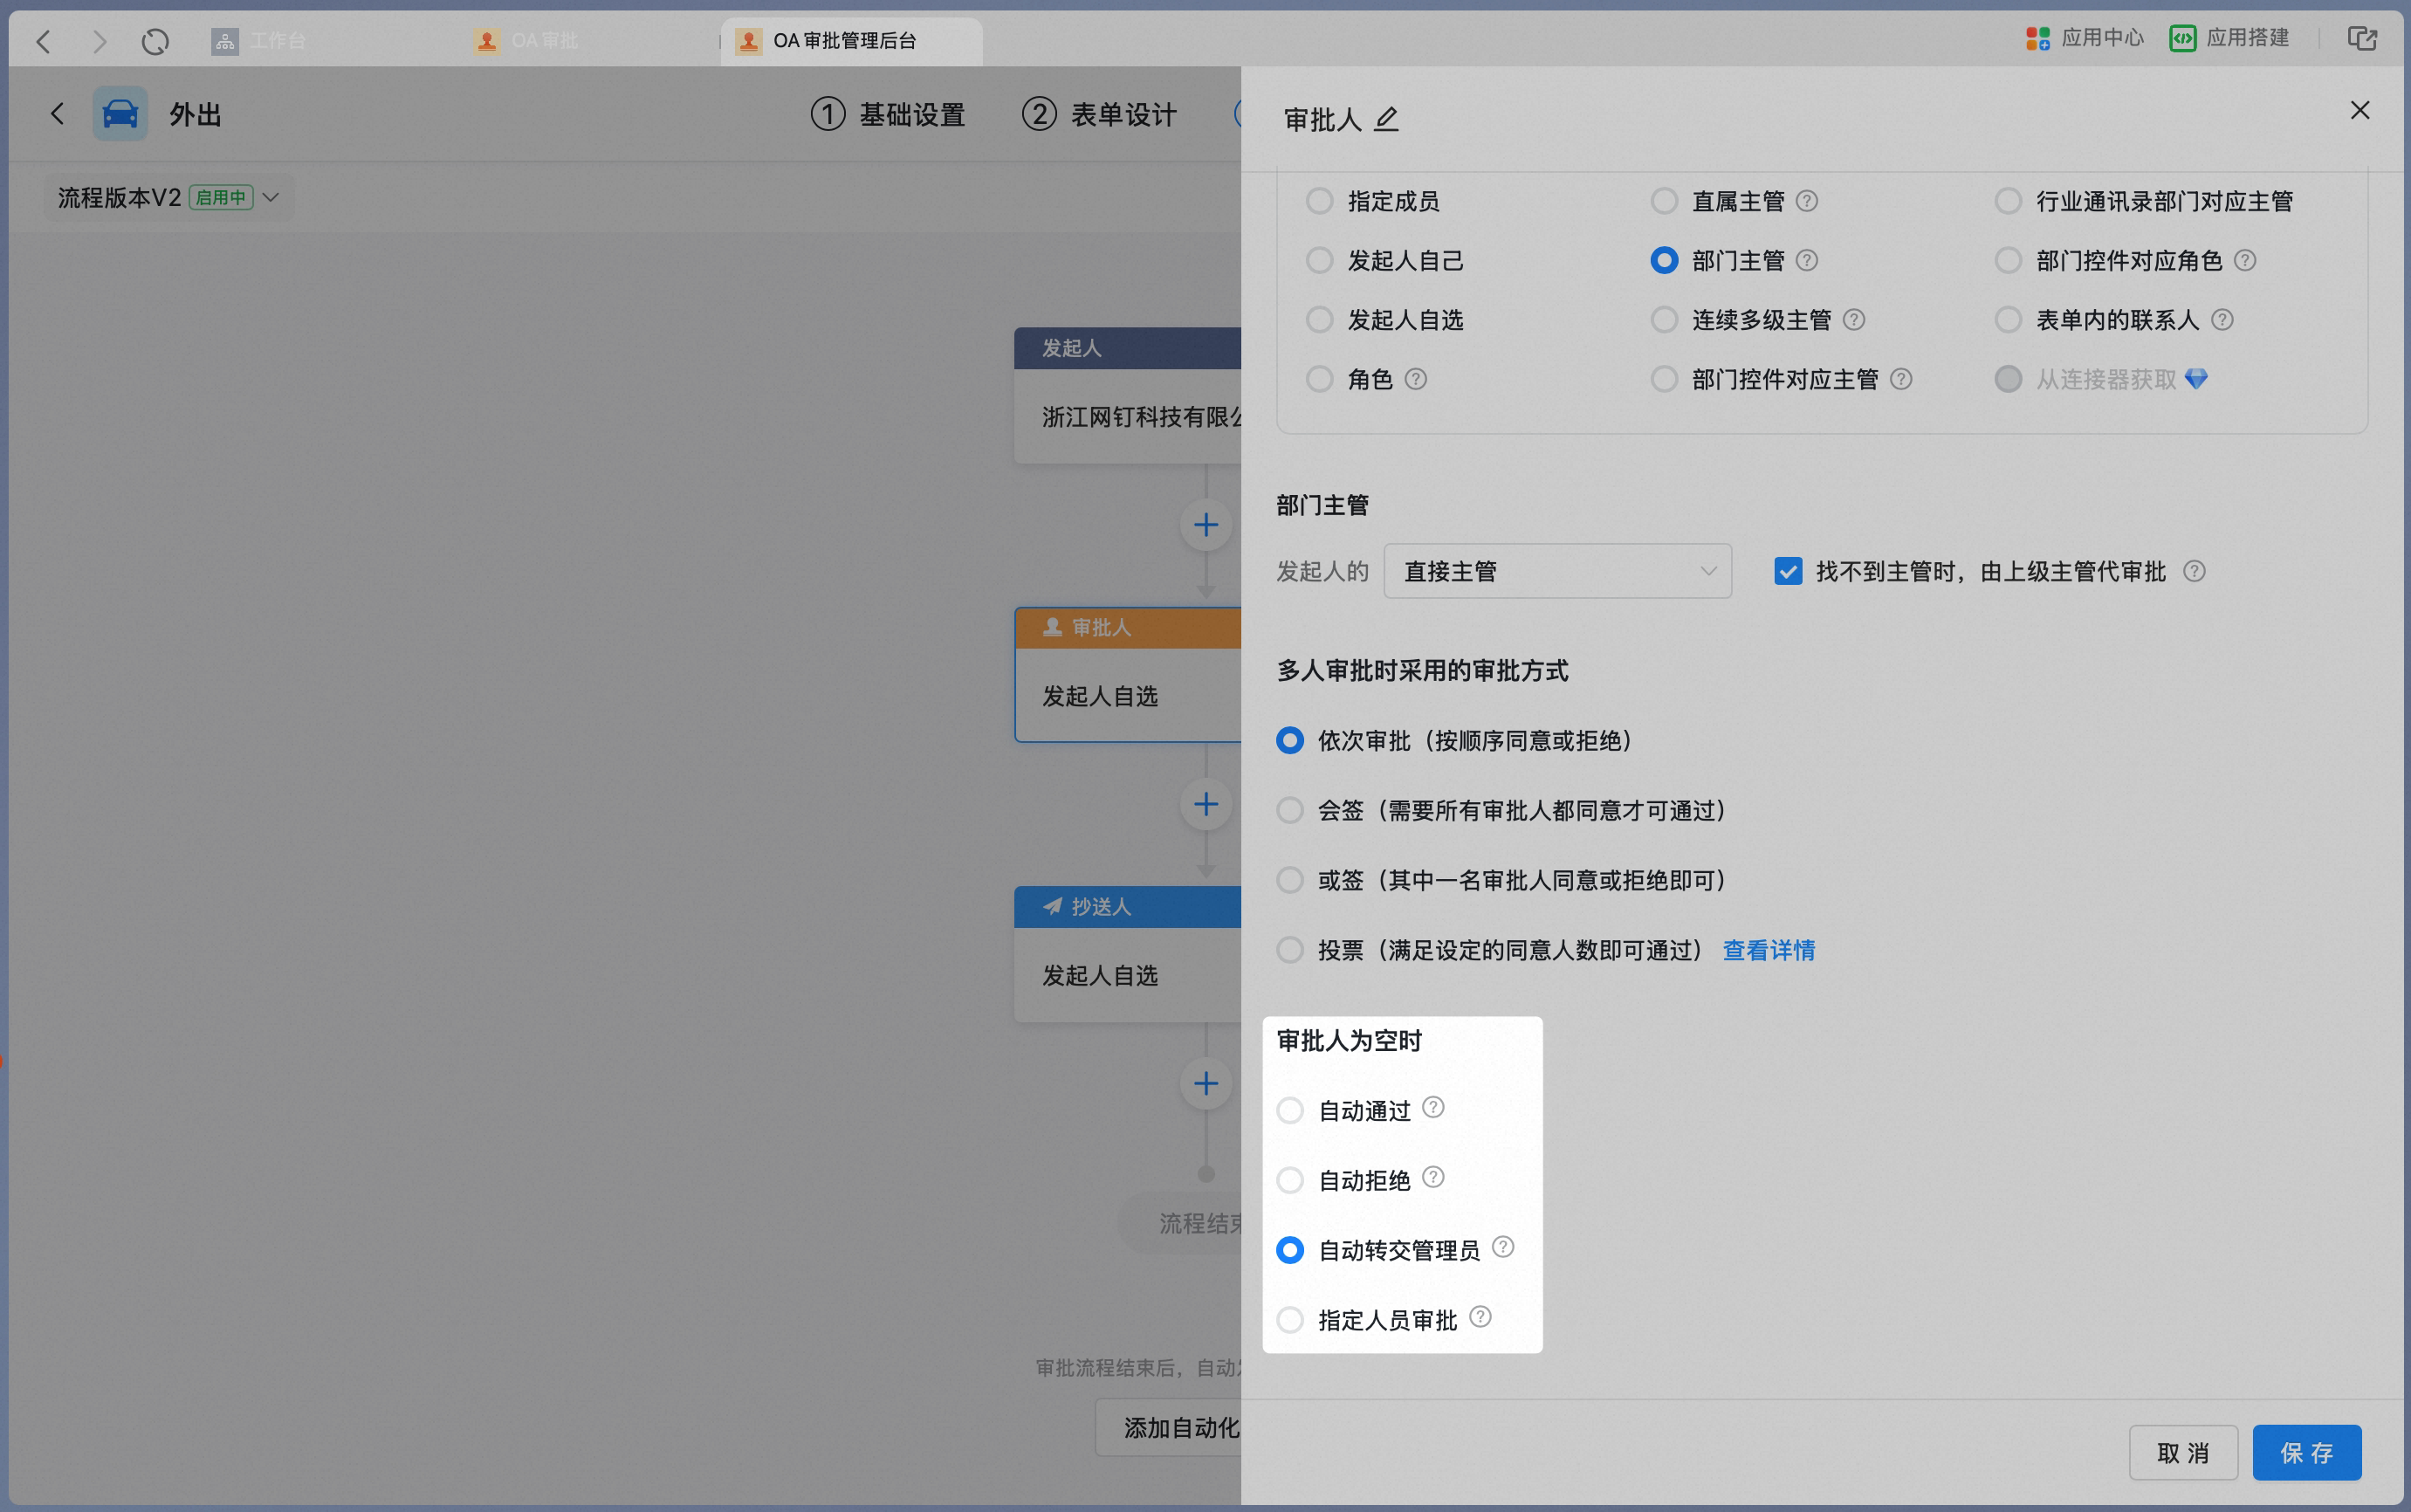
When you set the node approver to Role, add a role as the approver.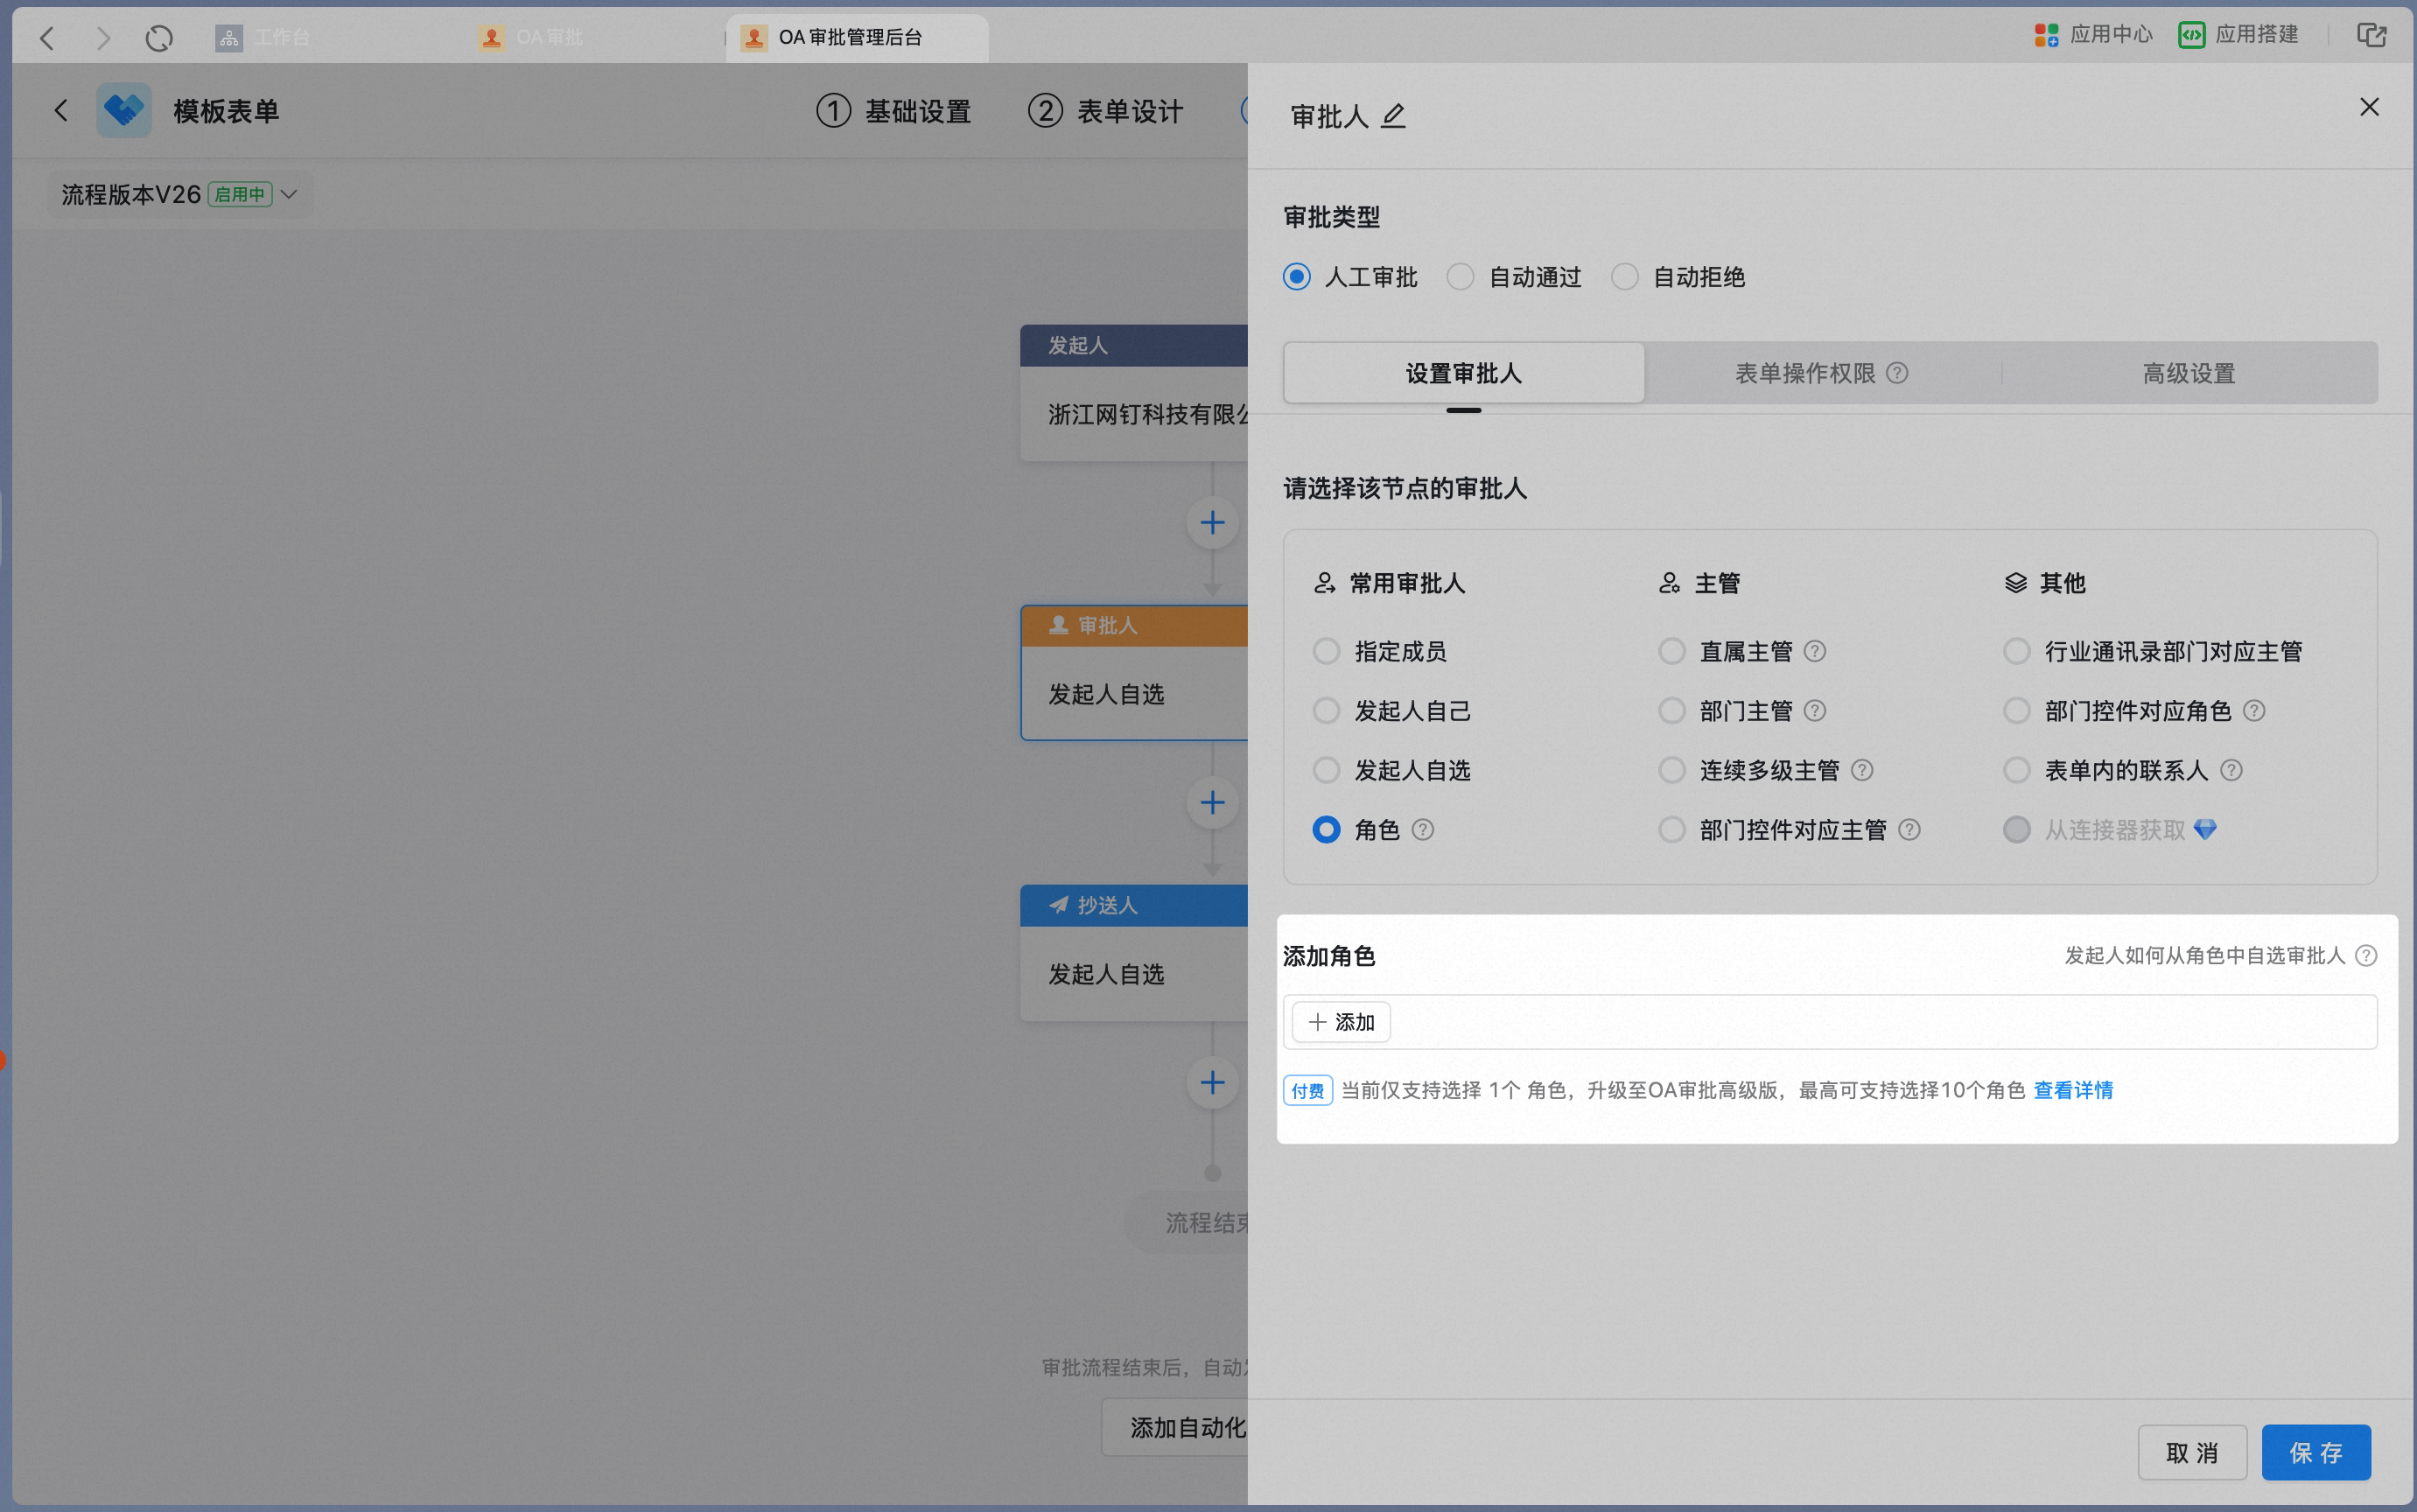 Set the approval method and the handling when the approver is empty: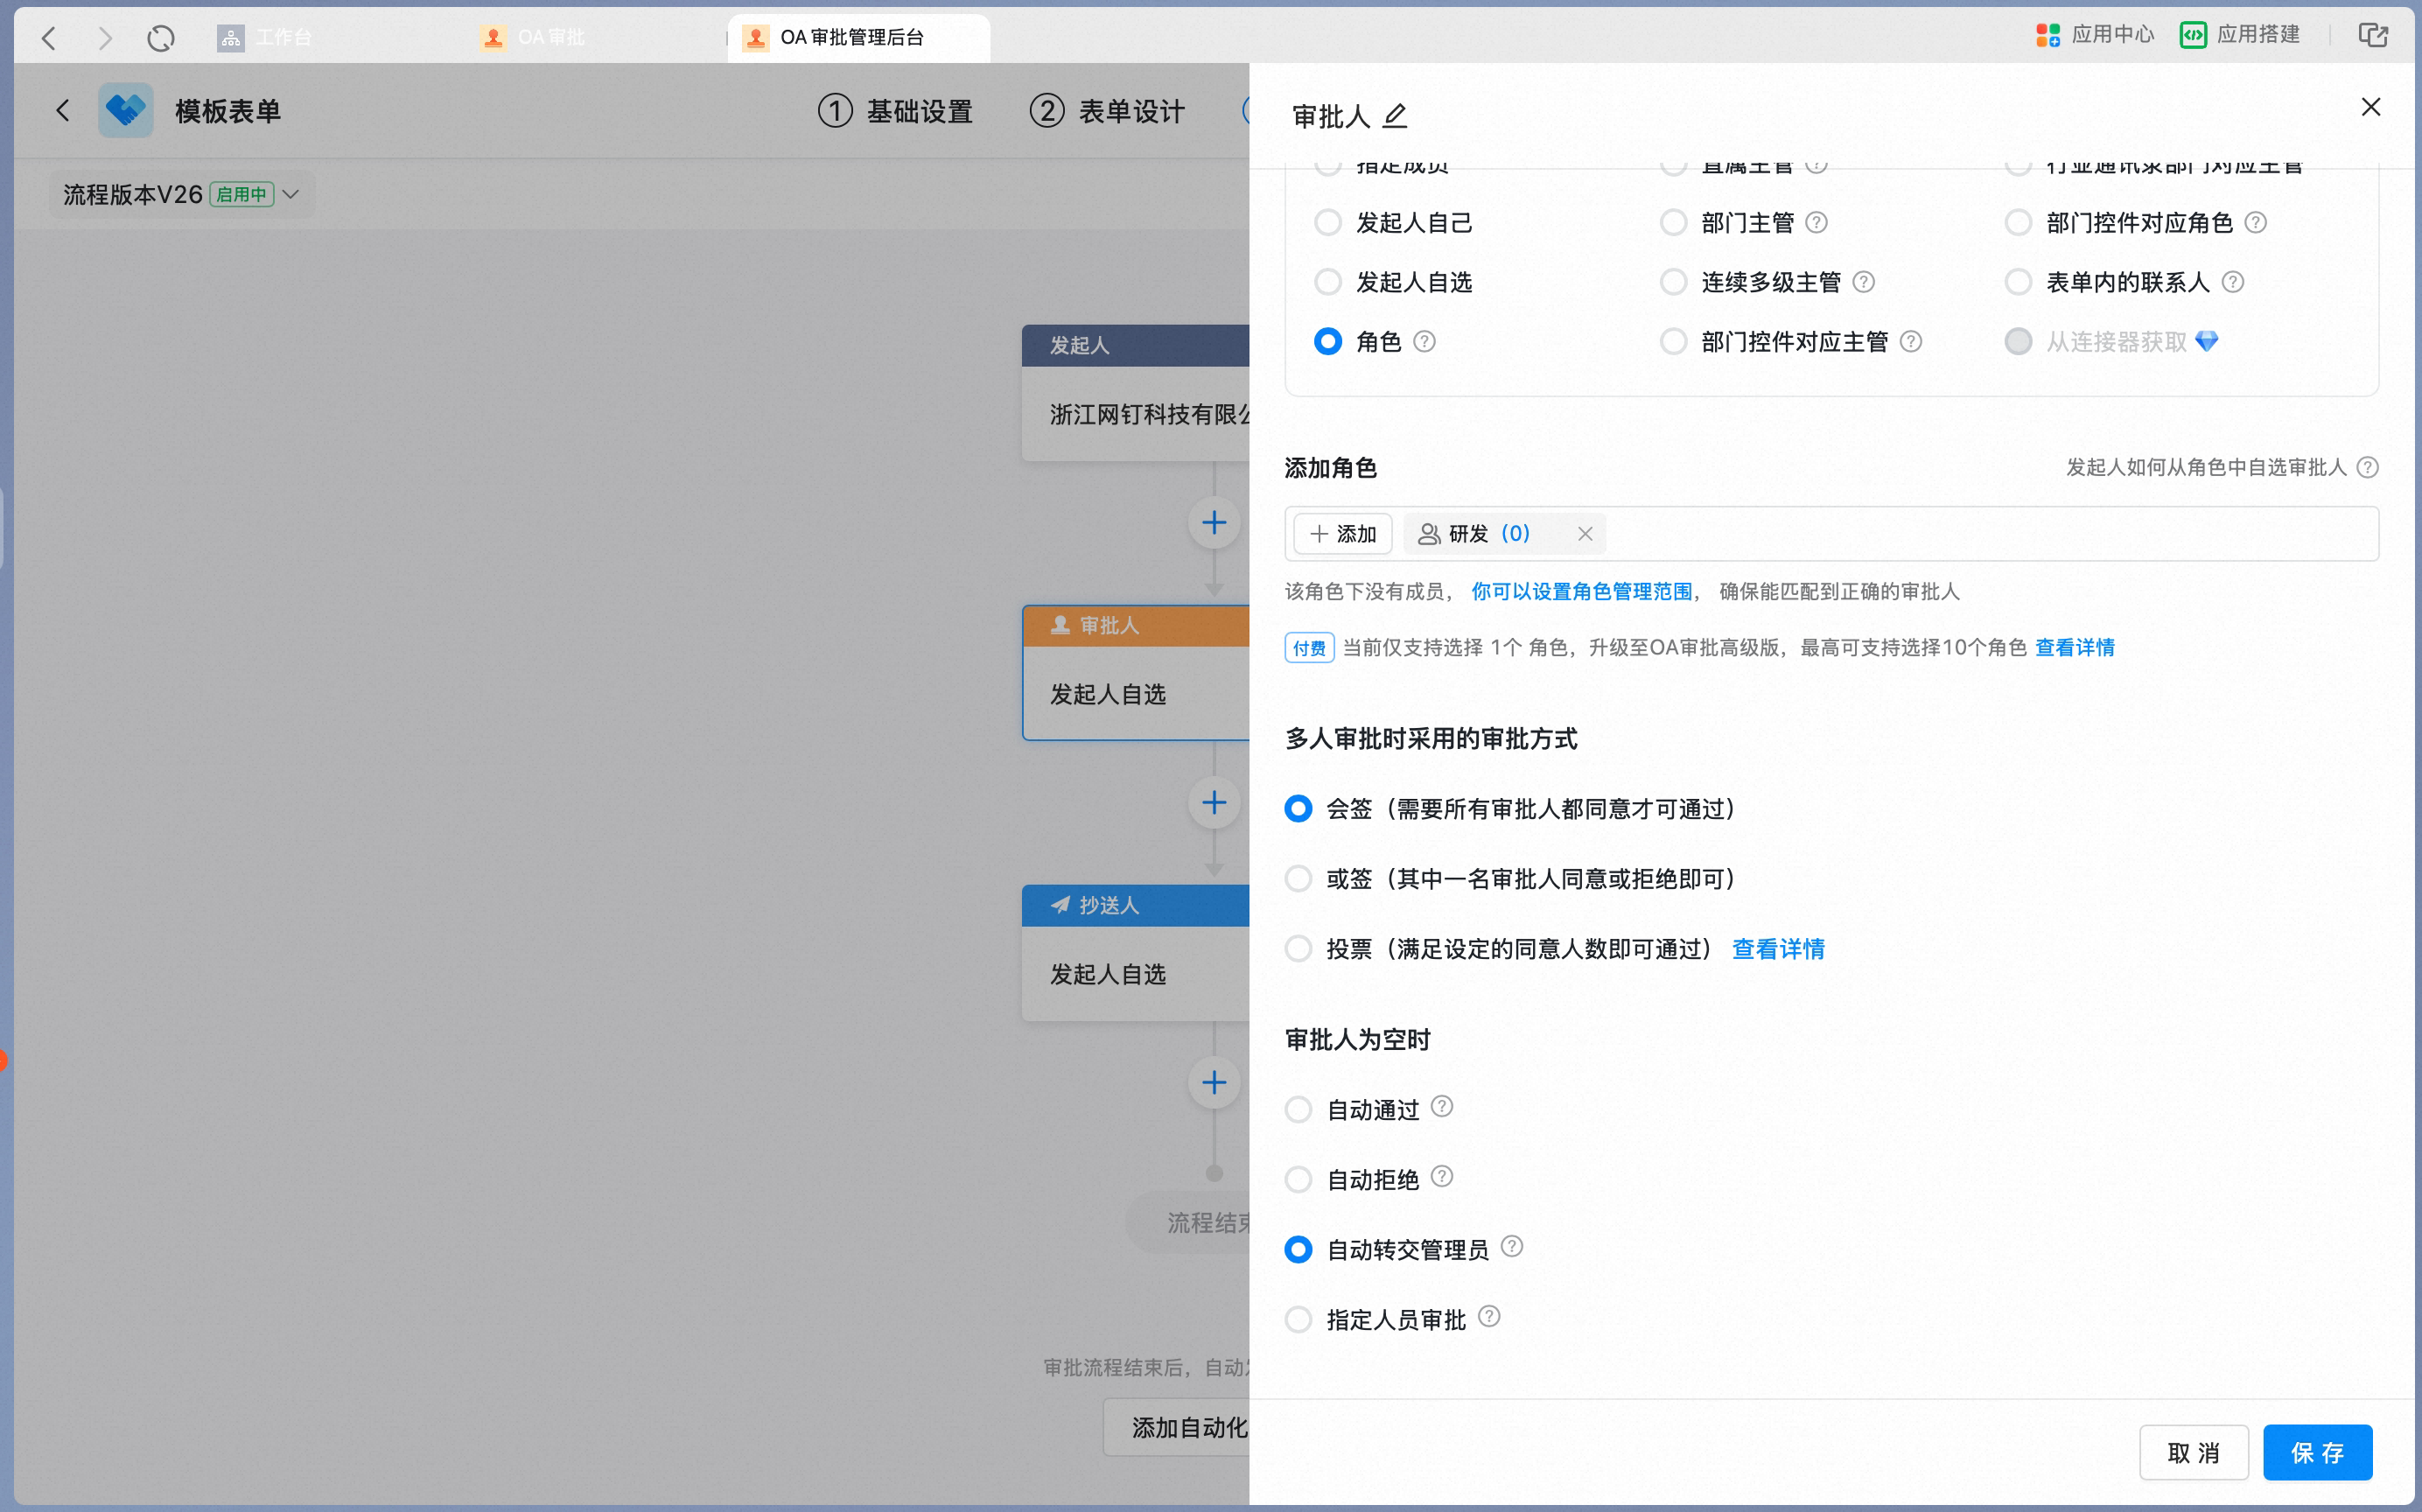
- After picking a specific role, set the approval method for multiple approvers.
- Because a role may return no approver due to management scope settings, set the handling logic for when the approver is empty.
- For details, see >>> How to set up role-based approval.
Direct manager
Direct manager
When you set the node approver to Direct manager, choose which tier of direct manager above the initiator should approve. Up to 8 tiers are supported.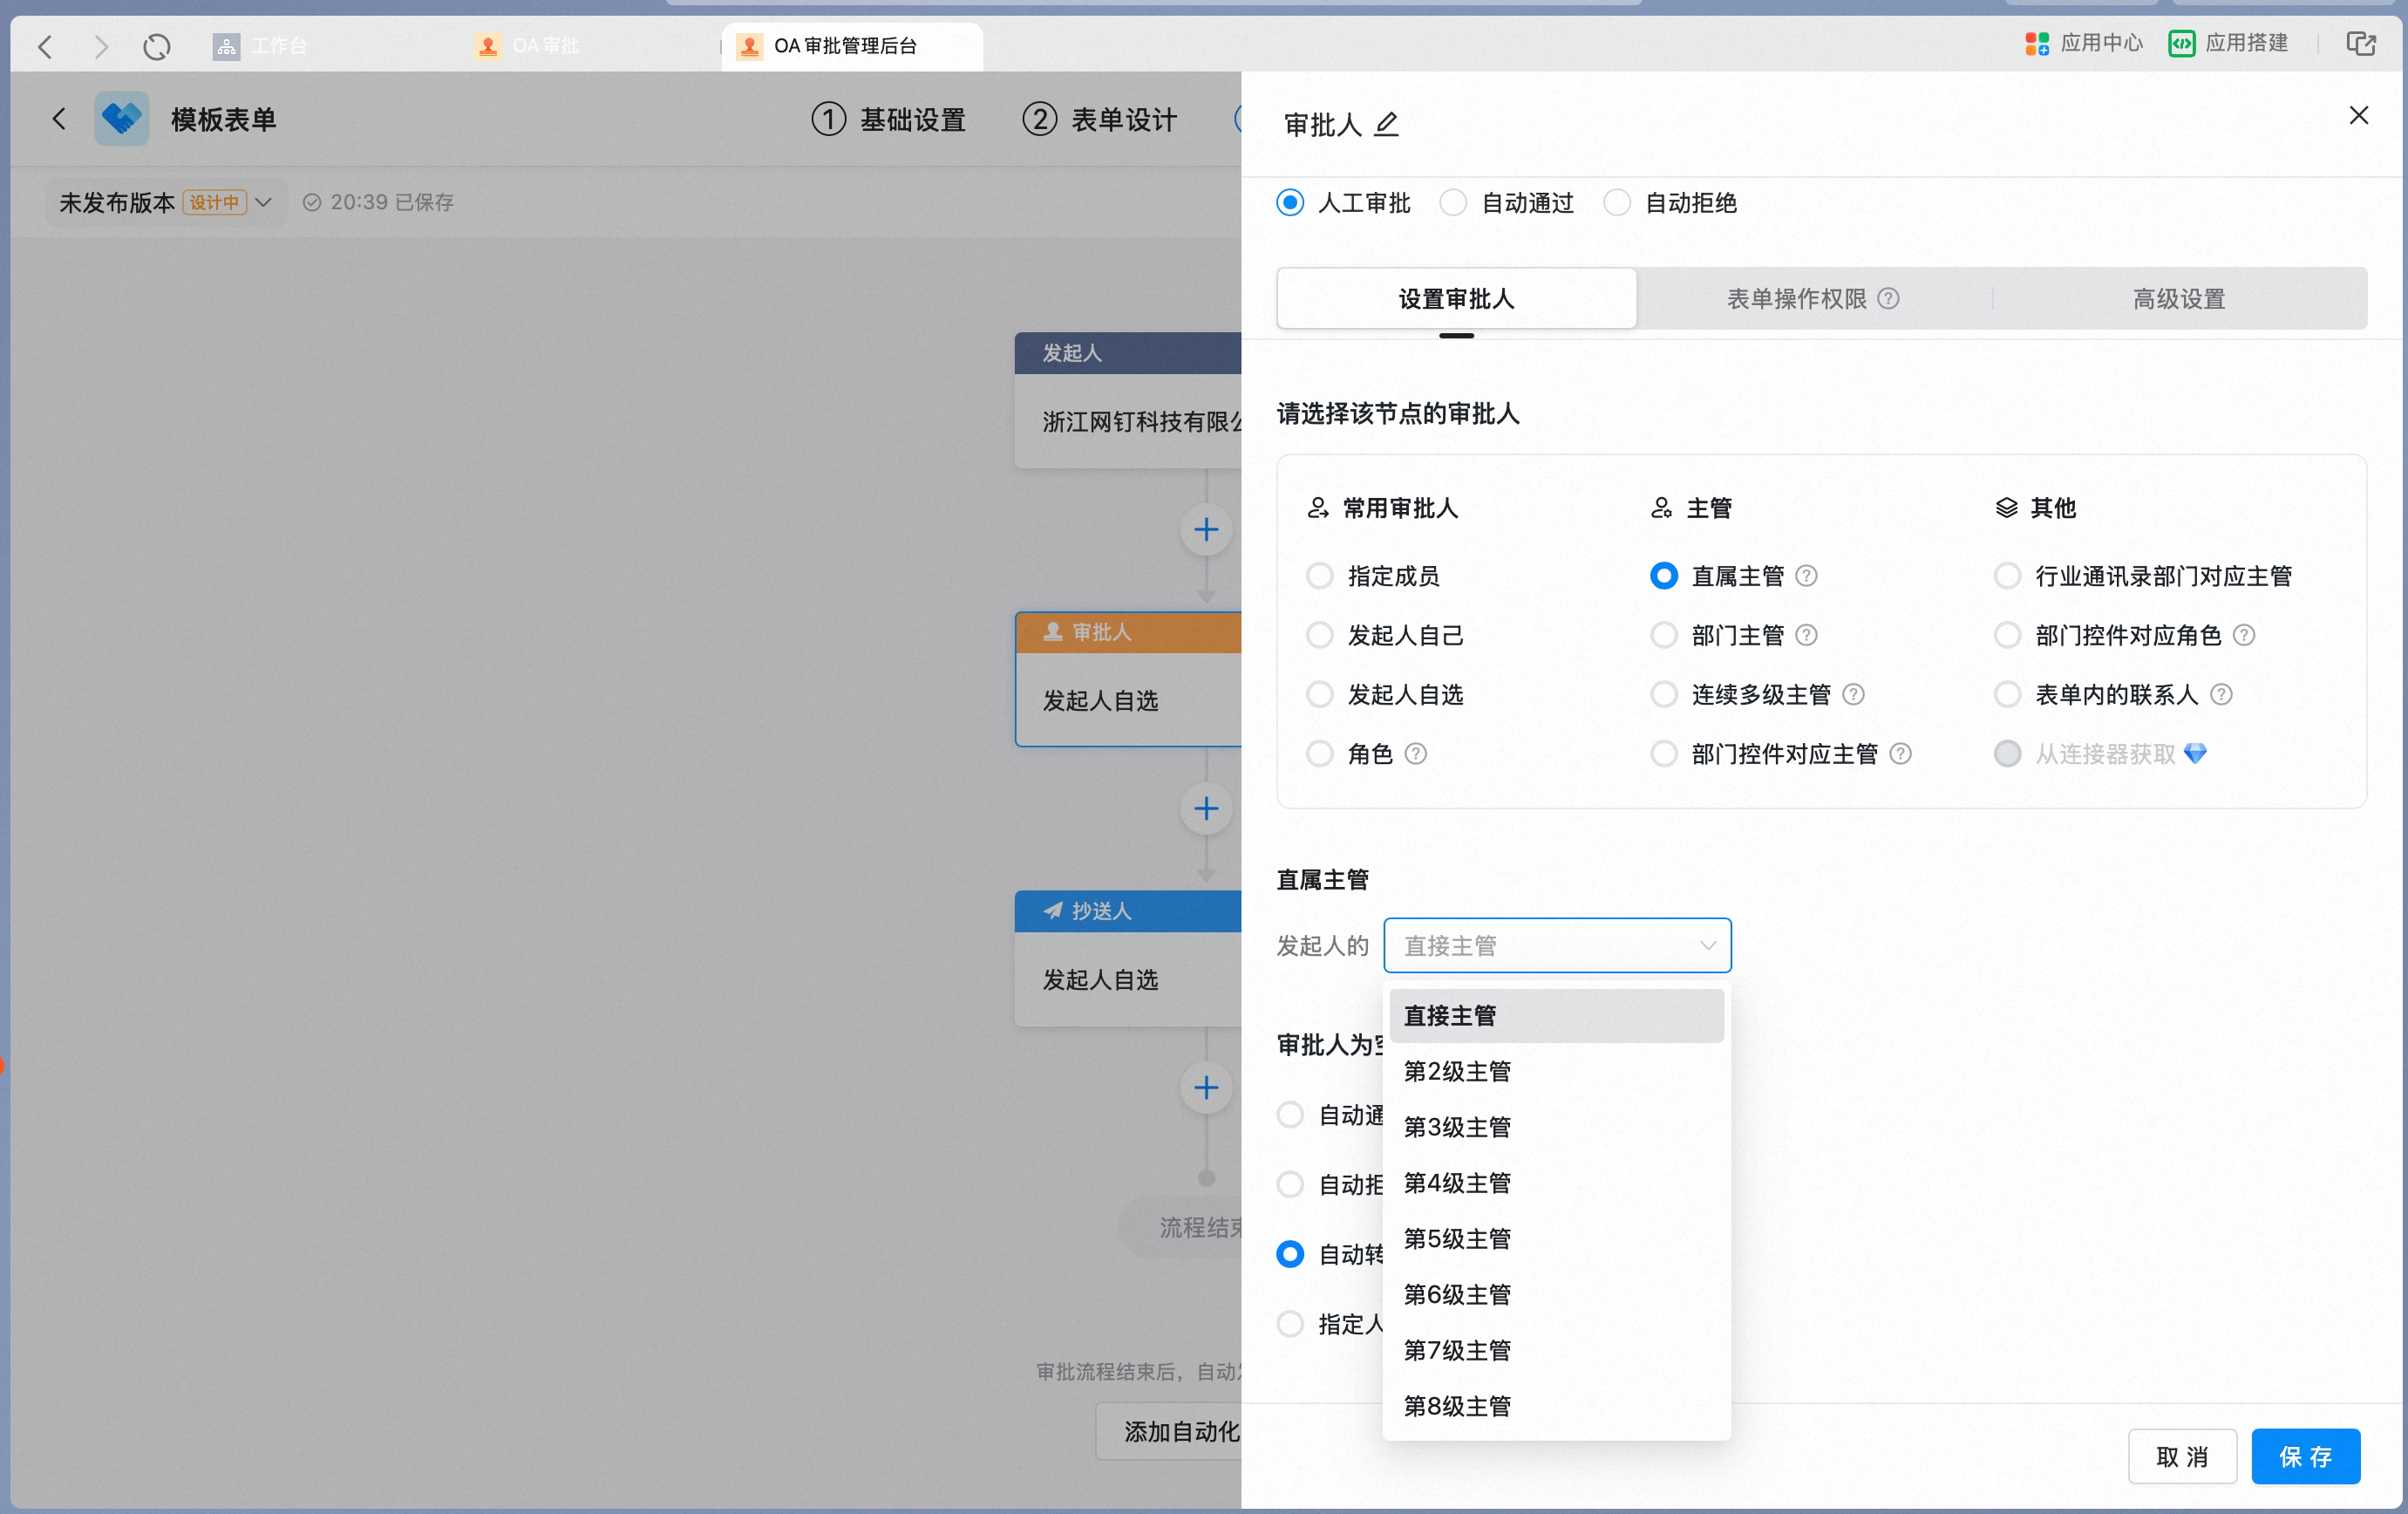
- Because a direct manager may return no approver due to direct manager settings, set the handling logic for when the approver is empty.
- For details, see >>> How to set up direct manager approval.
Department manager
Department manager
When you set the node approver to Department manager, choose which tier of department manager above the initiator should approve. Up to 8 tiers are supported.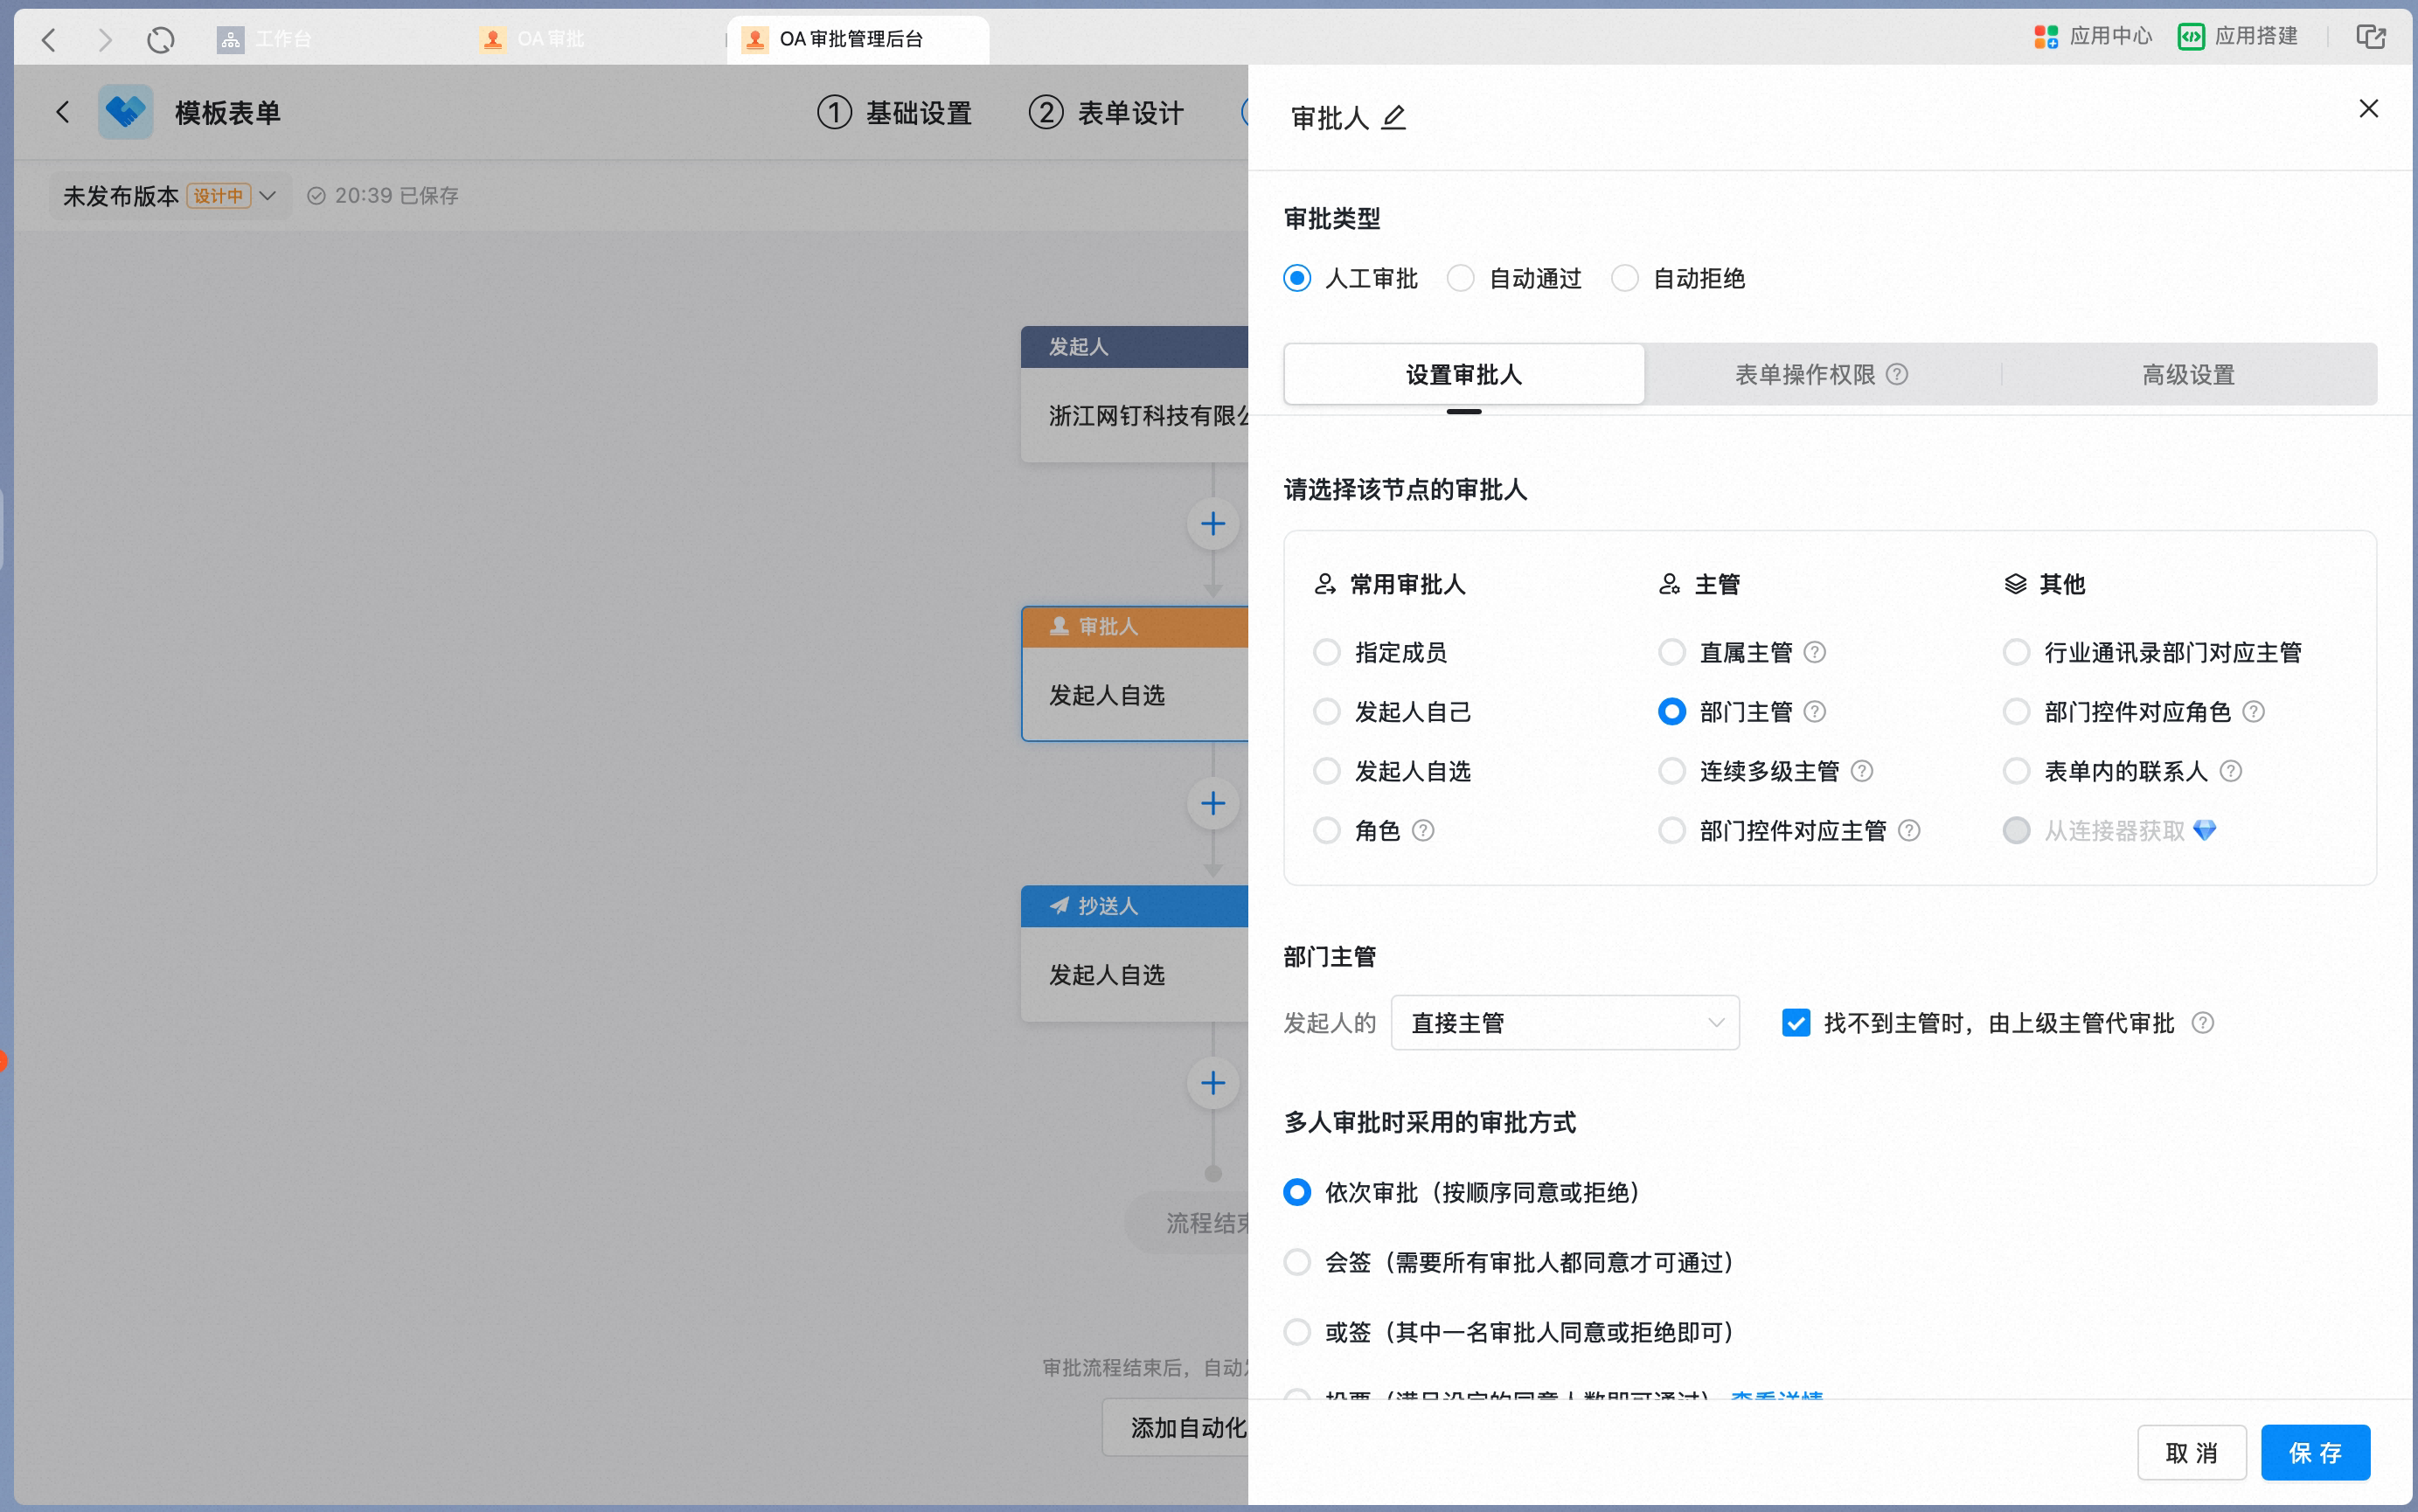 Choose which tier of department manager above the initiator should approve: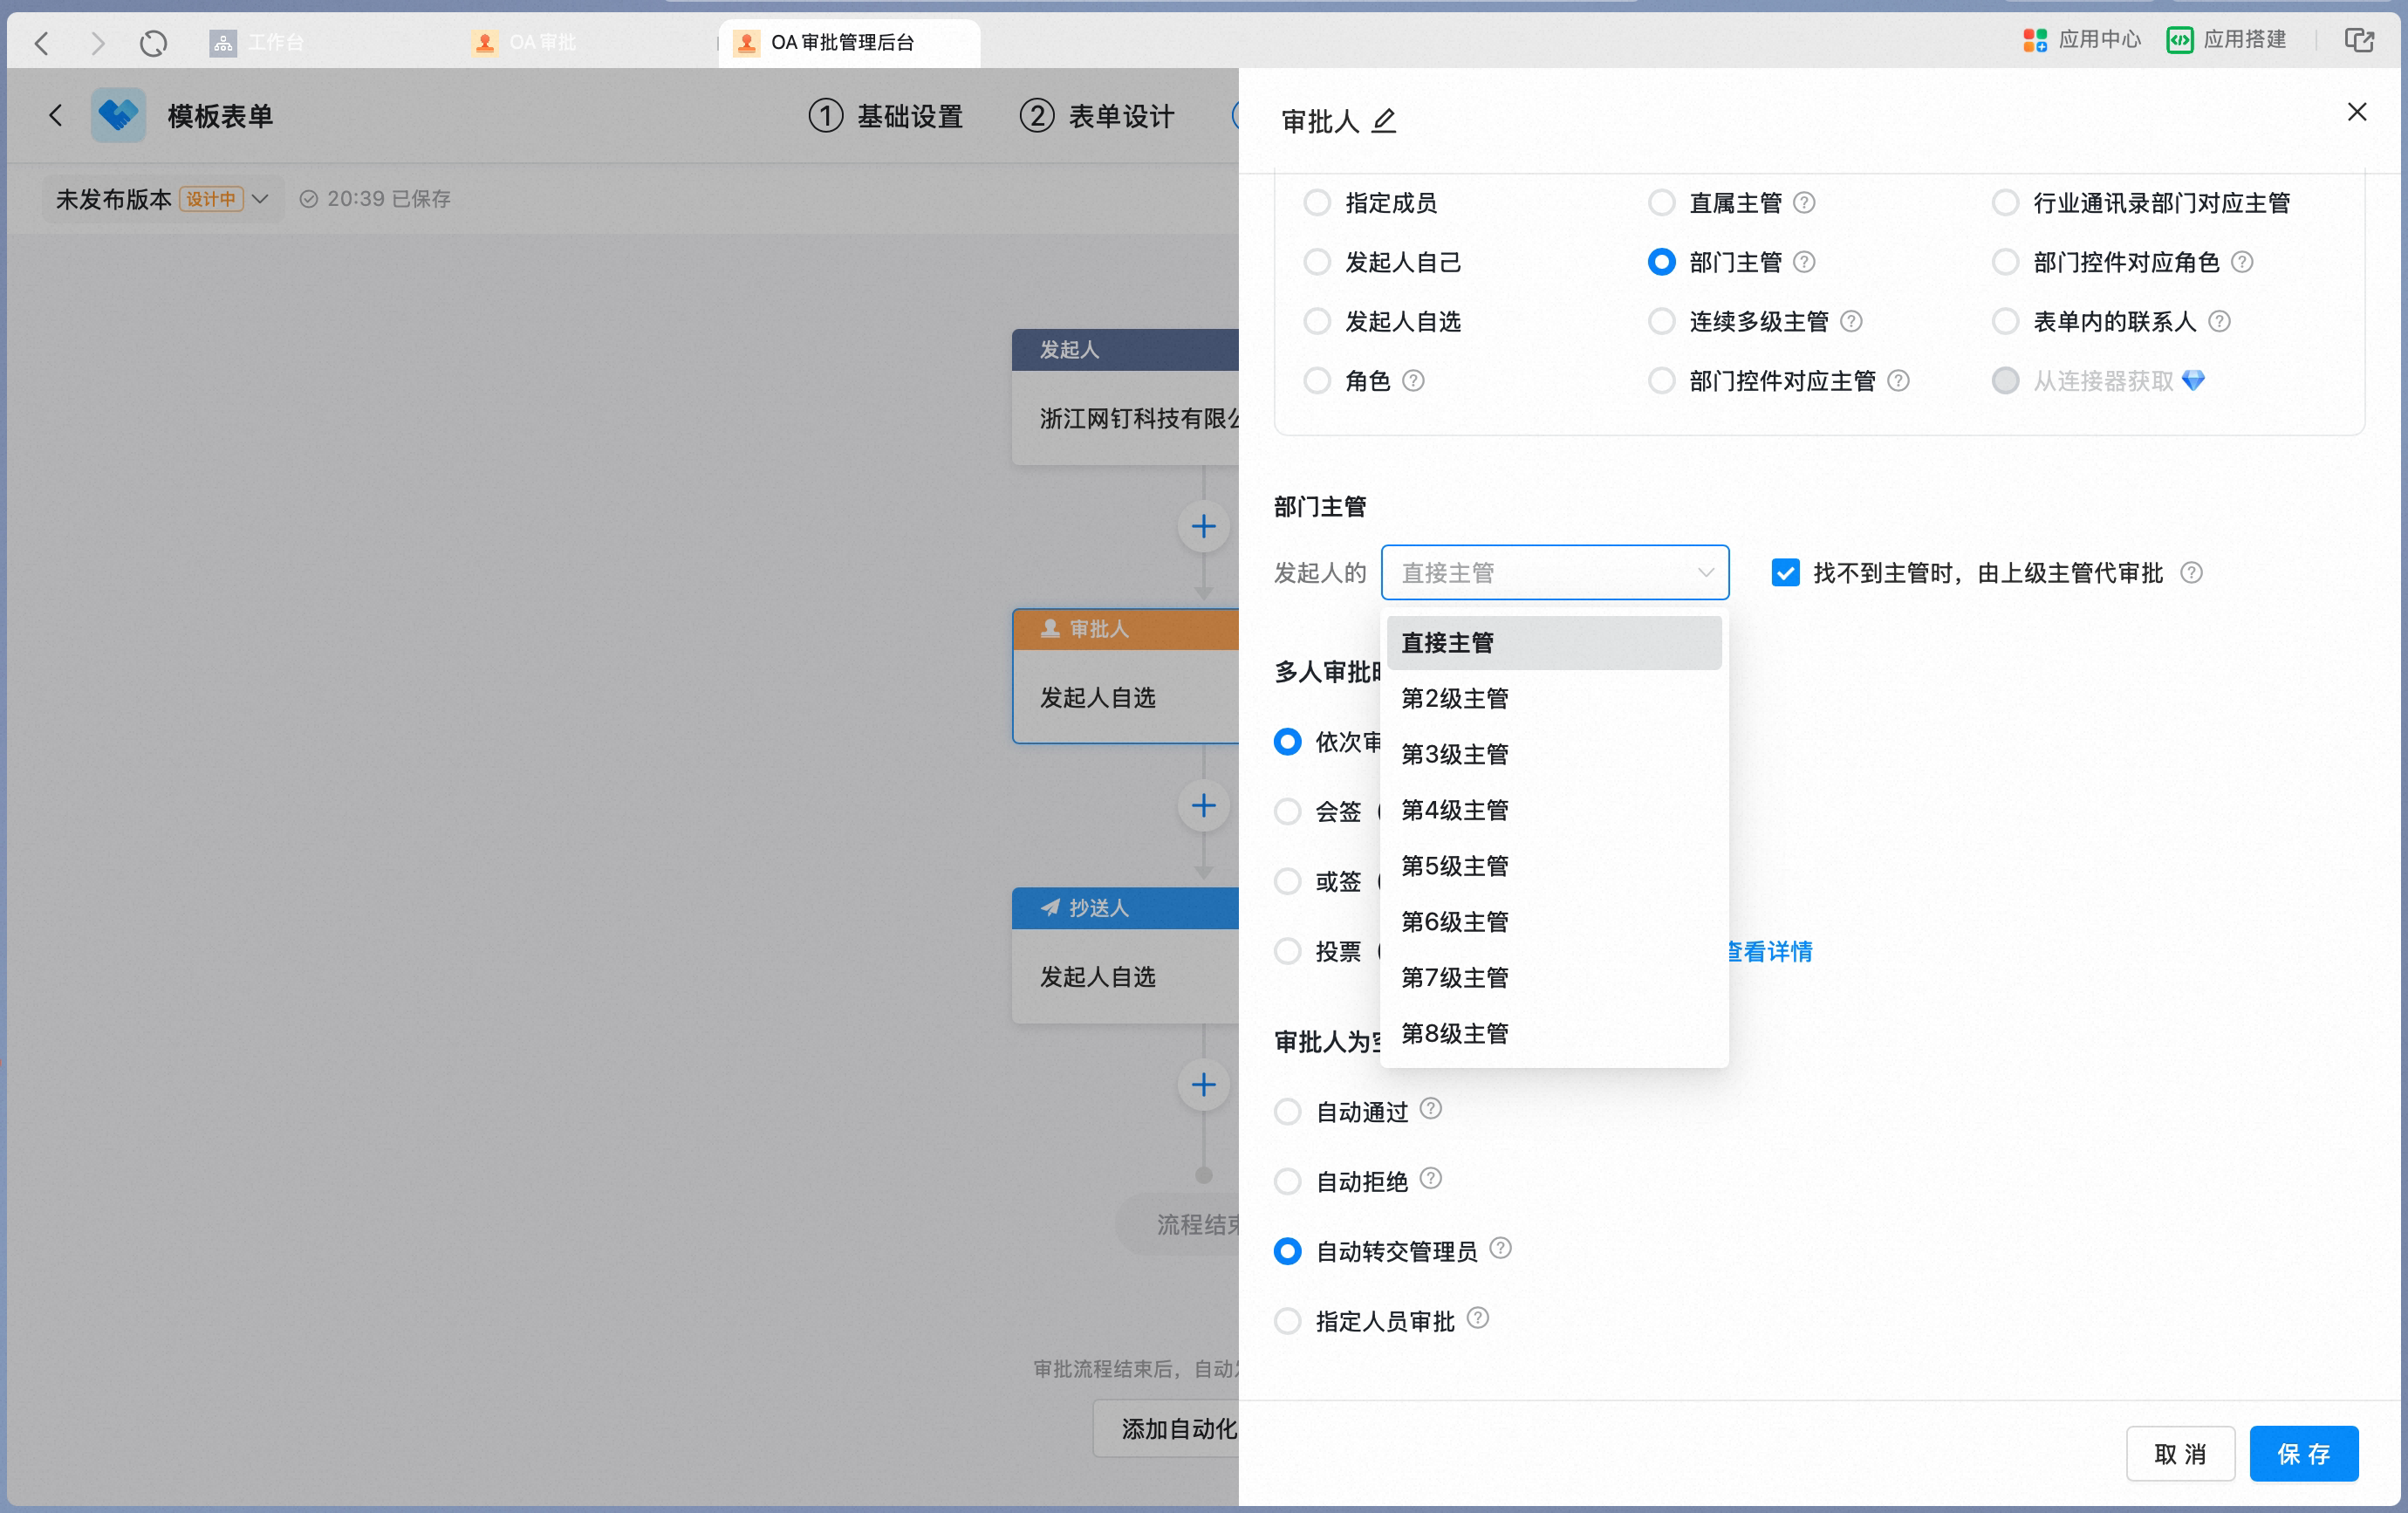
- Because a department manager may return no approver due to Contacts settings, set the handling logic for when the approver is empty.
- For details, see >>> How to set up department manager approval.
Multiple levels of managers
Multiple levels of managers
When you set the node approver to multiple levels of managers, set how many tiers above the initiator the approval should flow to. The process automatically routes upward tier by tier along the department manager hierarchy: it first identifies the initiator’s first-tier department manager, then the second-tier department manager, and so on, up to the Nth tier above the initiator.You can also set the highest tier in Contacts that the approval should reach. The process then routes upward tier by tier along the department manager hierarchy until it reaches the Nth-tier manager in Contacts.Set the maximum tier above the initiator: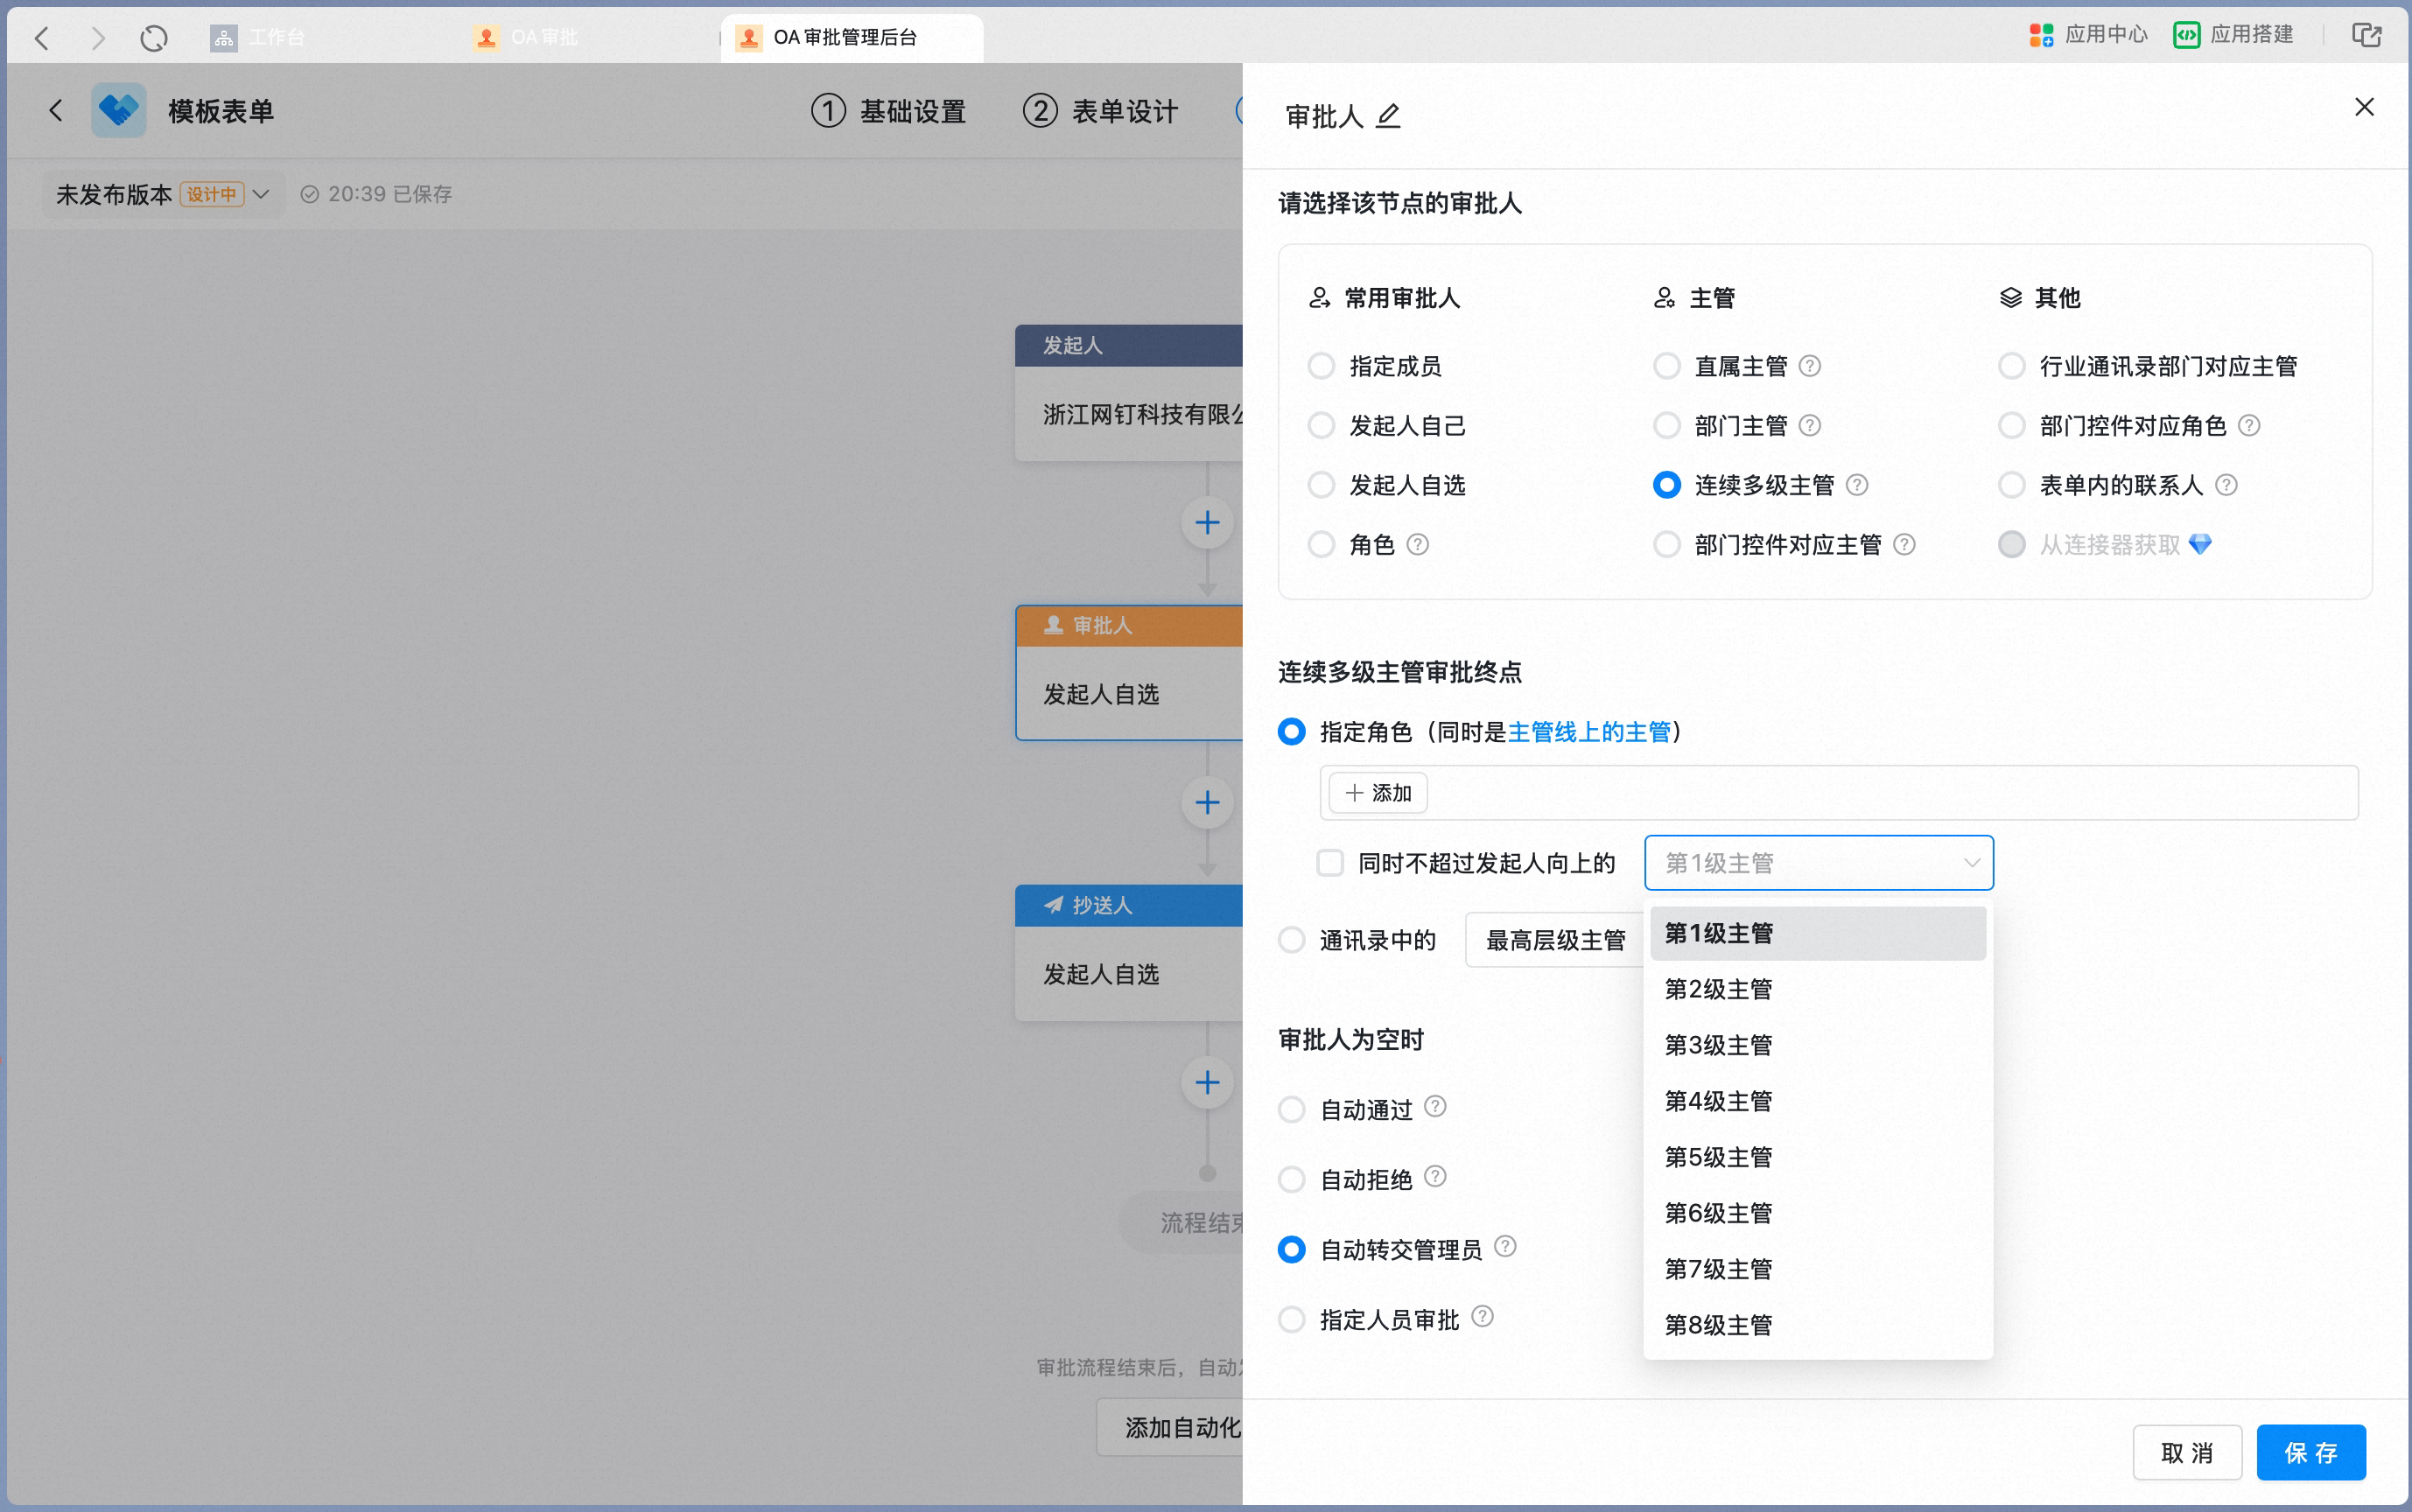 Set the highest tier in Contacts: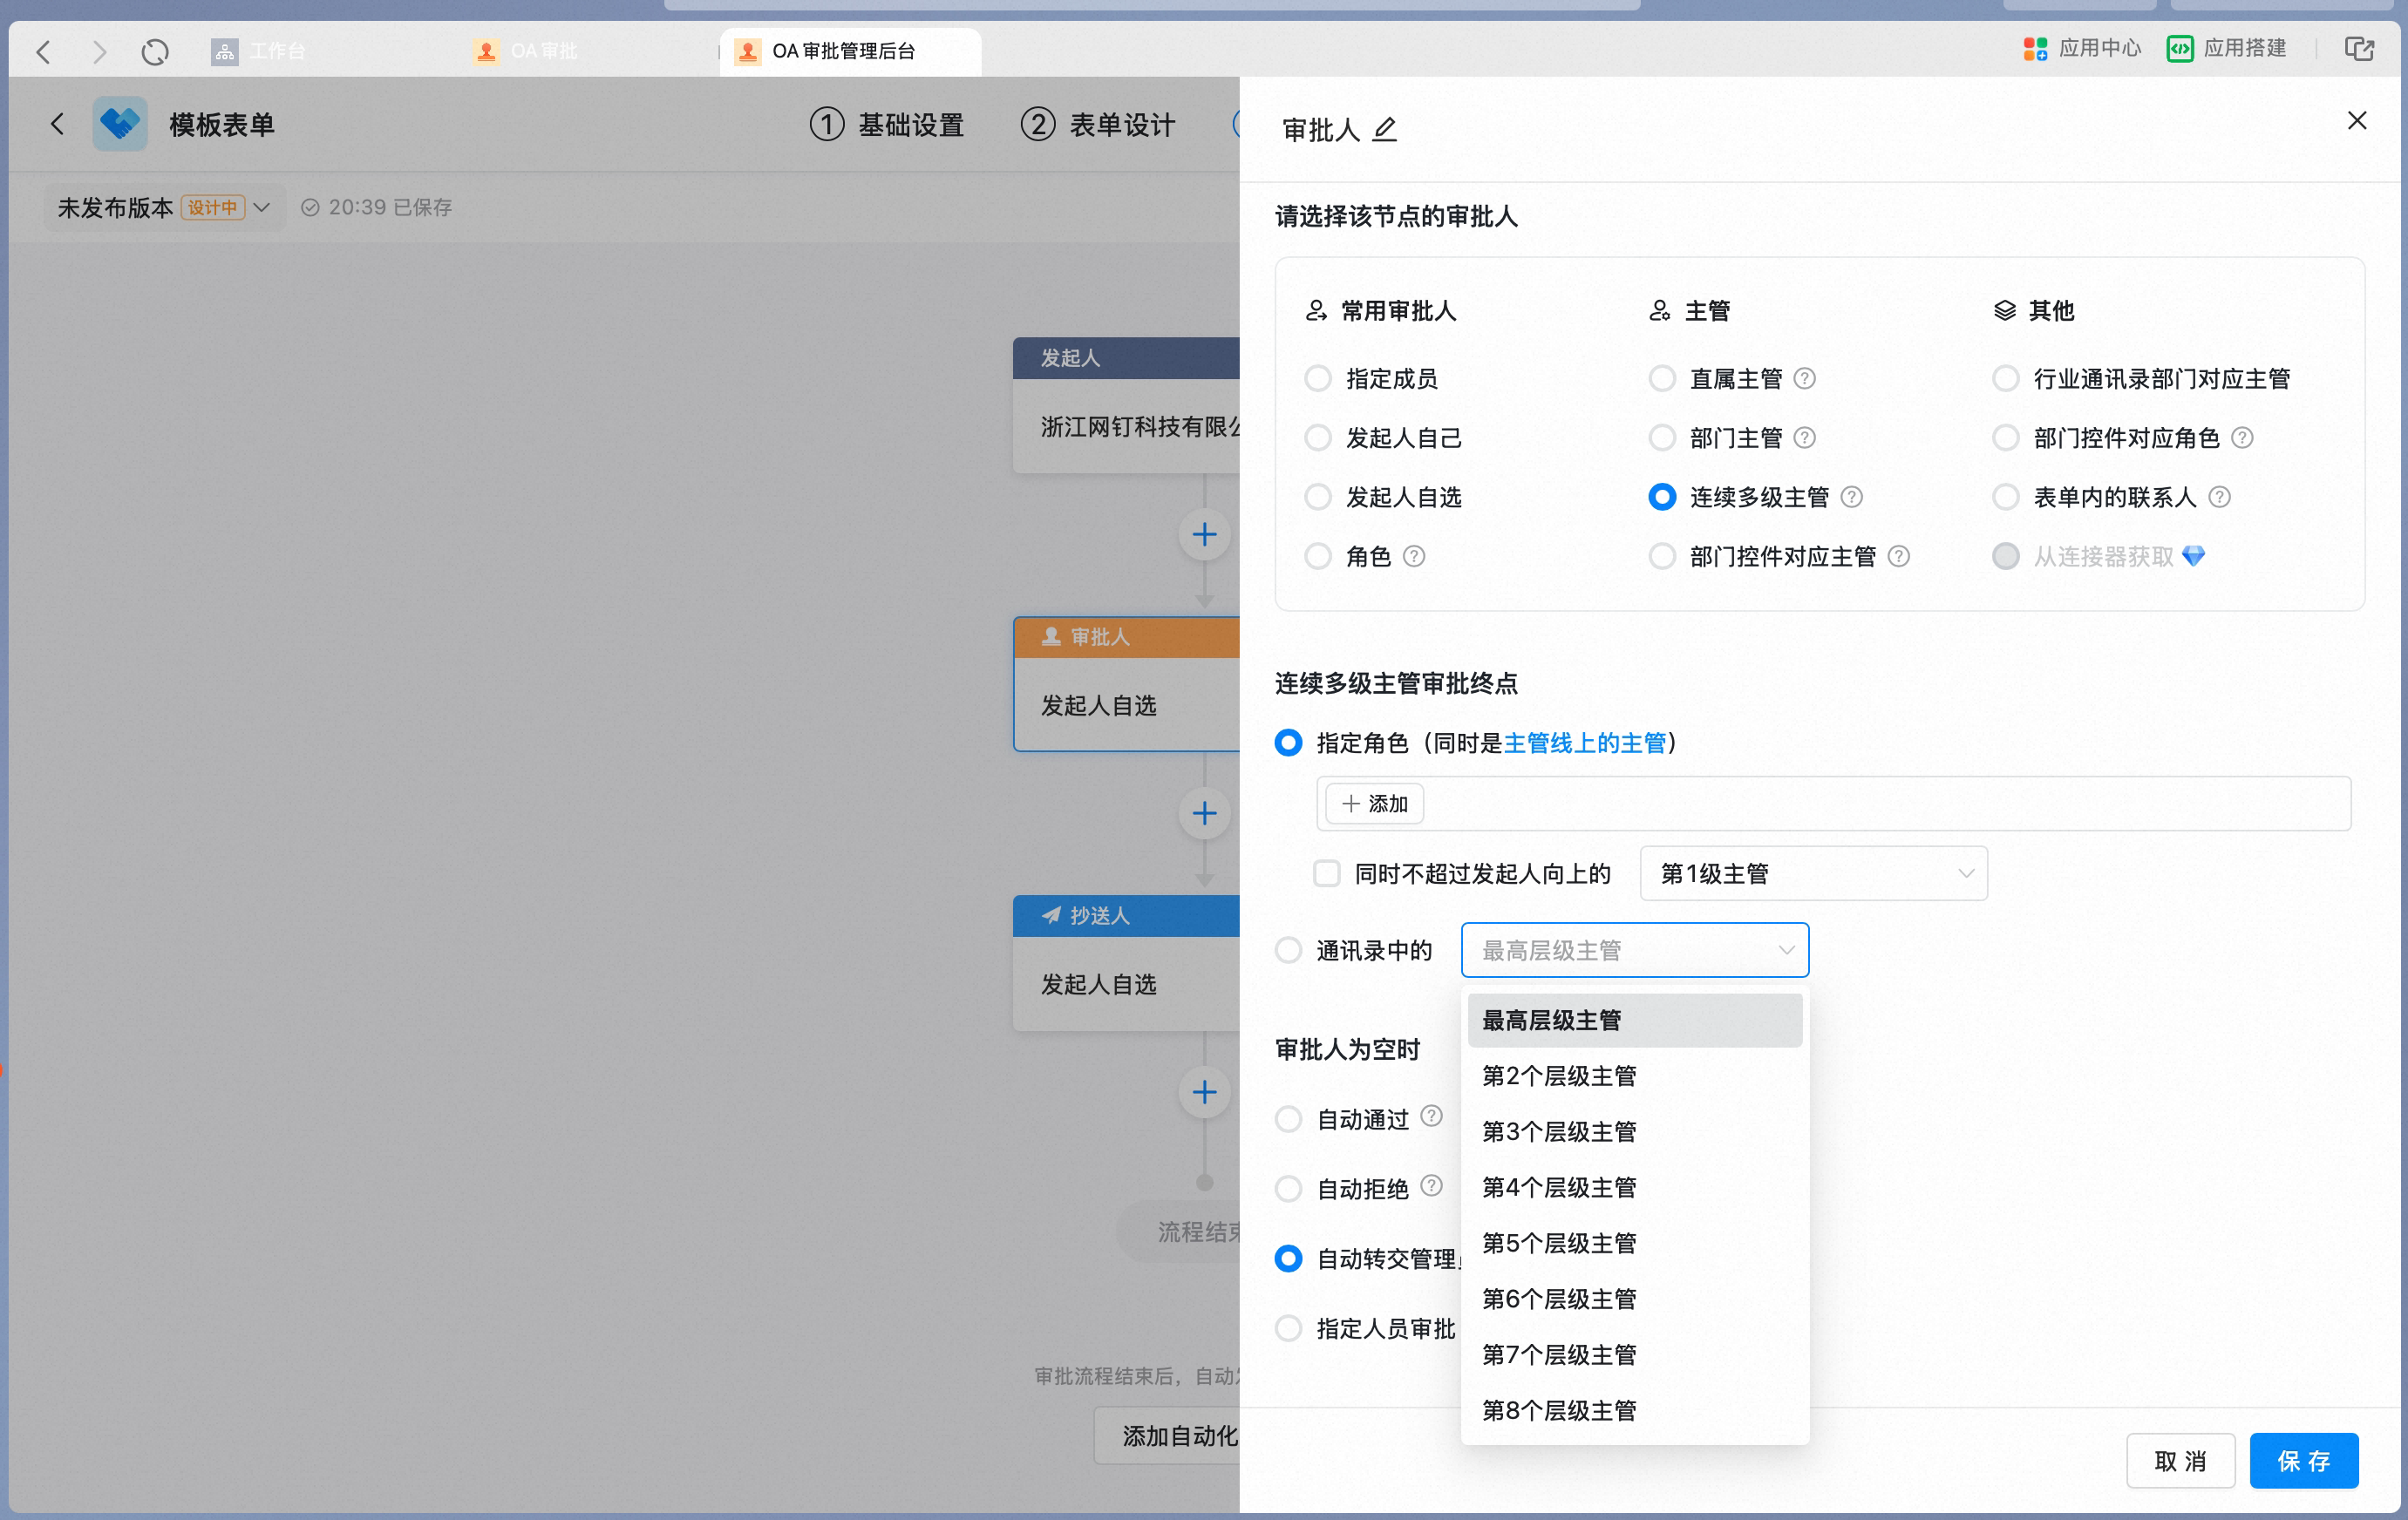
Manager of a department field
Manager of a department field
When you set the node approver to Manager of a department field, first select a Department field in the form. This is typically used when a specific department manager must confirm, such as for a transfer request.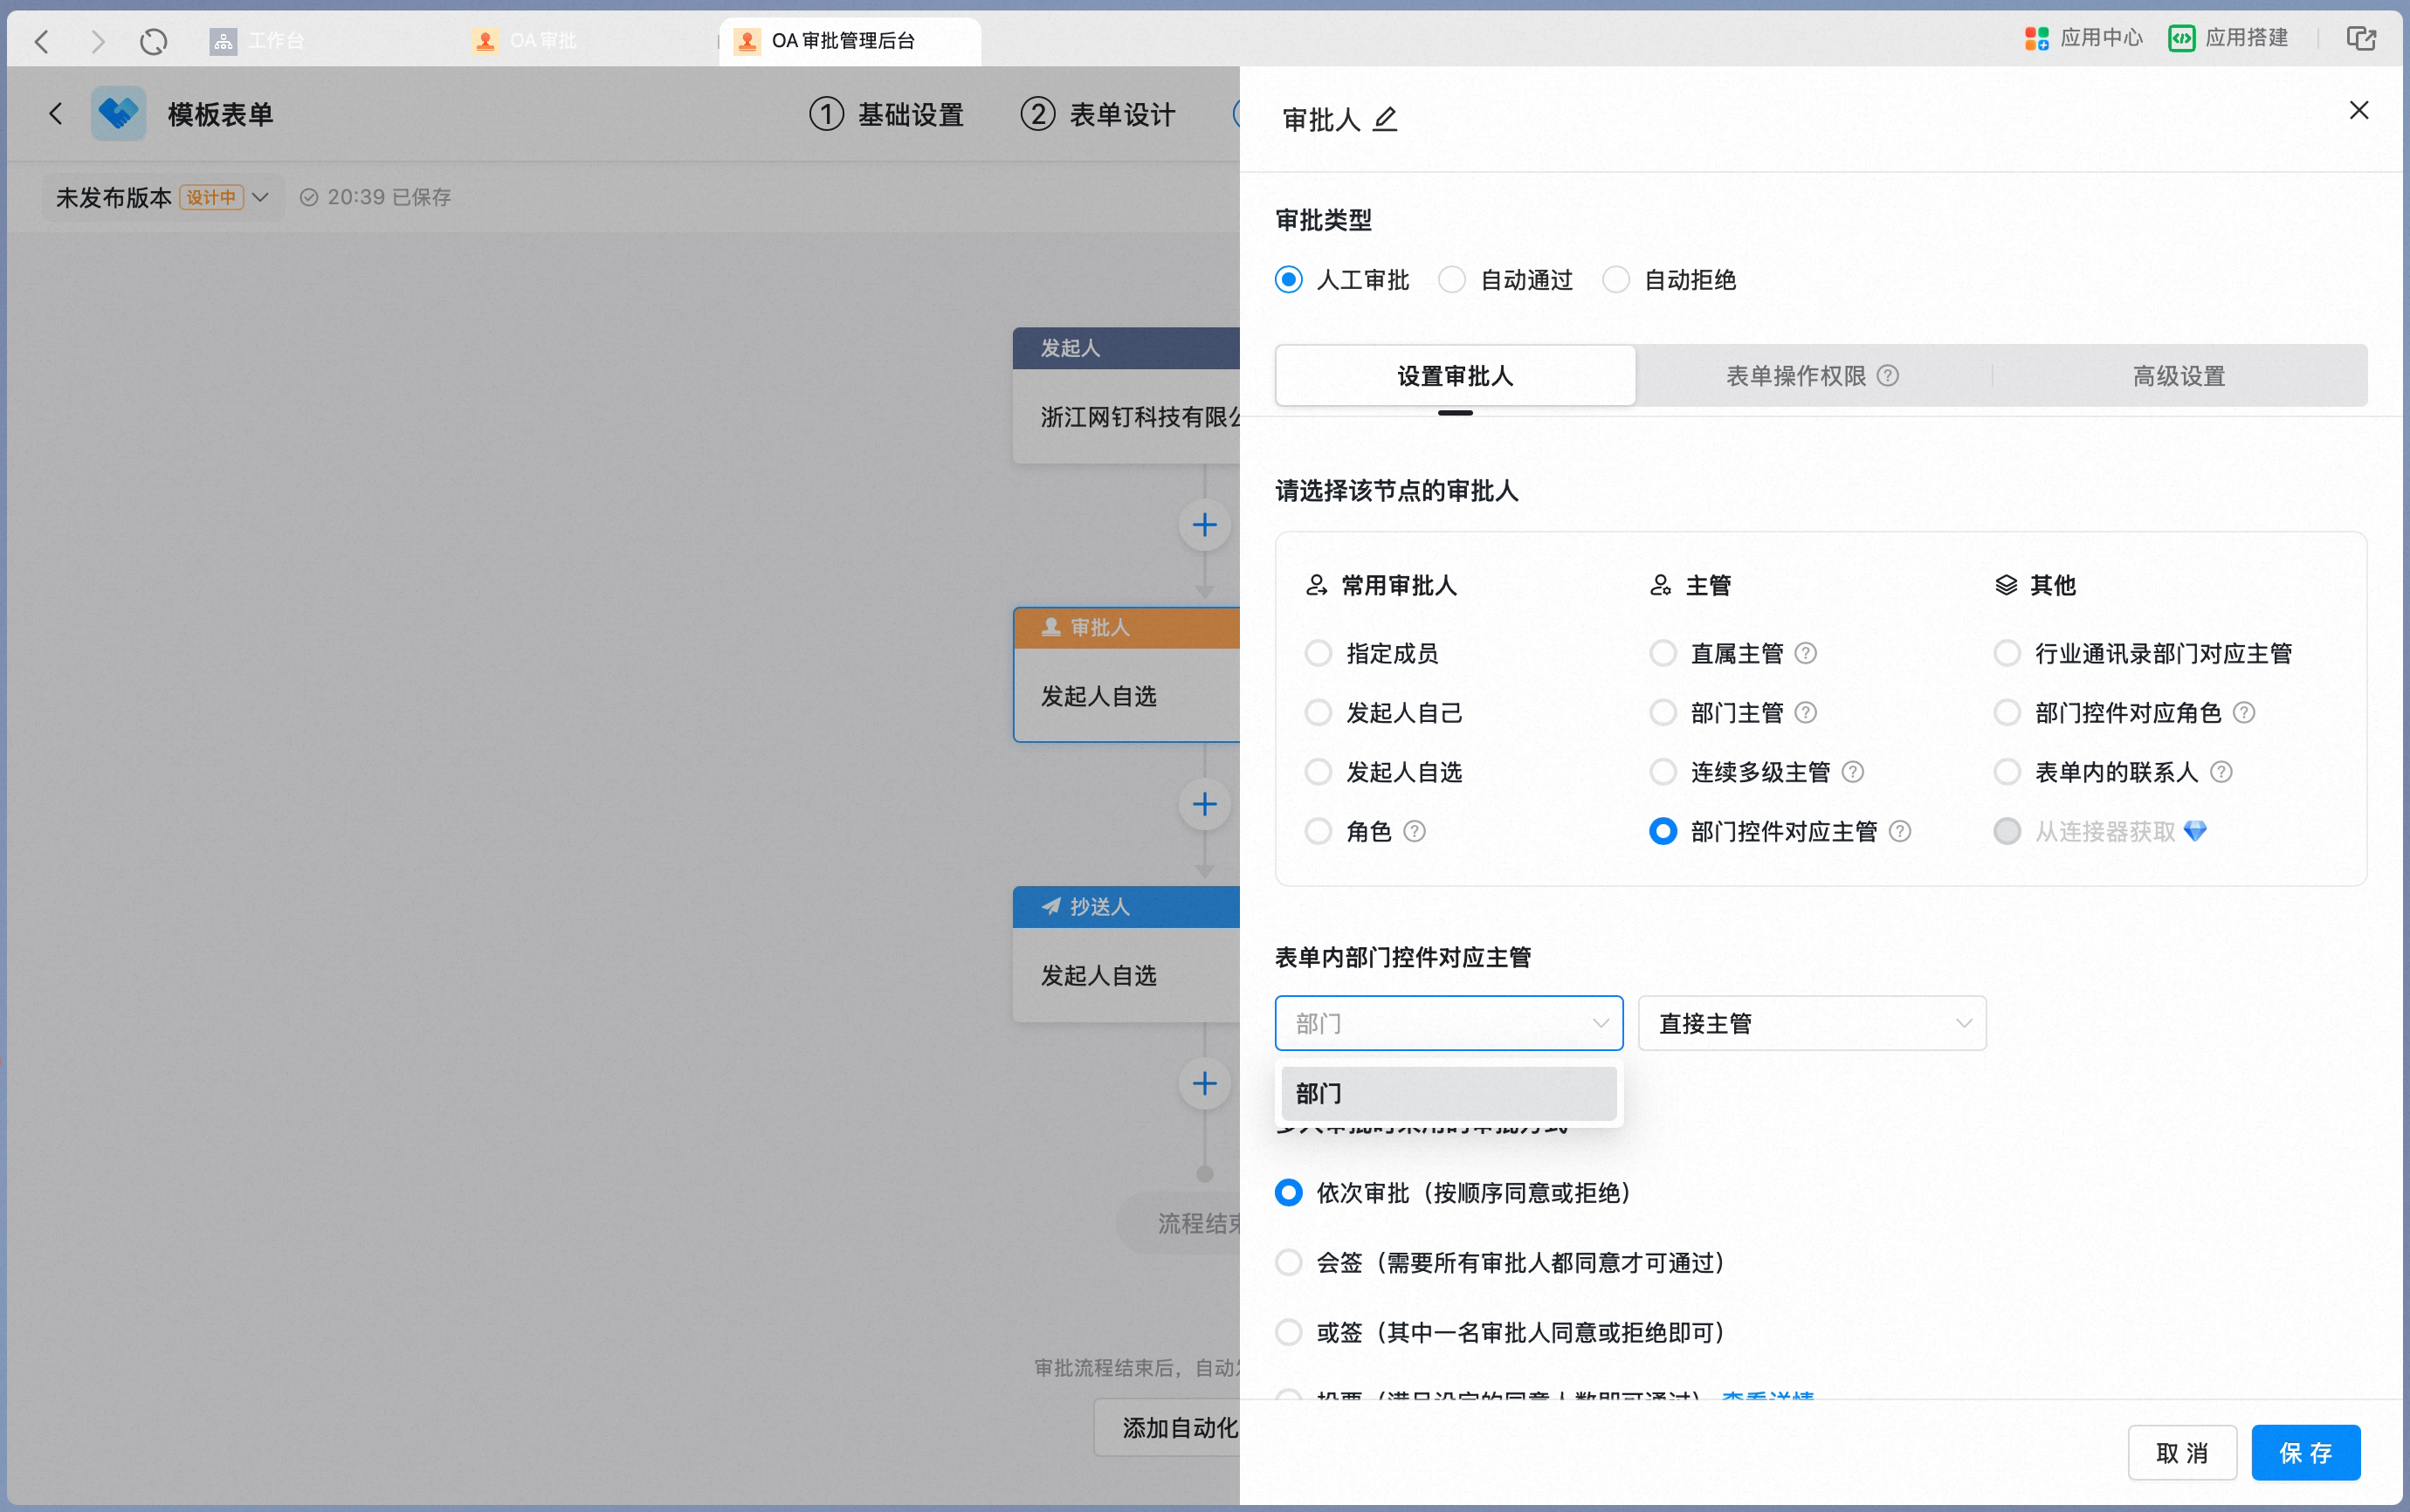 Choose which tier of manager the department field routes to: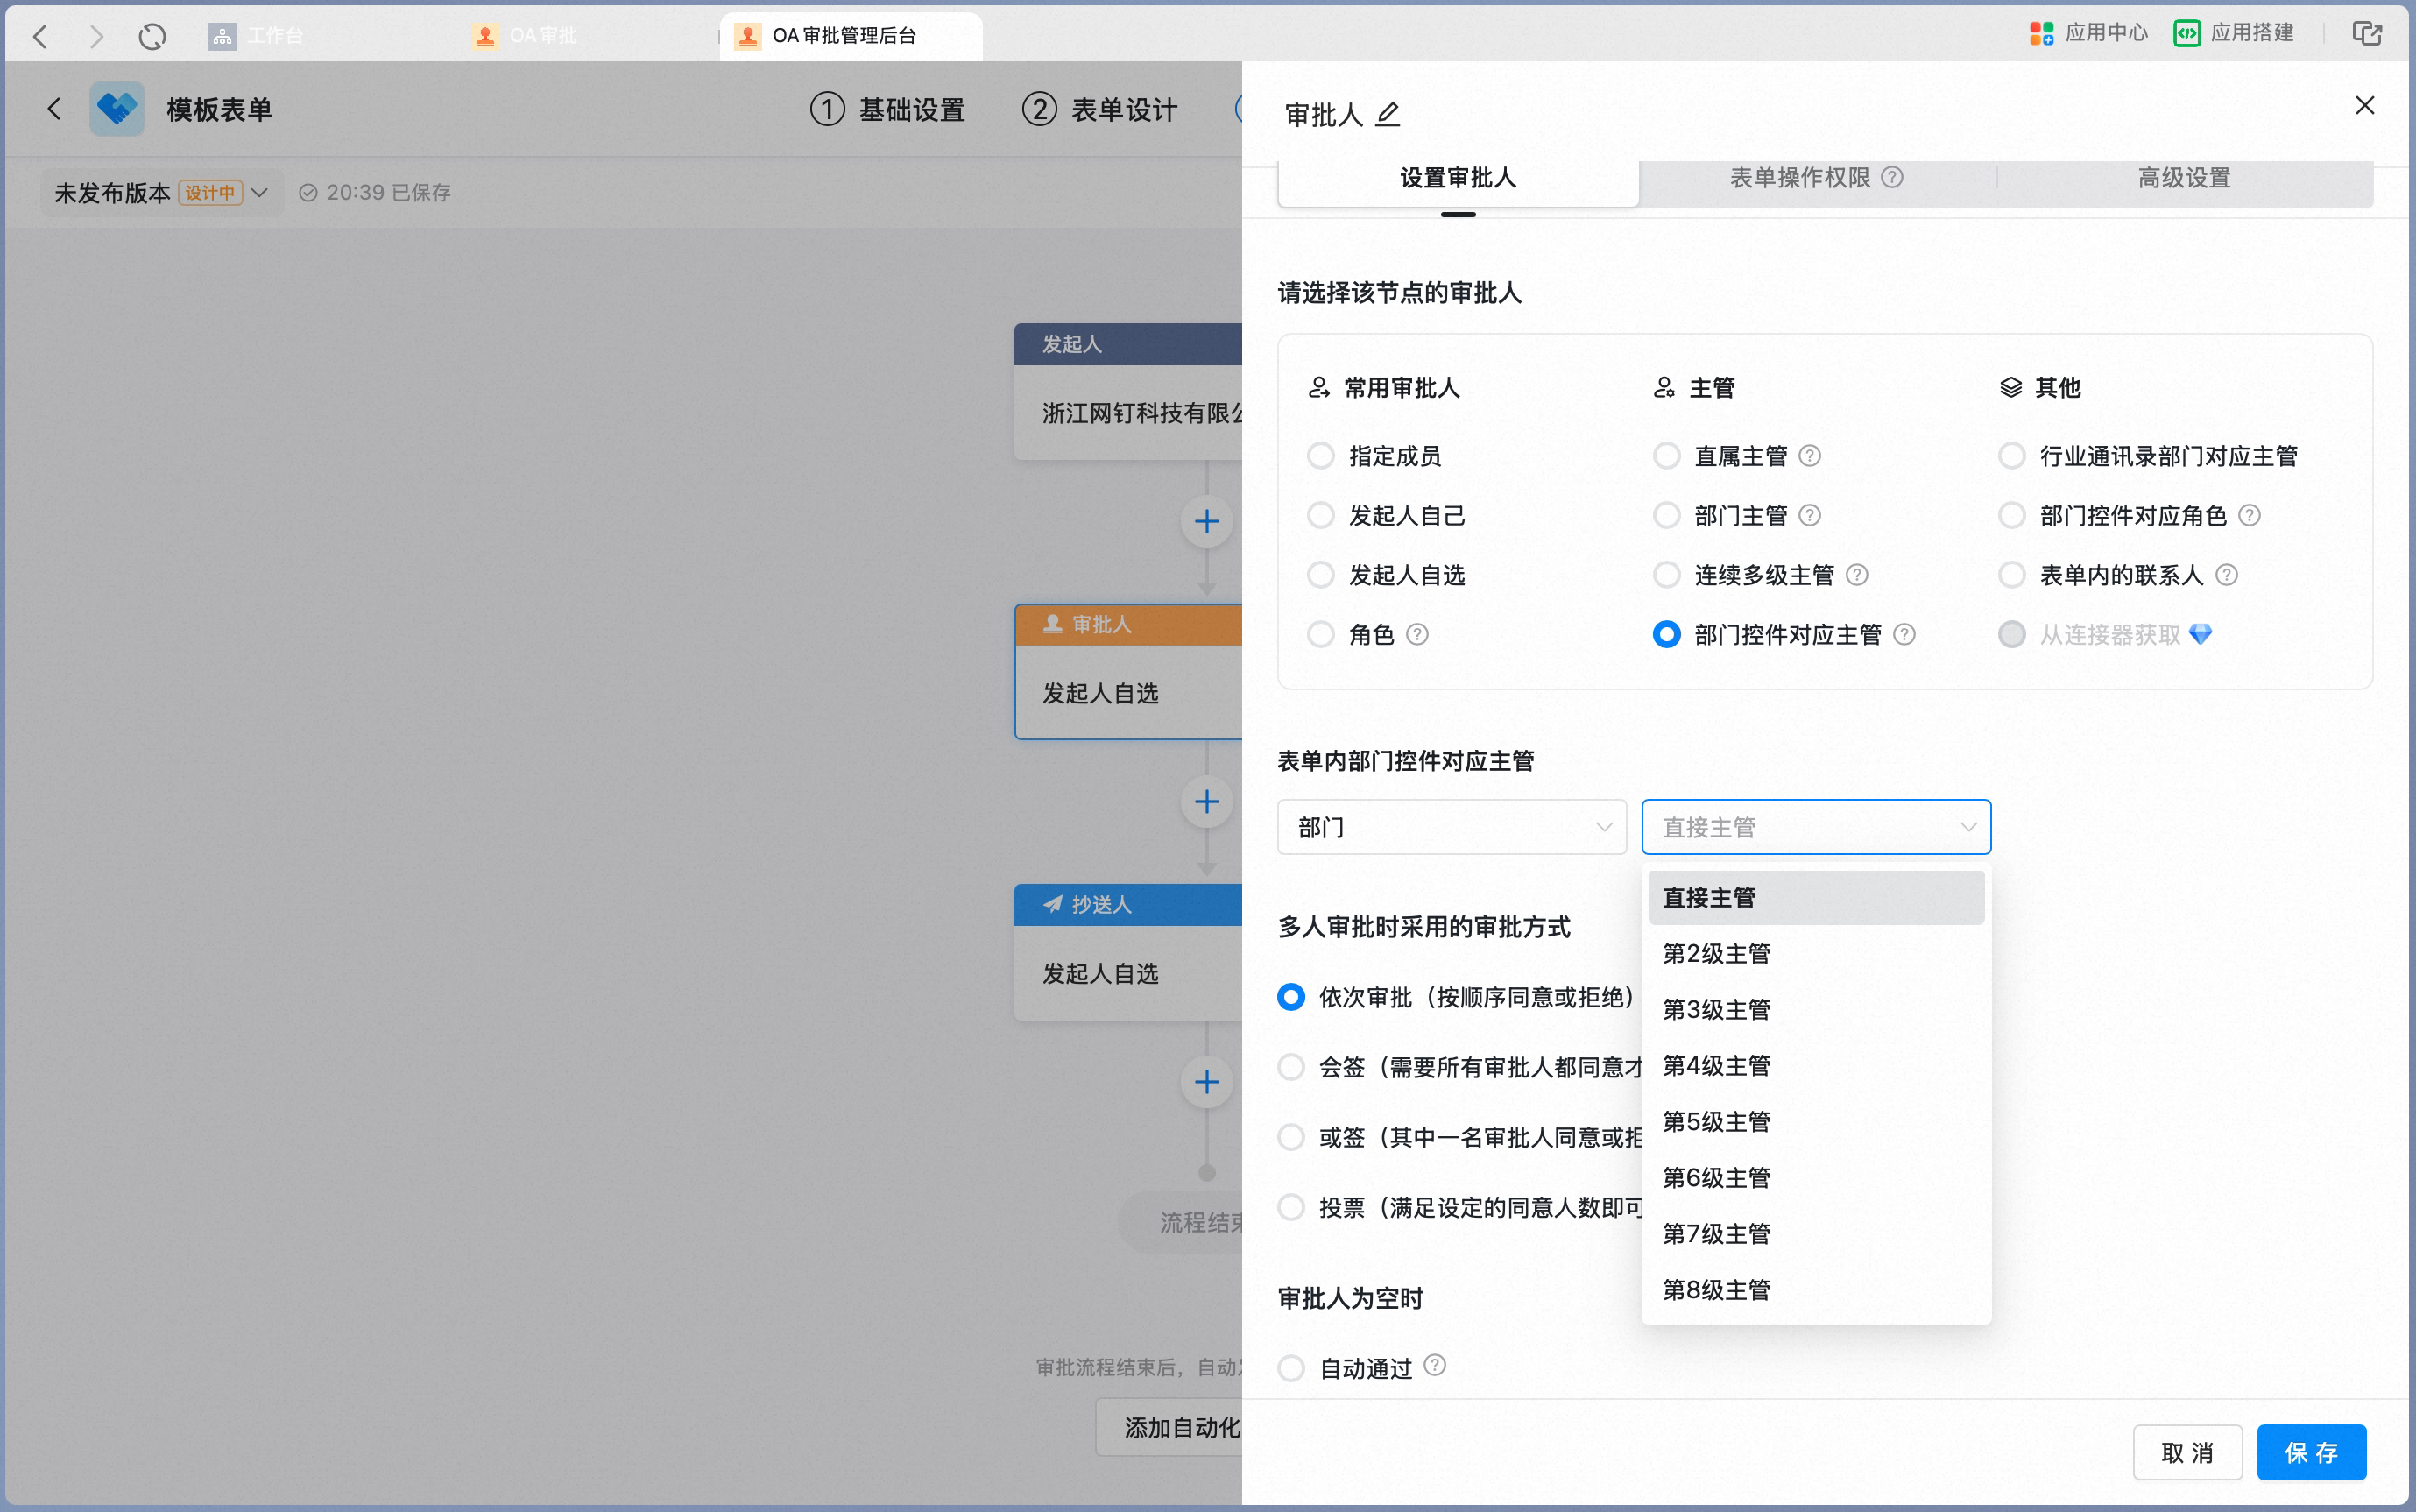
- Select which tier of department manager above that department should approve. Up to 8 tiers are supported.
Role for a department field
Role for a department field
When you set the node approver to Role for a department field, first select a Department field in the form. This is typically used when a specific role within a department must confirm, such as for a work handover.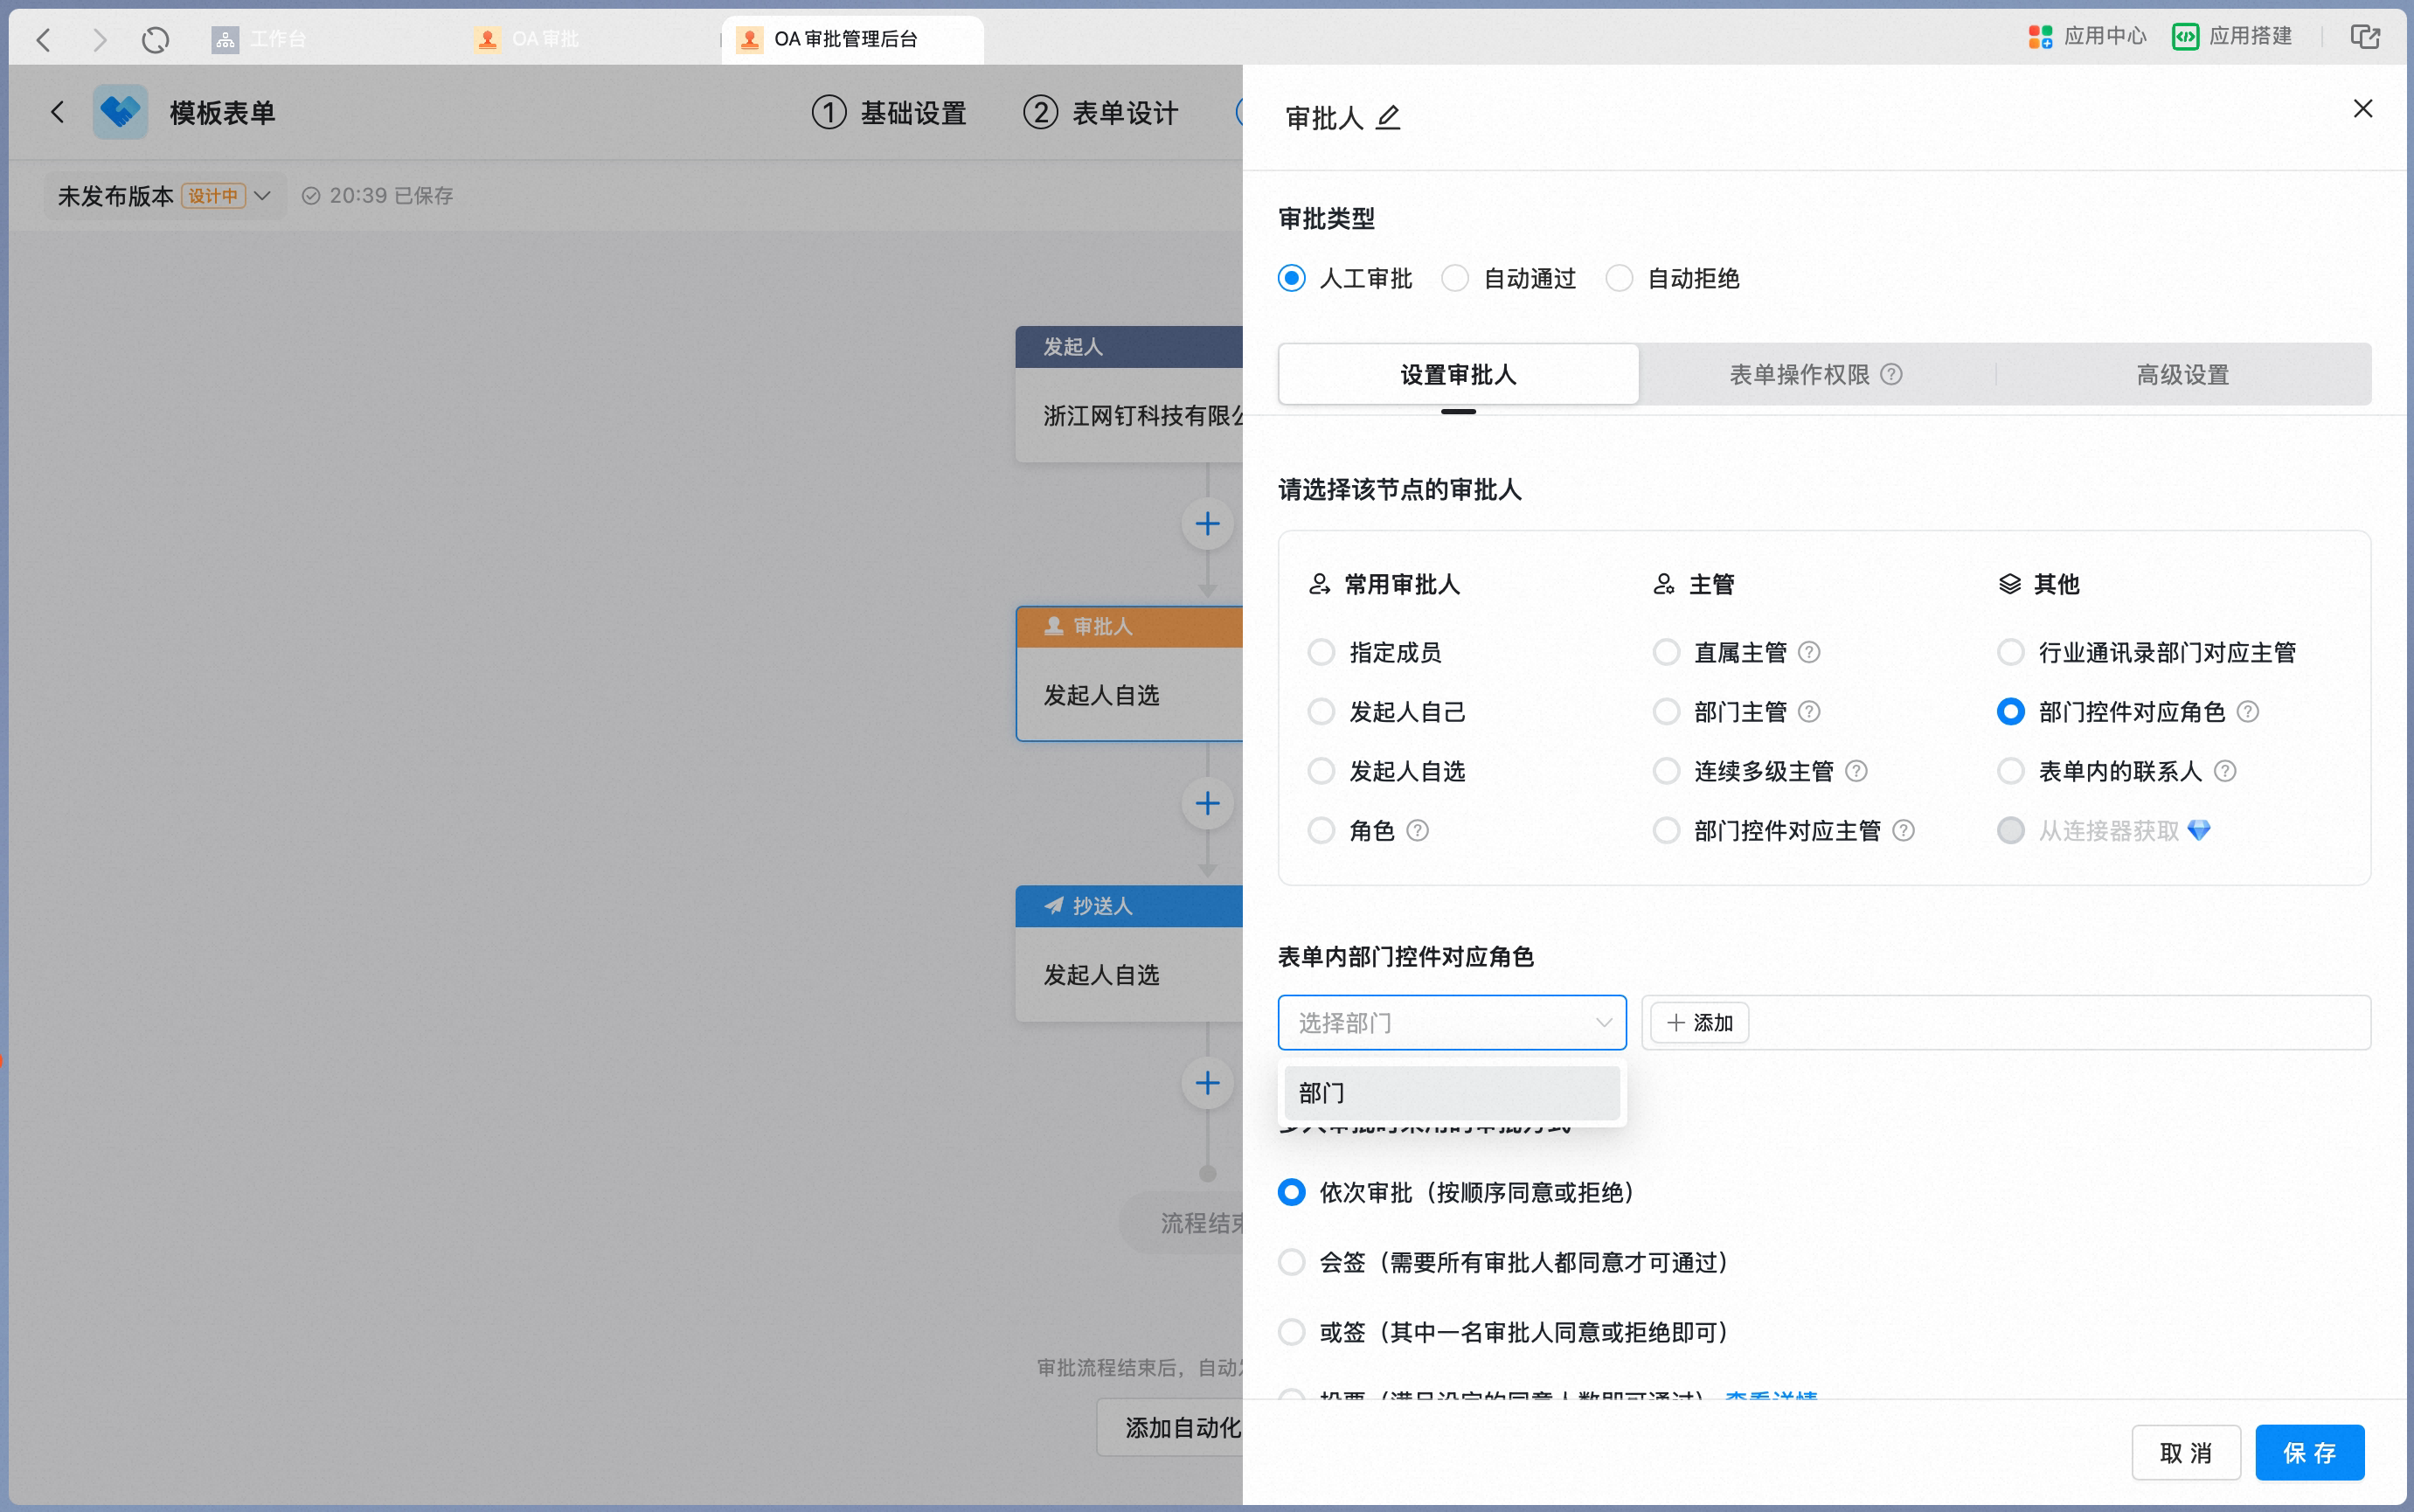 Pick a role from the role list: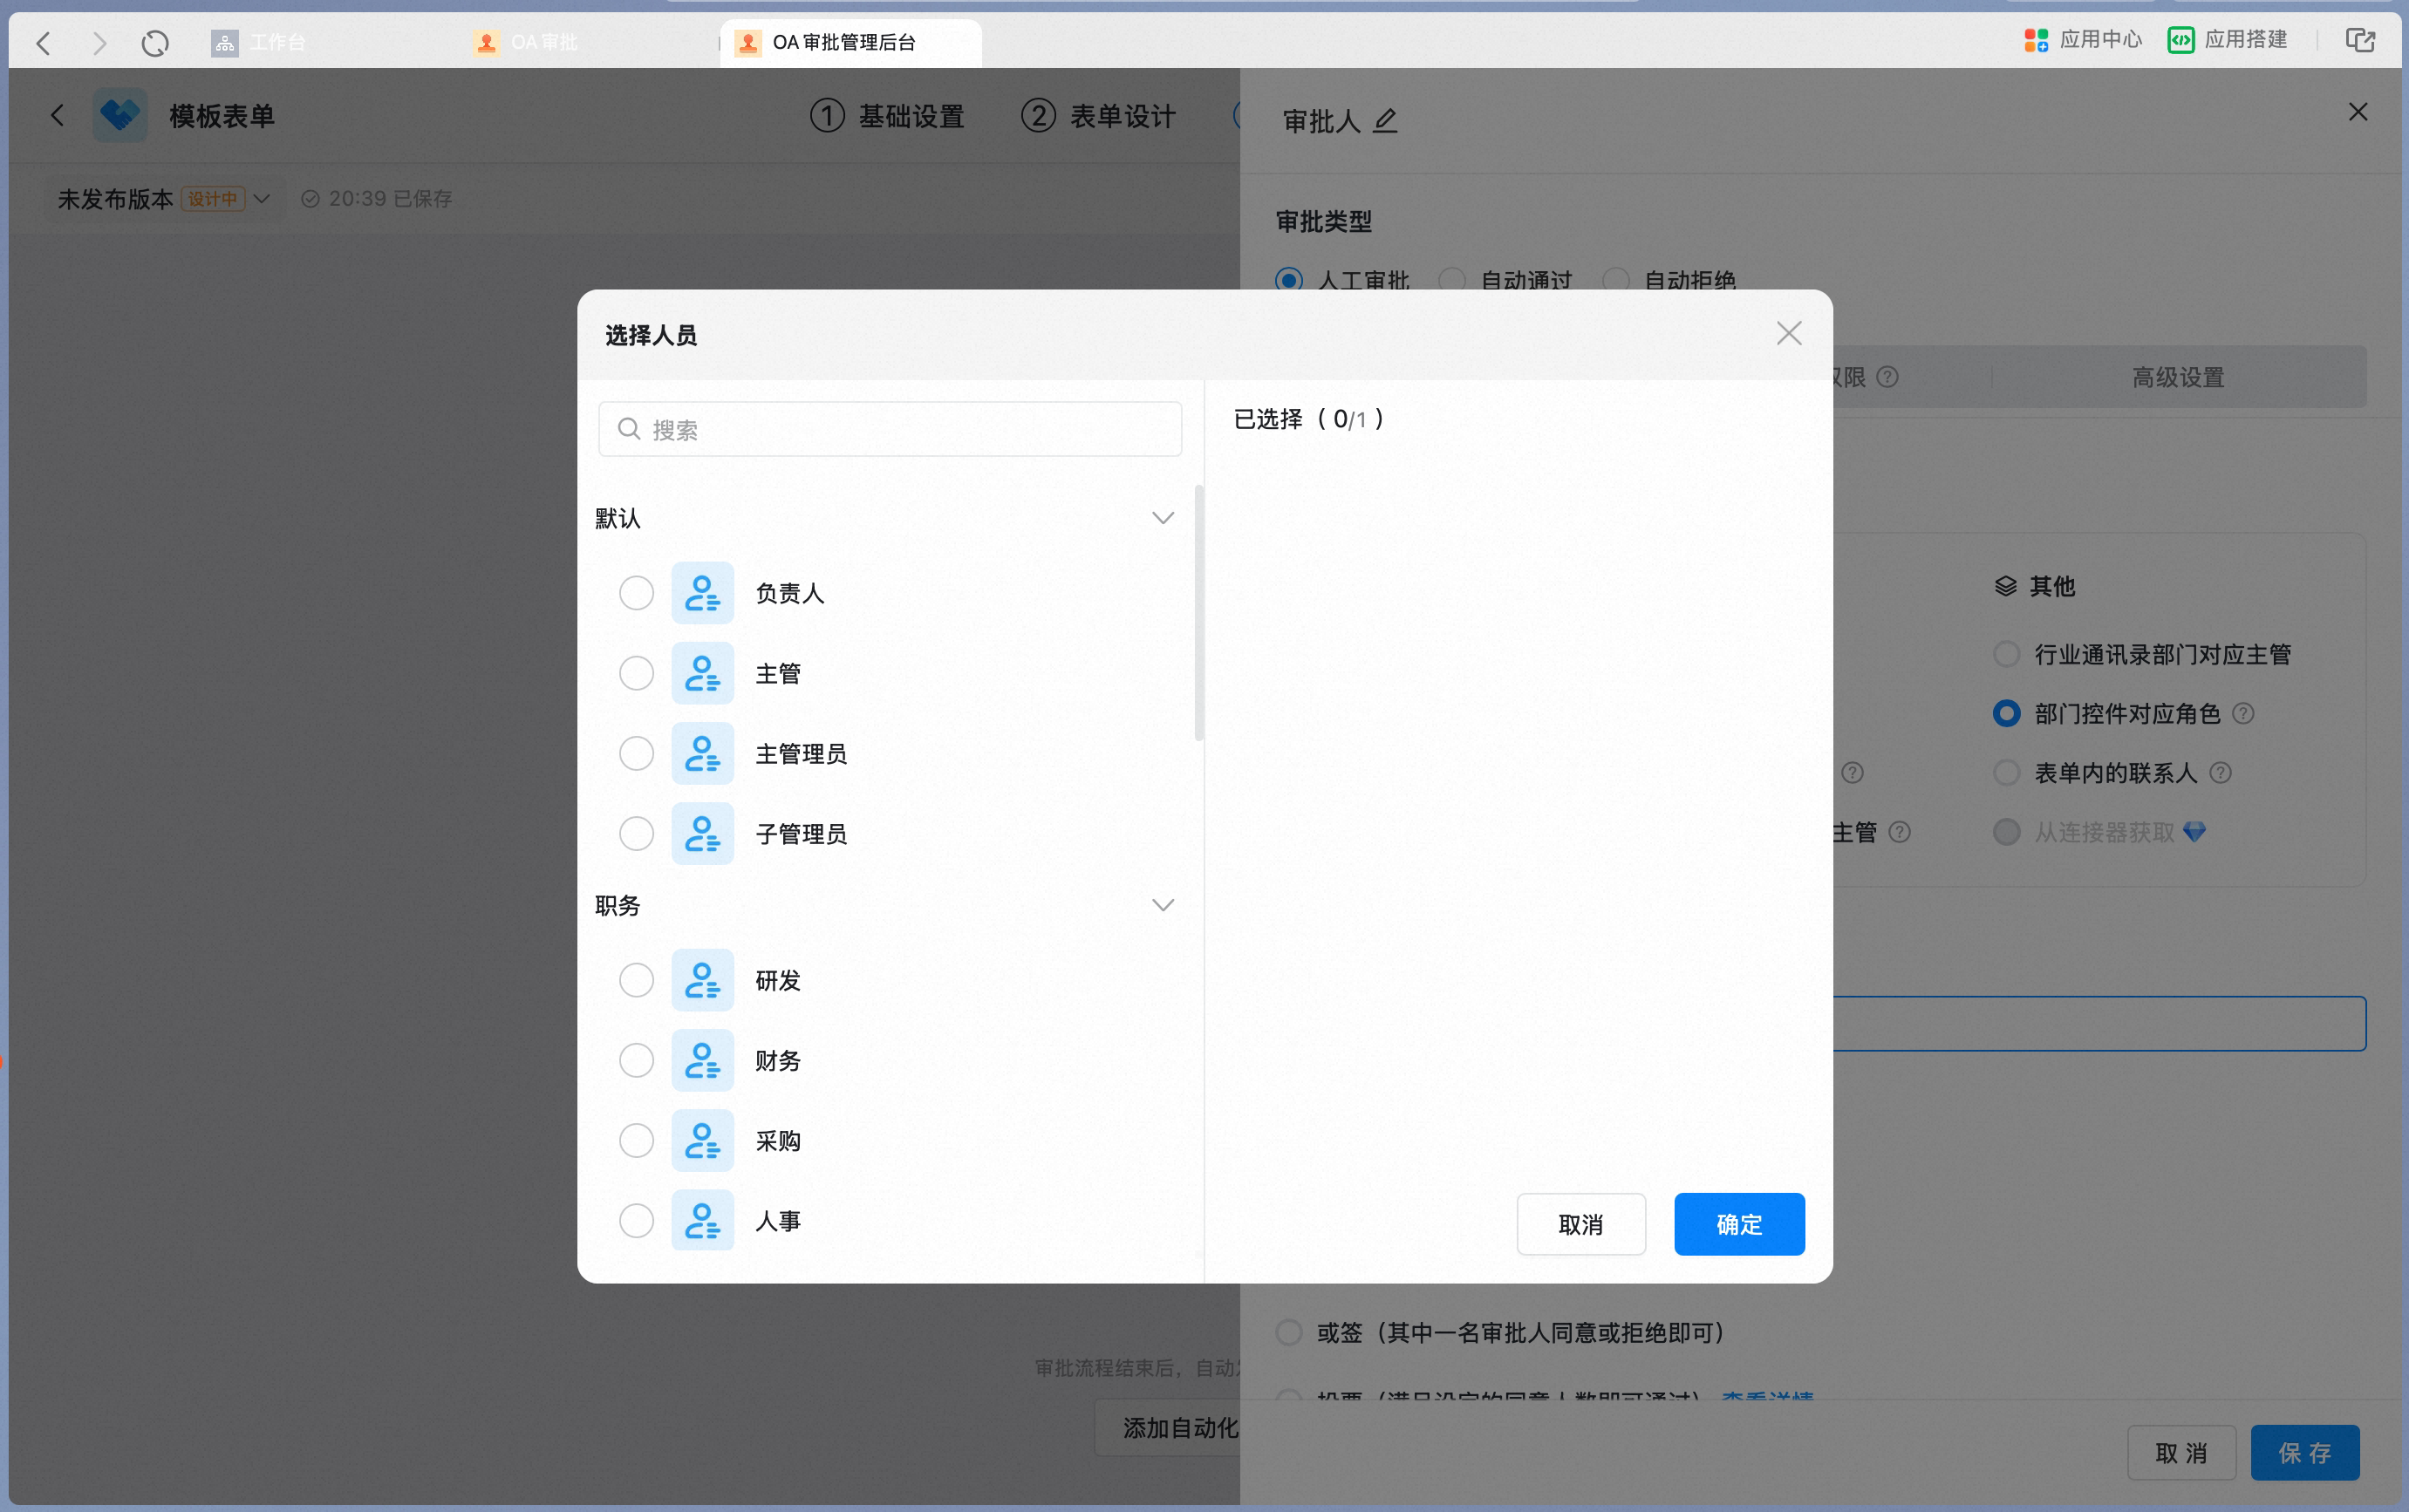
- Pick a role from the role list. For role and management scope settings, see >>> How to set up role-based approval.
Contact field in the form
Contact field in the form
When you set the node approver to Contact field in the form, select a Contact field in the form so that the user in that field acts as the approver.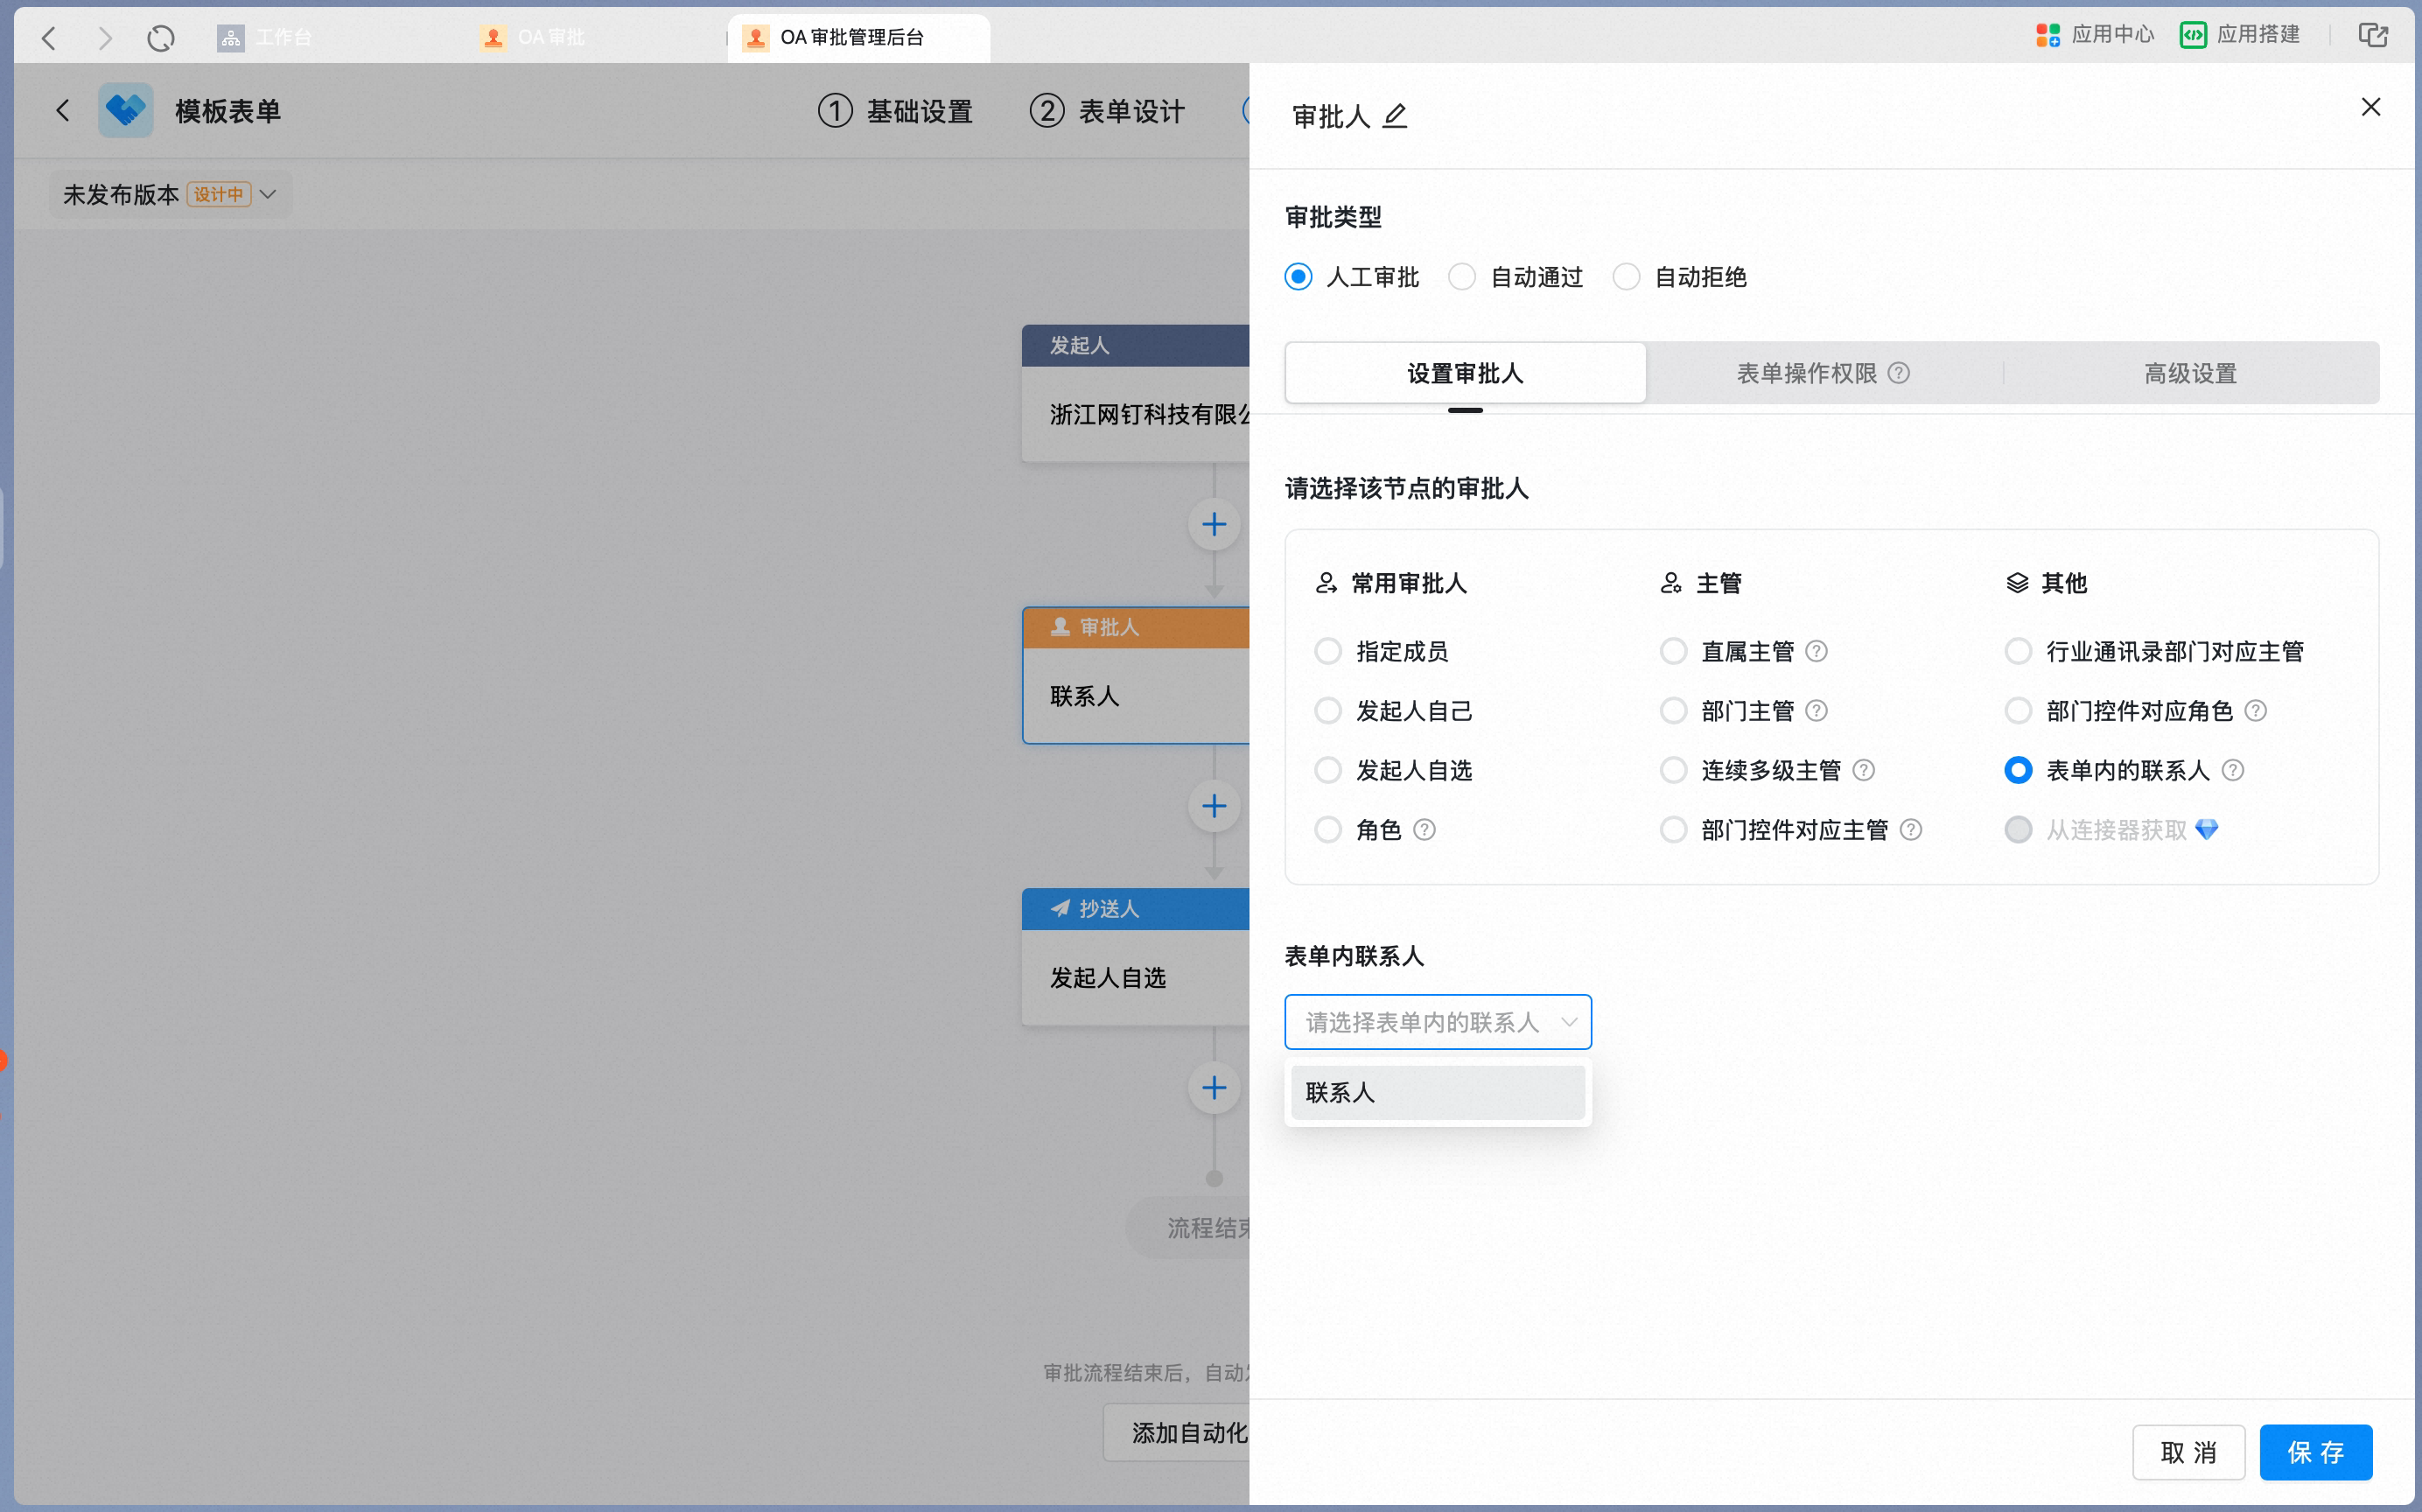
- For details, see >>> How to set up form contact approval.
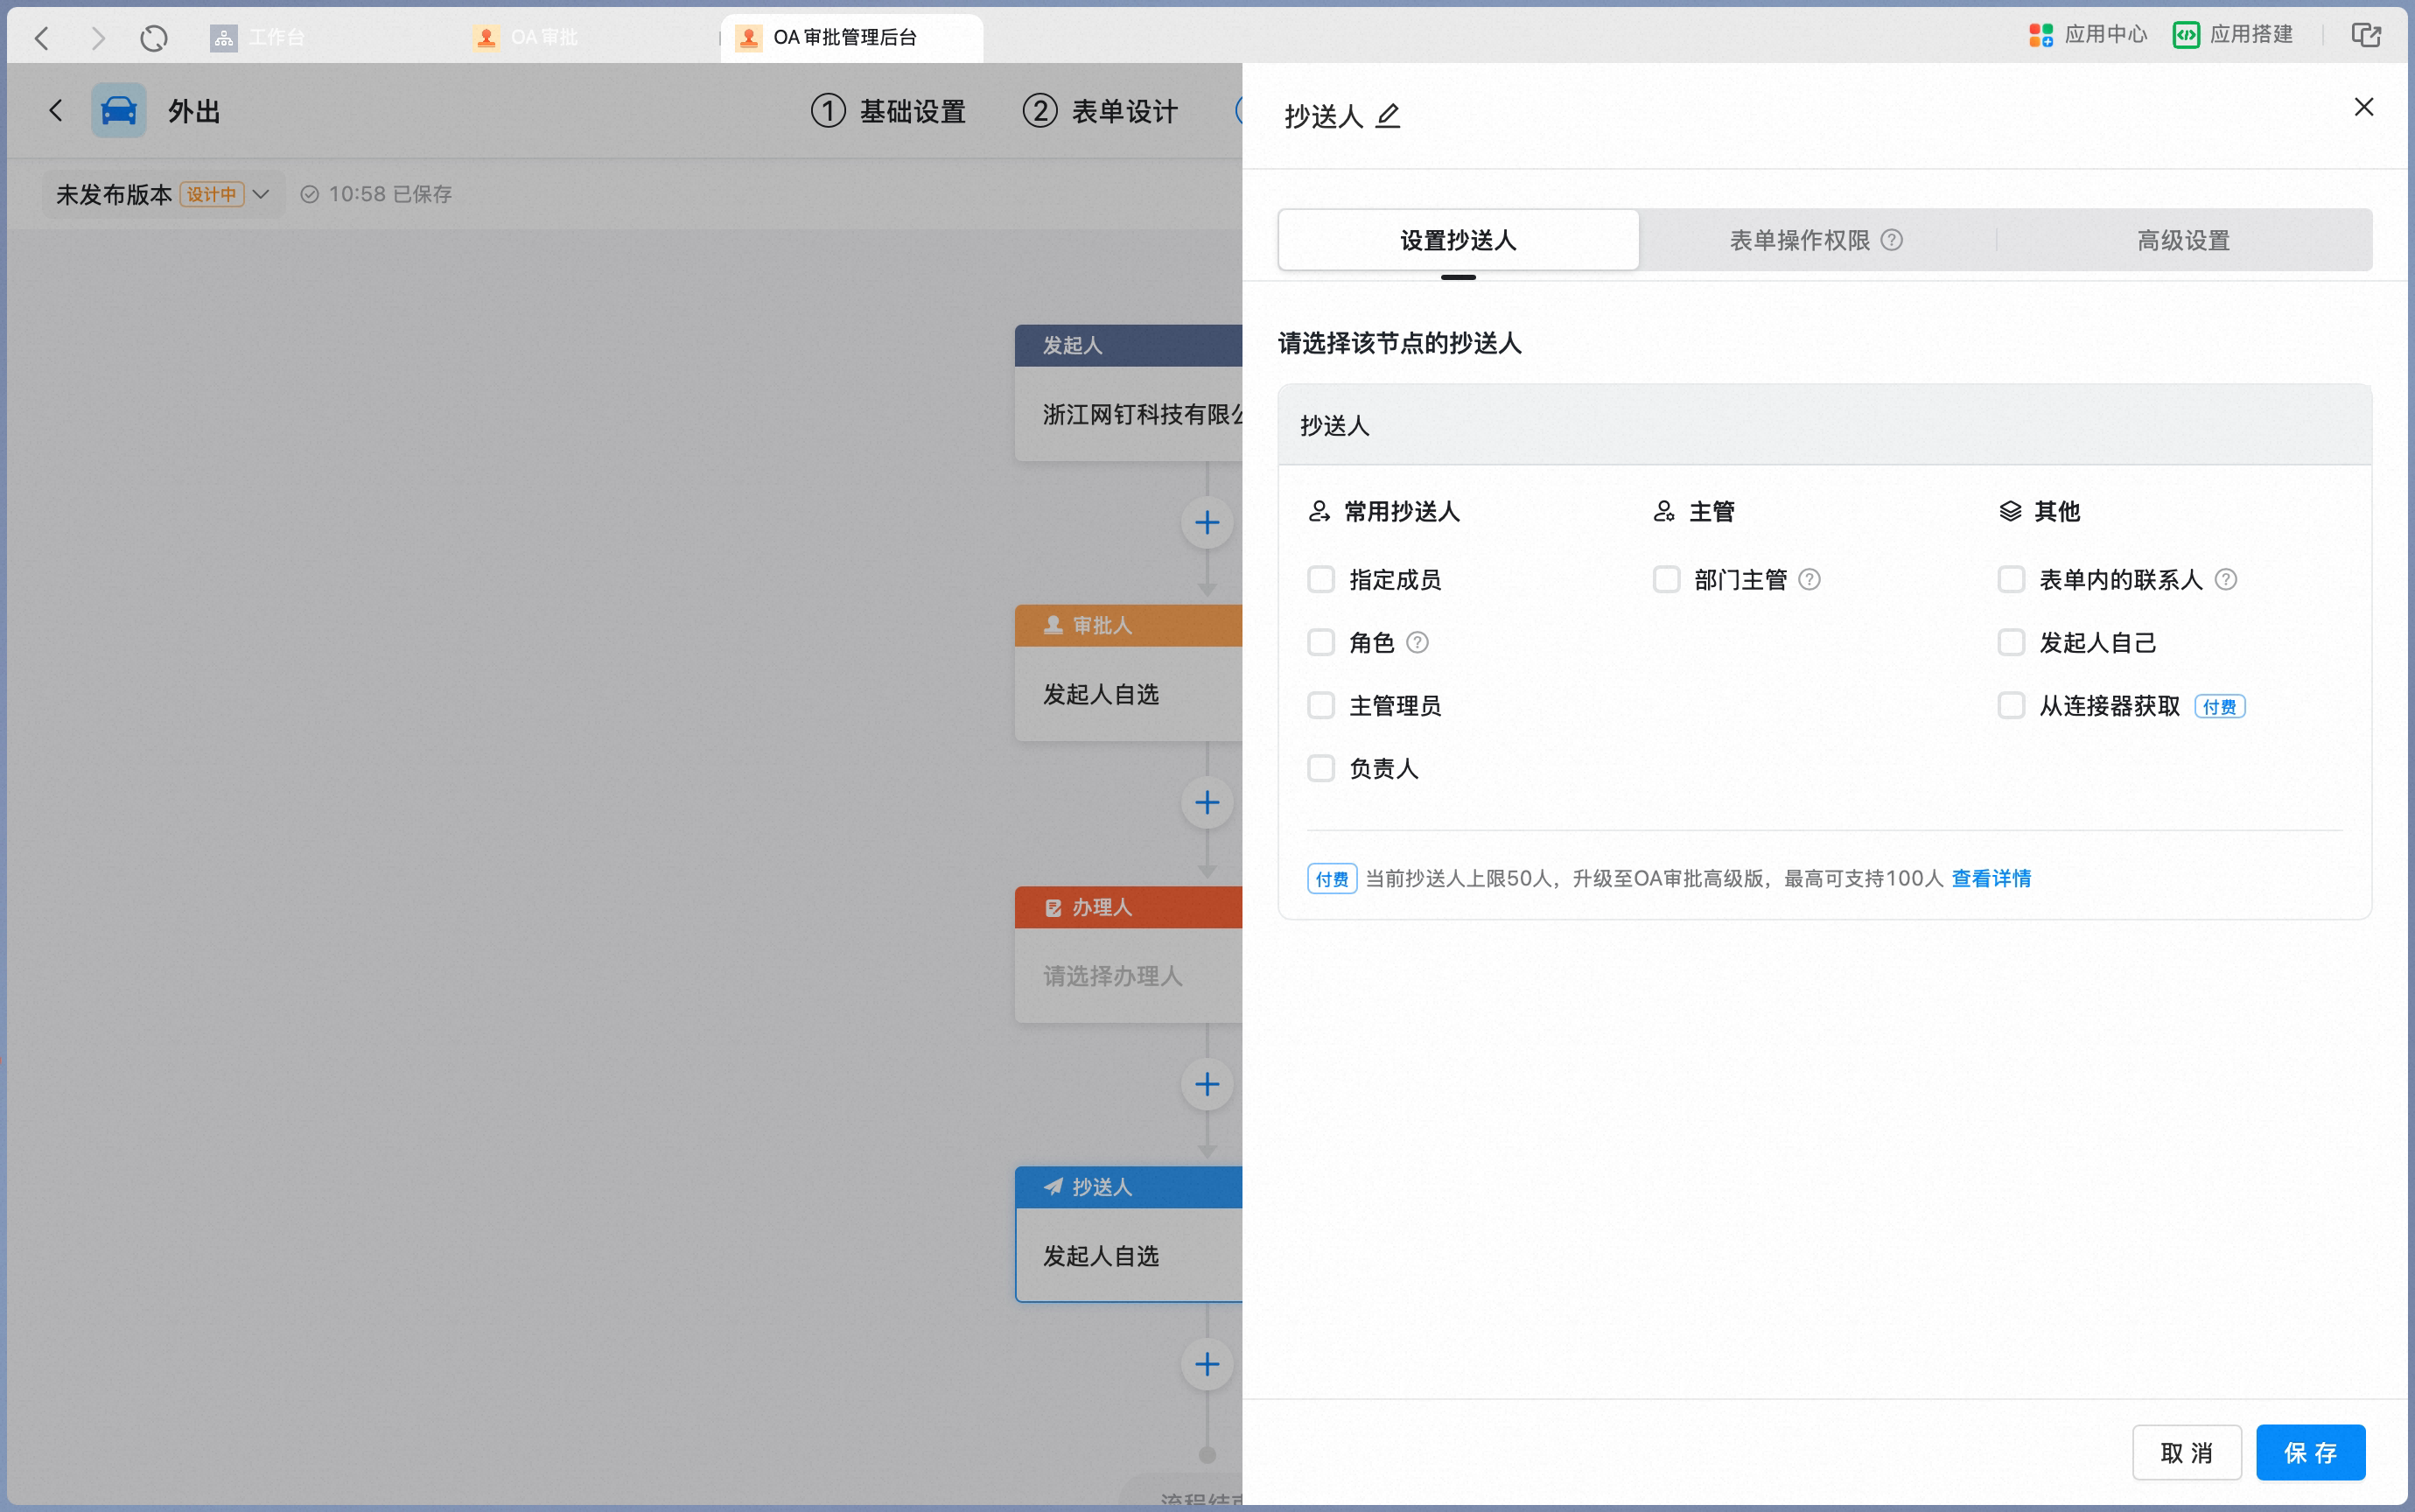
3.2.3 CC recipient
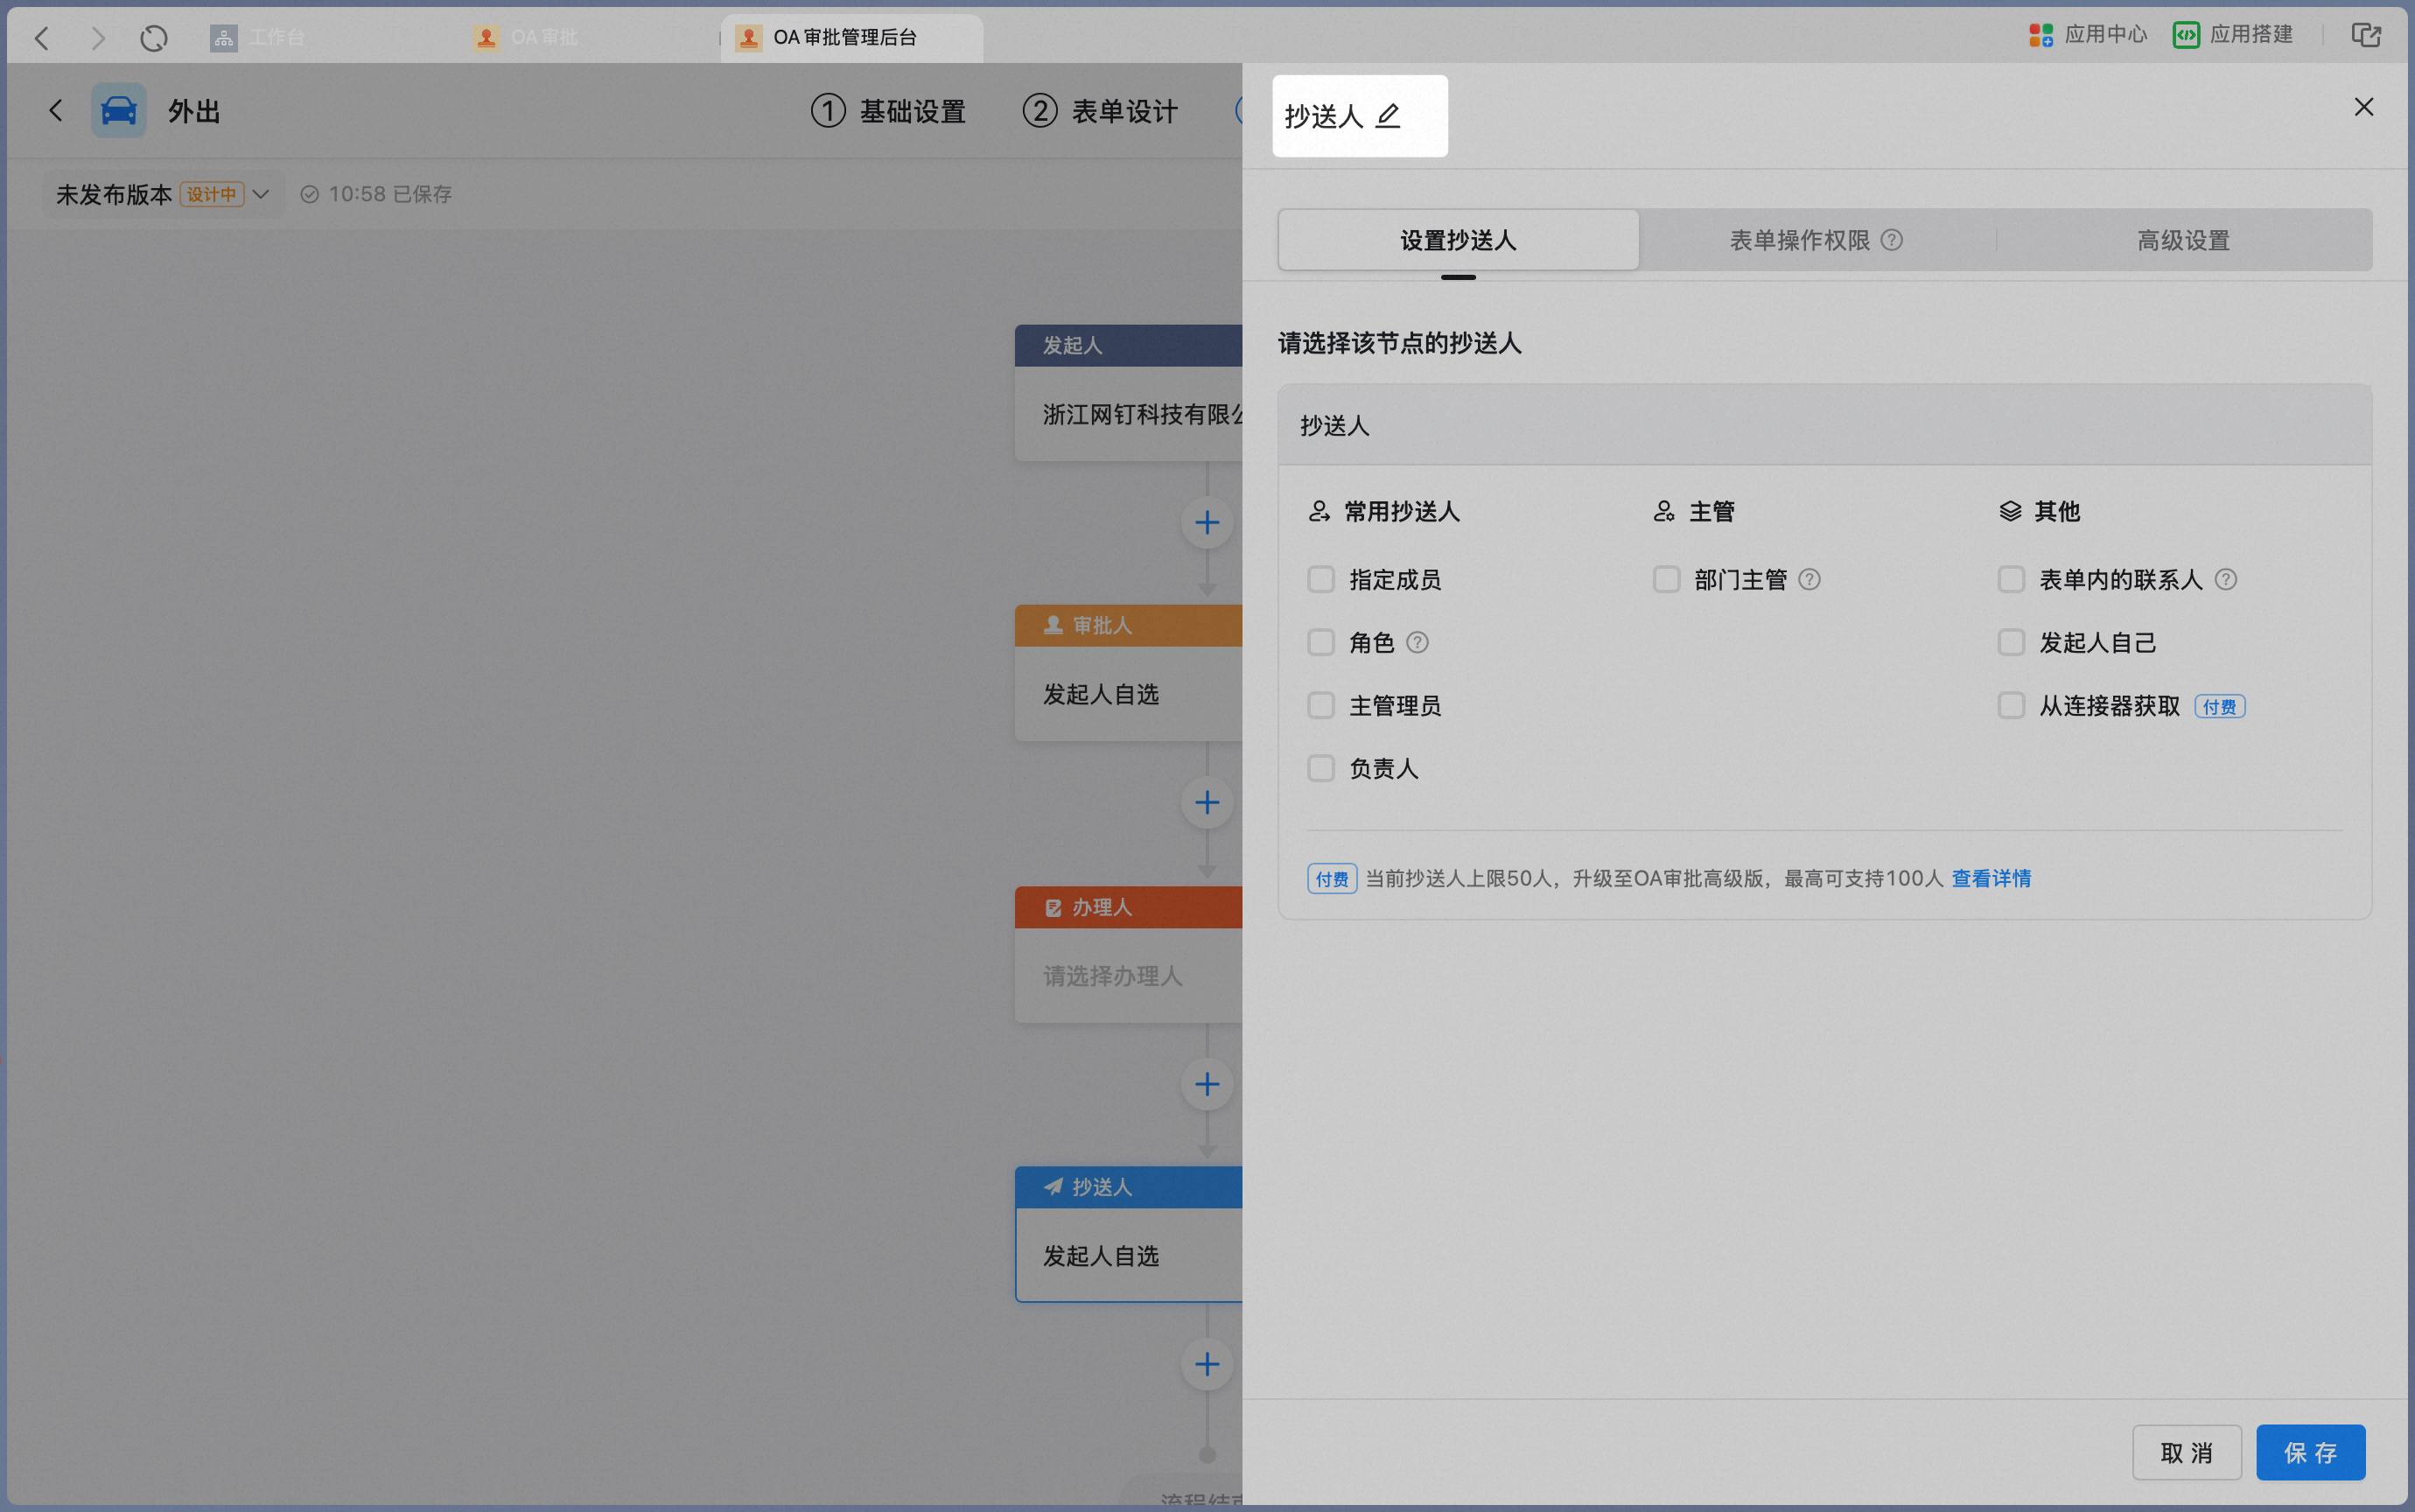
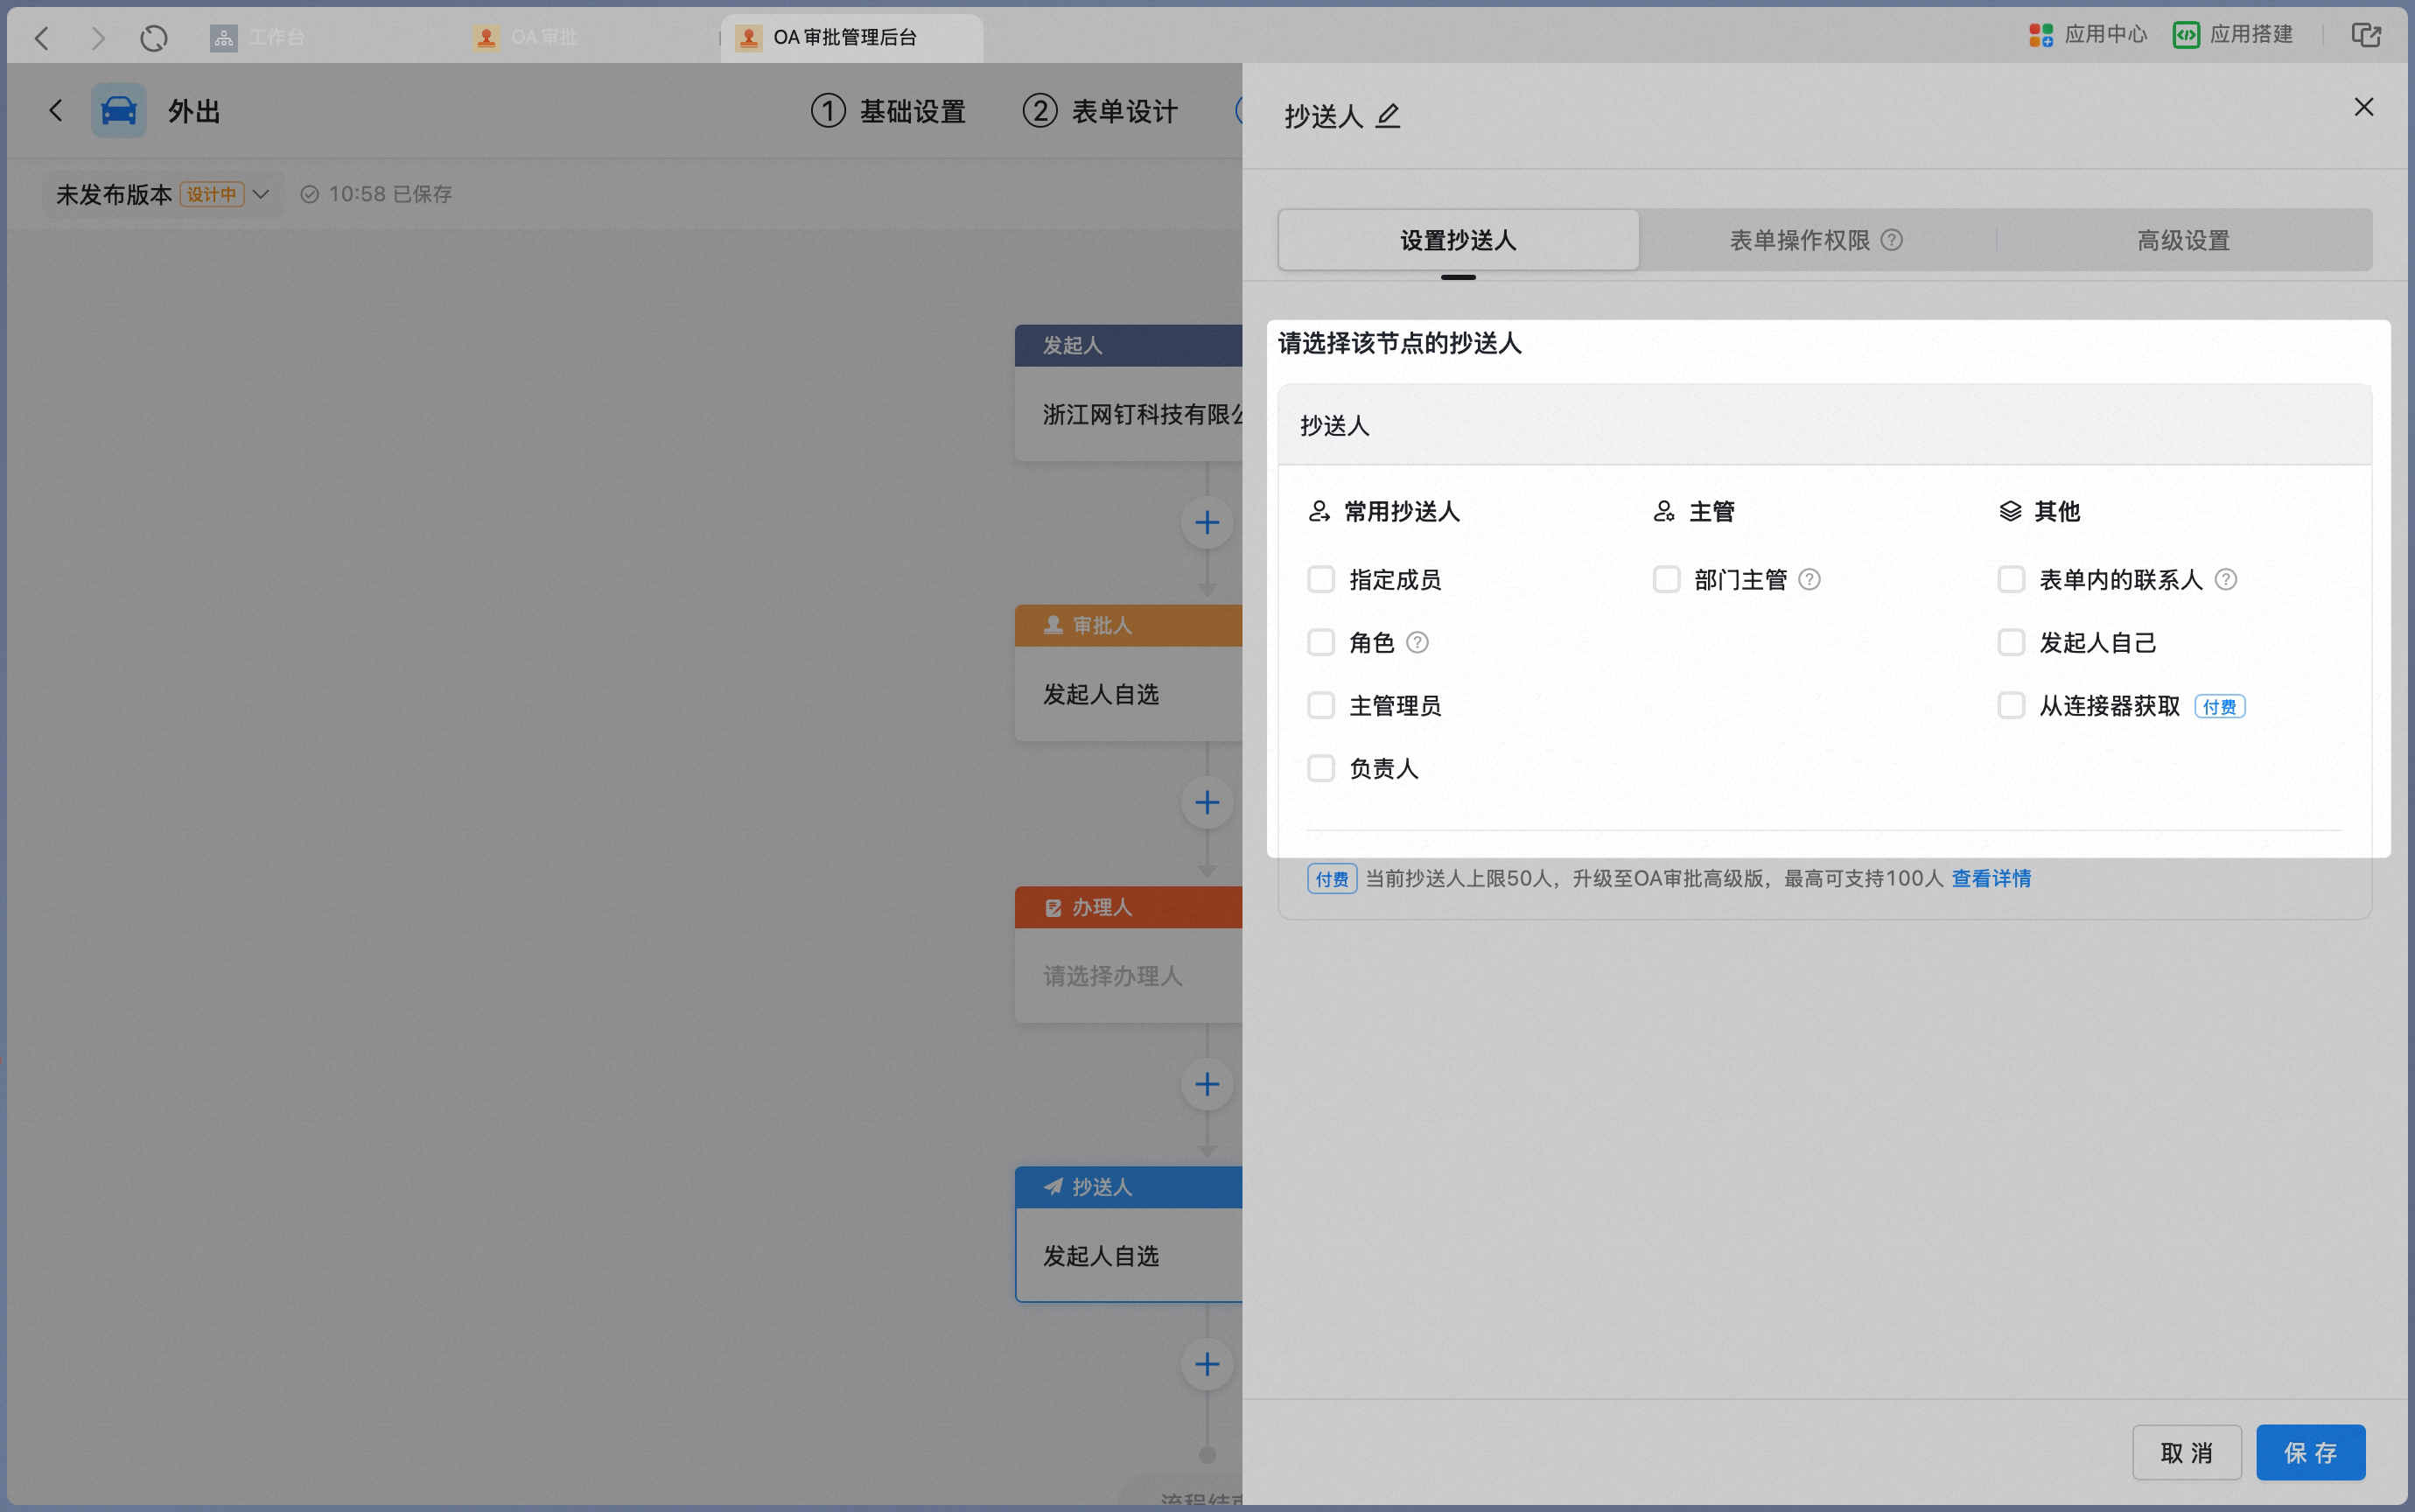
CC recipients are people related to the business action. They need to stay informed but do not make decisions. When the process reaches this node, the recipient cannot approve but receives the approval form and can view and comment on it.
CC recipient node attribute panel:
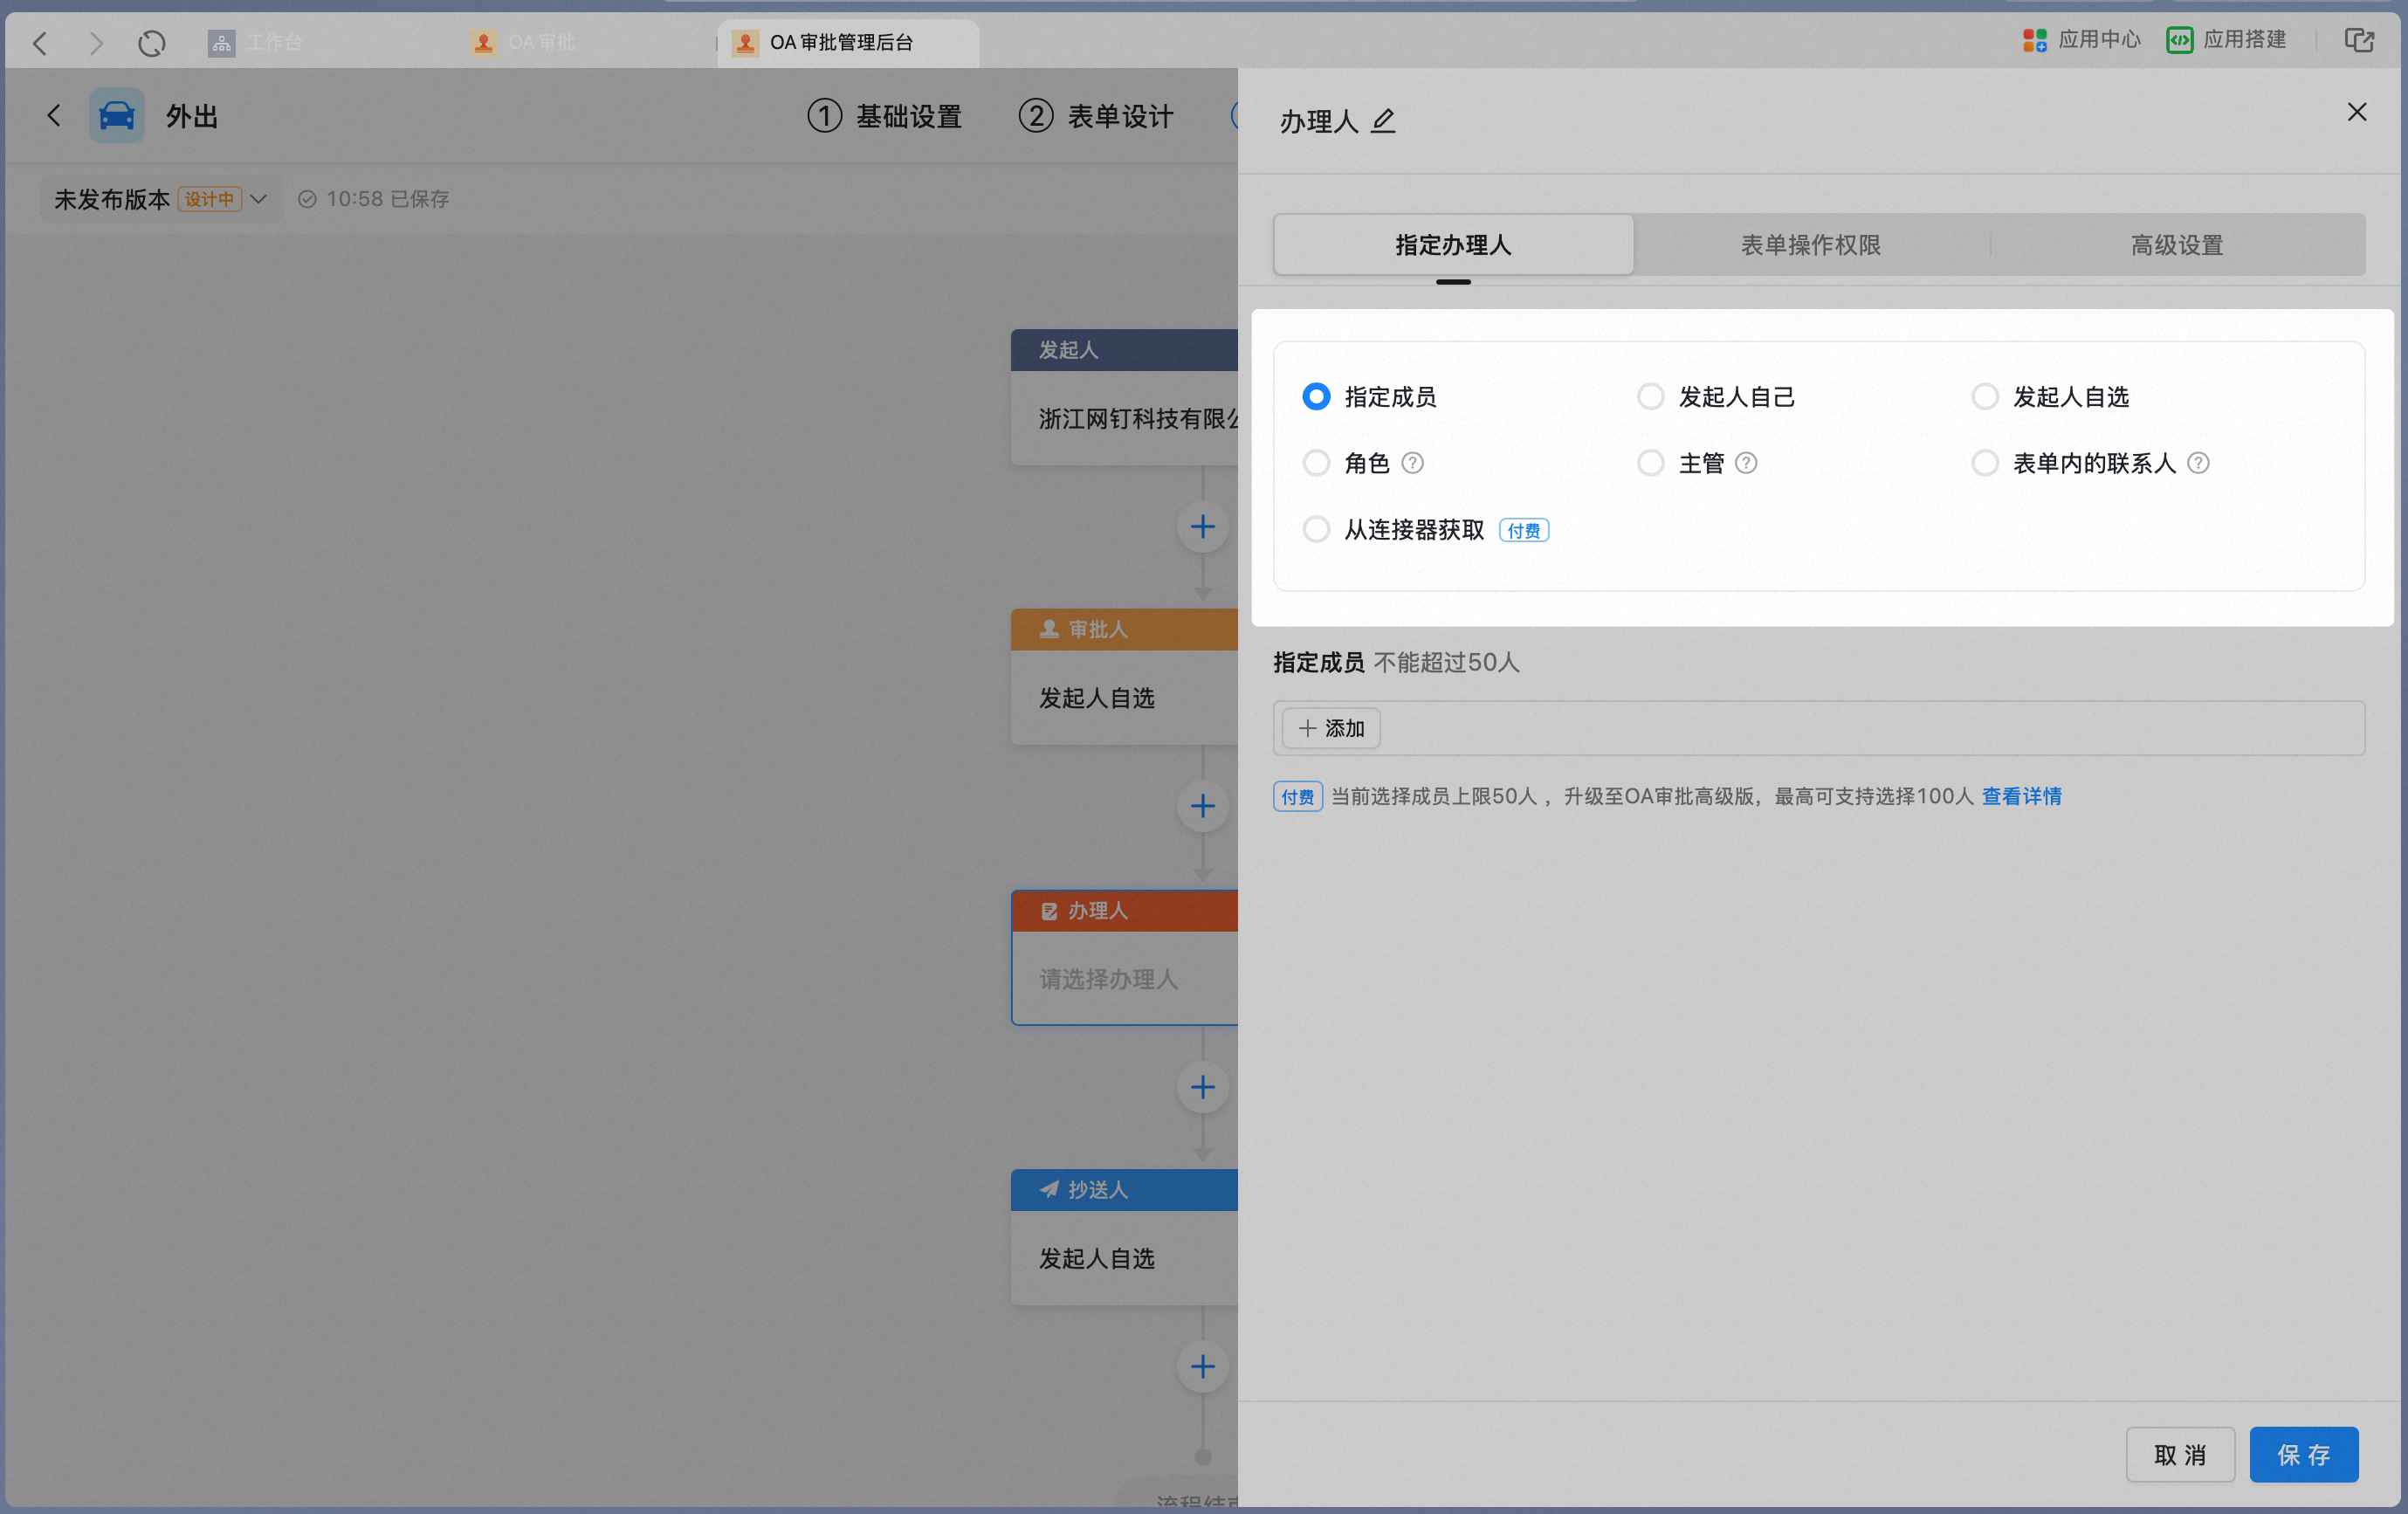
3.2.4 Handler
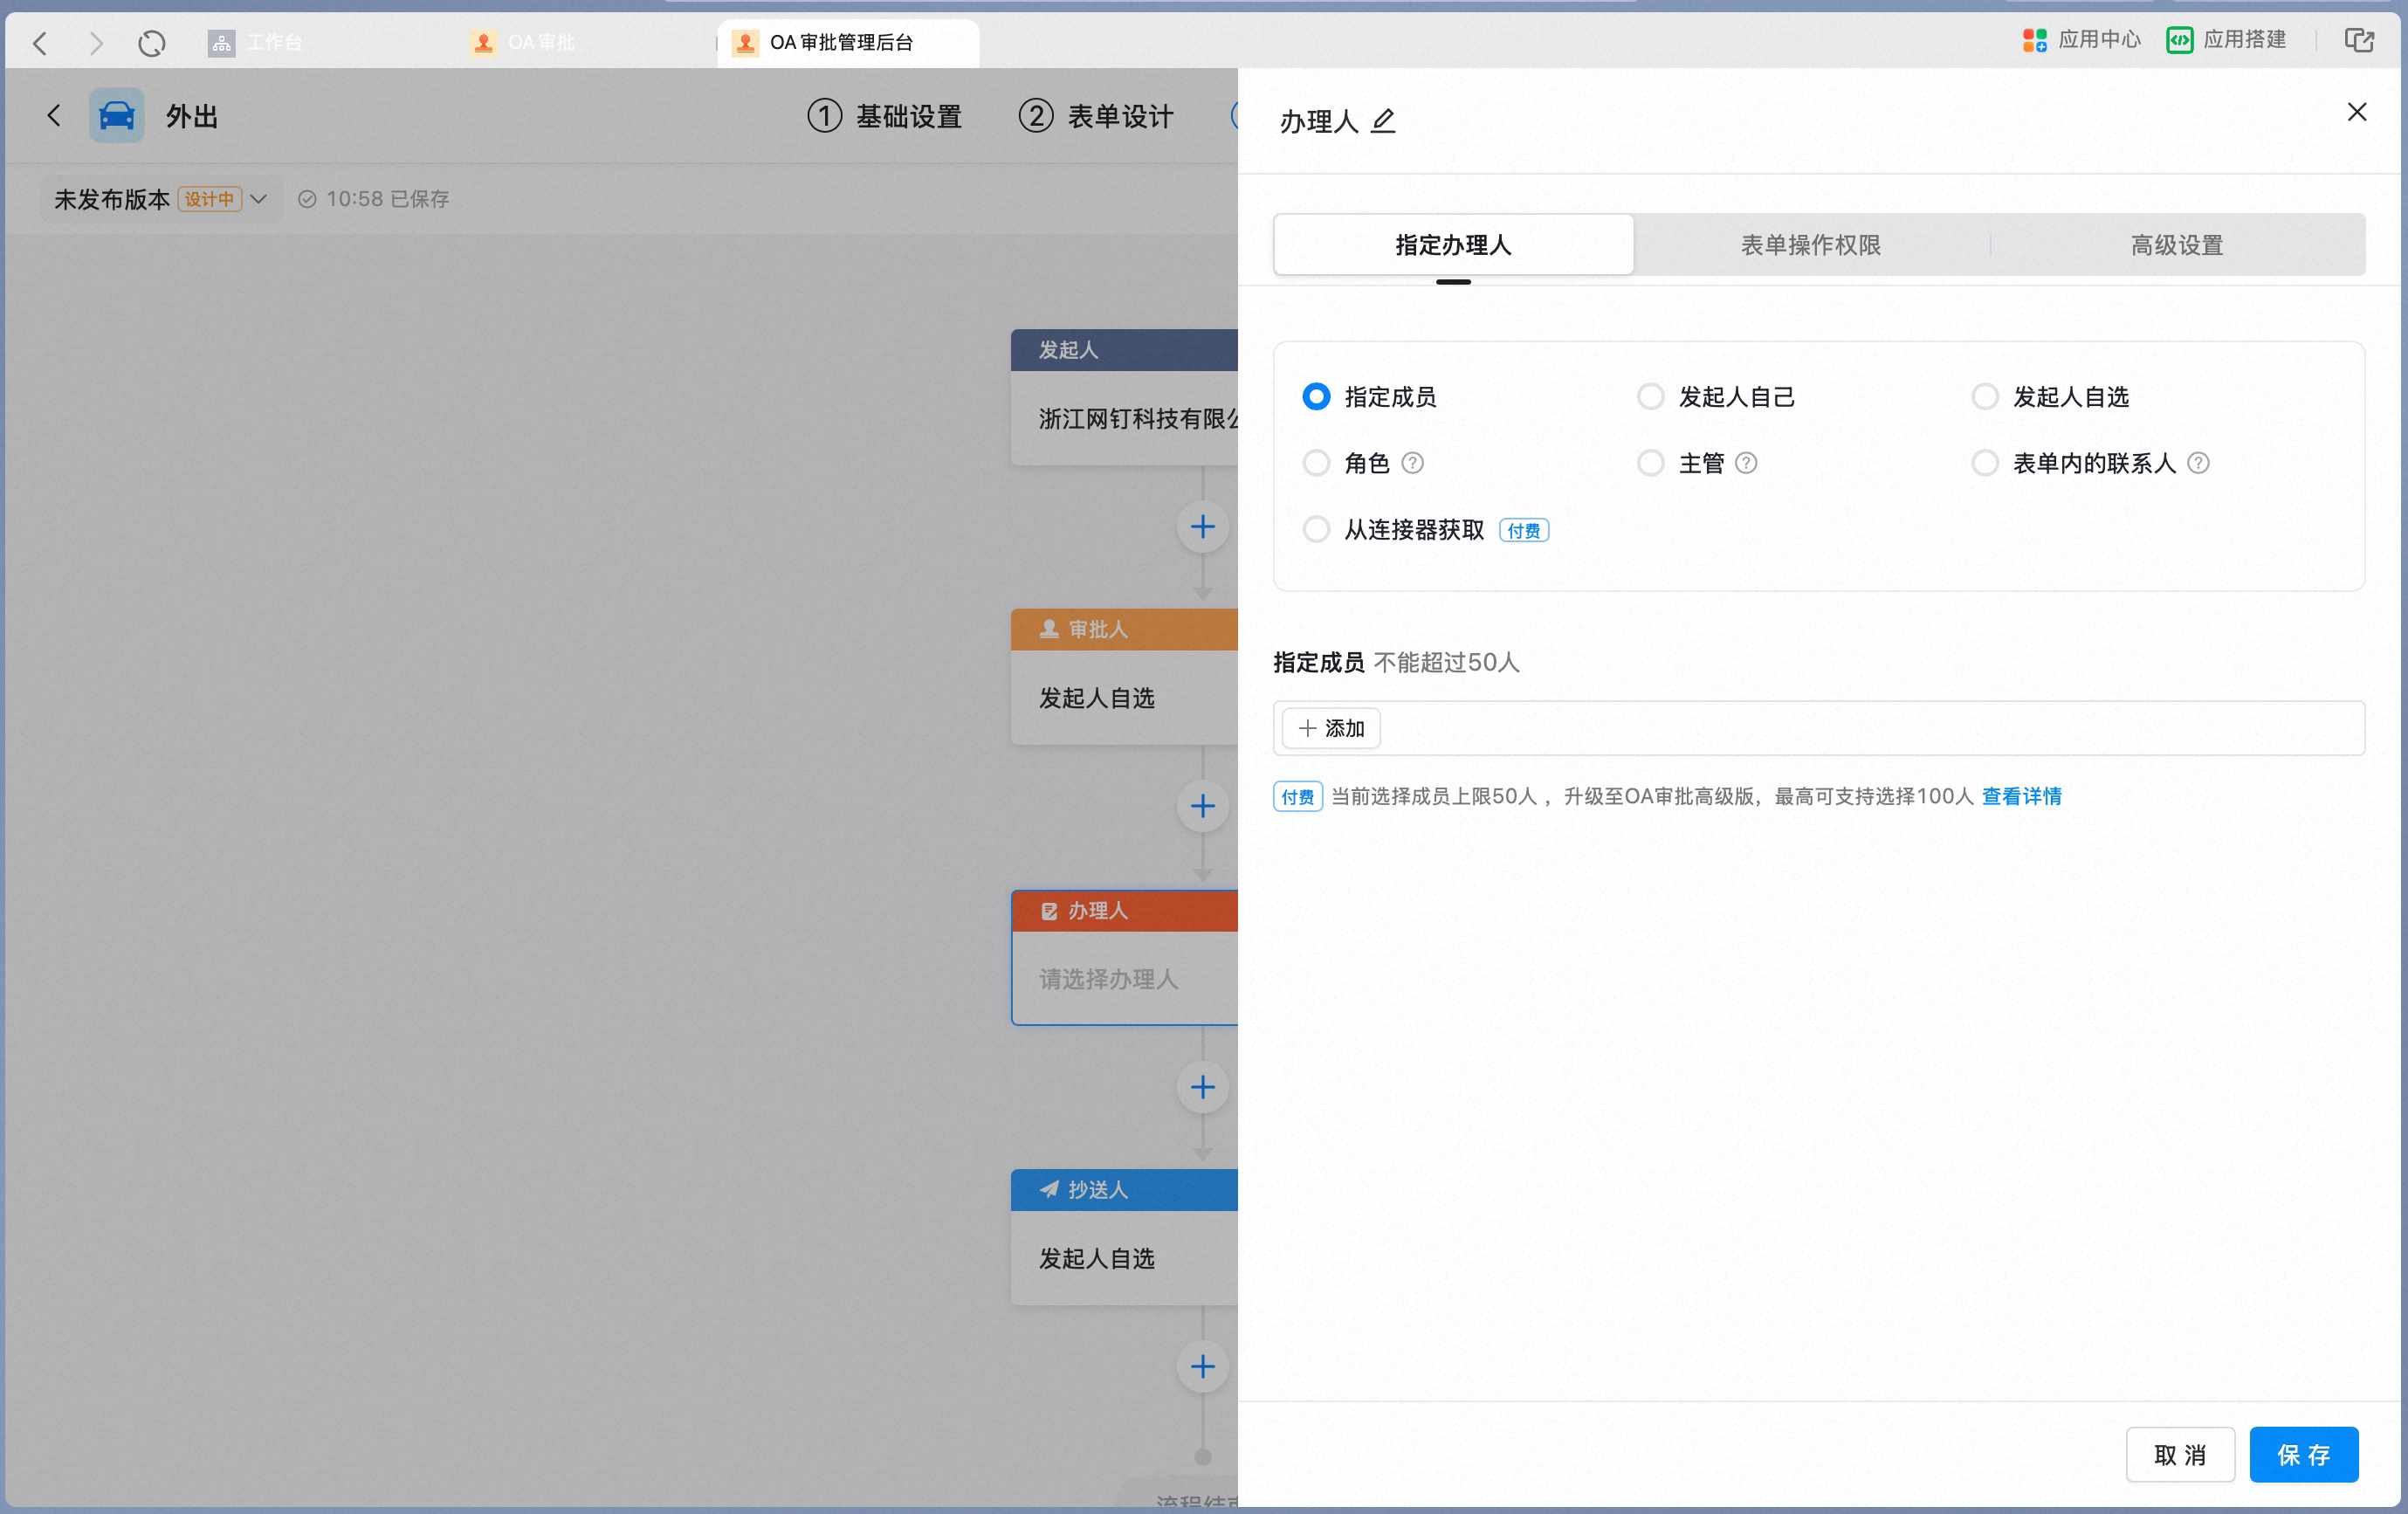
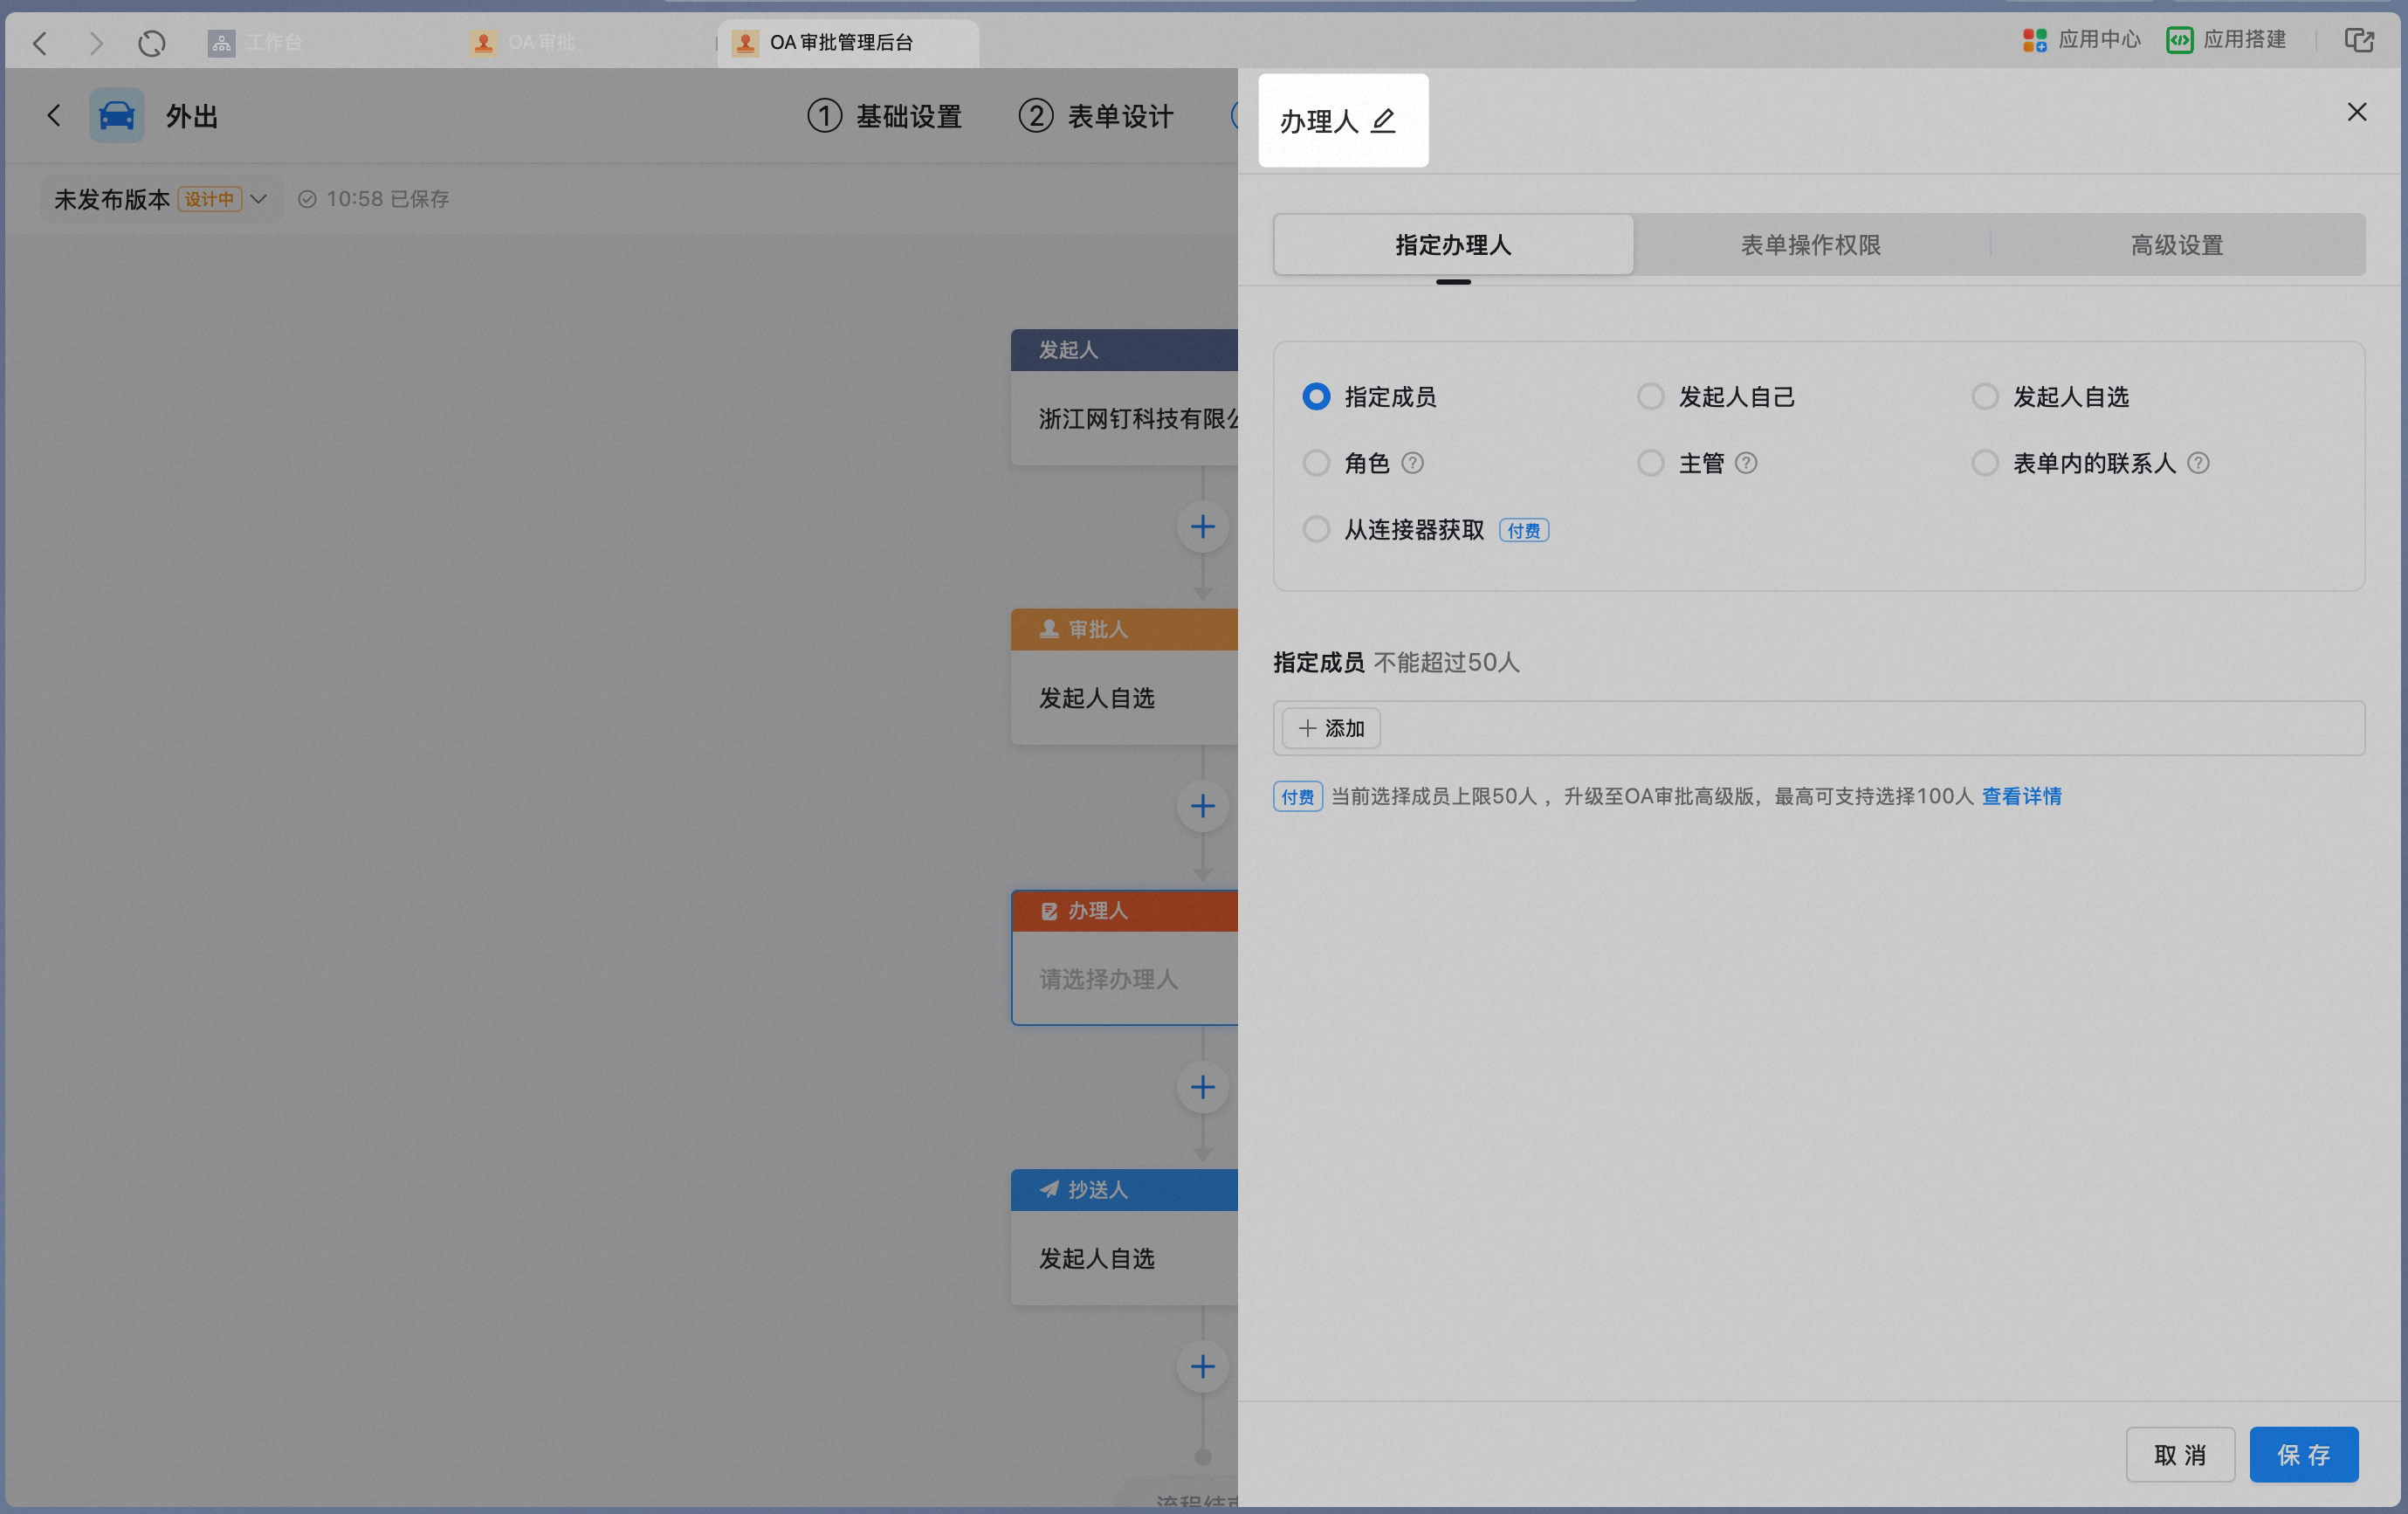
The handler is the person who actually carries out the business action. Handlers do not have review or approval authority, but they can Submit, transfer, return, add an approver, or comment on the approval form.
Handler node attribute panel:
3.3 Set node action permissions
In the node attribute panel, switch to the Form action permissions tab to set the node’s action permissions for each field in the form.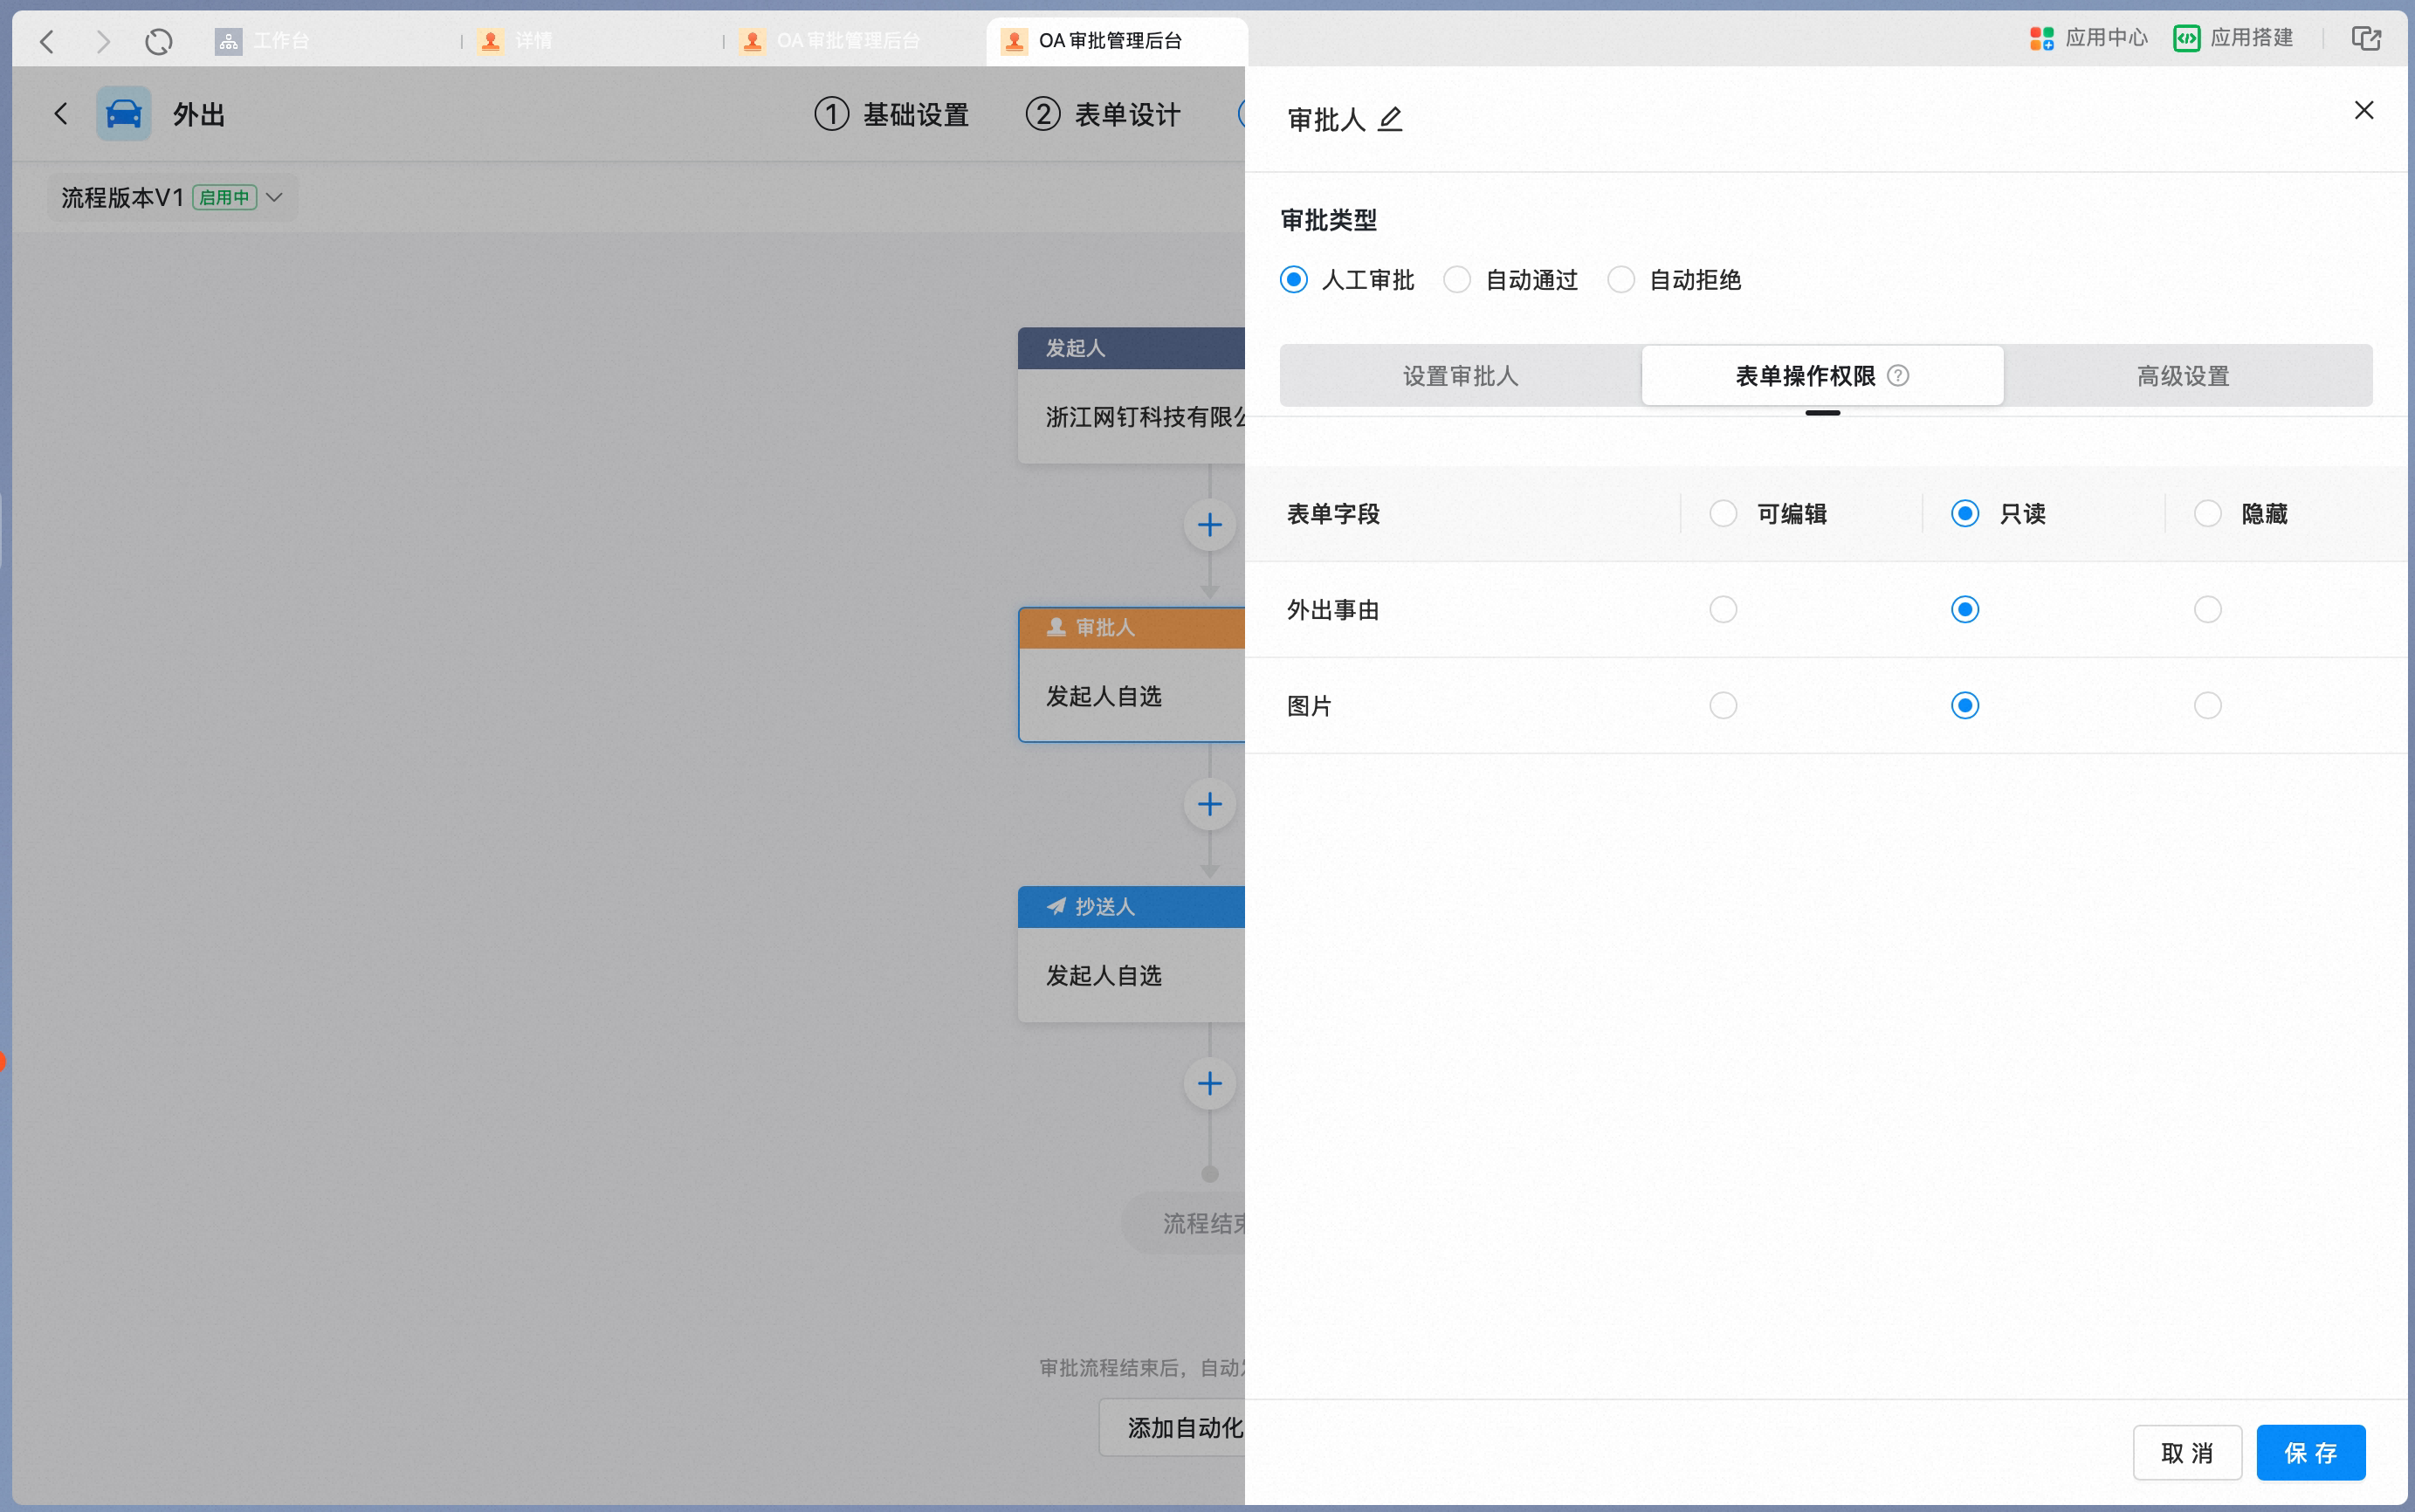
3.4 Add a branch
A conditional branch is not a traditional node, but it is an essential part of Flow configuration.Branches run in priority order at execution time. As soon as one branch rule passes, the others are skipped. At most one conditional branch is executed.
3.4.1 Add a conditional branch
Click +, and then click Conditional branch.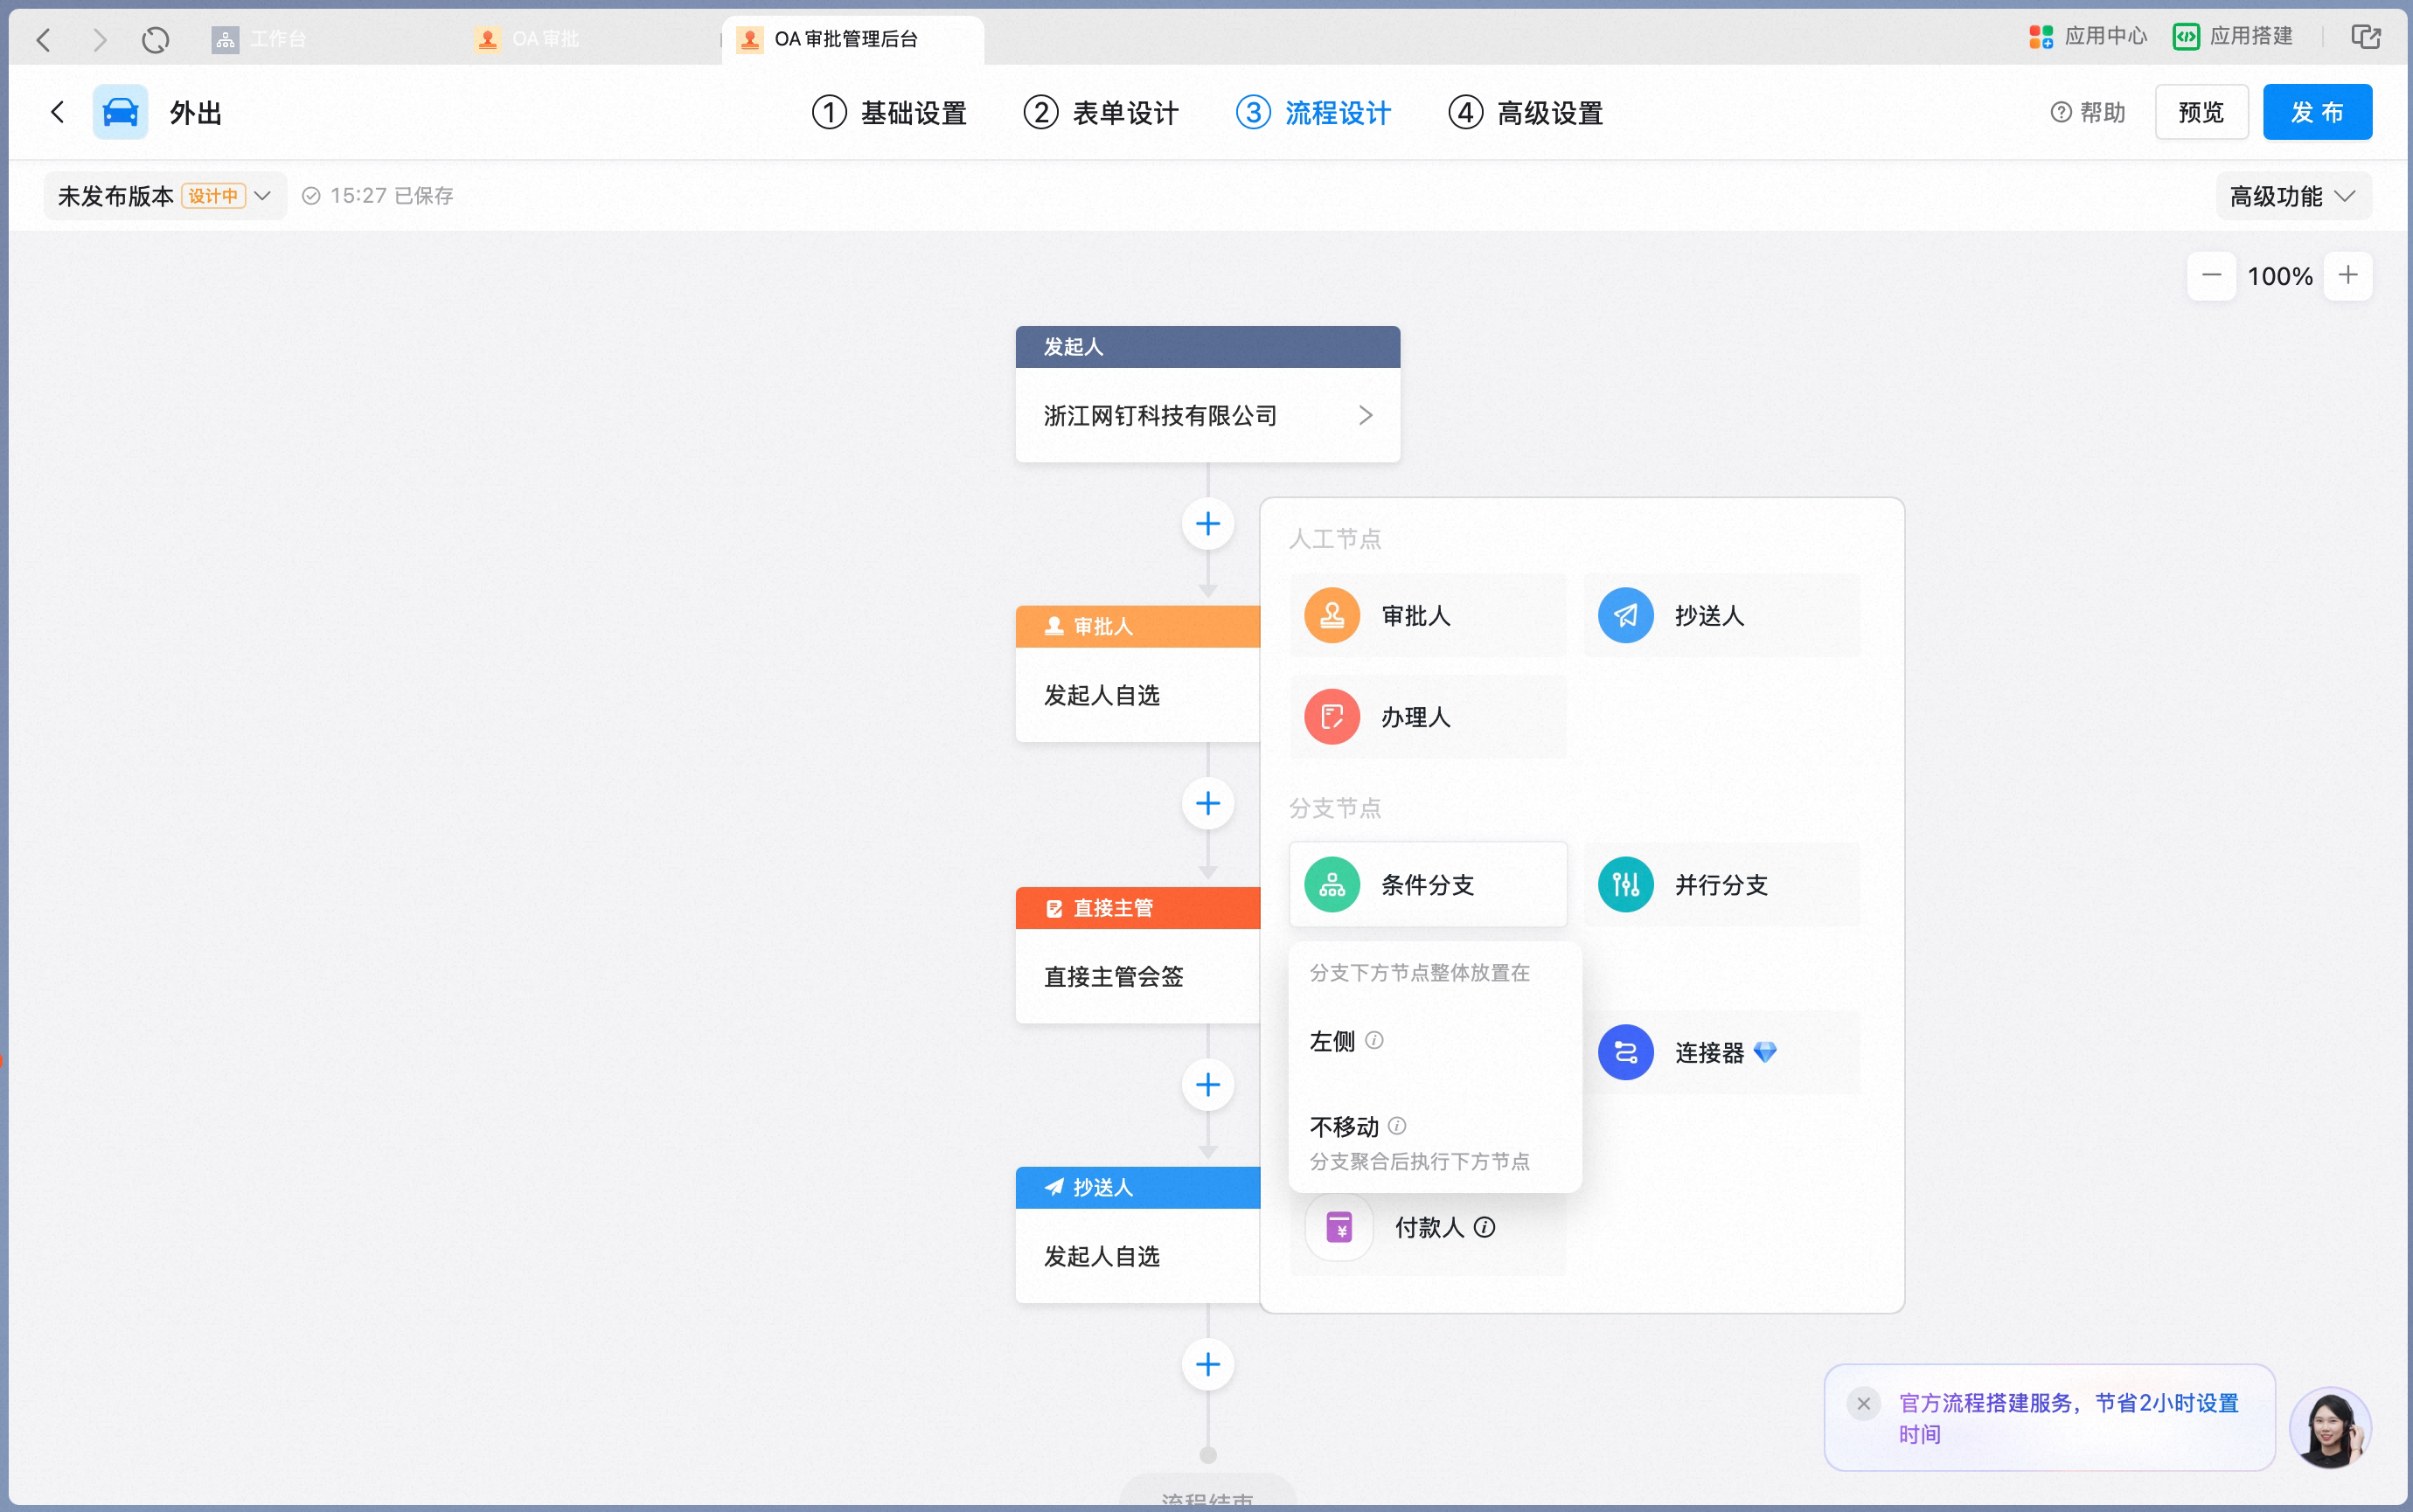
3.4.2 Duplicate a conditional branch
Click Copy to quickly duplicate an existing conditional branch.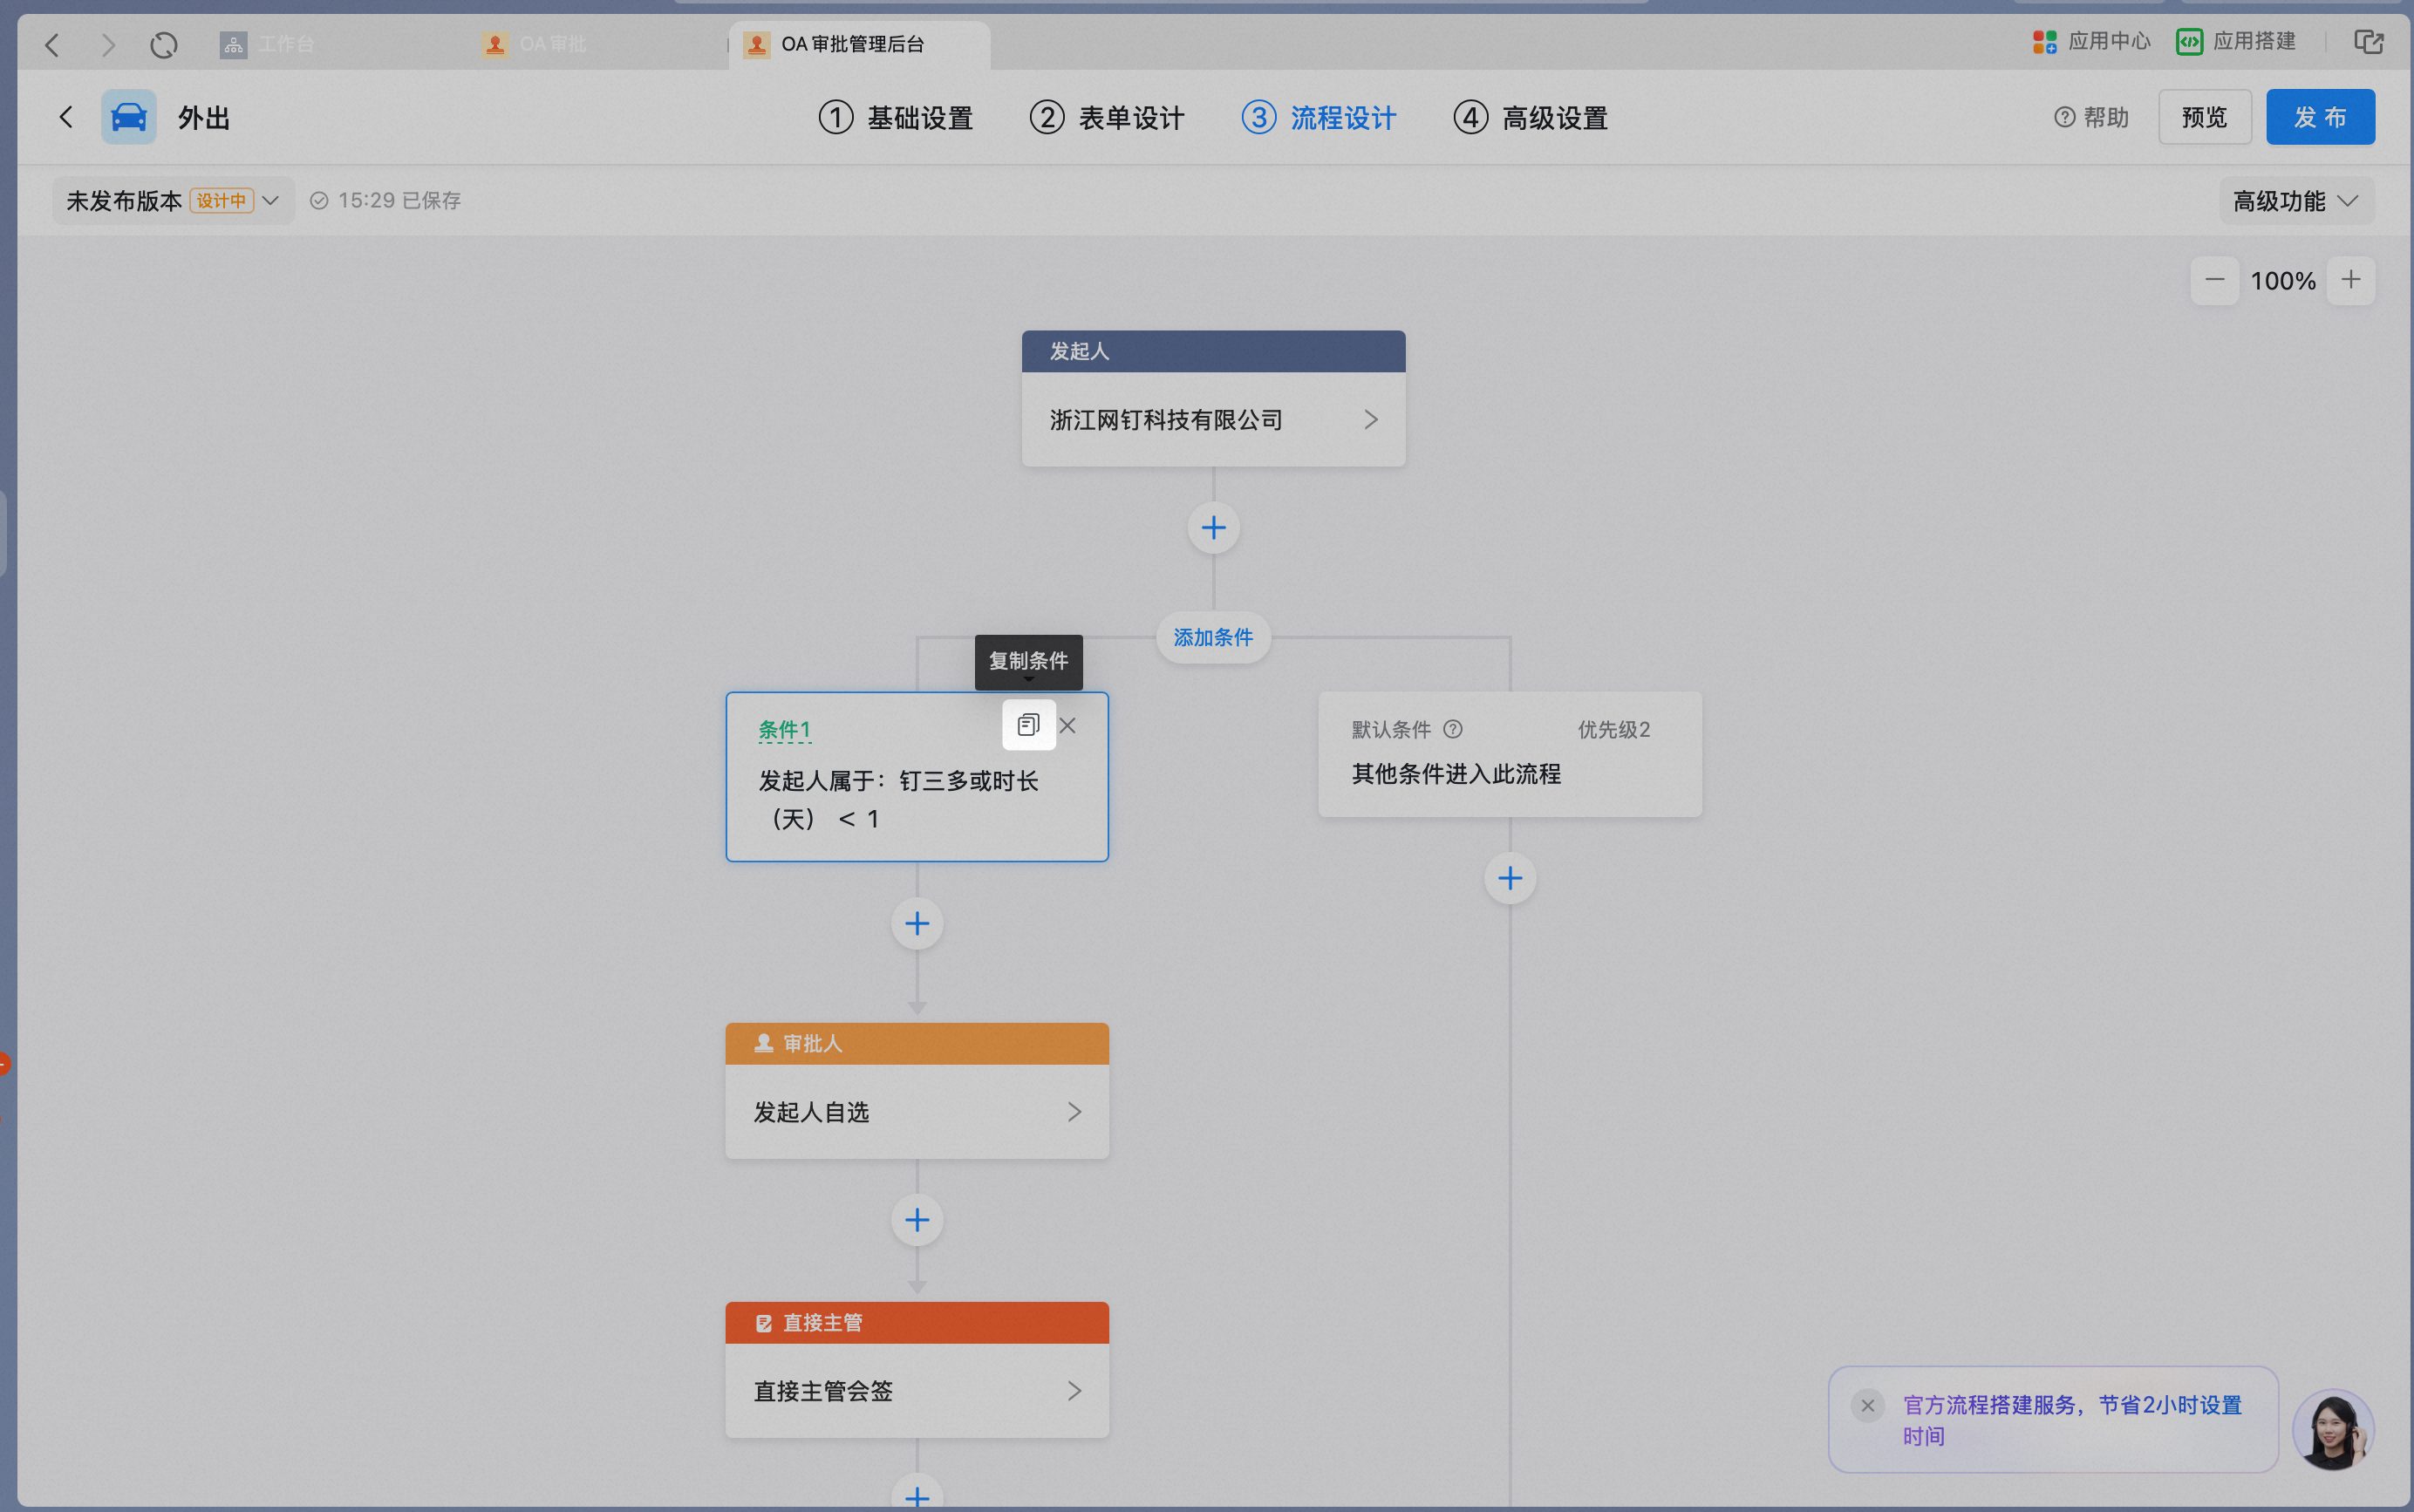
3.4.3 Set branch conditions
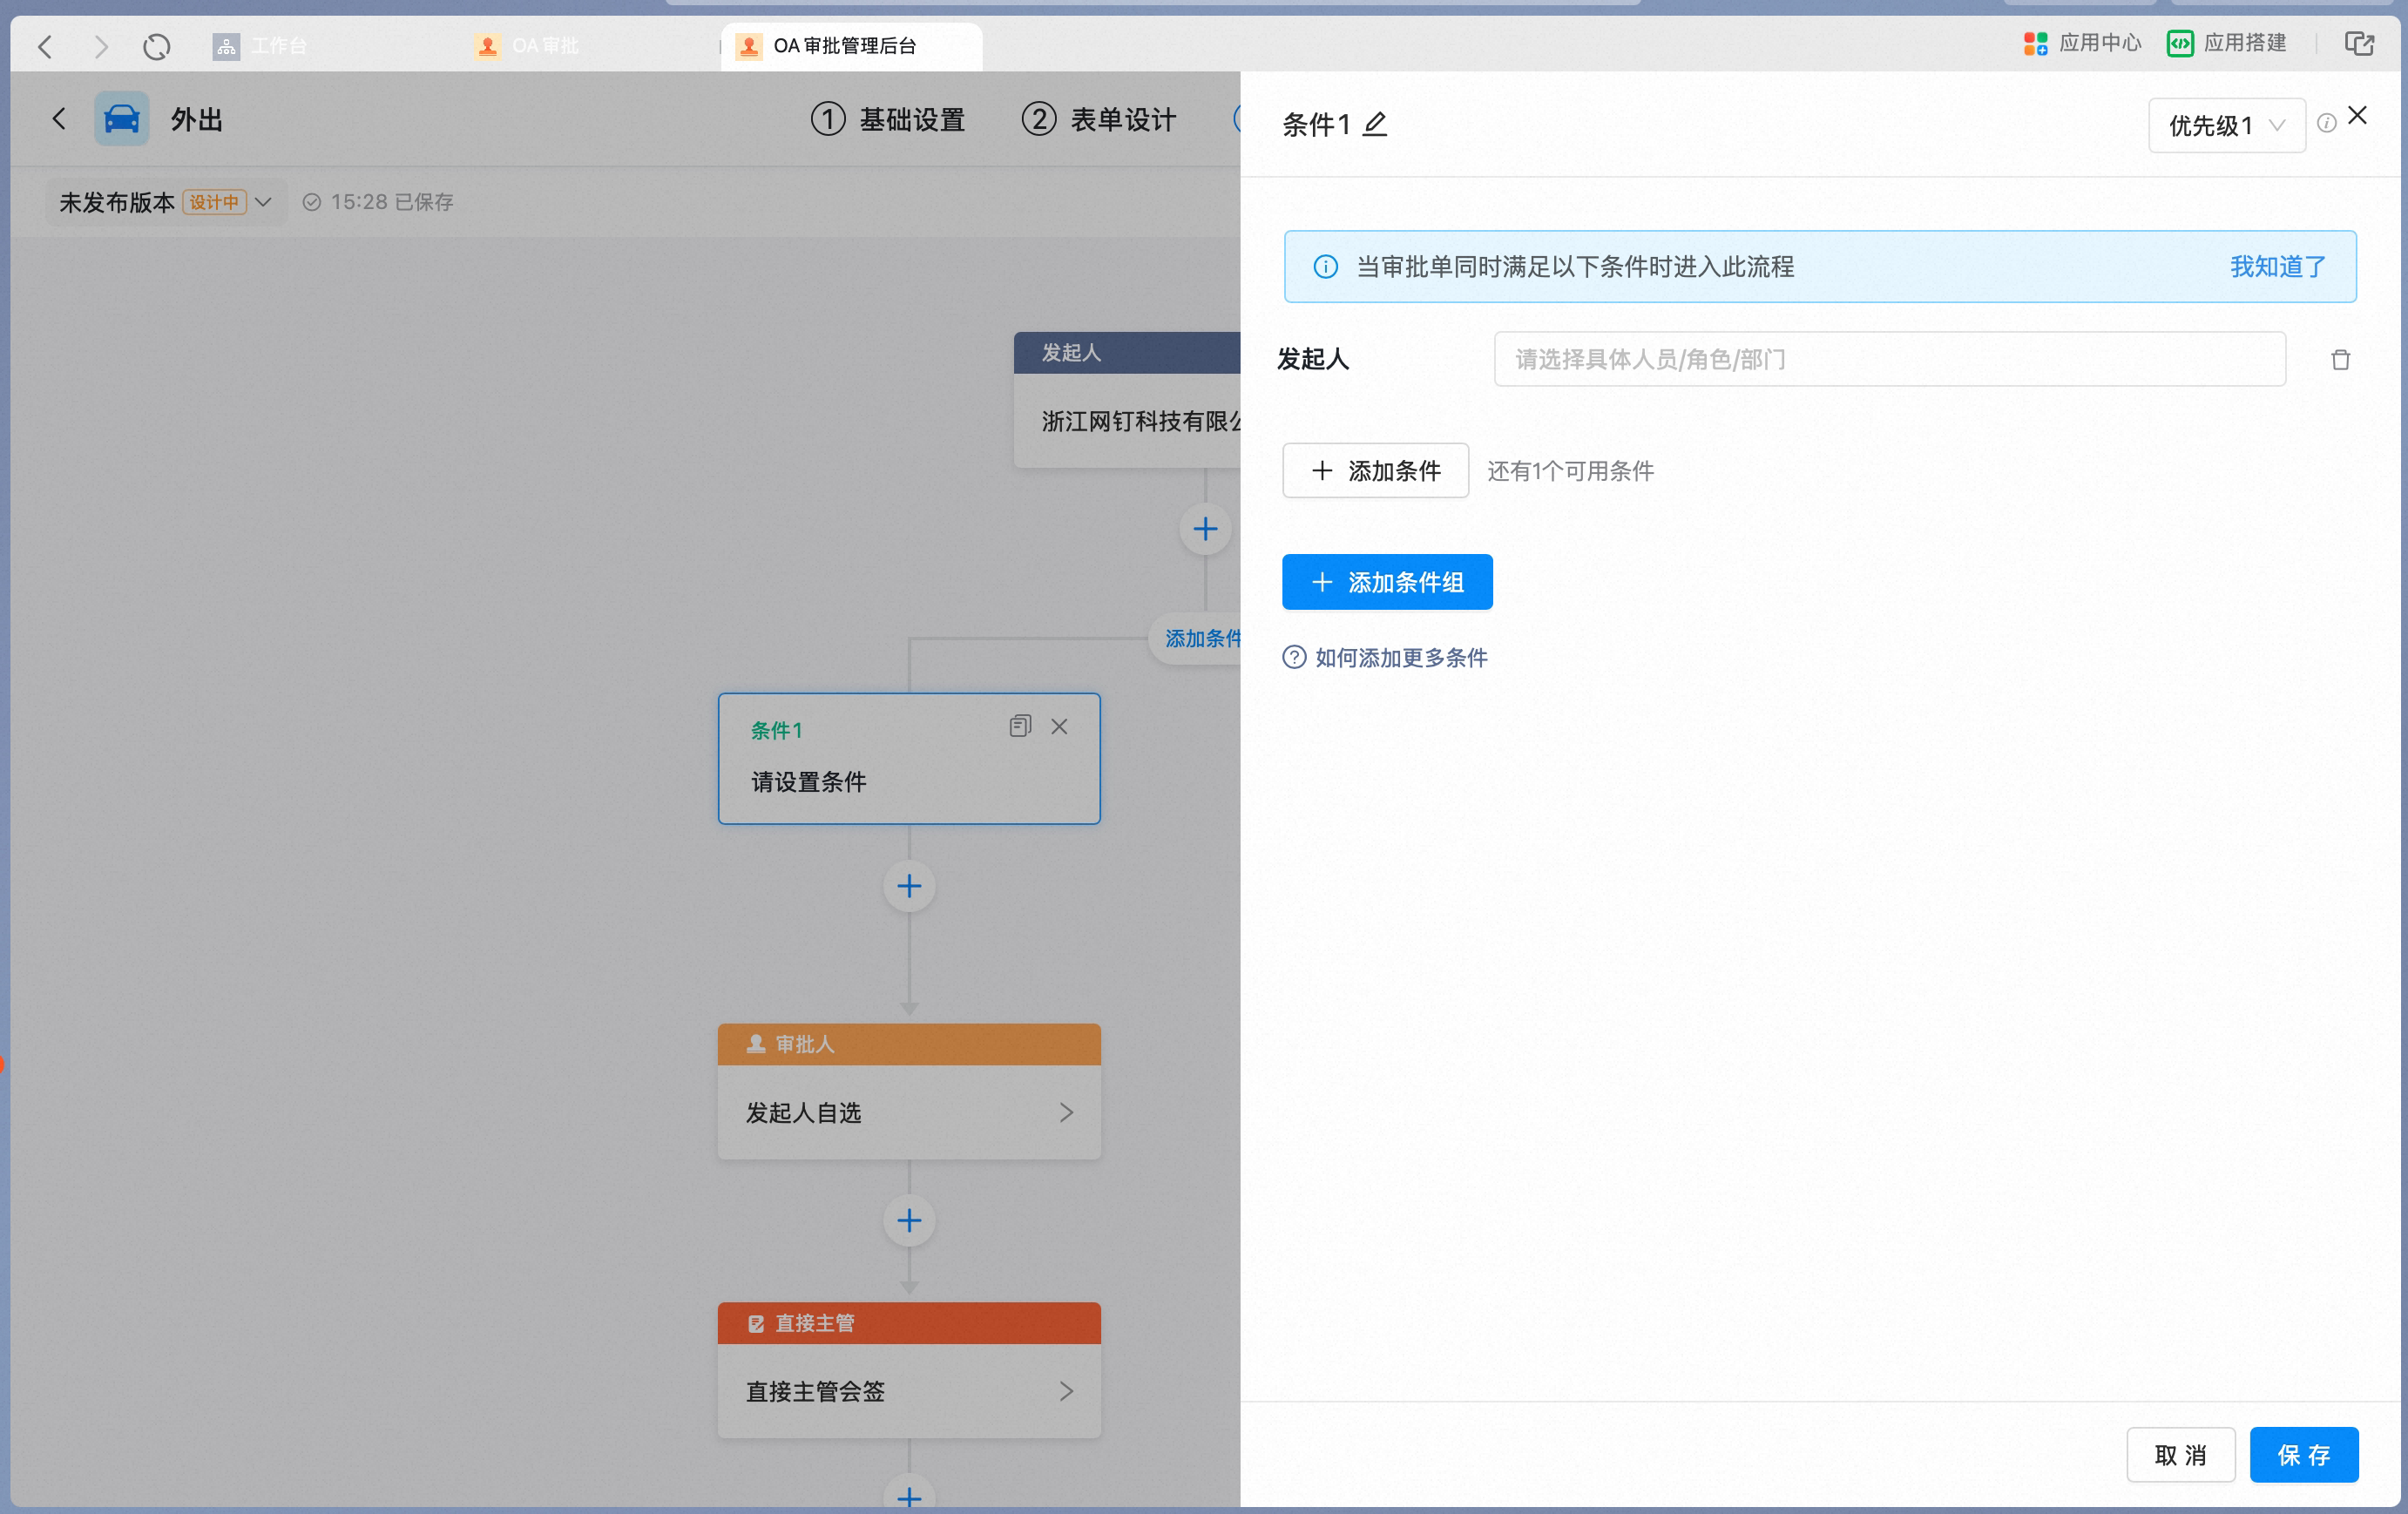
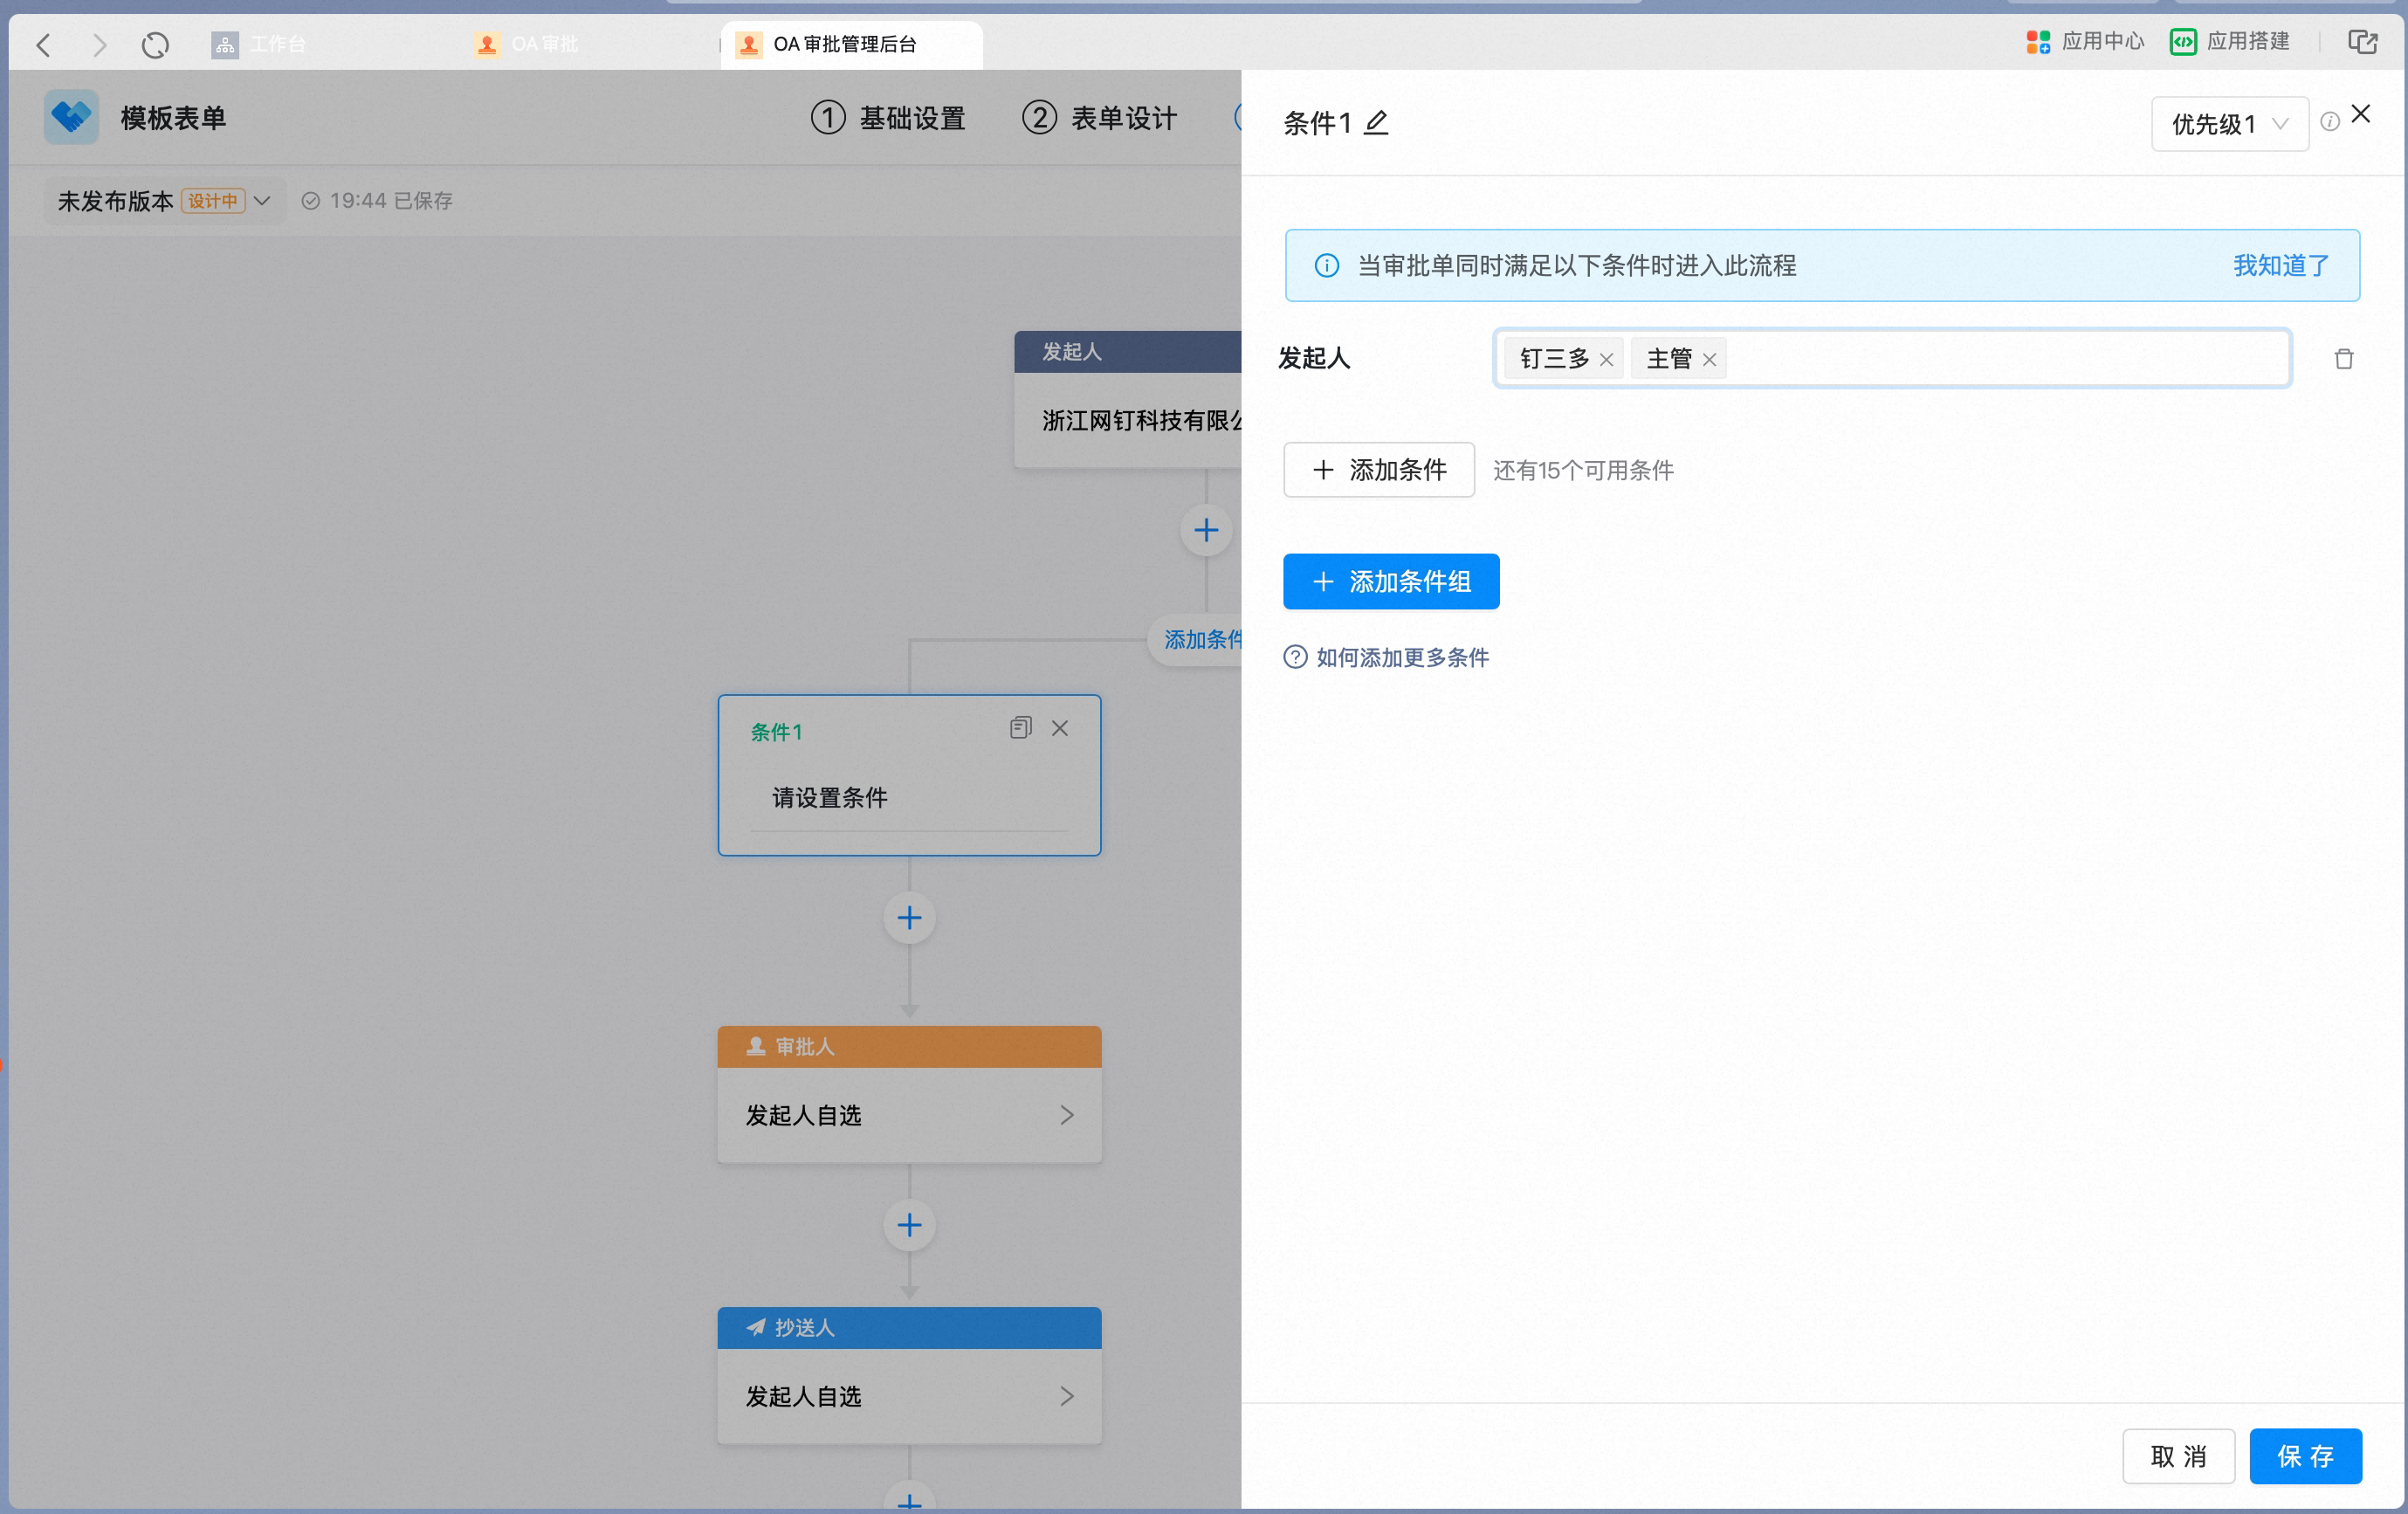
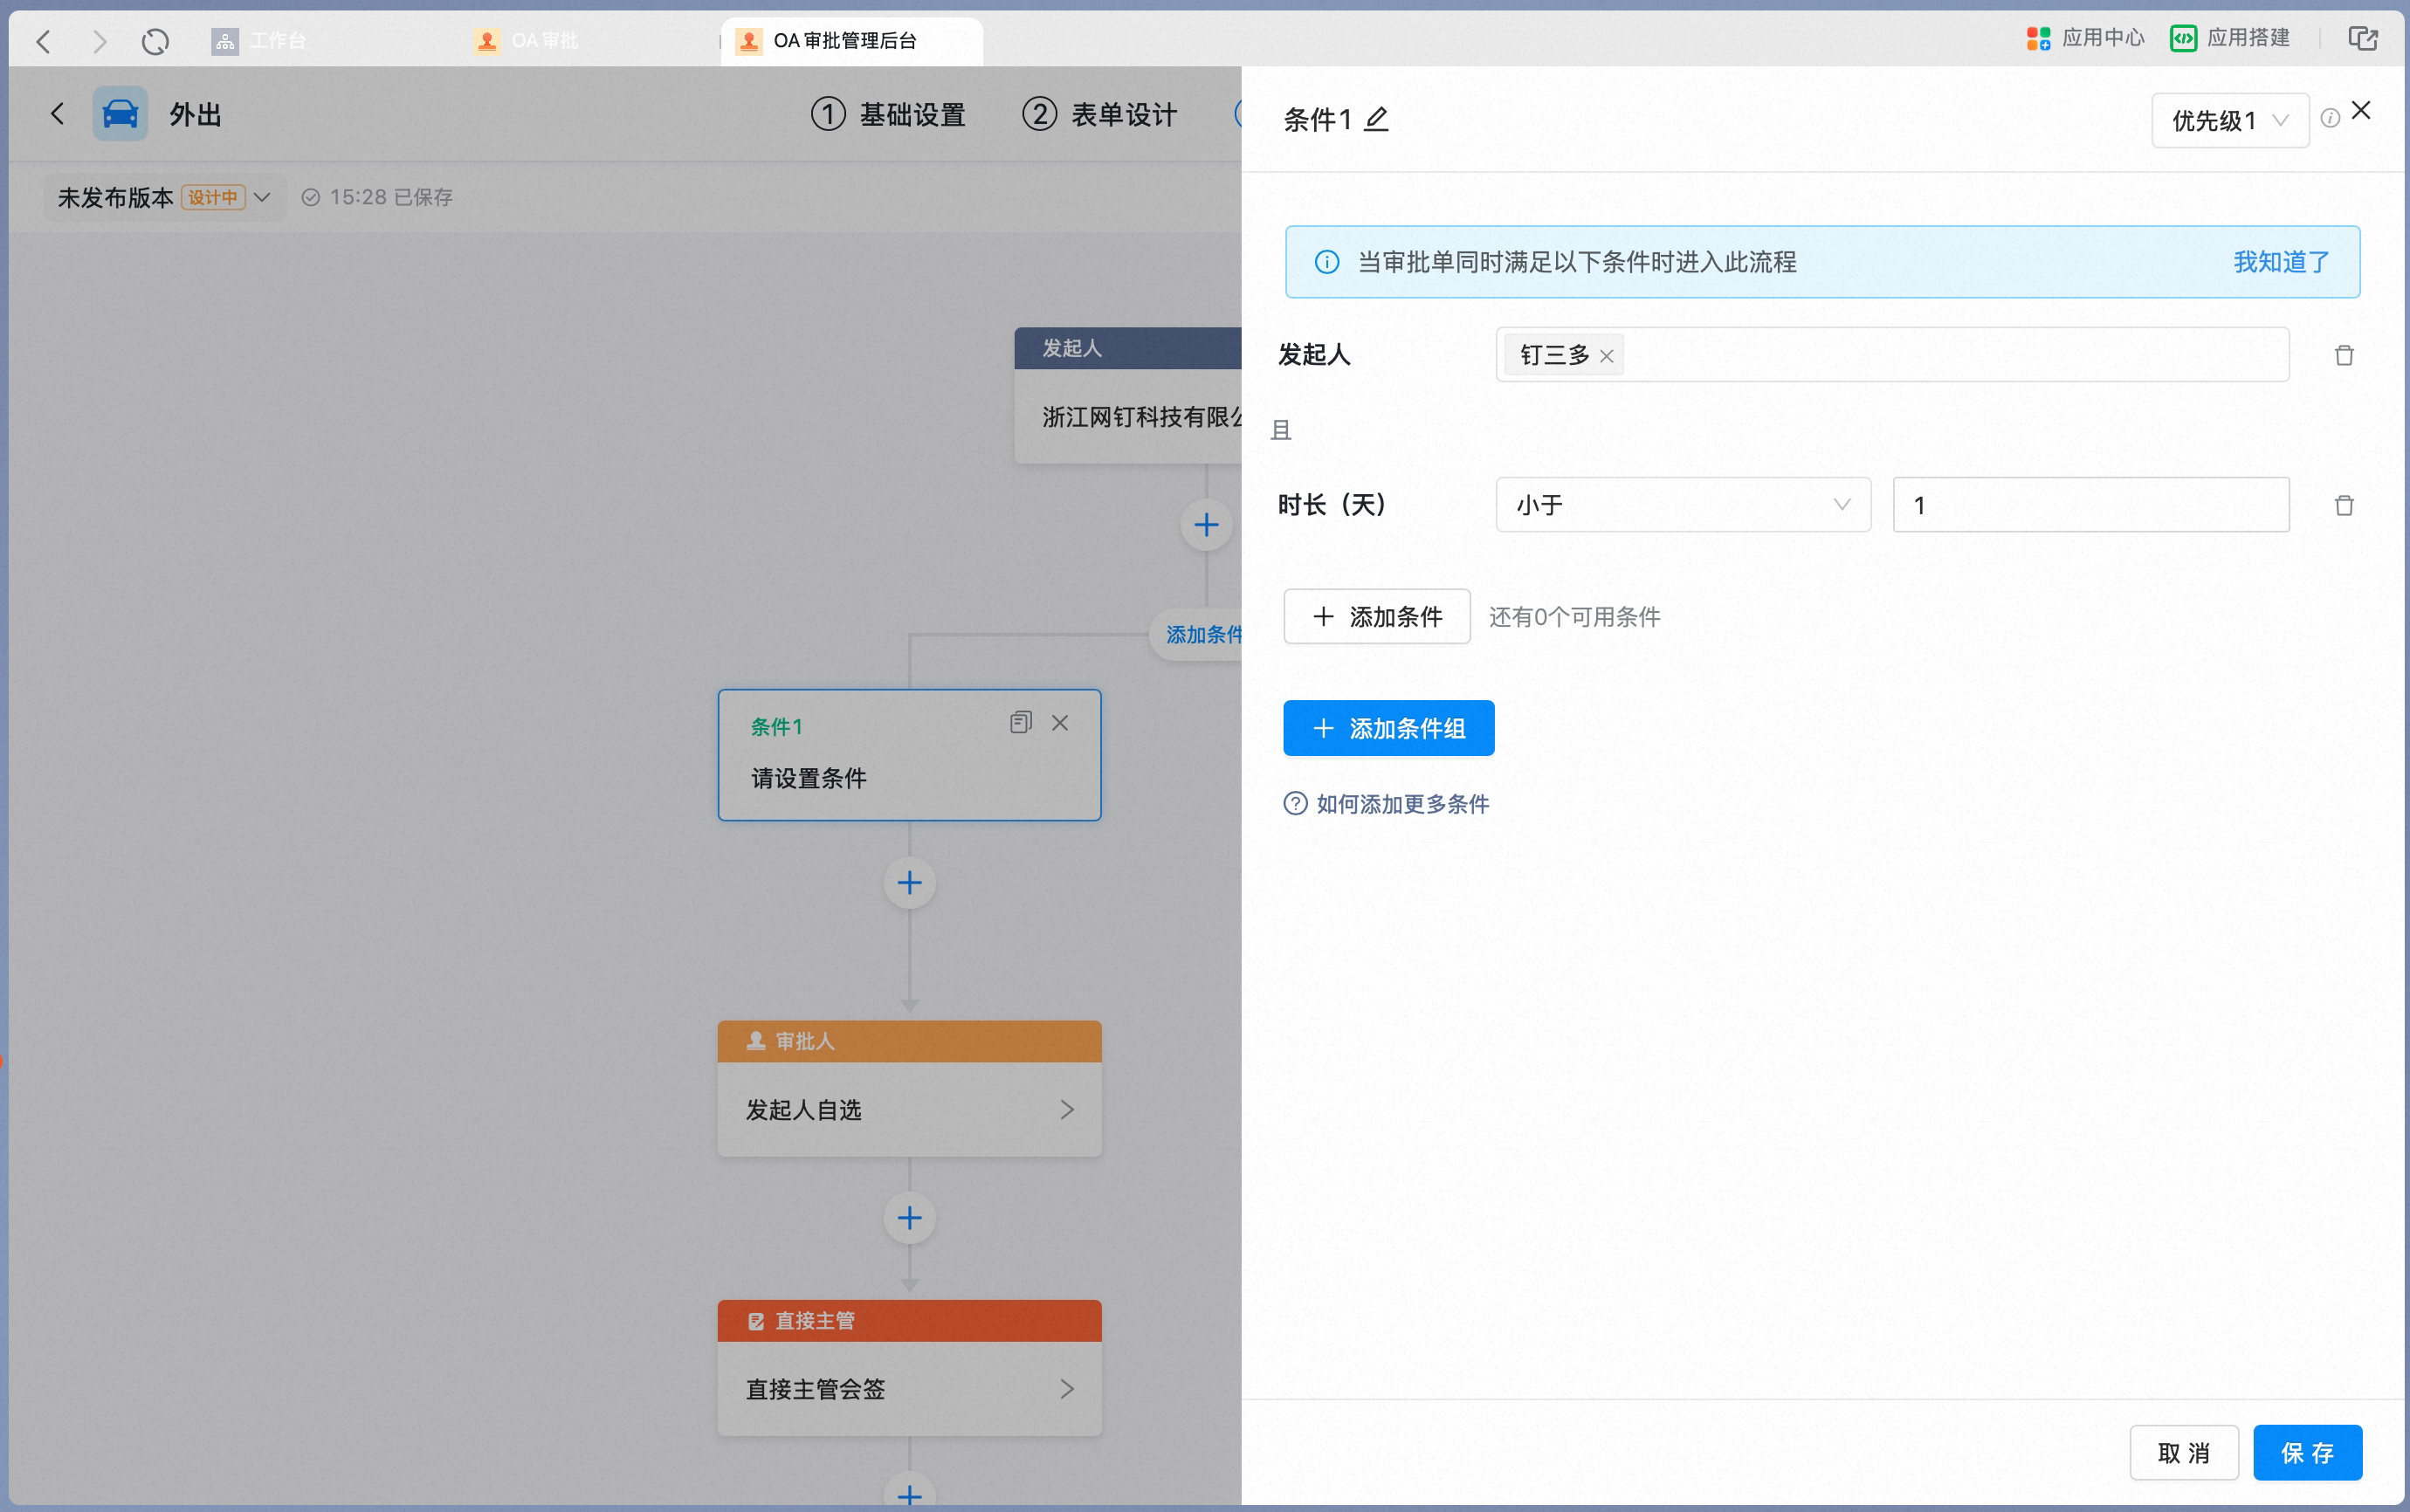
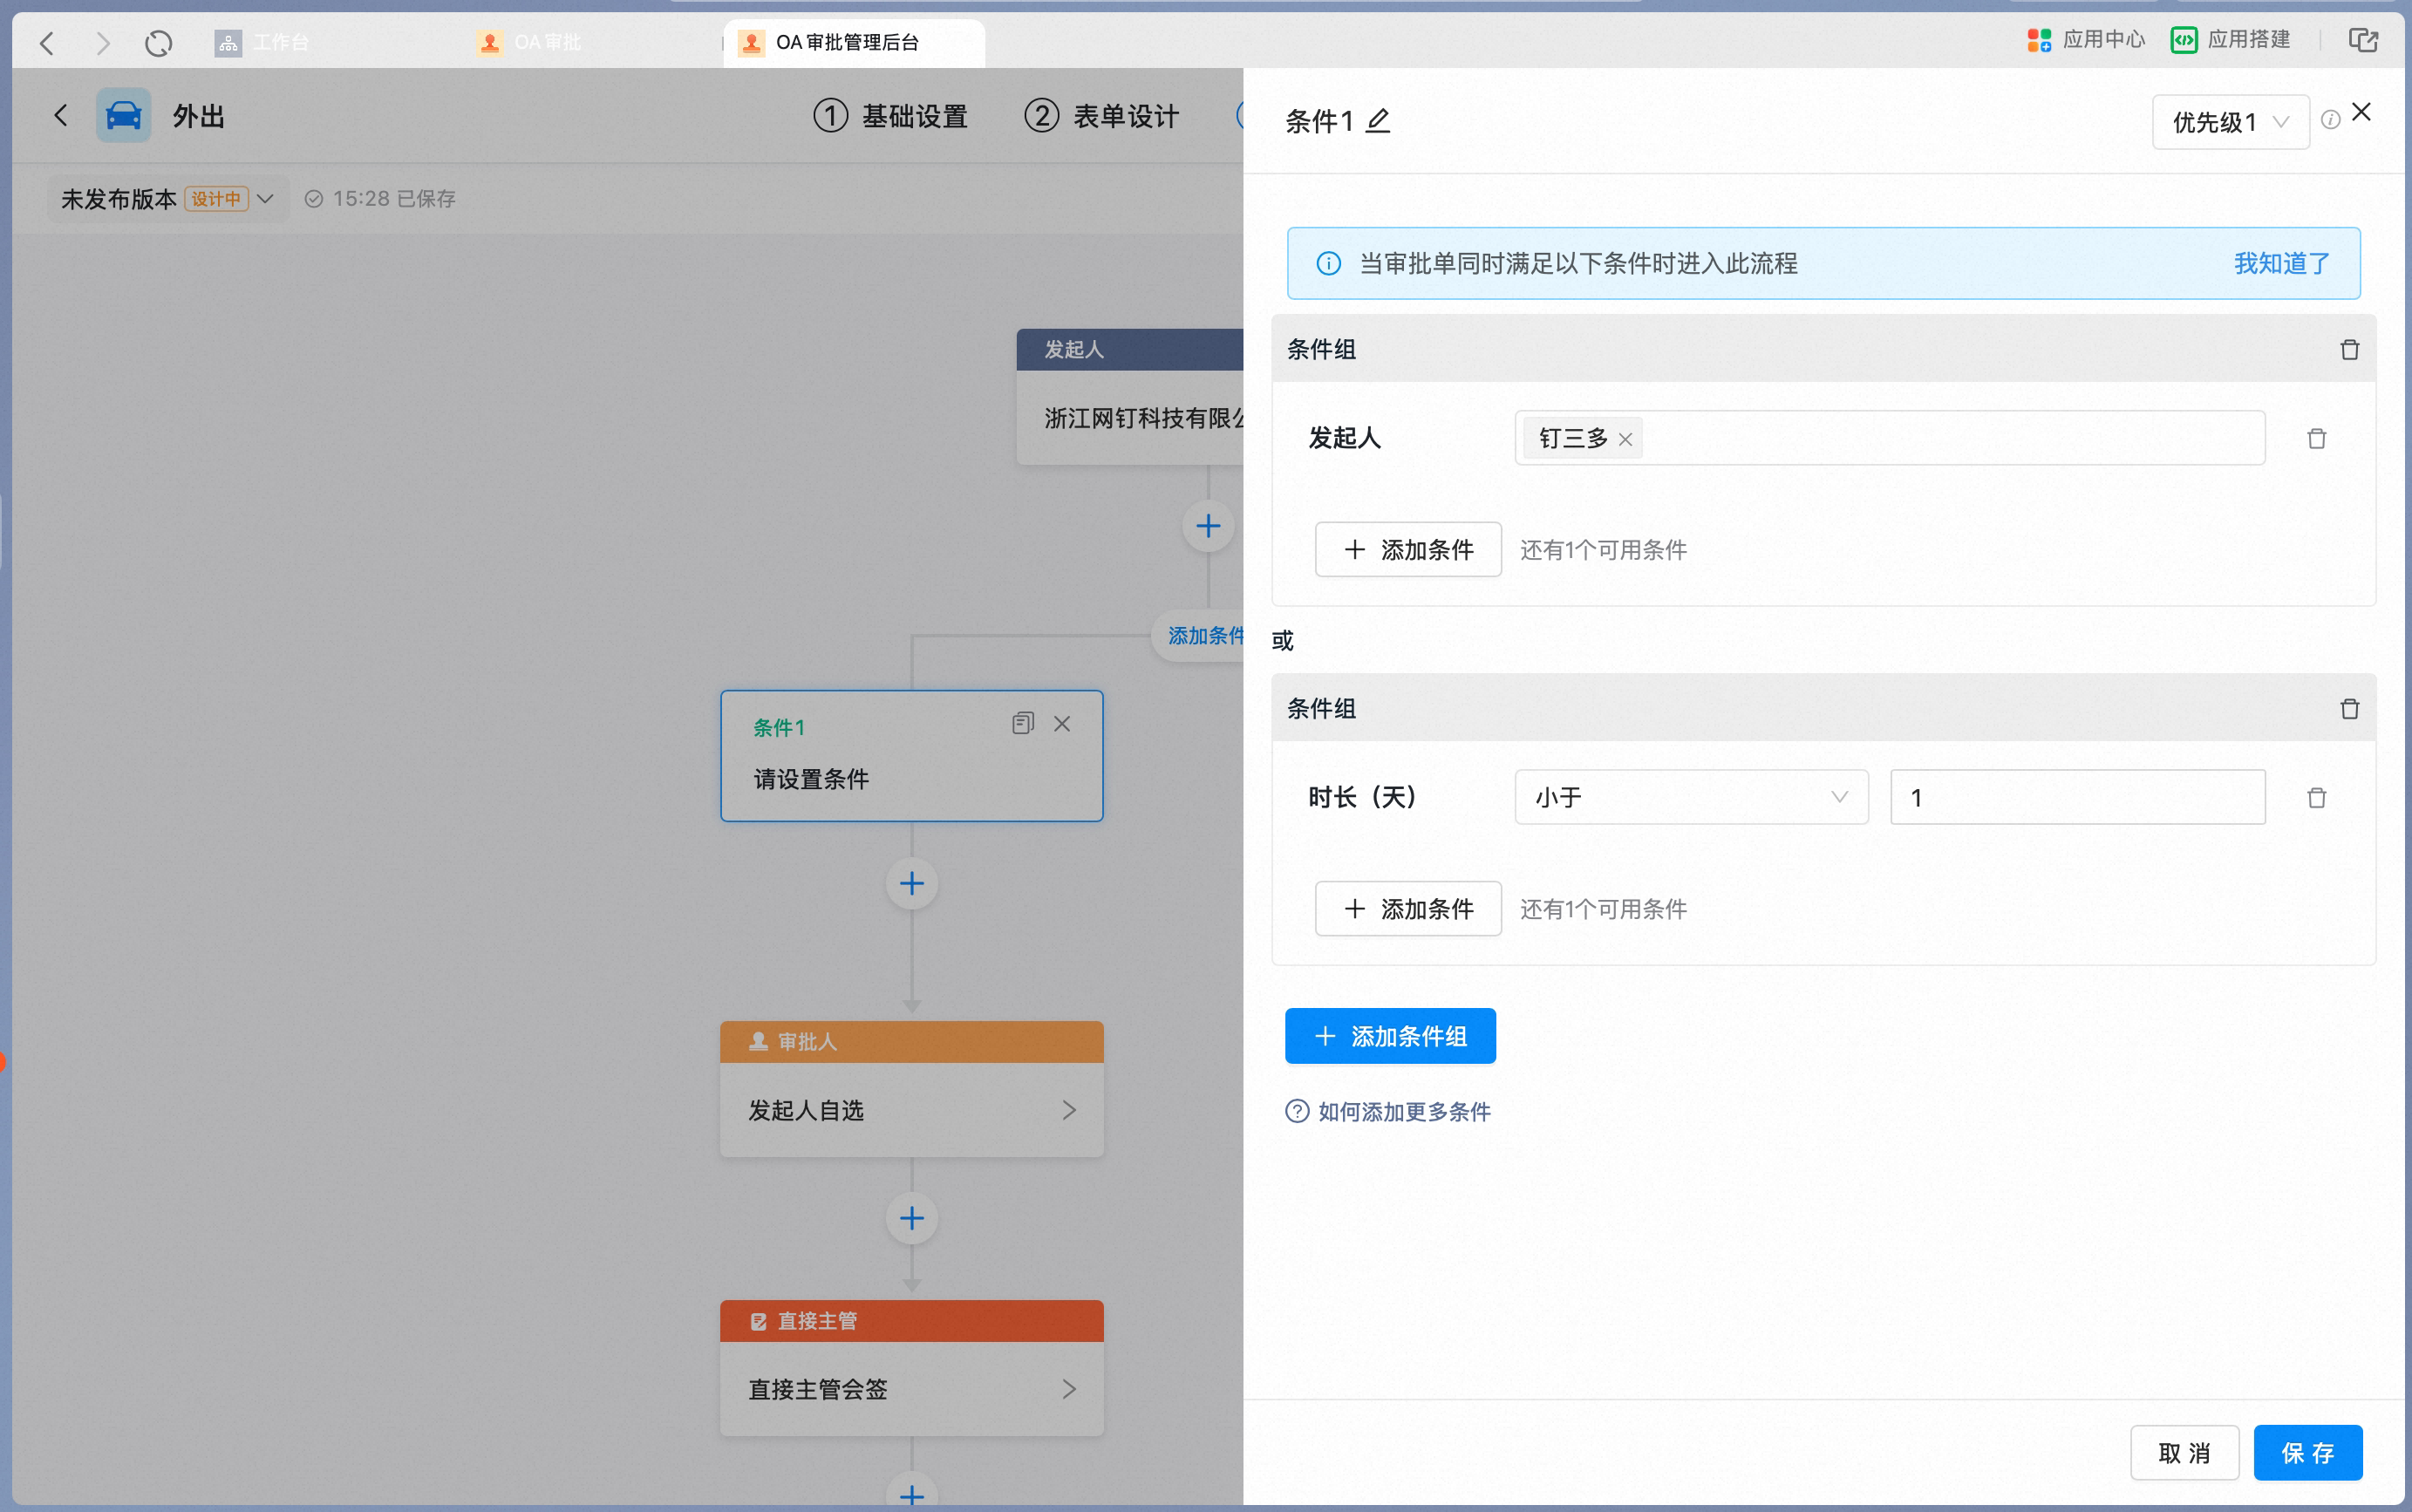
Click a conditional branch node in the flow diagram, and set the branch conditions in the right-hand panel. Conditional branch node and condition summary in the flow diagram: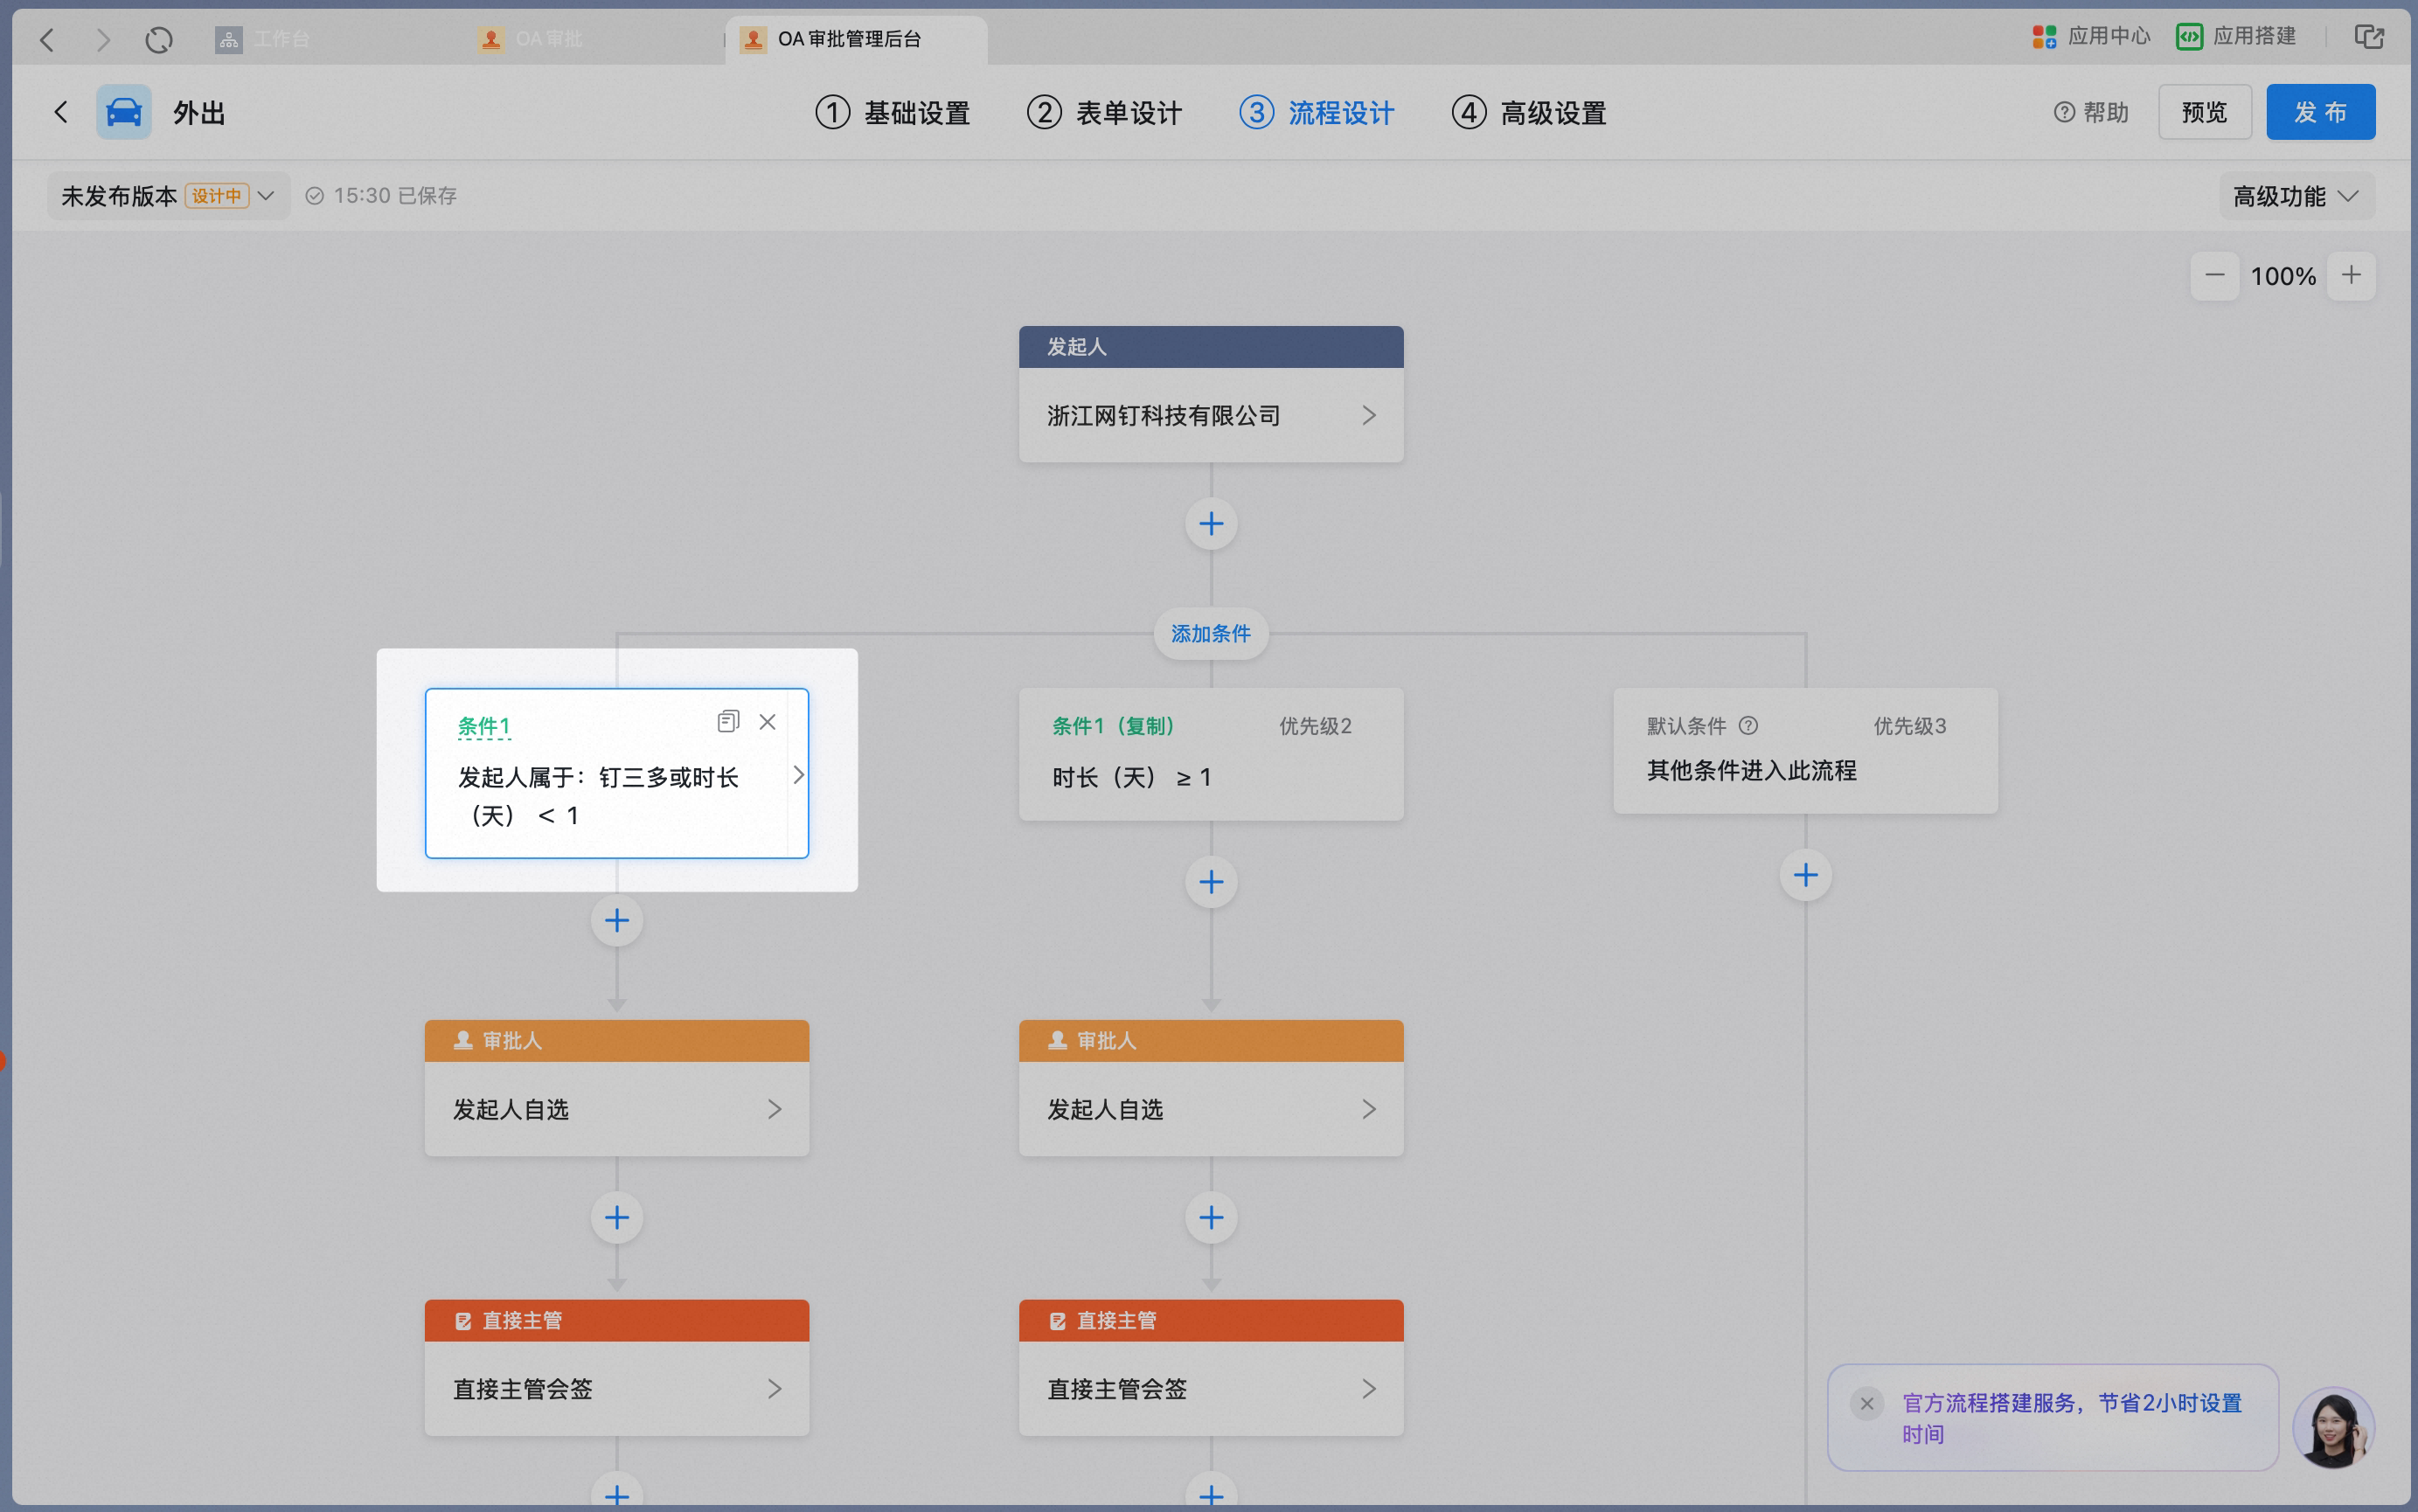
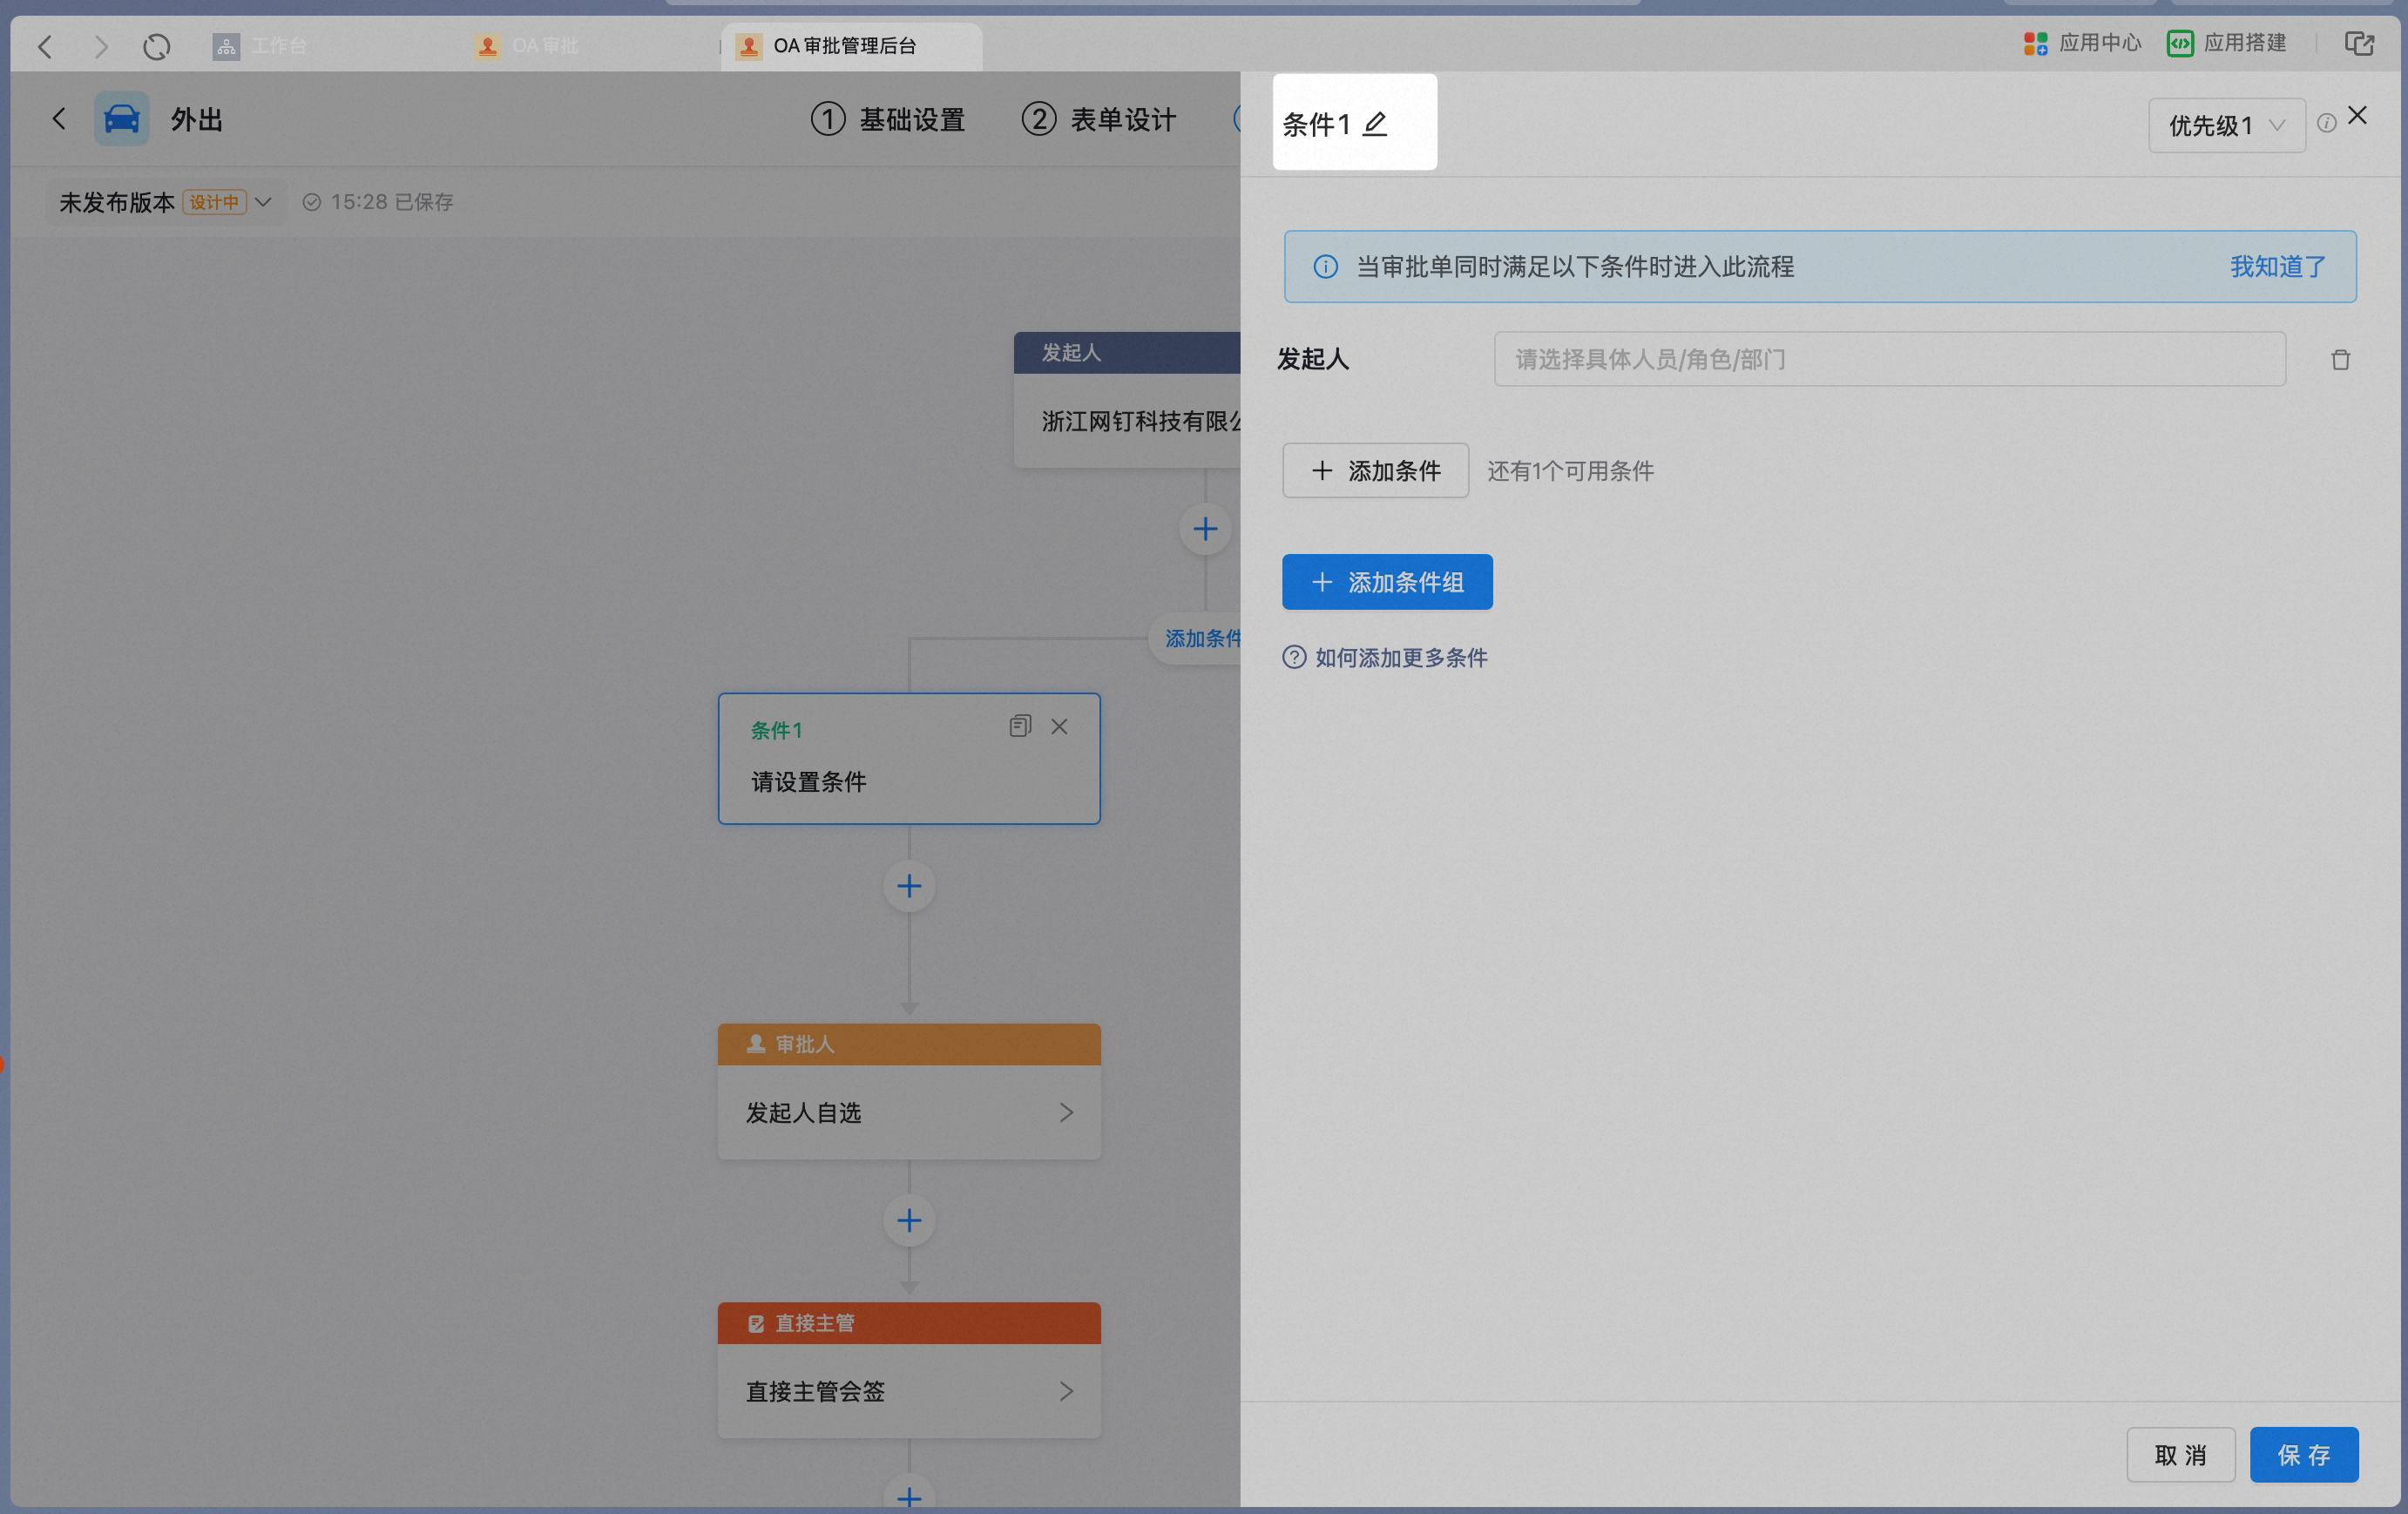
Click the edit icon next to the condition name to rename the condition:
3.4.4 Configure the flow for a branch condition
After setting the branch conditions, configure the operators for each conditional branch. The configuration is the same as for the main process.4. Related documents
How to set up conditional approval
Route approval forms down different branches based on department, amount, and other conditions.
How to set up role-based approval
Set roles as approvers and configure management scope.
How to set up direct manager approval
Set up tier-by-tier approval by direct managers.
How to set node action permissions
Control Editable, Read-only, and Hidden permissions for form fields at each node.