

 Chats
Chats Calendar
 Meetings
 Contacts
 Mail
Mail Docs
Docs Drive
Drive AI Table
 AI Minutes
 Attendance
 Approval
 YiDA
YiDA Admin Console
Admin Console Navigation
In the left navigation pane, go to Security & permission > Security > Access Control > Trusted Device.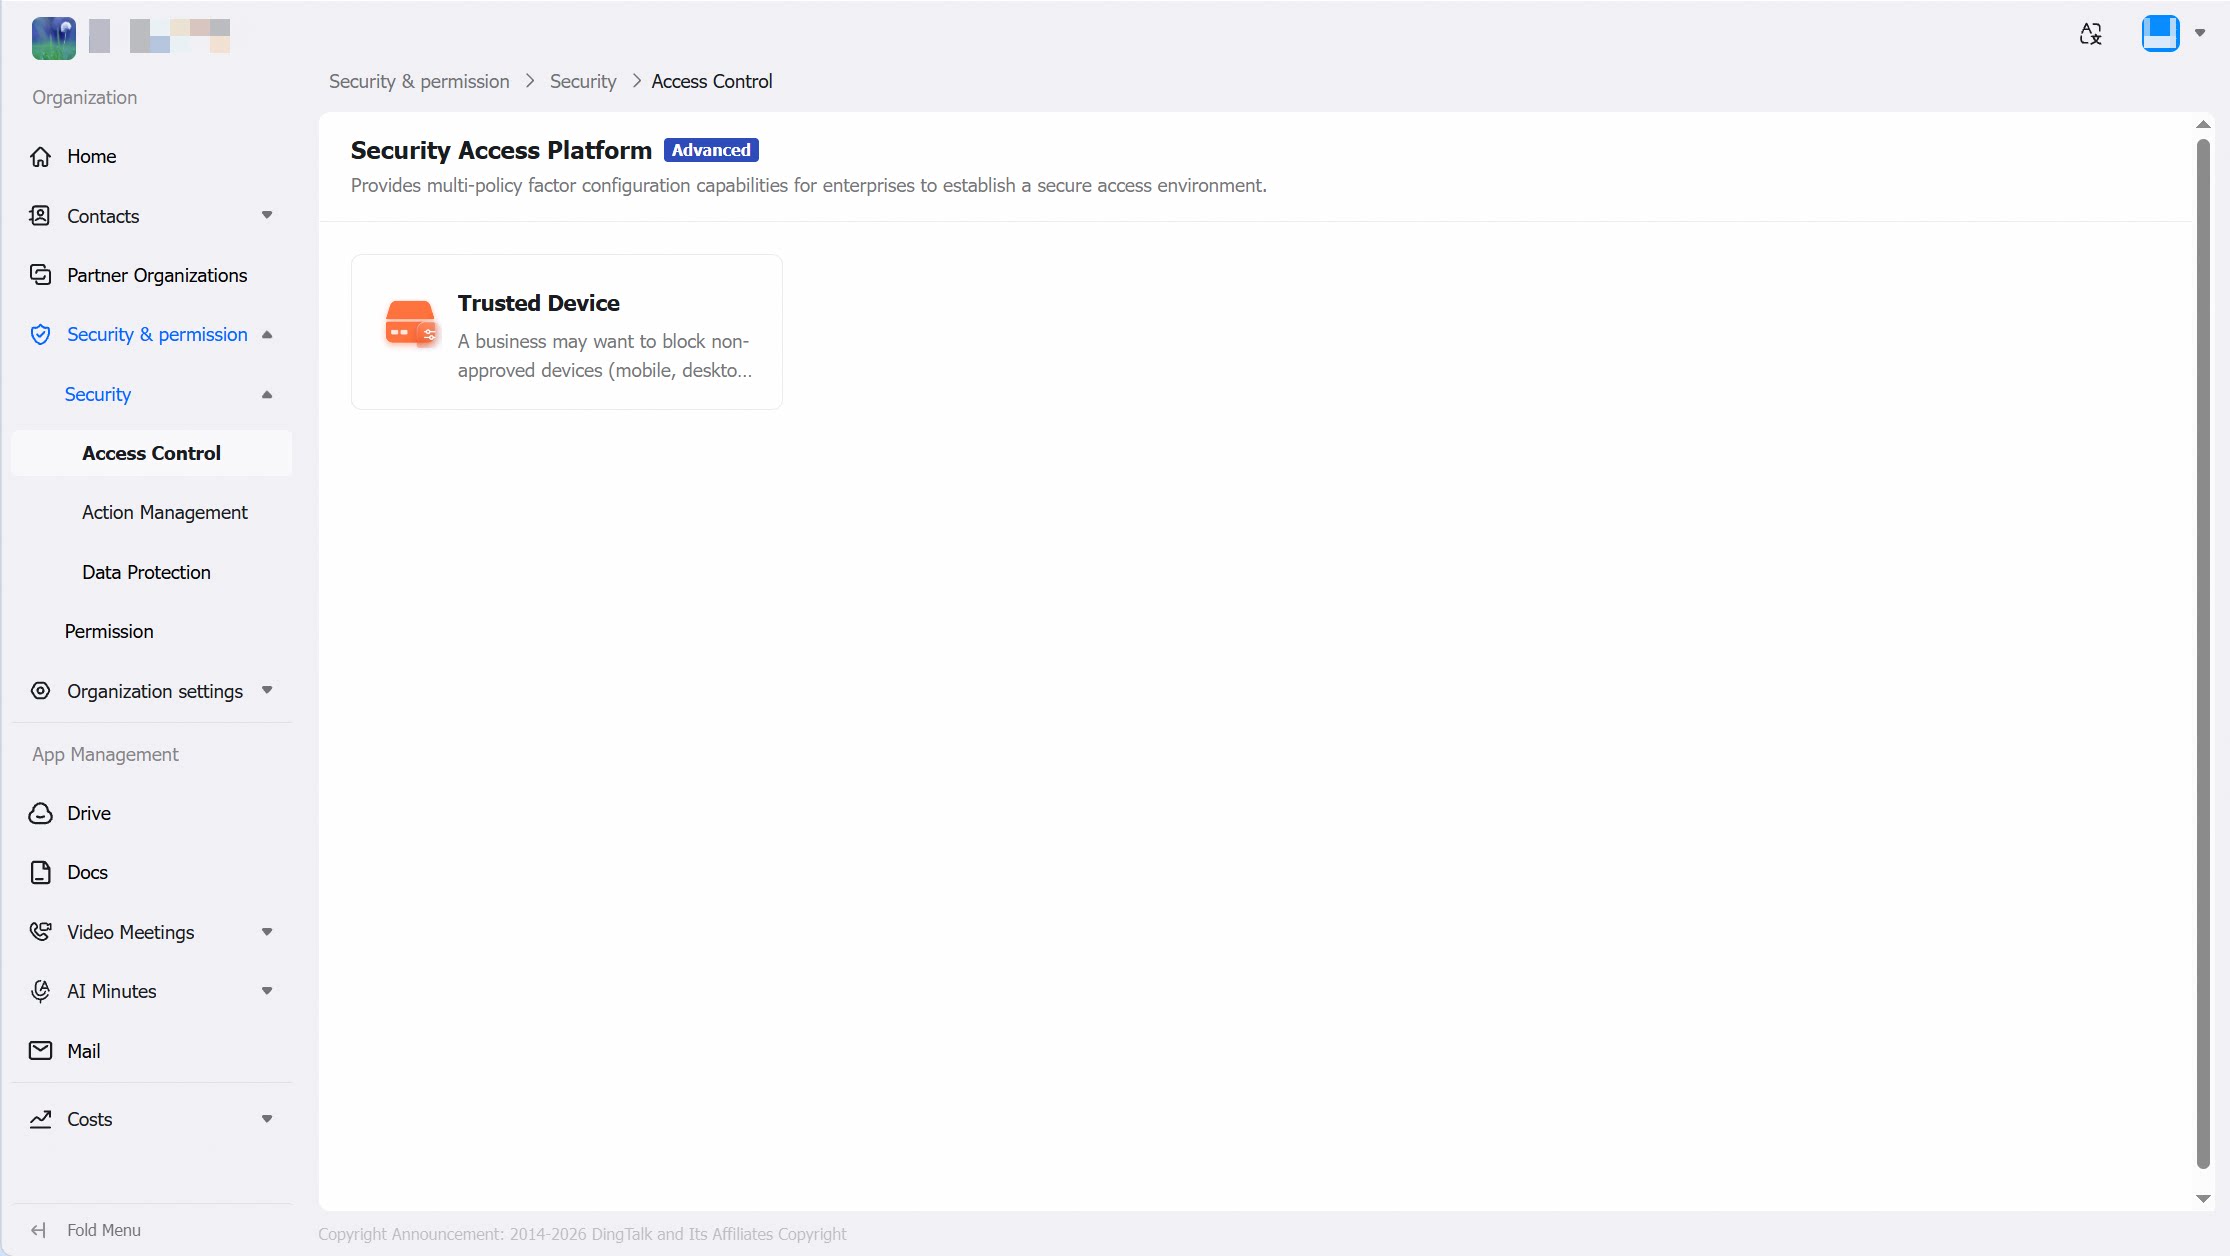
Personal Trusted Device Management
Navigation path: in the left navigation pane, go to Security & permission > Security > Access Control > Trusted Device > Personal Device.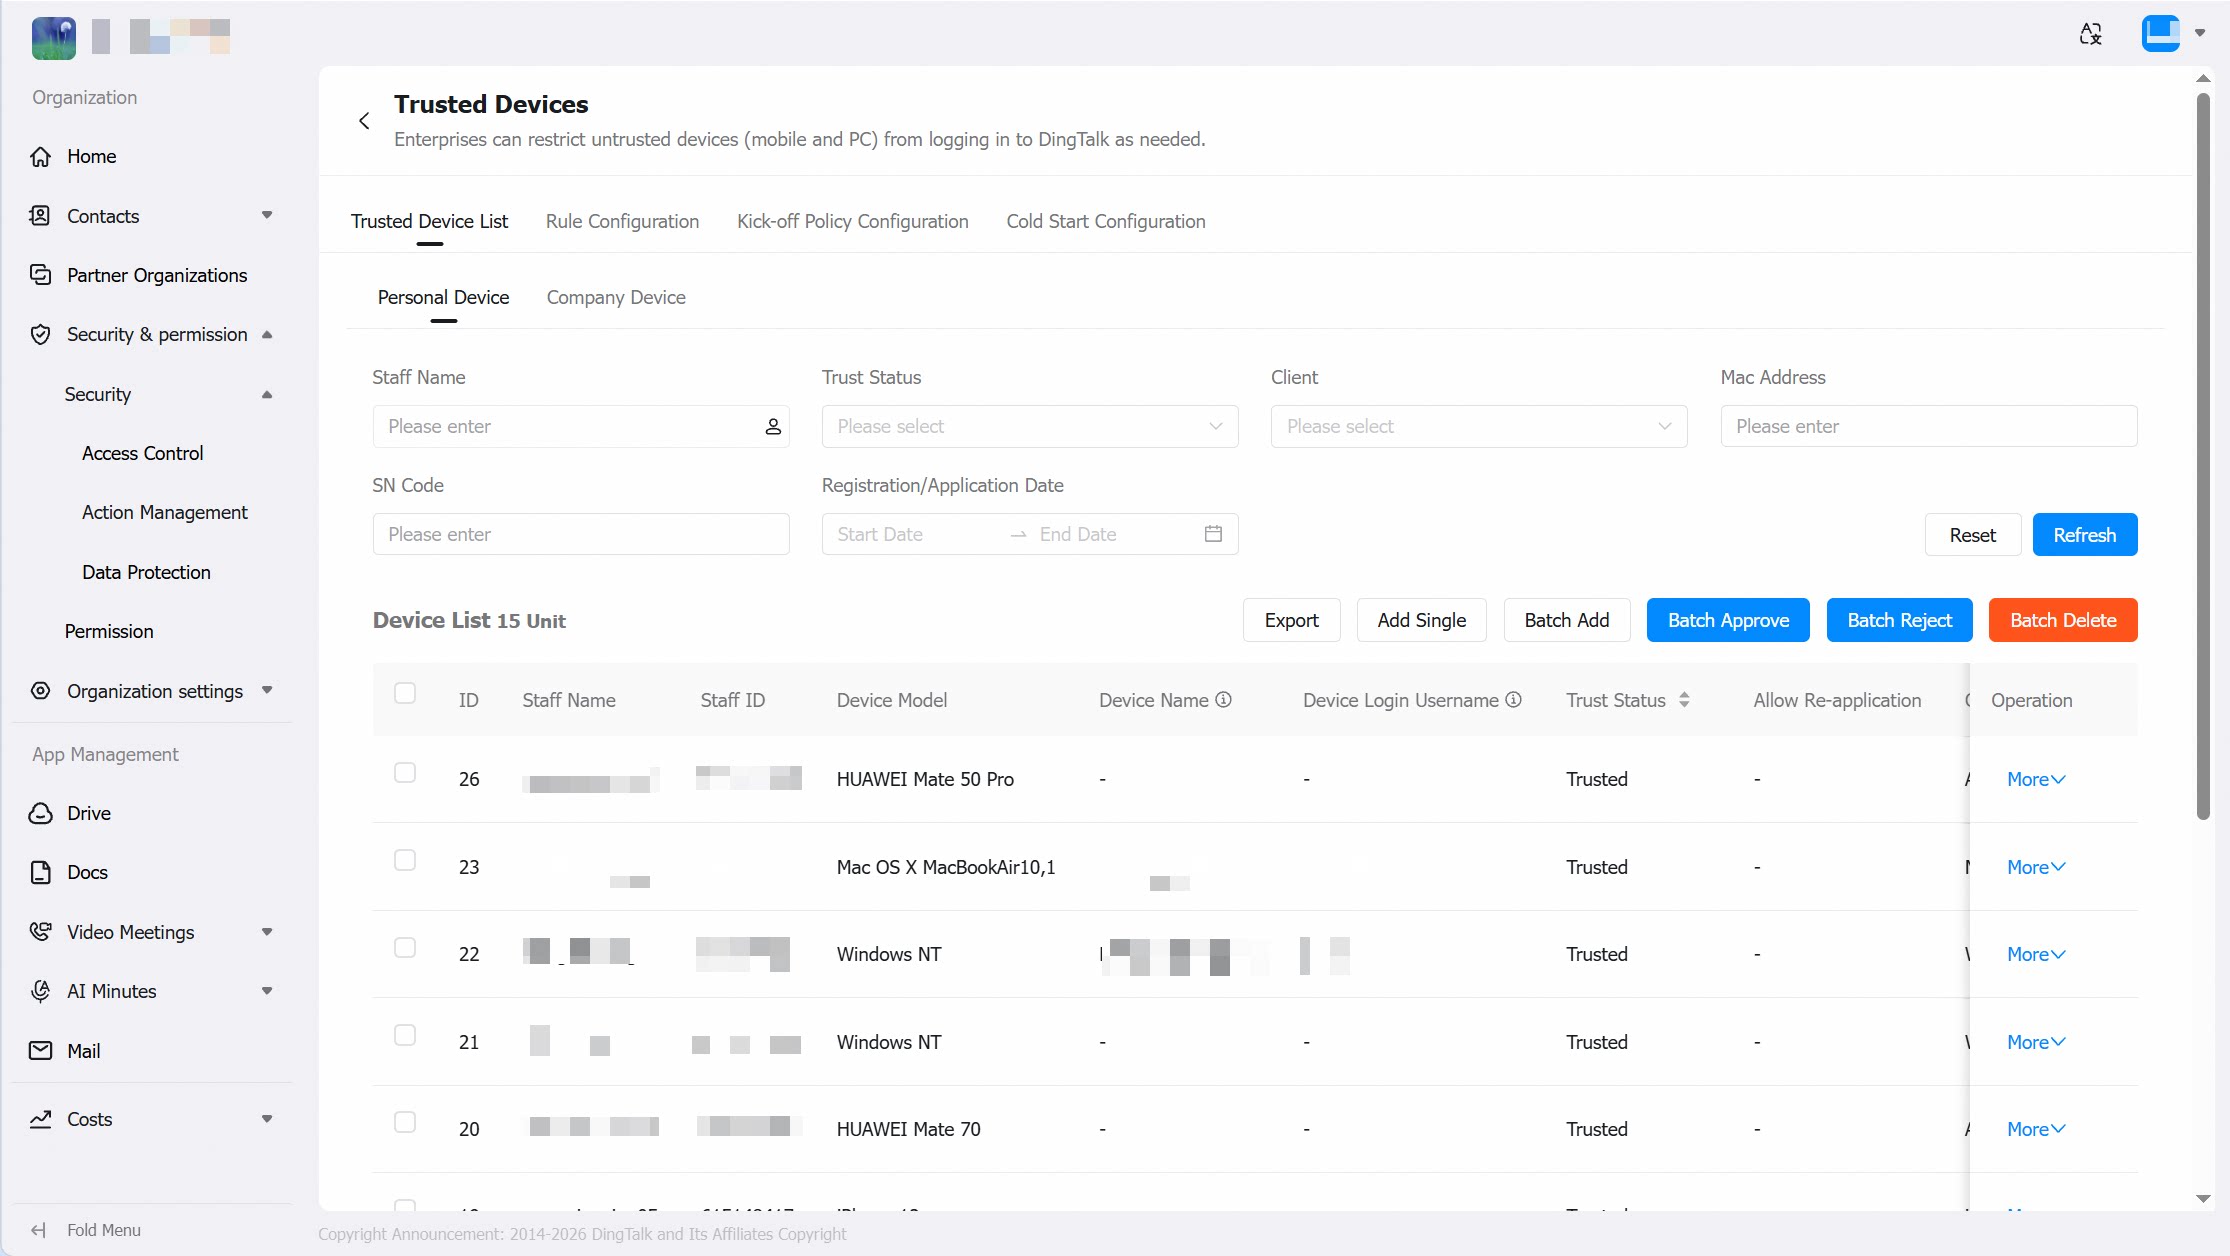
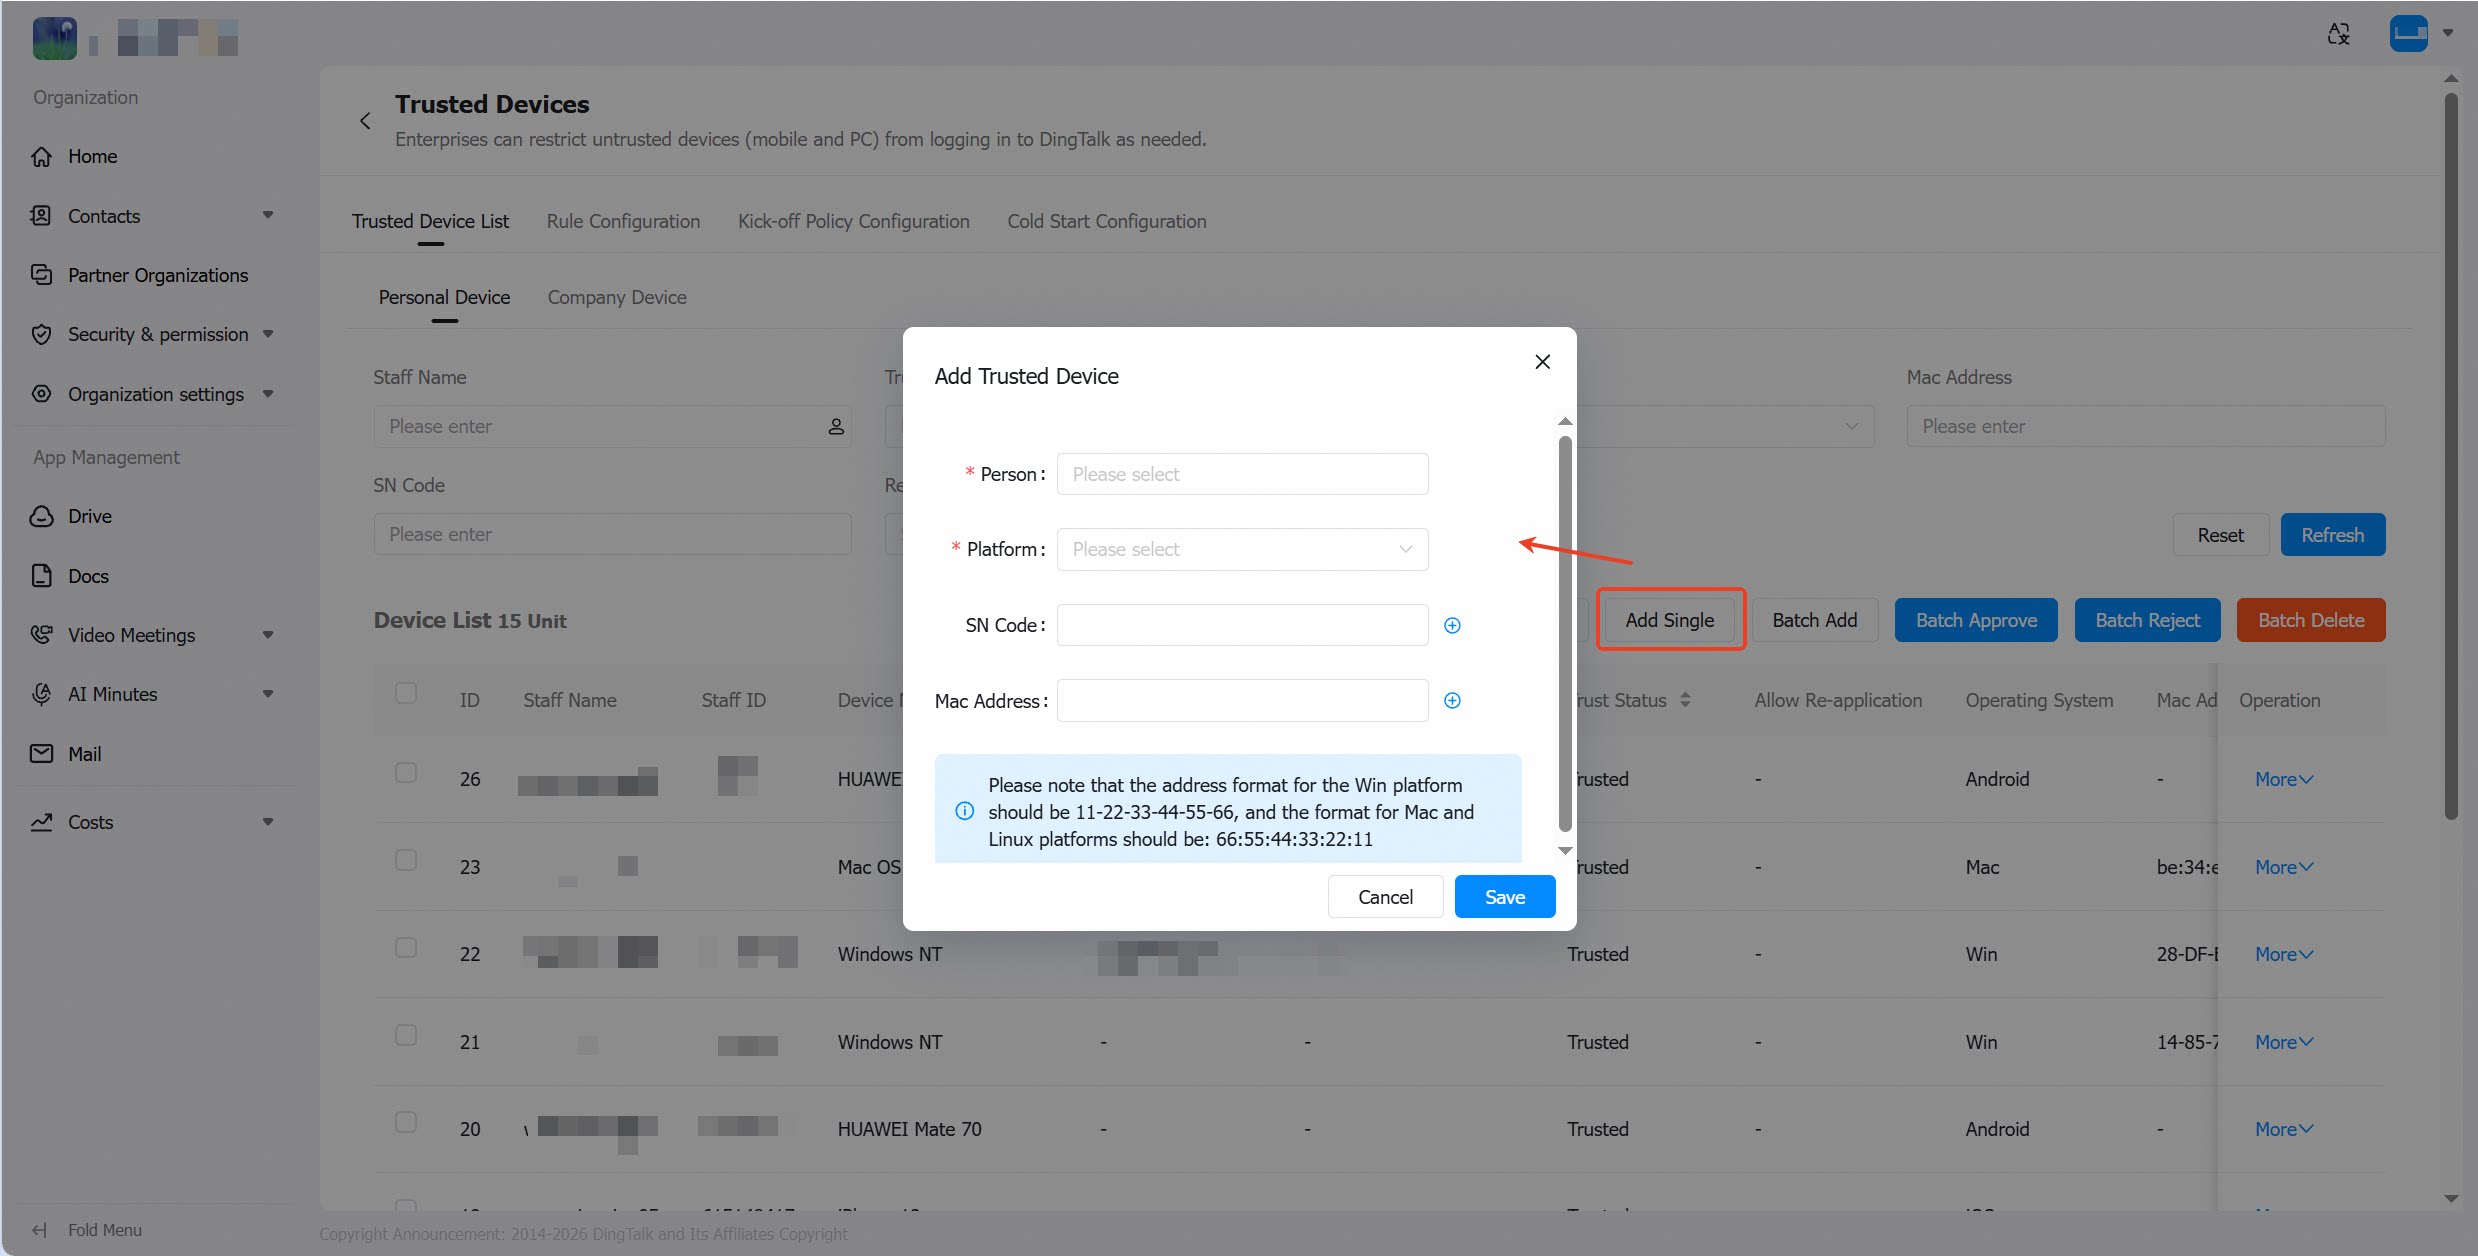
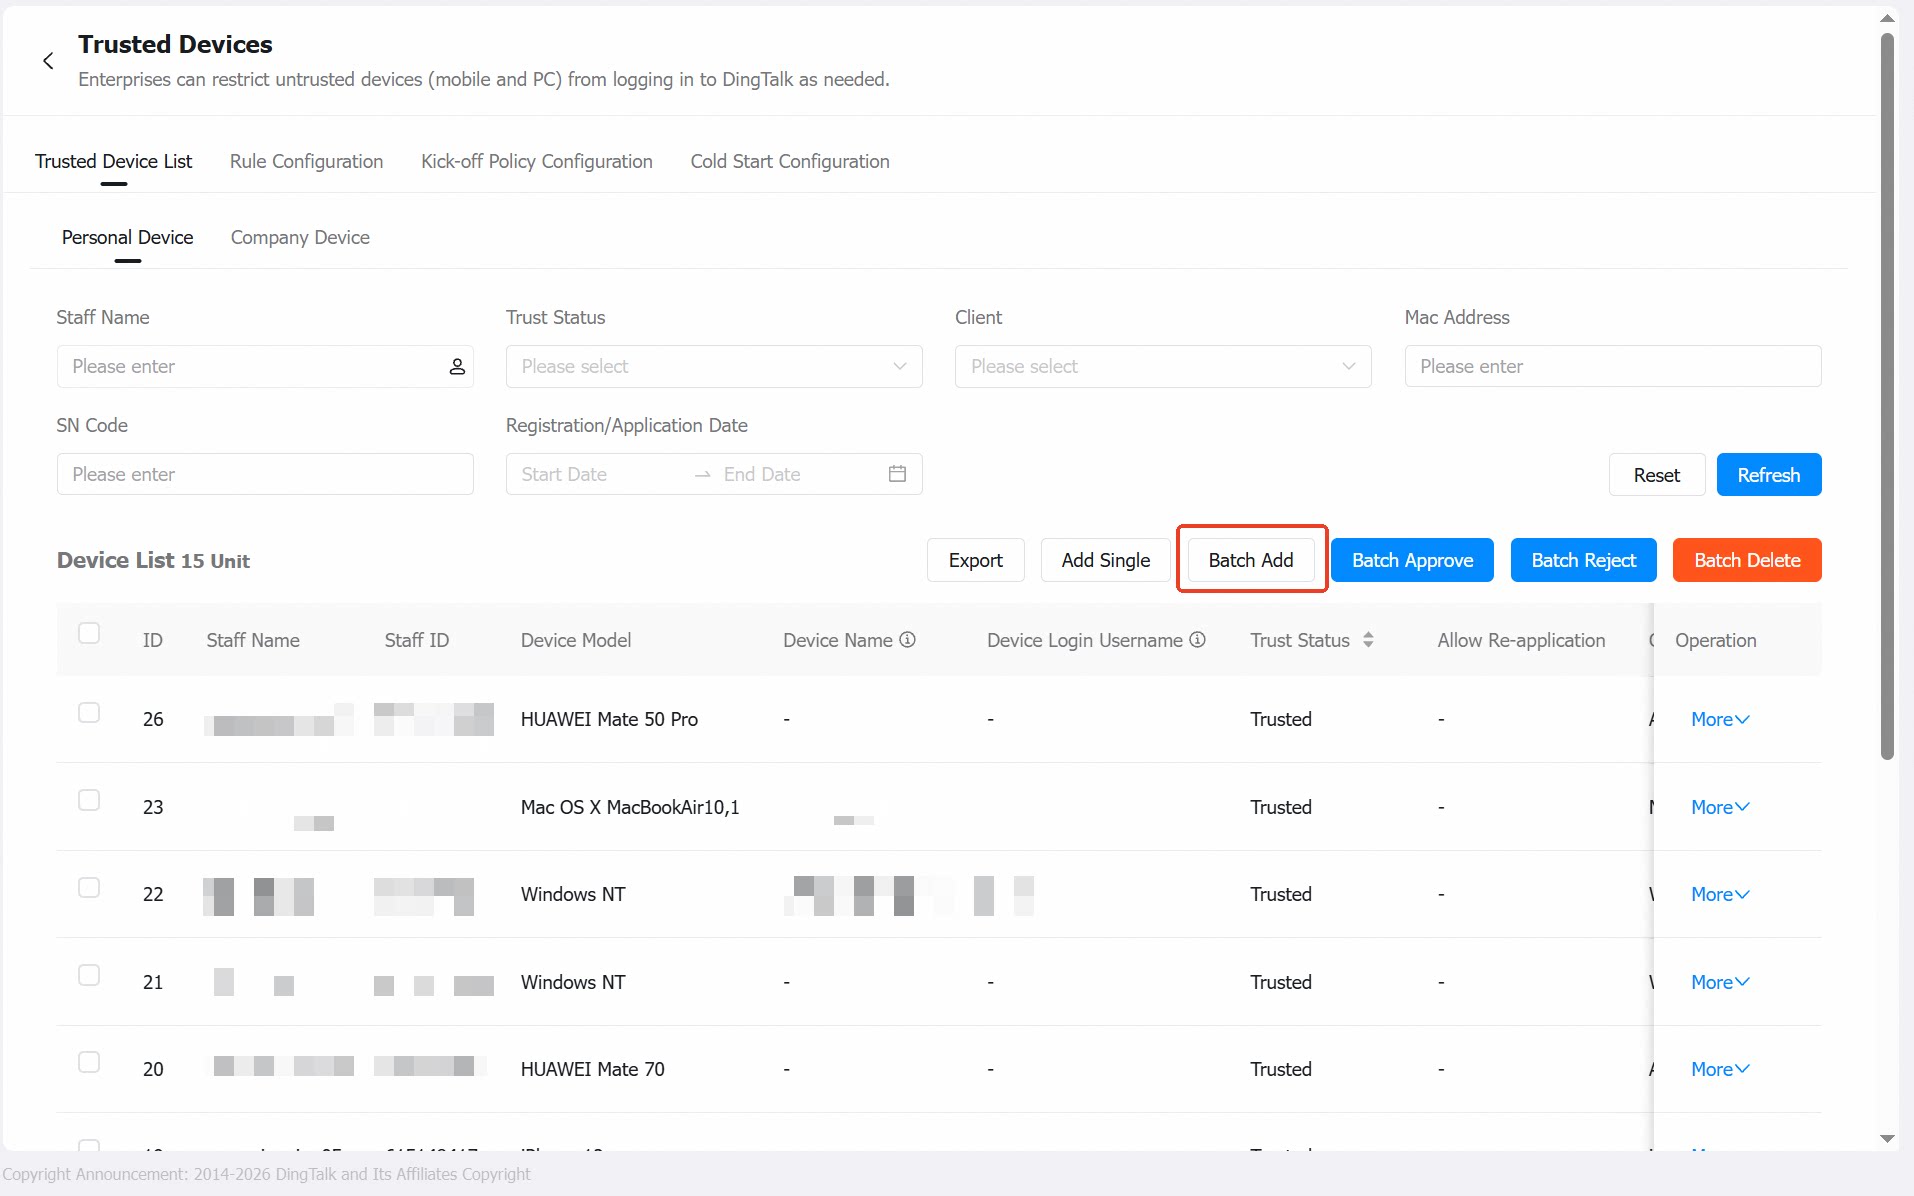
Adding a Desktop Personal Trusted Device
- Add a single device
- Batch add devices
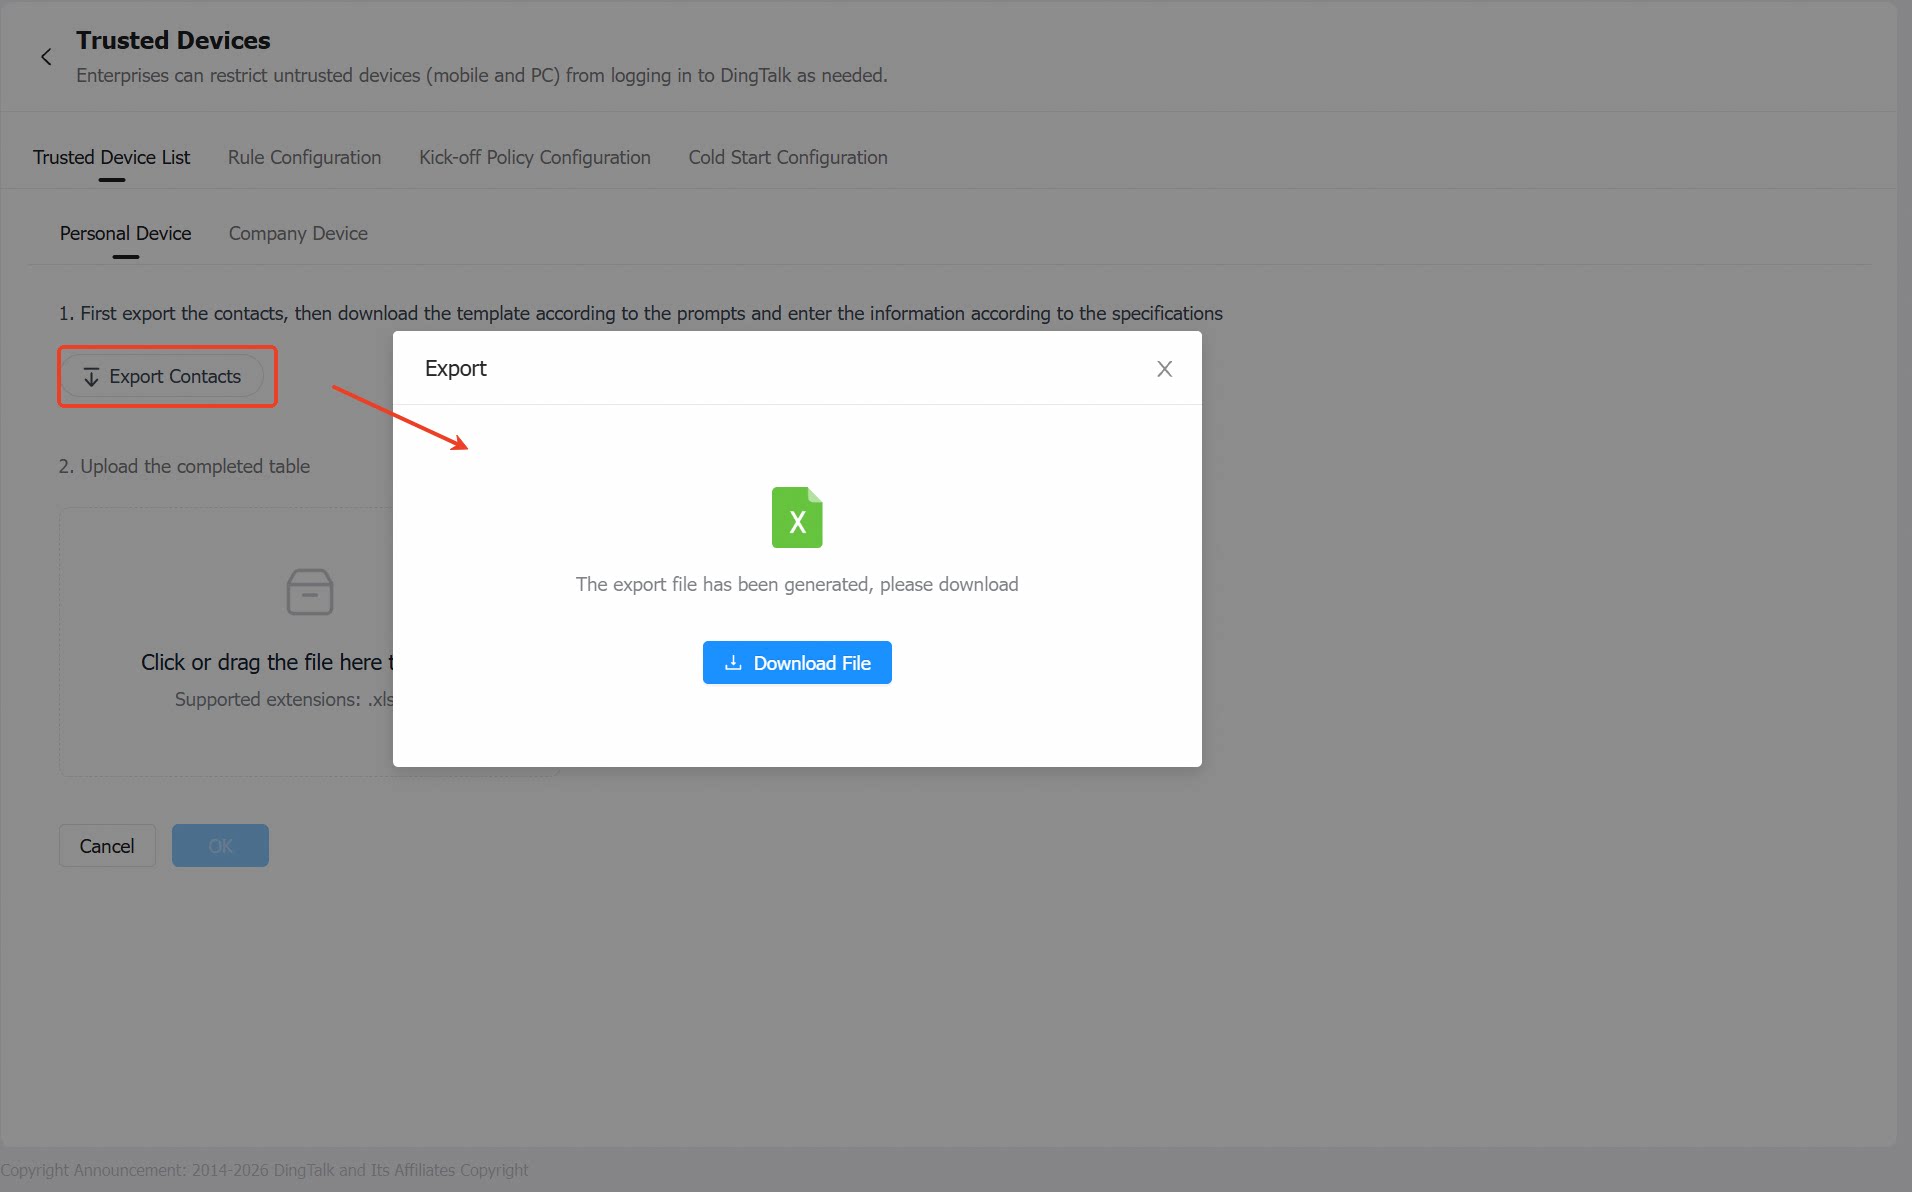
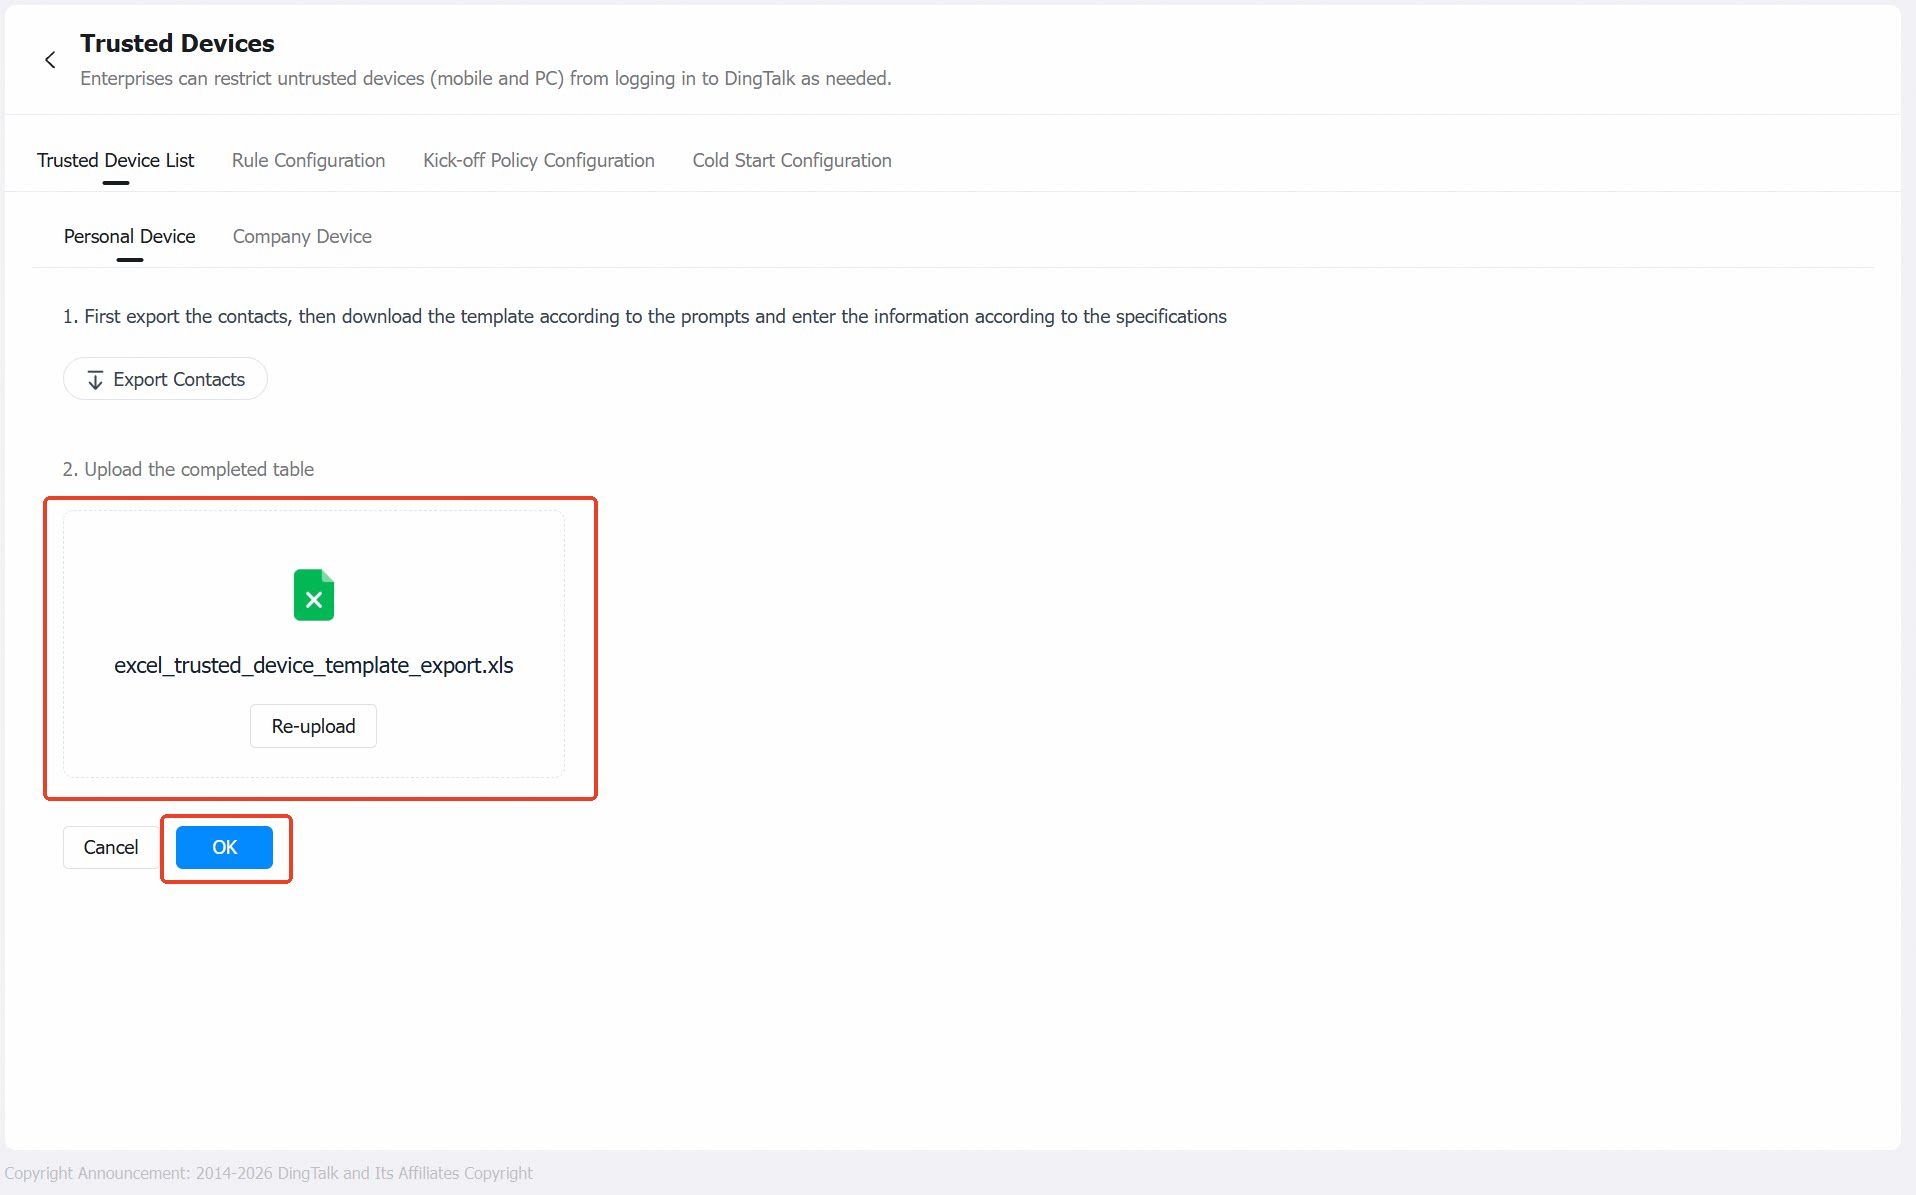
Adding a Mobile Personal Trusted Device
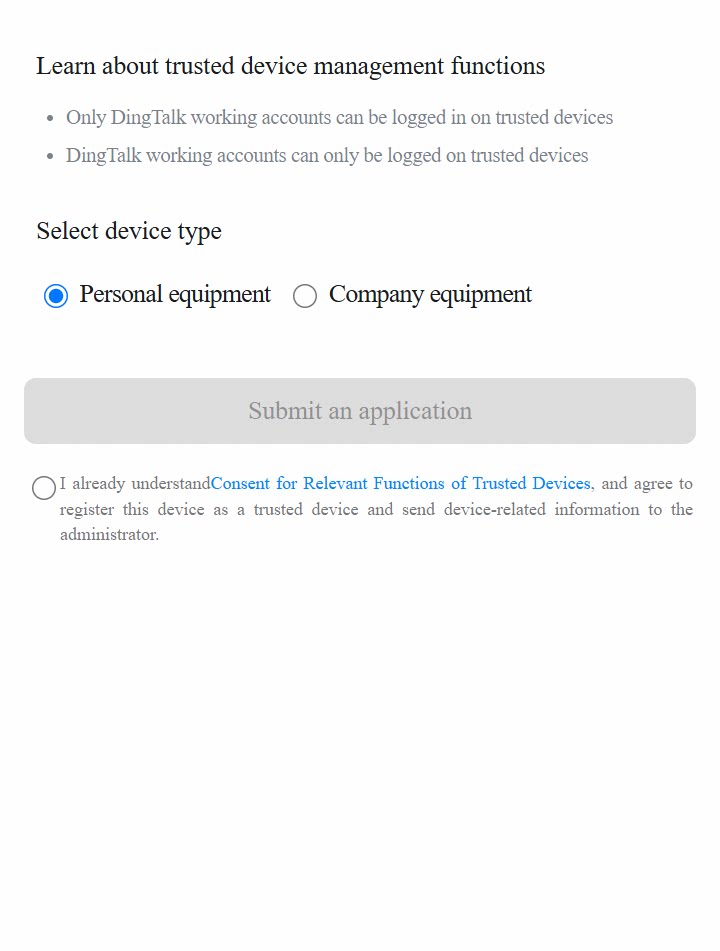
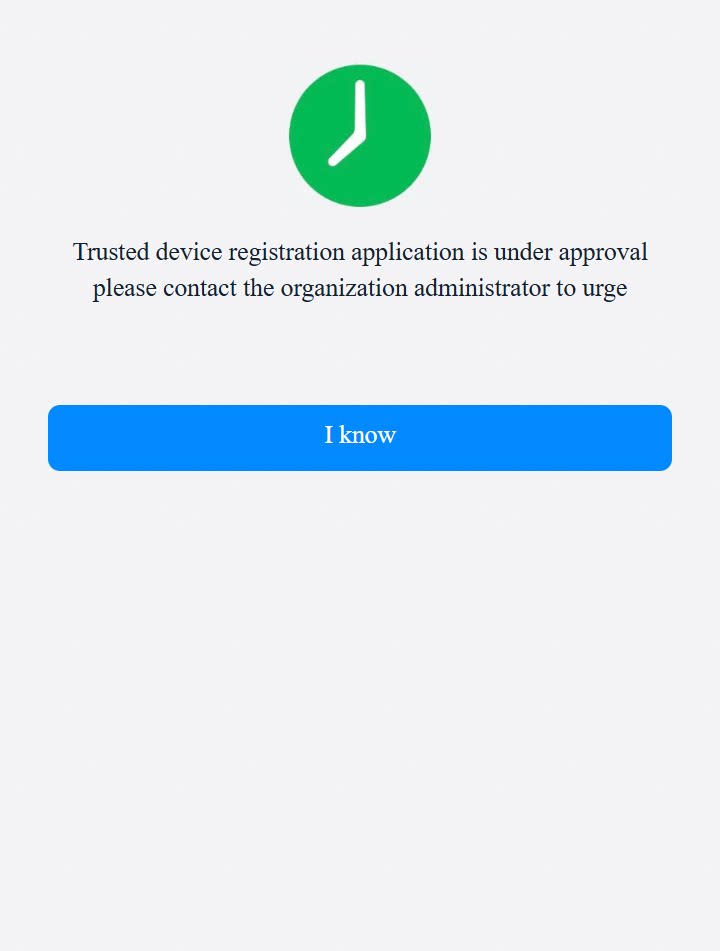
Mobile devices cannot be added from the admin console. When an employee attempts to sign in to DingTalk on an untrusted mobile device, they will be prompted to apply for trusted device status. Employee side: Click “To apply” to proceed to Step 2. Select the device type, agree to the terms, and submit the application. This completes the personal trusted device application.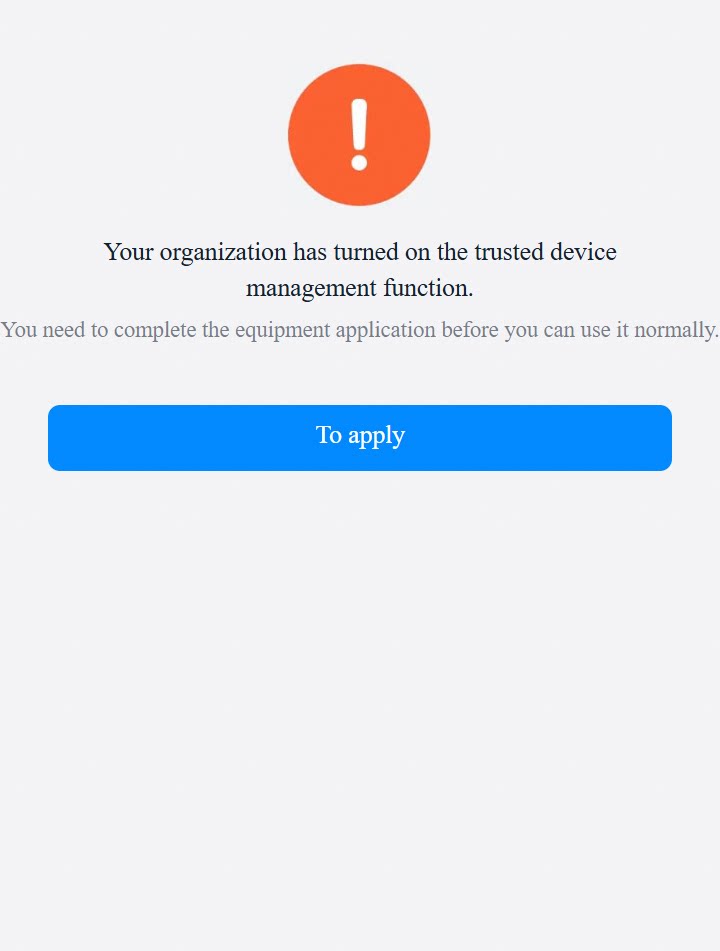
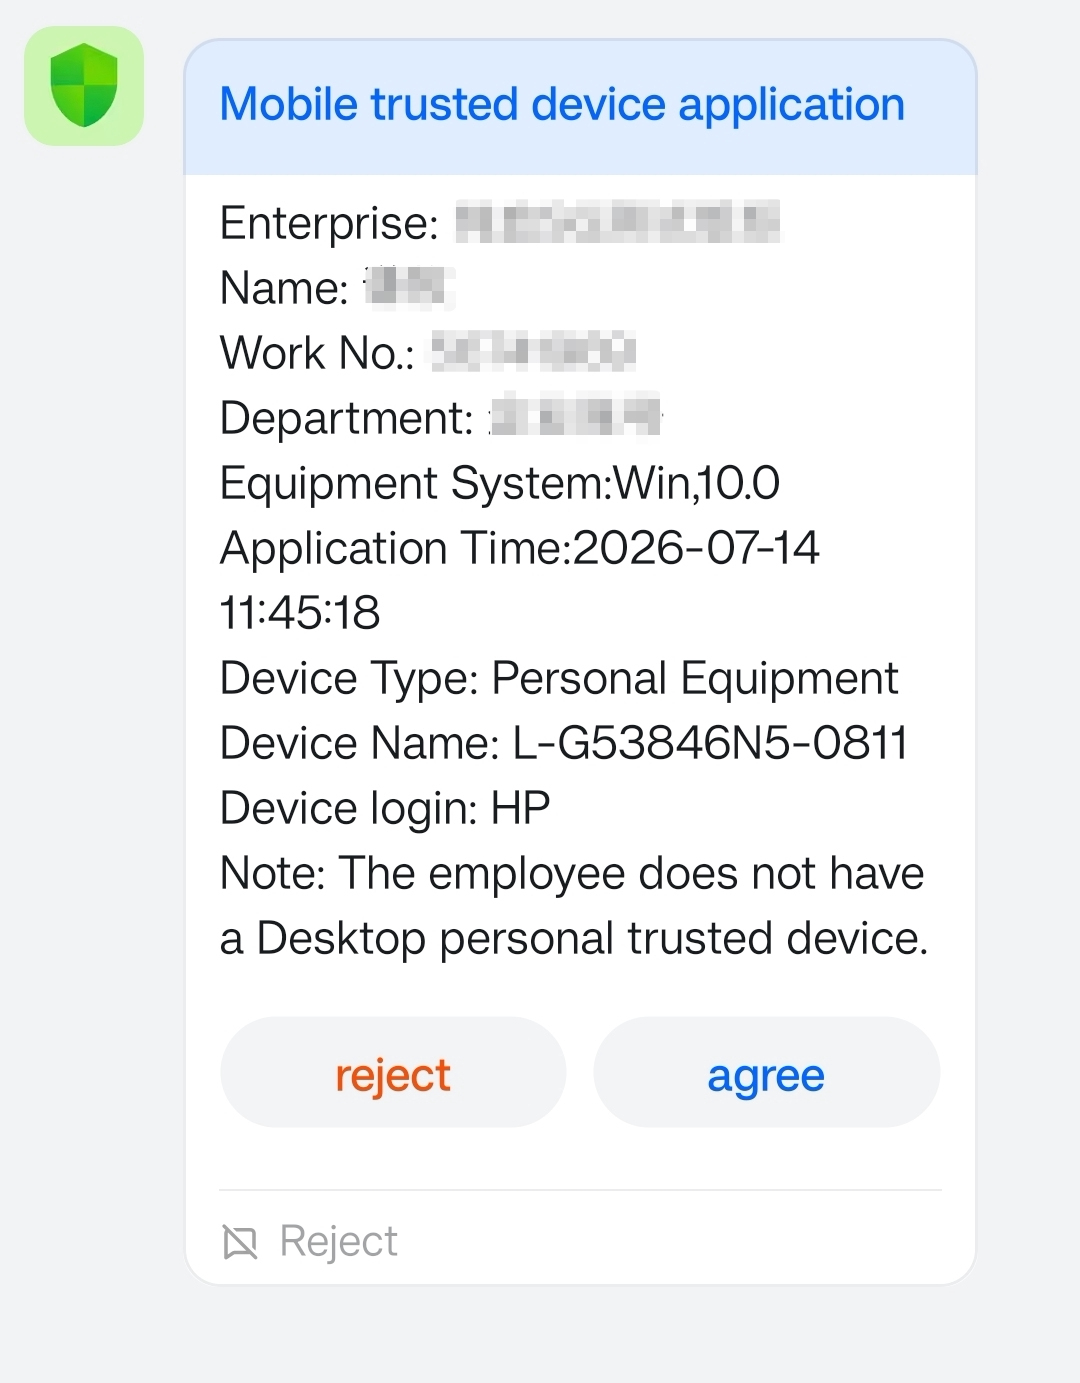
- Approve via message
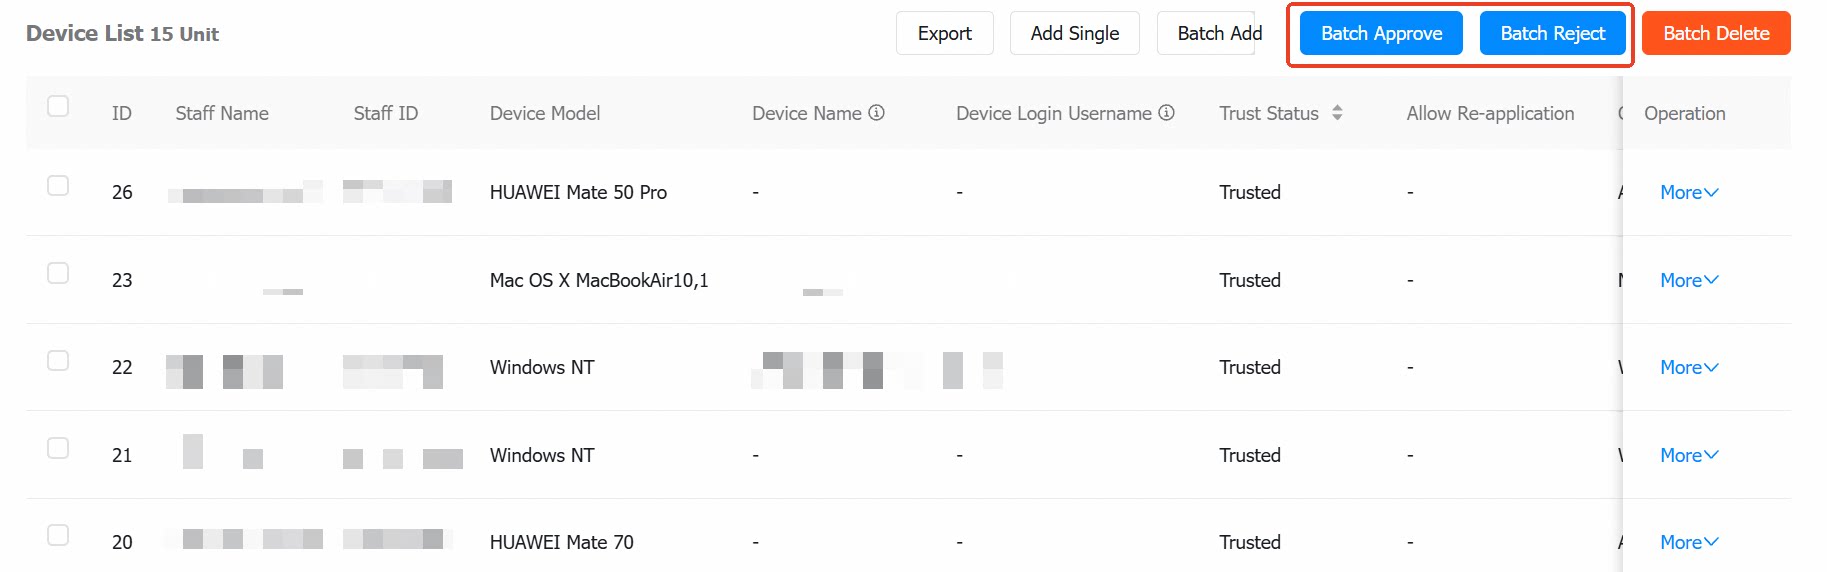
- Approve in admin console
- When approved: The device becomes trusted, and the employee can use it to sign in to DingTalk.
- When rejected: The device remains untrusted, and the employee cannot use it to sign in to DingTalk.

Managing the Personal Trusted Device List
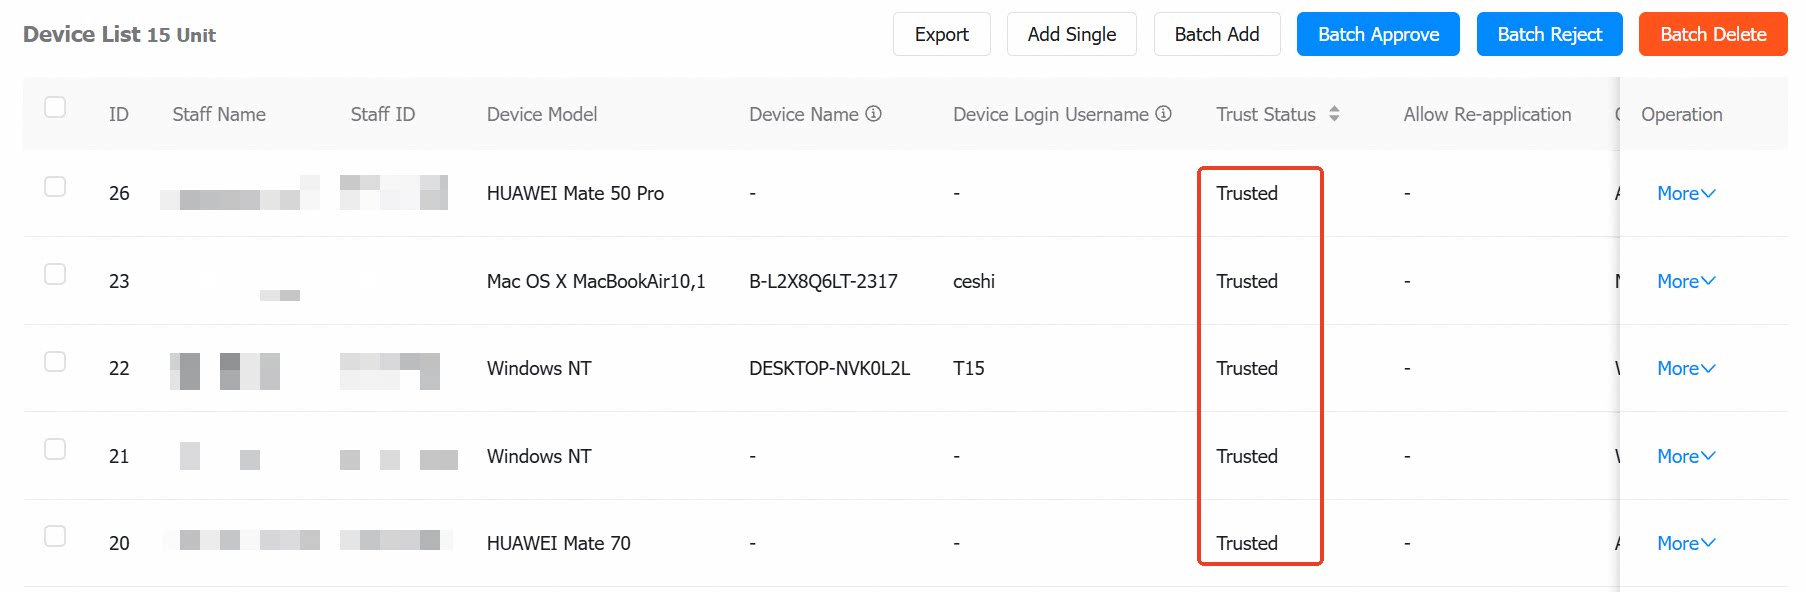
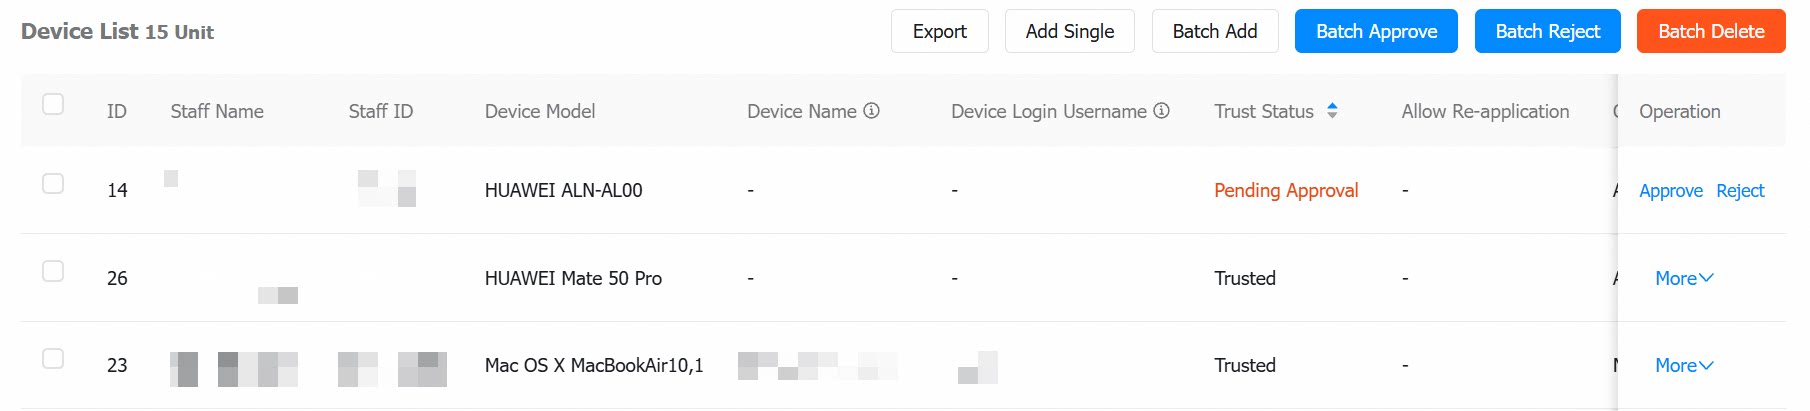
- You can search the trusted device list by multiple dimensions, including employee name, device trust status (all, pending approval, trusted), client type (all, Windows, Mac, Android, iOS), MAC address (xx:xx:xx:xx:xx:xx, desktop only), and registration/application time.
- You can report as lost, delete, batch delete, or promote to a shared trusted device (lost or deleted devices will be forced to sign out of DingTalk). The device list can also be exported locally.

Company Trusted Device Management
Navigation path: in the left navigation pane, go to Security & permission > Security > Access Control > Trusted Device > Company Device.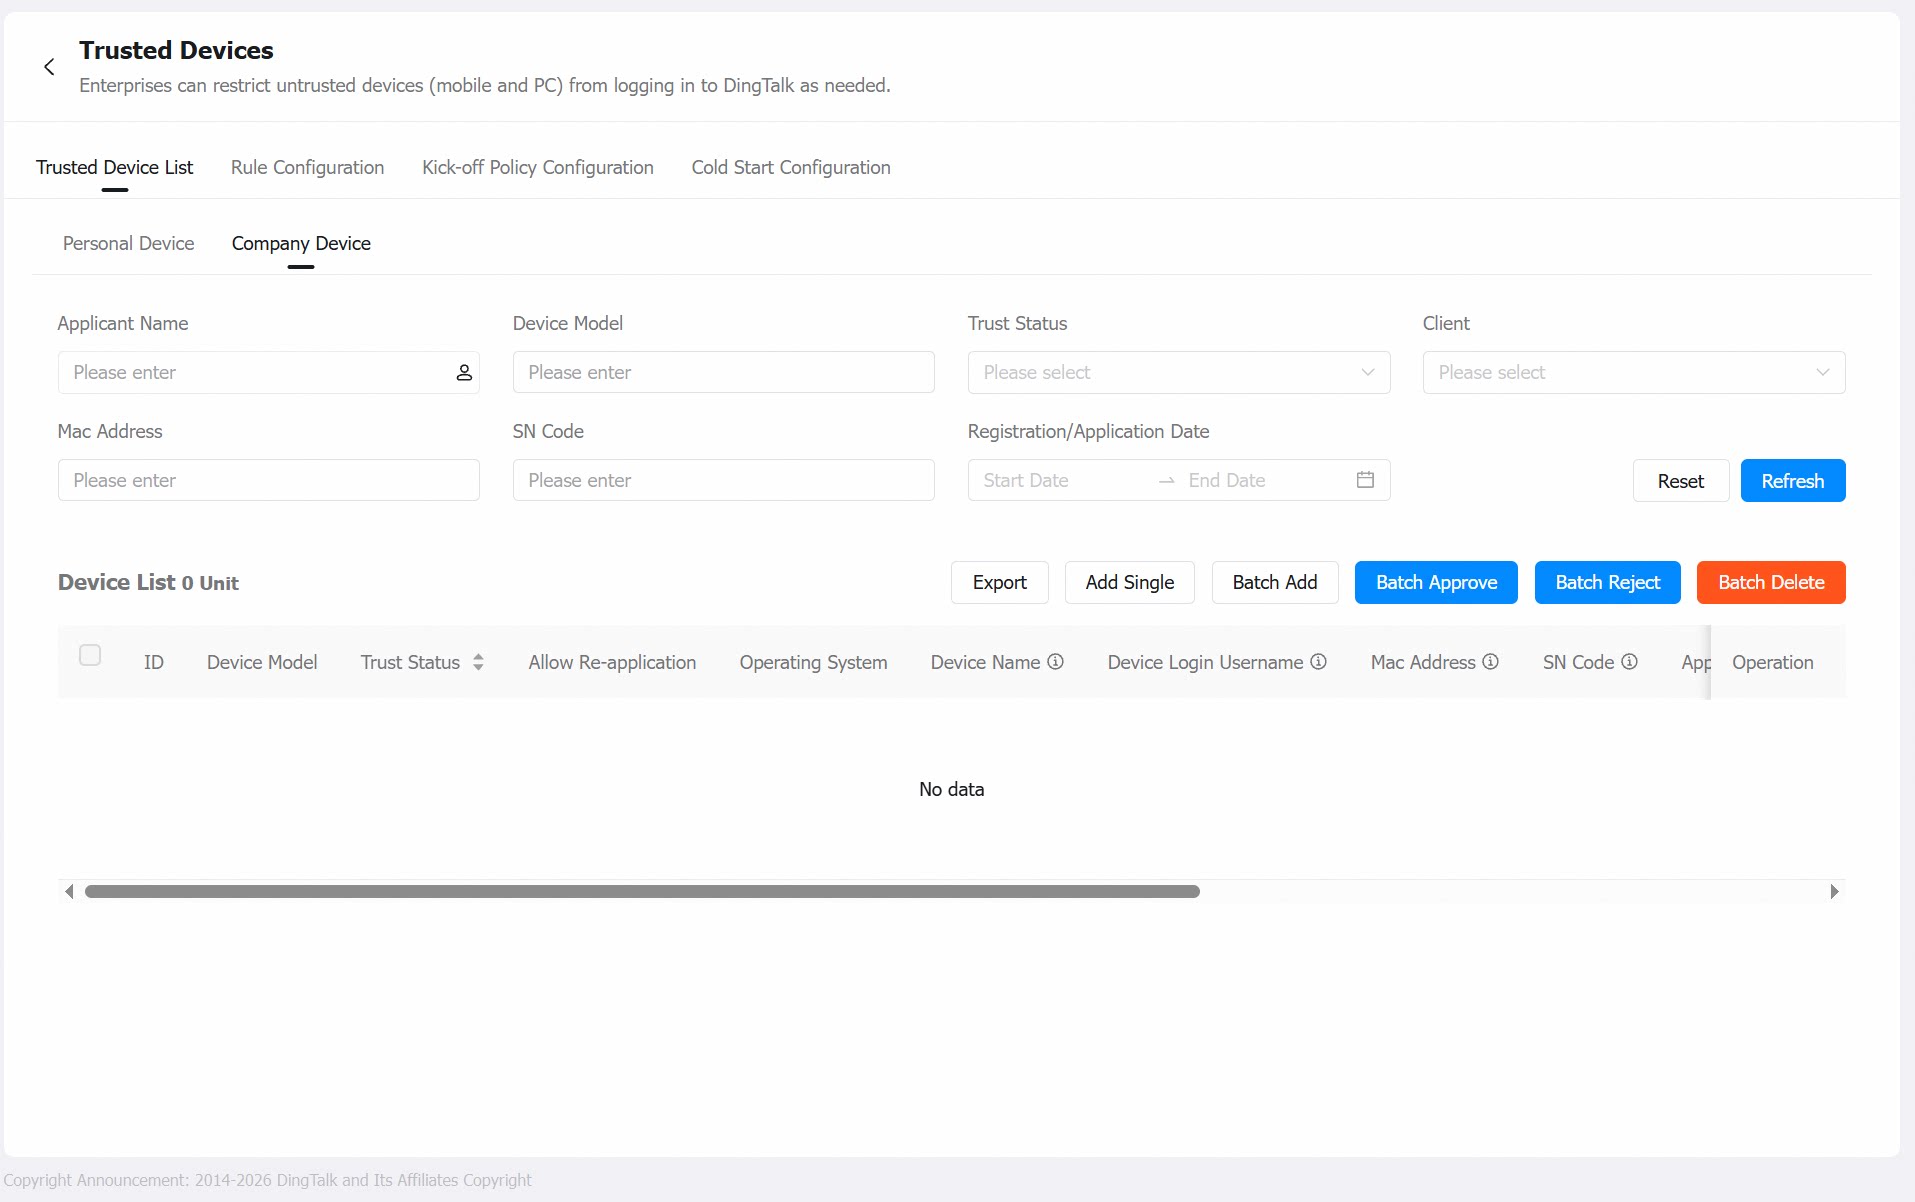
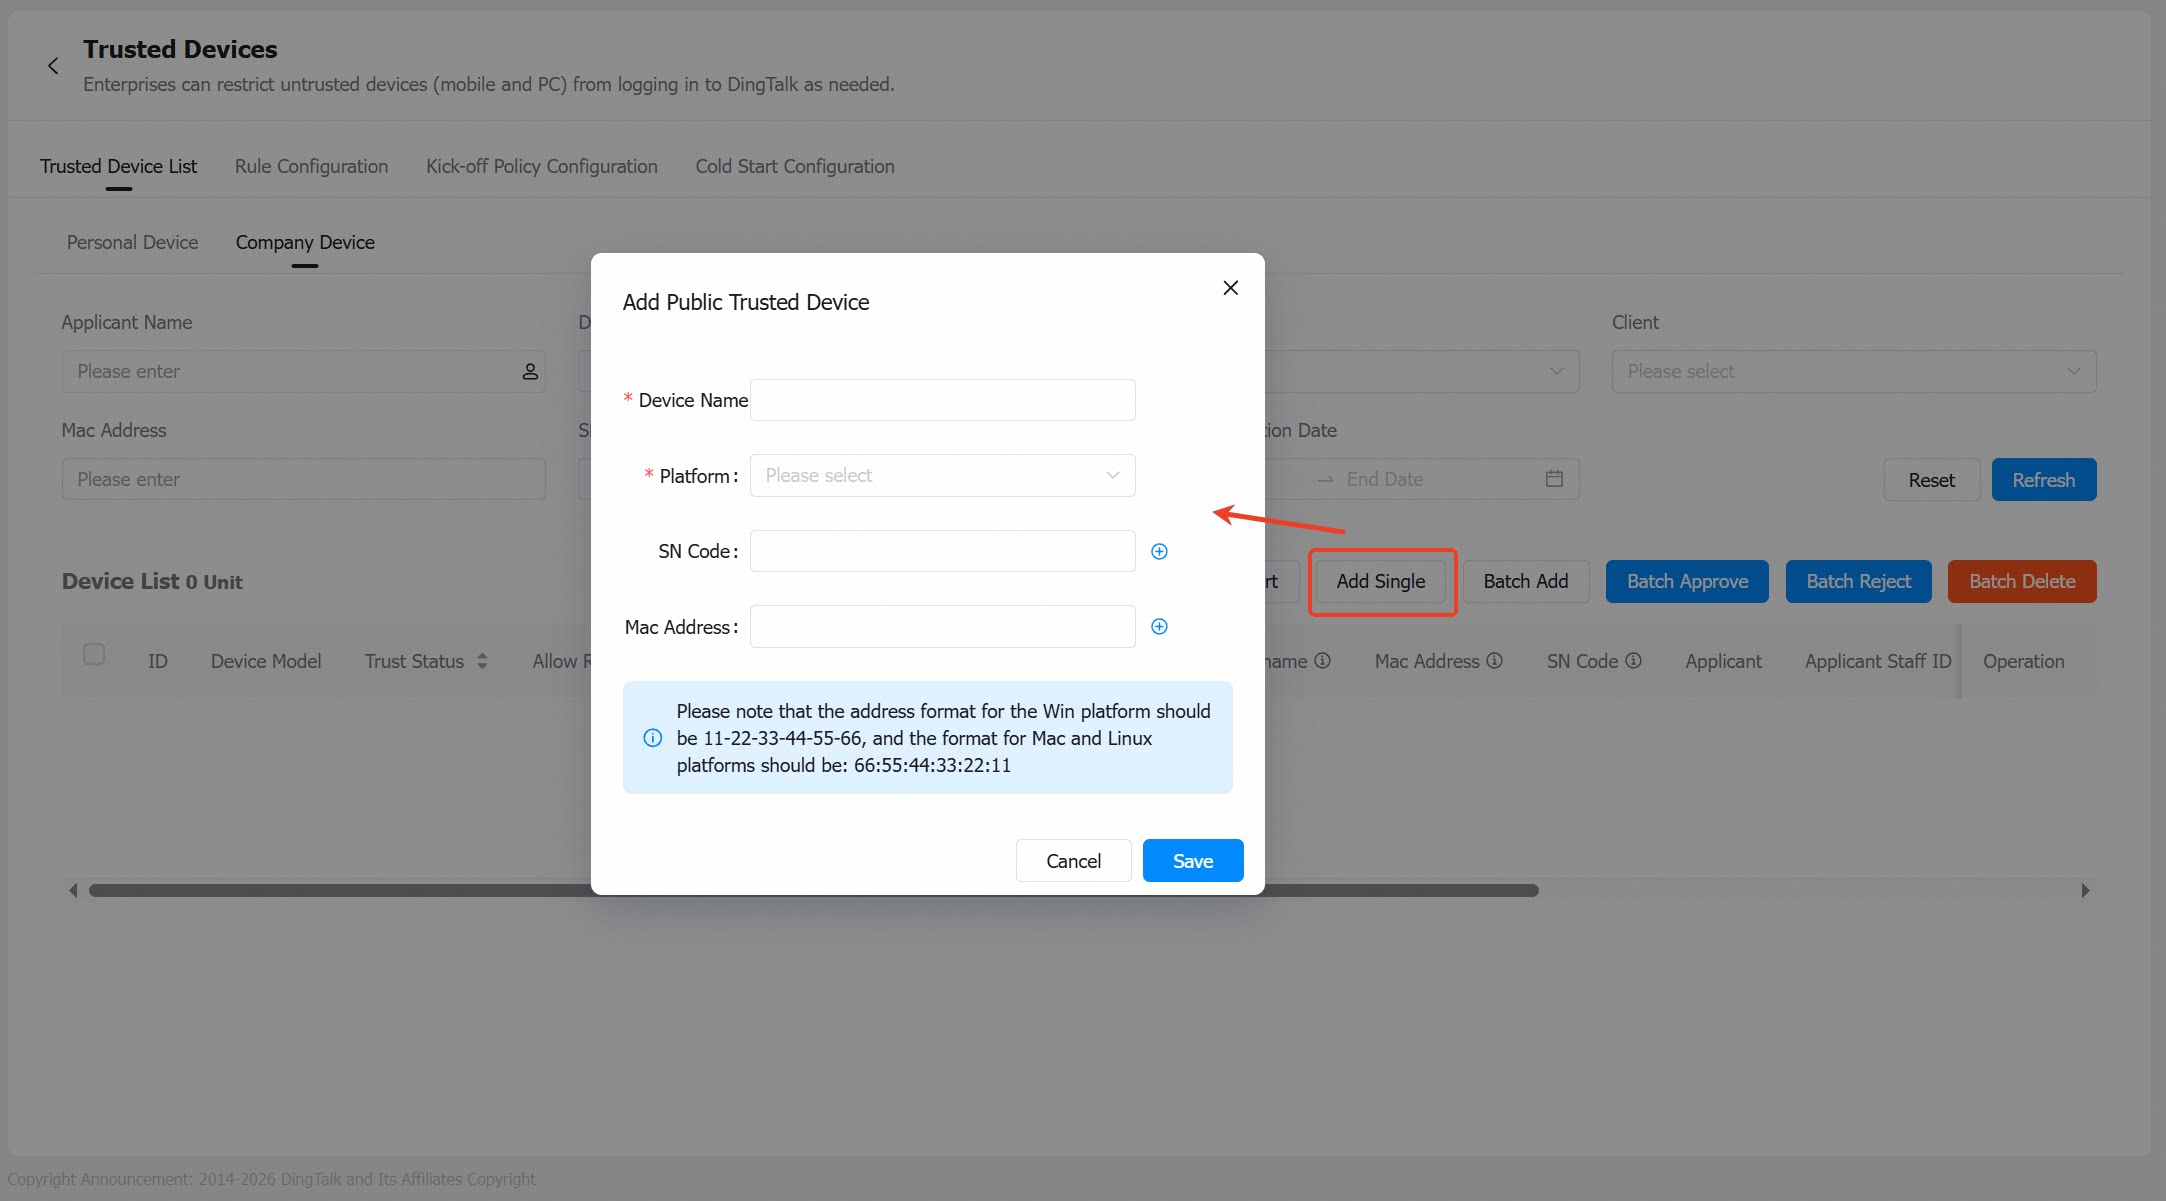
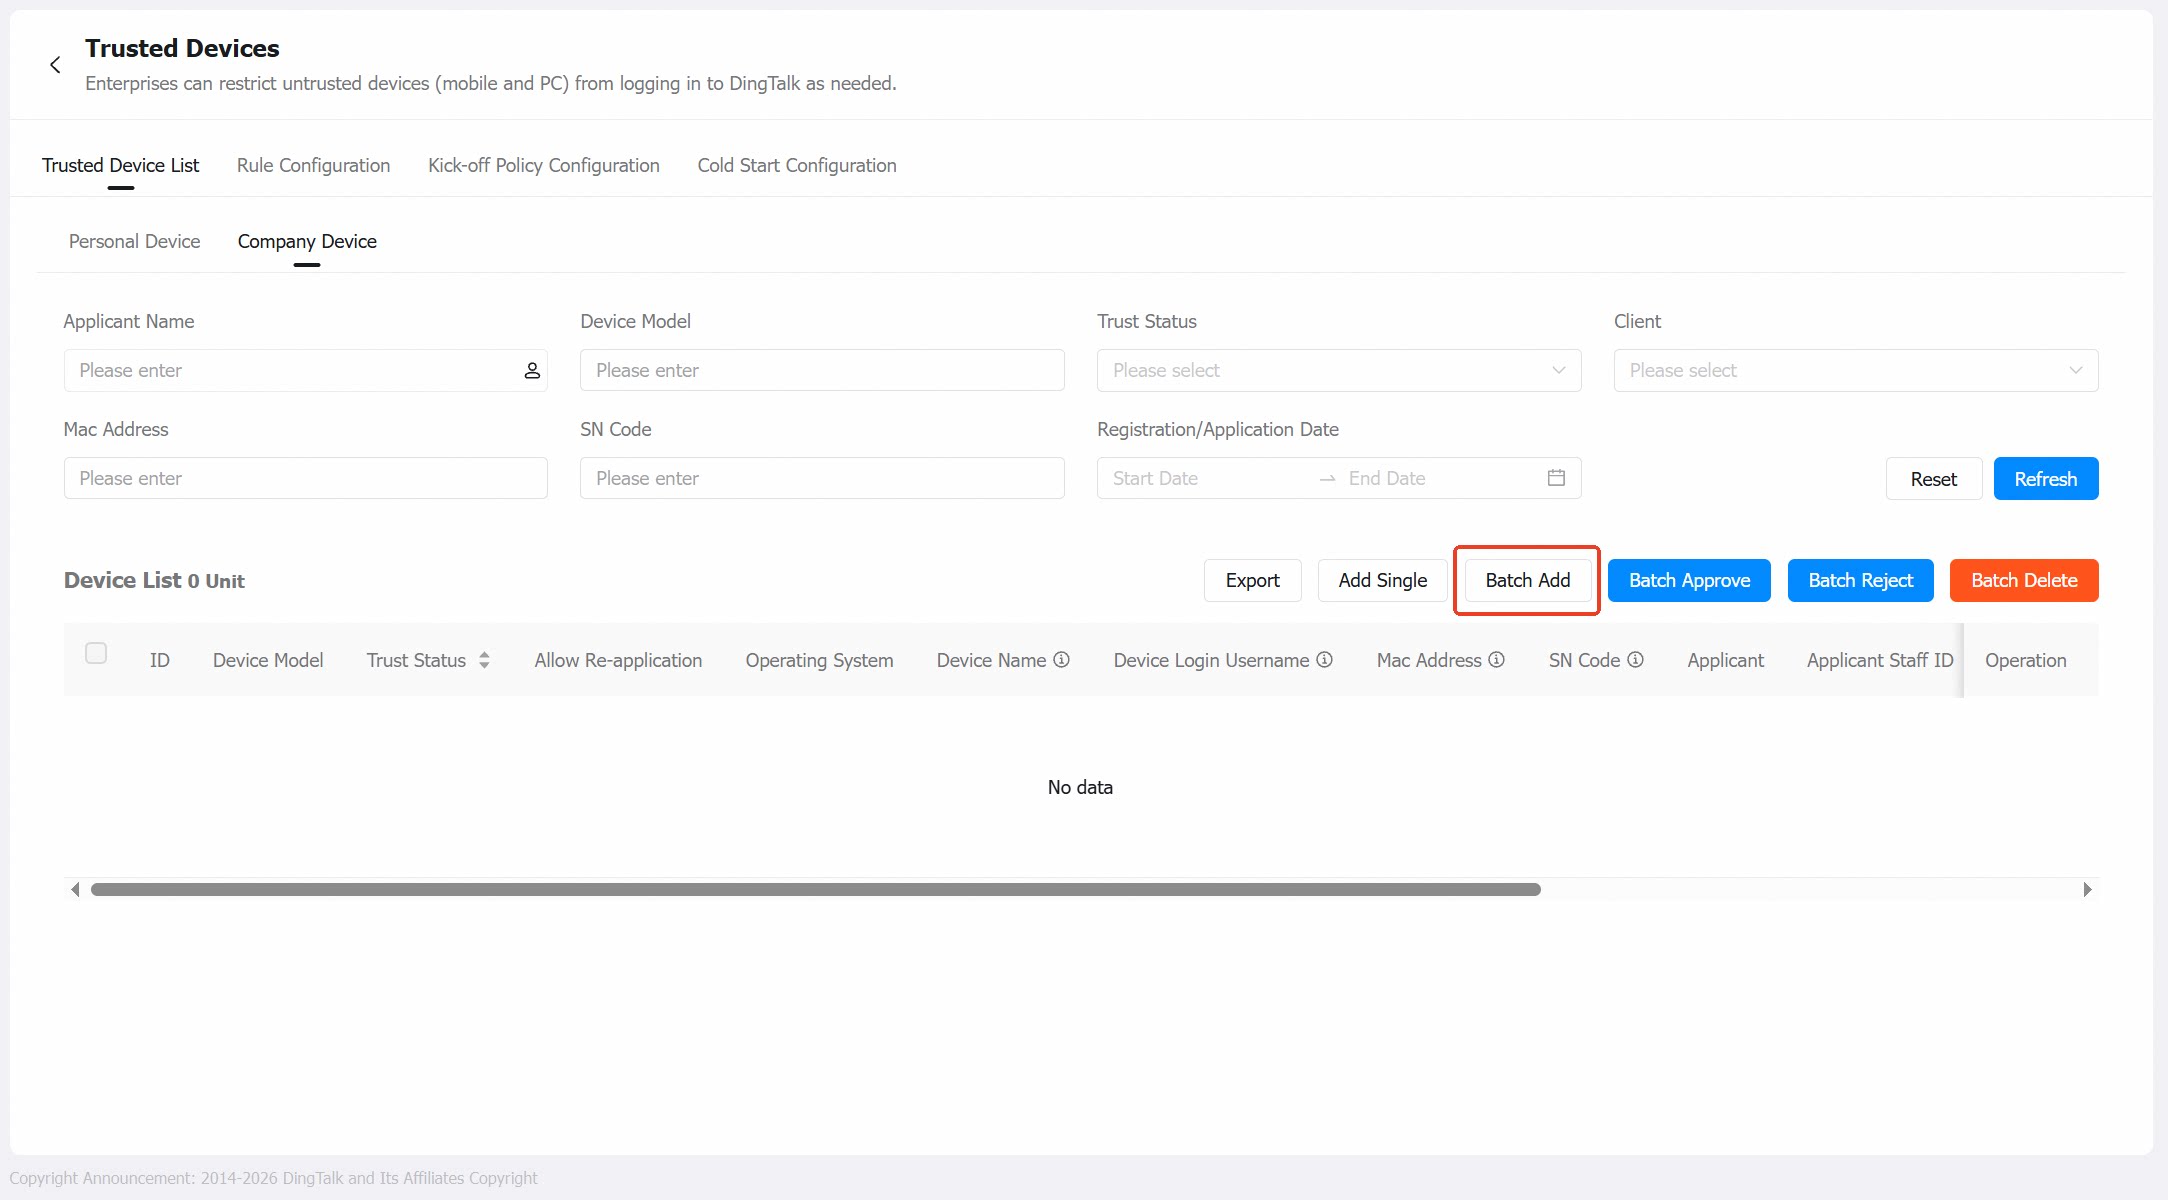
Adding a Desktop Company Device
- Add a single device
- Batch add devices
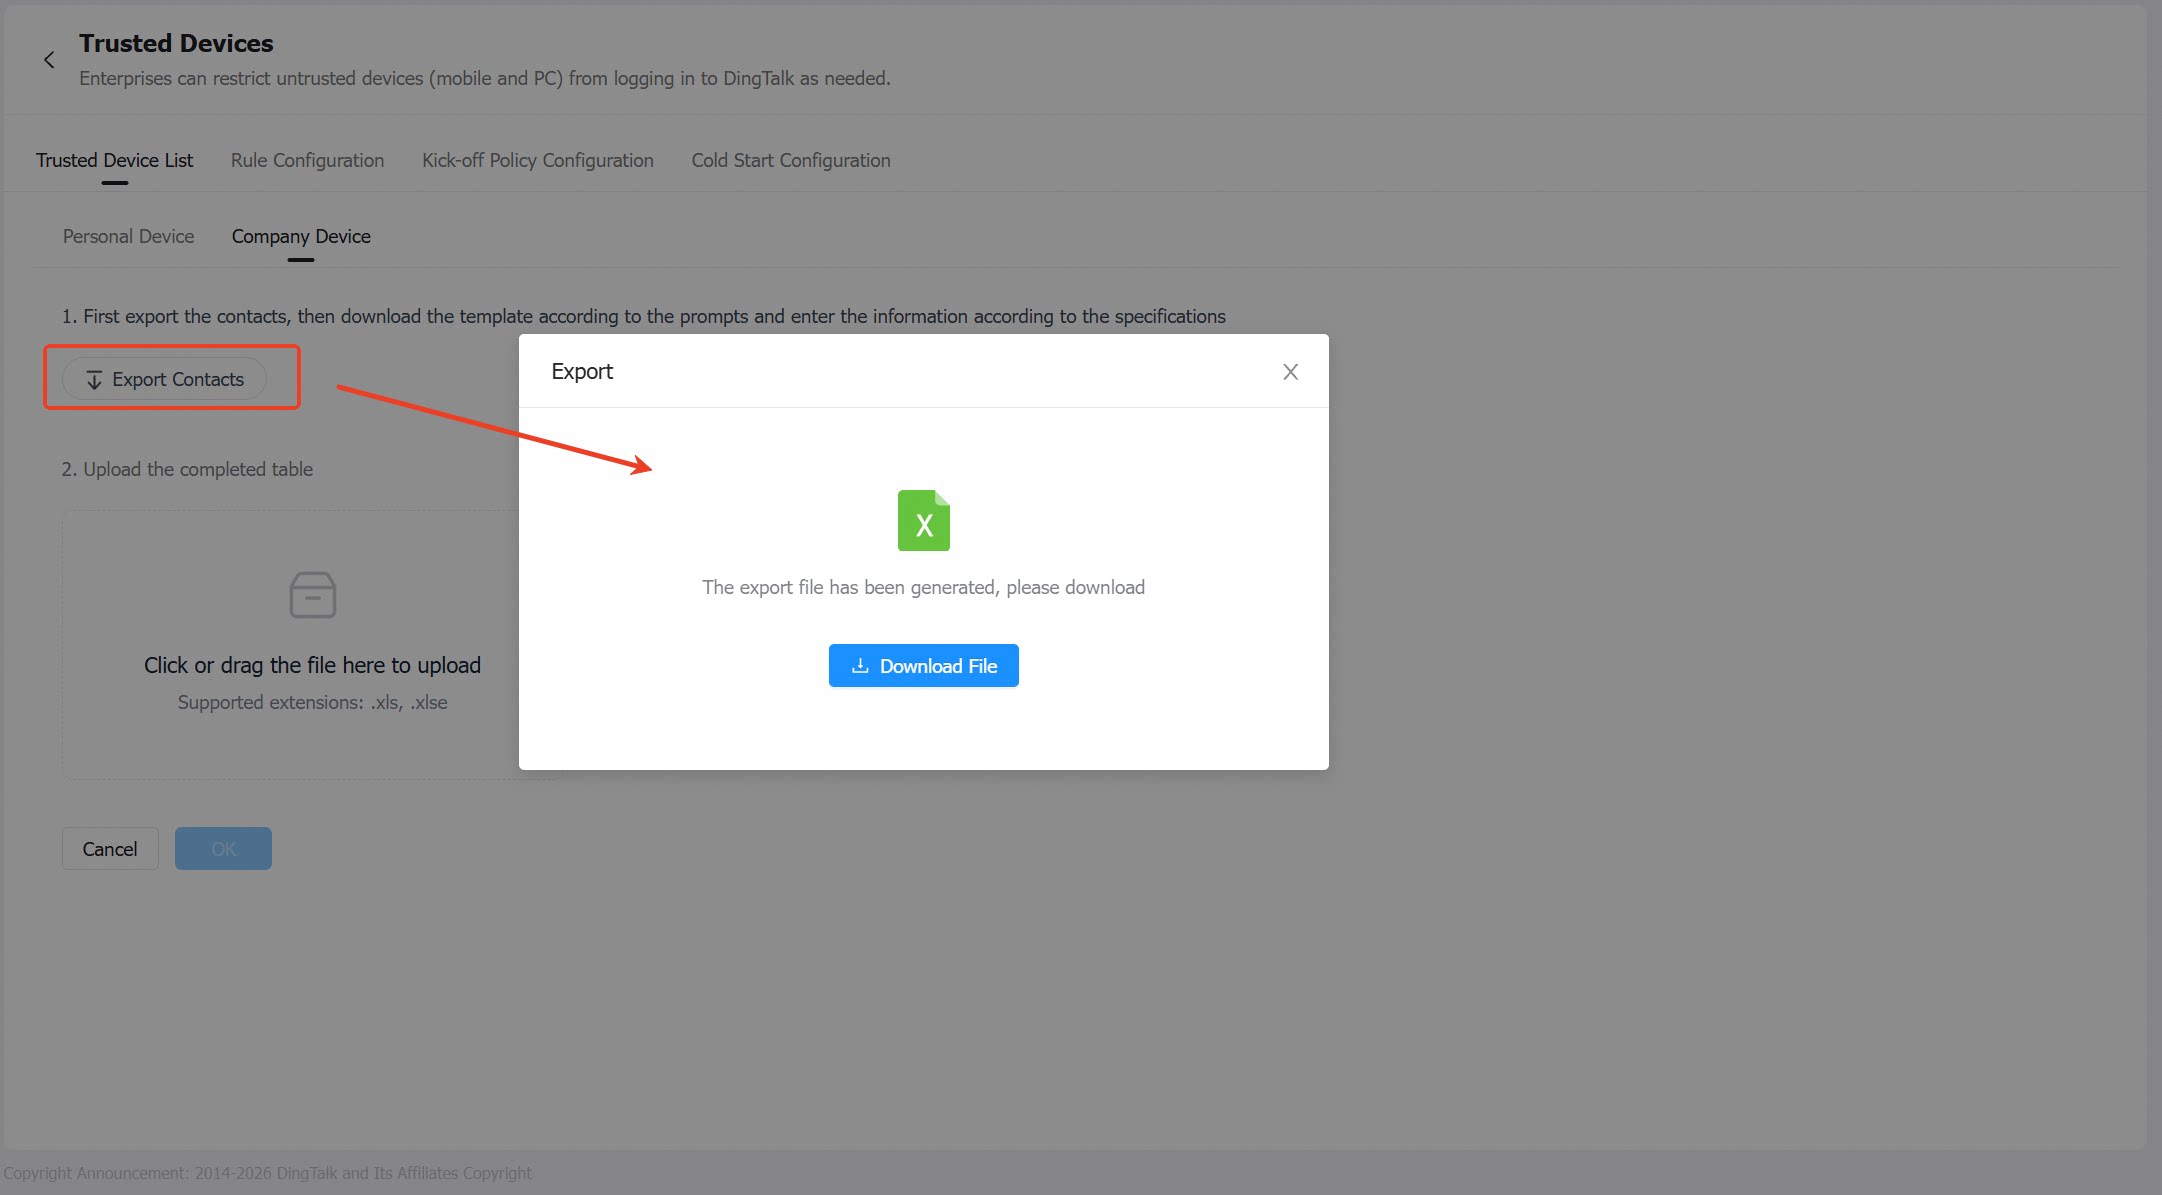
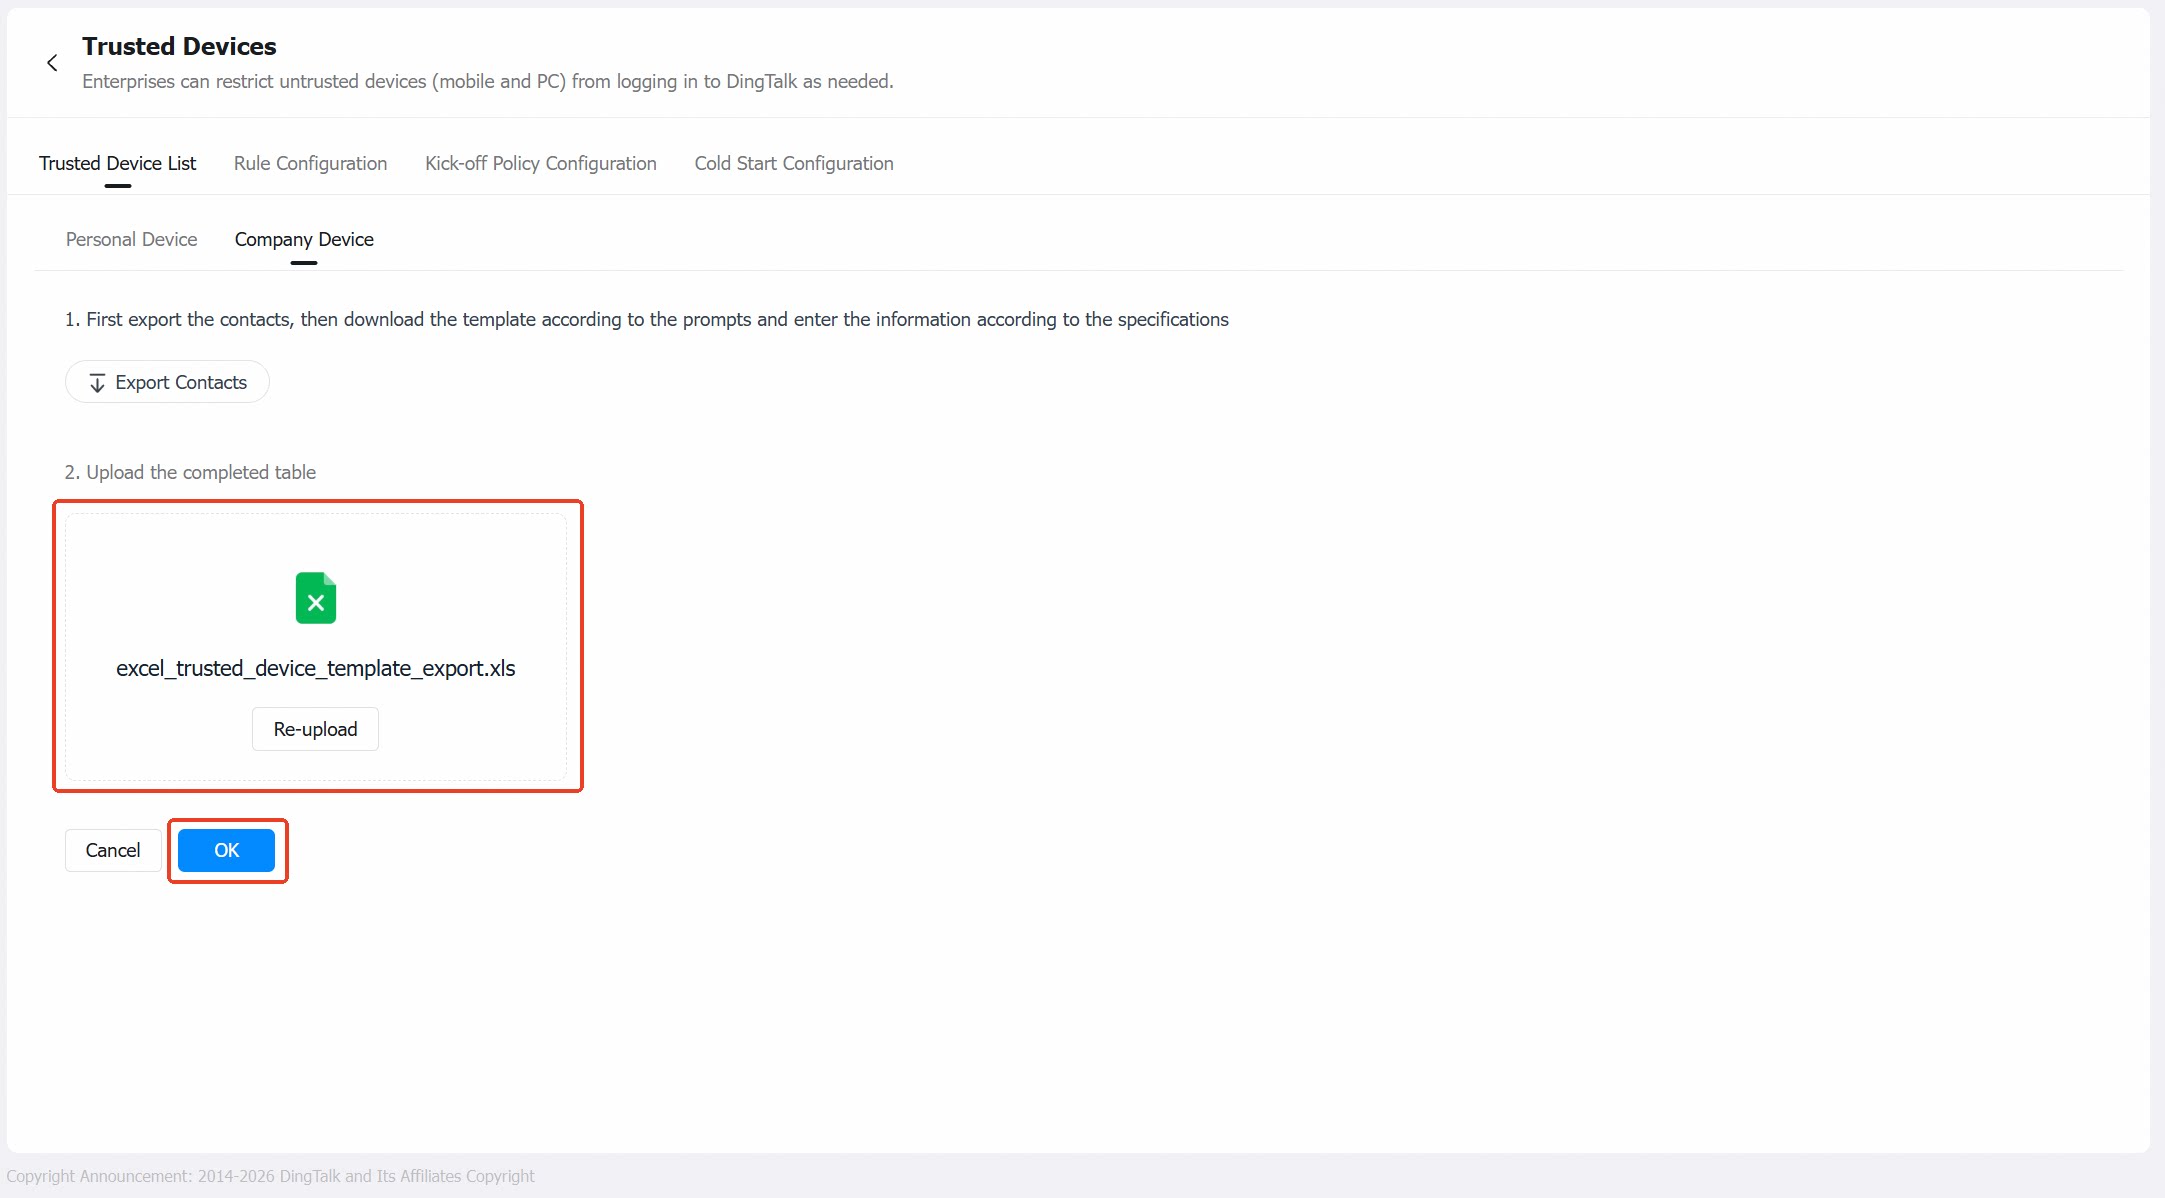
Managing the Shared Trusted Device List
- You can search the trusted device list by multiple dimensions, including device name, client type (all, Windows, Mac), MAC address (xx:xx:xx:xx:xx:xx, desktop only), and registration/application time.
- You can configure the available employee scope (all employees / specific employees), as well as delete or batch delete trusted devices (deleted devices will be forced to sign out of DingTalk). The device list can also be exported locally.
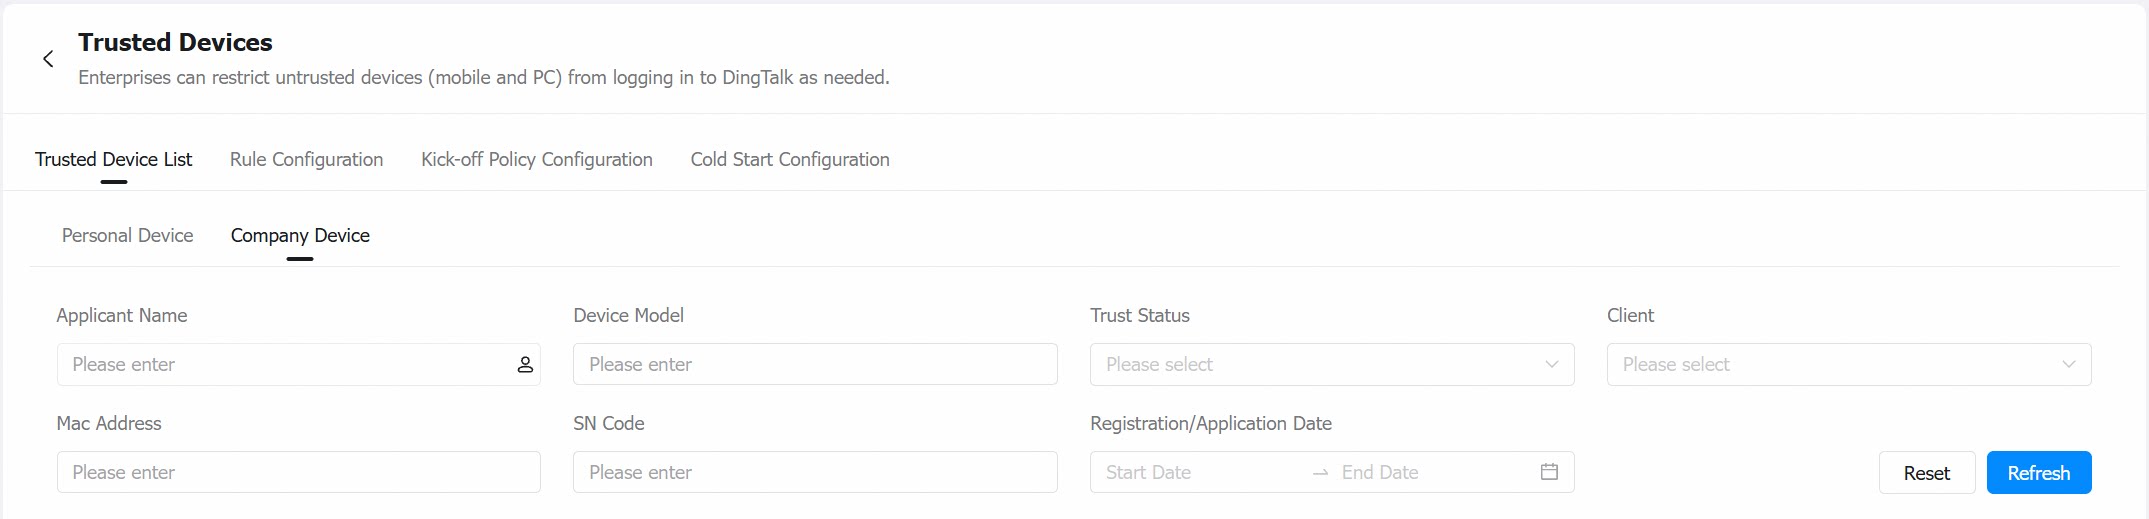

Rule Configuration
Navigation path: in the left navigation pane, go to Security & permission > Security > Access Control > Trusted Device > Rule Configuration.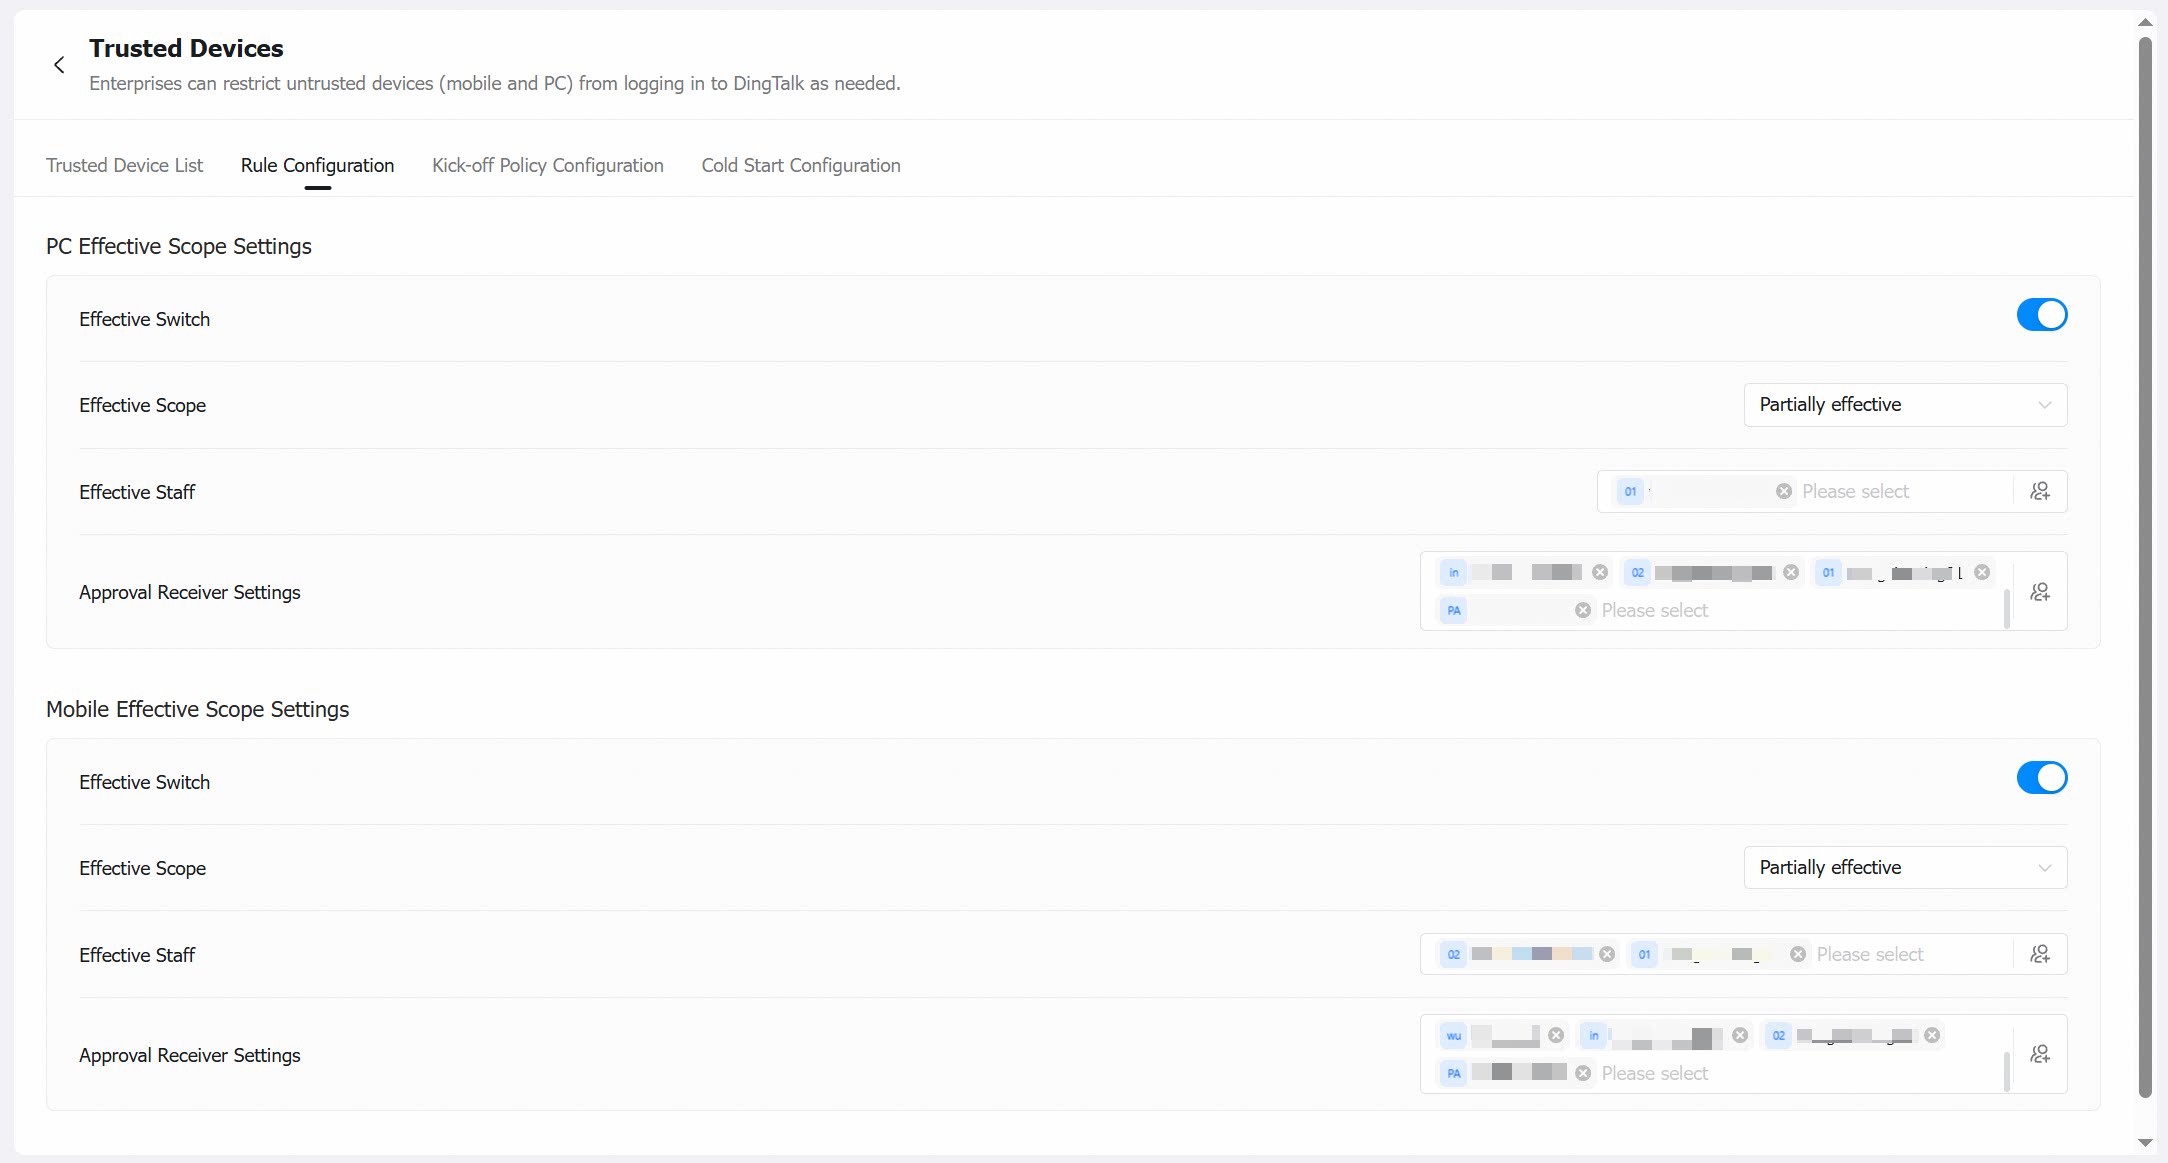
Kick-off Policy Configuration
Navigation path: in the left navigation pane, go to Security & permission > Security > Access Control > Trusted Device > Kick-off Policy Configuration.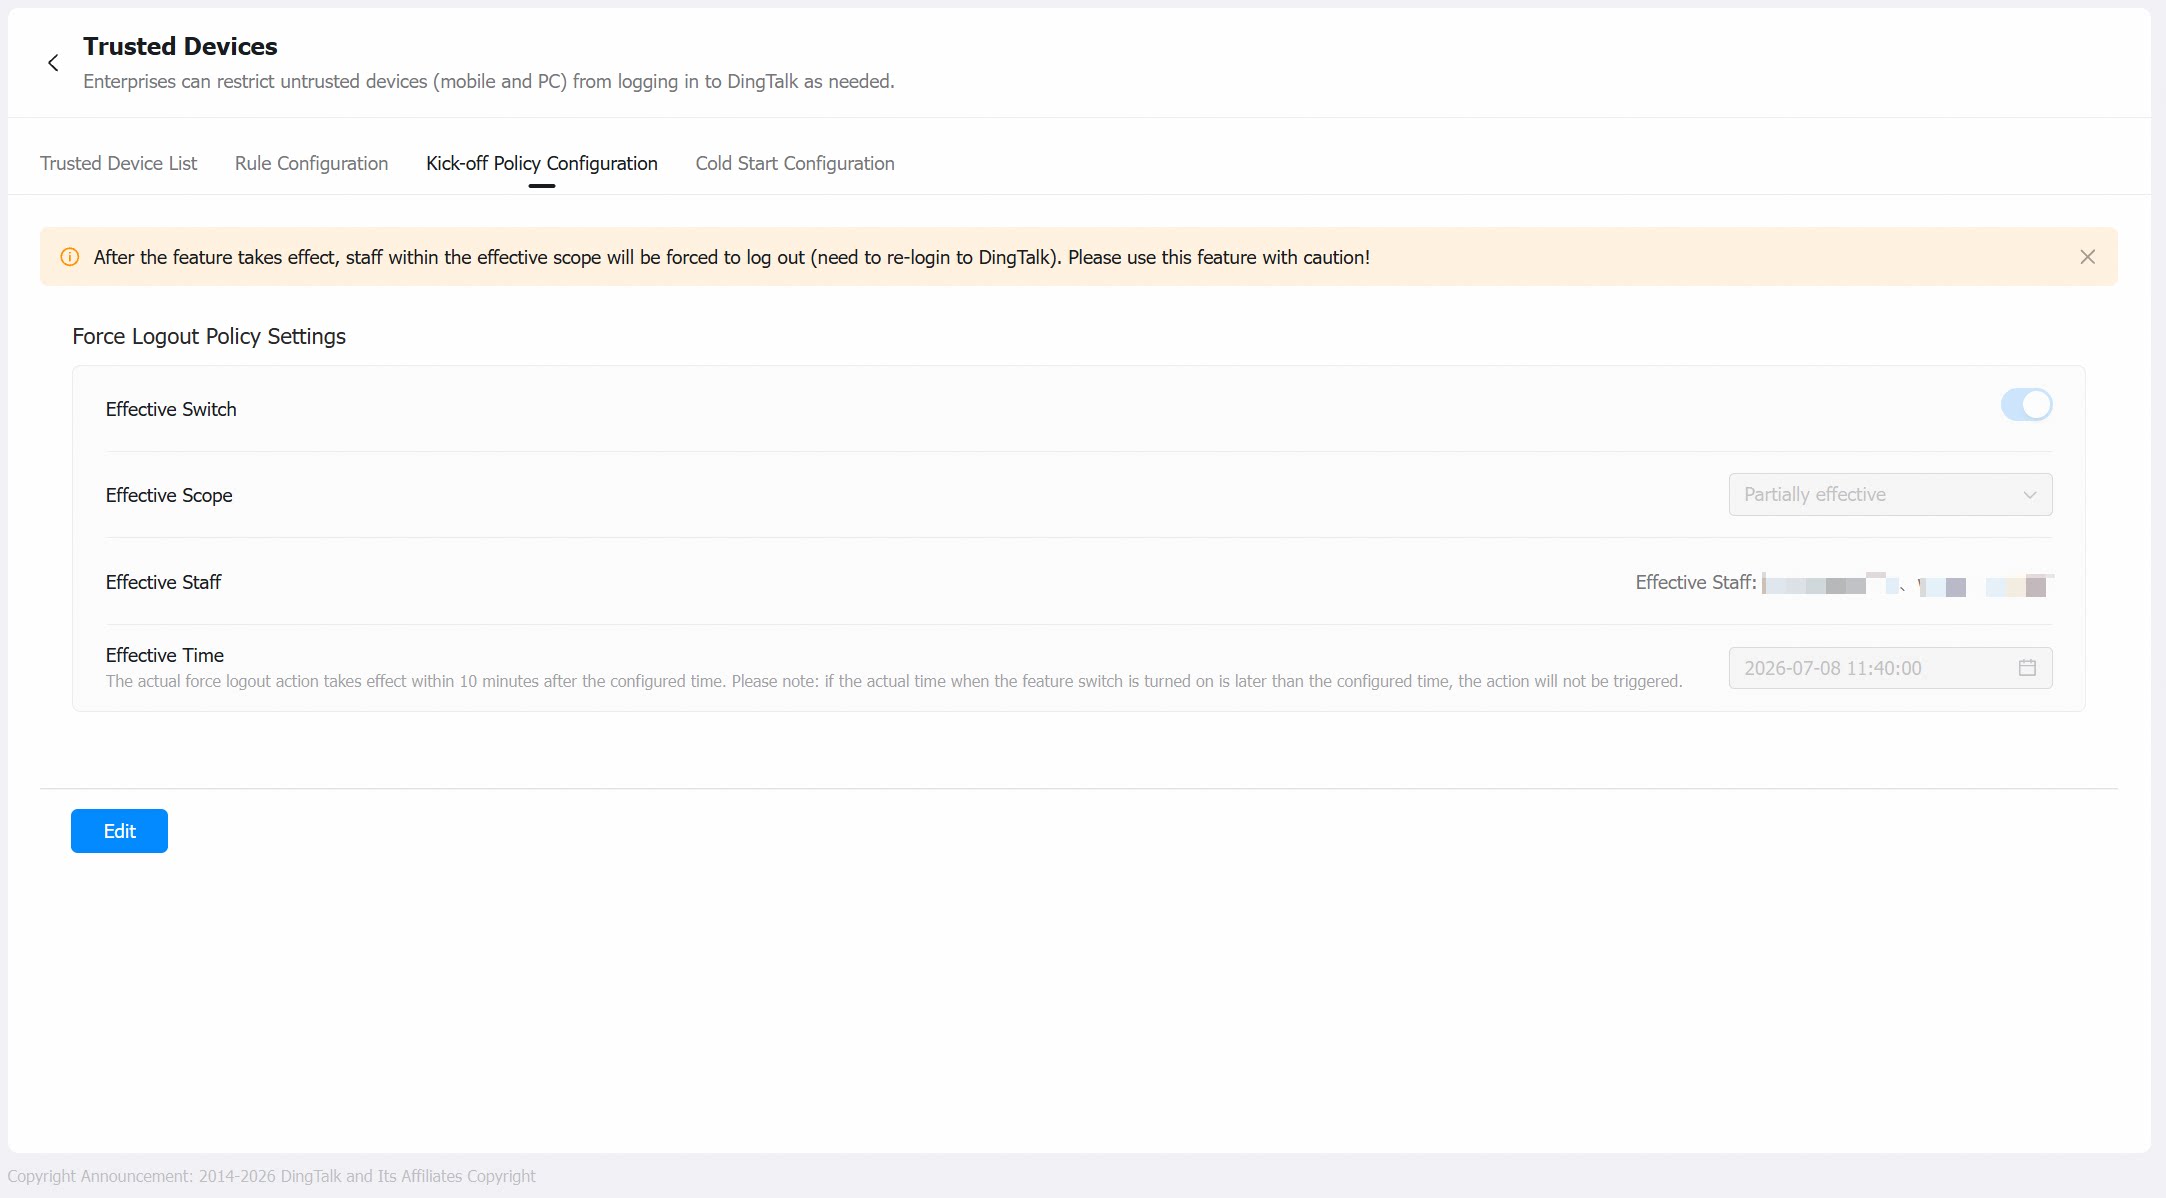
Cold Start Configuration
Navigation path: in the left navigation pane, go to Security & permission > Security > Access Control > Trusted Device > Cold Start Configuration.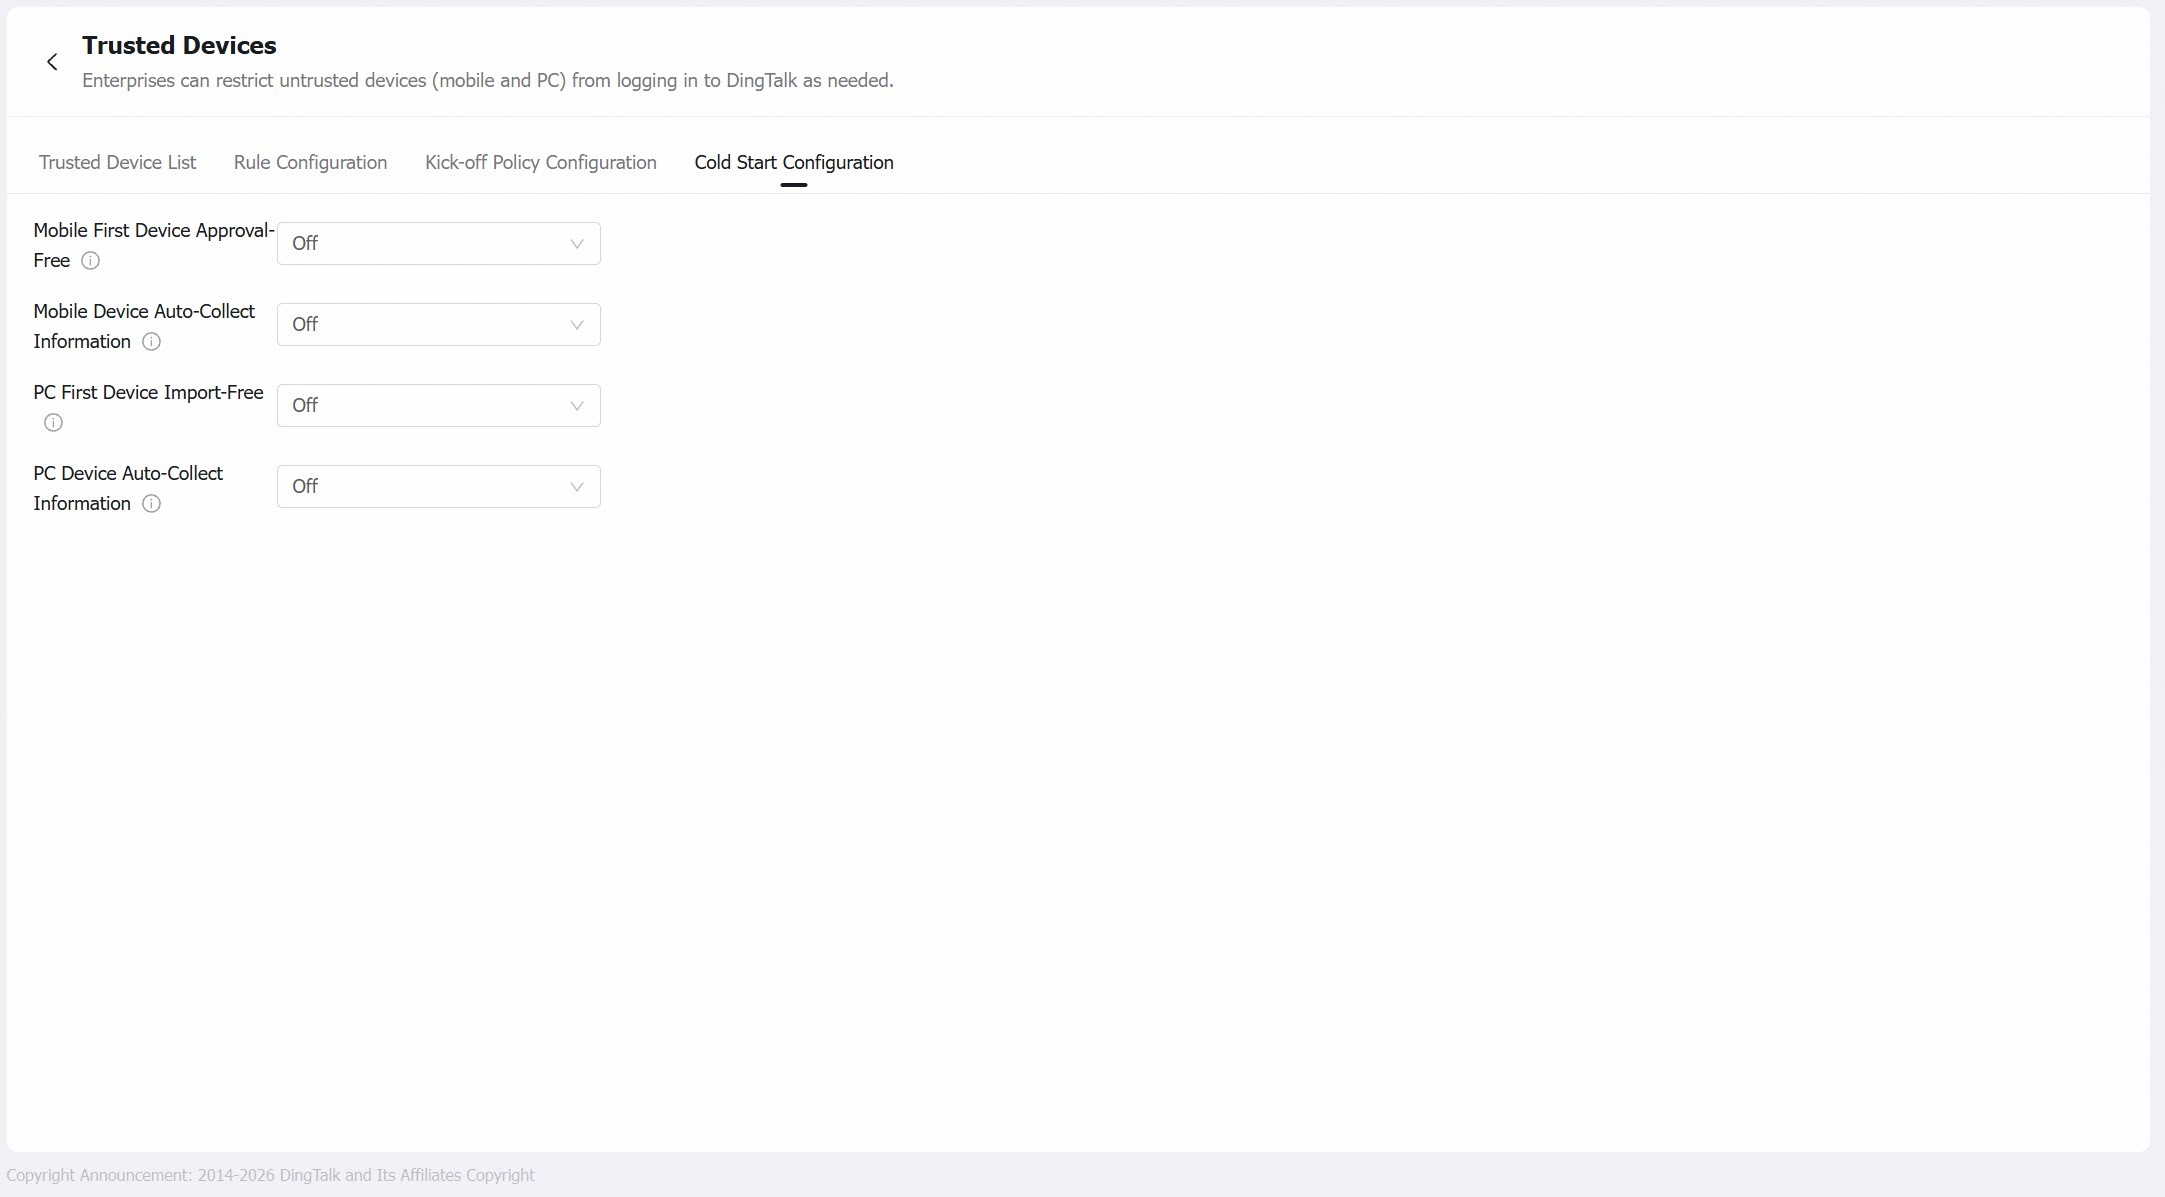
Enforcement Settings
- Auto-approve first mobile device and collect information: When enabled, an employee’s first mobile personal device is auto-approved and becomes a trusted device.
- Auto-collect mobile device information: When enabled, if an employee signs in on an untrusted mobile device, the device information is automatically collected. The trust status remains unchanged (still untrusted), and the administrator can approve it from the device list.
- Auto-approve first desktop device and collect information: When enabled, an employee’s first desktop personal device is auto-approved and becomes a trusted device.
- Auto-collect desktop device information: When enabled, if an employee signs in on an untrusted desktop device, the device information is automatically collected. The trust status remains unchanged (still untrusted), and the administrator can approve it from the device list.
Q&A
Q1: What does 'Remove users on untrusted devices' do in the policy settings? Can't untrusted devices already not sign in to DingTalk?
Q1: What does 'Remove users on untrusted devices' do in the policy settings? Can't untrusted devices already not sign in to DingTalk?
Q2: How do I set multiple MAC addresses for the same desktop device in the batch import template?
Q2: How do I set multiple MAC addresses for the same desktop device in the batch import template?
Q3: What is the validation logic for multiple MAC addresses on a desktop device?
Q3: What is the validation logic for multiple MAC addresses on a desktop device?
Q4: How are personal trusted devices associated with specific employees?
Q4: How are personal trusted devices associated with specific employees?
Q5: What happens if an employee submits an application after 'Auto-collect mobile device information' is enabled?
Q5: What happens if an employee submits an application after 'Auto-collect mobile device information' is enabled?
Q6: After enabling 'Auto-collect mobile device information,' will devices that were already signed in to DingTalk before the organization purchased trusted devices have their information collected?
Q6: After enabling 'Auto-collect mobile device information,' will devices that were already signed in to DingTalk before the organization purchased trusted devices have their information collected?
Q7: Does batch importing trusted devices overwrite previously imported data? What is the import logic?
Q7: Does batch importing trusted devices overwrite previously imported data? What is the import logic?
Q8: Can the device name field be used to obtain the device's unique identifier?
Q8: Can the device name field be used to obtain the device's unique identifier?