

 Chats
Chats Calendar
 Meetings
 Contacts
 Mail
Mail Docs
Docs Drive
Drive AI Table
 AI Minutes
 Attendance
 Approval
 YiDA
YiDA Admin Console
1. Feature overview
In daily operations, enterprises often need to jointly sign and approve contracts with external partners such as suppliers, customers, and outsourcing companies. To improve collaboration efficiency and standardize the contract process, External users can now participate in the Approval process. This guide walks you through how to set up and run the complete cross-organization contract approval workflow with external partners, helping enterprises achieve efficient and secure cross-organization Collaboration.2. Applicable scenarios
- Customer confirmation before signing a sales contract
- Supplier confirmation on a procurement contract
- Joint signing of a cooperation framework agreement
- Two-way confirmation on an outsourcing service contract
- Other similar scenarios
3. Operation flow
The overall flow consists of three steps:- Configure the required fields for the Contact profile, along with the contract Form and Approval process.
- The liaison for the external partner forwards the Contact profile and invites the partner to fill it in.
- The contract applicant initiates a contract Approval through cross-organization approval, selects the corresponding partner, and the partner then receives and confirms the contract.
1. Configure the Contact profile and contract form approval flow
1
Enter the Admin Console
Open DingTalk desktop > Workbench > OA Approval: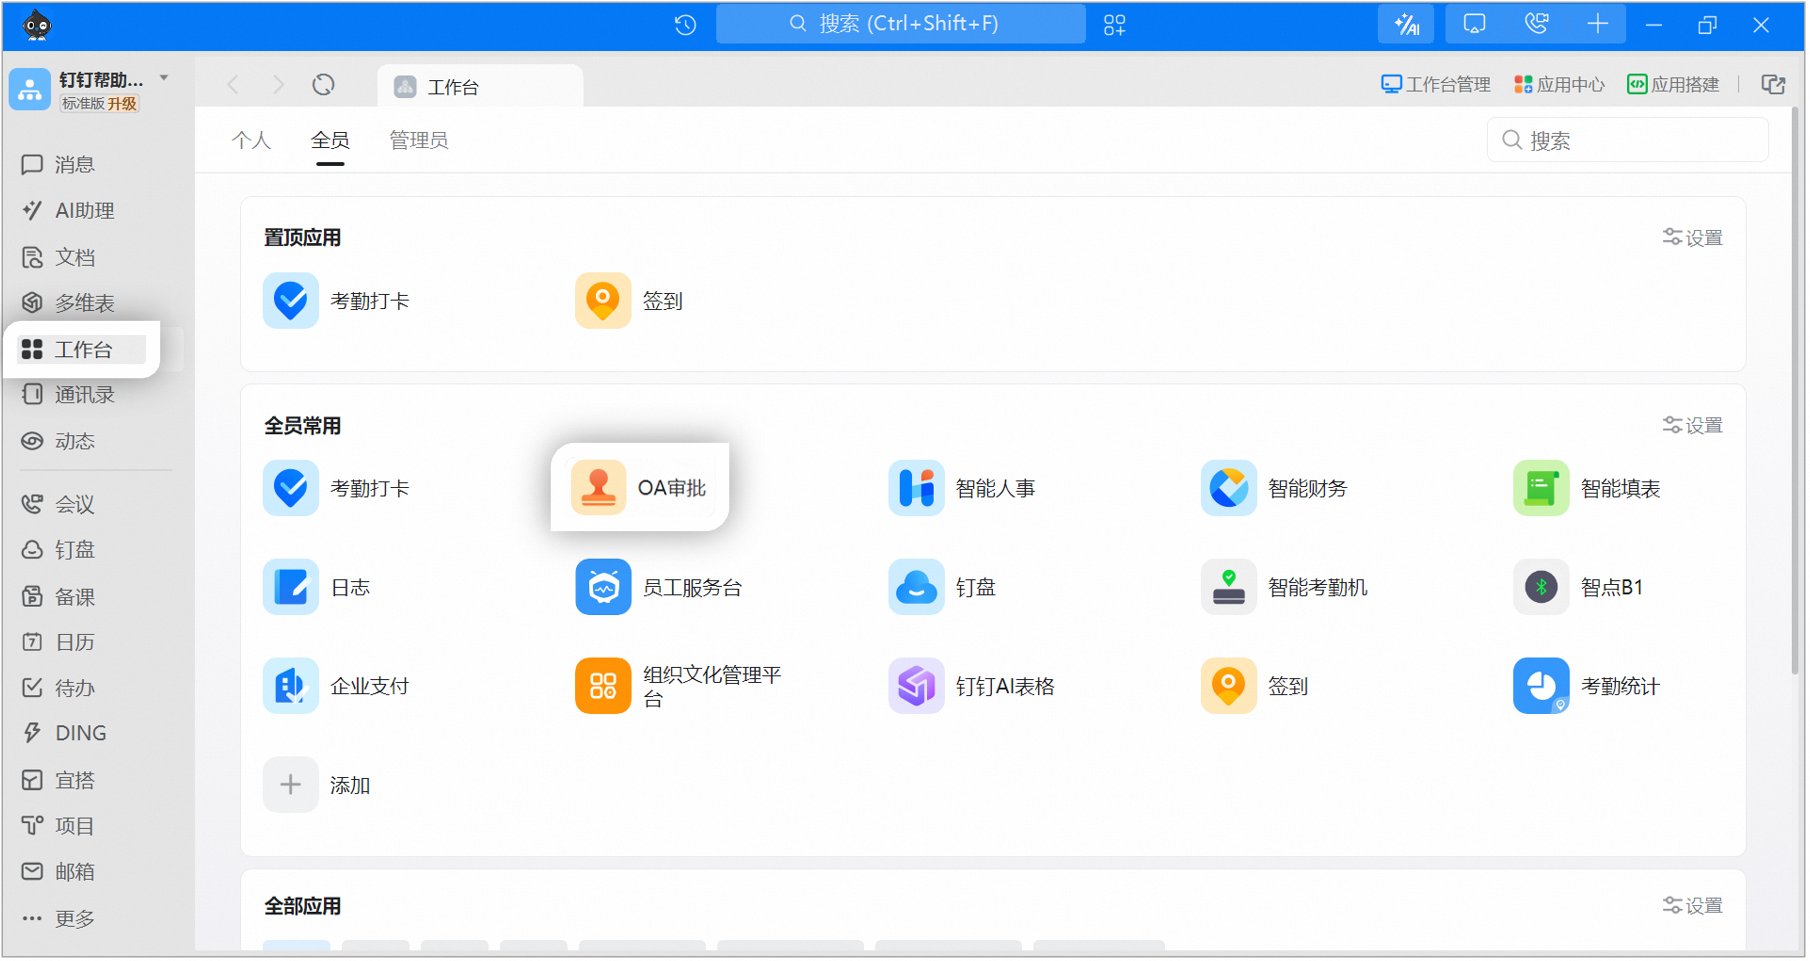 Click [Admin Console] in the top-right corner: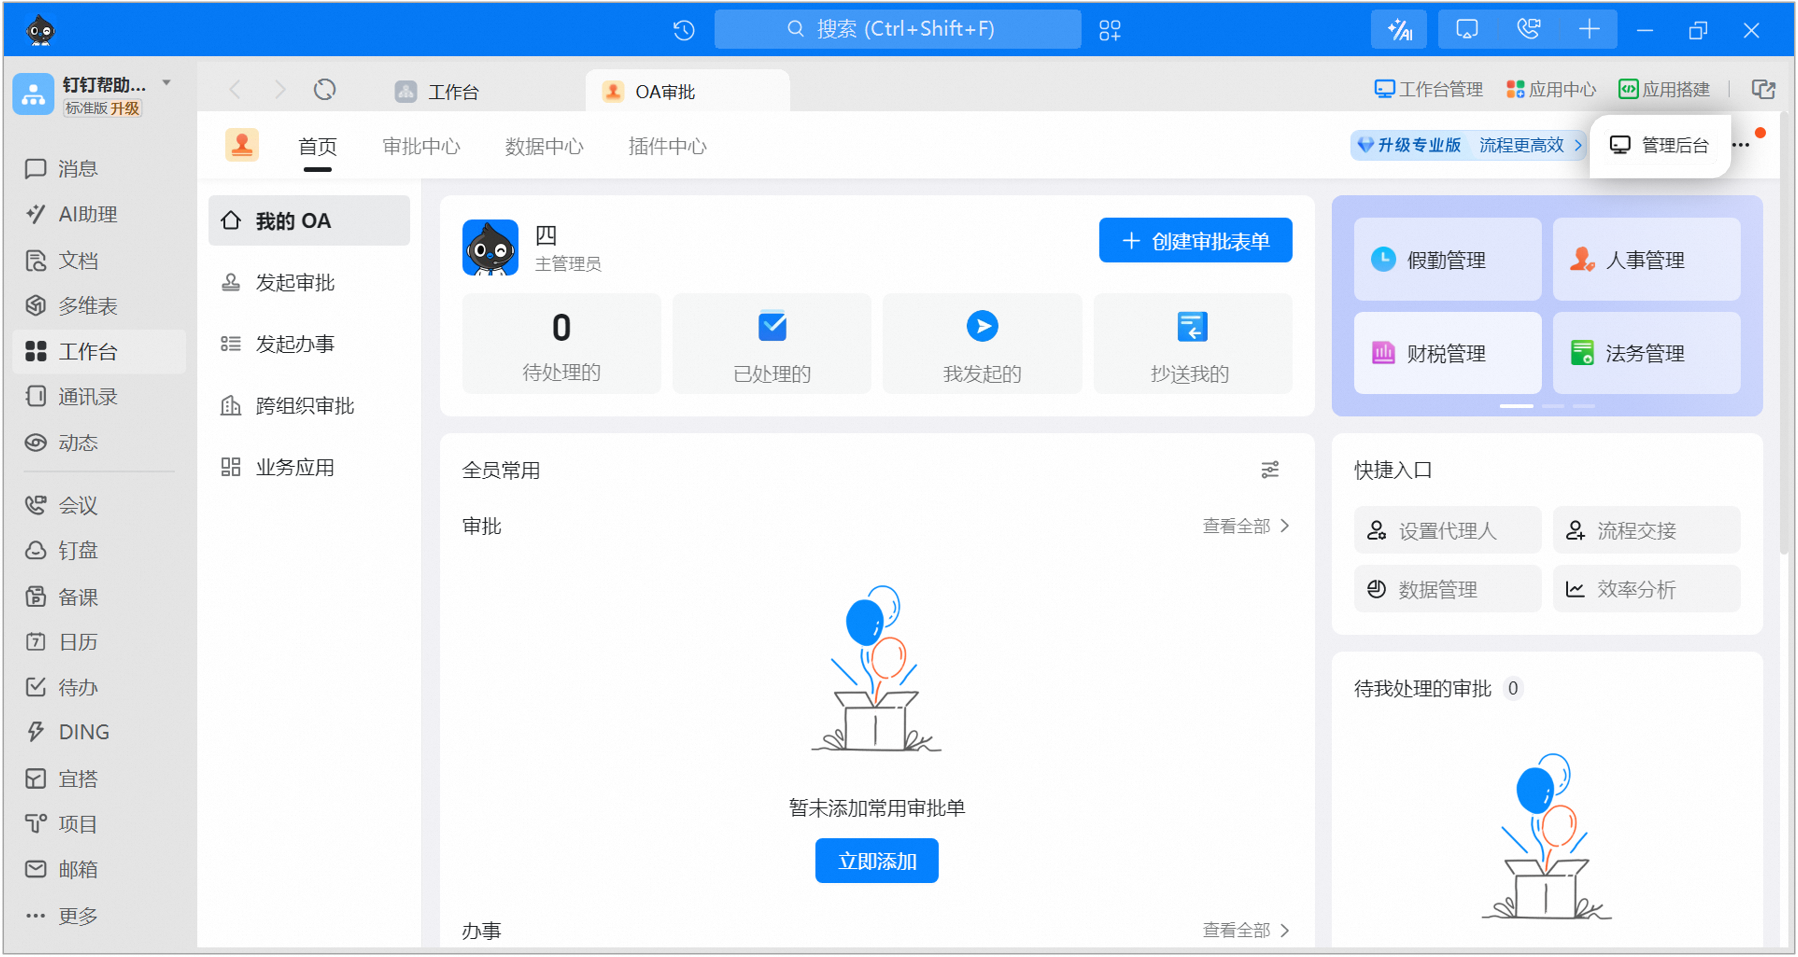
2
Edit the Contact profile Template
Click [Cross-organization Management] > select the Contact profile Template > [Edit]: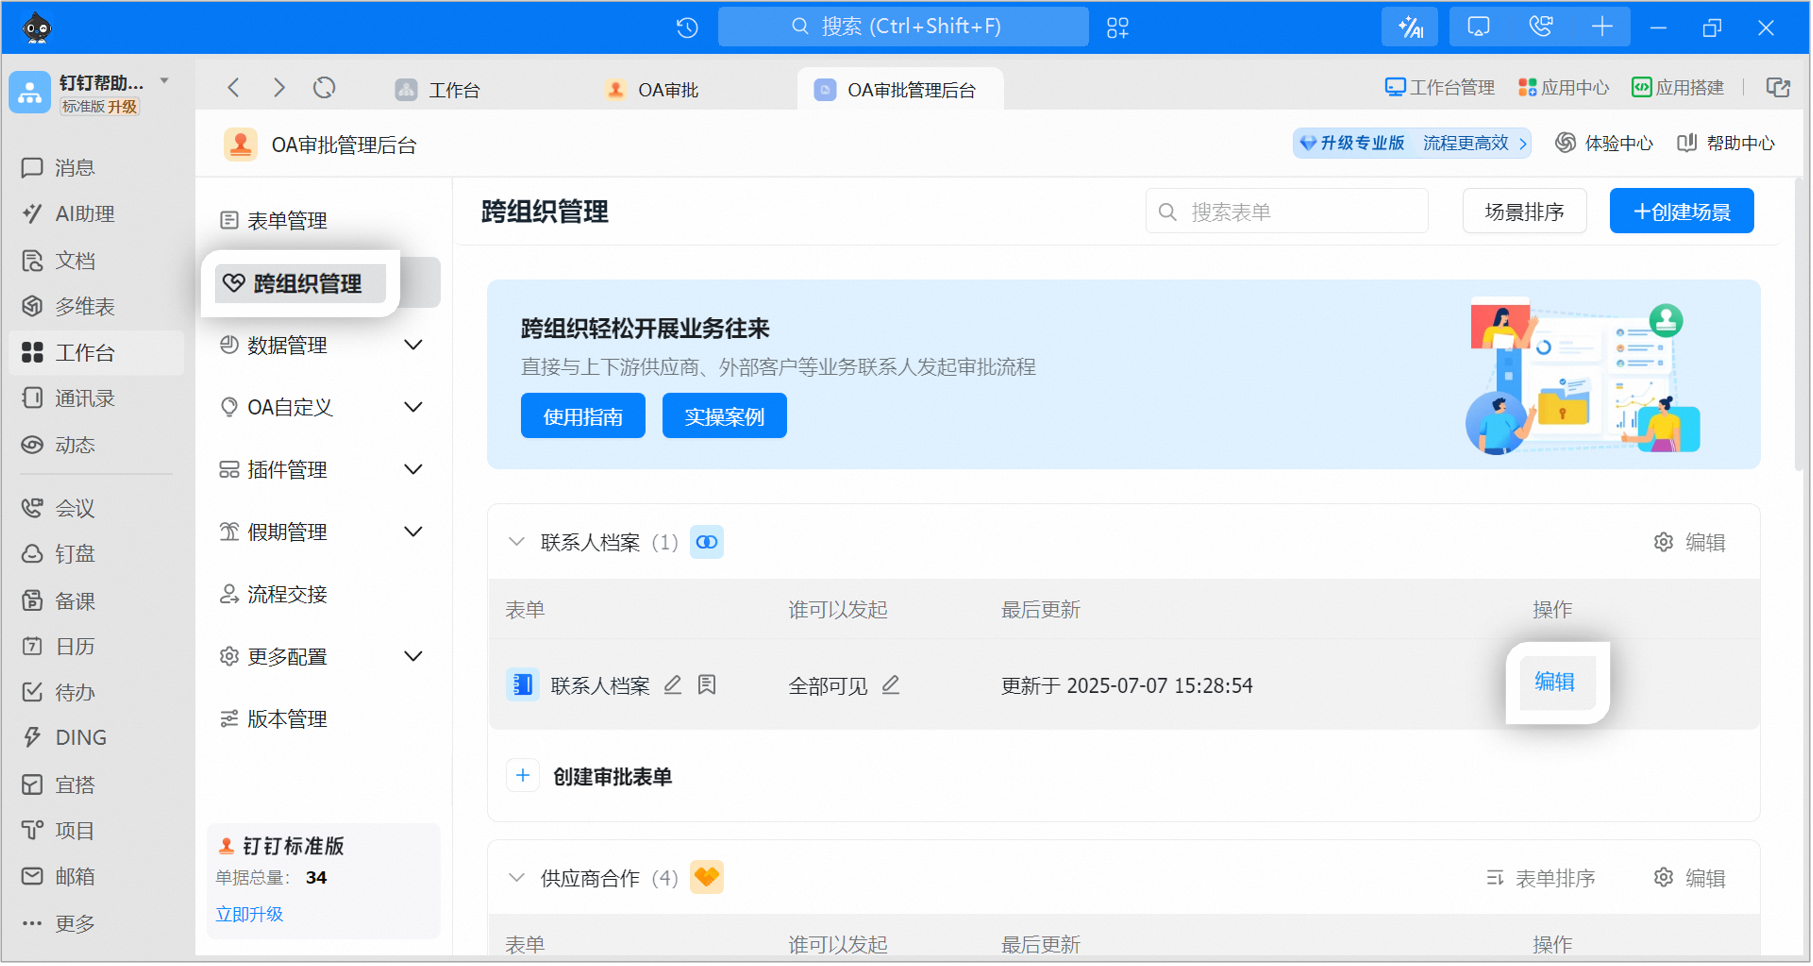
3
Adjust form fields
Select [form design] and adjust the Fields in the Form. The form design includes a default [User Authorization] widget, which cannot be deleted and is used to obtain the DingTalk Profile of the external User: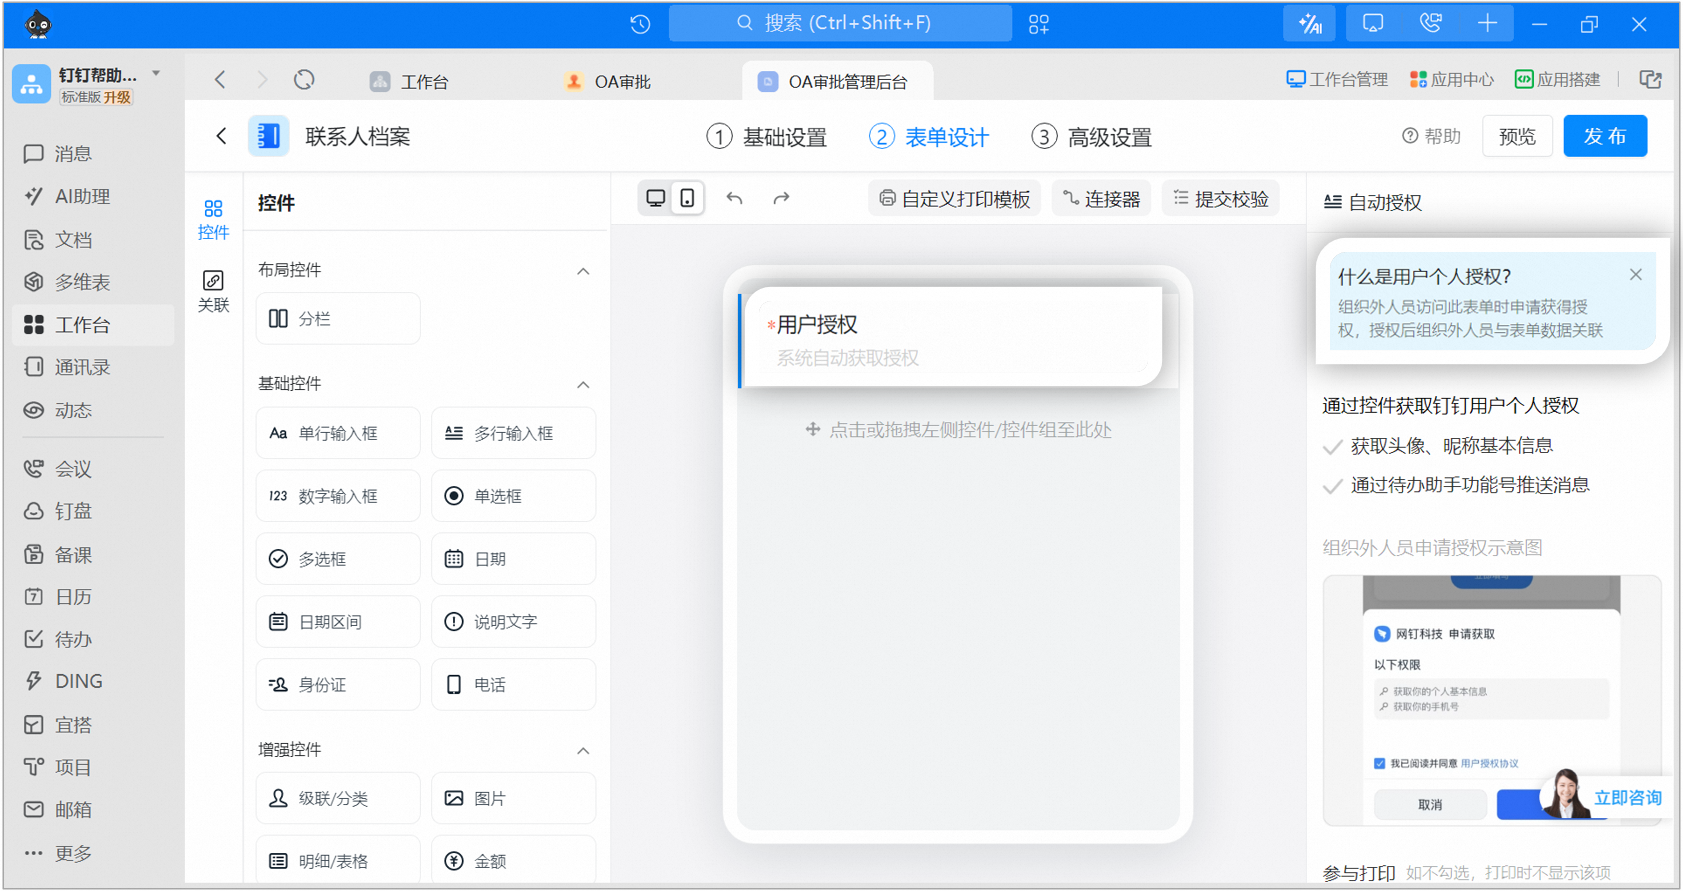 Drag widgets from the left panel into the Form as needed: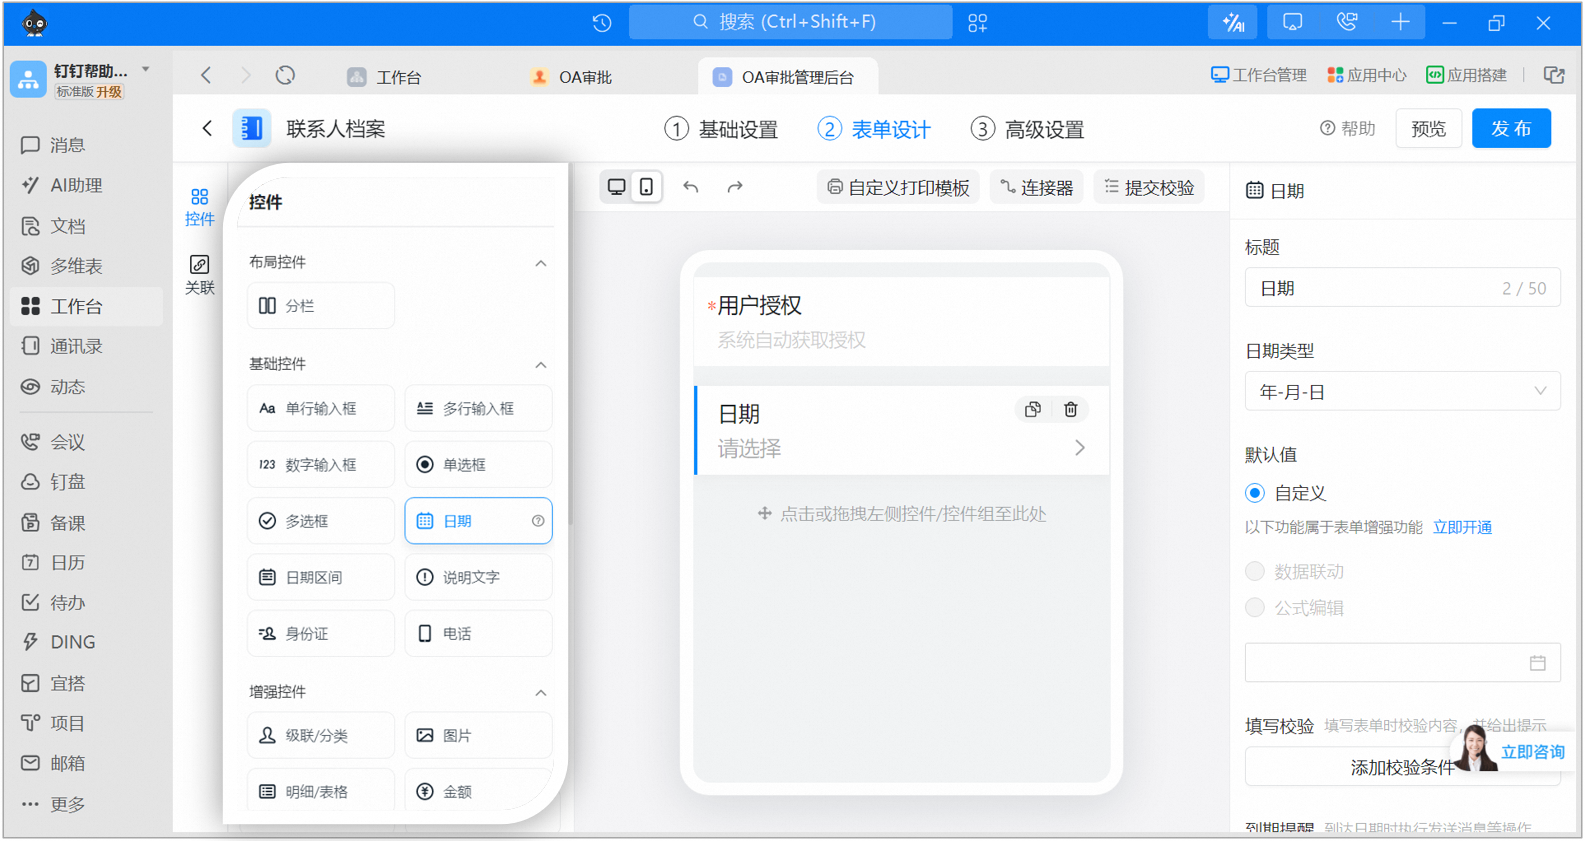
4
Publish and share
After editing, click [Publish], then save the QR Code (permanently valid by default) or Copy the Link to Share with external users so they can fill in the Form: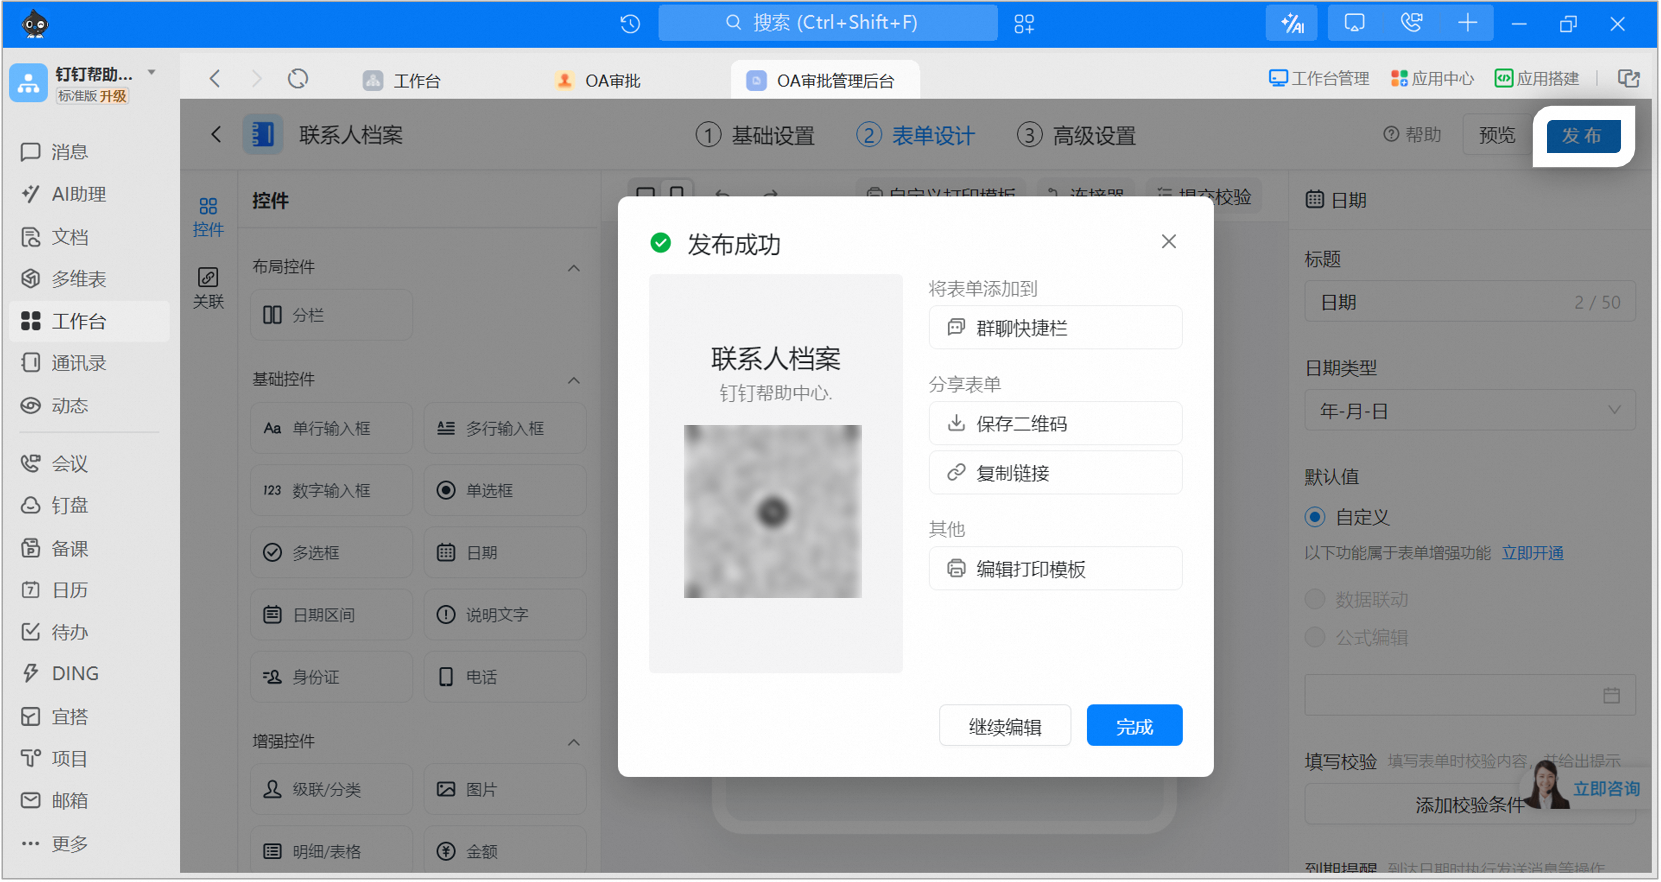
2. Invite partners to fill in the Contact profile
1
Enter the Contact profile
The partner’s internal liaison opens DingTalk mobile > OA Approval > [More] in the bottom-right corner > [cross-organization approval] > [Contact profile]:
2
Invite external users
Click [Invite External Users]. You can invite external users to fill in the profile by sending a QR Code, sharing via DingTalk, or copying a Link: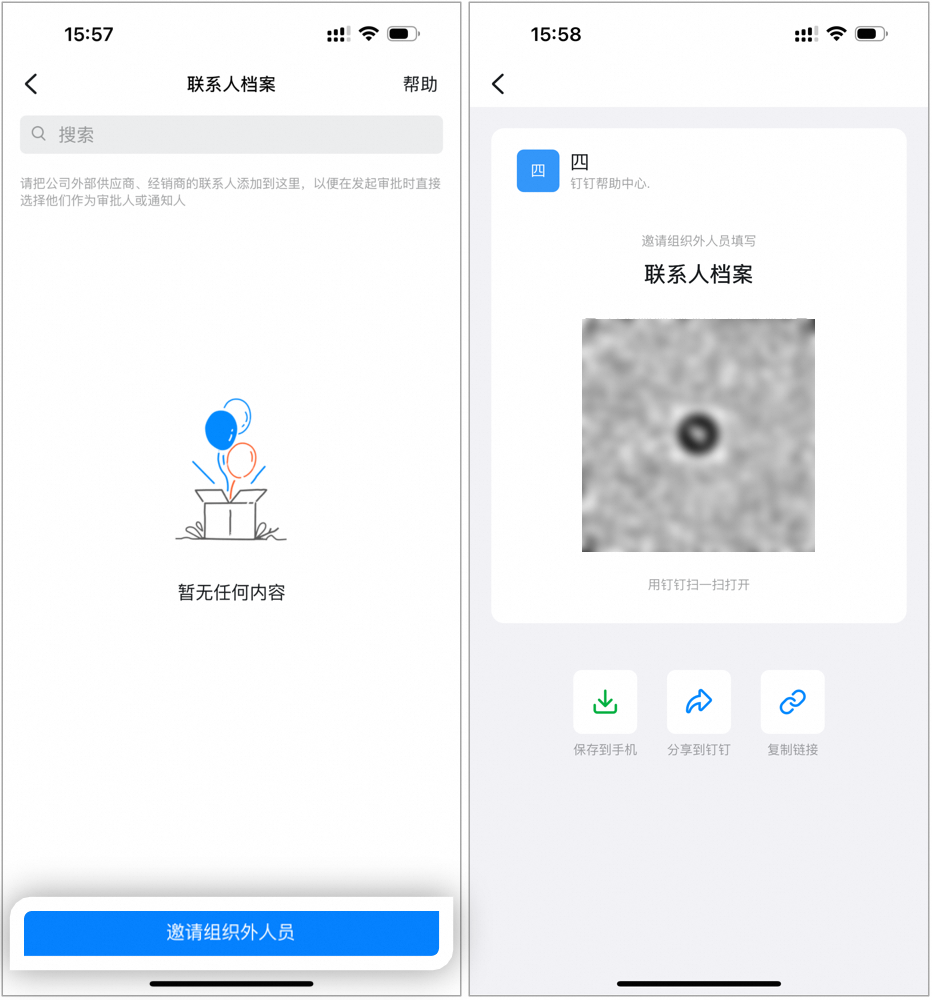
3
External users enter the Form
External users scan the QR Code with DingTalk mobile or tap the Link to open the Form submission Page: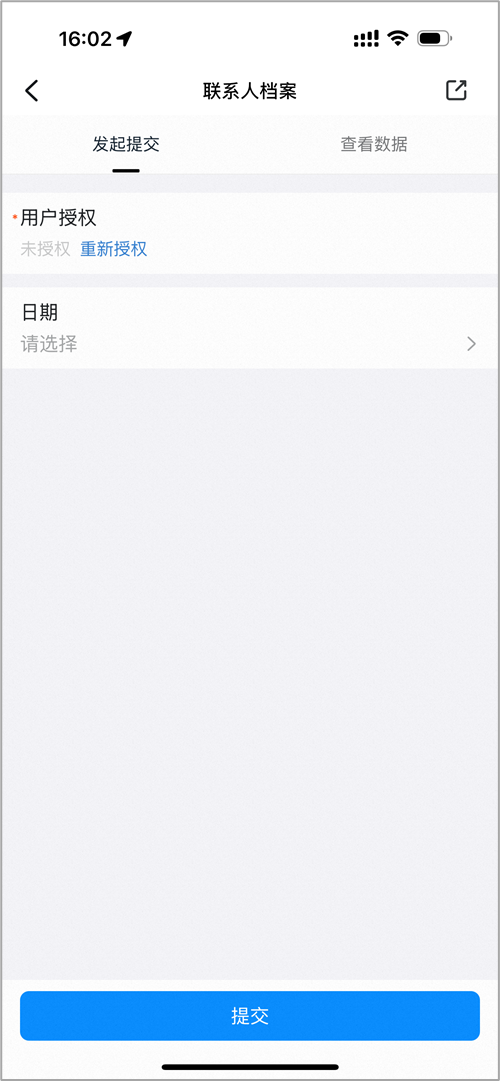
4
Complete User Authorization
Click [Reauthorize], read and accept the User Authorization Agreement, then click [Accept]: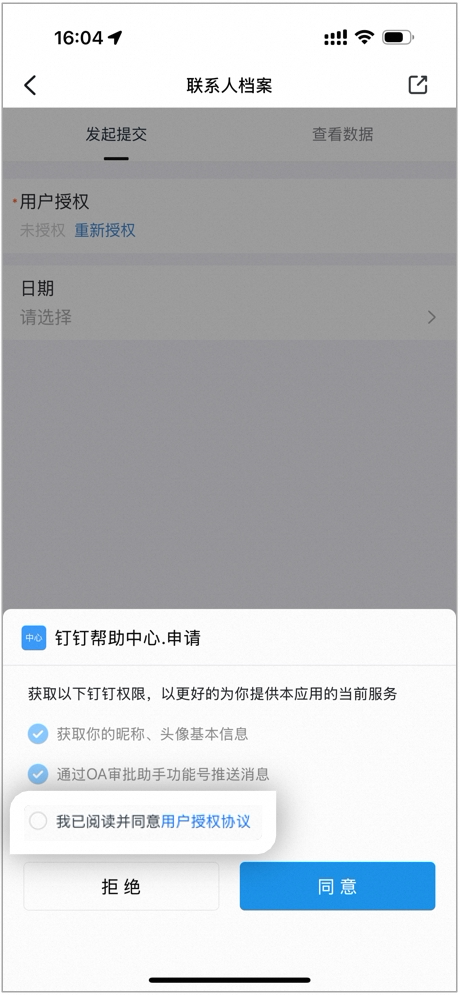
5
Fill in and Submit the profile
Fill in the information, then click [Submit]: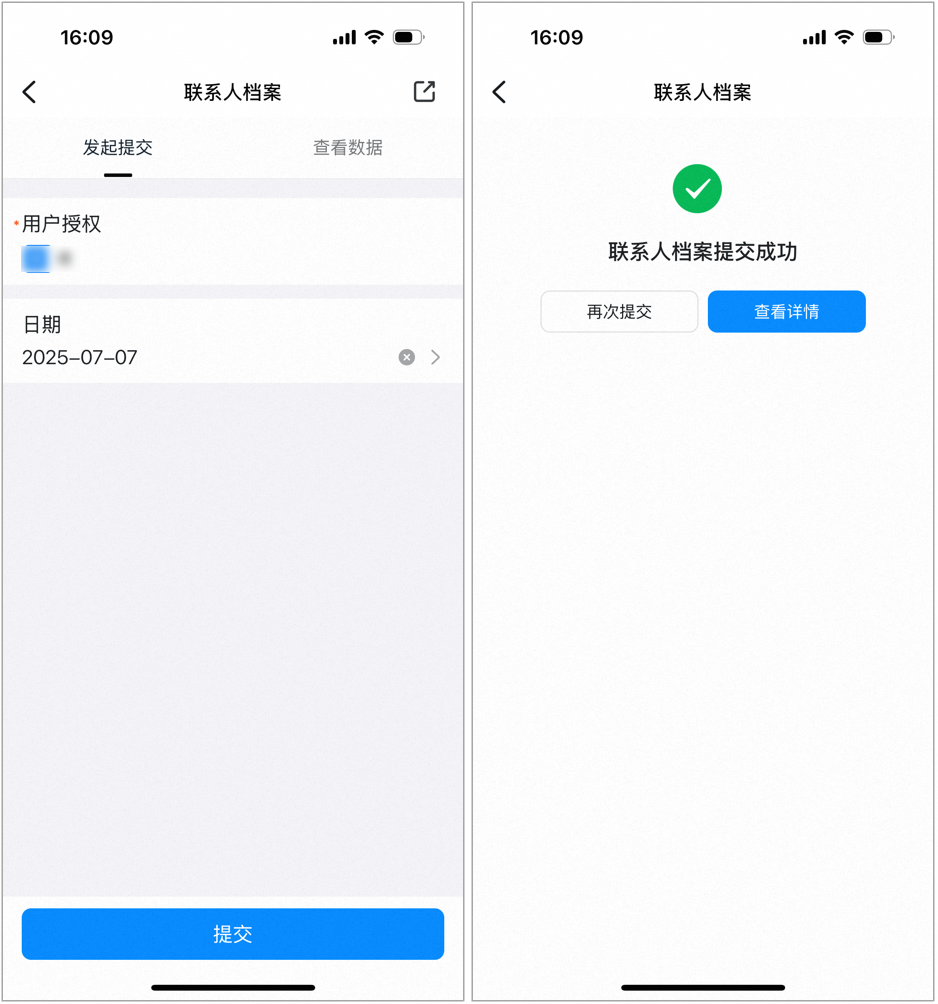
3. Initiate the contract Approval and have the partner confirm it
1
Initiate the contract Approval
The Employee opens DingTalk mobile > Workbench > OA Approval > [More] in the bottom-right corner > [cross-organization approval] > [Contract], opens the Form submission Page, and selects the Contact profile. The partner shown in the process is the selected Contact. Fill in the information, then click [Submit]: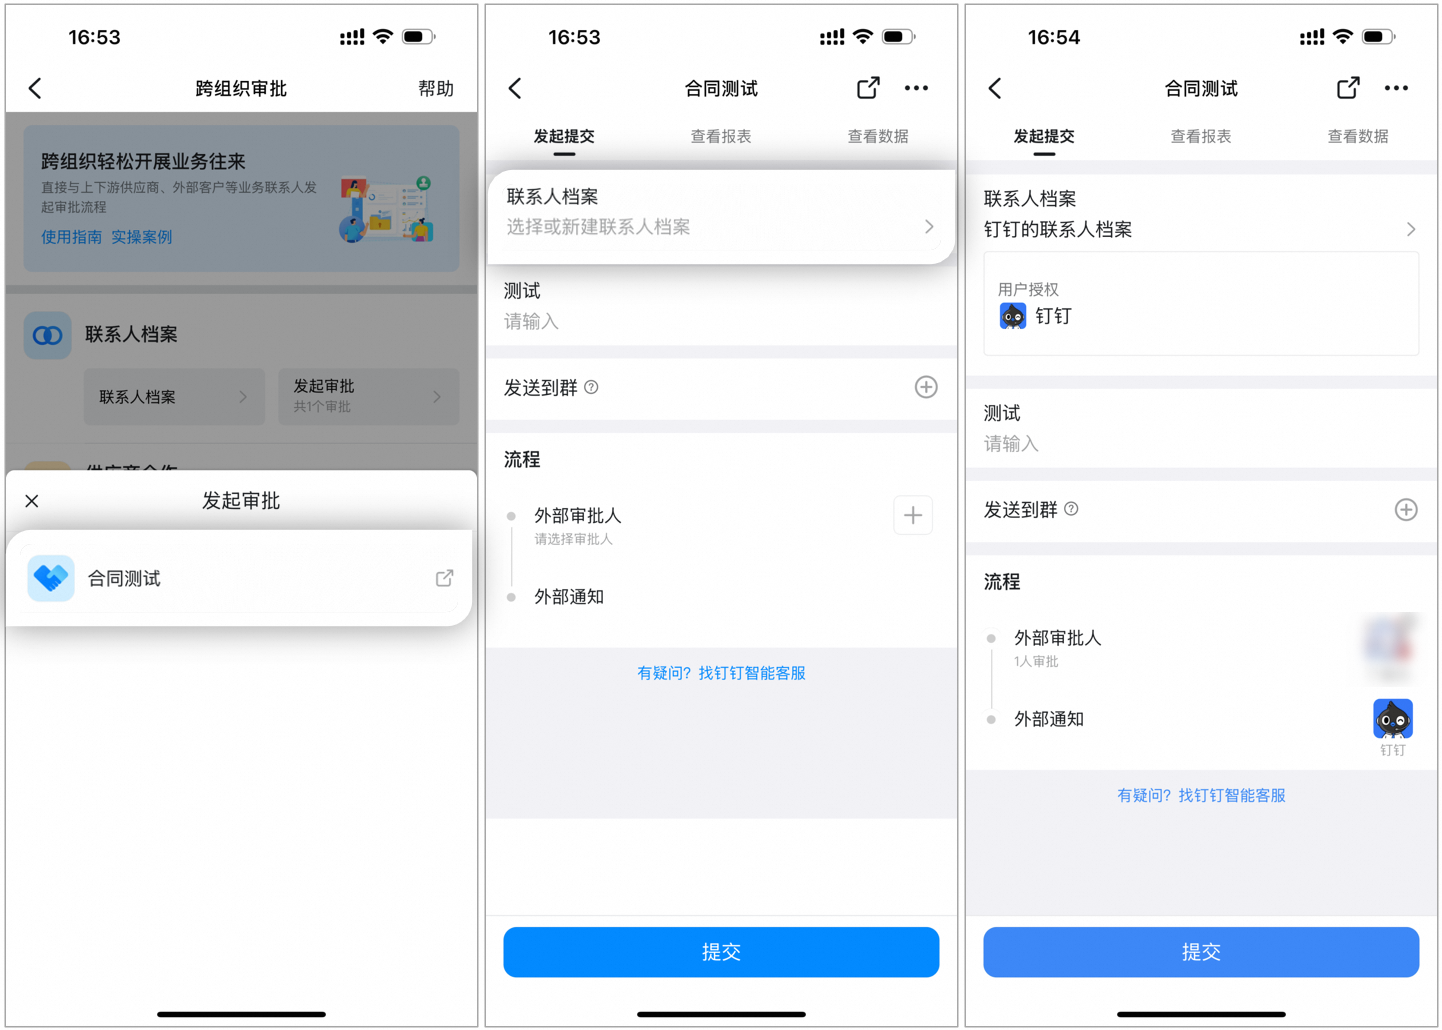
2
Partner confirms the contract
The external partner receives an approval-processing notification in the OA Approval assistant. Once the partner finishes processing, the flow is complete: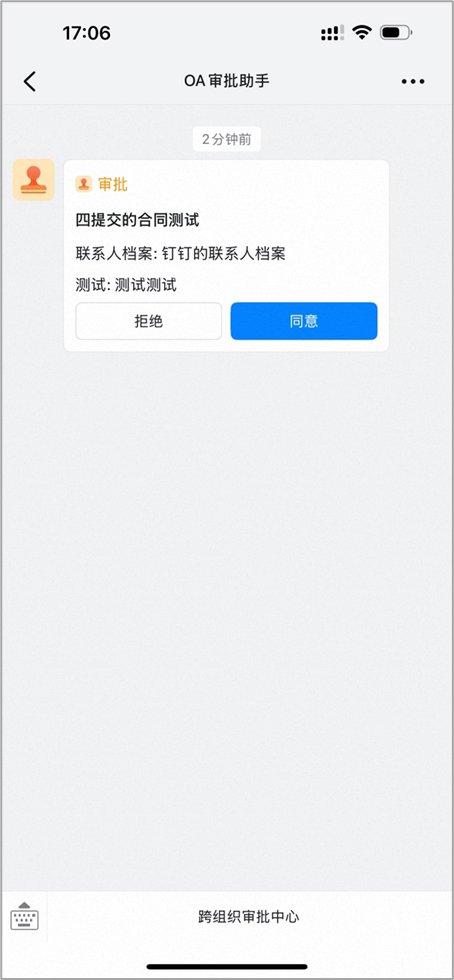
4. Related documents
Cross-organization quick start
Feature overview and basic operation flow for cross-organization approval
External supplier order confirmation
How to set up and run the complete flow for having an external supplier confirm a purchase order