1. Overview

Cross-organization approval lets you start approval processes with external organizations. It covers a wide range of needs across management, communication, collaboration, and business chains between enterprises and government-related organizations, helping you better connect with suppliers, distributors, platform merchants, and other business partners.

2. Use cases

  • Cross-regional collaboration projects
  • Supplier contract management
  • Visitor registration
  • Other applicable scenarios

3. Procedure

1. Create a scenario

1

Open OA Approval

As an admin with the required permissions, go to Admin Console > App Management > OA Approval, and click Open:
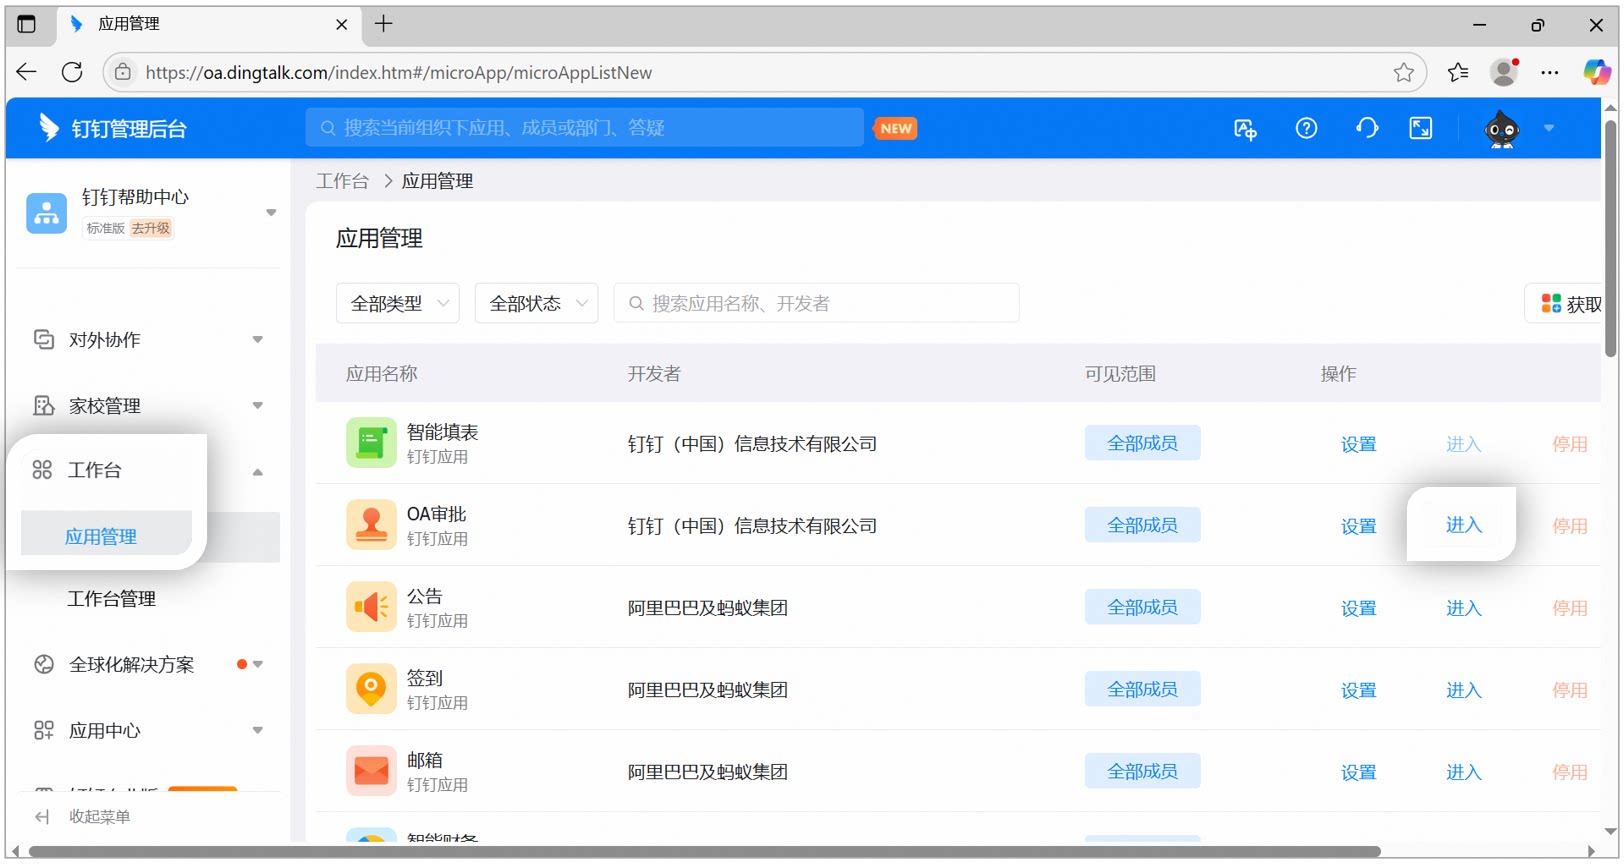
App Management page in the Admin Console, with the Open button next to the OA Approval app
2

Create a scenario

Click Cross-Organization Management > Create Scenario, enter the scenario name and description, and click Confirm.
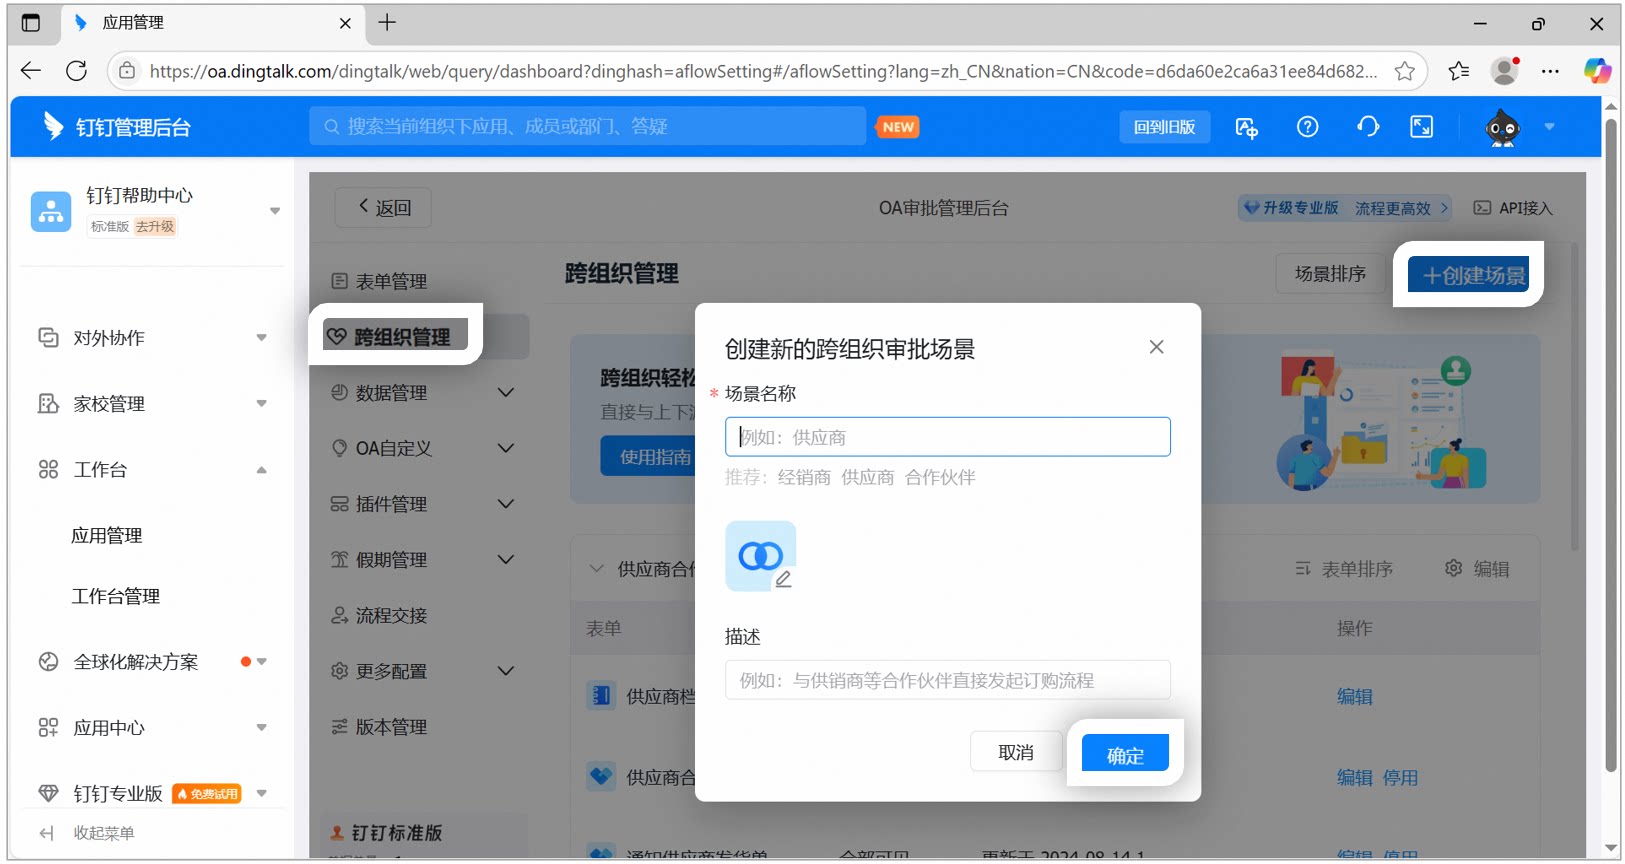
Note: The system provides preset profiles and process forms for three scenarios—customer service, visitor, and supplier. After a scenario is created, a Contact profile form is generated automatically.
Create Scenario dialog on the Cross-Organization Management page, where you enter the scenario name and description and confirm

2. Design the profile form

1

Enter editing mode

As an admin with the required permissions, go to Admin Console > App Management > OA Approval, and click Open > Cross-Organization Management > Edit:
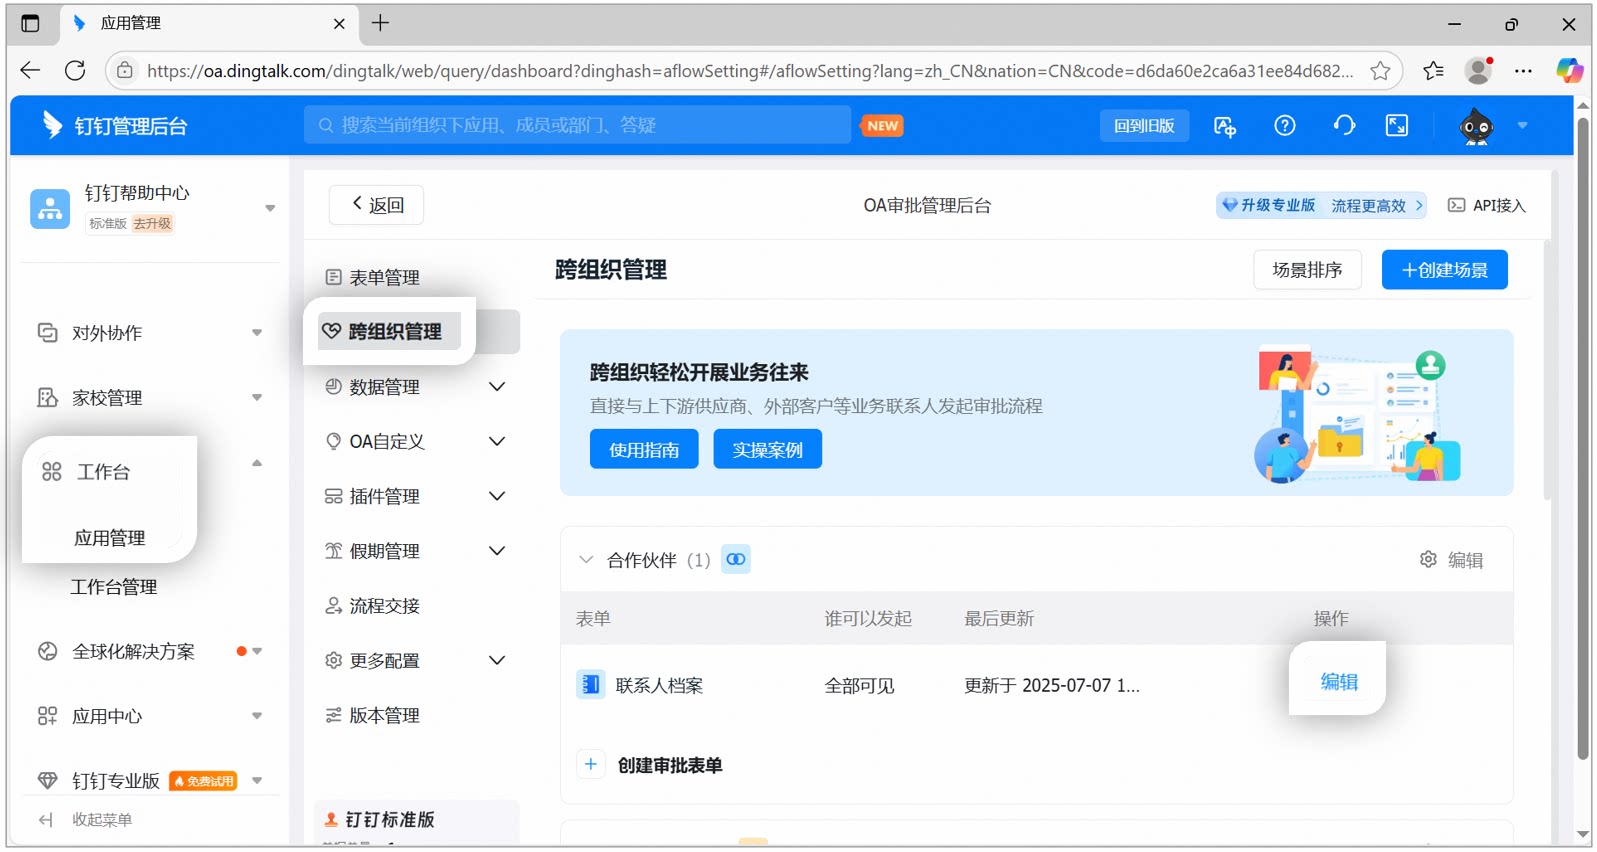
Cross-Organization Management page, with the Edit entry next to the Contact profile
2

Design the form

Notes:
  1. The User Authorization control is added to the form by default. This control cannot be deleted and is used to collect DingTalk profile information from users outside the organization.
  2. Drag controls from the left panel into the form as needed. For details, see approval form controls.
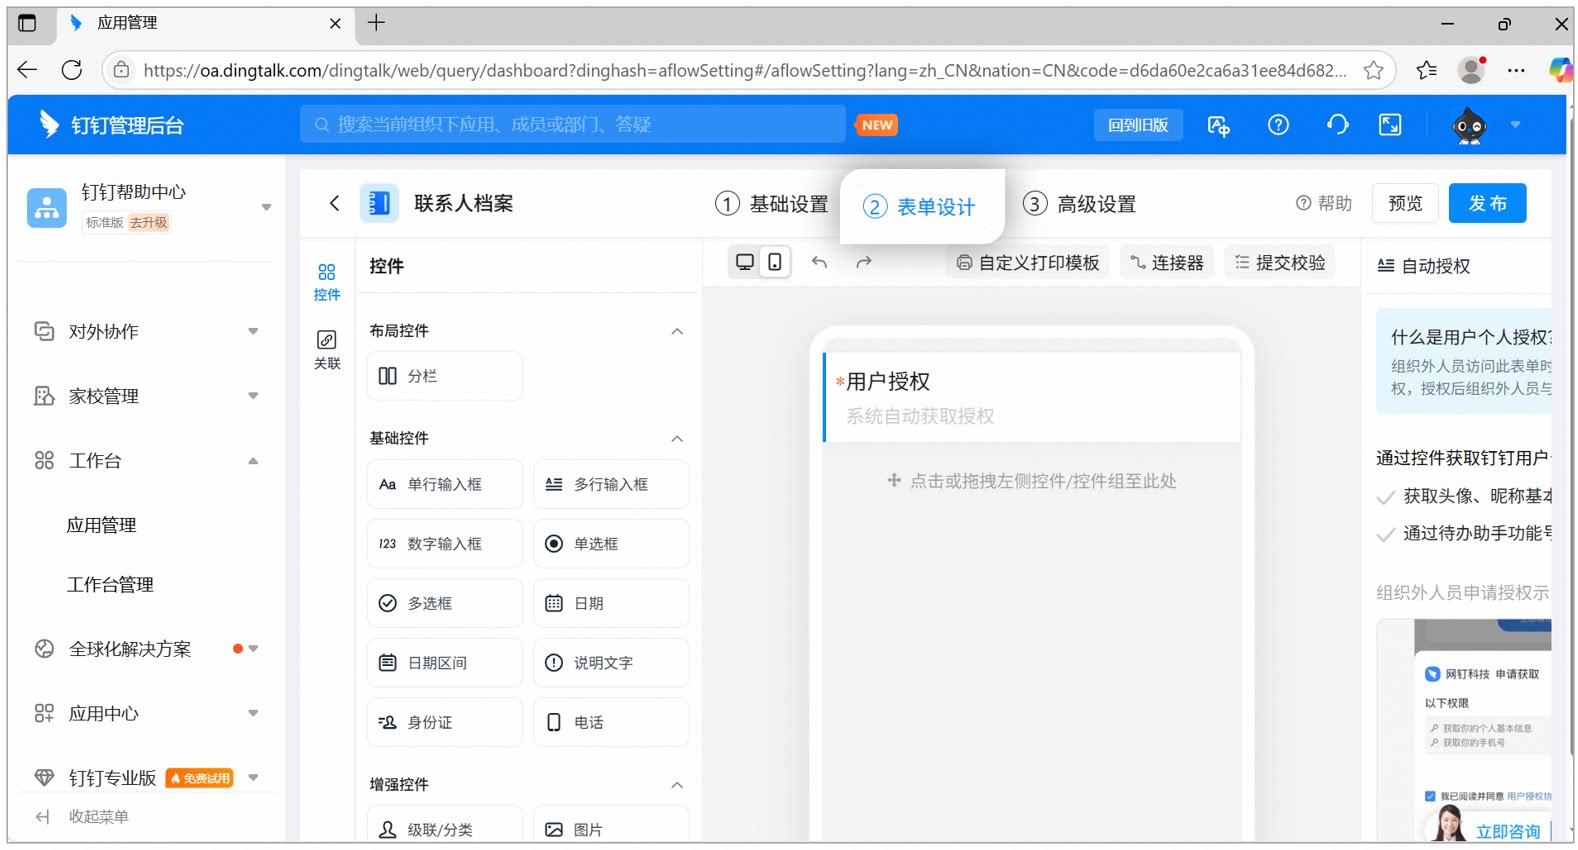
Contact profile form design page, with the User Authorization control added by default and other controls available to drag in from the left
3

Publish

After editing, click Publish in the upper-right corner.
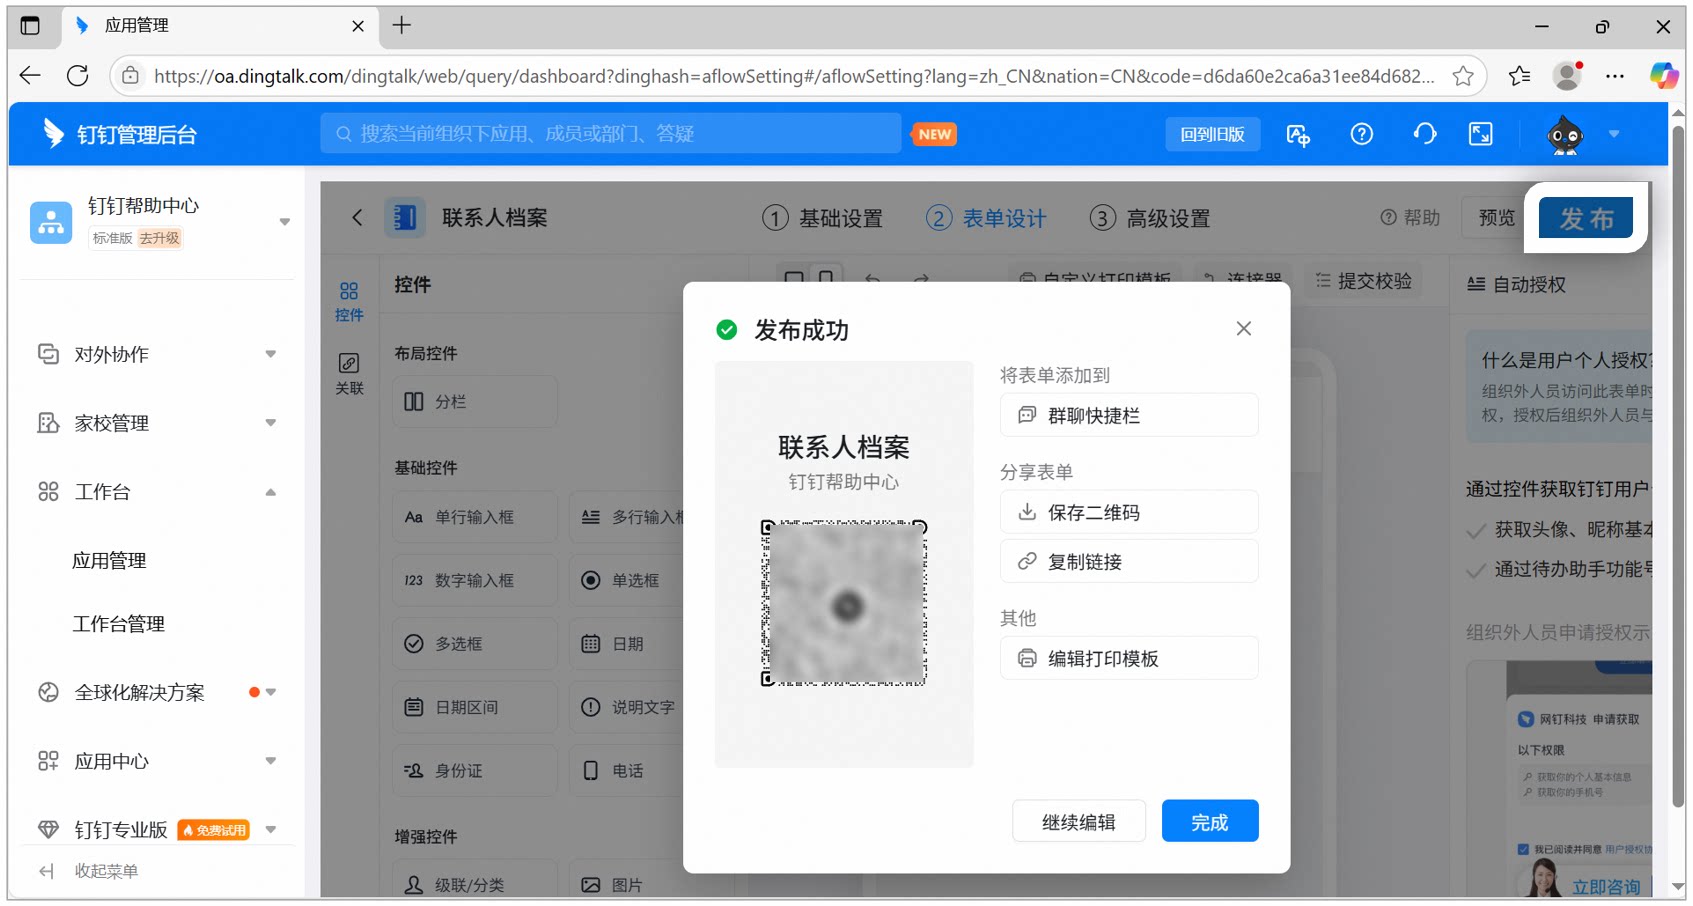
Note: Save the QR Code (valid permanently by default) or copy the link and share it with external users so they can fill out the form.
Contact profile published dialog, where you can save the QR Code or copy the link to share with external users

3. Design the process form

1

Create an Approval form

As an admin with the required permissions, go to Admin Console > App Management > OA Approval, and click Open > Cross-Organization Management > Create Approval Form:
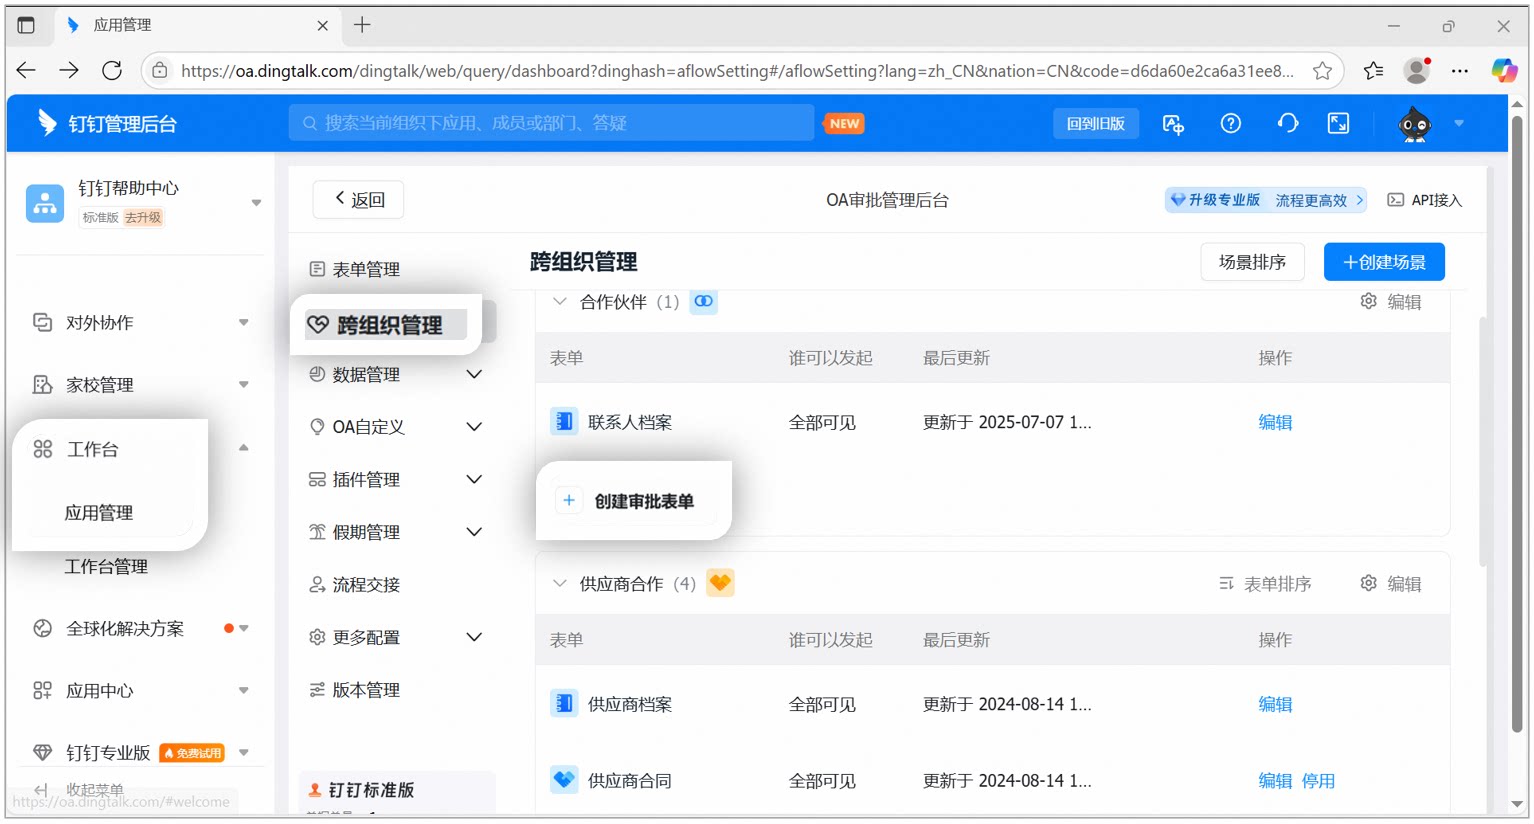
Cross-Organization Management page, with the Create Approval Form entry
2

Select a process form

In the Create Approval Form dialog, select Process Form:
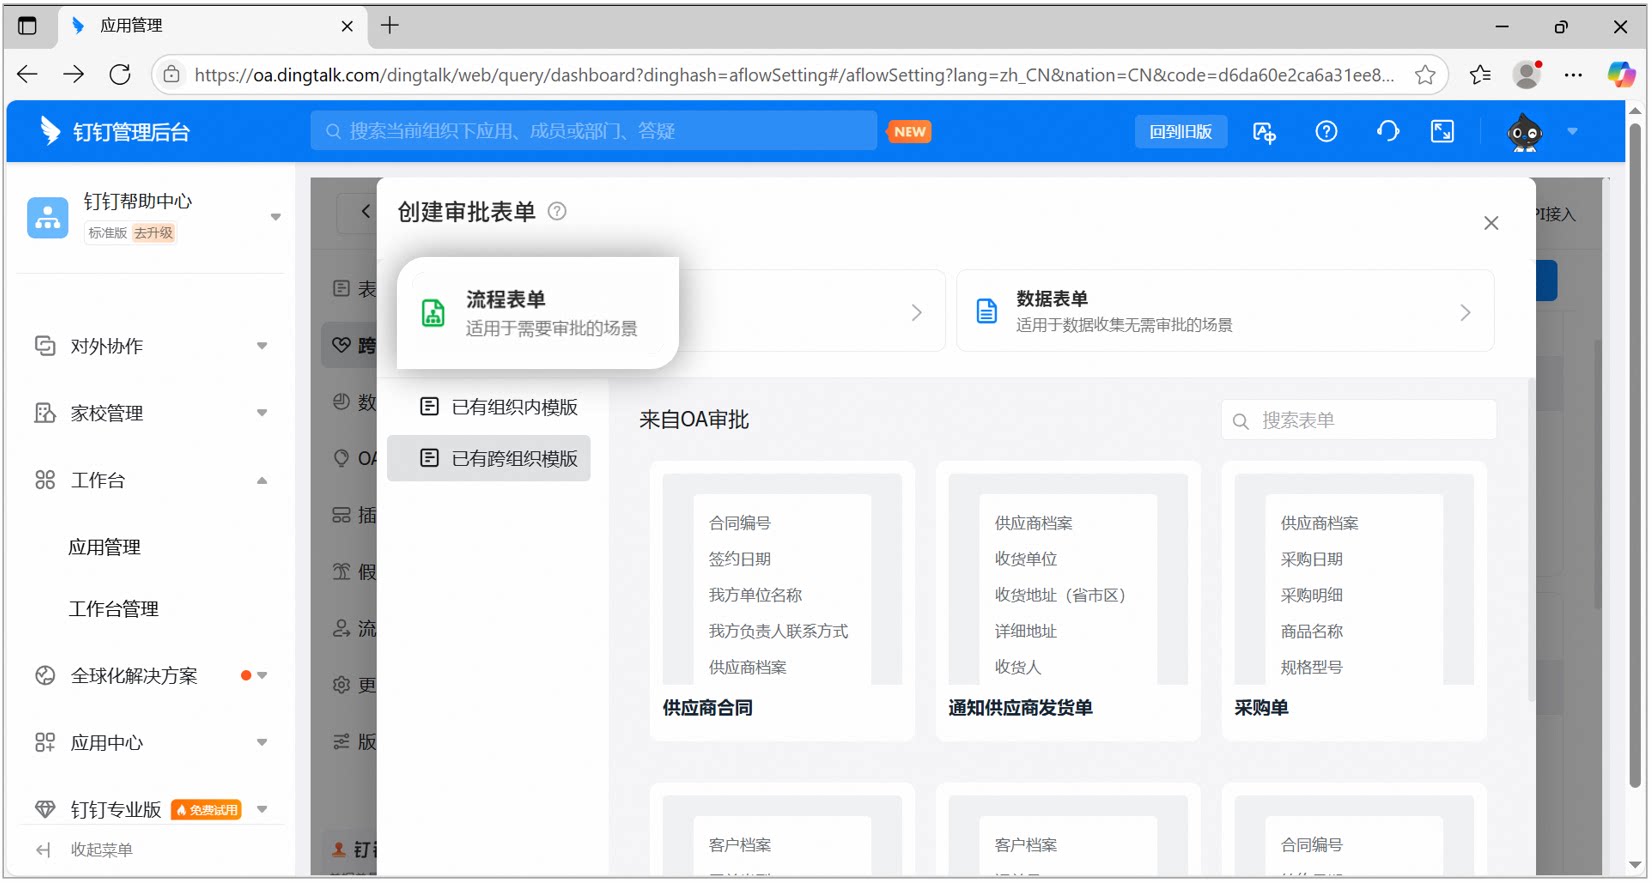
Create Approval Form dialog, where you can choose the process form or data form type
3

Basic settings

Enter the form name, description, and other basic information:
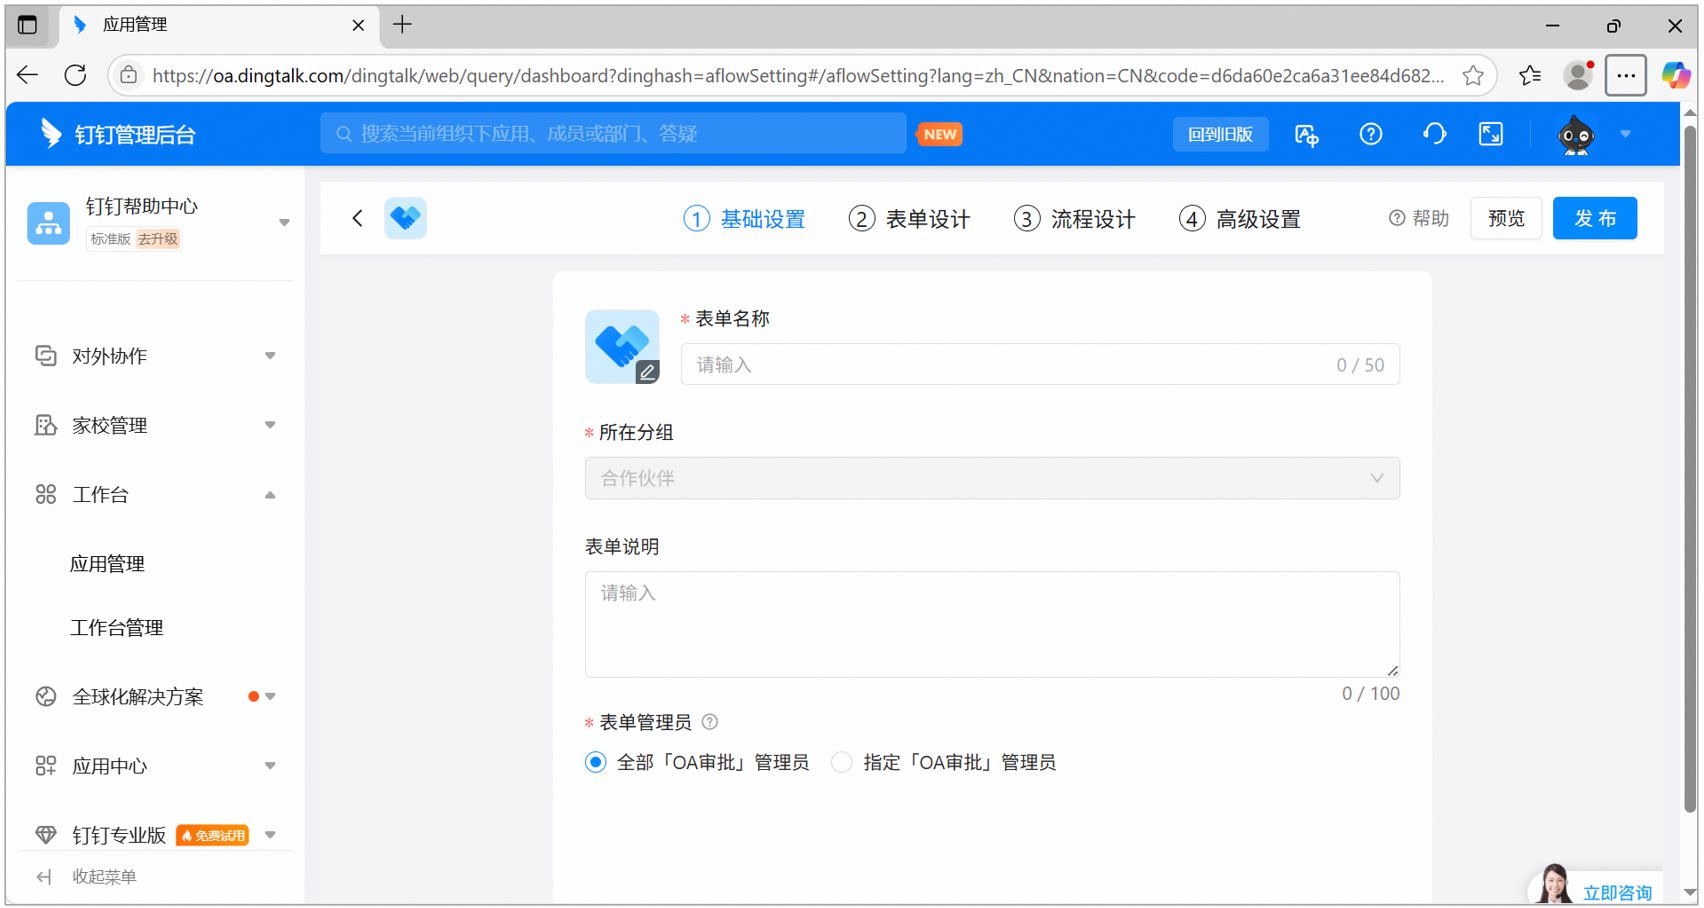
Basic settings page of the process form, where you enter the form name and description
4

Design the form

Drag controls from the left panel to design the form fields:
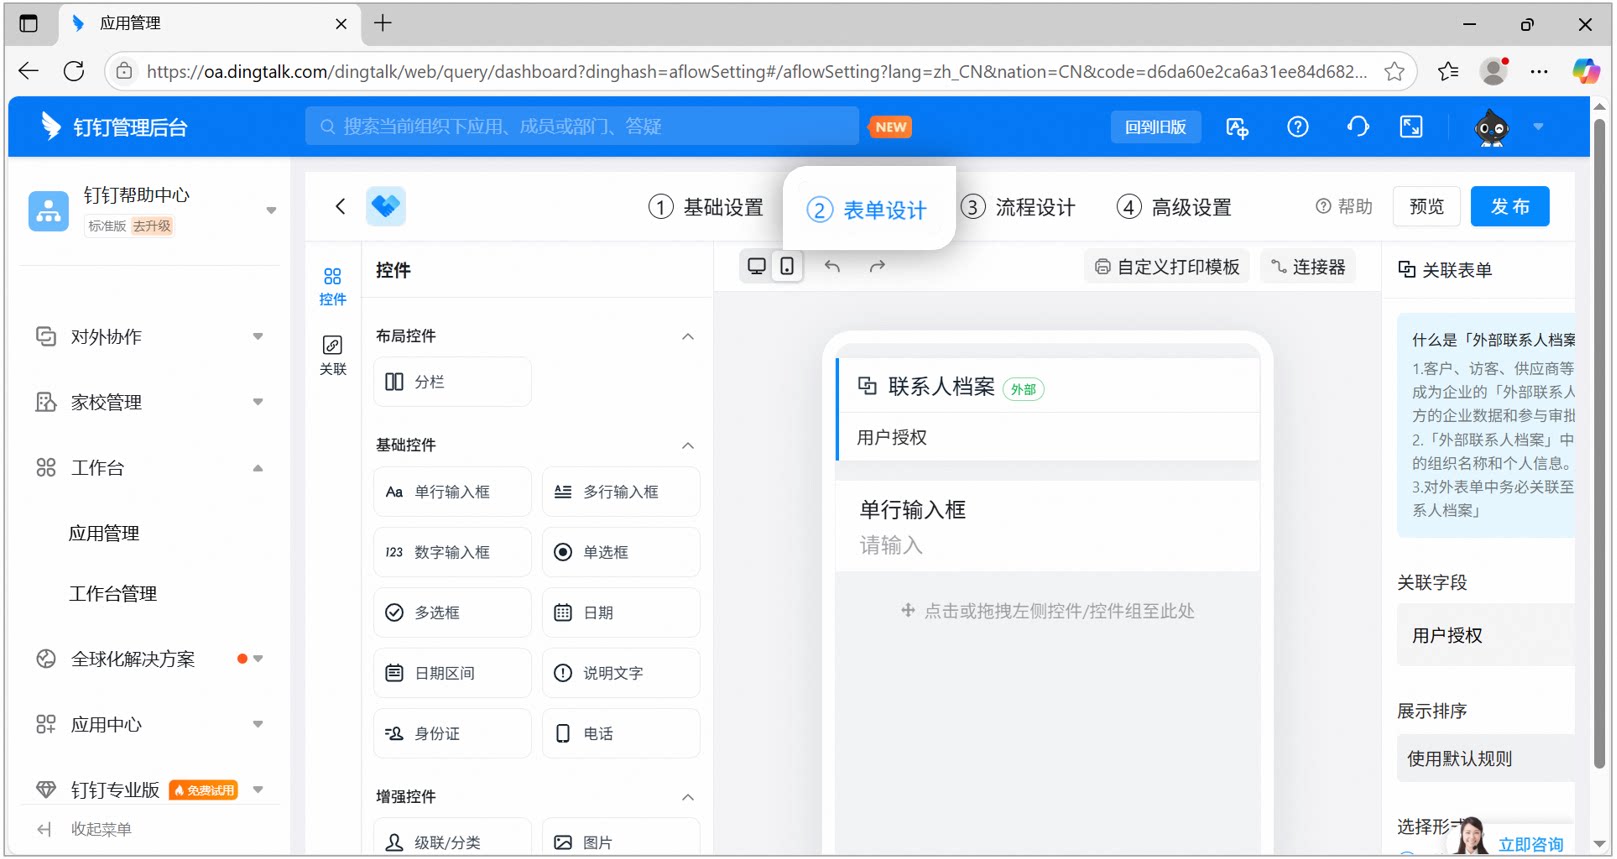
Form design page of the process form, where you drag controls from the left panel and configure the approver field
5

Design the process

Configure the approval steps, including the external approver step:
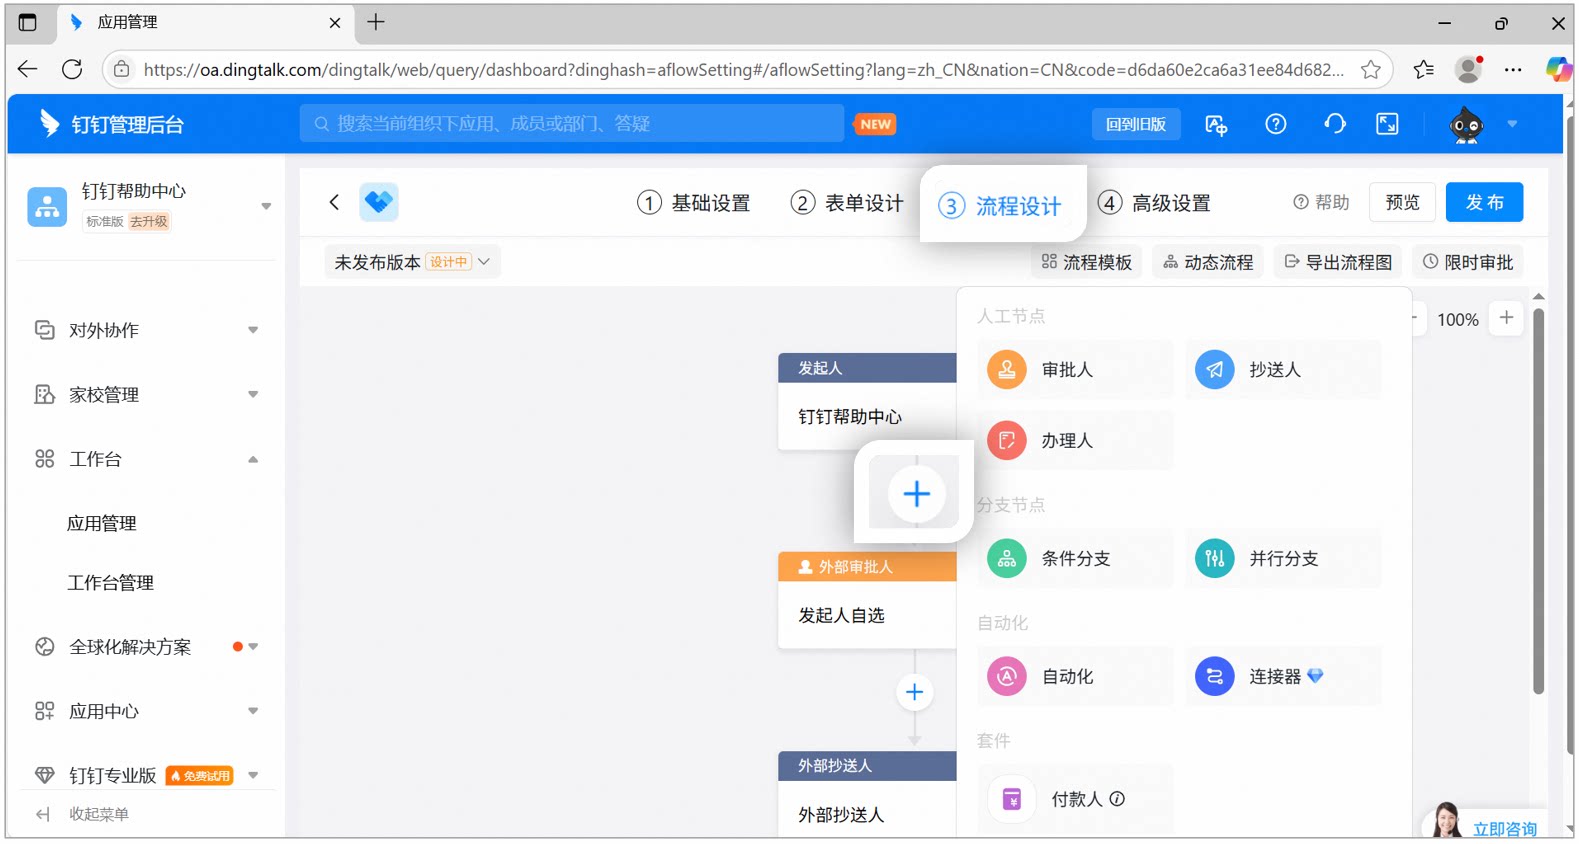
Process design page of the process form, where you can configure initiator, approver, and External contacts steps
6

Premium settings

Configure Premium options such as automatic deduplication and withdrawal rules as needed:
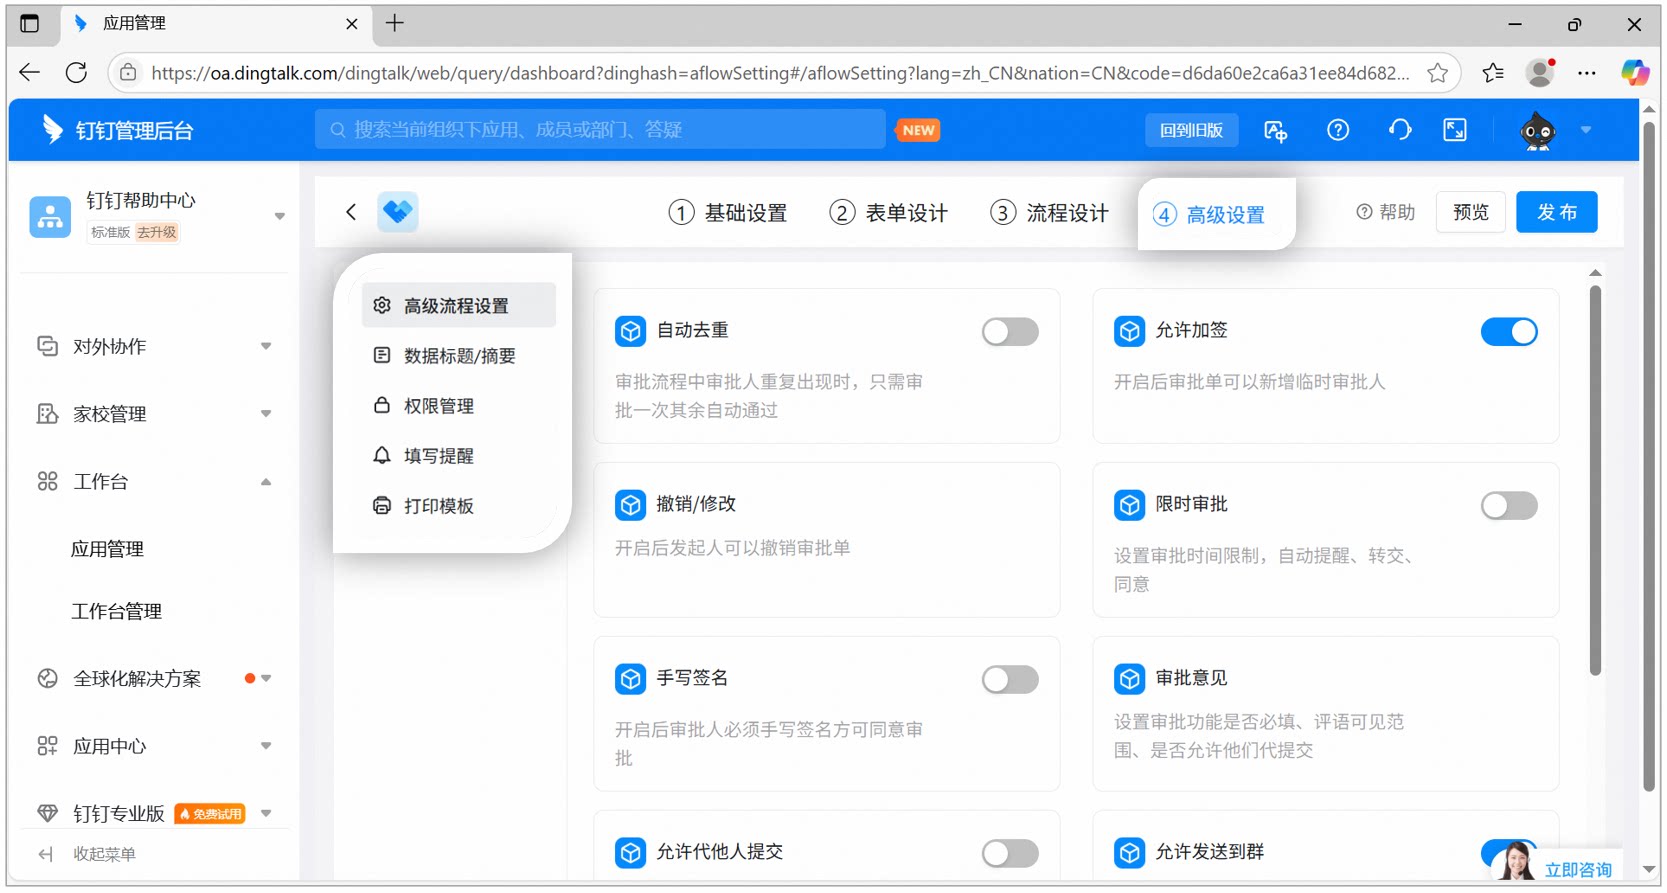
Premium settings page of the process form, where you can configure rules such as automatic deduplication and withdrawal
7

Publish

Once the design is complete, click Publish:
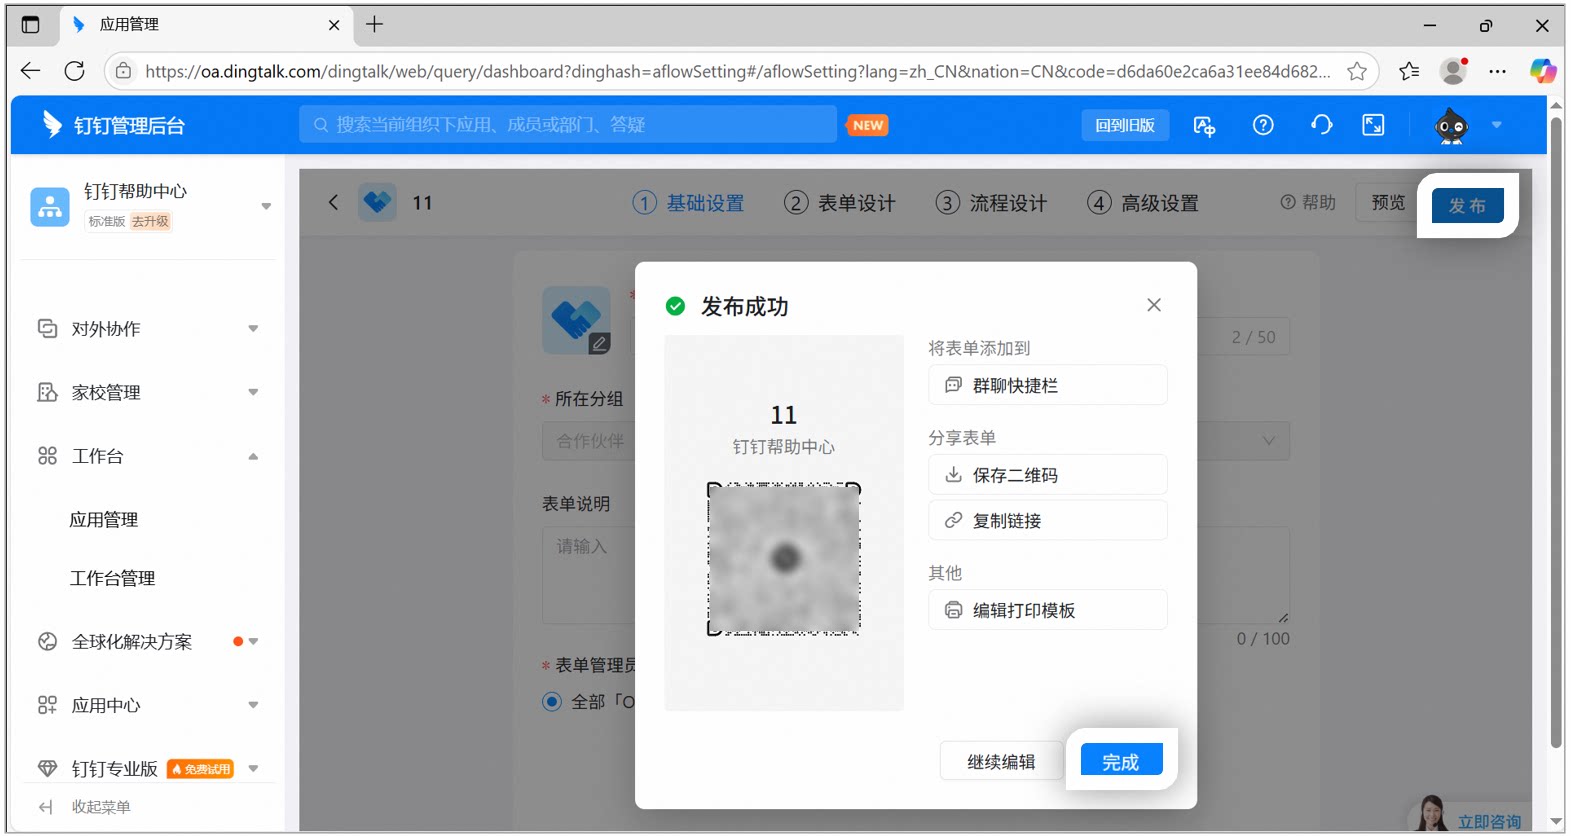
Process form published dialog, where you can save the QR Code or copy the link

Mobile

Open DingTalk Mobile > Workbench > OA Approval > More in the lower-right corner > Cross-Organization Approval:
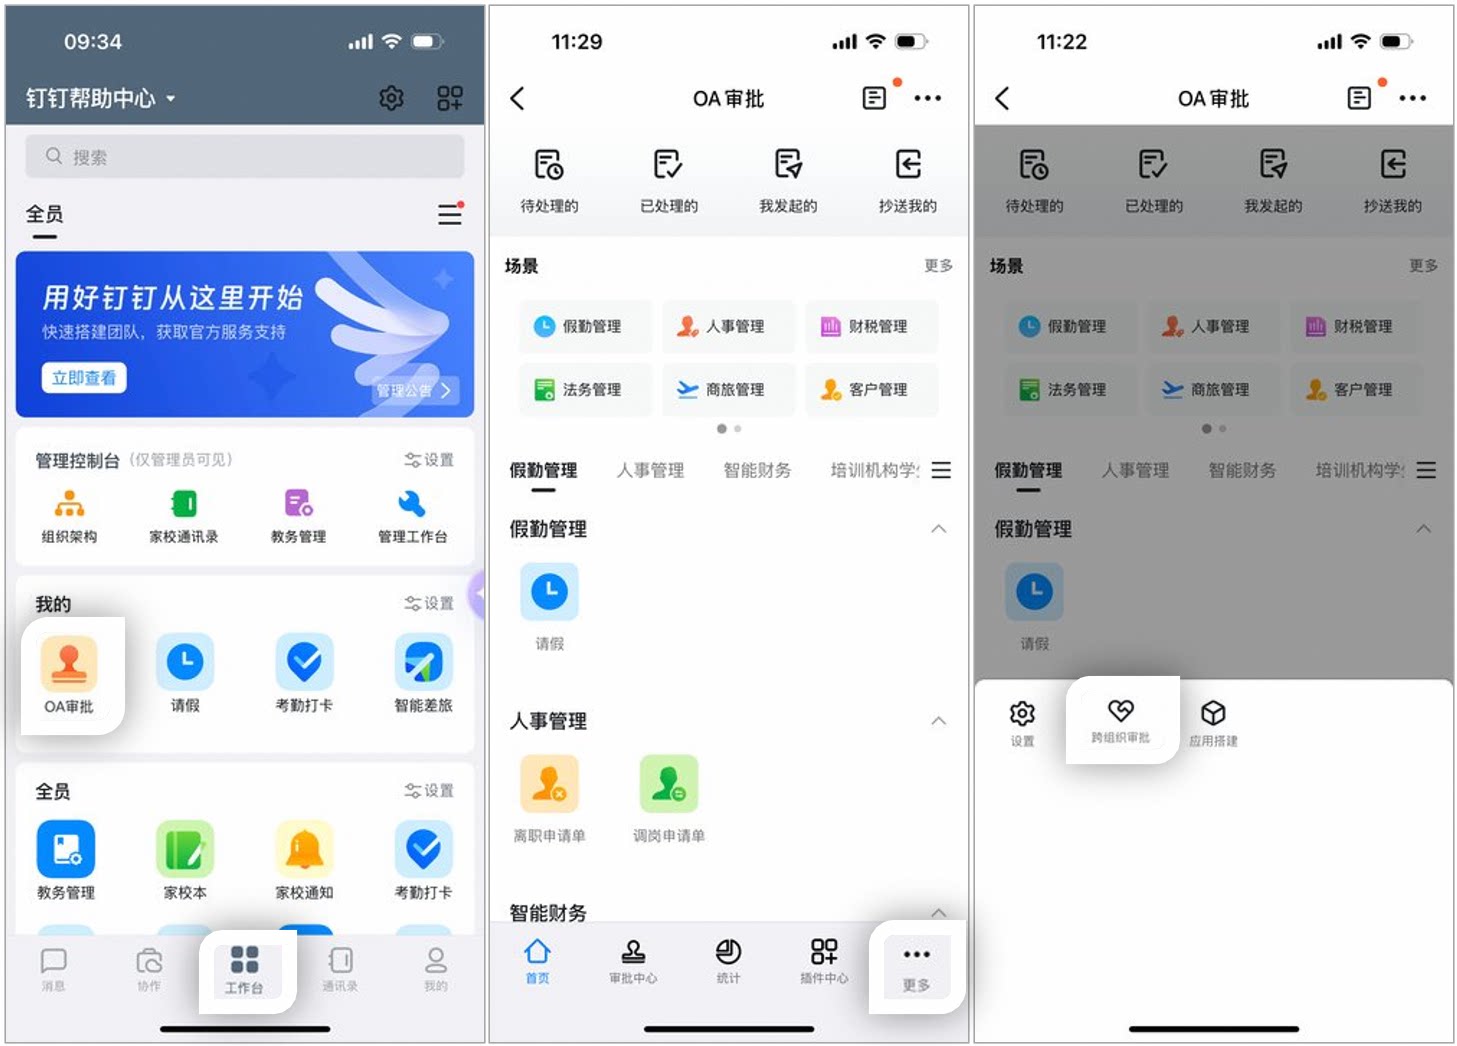
Path in DingTalk Mobile to access Cross-Organization Approval: Workbench, OA Approval, More, Cross-Organization Approval
Tap Profile Form to view all customer information in the scenario. Tap an entry to open Profile Details, where you can edit or share it. Tap ··· to delete or print.
Note: To export or bulk delete data, use the desktop client.
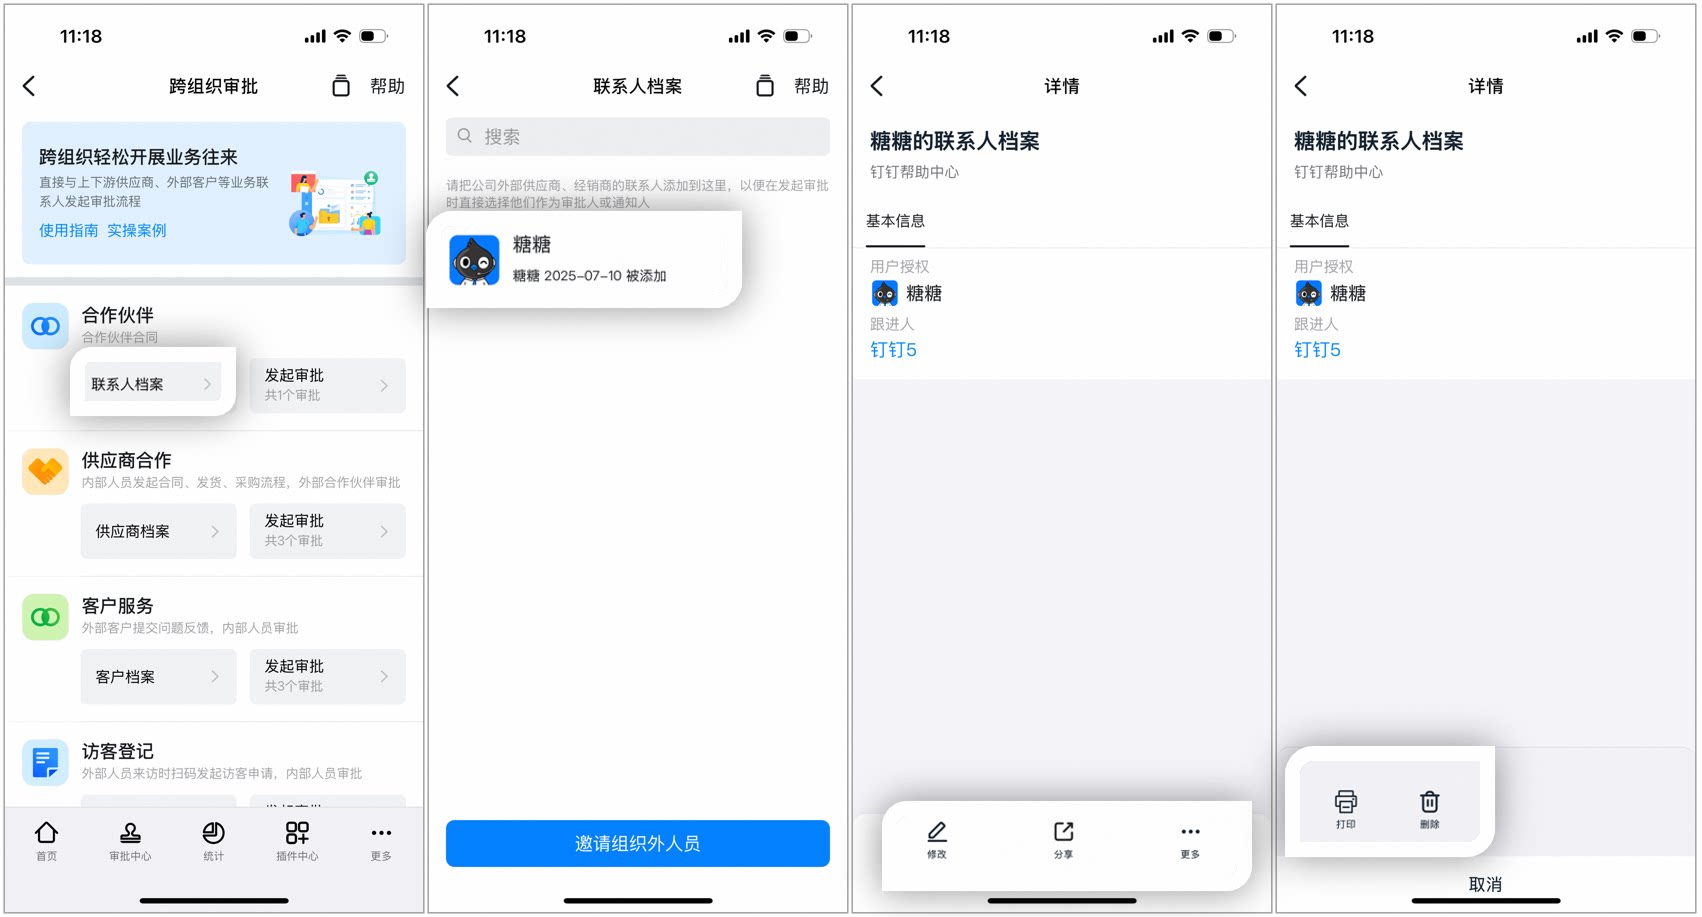
Contact profile list and profile details pages on mobile, supporting edit, share, delete, and print
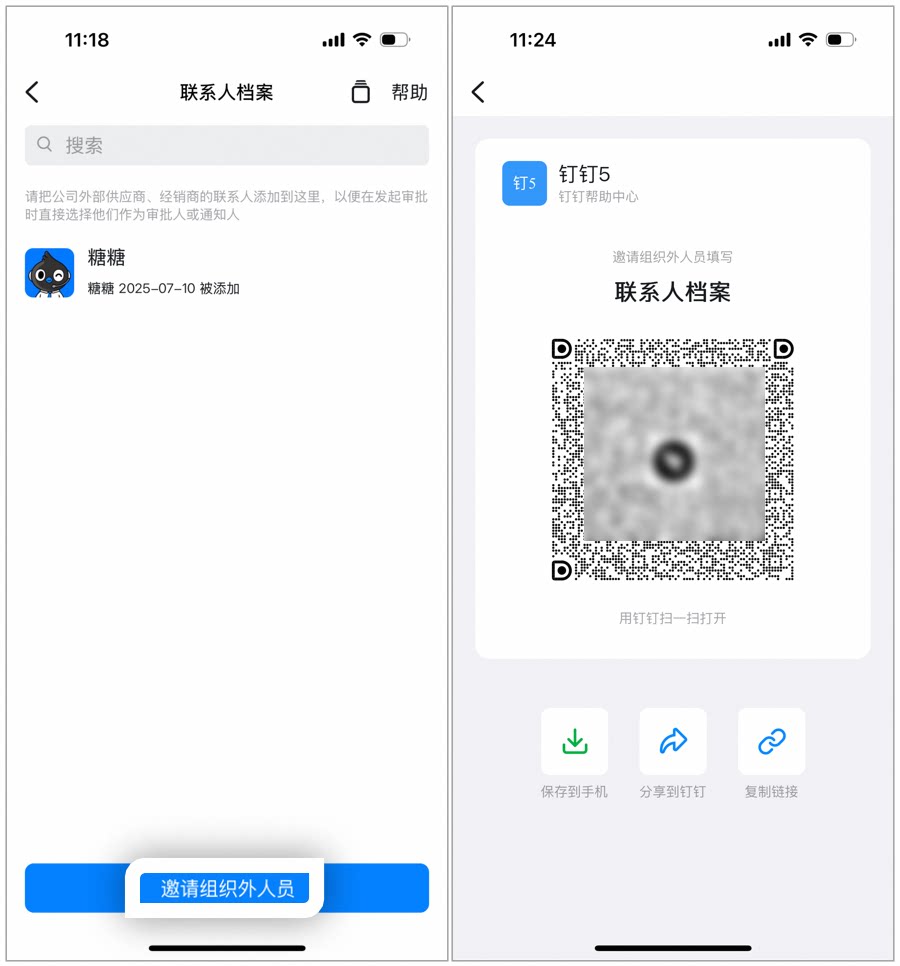
Tap Invite External User to invite external users to fill out the profile via QR Code, DingTalk sharing, or a copied link:
Invite External User on the Contact profile page on mobile, which generates an invitation QR Code
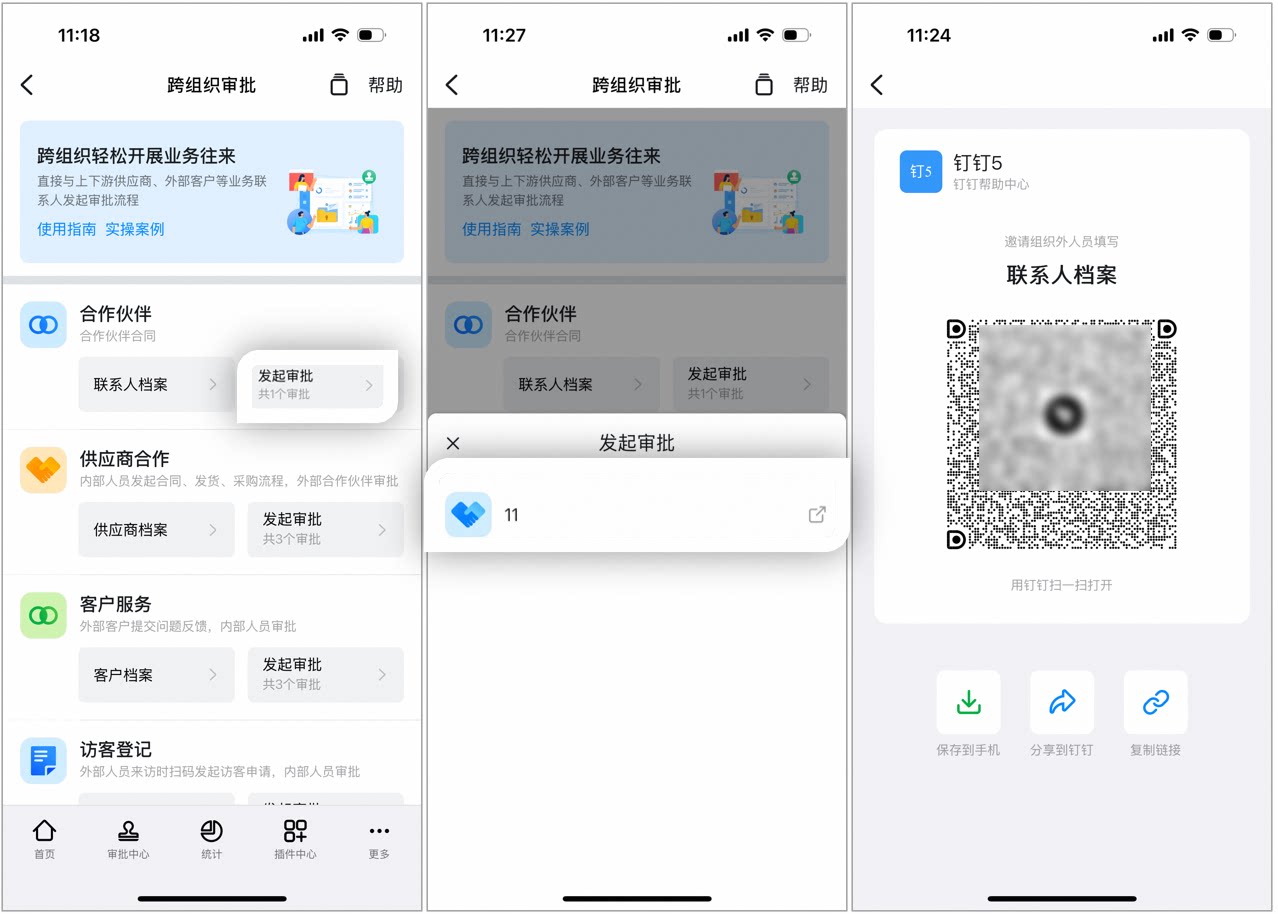
Tap Submit for Approval to share the form directly:
Submit for Approval on the Cross-Organization Approval page on mobile, where the form can be shared directly with external users
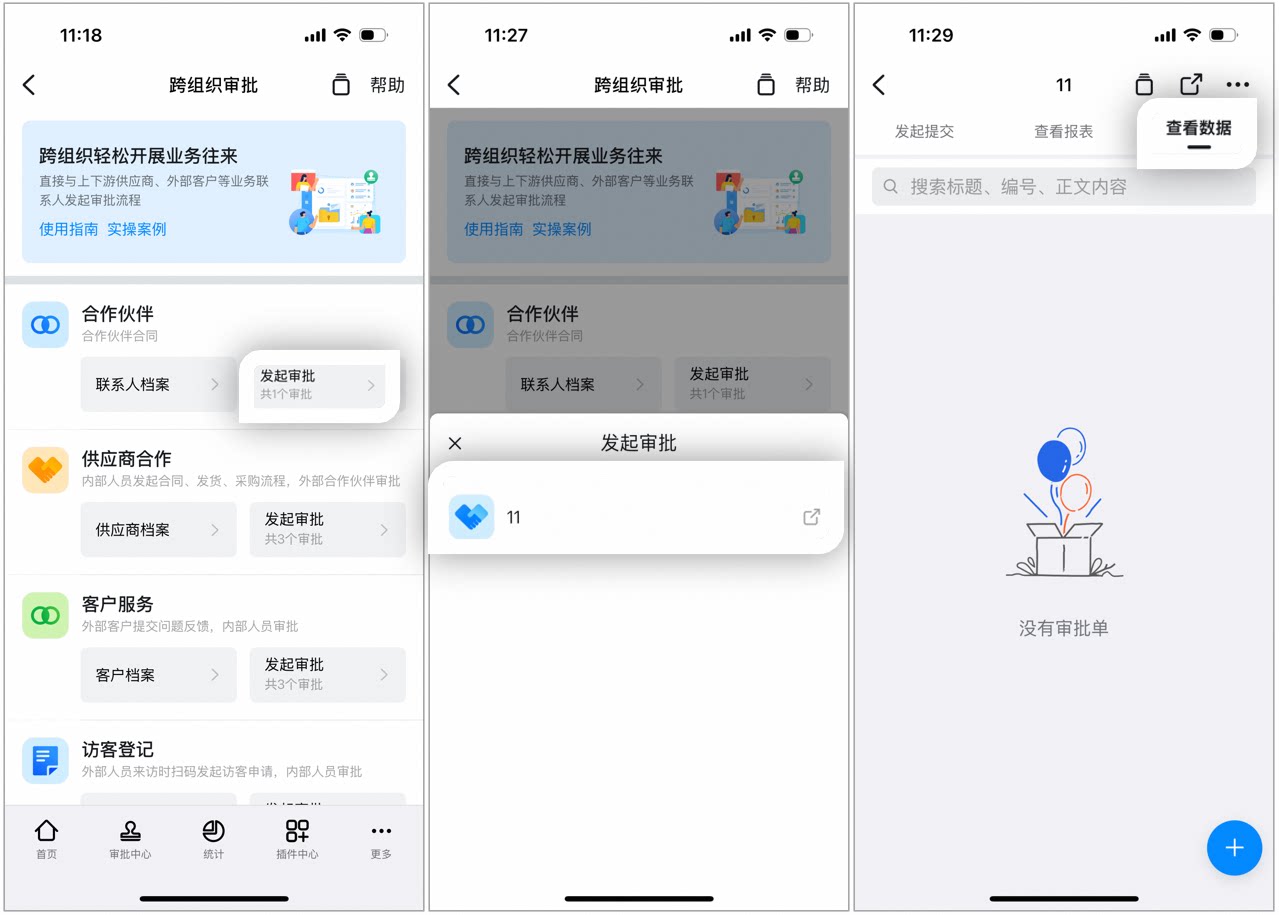
Tap a form to submit an approval directly. Tap View Data to see all form data:
Cross-Organization Approval page on mobile, where tapping a form starts a submission or opens the full data view

Desktop

As an admin with the required permissions, open Workbench > OA Approval > Cross-Organization Approval:
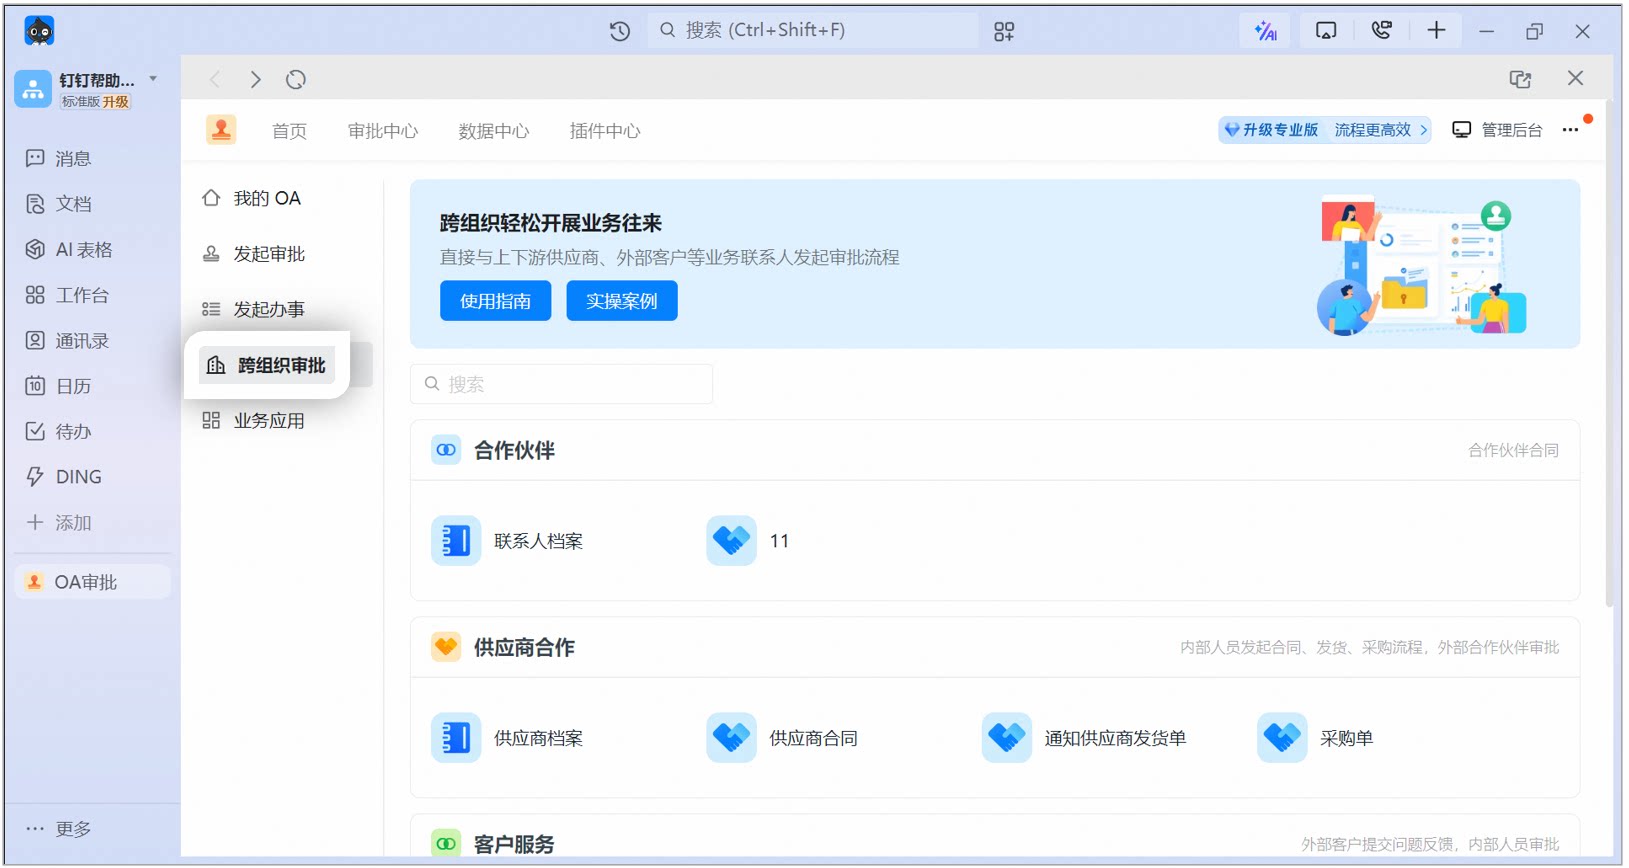
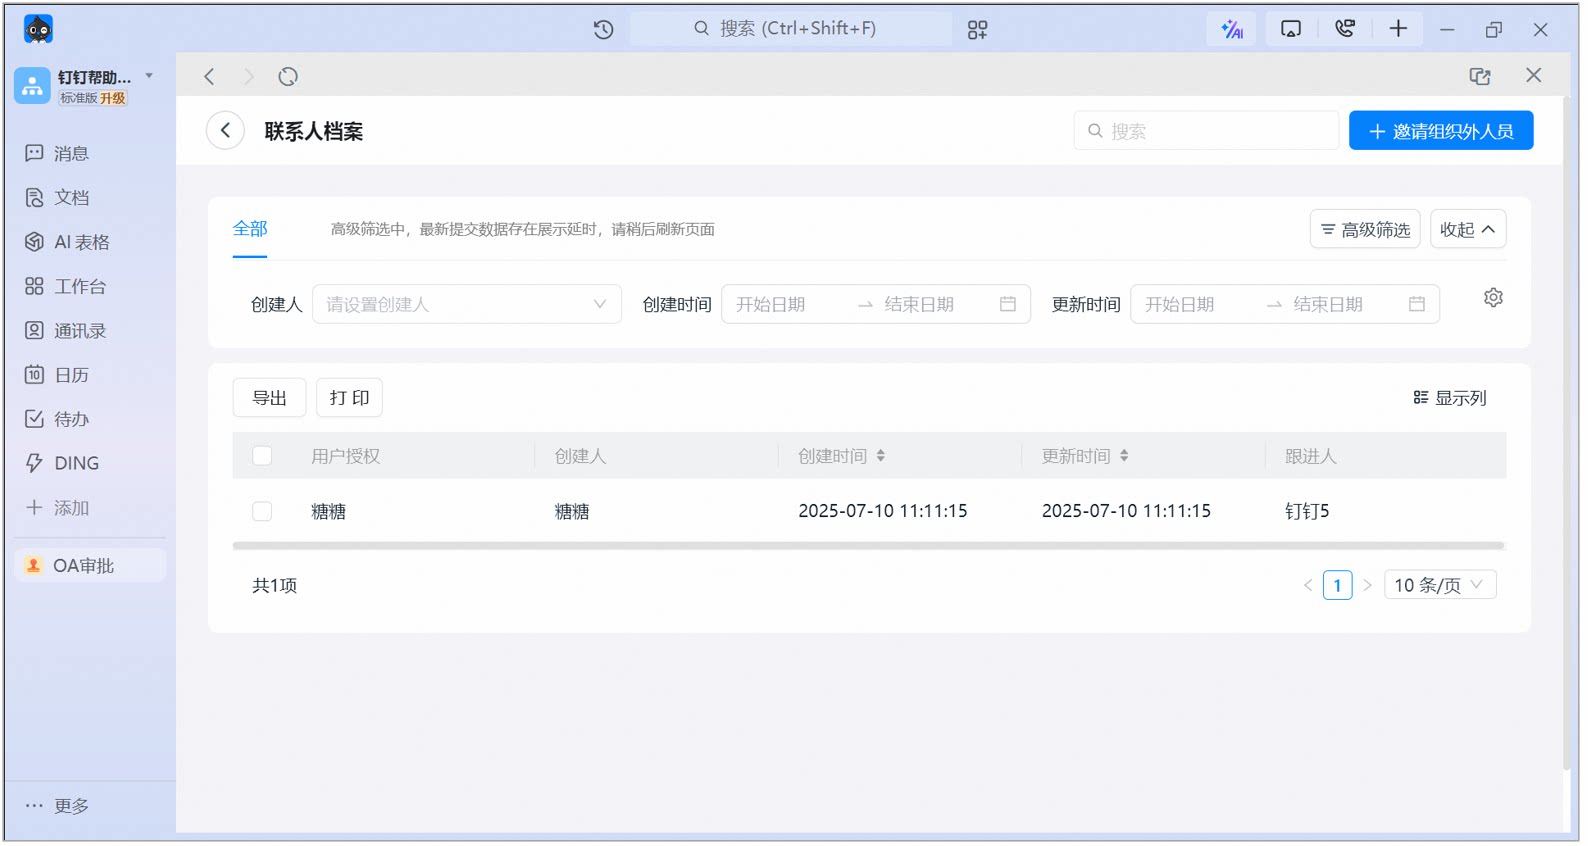
Cross-Organization Approval home in OA Approval on desktop, showing profile forms and process forms for each scenario
Click Profile Form to view all customer information in the scenario:
Contact profile list on desktop, showing all customer profile data in the scenario
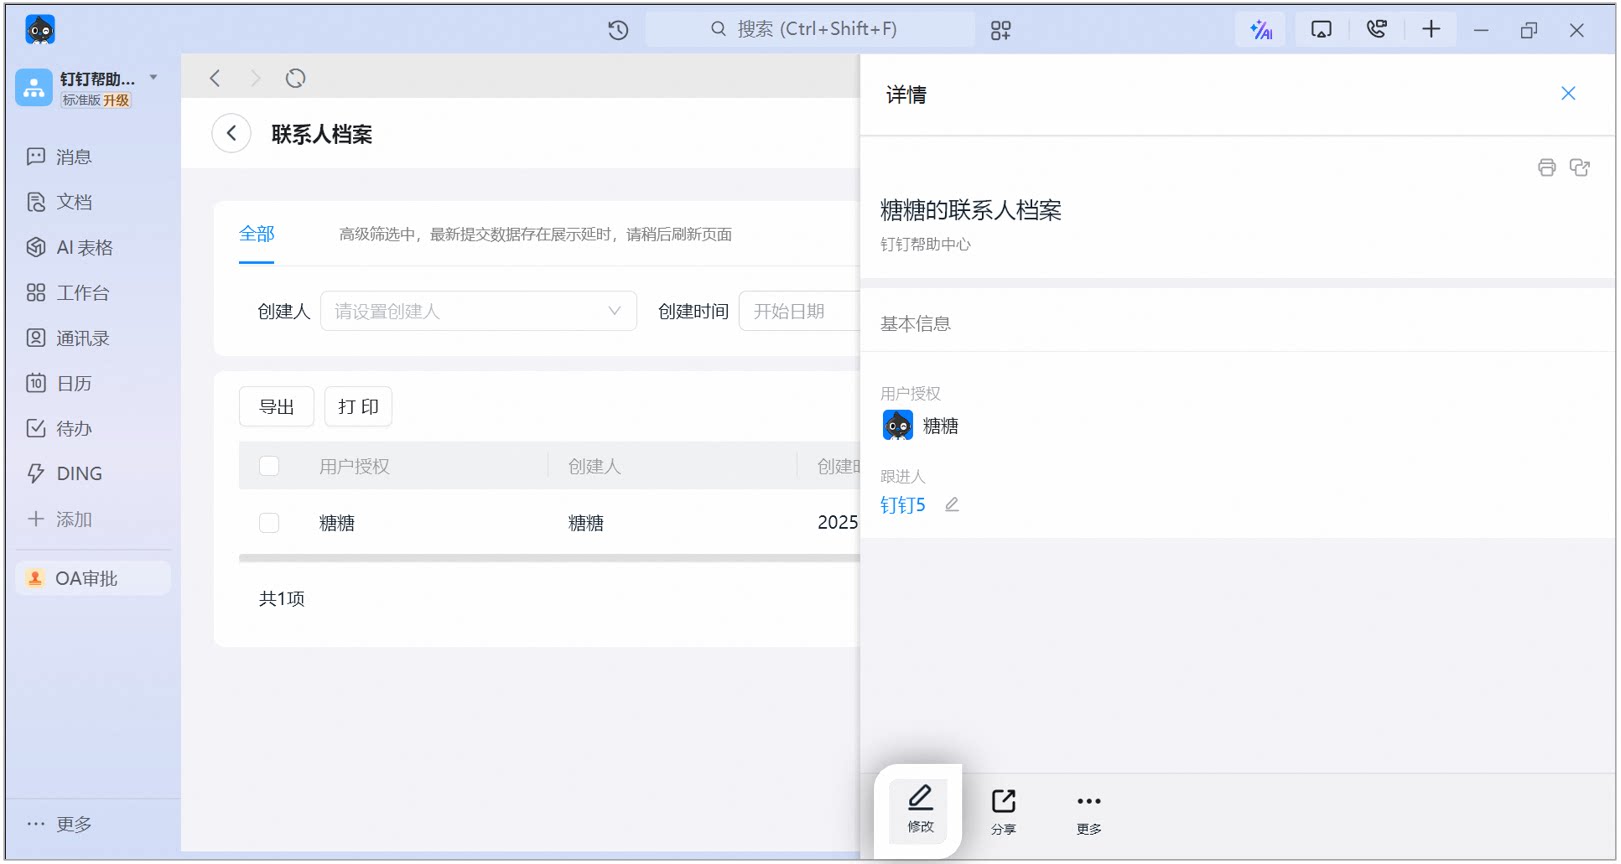
Click a profile to view its details and edit it inline:
Contact profile details side panel on desktop, supporting inline editing of the profile
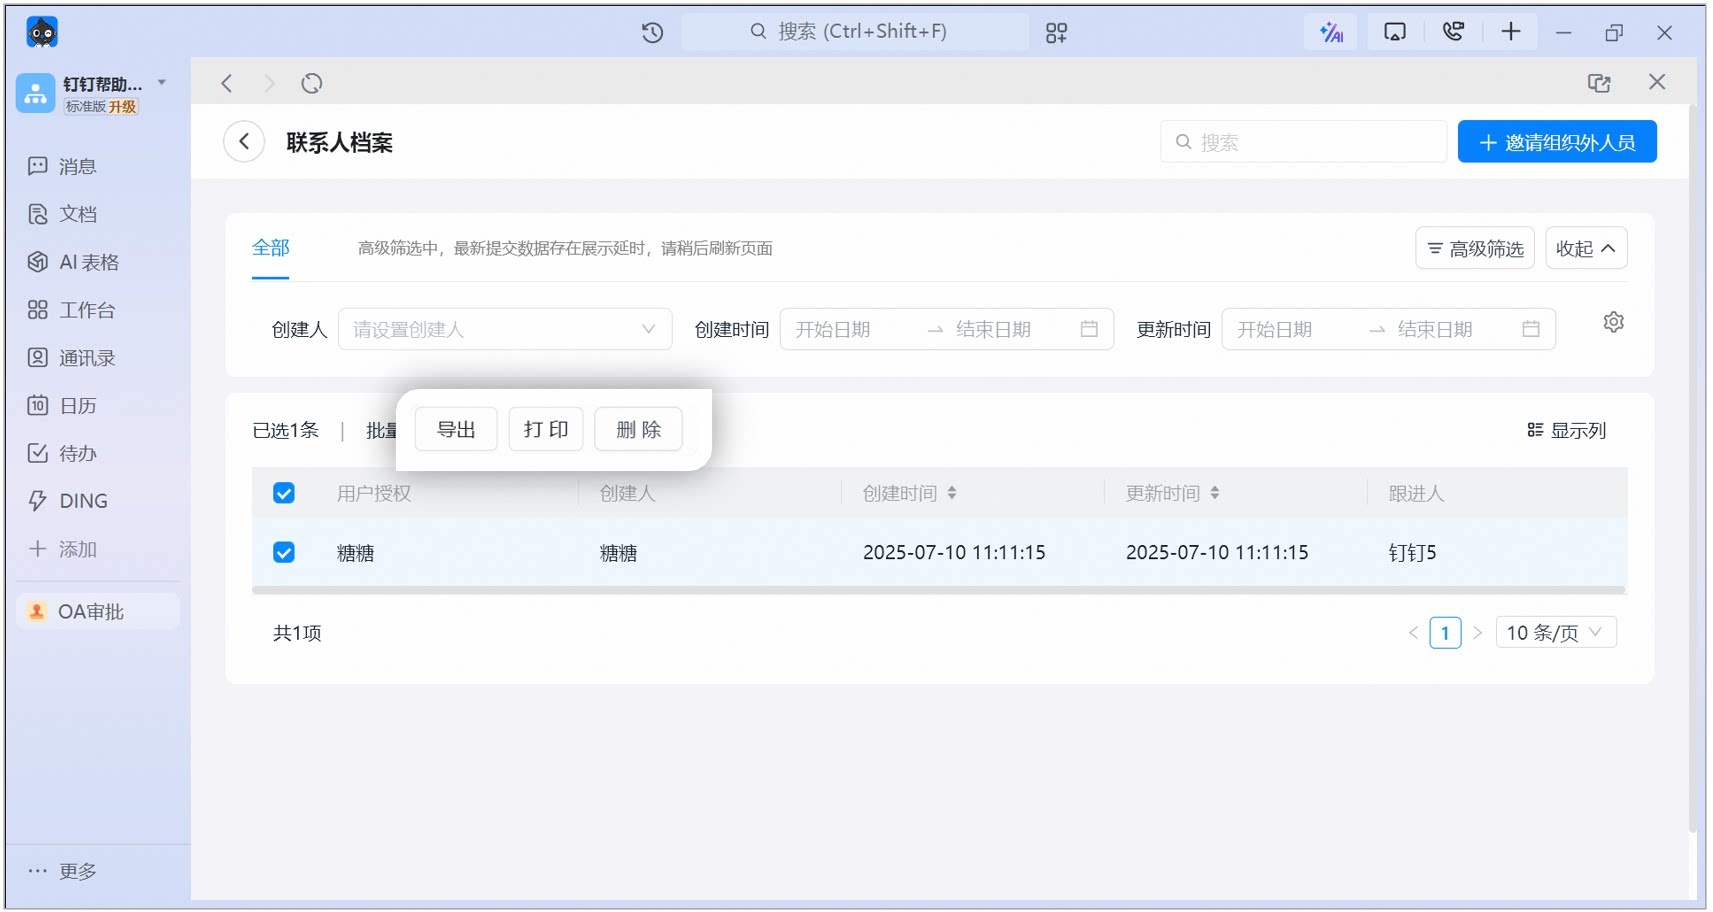
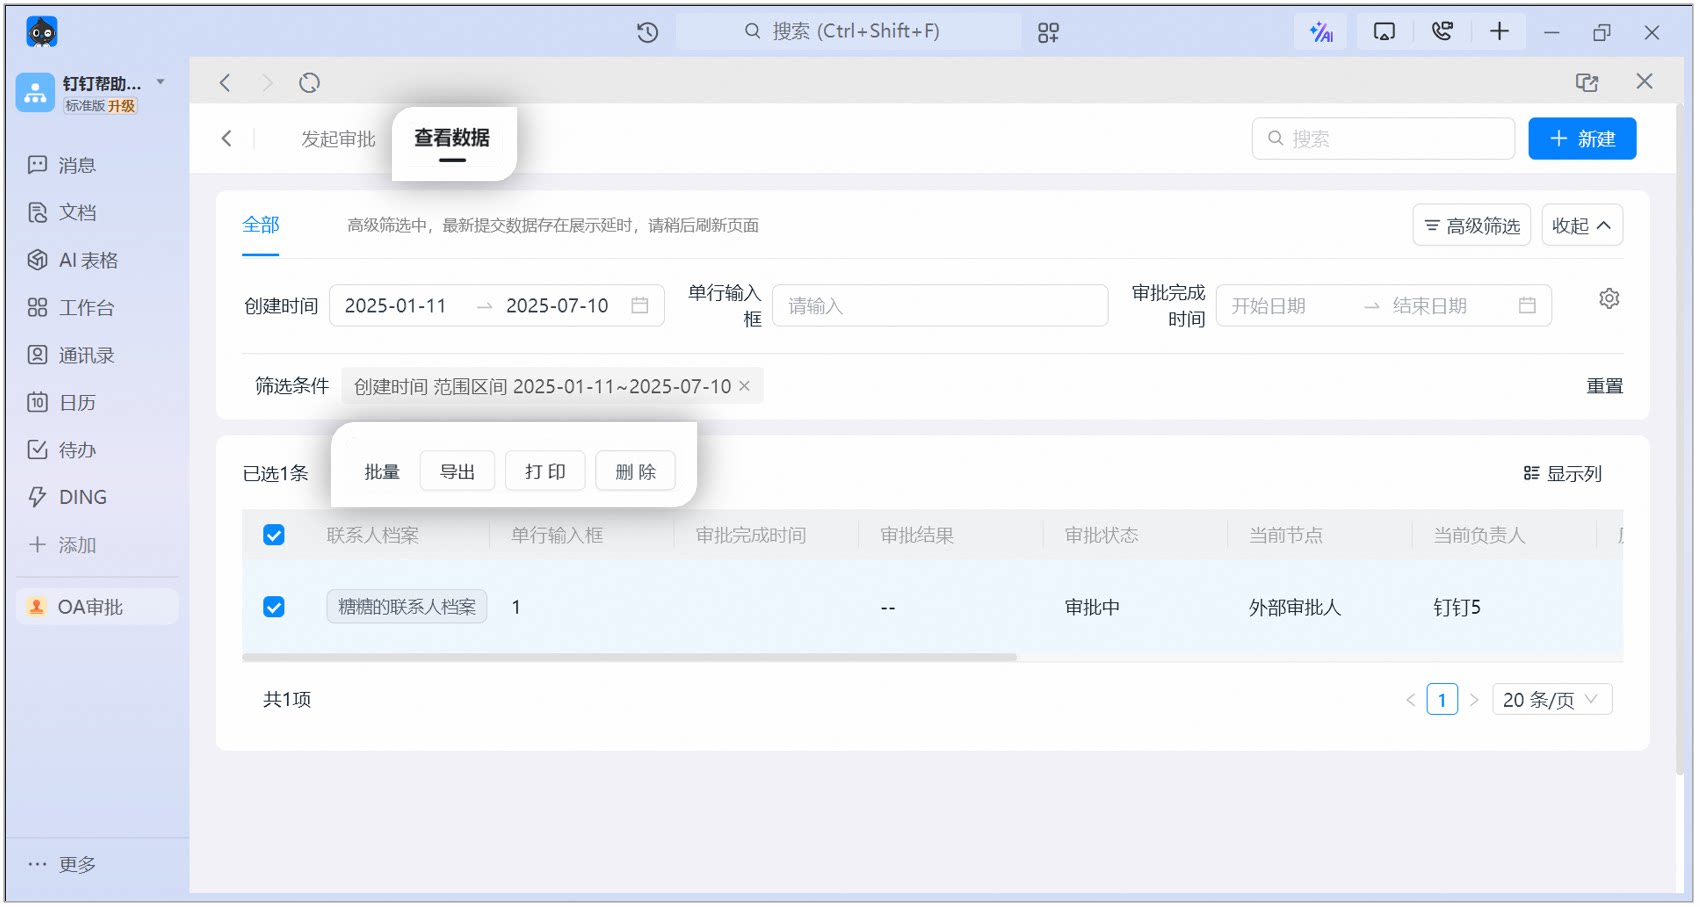
You can also bulk export, print, or delete data:
Contact profile list on desktop, where selected records can be bulk exported, printed, or deleted
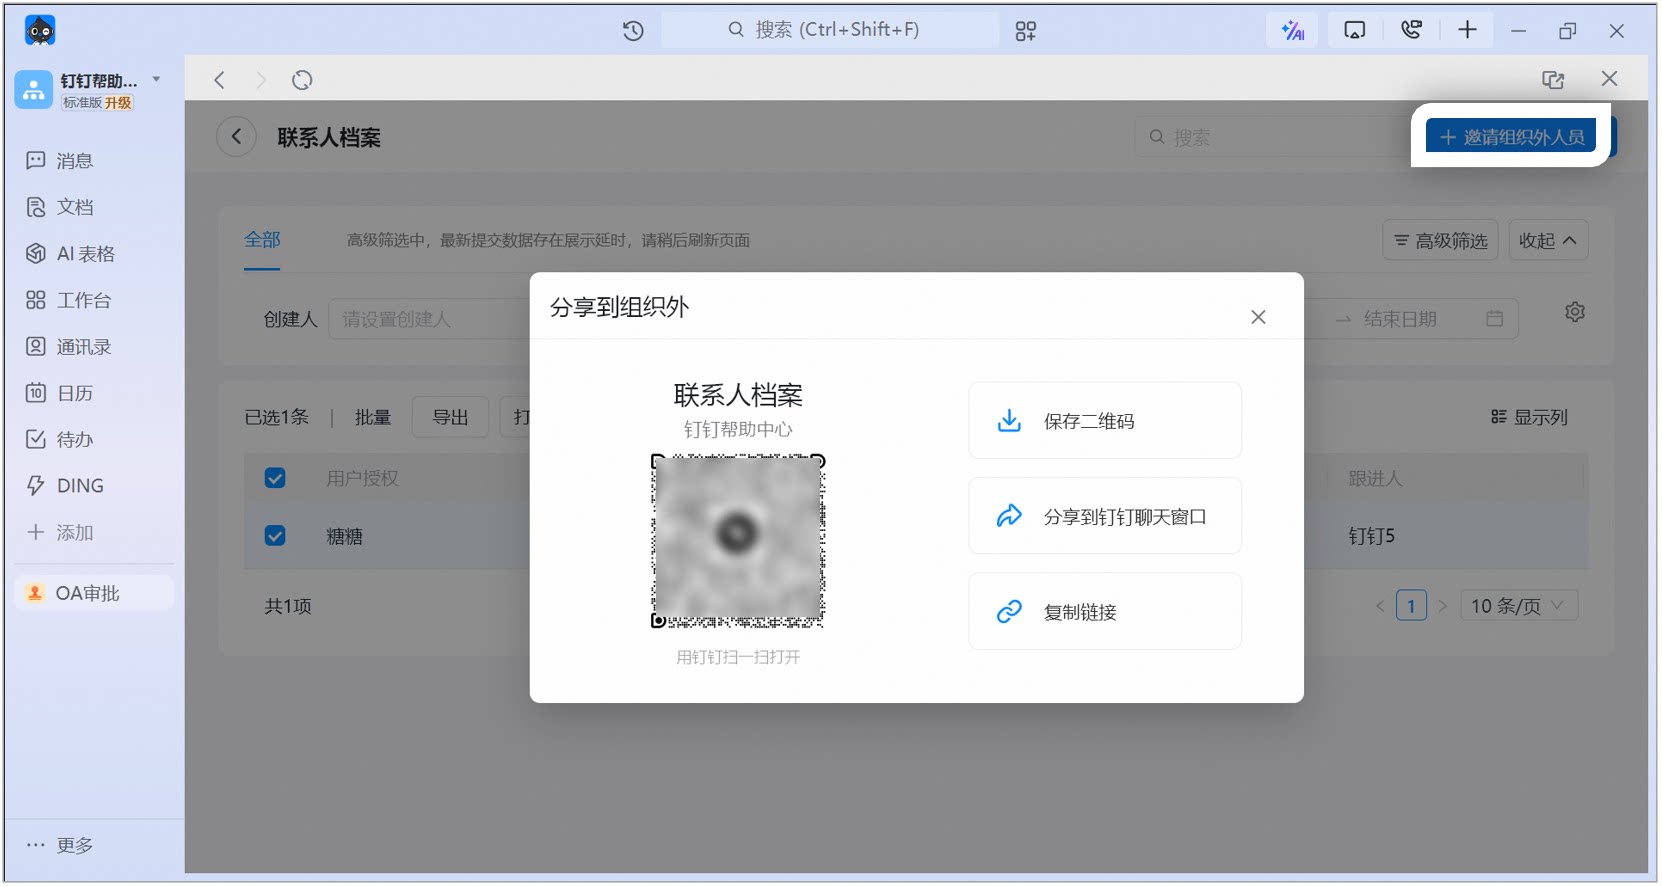
Click Invite External User in the upper-right corner to invite customers to complete their profile via QR Code, a DingTalk chat, or a copied link:
Invite External User dialog on desktop, where you can save the QR Code, share to DingTalk, or copy the link
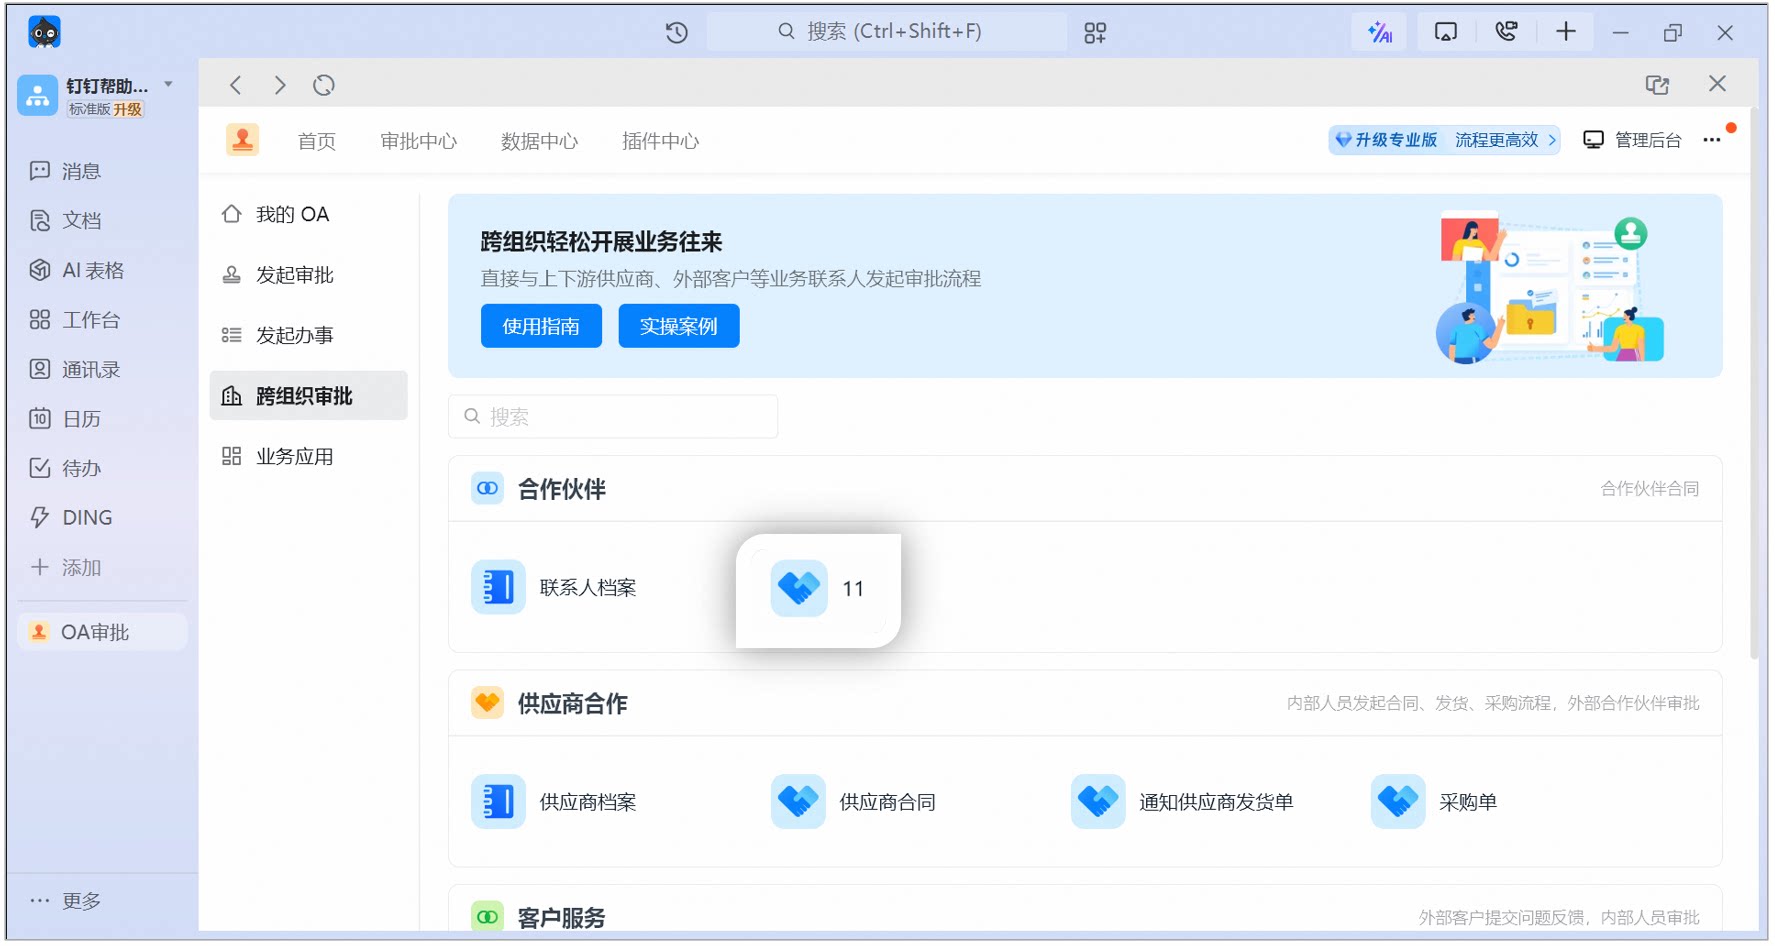
Click Process Form:
Process form entry on the Cross-Organization Approval page on desktop
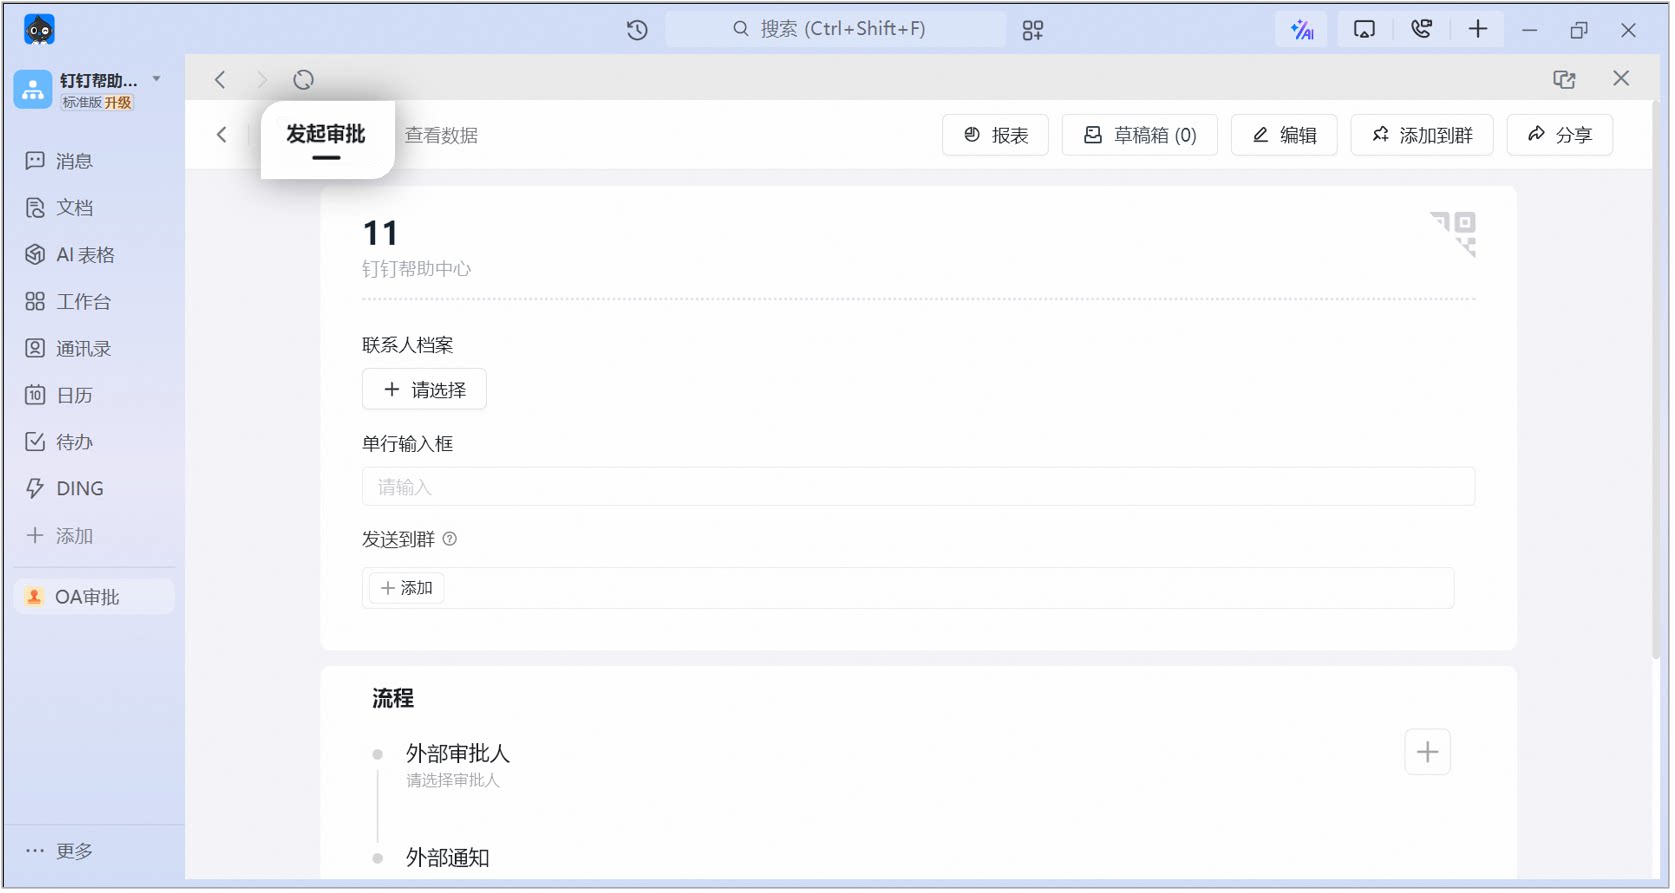
Submit an approval directly:
Submit a cross-organization approval directly from the process form page on desktop
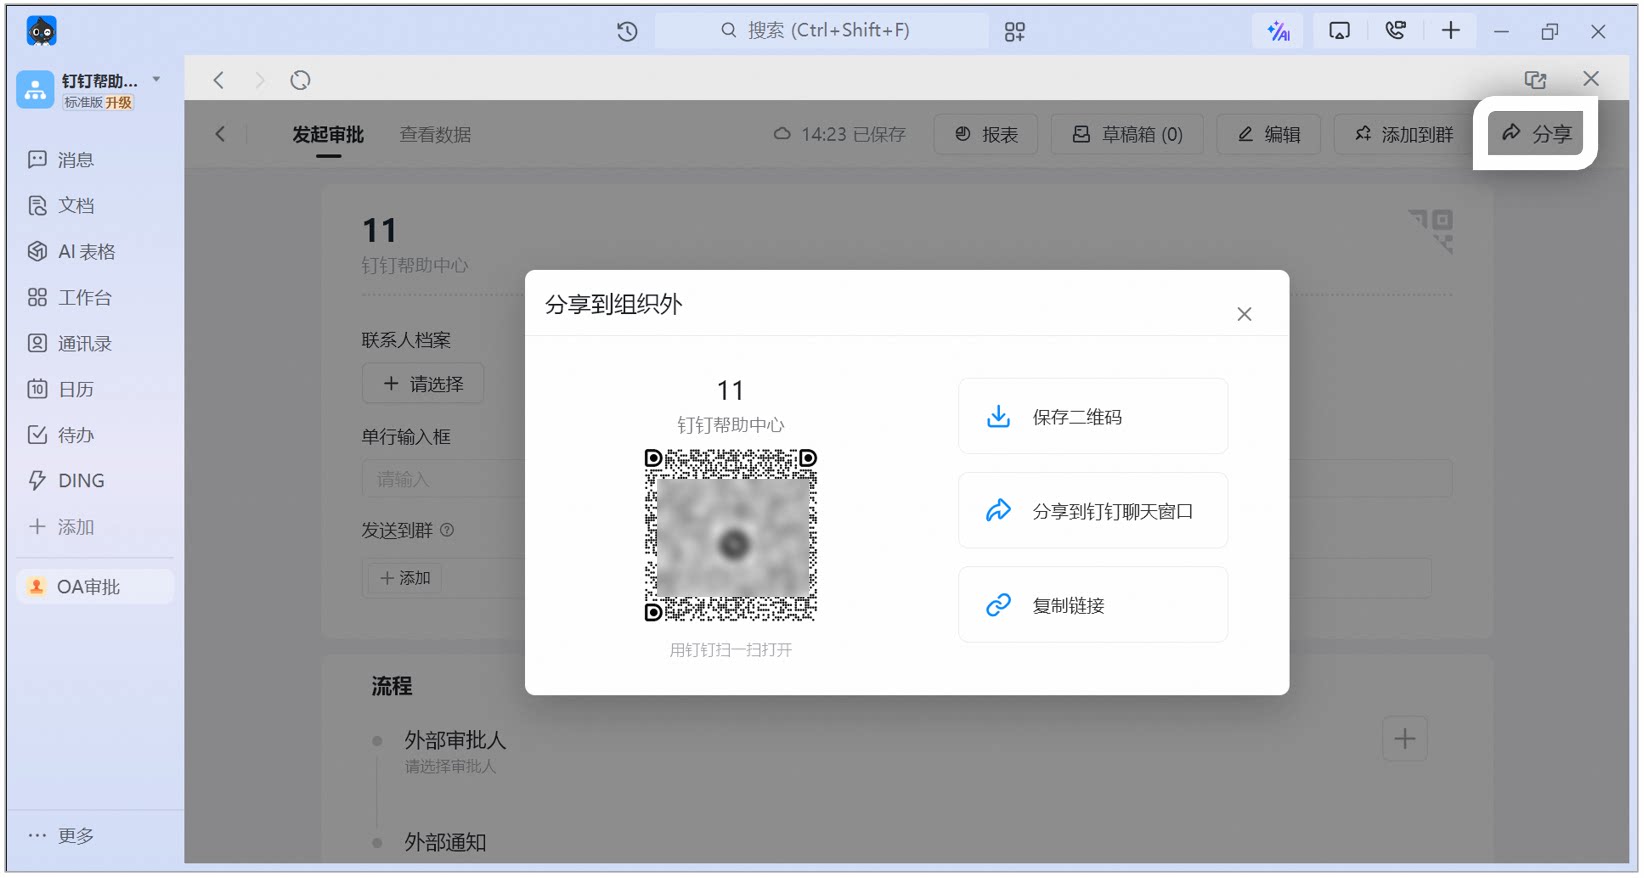
Or share it with external users to fill out:
Share Externally dialog on desktop, where you can share the process form with external users to complete
Click View Data to open the data page, where you can review all customer submissions and bulk export, print, or delete them:
View Data page on desktop, showing all form data submitted by customers and supporting bulk actions
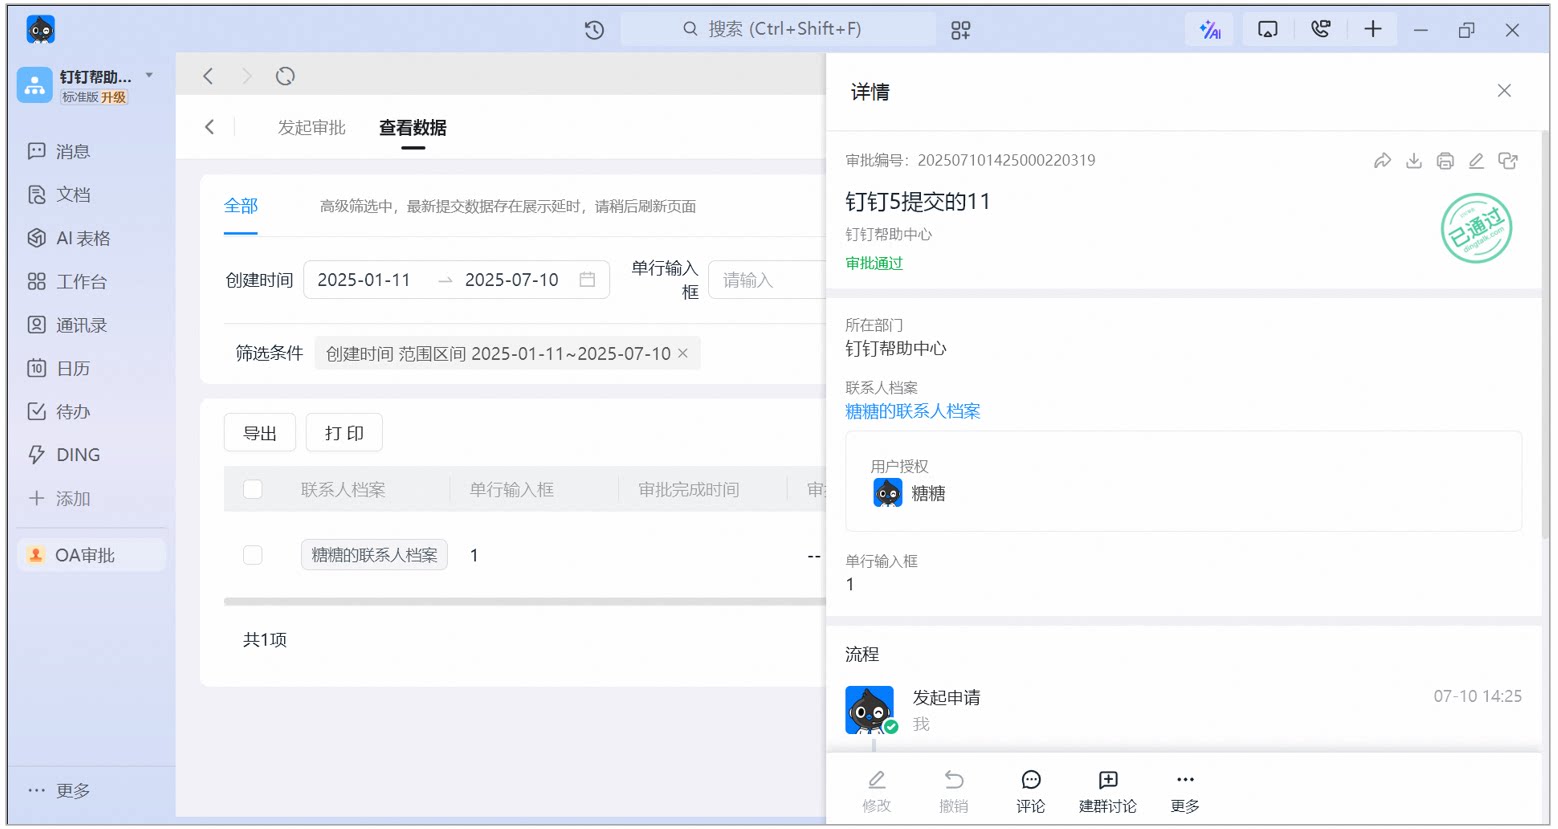
Click a record to view the form details:
Form details side panel on desktop, showing the Approval form content and process record
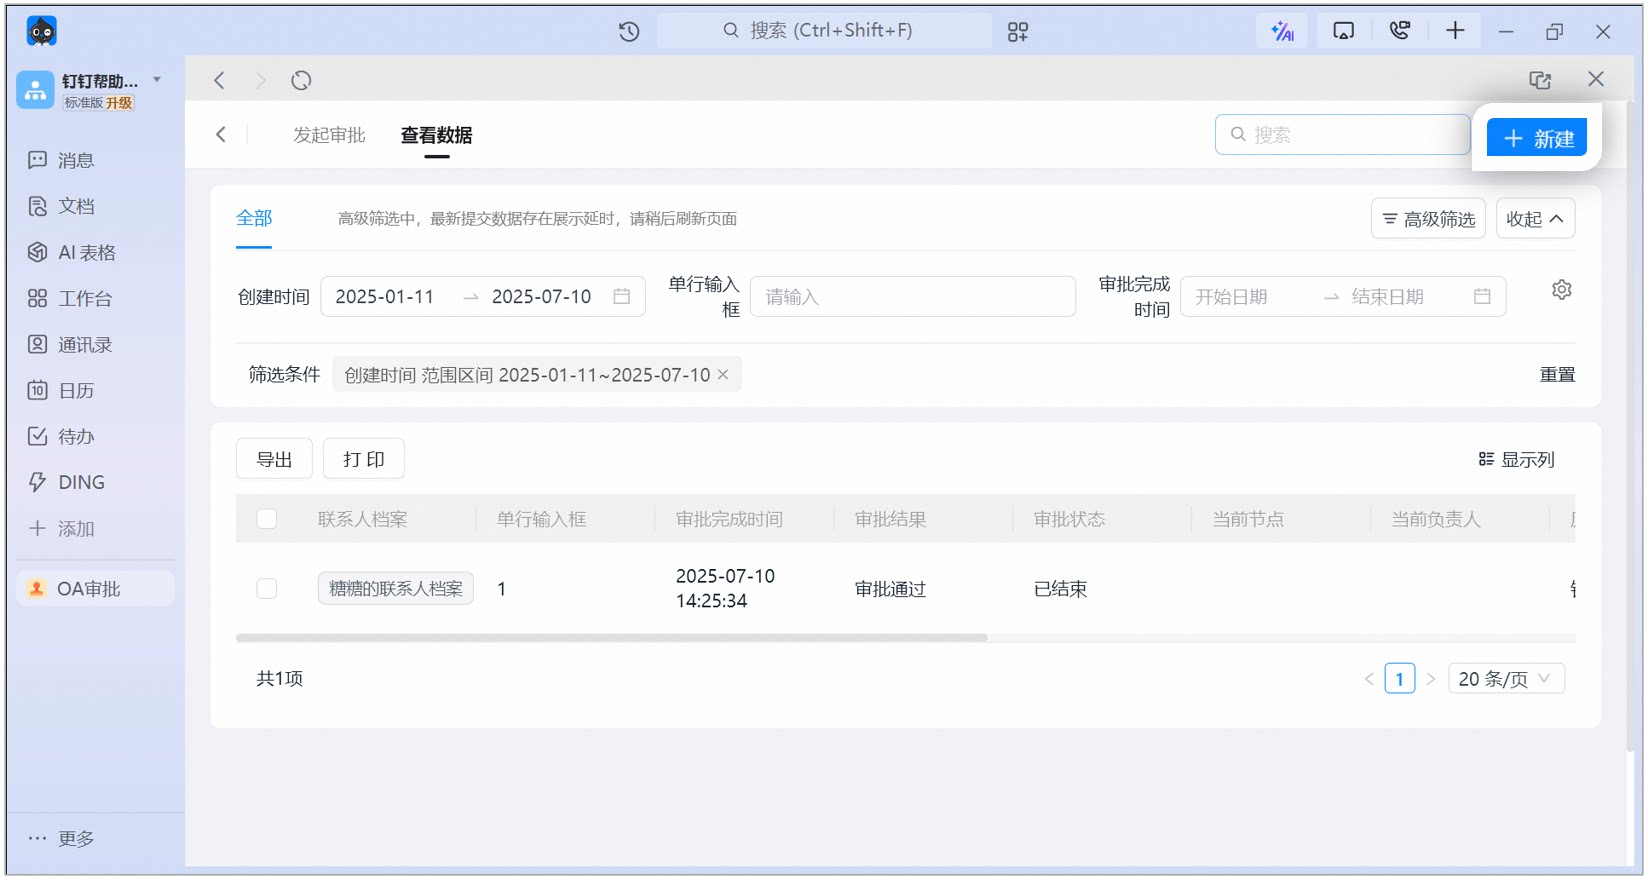
Click Create in the upper-right corner to submit an approval:
Create button in the upper-right of the data page on desktop to submit a cross-organization approval

Cross-organization quick start

Overview and basic workflow of cross-organization approval

Cross-organization employee guide

How employees use cross-organization approval