
 Chats
 Calendar
 Meetings
 Contacts
 Mail
 Docs
 Drive
 AI Table
 AI Minutes
 Attendance
 Approval
 YiDA
 Admin Console
Key Features
Multiple identity management
Users who need to maintain separate identities across work, personal life, and social activities can communicate with different groups using different email addresses while managing all messages in one mailbox. This eliminates the need to switch frequently between email accounts.
Privacy protection
By using disposable aliases or aliases for specific scenarios, users can avoid exposing their primary email addresses when registering on websites or subscribing to services. This helps reduce spam and potential security risks.
Convenient filtering and organization
Email services typically let users automatically categorize or filter incoming messages based on the alias address. This makes it easier to manage messages, prioritize important email, and work more efficiently.
Consistent brand identity
Enterprise users can create professional alias addresses that use their company domain, such as
info@yourcompany.com or hr@yourcompany.com, helping strengthen the company’s brand image and professionalism.Examples
- Individual user
- Enterprise environment
Zhang San may use
zhangsan@example.com as his primary personal email address. As an active member of a photography forum, he can set up photography_zs@example.com as an alias dedicated to forum communications, helping keep them separate and private.Technical implementation
Technical implementation
Email aliases rely on mail server configuration, which typically involves DNS records, such as MX records, and support from the mail server software. Users can add, delete, or manage aliases through an email client or web interface. The mail server resolves the aliases and ensures that messages are delivered to the correct primary mailbox.
Procedure
Email administrators can follow these steps to configure the relevant account.1
Open the member's information editor
Sign in to the DingTalk admin console with a DingTalk Enterprise Mail administrator account. Go to Directory > Members. For the account you want to update, click More > Edit information.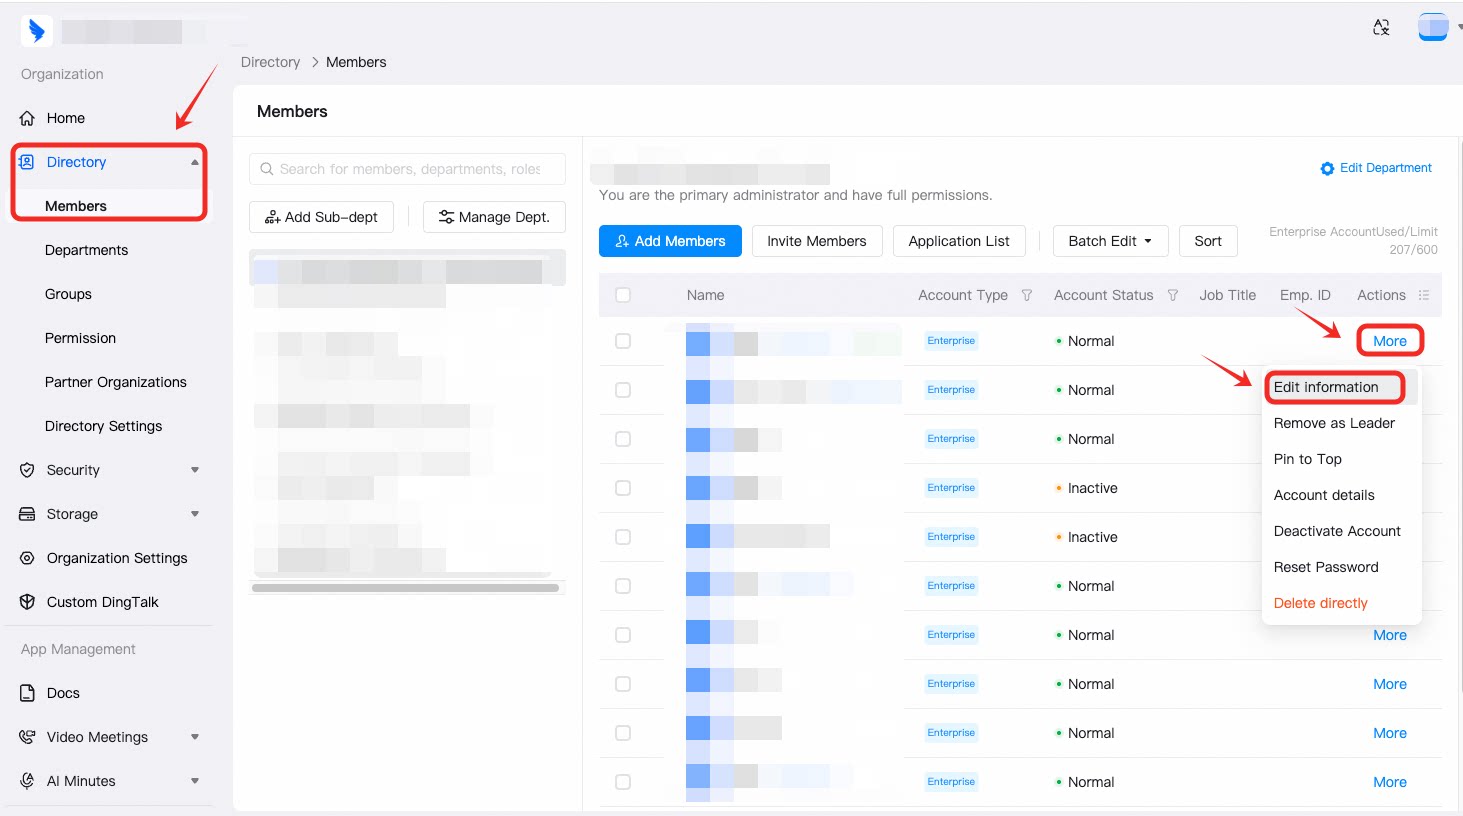
2
Open Advanced Settings
Open Advanced Settings below the Enterprise Email field.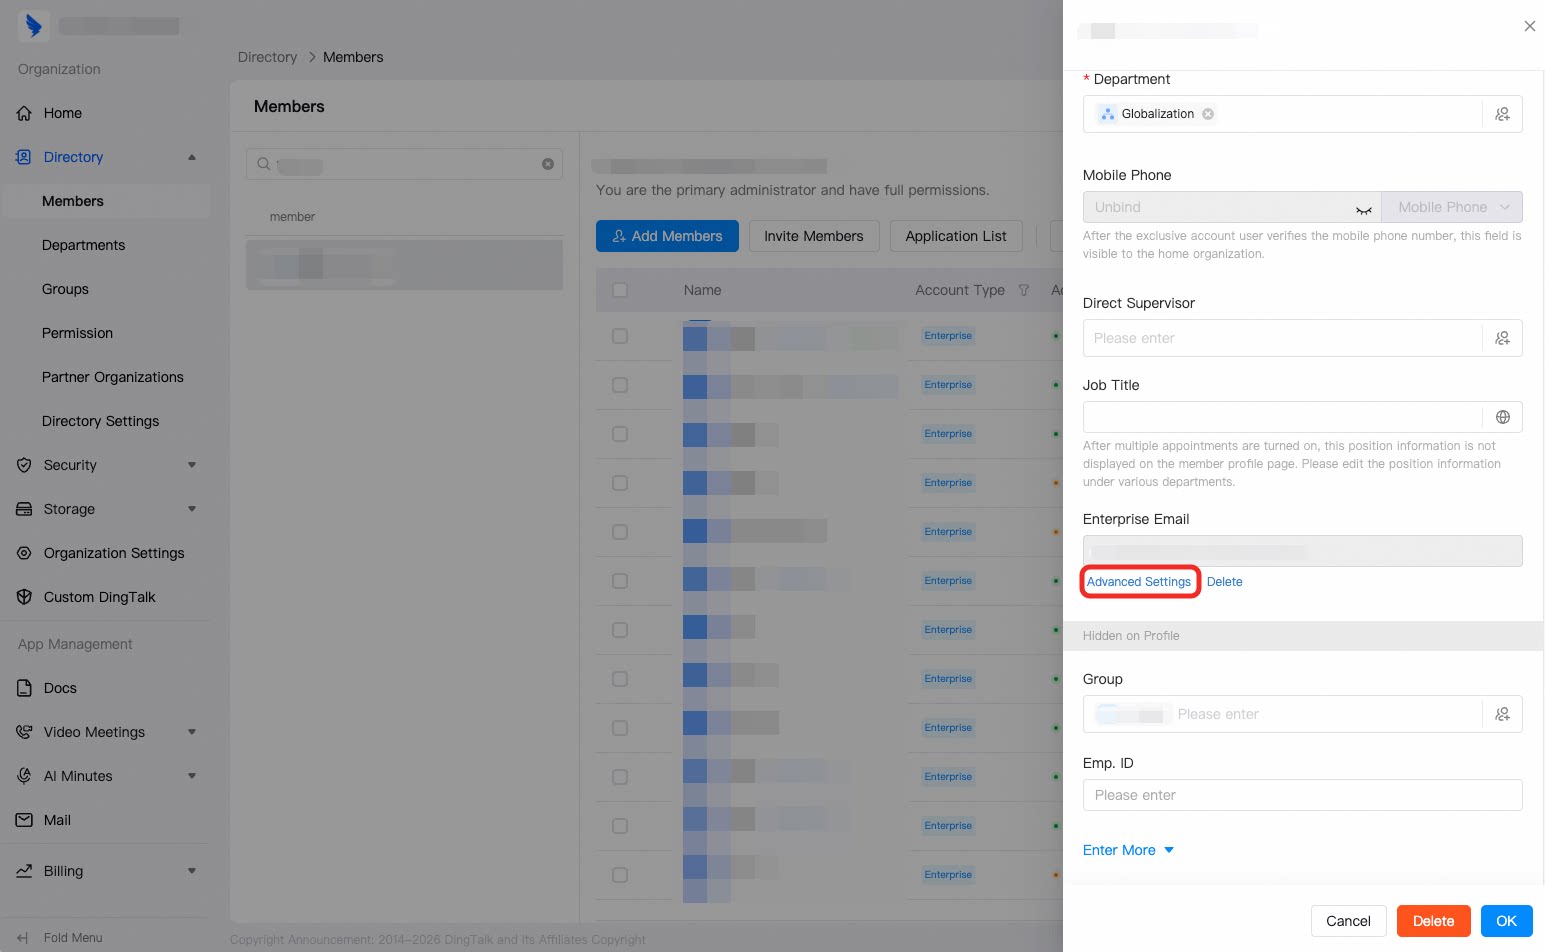
3
Add an alias
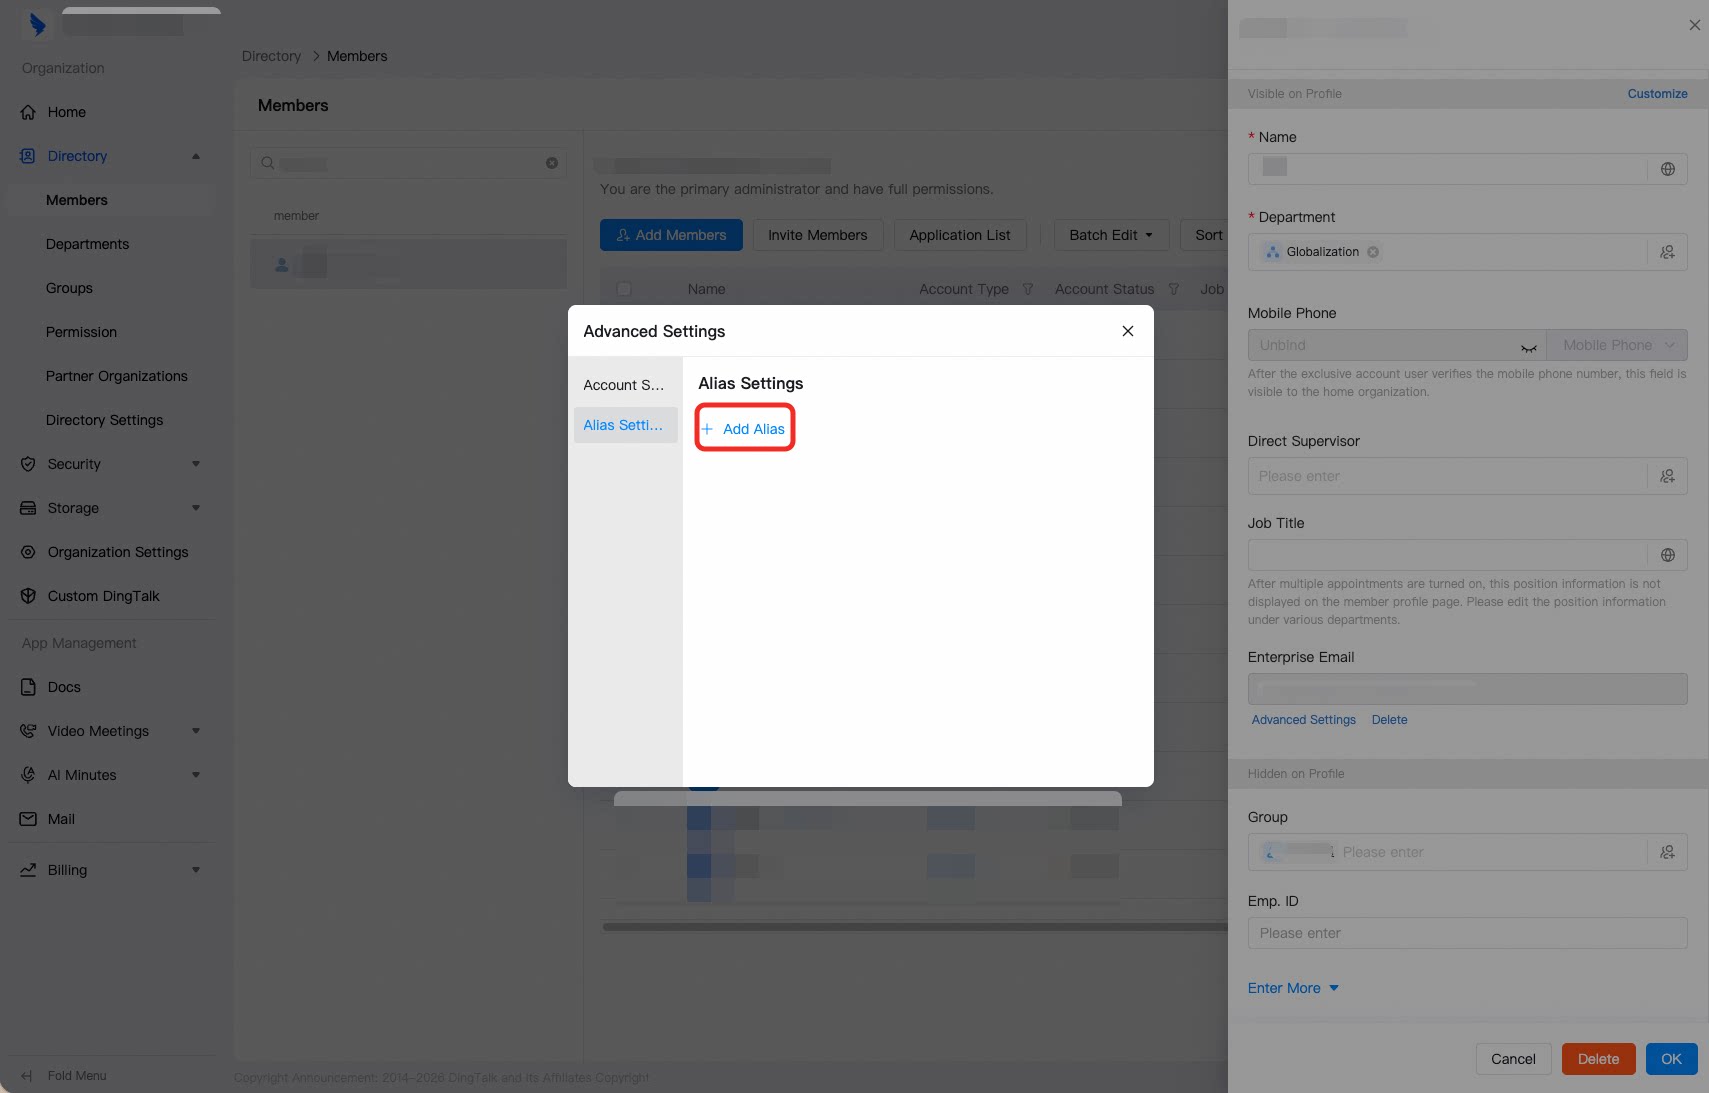
In the Advanced Settings window, click Alias Settings > Add Alias. Select a domain, enter a prefix, and save the alias.