Answers to frequently asked questions about attendance approval settings, including how to configure attendance-related approval processes, to help admins correctly set up approval templates and workflows for leave requests, makeup clock-ins, overtime, and more.
How do I set up attendance-related approval processes?
Take business trips as an example. Once an employee submits a business trip approval request through DingTalk and the request is approved, the employee’s status automatically shows as on a business trip during that period, and the business trip is recorded in the attendance report.
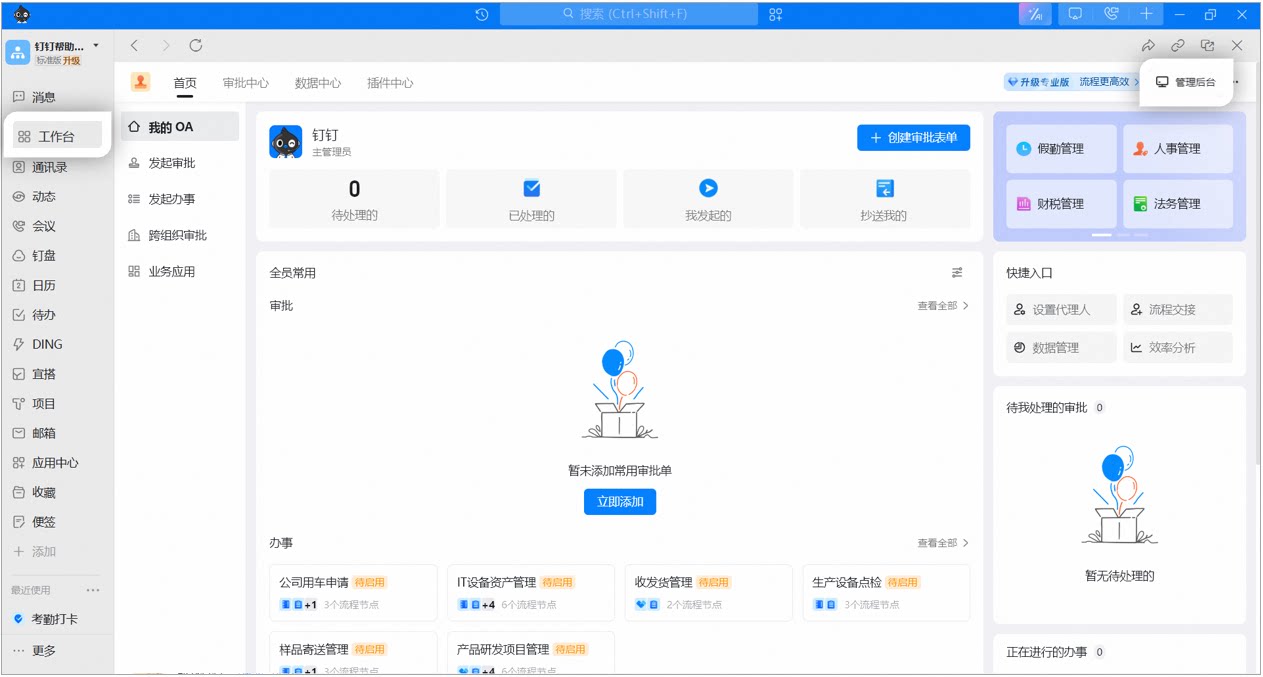
As an Admin, open the DingTalk desktop client > Workbench > OA Approval > Admin Console.
Example of setting up an attendance-related approval process
2
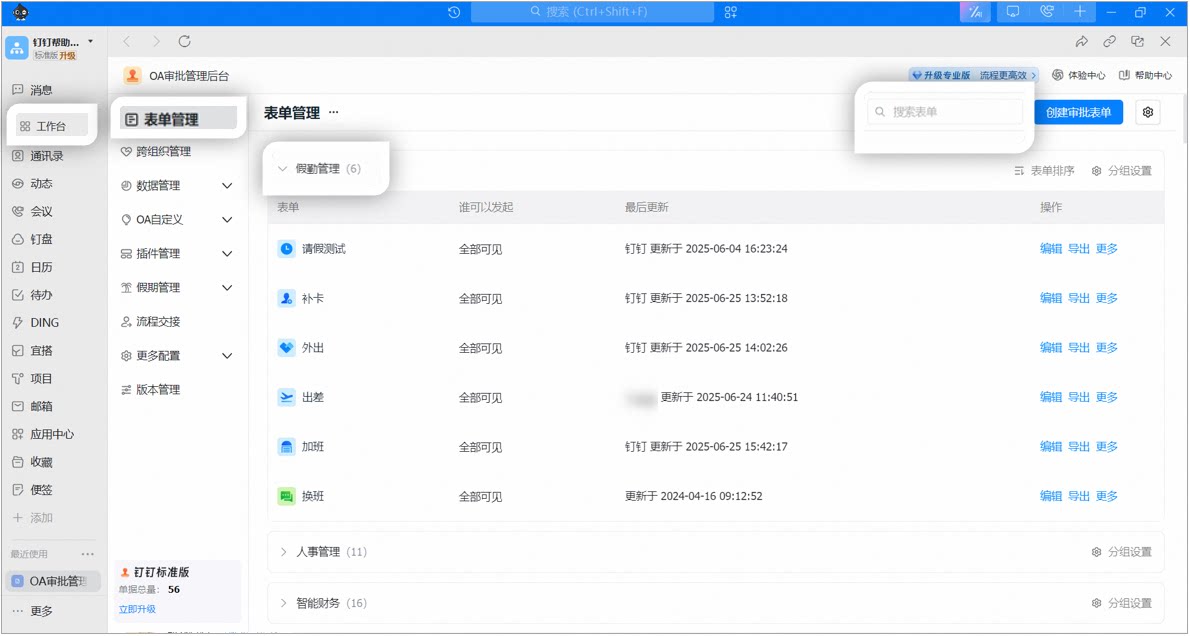
On the Form Management > Attendance Management page, locate the form you want to edit, such as the business trip form, and click Edit. Alternatively, use the search box in the upper-right corner to find the form by name.
Example of setting up an attendance-related approval process
3
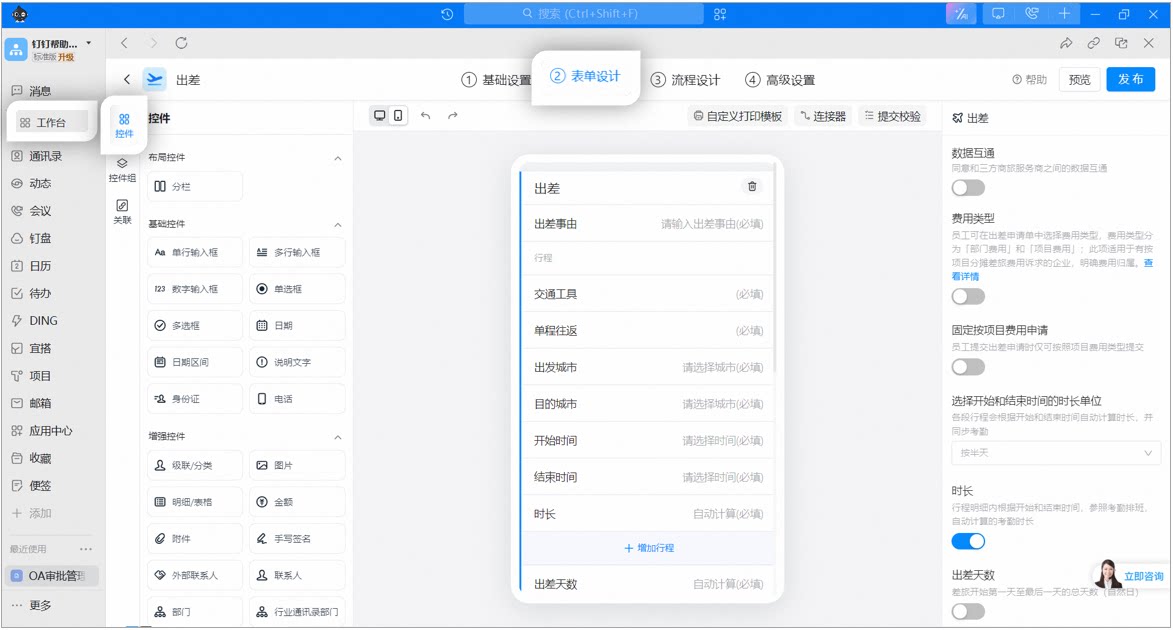
In form design, the system provides a preset business trip control group. Fields within this control group cannot be modified, but you can add extra controls as needed.
Example page for setting up an attendance-related approval process
Form action permissions: Grant the approver different permissions for different fields on the approval form as needed.
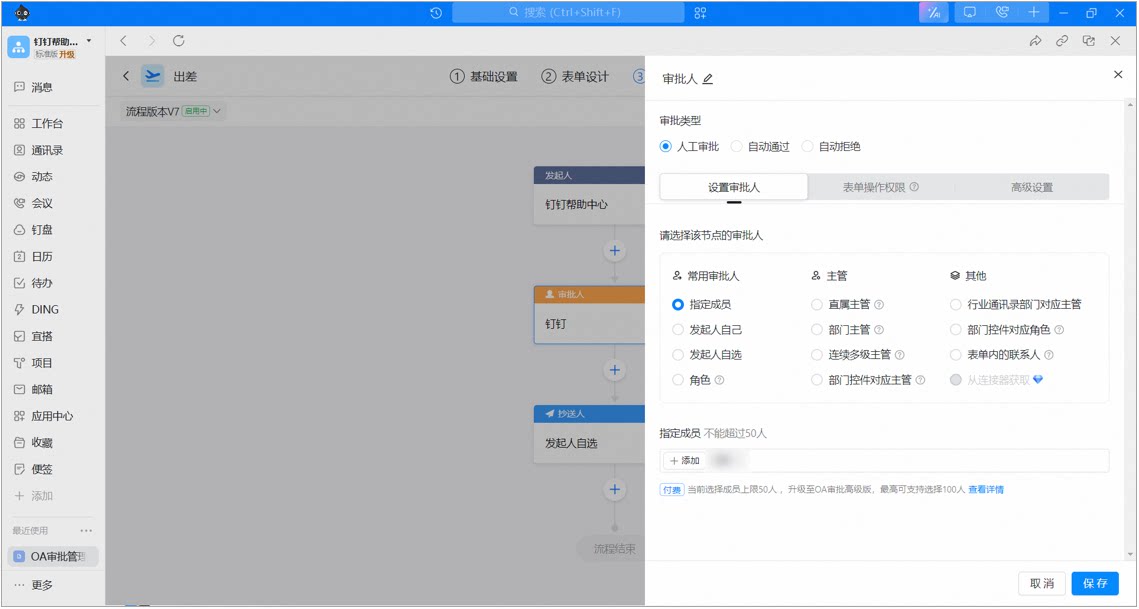
Set roles:
Go to Contacts to set roles. Users with the same approval responsibilities can be assigned to the same role.
Define the management scope of the role and assign each user in the role to the department they manage.
Set the role as an approver in OA Approval.
Set the direct manager:
Go to Contacts to set the direct manager (typically the reporting-line manager, who does not belong to the higher-level department but to whom the relevant business is reported).
Set the direct manager as an approver in OA Approval.
Set the department manager:
Go to Contacts to set the department manager.
Set the department manager as an approver in OA Approval.
Set multiple levels of managers:
Go to Contacts to adjust the manager Tier.
Once multiple levels of managers are set, each level of manager above the initiator can approve in sequence.
Set the manager associated with a department control:
Add a department control to the Form.
In the Form, set the approver as the manager associated with the department control, and specify the manager level.
After the initiator selects a Department when submitting the Form, the corresponding department manager becomes the approver.
Set the role associated with a department control:
Add a department control to the Form.
In the Form, set the approver as the role associated with the department control, and specify the role.
When submitting the Form, the initiator selects an approver from the specified role.
Set contacts within the Form:
Add a Contact control to the Form.
Set the approver as a Contact specified in the Form.
When submitting the Form, the initiator selects an approver from the specified contacts.
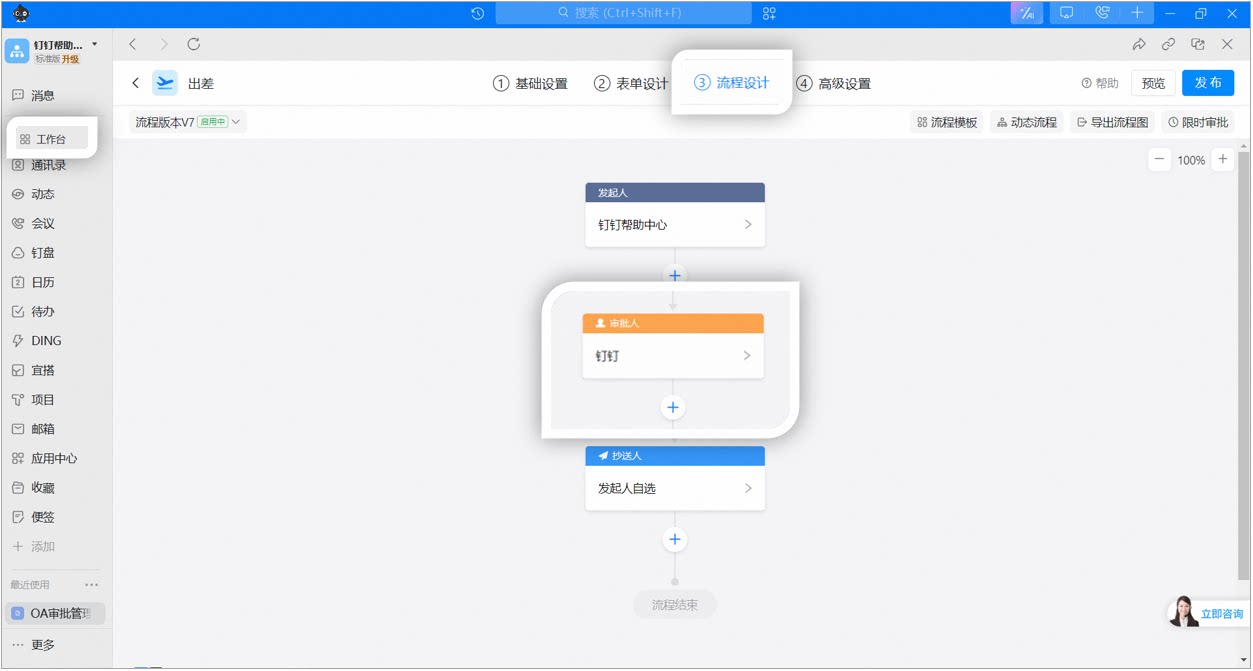
Example page for setting up an attendance-related approval process
Example page for setting up an attendance-related approval process
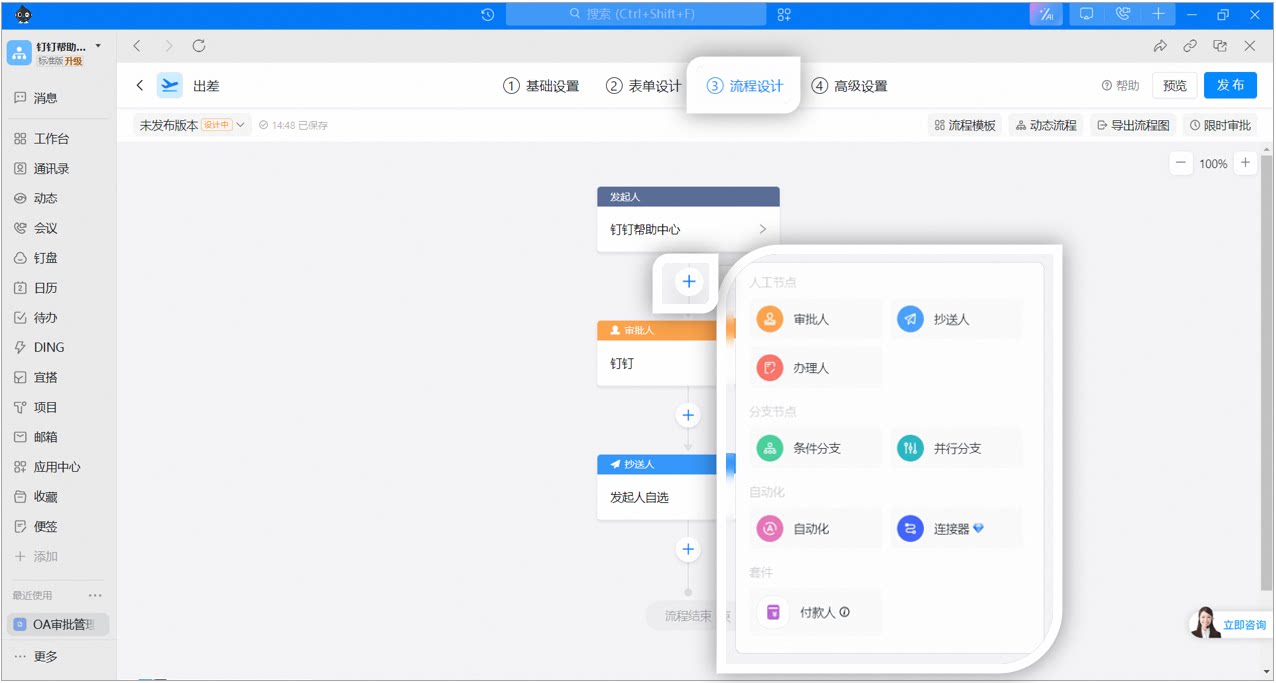
1
You can also add approvers, CC recipients, handlers, or conditional branches as needed.⚠️ Notes:Payer: When the approval form reaches this step, a payment order can be generated and synced to online banking. After the finance team processes the payment through online banking, the payment result is sent back to the approval form.
Example page for setting up an attendance-related approval process
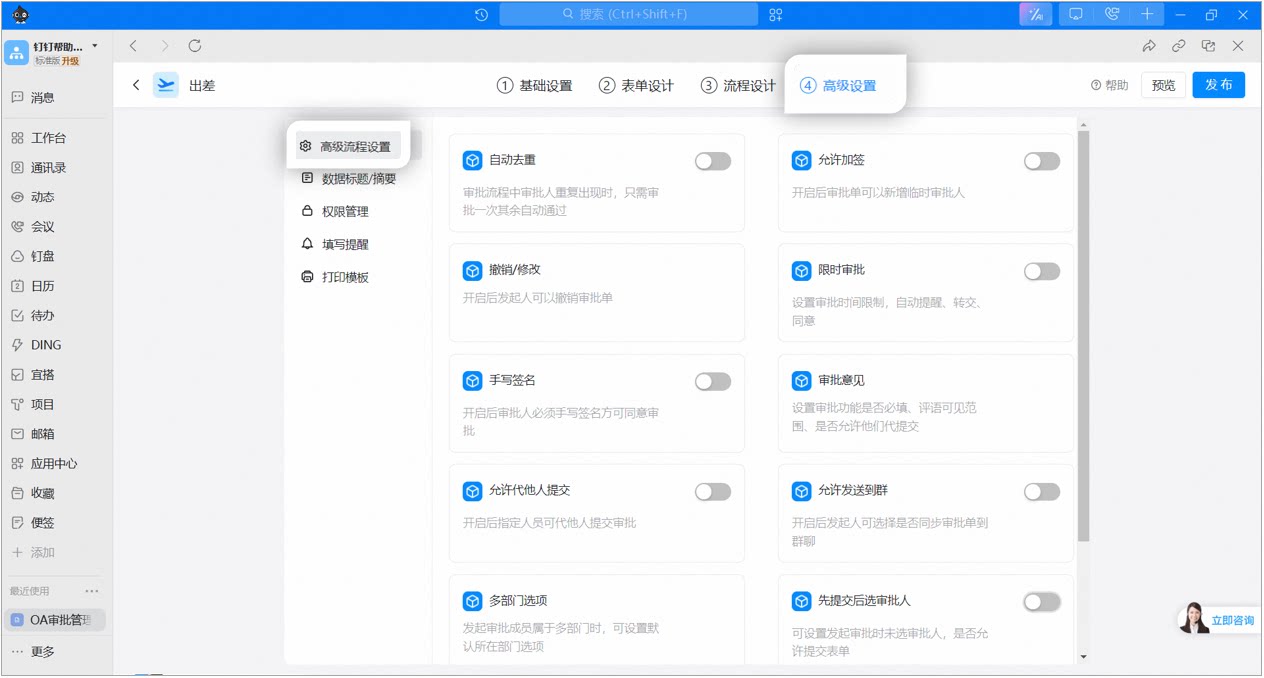
2
Premium process settings support features such as automatic deduplication, allow add approver, time-limited approval, and Signature.⚠️ Notes:
Automatic deduplication: When the same approver appears multiple times in the approval process, they only need to approve once, and the remaining steps are approved automatically.
Allow add approver: When enabled, temporary approvers can be added to the approval form.
Withdraw/Modify: When enabled, the initiator can withdraw the approval form.
Time-limited approval: Configure whether the approval feature is Required, the visibility scope of comments, and whether others are allowed to submit on their behalf.
Signature: When enabled, the approver must provide a Signature before approving.
Approval comments: Configure whether approval comments are Required, the visibility scope of comments, and whether others are allowed to submit on their behalf.
Allow submission on behalf of others: When enabled, designated users can submit approvals on behalf of others.
Allow sending to Group Chat: When enabled, the initiator can choose whether to sync the approval form to a Group Chat.
Multi-department option: When the initiator belongs to multiple departments, the default department option can be configured.
Submit before selecting an approver: Configure whether the Form can be submitted when no approver has been selected.
Message notifications: Configure whether relevant participants are notified during the approval form’s workflow.
Example page for setting up an attendance-related approval process
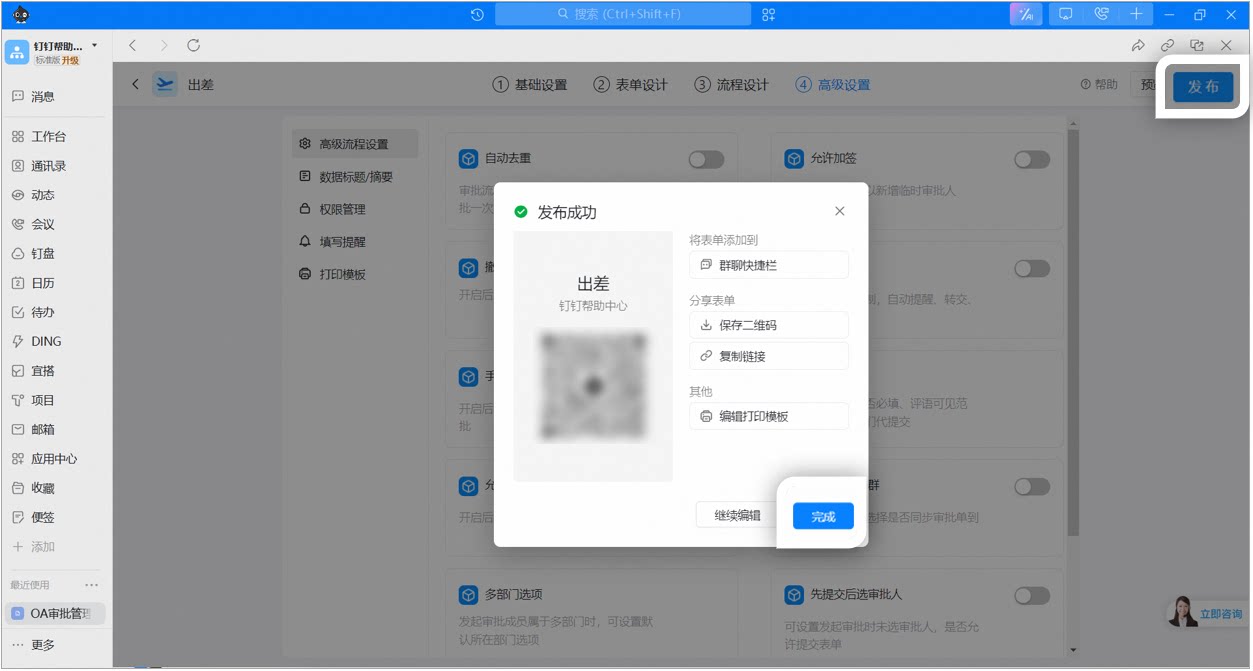
3
Once all settings are complete, click the Publish Button in the upper-right corner to finish the Edit.
Example page for setting up an attendance-related approval process


 Chats
Chats Calendar
 Meetings
 Contacts
 Mail
Mail Docs
Docs Drive
Drive AI Table
 AI Minutes
 Attendance
 Approval
 YiDA
YiDA Admin Console