

 Chats
Chats Calendar
 Meetings
 Contacts
 Mail
Mail Docs
Docs Drive
Drive AI Table
 AI Minutes
 Attendance
 Approval
 YiDA
YiDA Admin Console
- Available in YiDA China edition, Professional edition (overseas), and Dedicated edition (overseas).
- Available in YiDA International edition with the “internationalization capability” included.
1. Feature Overview
The YiDA China edition requires the internationalization capability extension module. The International edition includes this capability by default. Outlook and Gmail accounts are supported and can be used to send mail from the message node.- Creating an Outlook account requires an authorization code to complete authorization.
- Creating a Gmail account requires entering the mail account and authorization code, and then saving.
- Mail content can dynamically receive form parameters or system default data for greater flexibility.
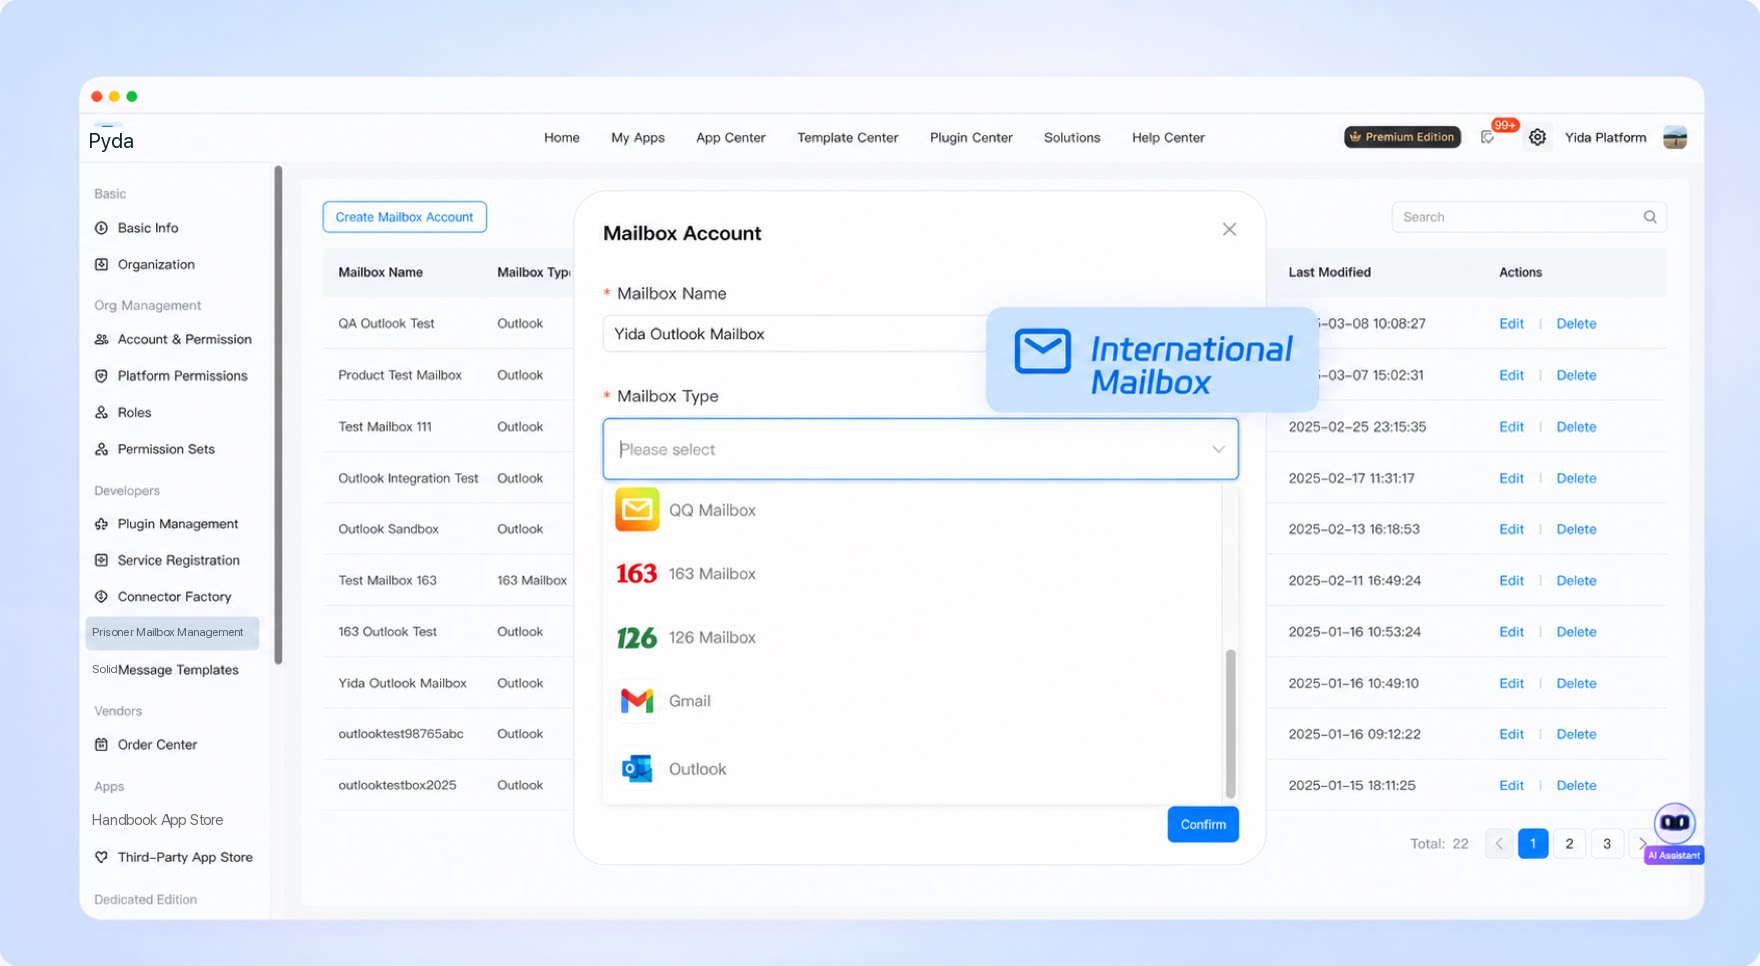
2. Create a Mail Account
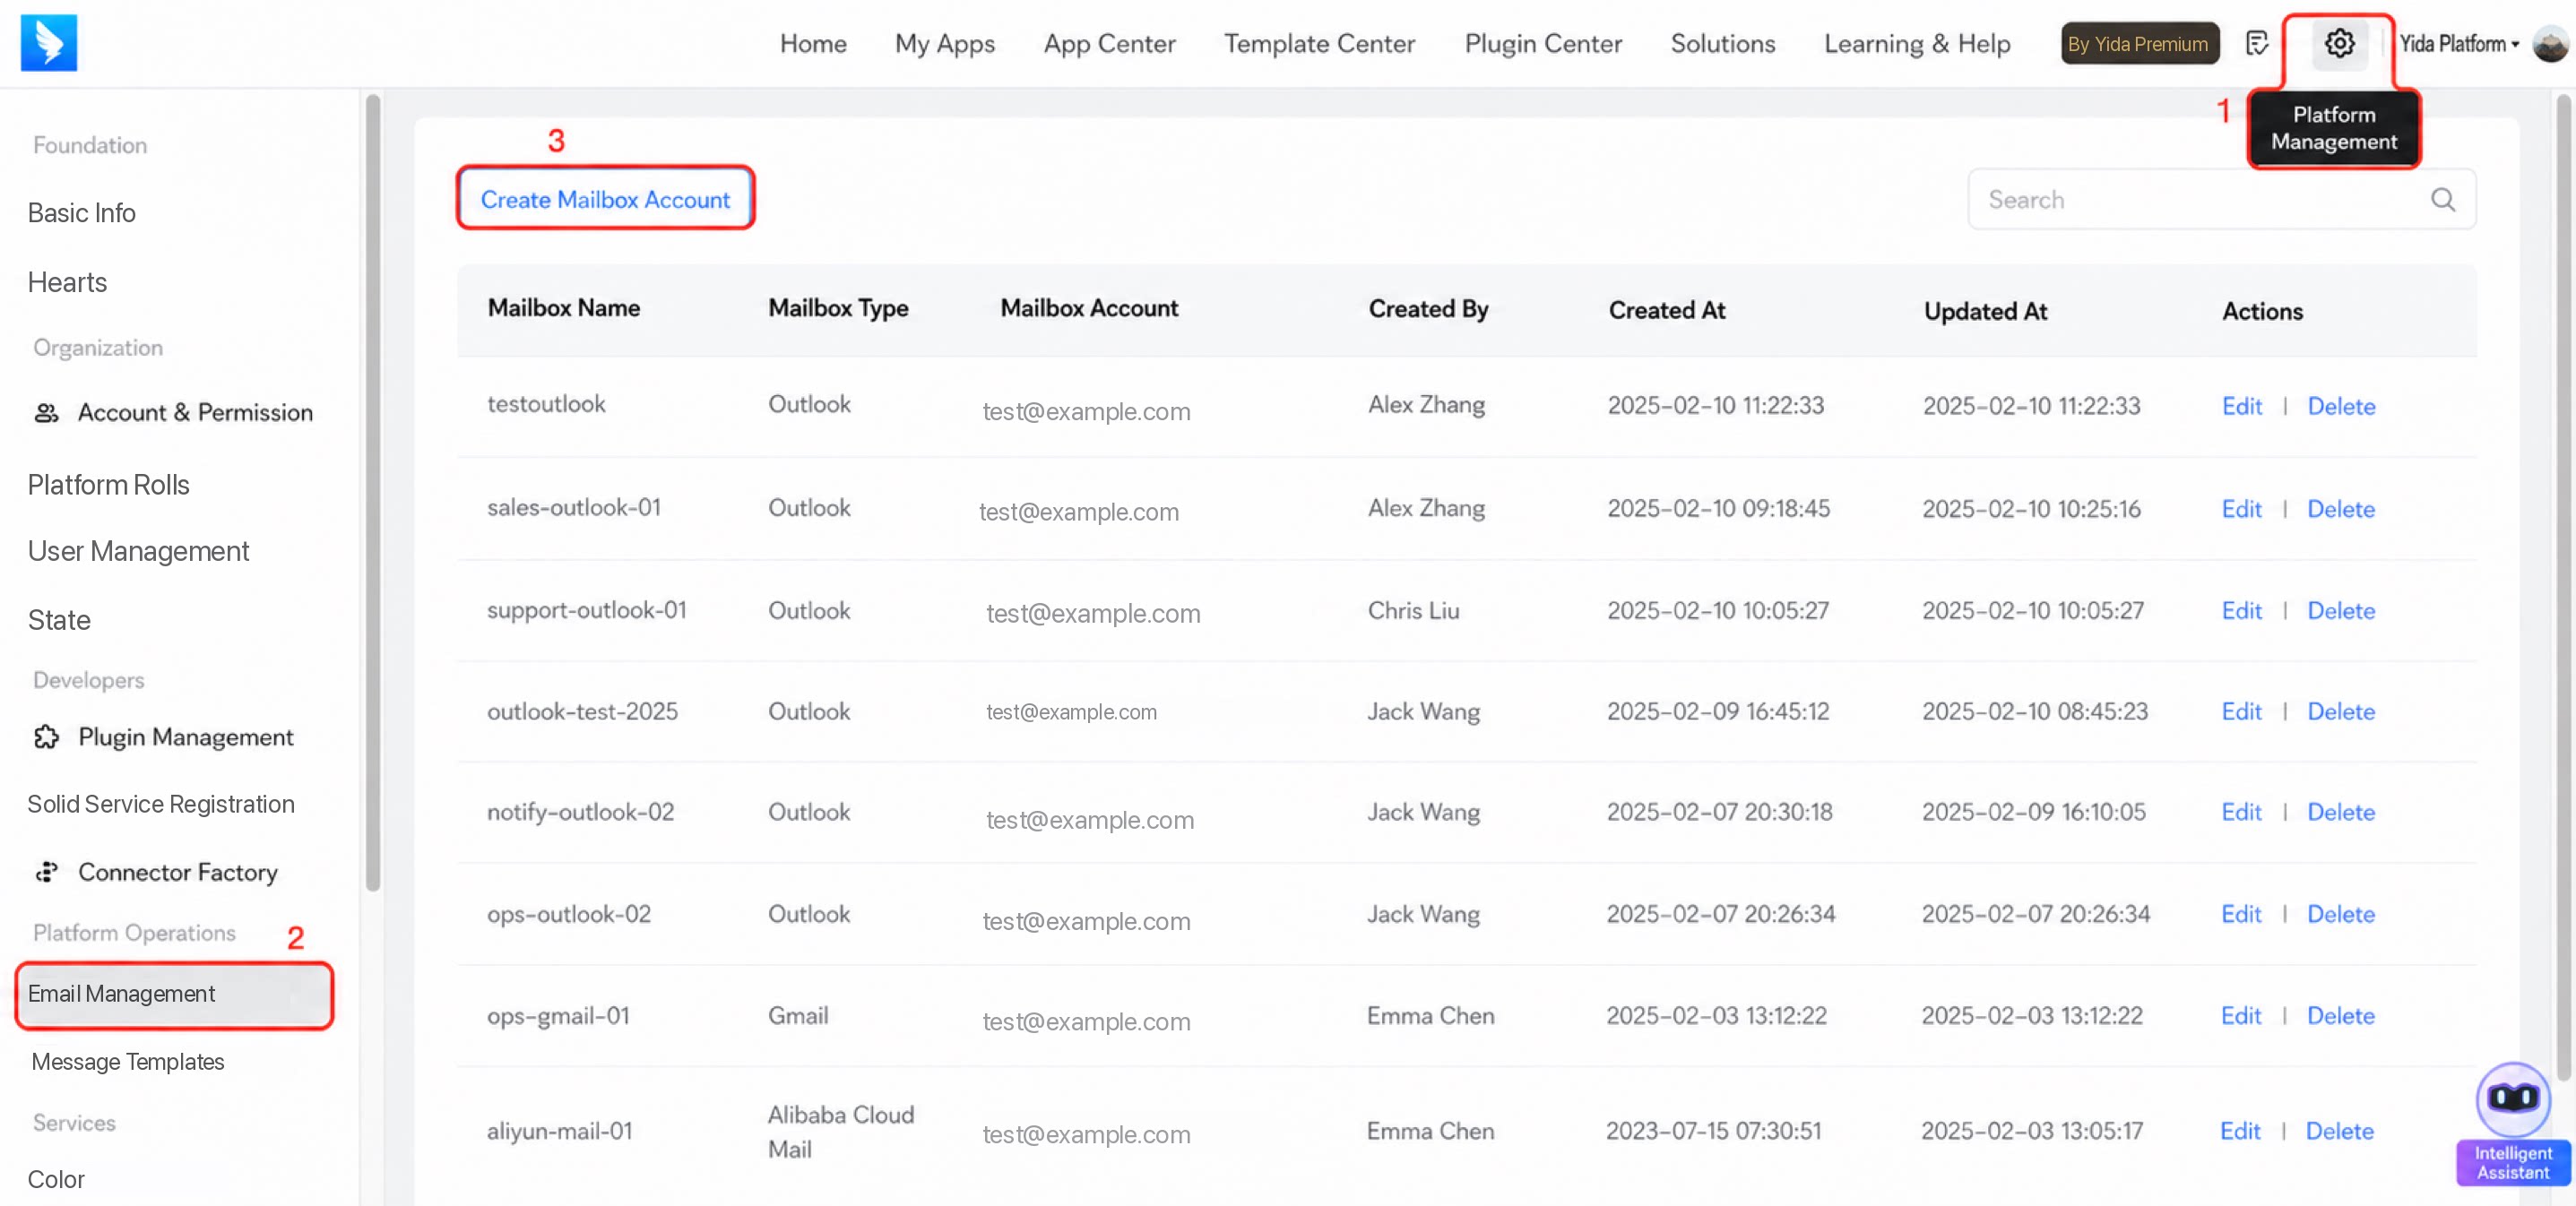
- Entry: click Platform management > Mail management > Create mail account.
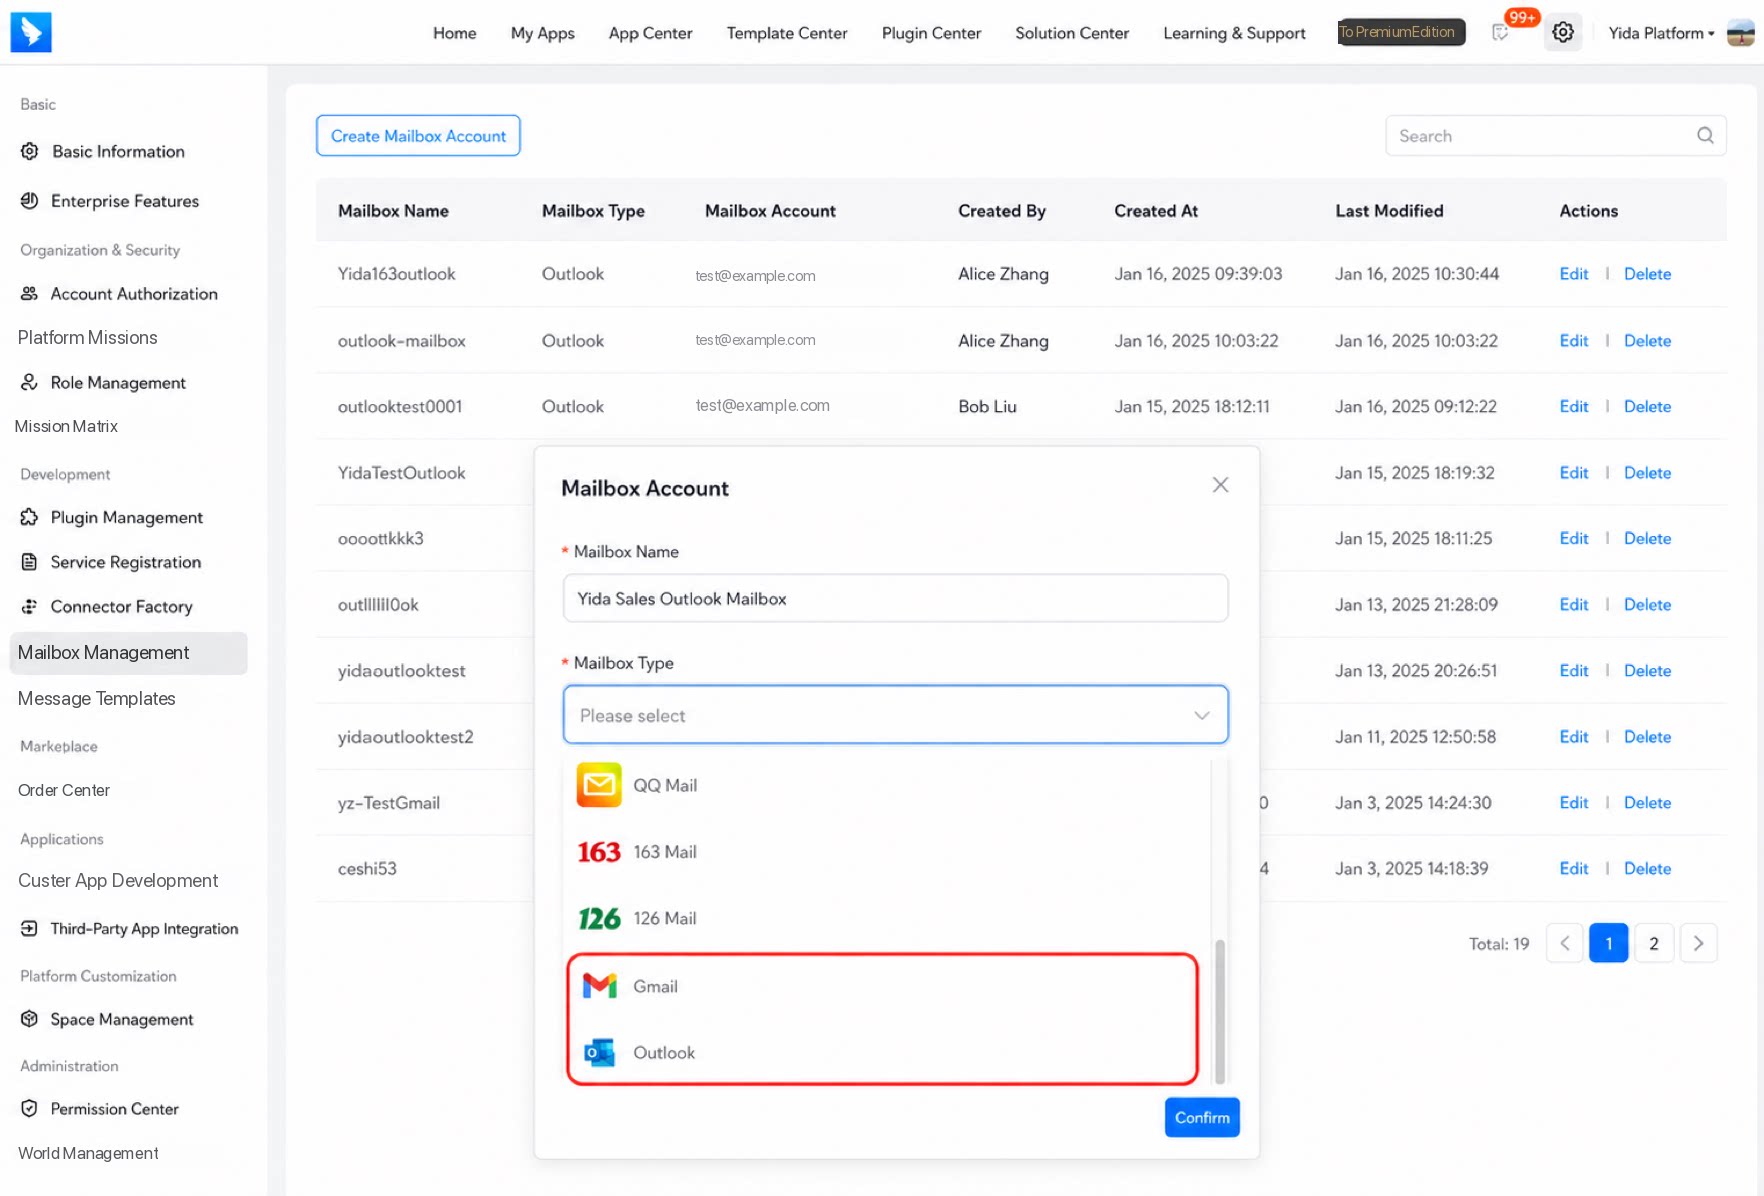
- Enter the mail account name and select the mail type: Outlook or Gmail.
2.1. Create an Outlook Account
- After you select Outlook, the Get account and authorization code button appears.
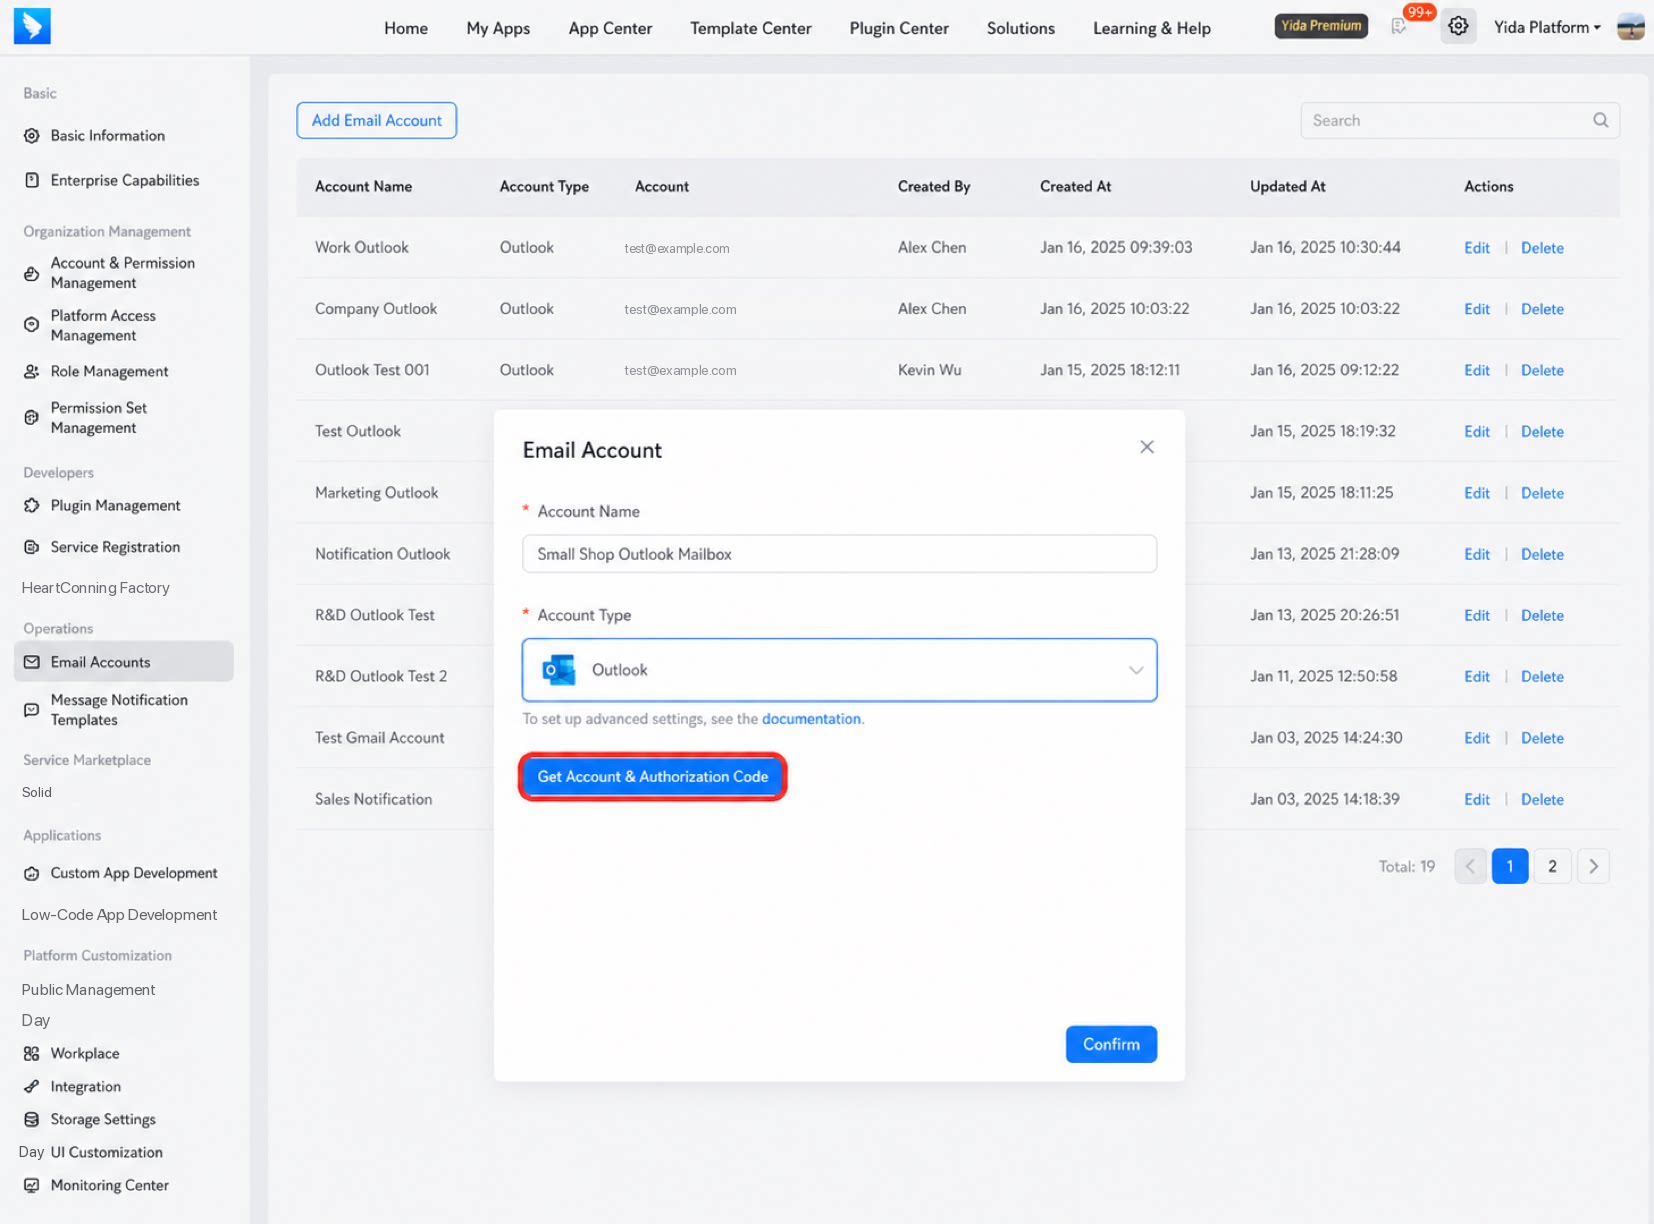
- Click Get account and authorization code. A new tab opens the Outlook sign-in page. Follow the prompts to accept and complete system authorization.
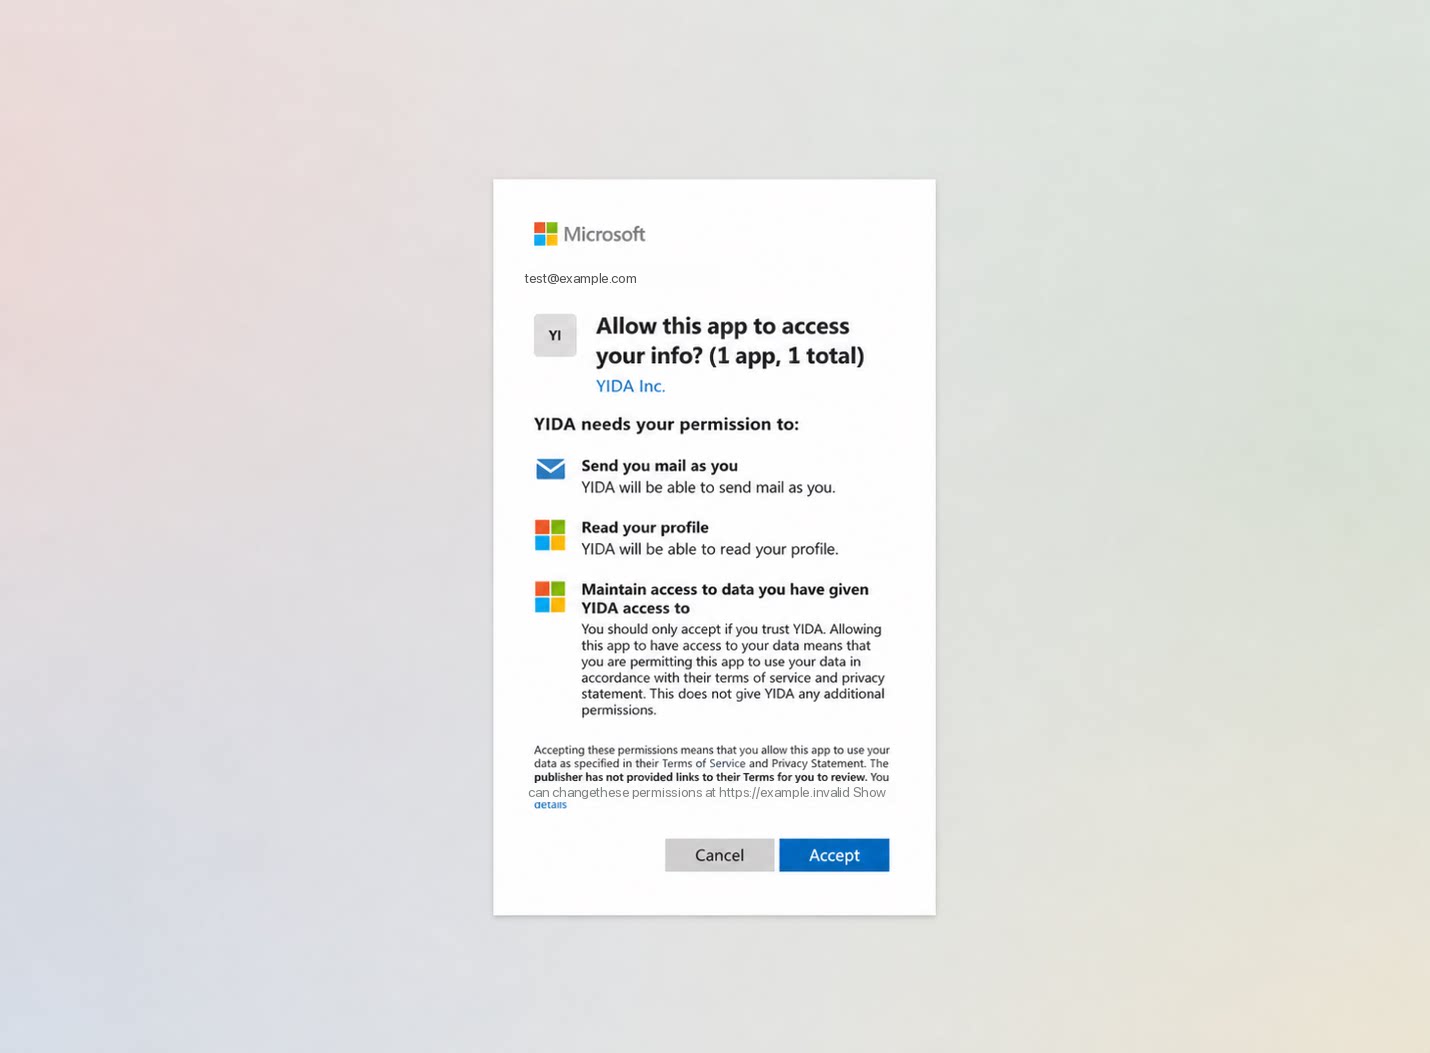
- After authorization succeeds, click Return to the mail account creation page.
- On the mail account creation page, the current mail account appears in the dialog, with Authorization successful shown below. Click Confirm to finish.
Authorization for an Outlook account is generally valid for 90 days. Re-authorize promptly before expiration; otherwise, mail sending may fail.
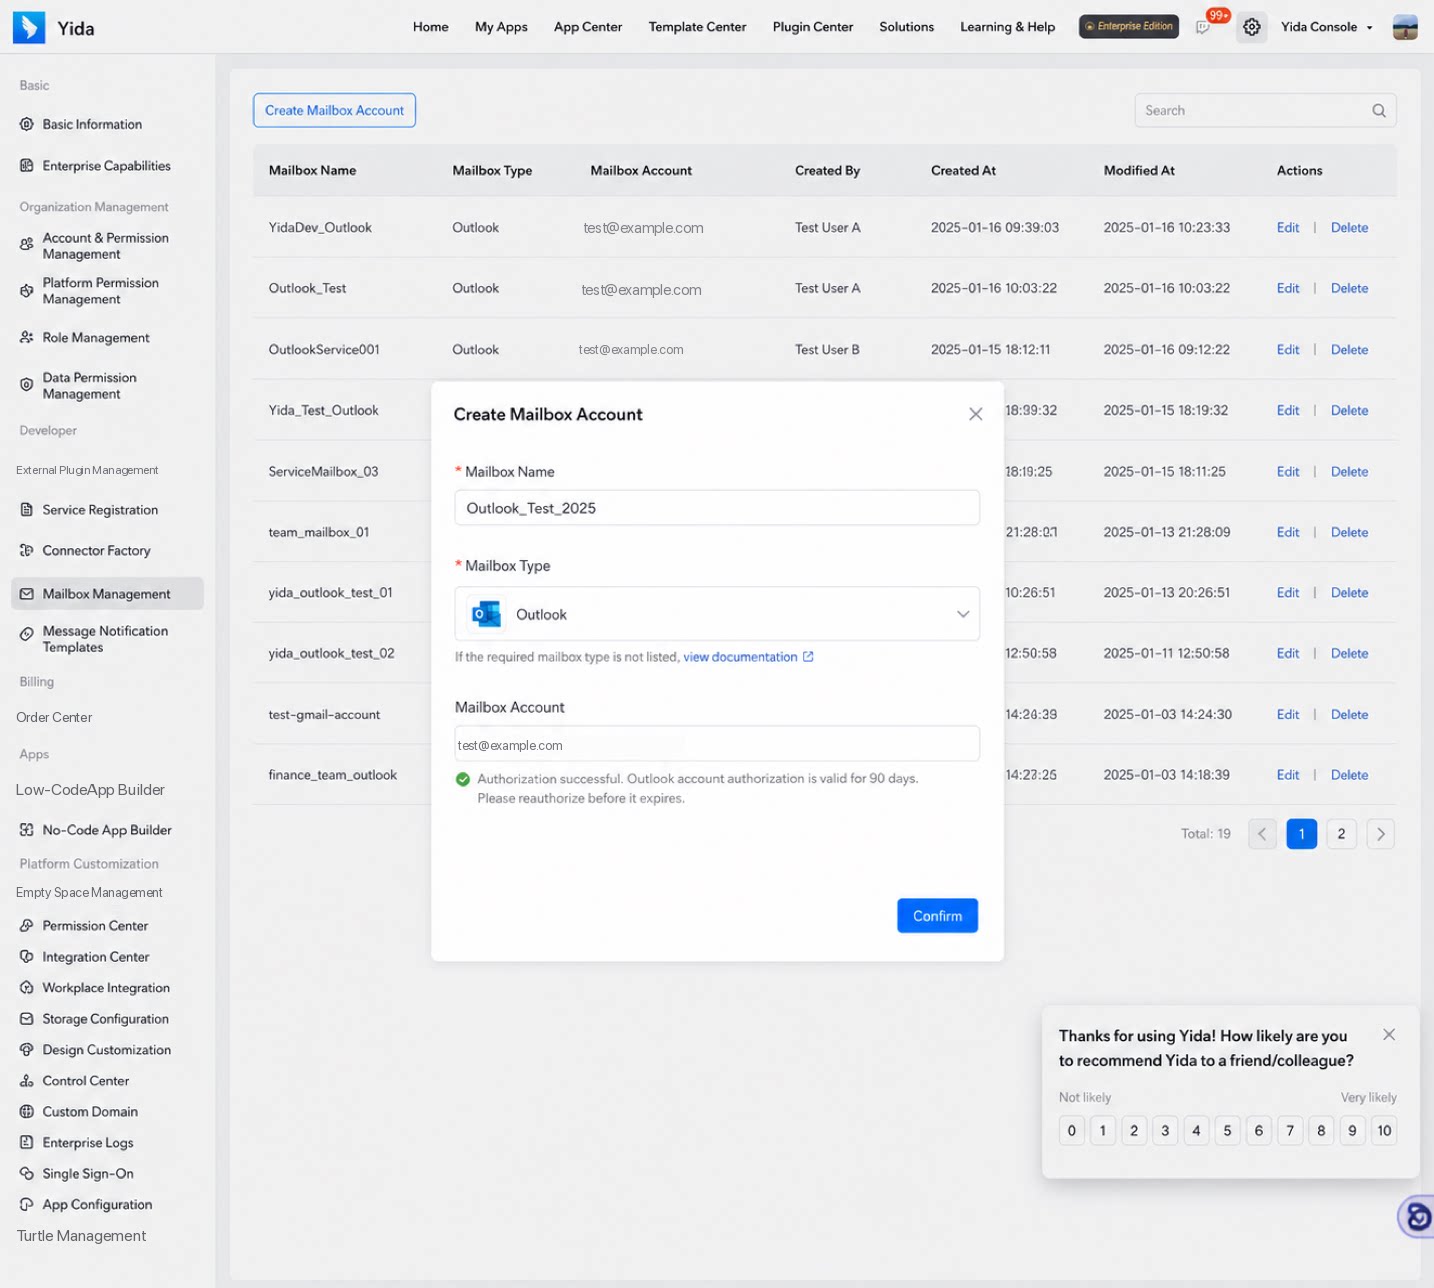
2.2. Create a Gmail Account
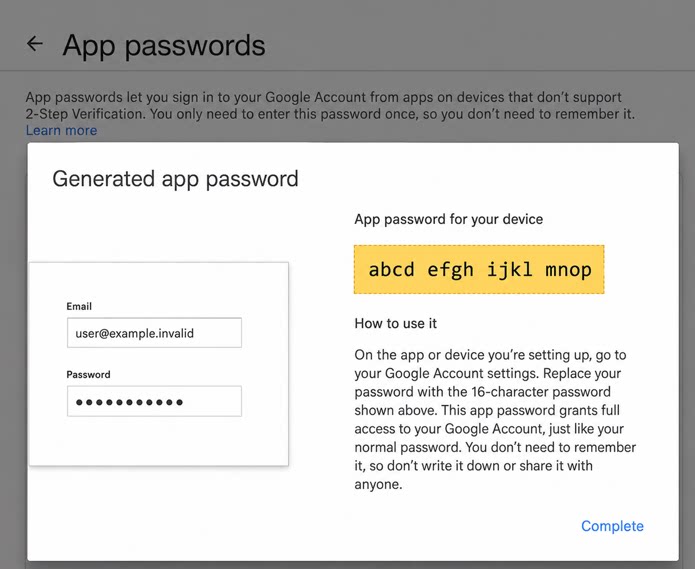
To use Gmail, enter the mail account and authorization code. See the next section for how to obtain them. Click Save to complete account creation.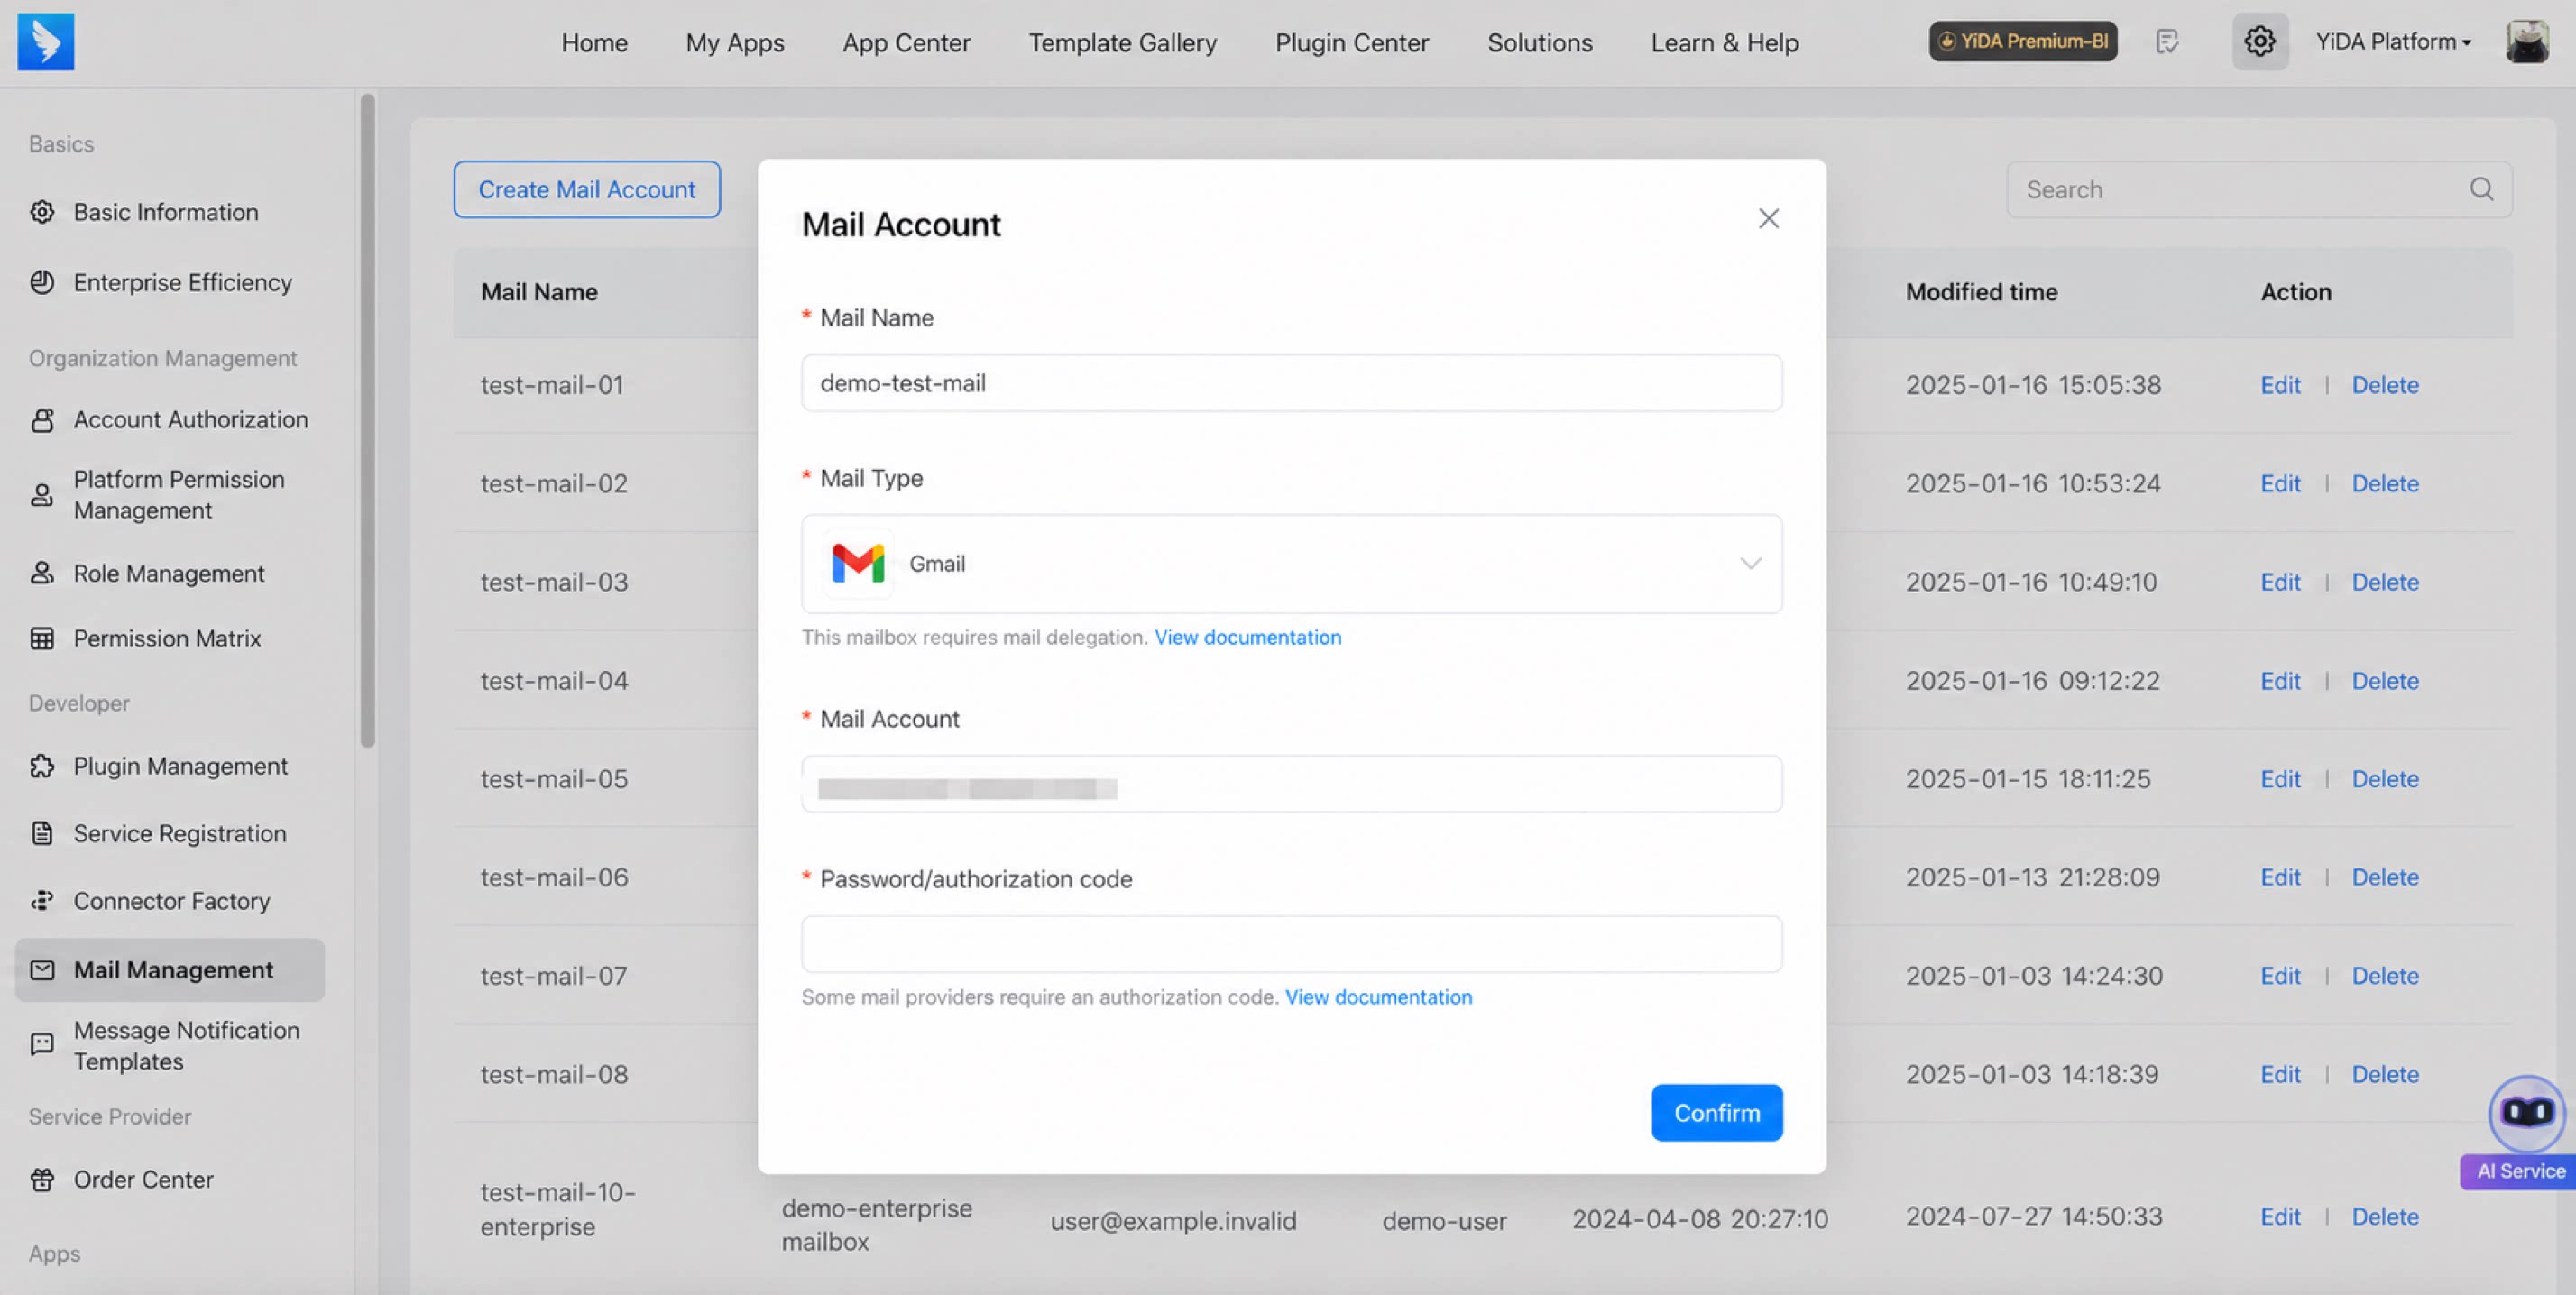
2.3. Steps to Obtain the Gmail Authorization Code
- Open Gmail: https://mail.google.com/mail/u/0/#settings/fwdandpop.
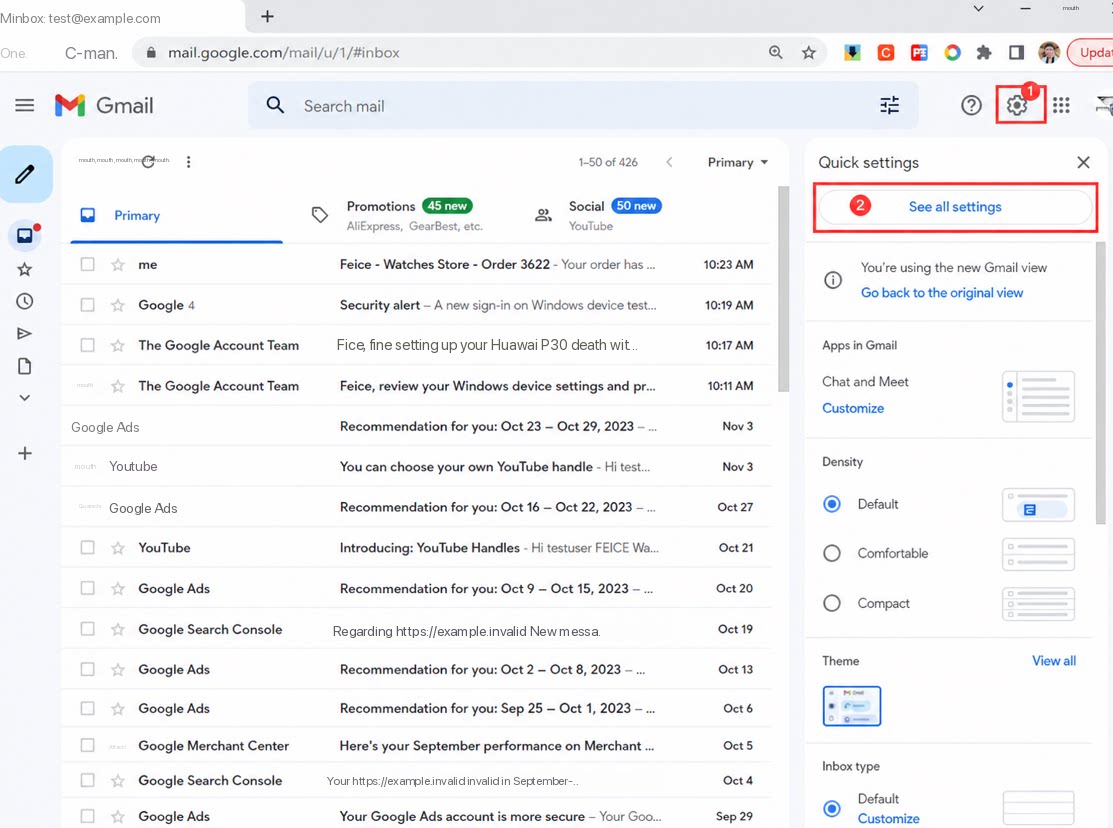
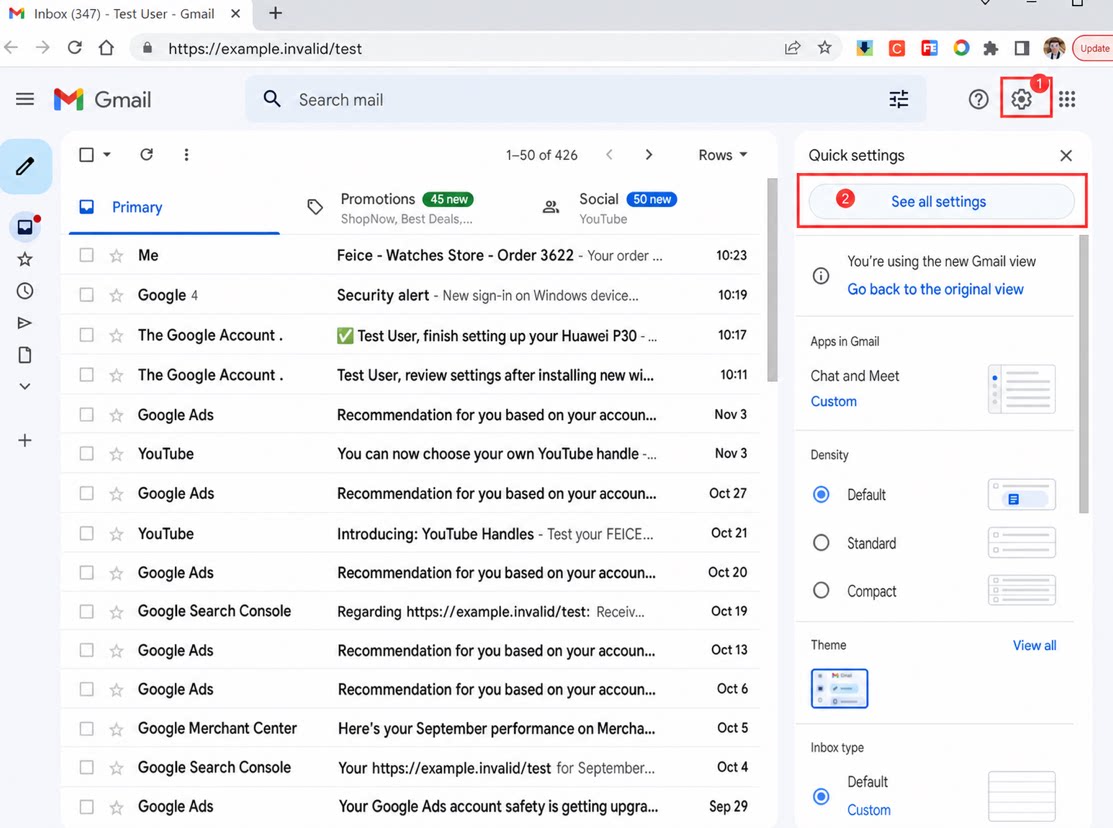
- Click Settings > See all settings.
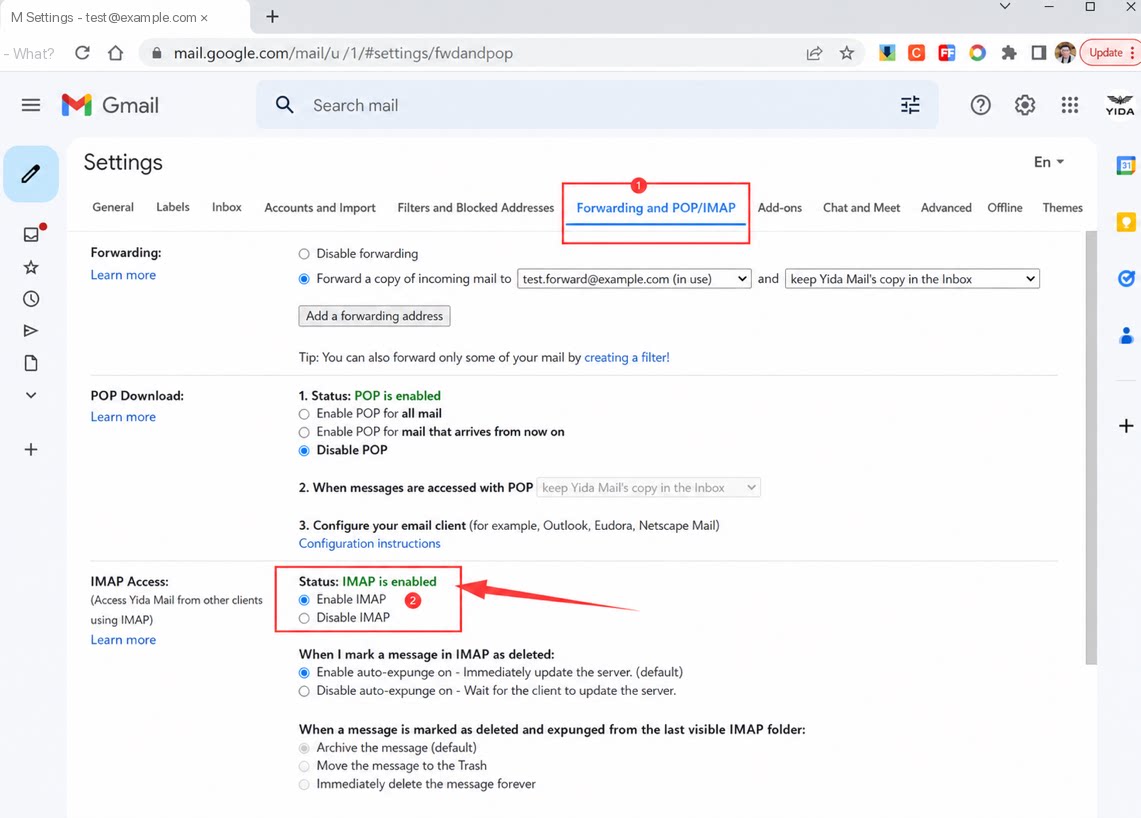
- Go to Forwarding and POP/IMAP and enable IMAP.
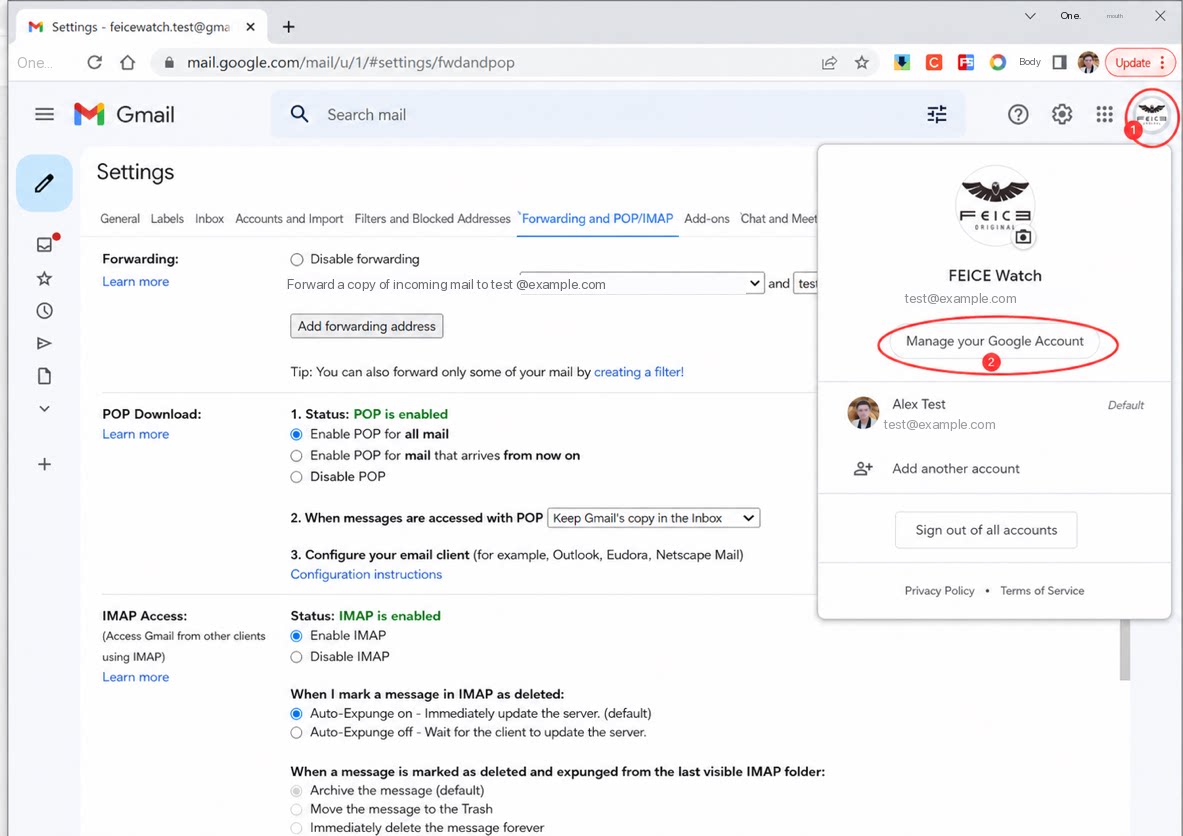
- Click the logo in the top-right corner > Manage your Google Account.
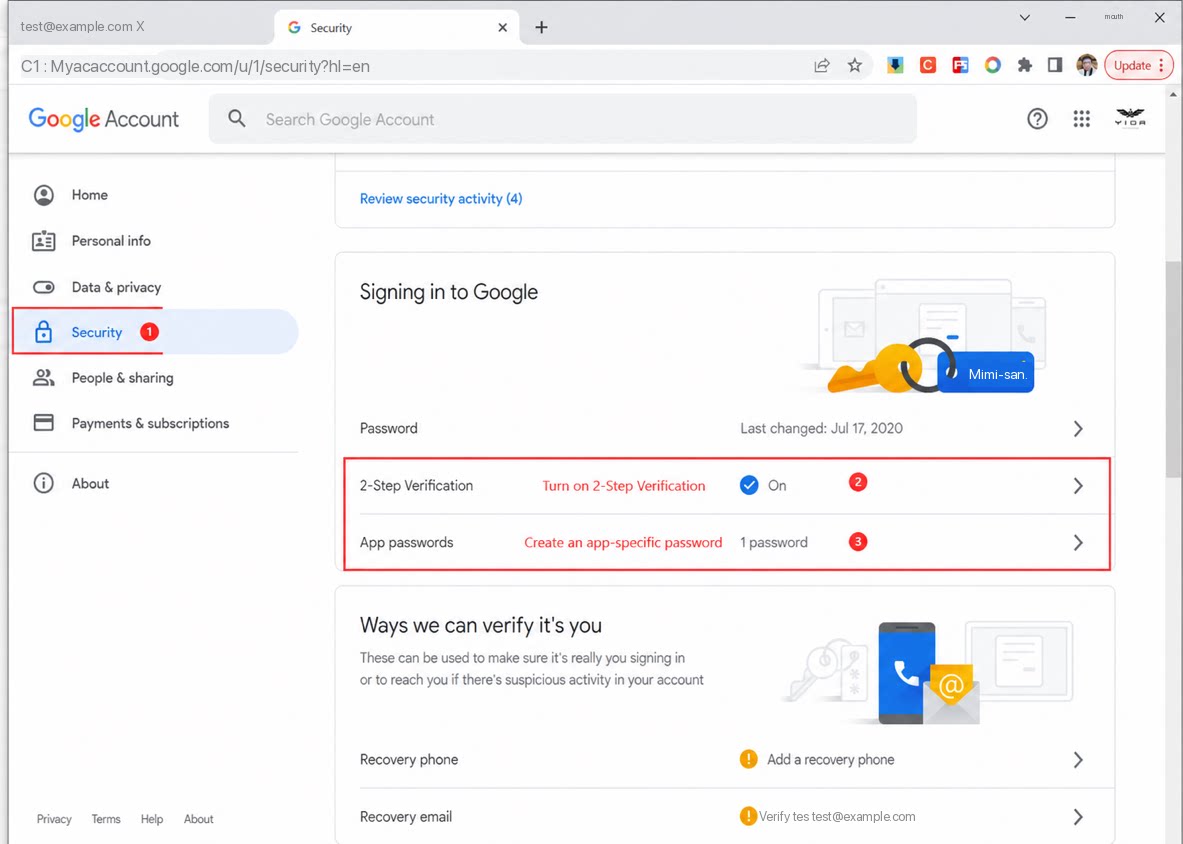
- On the Manage your Google Account page, set up an app-specific password (this is the authorization code).
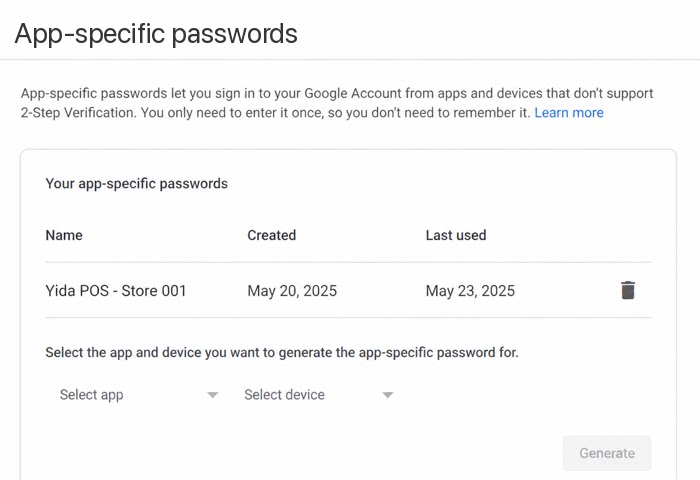
- Generate the app-specific password (this is the authorization code), then copy and apply it to the mail list.
3. Use the Mail Account
3.1. Use in an Integration & Automation Flow
- Entry: from My apps or All apps, click to open the app and select Integration & Automation.
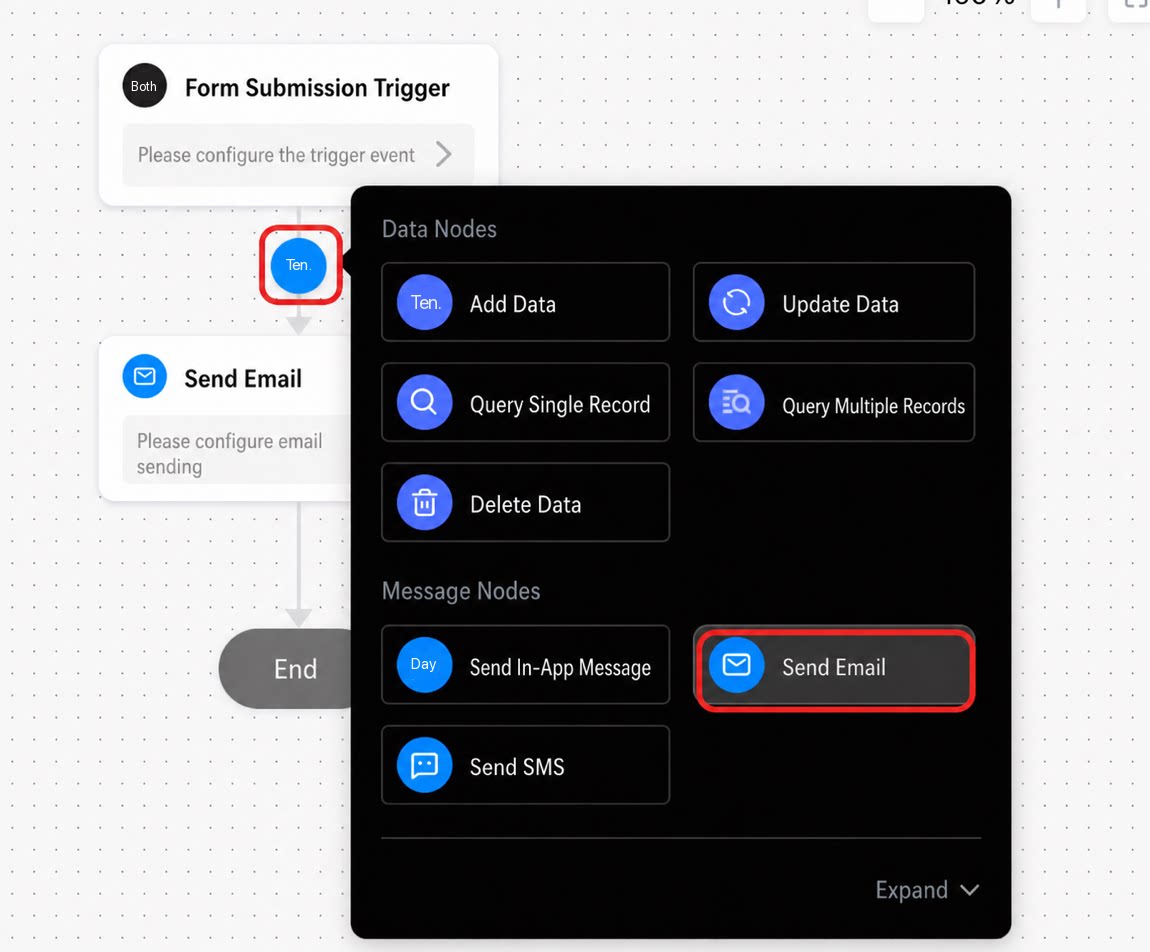
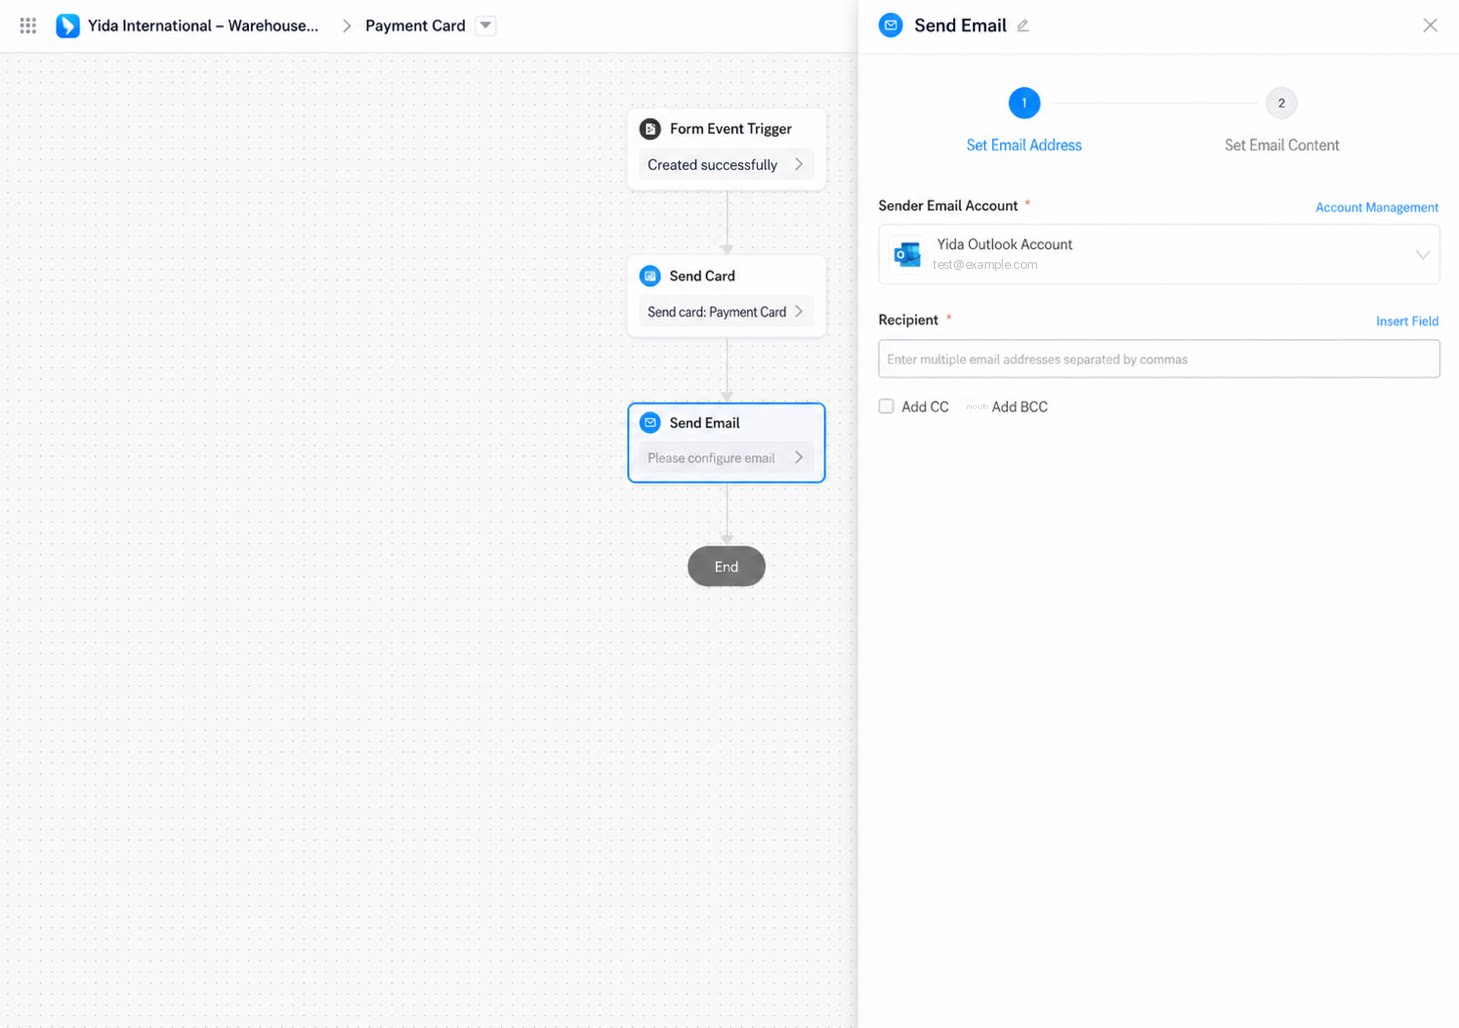
- On the integration & automation page, add the Send mail node. Configure the node information on the right, and select an Outlook or Gmail account as the sender.
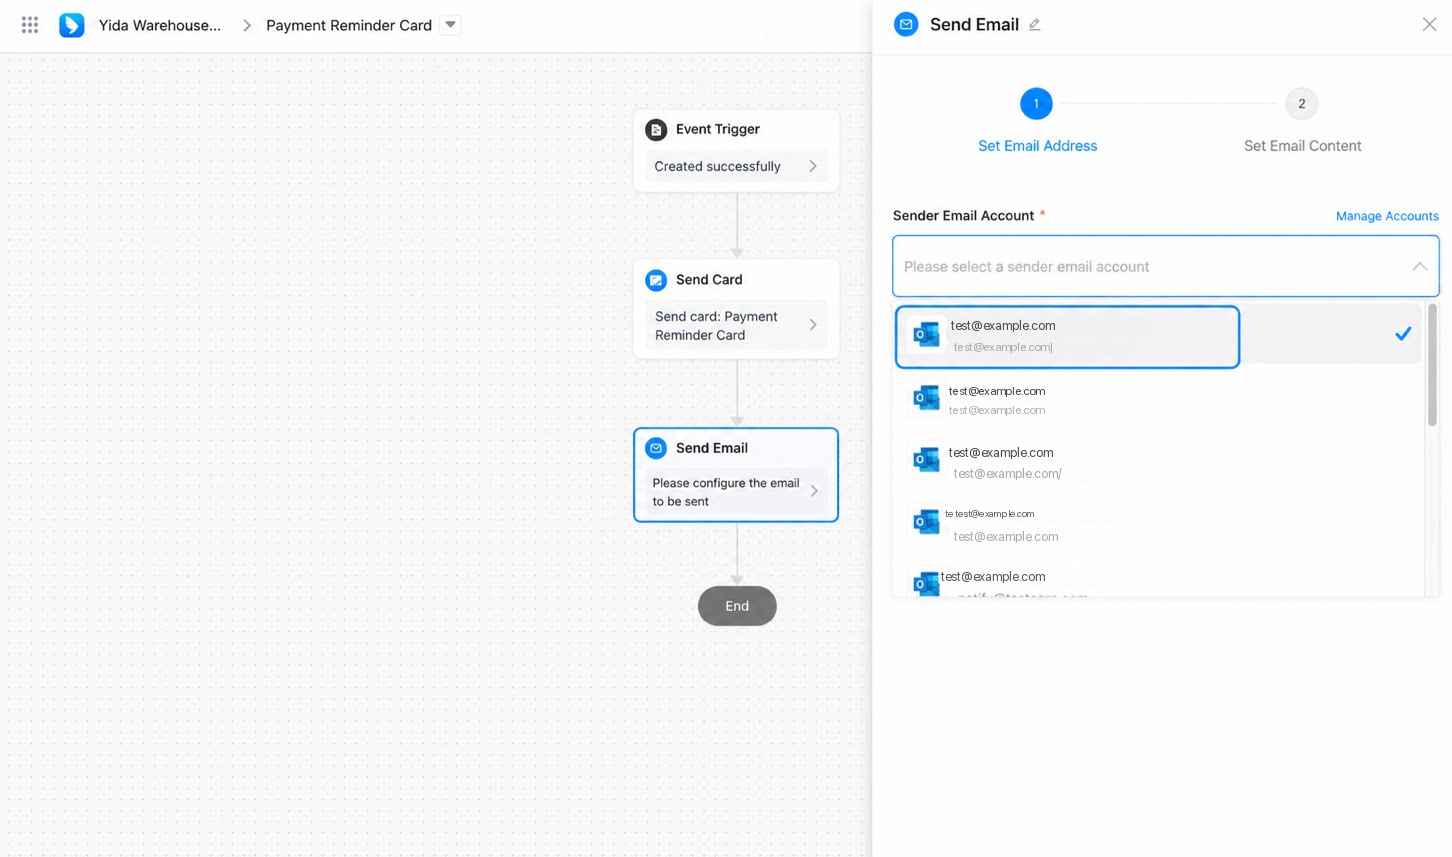
- Enter the recipient’s mail address, or click Insert character to select parameter data from the current form submission or system default field data.
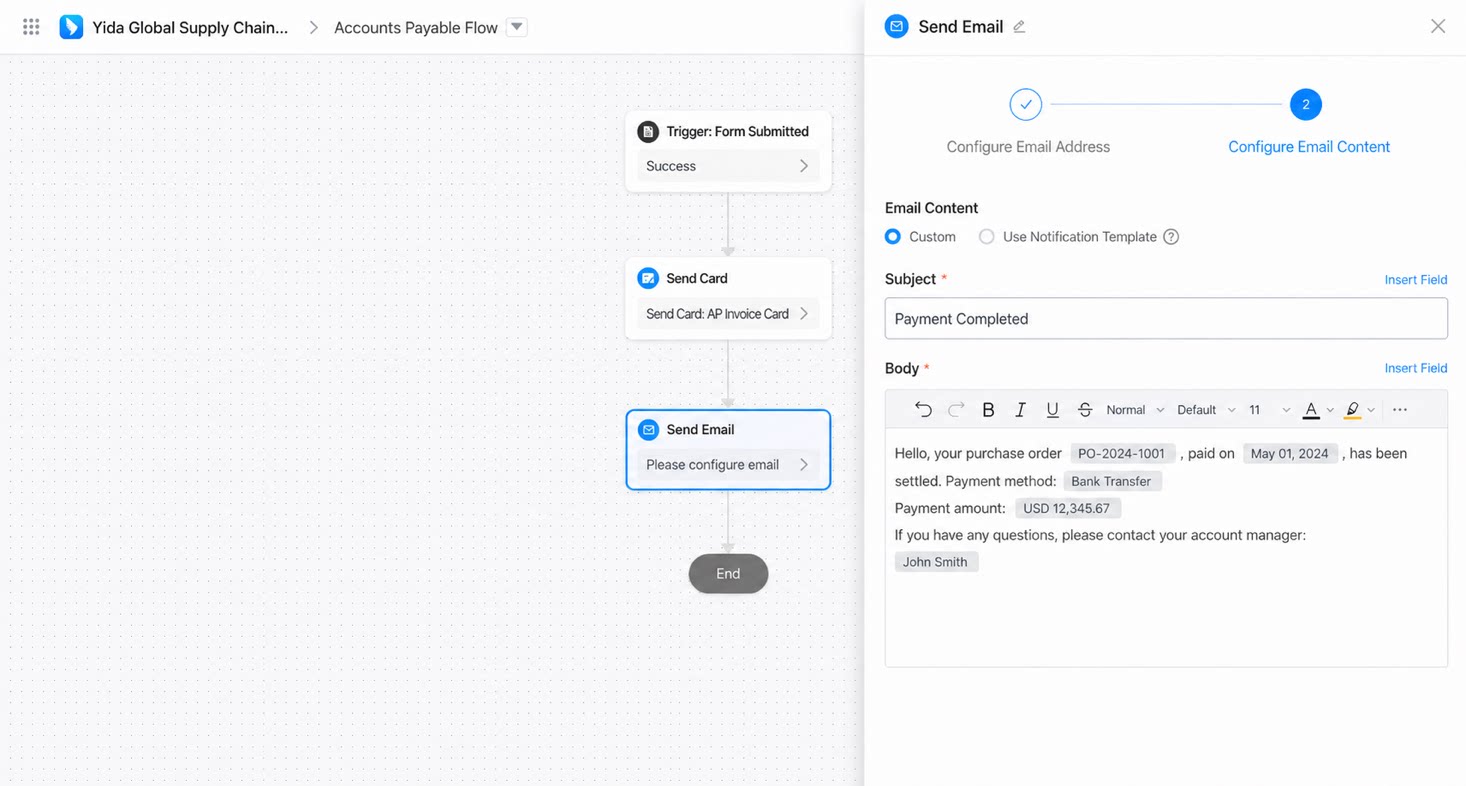
- Configure the mail content by entering the subject and body. Click Save, and then click Publish integration & automation to test the flow.
3.2. Use in an Approval Process
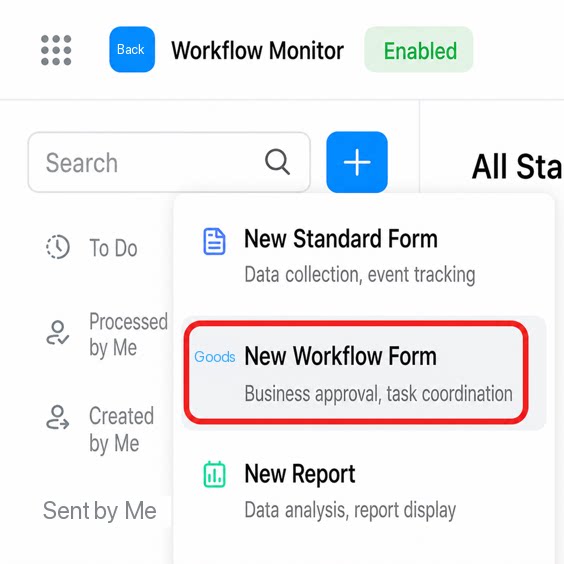
- Entry: from My apps or All apps, click to open the app and create a workflow form.
- Open Workflow form > Workflow design, add the Send mail node, and configure the node information on the right. Select an Outlook or Gmail account as the sender. Click Account management to open the Mail management page. For details, see sections 1.1 and 1.2.
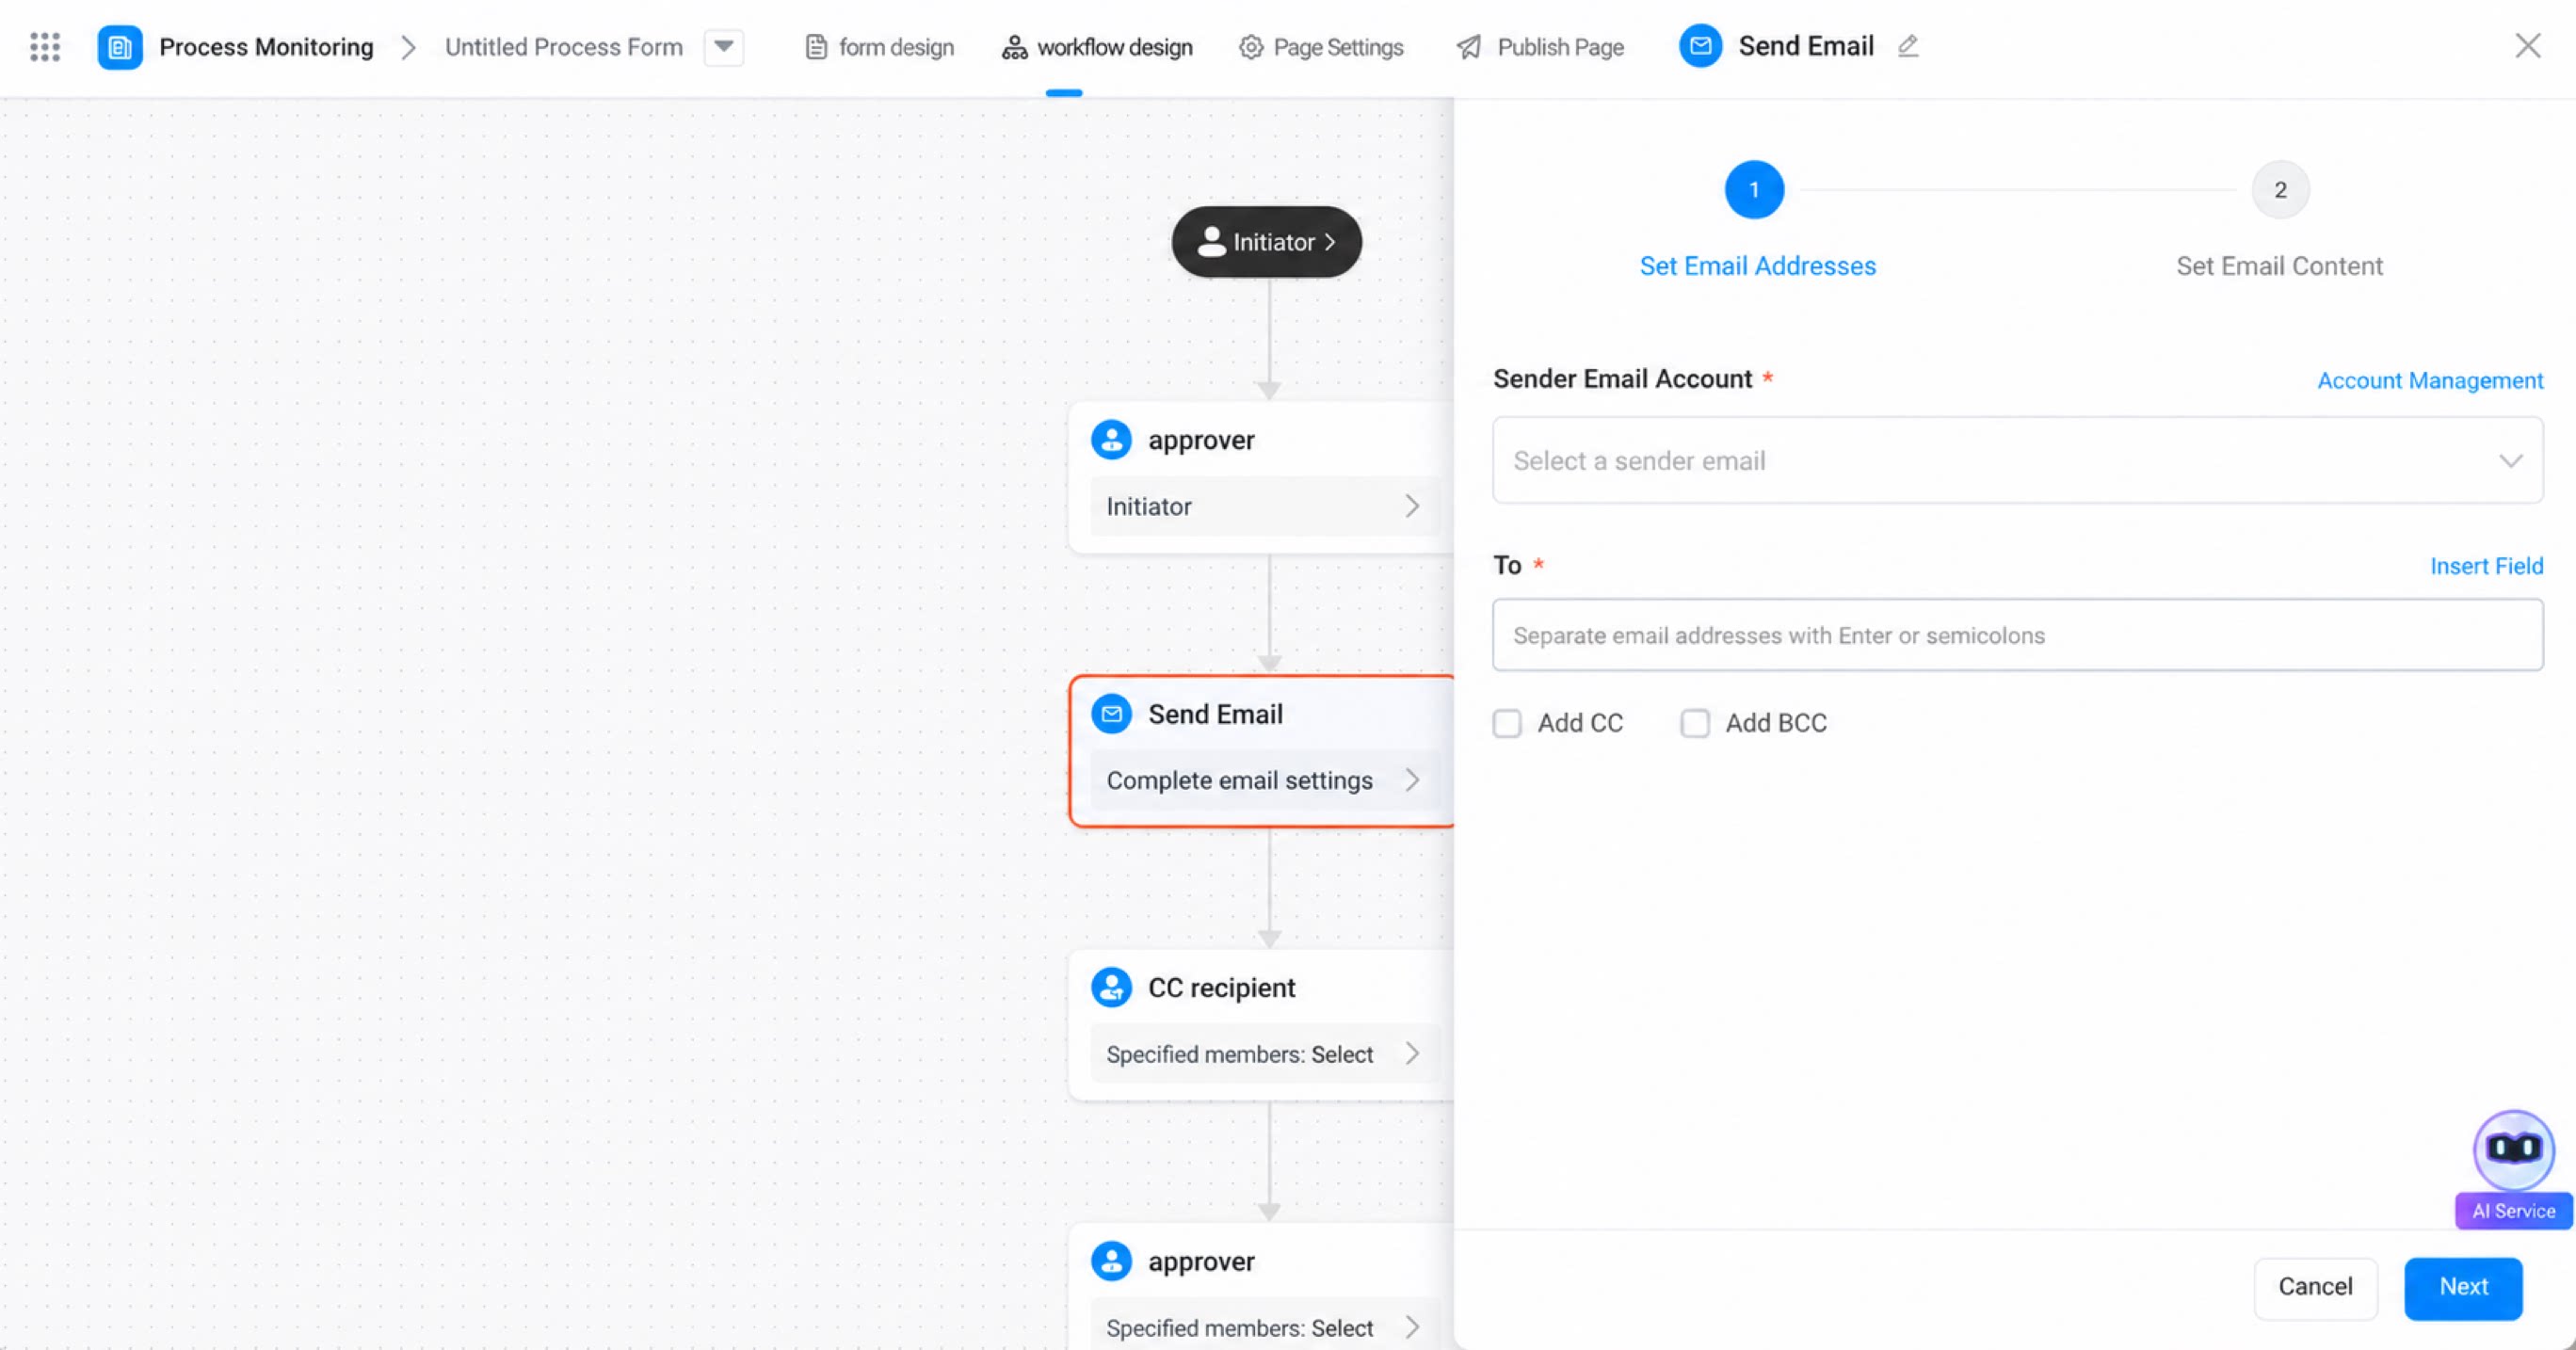
- Enter the recipient’s mail address, or click Insert character to select parameter data from the current form submission or system default field data.
- Configure the mail content by entering the subject and body. Click Save, and then click Publish integration & automation to test the flow.