

 Chats
Chats Calendar
 Meetings
 Contacts
 Mail
Mail Docs
Docs Drive
Drive AI Table
 AI Minutes
 Attendance
 Approval
 YiDA
YiDA Admin Console
1. Introduction
1.1 Feature Overview
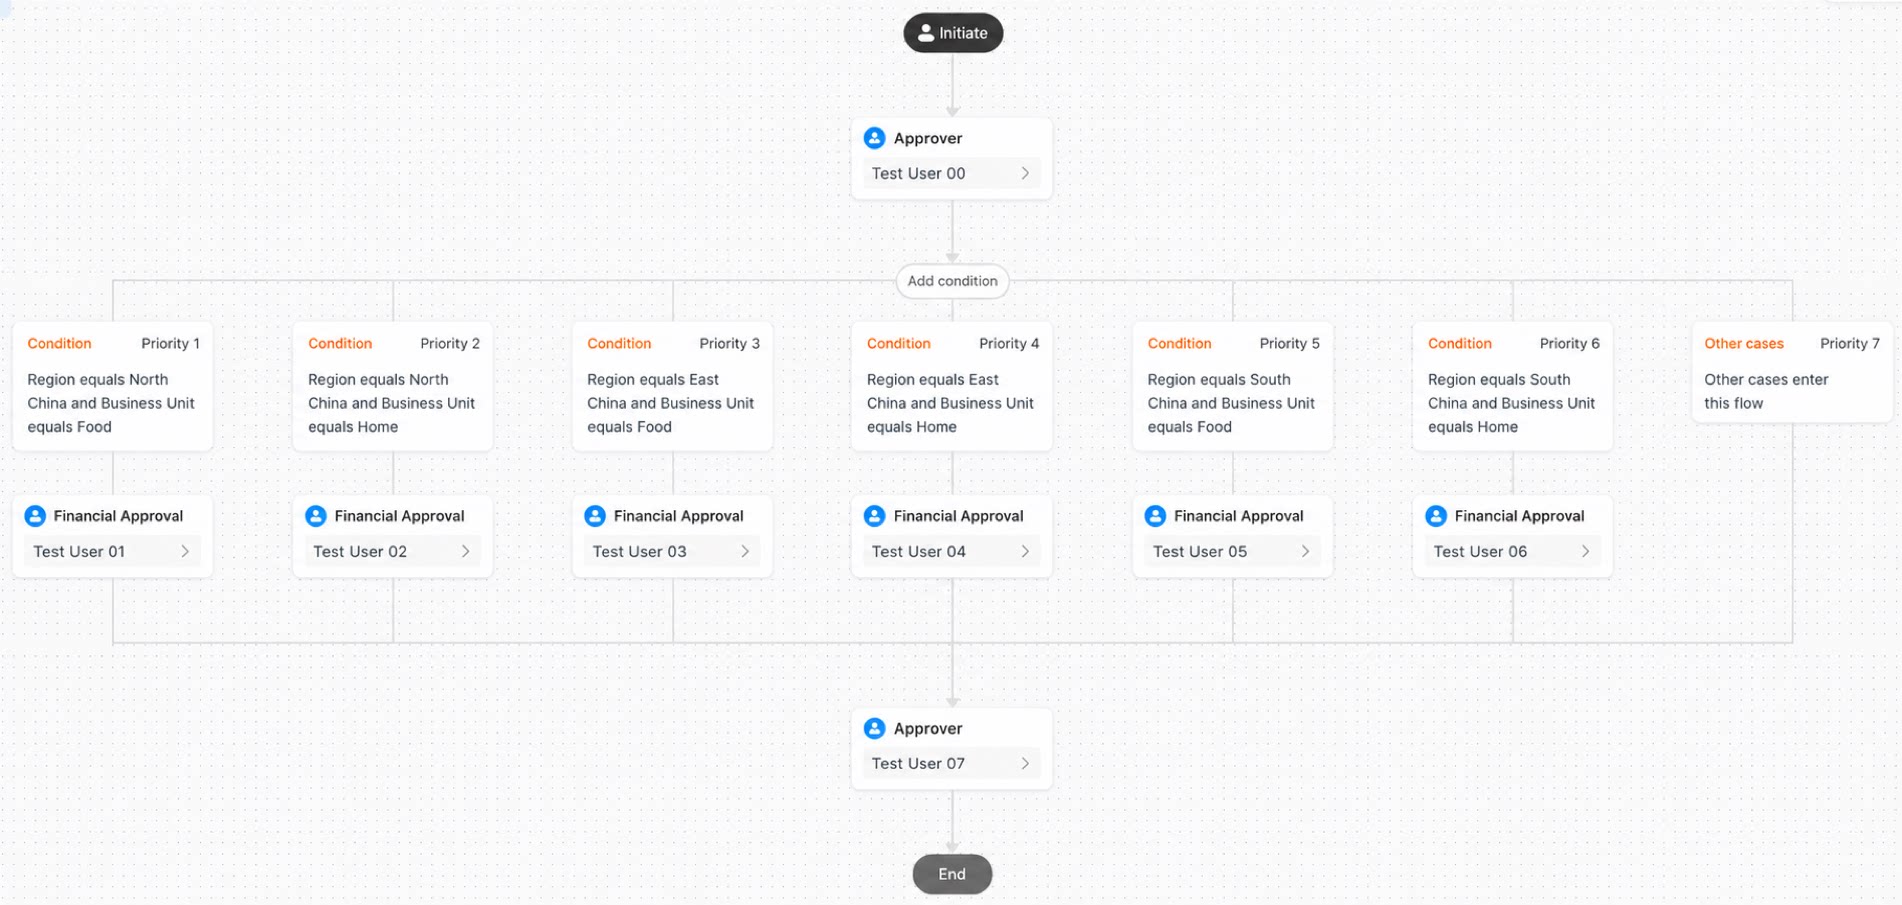
The permission matrix provides data-driven management for permission settings, enabling batch operations and reuse to improve efficiency. It gives organizations a more secure, efficient, and flexible platform for data management and access control.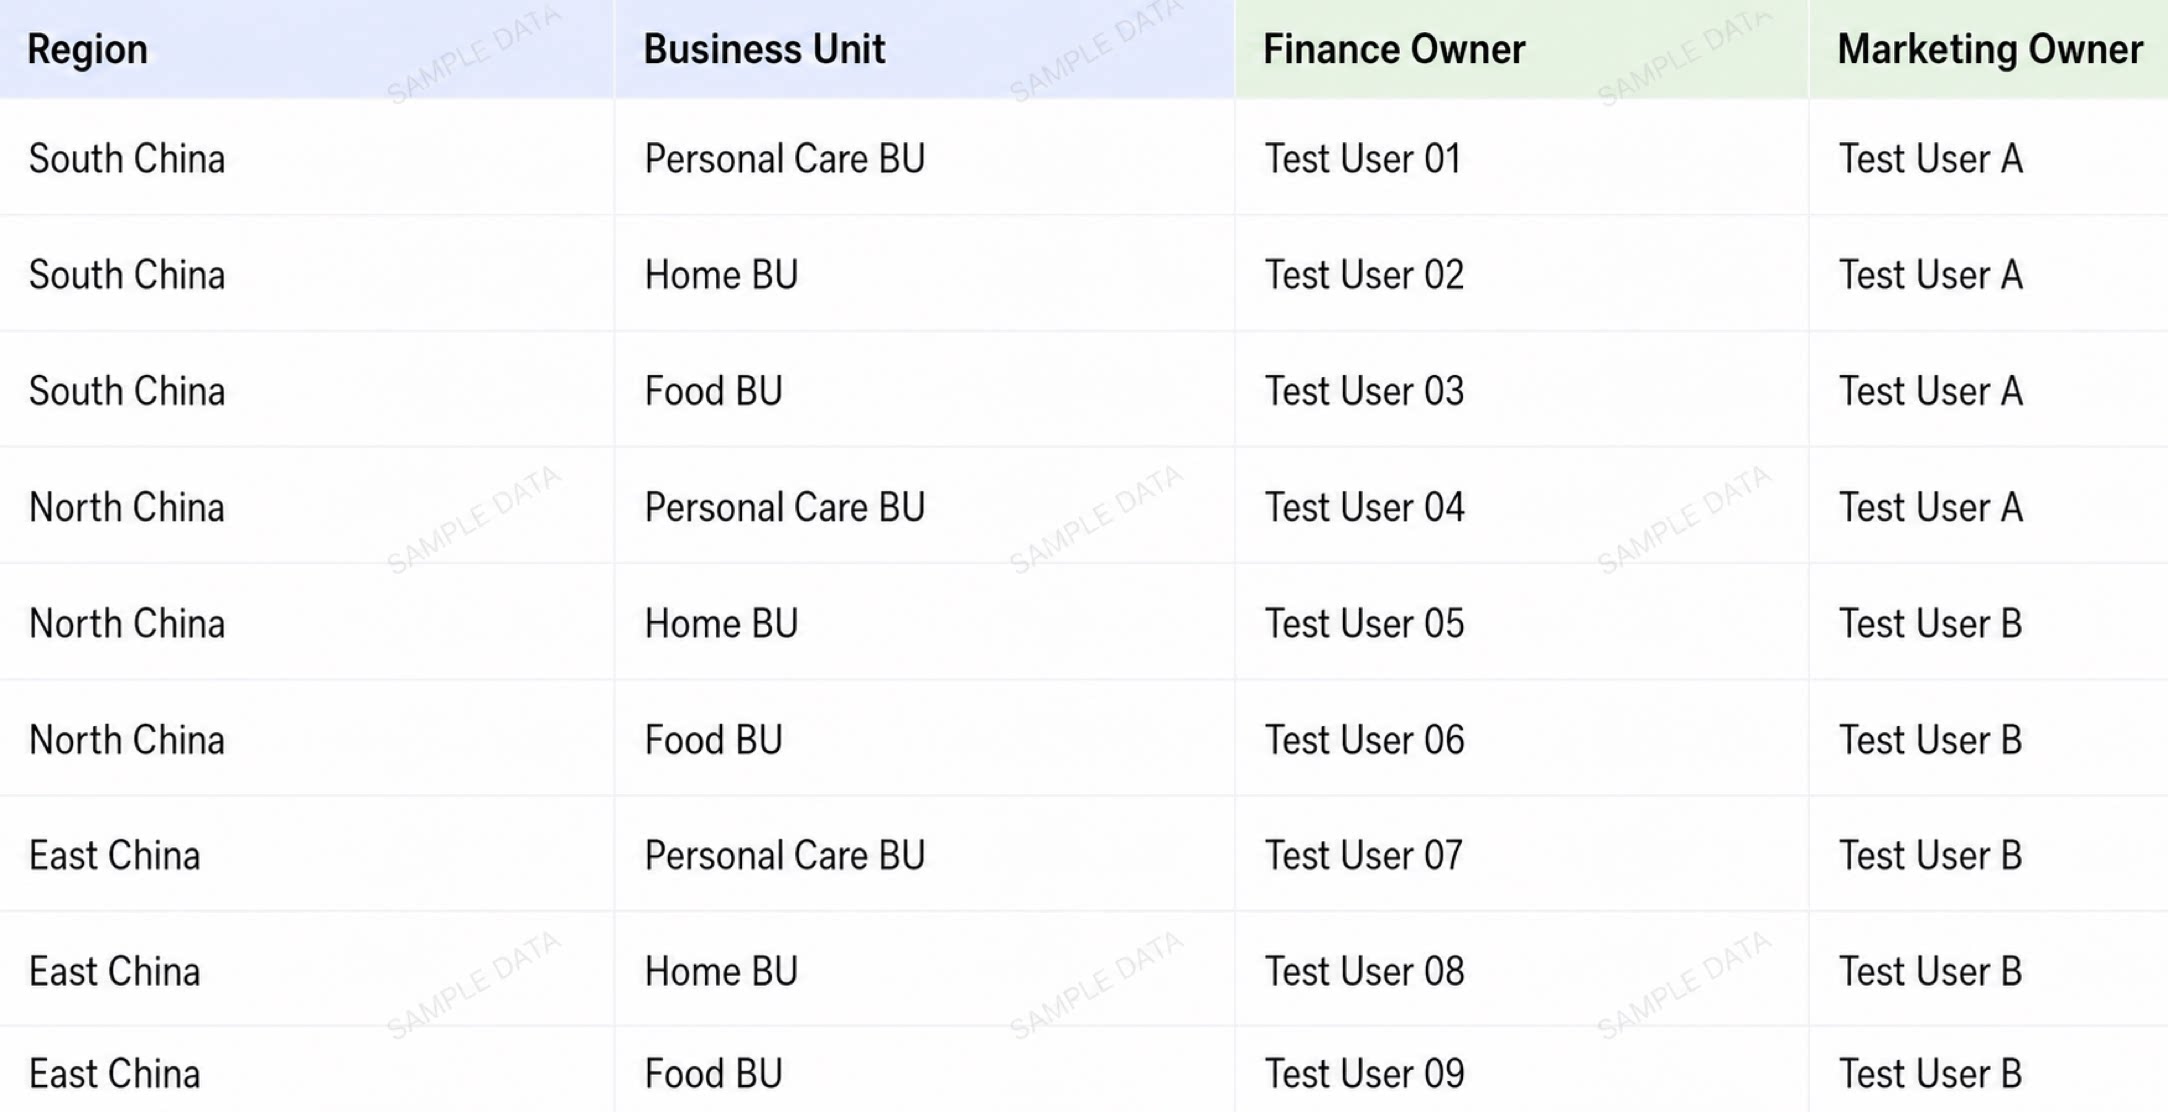
1.2 Use Cases
- Flexible role assignment: Create roles based on specific business needs and assign the corresponding permissions to each role. Team members can then collaborate freely within their permission scope without risking data leakage or misuse.
1.3 Concept Overview
1.3.1 About the Permission Matrix
A permission matrix consists of three parts: basic information, matrix header, and matrix details.1.3.2 Basic Information of the Permission Matrix
Basic information includes the matrix name and matrix description.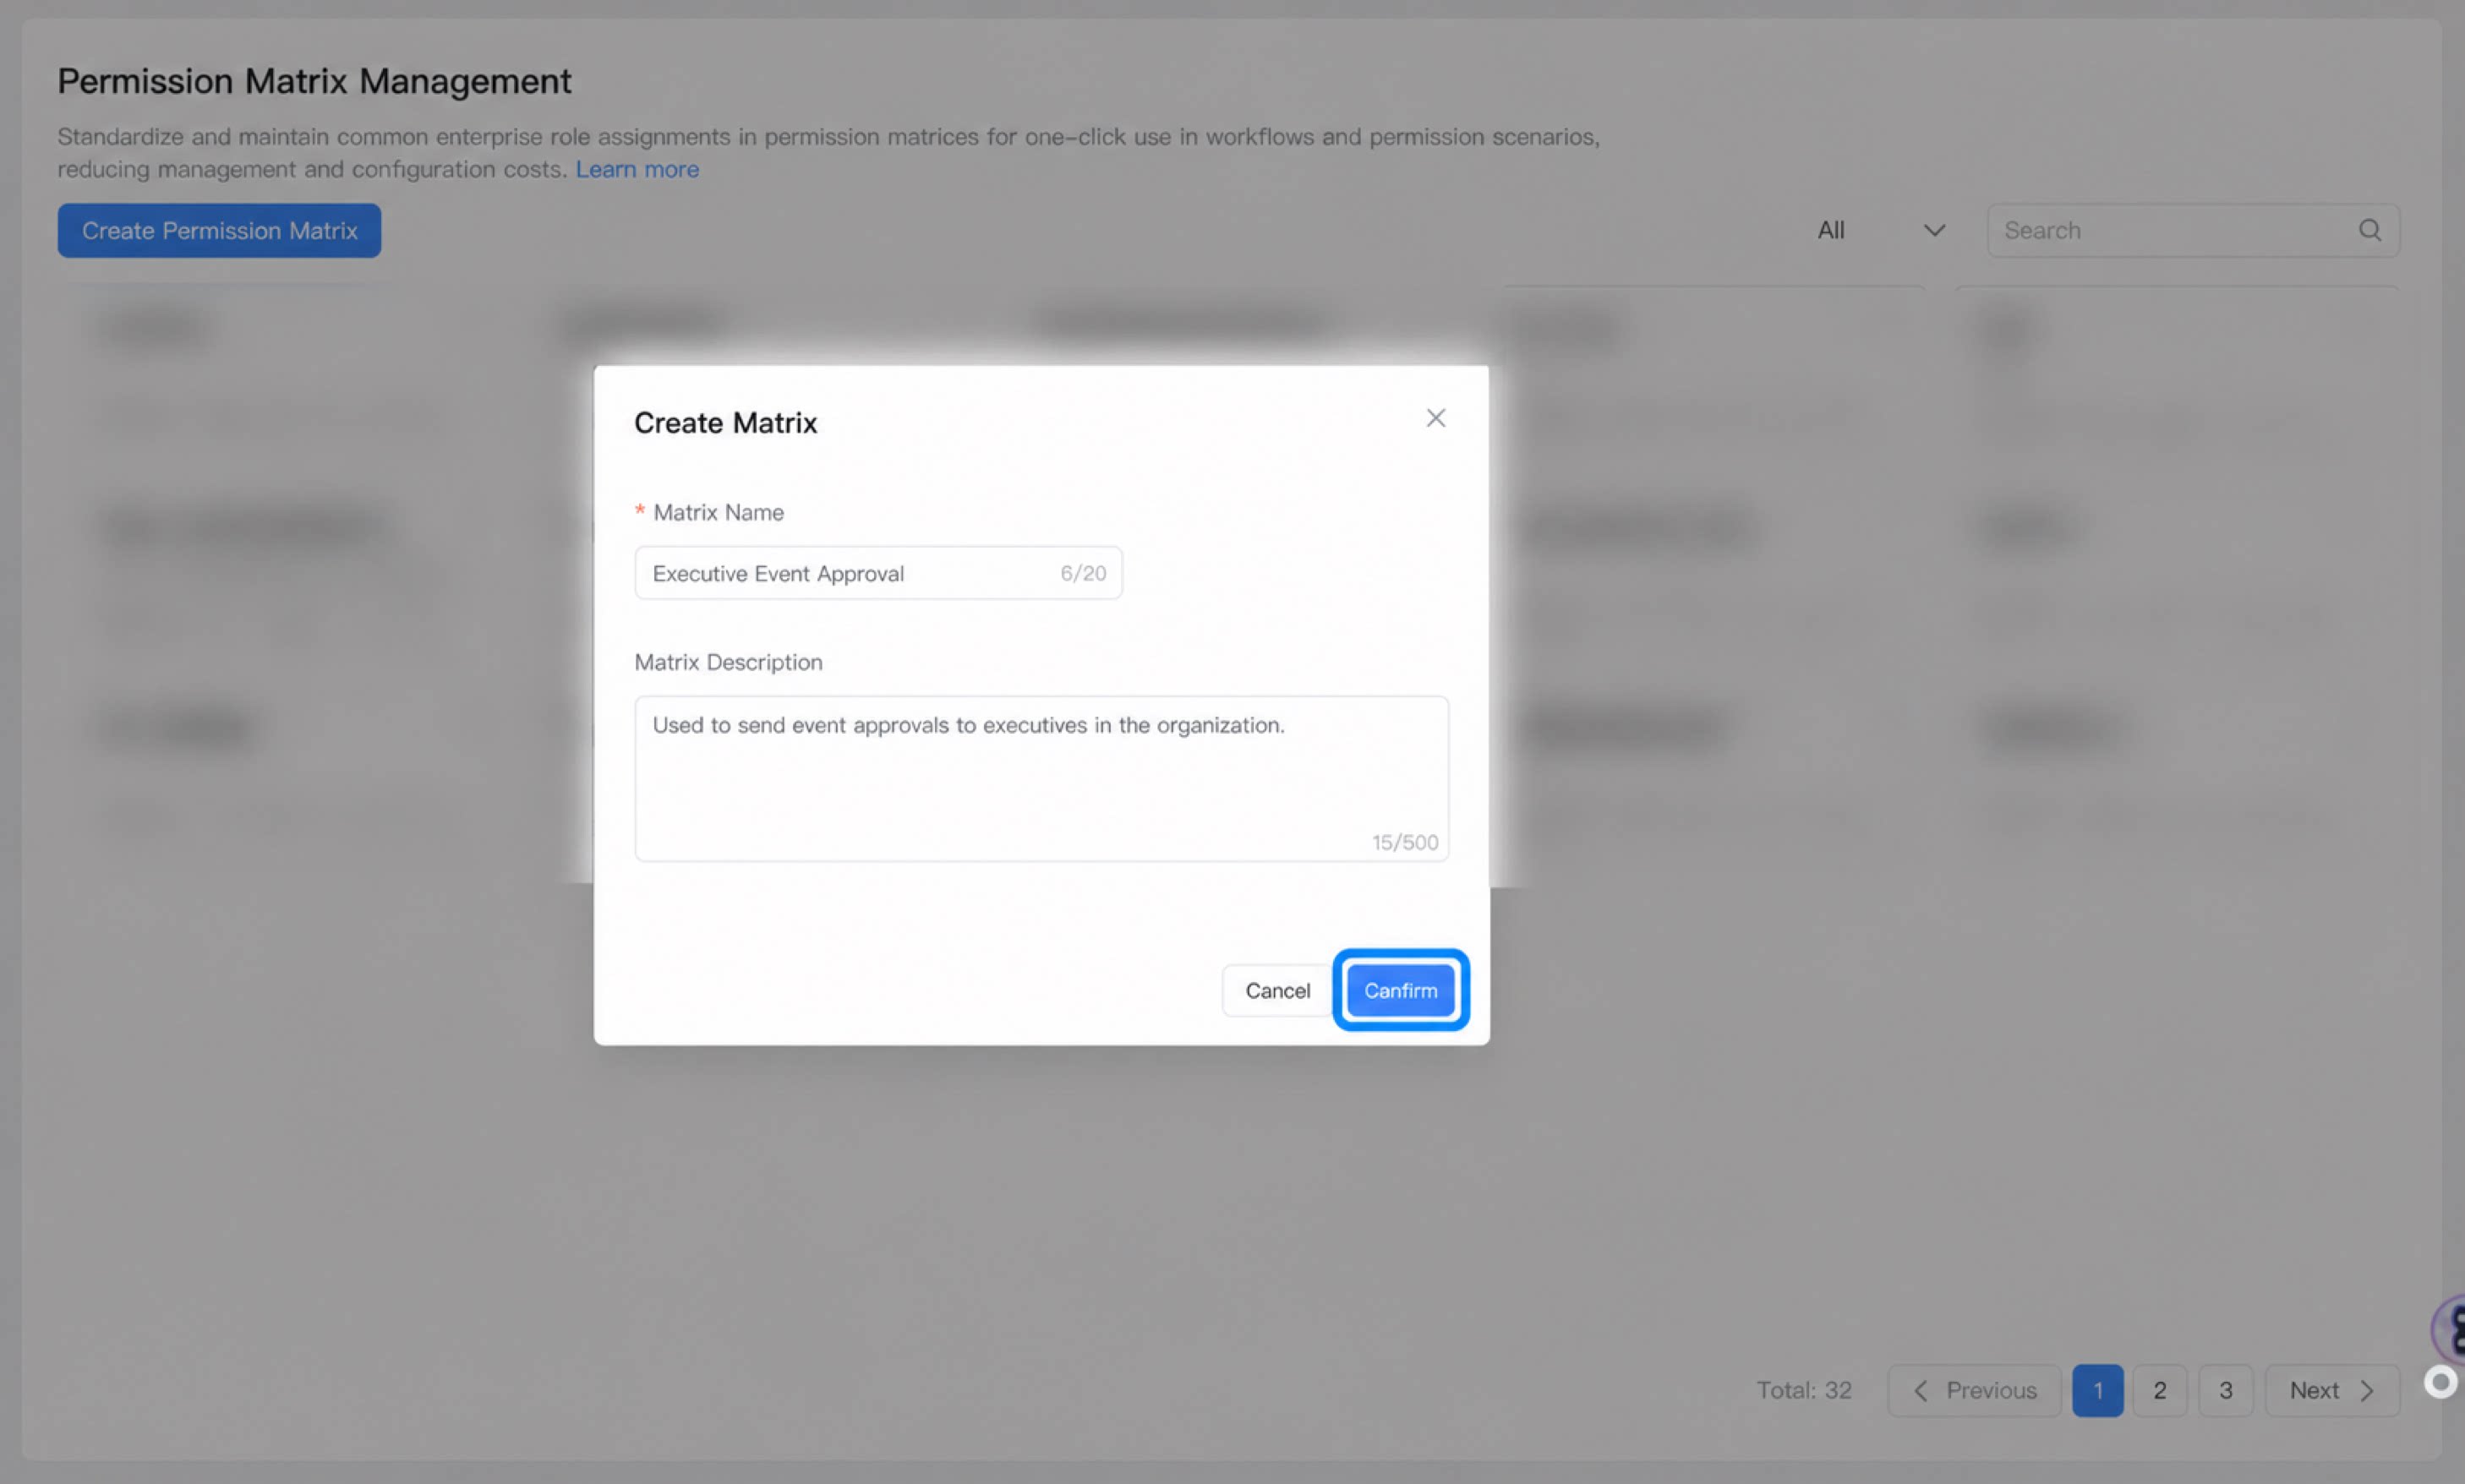
1.3.3 Matrix Header Concepts
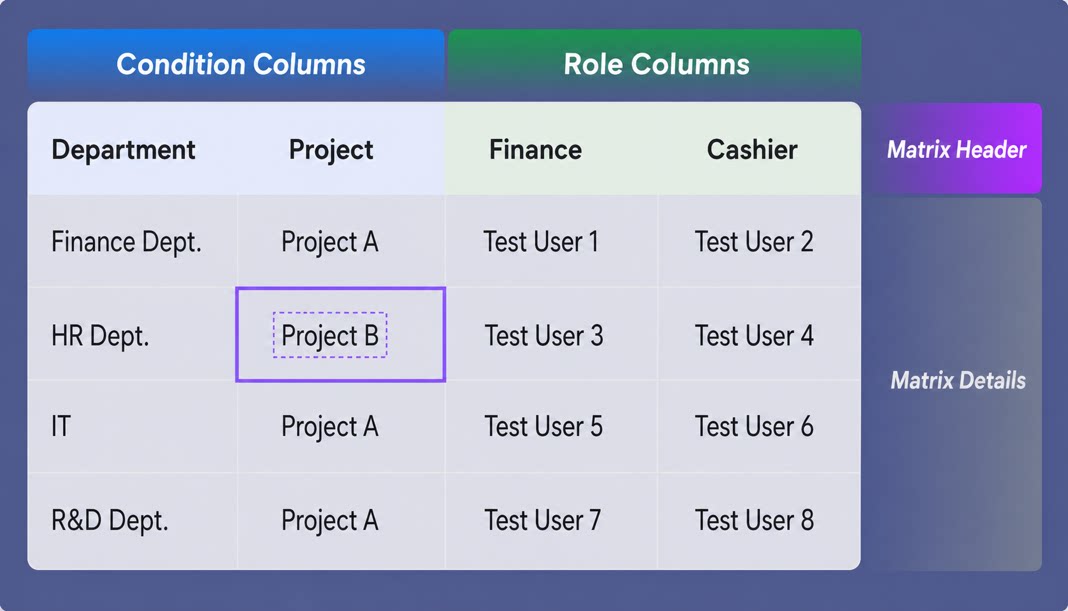
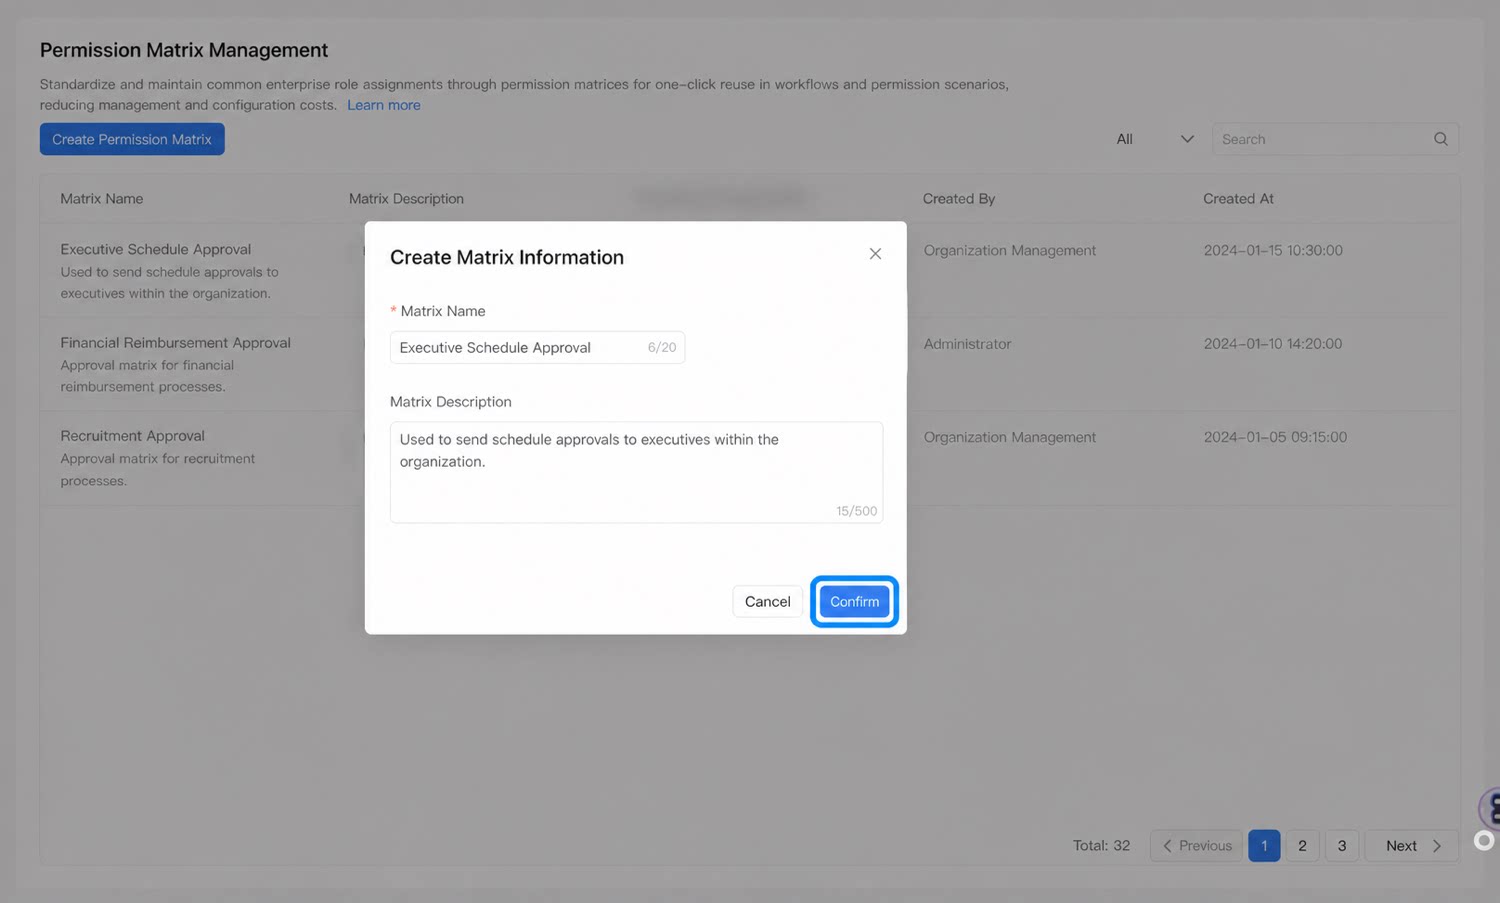
- Condition columns: Define the conditions under which the permission matrix takes effect (for example, project x department forms a condition combination for role assignment). Minimum 1, maximum 10.
- Role columns: Define the person responsible under the given conditions. You can select users from your organization. Minimum 1, maximum 50.
2. Operating Steps
The permission matrix consolidates commonly used role assignments across your organization, so you can reference them with one click in scenarios such as workflows and permissions, reducing management and configuration costs. This section describes the basic concepts and usage of the permission matrix.2.1 Create a Permission Matrix
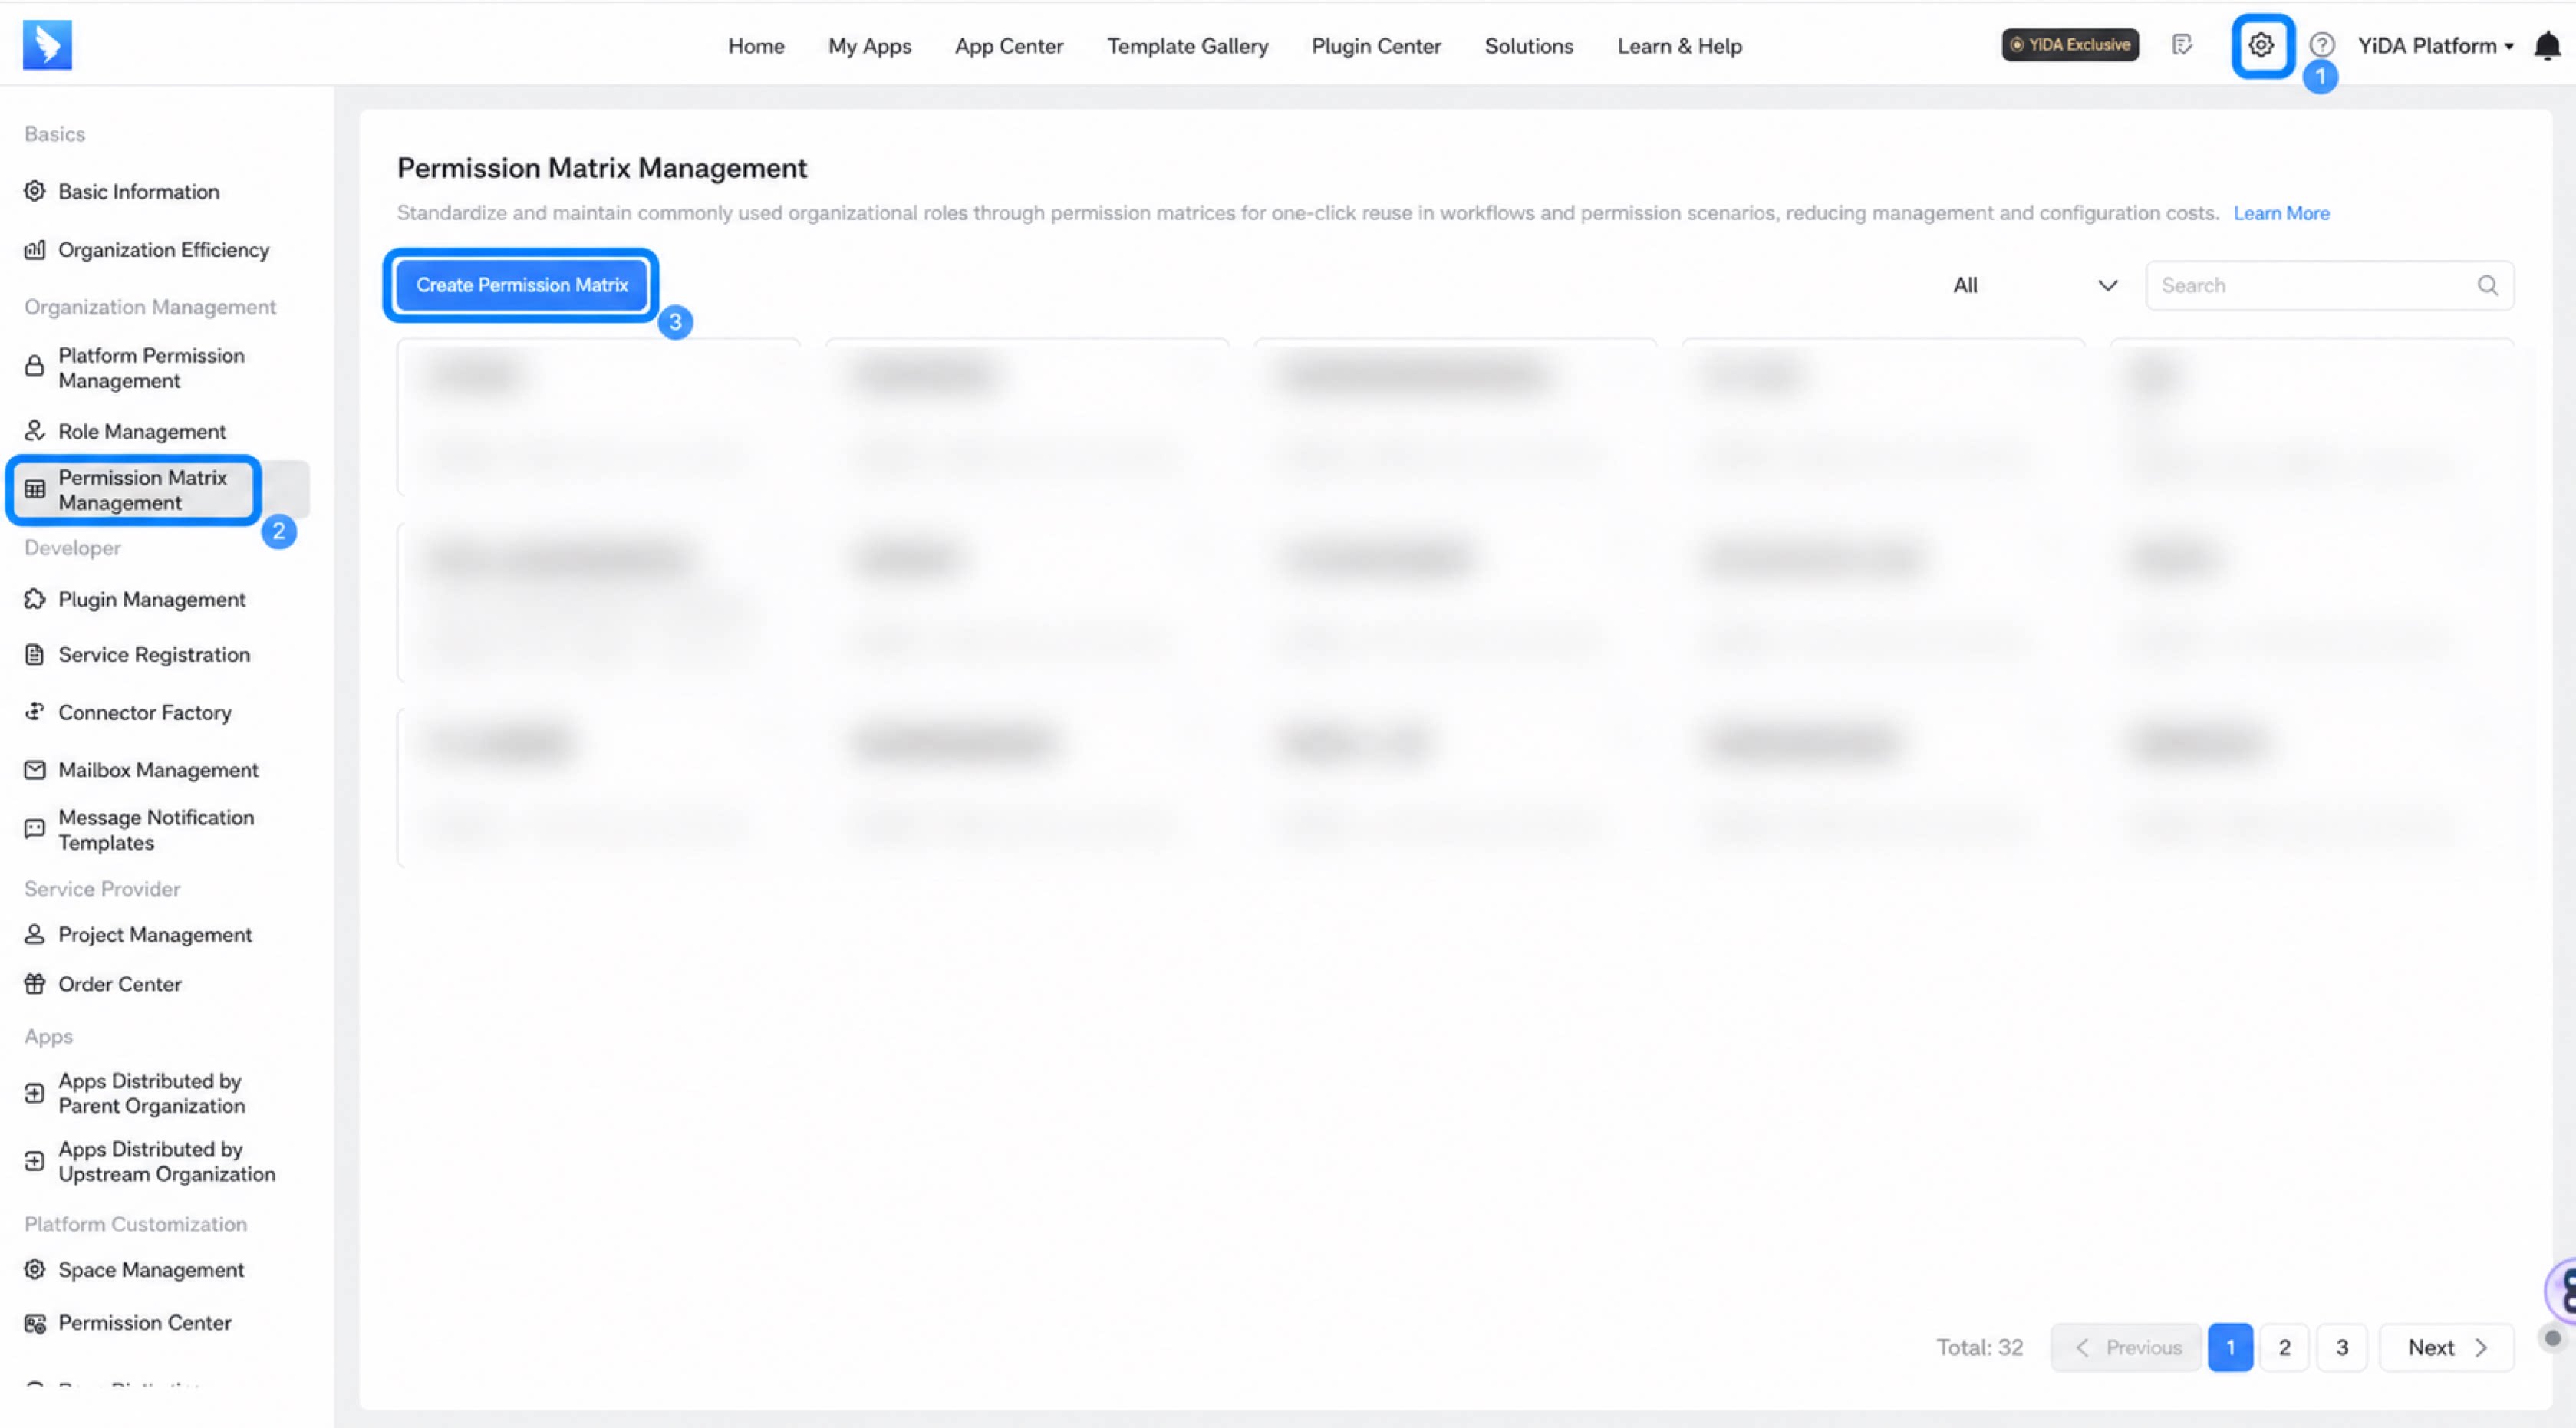
Step 1
Step 2
 in the upper-right corner to open the Platform management page.
Step 3
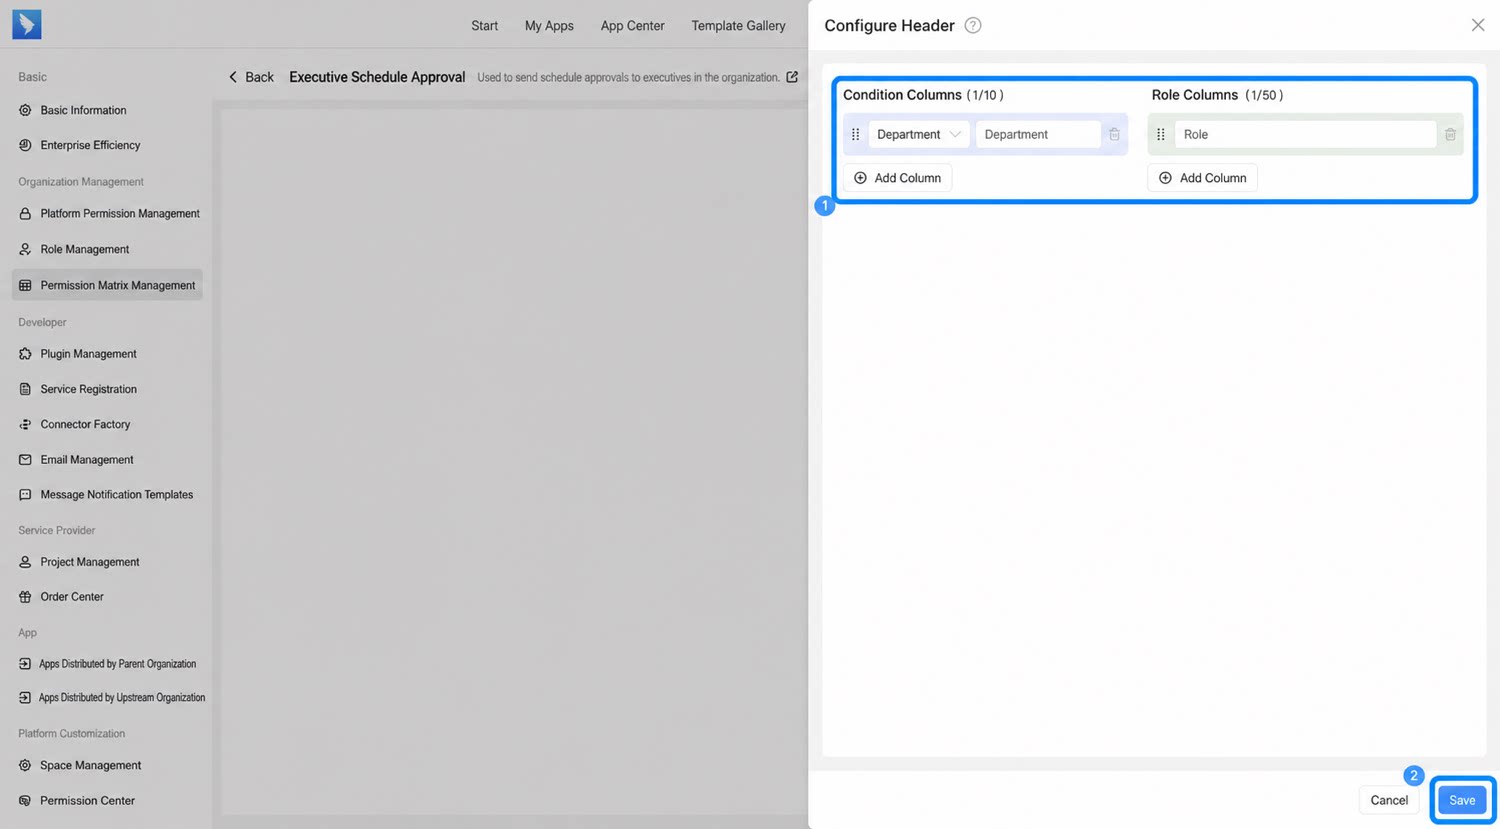
In the Create matrix info dialog, enter the Matrix name and Matrix description, then confirm
Configure the matrix header, and click Save when done
Click Add row, enter the corresponding conditions and roles in the table below, and click Save in the upper-right corner when done
Click Duplicate row to copy the current record and add it directly to the first row of the table
2.2 Maintain the Permission Matrix
After creating a permission matrix, follow these steps to edit its data.- Sign in to the YiDA workbench, open the platform management page, and click Permission matrix.
- Select the permission matrix you want to modify, and click ··· > Edit in the upper-right corner.
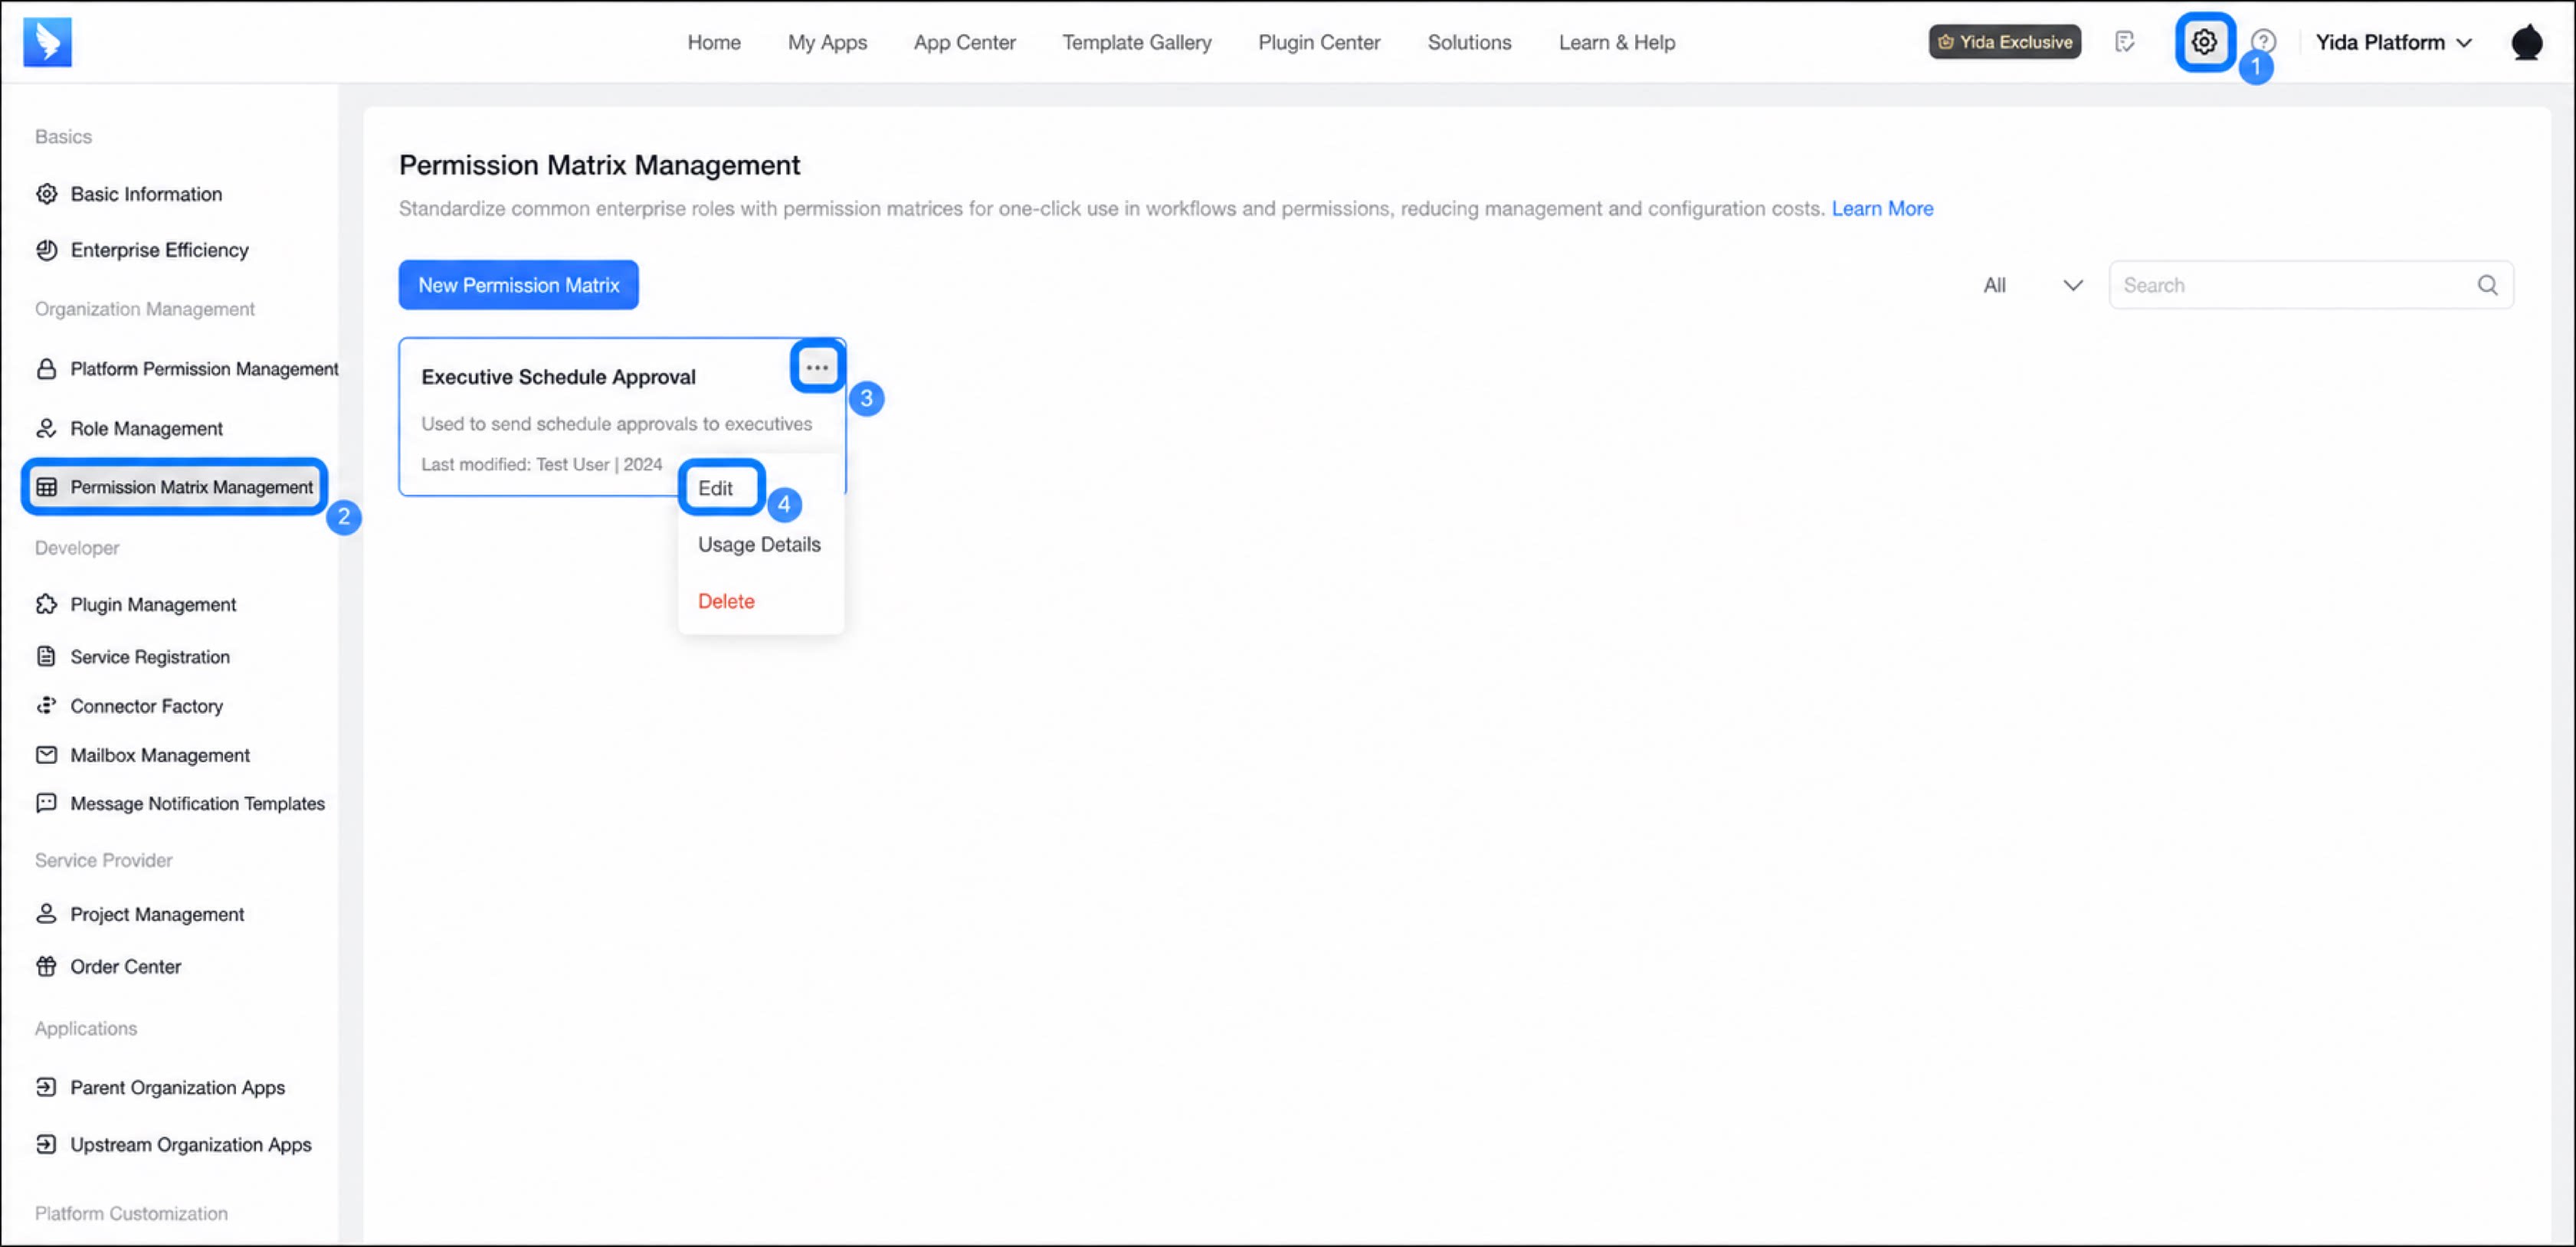
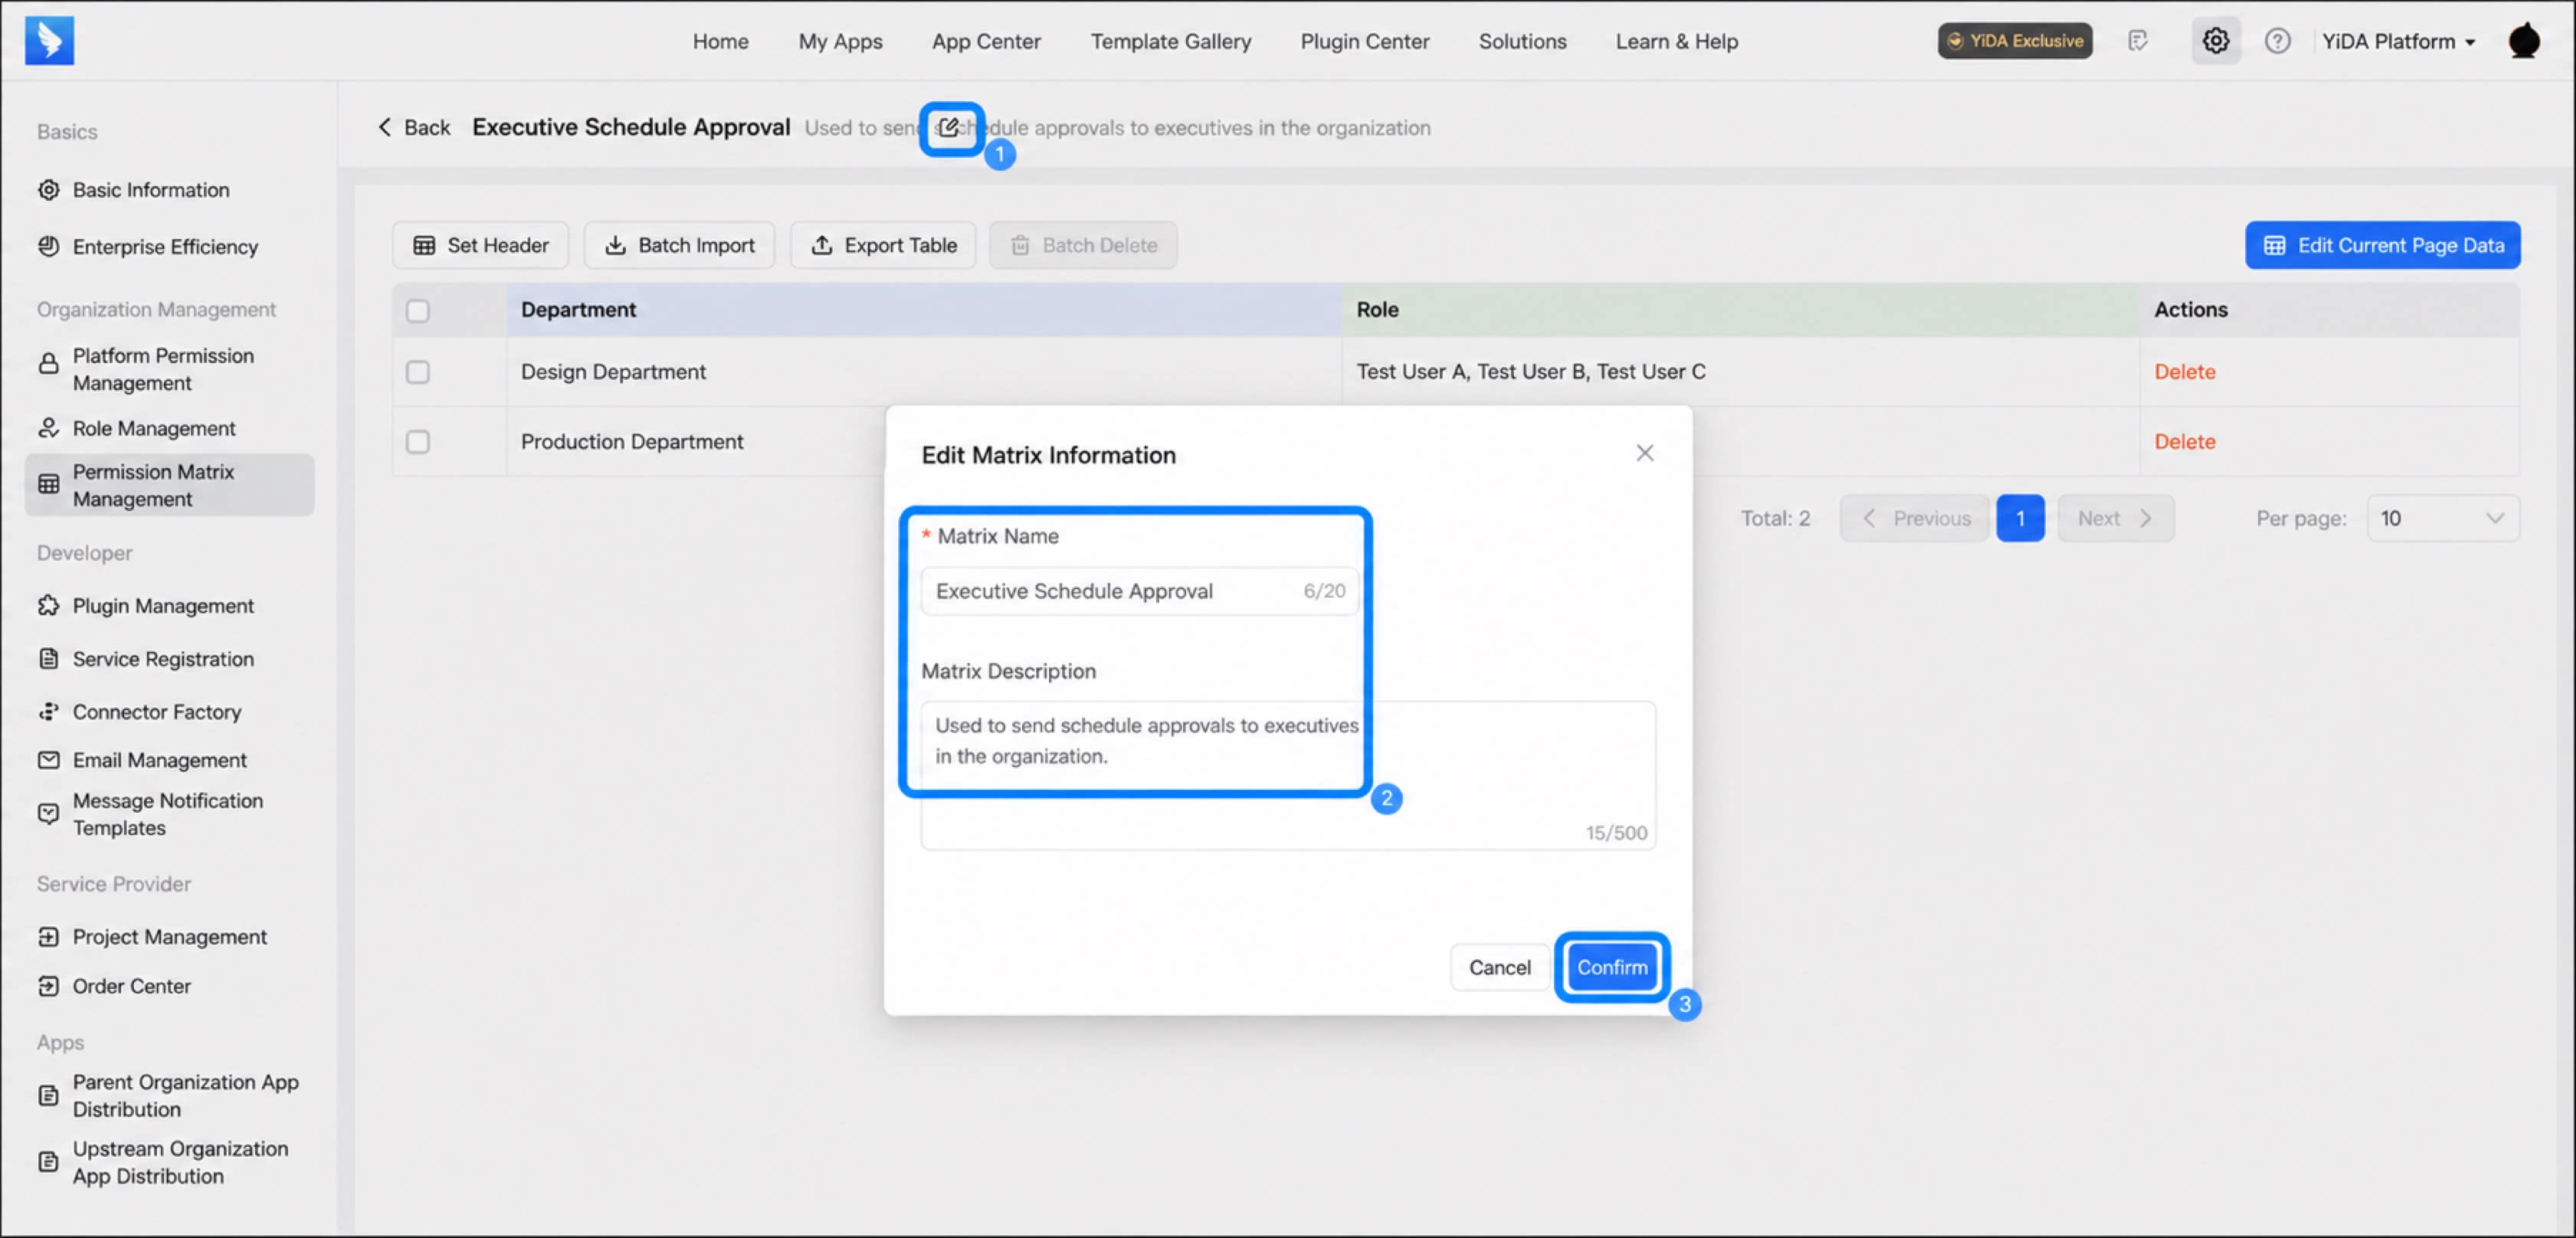
Click Edit to modify the matrix name and description, and click Confirm when done
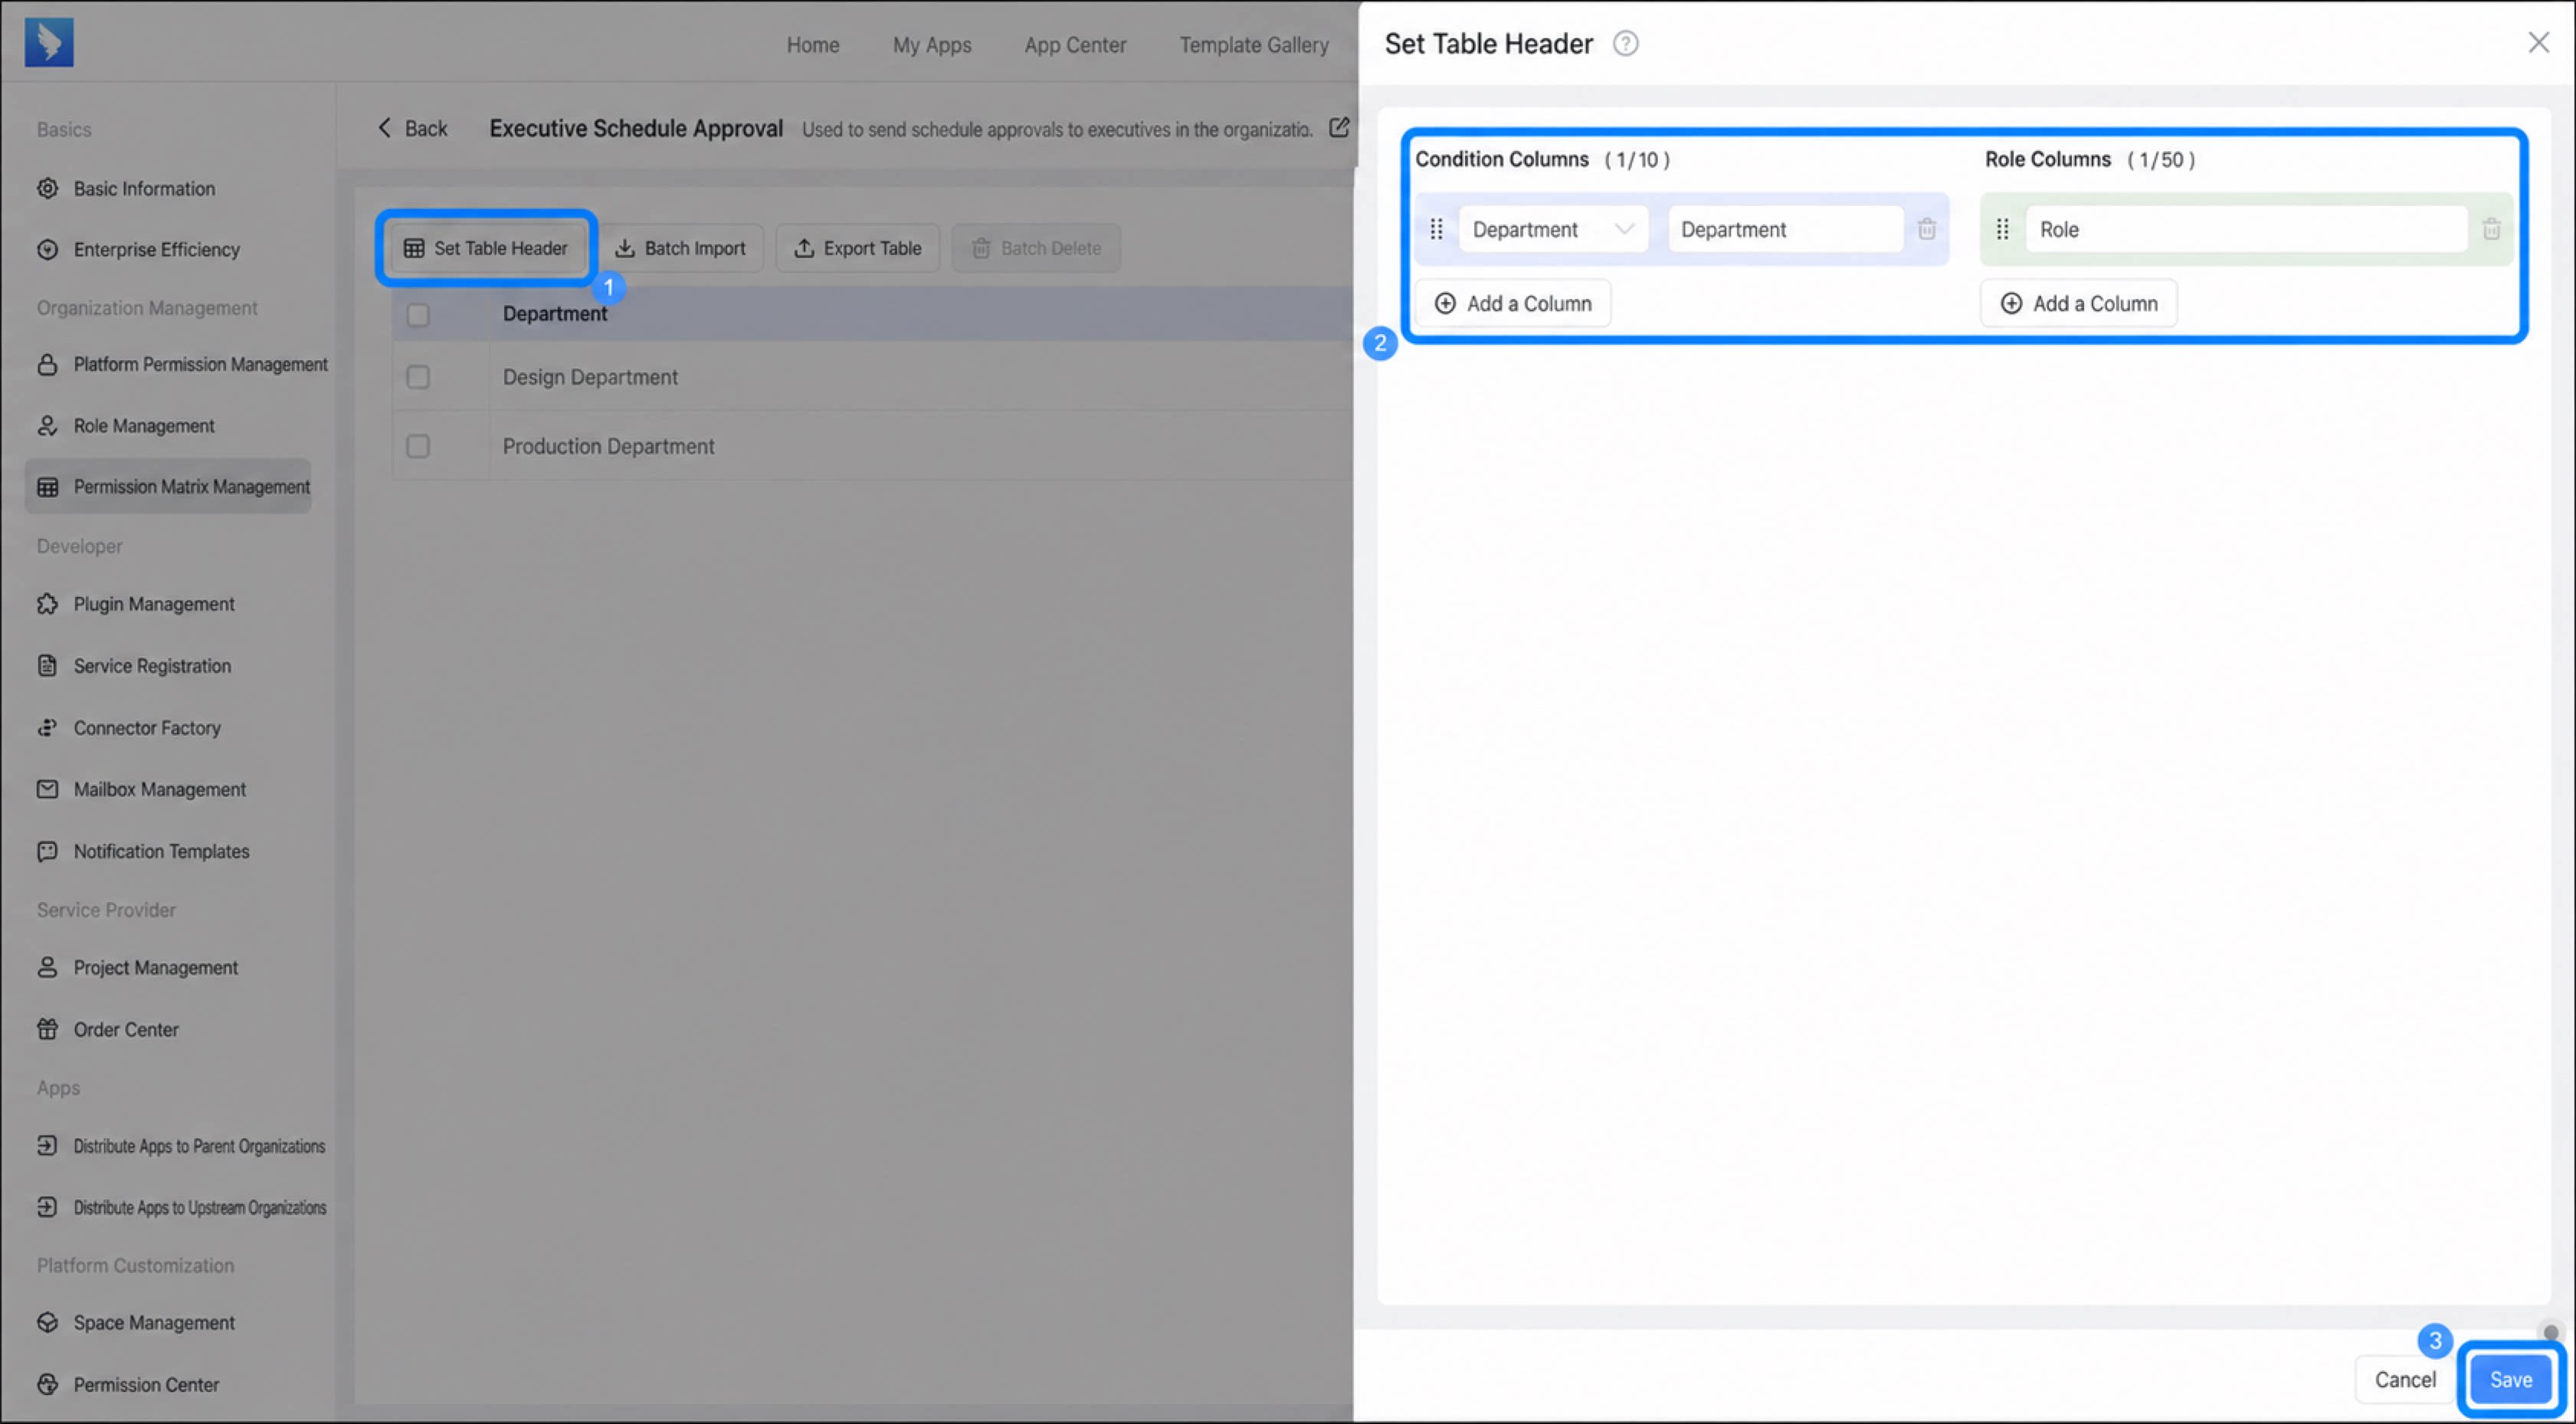
Click Set header, modify the Condition columns and Role columns in the dialog, and click Save when done
Click Edit current page data in the upper-right corner, edit the corresponding conditions and roles, and click Save in the upper-right corner when done
2.3 Delete a Permission Matrix
Follow these steps to delete a permission matrix you no longer need.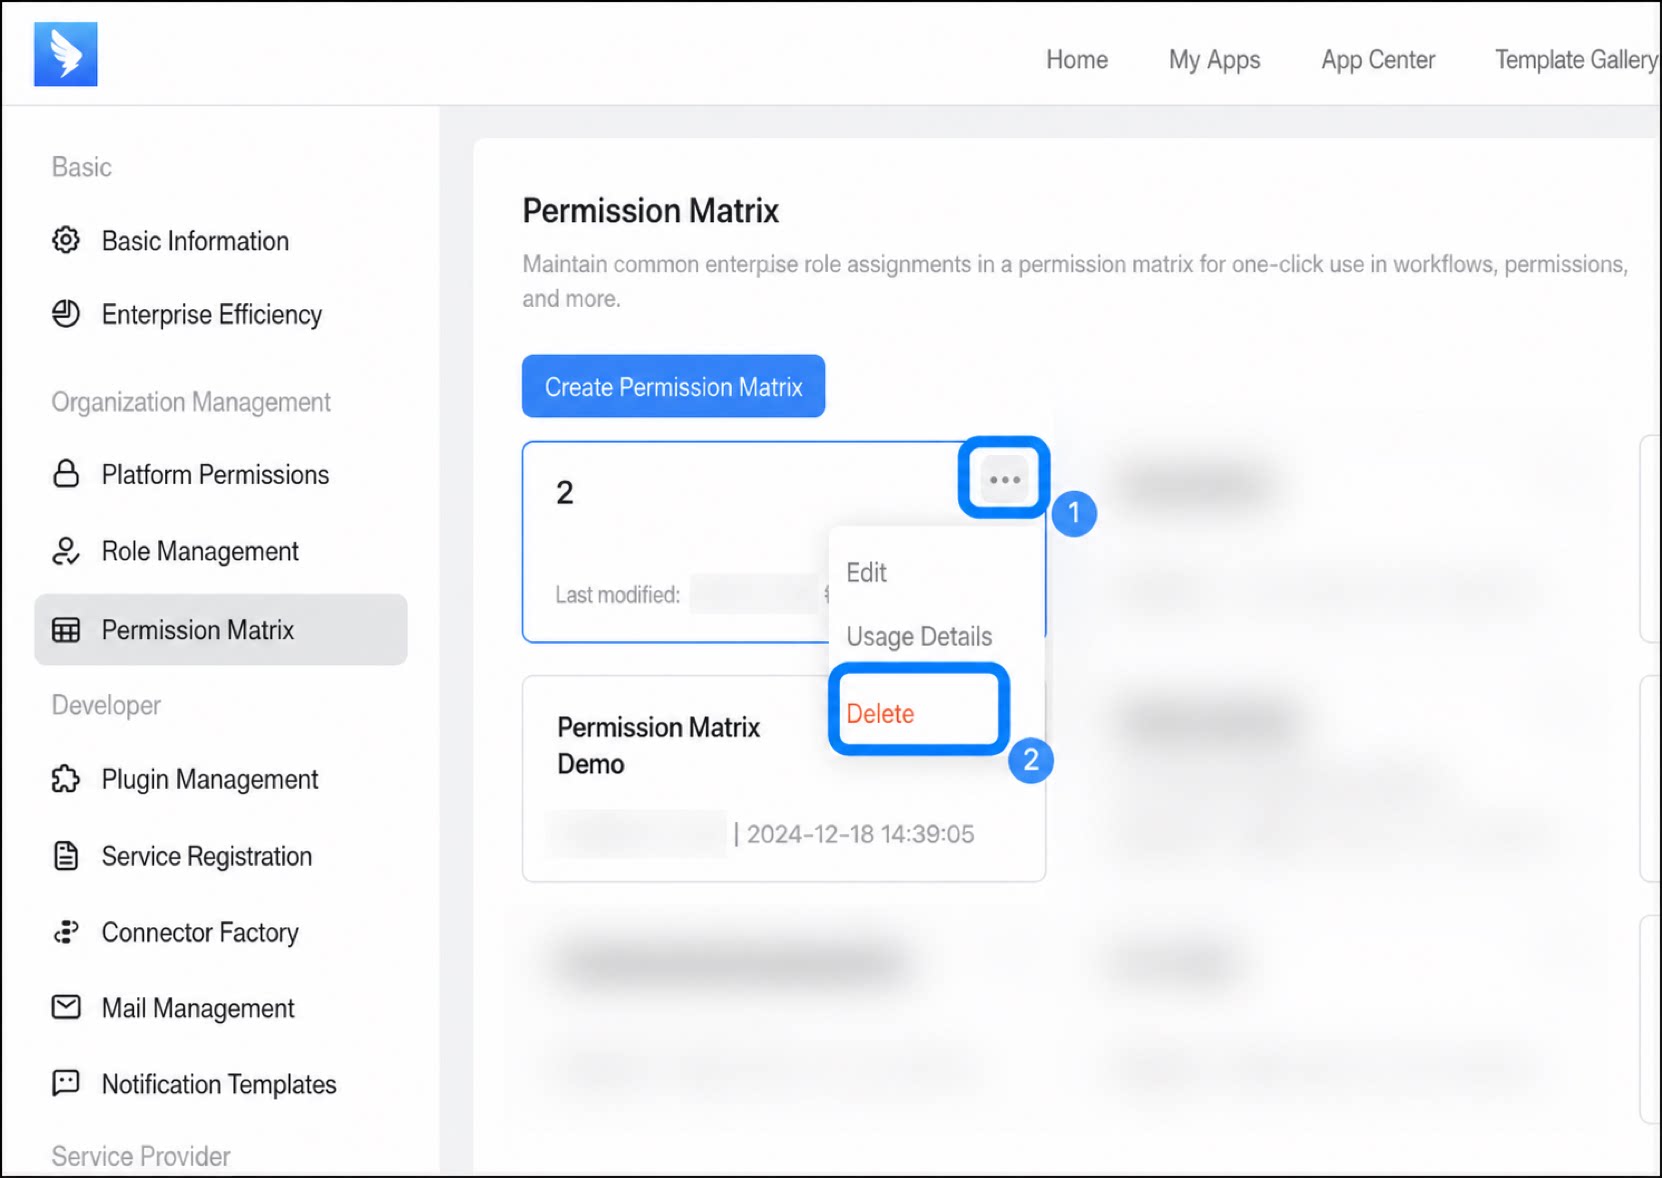
- On the permission matrix details page, locate the matrix you want to delete.
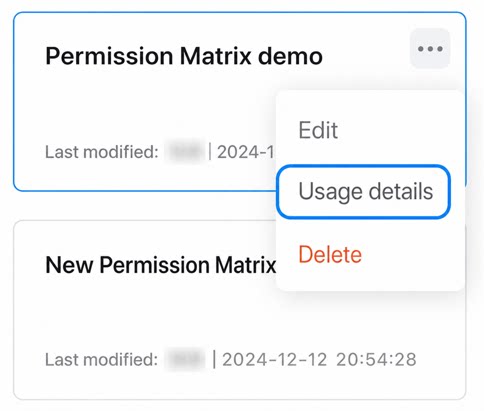
- Click ··· > Delete.
- You cannot delete a permission matrix that is currently in use.
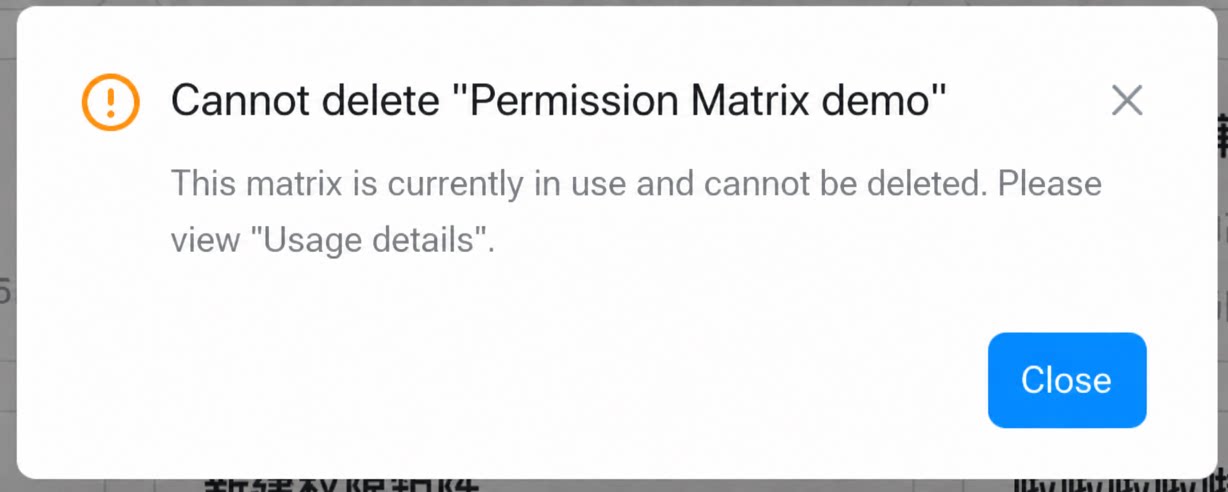
- To view the usage details of a permission matrix, click More on the matrix.
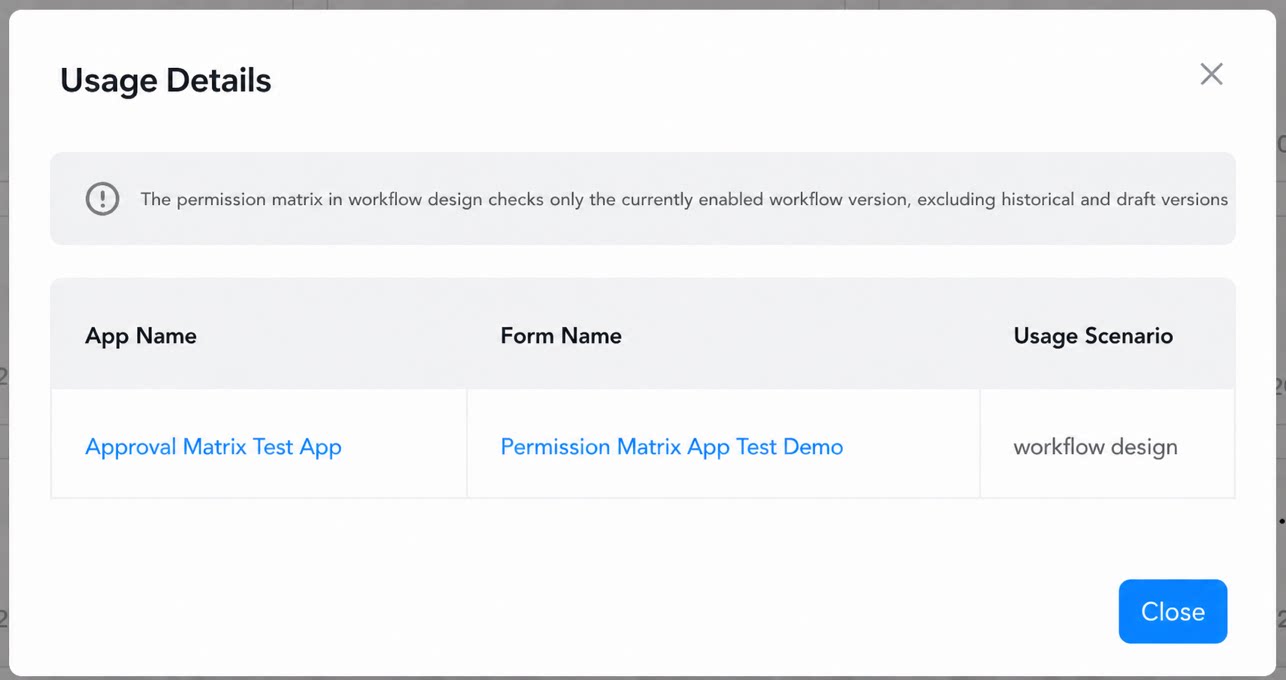
- In workflow design, the usage check applies only to the currently active workflow version, not to historical or draft versions.
- If a permission matrix used in a historical version is deleted while running workflow instances still exist for that version, the corresponding nodes in those workflow instances will have no assigned operator.
2.4 Batch Operations for Permission Matrix Details
You can batch import and batch delete data in a permission matrix. See the following sections for details.2.4.1 Batch Delete
- Sign in to the YiDA workbench, open the platform management page, and click Permission matrix.
- Select the permission matrix you want to modify, and click ··· > Edit in the upper-right corner.
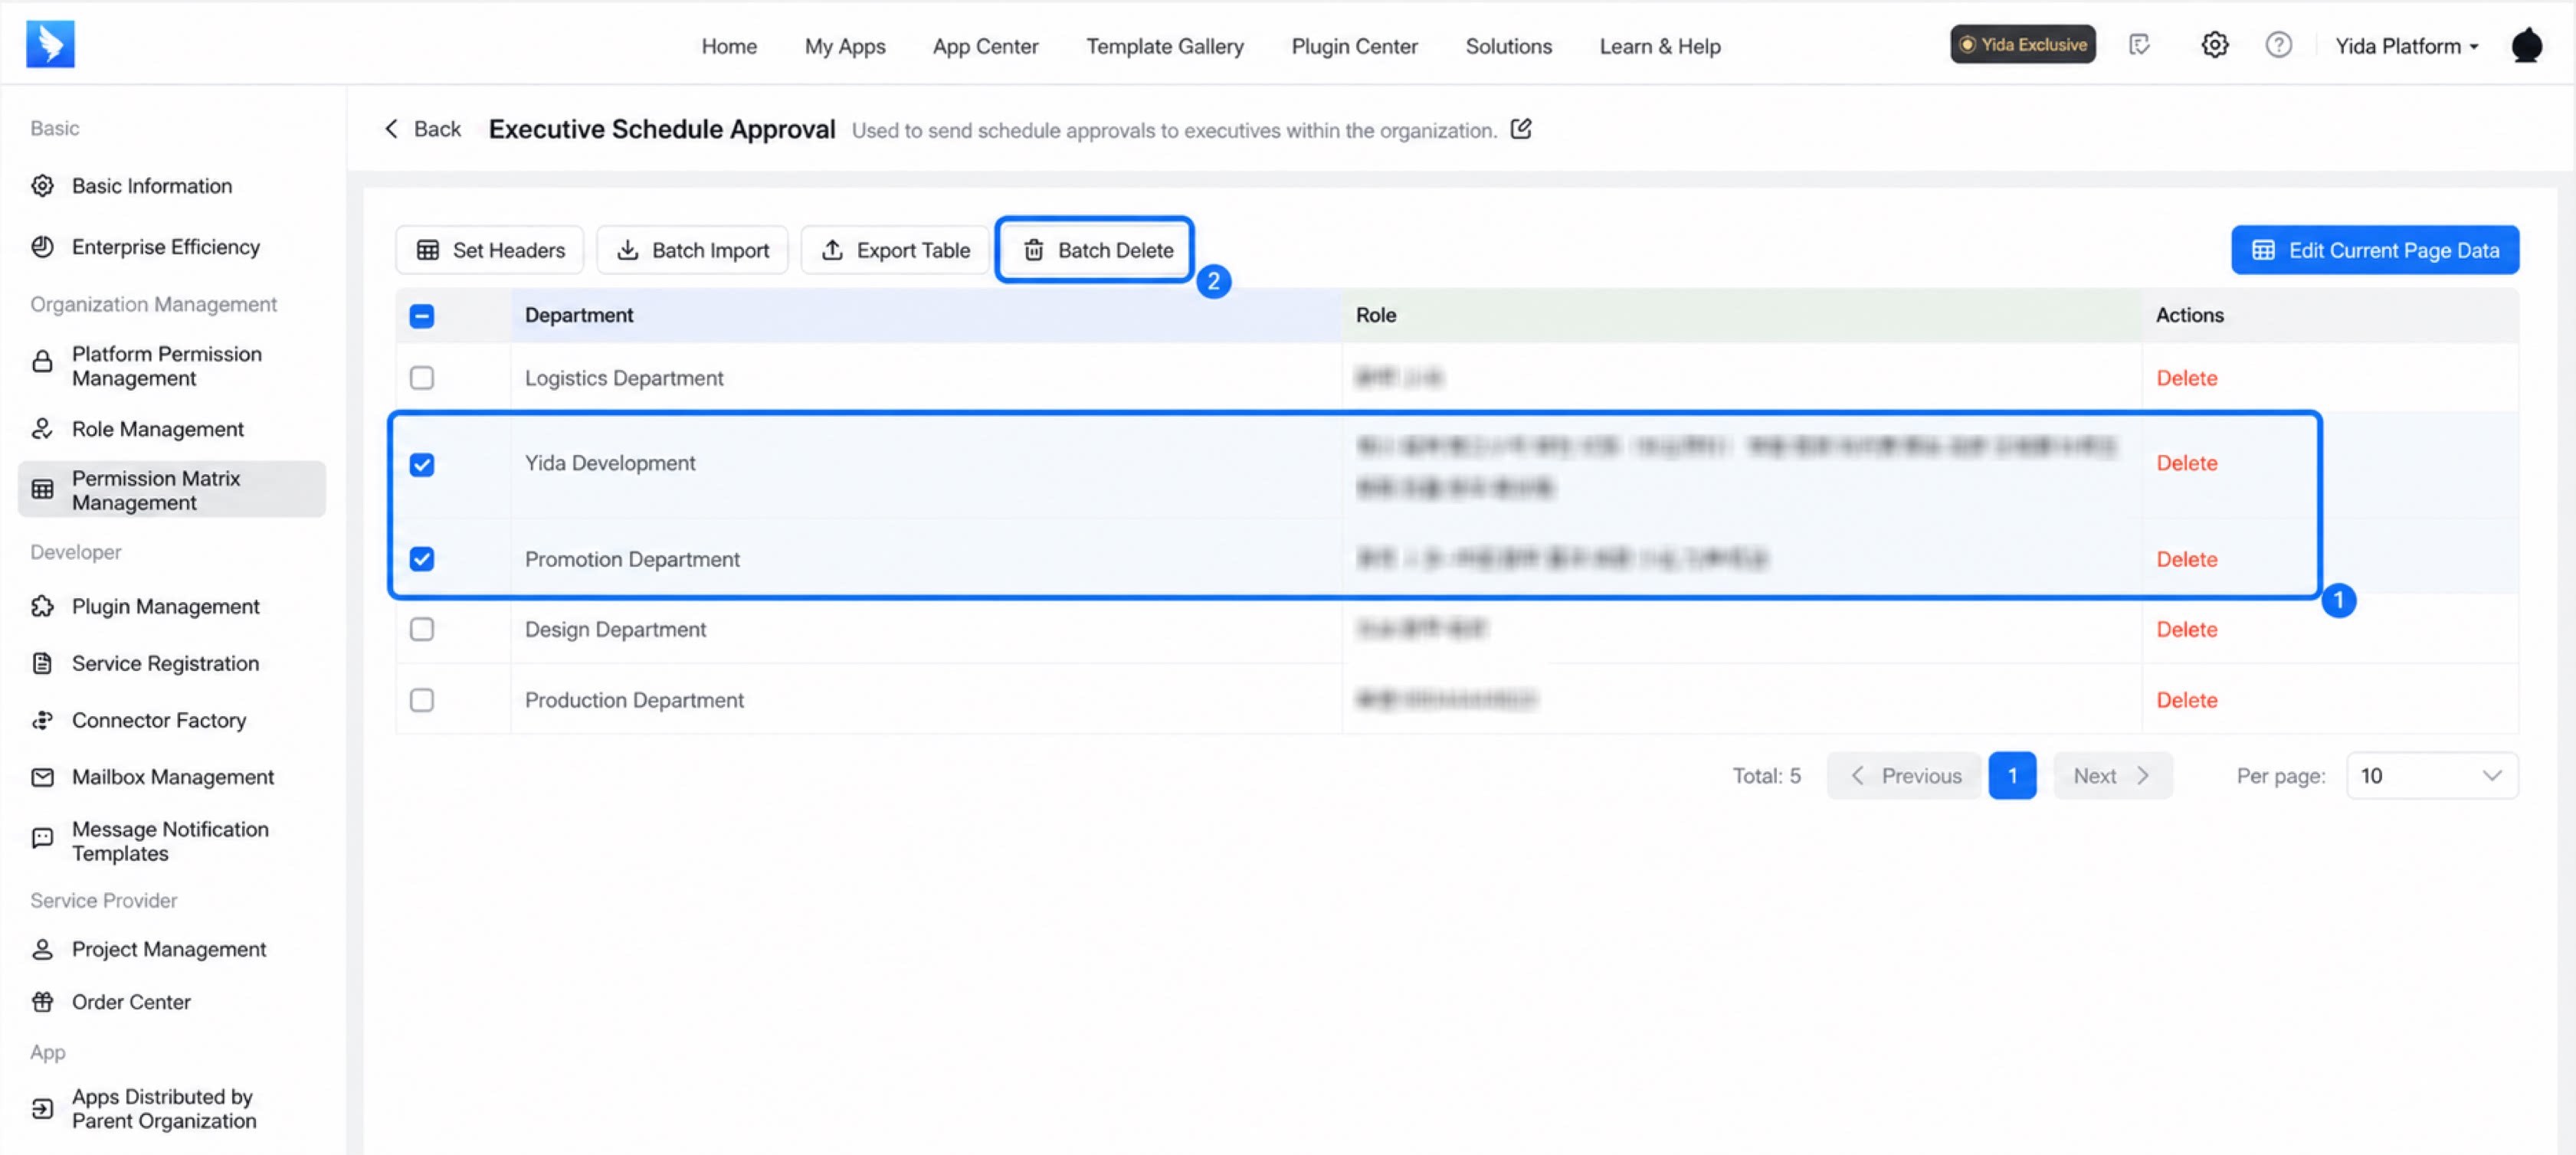
- Select the data you want to delete, and click Batch delete.
2.4.2 Batch Import
- Sign in to the YiDA workbench, open the platform management page, and click Permission matrix.
- Select the permission matrix you want to modify, and click ··· > Edit in the upper-right corner.
- Click Batch import.
- Set the Import method in the dialog.
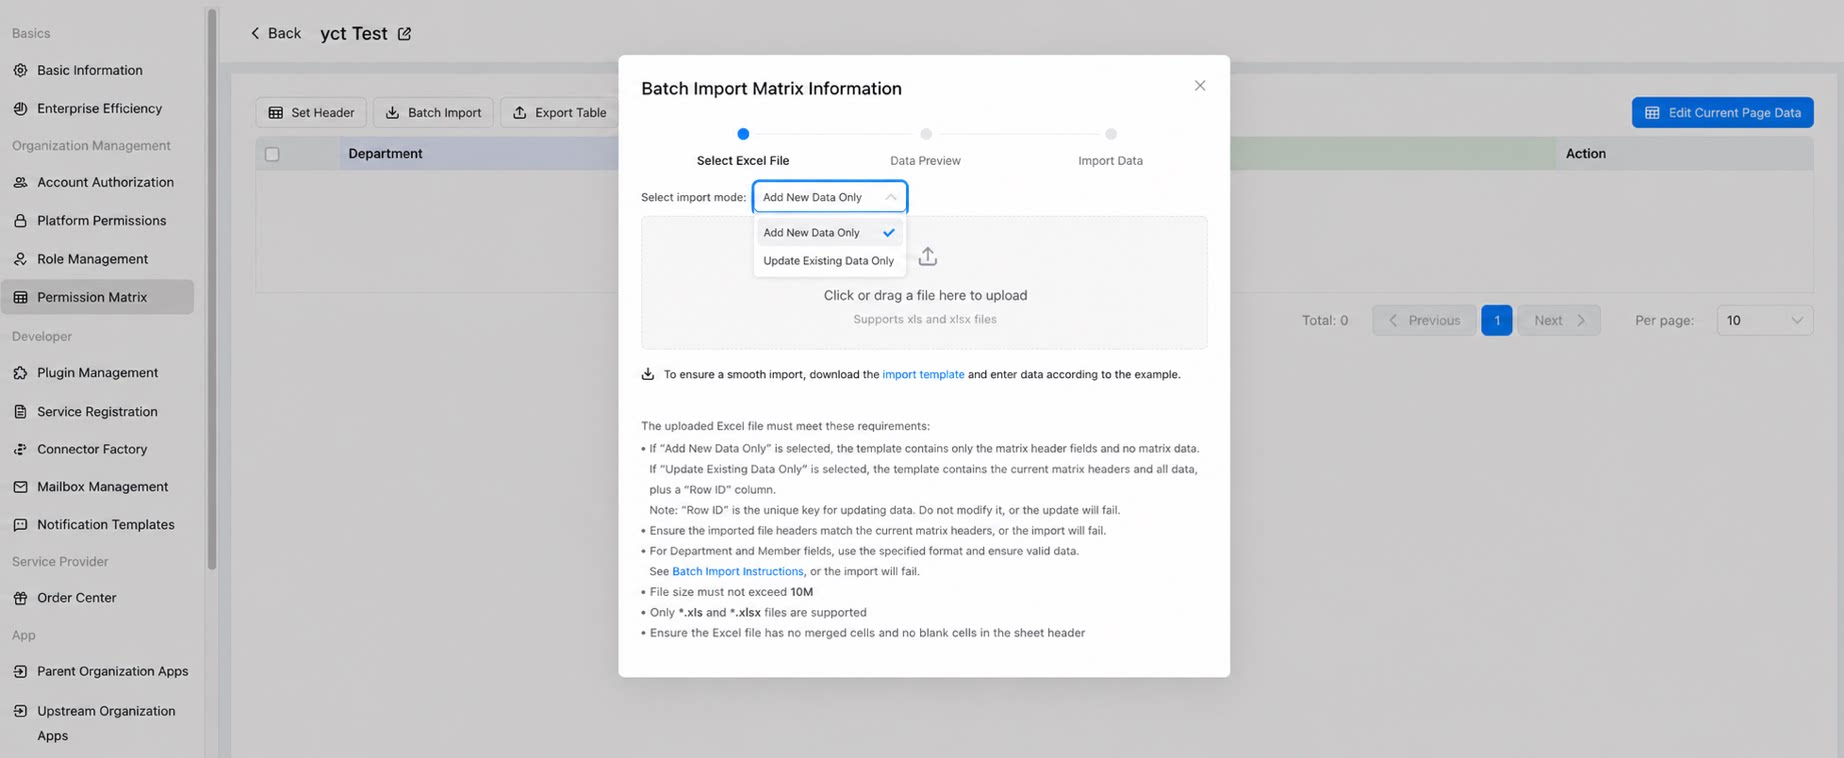
Click or drag a file into the dashed box in the dialog to upload it
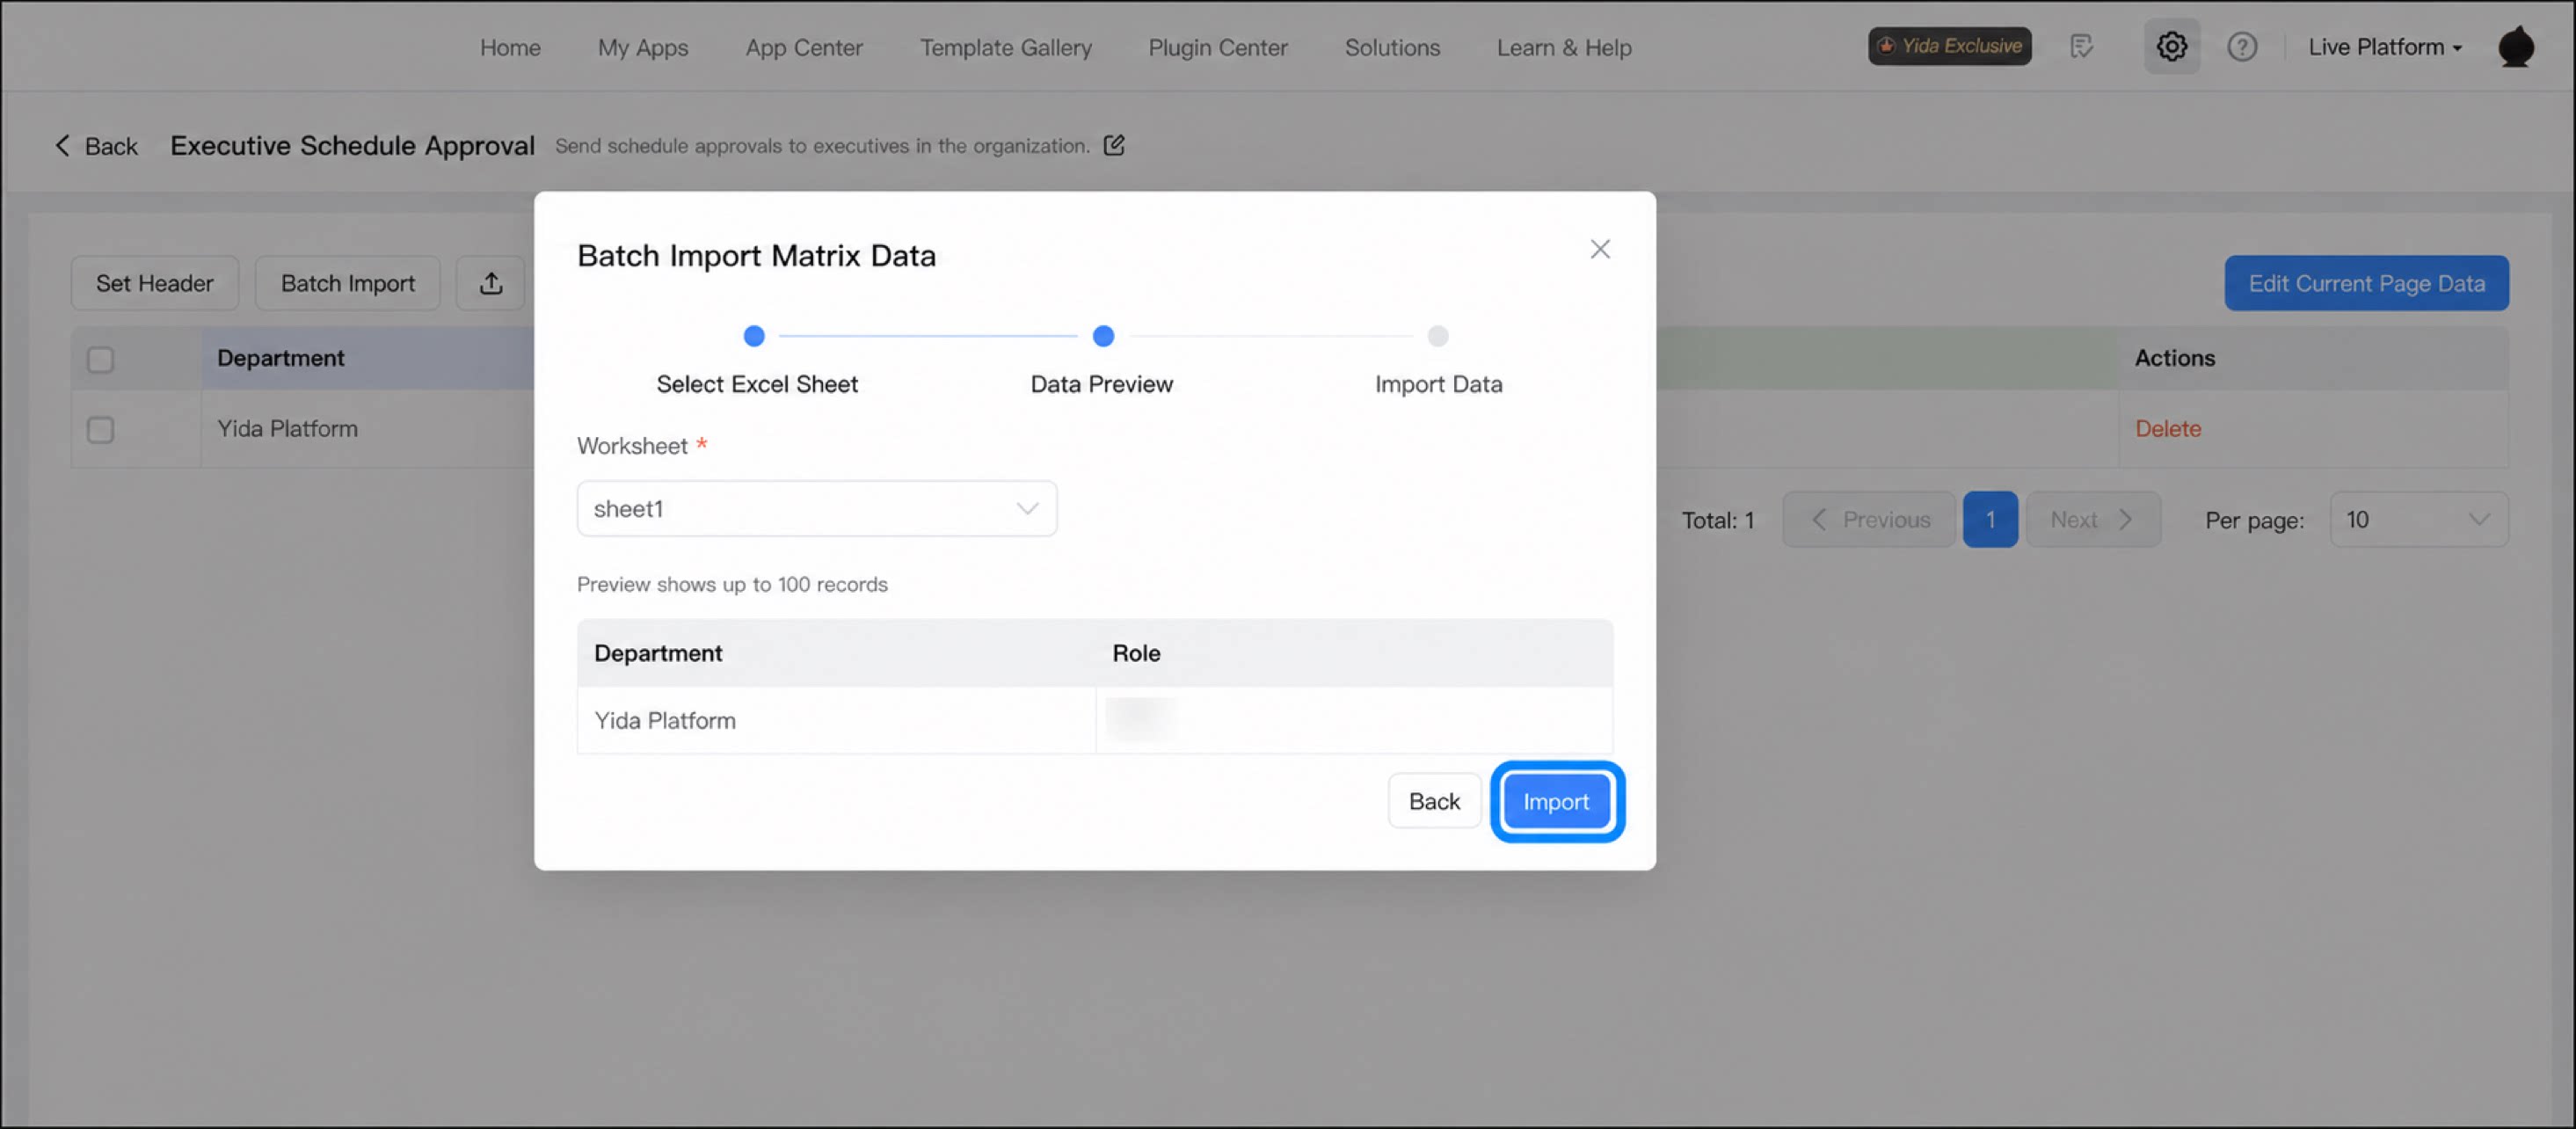
Preview the imported data, and click Import after confirming that it is correct
2.4.3 Batch Import Rules
The uploaded Excel file must meet the following requirements:- If the import method is “Add new data only”, the import template contains only the header fields of the matrix, without any matrix data.
- If the import method is “Update data only”, the import template contains the header and all data of the current matrix, plus an additional Row ID column.
- Make sure the header of the import file matches the header of the current matrix. Otherwise, the import will fail.
- The import file must not exceed 10 MB.
- Only *.xls and *.xlsx files are supported.
- Make sure your Excel file meets the following requirements:
- Only one import task can run at a time for a single matrix.
- If the imported data contains departments or users, the input must follow the formats below, and the data must be valid.
2.5 Use the Permission Matrix
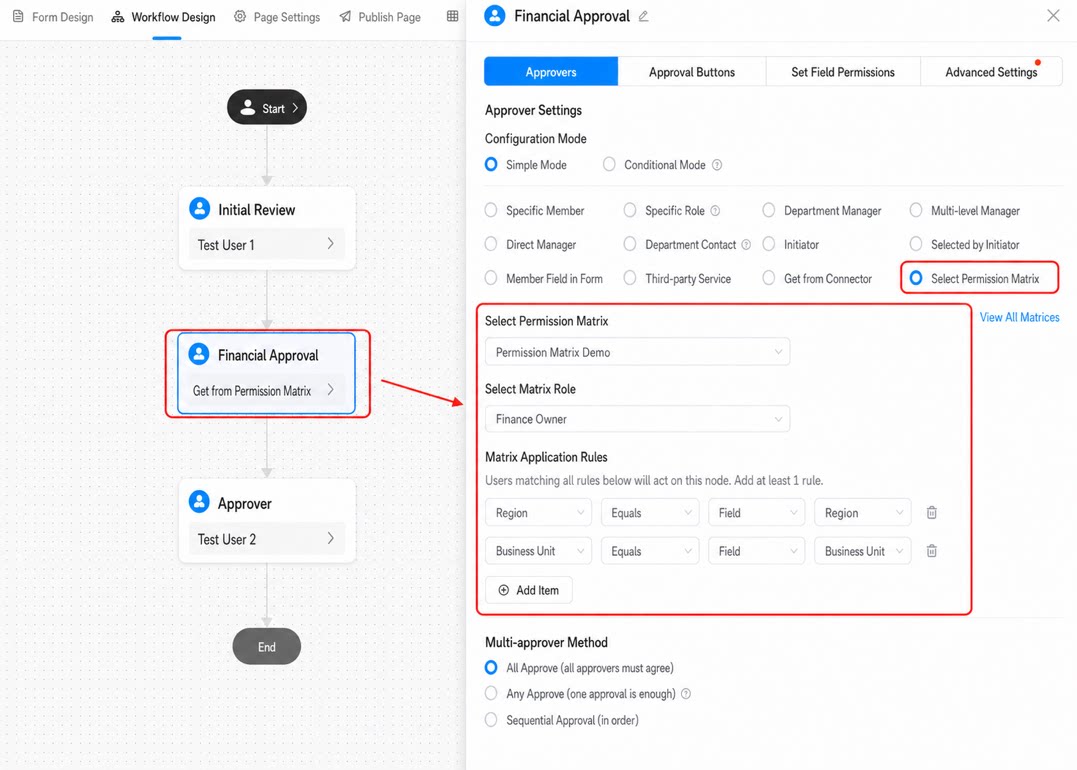
You can use the permission matrix in the manual nodes (approver, CC recipient, and executor) of an approval process. Select the permission matrix directly in the attribute settings of the approver, CC recipient, or executor node.Step 1
Step 2
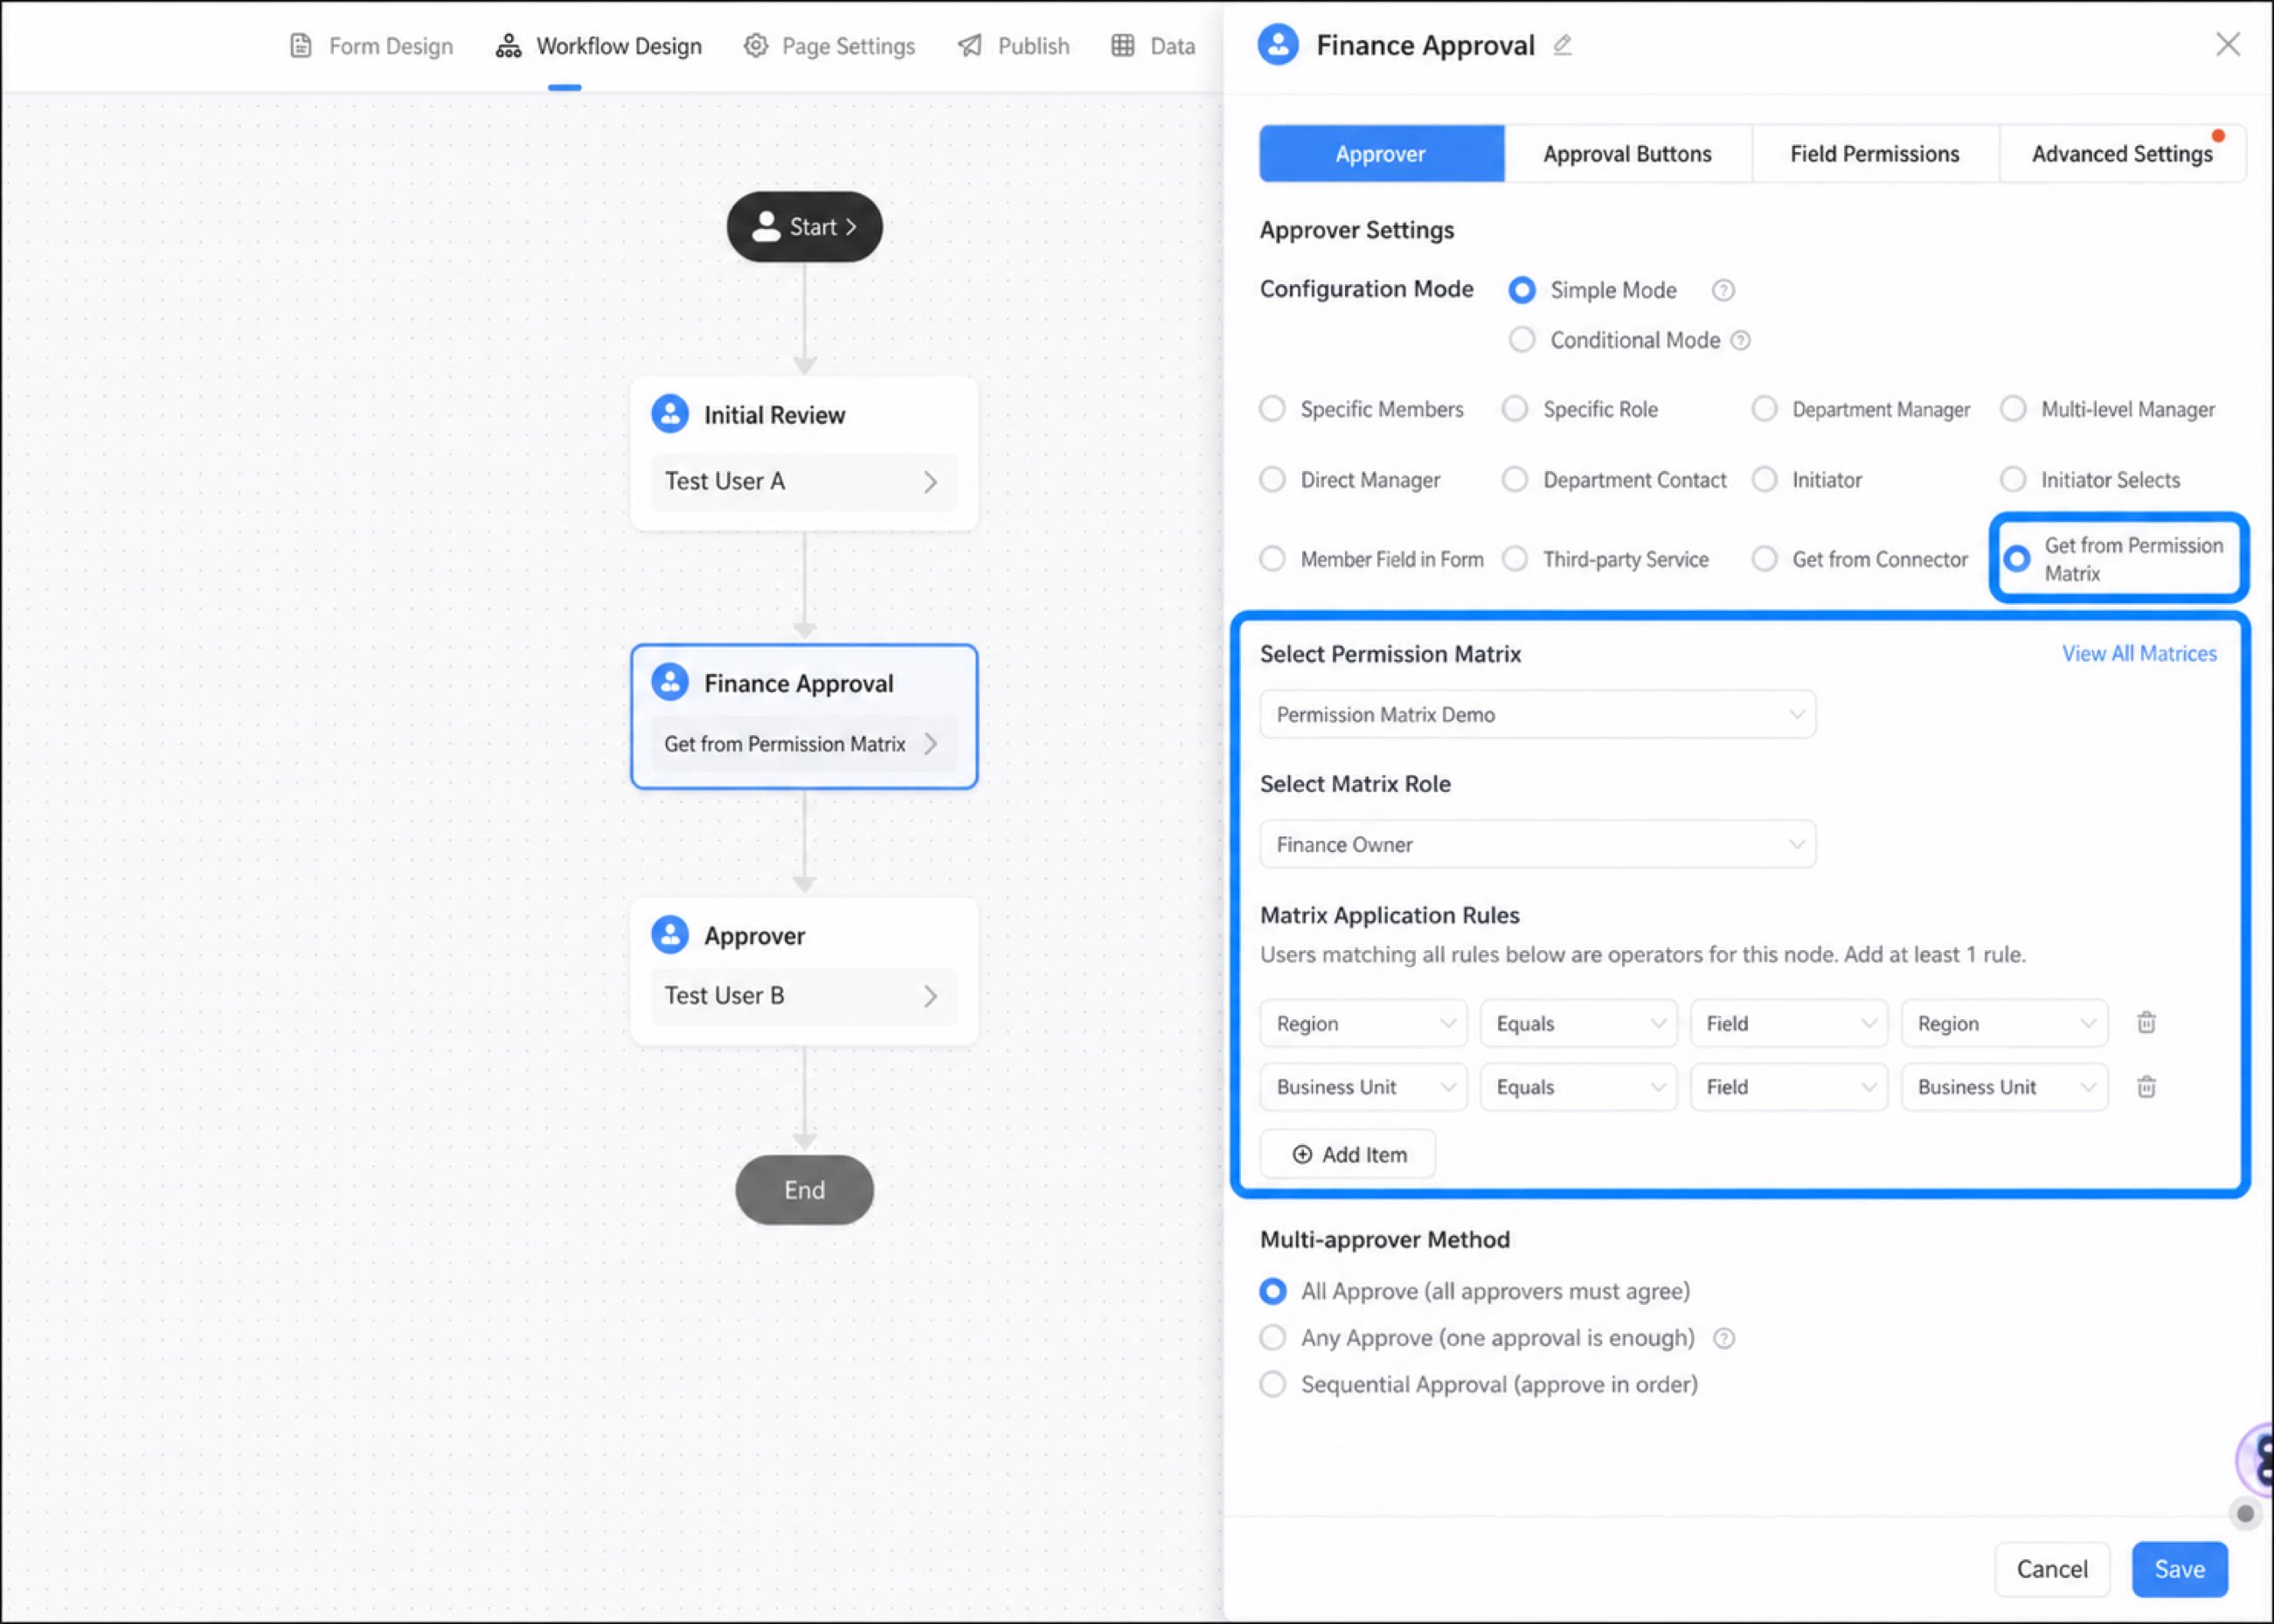
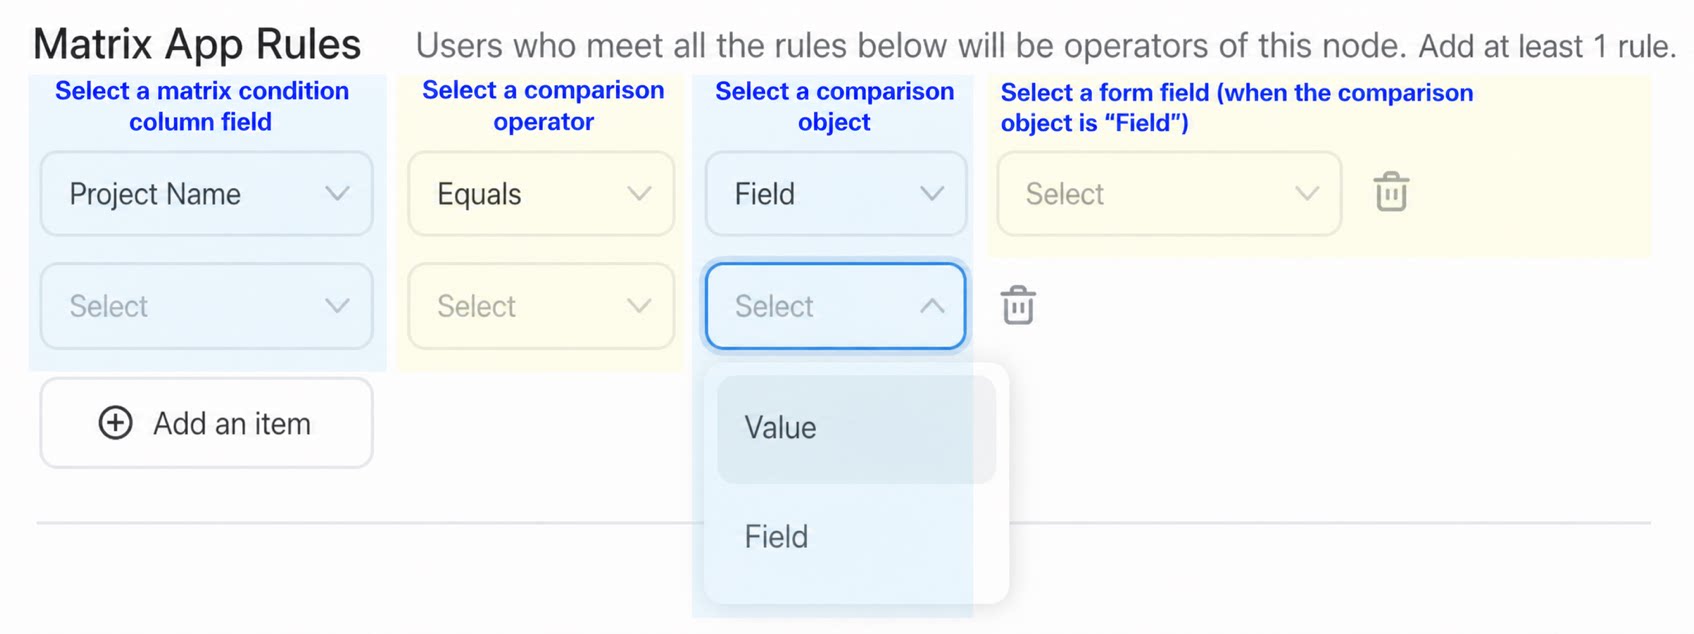
- If multiple application rules exist, users are matched in the selected matrix using AND logic to determine the operator for the current node.
- If multiple users match the matrix application rules, all matched users become operators for the current node, and the “multi-approver mode” configuration determines how the node takes effect.
- If no user matches the matrix application rules, the current node is handled according to its “approver is empty” configuration.
- If the field source of a matrix condition is Department, the form field dropdown shows only Department components from the current form.
- You can add up to 20 matrix application rules.