Chats
Chats Calendar
 Meetings
 Contacts
 Mail
Mail Docs
Docs Drive
Drive AI Table
 AI Minutes
 Attendance
 Approval
 YiDA
YiDA Admin Console
- Available on YiDA China edition, Professional edition (overseas), and Dedicated edition (overseas)
- Available on YiDA international edition with the “Internationalization” capability included
Overview
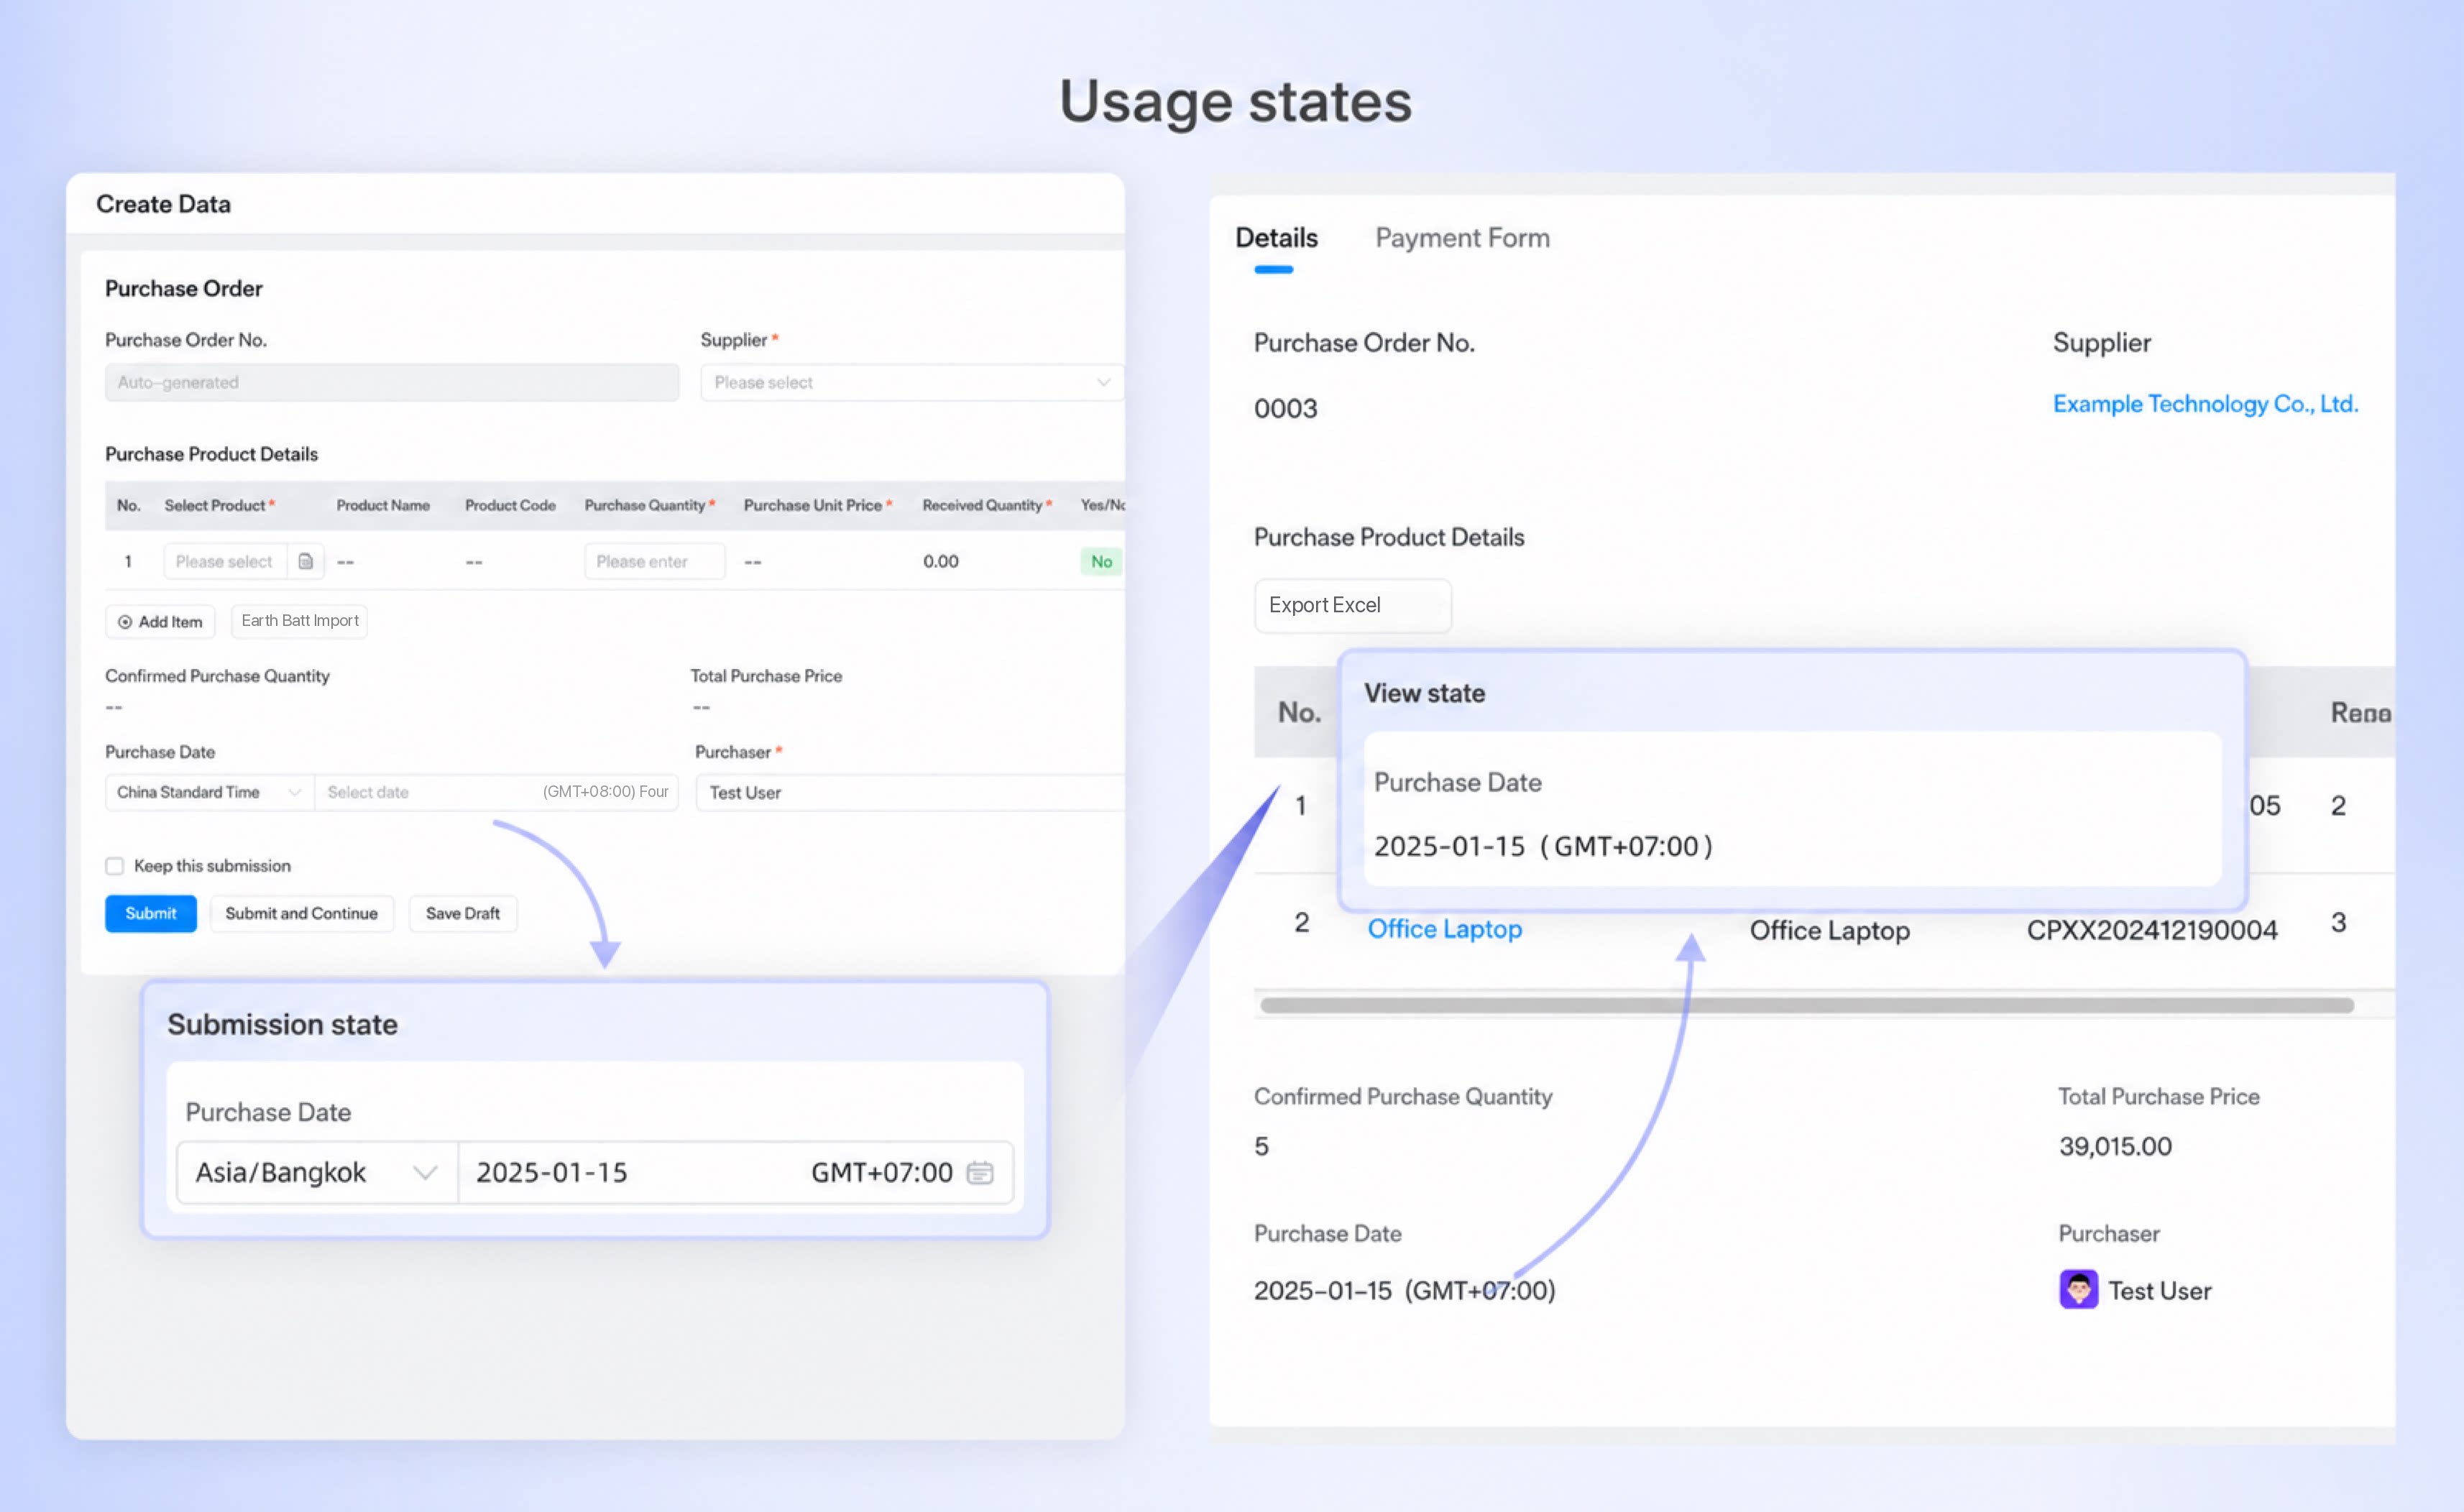
YiDA now supports internationalized time zones. Users in overseas time zones can view system time and form time fields based on their own device’s time zone.- Single overseas time zone scenario: Both YiDA system time and form date field time are displayed in the current device’s time zone.
- Cross-time zone collaboration scenario
Time Zone Date Component
Feature Overview
The Time Zone Date component adds a Time Zone attribute on top of the Date component, ensuring the consistency and accuracy of time fields for users across different time zones in cross-time zone collaboration scenarios.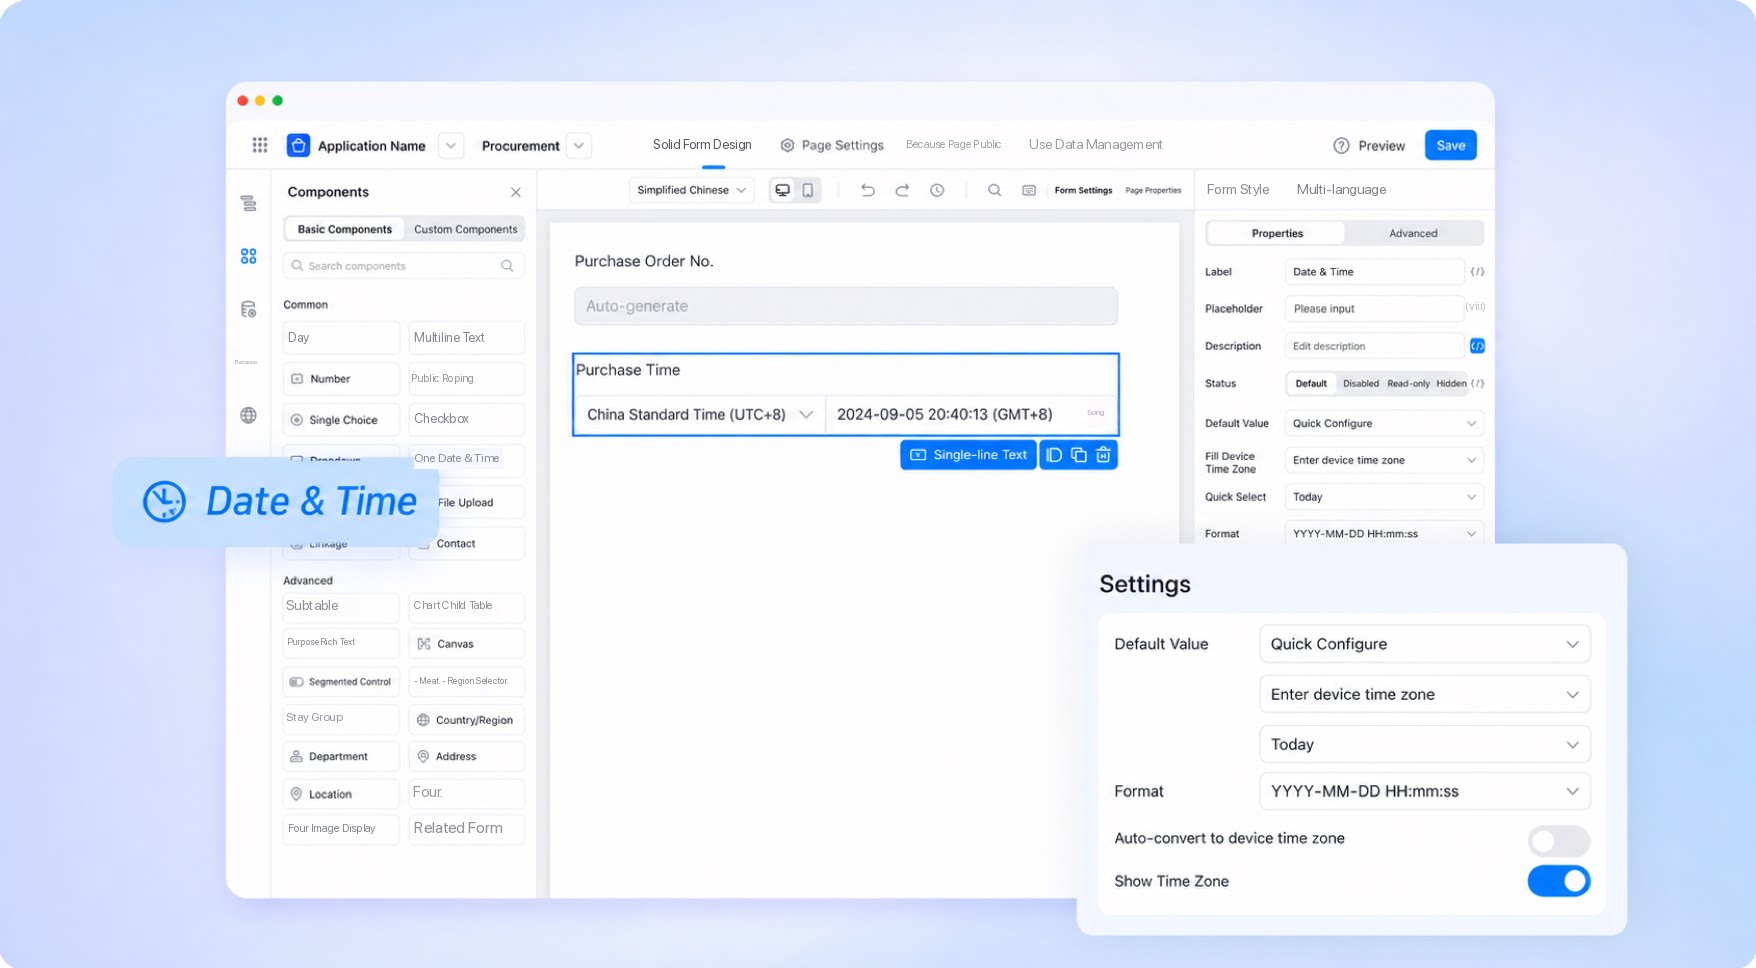
Use Cases
- Cross-border work and project management: Helps team members in different regions view and confirm meeting times.
- International trade: Clearly displays shipment time, arrival time, payment collection time, and more.
Effect
How to Use
Configure the Time Zone Date Field in a Form
Follow these steps to configure the Time Zone Date component.- Sign in to the YiDA workbench.
Overseas users, sign in to the YiDA international edition.
1
Step 1
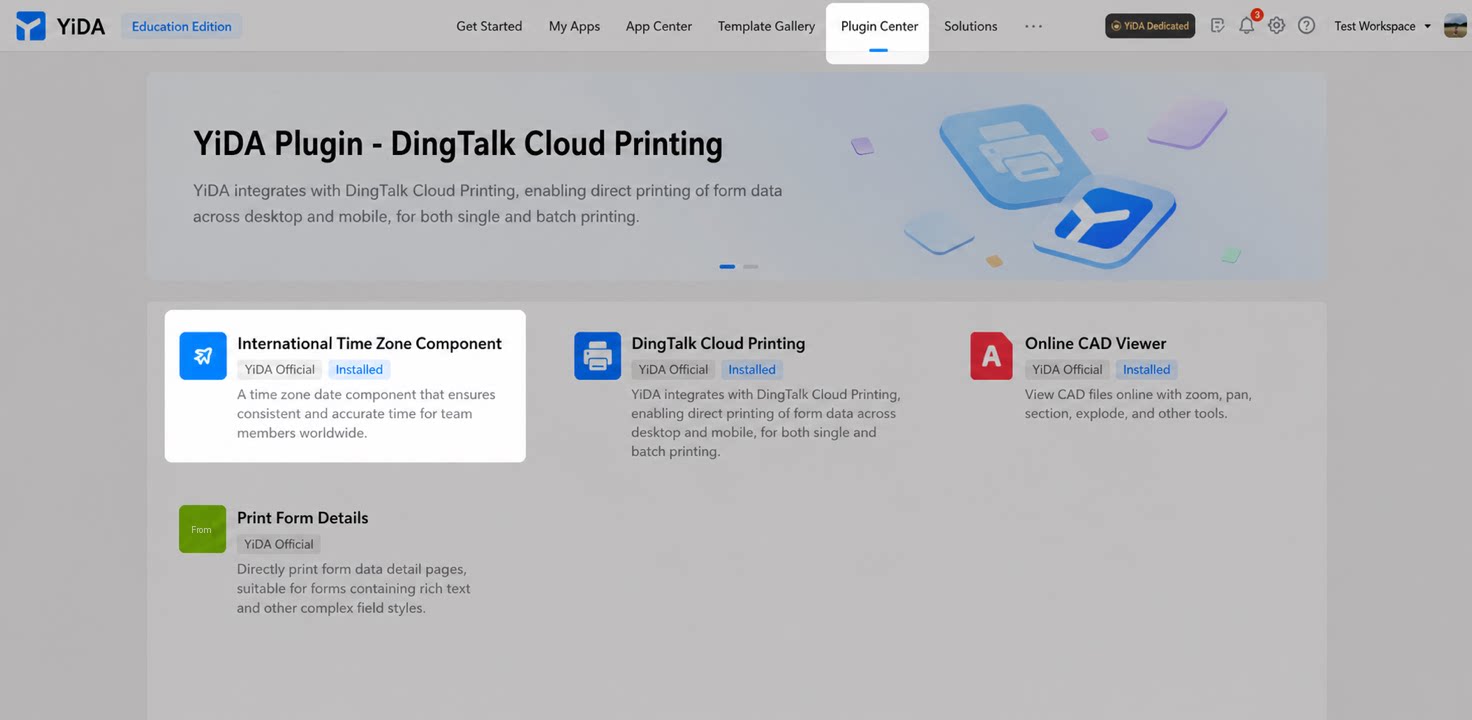
Install the Internationalized Time Zone Component from the YiDA Plugin Center.
2
Step 2
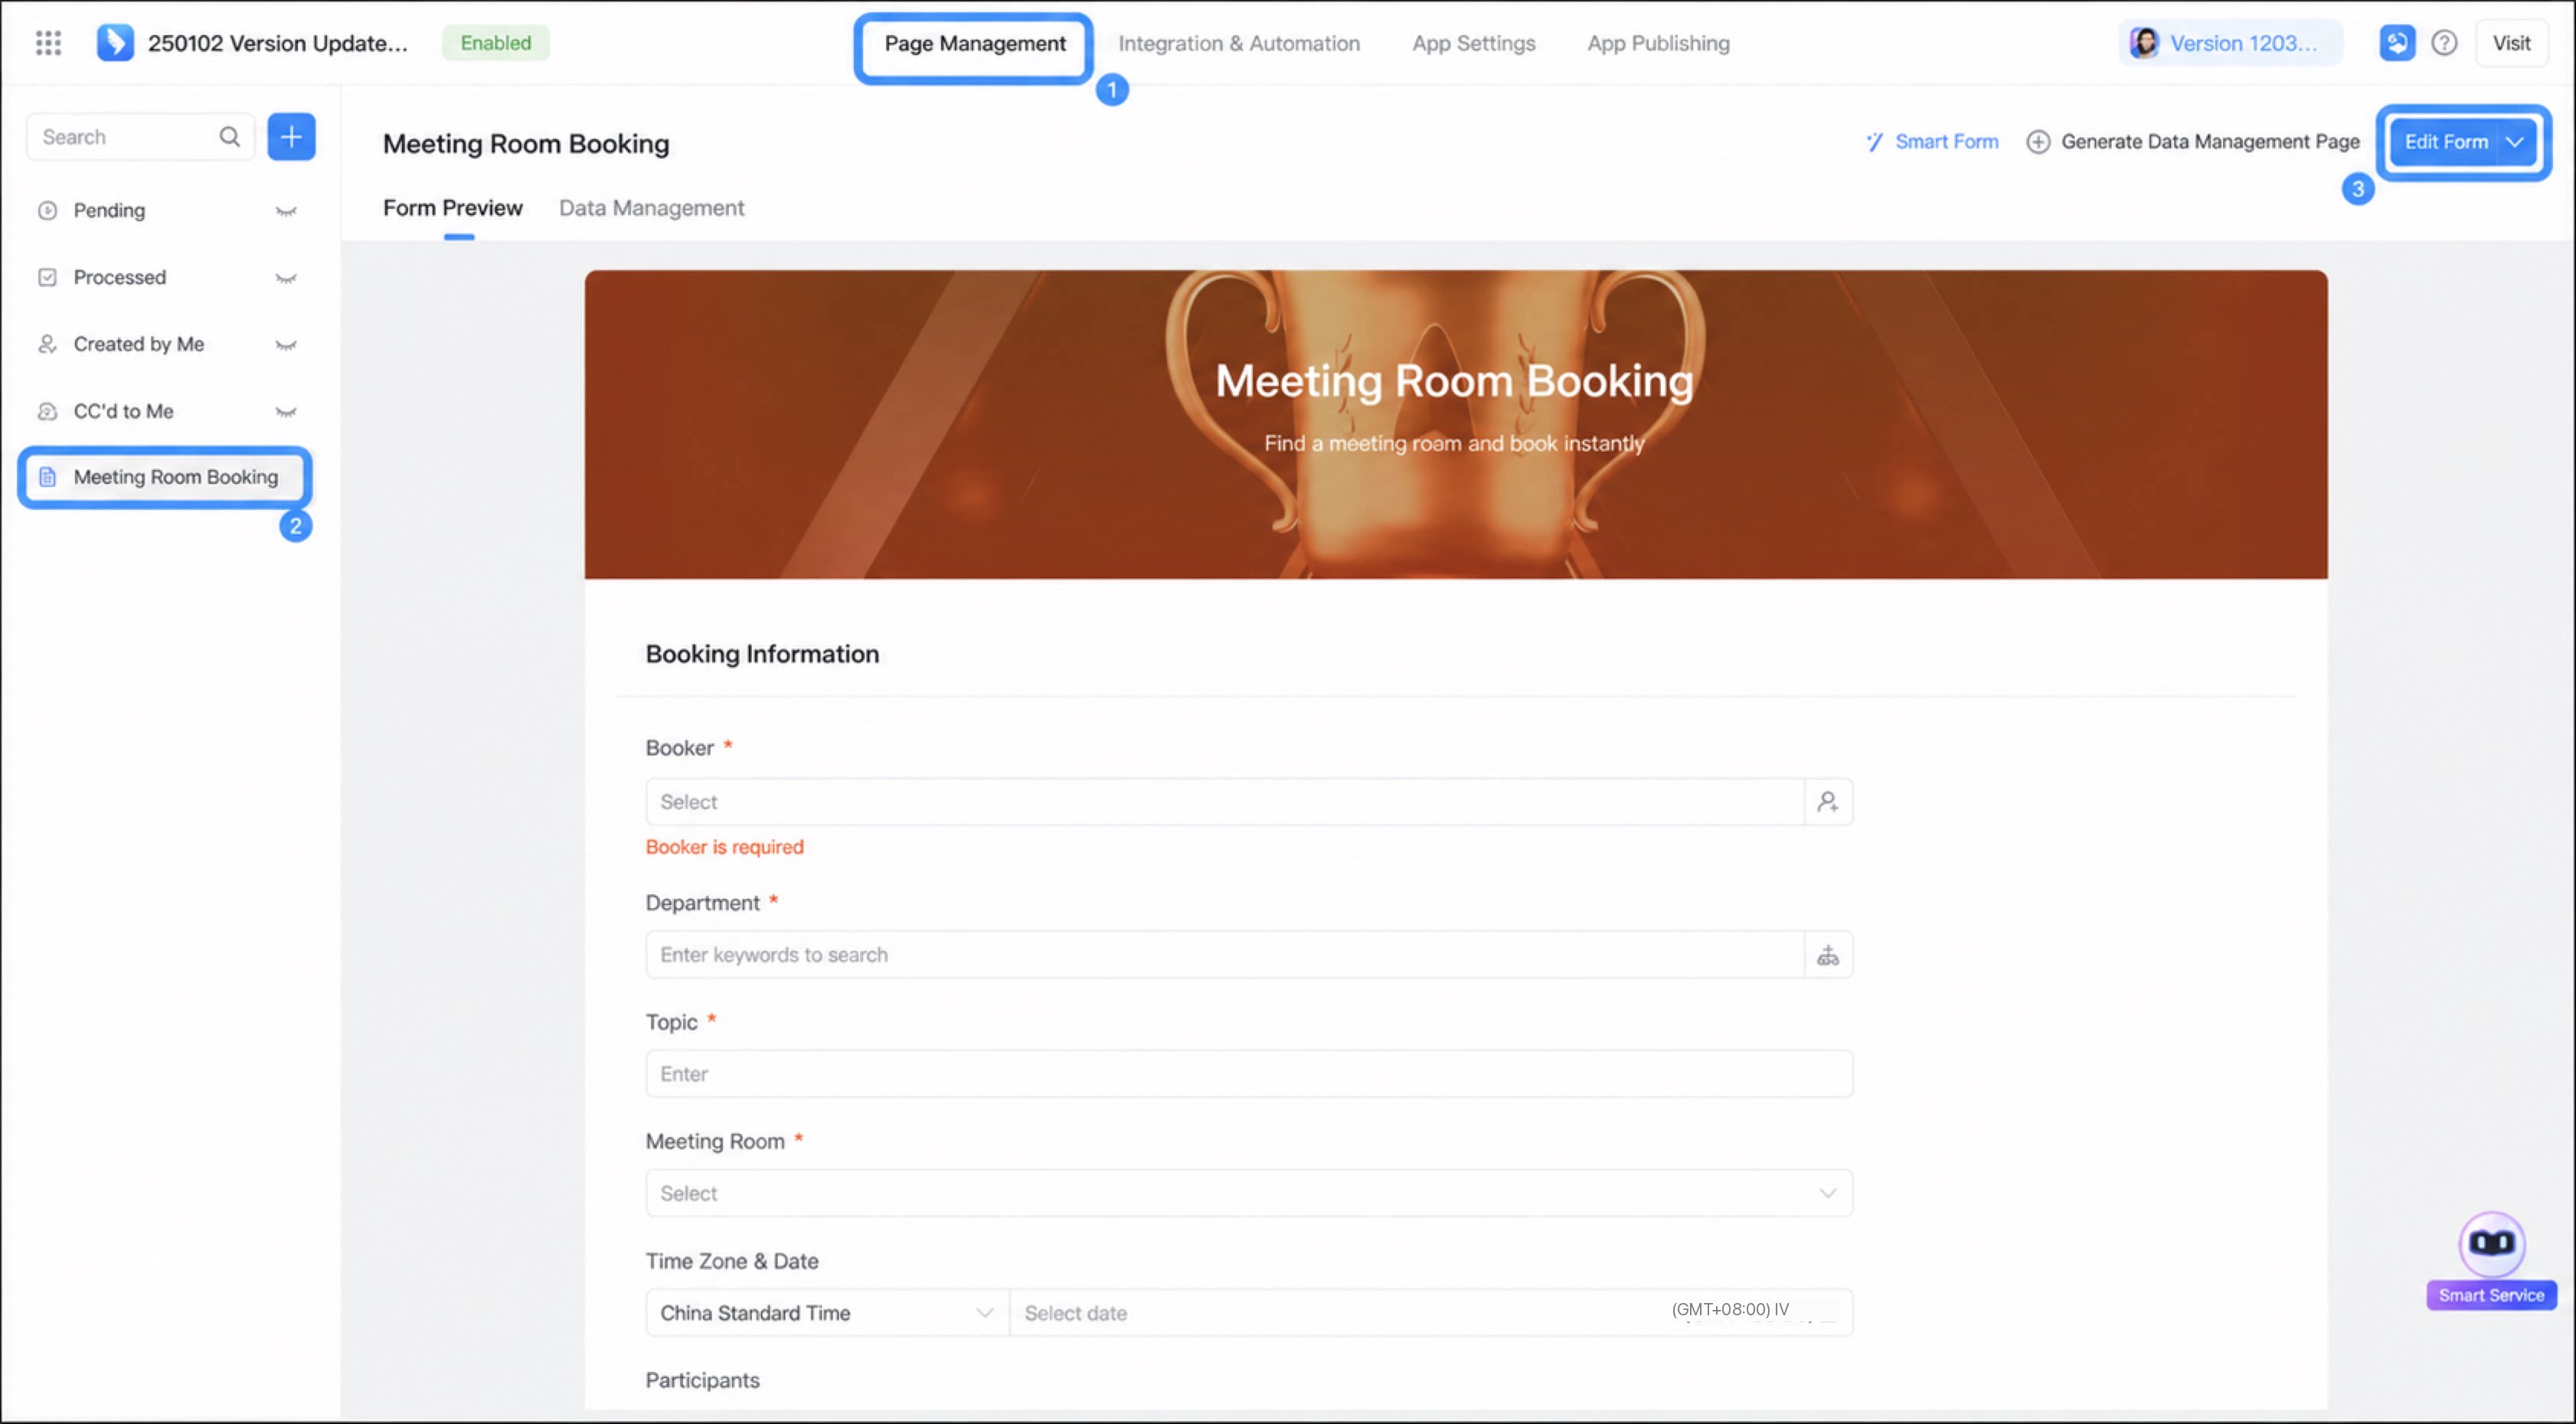
Open the Page Editor of the app, select the target page, and click Edit Form.
1
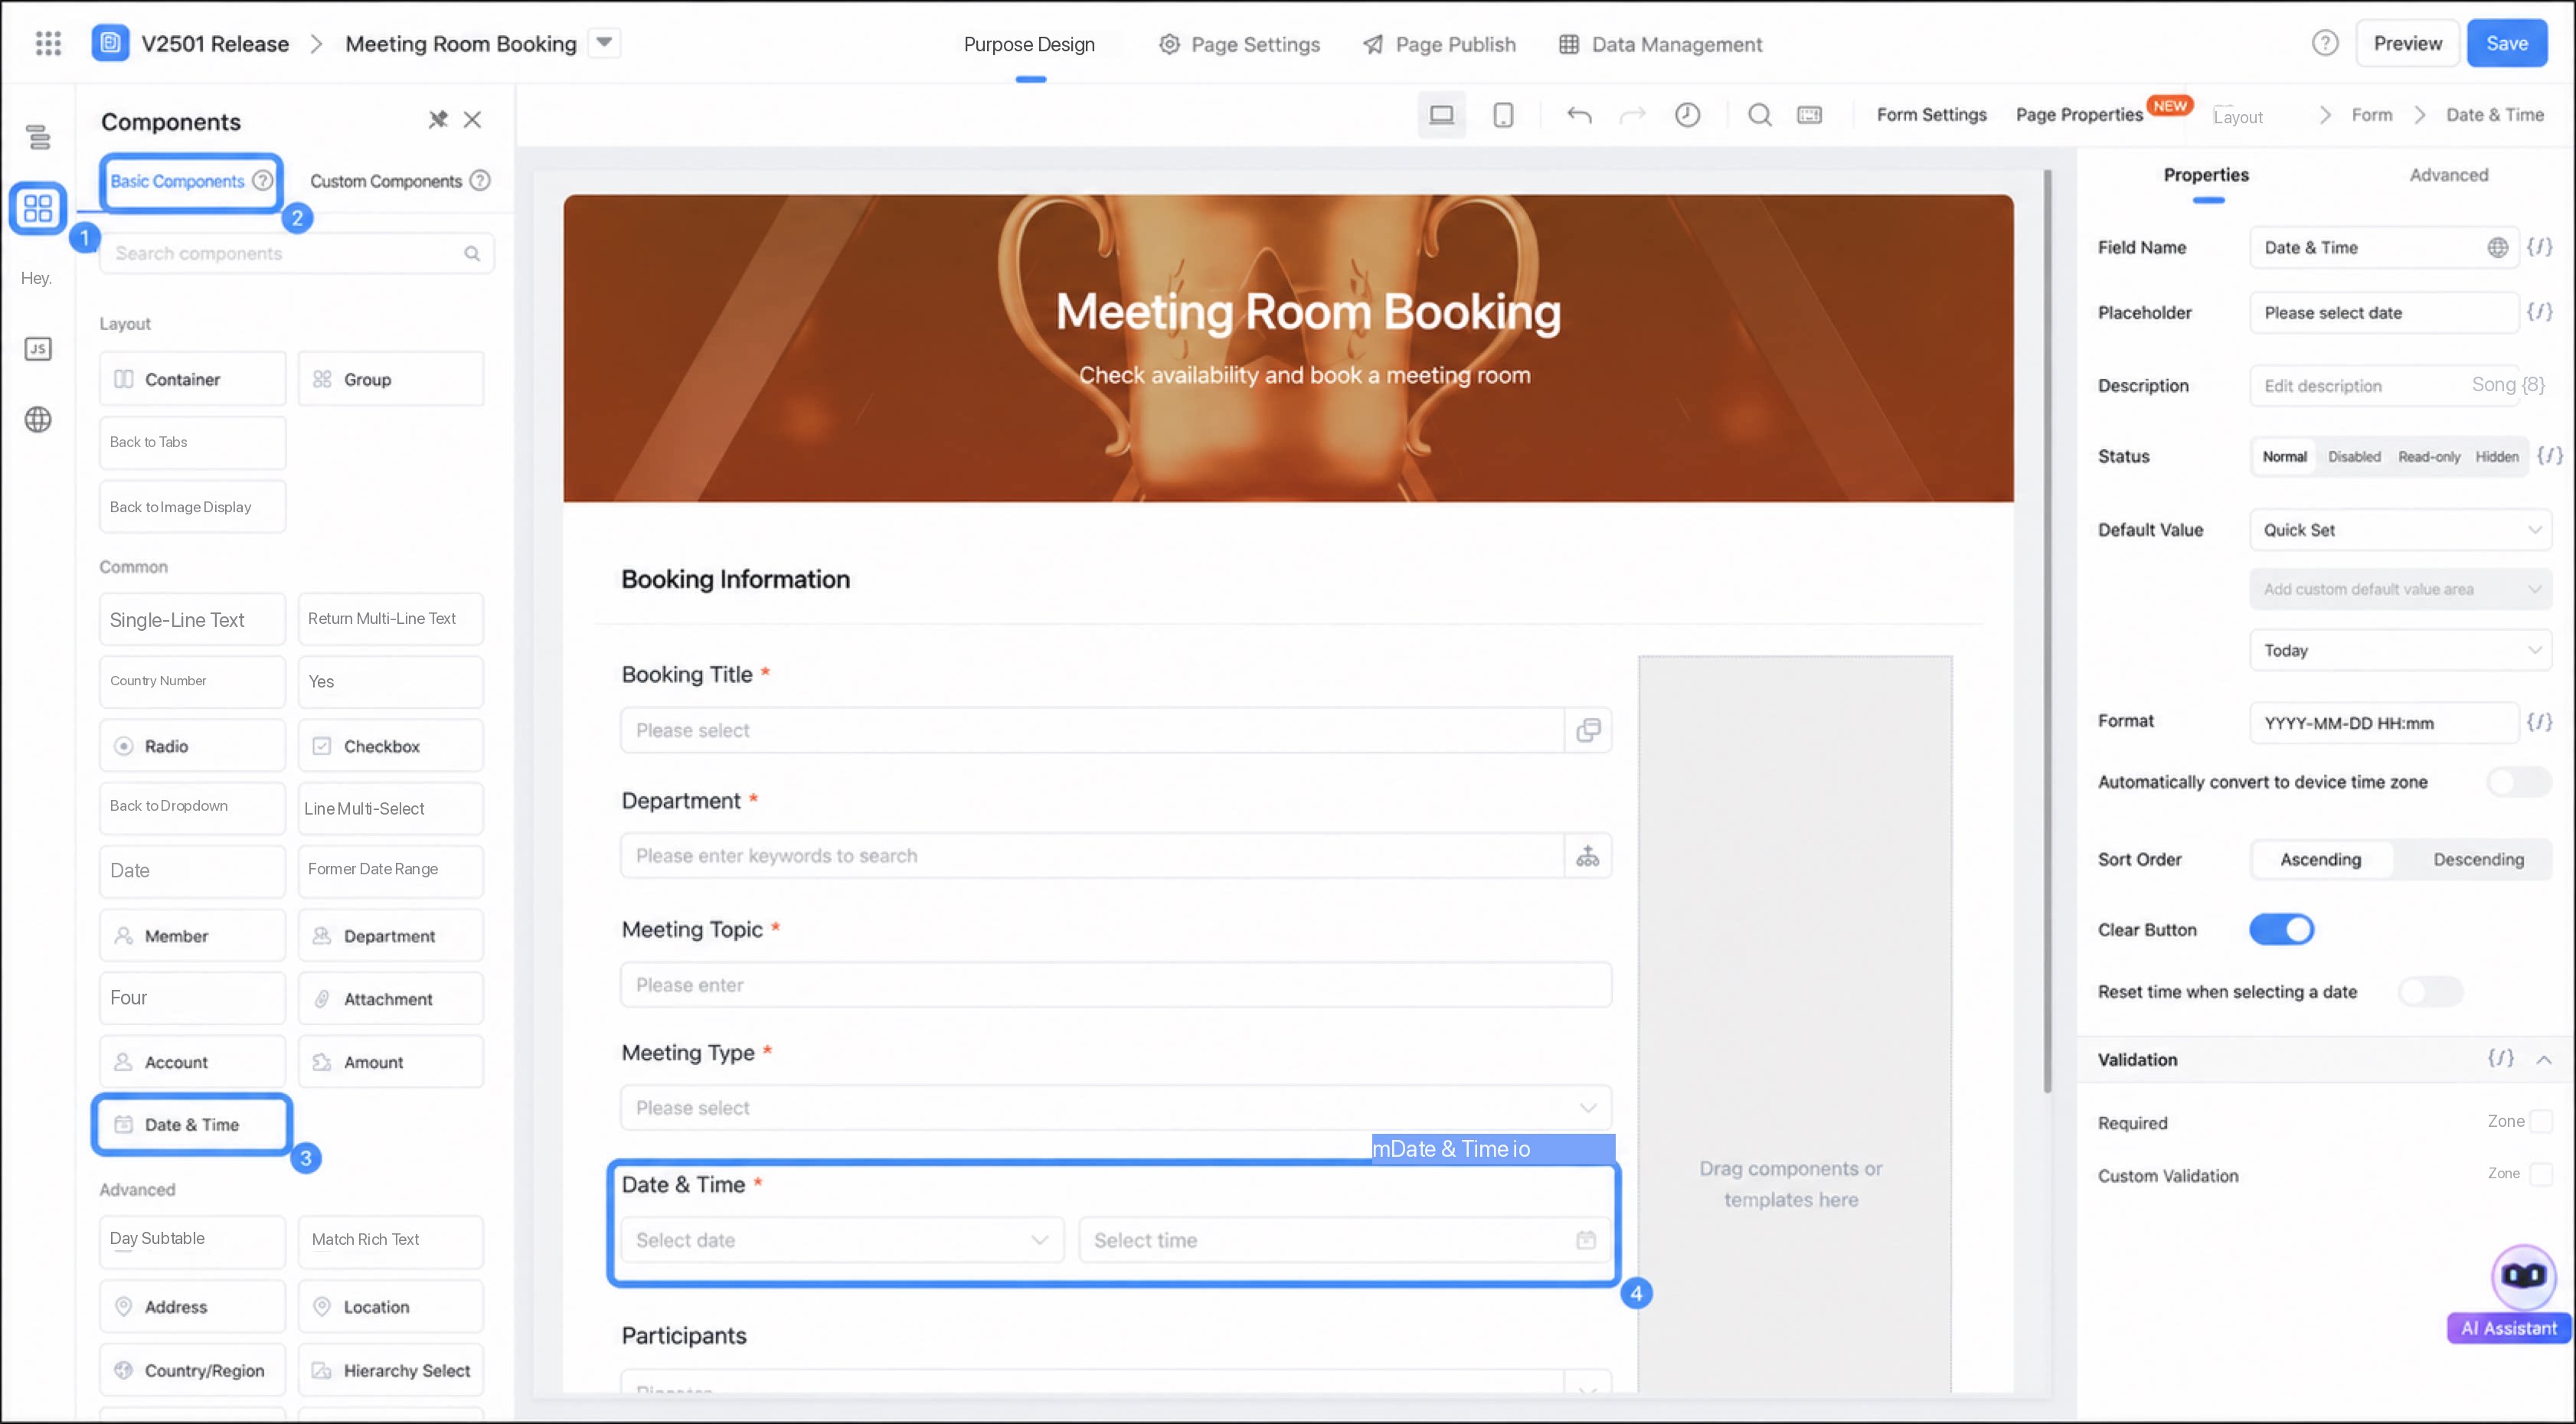
Go to Component > Basic components > Common > Time Zone Date
2
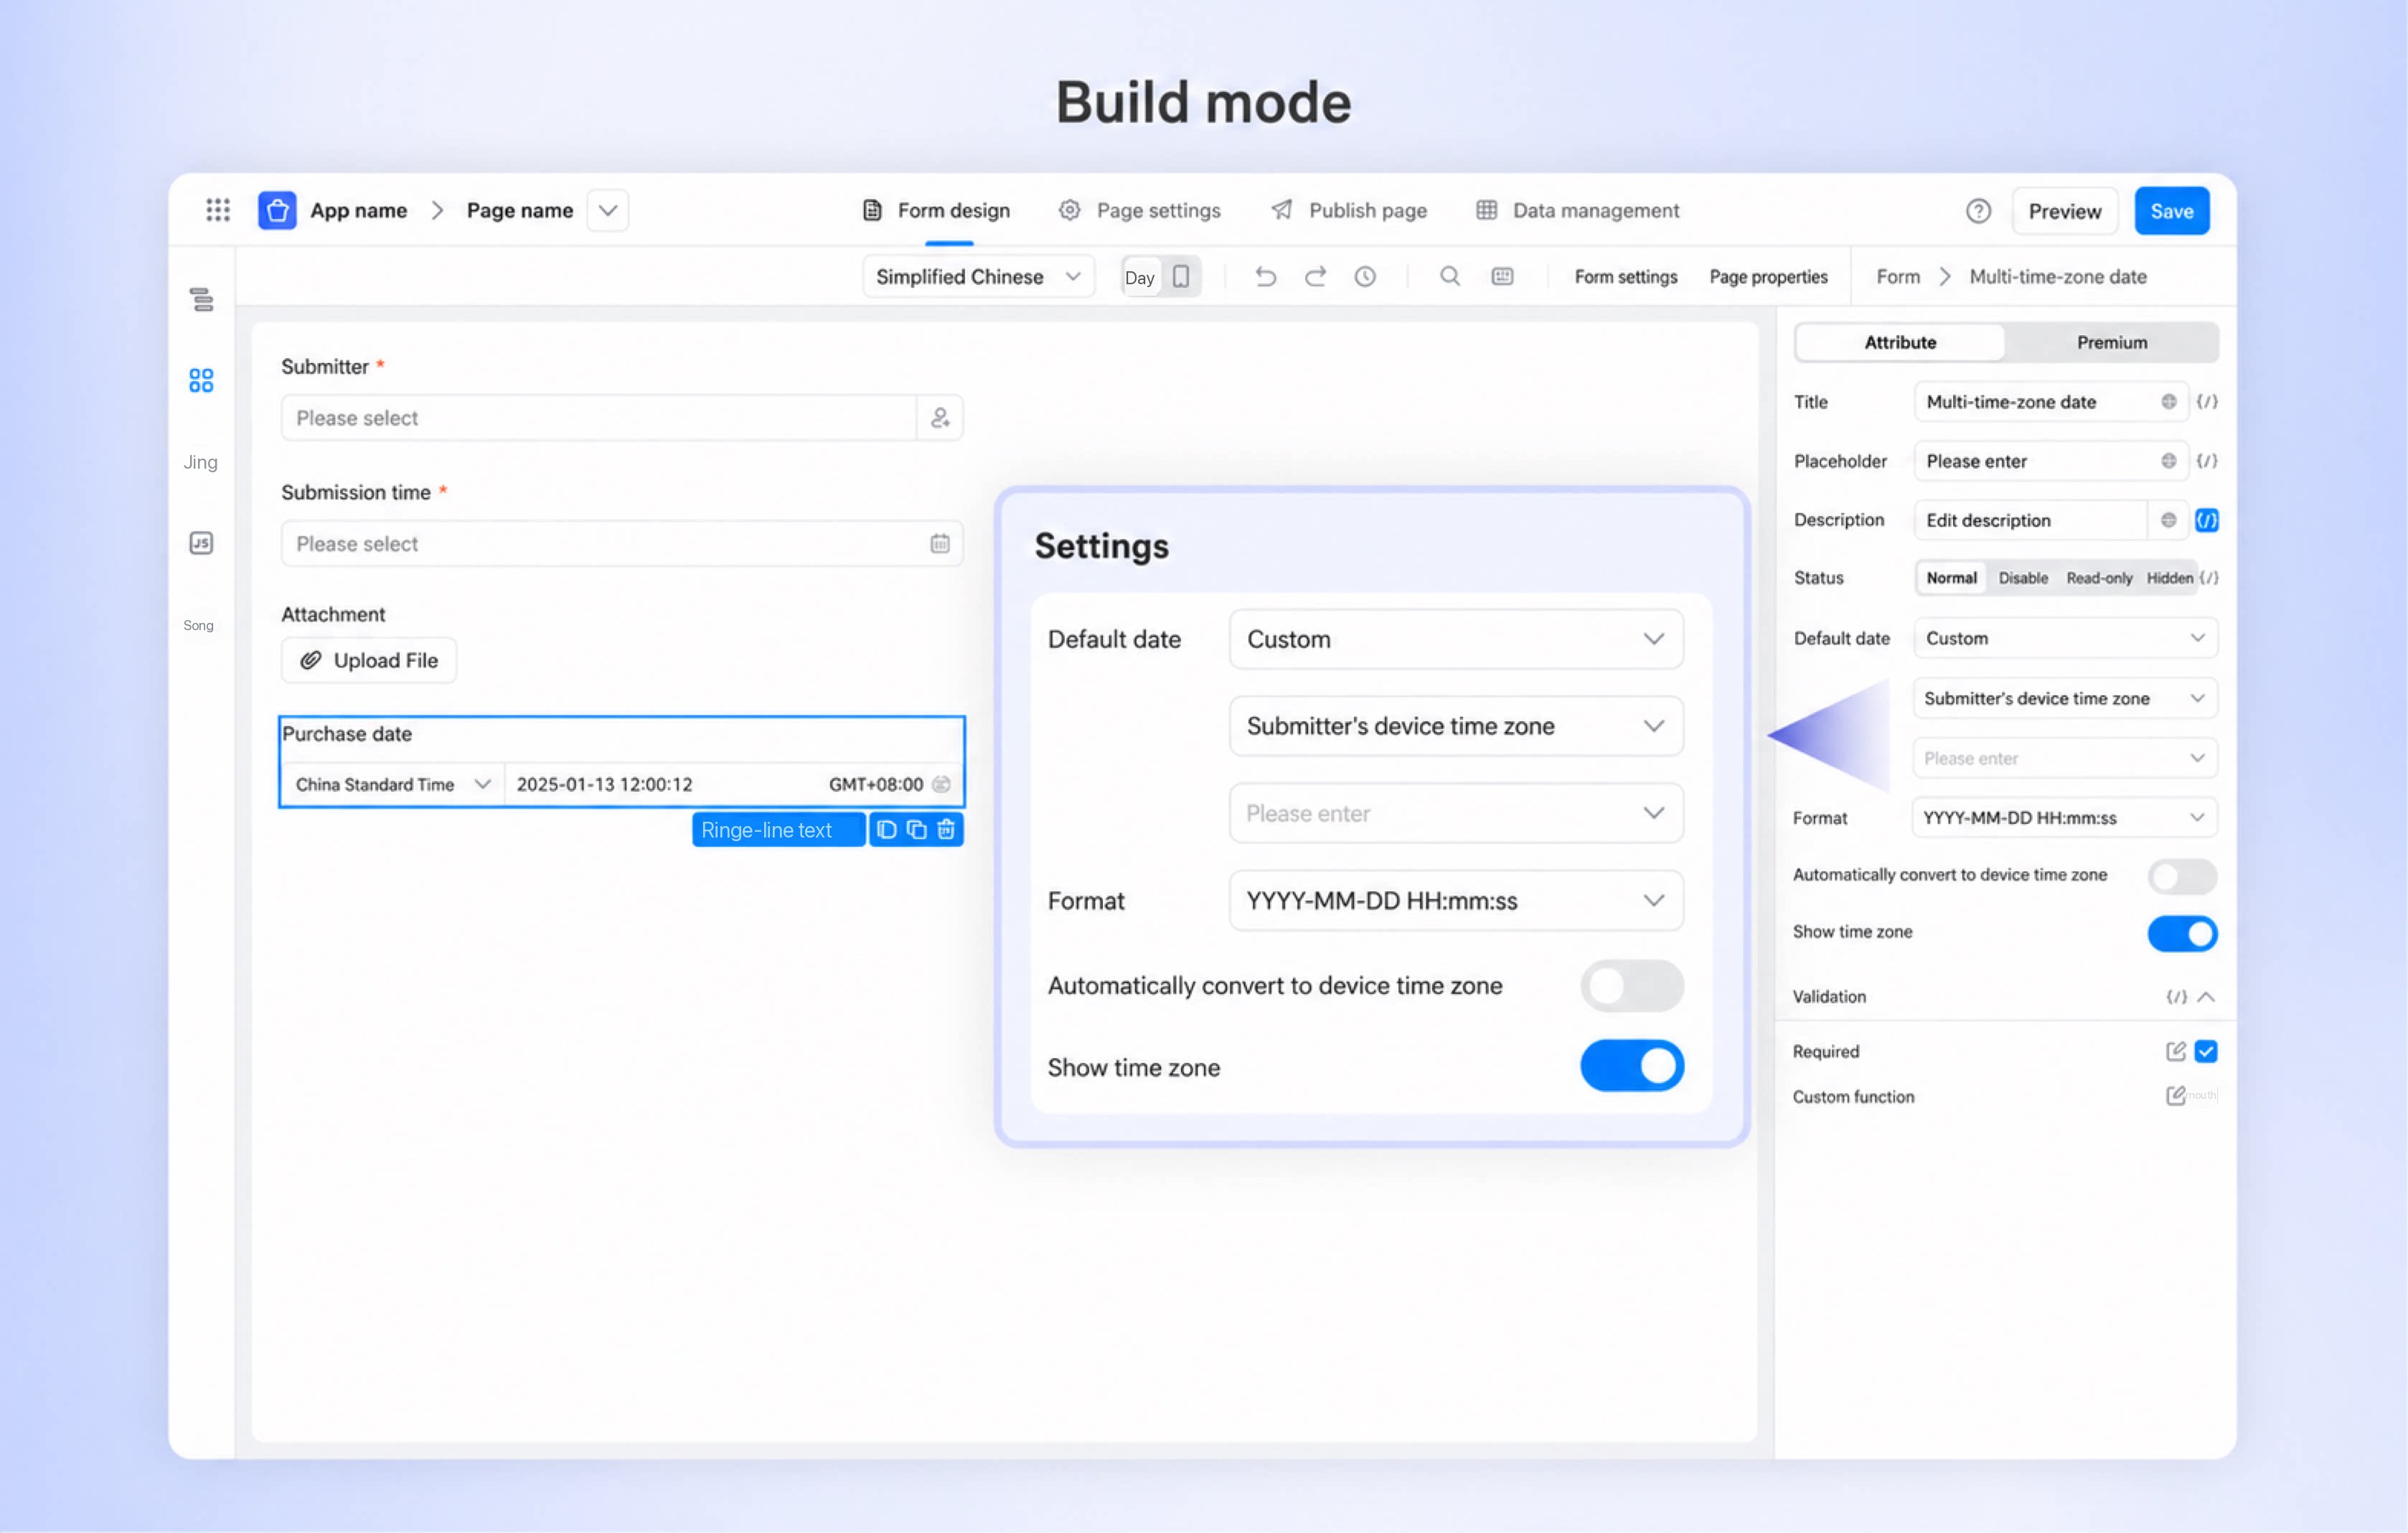
Configure the following settings in the Attribute panel on the right
- After configuration, click Preview at the top to view the result.
Configure the Time Zone Time Field in Reports
In reports, you can select the following time zone information fields from a Time Zone Date field: the city corresponding to the time zone, the GMT offset of the time zone, and the date time zone text.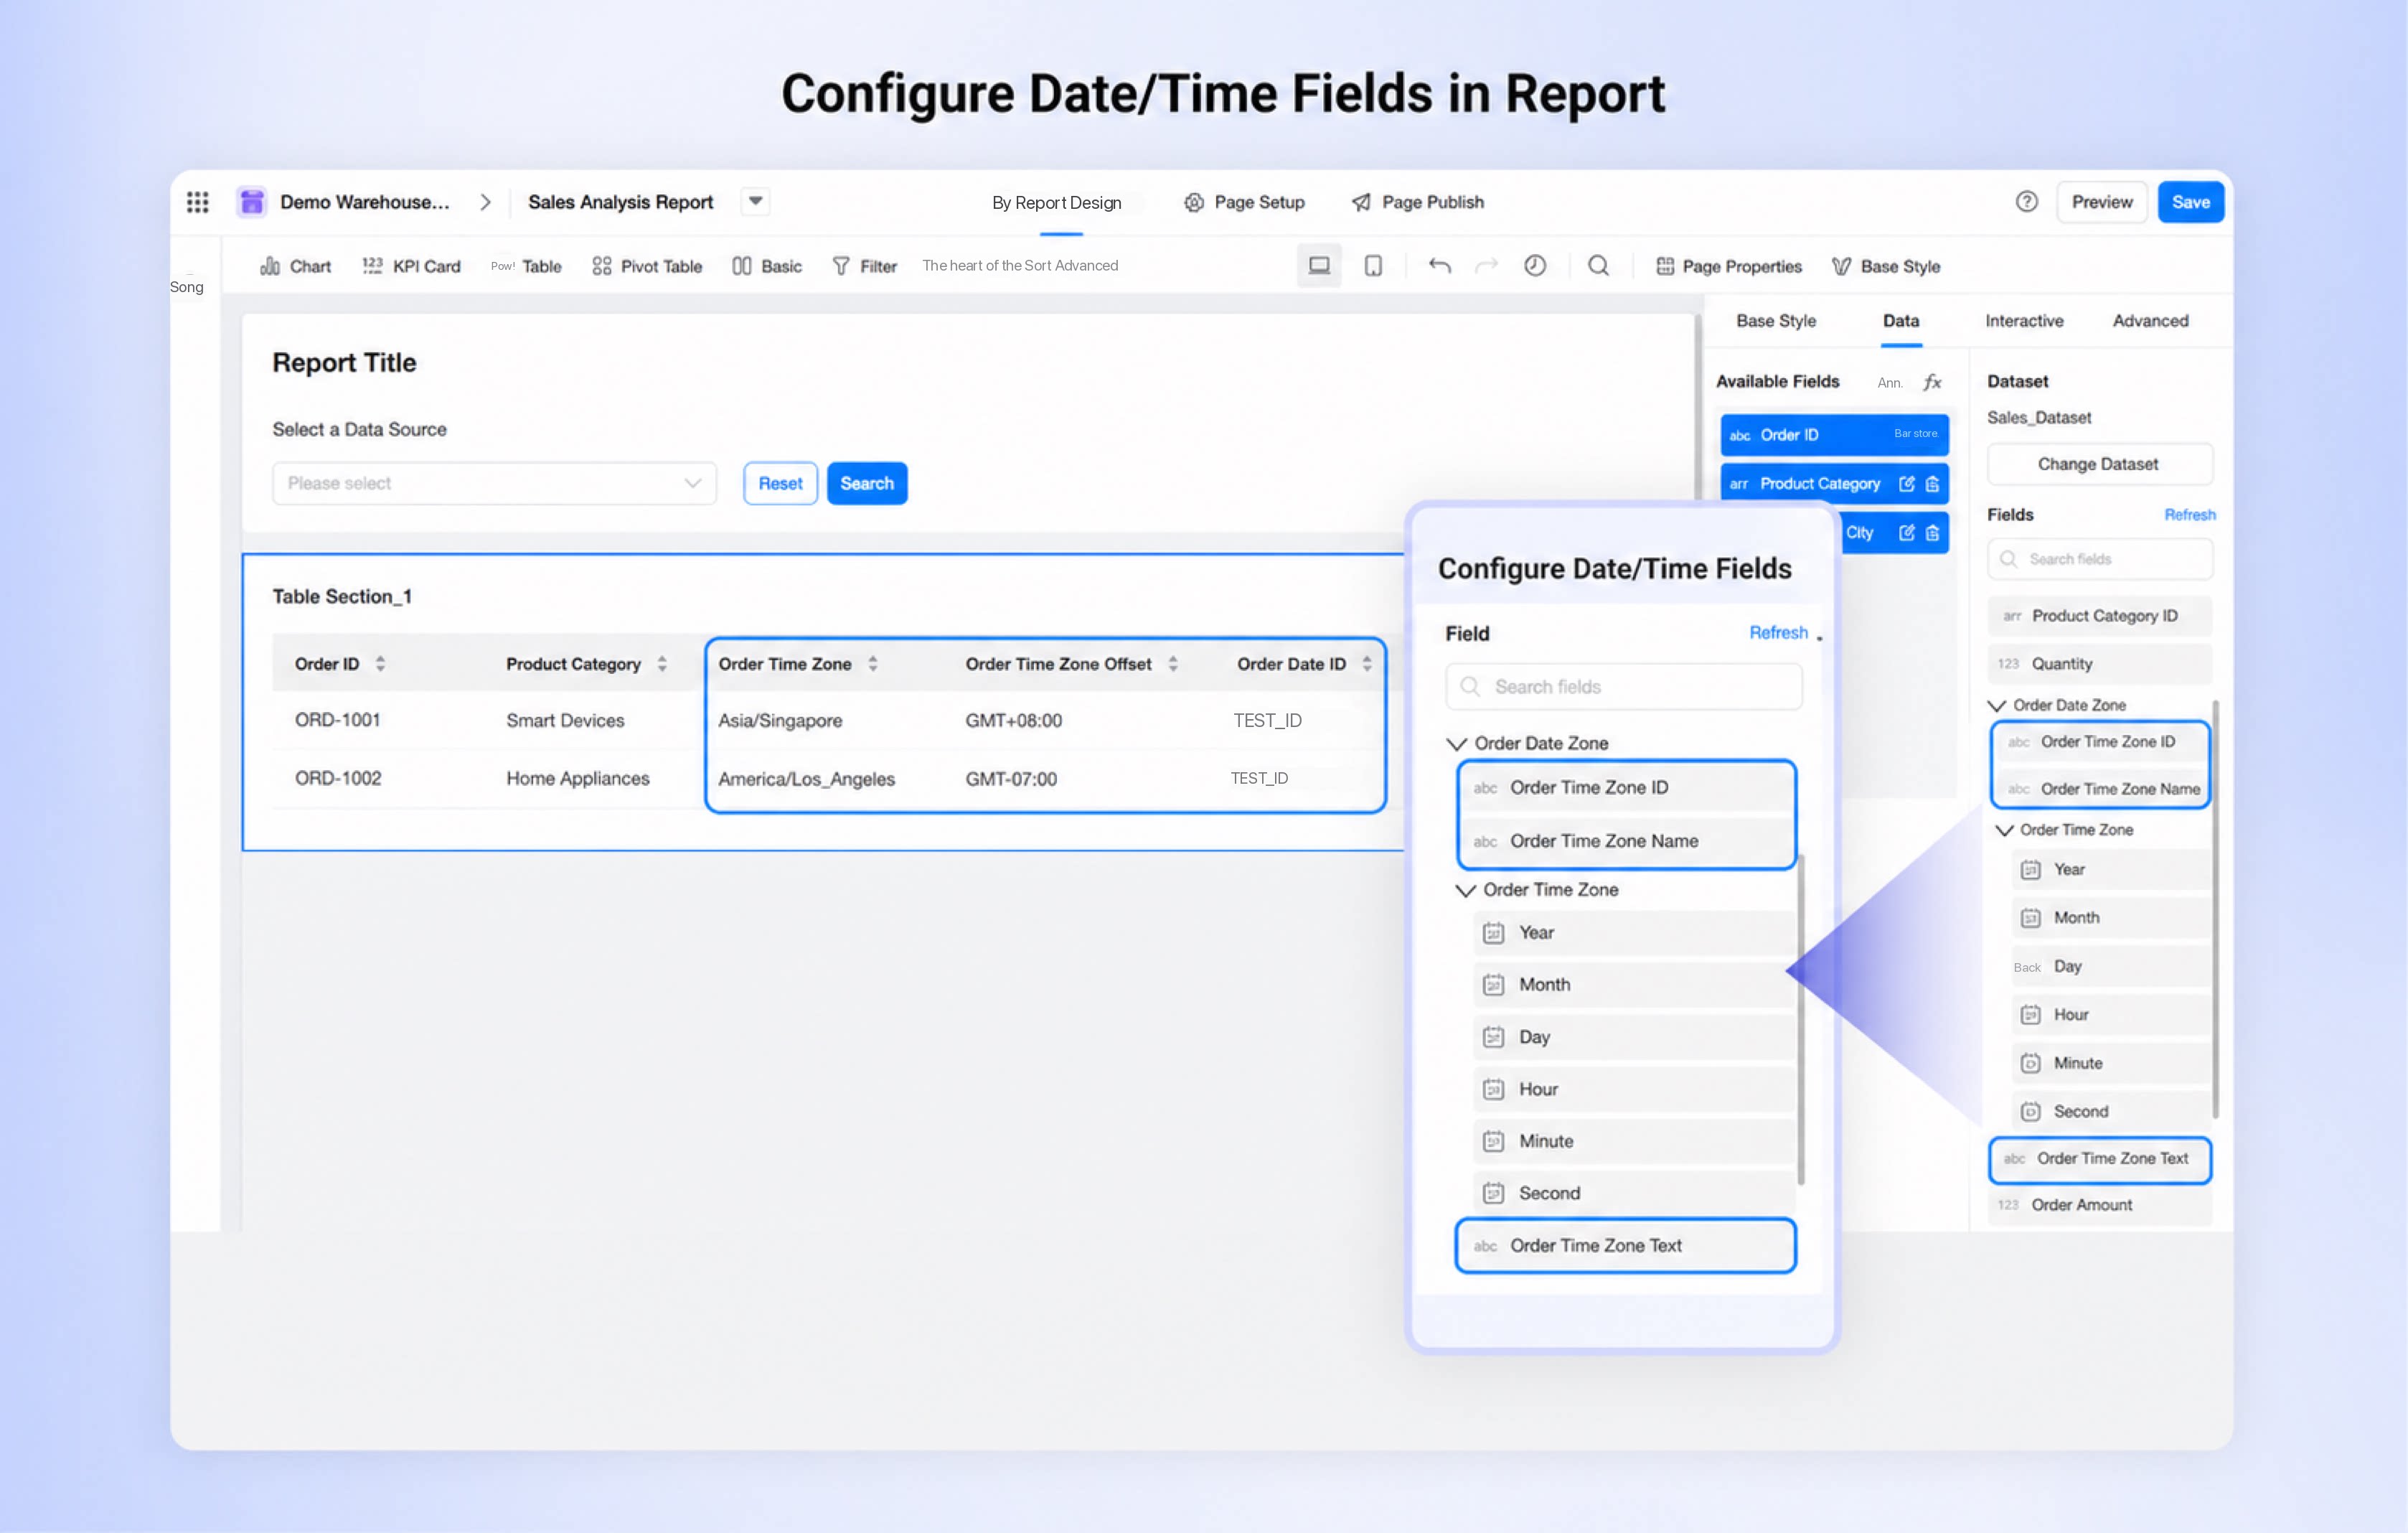
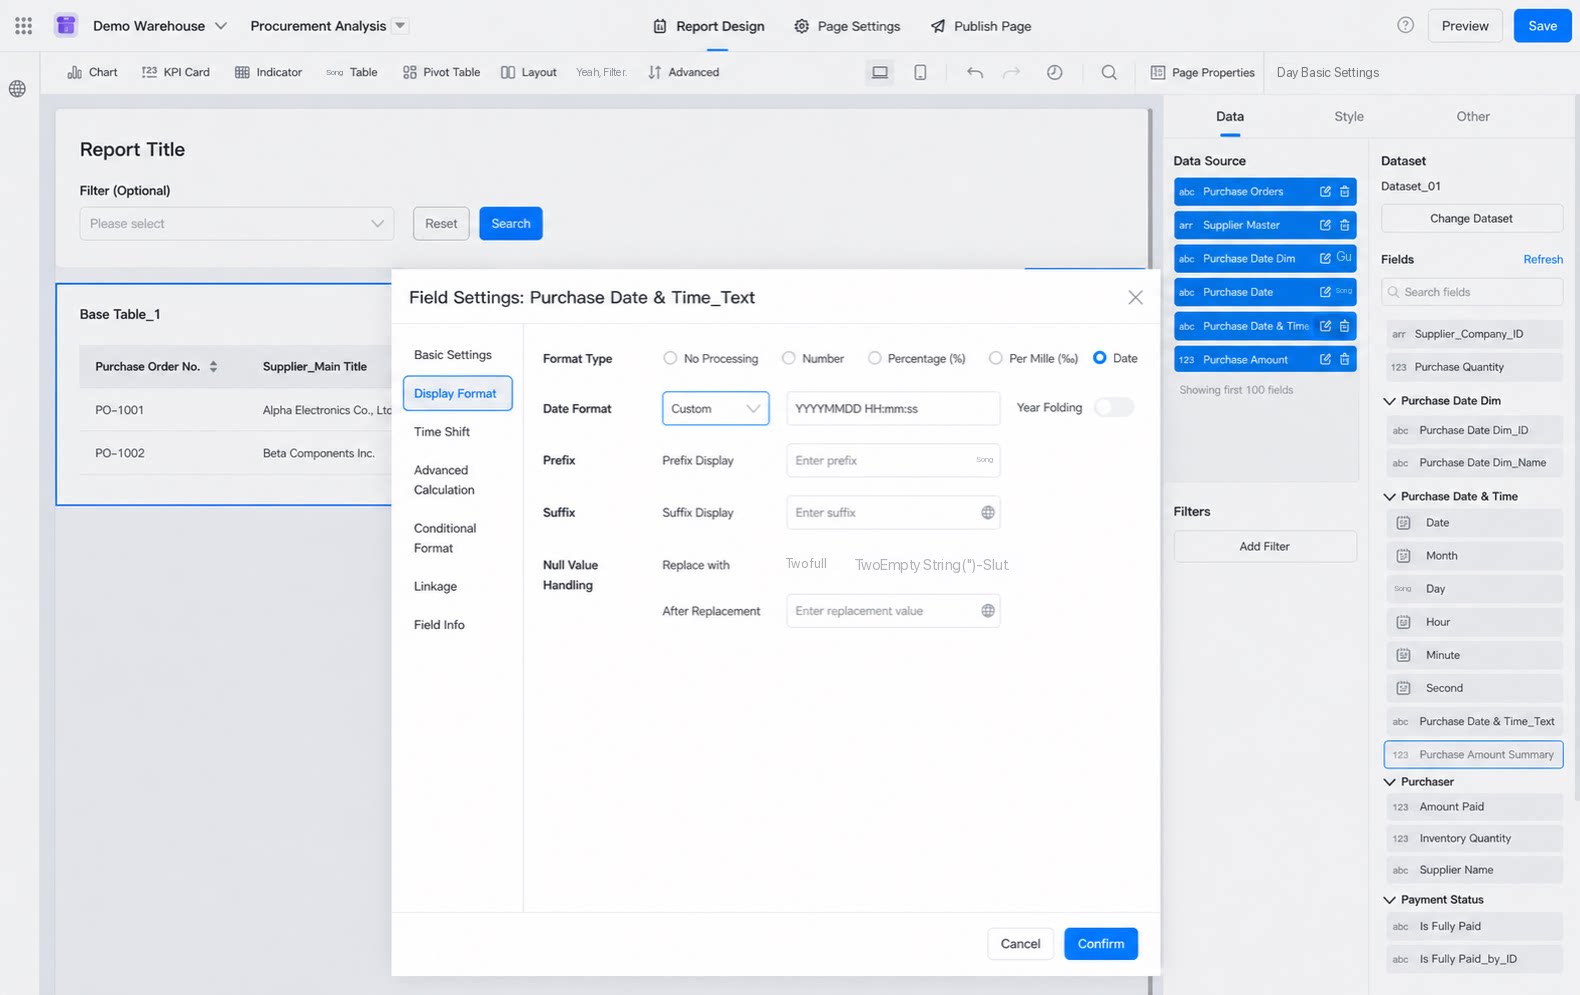
Use the Time Zone Date Field
The Time Zone Date component is supported on the Source records page, data list page, import and export, print, custom pages, and reports.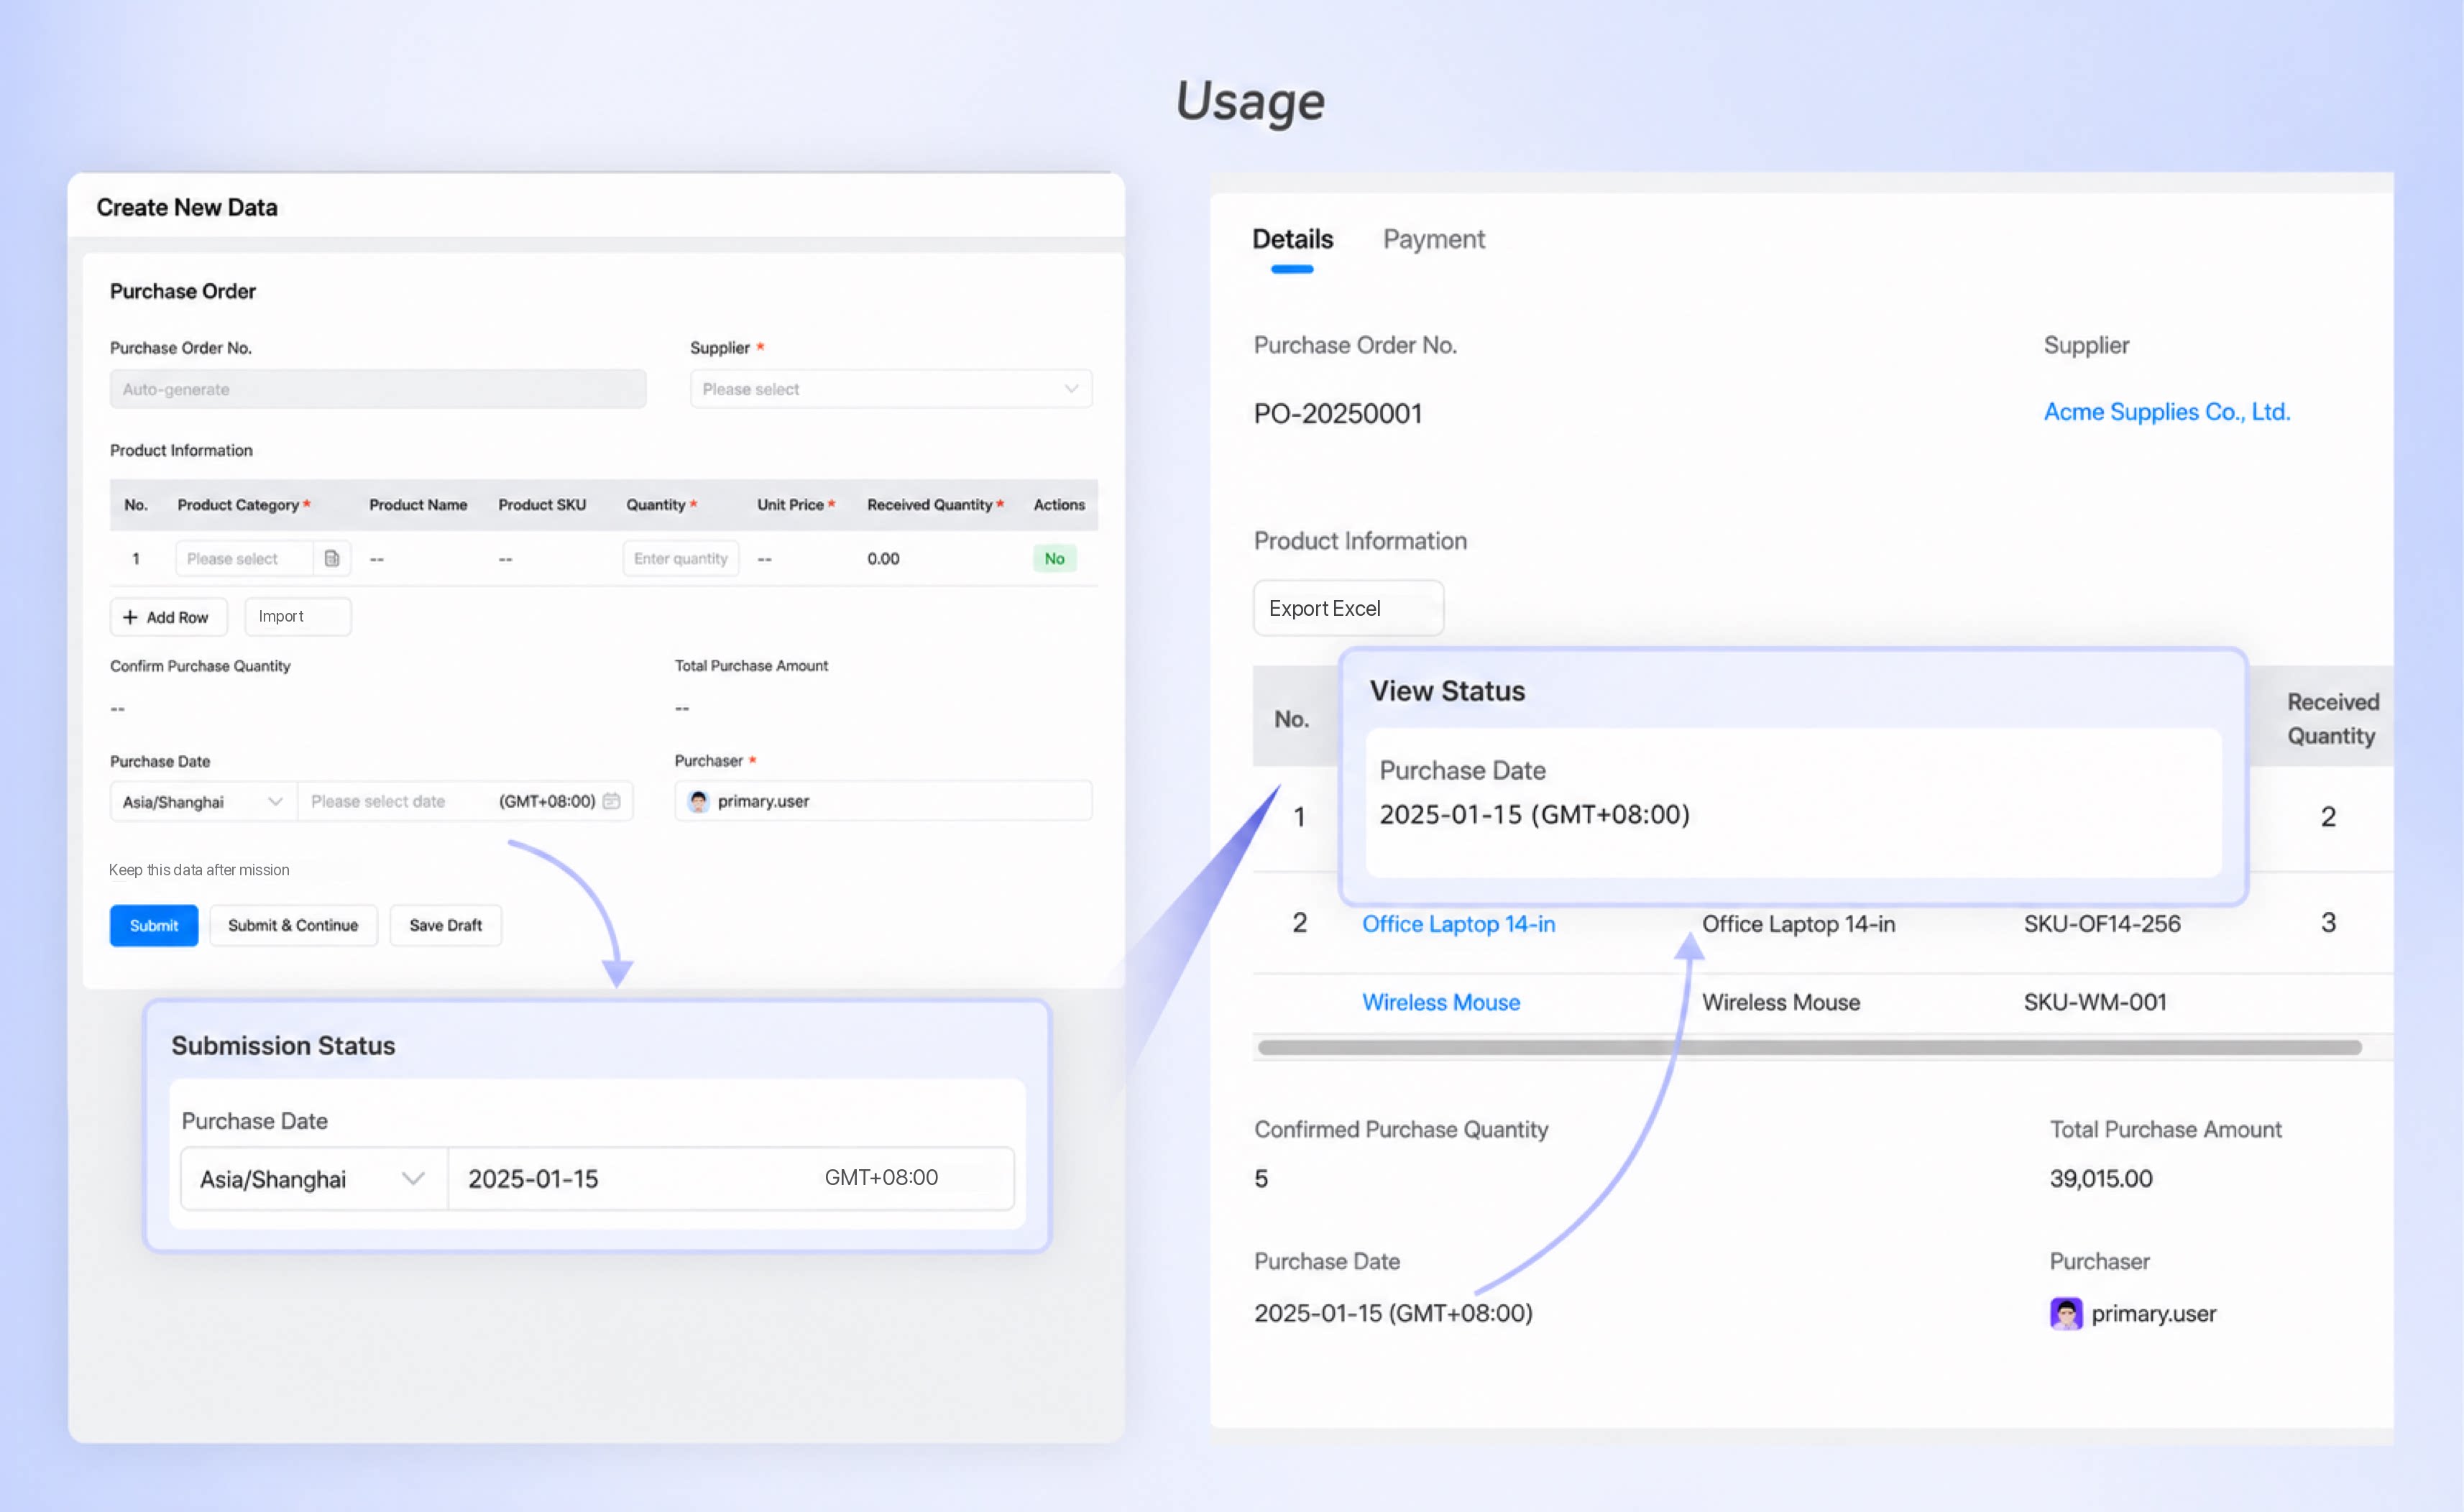
FAQ
1. After Adding a “Time Zone Date” Field to a Form, How Do I Batch Assign the Values from the Existing “Date” Field to the New “Time Zone Date” Field?
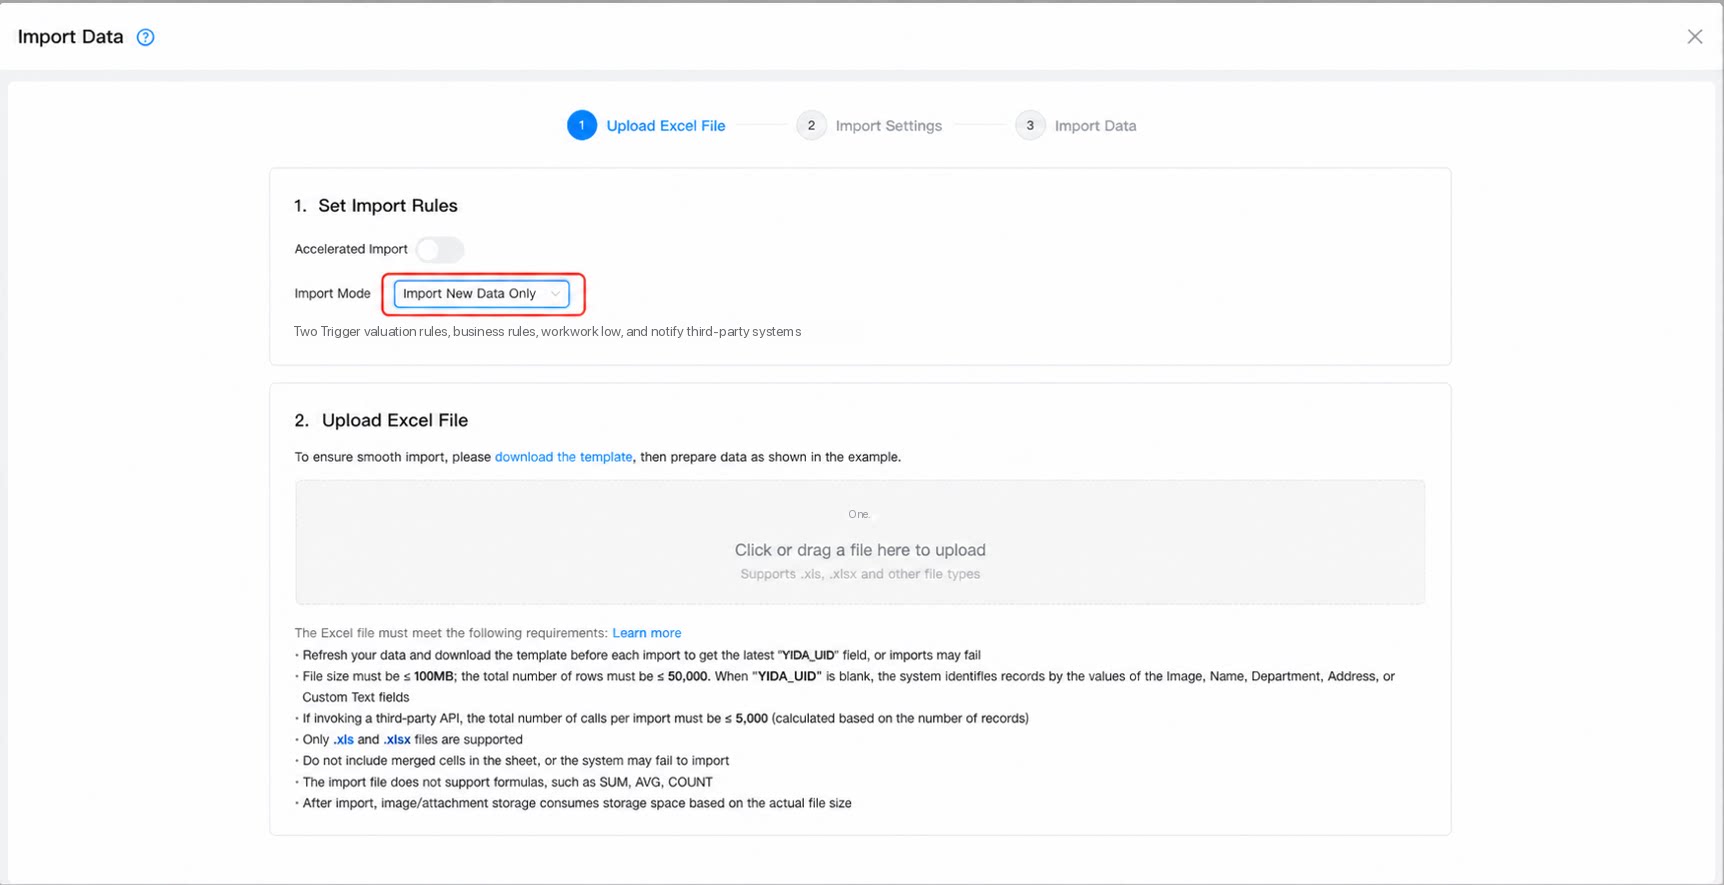
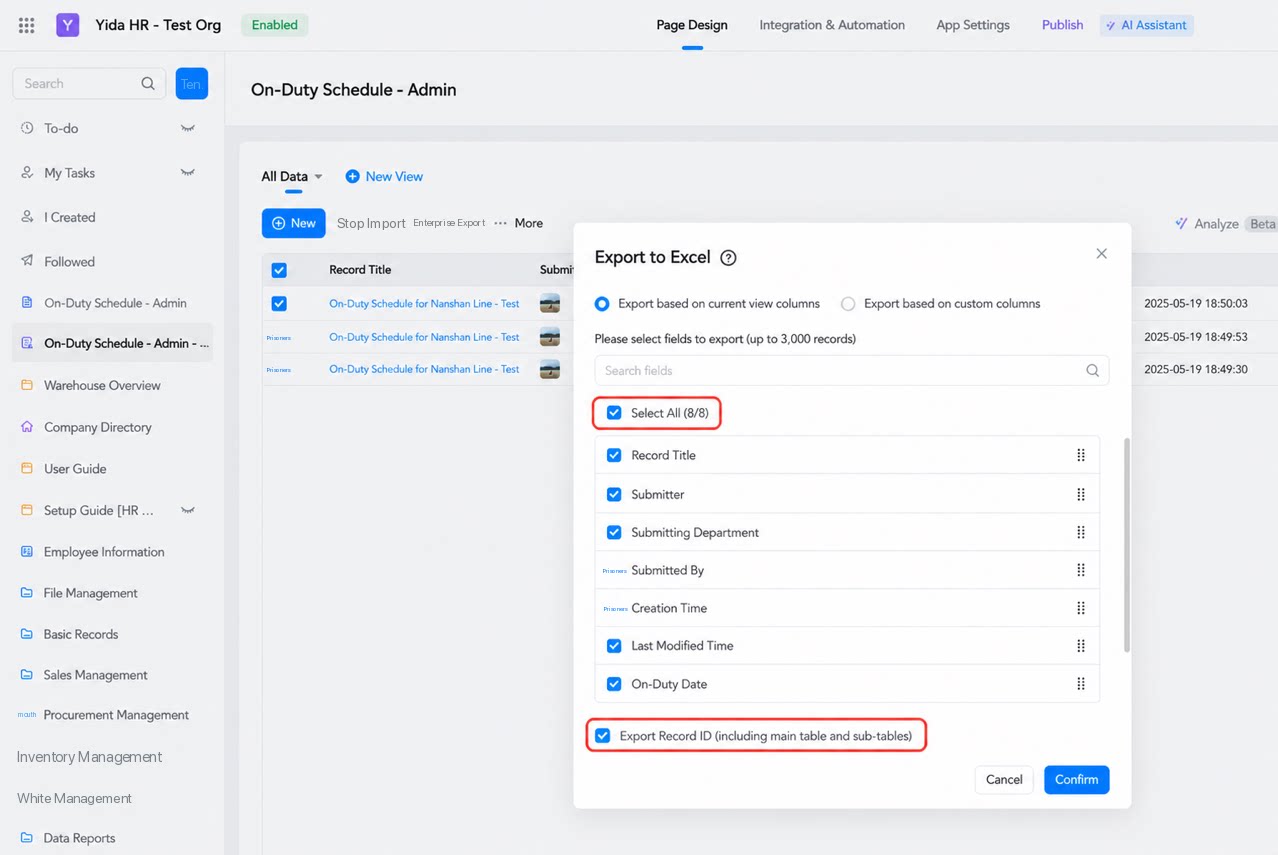
Migrate the data by exporting and then update-importing, in five steps:- Batch export the form data. Be sure to select the option to export the instance ID, which serves as the matching field for the subsequent update import.
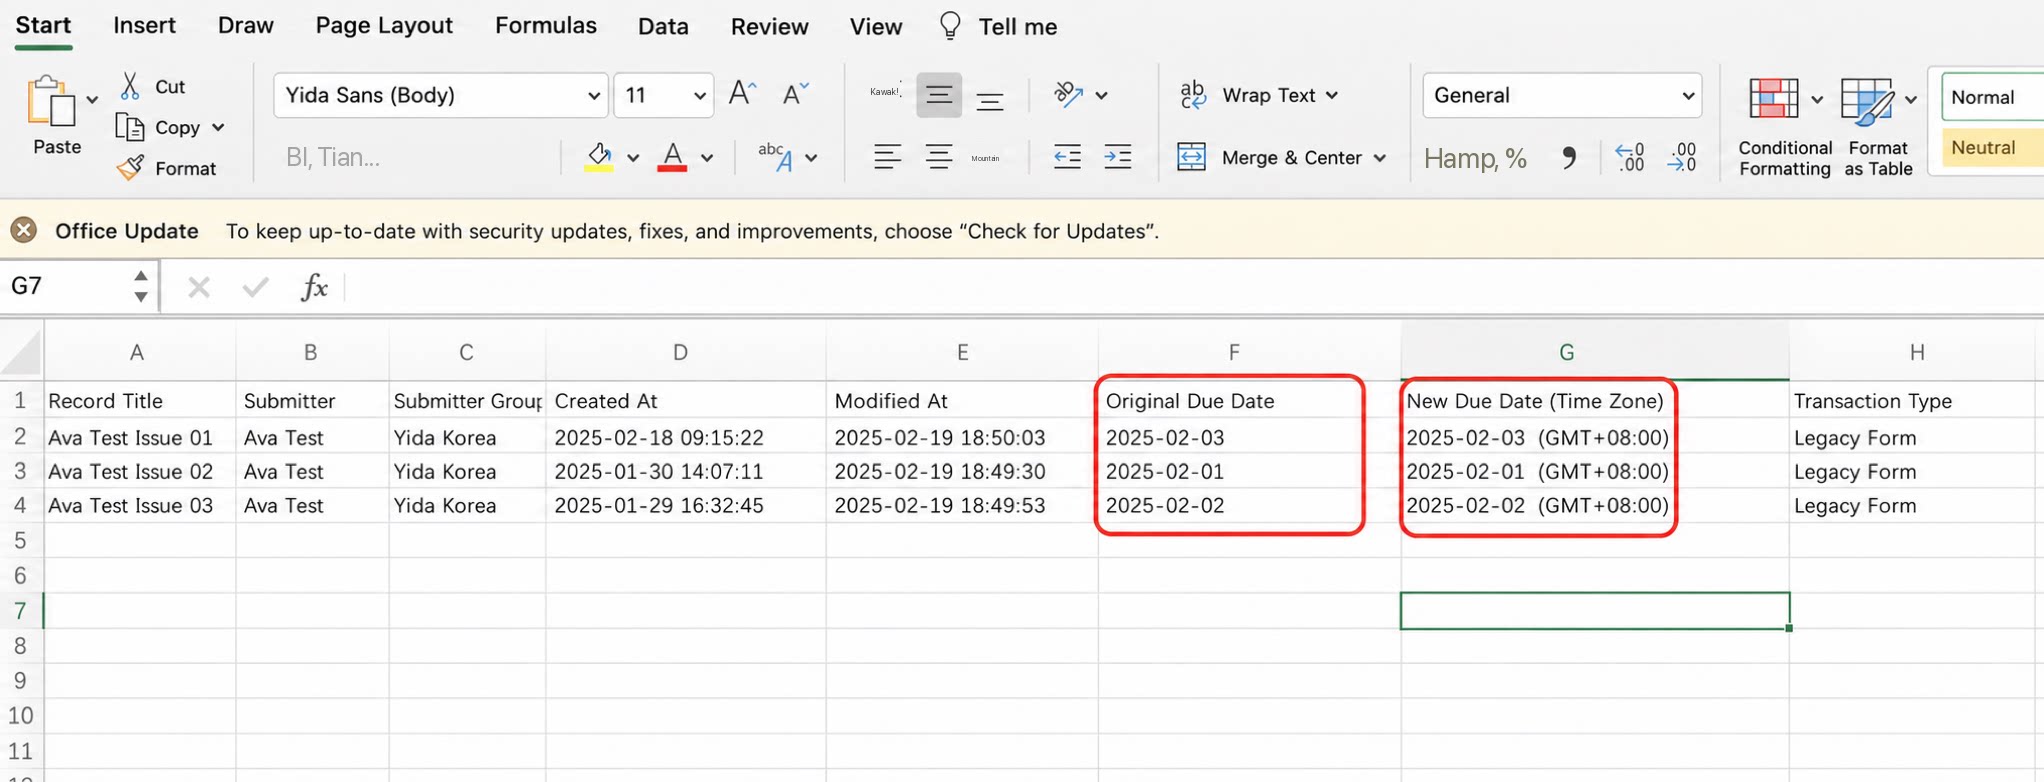
- Populate the new field values in Excel in bulk (copy the old field values to the new field and add time zone information).
- Bulk edit any one legacy field in the form.
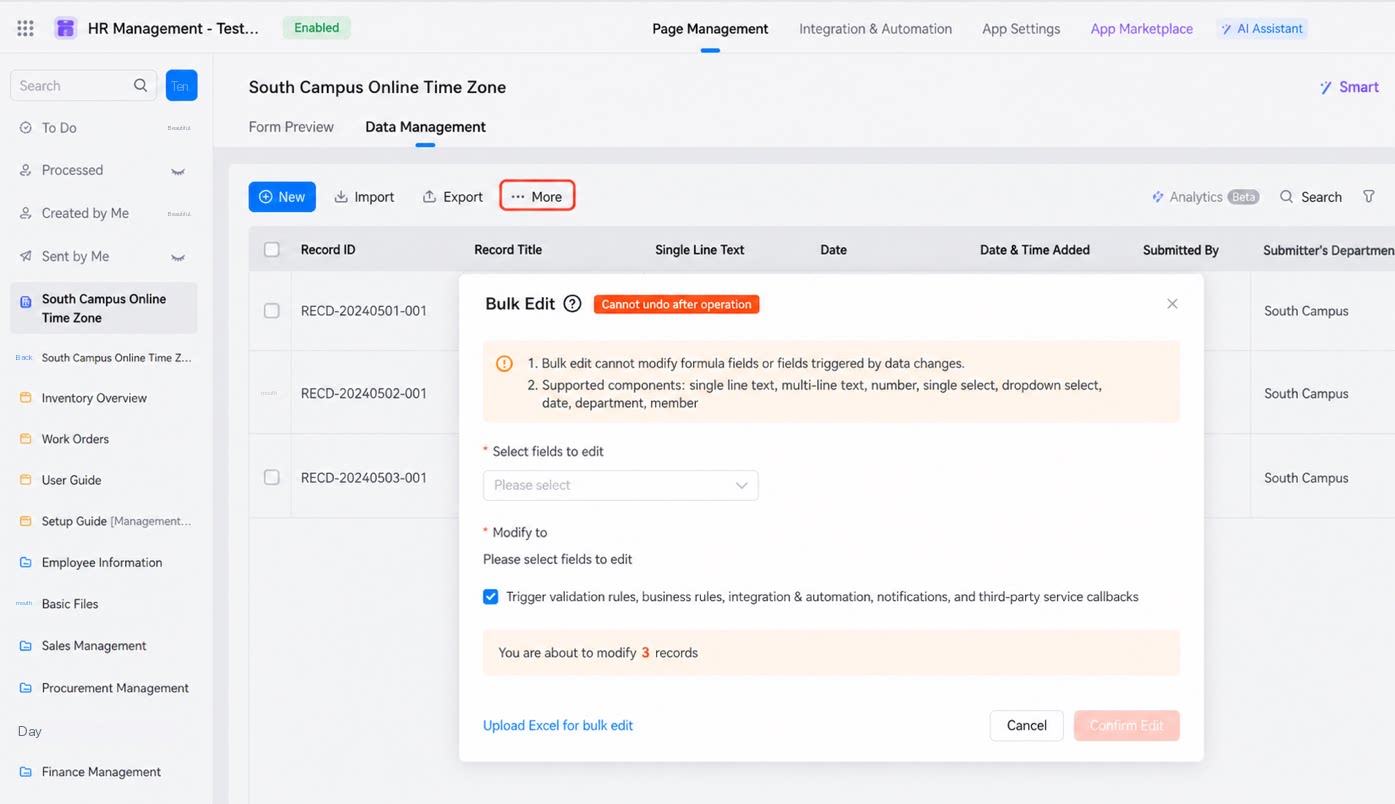
- Update-import the data from the Excel file back into the current form.