Chats
Chats Calendar
 Meetings
 Contacts
 Mail
Mail Docs
Docs Drive
Drive AI Table
 AI Minutes
 Attendance
 Approval
 YiDA
YiDA Admin Console
Preparation
Before you start, create a YiDA app.Step 1: Create a Workflow Form from a Template
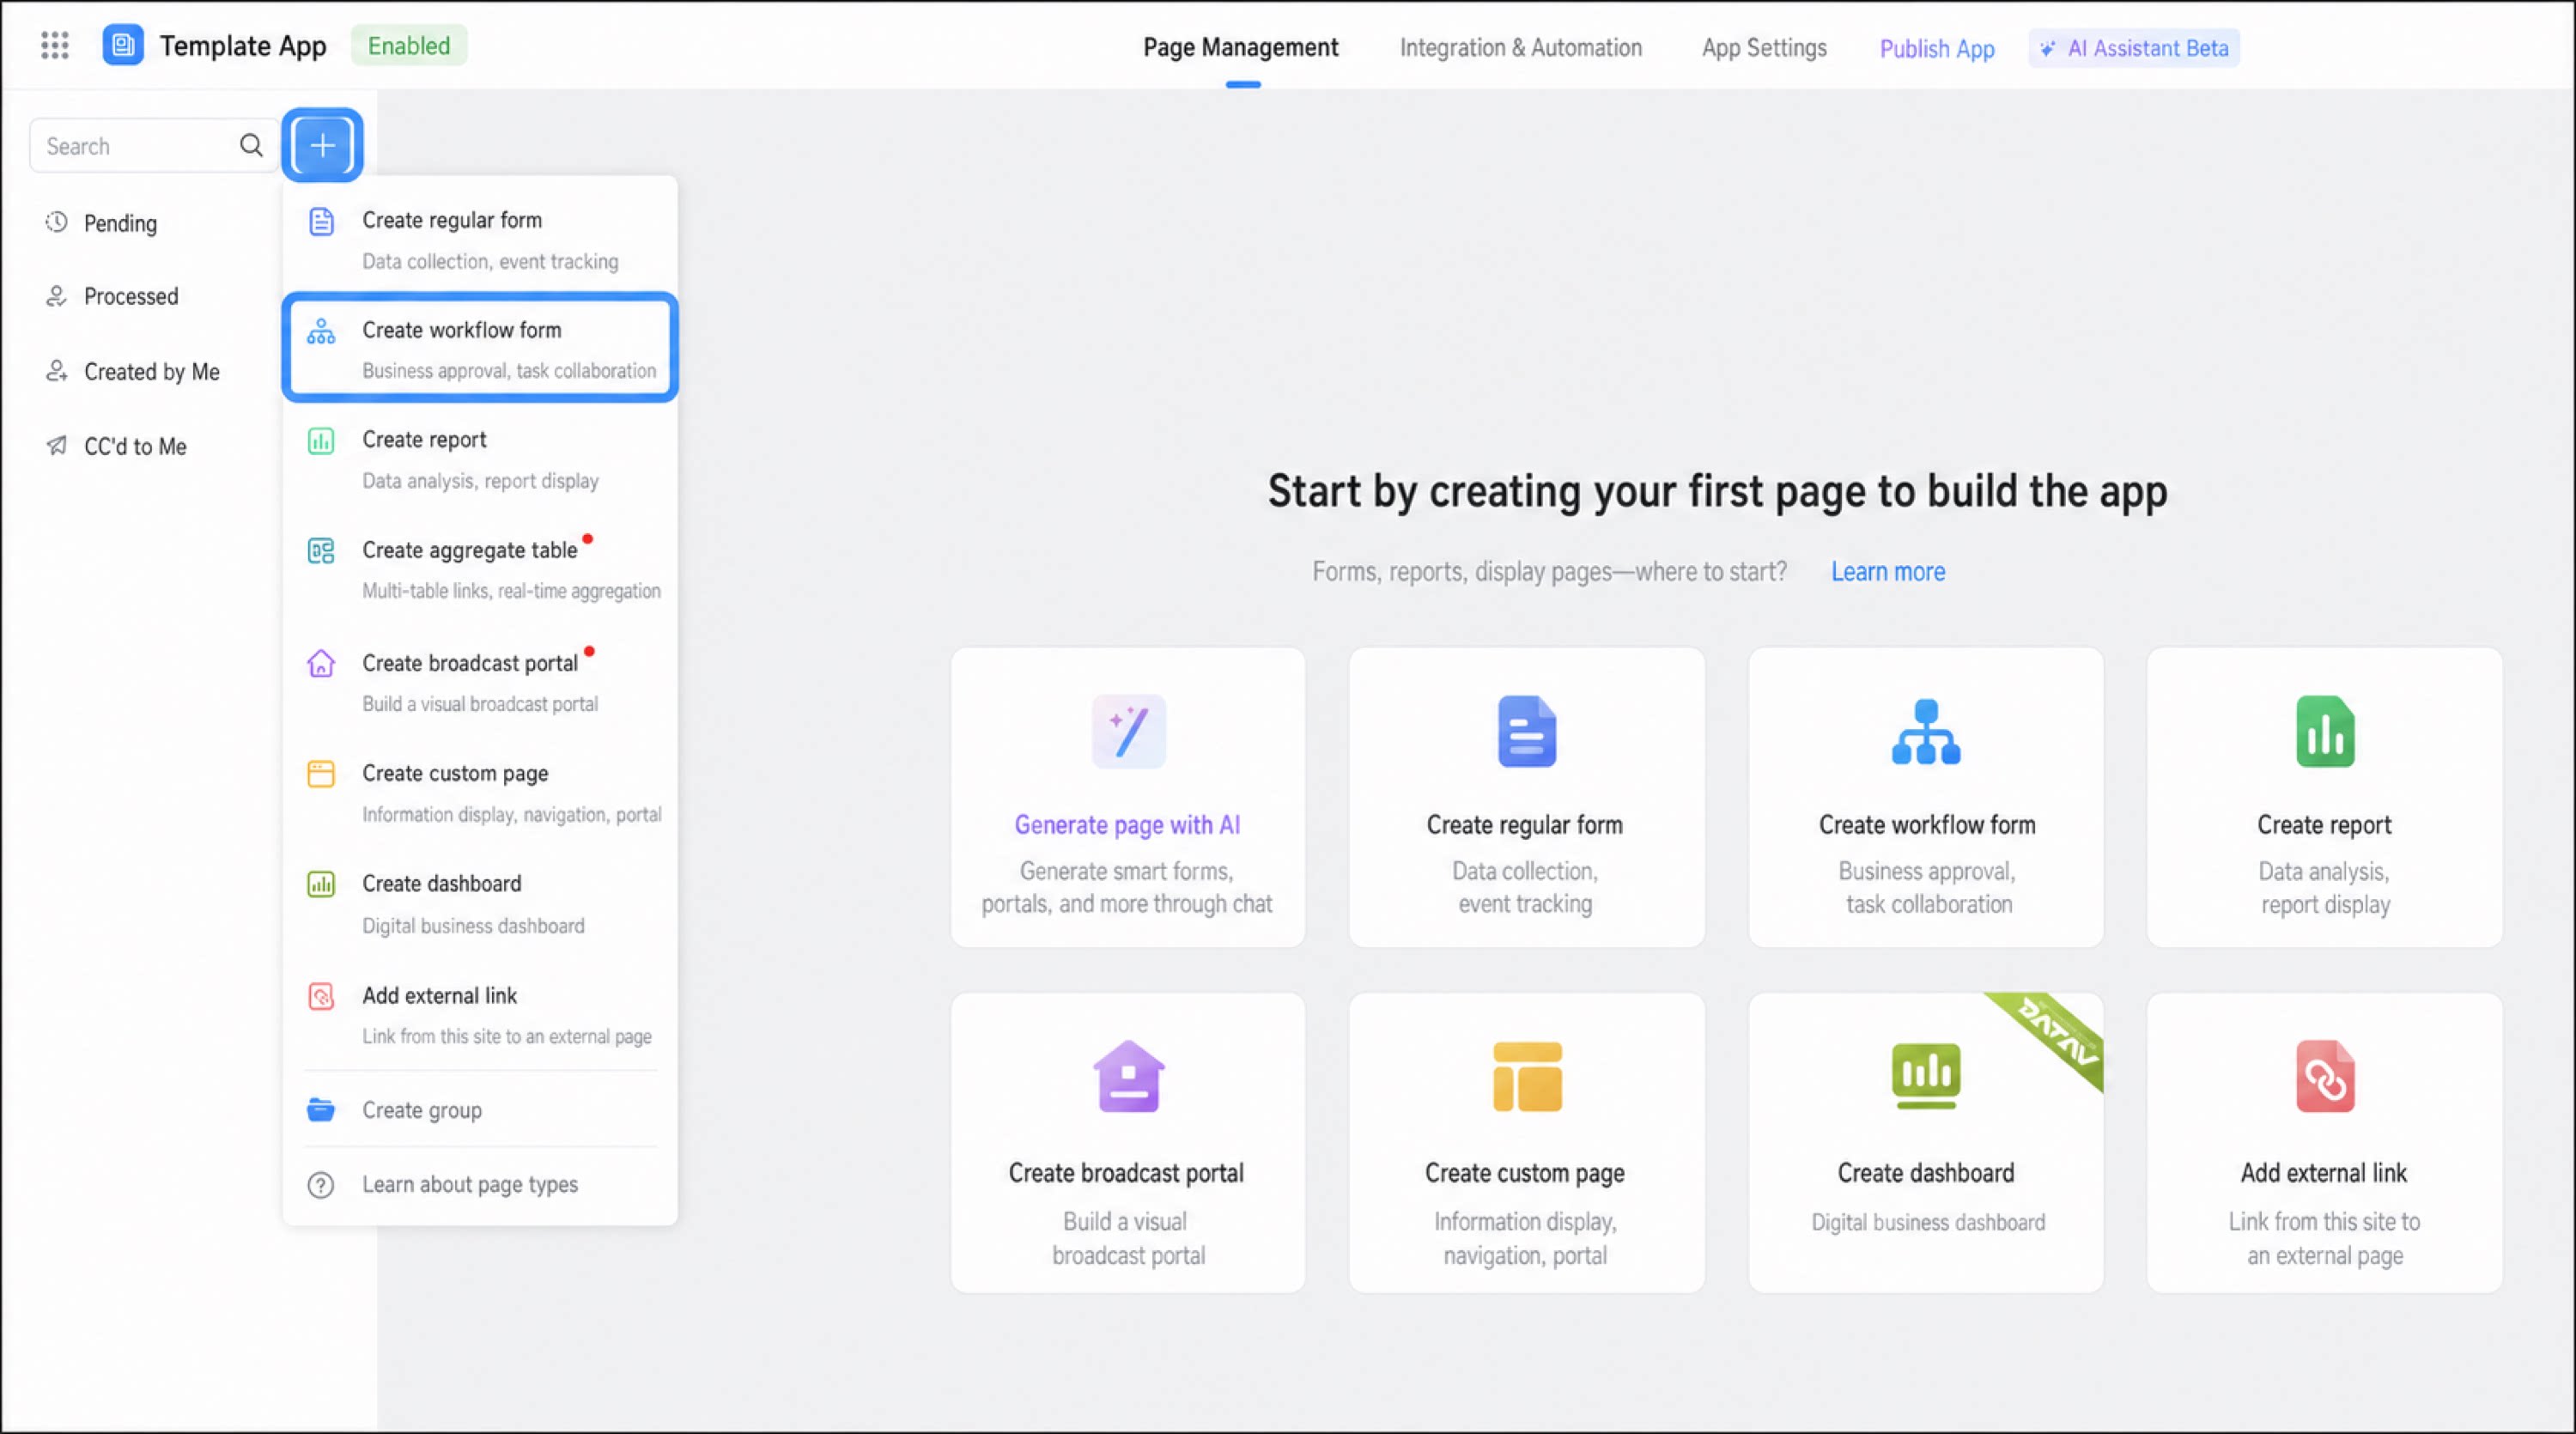
- Sign in to the YiDA workbench. Select the target app and go to the Page Management page.
- Click the + icon in the upper-left corner and select Create workflow form.
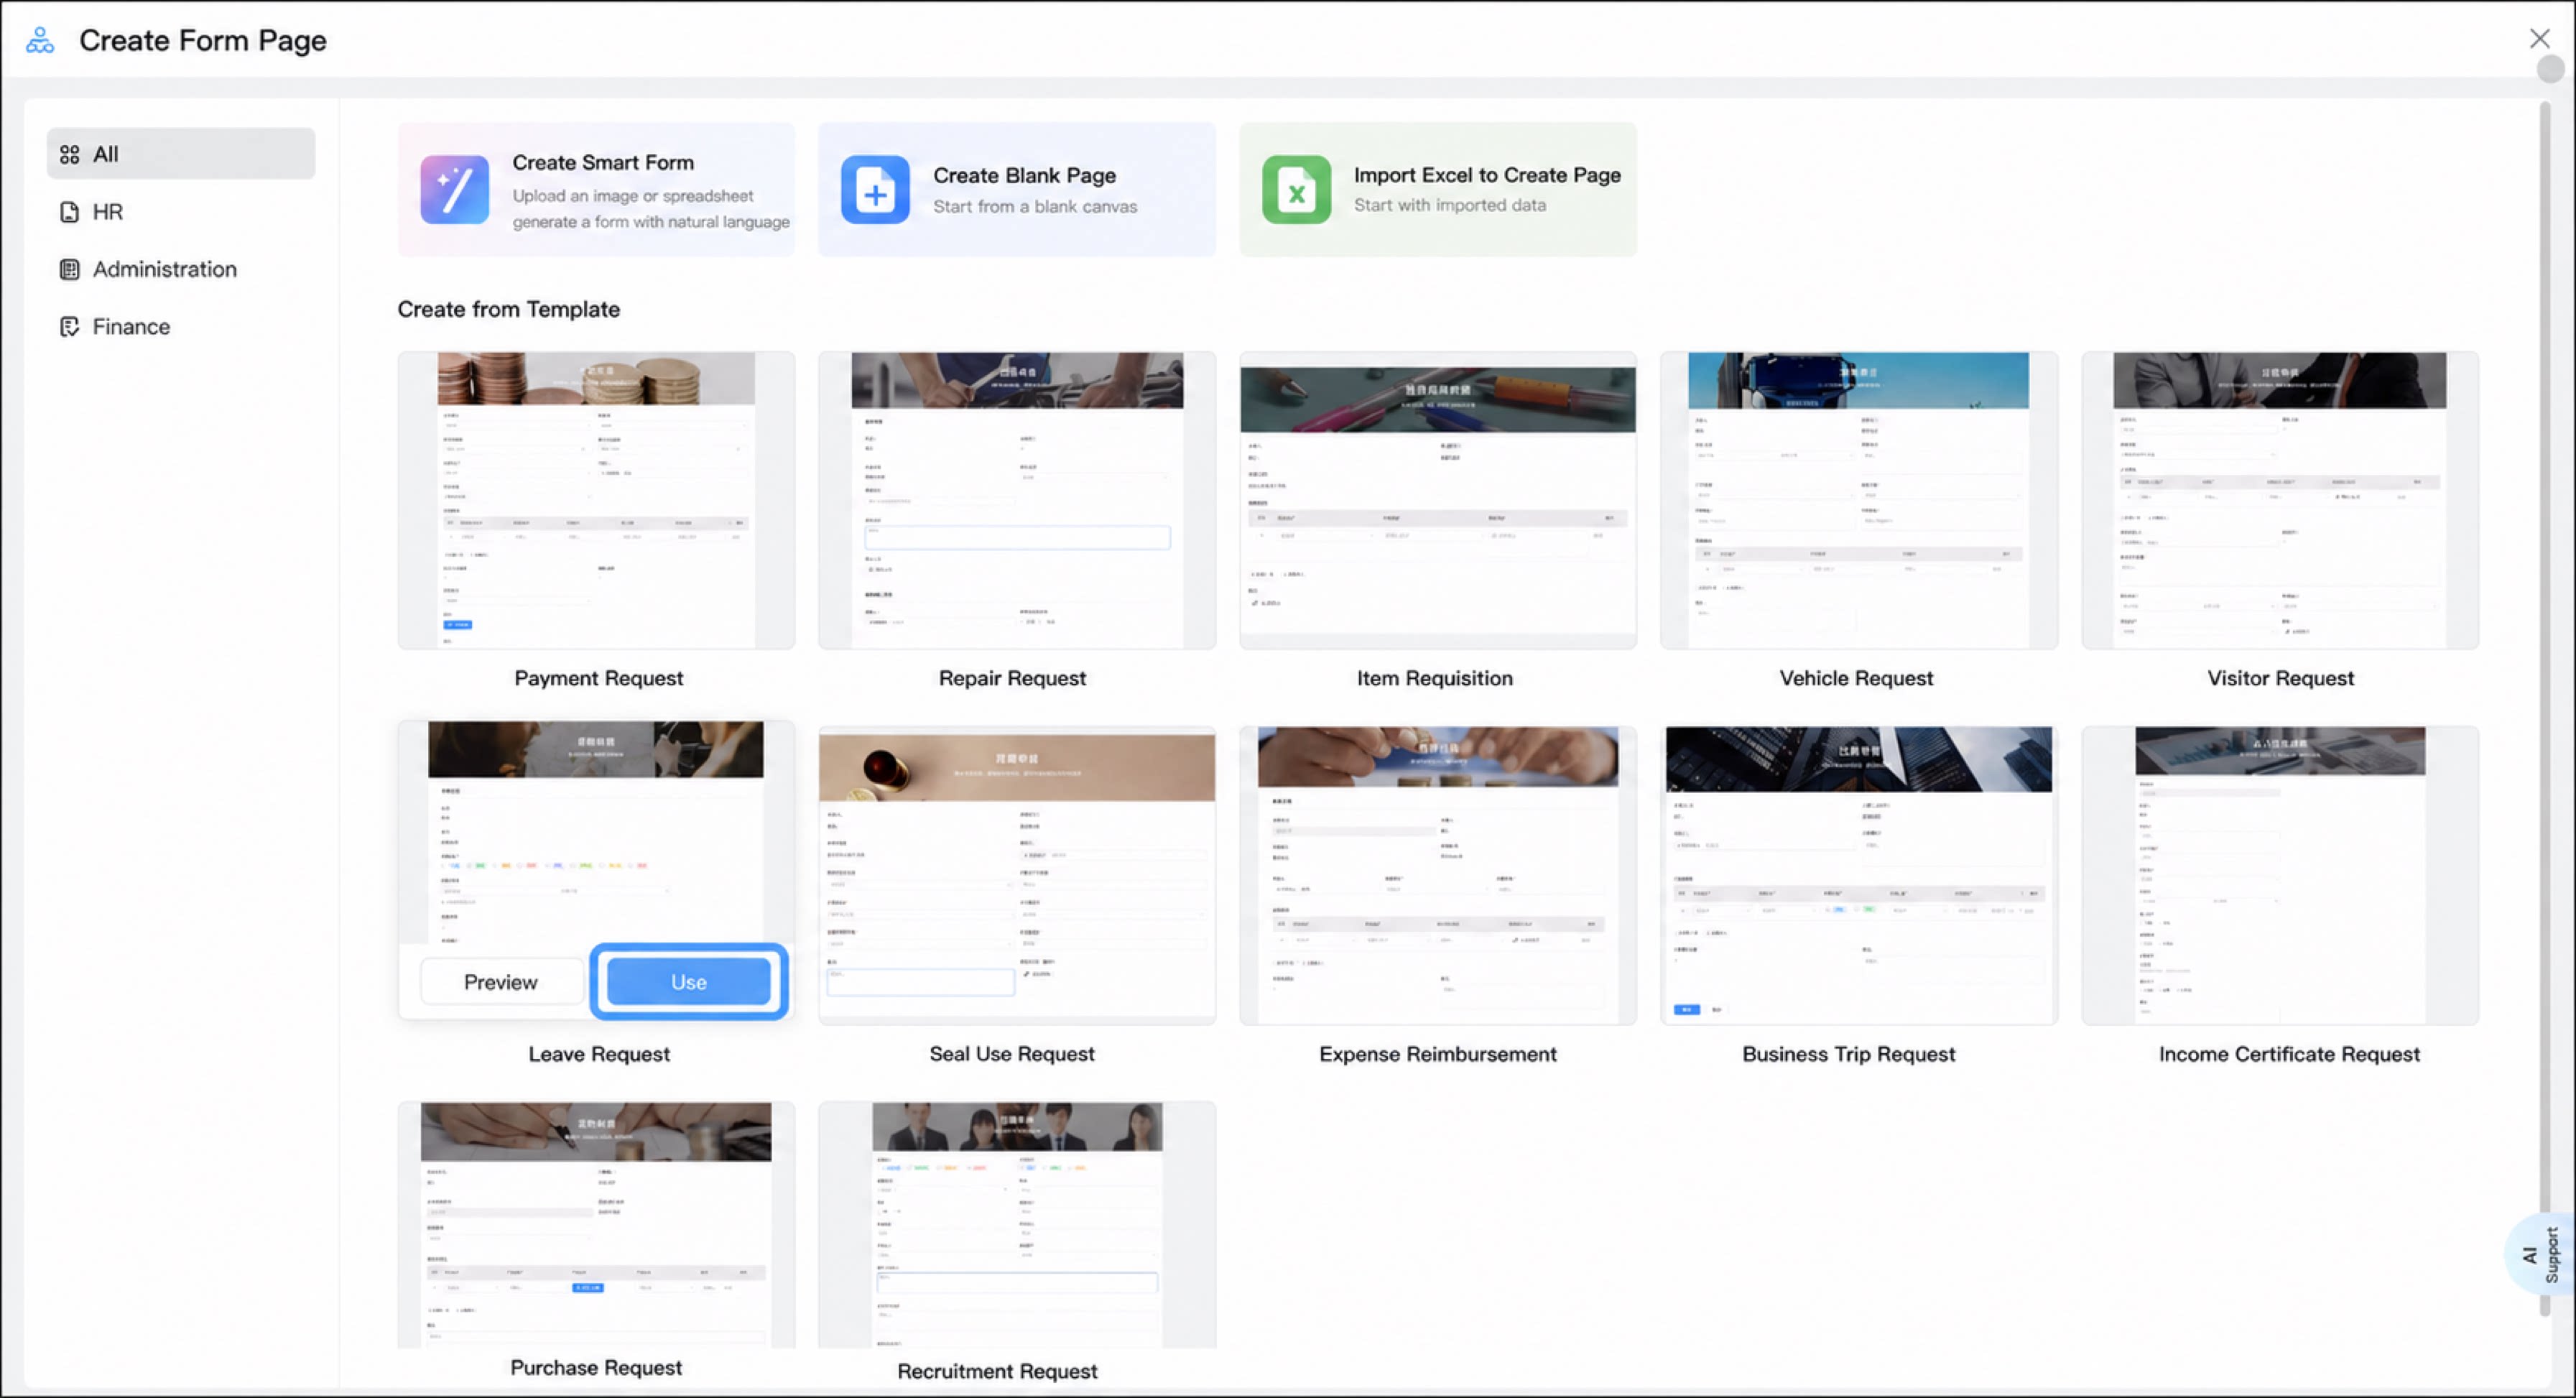
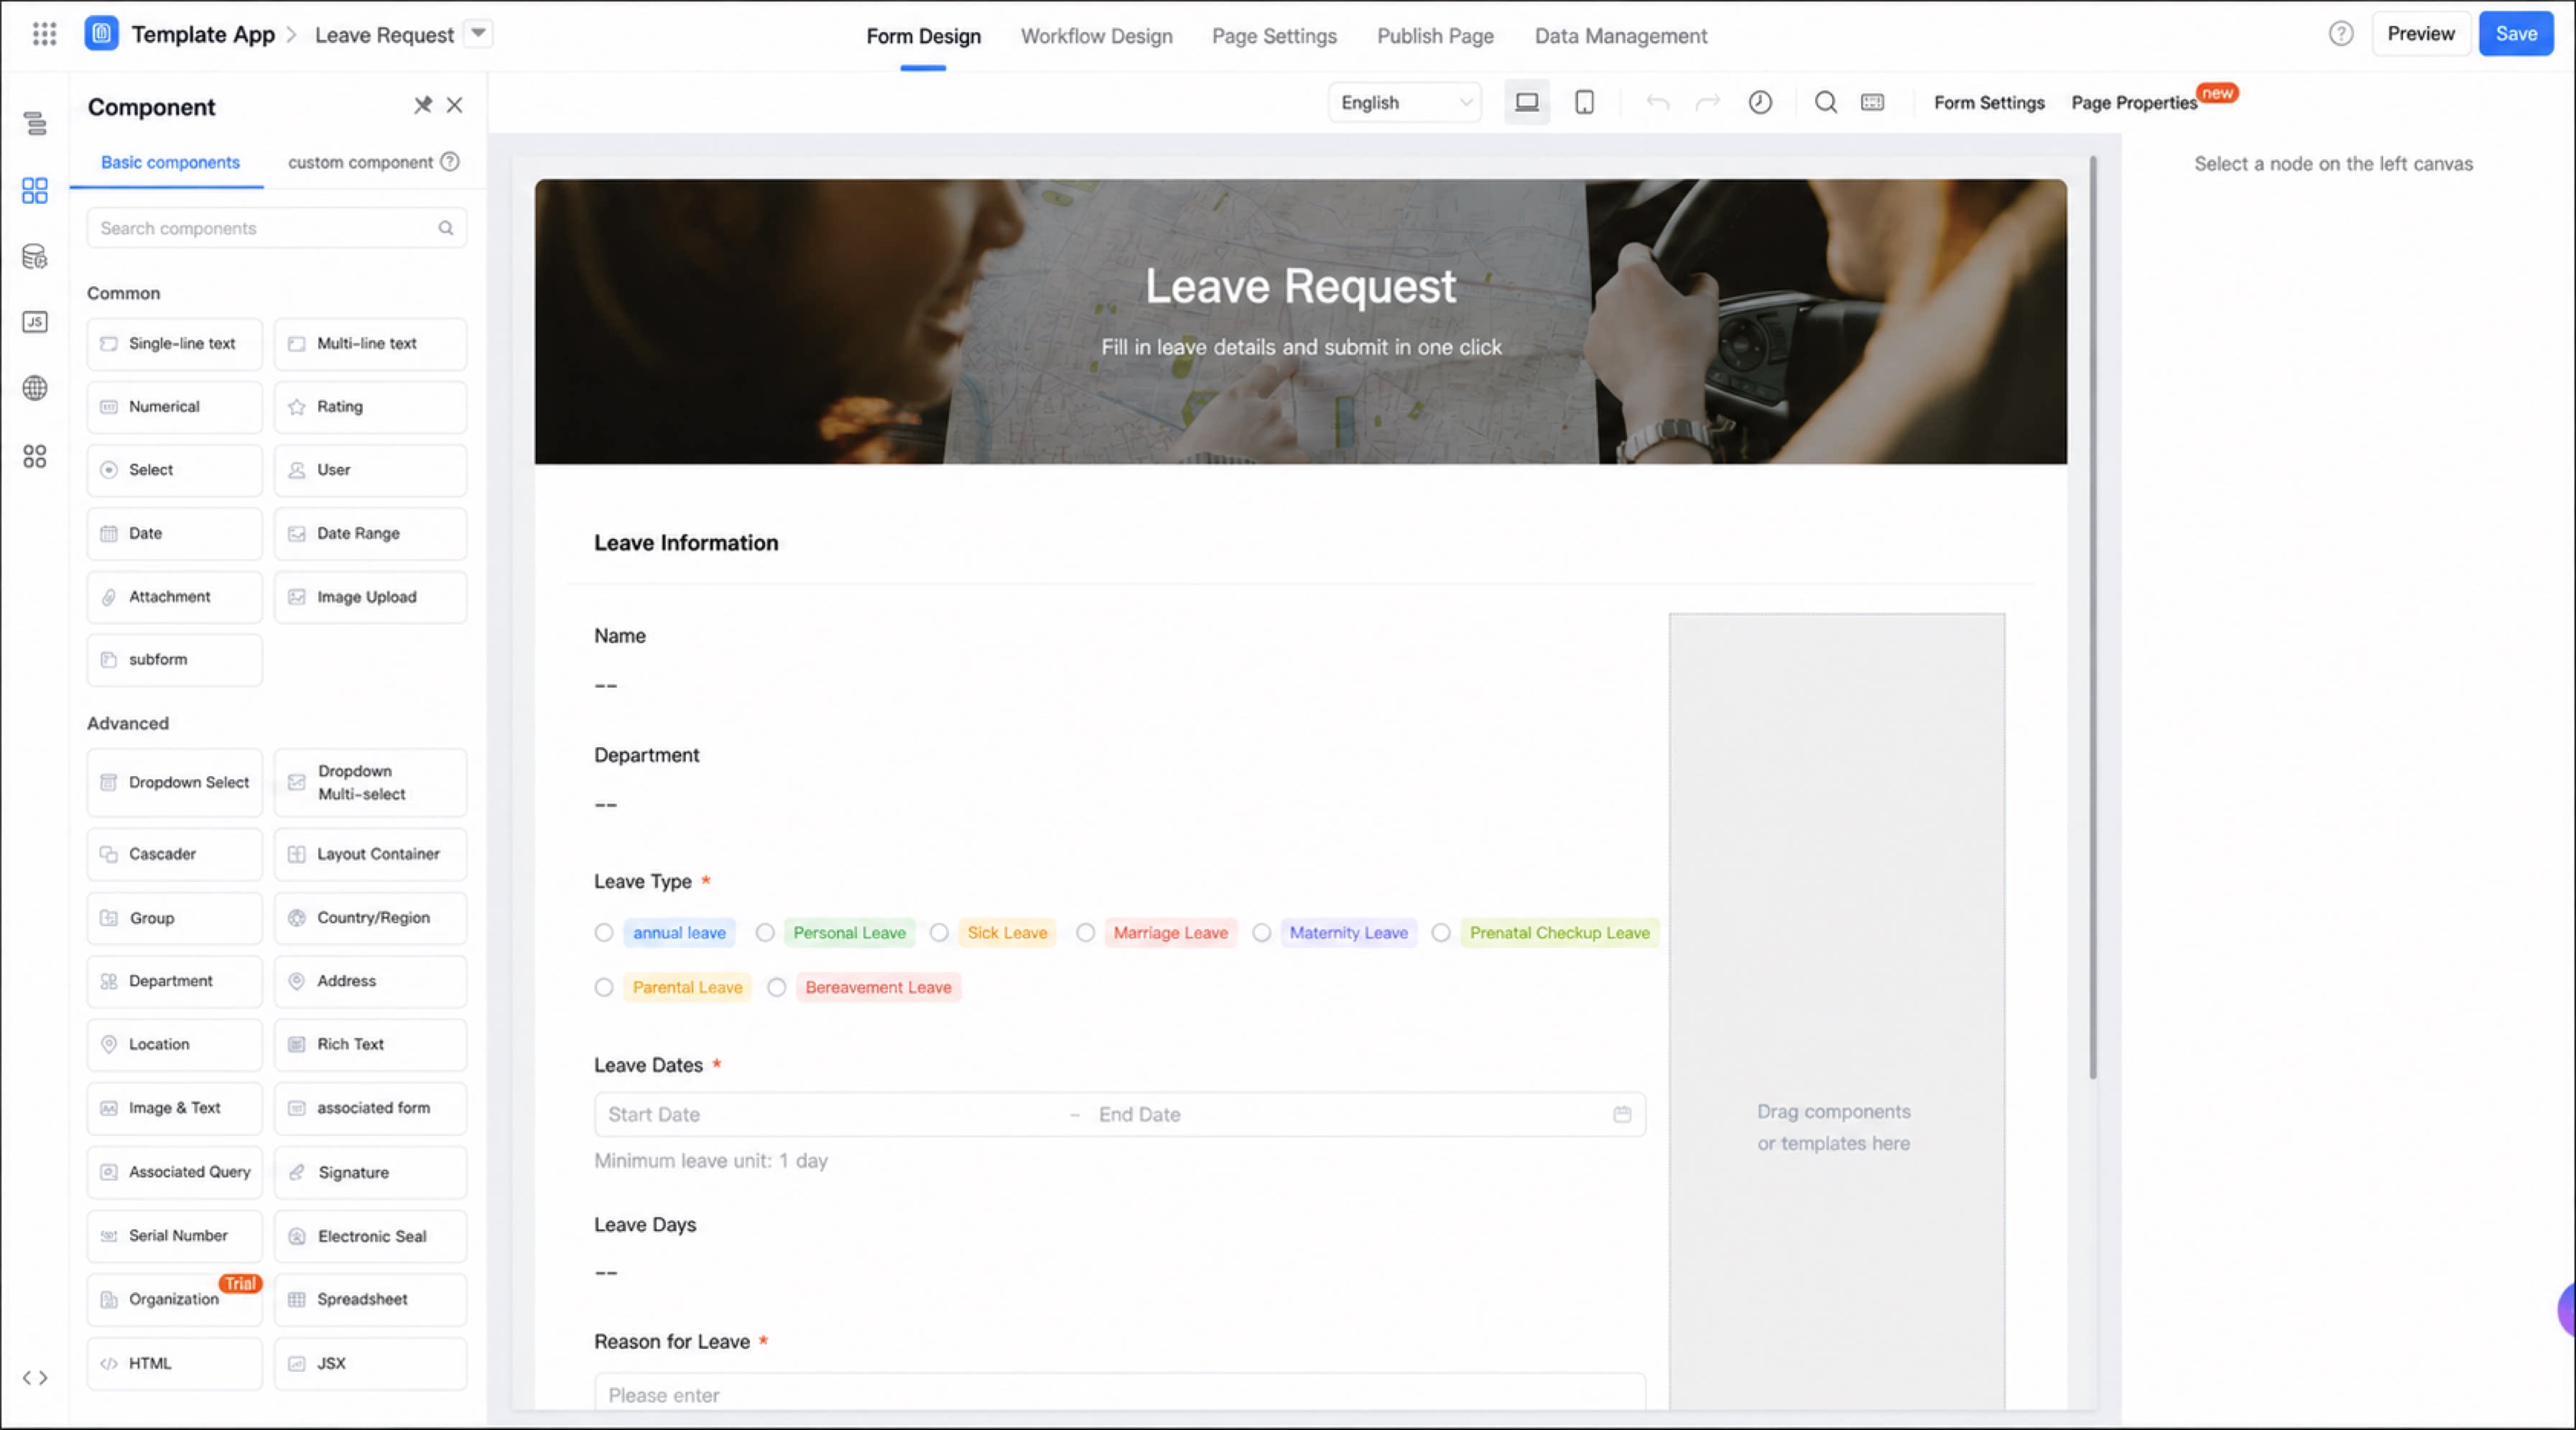
- Select Create from template, choose the Leave Request template, and click Use.
Step 2: Design the Leave Flow
1
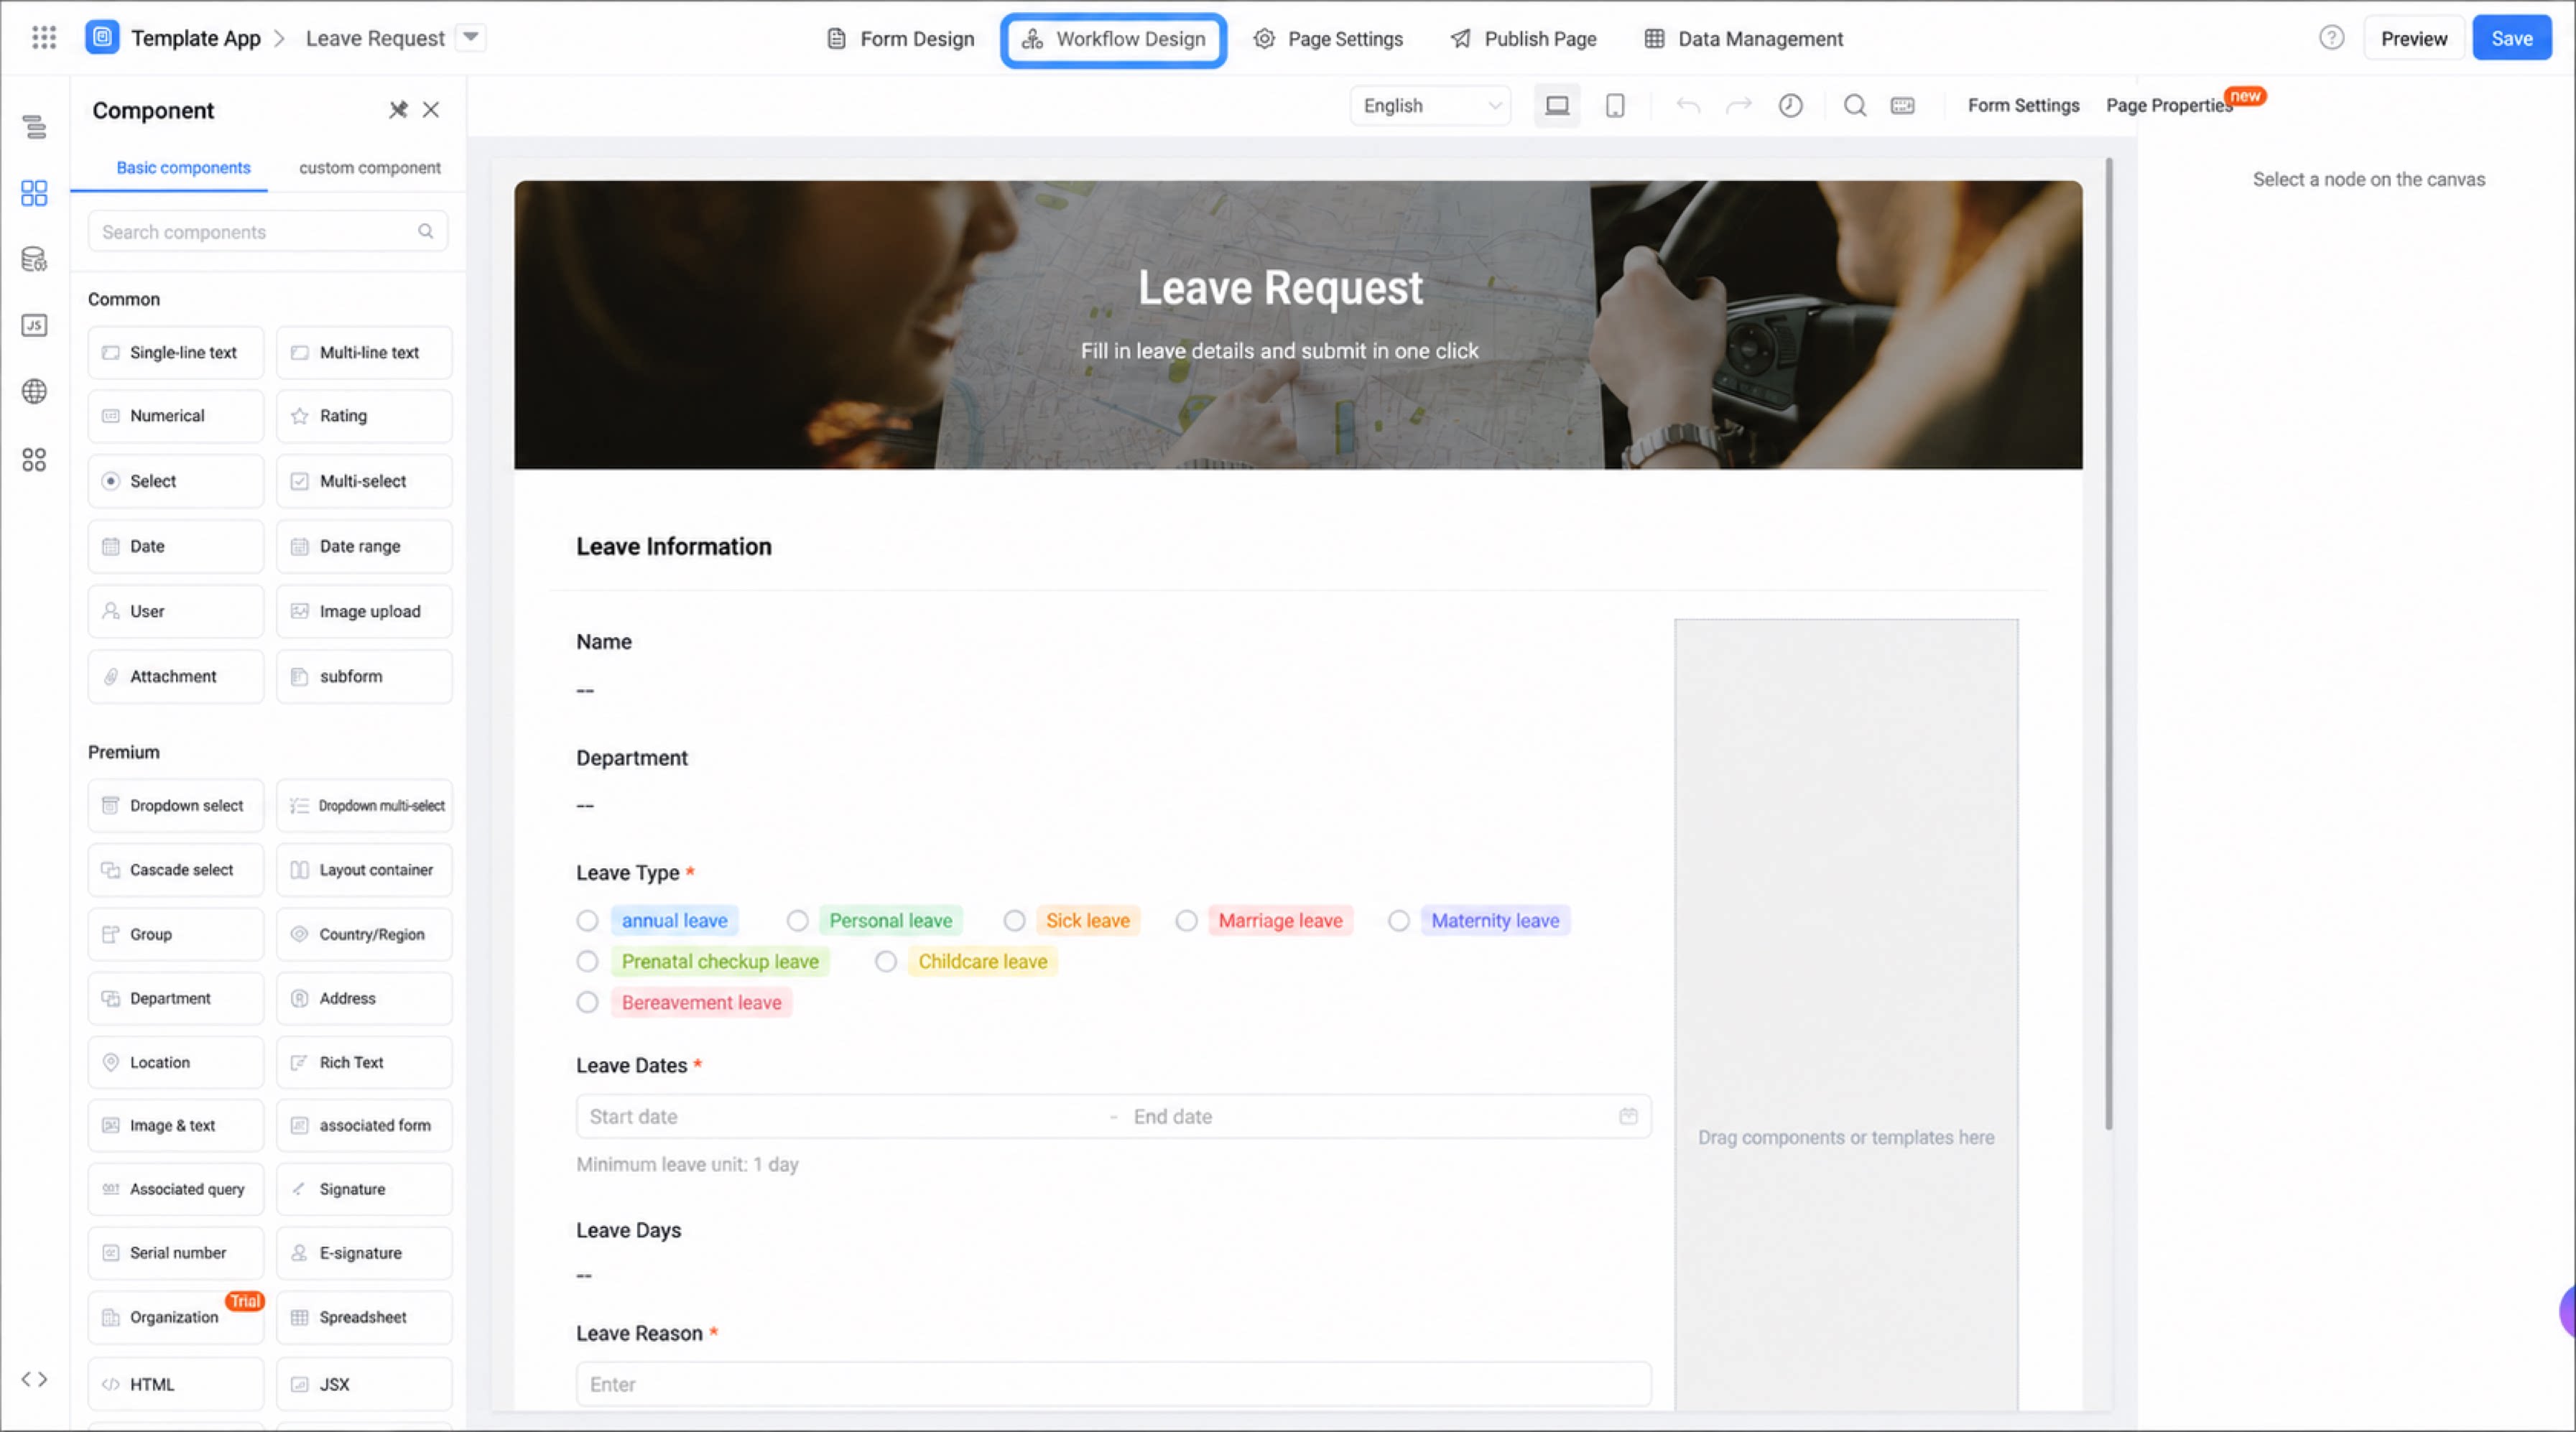
On the form design page, click Workflow design at the top
2
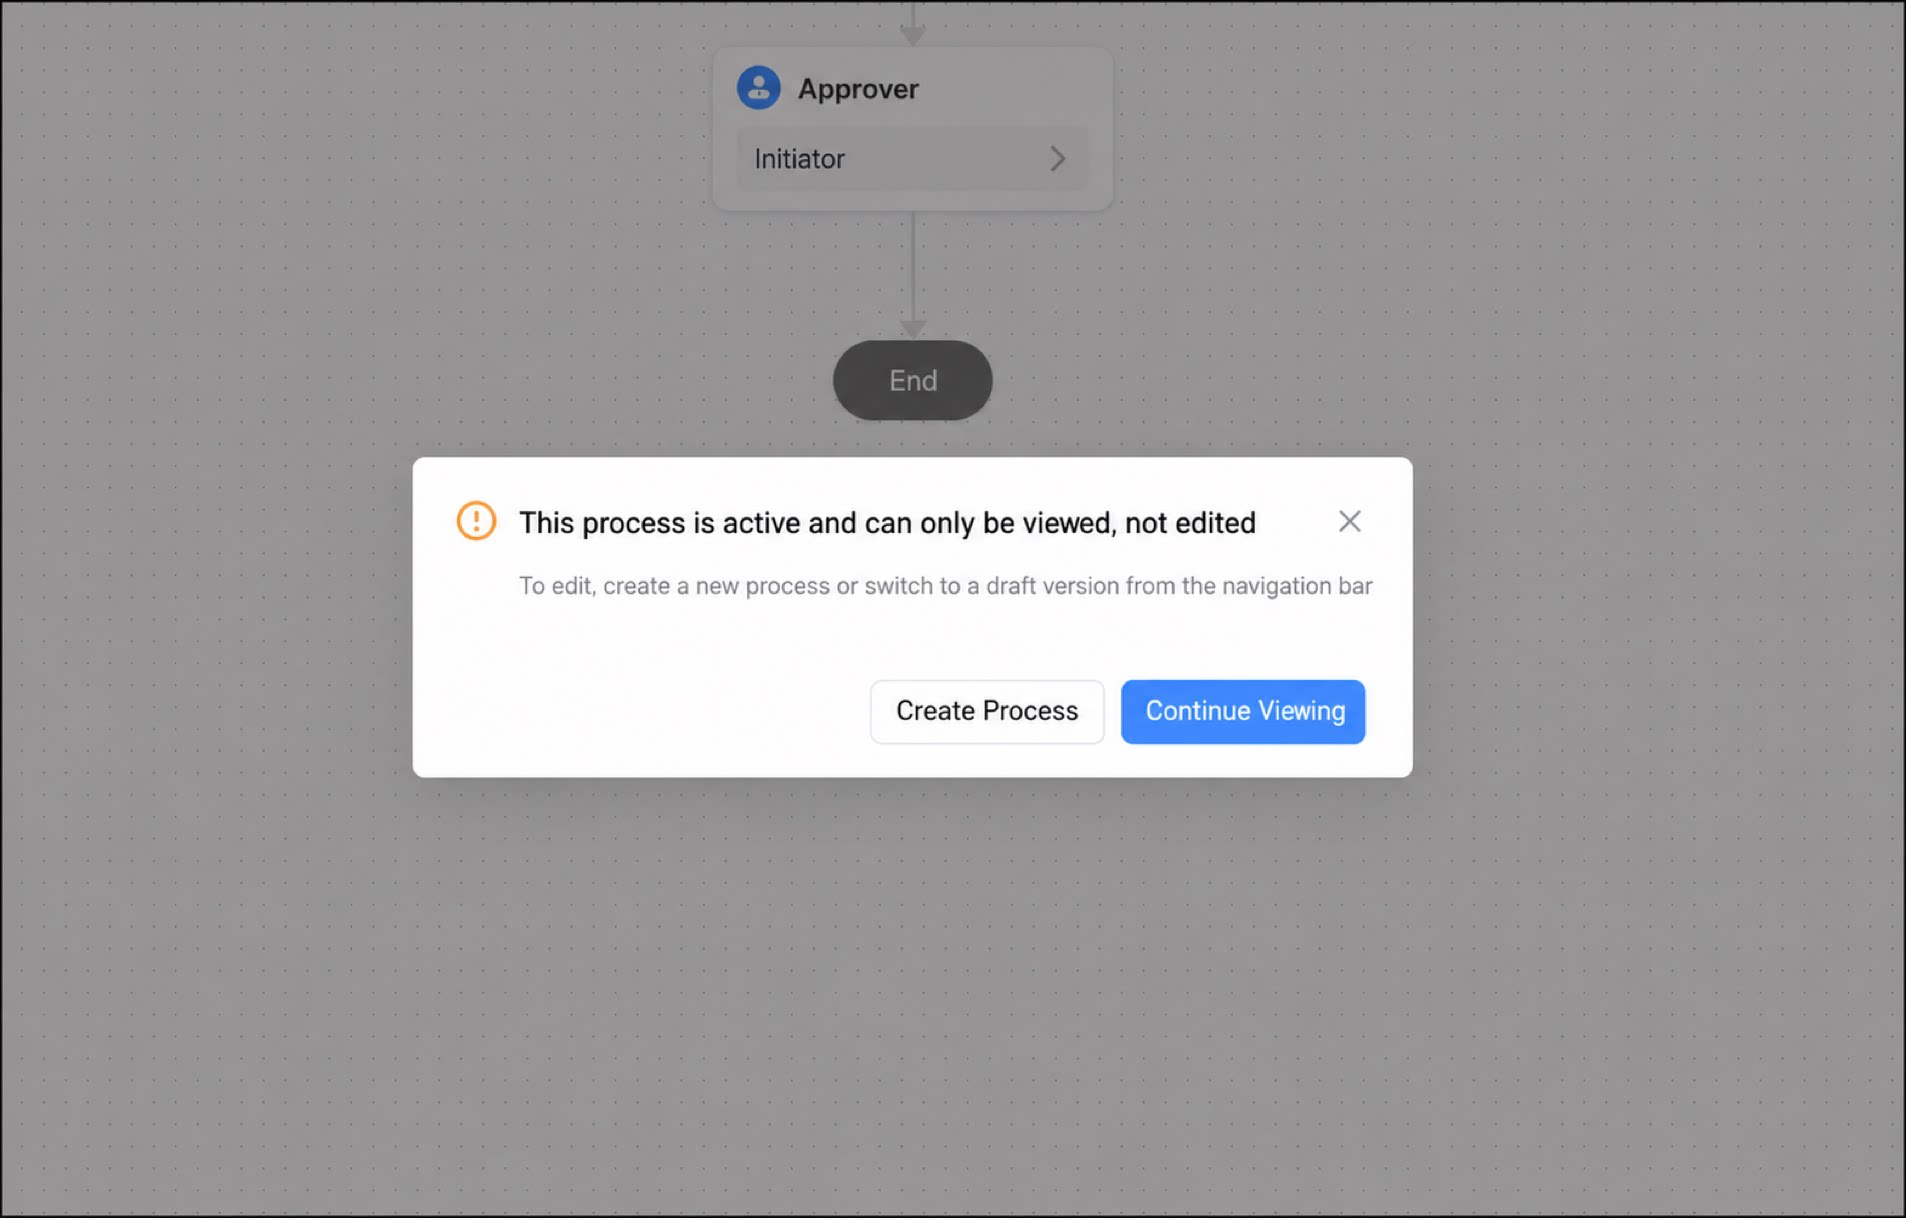
Click Create new flow in the upper-right corner
Enabled flows can only be viewed and cannot be edited directly. After a workflow form is created, a V0 flow is automatically generated with you as the approver.
3
Hover over the connection line at the approval node to display the + button, then click + and select the Approver node
4
Step 4
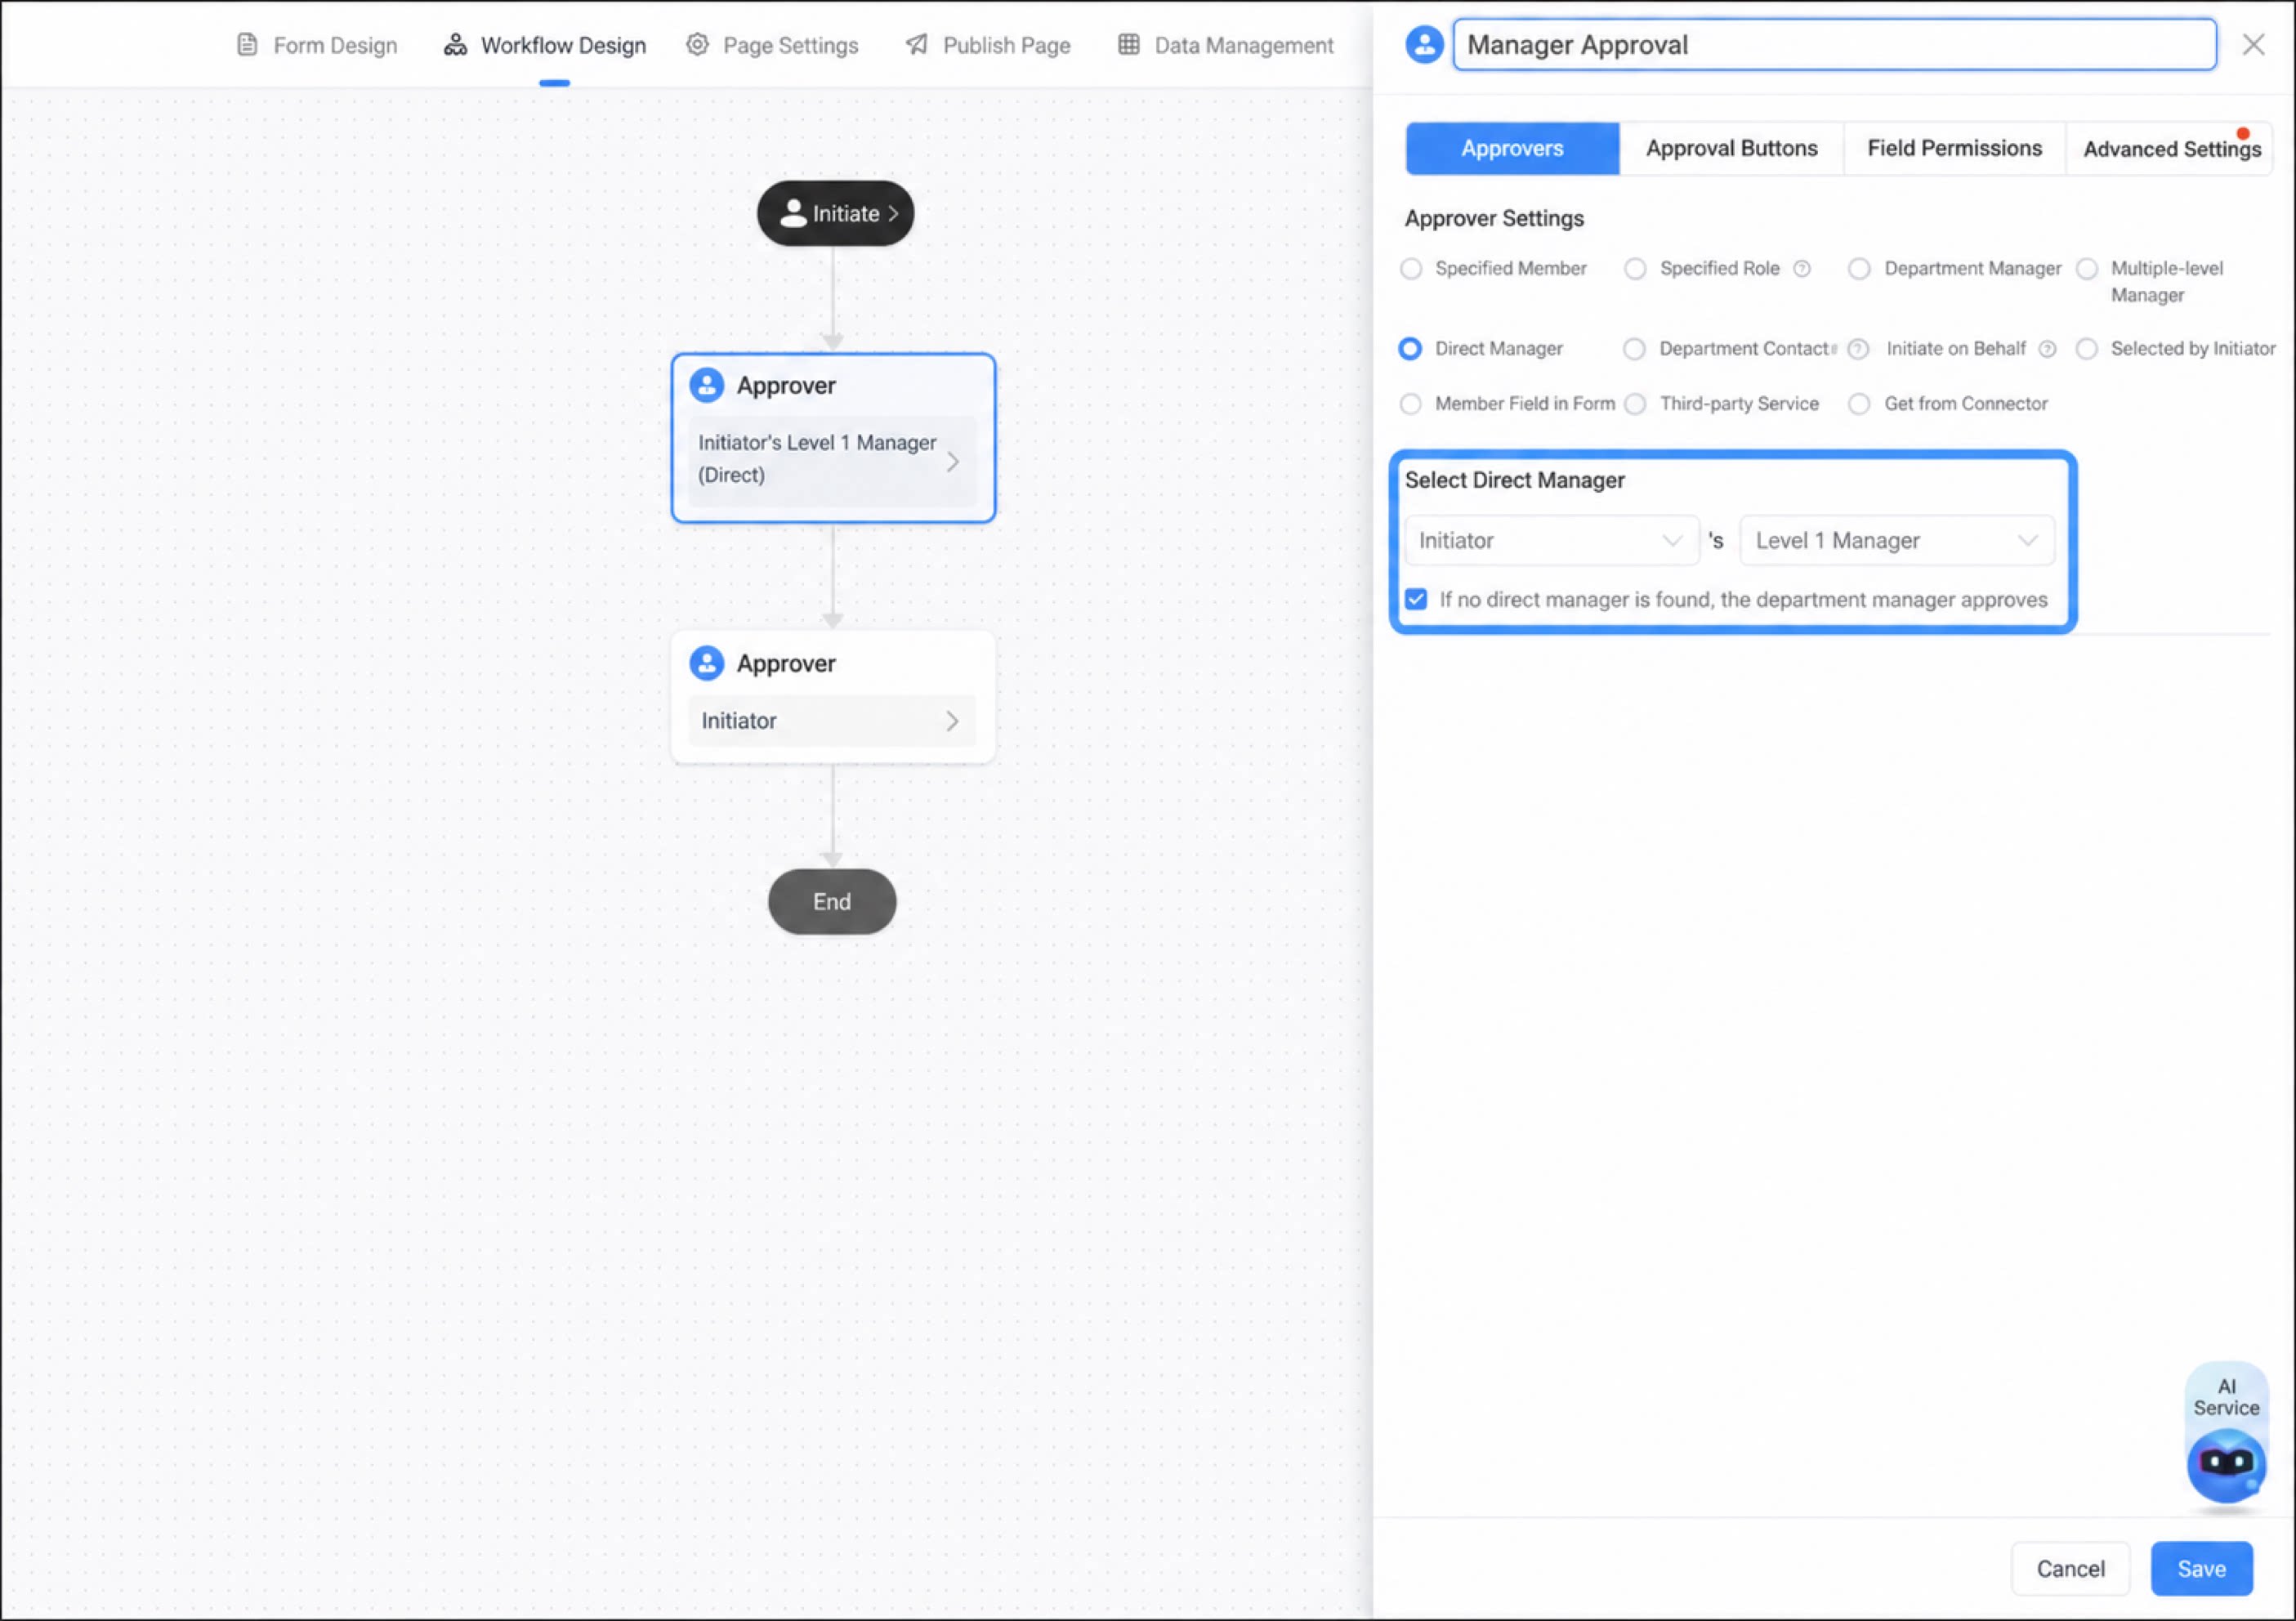
Rename the approval node to Manager approval, set the approver to Direct manager, select the direct manager as the level-1 manager of the initiator, and click Save to complete the configuration.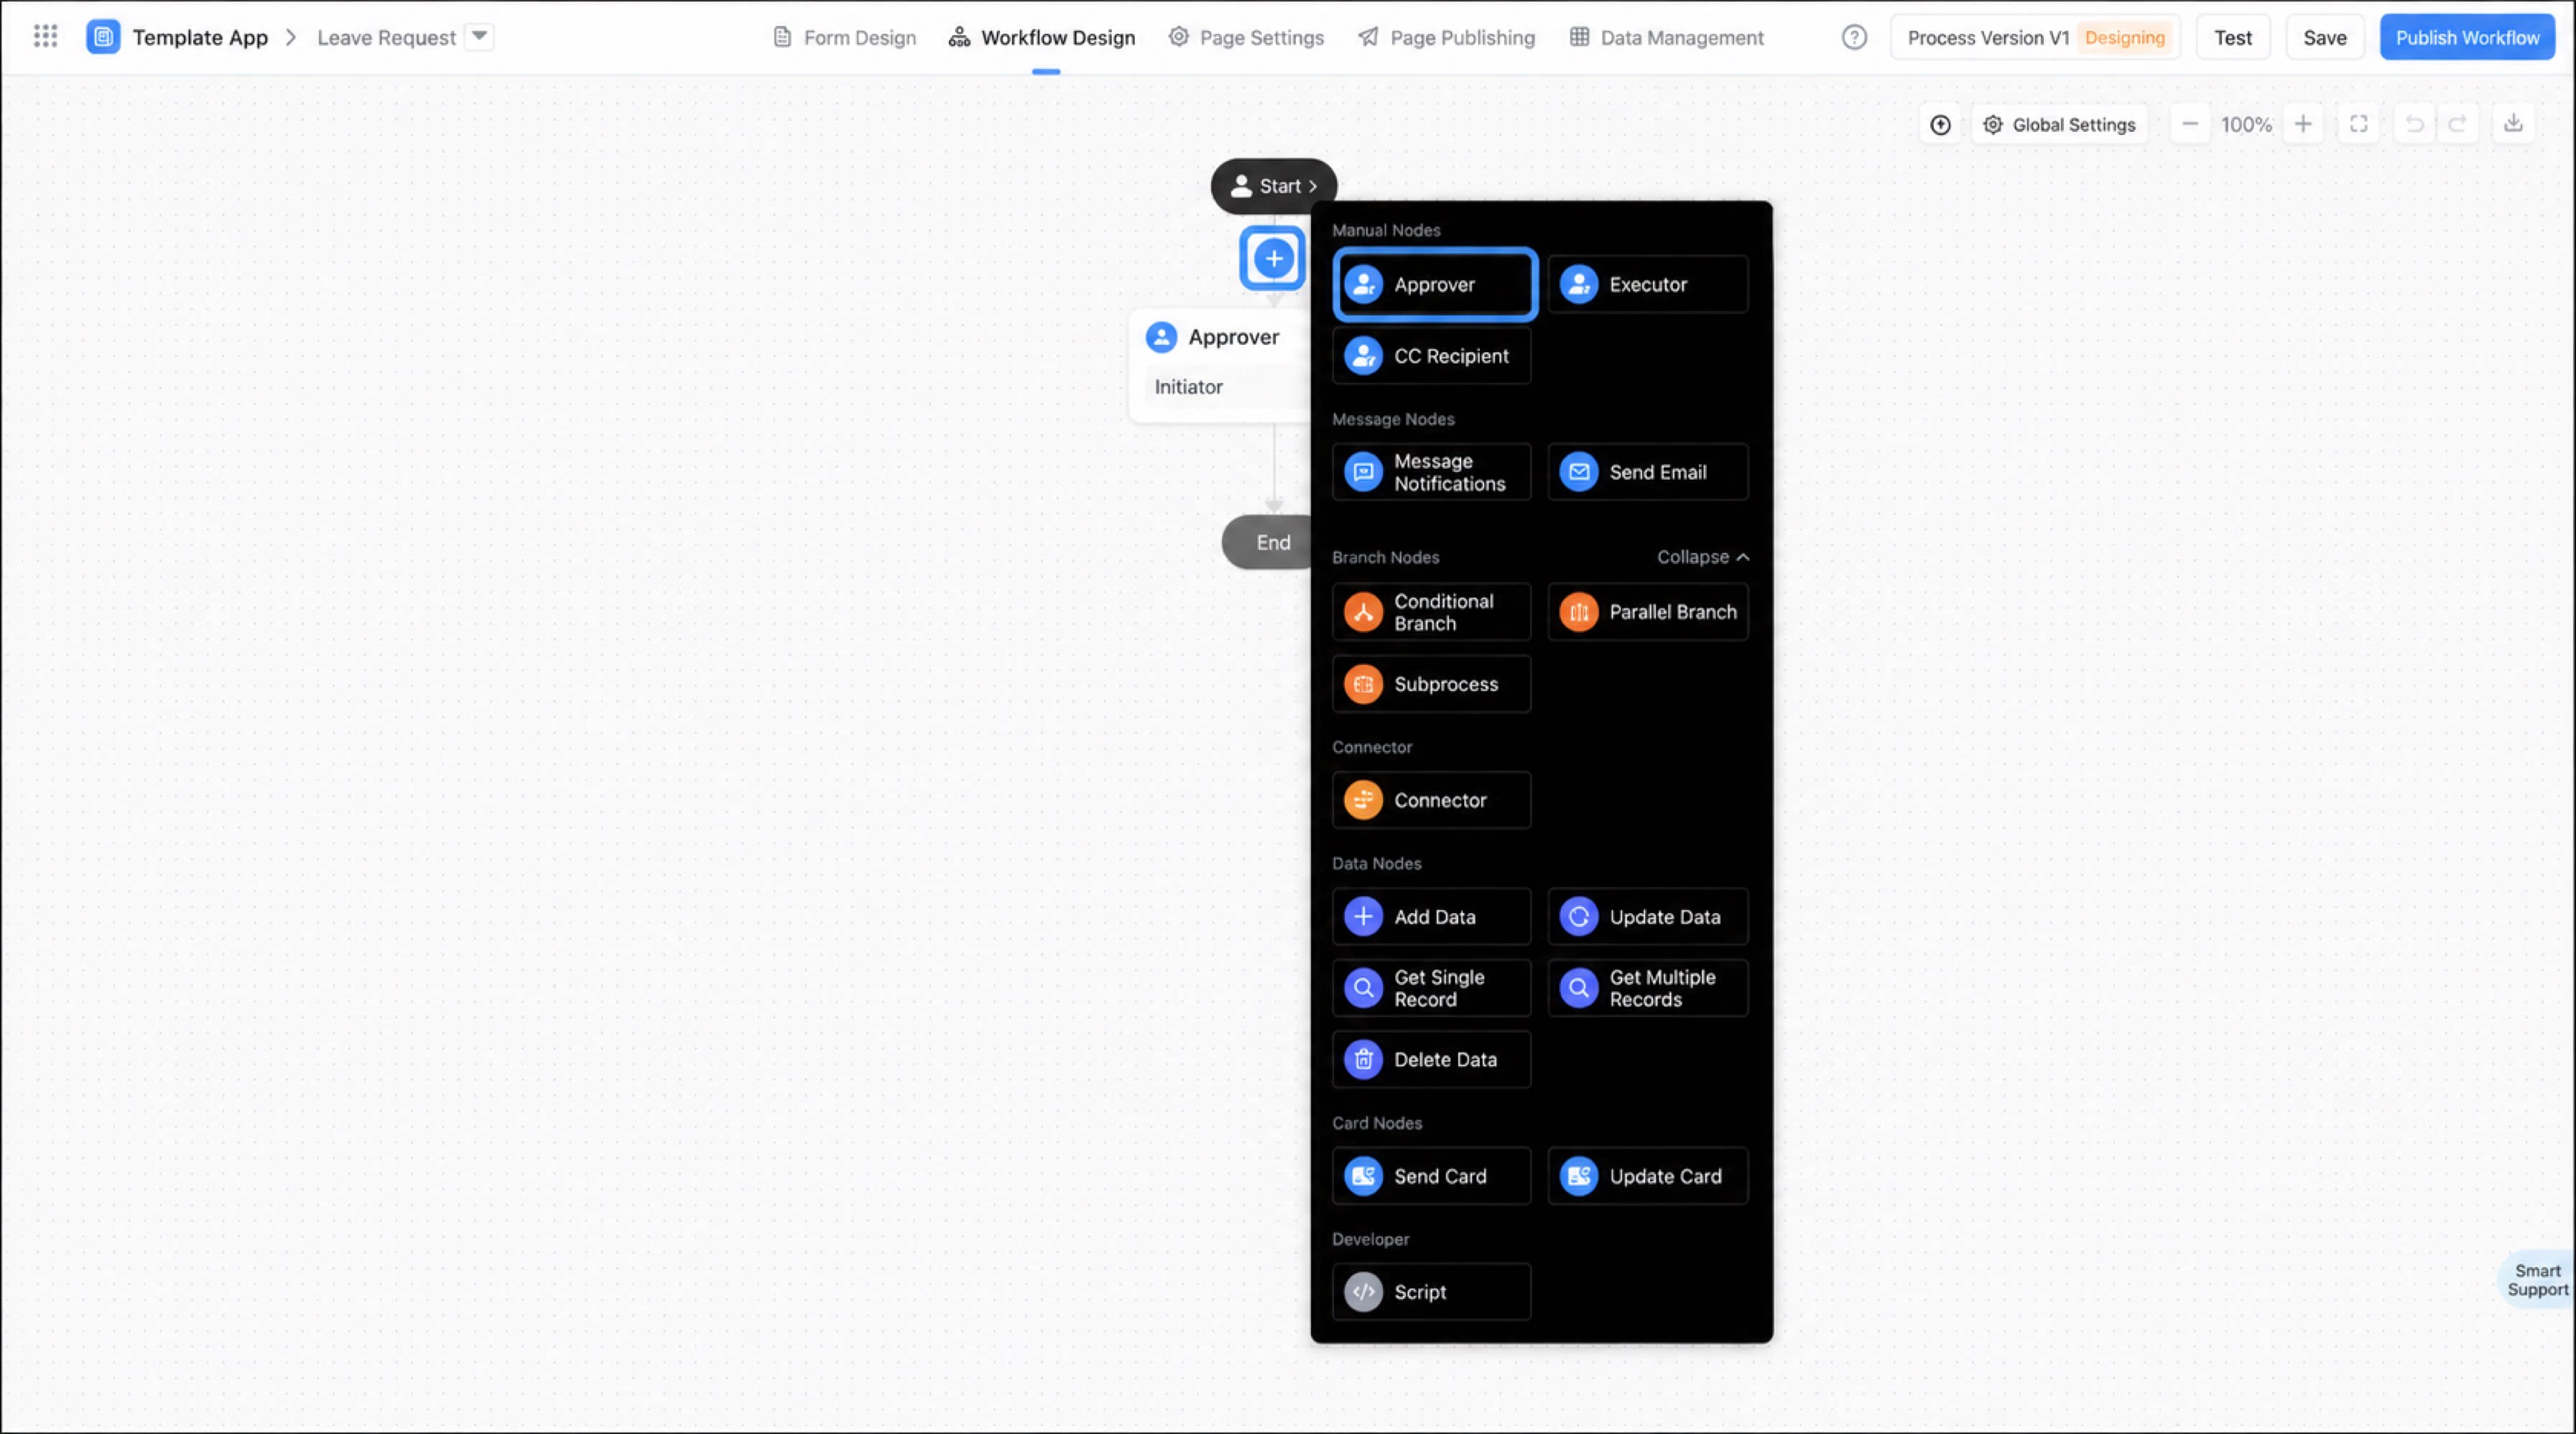
5
Hover over the next-level approval node, click Delete in the upper-right corner of the node to remove it
6
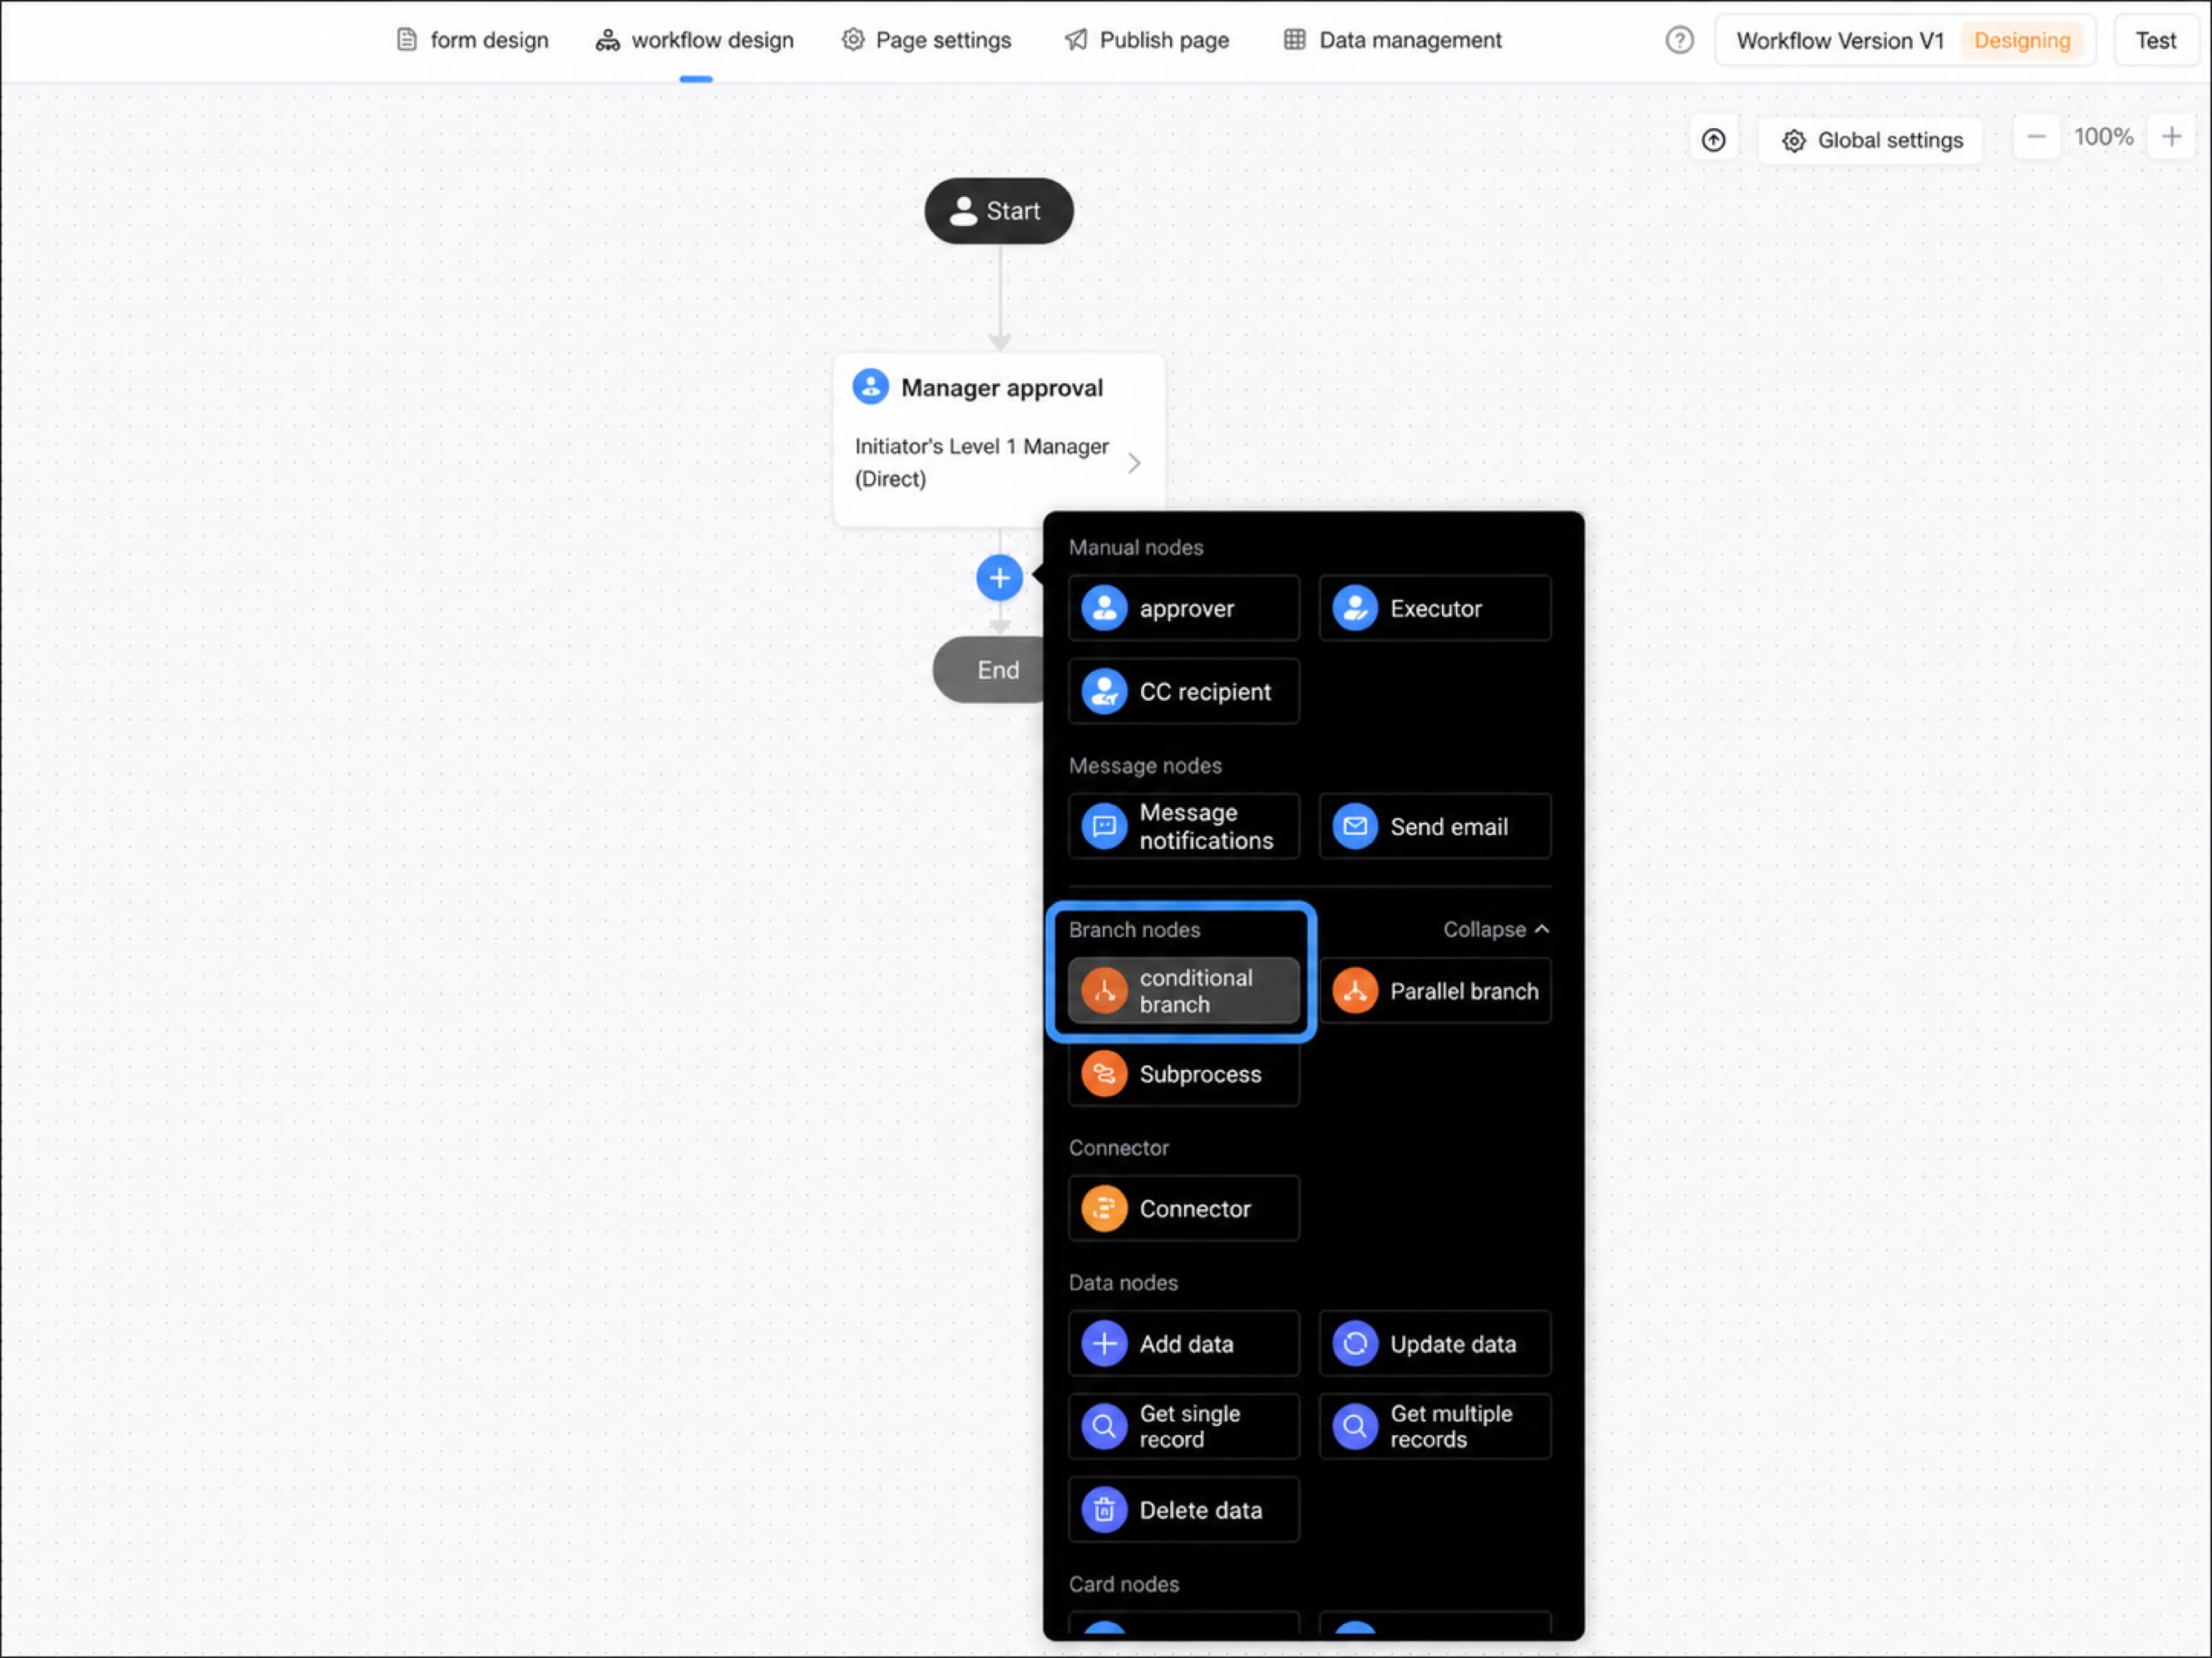
Hover below the Manager approval node, click +, and select Branch node > Conditional branch
7
Select Condition 1, rename it to Leave over 30 days, and set the condition rule to Leave days greater than or equal to 30
8
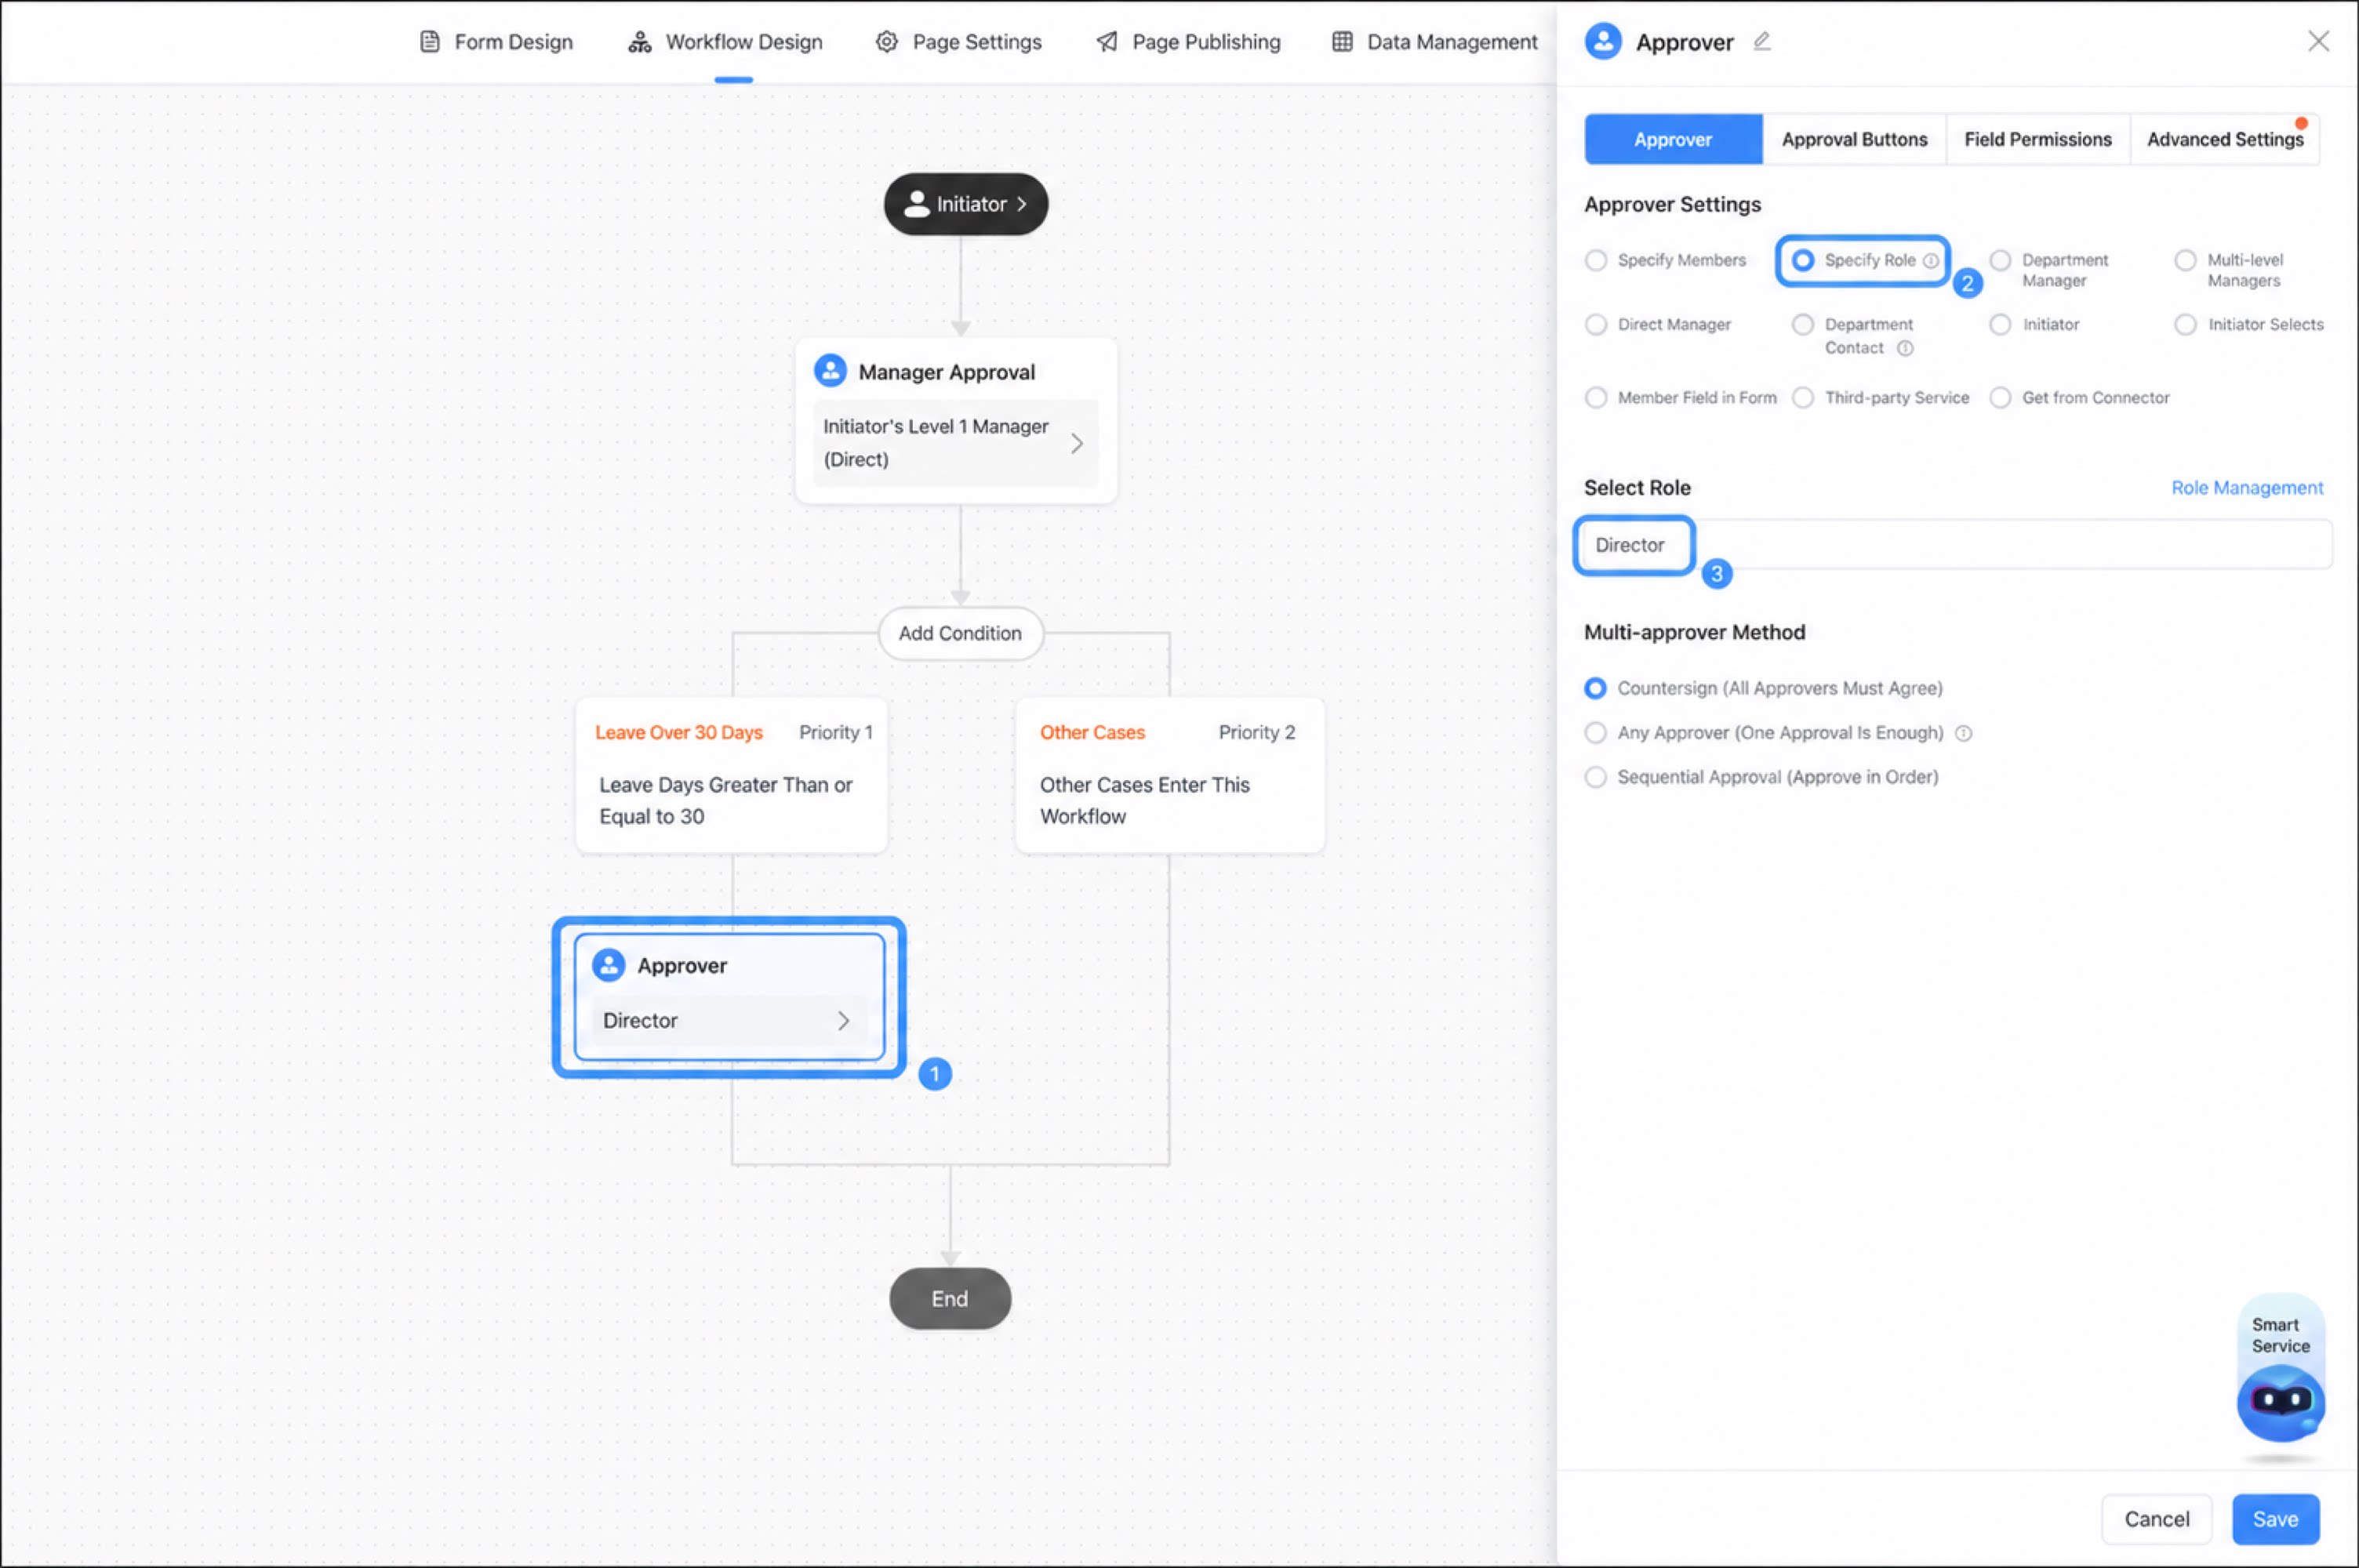
Under the Leave over 30 days branch, add an approver node and set the approver to Director
Leave requests over 30 days typically require approval from a department or company manager. The Director setting here is for reference only.
Step 3: Test the Approval Flow
After configuring the flow, follow the steps below to test it.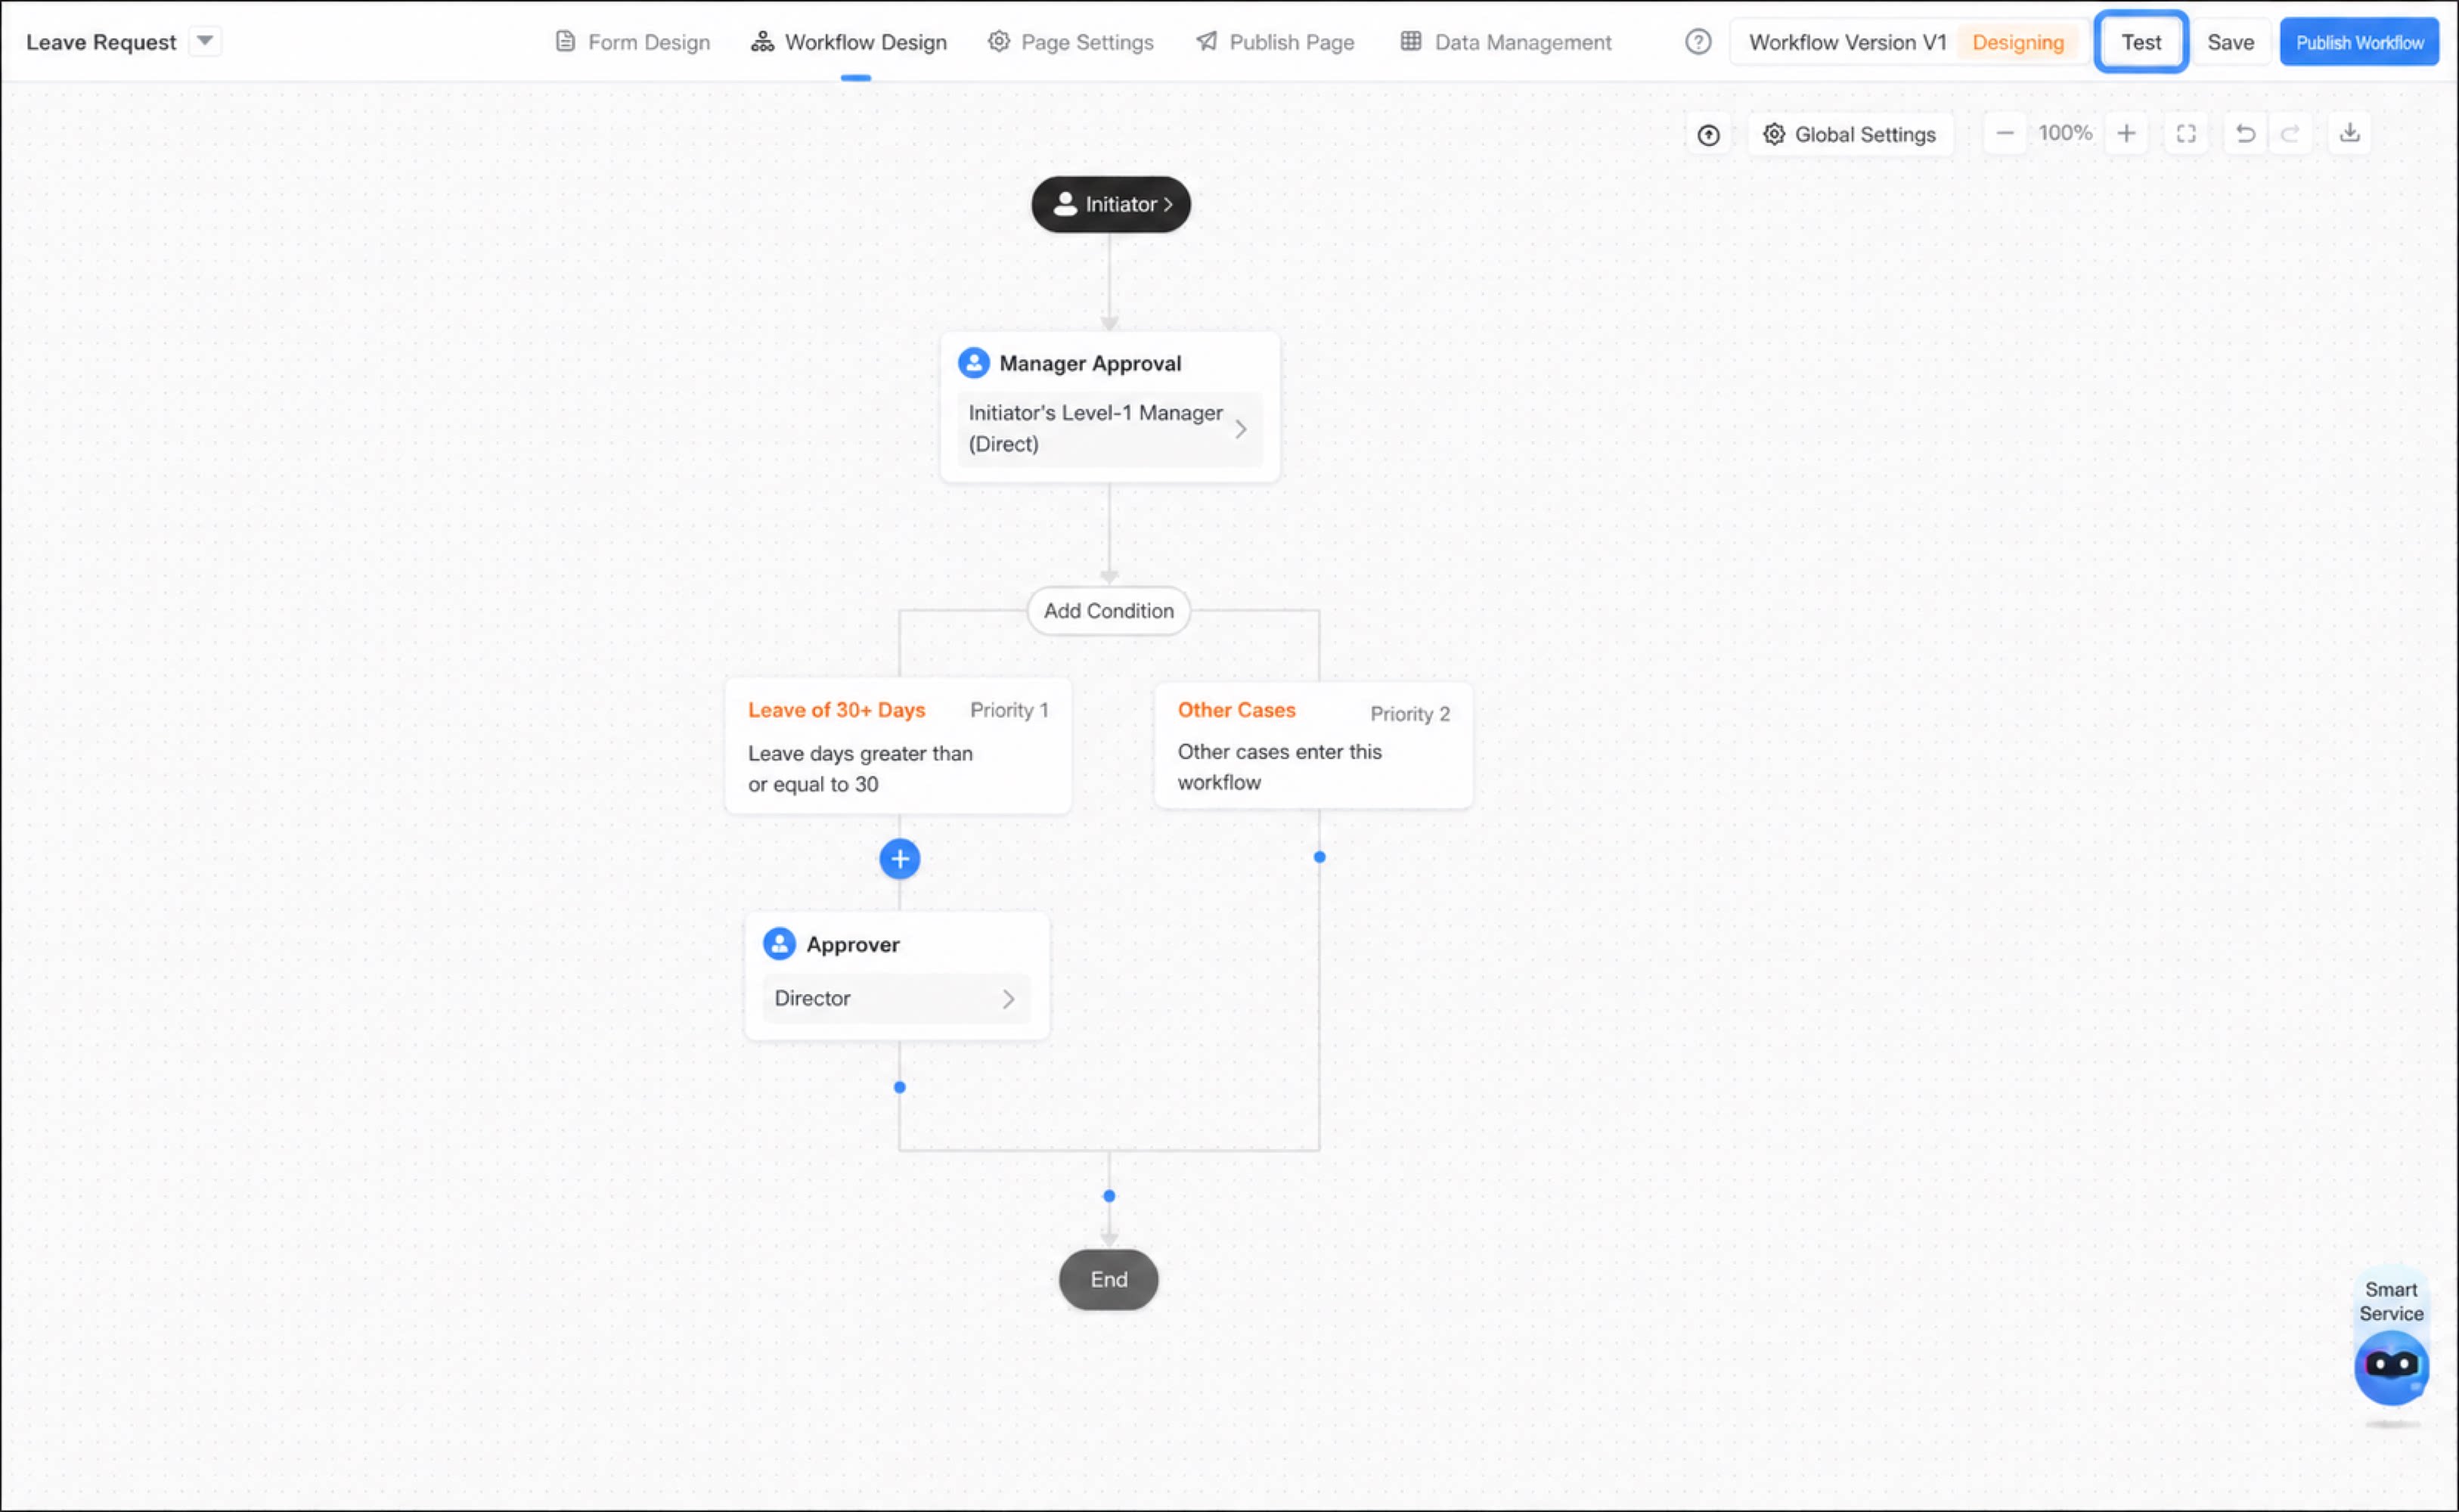
1
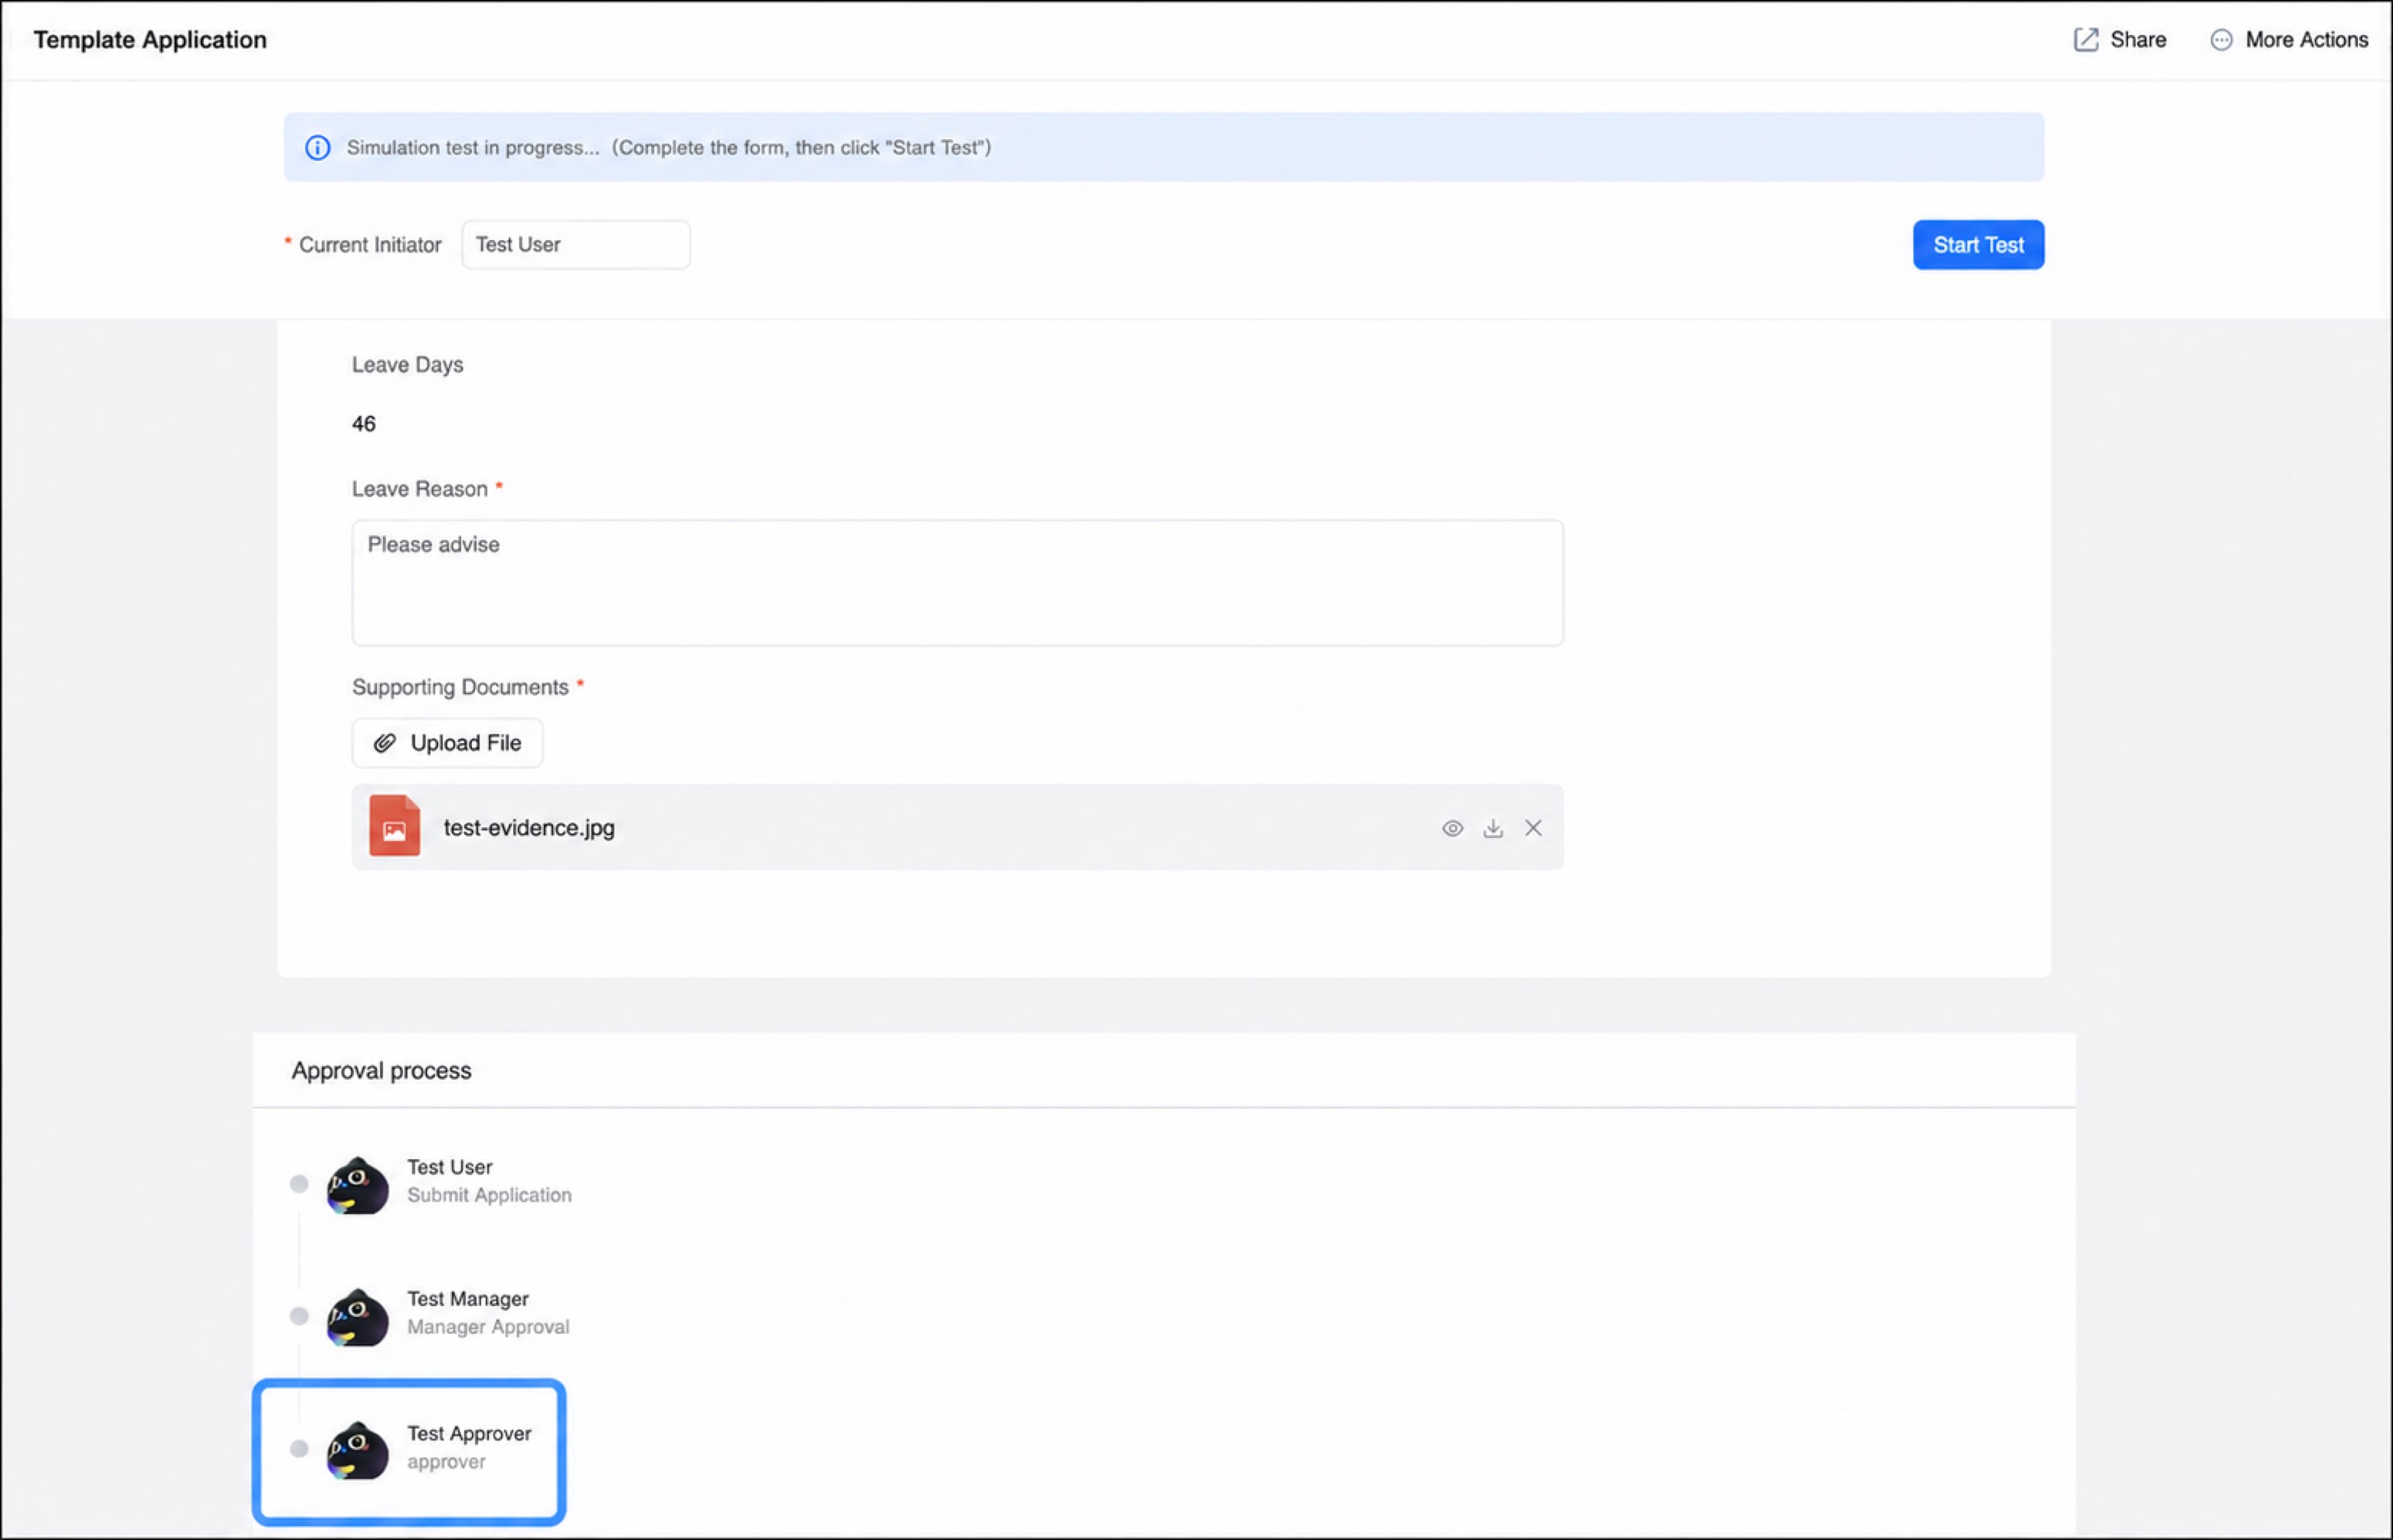
Click Test in the upper-right corner
2
Submit a leave request within 30 days, then click Start test
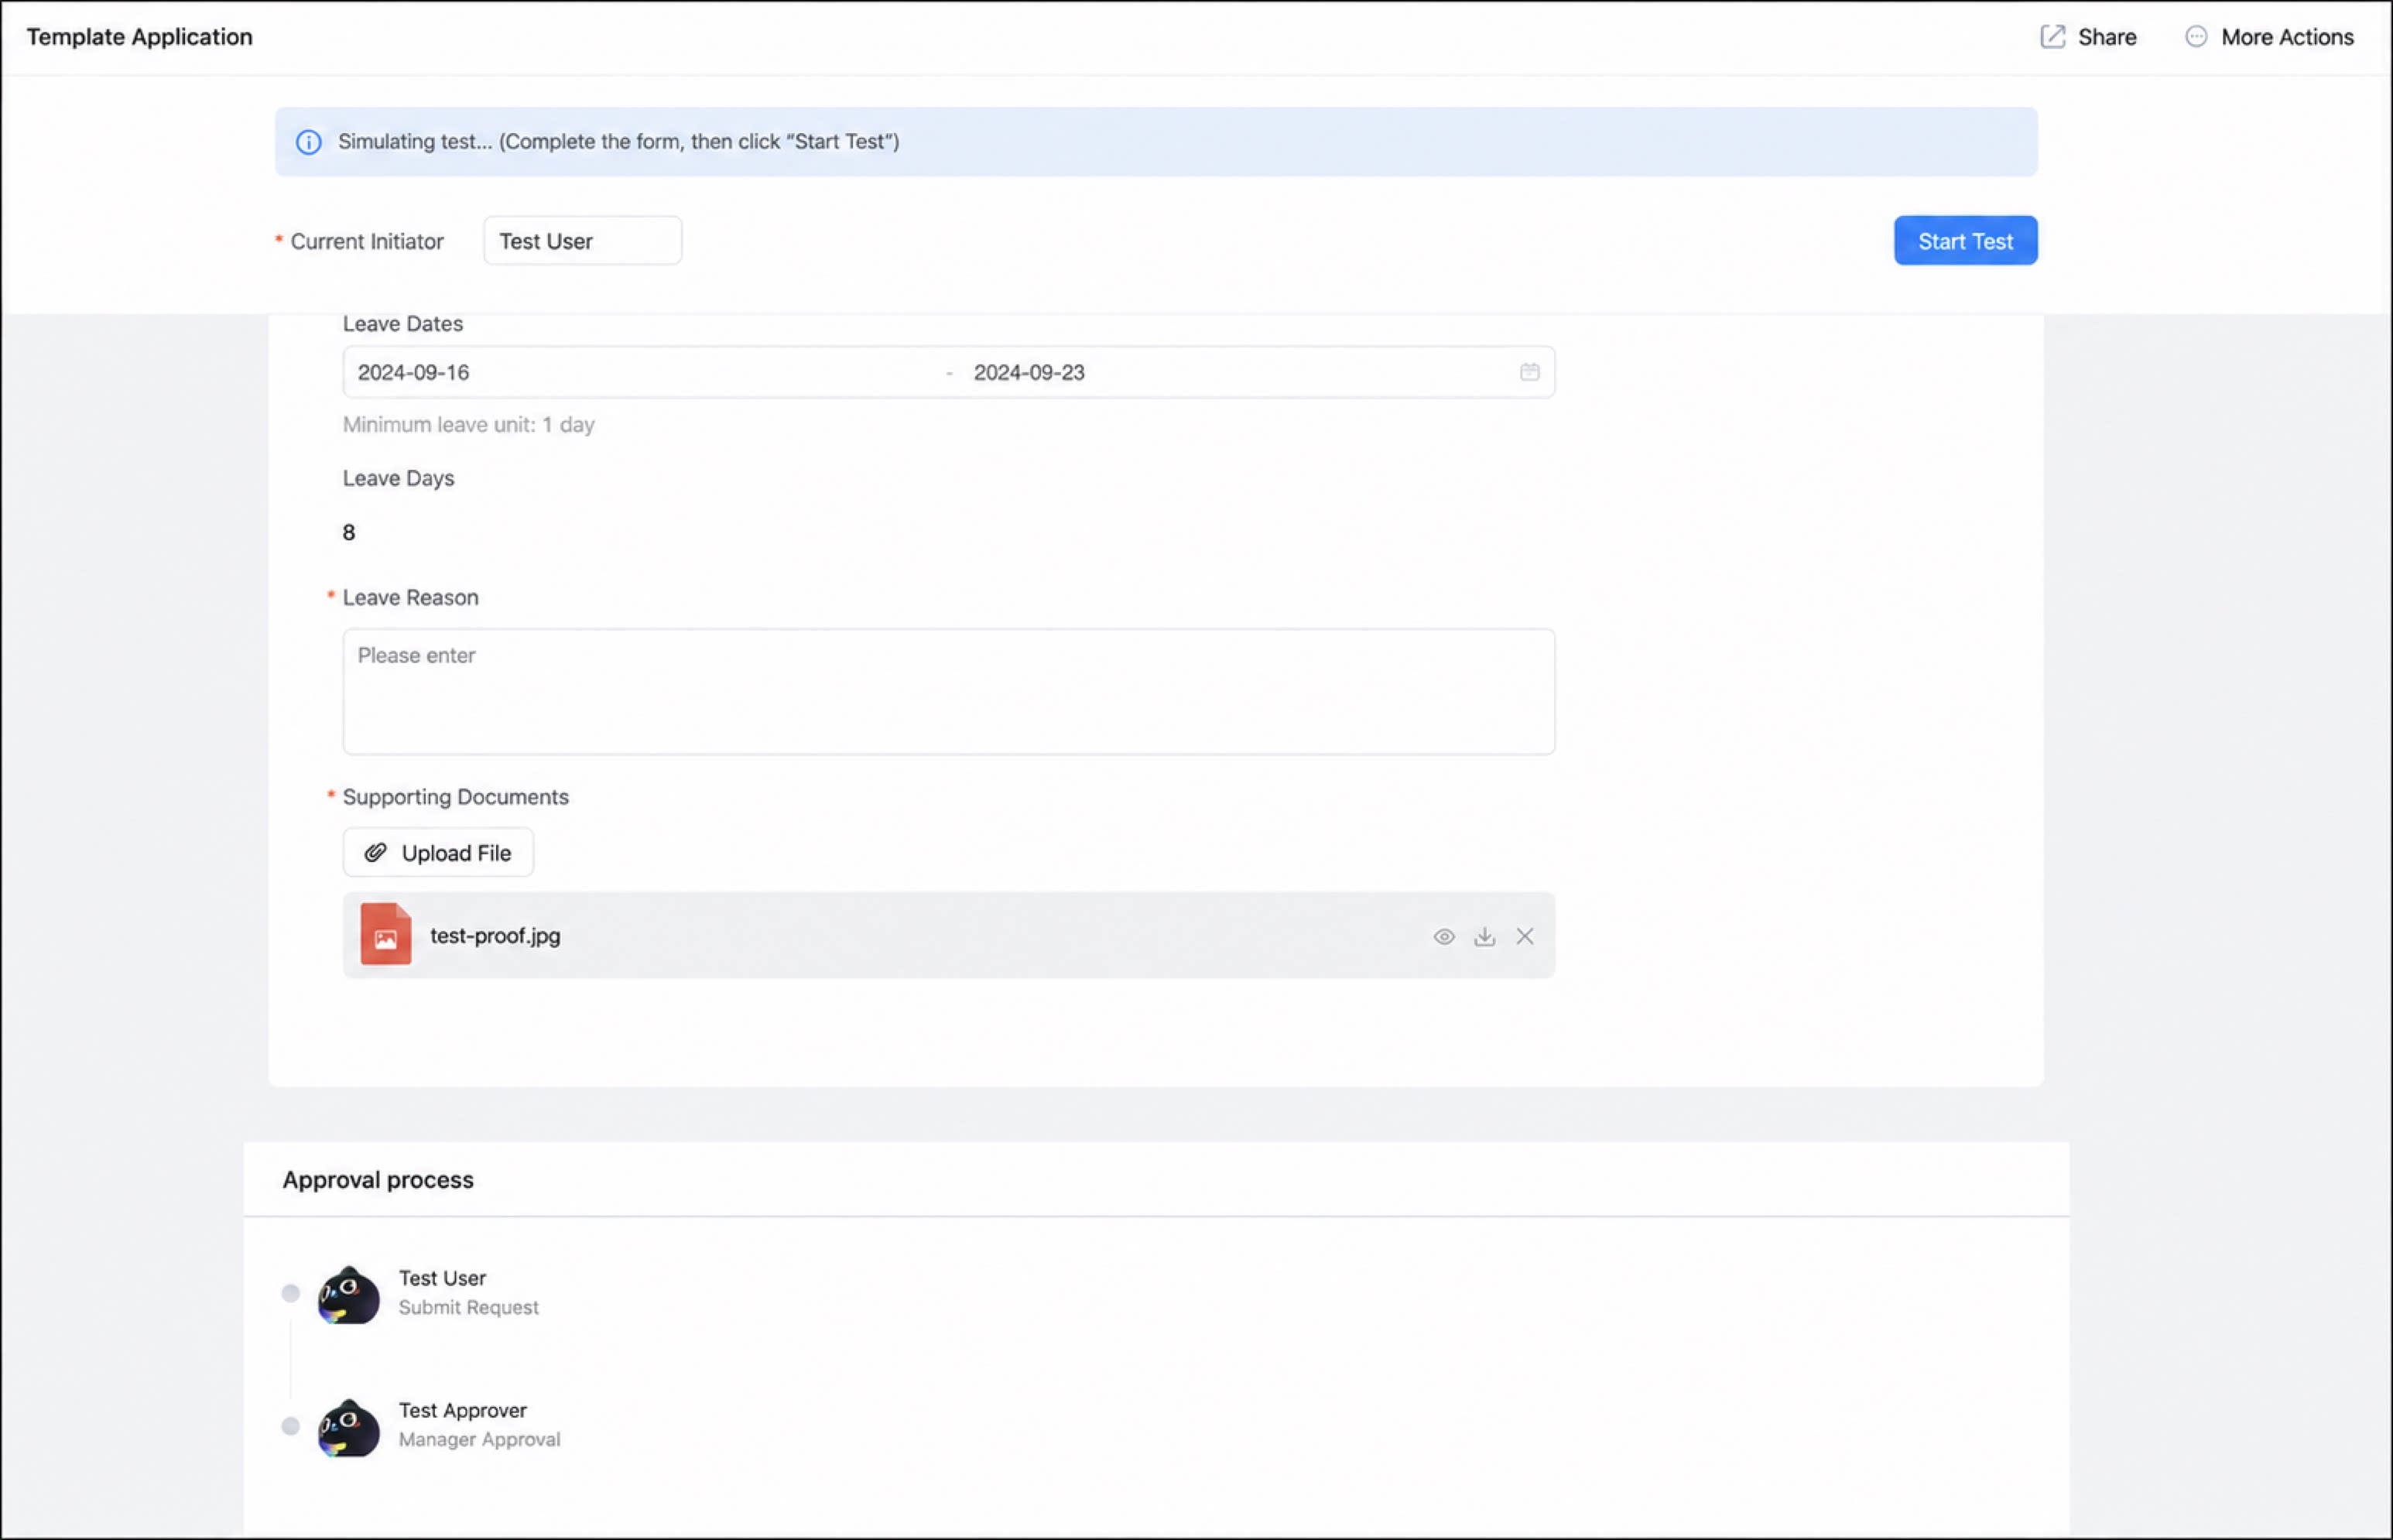
- Submit a leave request for more than 30 days, then click Start test.
Step 4: Publish the Approval Flow
After the flow design is complete and the test passes, return to the workflow design page and click Publish flow in the upper-right corner to enable the flow.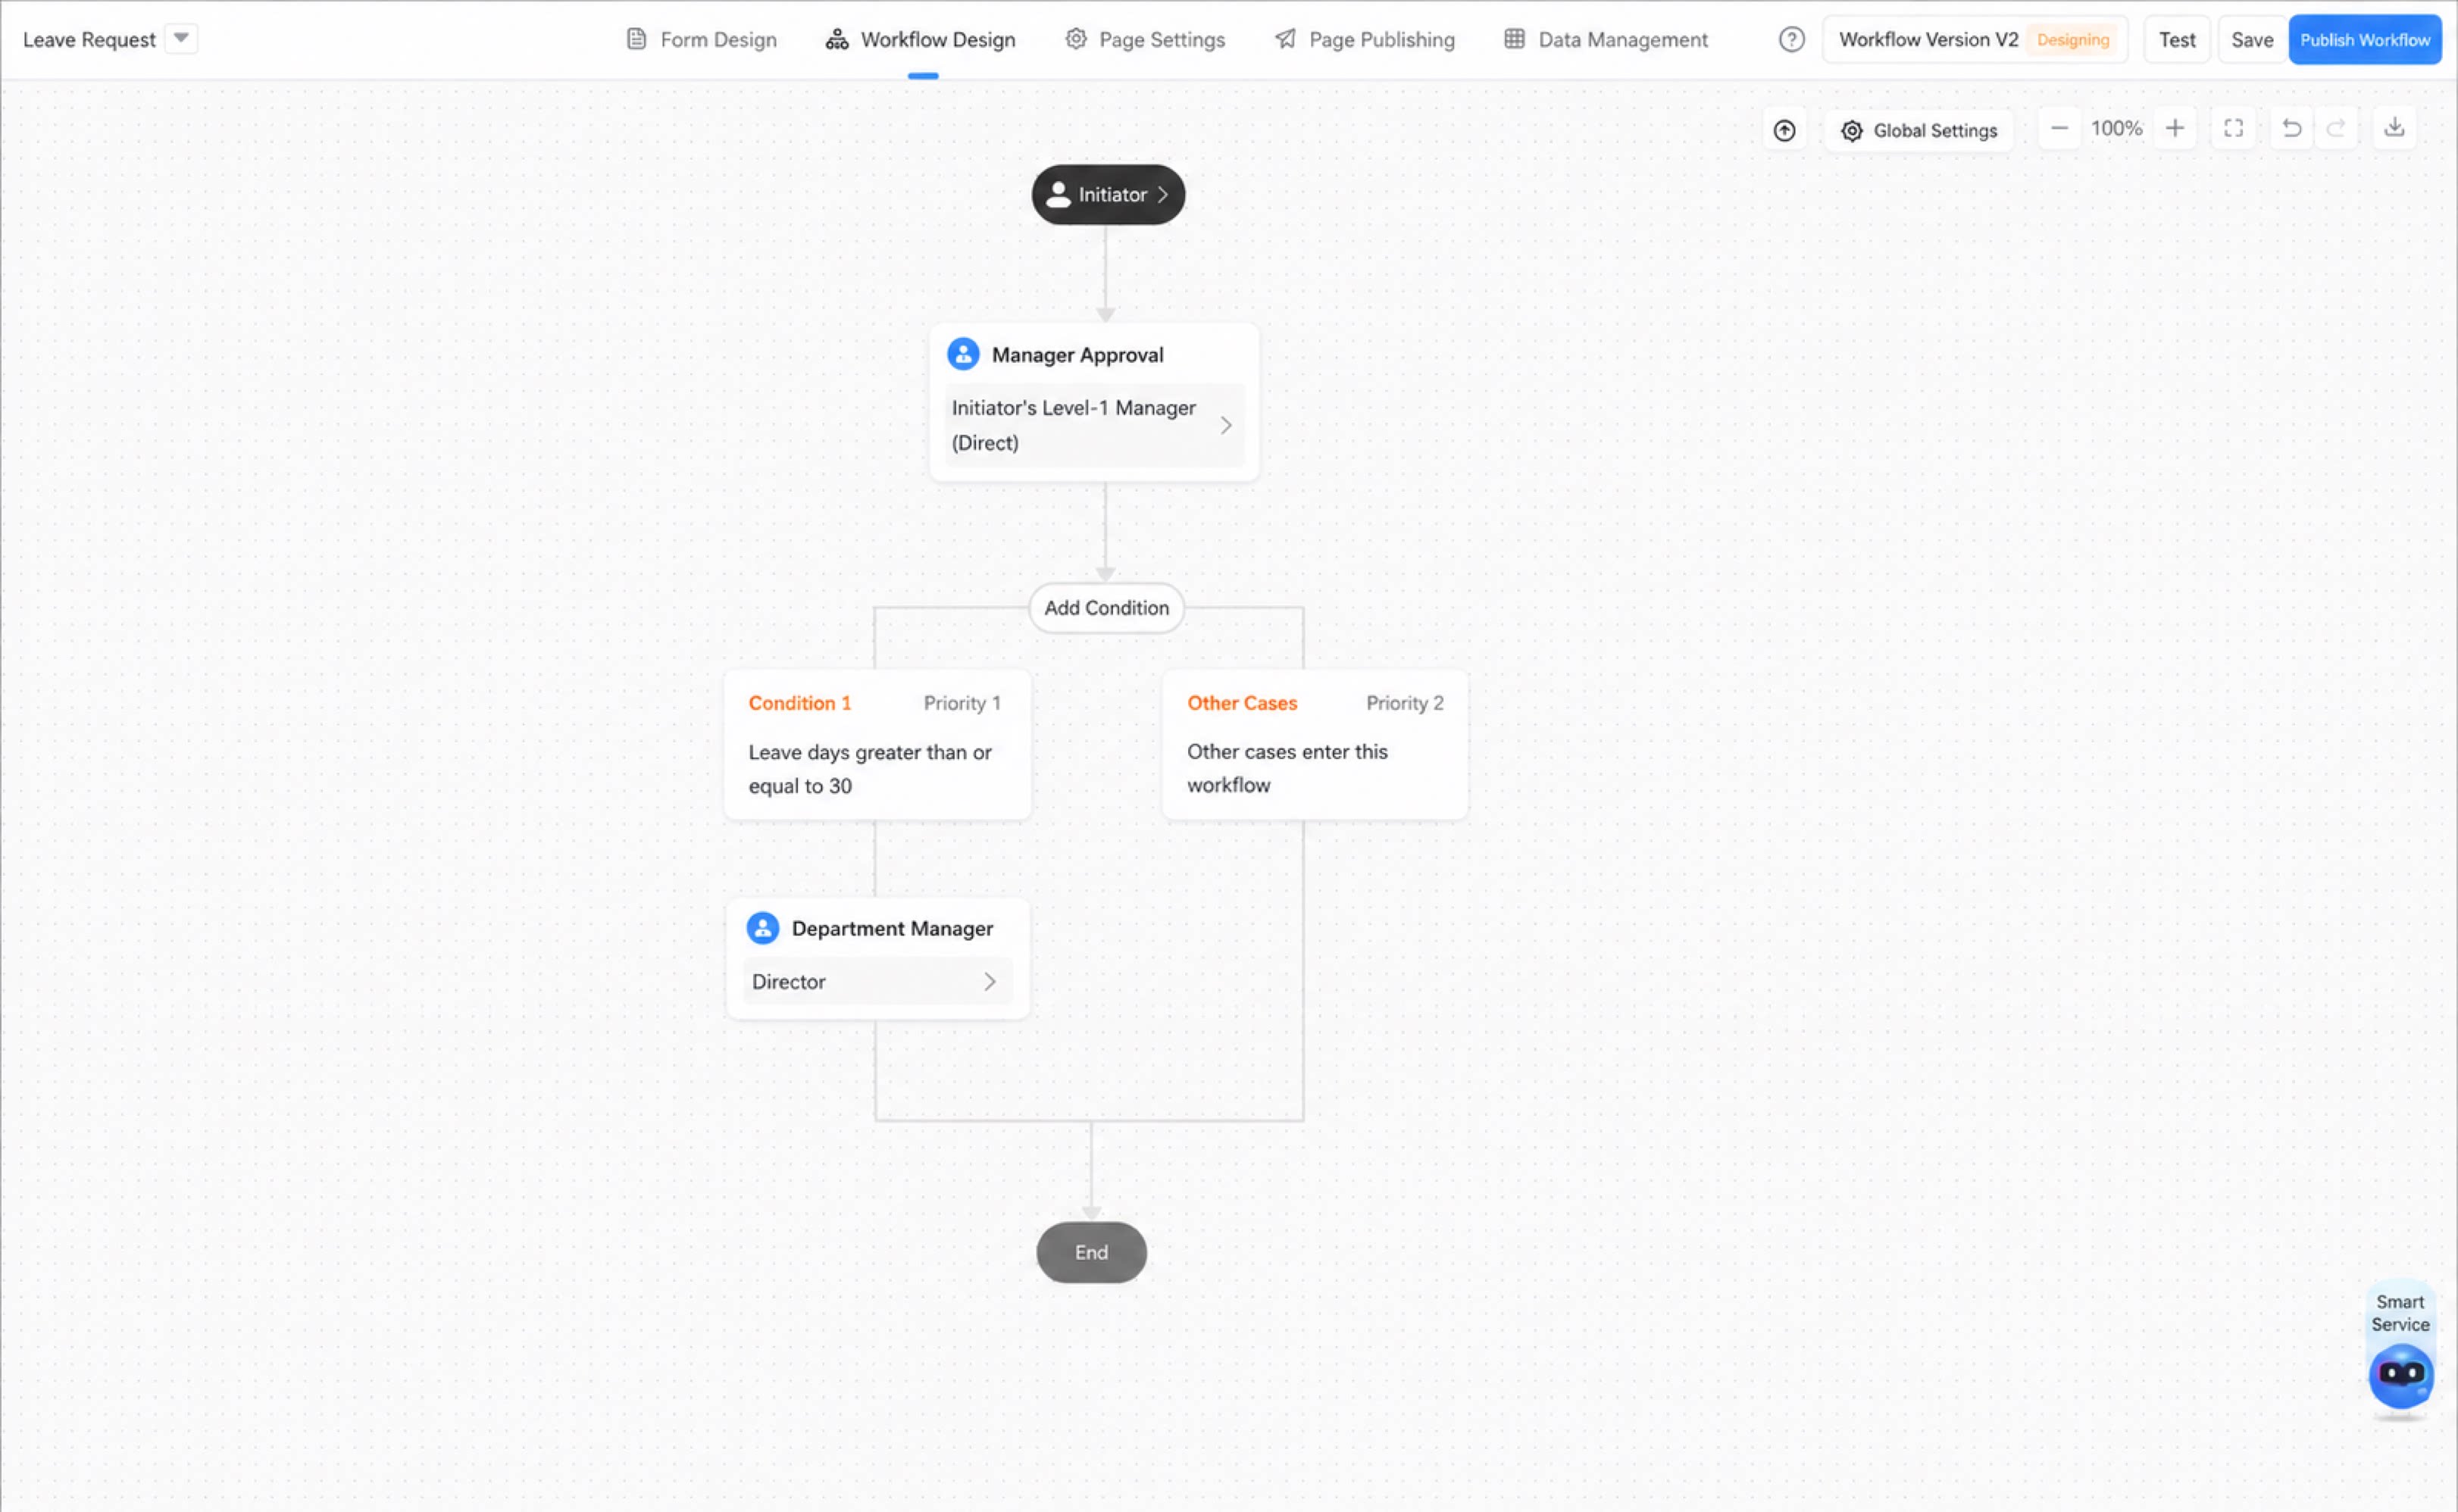
Notes
- The End node cannot be deleted.
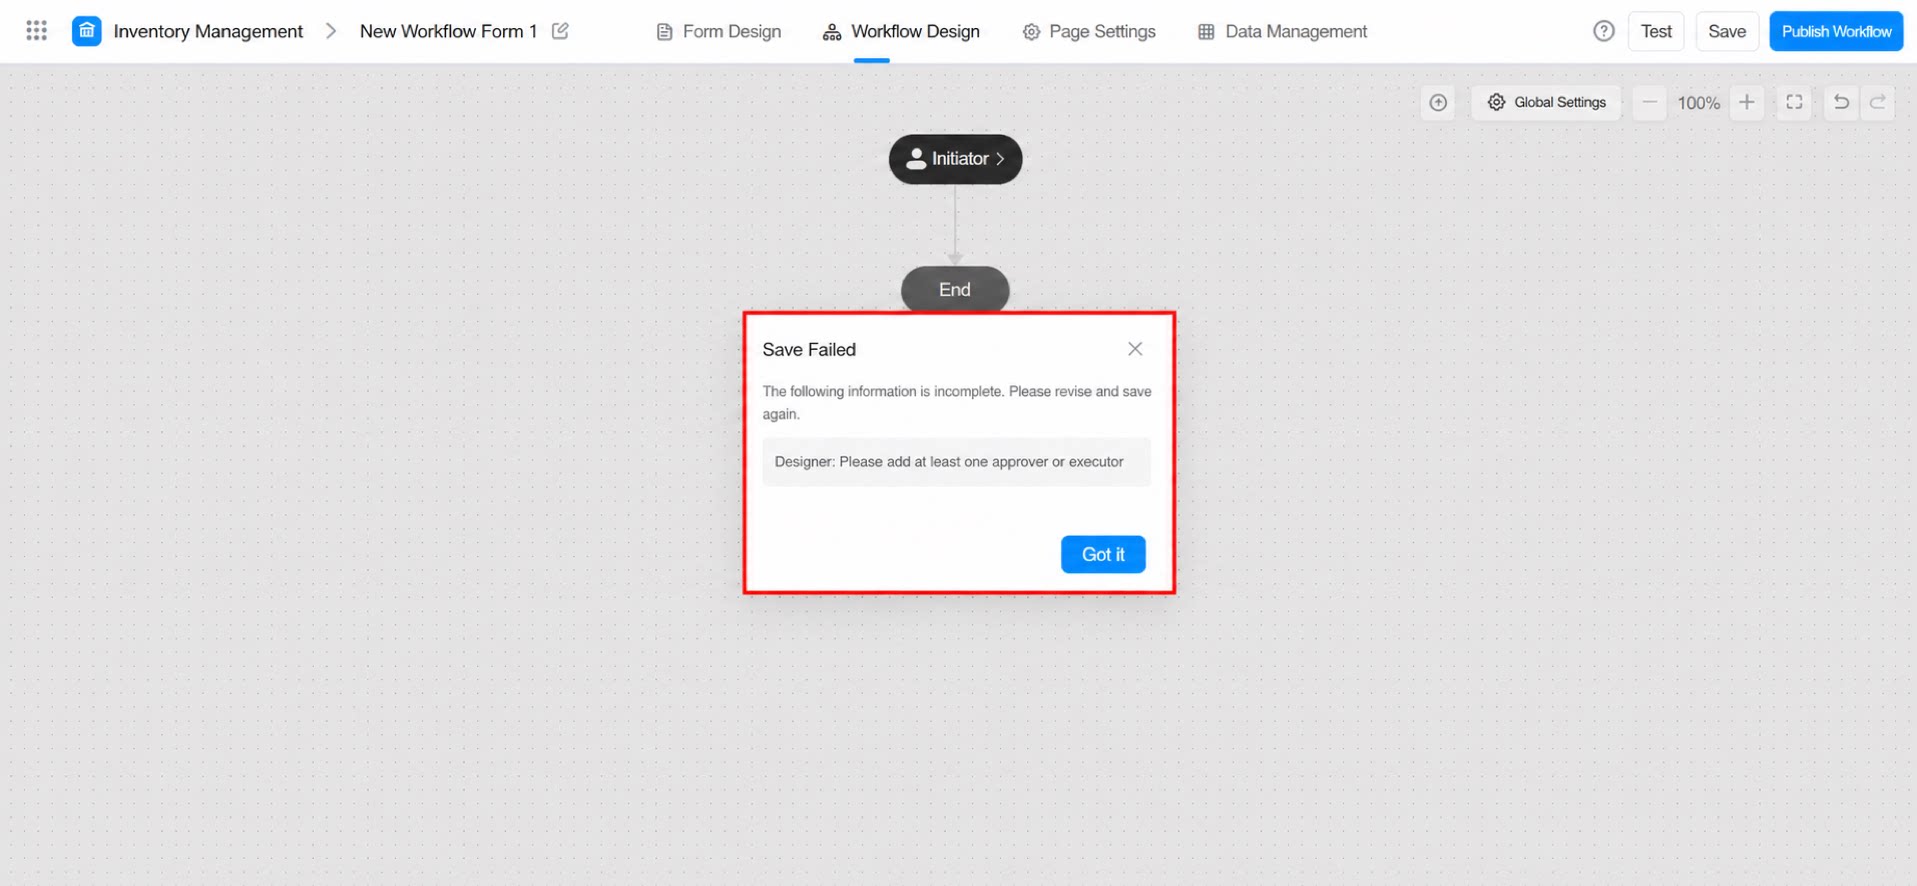
- An approval process must contain at least one approval or execution node; otherwise, it will fail to save.