1. Overview
1.1 Feature Overview
Forms are the foundational tool in YiDA. All data collection and entry rely on forms, which serve as the source of data.
YiDA offers two form types:
Regular form: Collects all data generated during business operations. Collected data can be shared with different collaborators. You can publish data permissions to internal members who need to manage the data, or to external members for external data collection.
Workflow form: Enables data to flow from the bottom up through multiple approval levels. Permissions can also be assigned to further manage workflow data.
The key difference between a regular form and a workflow form is that a workflow form requires step-by-step approval and workflow configuration.
1.2 Use Cases
- Regular form: surveys and statistics, online registration, sales reporting, meeting reservations, procurement receiving, order entry, QR code check-in, and more.
- Workflow form: expense approval, work reports, task dispatching, employee leave requests, item requisition, repair requests, feedback collection, and more.
1.3 Availability
Forms are a Free YiDA feature and are available to users on all plans.
Free plan users are limited to 20,000 data records and 20 GB of attachment storage. For details, see YiDA pricing policy.
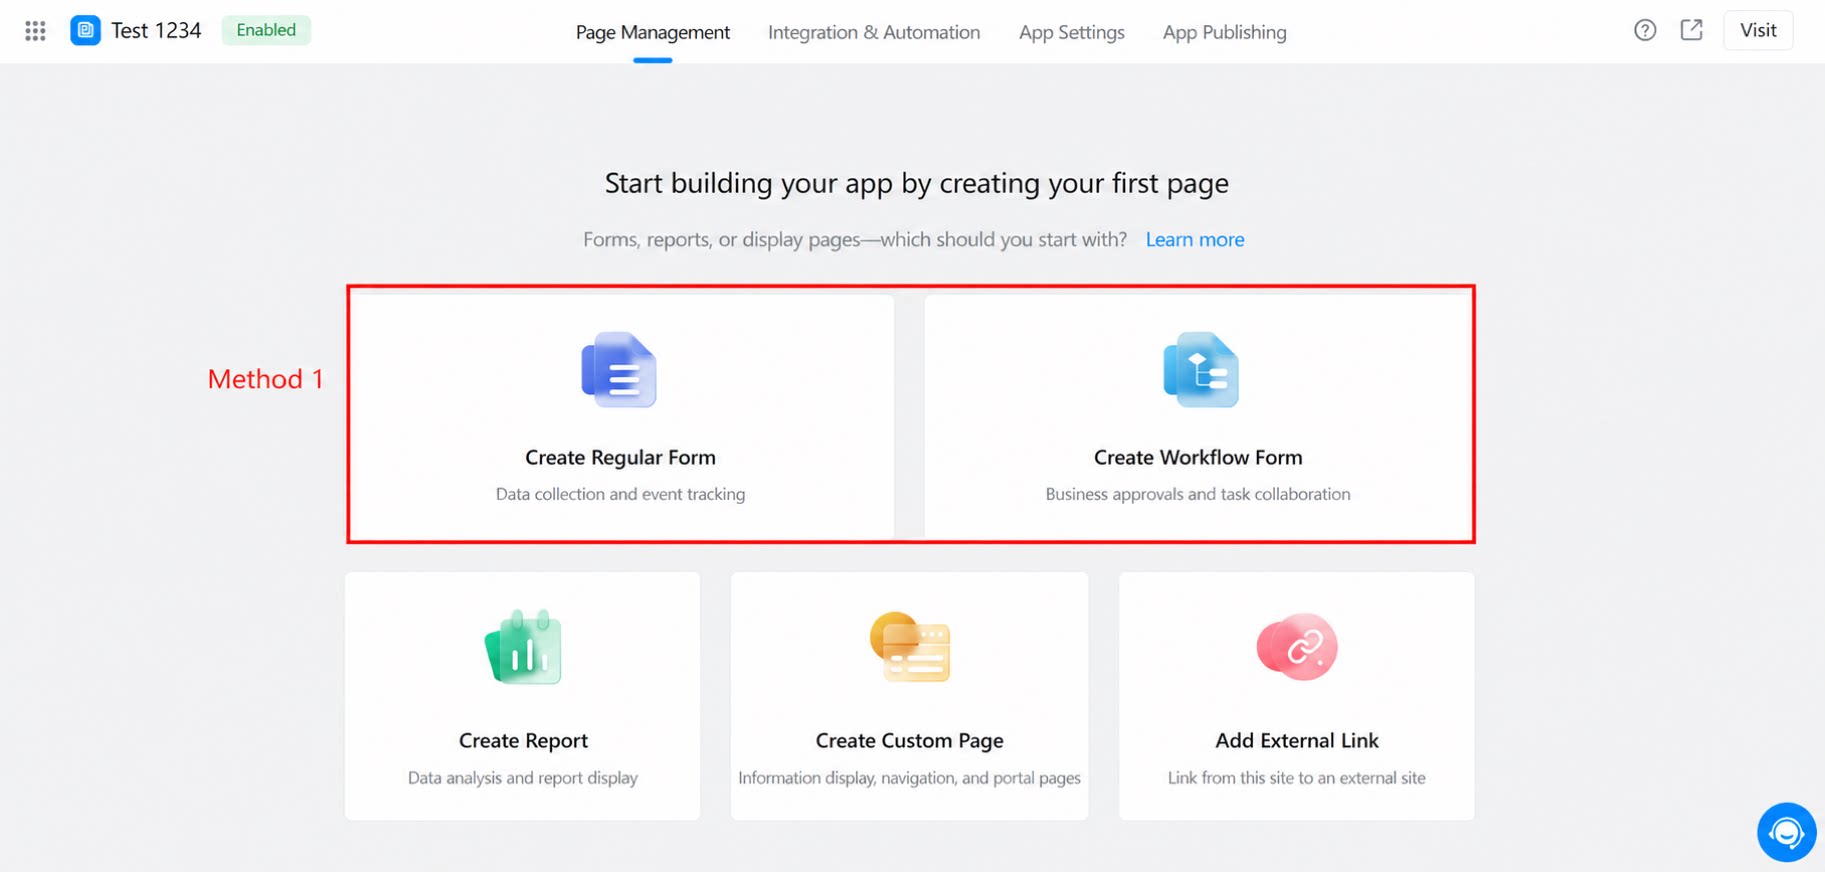
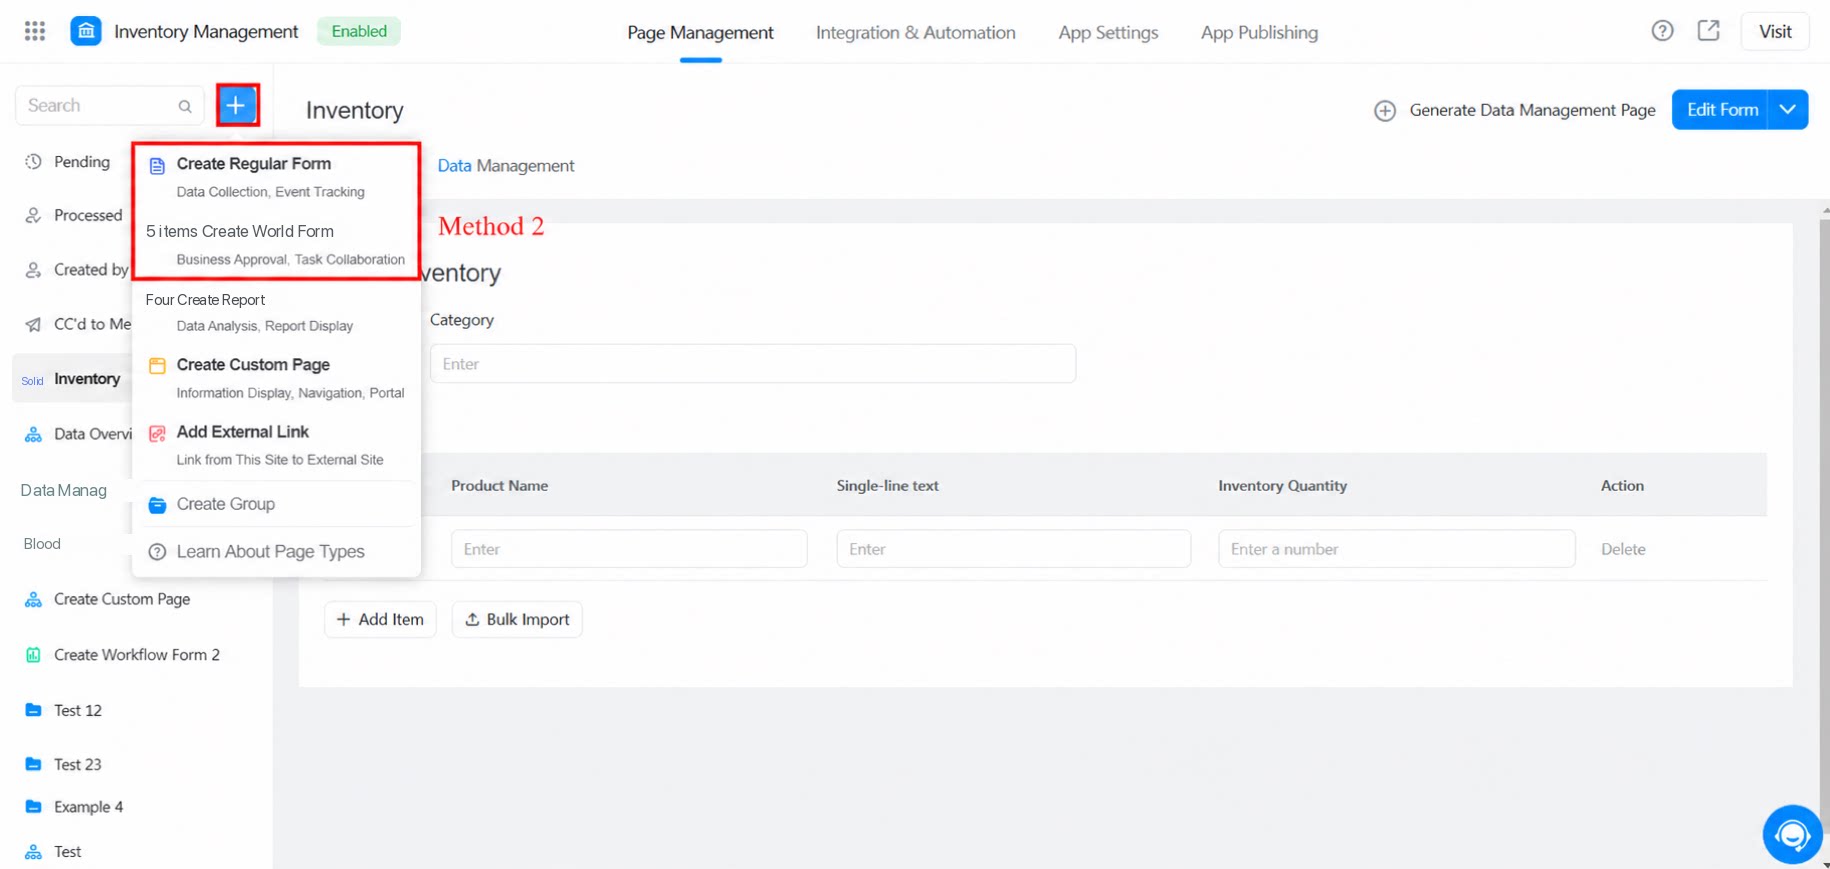
After creating a YiDA app, you can create a regular form or a workflow form in the following ways:
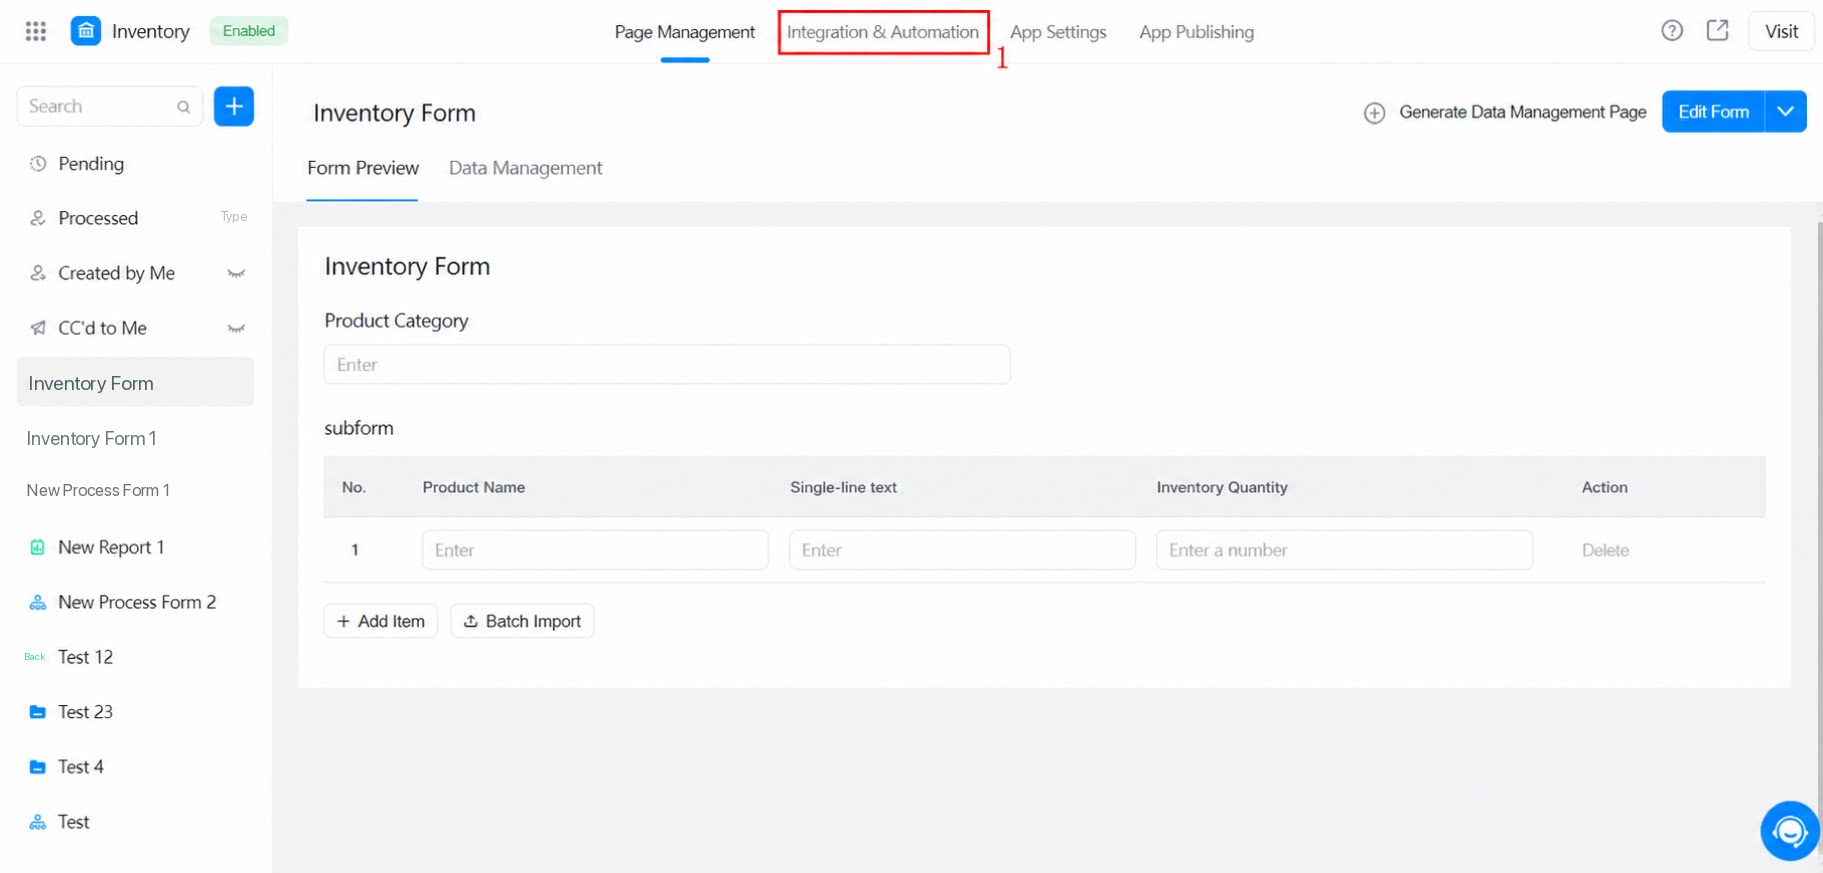
Method 1: Open the newly created app, go to Page Management, and select Create form or Create workflow form.
Method 2: Open the app, click the + icon in the upper-left corner, and select Create form or Create workflow form.
After creating a form, you can begin configuring it. Setup for workflow forms and regular forms differs slightly — workflow forms require an additional workflow design step.
(1) Regular form
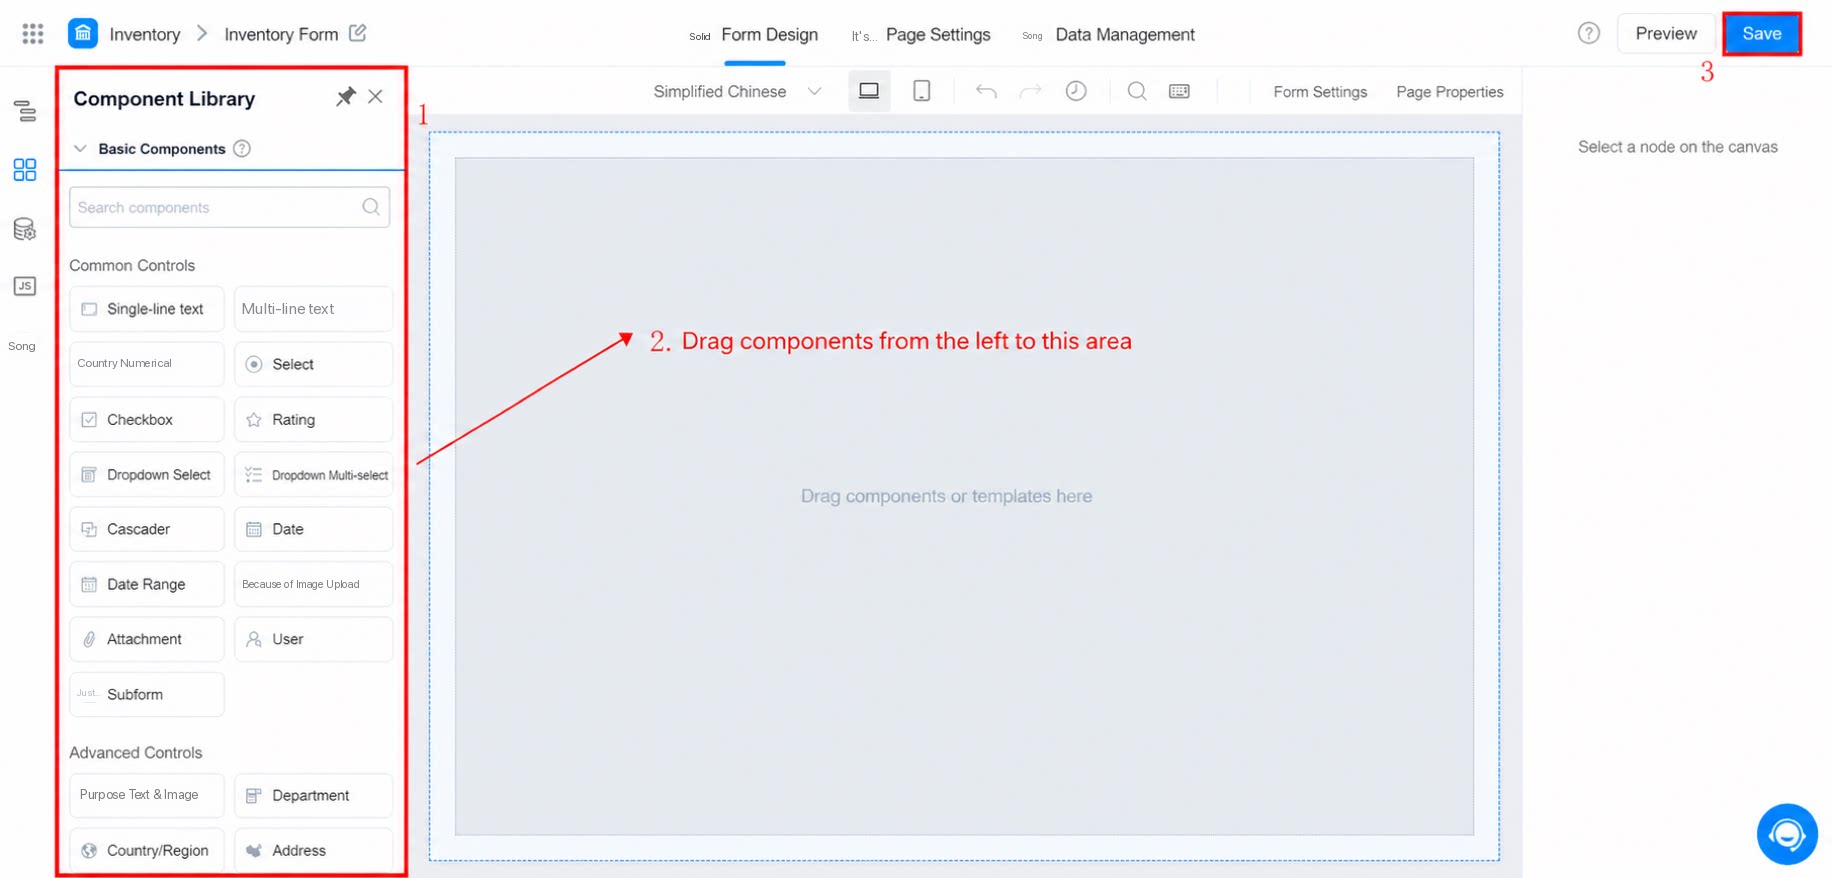
Setup steps: Open Form design >> Select the components you want to use >> Save.
(2) Workflow form
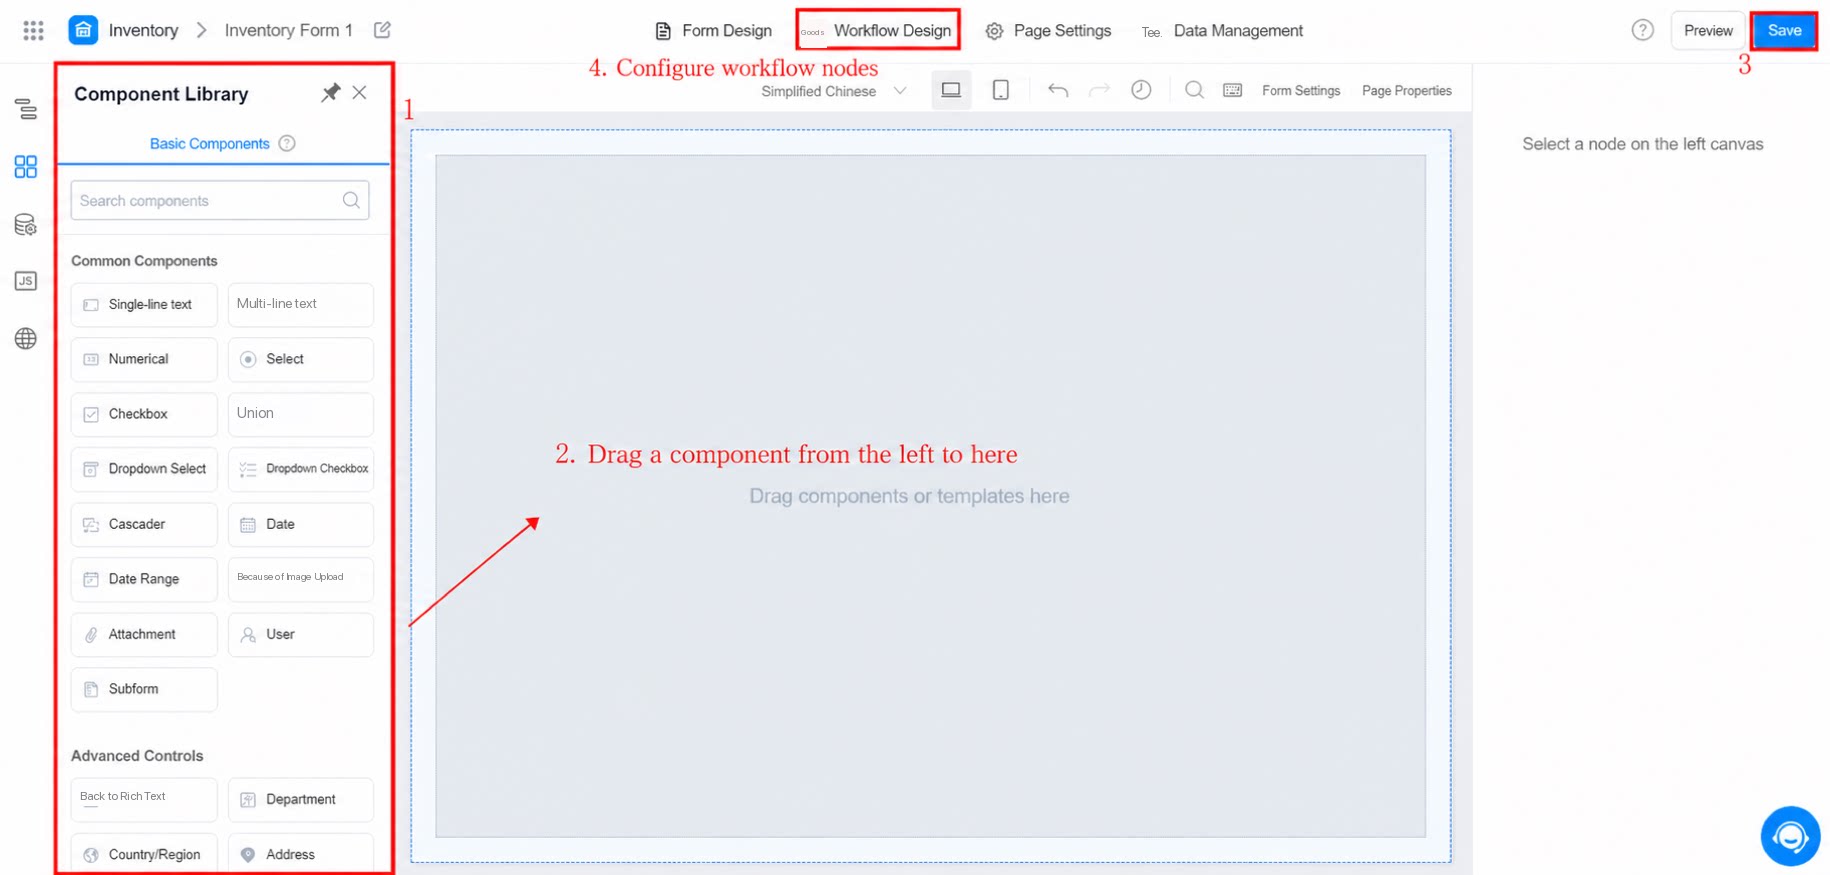
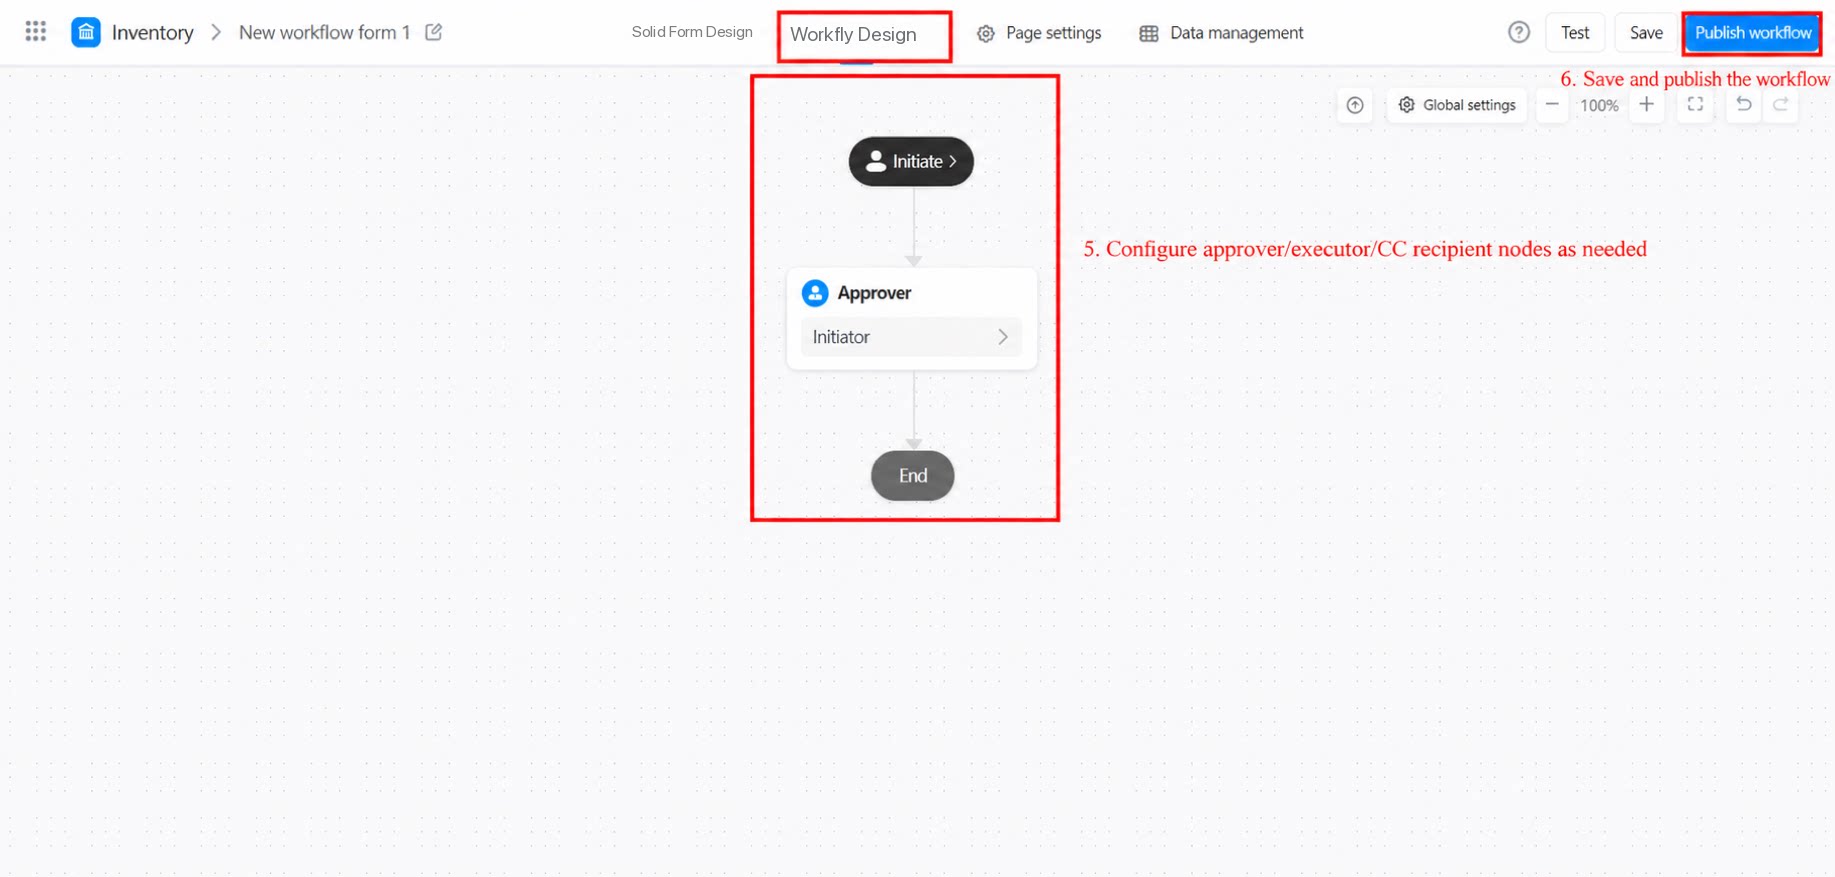
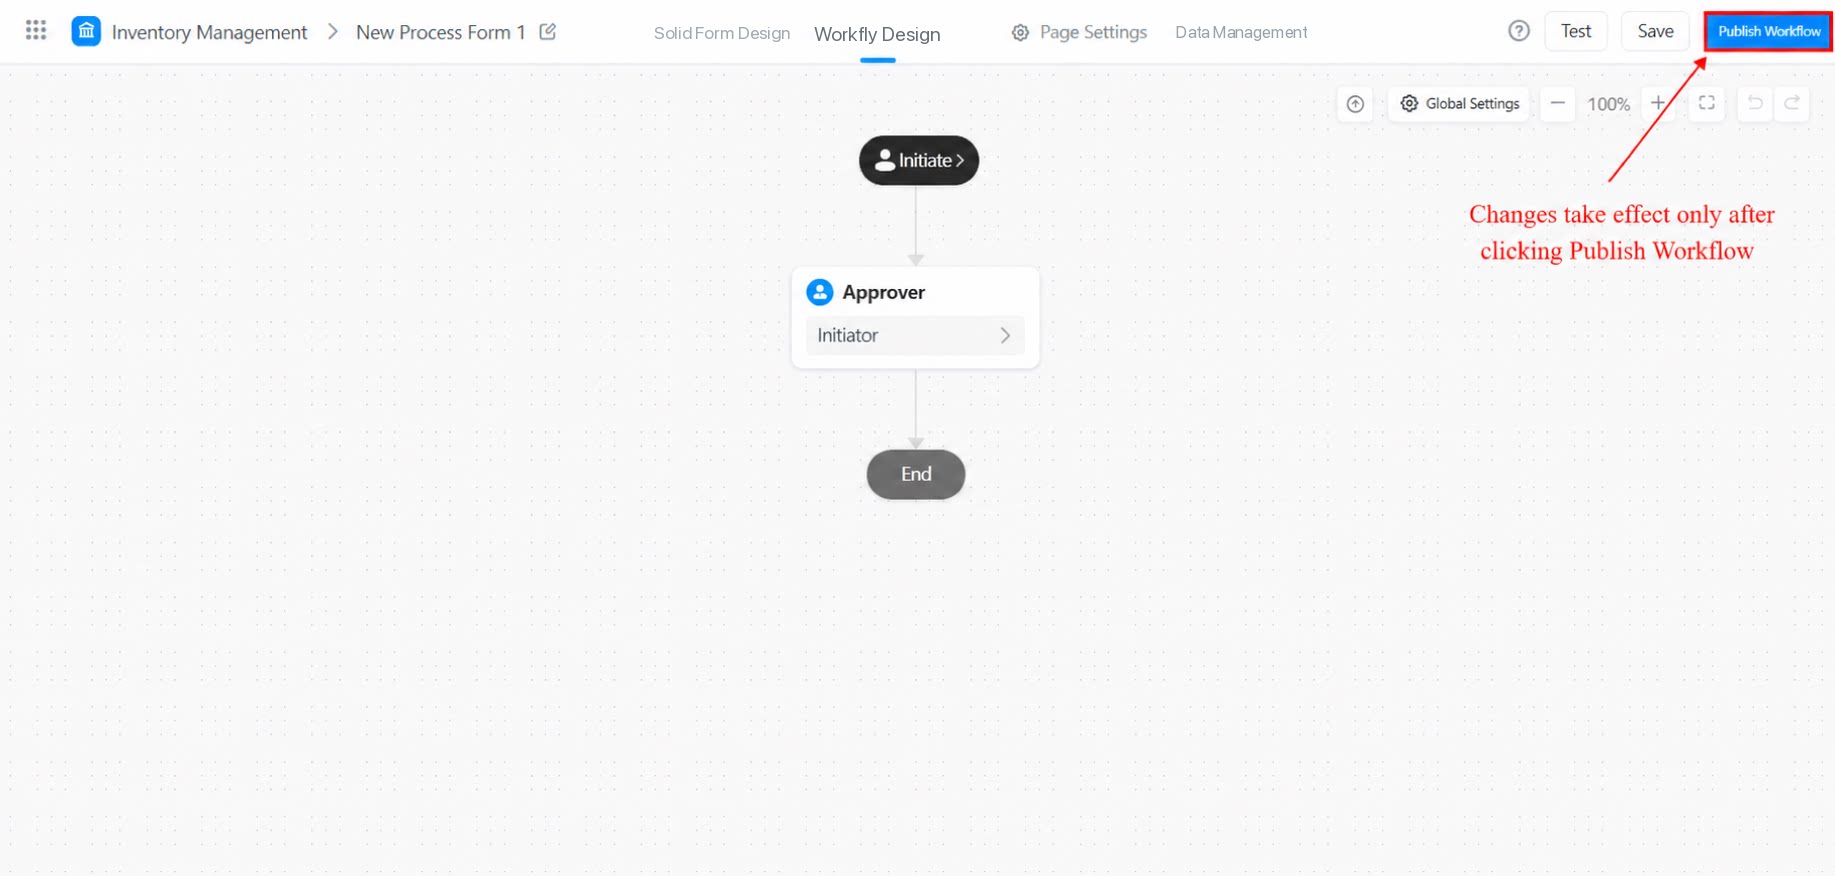
Setup steps: Open Form settings >> Select the components you want to use >> Save >> Workflow design >> Configure Steps such as approver, executor, and CC recipient >> Save >> Publish the workflow.
After completing the steps above, publish the app so that members can access the form and enter data. Admins can view submitted data in Data management.
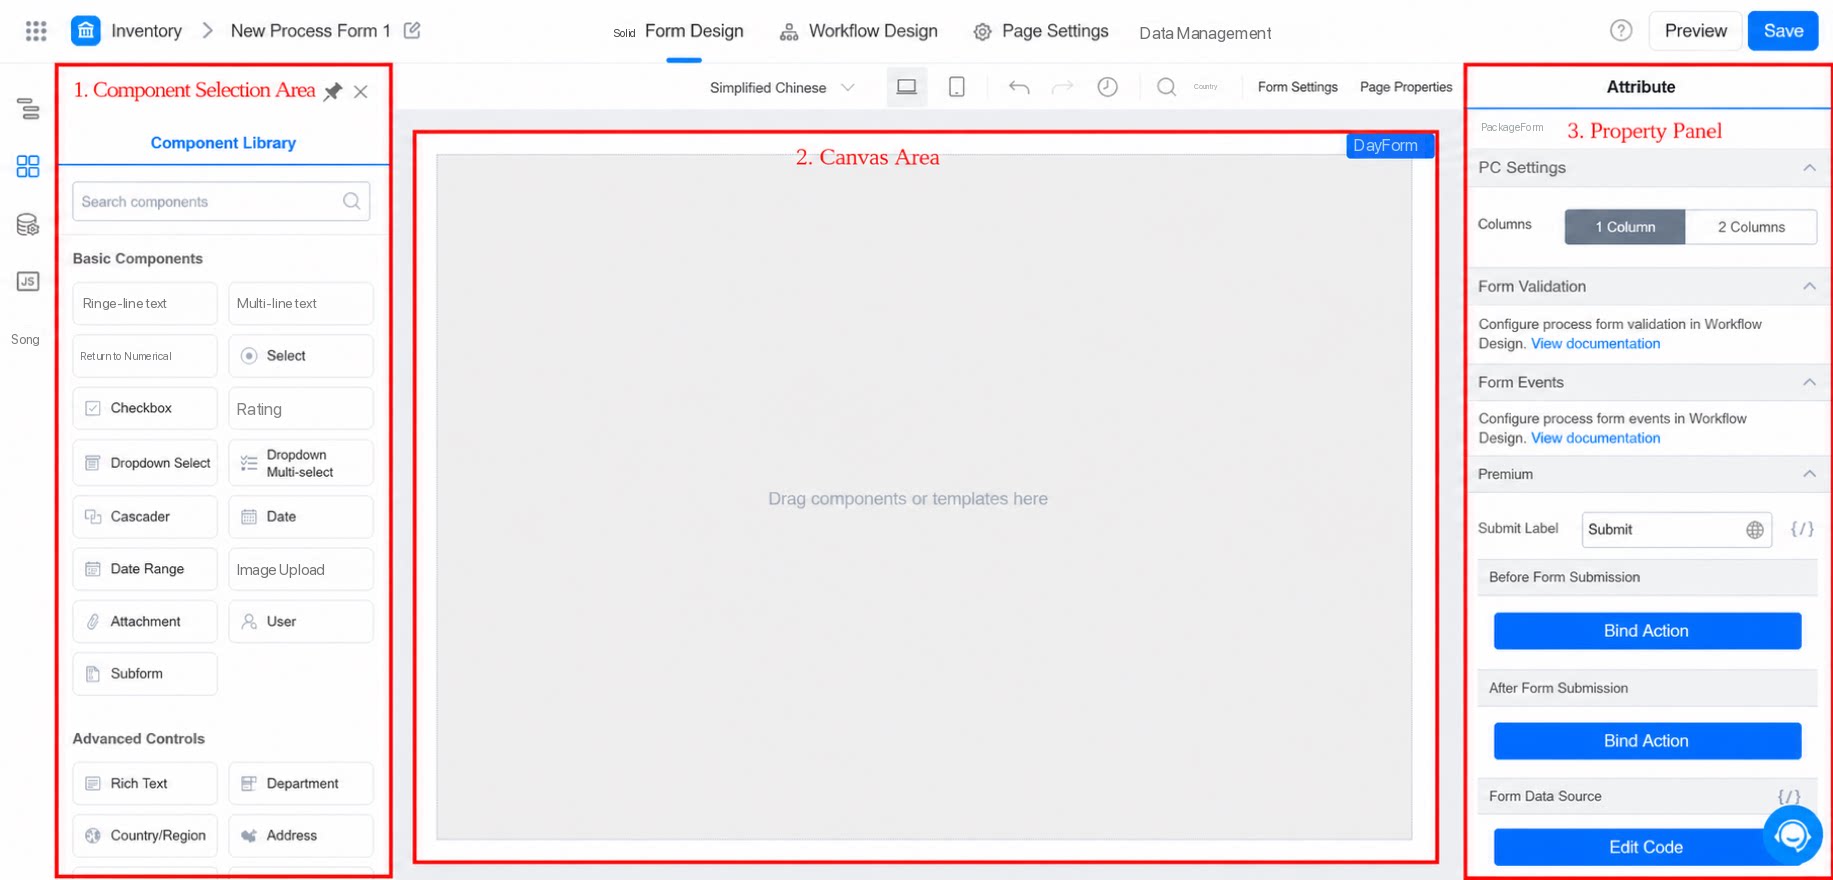
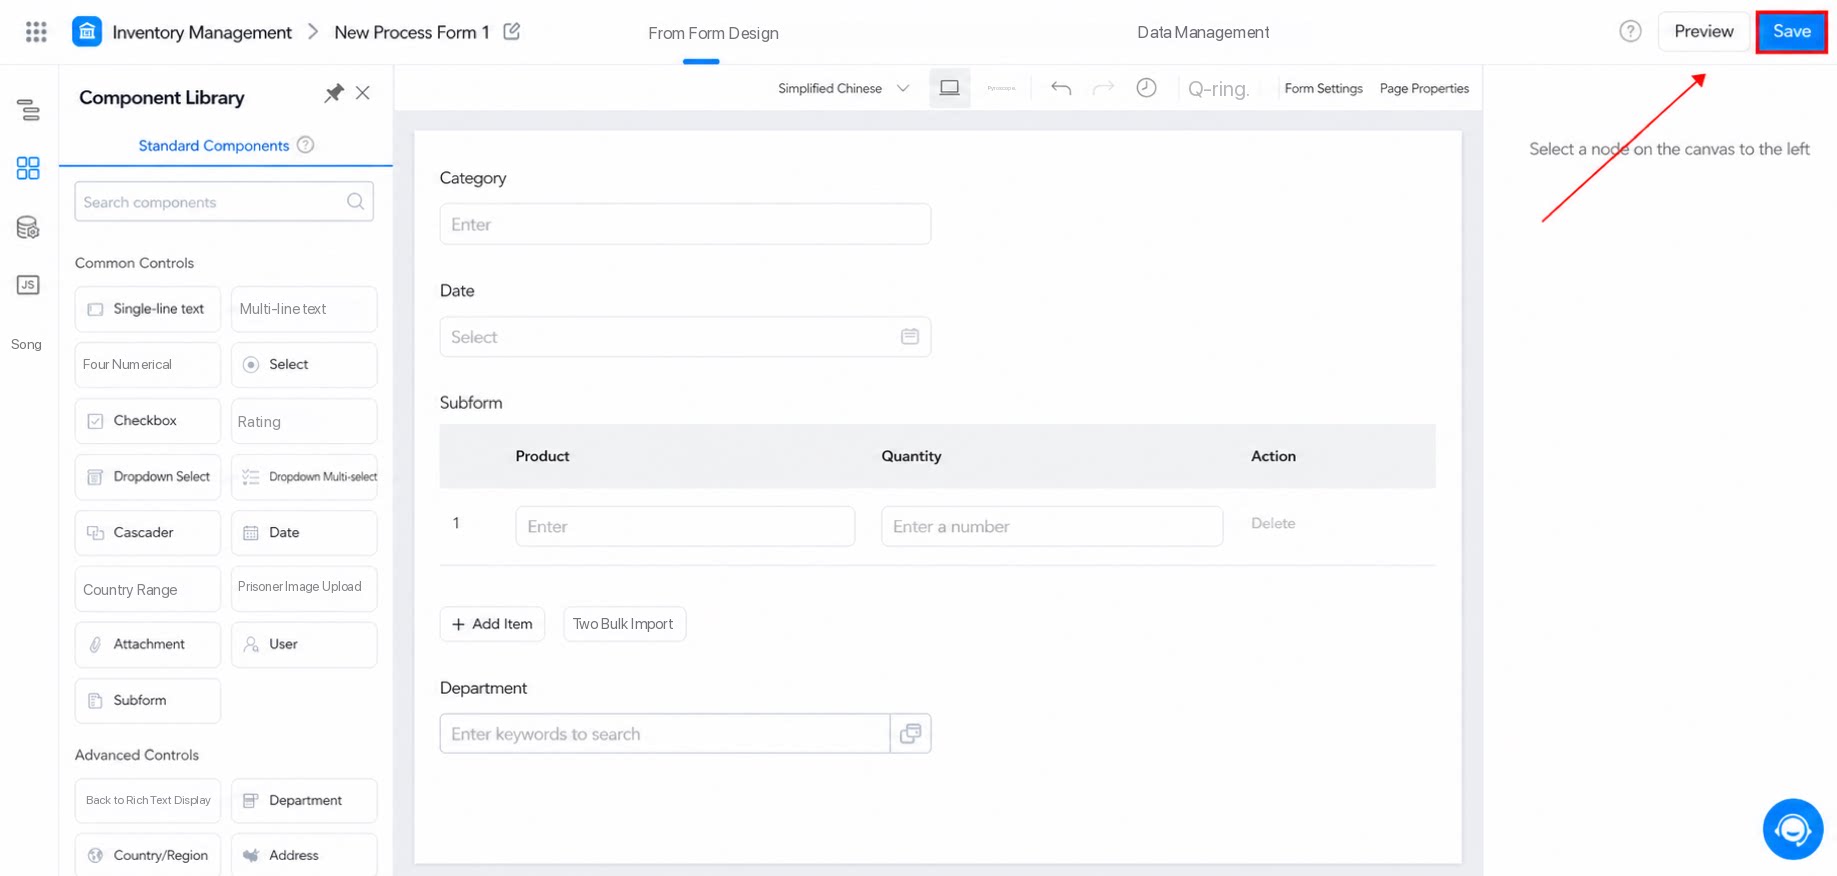
The form design page is divided into three sections, as shown below:
Component selection: choose components. Different components store different types of data.
Canvas area: arrange the layout and order of components.
Component attributes: configure attributes for individual components and for the form as a whole.
3.2 Workflow Design
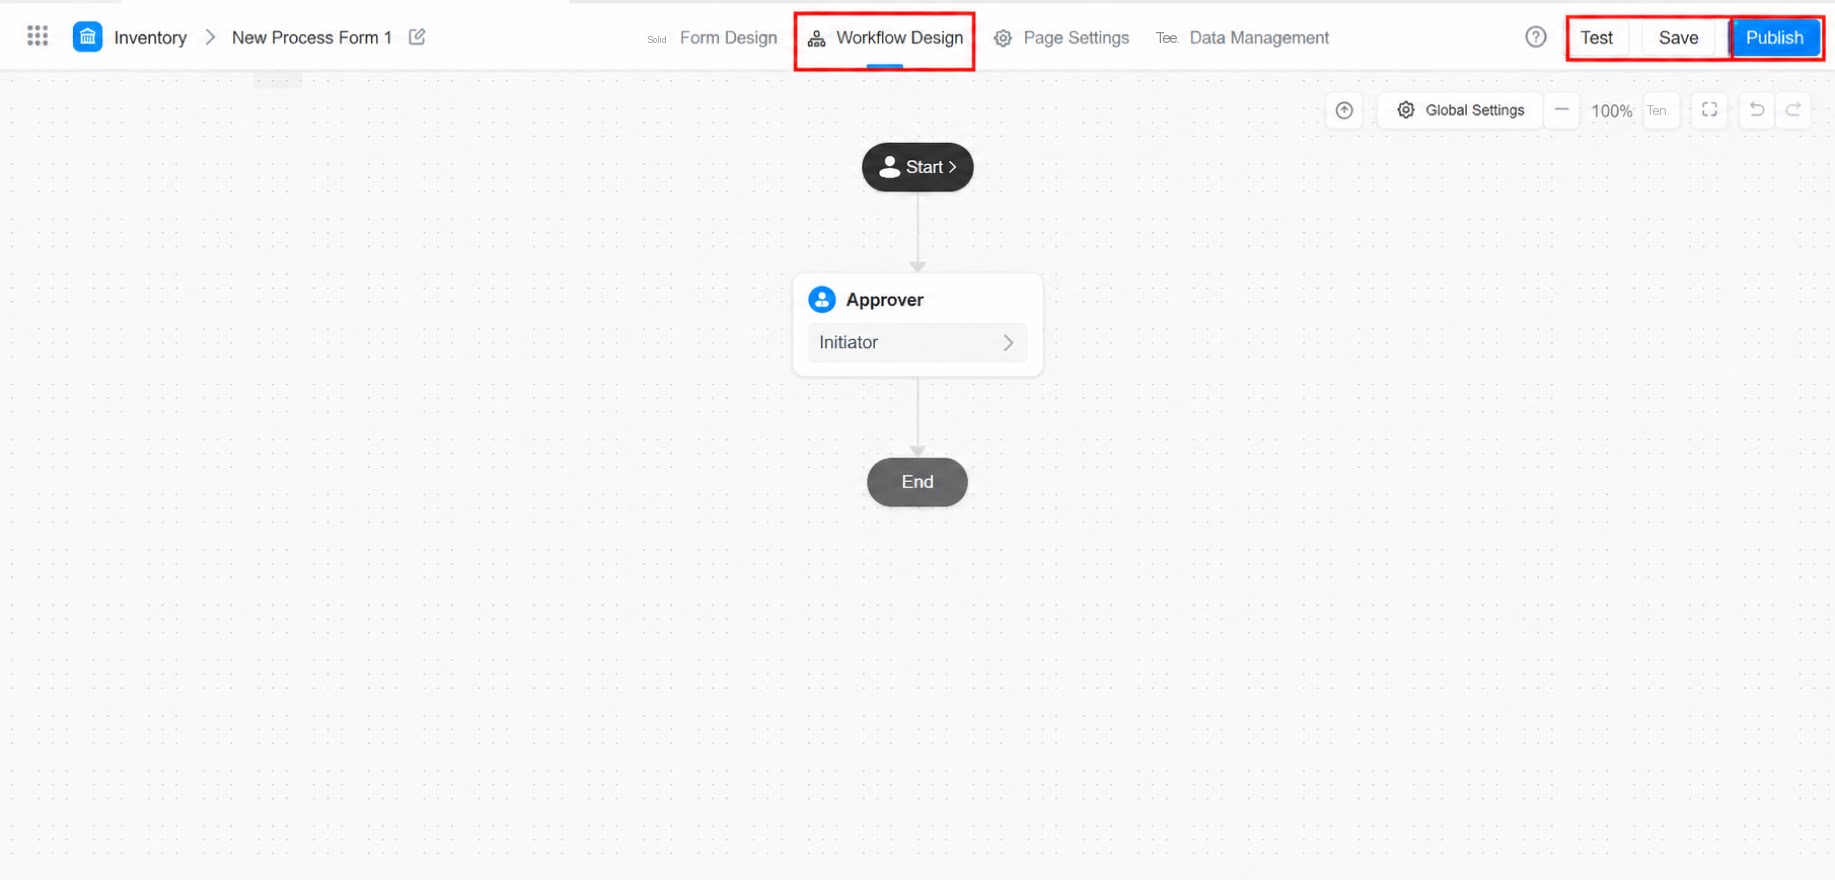
Workflow design applies only to workflow forms. Regular forms do not require this step.
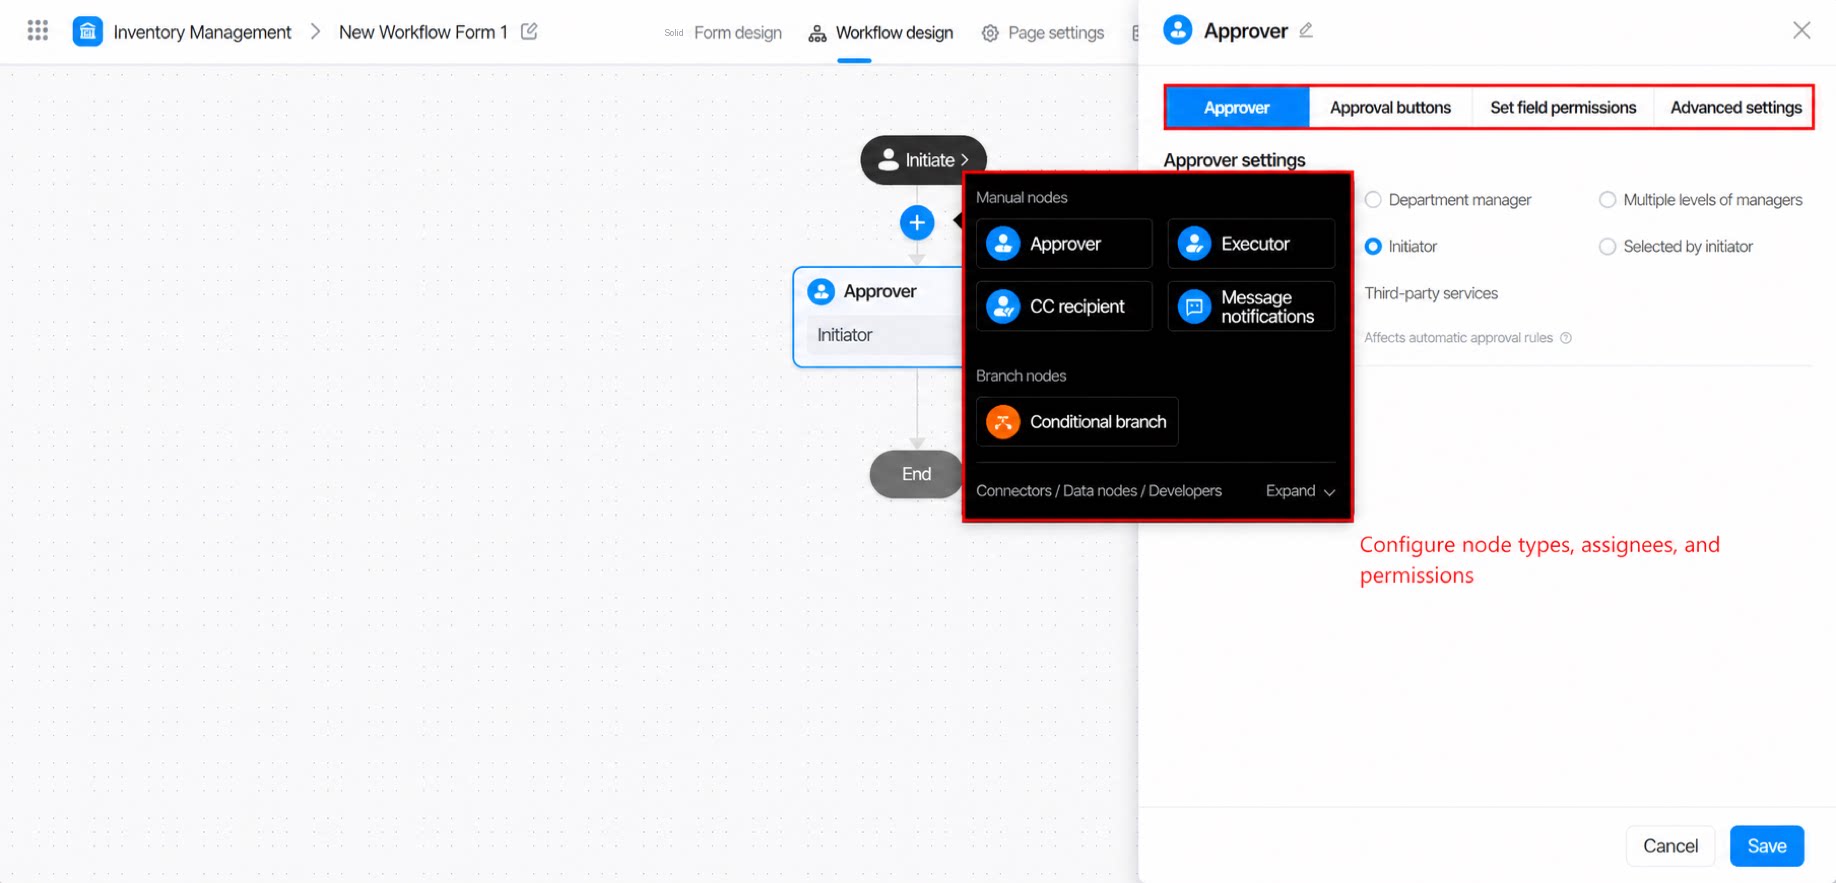
Step type selection: choose an approver, executor, or CC recipient Step based on your scenario.
Step user and permission configuration: configure user rules for approvers, executors, and CC recipients, as well as field permissions and approval permissions.
For both regular forms and workflow forms, after configuring components in form design, click Save in the upper-right corner to finish creating the form.
3.4 Publish the Workflow
Workflow forms include a default Step in which the initiator is set as the approver. This prevents workflows from stalling if the Admin forgets to configure Steps. You can customize Steps as needed. After customizing Steps, click Publish on the workflow page for the changes to take effect.
Note: Newly published workflow Steps apply only to data submitted after publication. Previously submitted data continues to follow the earlier workflow rules.
4. Data Management
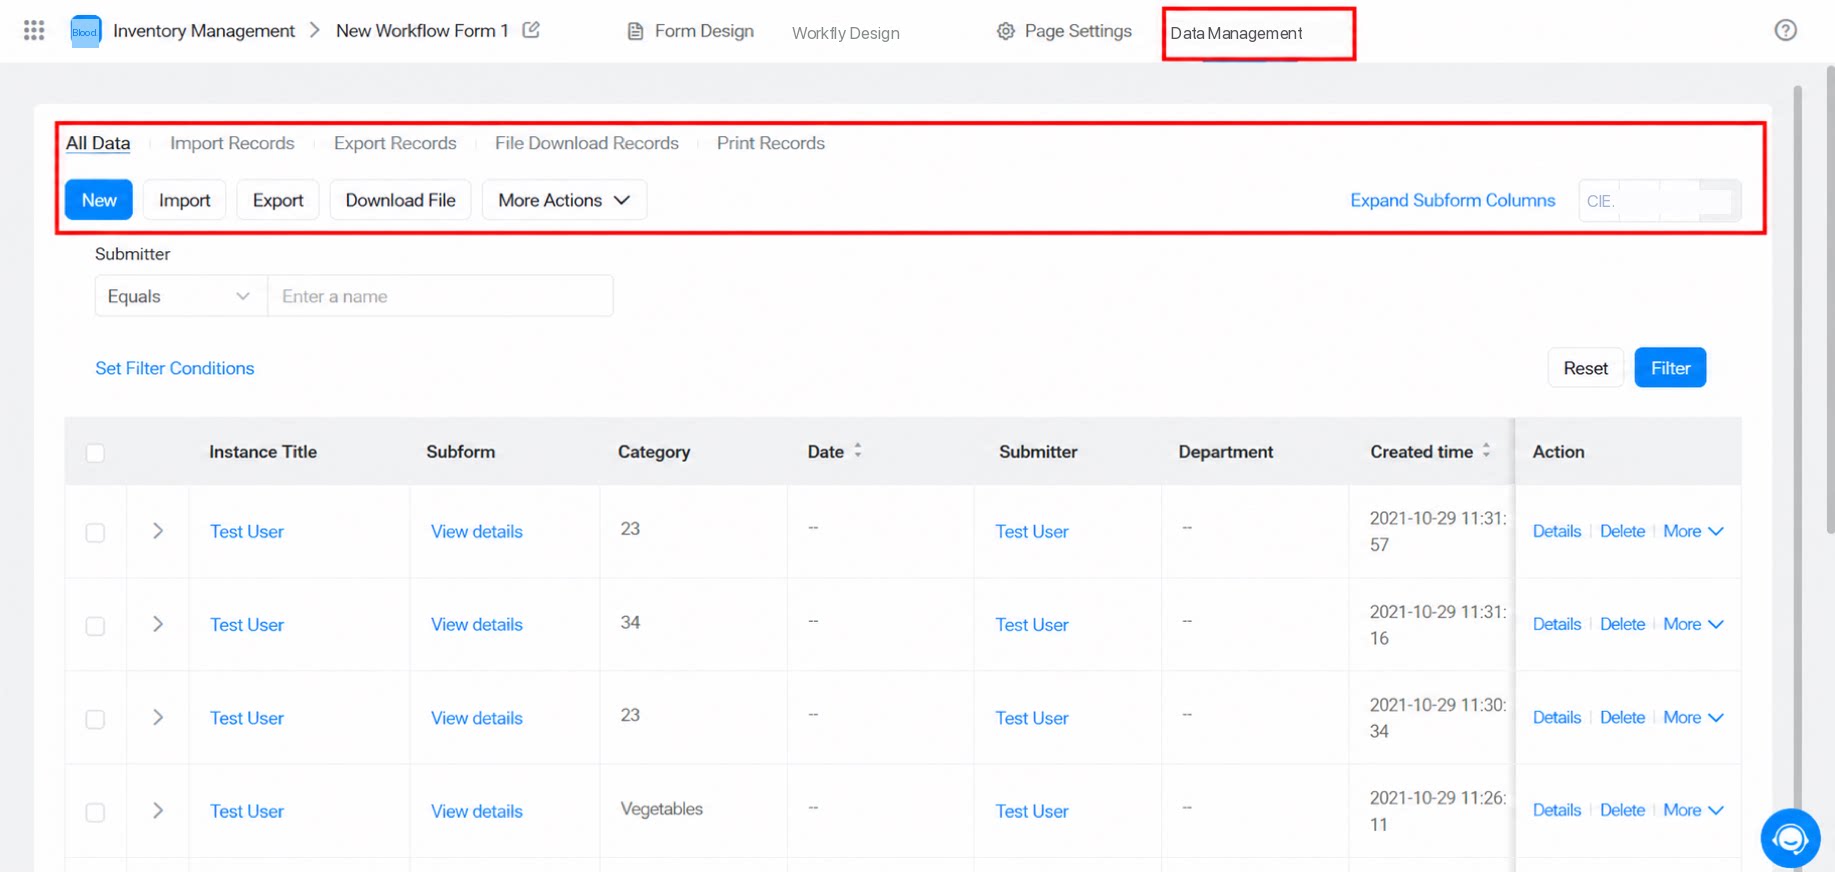
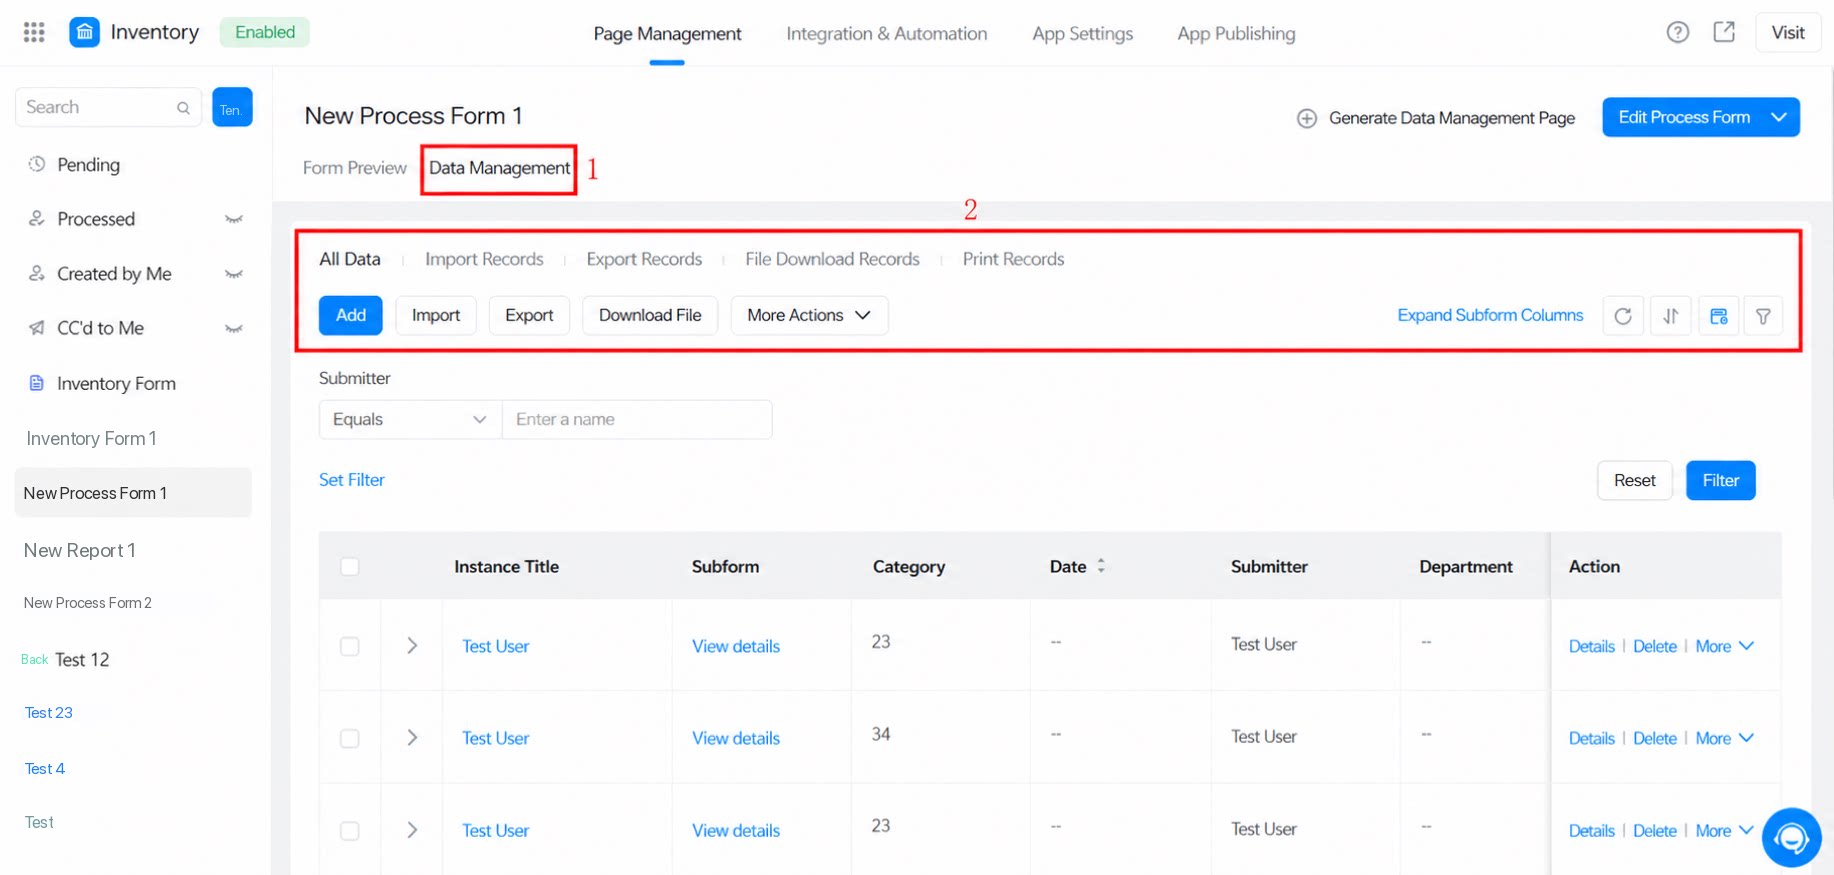
After employees submit data through a form, Admins with app management permissions can import, export, edit, delete, view, and print the submitted data in Data management. There are currently two entry points to Data management:
Entry 1: Open the form or workflow form >> Edit form or workflow form >> Data management.
Entry 2: Open the form or workflow form >> Data management.
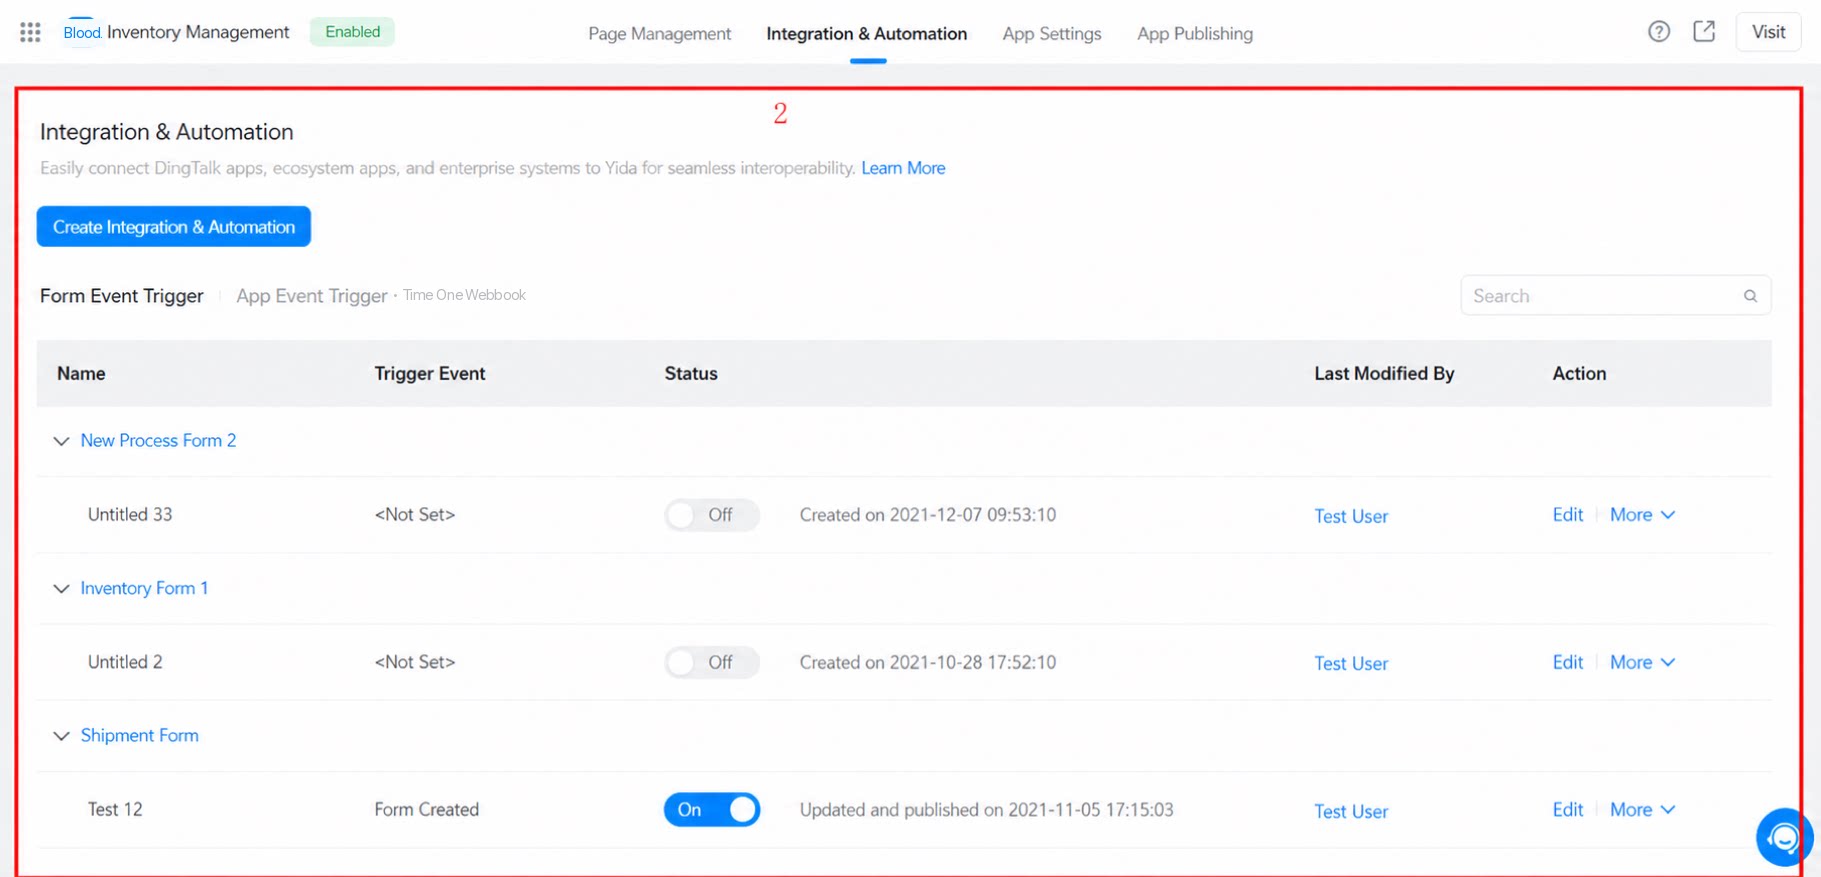
5. Integration & Automation
The workflow orchestration feature has been fully upgraded and now integrates with DingTalk Connector. DingTalk official apps, apps in the DingTalk ecosystem, and your organization’s own systems can be lightly integrated with YiDA, giving YiDA apps built-in interoperability.
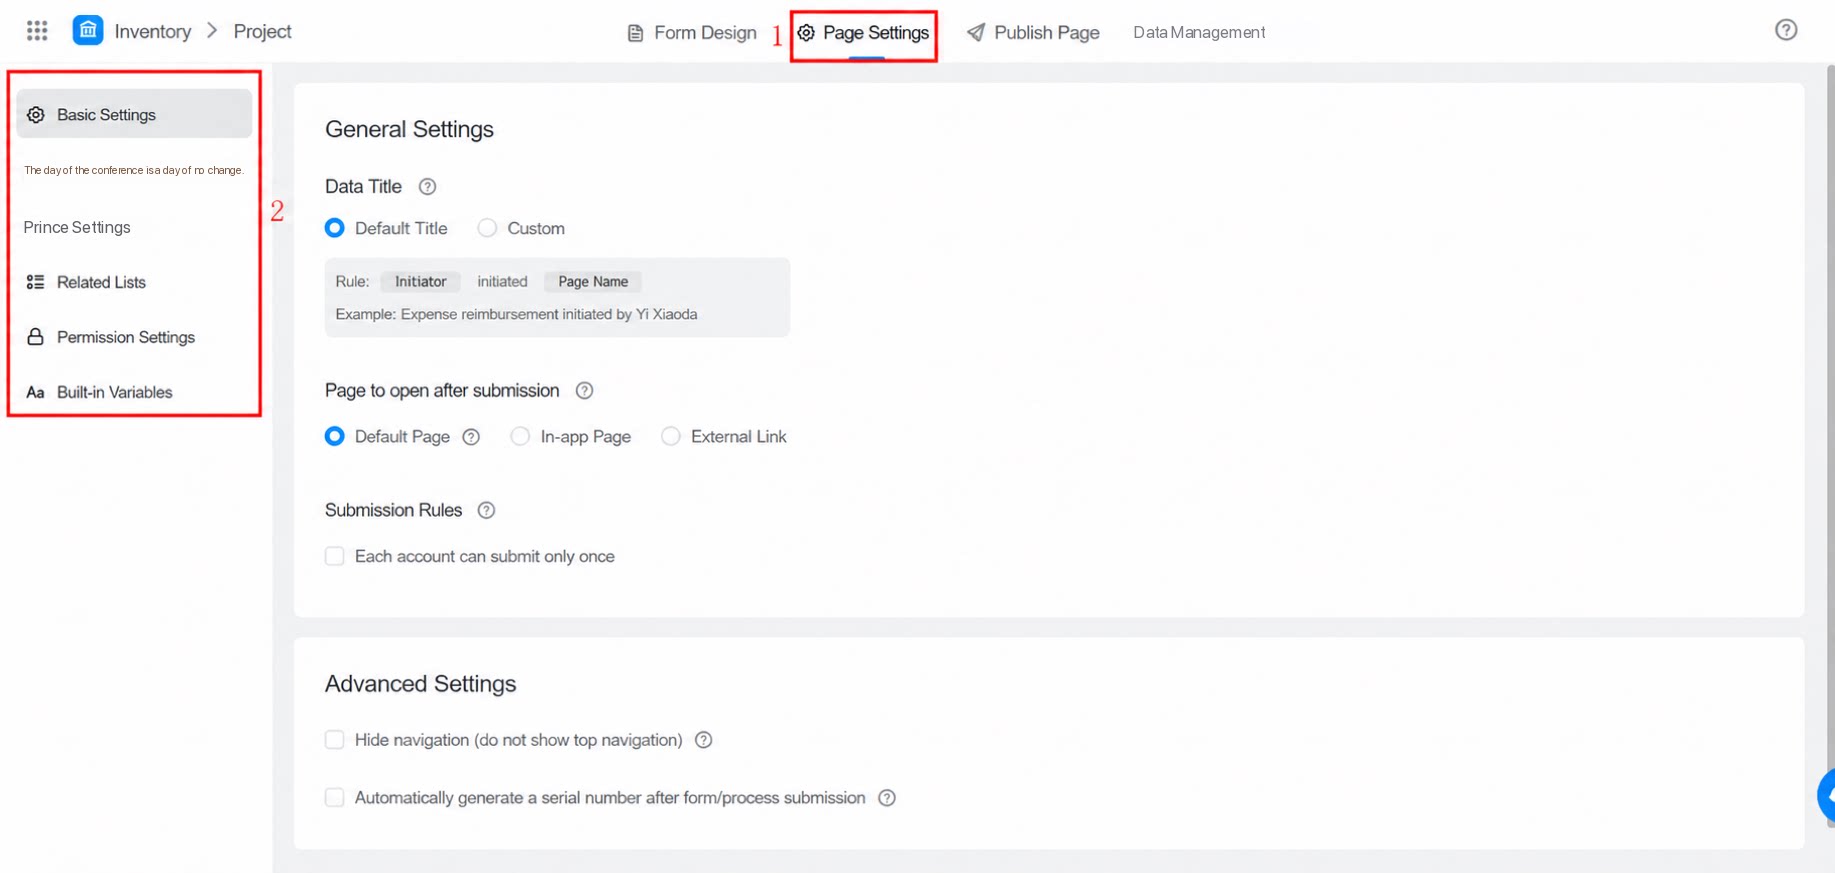
6. Page Settings
Page settings covers basic and advanced form features, including Basic settings, Message notifications, Print settings, Associated lists, integration & automation, and built-in variables.


 Chats
Chats Calendar
 Meetings
 Contacts
 Mail
Mail Docs
Docs Drive
Drive AI Table
 AI Minutes
 Attendance
 Approval
 YiDA
YiDA Admin Console