

 Chats
Chats Calendar
 Meetings
 Contacts
 Mail
Mail Docs
Docs Drive
Drive AI Table
 AI Minutes
 Attendance
 Approval
 YiDA
YiDA Admin Console
Prerequisites
Before using the YiDA app distribution feature for sales, complete the following prerequisites:- Become a DingTalk partner.
- Apply for app distribution permission.
- (Optional) Become a YiDA Premium partner.
Workflow Overview
Service providers can distribute apps by following the steps below.Step 1: Service Provider Distributes the App
1
Step 1
Sign in to the YiDA workbench as an admin.
2
Step 2
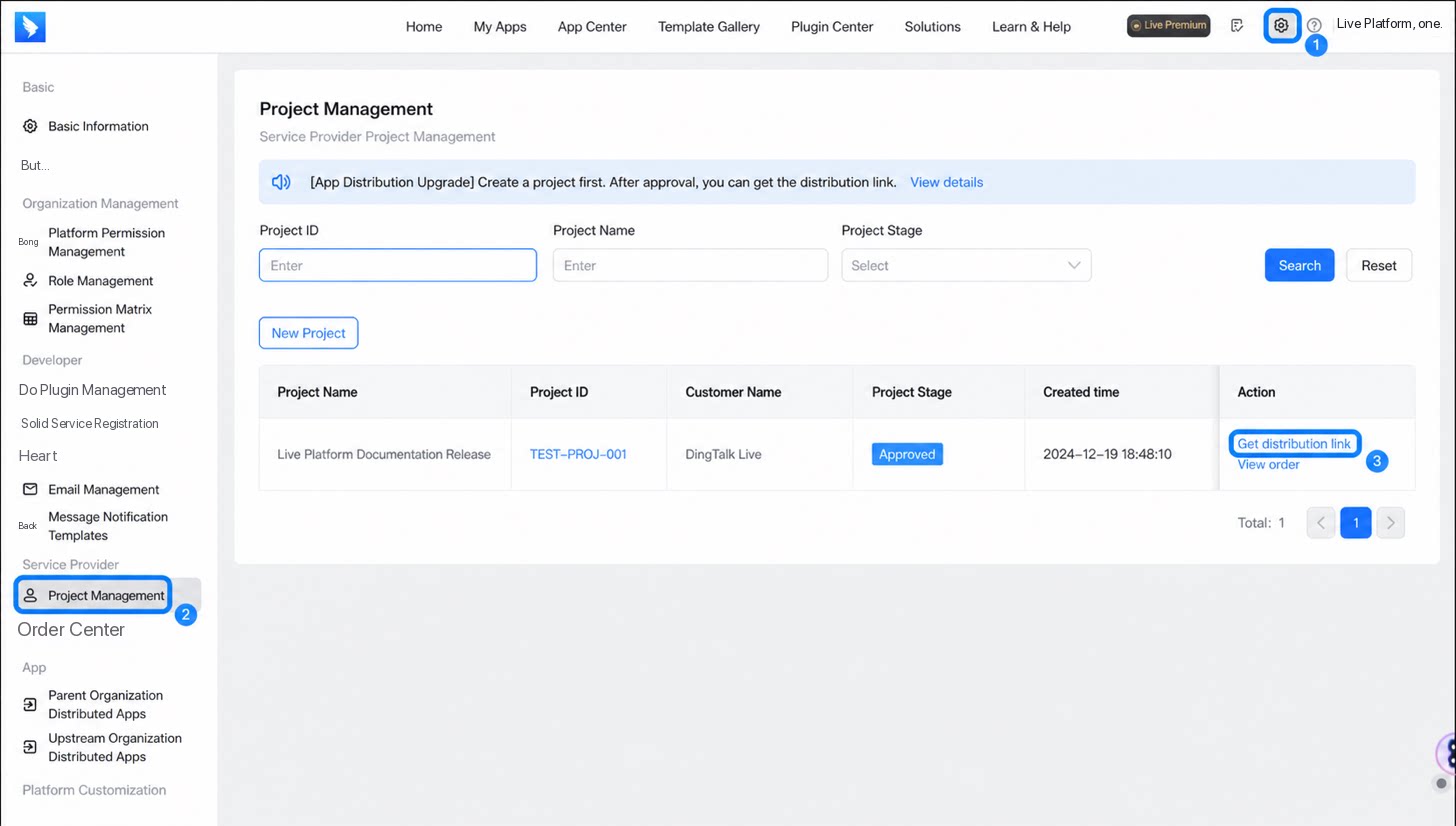
Click the  (Platform management) button in the upper-right corner to open the platform management page.
(Platform management) button in the upper-right corner to open the platform management page.3
Step 3
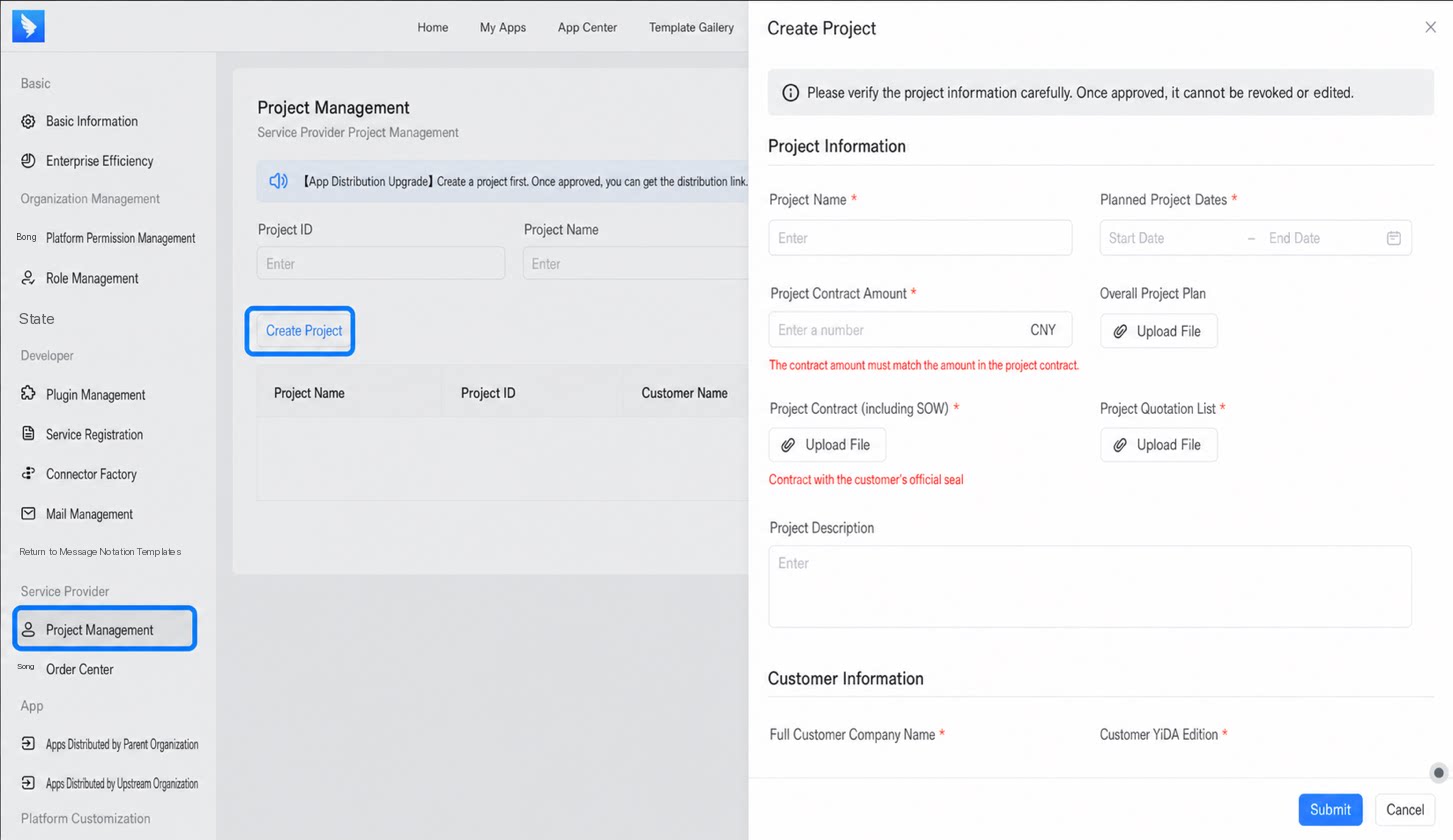
Select Service provider > Project management, and then click Create project.
1
Fill in the Project information and Customer information, and then click Submit to initiate the project approval
- The Project contract amount must match the amount specified in the Project contract file. Otherwise, the approval will fail.
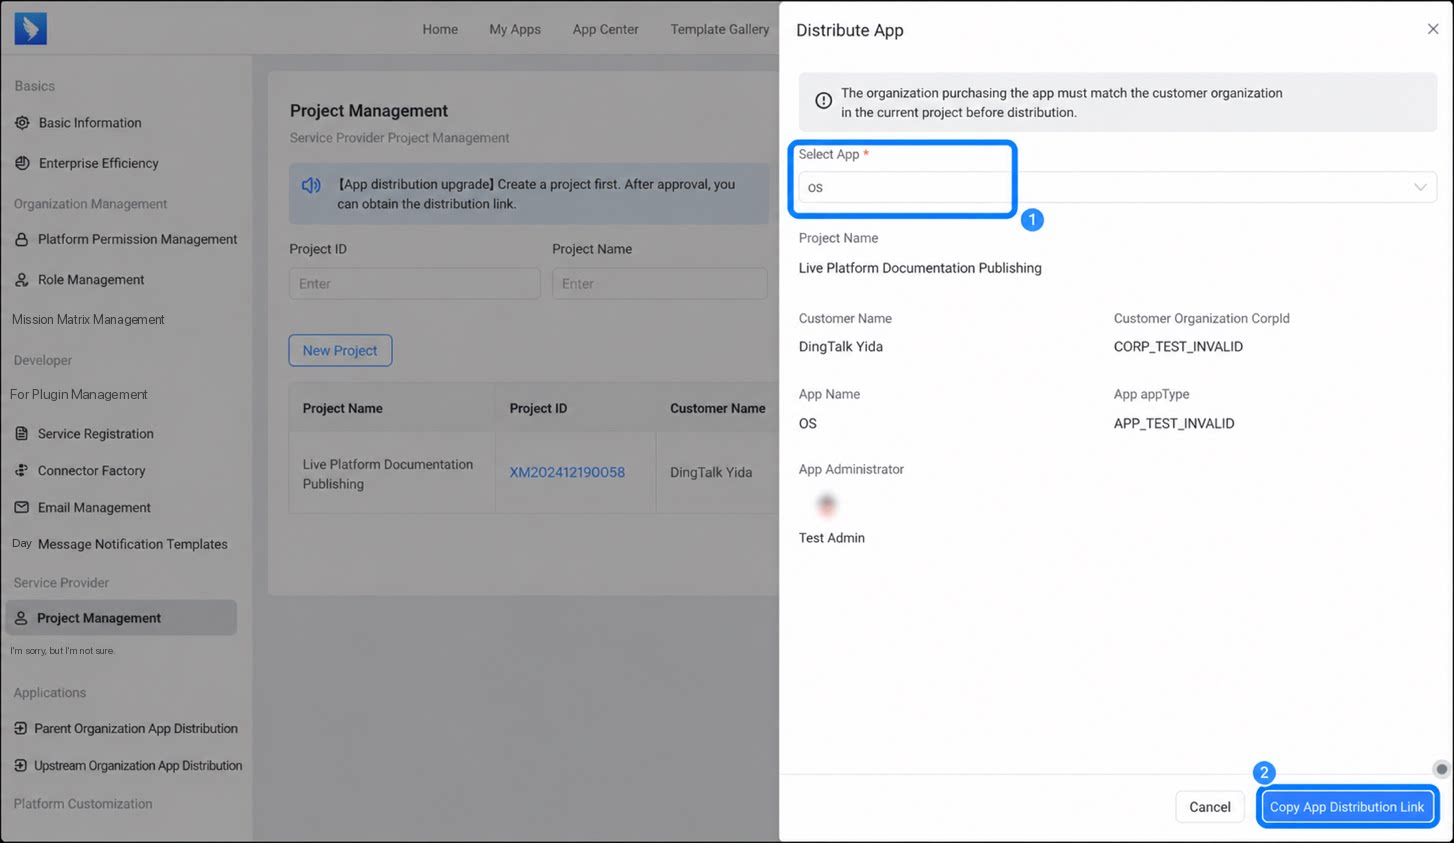
- The customer organization CorpID must match the CorpID of the actual purchasing organization. Otherwise, the customer cannot complete the purchase.
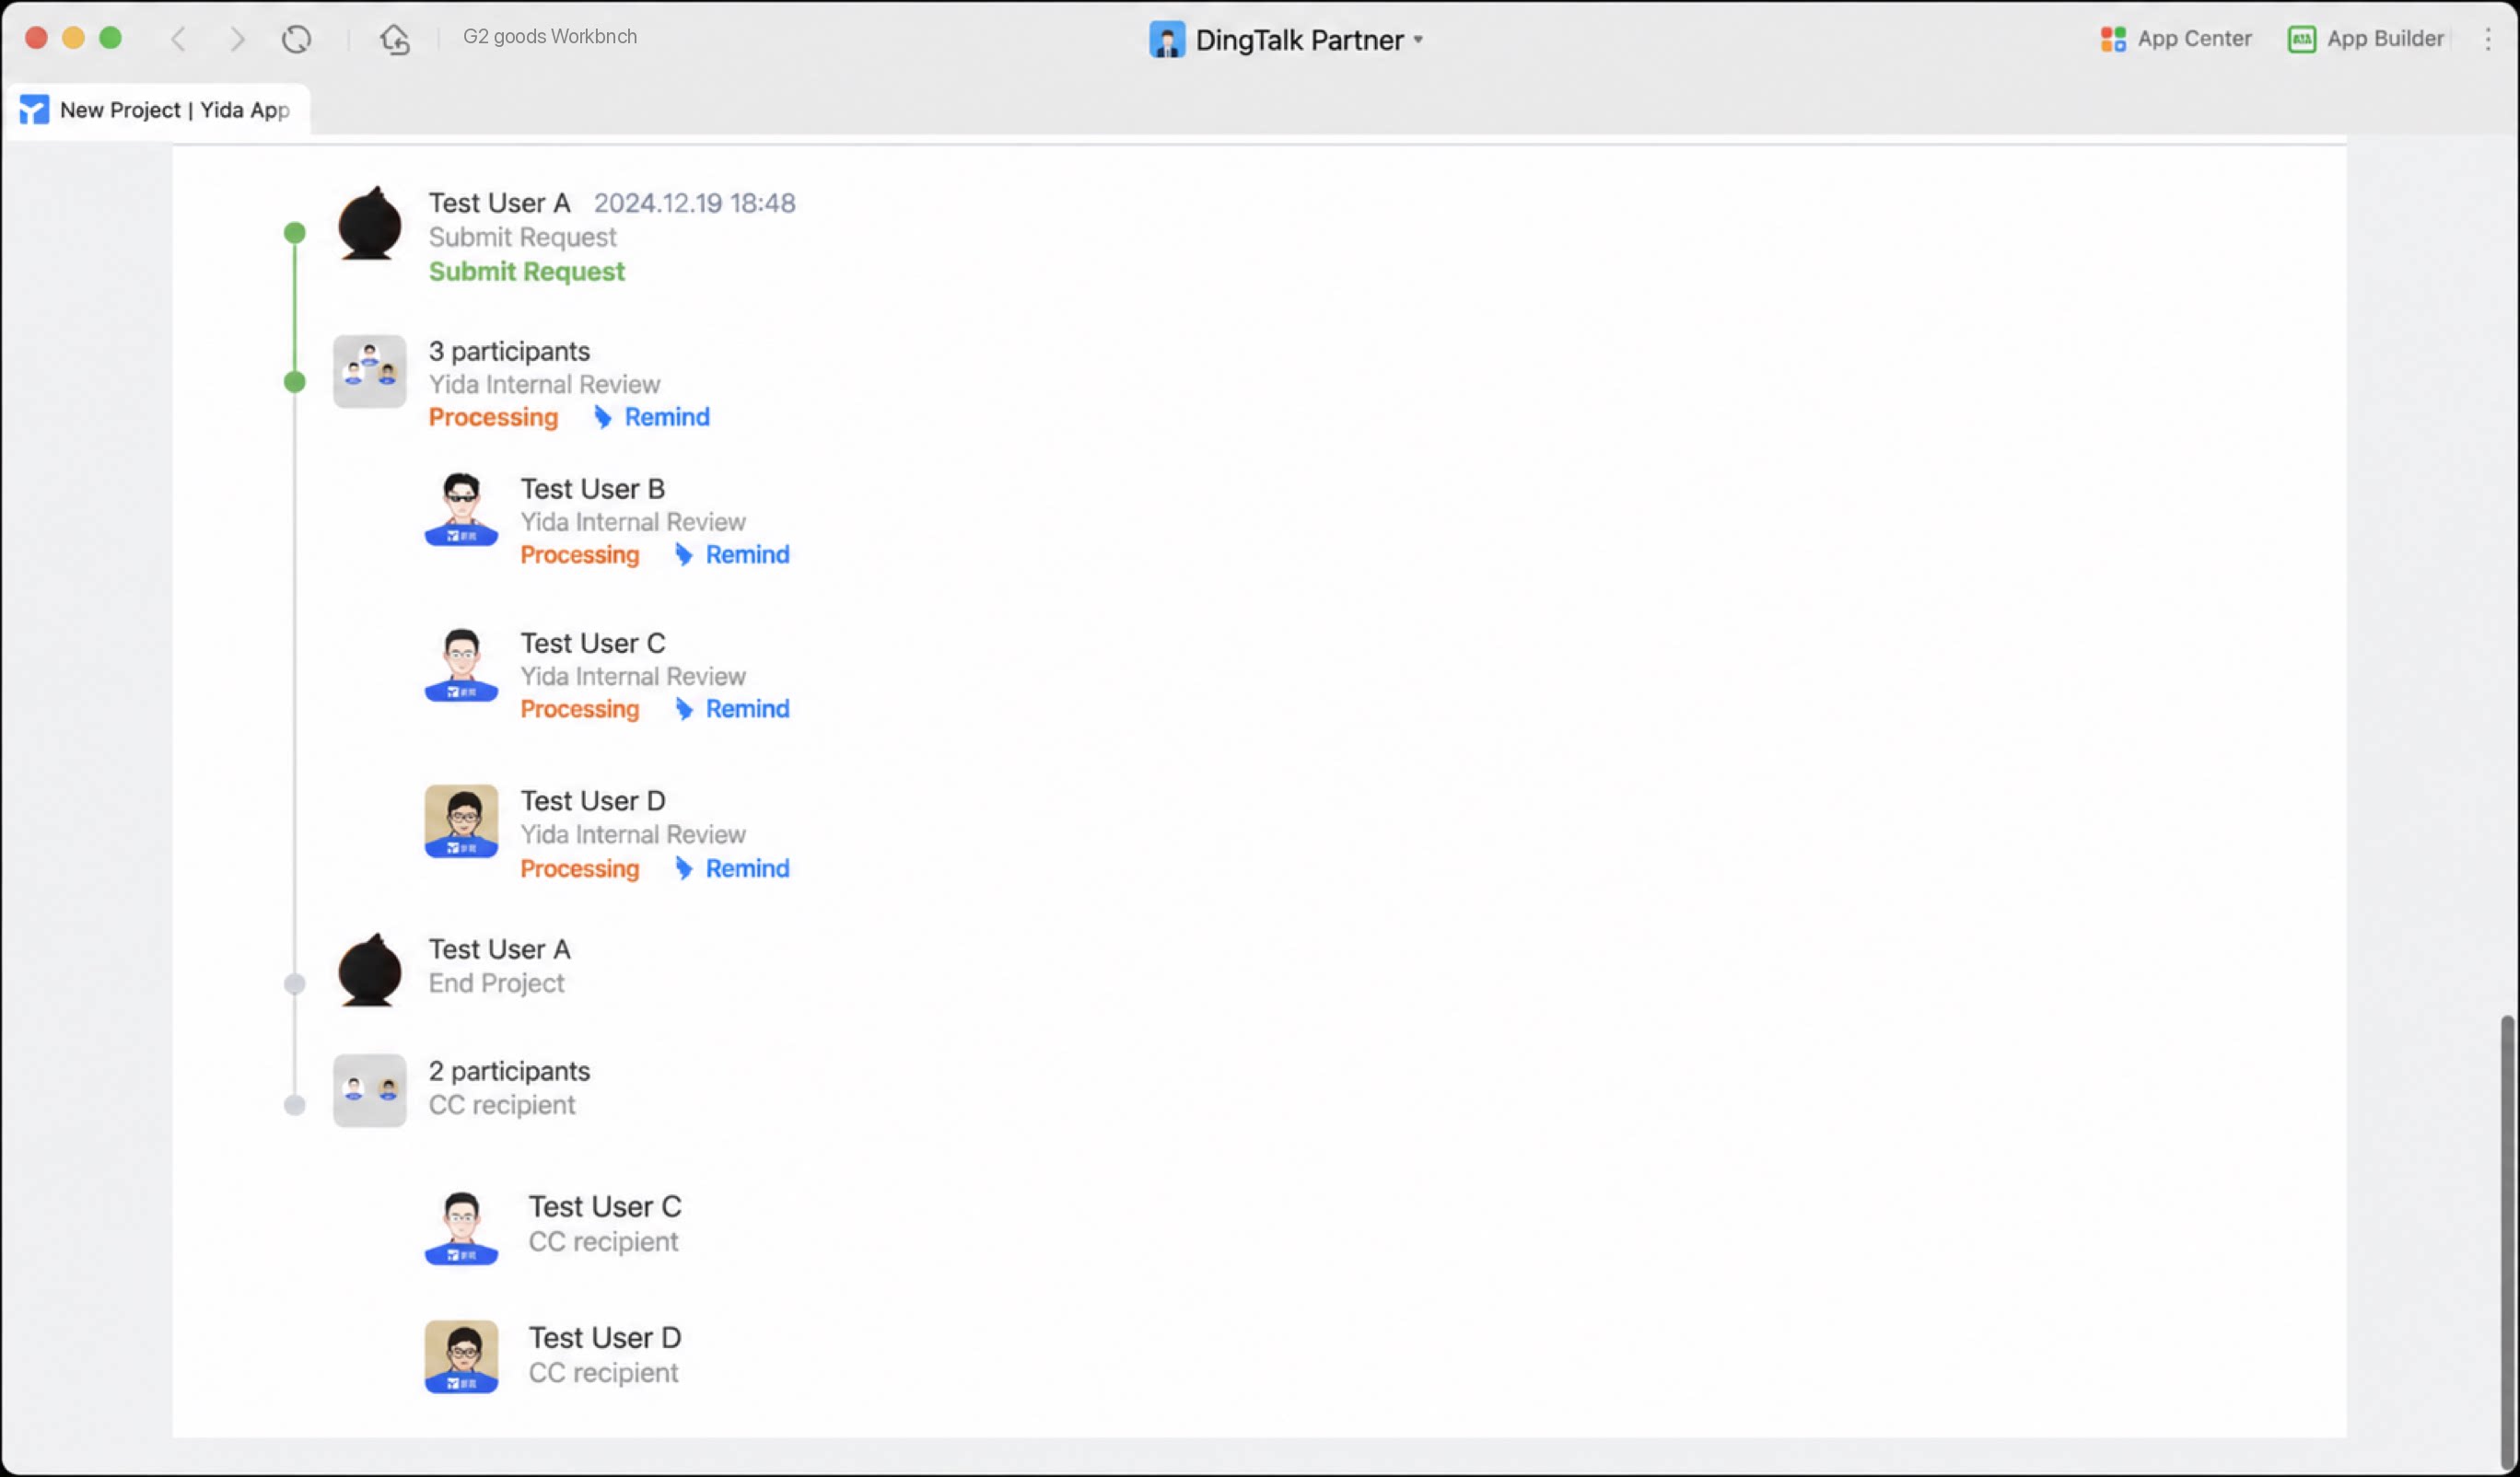
- The approval is completed within one business day. Please wait patiently.
2
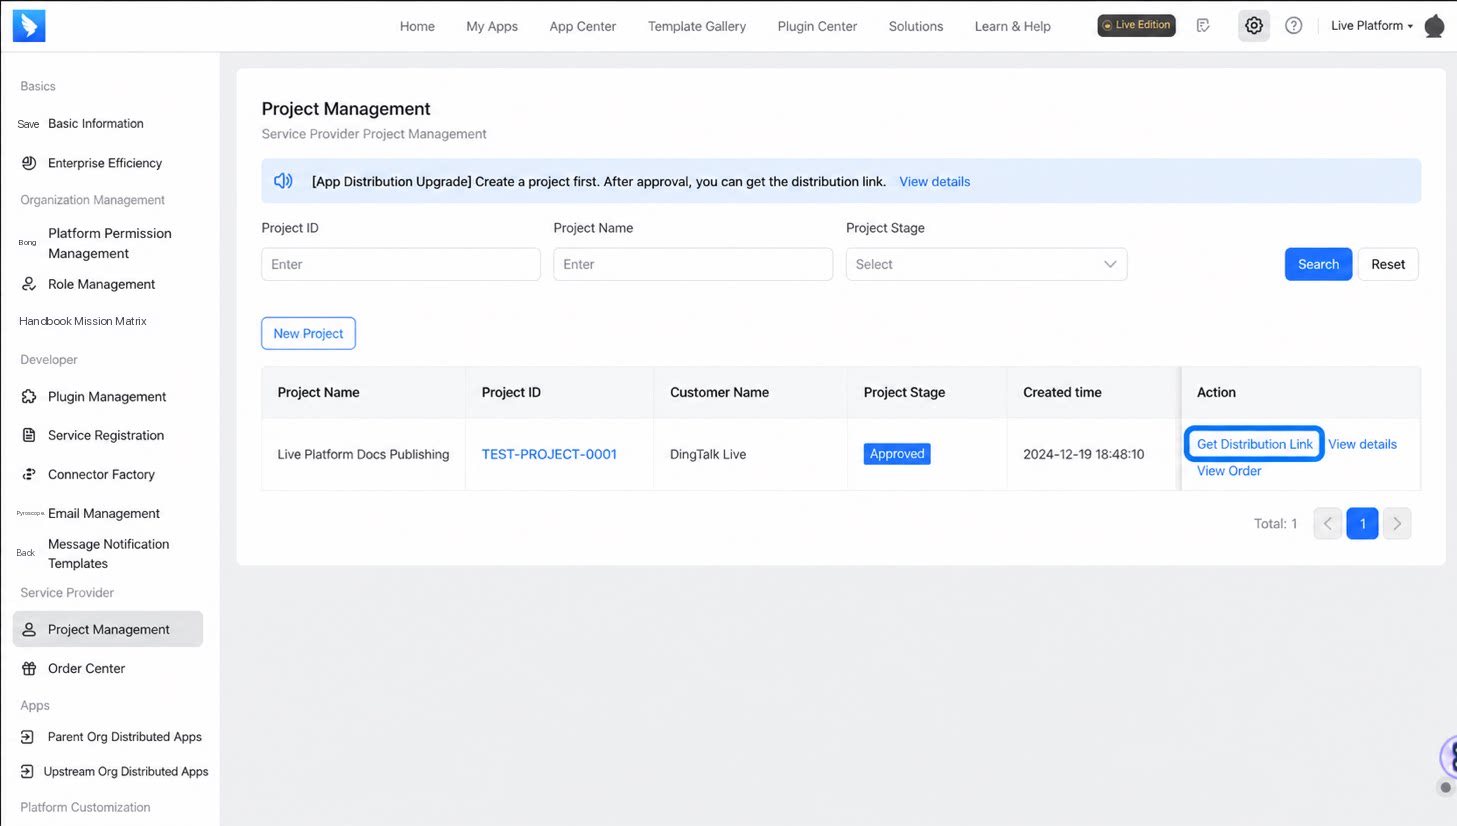
After approval, click Get distribution link
3
In the dialog box, select the app to distribute and click Copy app distribution link
Step 2: Customer Purchases the App
- Send the app distribution link to your customer.
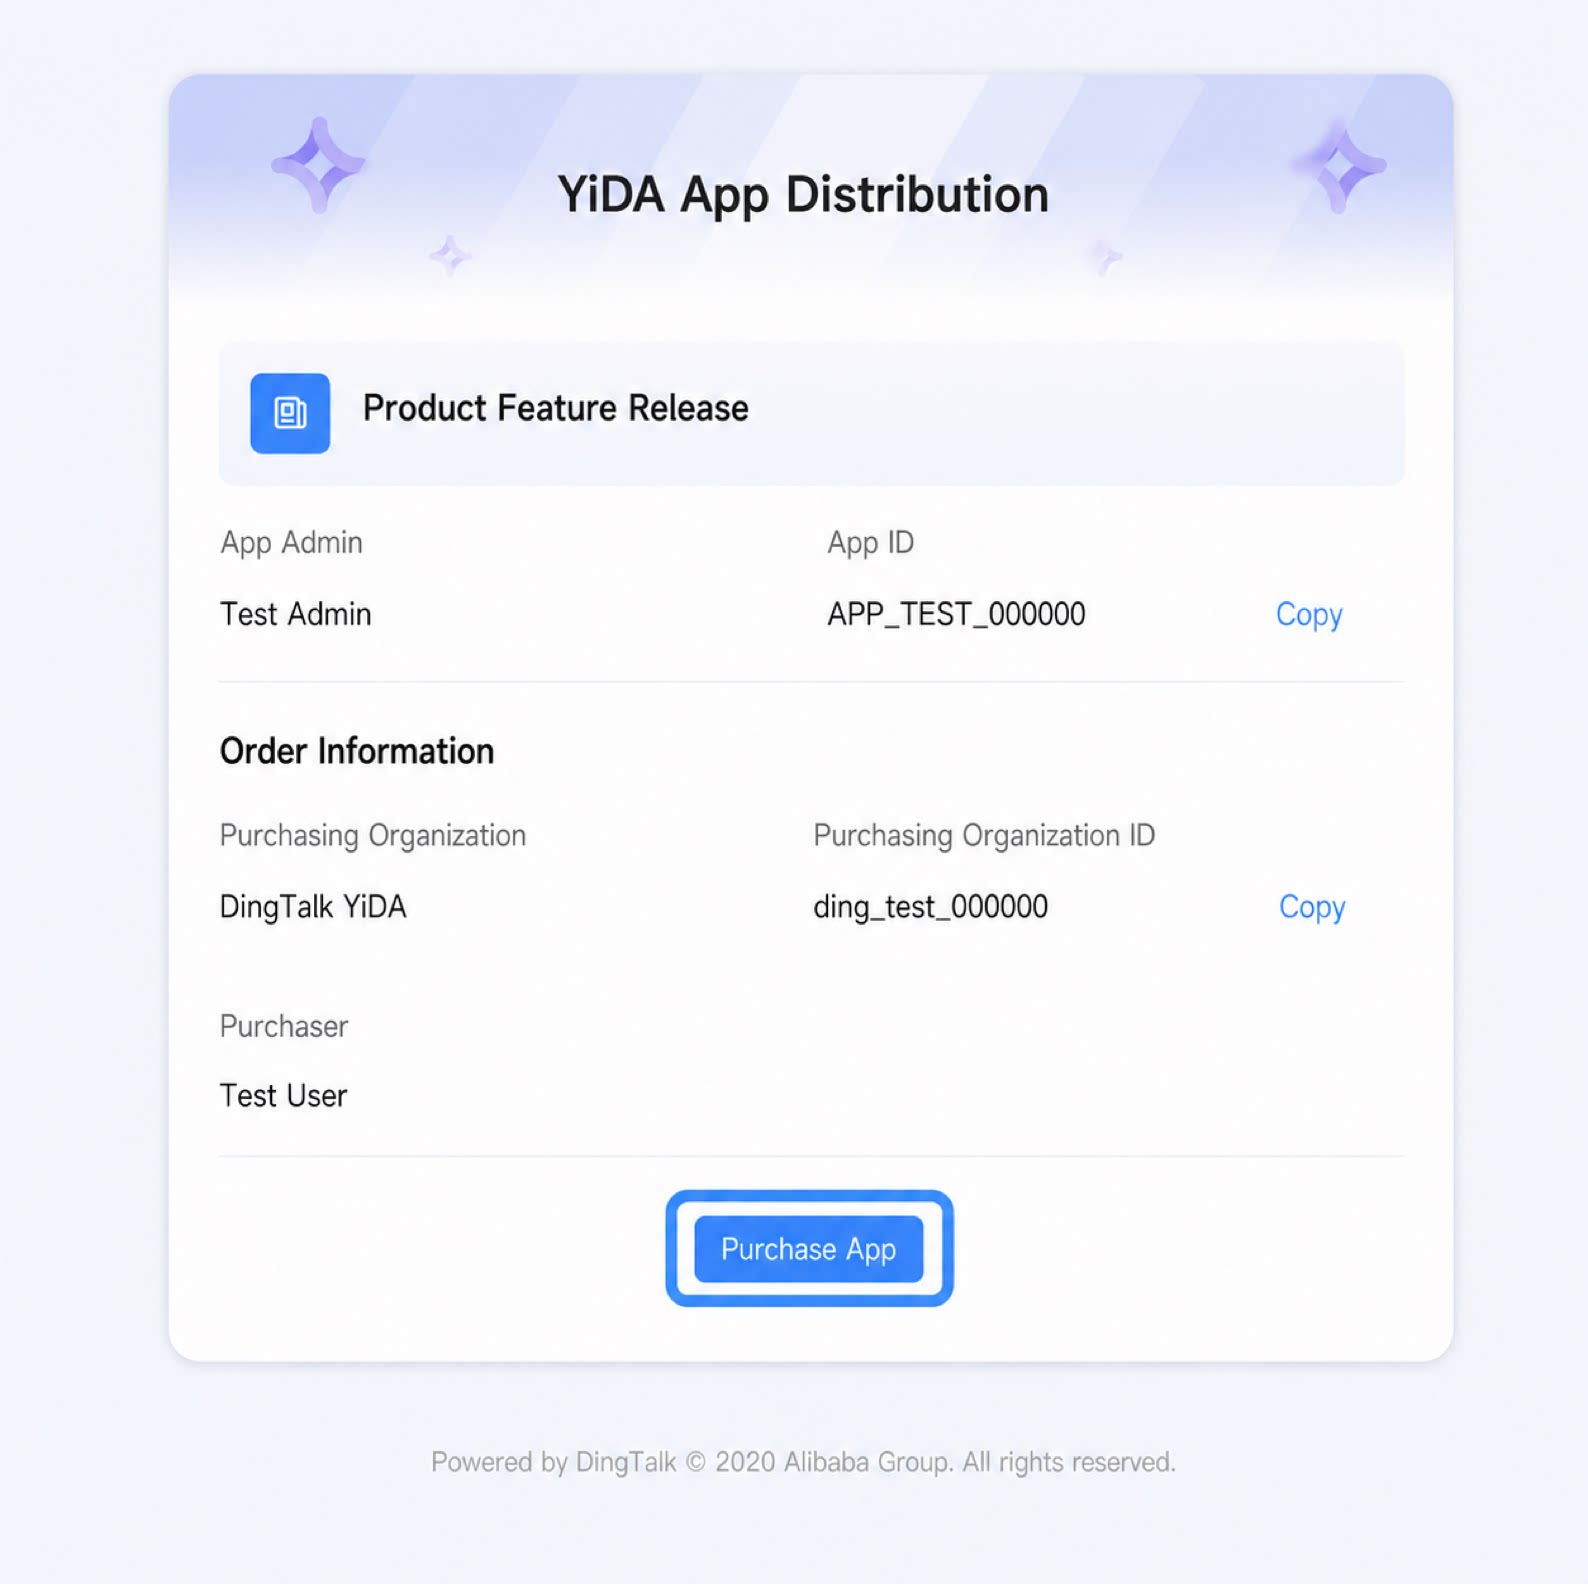
- The customer opens the link in a browser and signs in to the organization that will purchase the app.
- After confirming that the app is correct, the customer clicks Purchase app at the bottom.
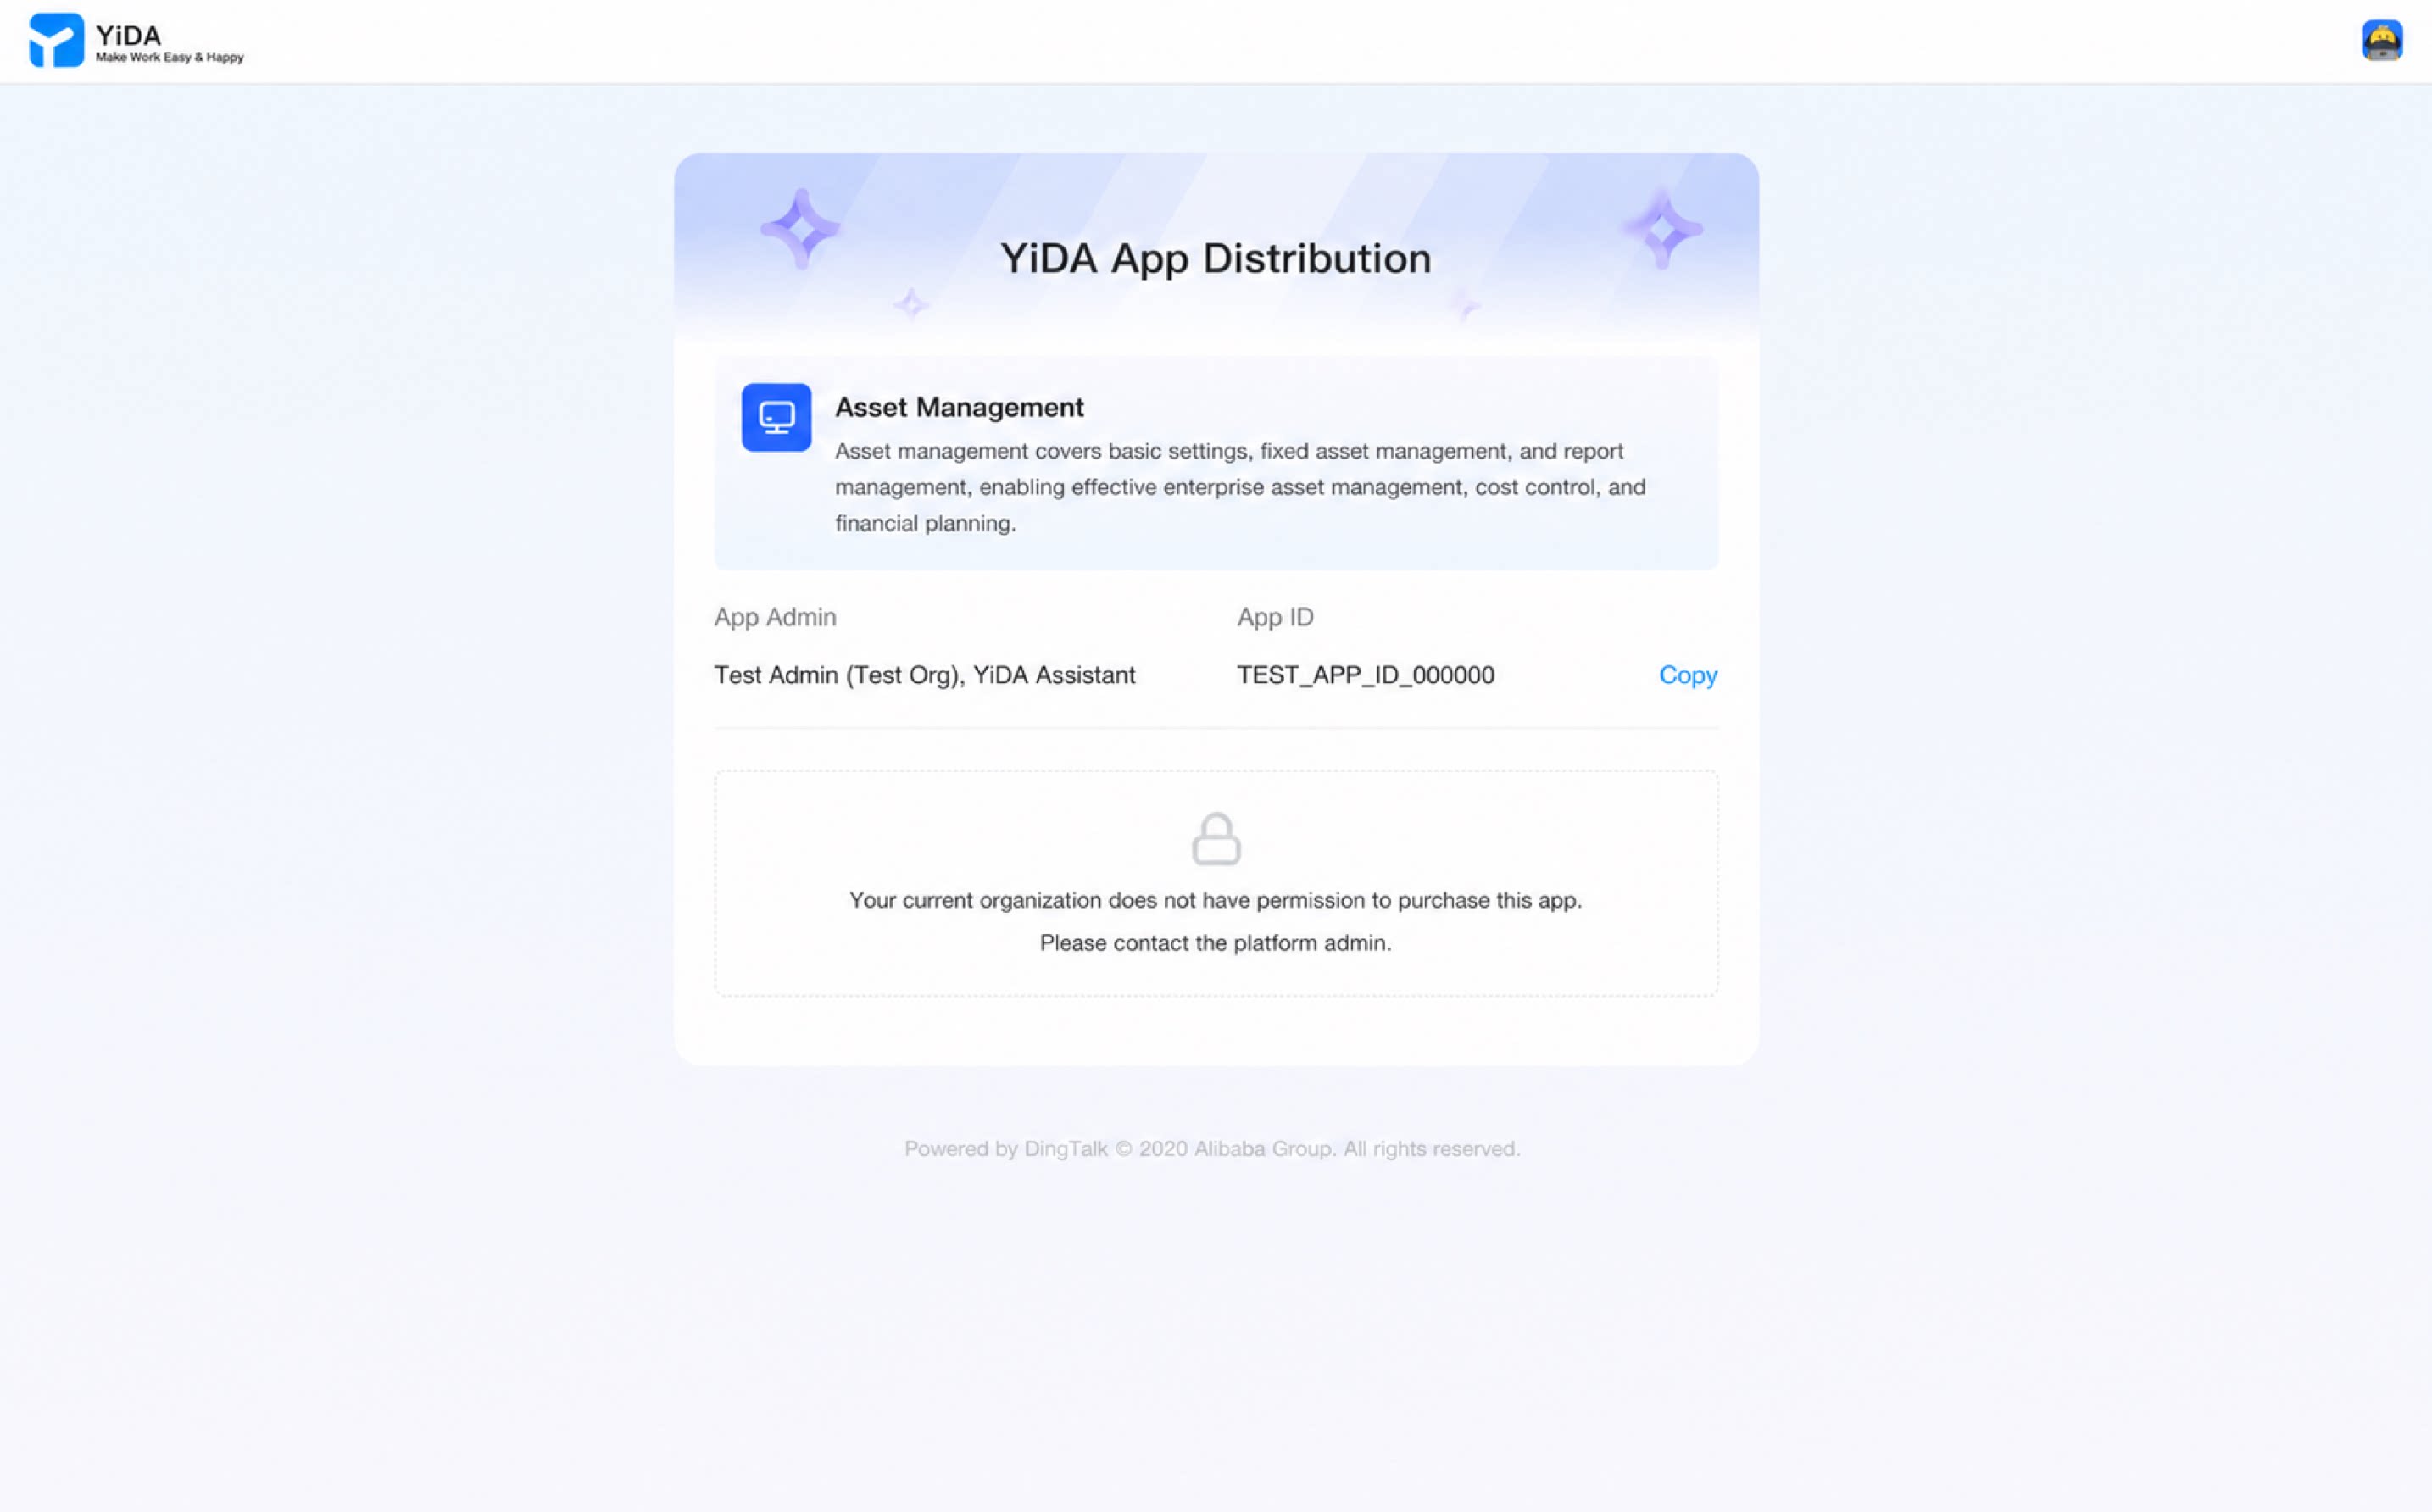
If the customer is a regular employee of the organization, a No permission message appears when they open the link. The customer must be at least a platform admin in the DingTalk organization to complete the purchase.
Step 3: Distribute the App in the Order Center
After the customer completes the purchase, follow the steps below to send the app to the customer’s organization.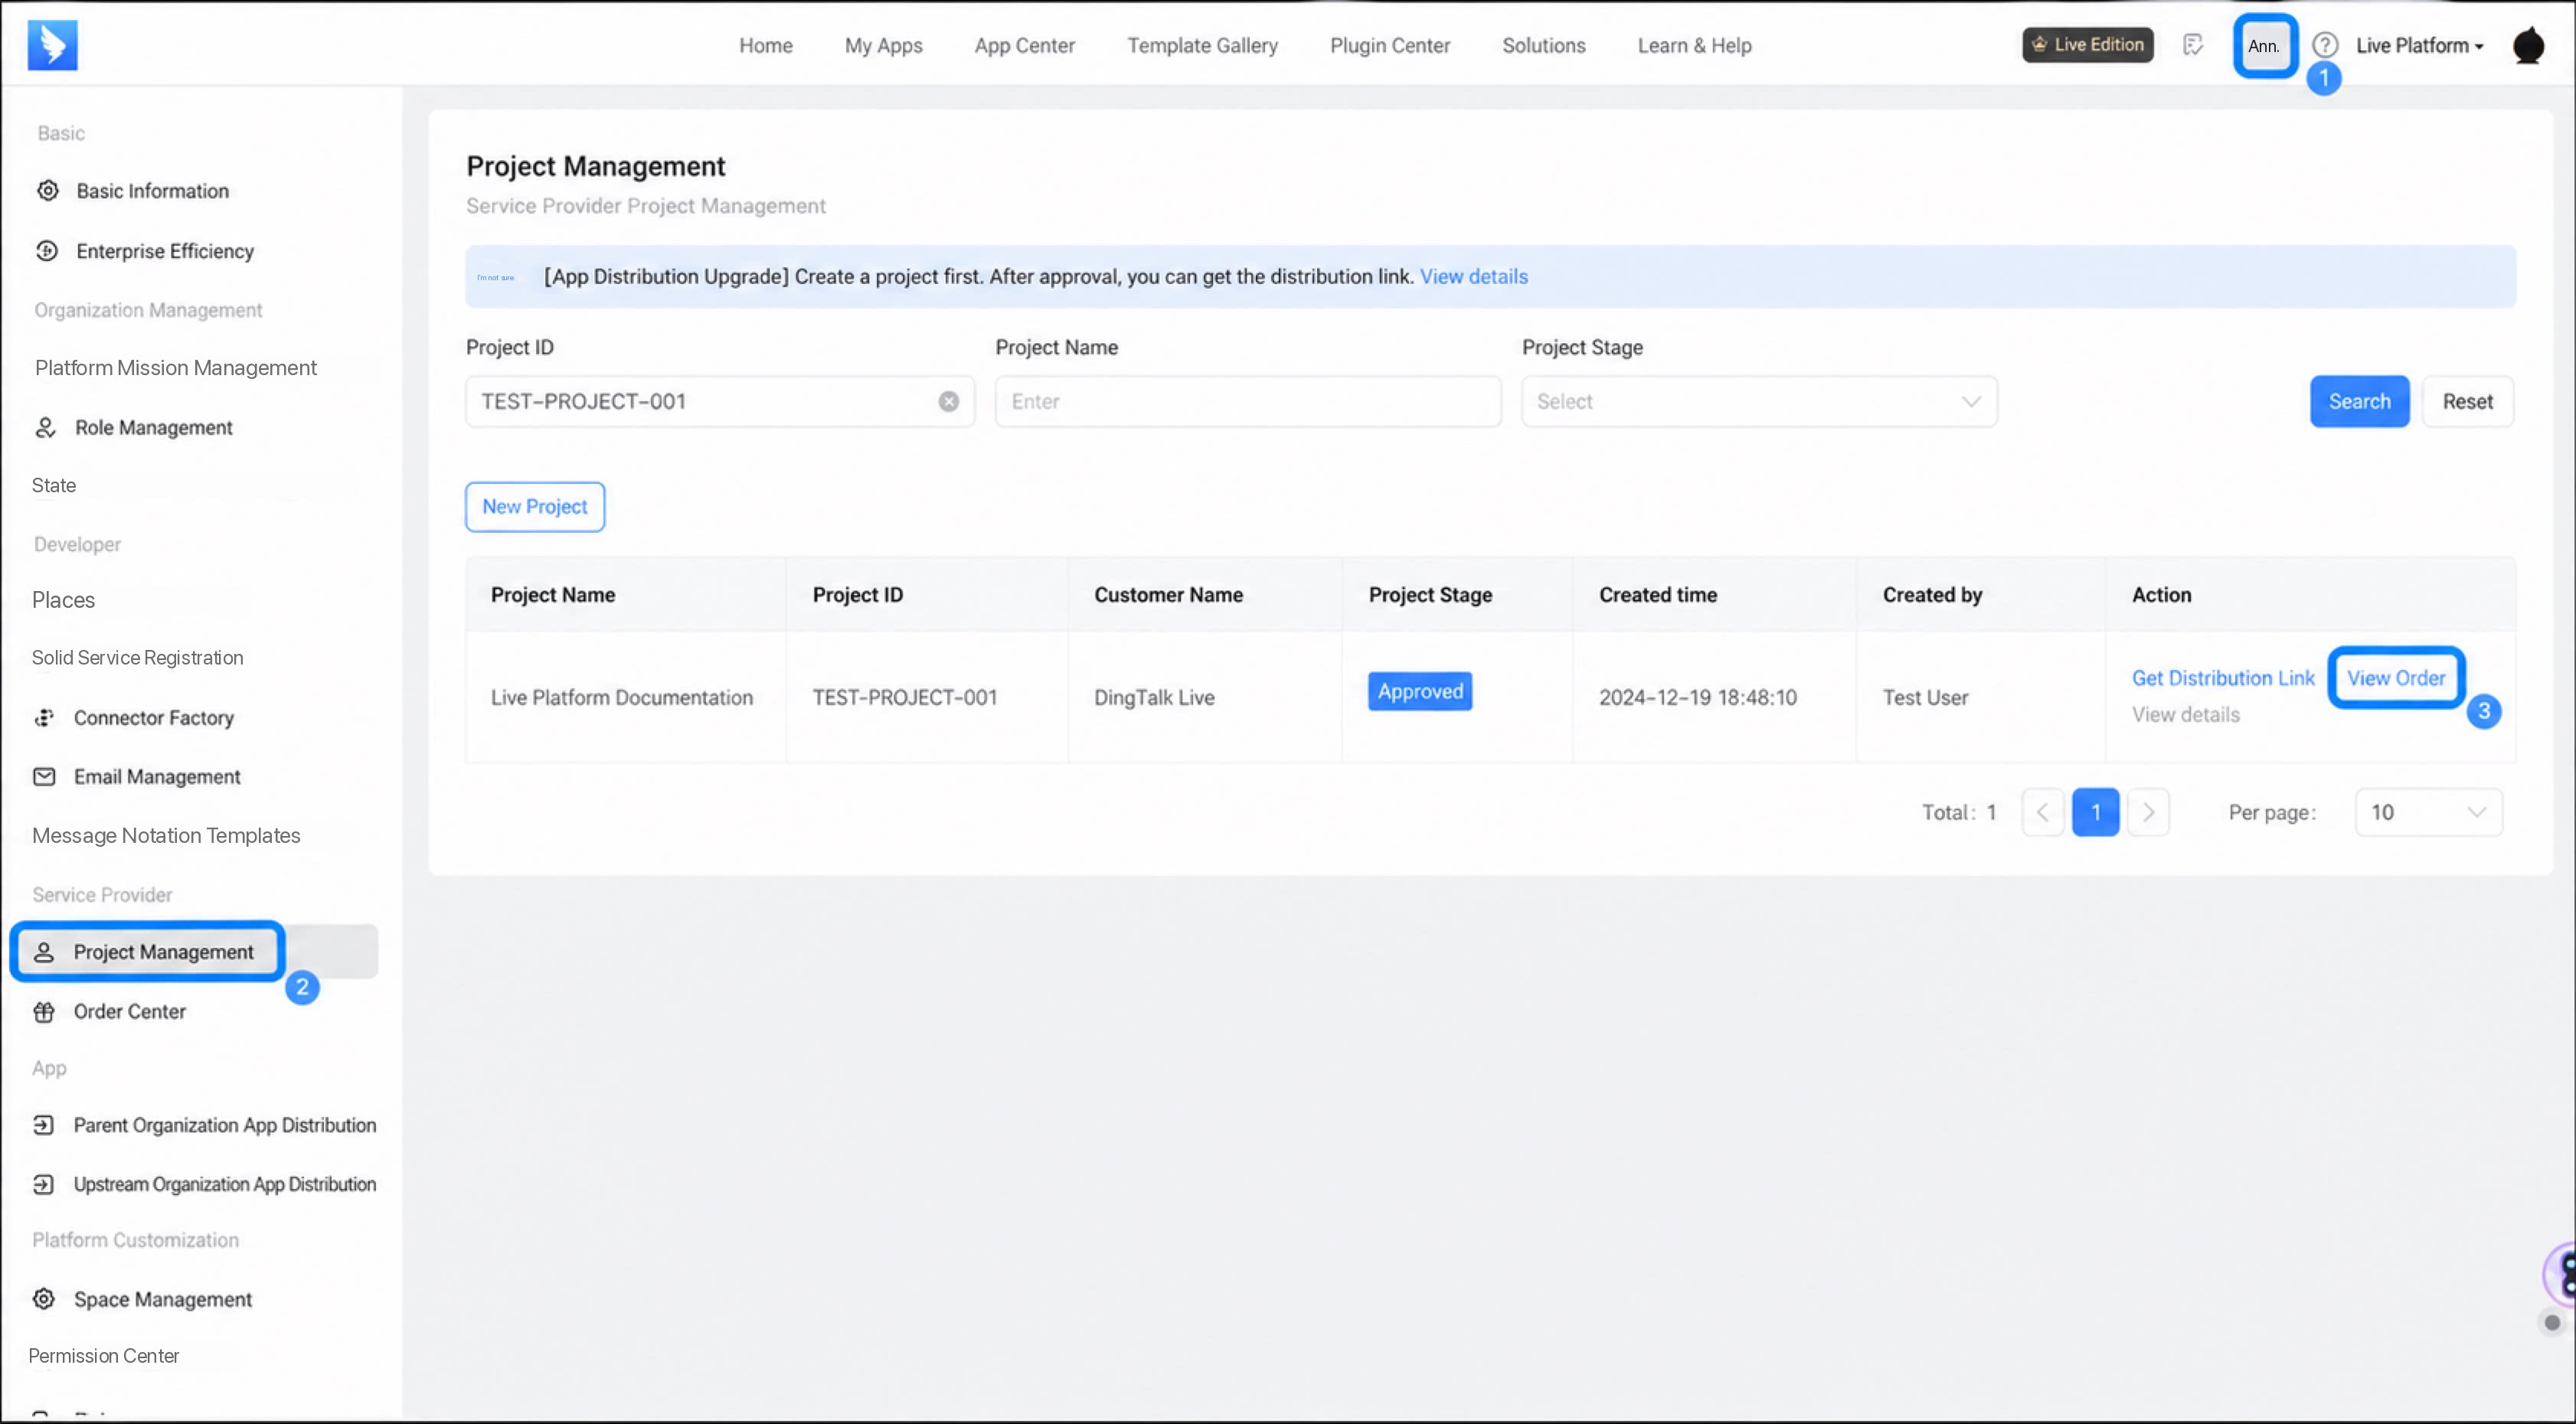
1
Sign in to the YiDA workbench, and then click Platform management in the upper-right corner to open the platform management page
2
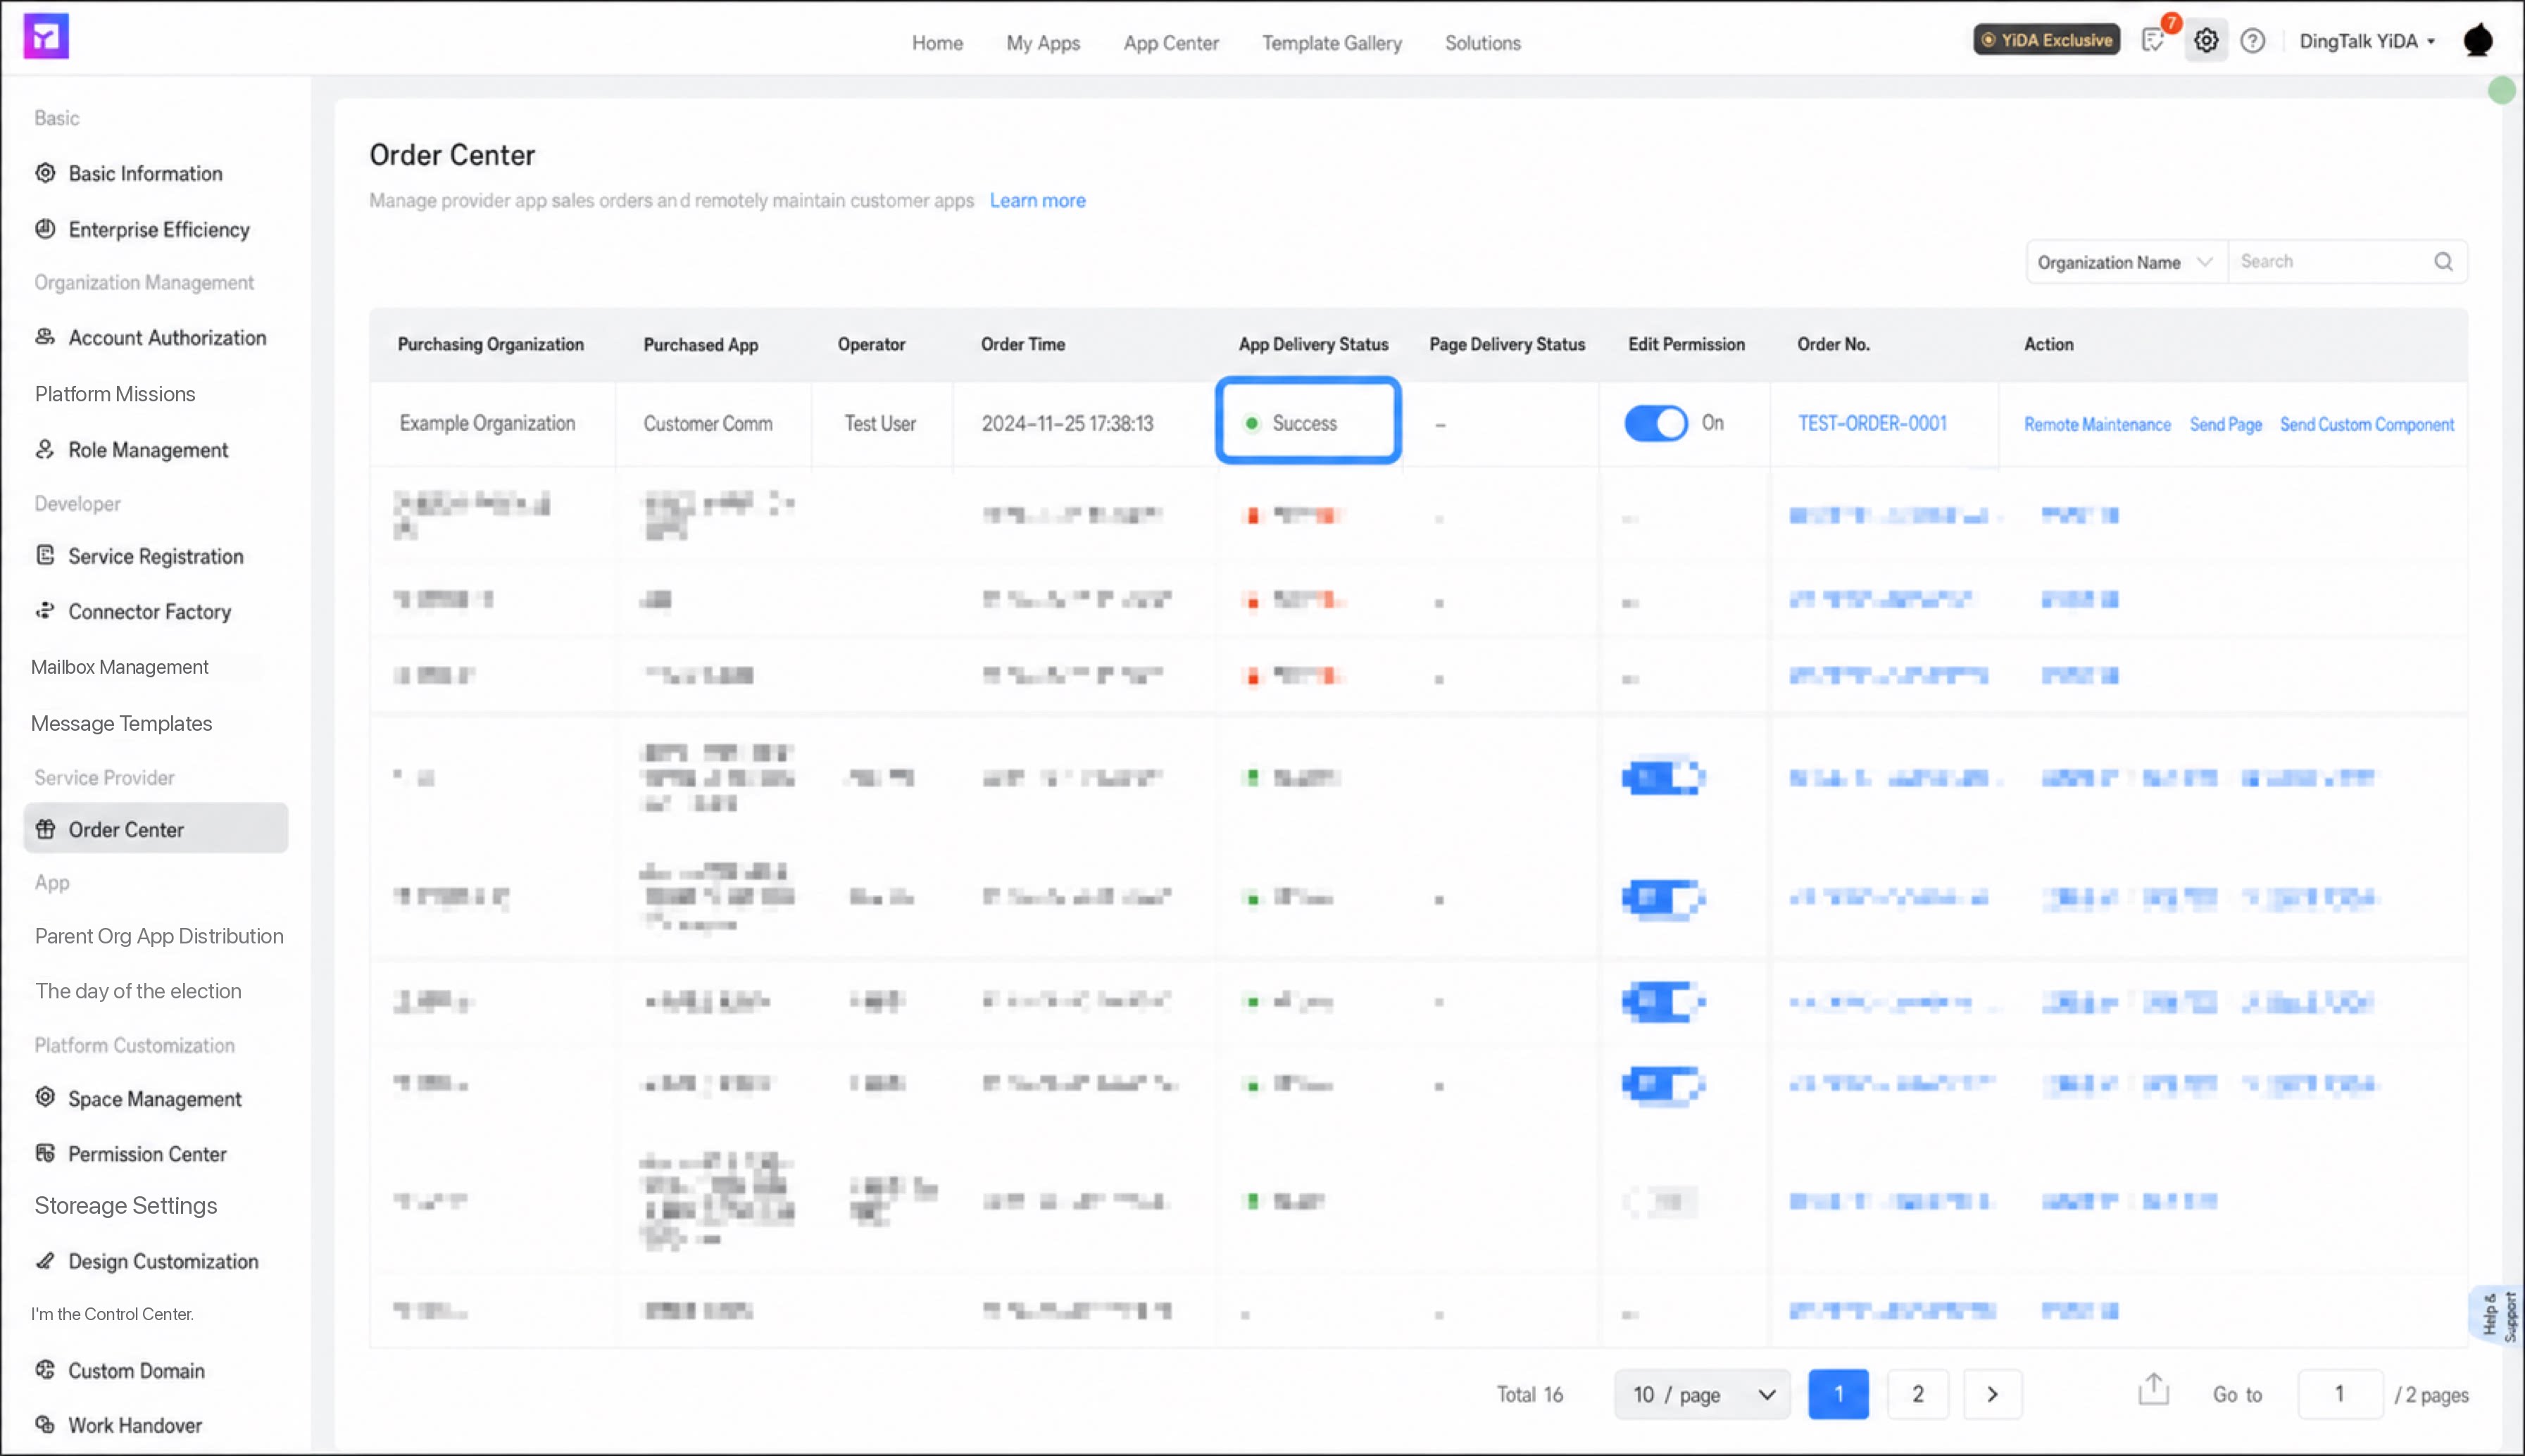
Click Service provider > Project management, select the corresponding project, and then click View order
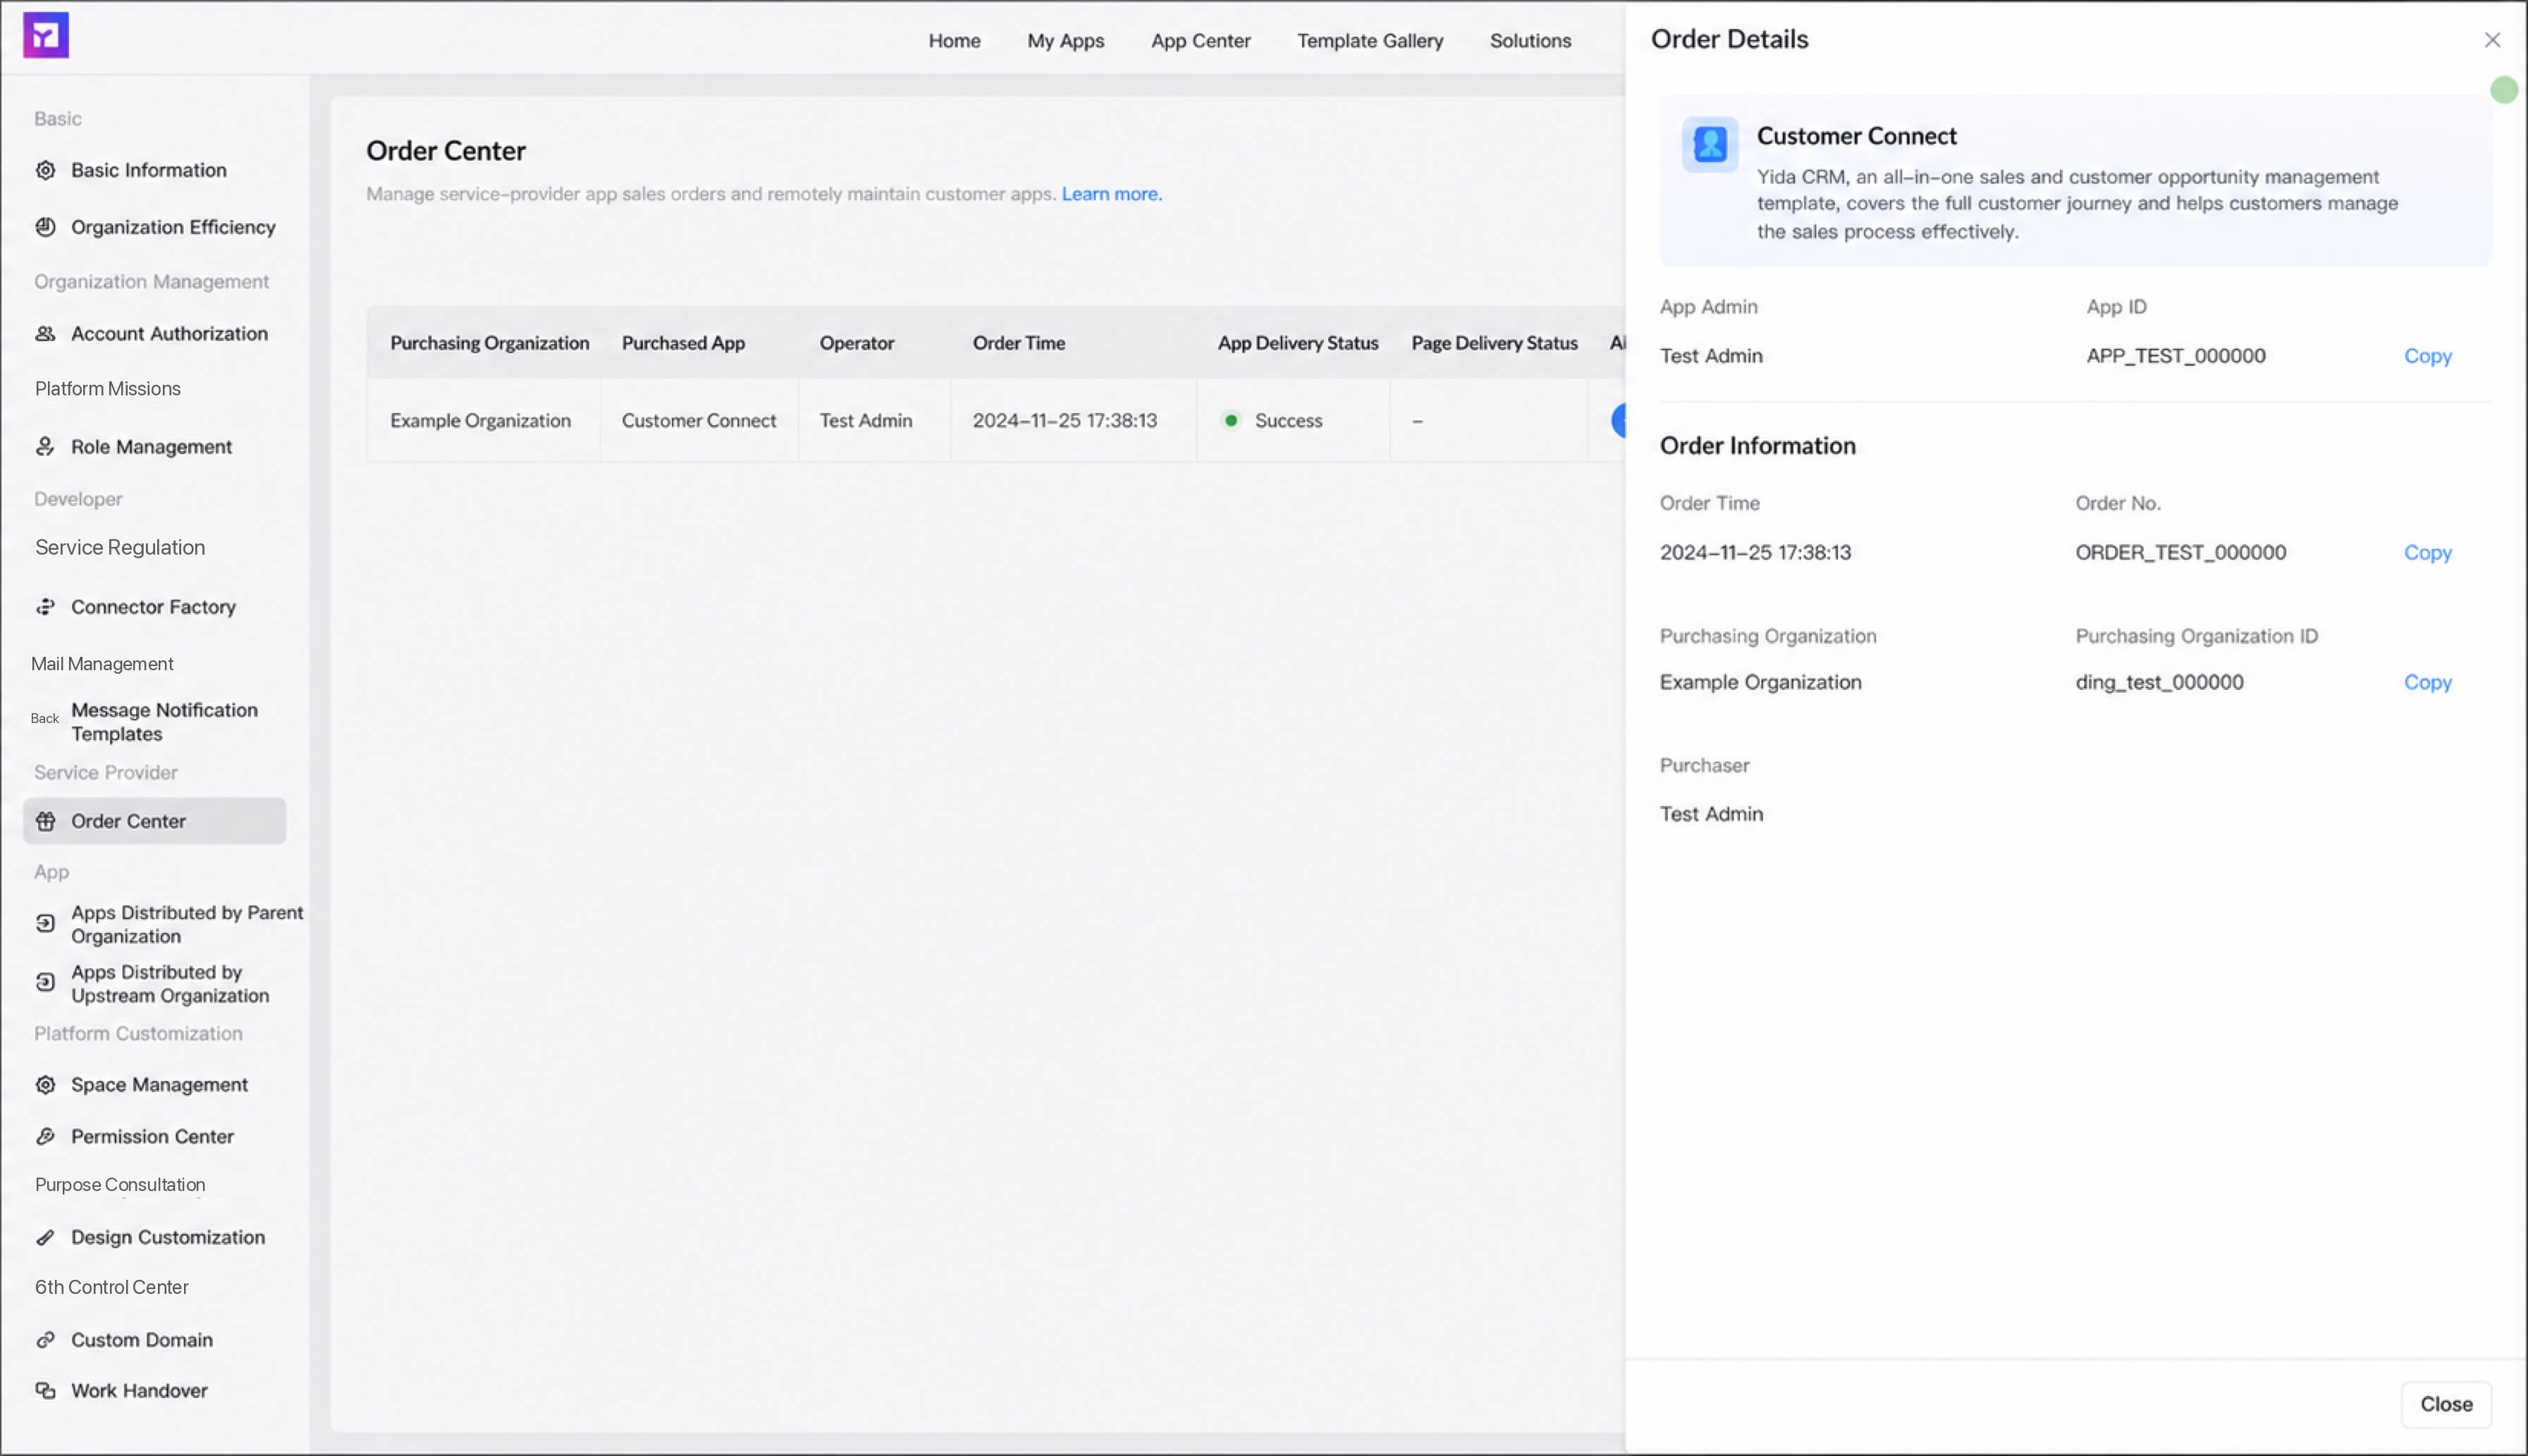
- In the order center, click Send app.
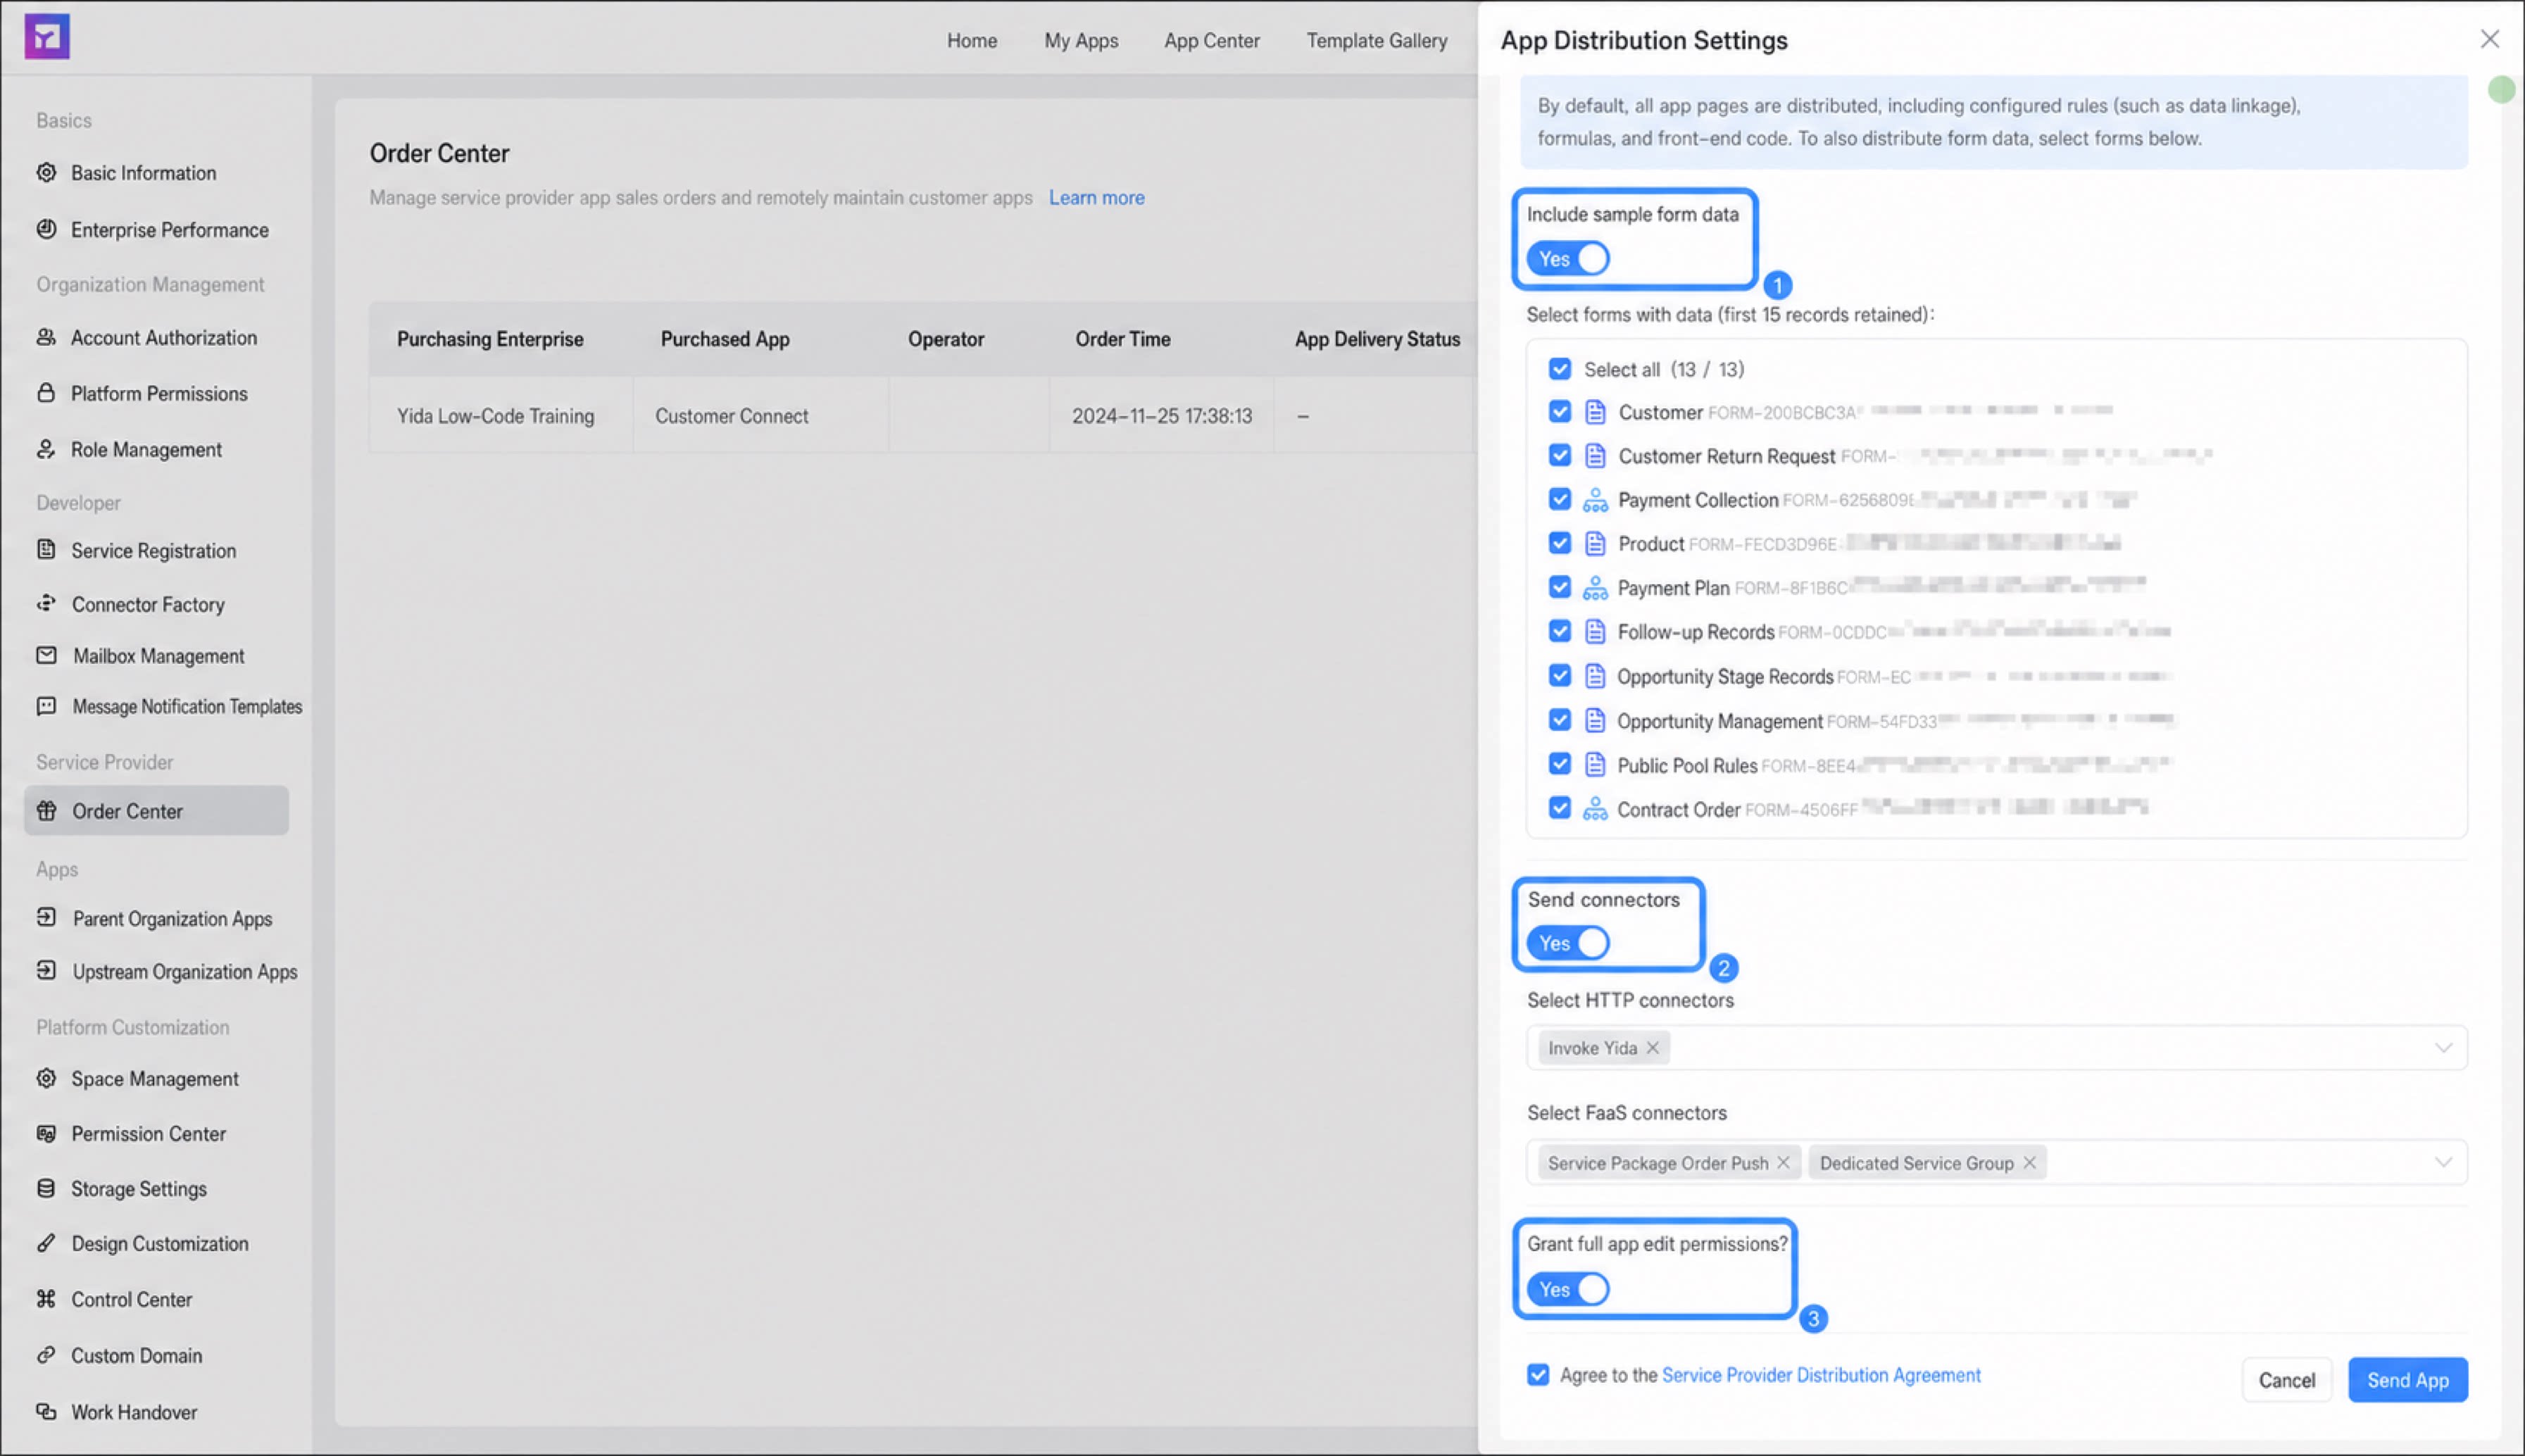
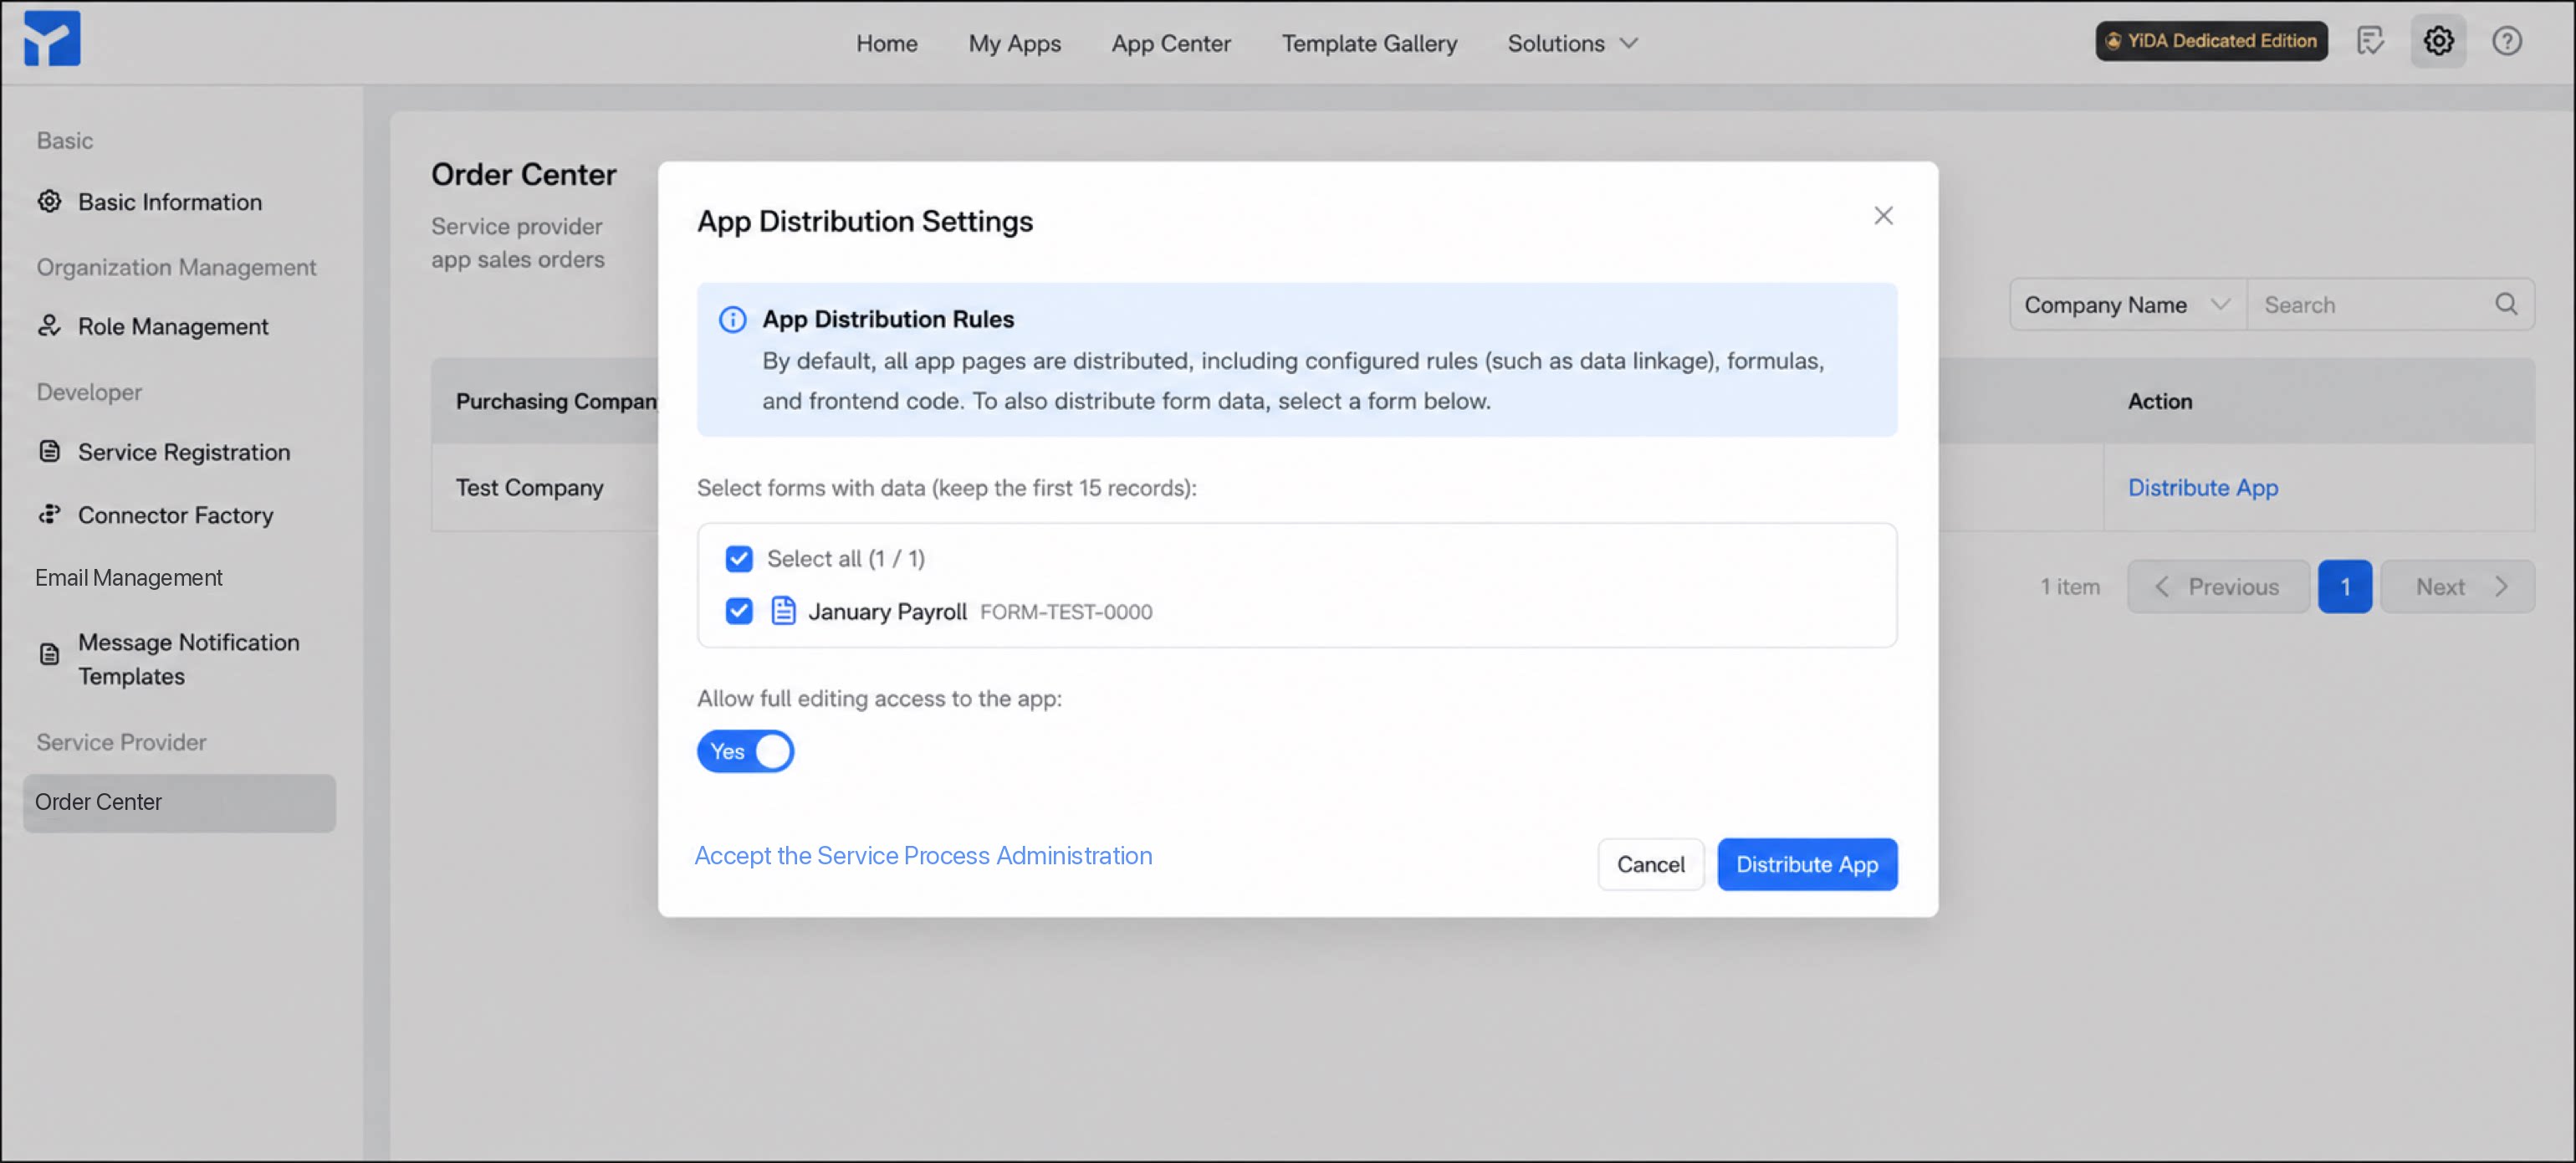
- In the app distribution settings dialog box, choose whether to include form sample data, whether to send the connector, and whether to grant full edit permission for the app.
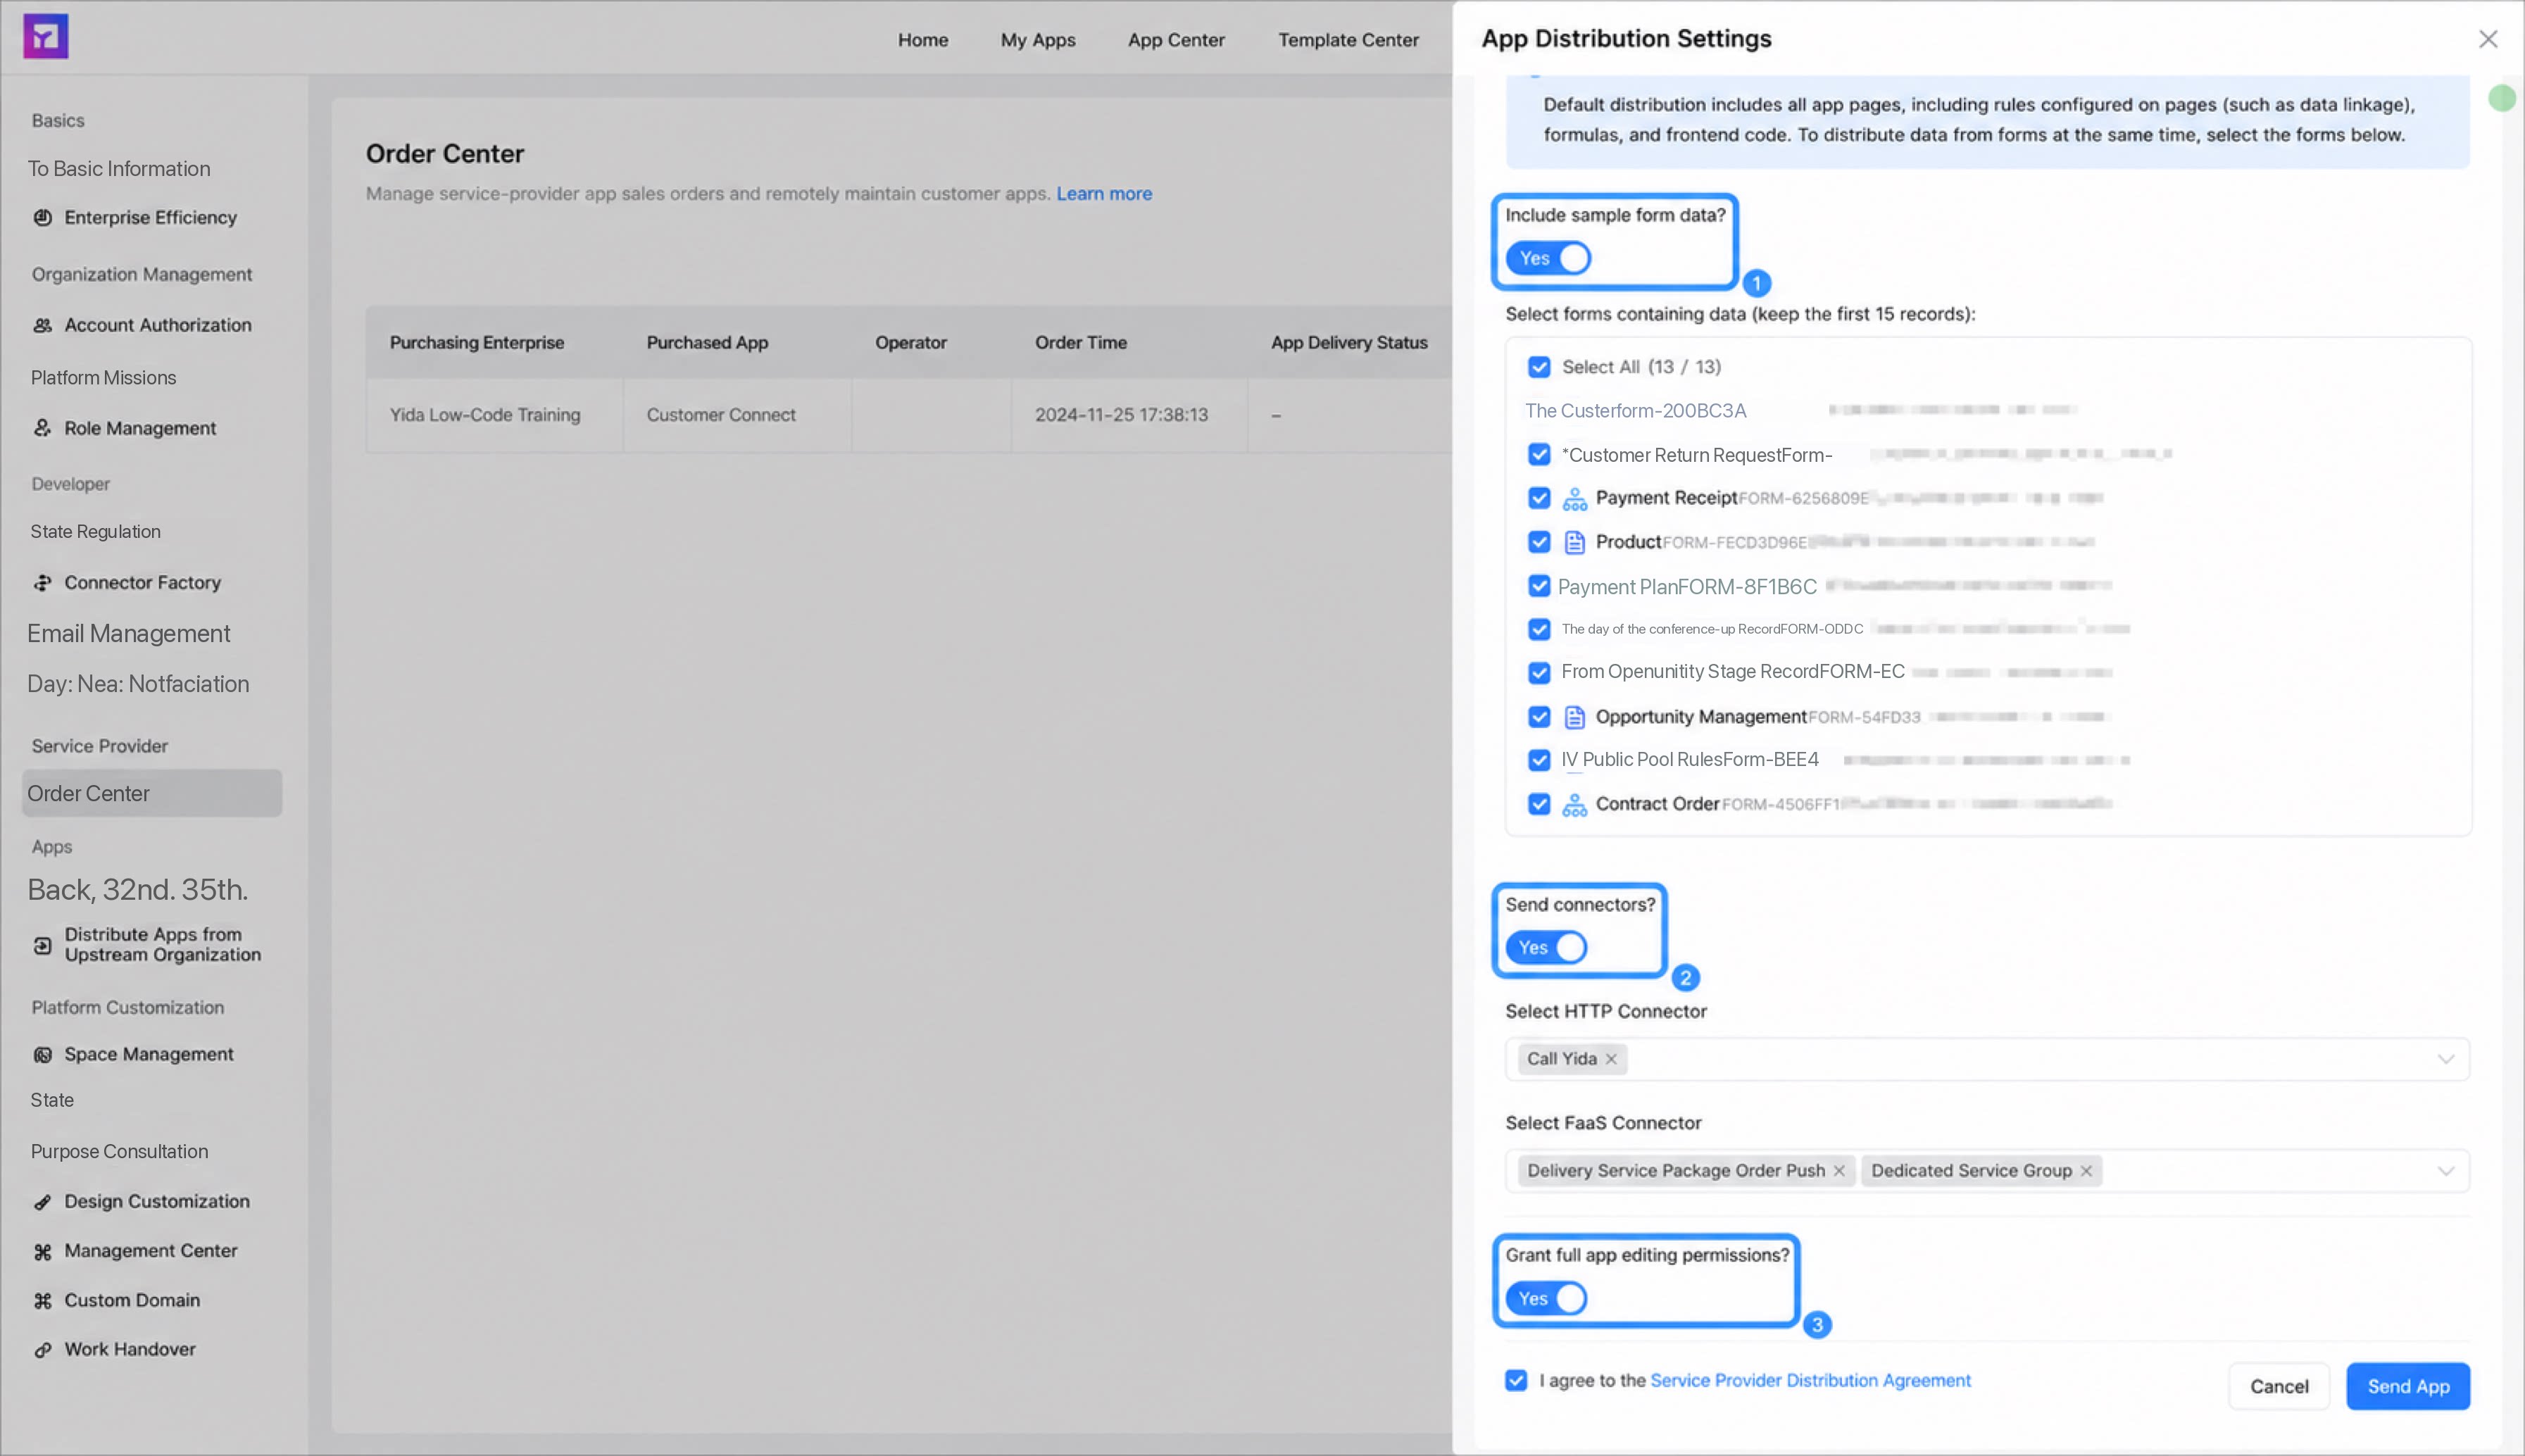
You can distribute all form pages, custom pages, portals, Tablers, data preparation resources, YiDA roles and contact information, integration & automation Automations, connectors, and more within the app. For more information, see App distribution overview.
1
Click Send app
Before clicking Send app, read and review the Service Provider Distribution Agreement. If you agree to the terms, select the checkbox. Otherwise, exit the workflow.
2
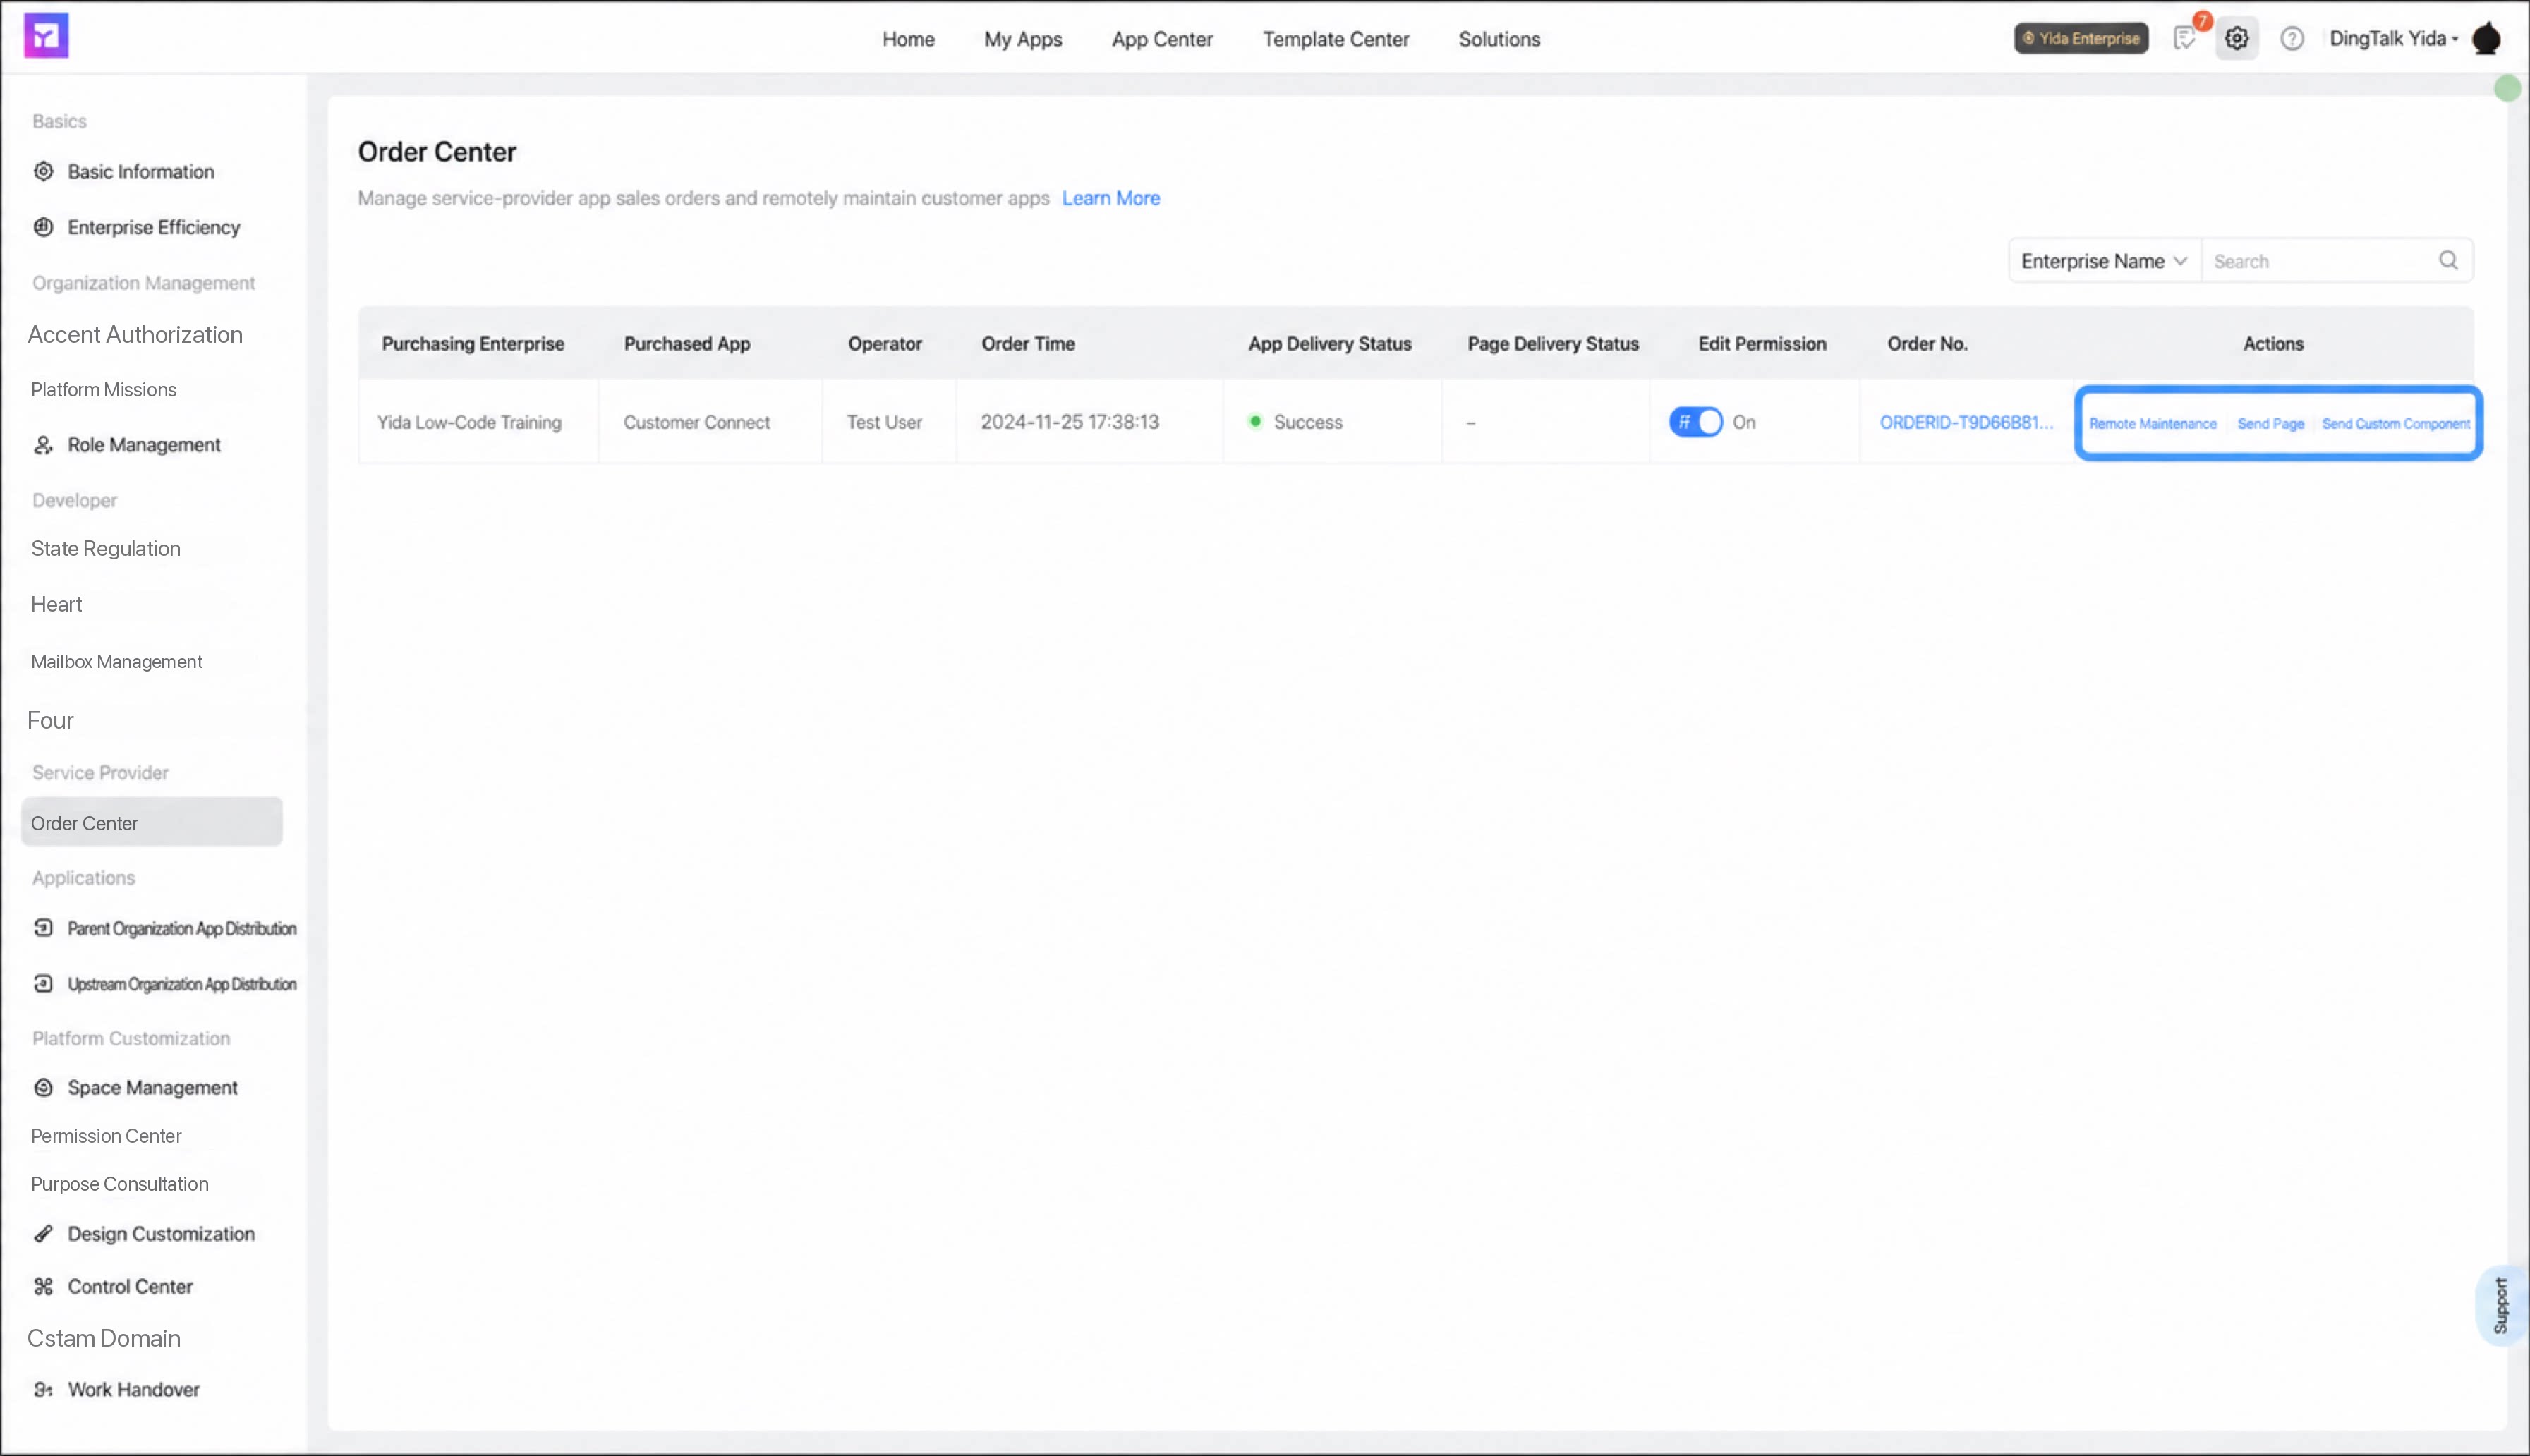
Check the app sending status. If the app is sent successfully, Success is displayed
Step 4: Customer Updates the App Status
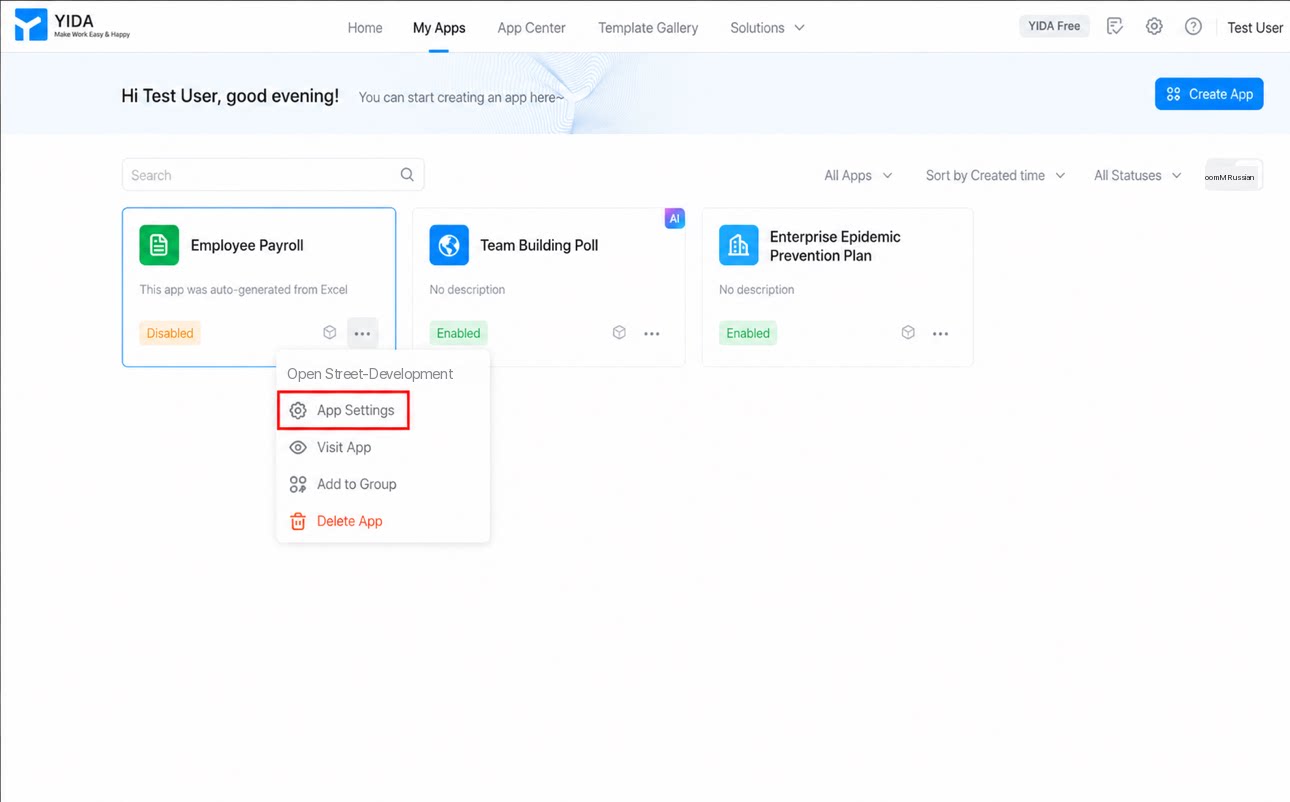
After the app is distributed to the customer’s organization, the customer can manage it on the My apps page. As shown below, the status of a newly distributed app is In development and maintenance.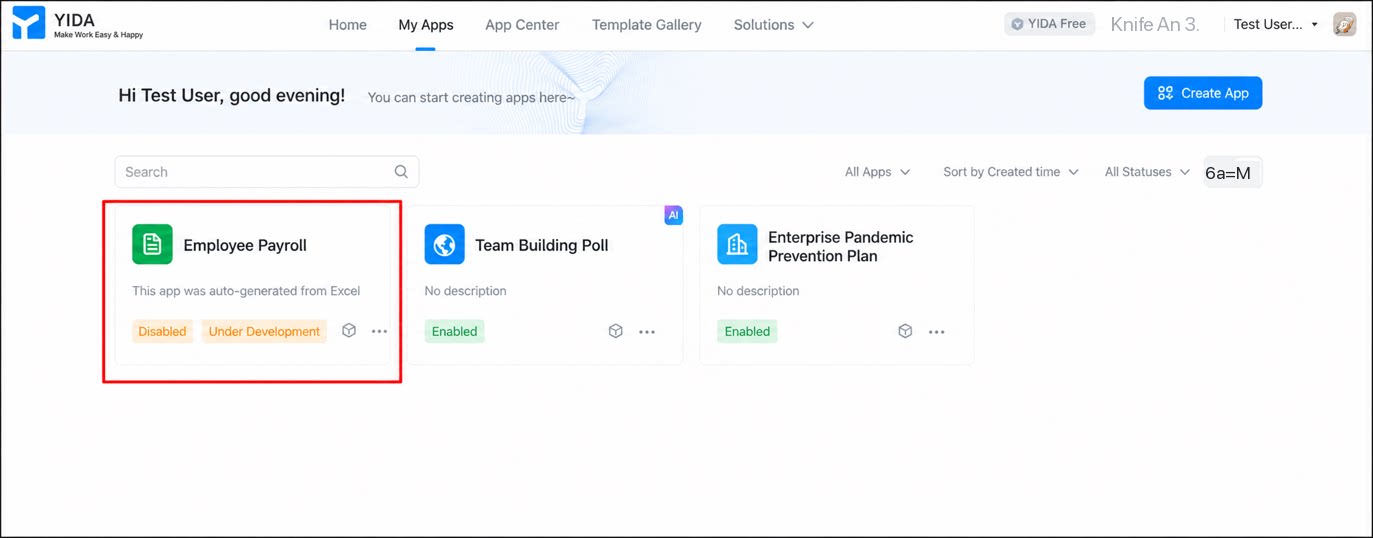
- Sign in to the YiDA workbench and go to the My apps page.
- Locate the purchased app and start acceptance testing.
- After acceptance, return to the My apps page, and click ··· > Close development and maintenance.
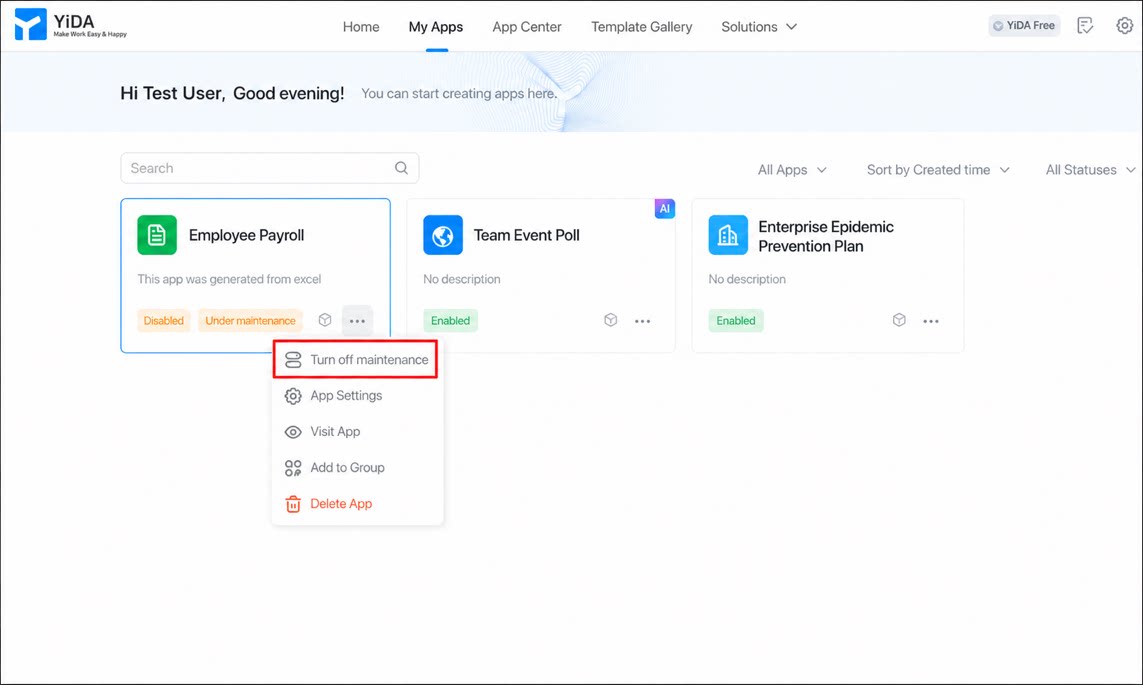
1
Click ··· > App settings to open the app settings page
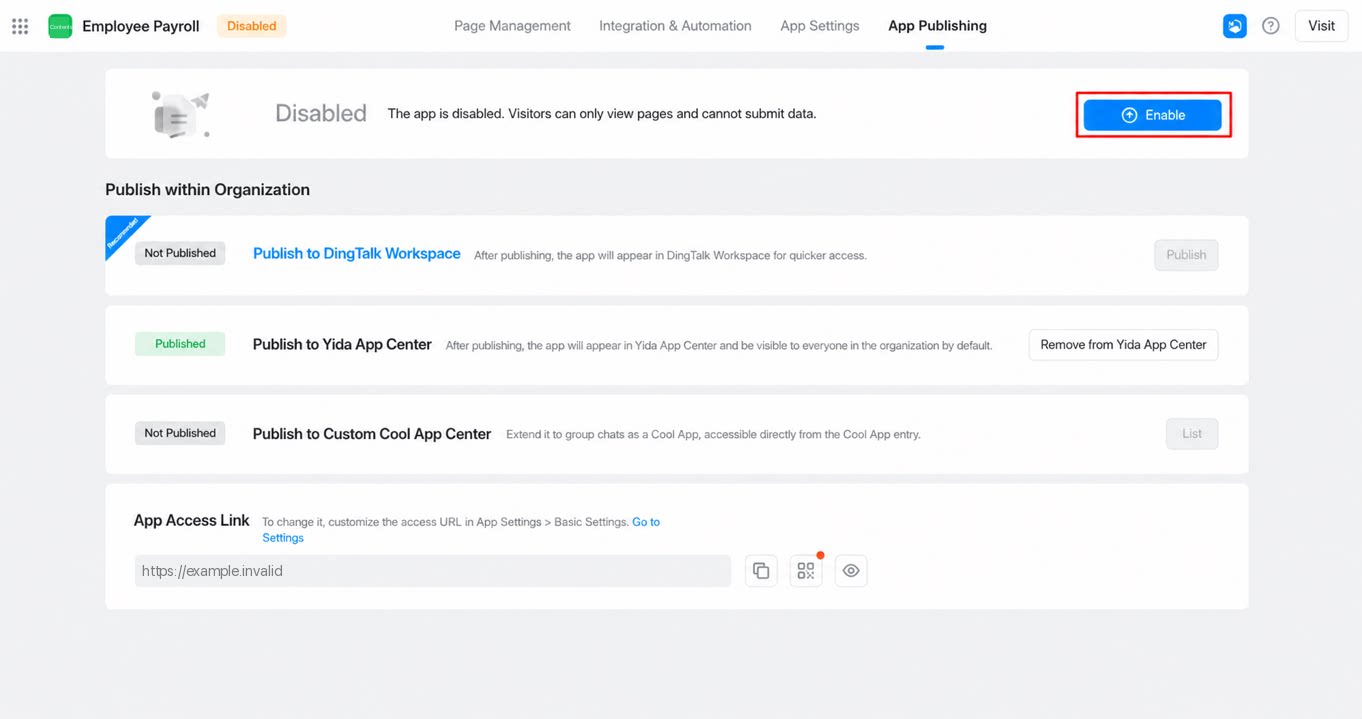
2
At the top of the page, click App release, and then click Enable to start using the app
Step 5: Close the Project
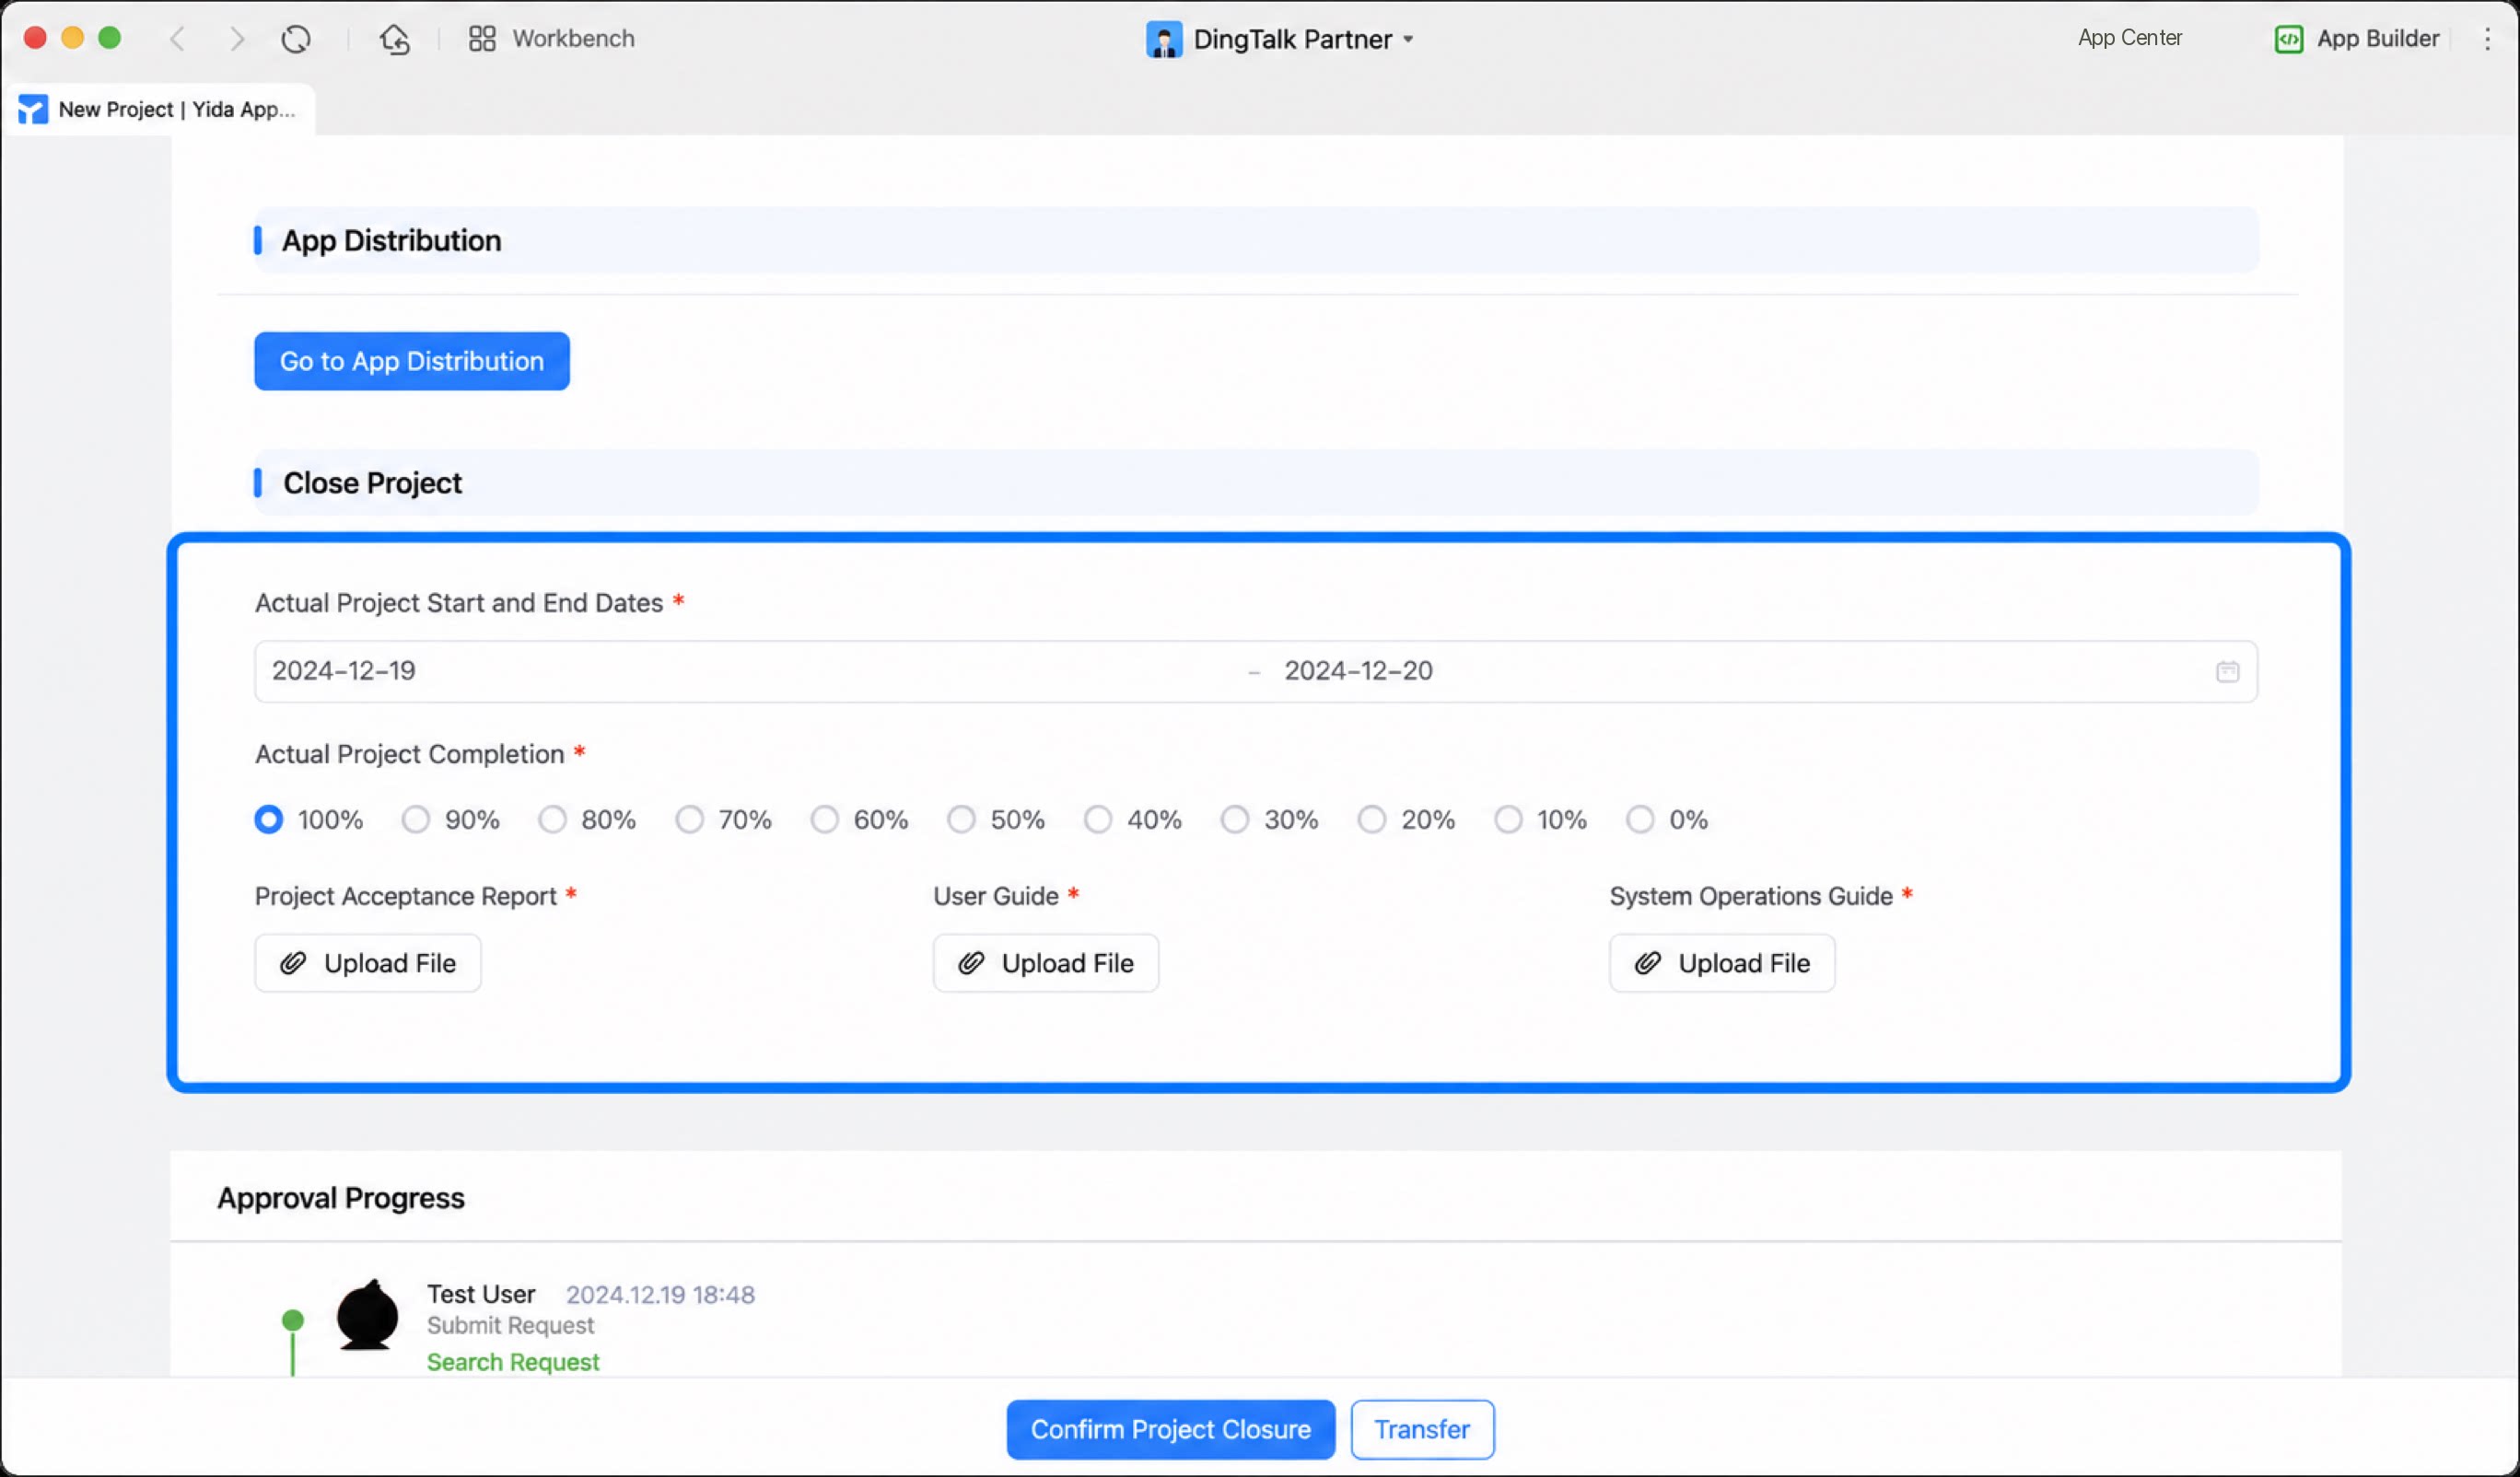
Once the project is completed, the service provider must return to the YiDA workbench to close it.- Sign in to the YiDA workbench and go to the platform management page.
- Click Service provider > Project management, select the completed project, and then click View details.
- On the form details page, fill in the project closure information, and then click Confirm project closure.
Notes
When using app distribution to deploy apps to a customer’s organization, note the following:- App distribution helps YiDA partners quickly copy apps to a customer’s organization. After distribution, the app’s feature entitlements are verified against the entitlements of the target organization. We recommend that the source organization and the target organization use the same YiDA paid edition whenever possible, to avoid issues where advanced features cannot be enabled or used in the target organization.
FAQ
- Q: After creating a project, I found that the project information was entered incorrectly. How do I modify it? Modification is not currently supported. Before the project is approved by YiDA, click Undo in the Actions column to cancel the initiated workflow.
- Q: Can an app be distributed multiple times for a single project?
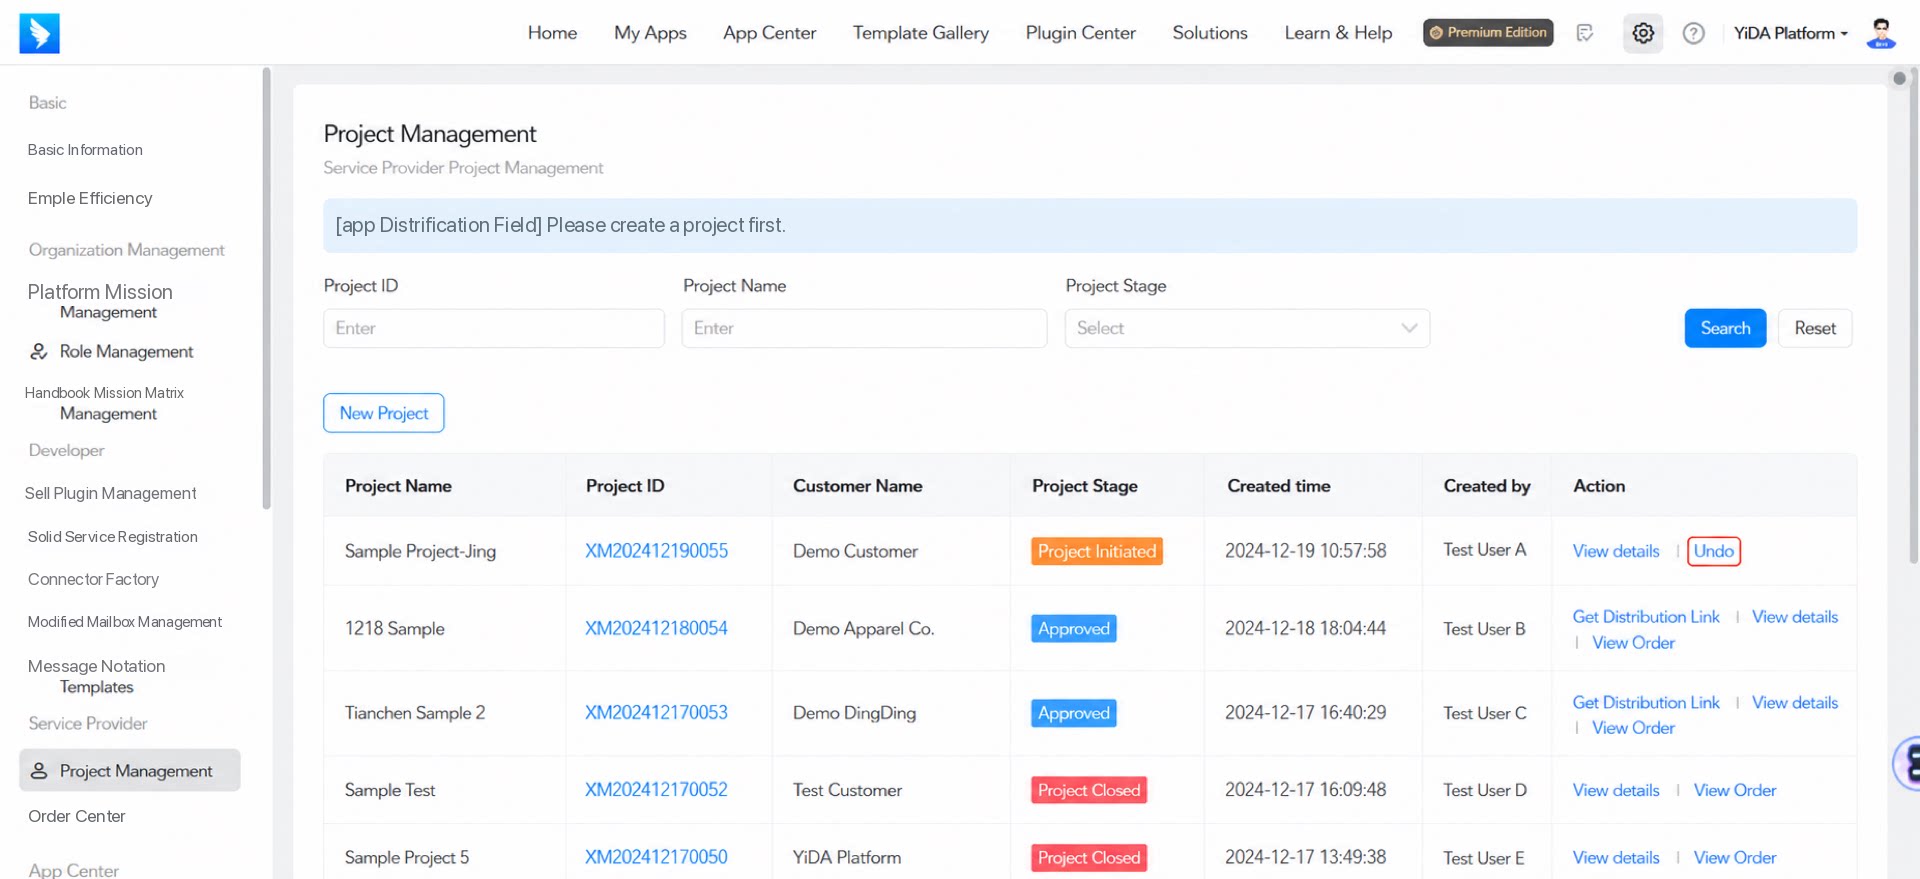 For the same customer, you can obtain distribution links multiple times to distribute the same or different apps, from project approval until the project is closed.
- Q: Does “Project contract amount” refer to the total project amount or only the YiDA-related amount?
- Q: What if I need to distribute an app to a customer in advance under special circumstances, but the contract has not been signed yet?
- Q: Why is “View details” grayed out and unavailable?
- Q: Why does the message “This organization cannot make a purchase. Please contact the service provider” appear when a customer tries to purchase the app?
- Q: Why does the message “The selected app does not support distribution links” appear when I try to obtain a distribution link?