

 Chats
Chats Calendar
 Meetings
 Contacts
 Mail
Mail Docs
Docs Drive
Drive AI Table
 AI Minutes
 Attendance
 Approval
 YiDA
YiDA Admin Console
1 End-To-End Process for Low-Code SaaS App Development
See Partnership process guide - Open Platform.
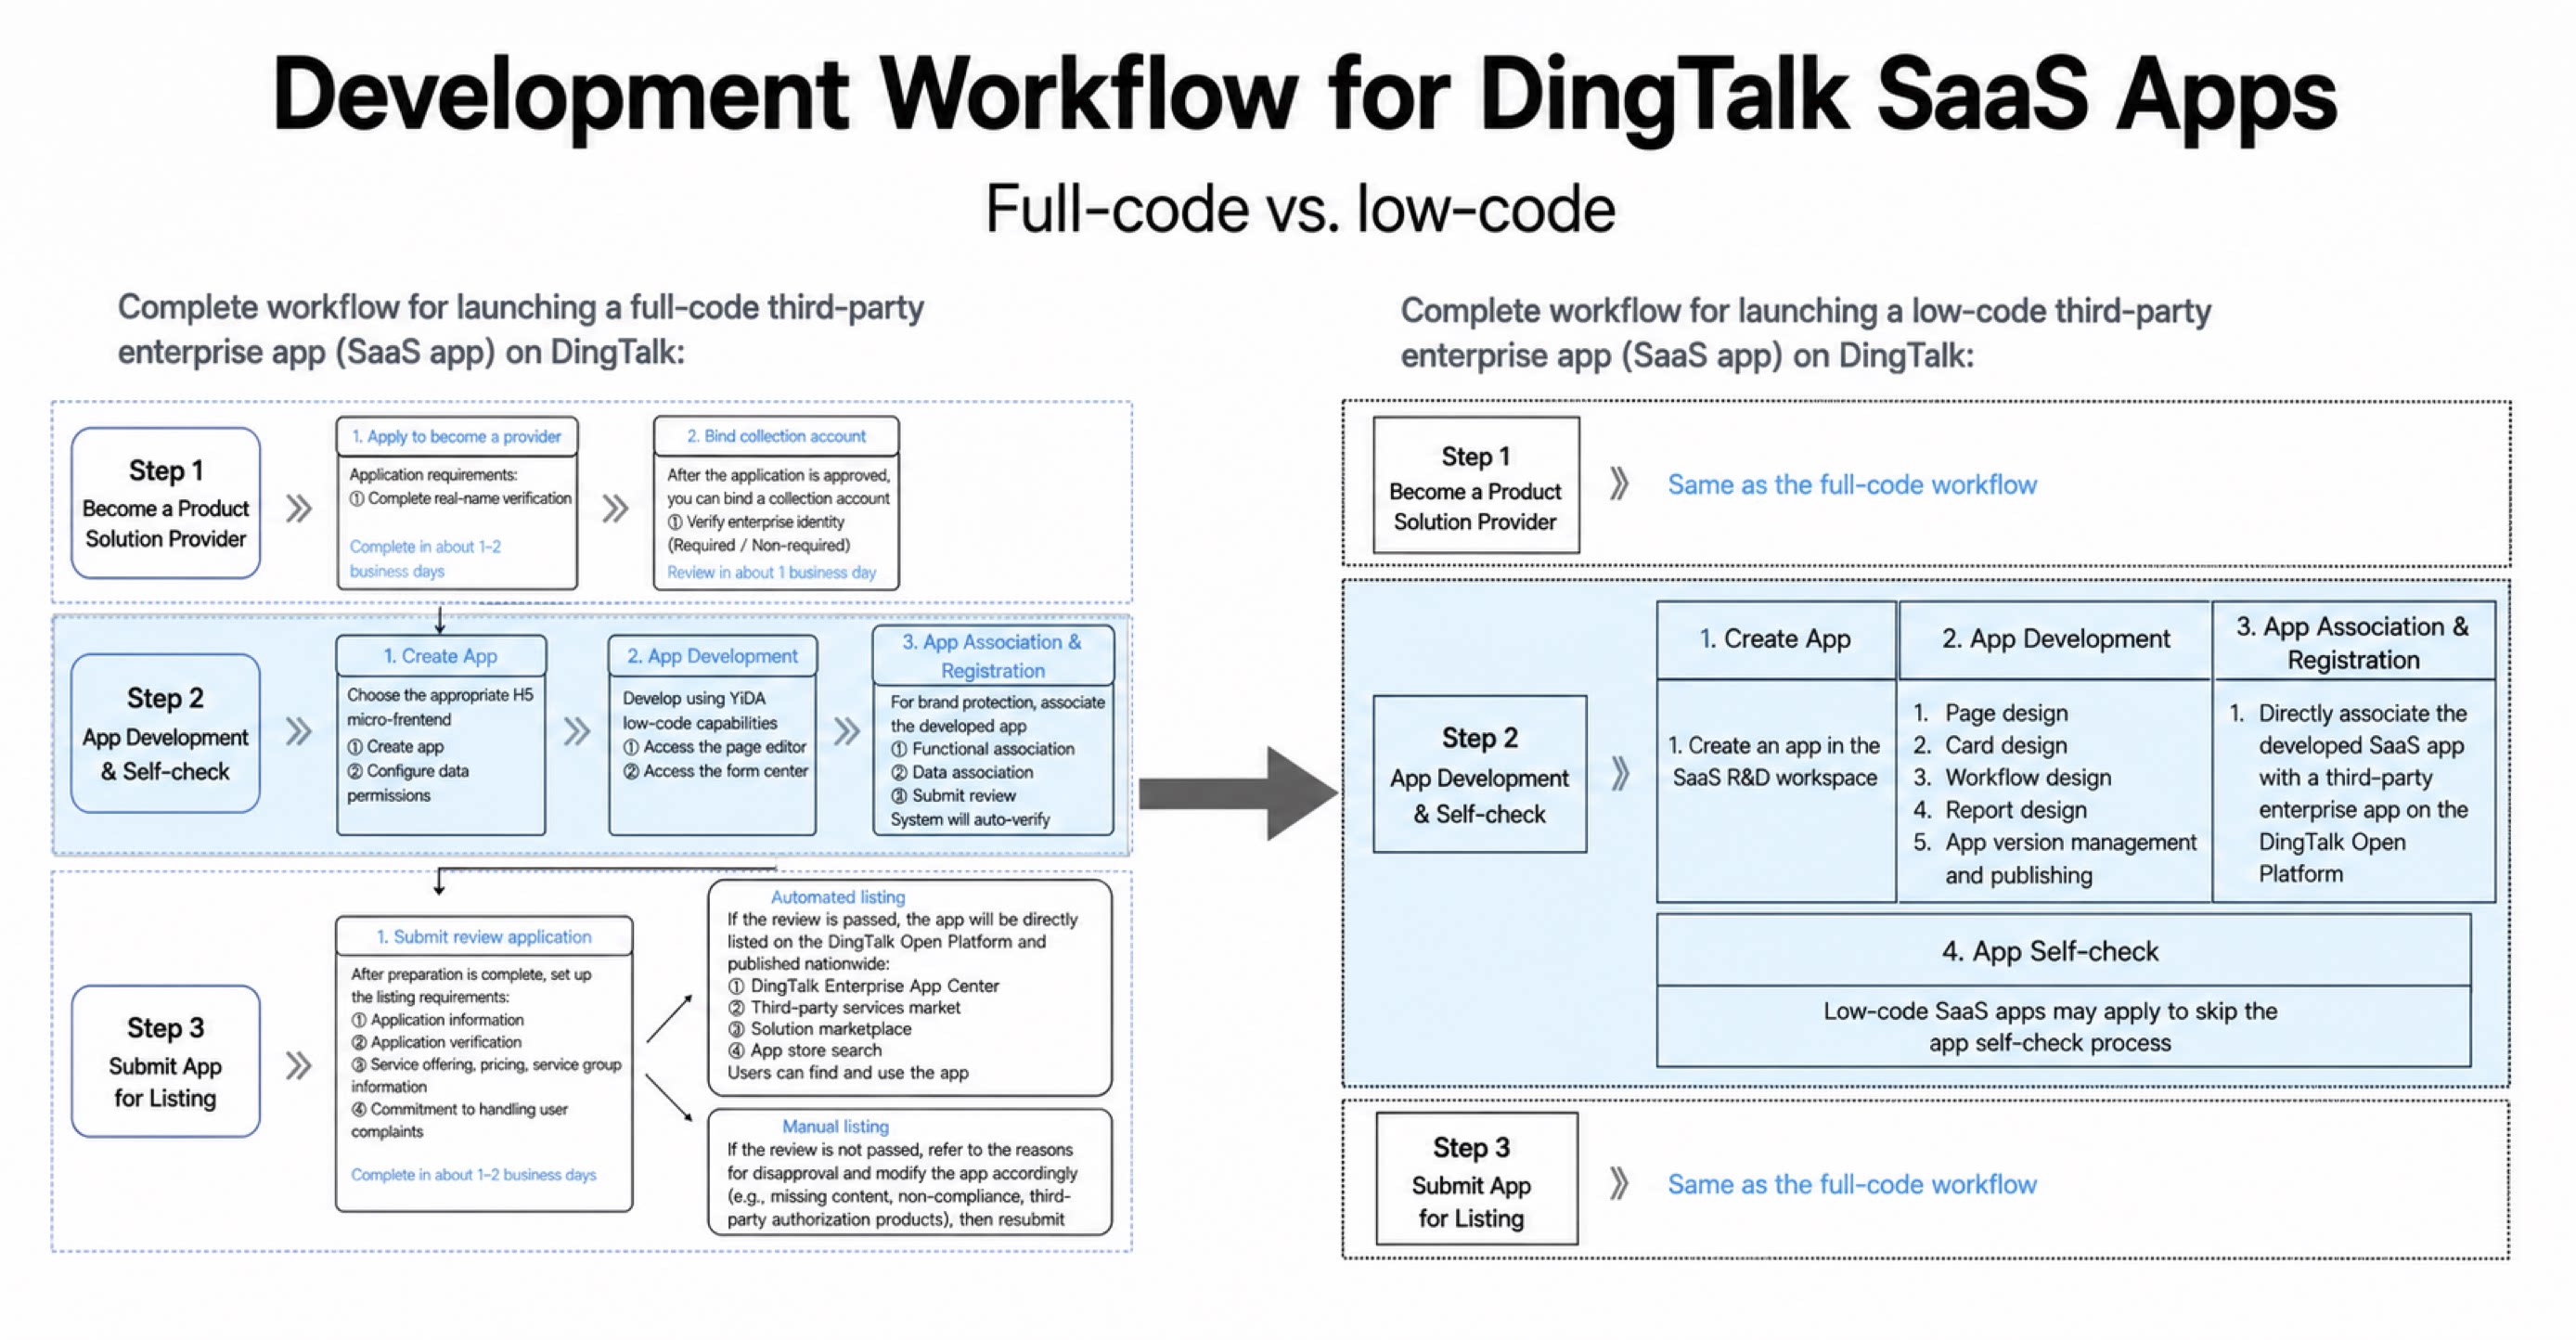
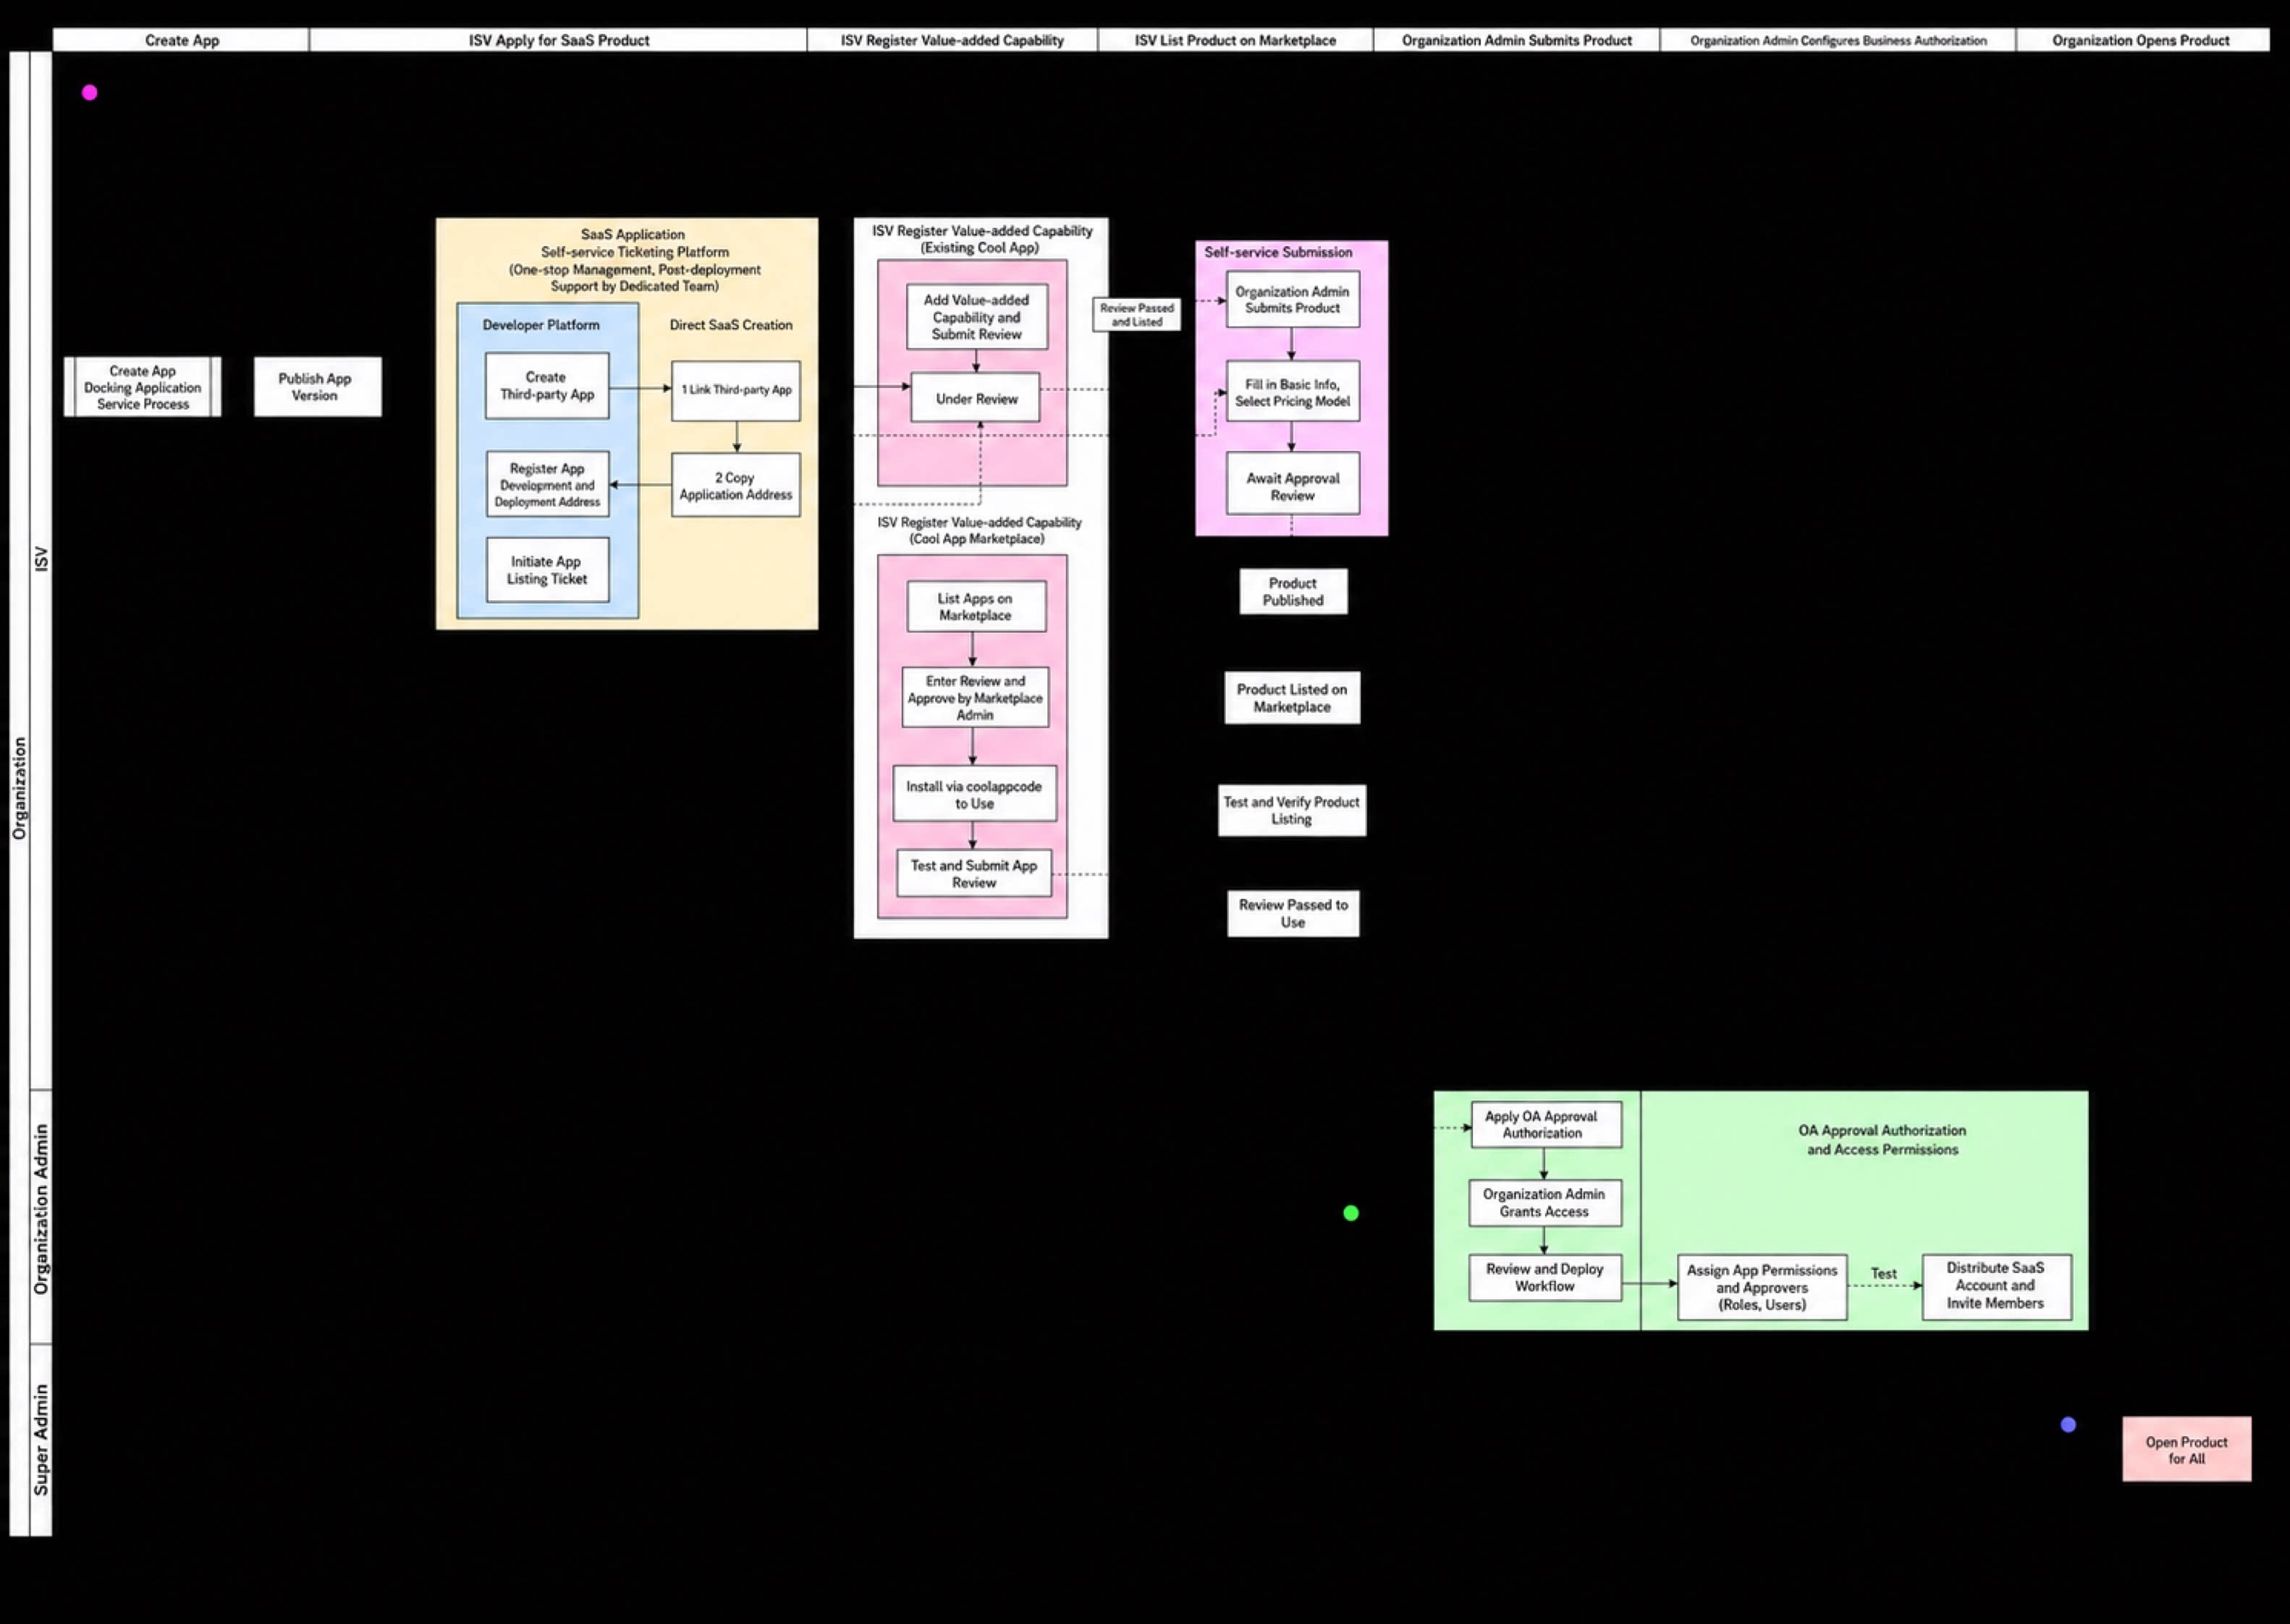
1.1 Prerequisites
Step 1
Step 2
Step 3
1.2 How to Access the SaaS Development Workbench
Once your organization holds product solution provider verification, sign in to YiDA. The entry point “Enter SaaS development workbench” appears in the top menu for direct access.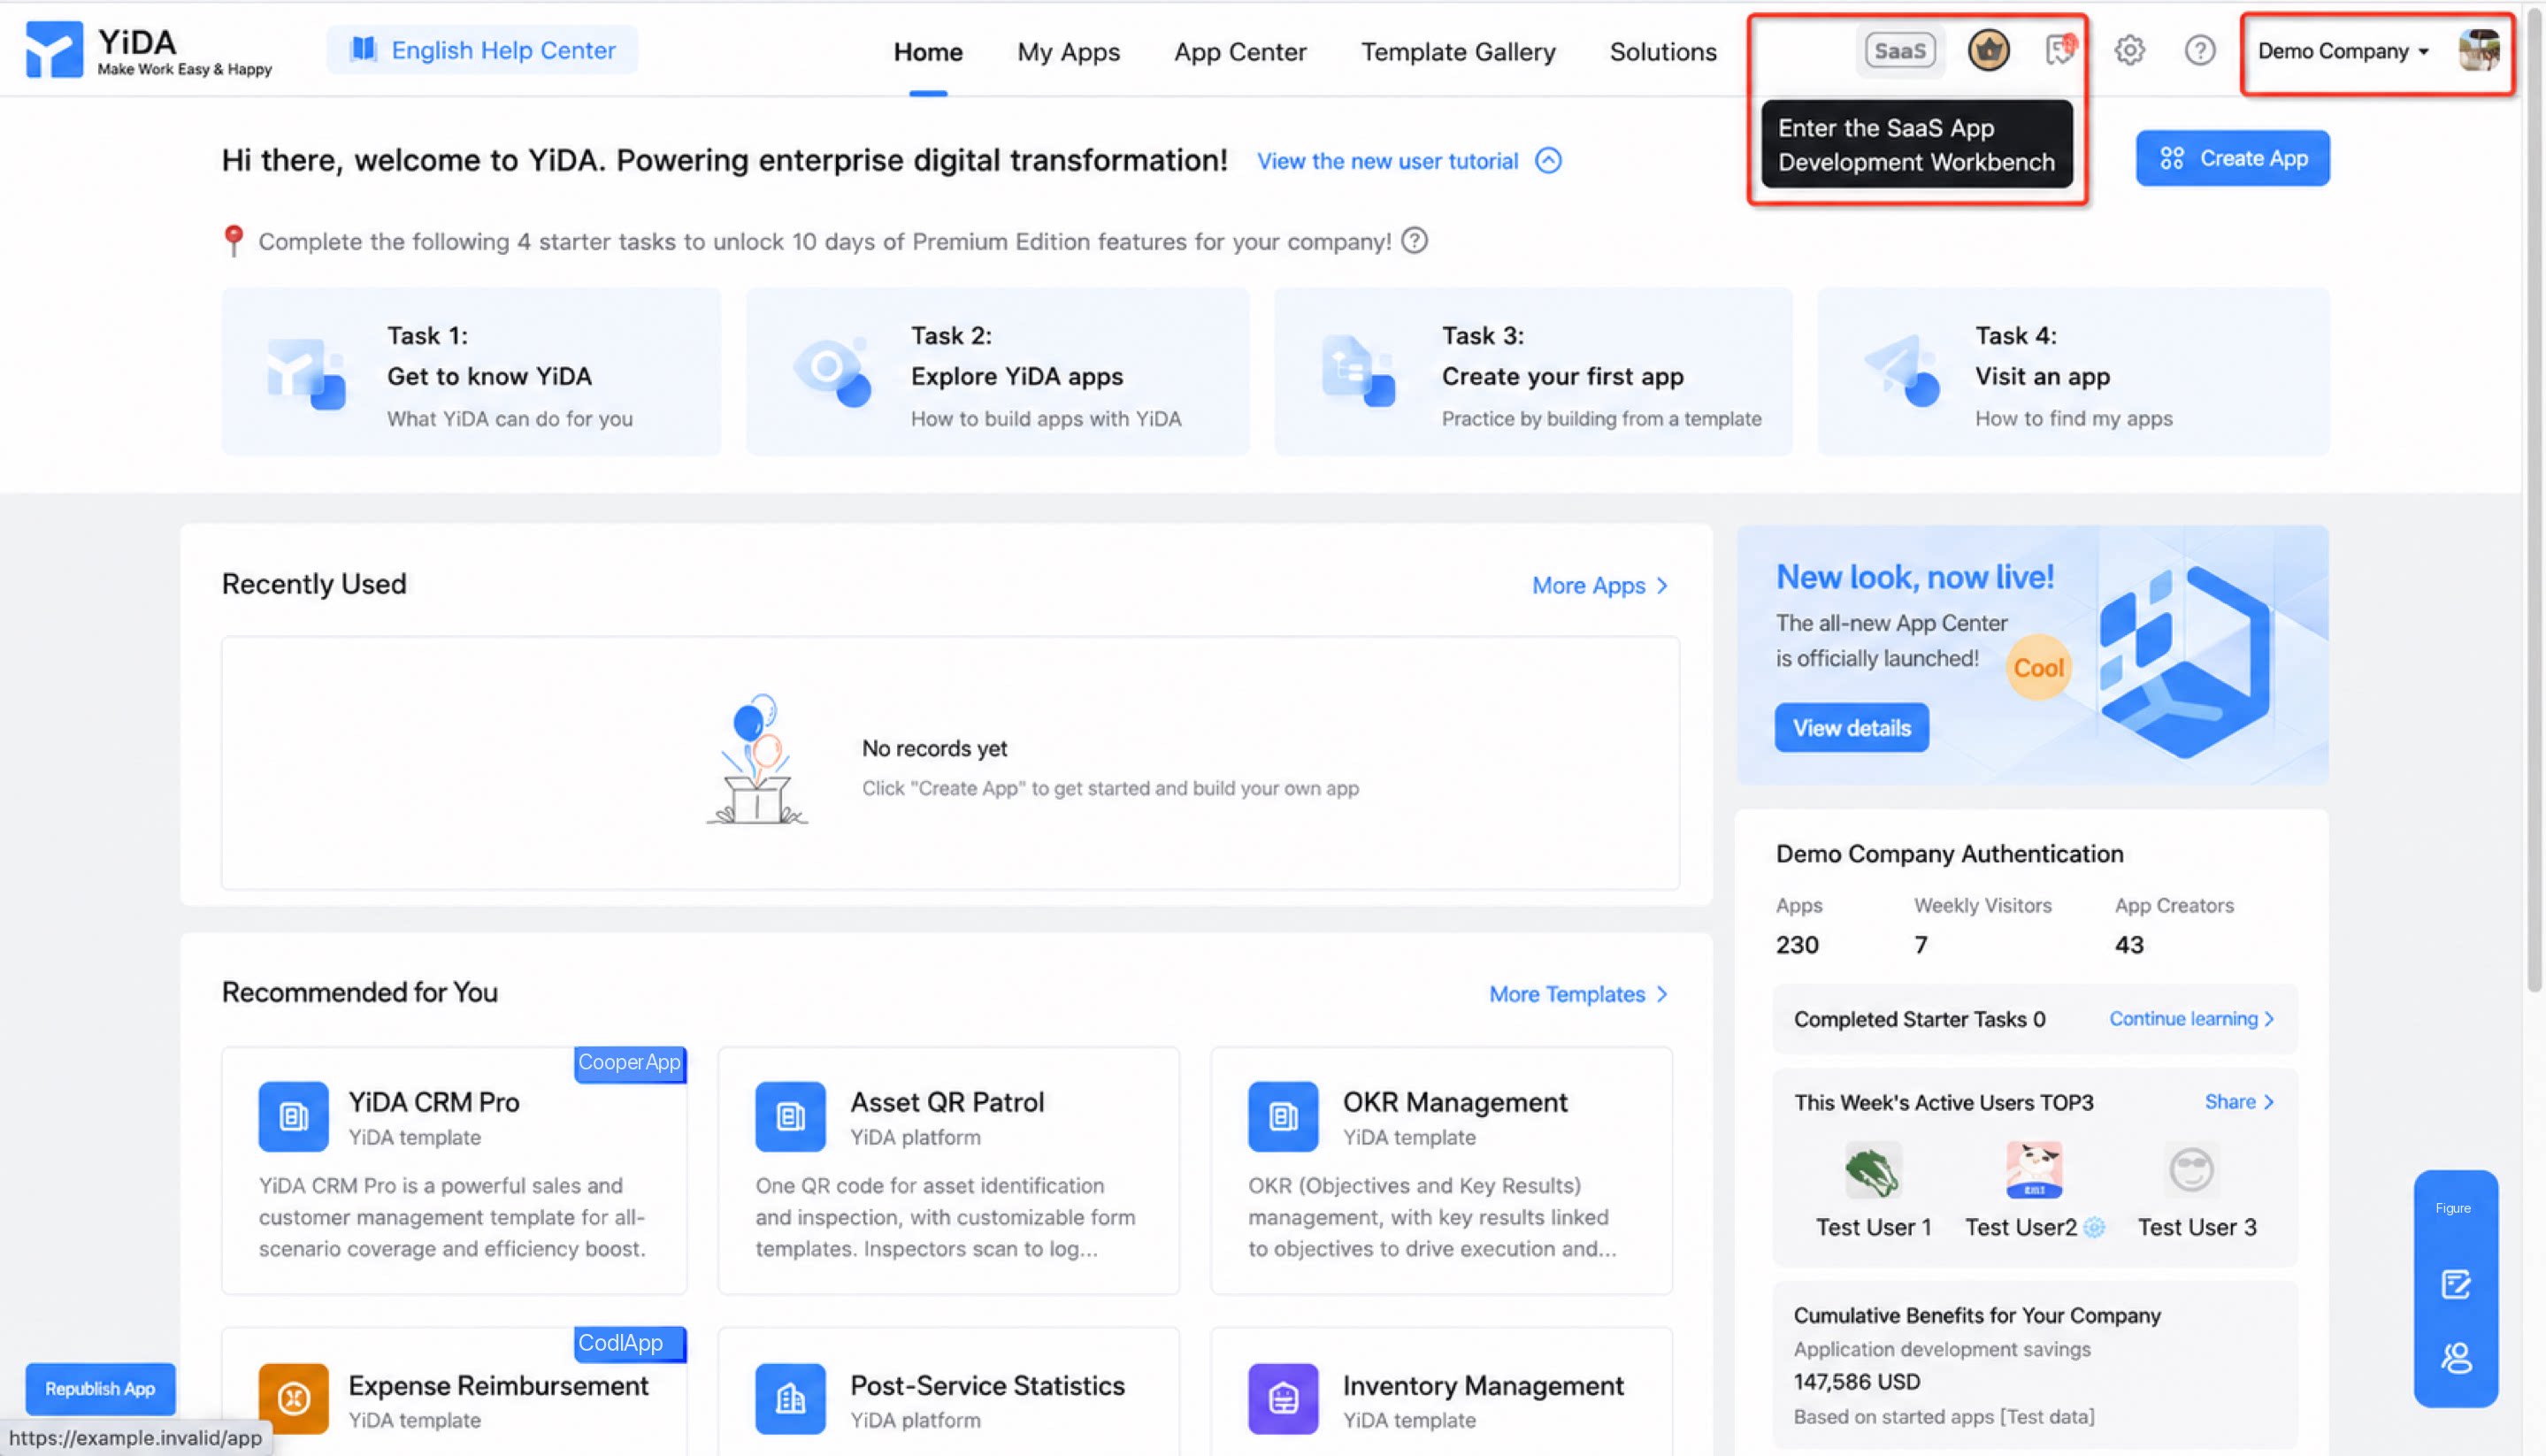
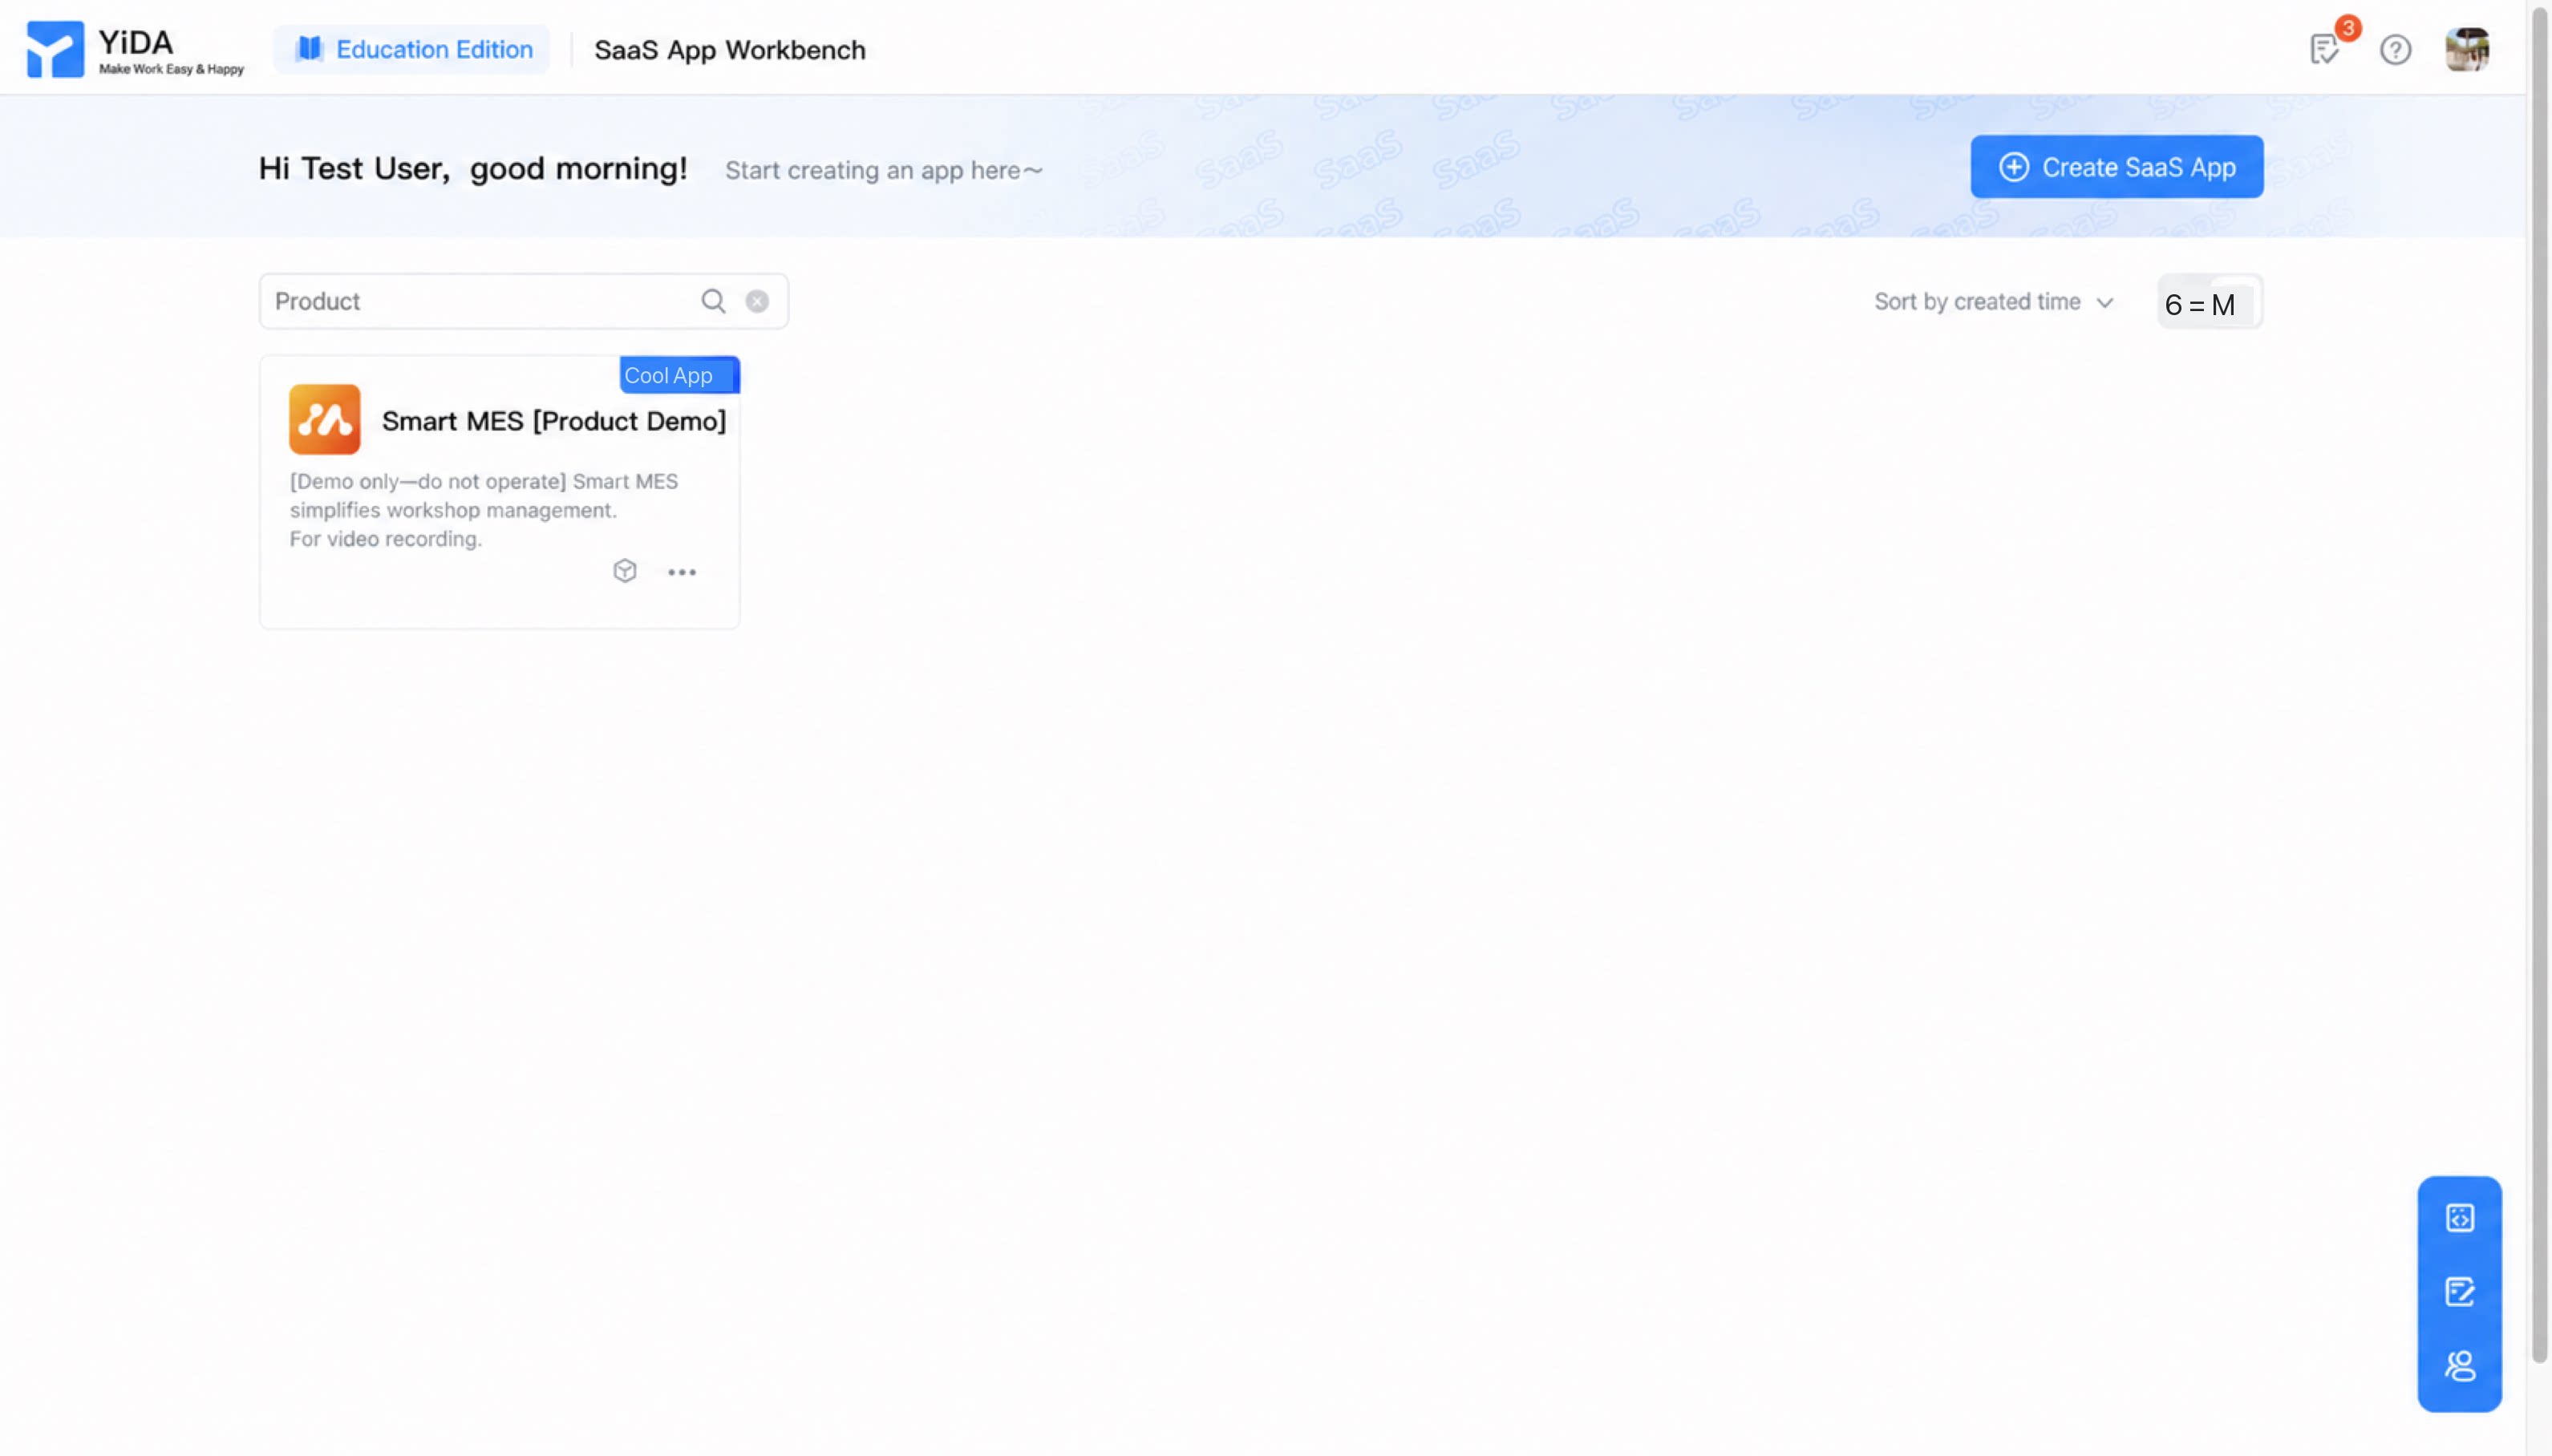
1.3 Supported aPaaS Platform Capabilities
The DingTalk SaaS Factory development workbench mirrors the existing YiDA interaction model. This release provides the following core capabilities:- Platform capabilities:
2 Main App Design
Once the prerequisites are complete, you can start building your SaaS app. If you already have a complete solution under another YiDA organization and want to switch it directly to SaaS mode, contact the YiDA product and engineering team to request migration to the SaaS environment.
- Using the SaaS development workbench and the capabilities currently provided by the platform, design your app to match your business requirements. For example:
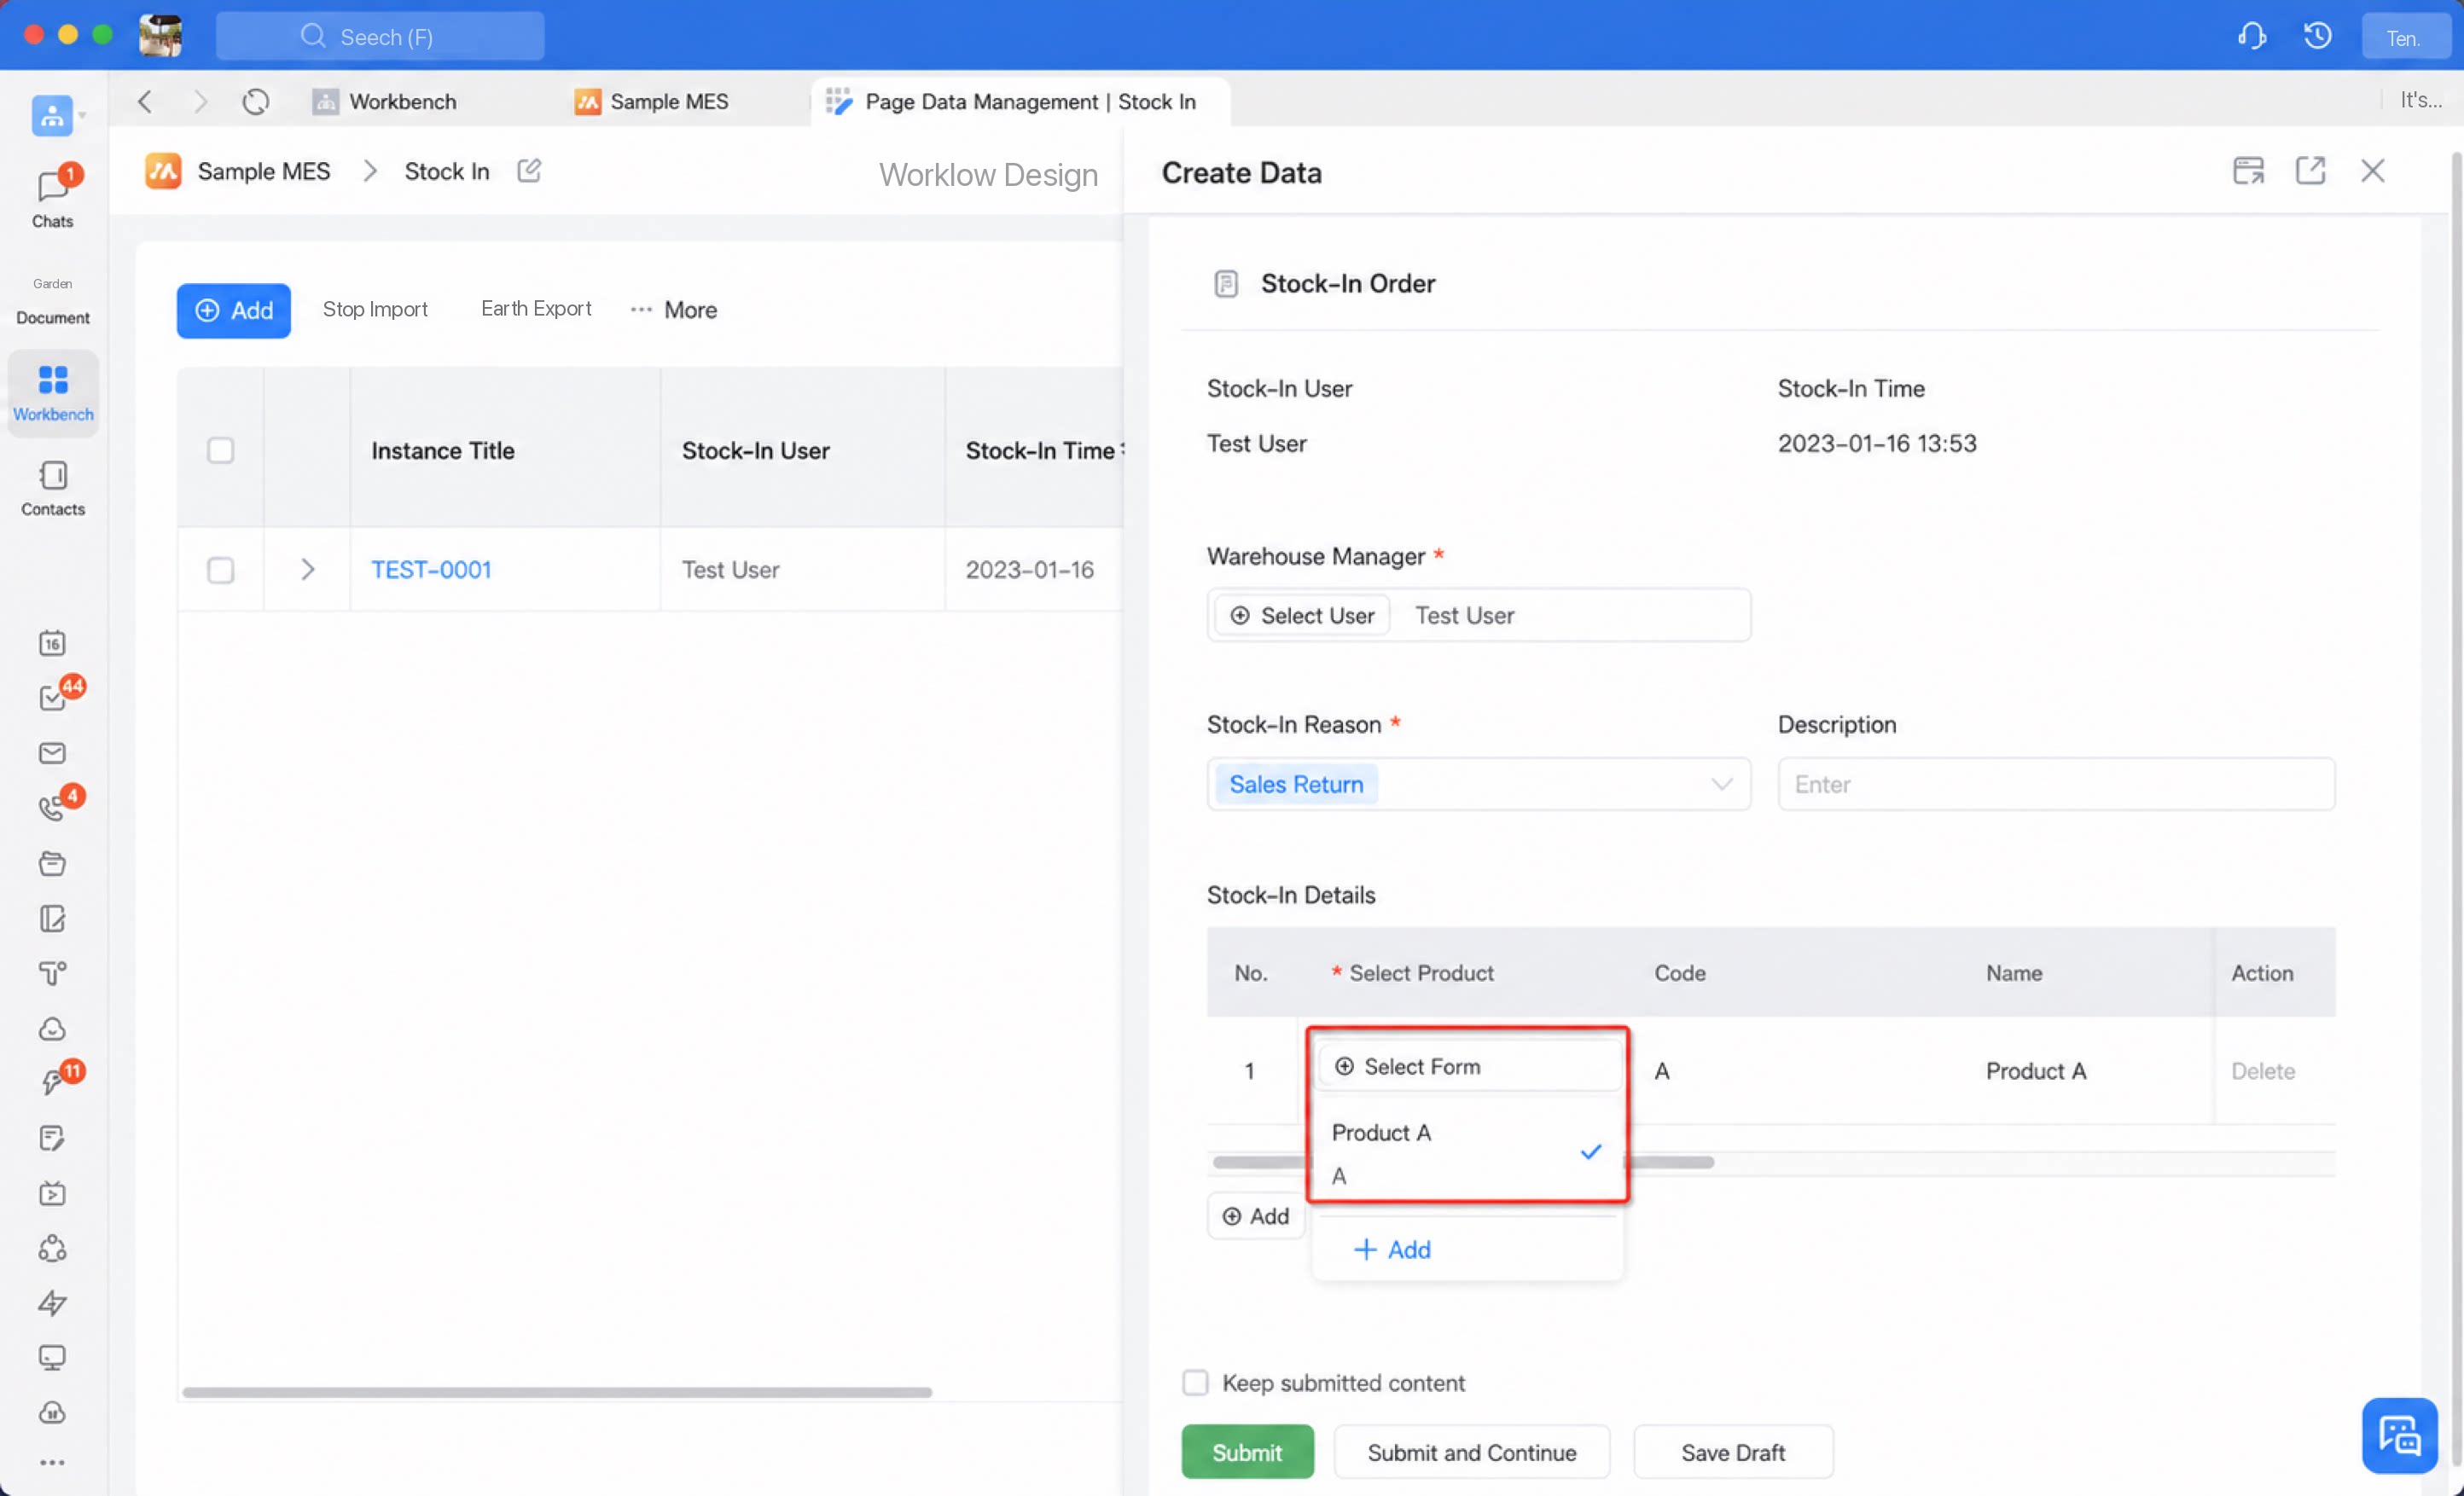
- If your SaaS product ships with baseline business data and you want subscribers to see sample data after subscribing, enter this “baseline data” and maintain it in a single folder named “Baseline business data” (see the example below).
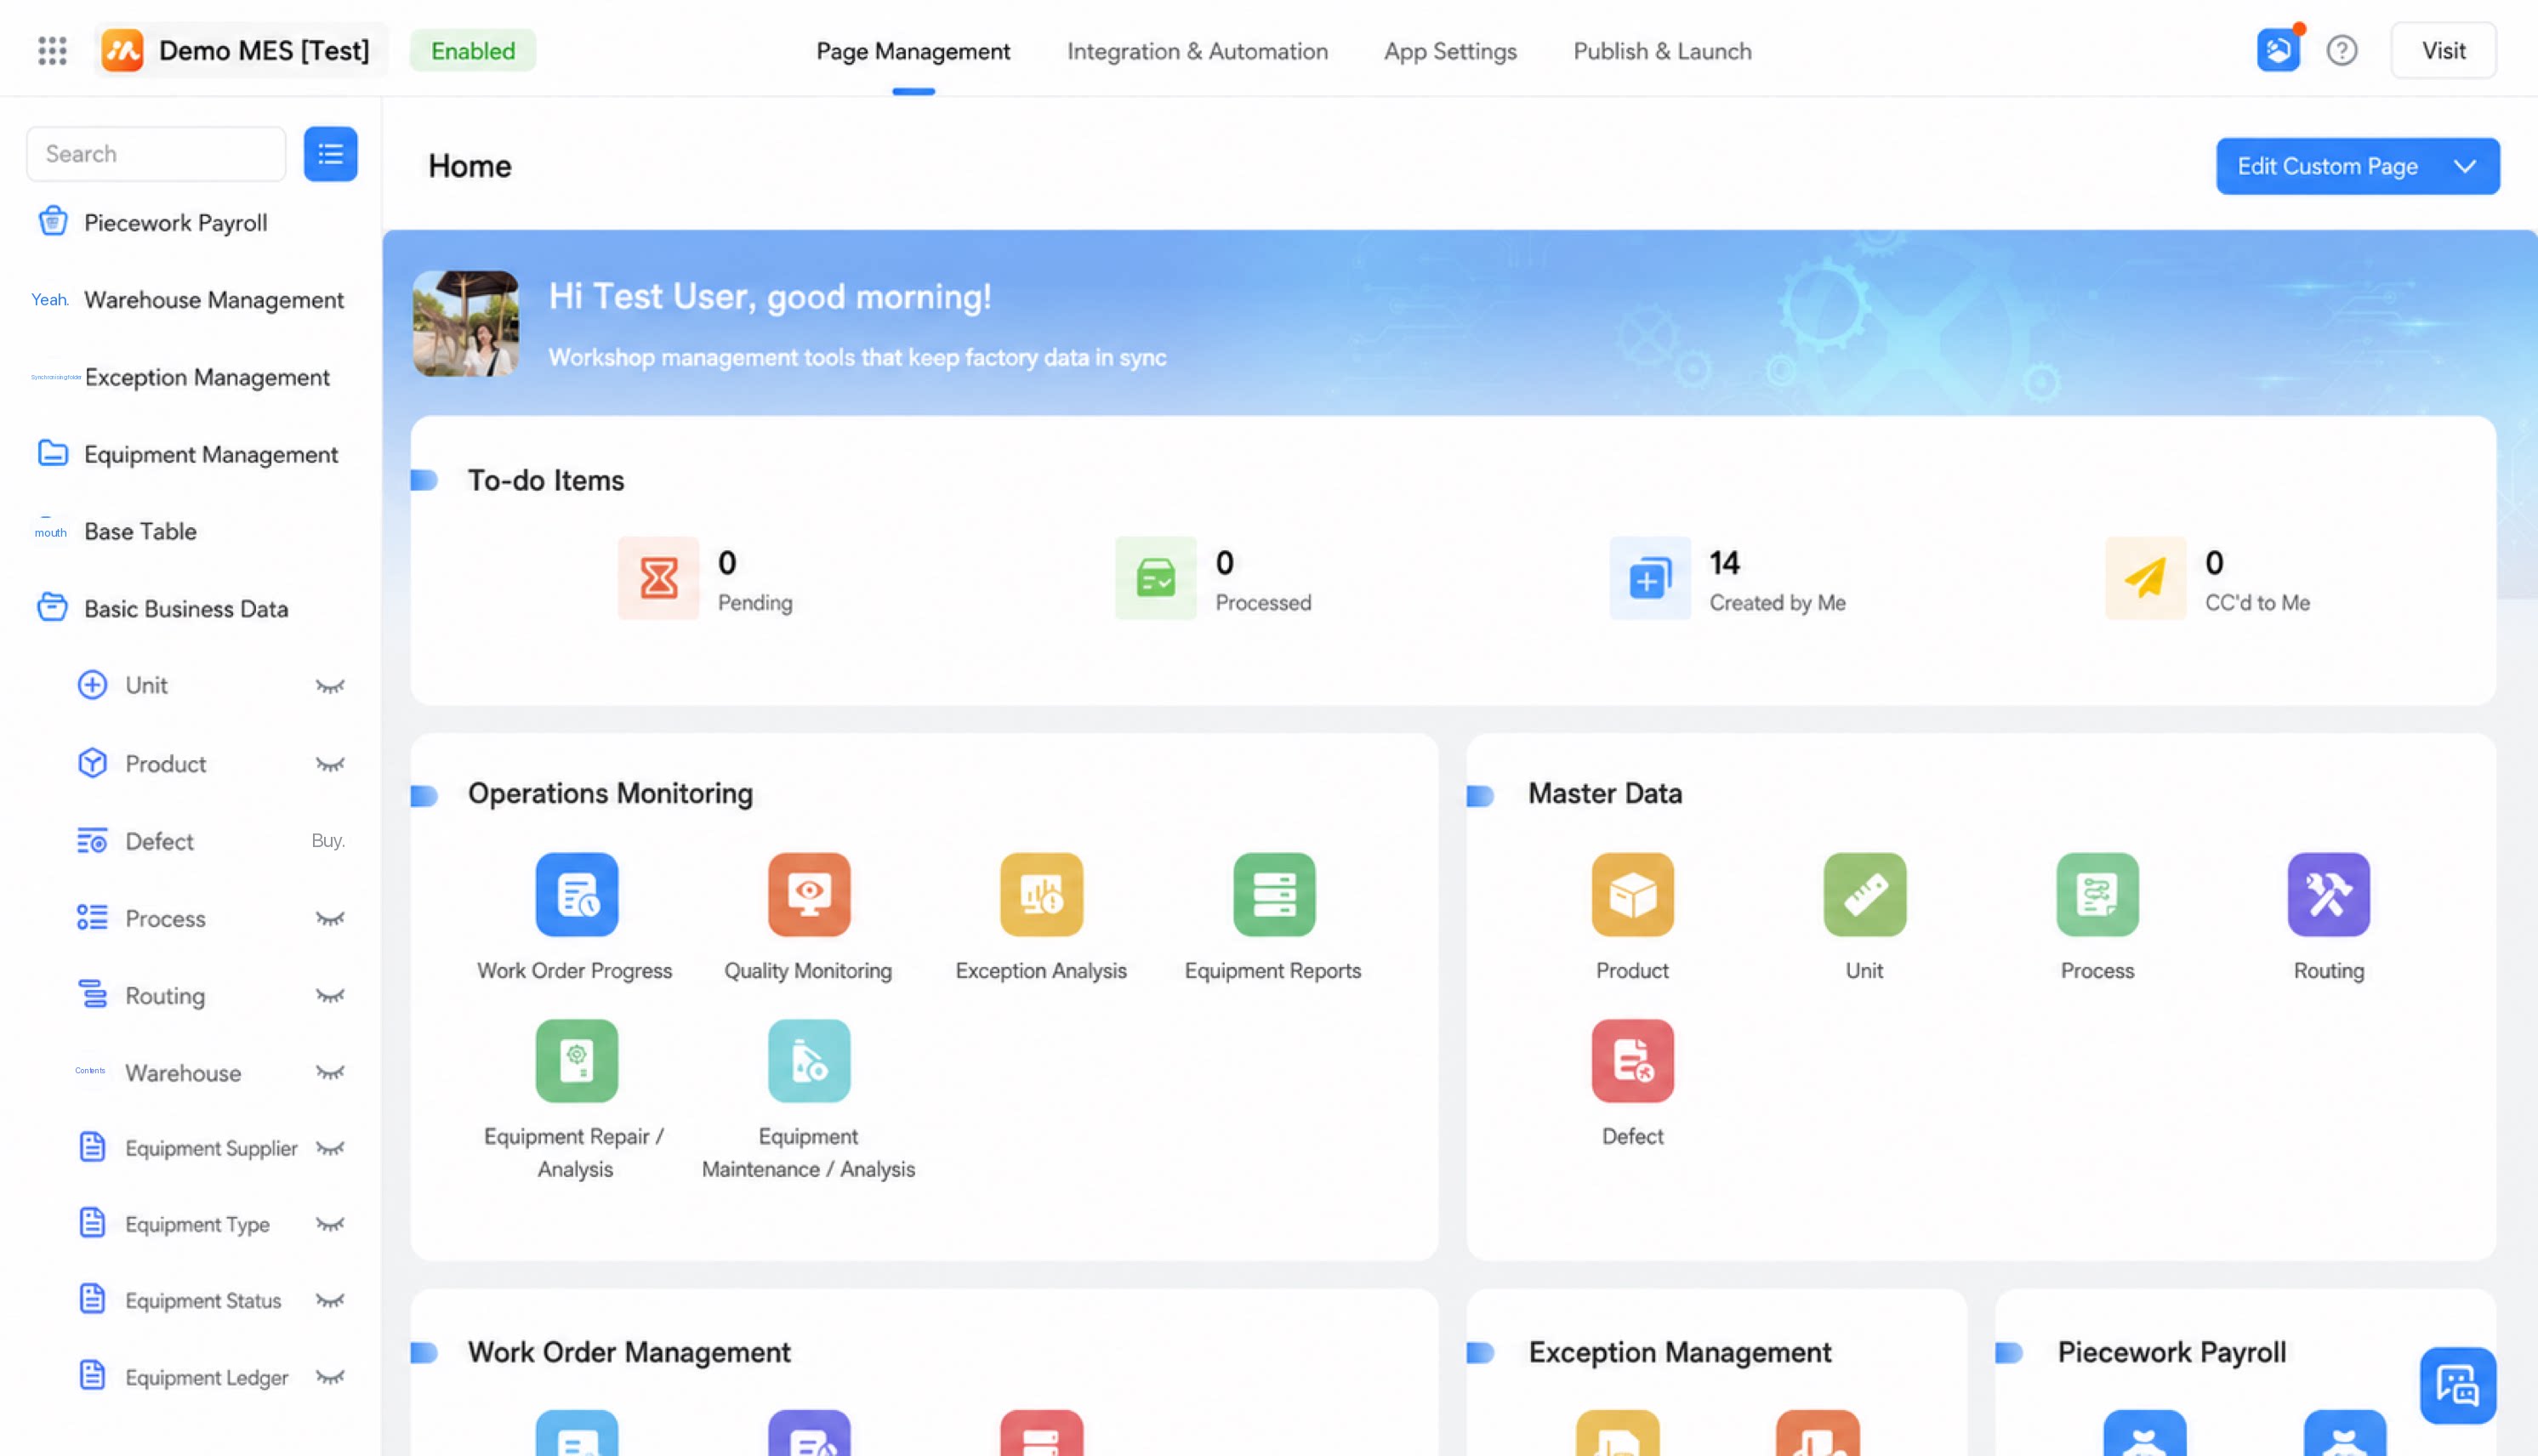
3 Cool App Design
From the SaaS development workbench, you can configure Cool App card styles and the logic for sending and updating cards under the app layer: Card Management / Integration & Automation flow. See the following document for detailed design guidance:4 App Release
Step 1
Click Create Version and fill in the SaaS app version information, including version number and release notes.
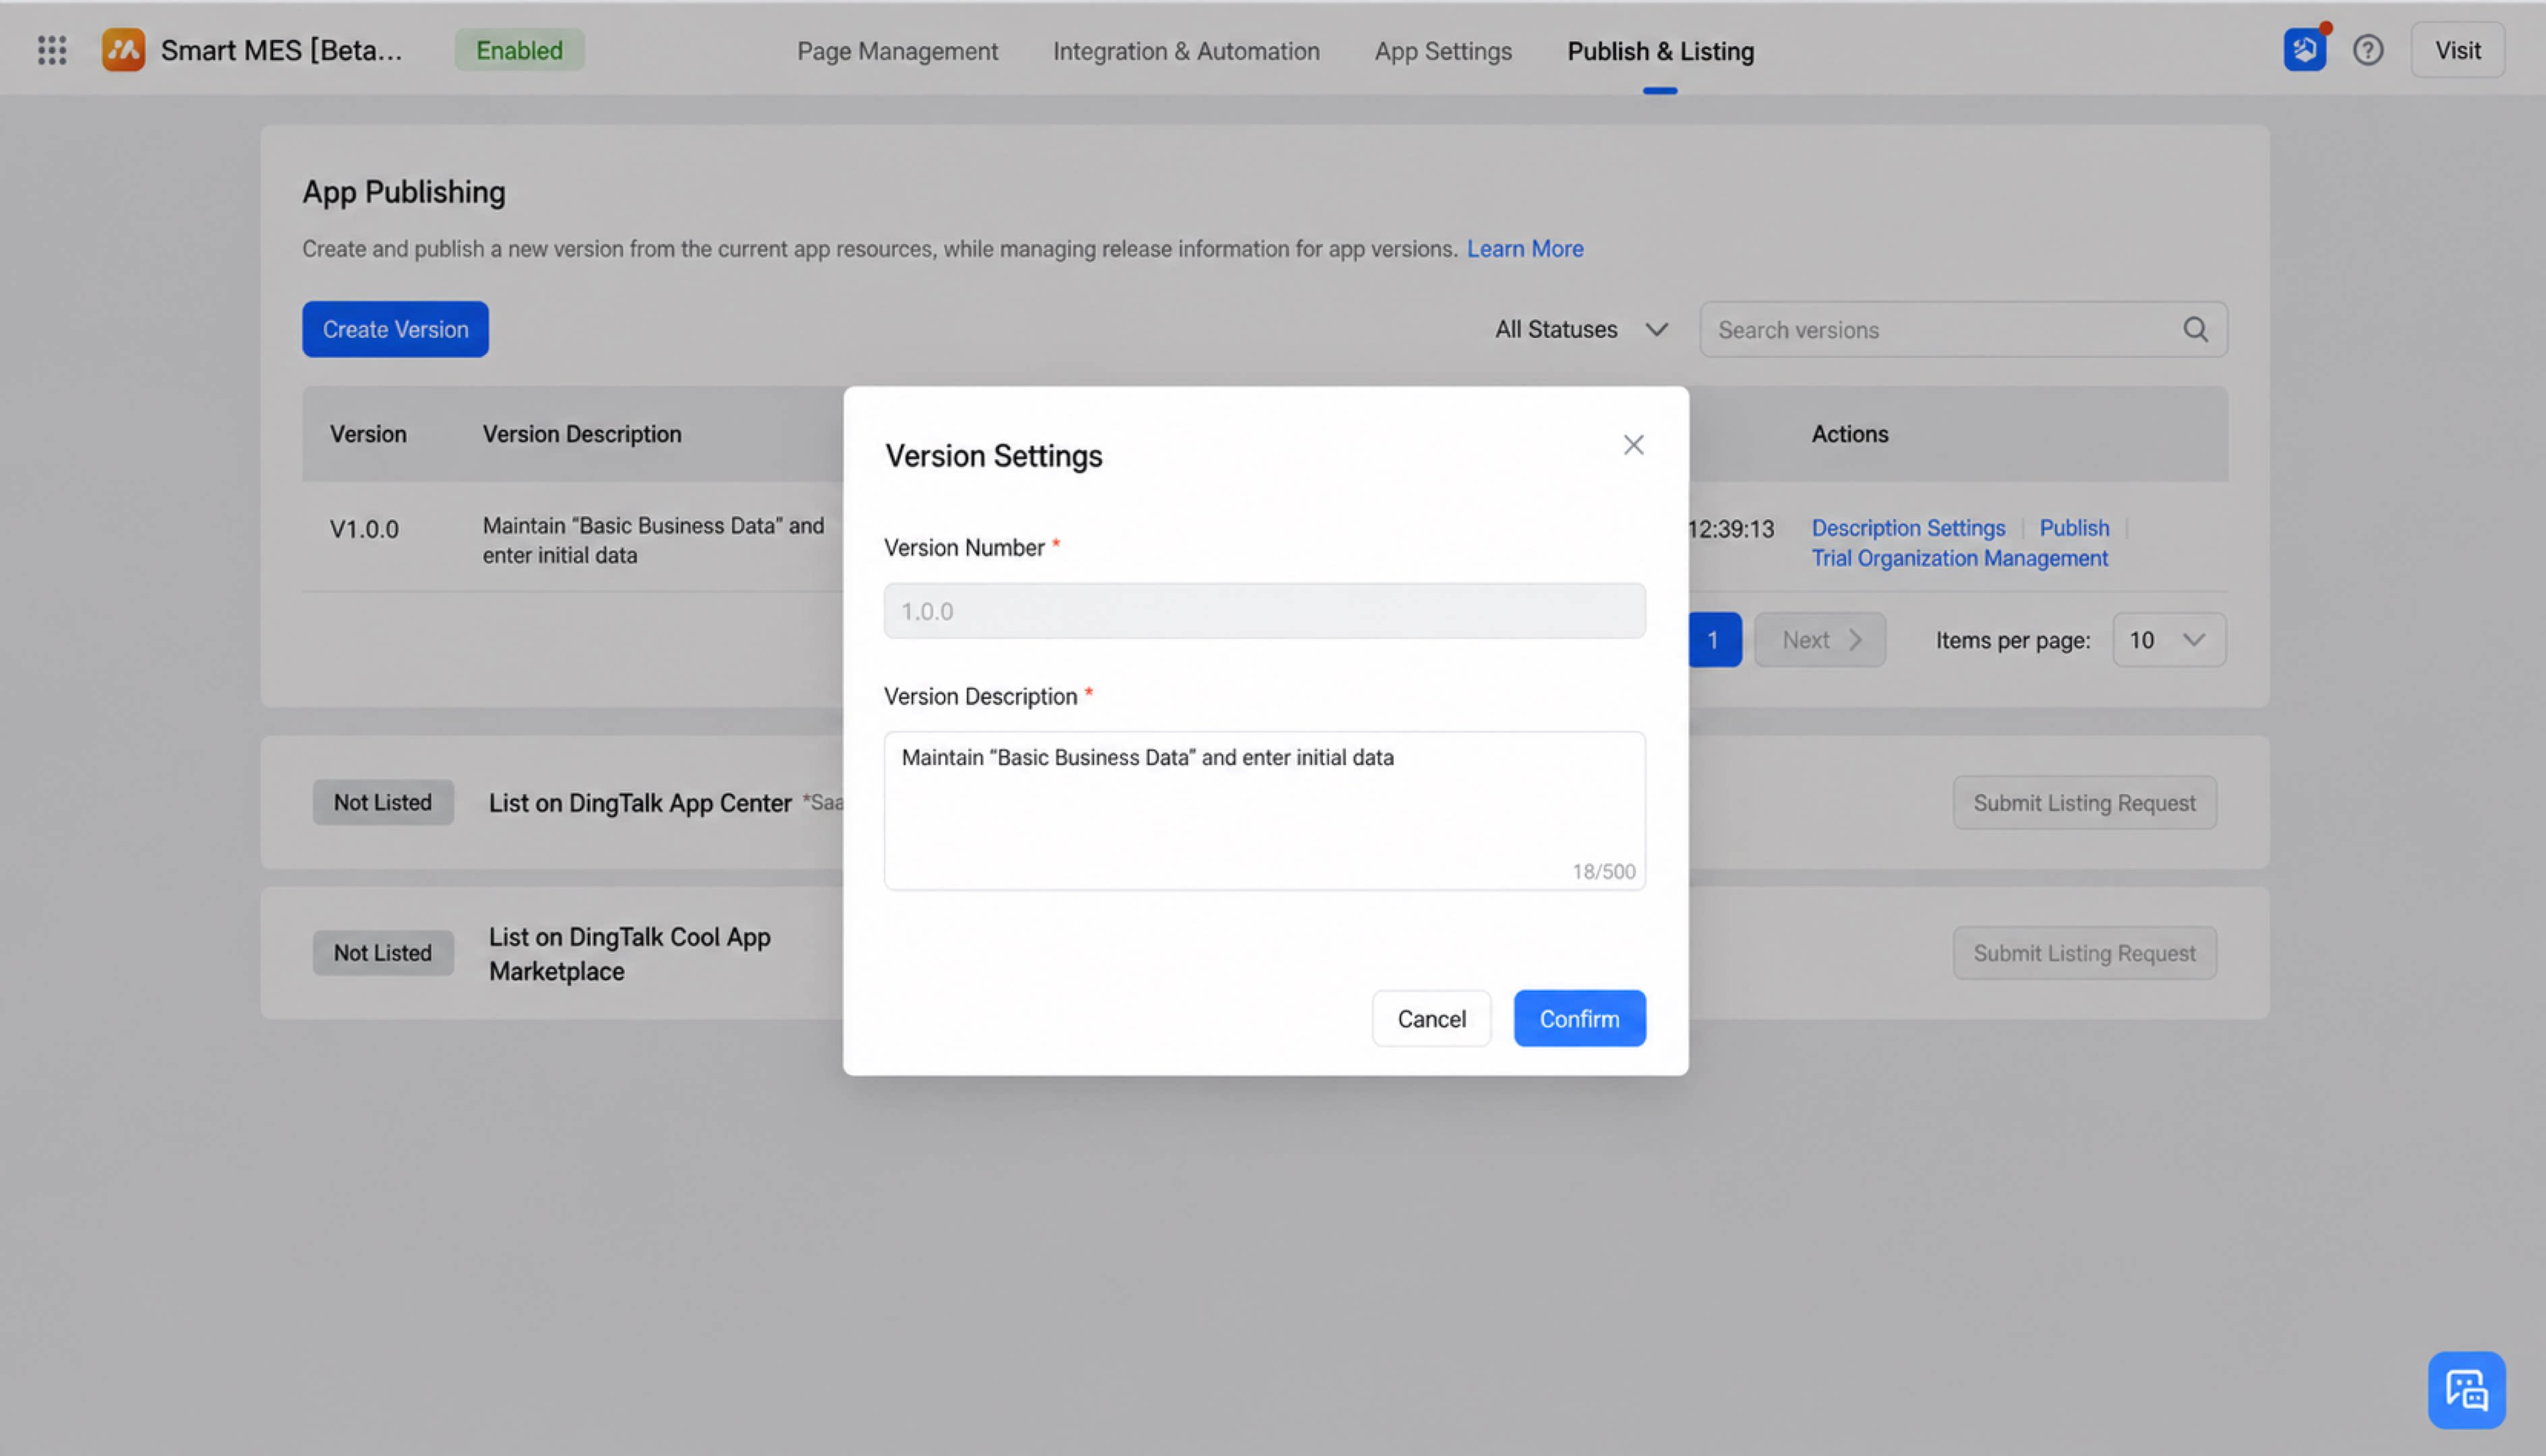
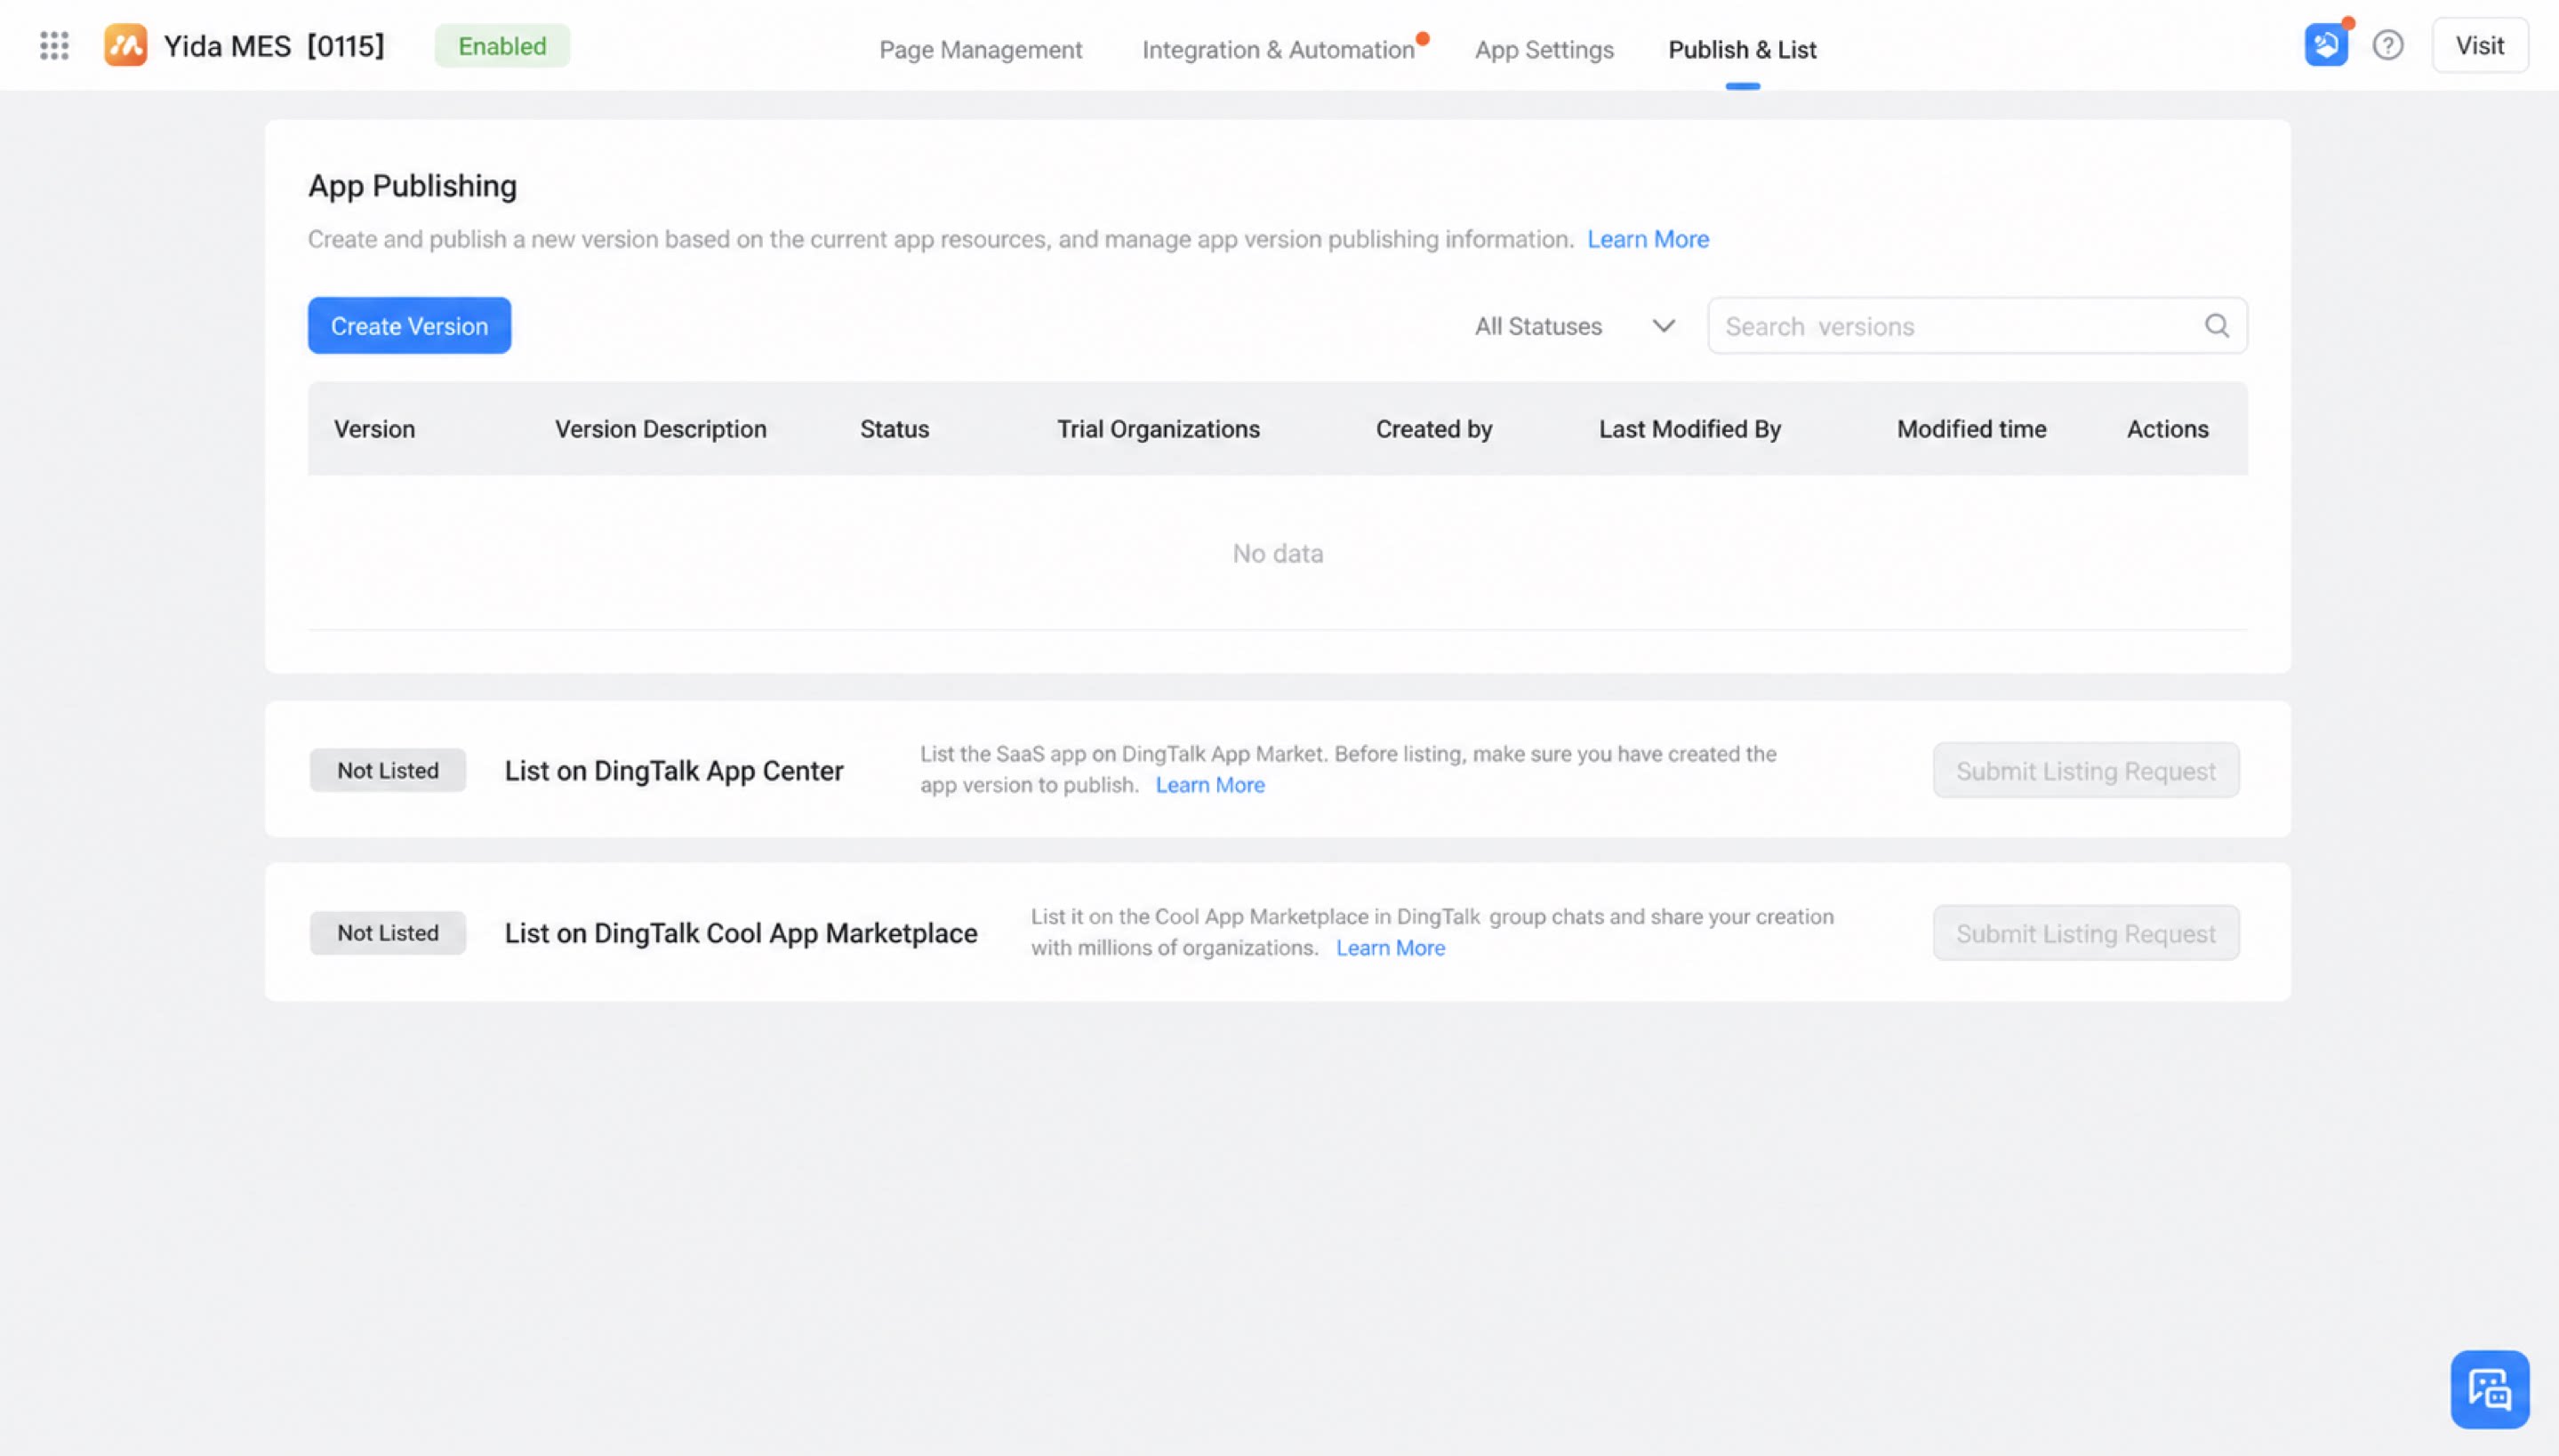
4.1 App Version Management
- Whenever app functionality changes, you can create a new version. New versions default to the “Unpublished” state. Click Publish to release the version.
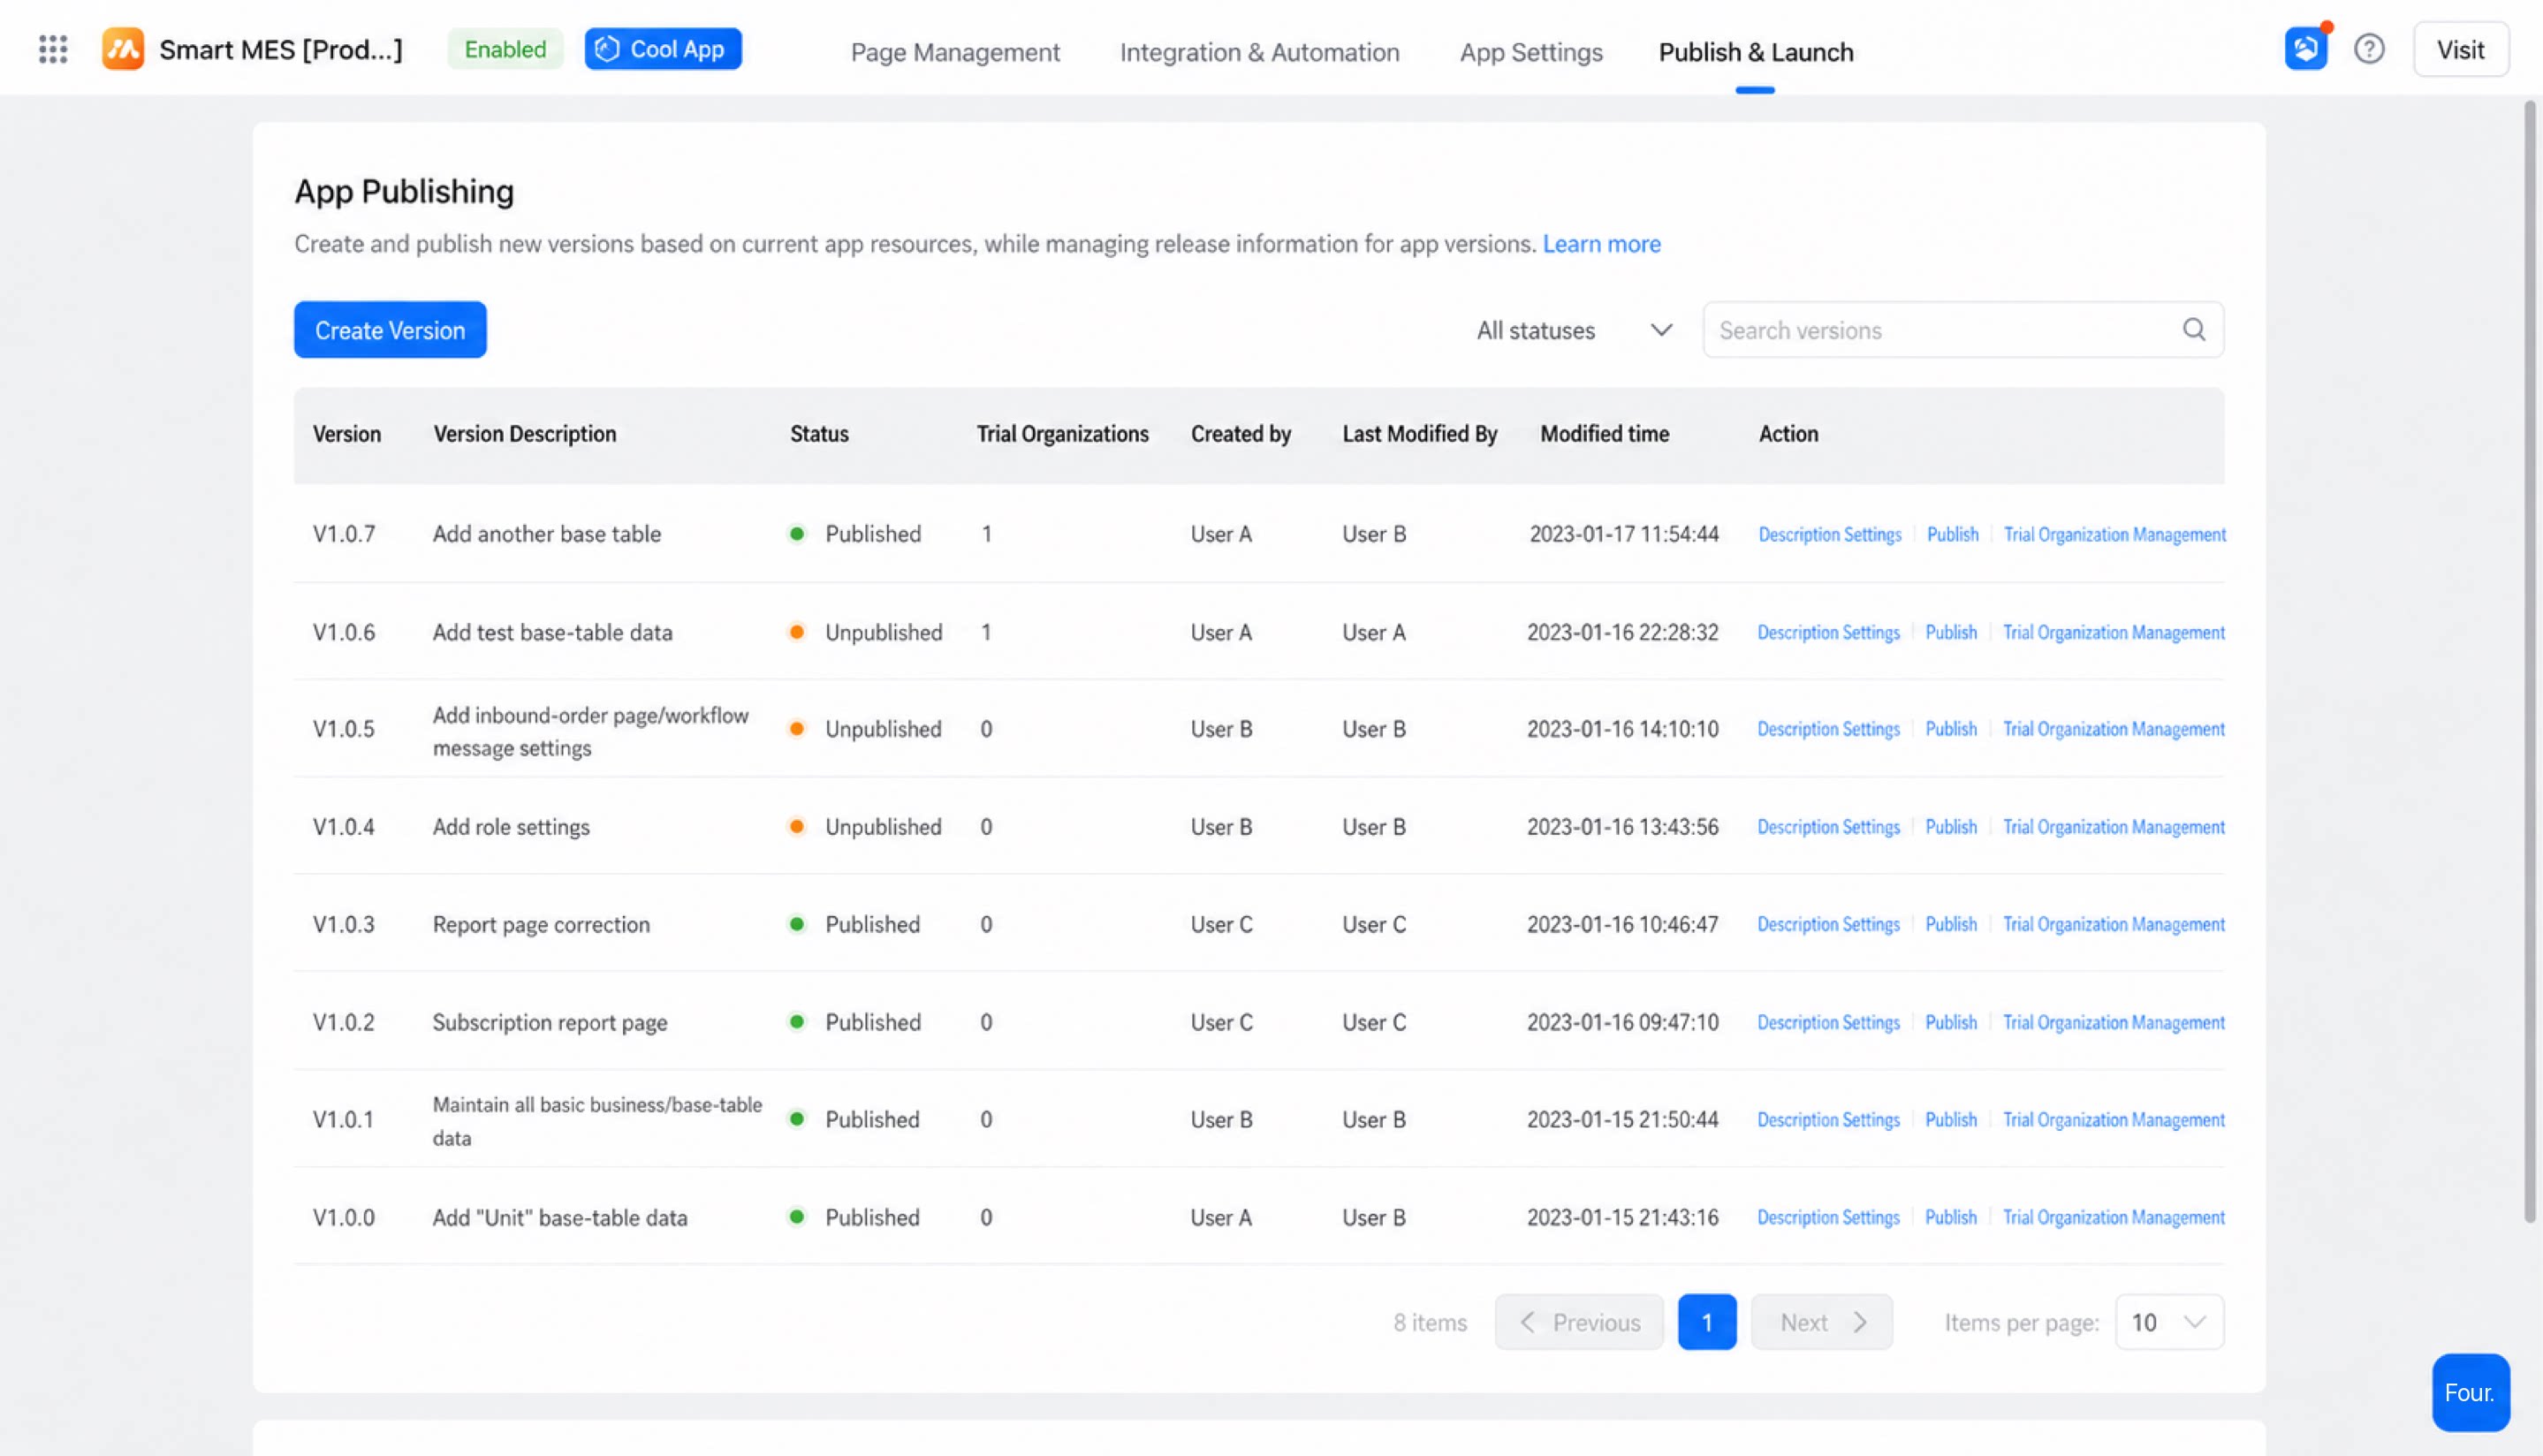
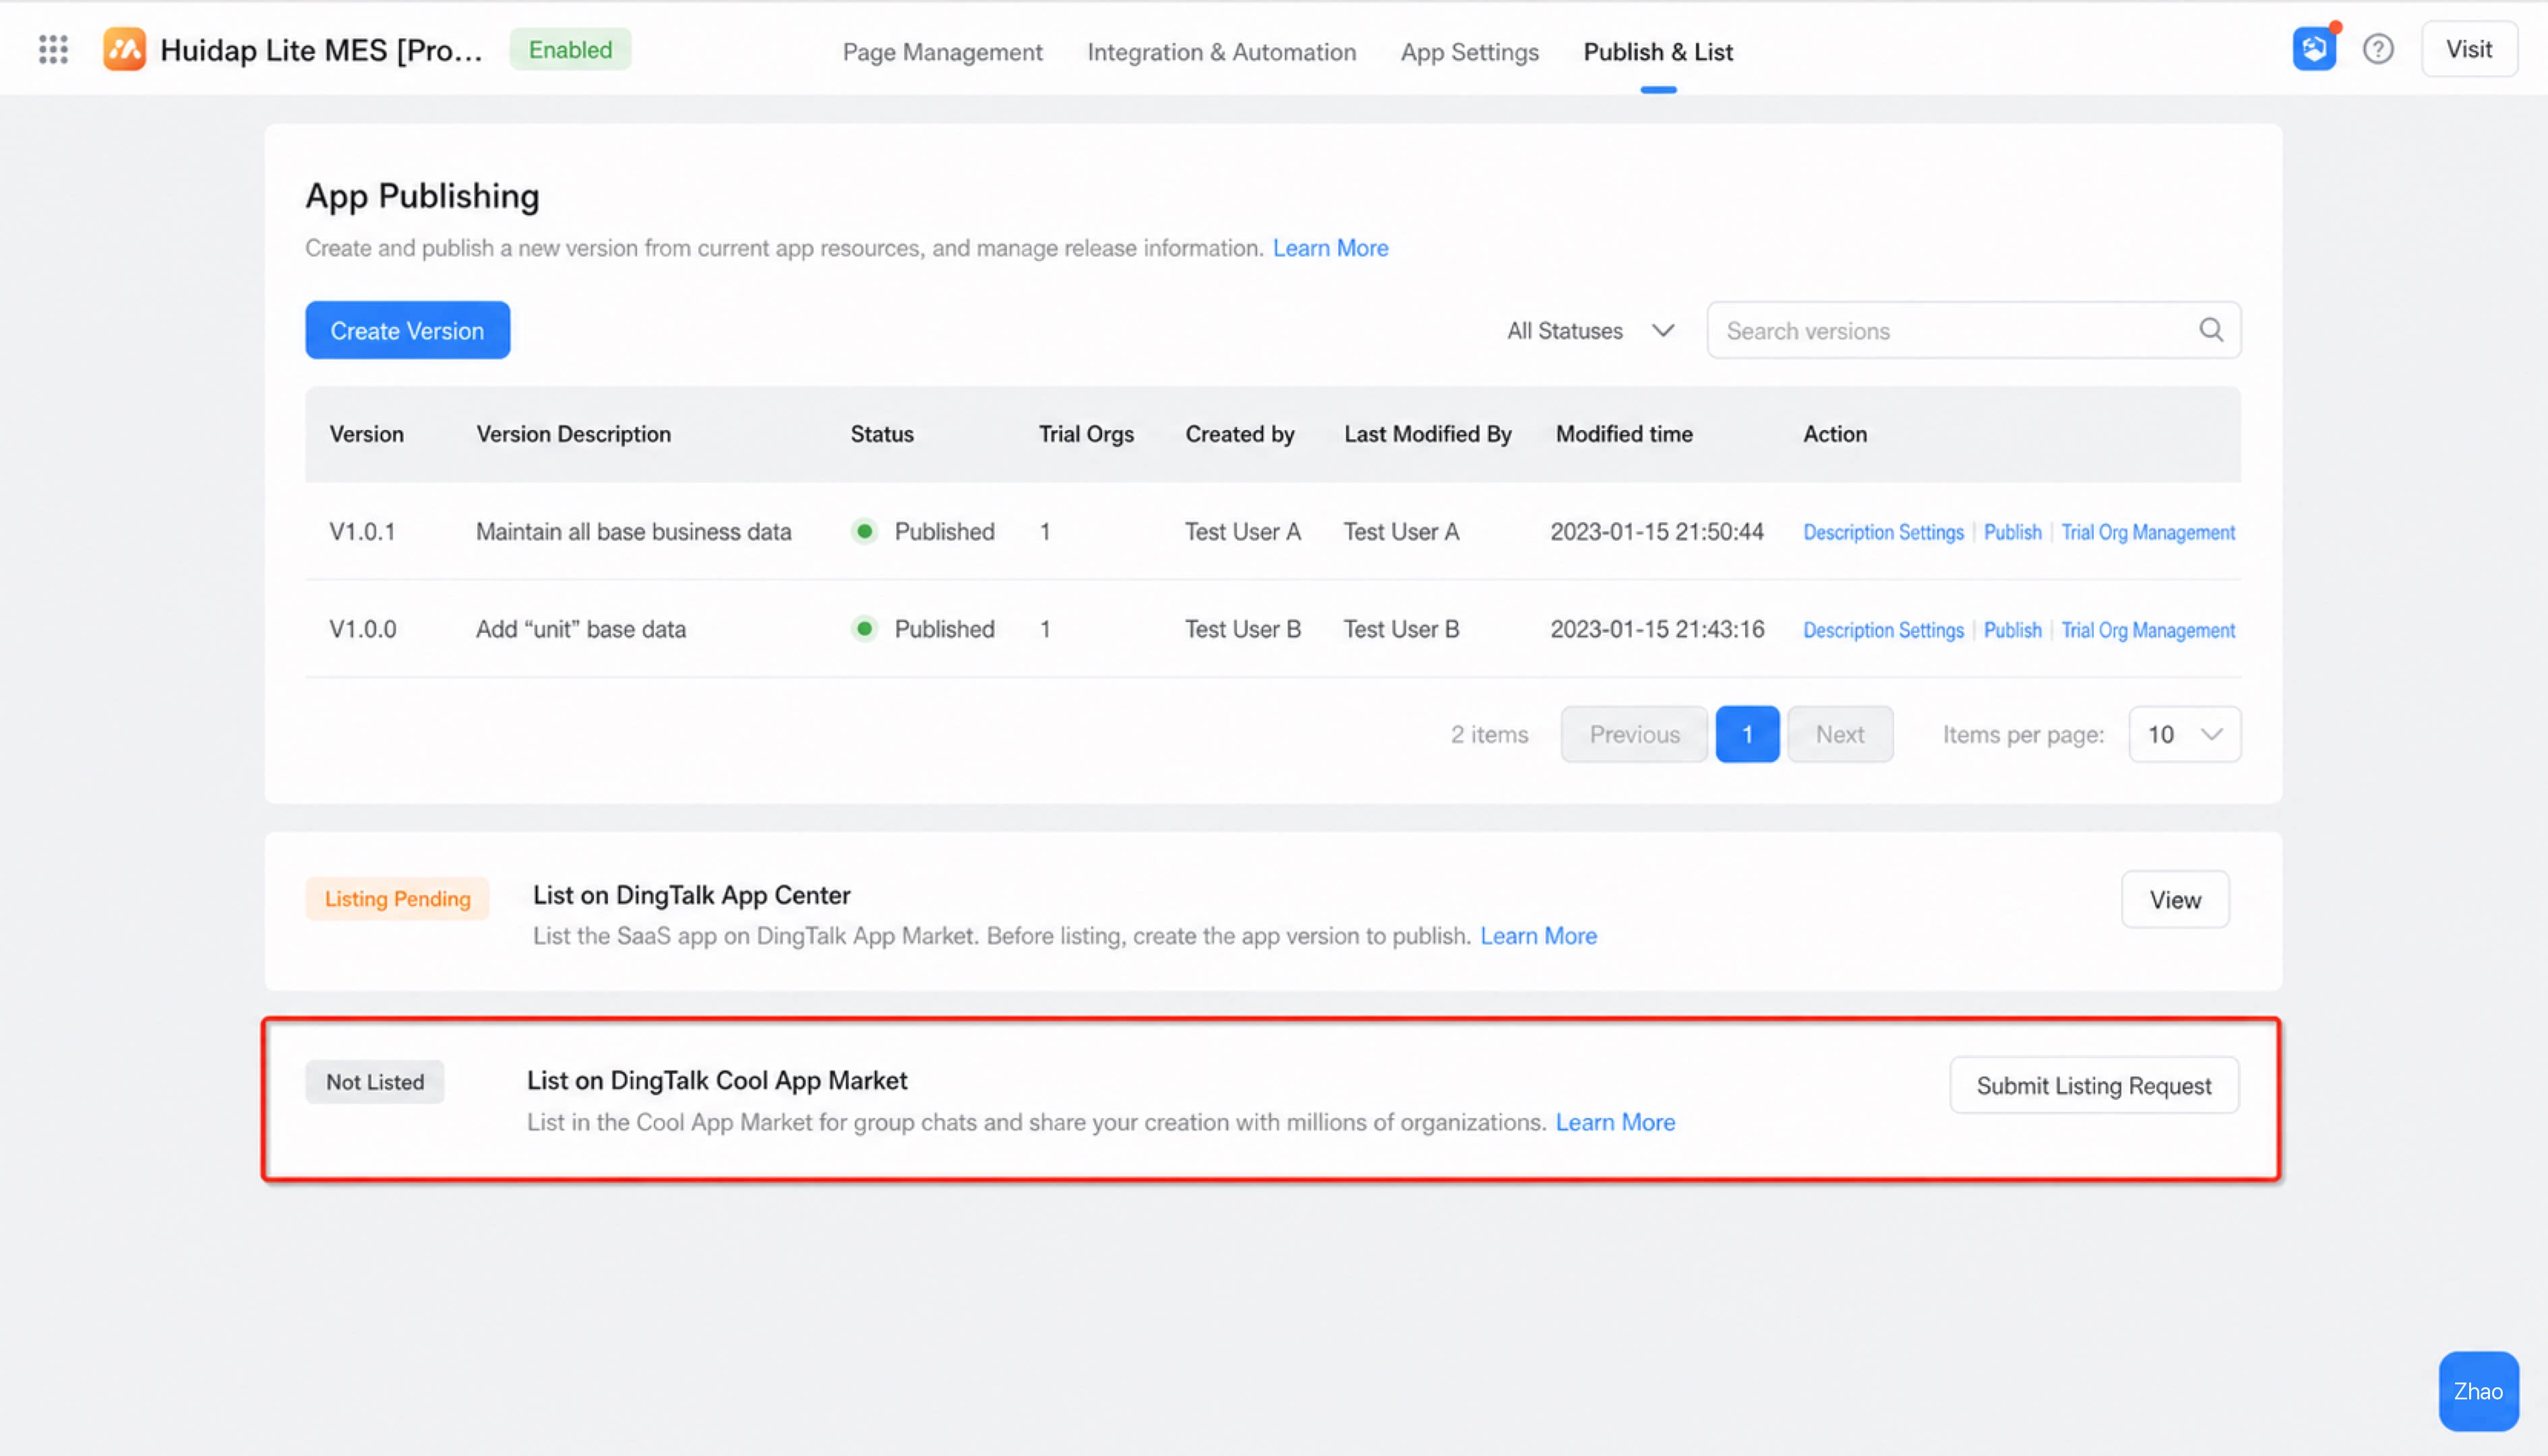
4.2 App Publication Request — Link a Third-Party App
Step 1: Link a Third-Party App
| SaaS development workbench | DingTalk Open Platform > Third-party enterprise app |
|---|---|
| 1. After creating at least one app version, submit the publication request under “Publish to DingTalk App Center.” 2. Select the third-party app that you registered on the Open Platform and link it here. 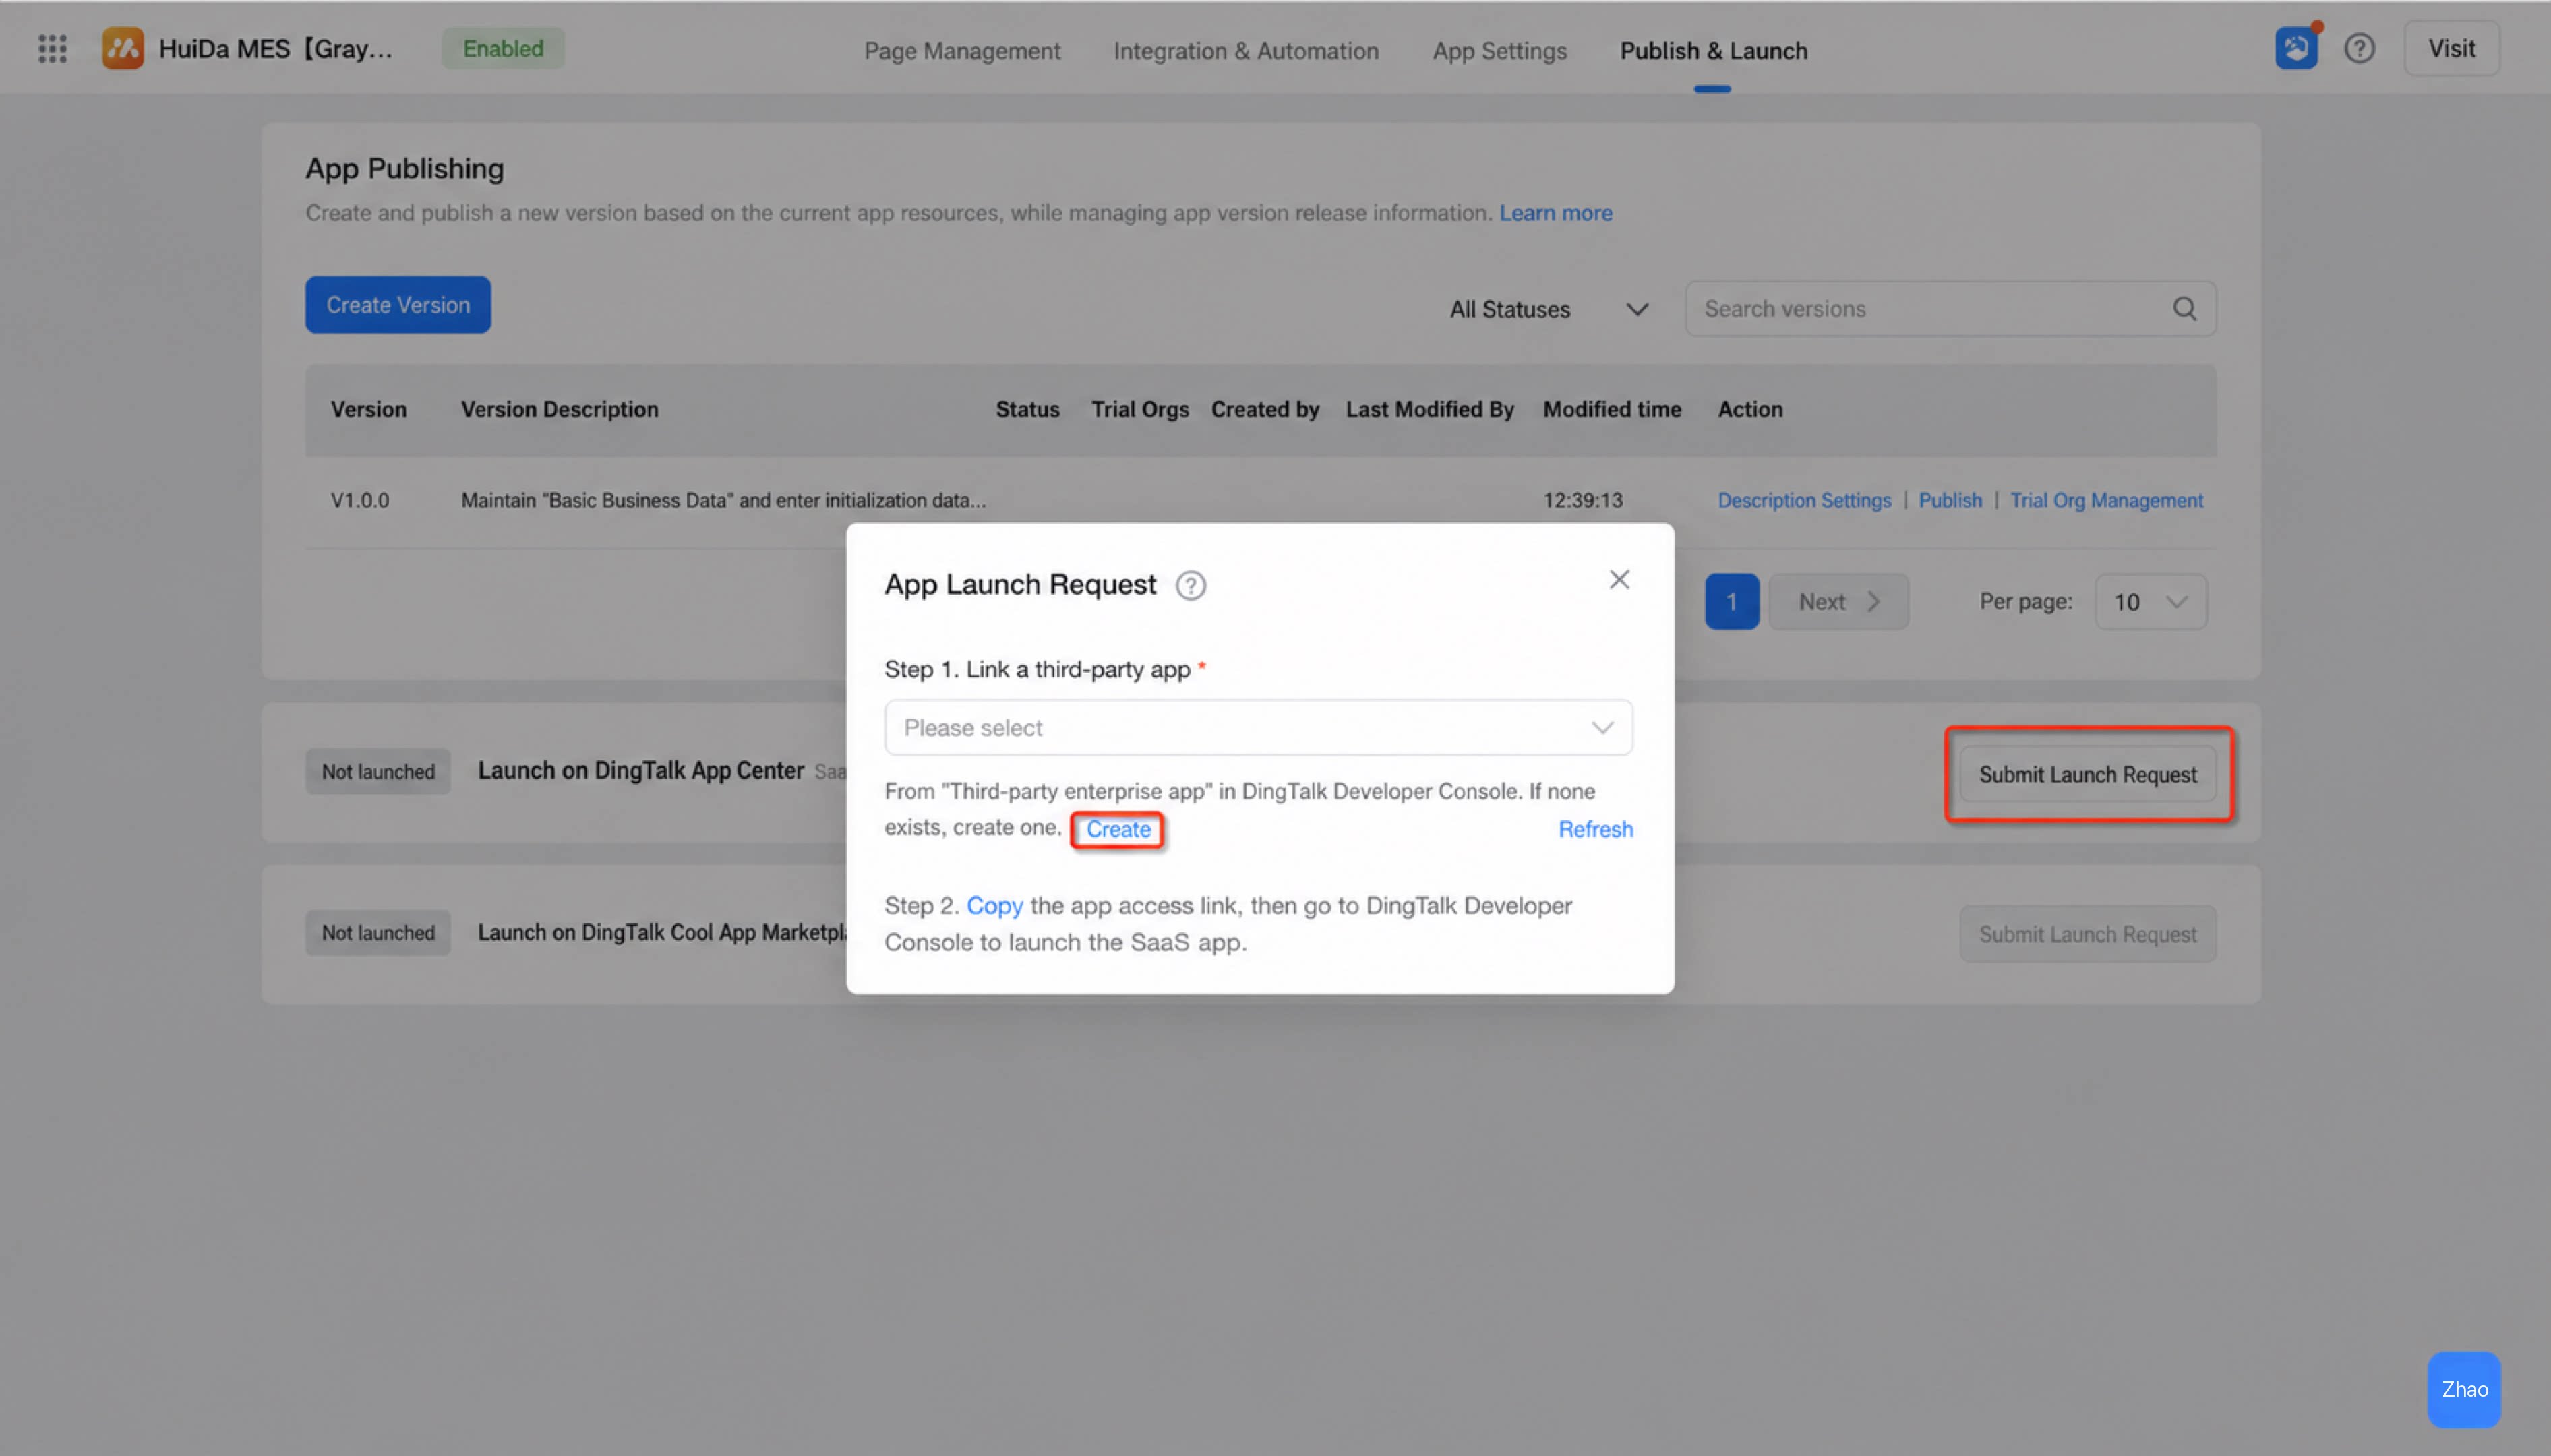 | 1. On the DingTalk Open Platform, under Third-party enterprise app, create an H5 Micro app and fill in the basic app information. 2. Generate the app credential. 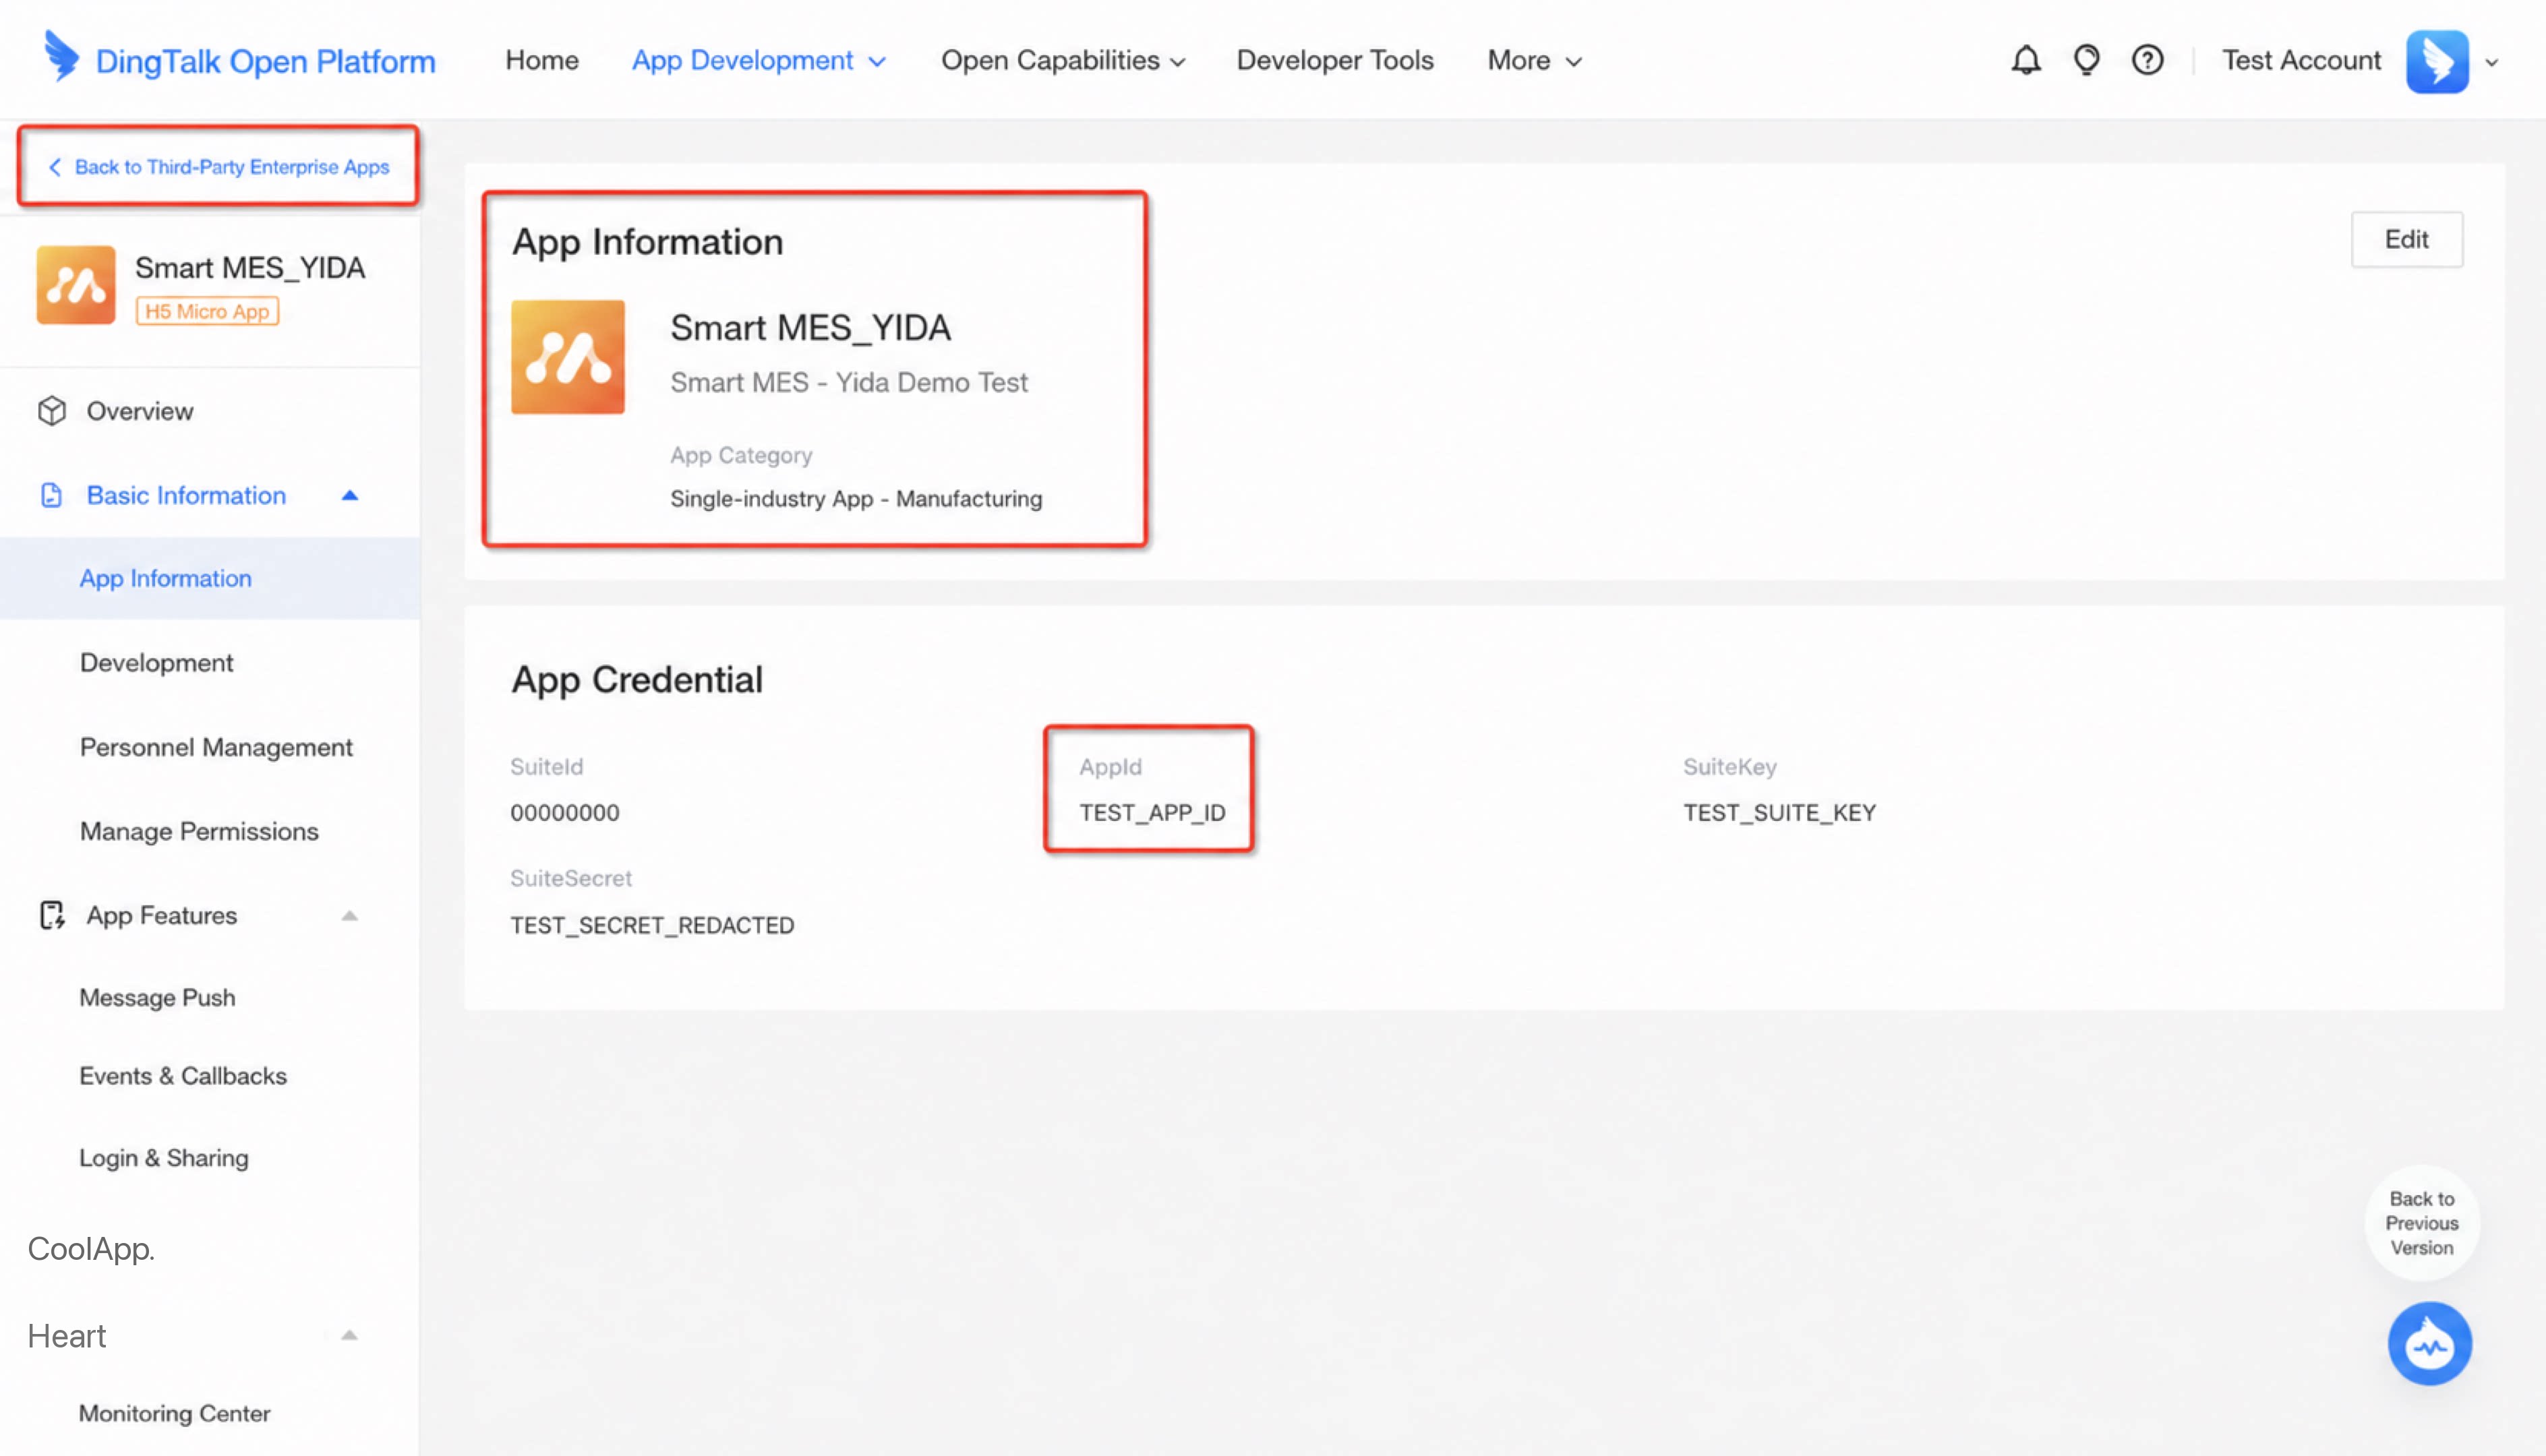 |
Step 2: Fill in SaaS App Development Information
Copy the SaaS app URL and configure the app information.| SaaS development workbench | DingTalk Open Platform > Third-party enterprise app |
|---|---|
1. After completing Step 1, click Copy and paste the link into the Open Platform, as shown on the right.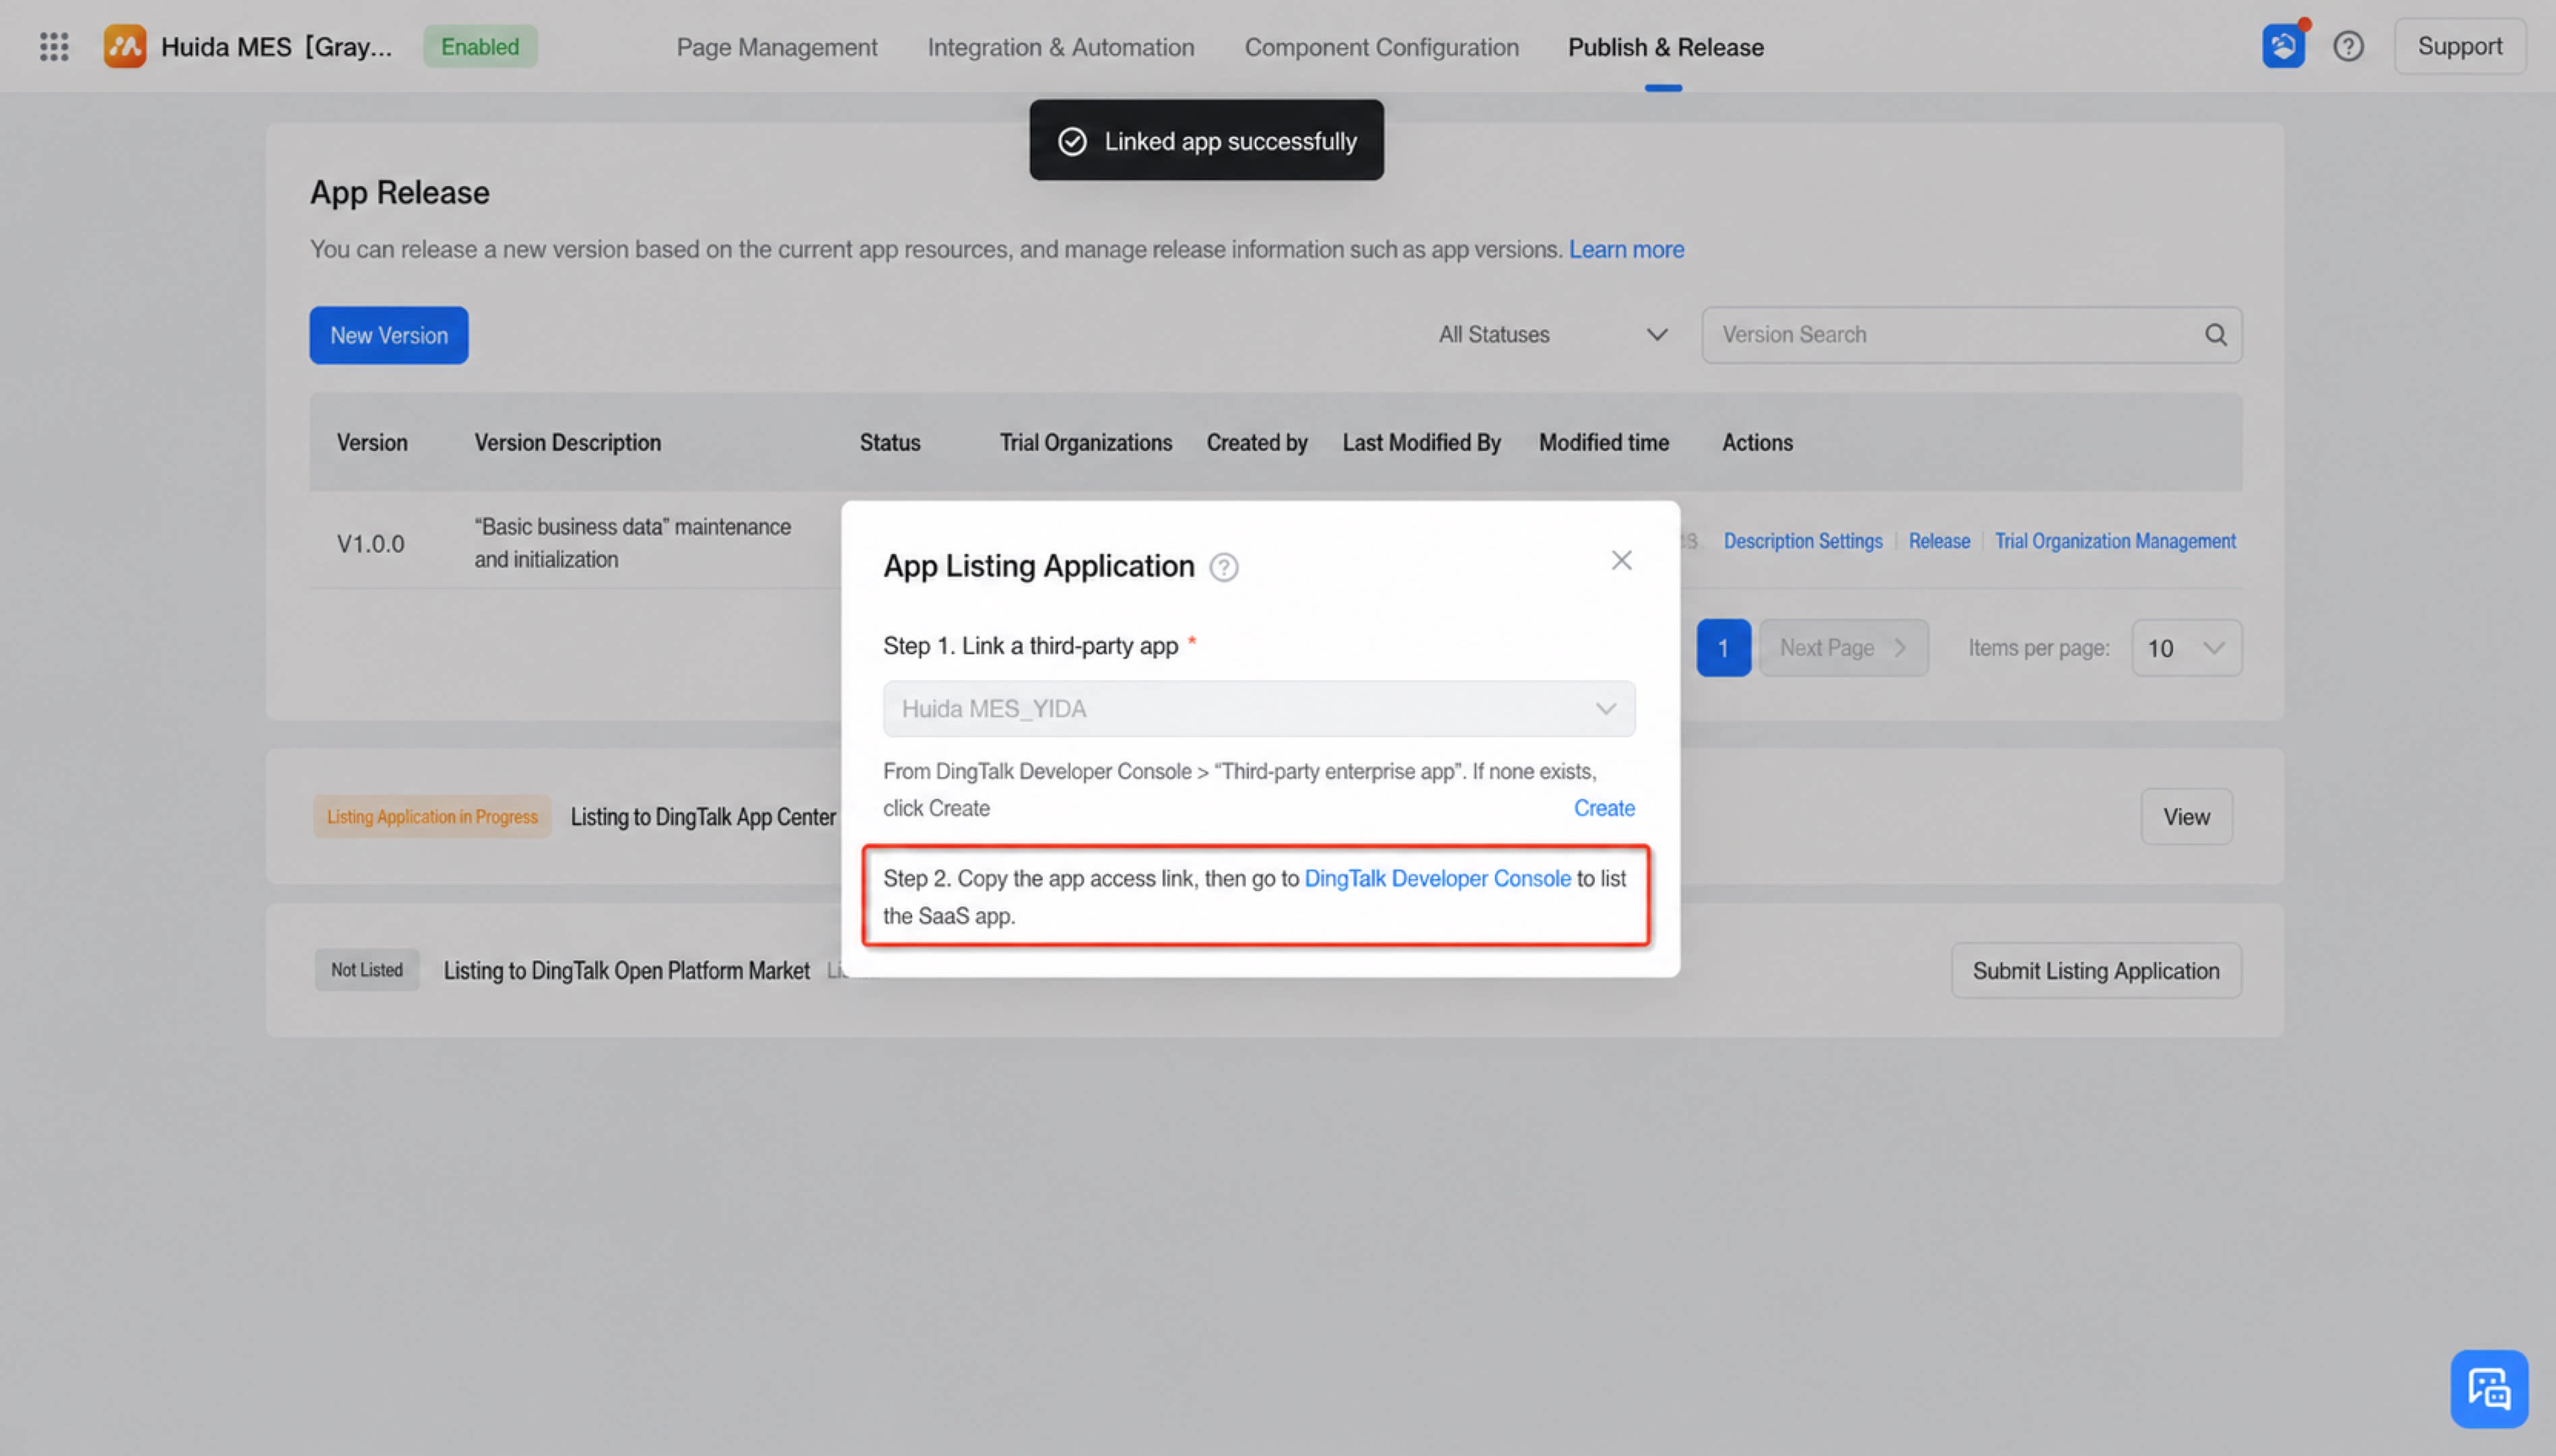 | 1. On the DingTalk Open Platform, under Third-party enterprise app, select the registered third-party app, click “Development Management,” and fill in: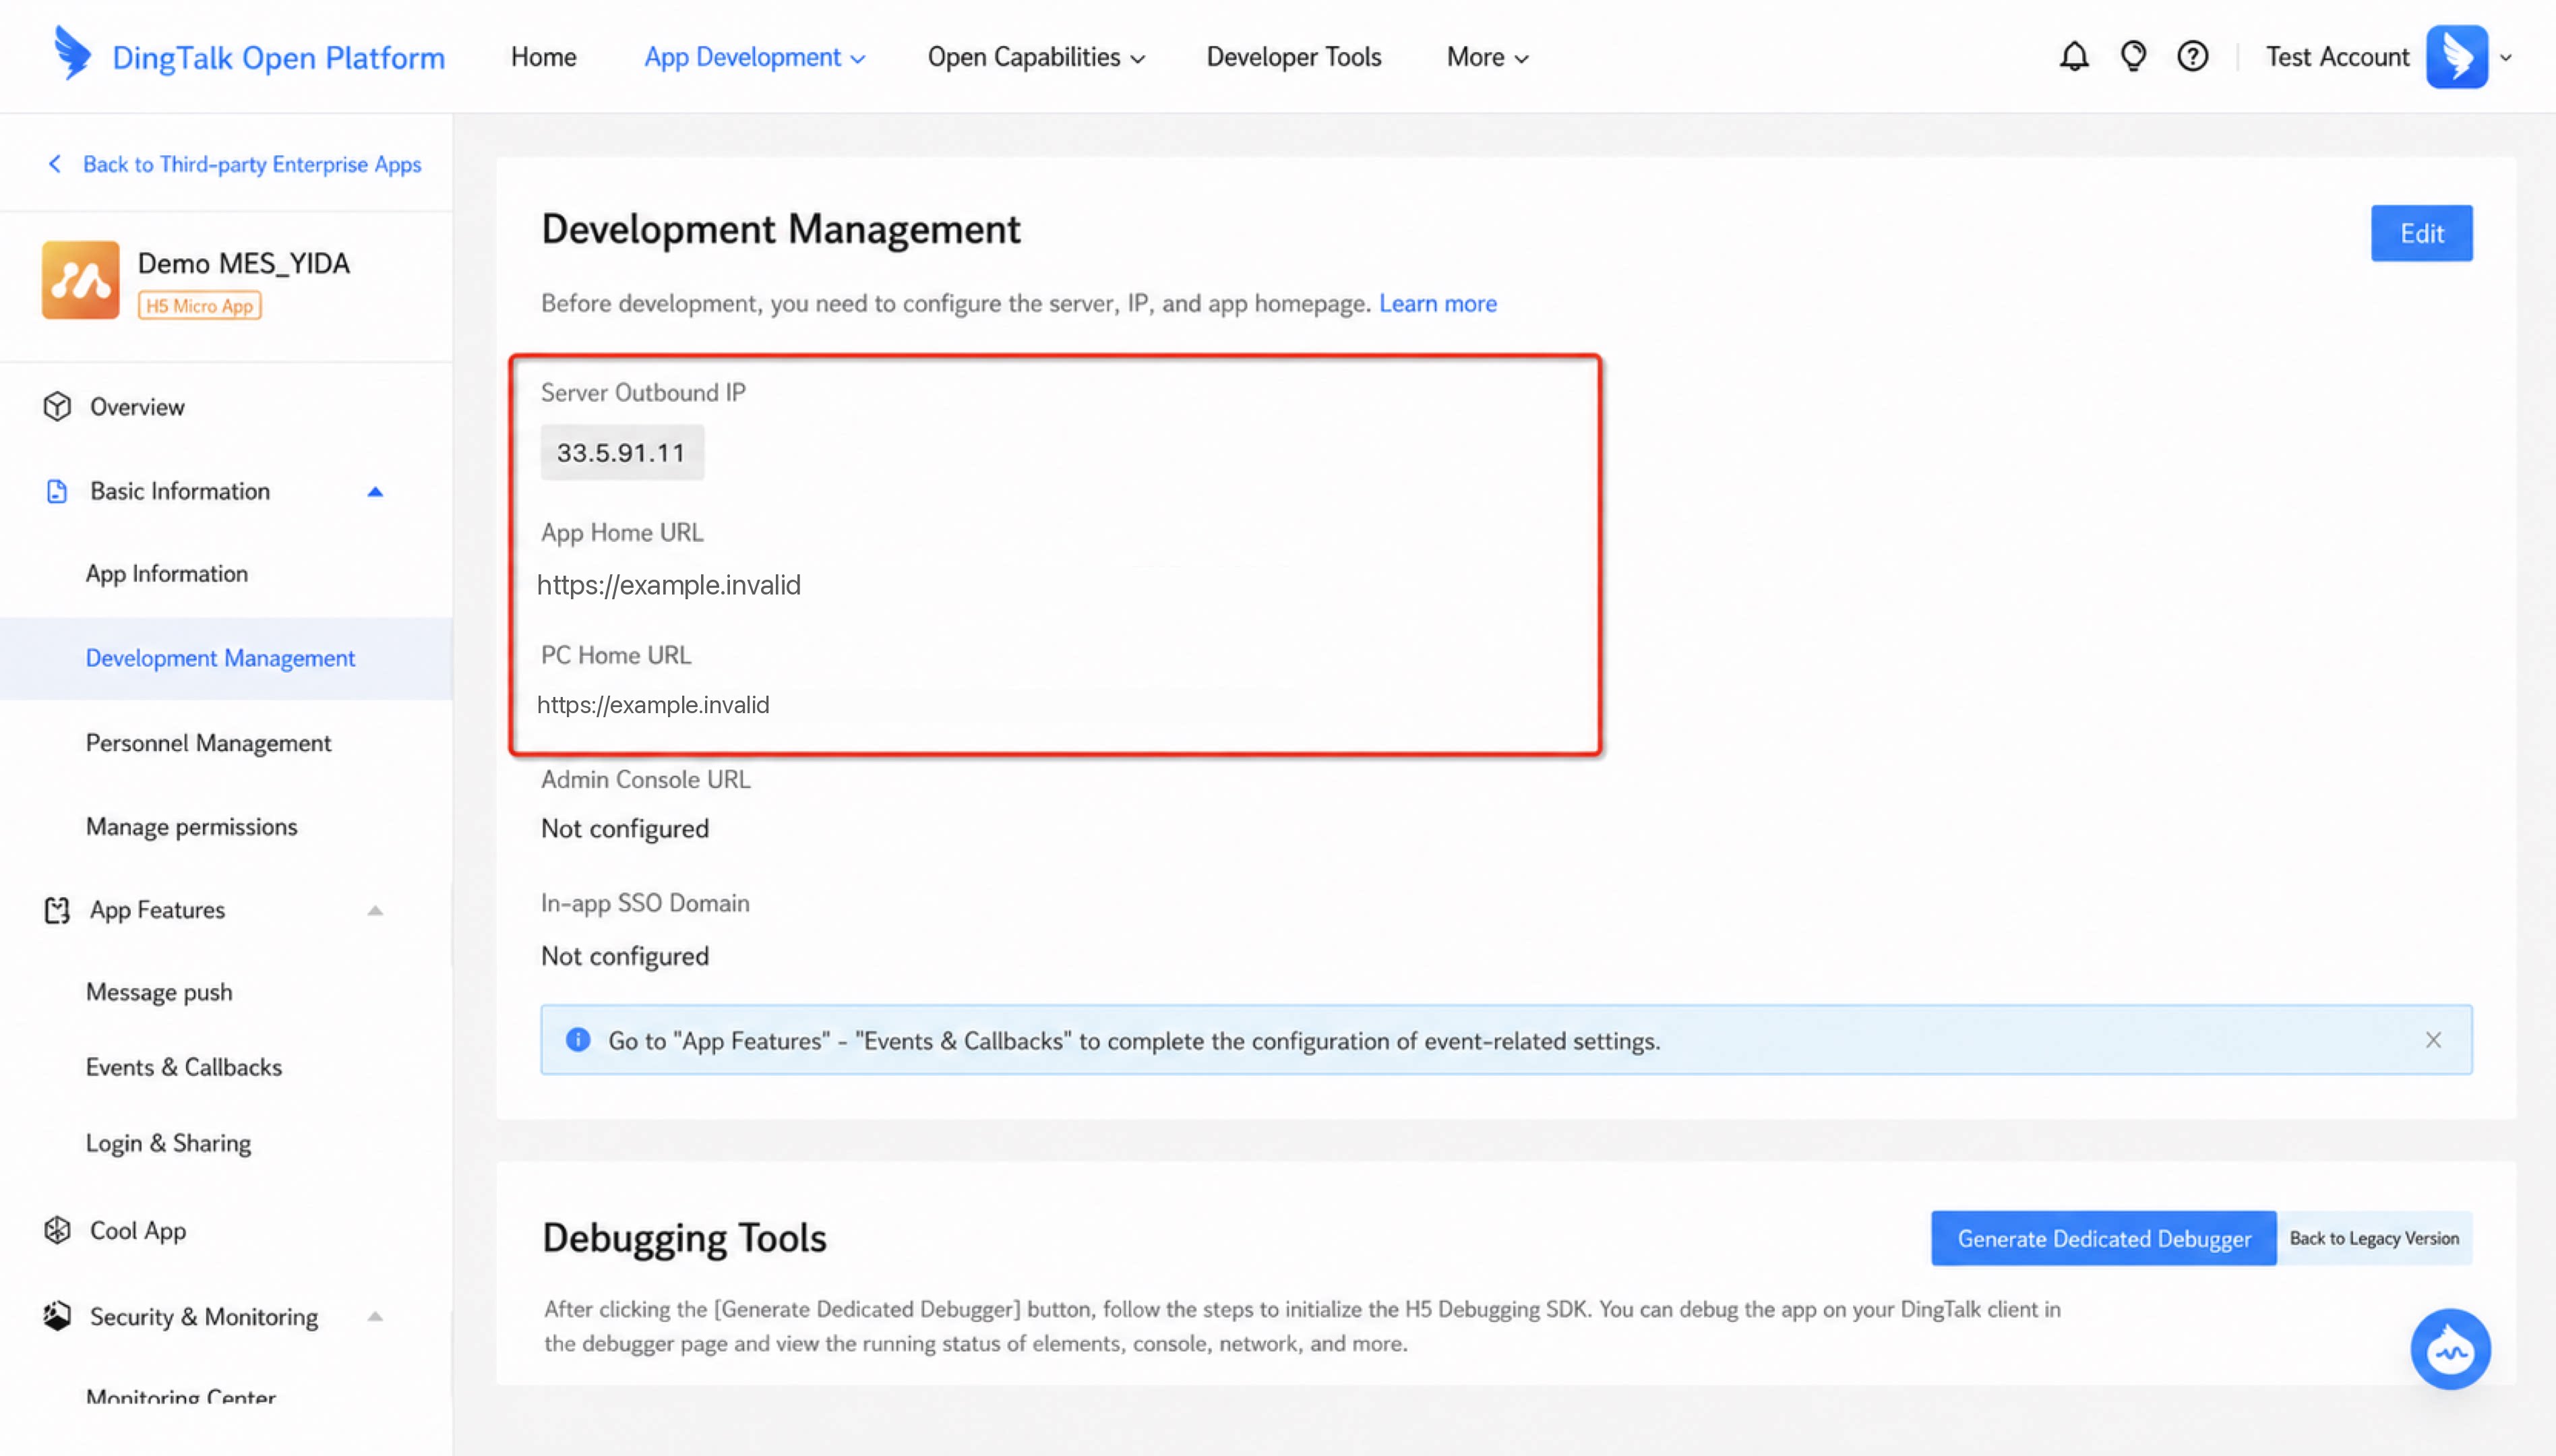 |
Step 3: Verify SaaS App Configuration Items
(1) Confirm app development information
- On the DingTalk Open Platform, under Third-party enterprise app, select the registered third-party app and confirm that all functional configuration items are complete. Finish any that are still missing.
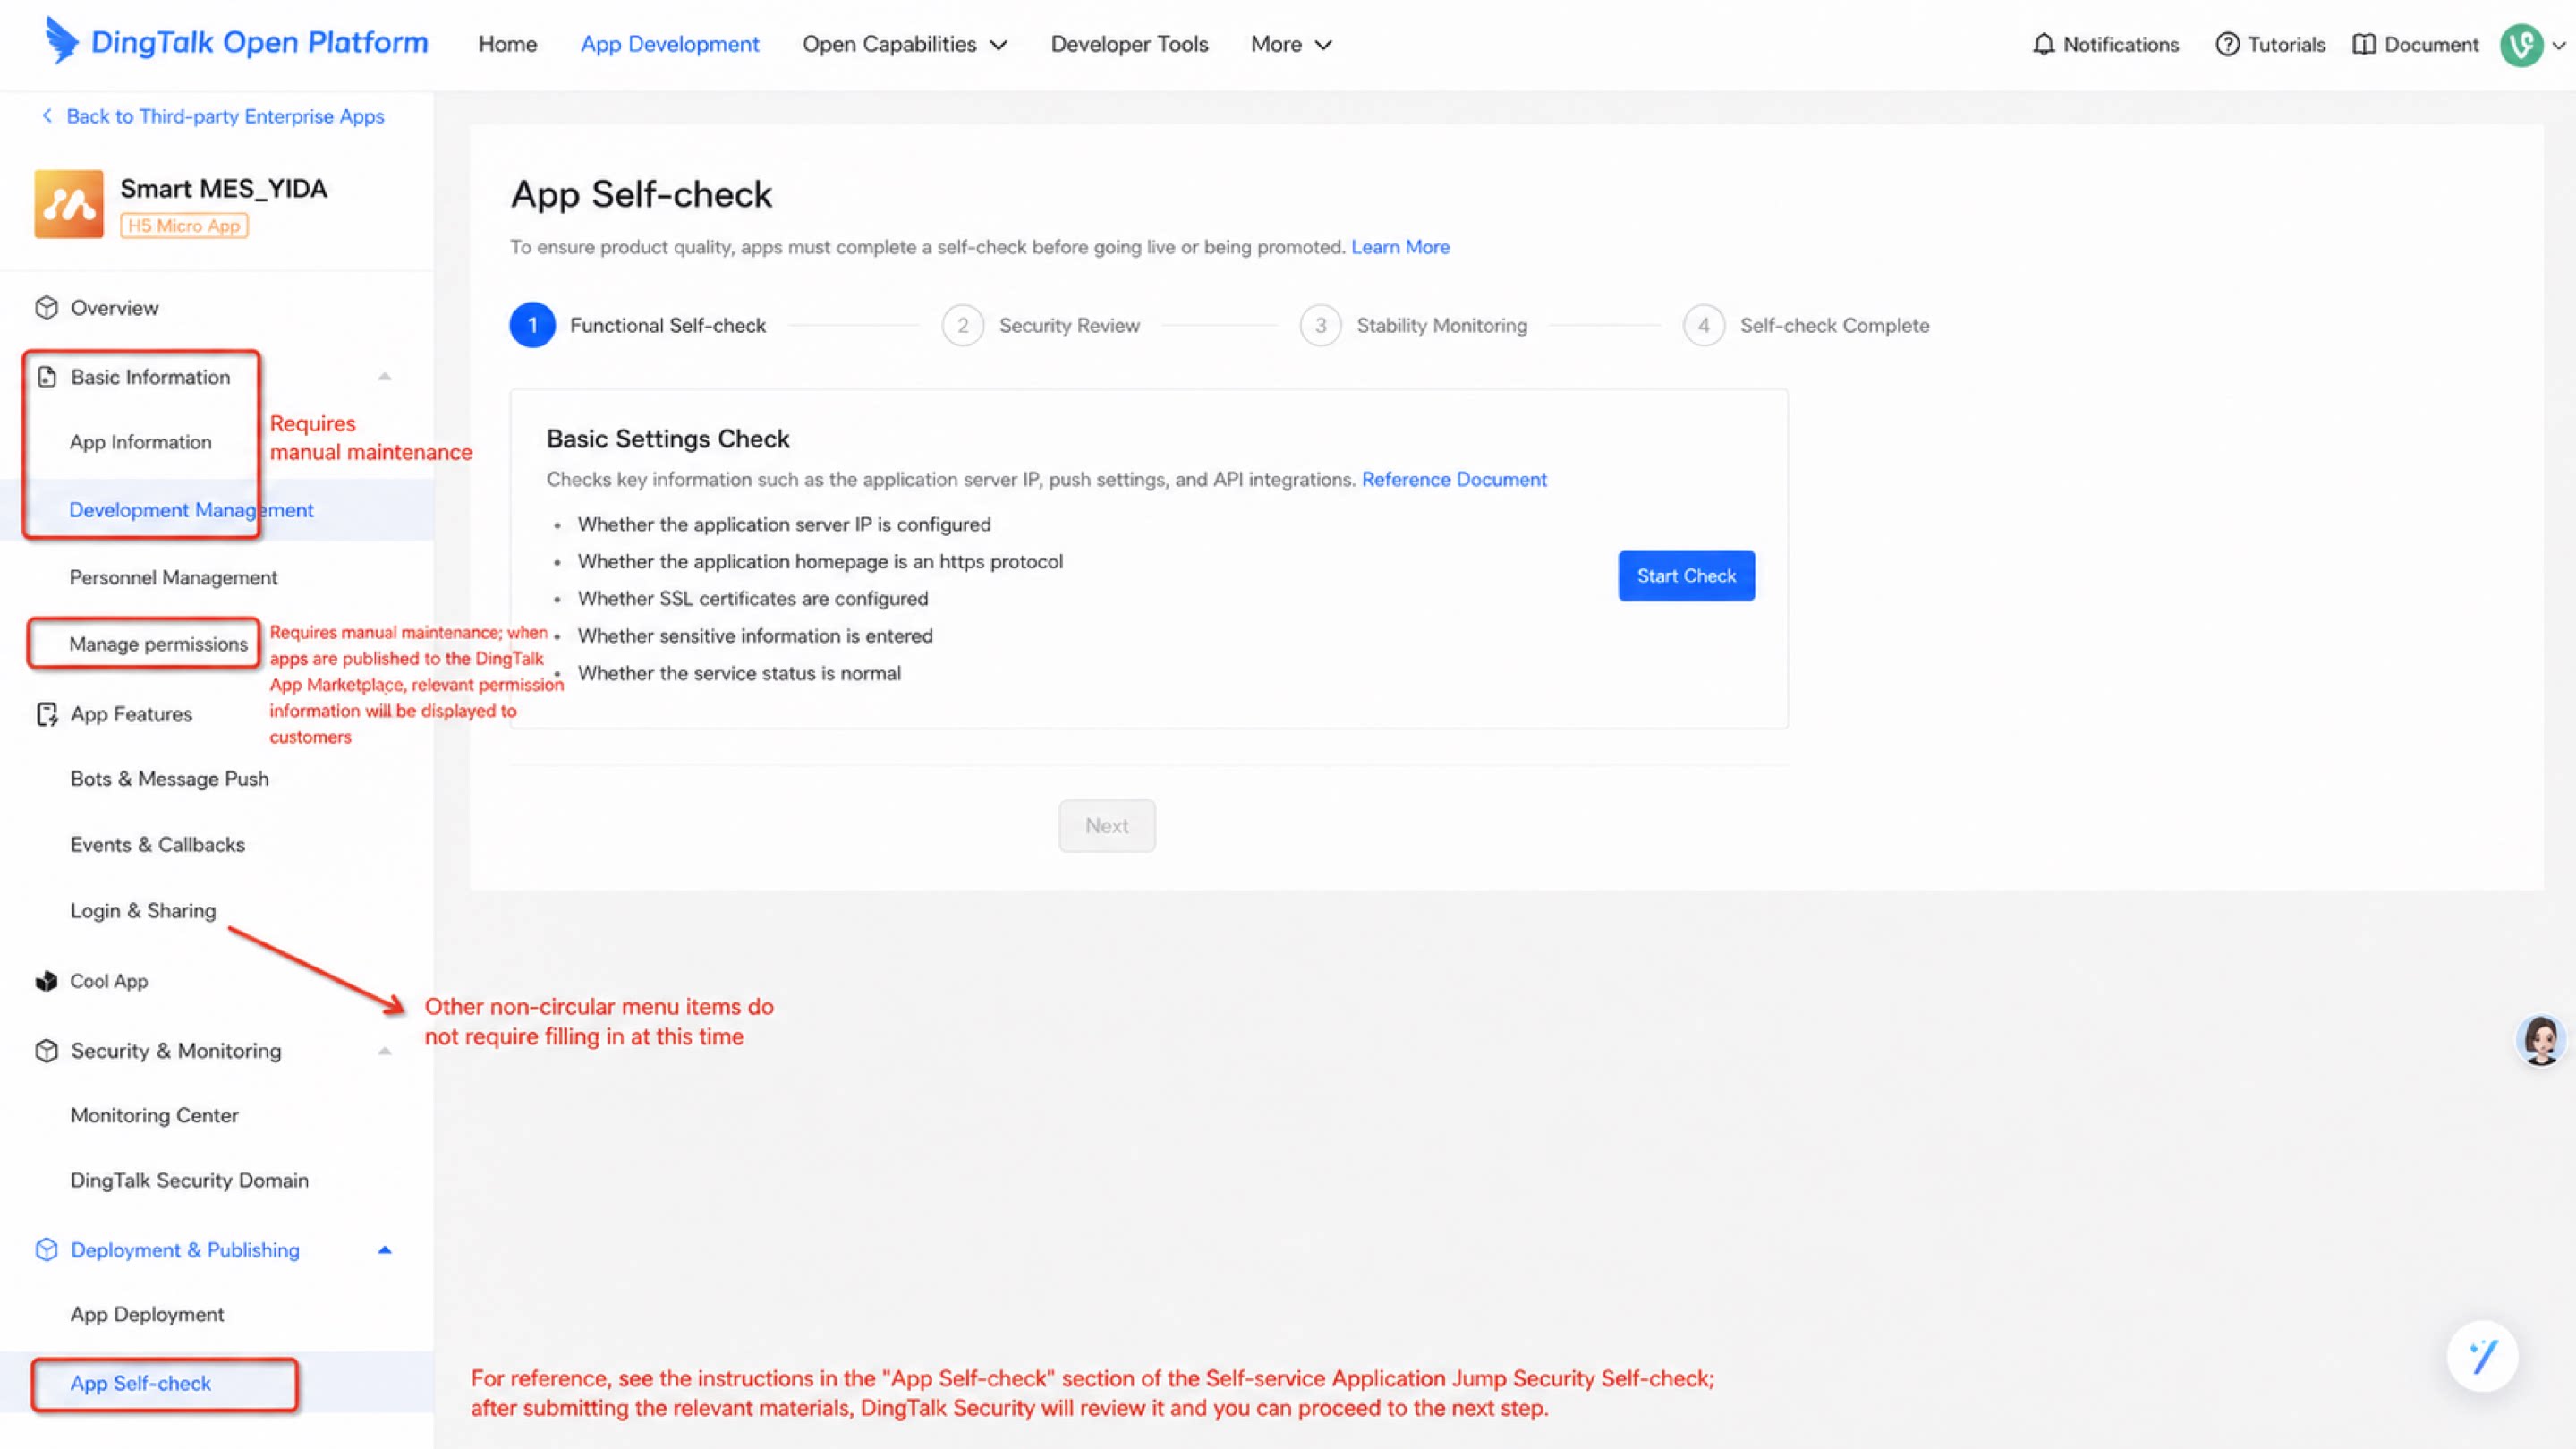
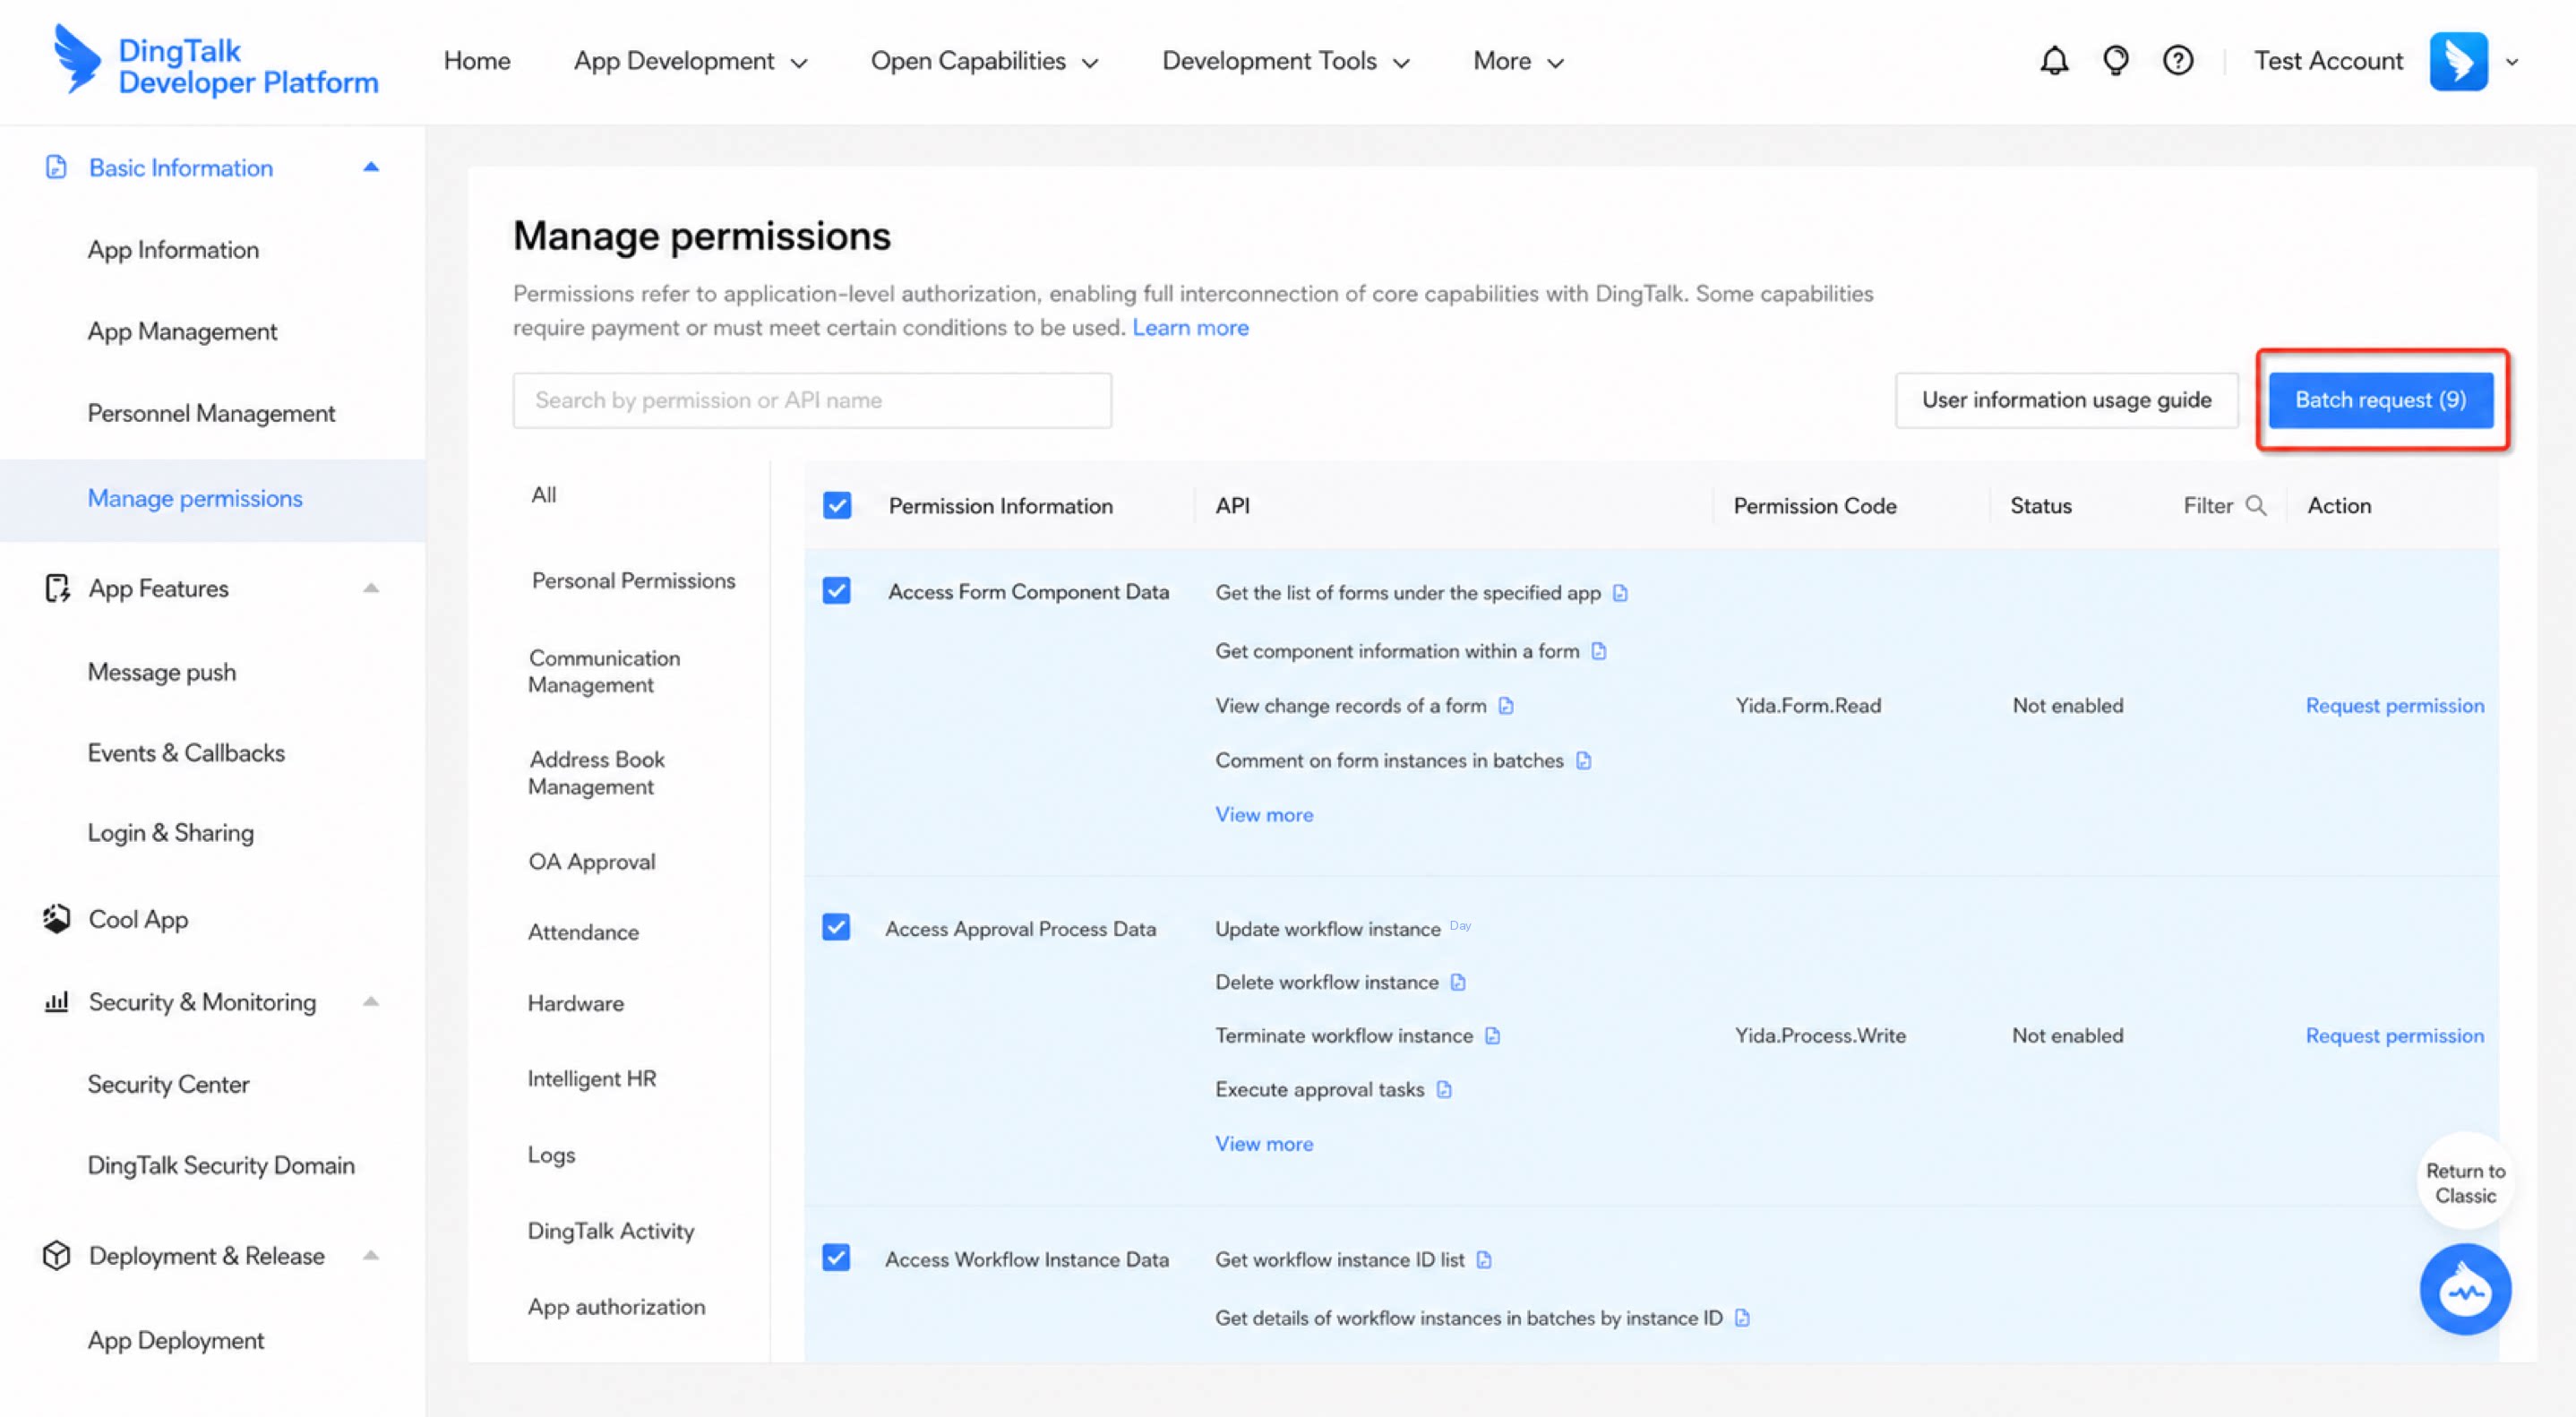
(2) Manage permissions
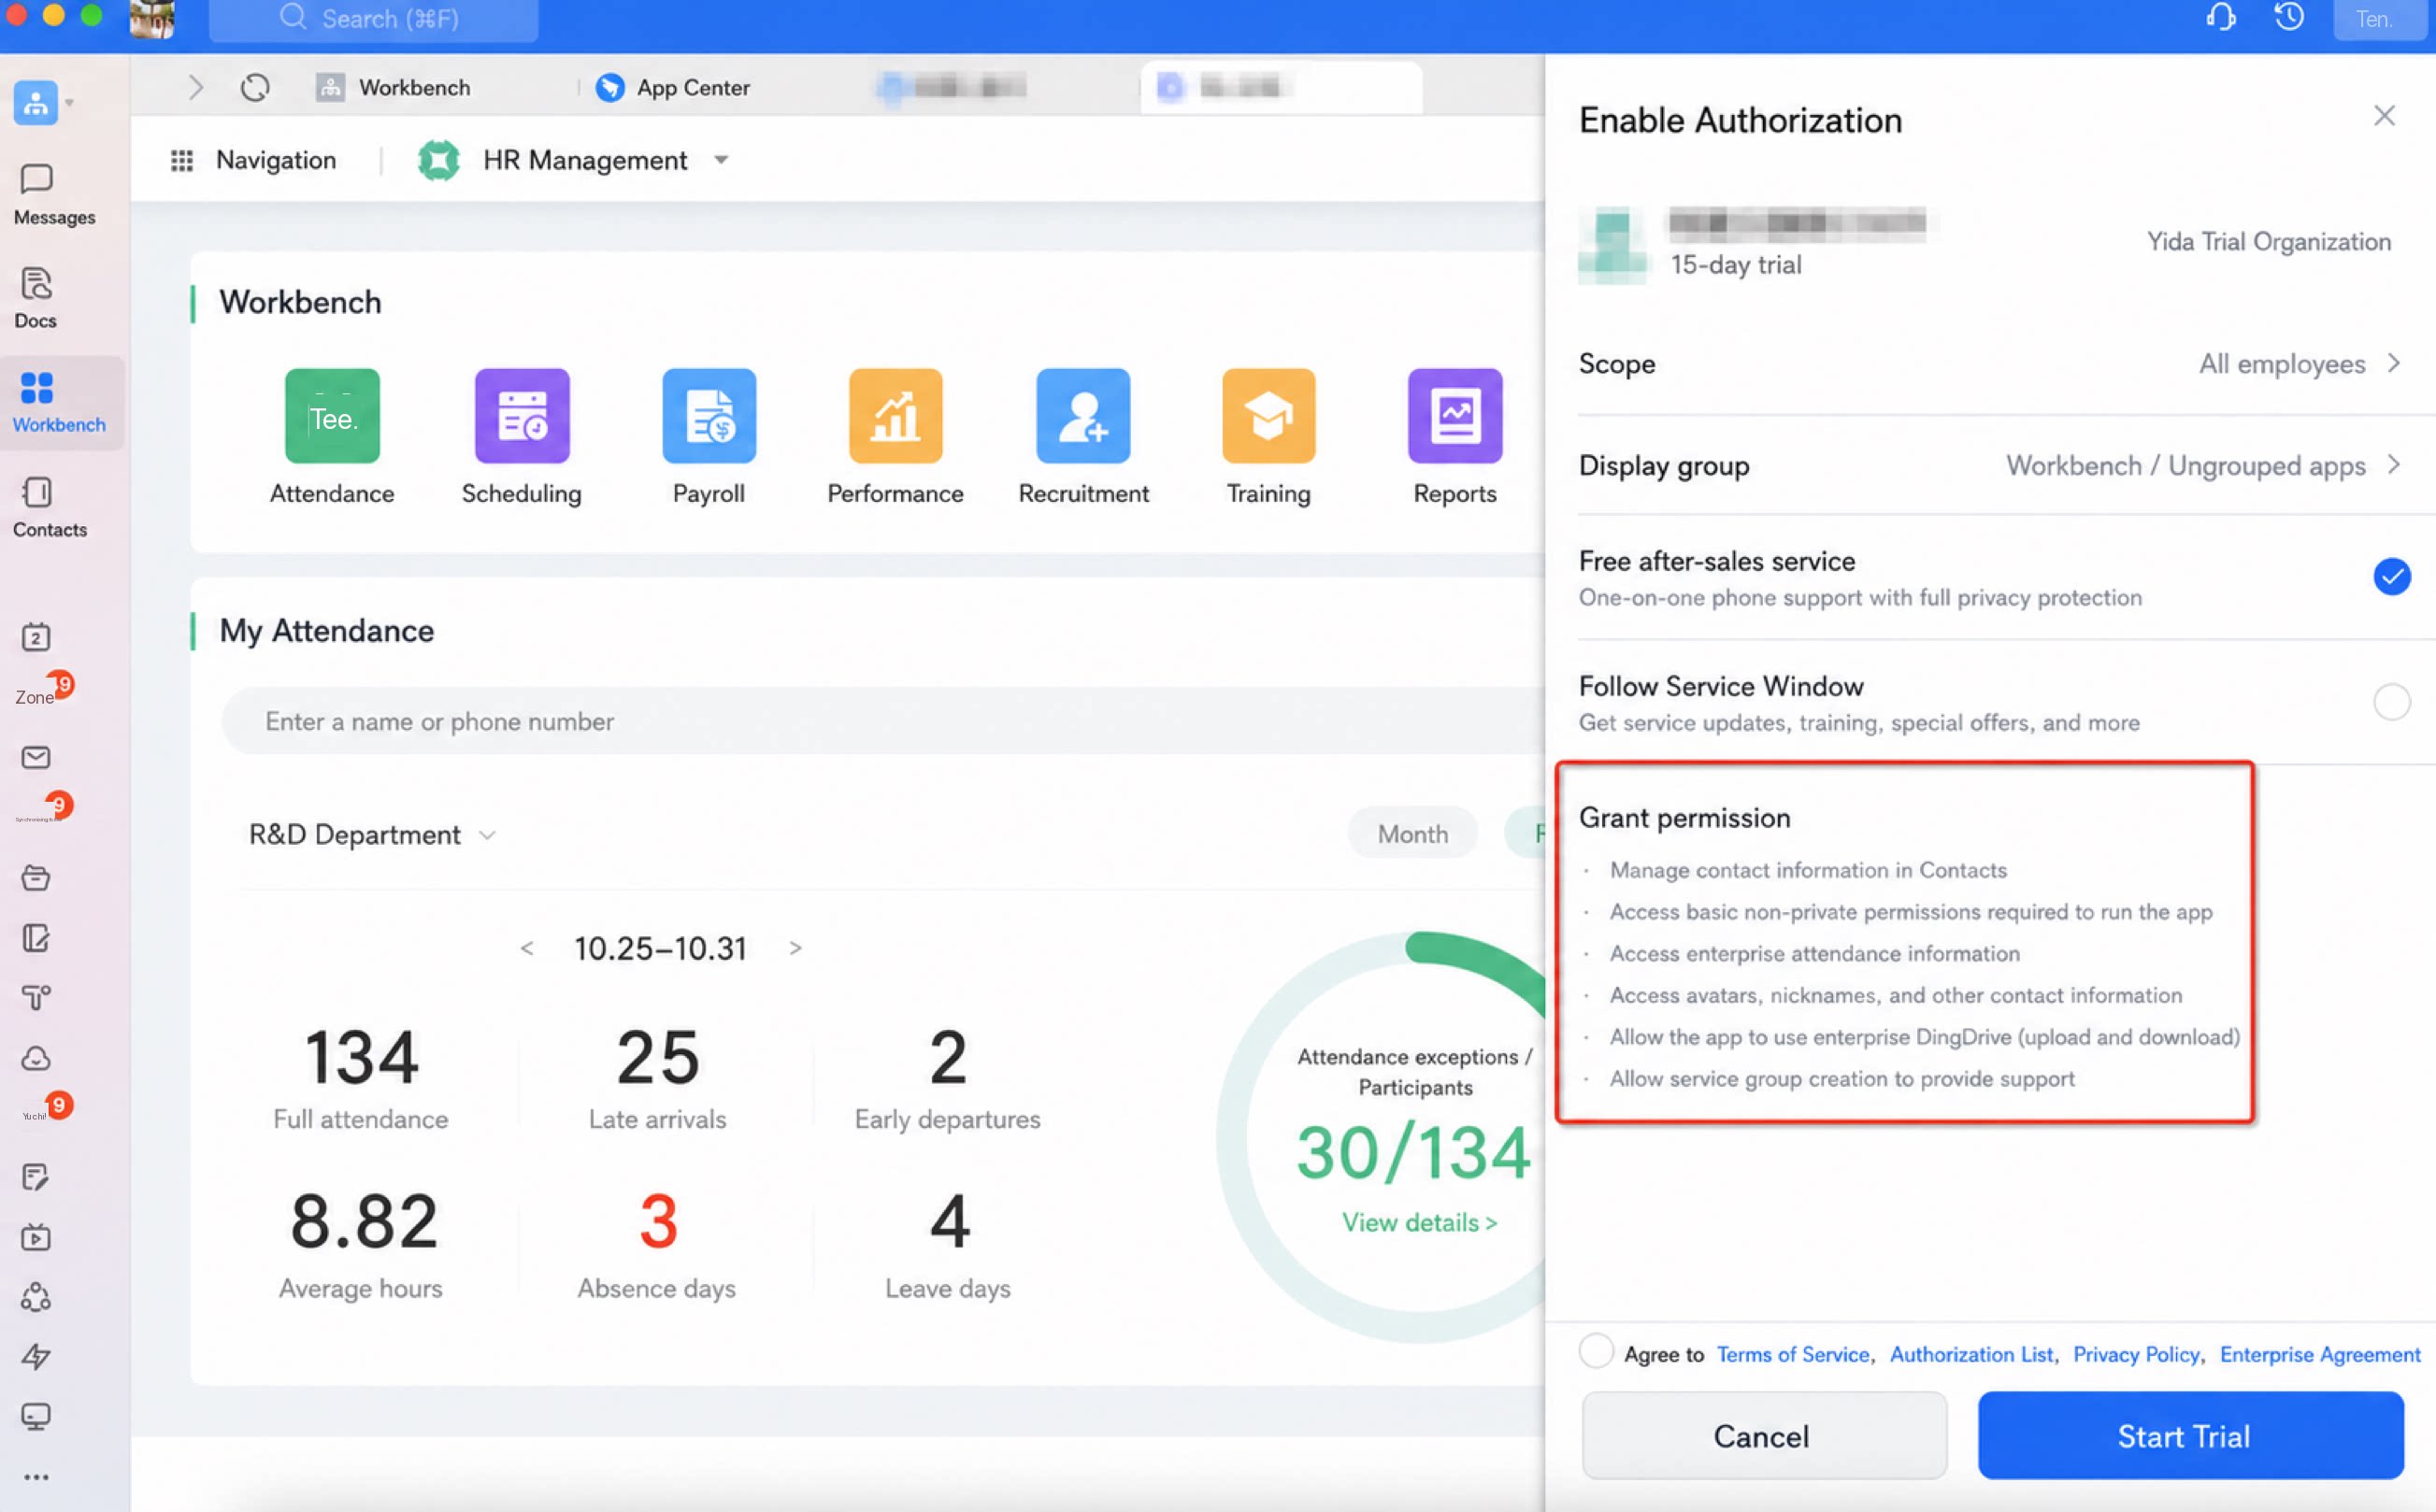
To safeguard SaaS product data, apps must confirm authorization scopes with users at activation. ISVs must configure the required permission scopes themselves.- Open the “Manage permissions” menu. Standard SaaS products must select the following permissions, then click “Batch apply.”
- If your SaaS product uses the “DingTalk Official” connector under “Integration & Automation > Connector node,” contact the YiDA team to confirm which first-party connector permissions you need to select.
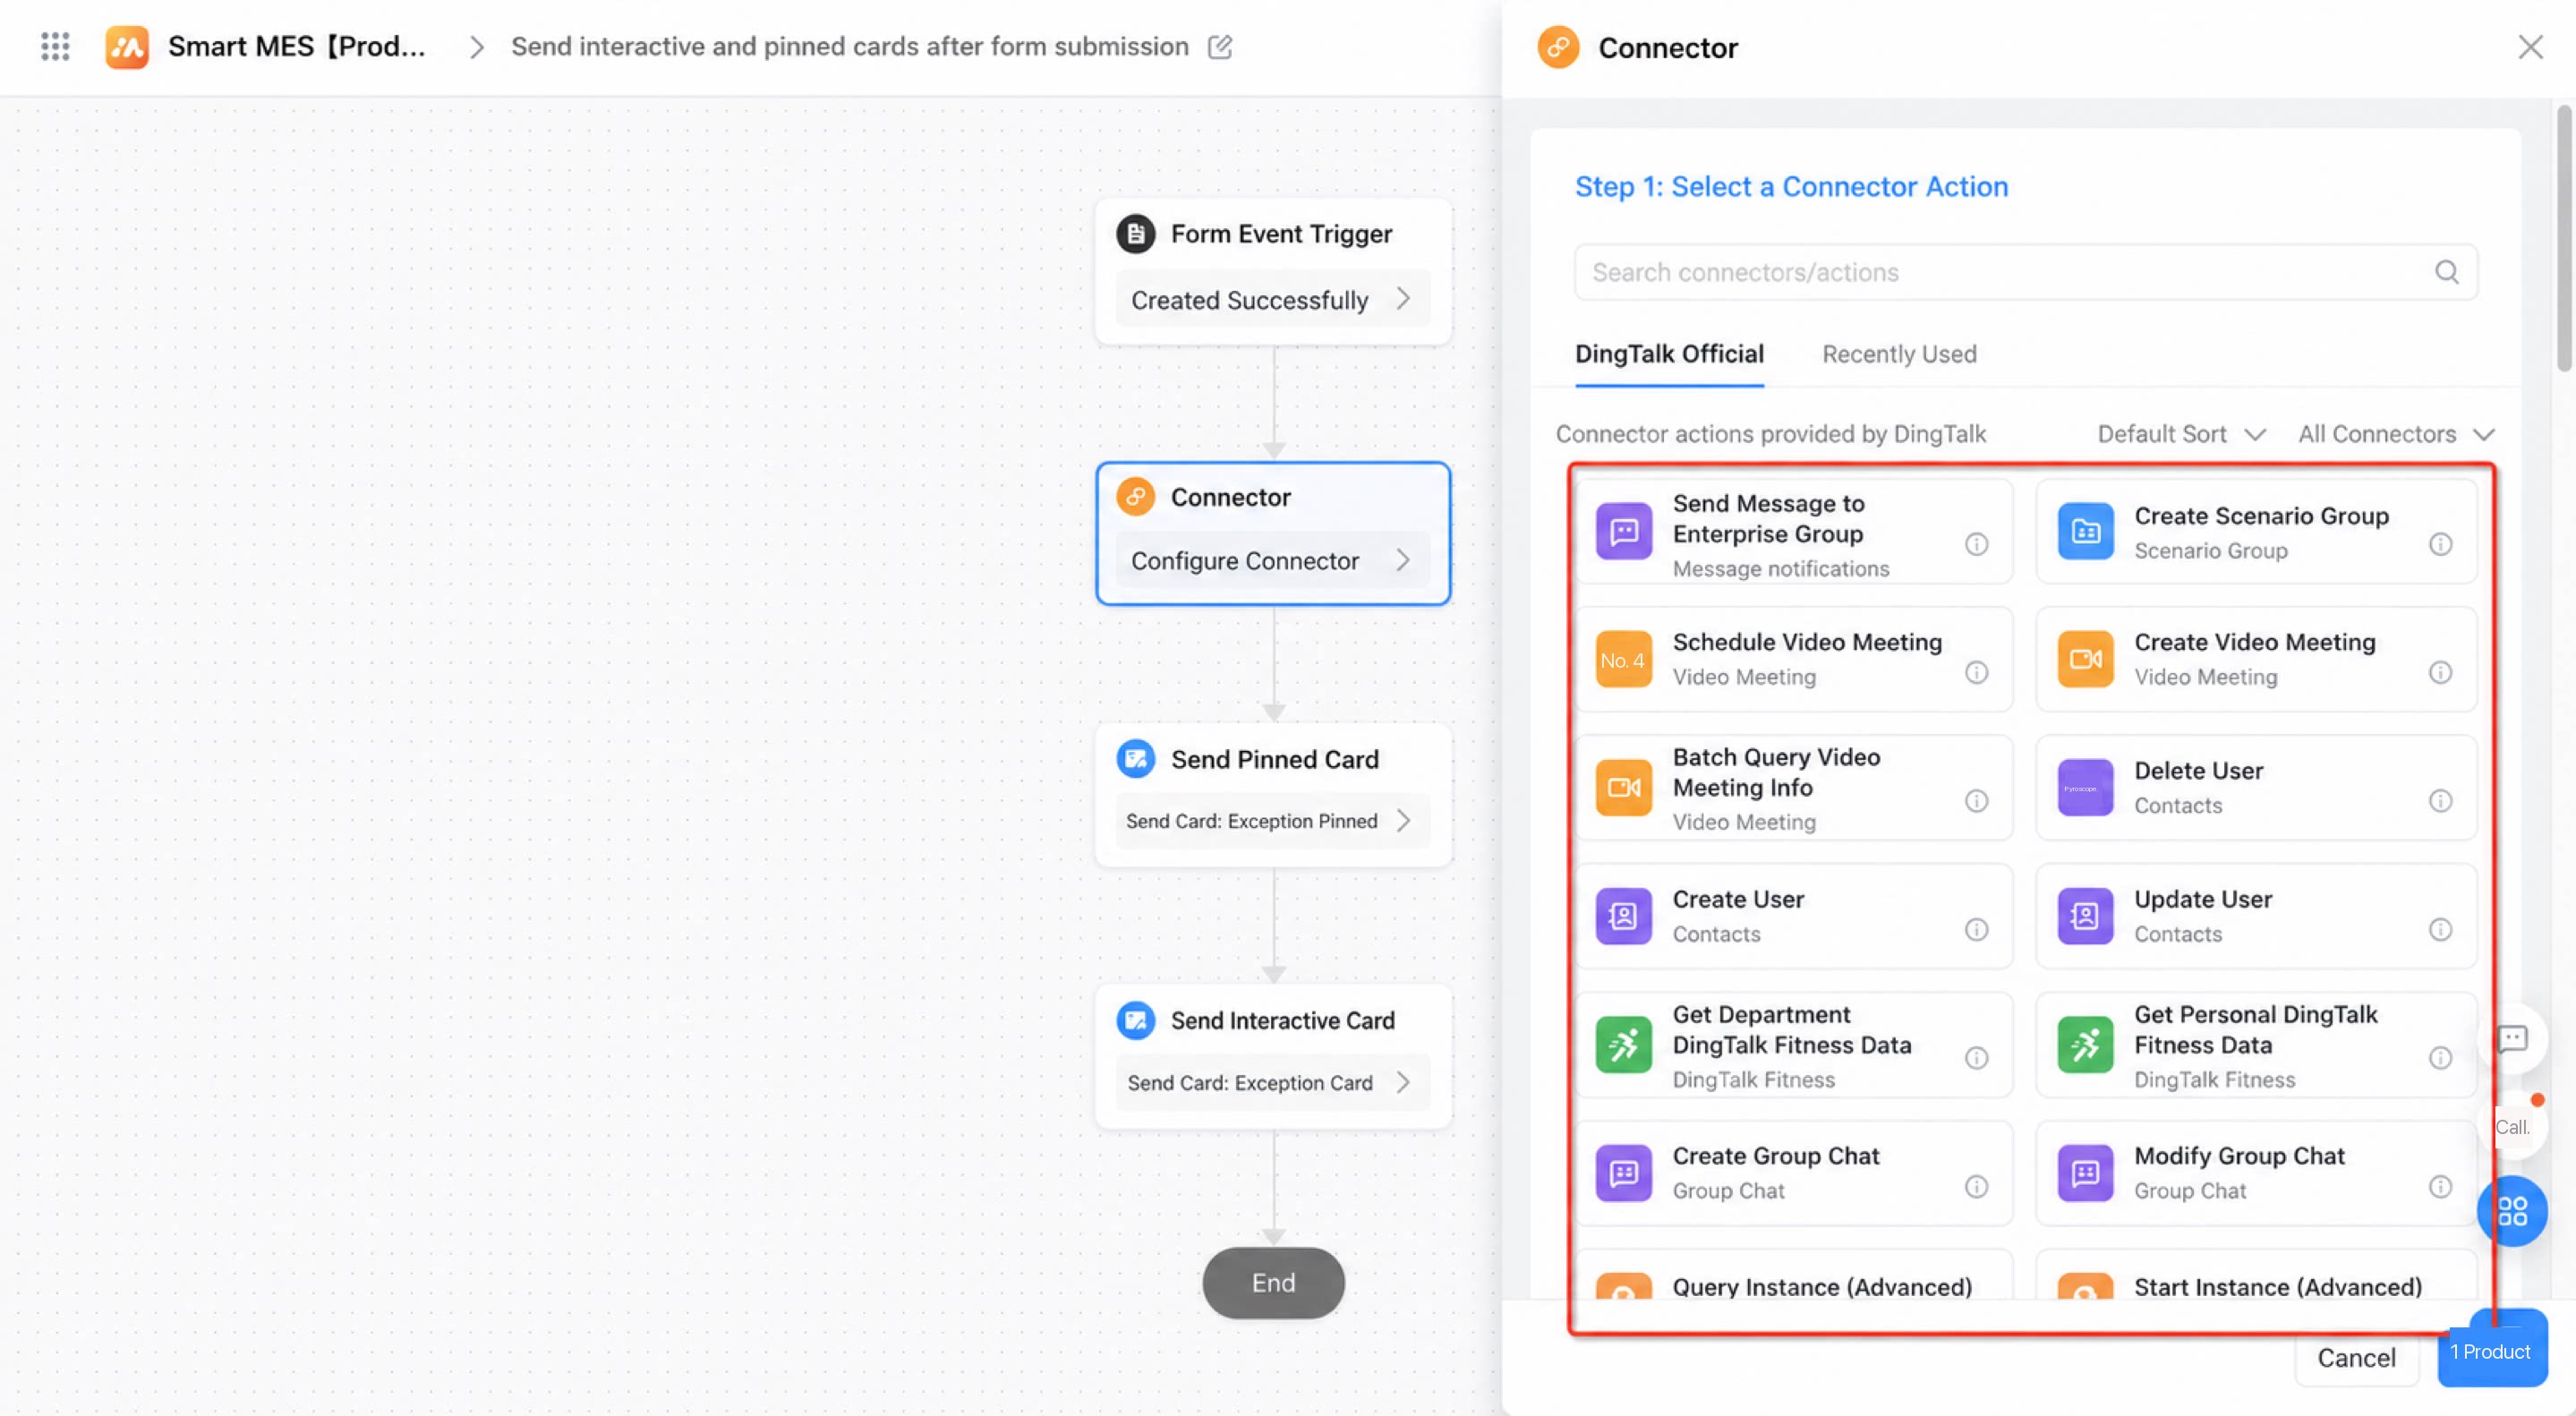
| Connector | Permission category | Permission scope |
|---|---|---|
Smart meeting room | Smart meeting room | Write access to meetings in the Video Meeting app |
Project management | Project management | Write access to tasks in the Project app |
Step 4: Self-Service Request to Skip the Security Self-Check
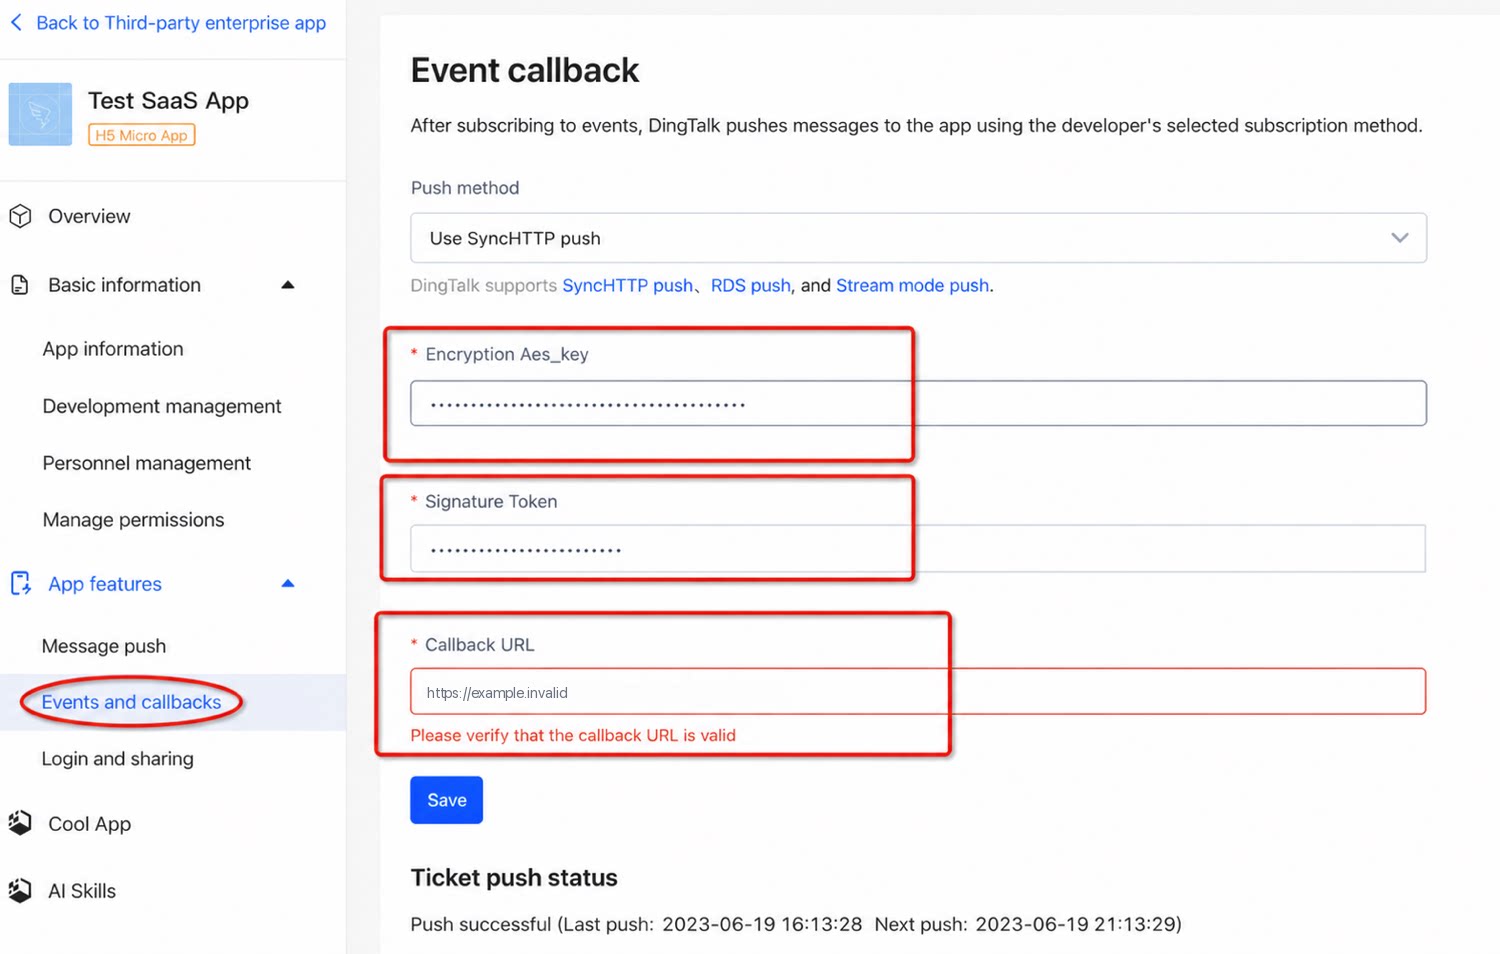
- To skip the self-check, configure “Events & callbacks” as follows:
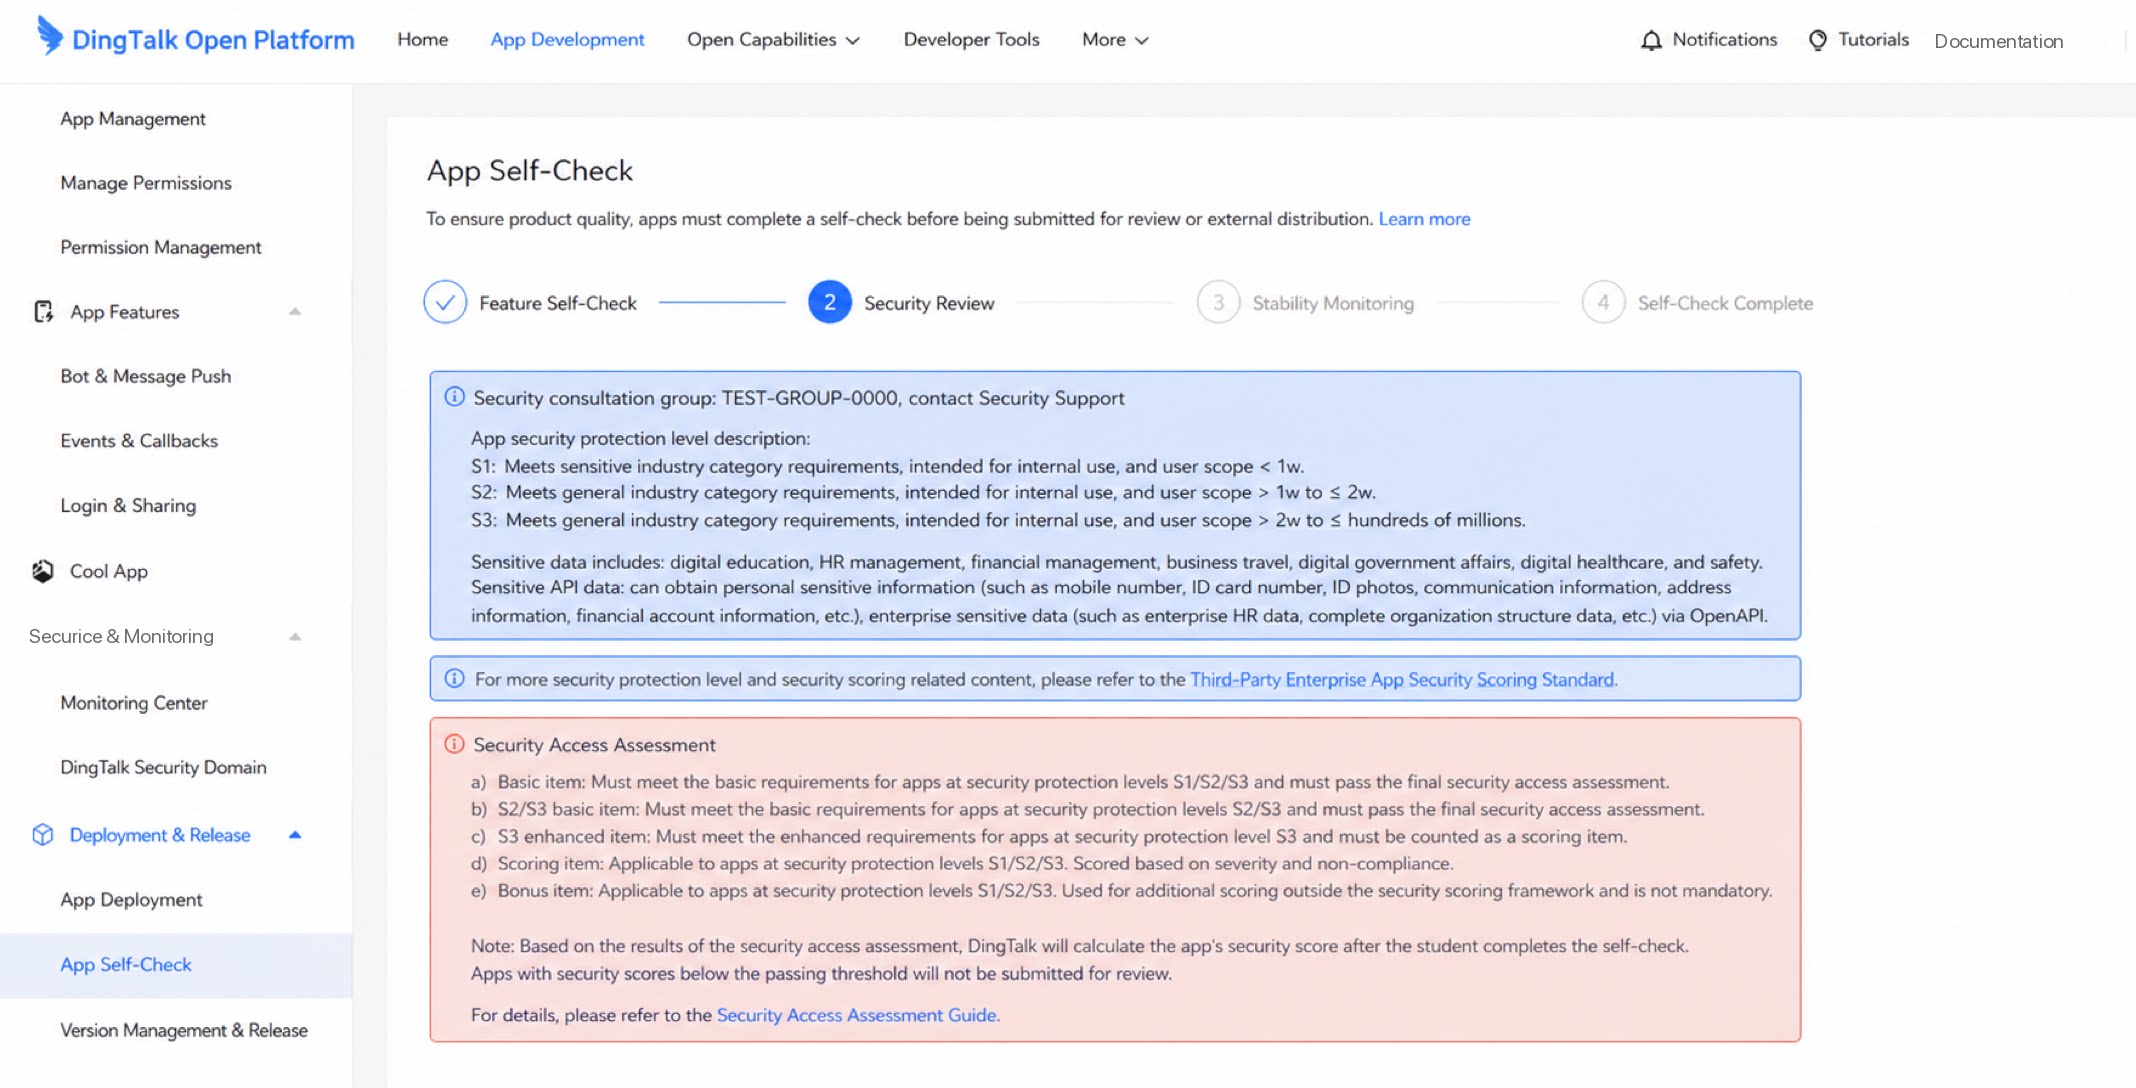
- Complete the app self-check “Security review” content. For security admission evaluation, see 📎YiDA Cool SaaS security admission guide - ISV.pdf.
4.3 Trial Organization Management
Use trial organization management for ISV self-testing of both the main app and the Cool App in either published or unpublished states. After self-testing passes, submit the app for publication to the DingTalk App Center and the Cool App Marketplace.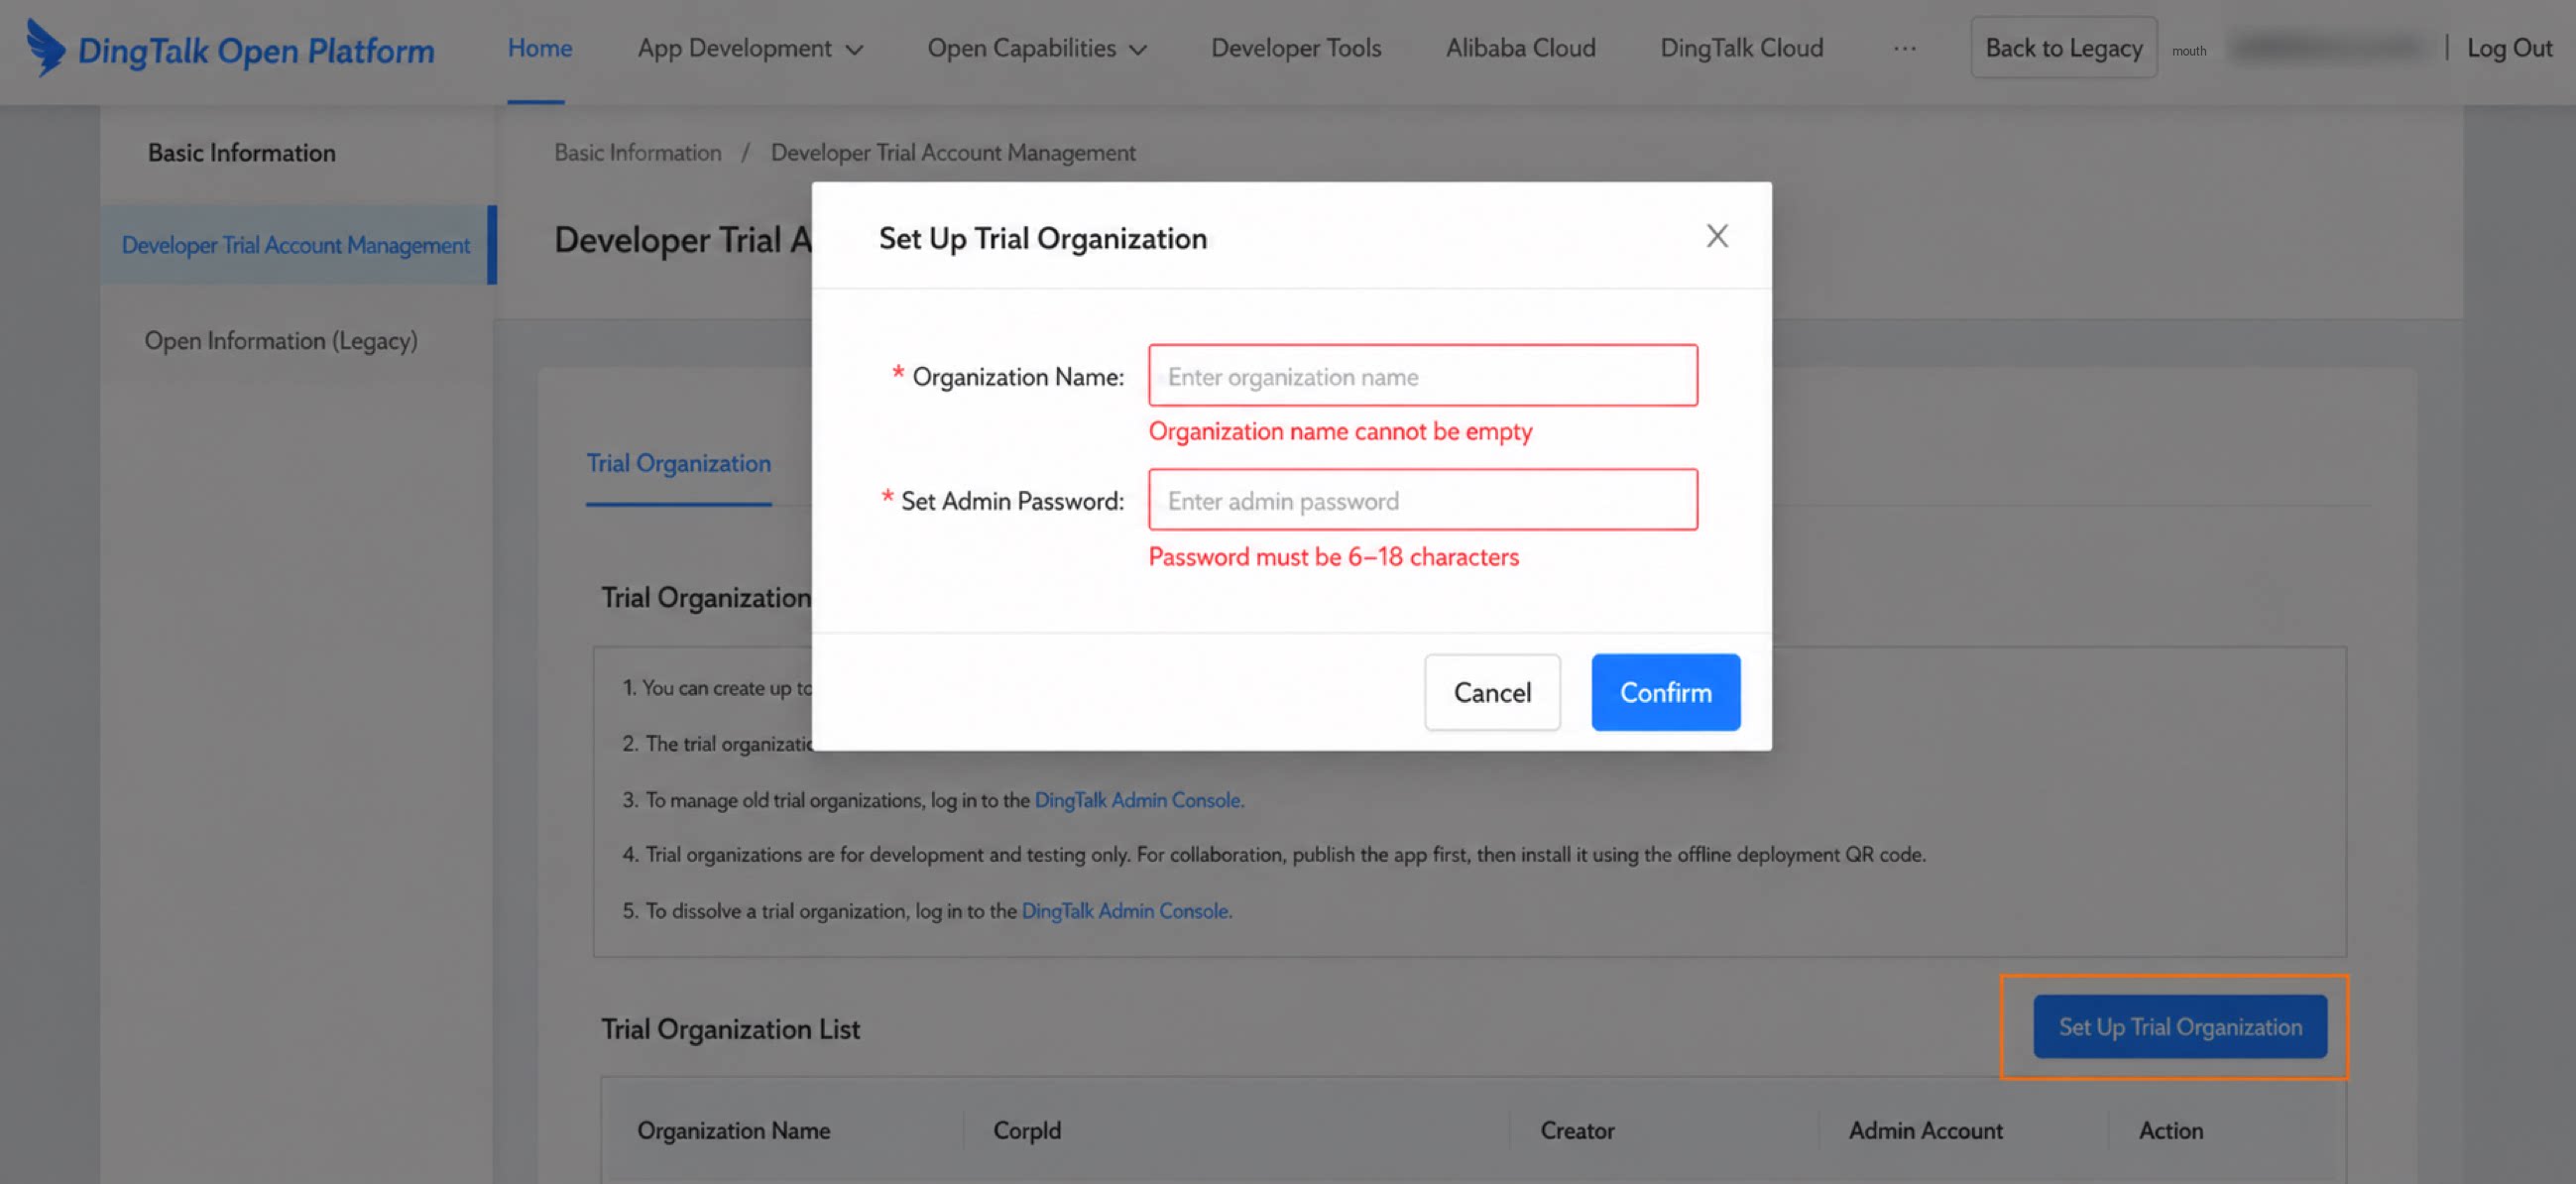
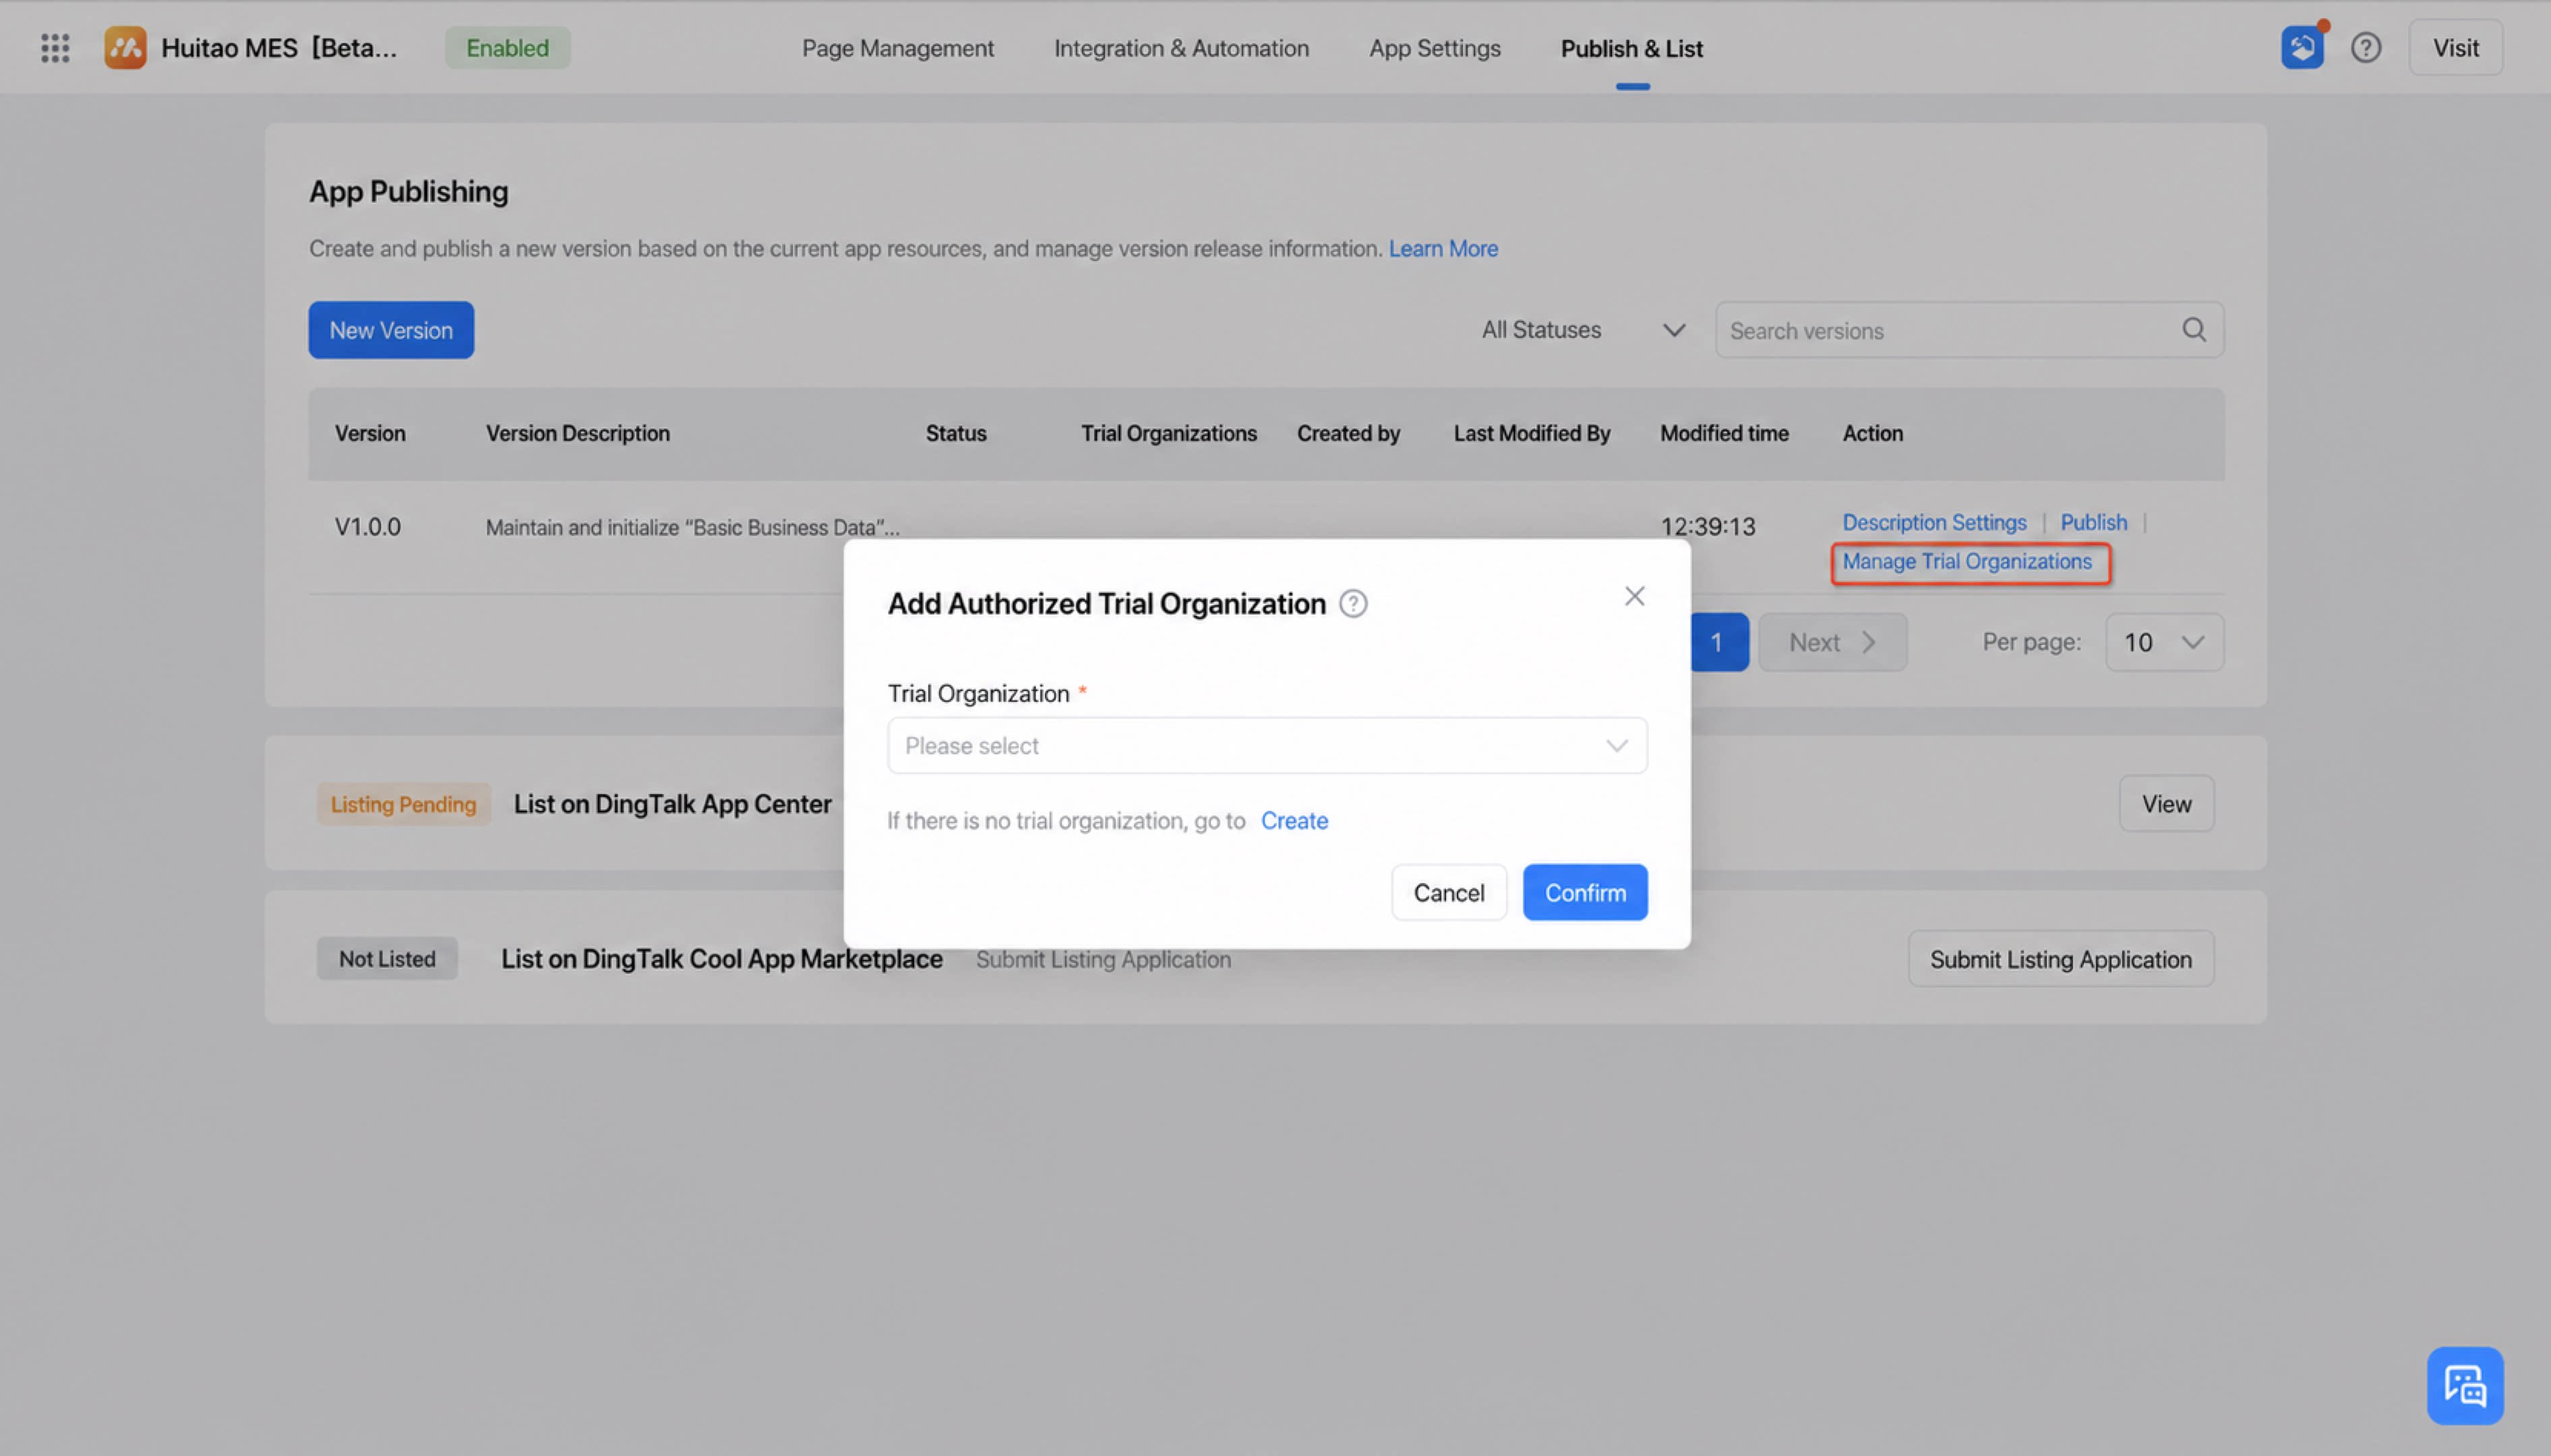
Step 1
Step 2
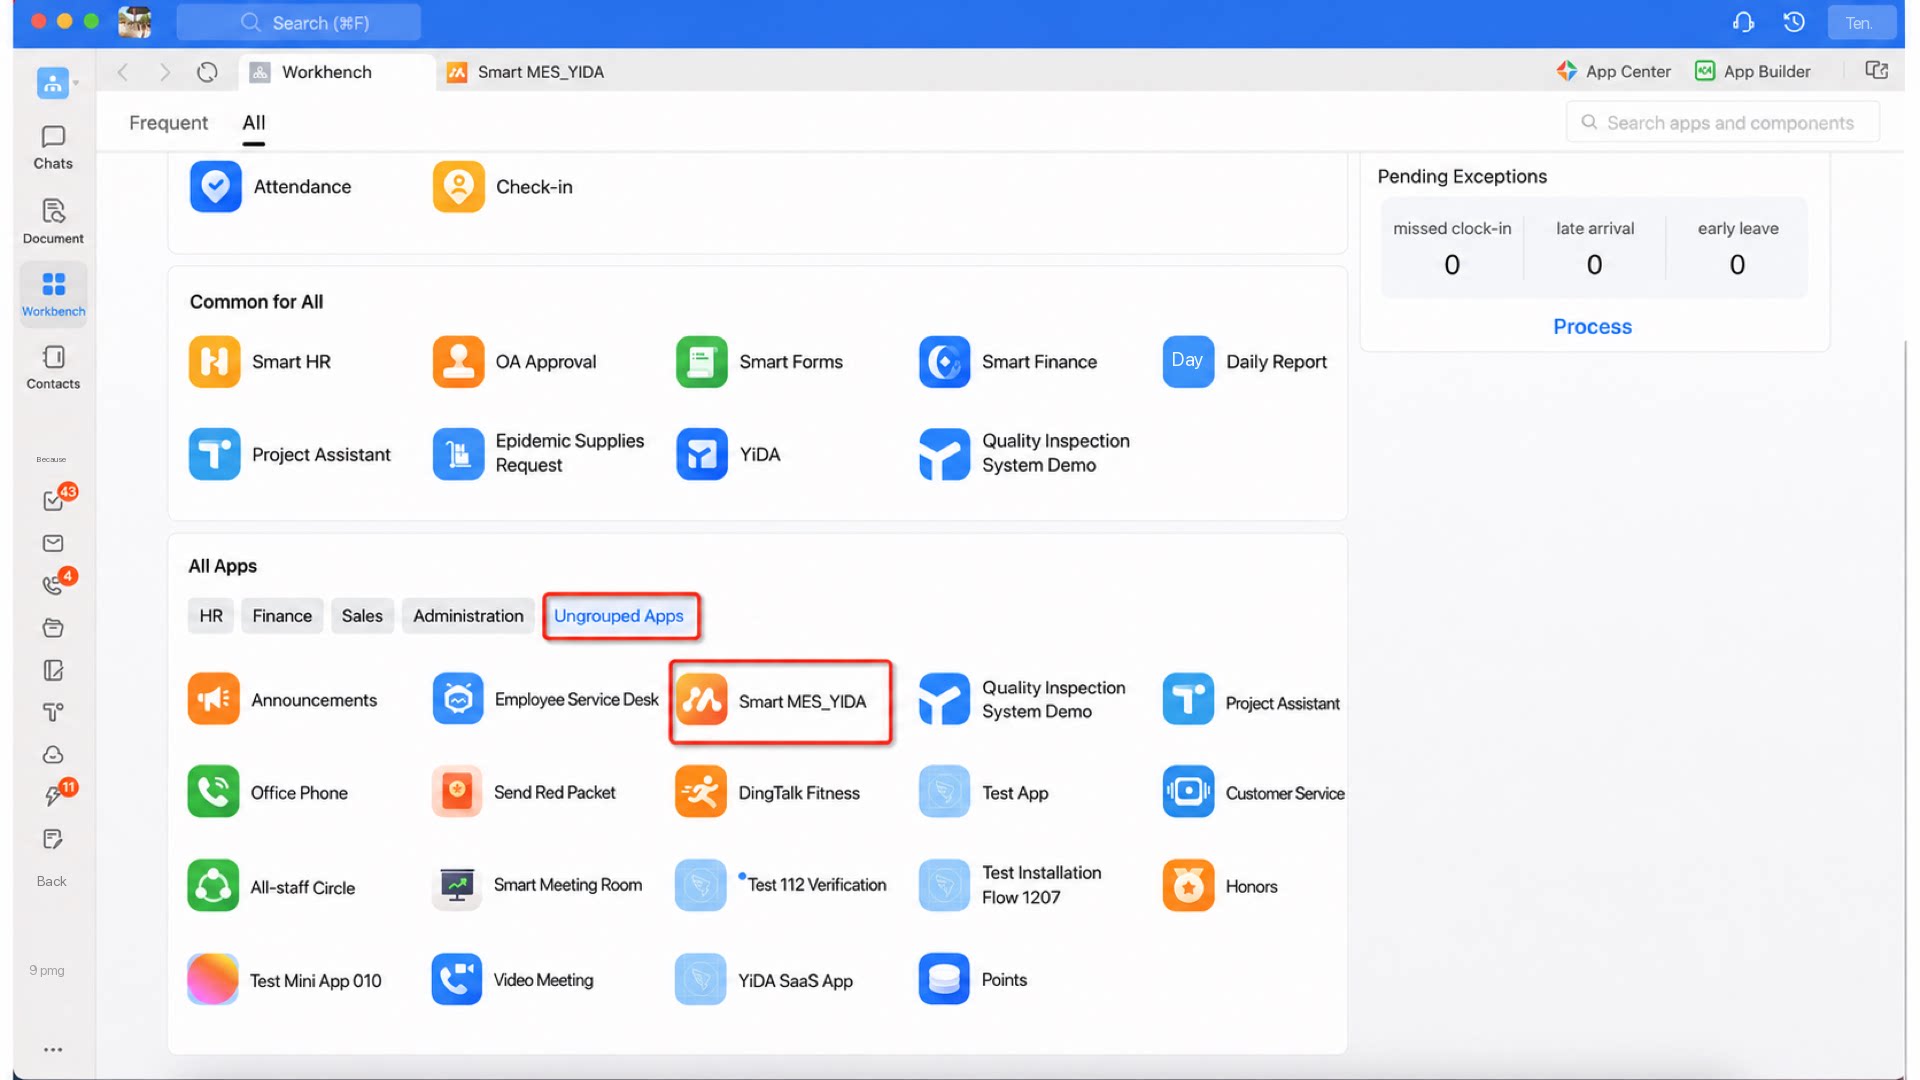
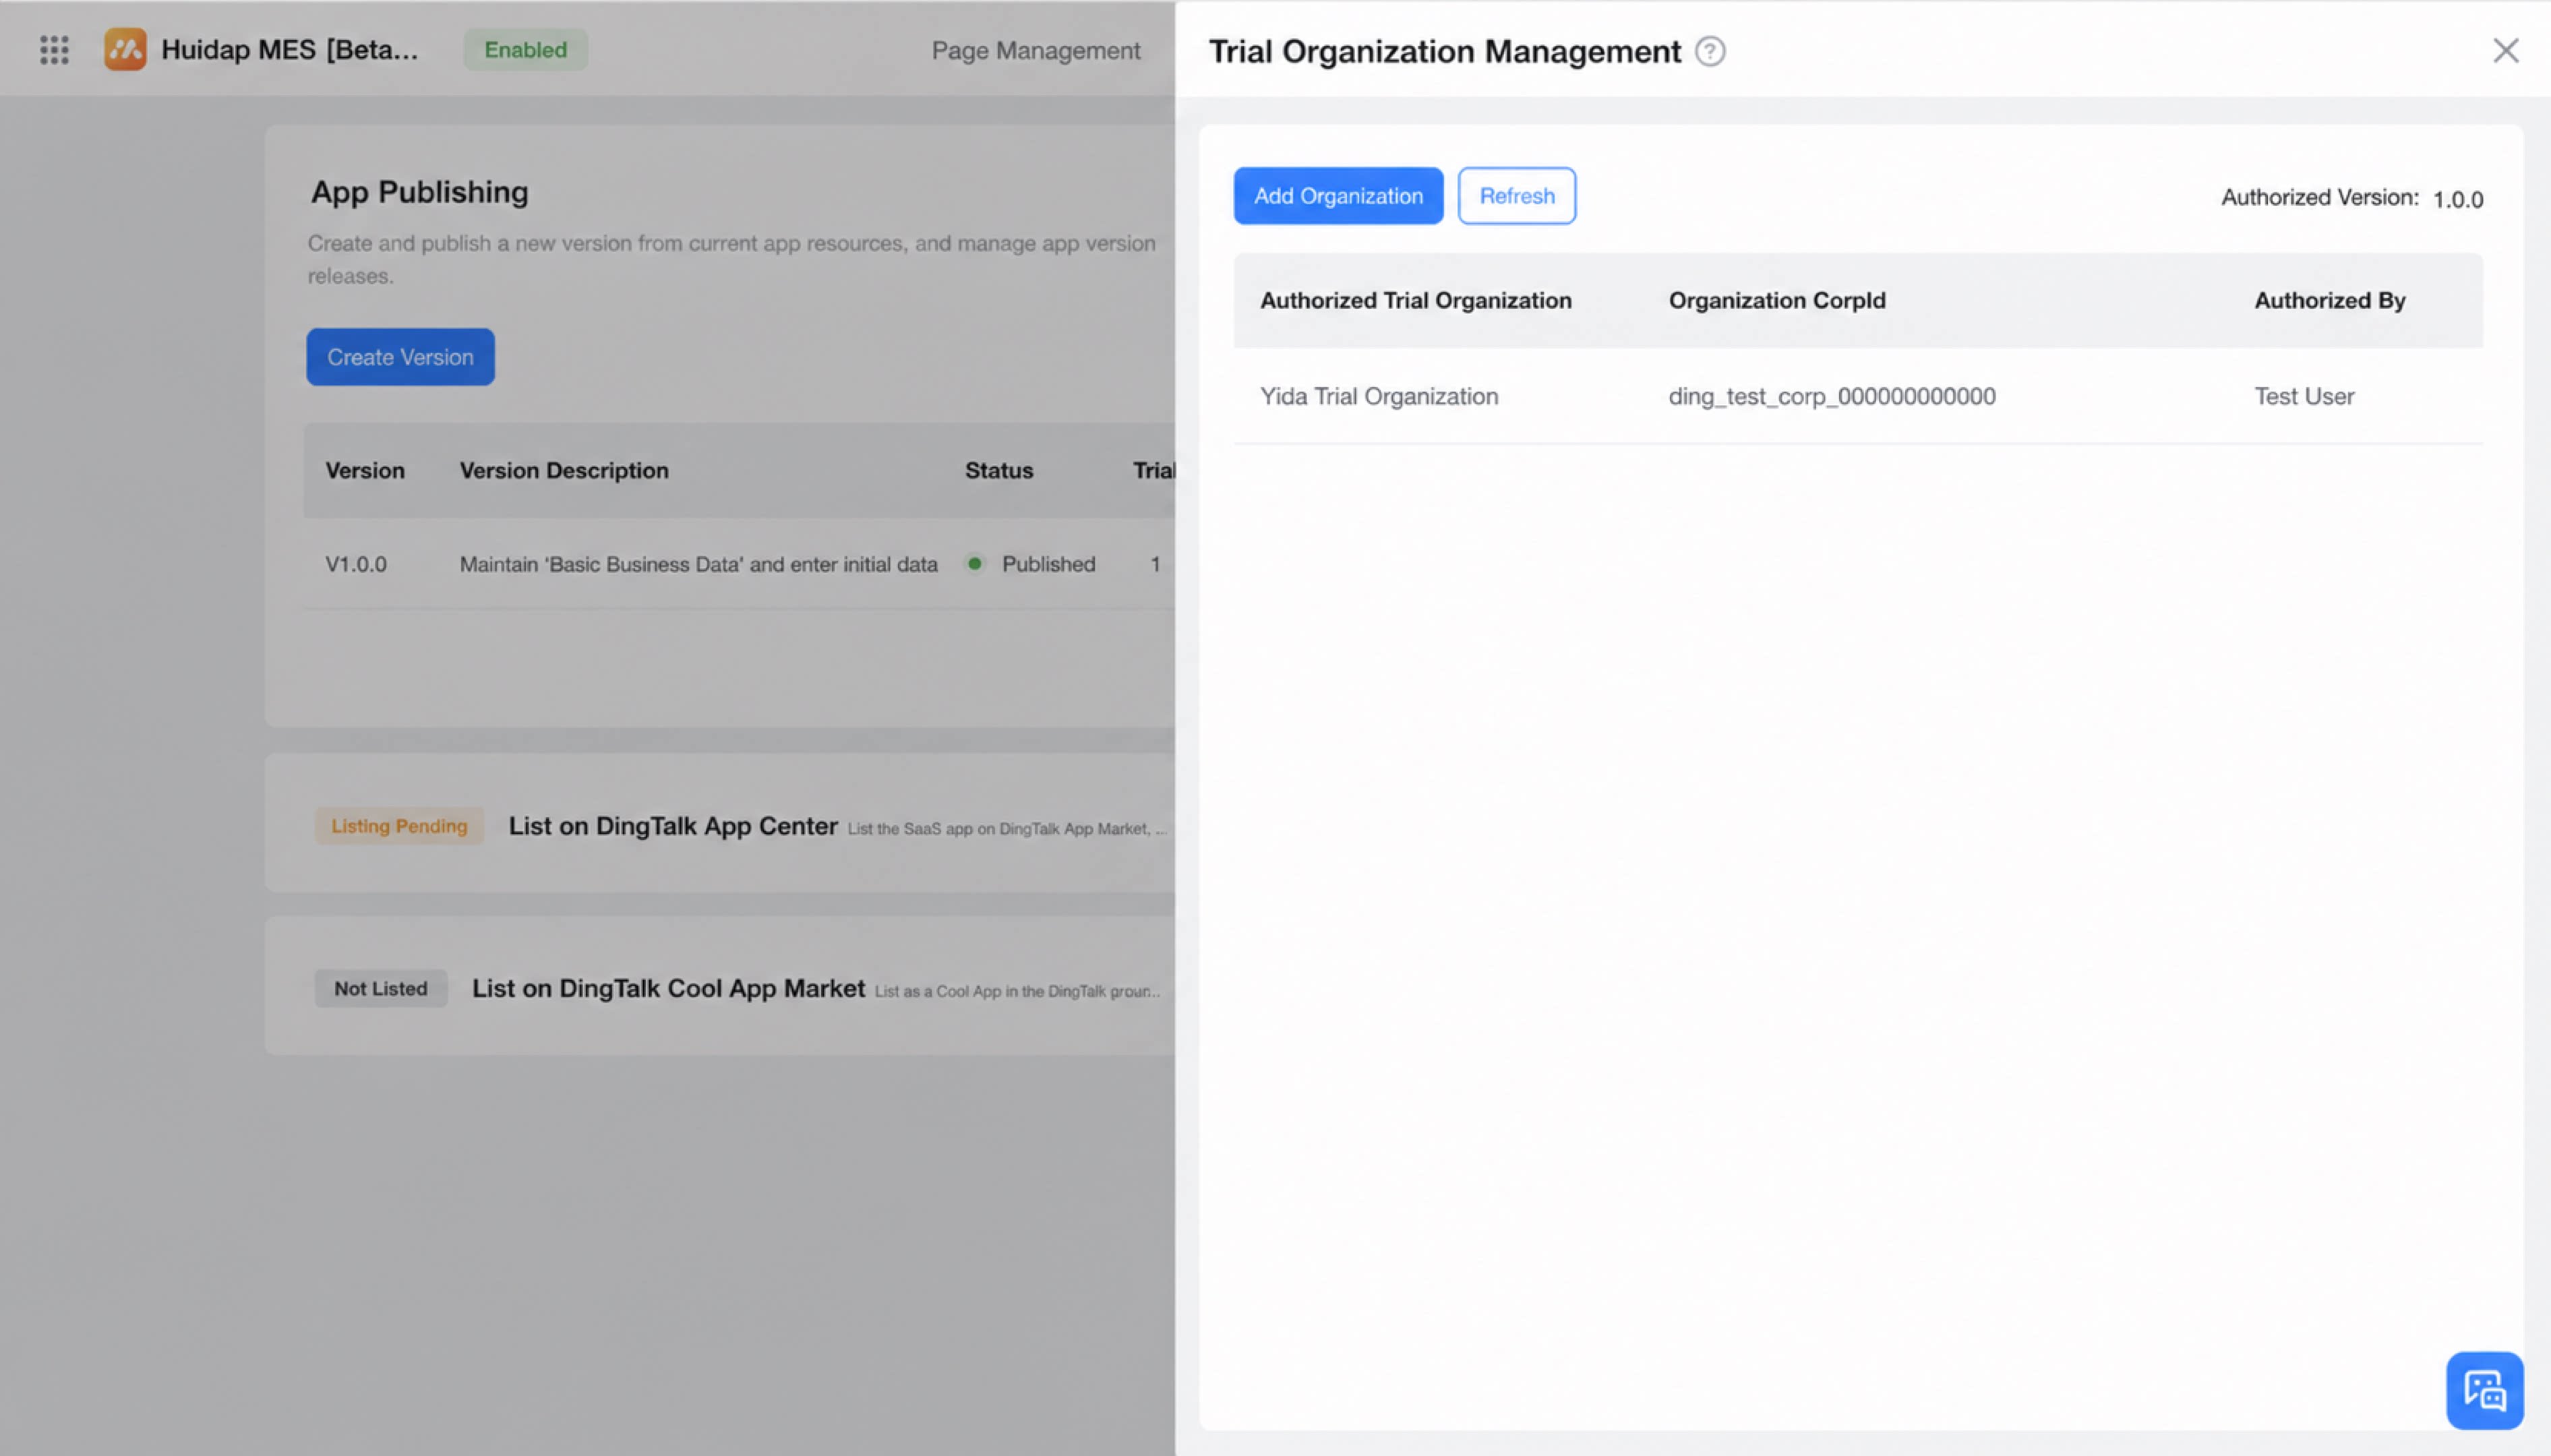
4.3.1 Trial Testing the Main App
Step 1
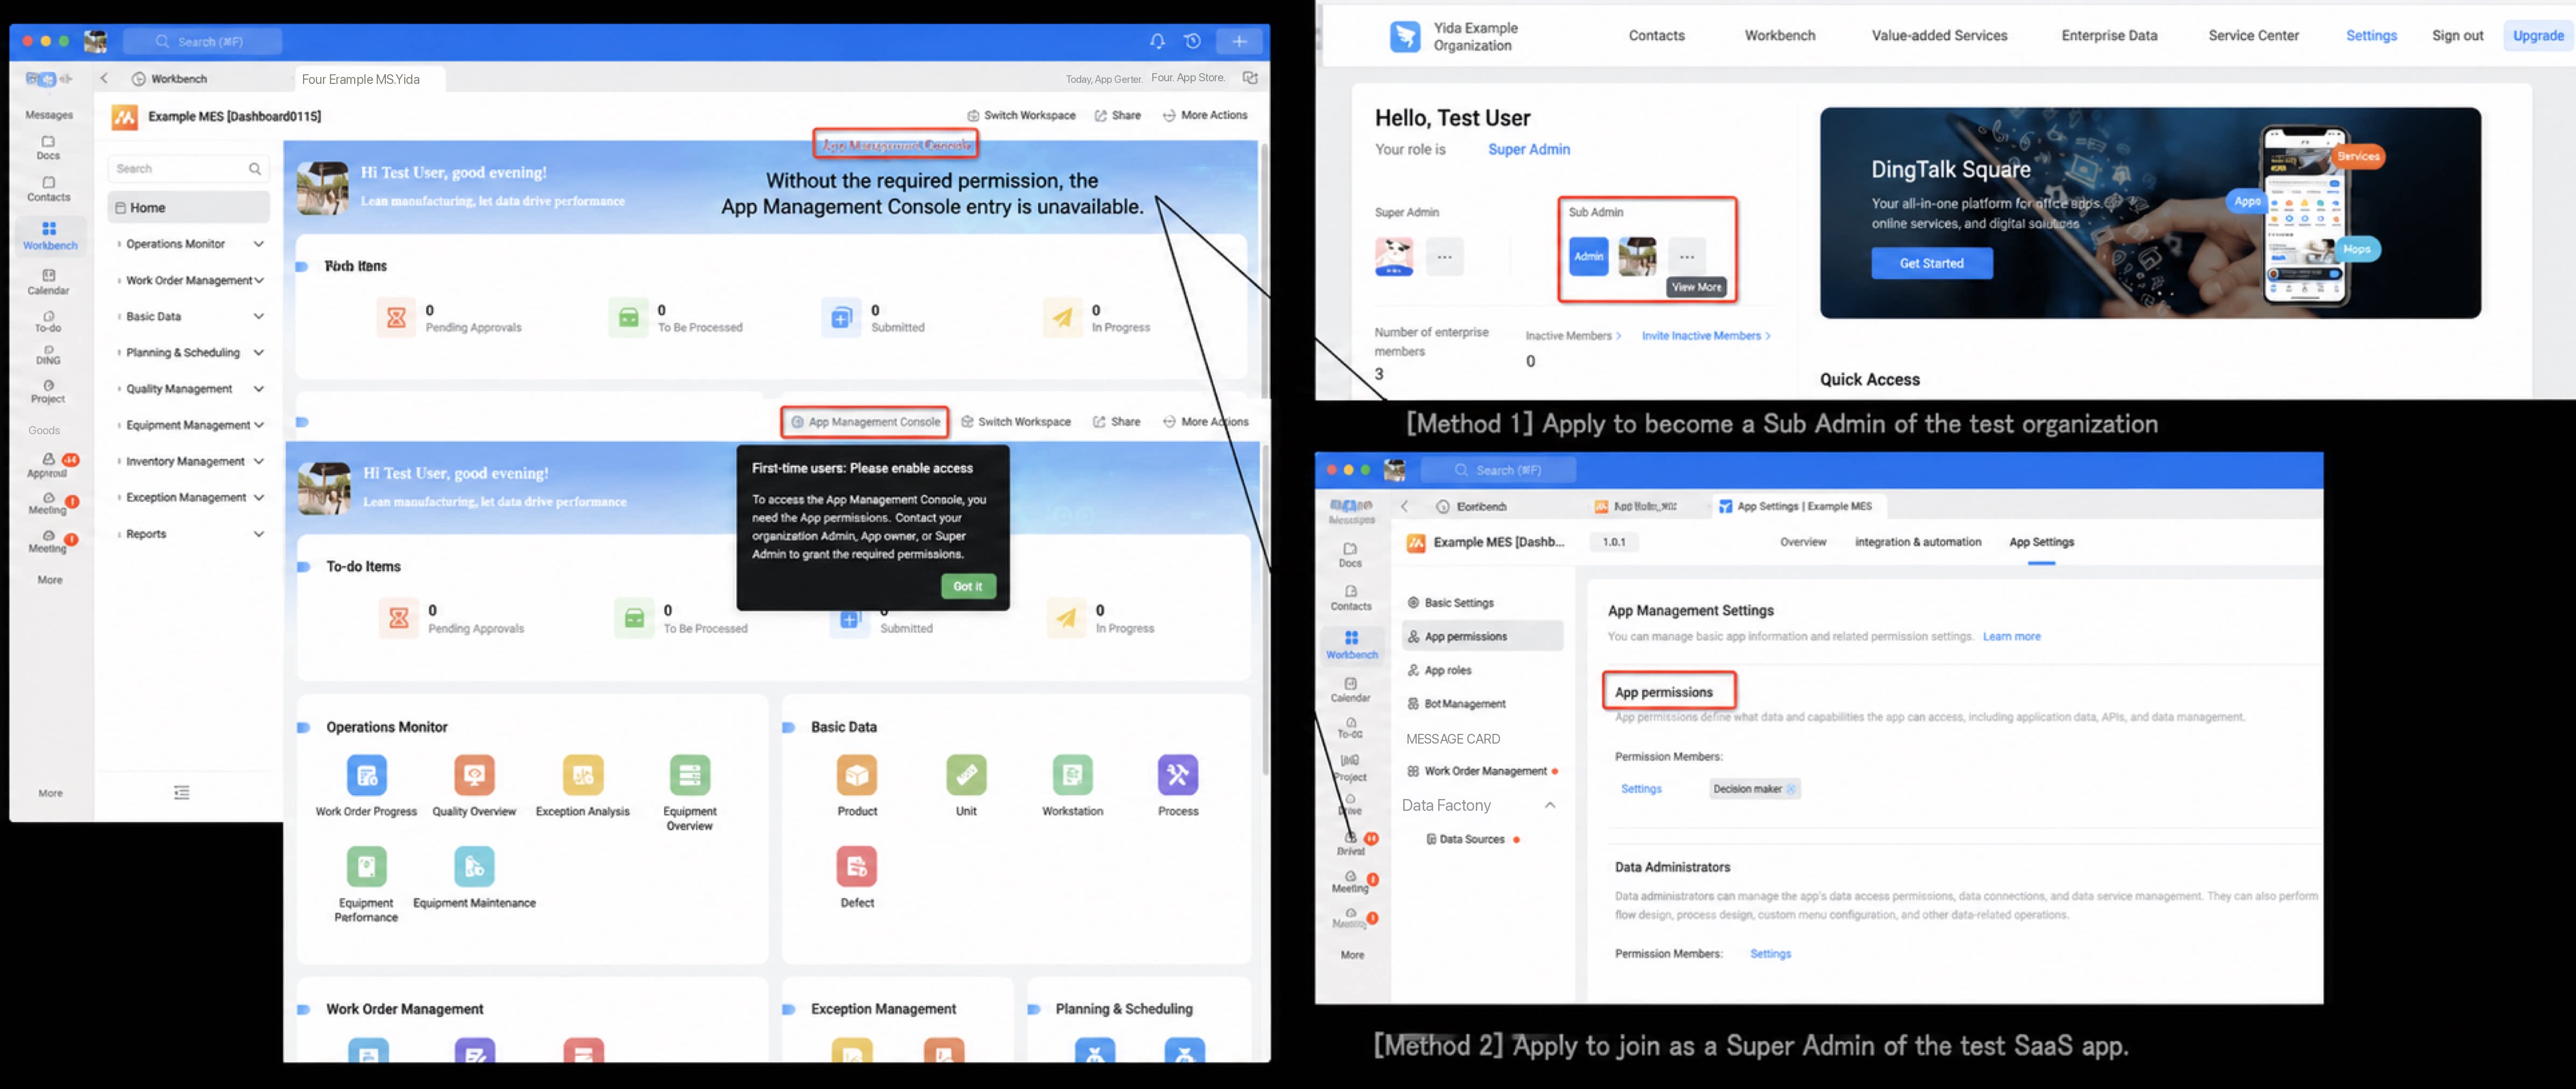
Once you have access to the app management backend, review the backend configuration of the subscribed SaaS app. Specific features can be modified.
General logic: Once a modification is made and the ISV later releases a new version, the customer’s local configuration takes precedence for the affected feature. Changes to the main app do not sync down to the child app. If no modification was made, incremental resource changes in the main app sync to the child app. Approval process change logic:
- If the child app subscribes to V0 and the main app has an unpublished V1, V1 does not appear in the child app’s version history.
- If the child app subscribes to V0 without customization and the main app later upgrades to V1, the child app continues to display and run against the subscribed V0.
- If the child app subscribes to V0 and customizes it, an internal V0 history version is created together with a V1 draft. After the child app subscribes to the new version, the current process no longer follows main app upgrades.
- The version scope above includes all business rules and formulas within the version.
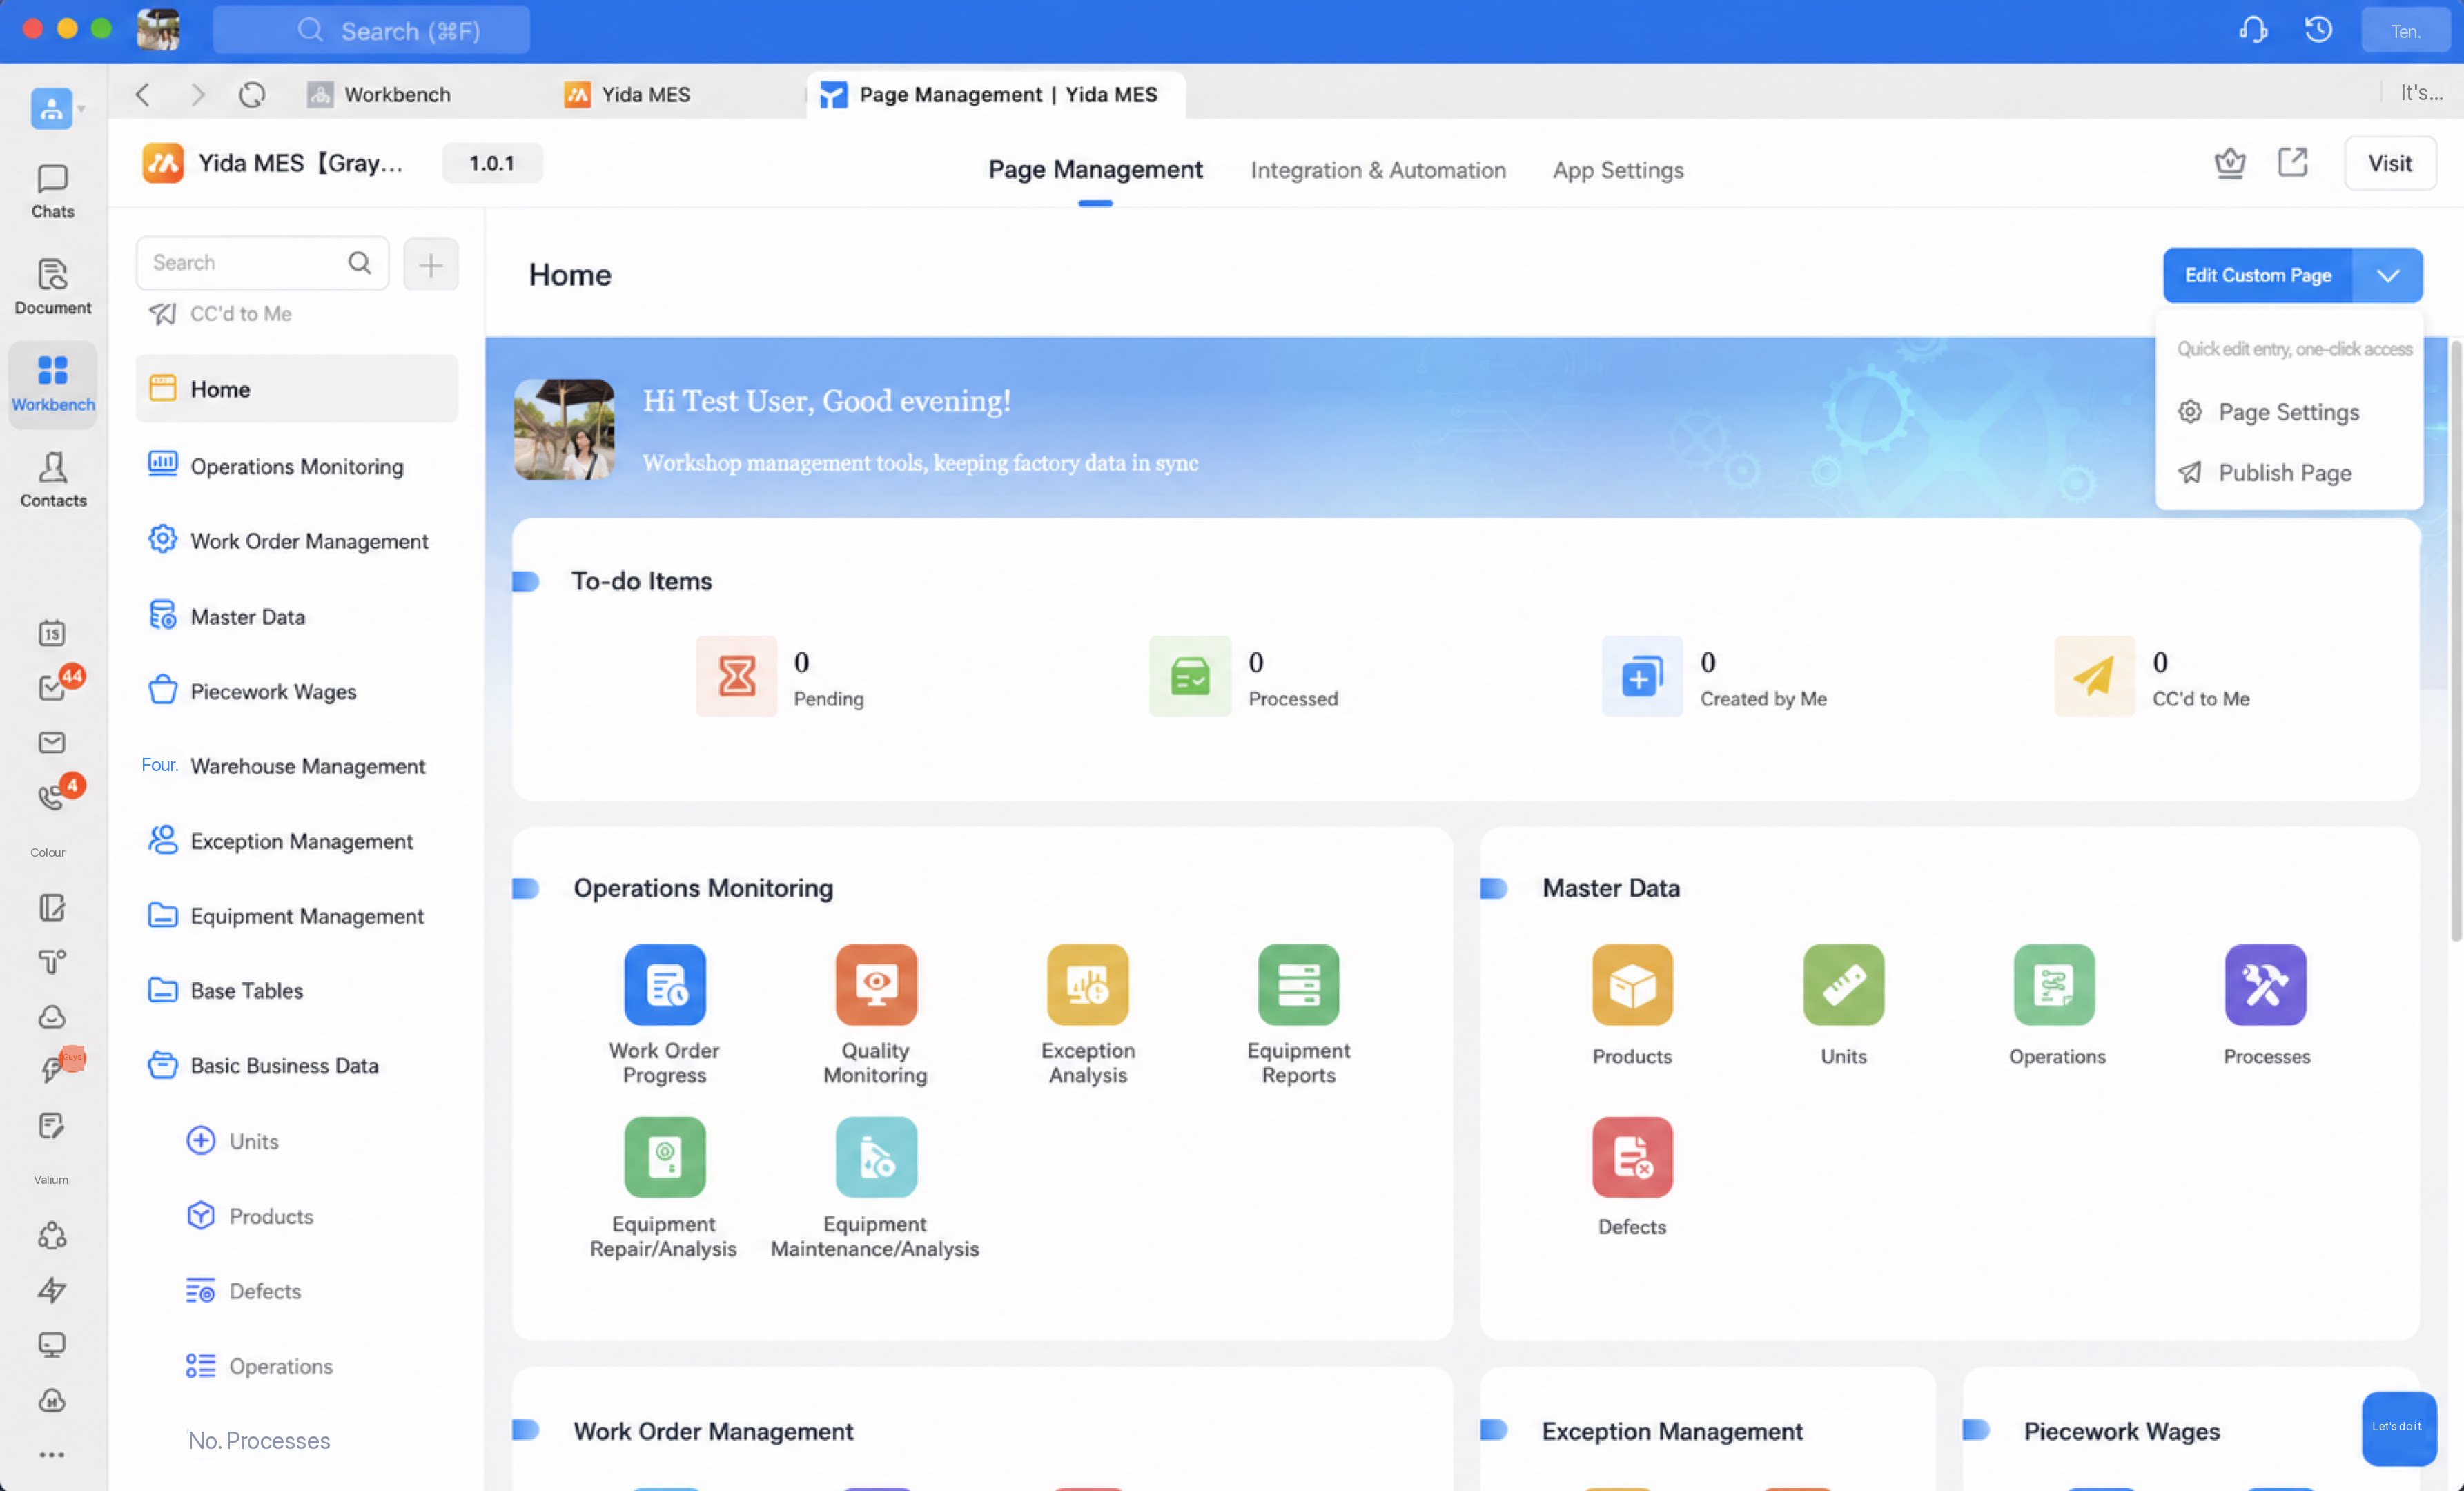
- By default, the “Baseline business data” form data from the main app is carried over to the child app so baseline data works out of the box. Modifications are supported.
4.3.2 Trial Testing the Cool App
Step 1
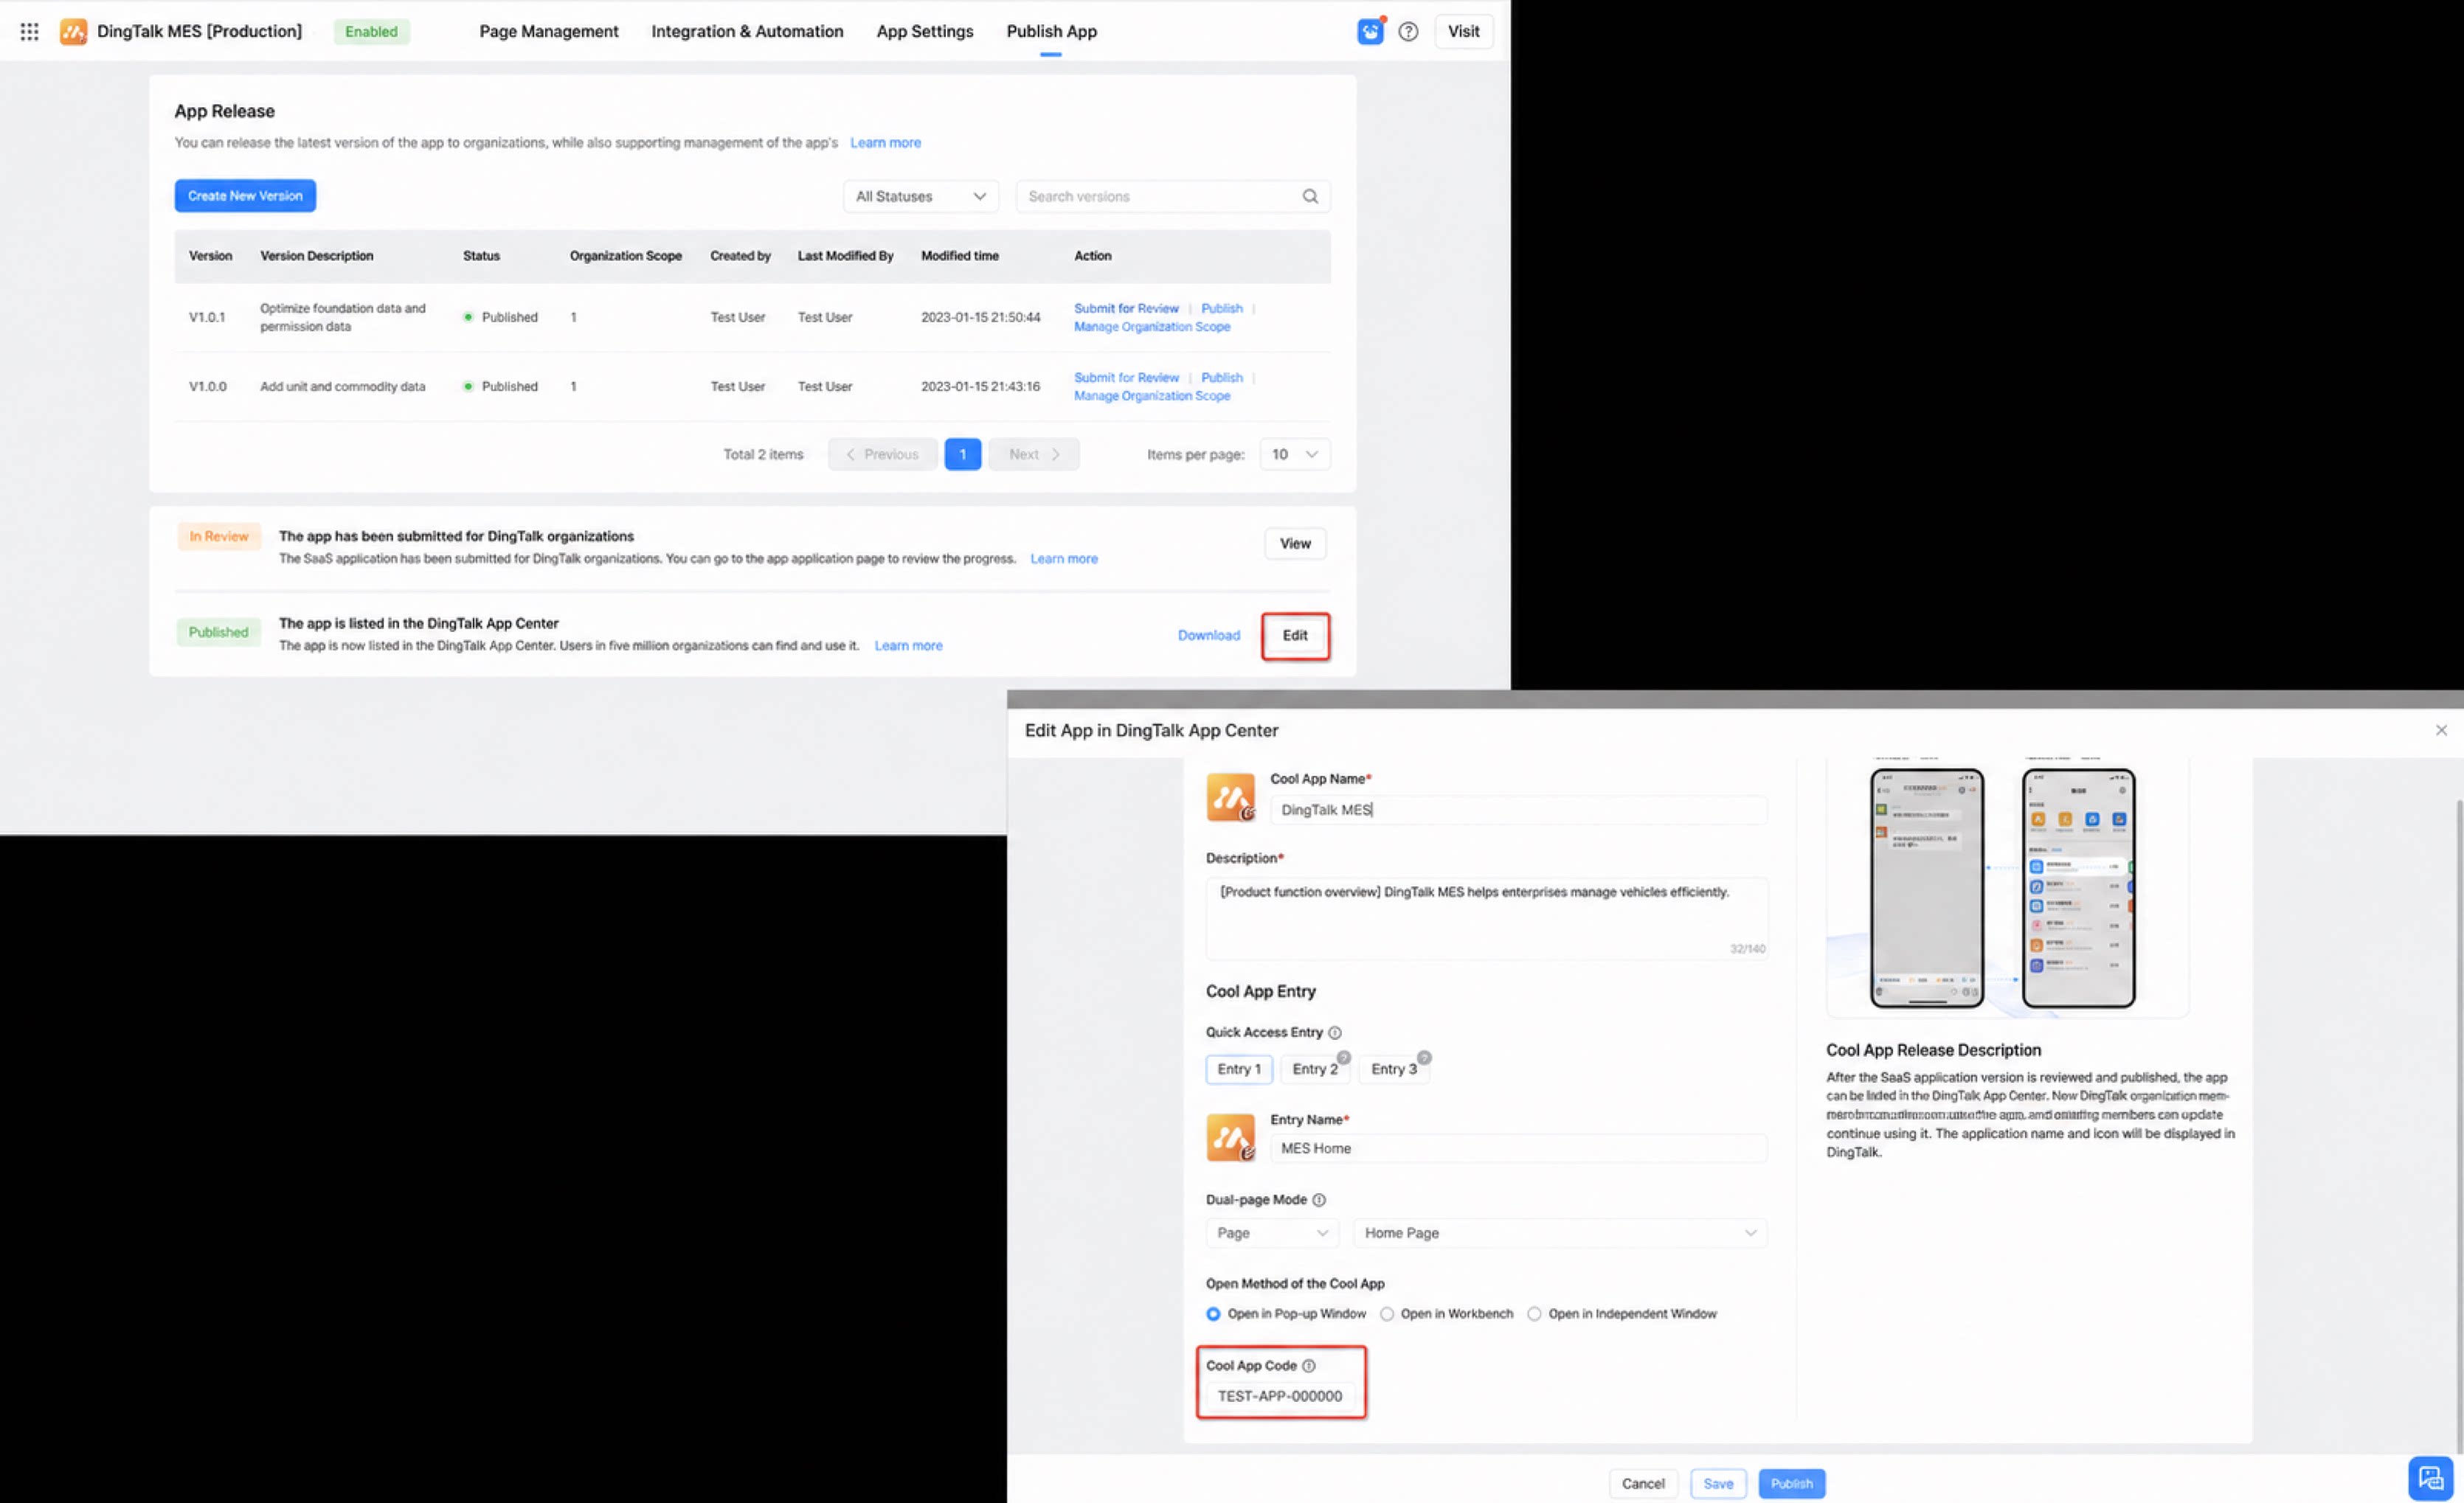
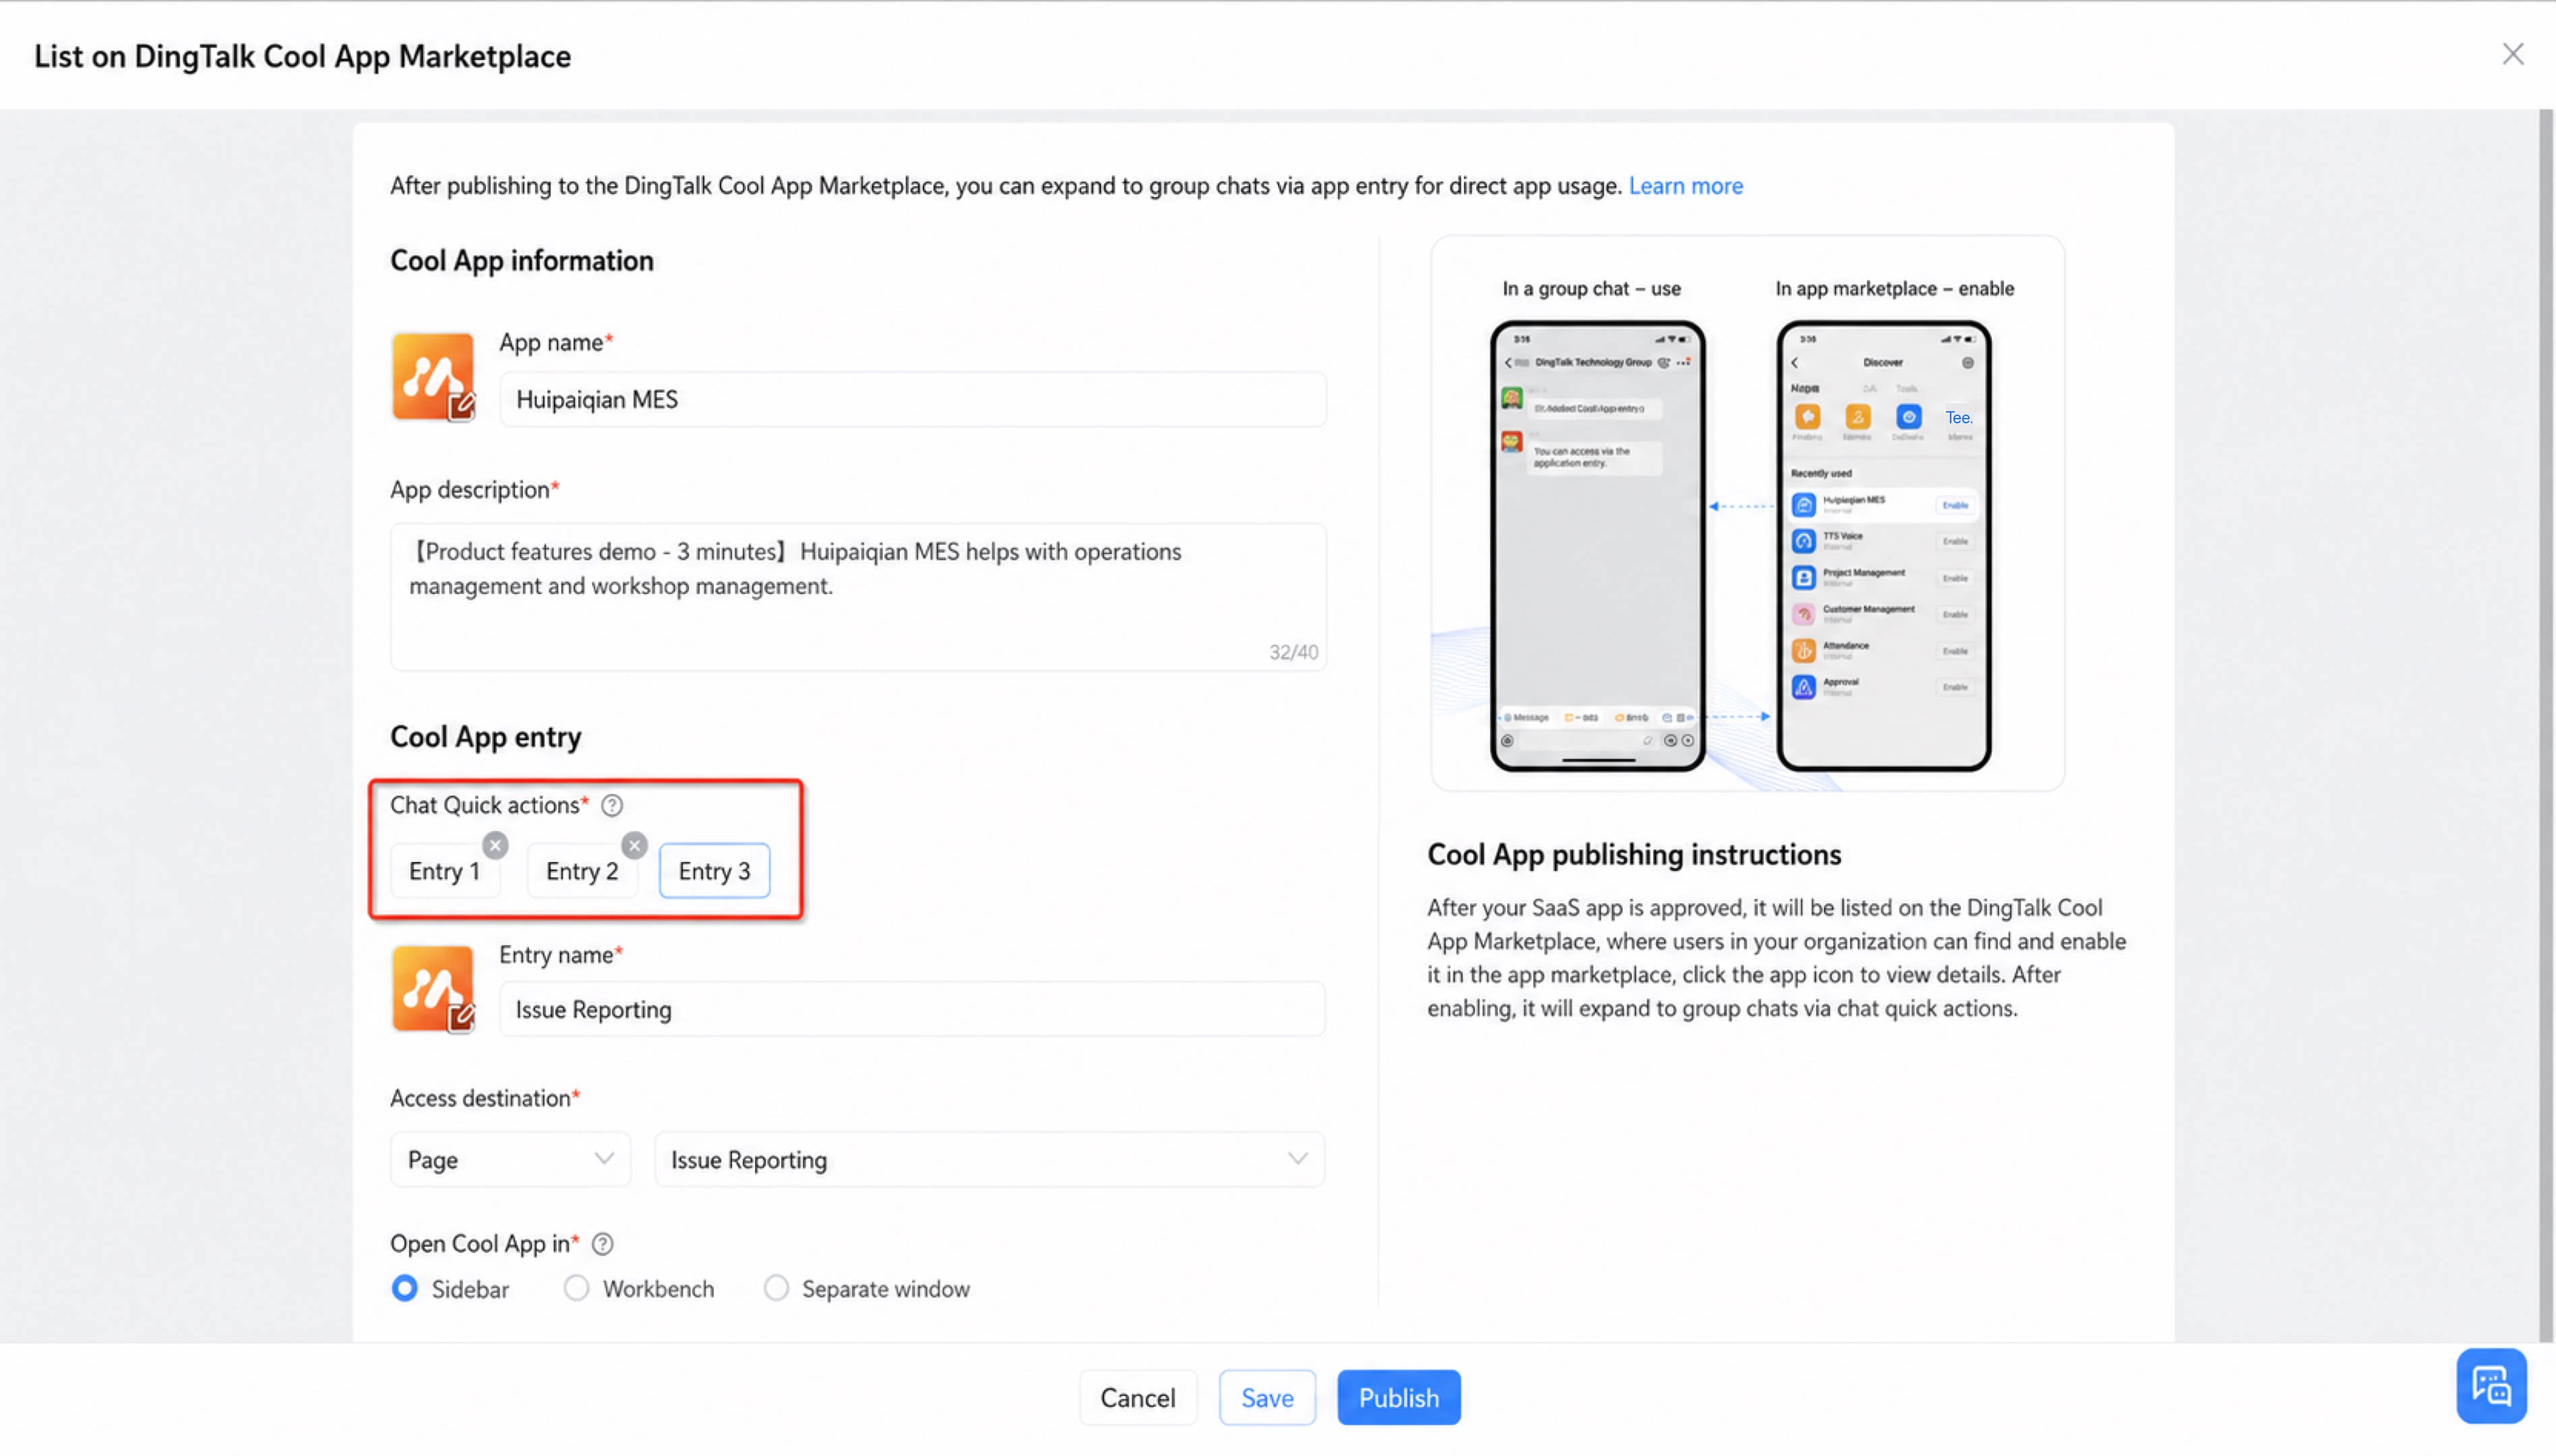
After filling in the information, click Save and publish to generate the coolappcode.
Copy the coolappcode of this Cool App, create an internal group in the current trial organization, and install and test it on mobile as shown below.
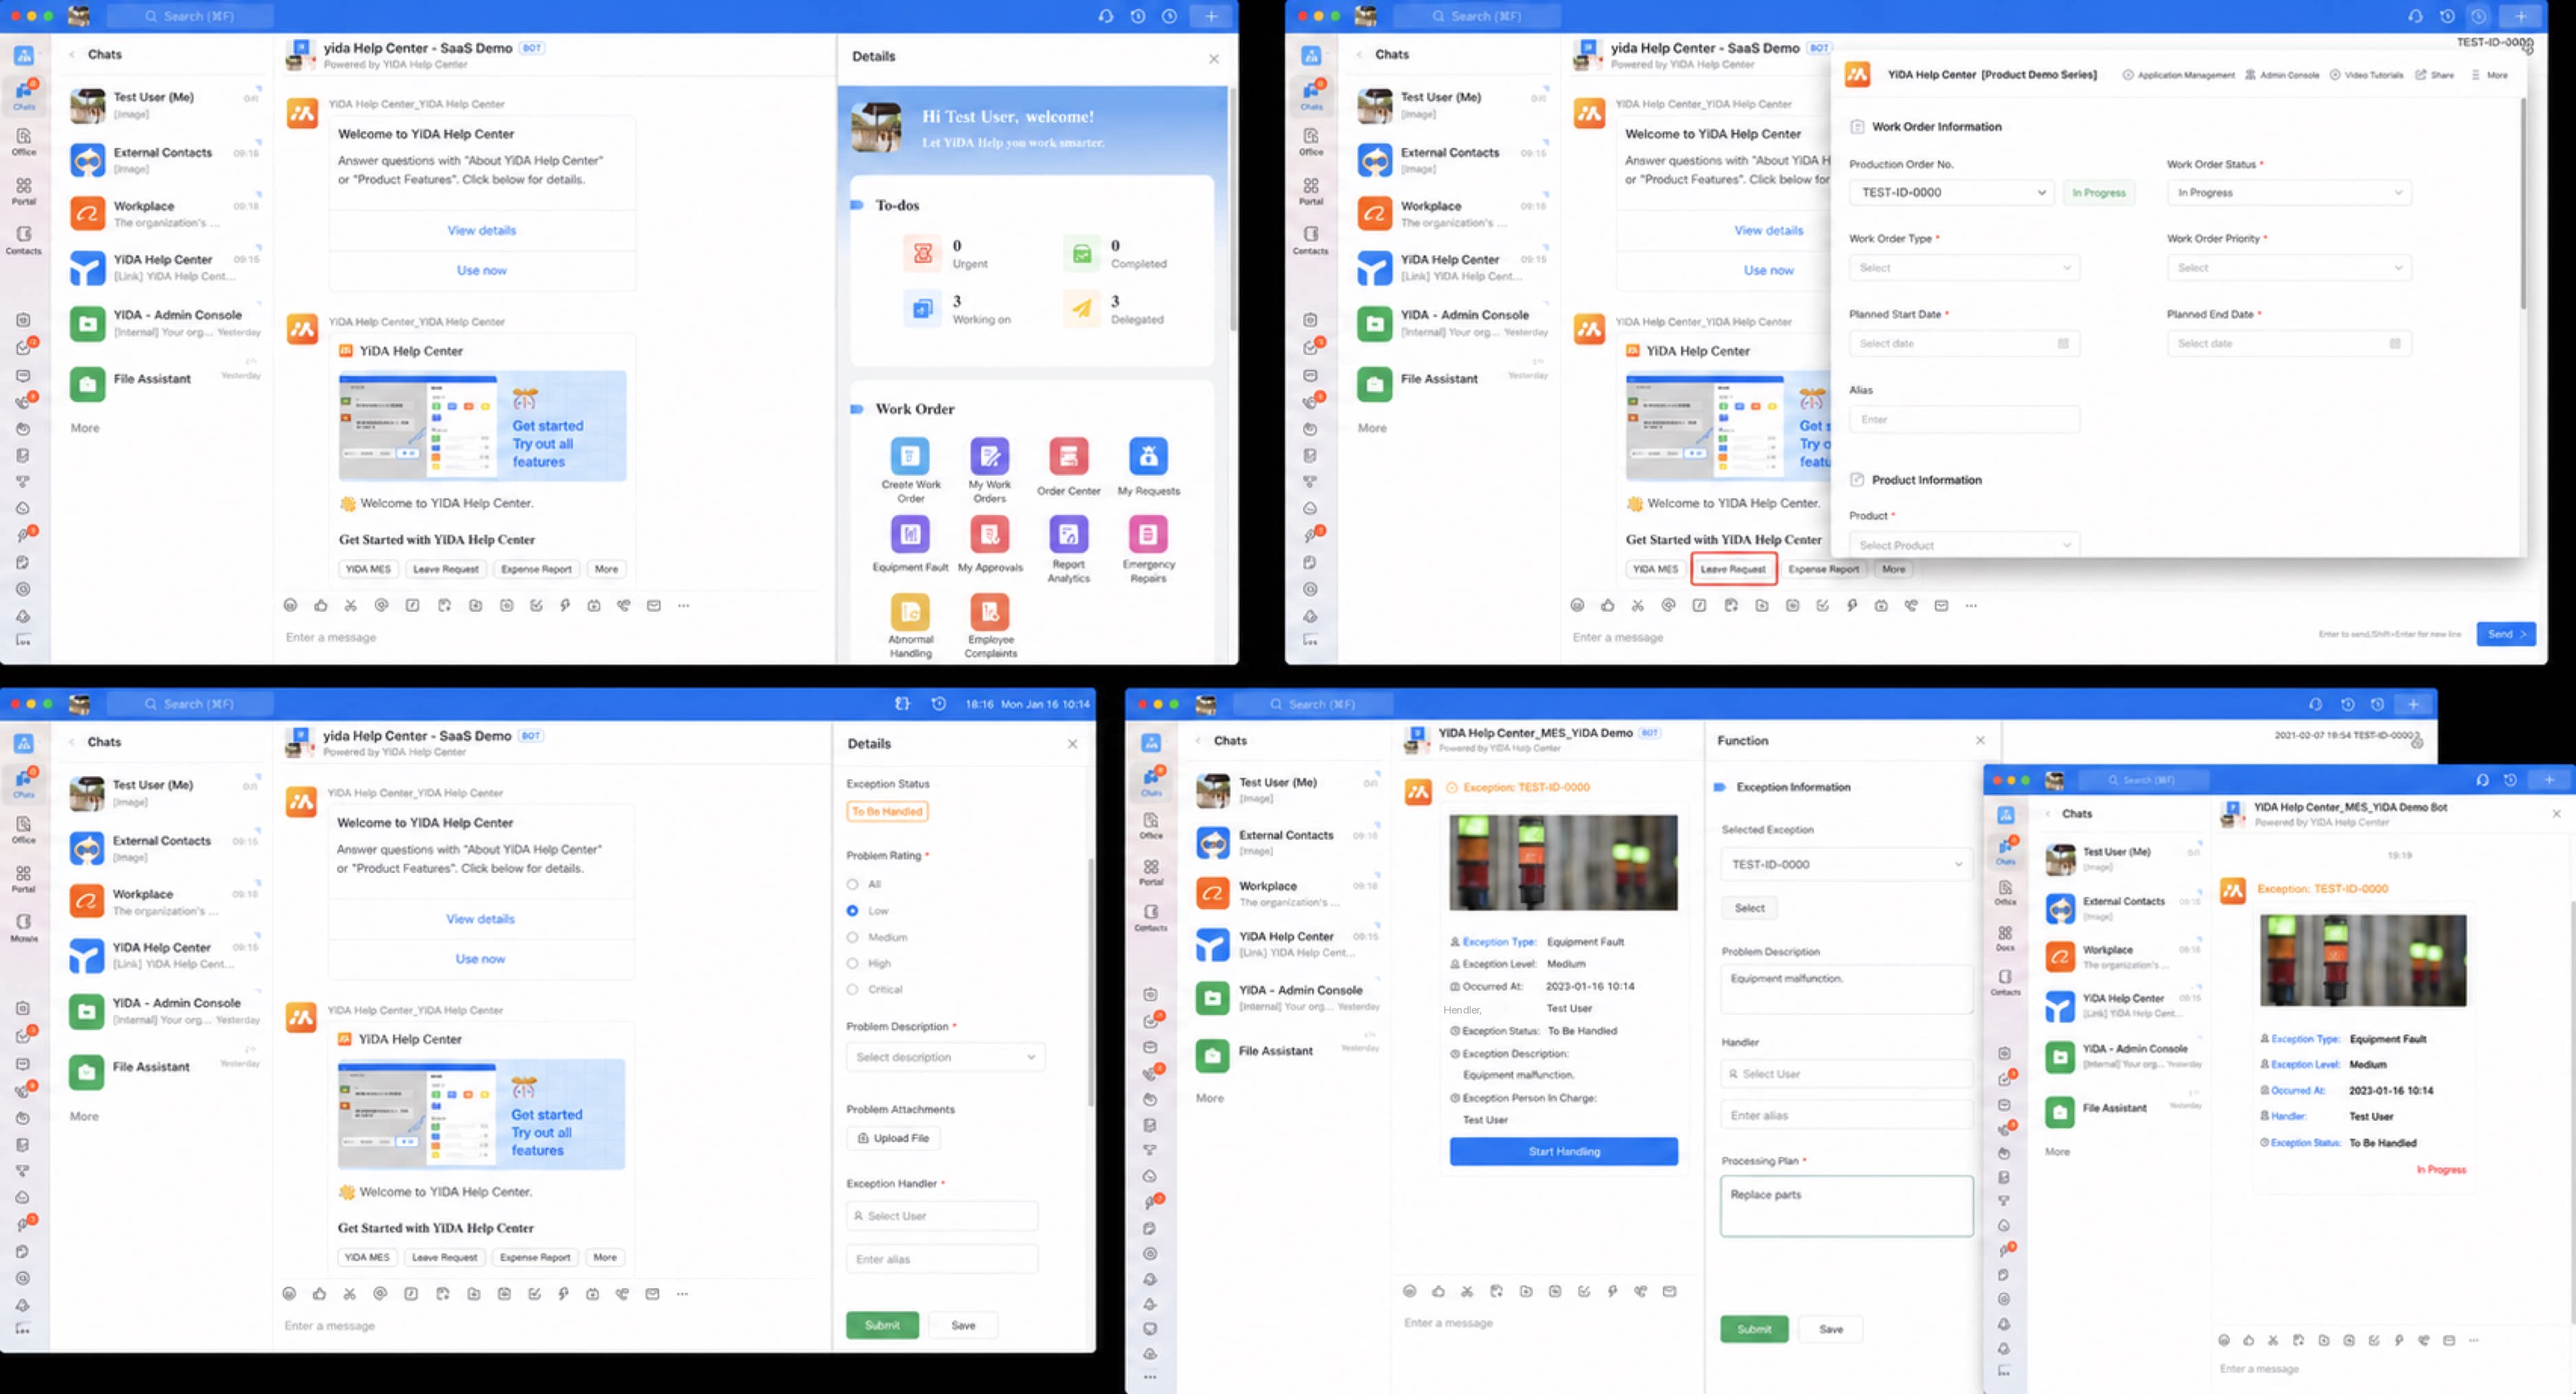
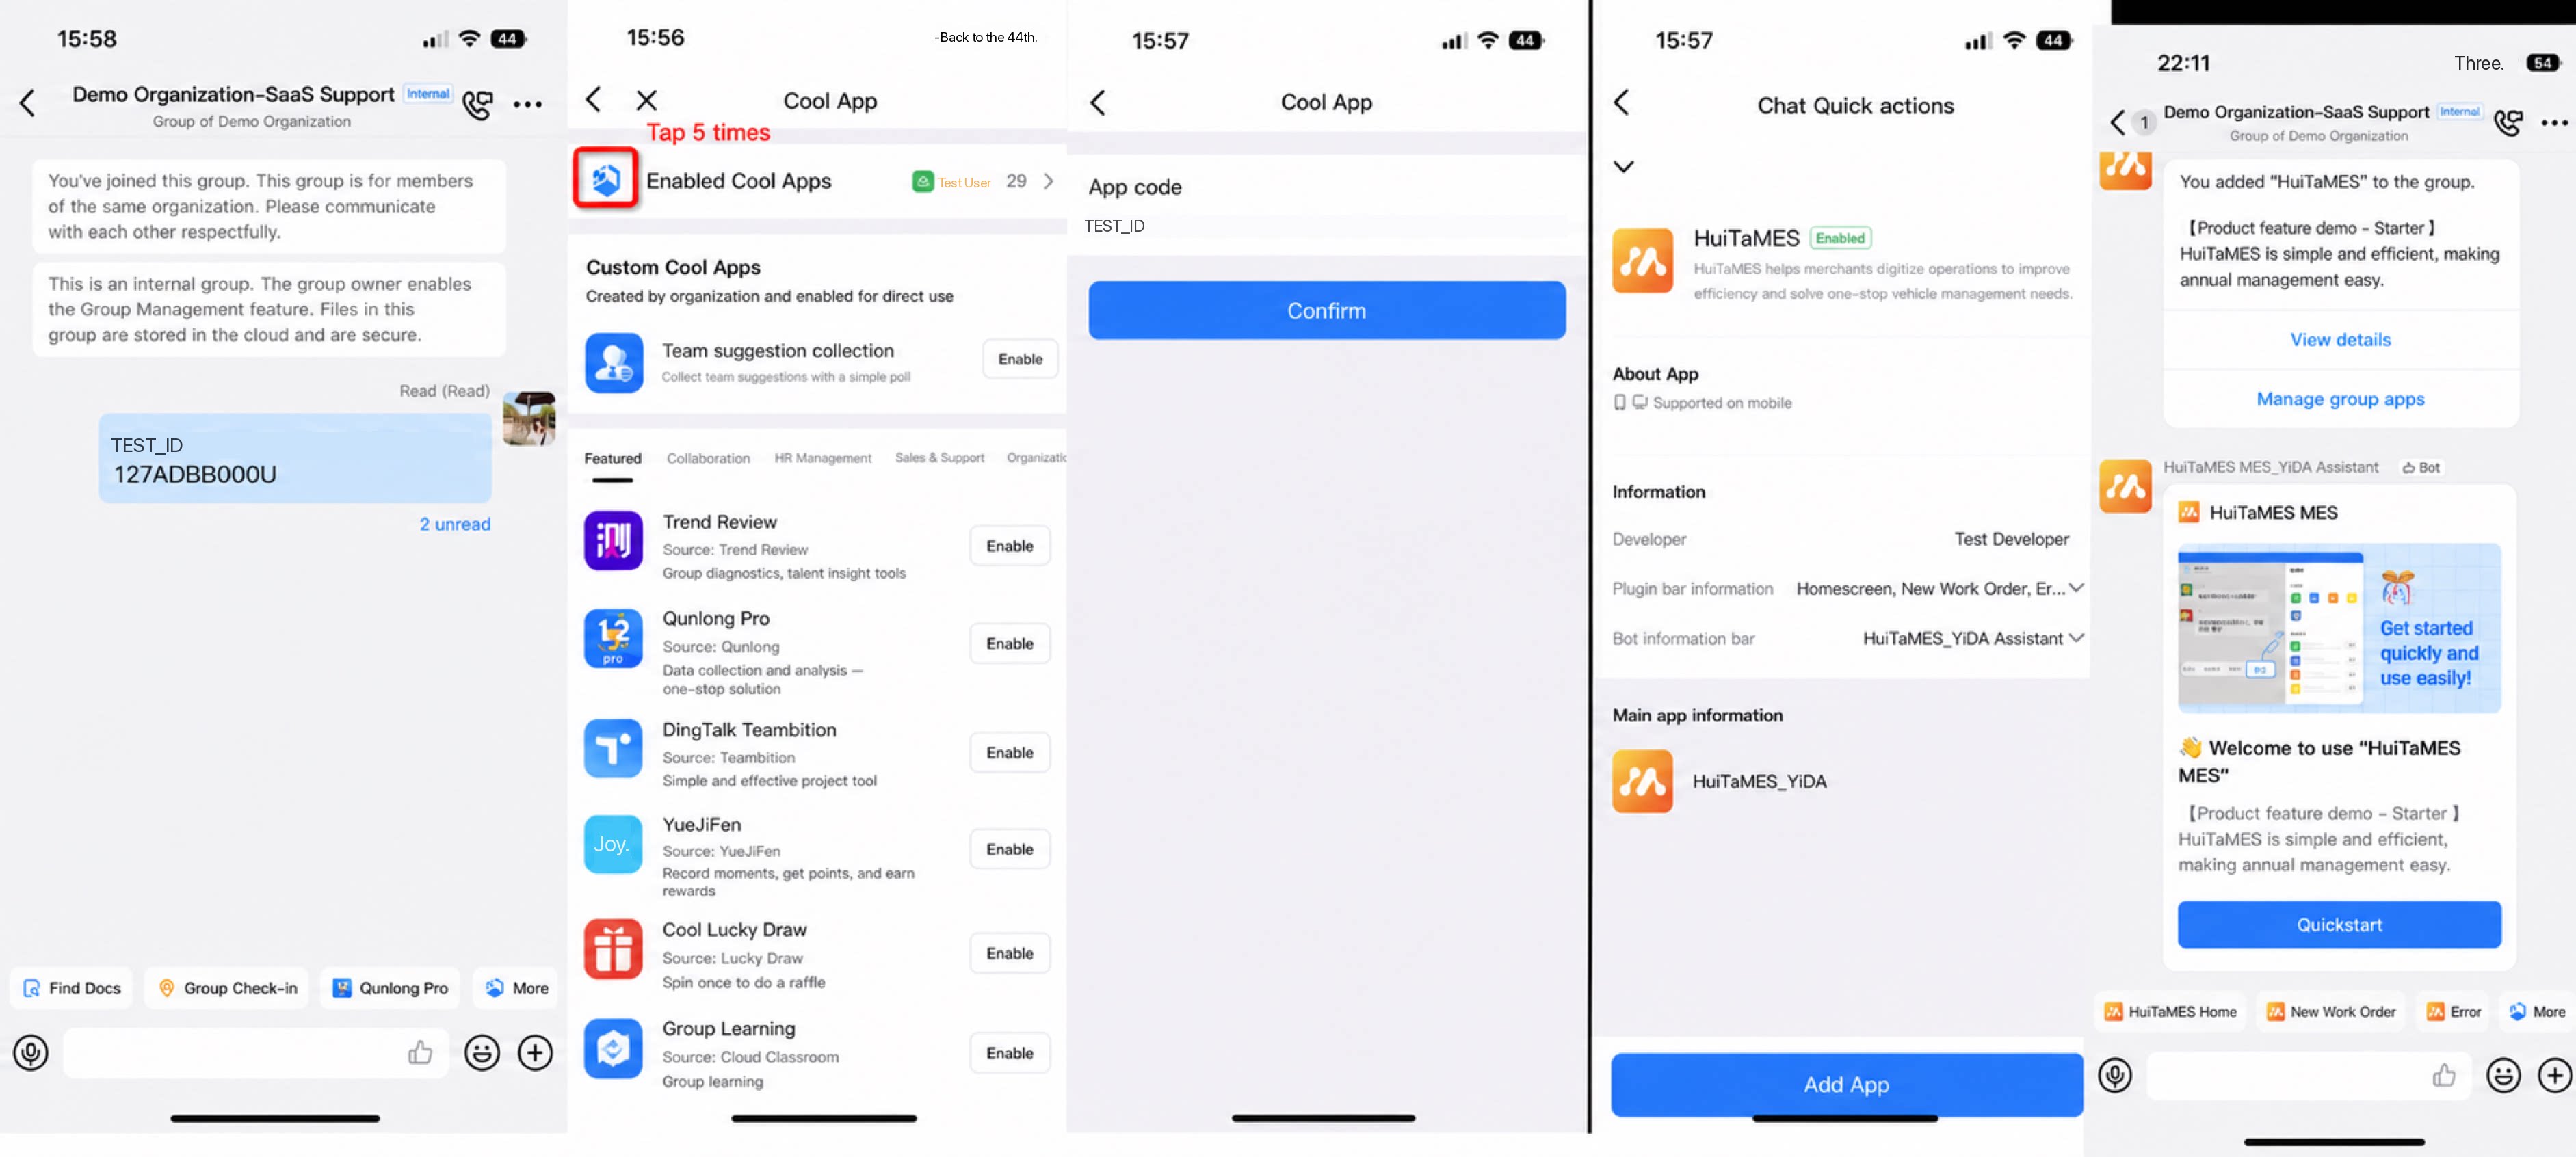
5 App Operations
5.1 Version Upgrades
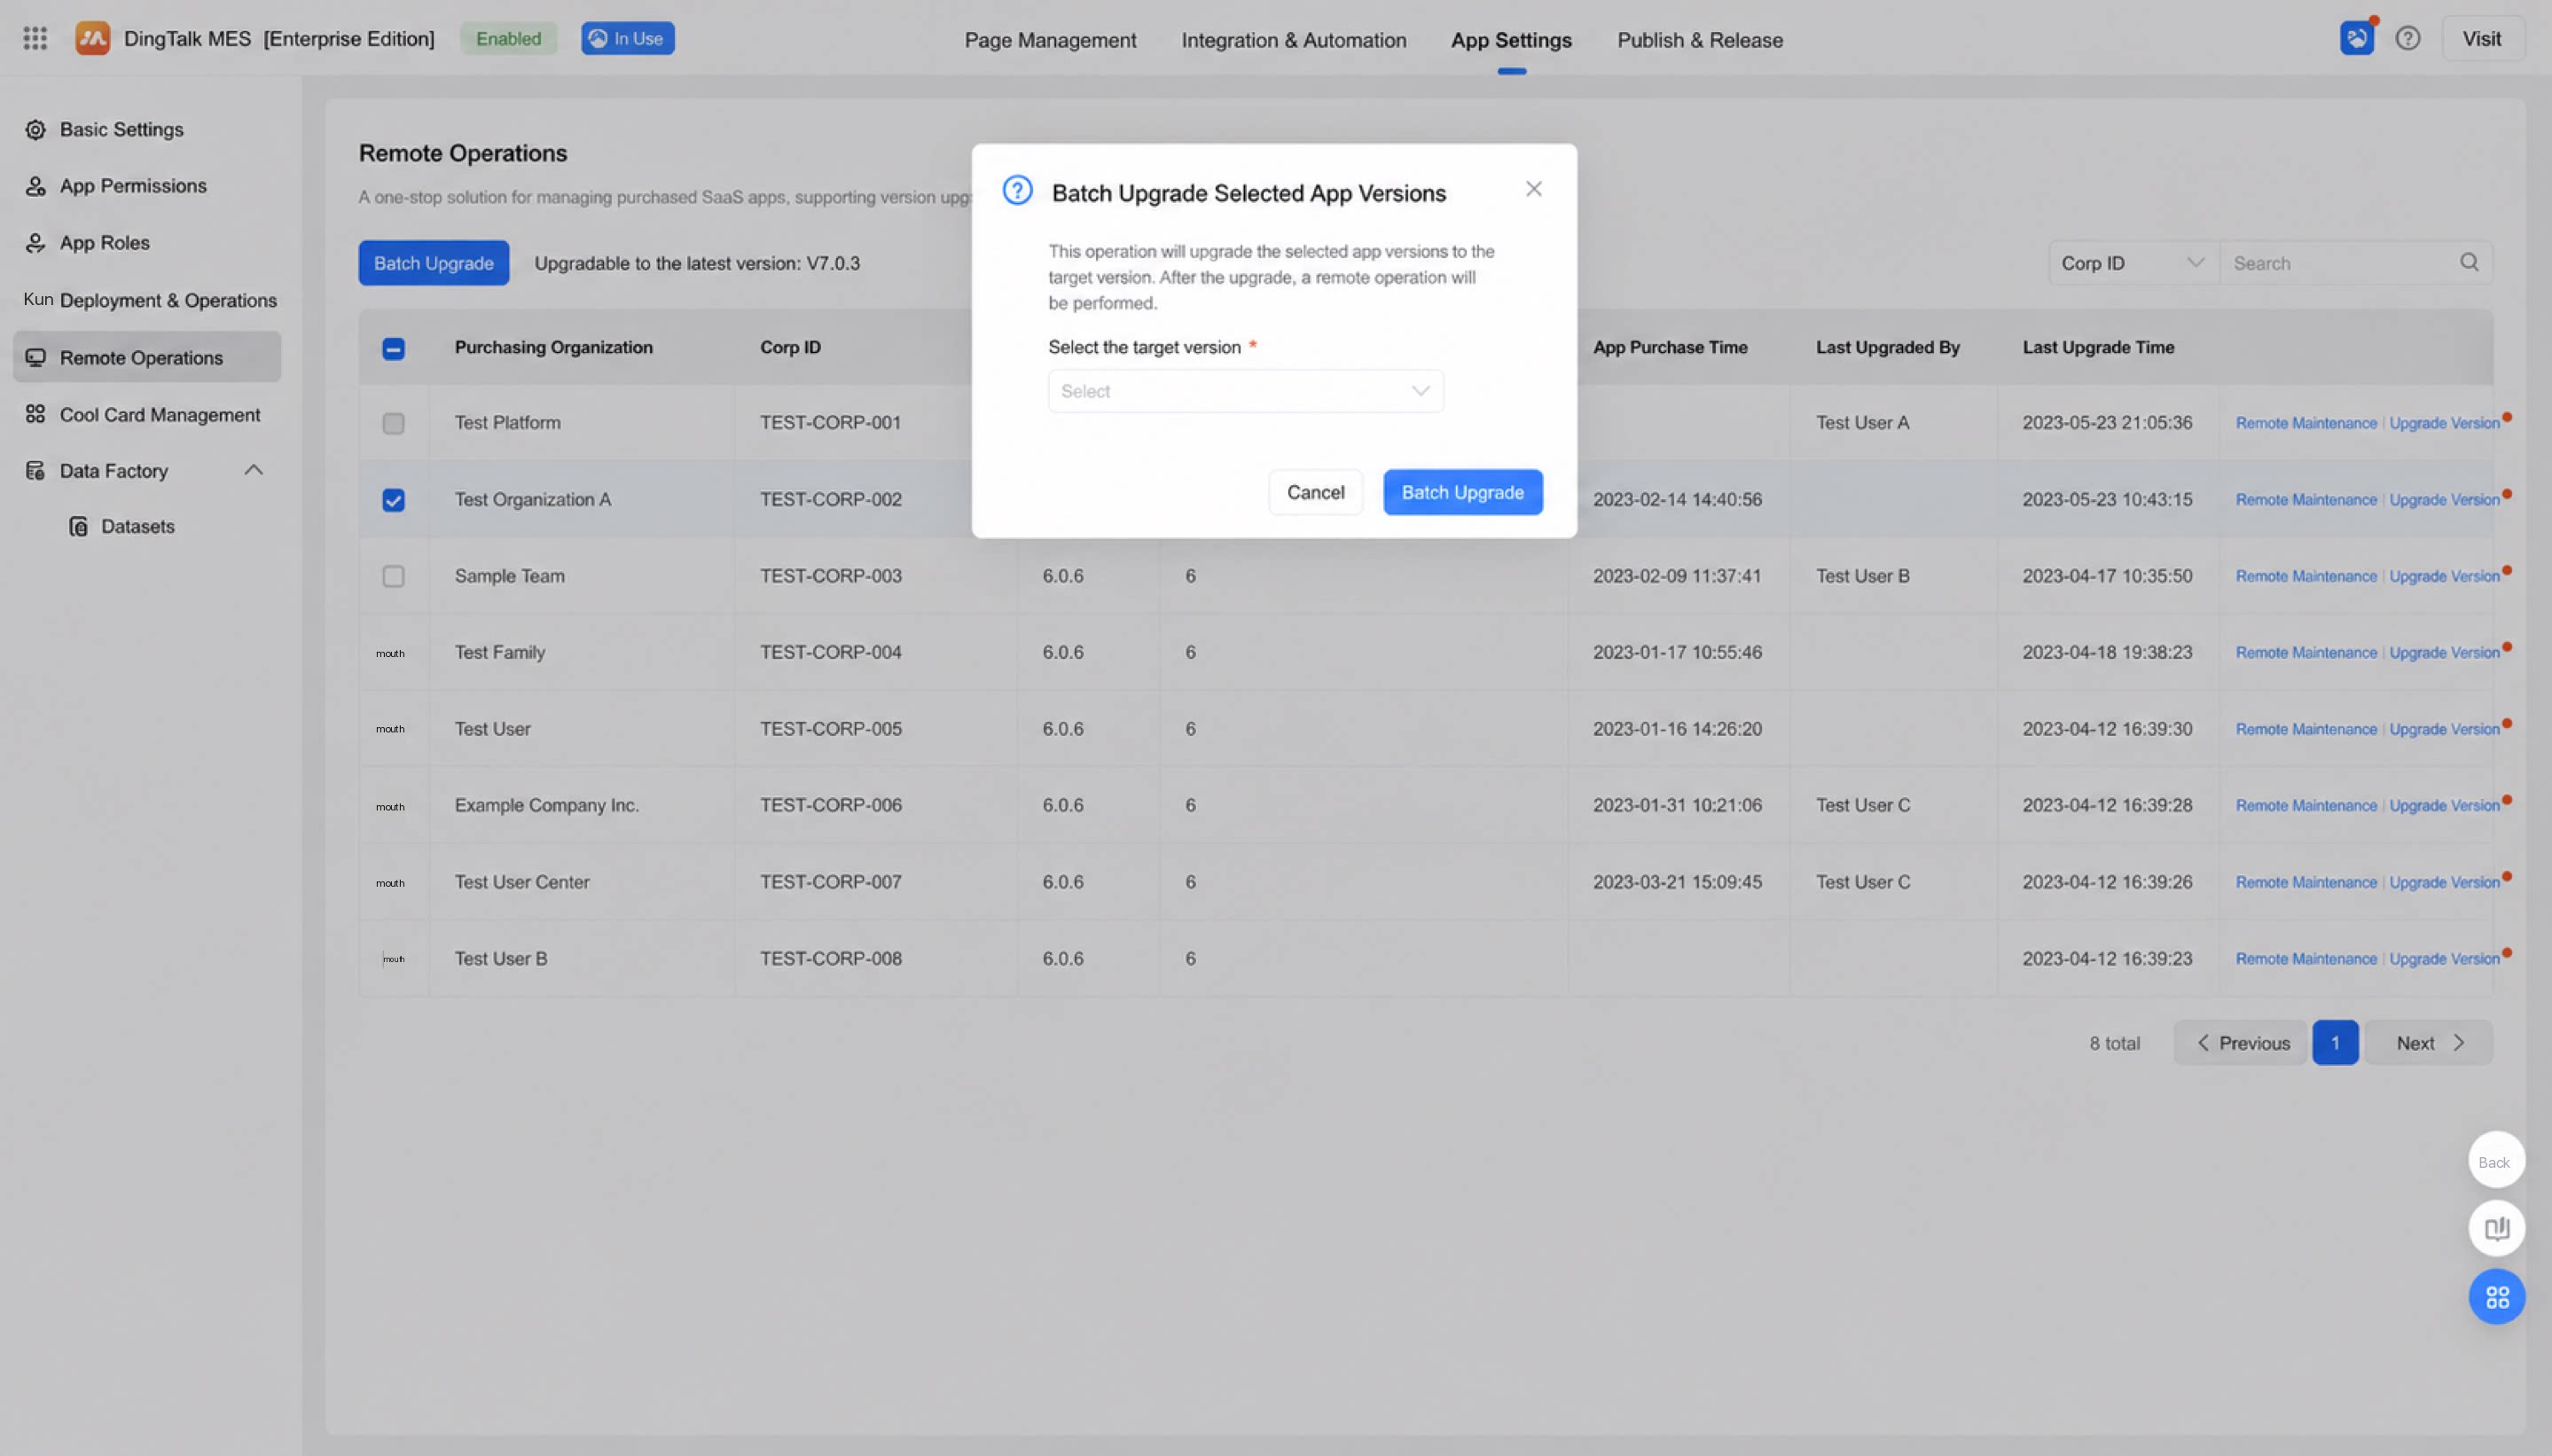
After the ISV-built SaaS app is published to the App Marketplace and customers subscribe, ISVs can iterate on features and, under “YiDA SaaS development workbench > App settings > Remote operations,” roll out version upgrades to specific organizations individually or in batches. Feature notes:- By default, upgrade options are the latest iterations released after the currently published version.
- Batch version upgrades across multiple paying organizations are supported.
Remote operations — coming soon.
5.2 App Activation Authorization Landing Page
Once a YiDA SaaS app is published to the DingTalk Open Platform and App Center, you can customize the authorization landing page. 👉Learn more Configuration notes:- Upload the PC and mobile authorization landing pages separately (only one image per channel is supported).
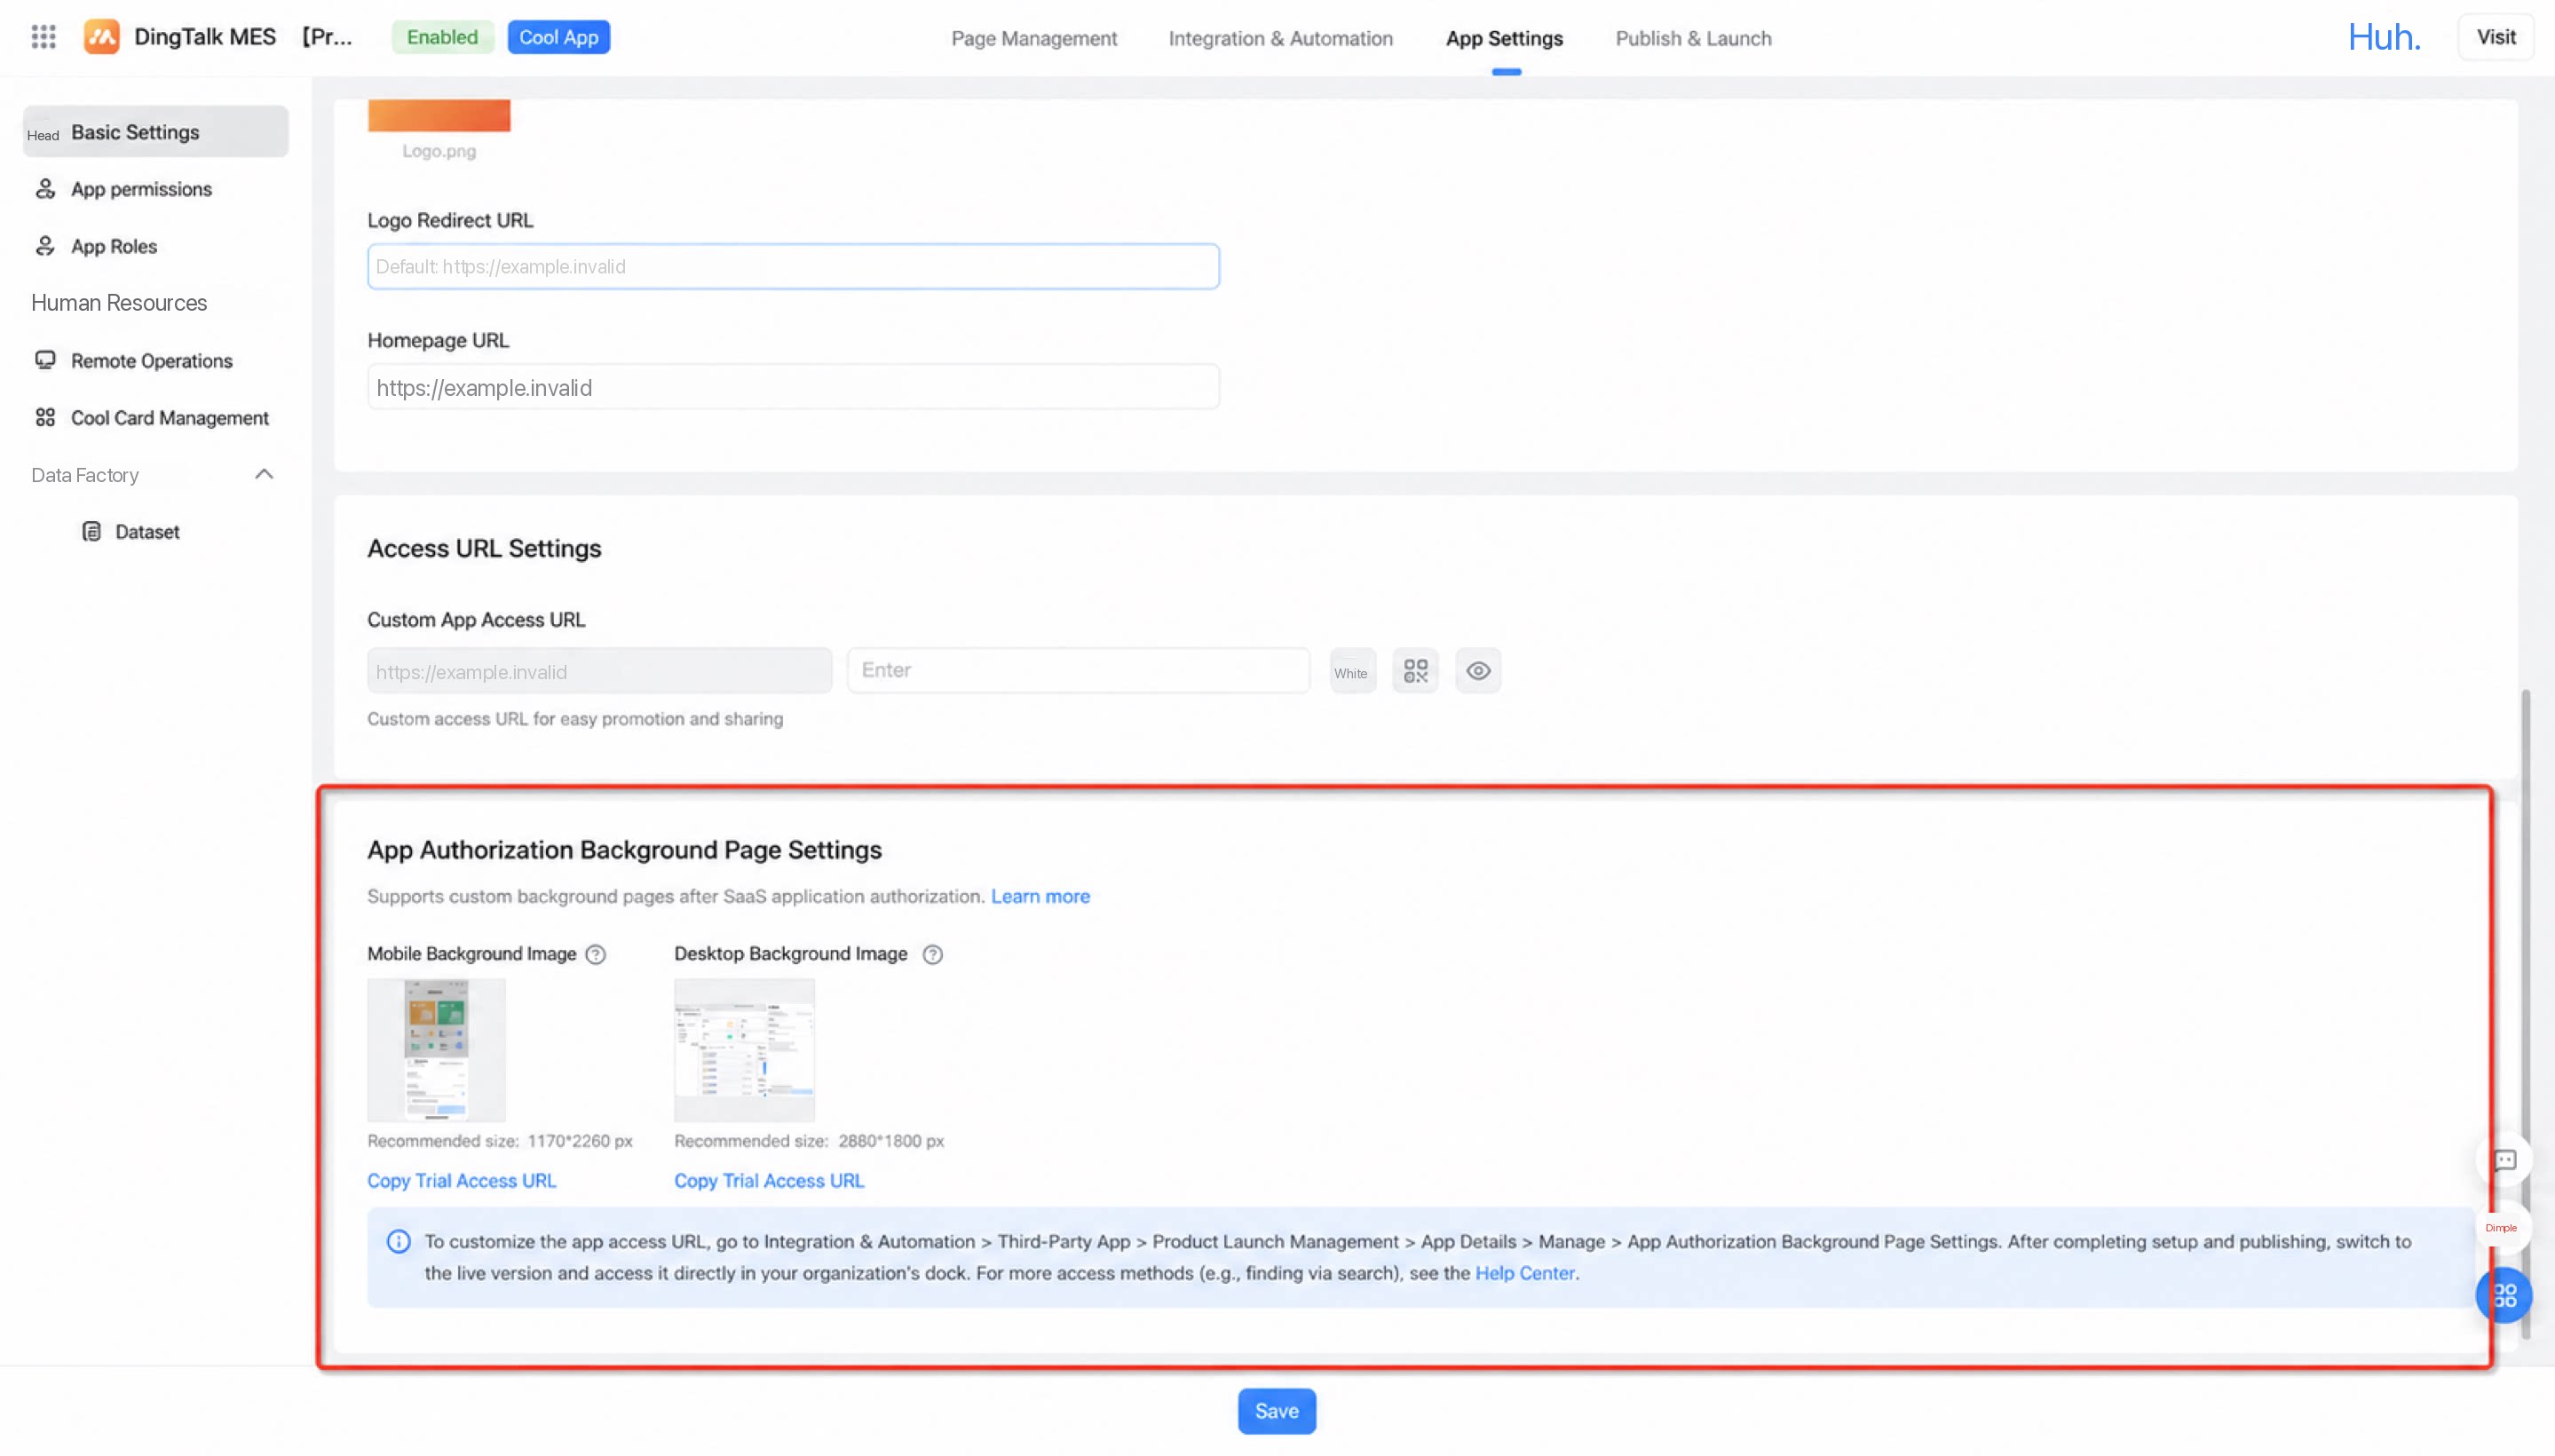
- After uploading, copy the “Trial access URL” and go to Partner Self-Operation Platform > Third-party enterprise app > Product publication management > App details > Manage > “In-app authorization settings.” Once integration is complete and your self-acceptance passes (👉 learn more about the acceptance process), the SaaS app can be promoted across more DingTalk online channels, such as DingTalk Search.
Mobile view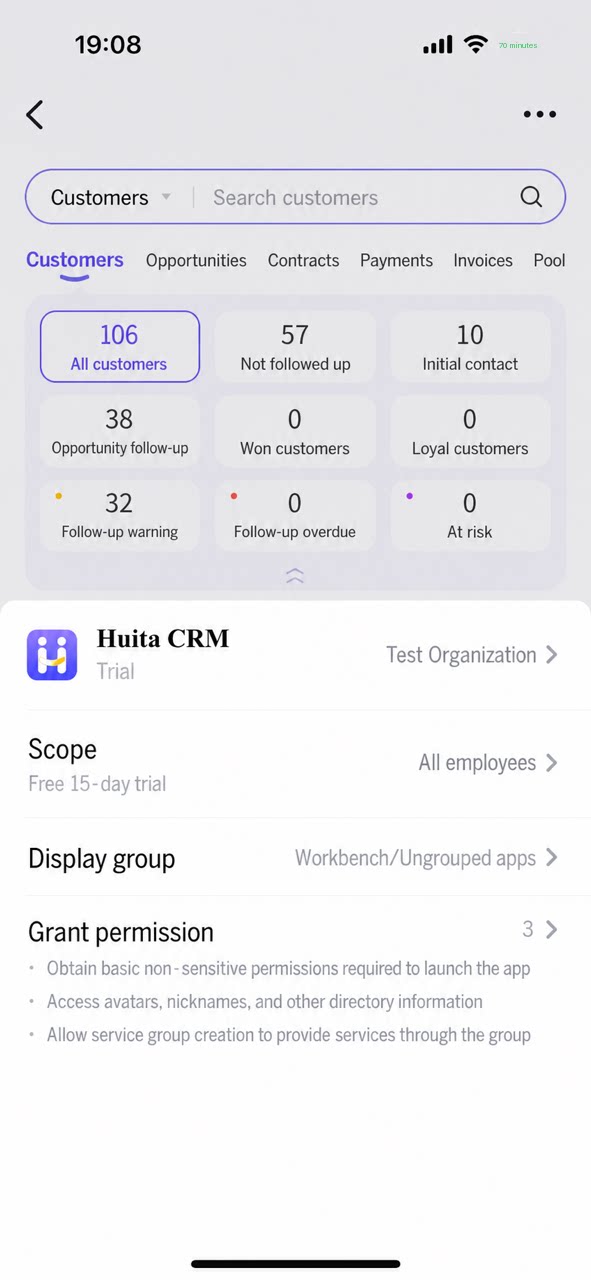 | PC view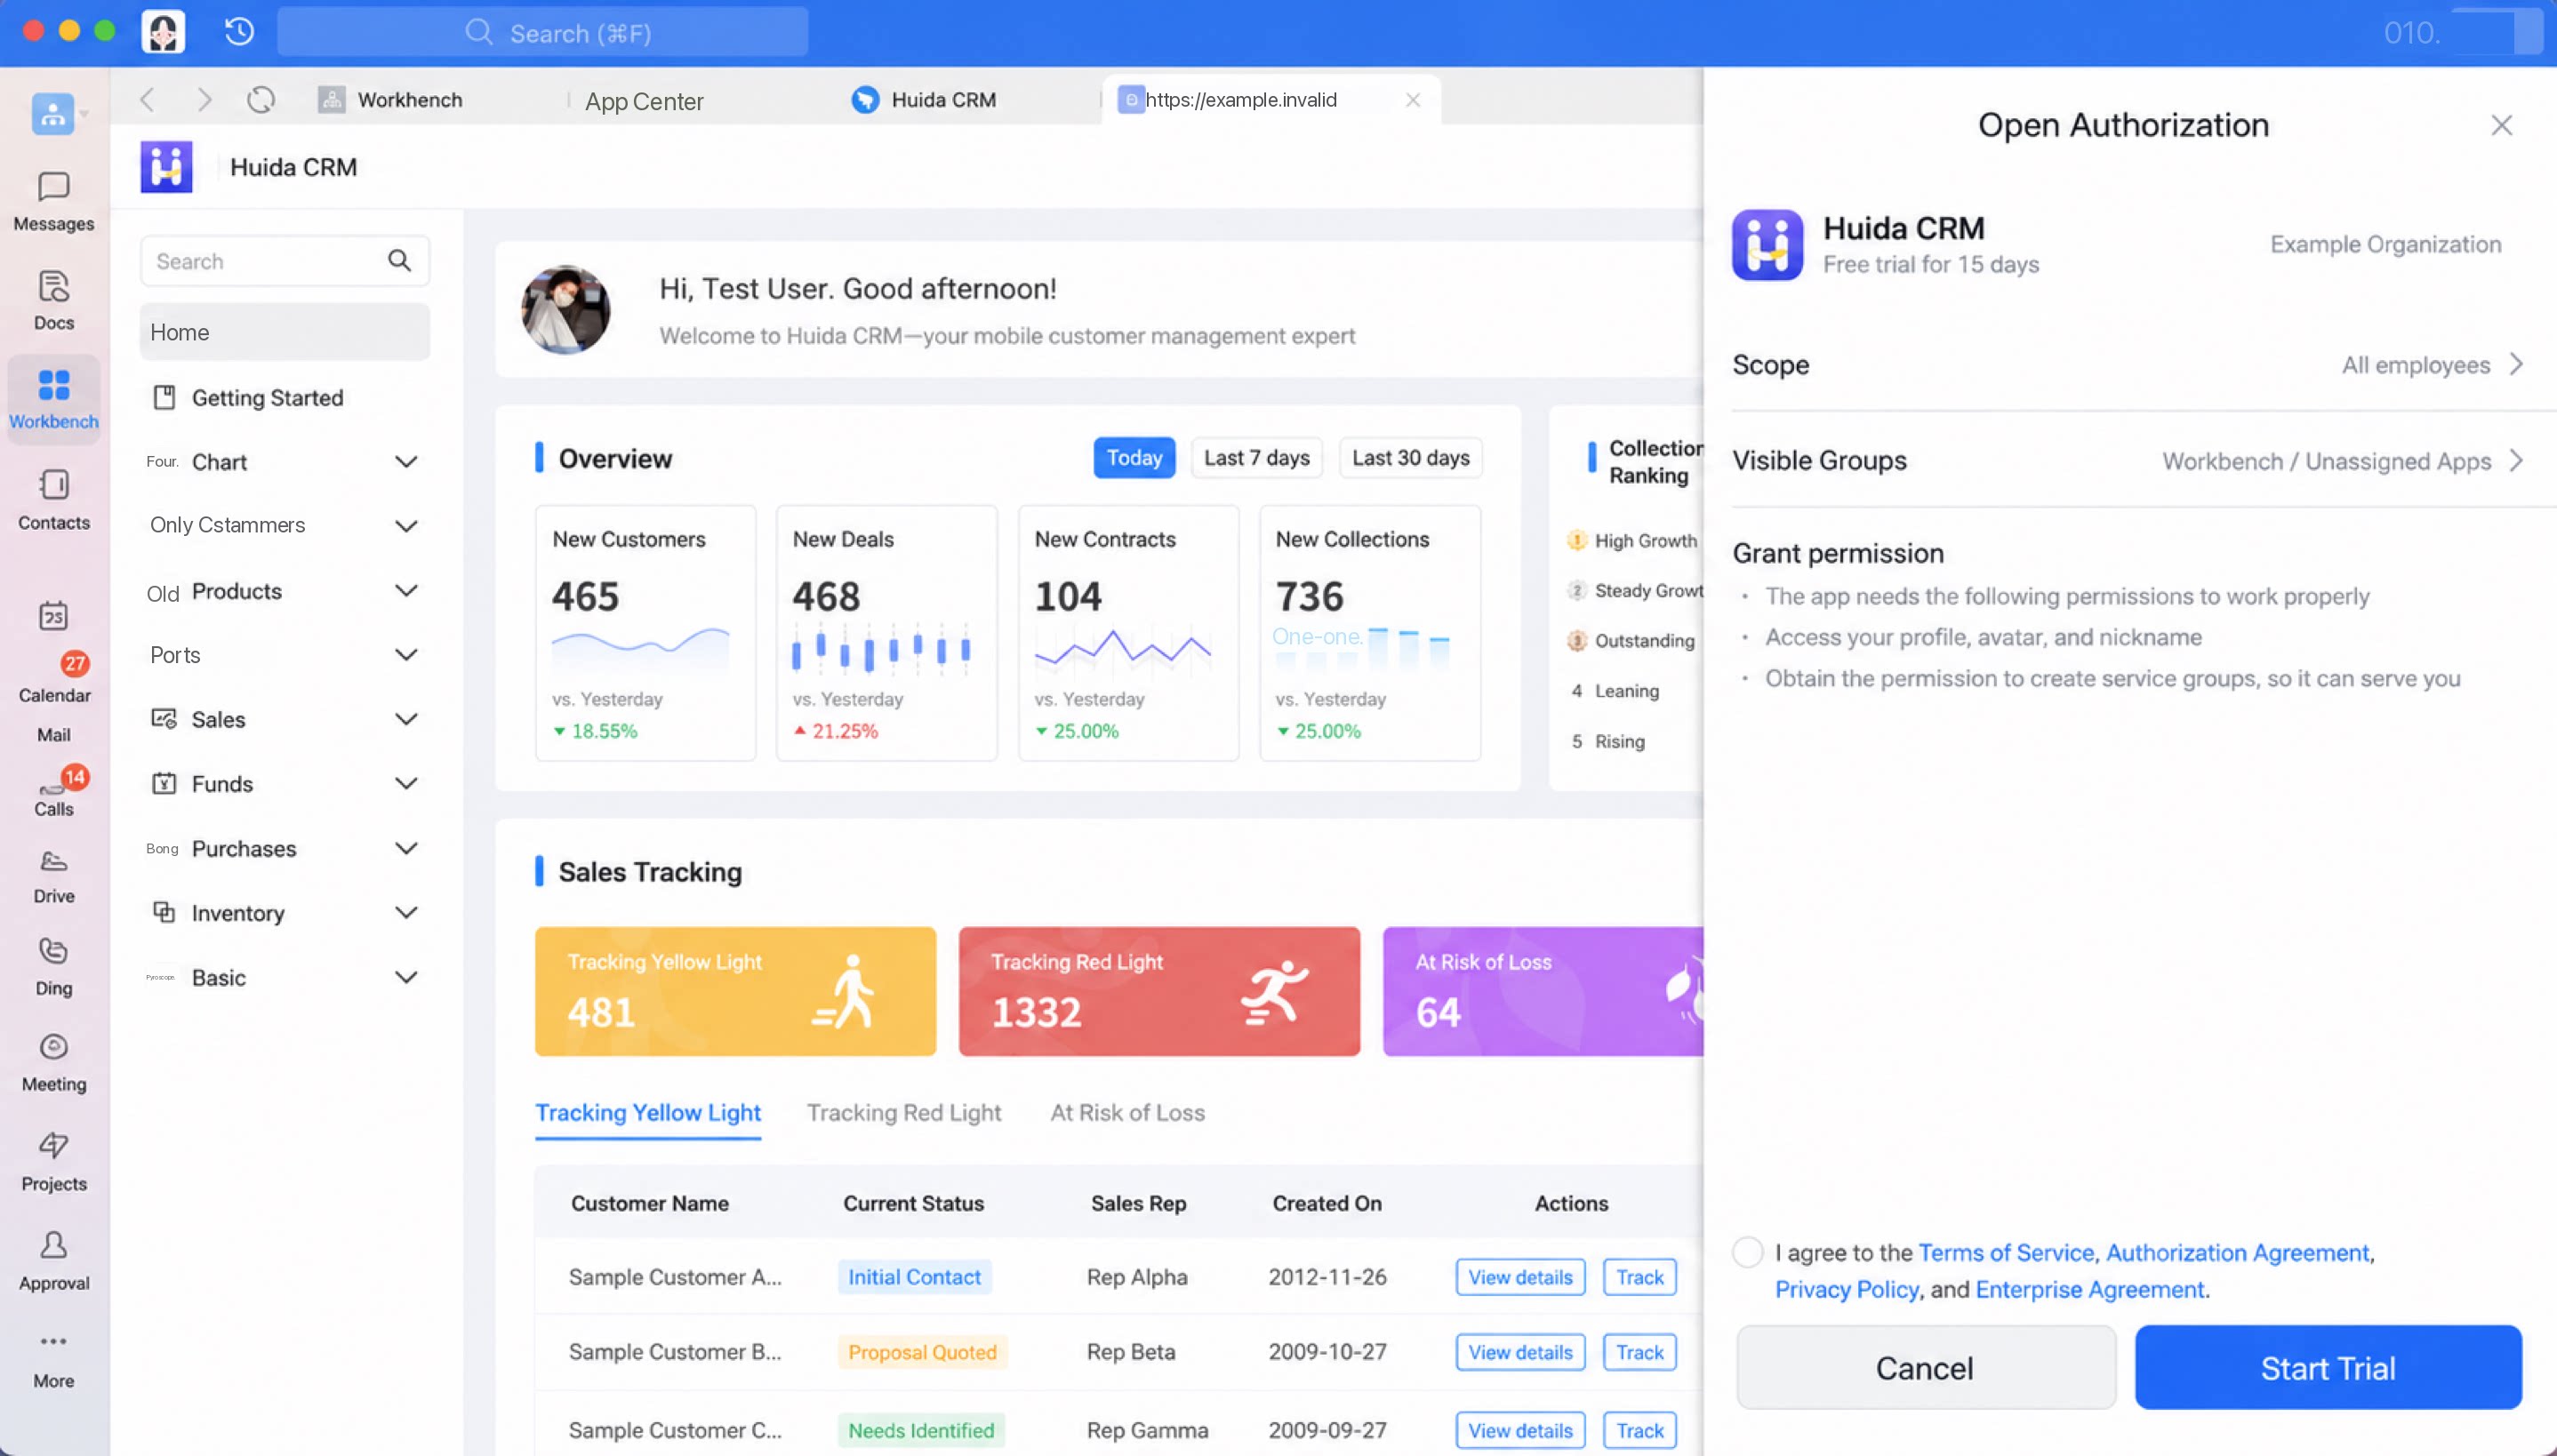 |
|---|
6 FAQ
Q1: How do I modify form fields in a subscribed SaaS app?
Q1: How do I modify form fields in a subscribed SaaS app?
Q2: Can I delete components from a published form?
Q2: Can I delete components from a published form?
Q3: Can a published custom page carry a fixed CorpId?
Q3: Can a published custom page carry a fixed CorpId?
Q4: What should I do if Cool App installation fails?
Q4: What should I do if Cool App installation fails?
Q5: When a custom page redirects to a form page, how do I pass the current group ID?
Q5: When a custom page redirects to a form page, how do I pass the current group ID?
Q6: How do I hide the menu and navigation bar on a SaaS app page?
Q6: How do I hide the menu and navigation bar on a SaaS app page?