Chats
Chats Calendar
 Meetings
 Contacts
 Mail
Mail Docs
Docs Drive
Drive AI Table
 AI Minutes
 Attendance
 Approval
 YiDA
YiDA Admin Console
Enable App Governance
- Sign in to the YiDA workbench as a platform admin, go to the platform management page, click Governance Center, and turn On App governance.
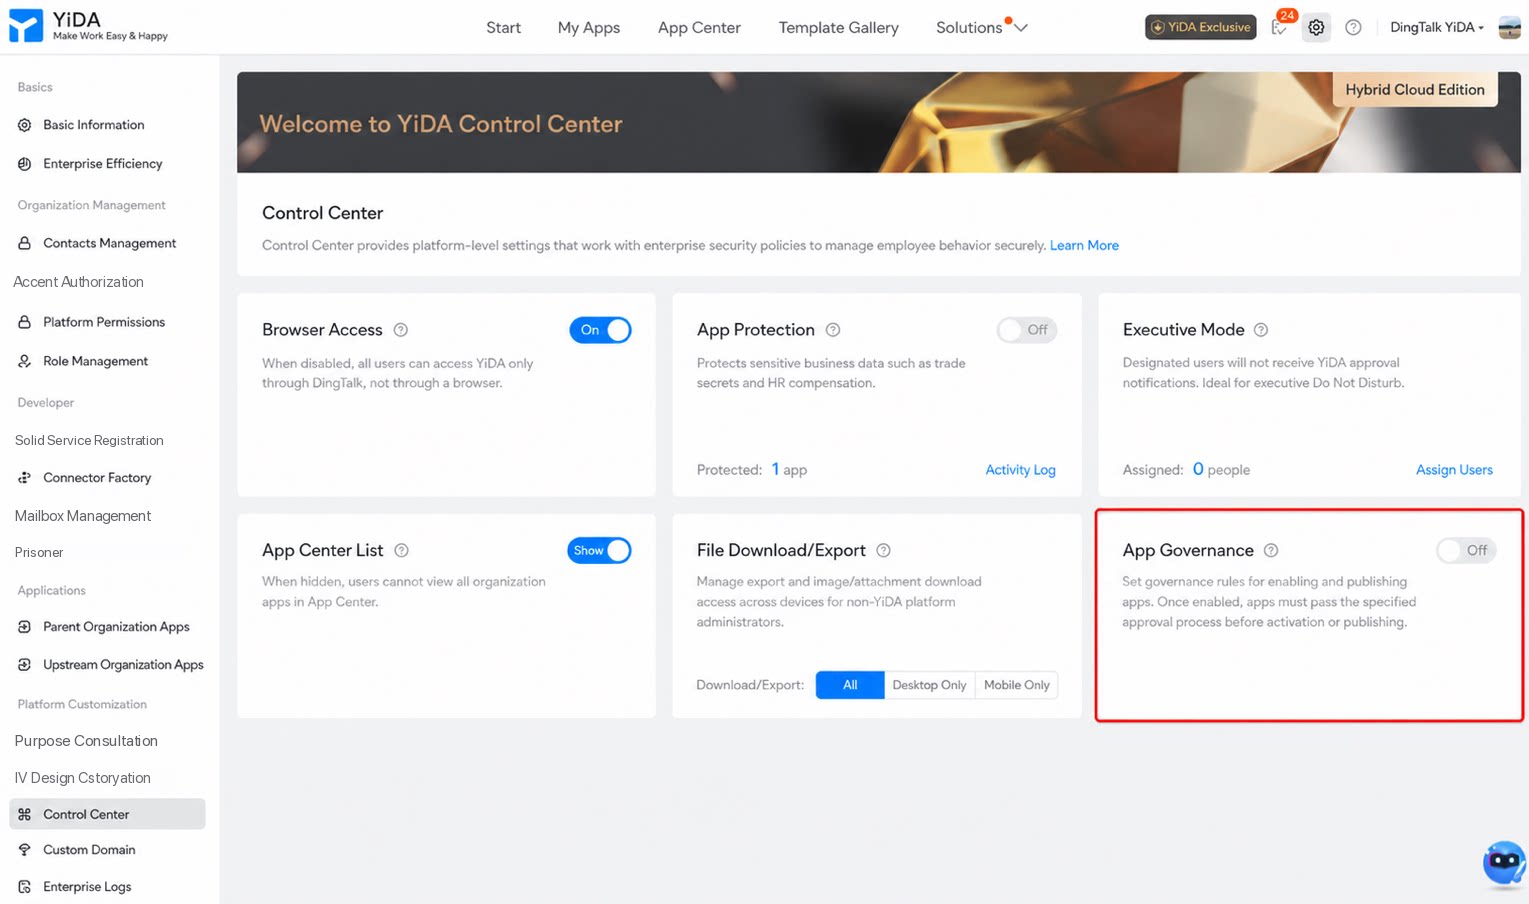
- Enable the governance toggle and select the publishing channels to govern.
- Configure the governance scope.
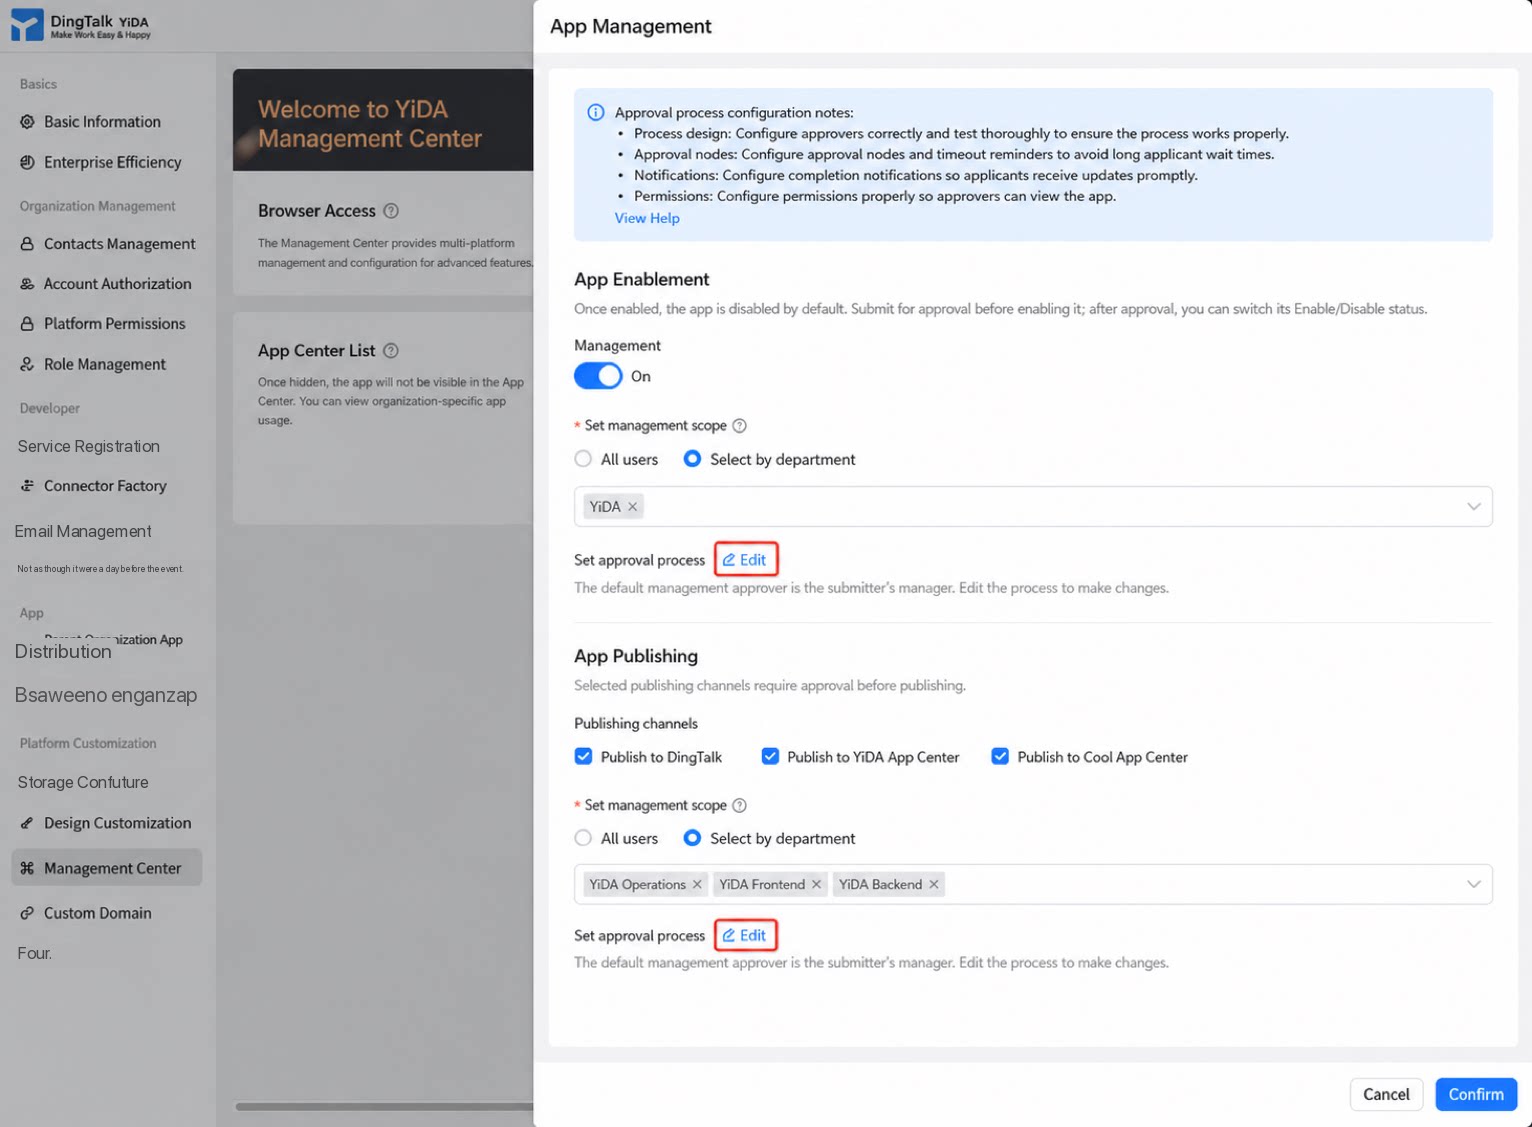
- Configure the governance approval process.
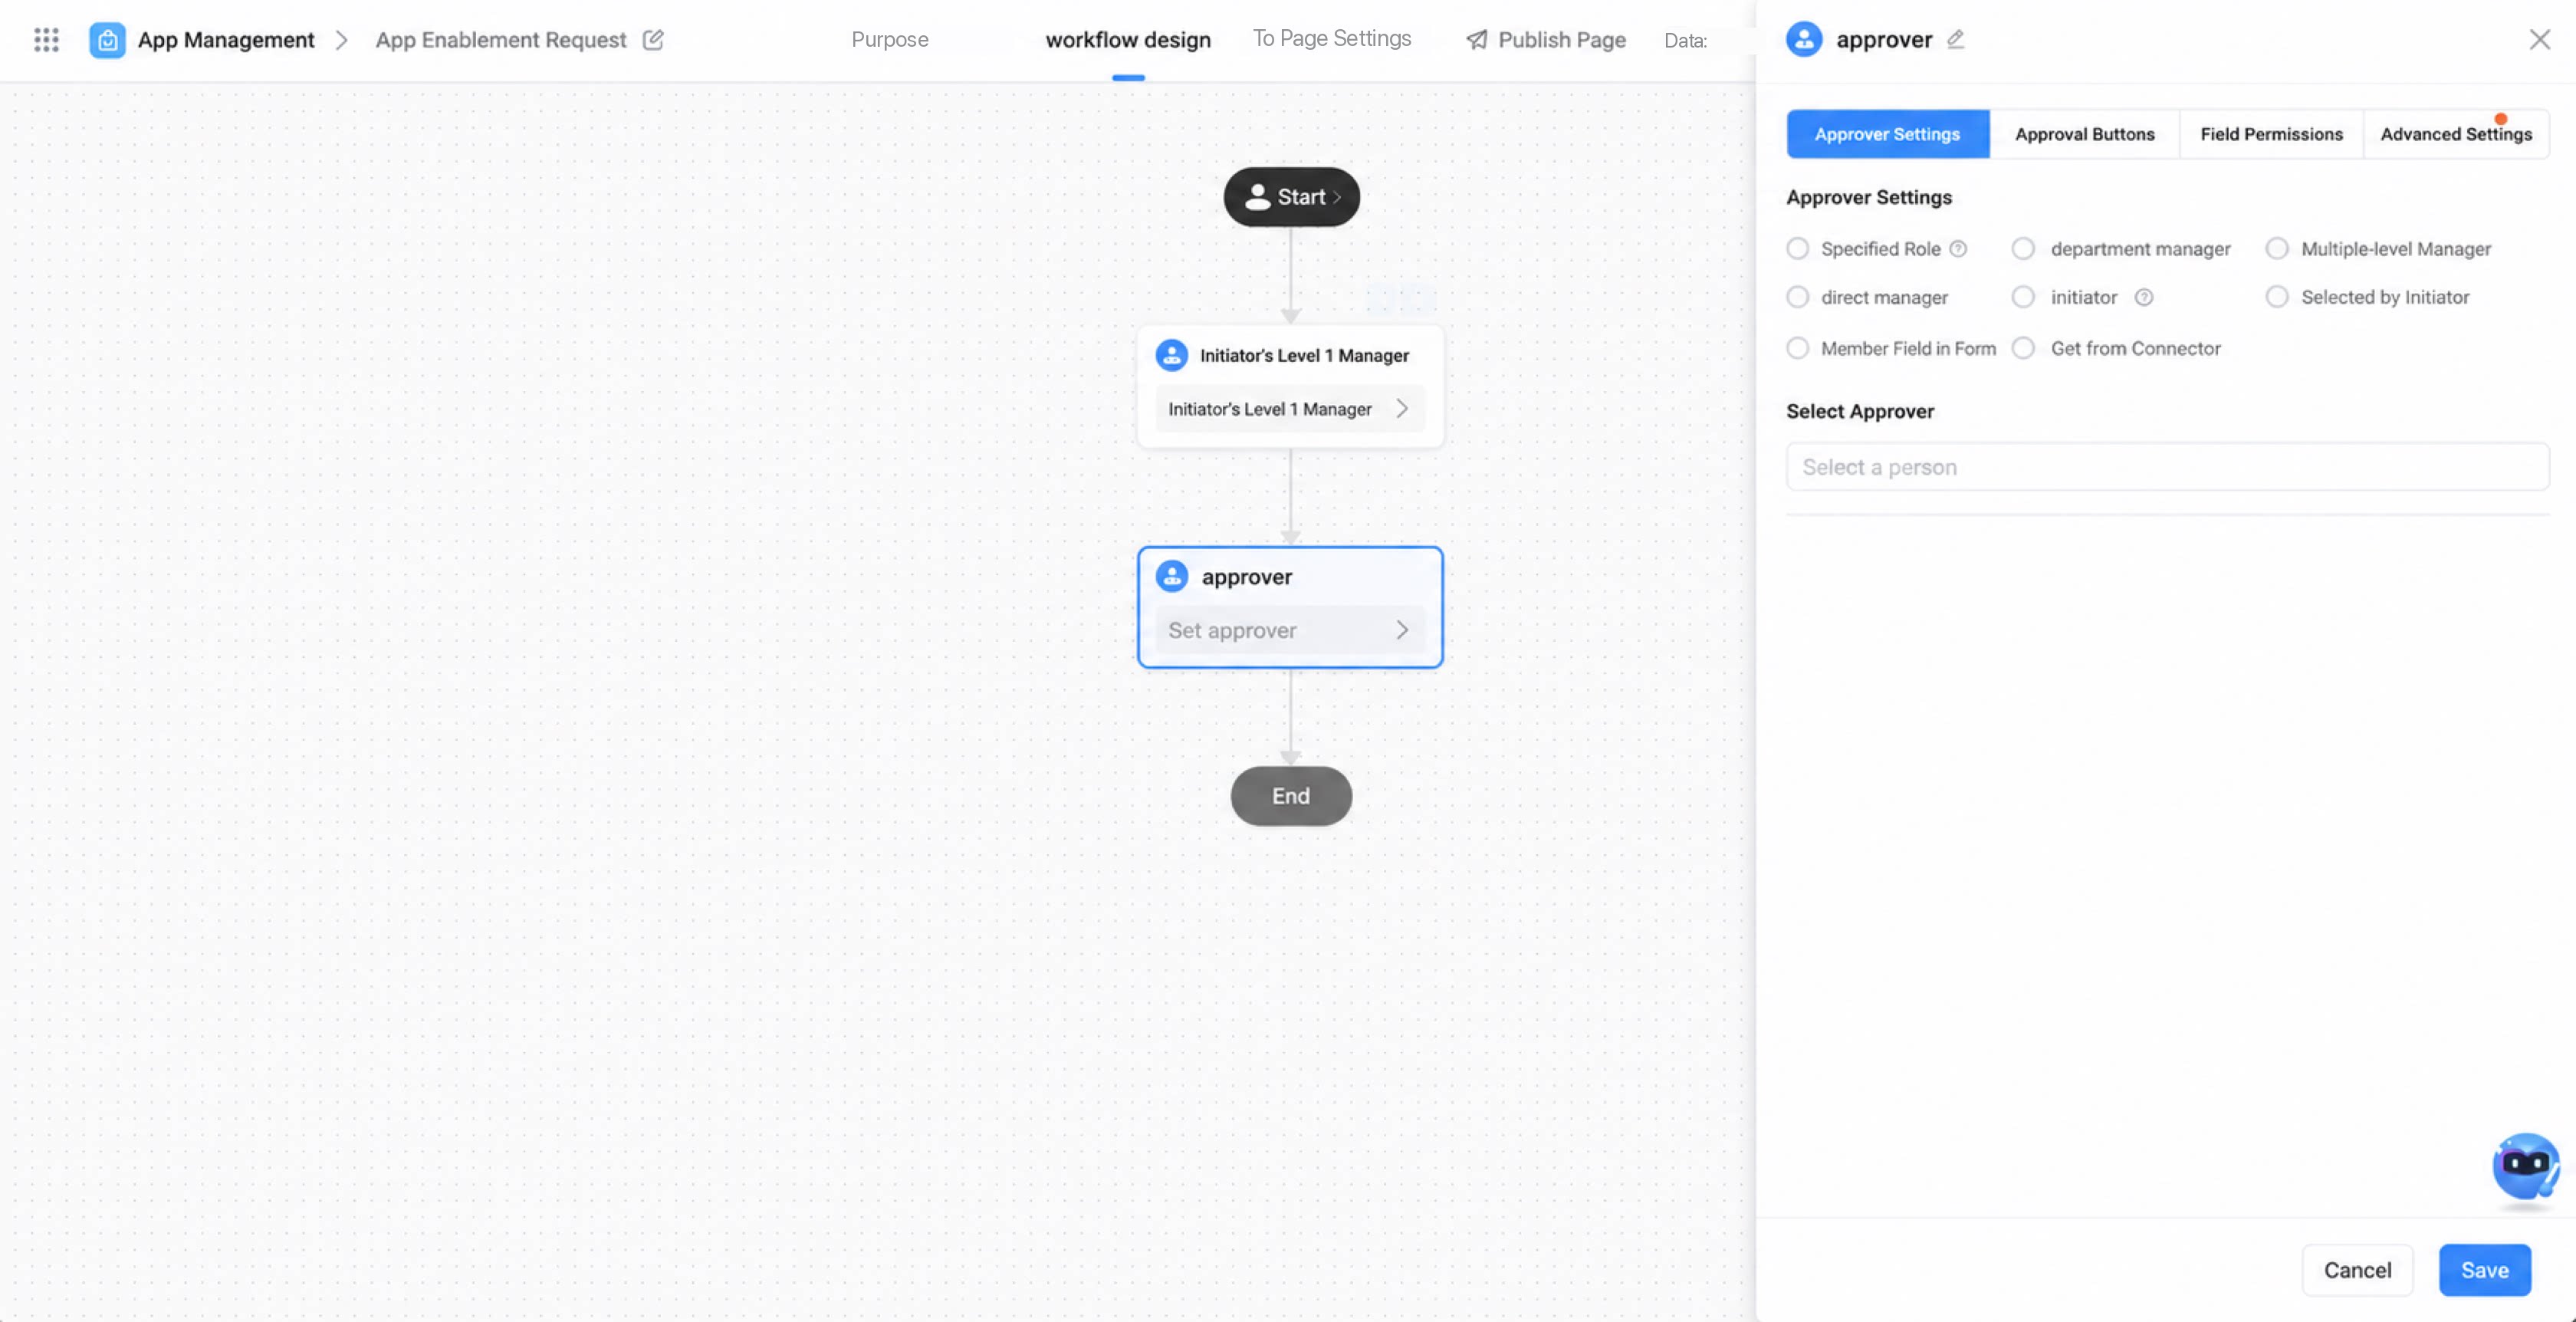
Approval for Enable Requests
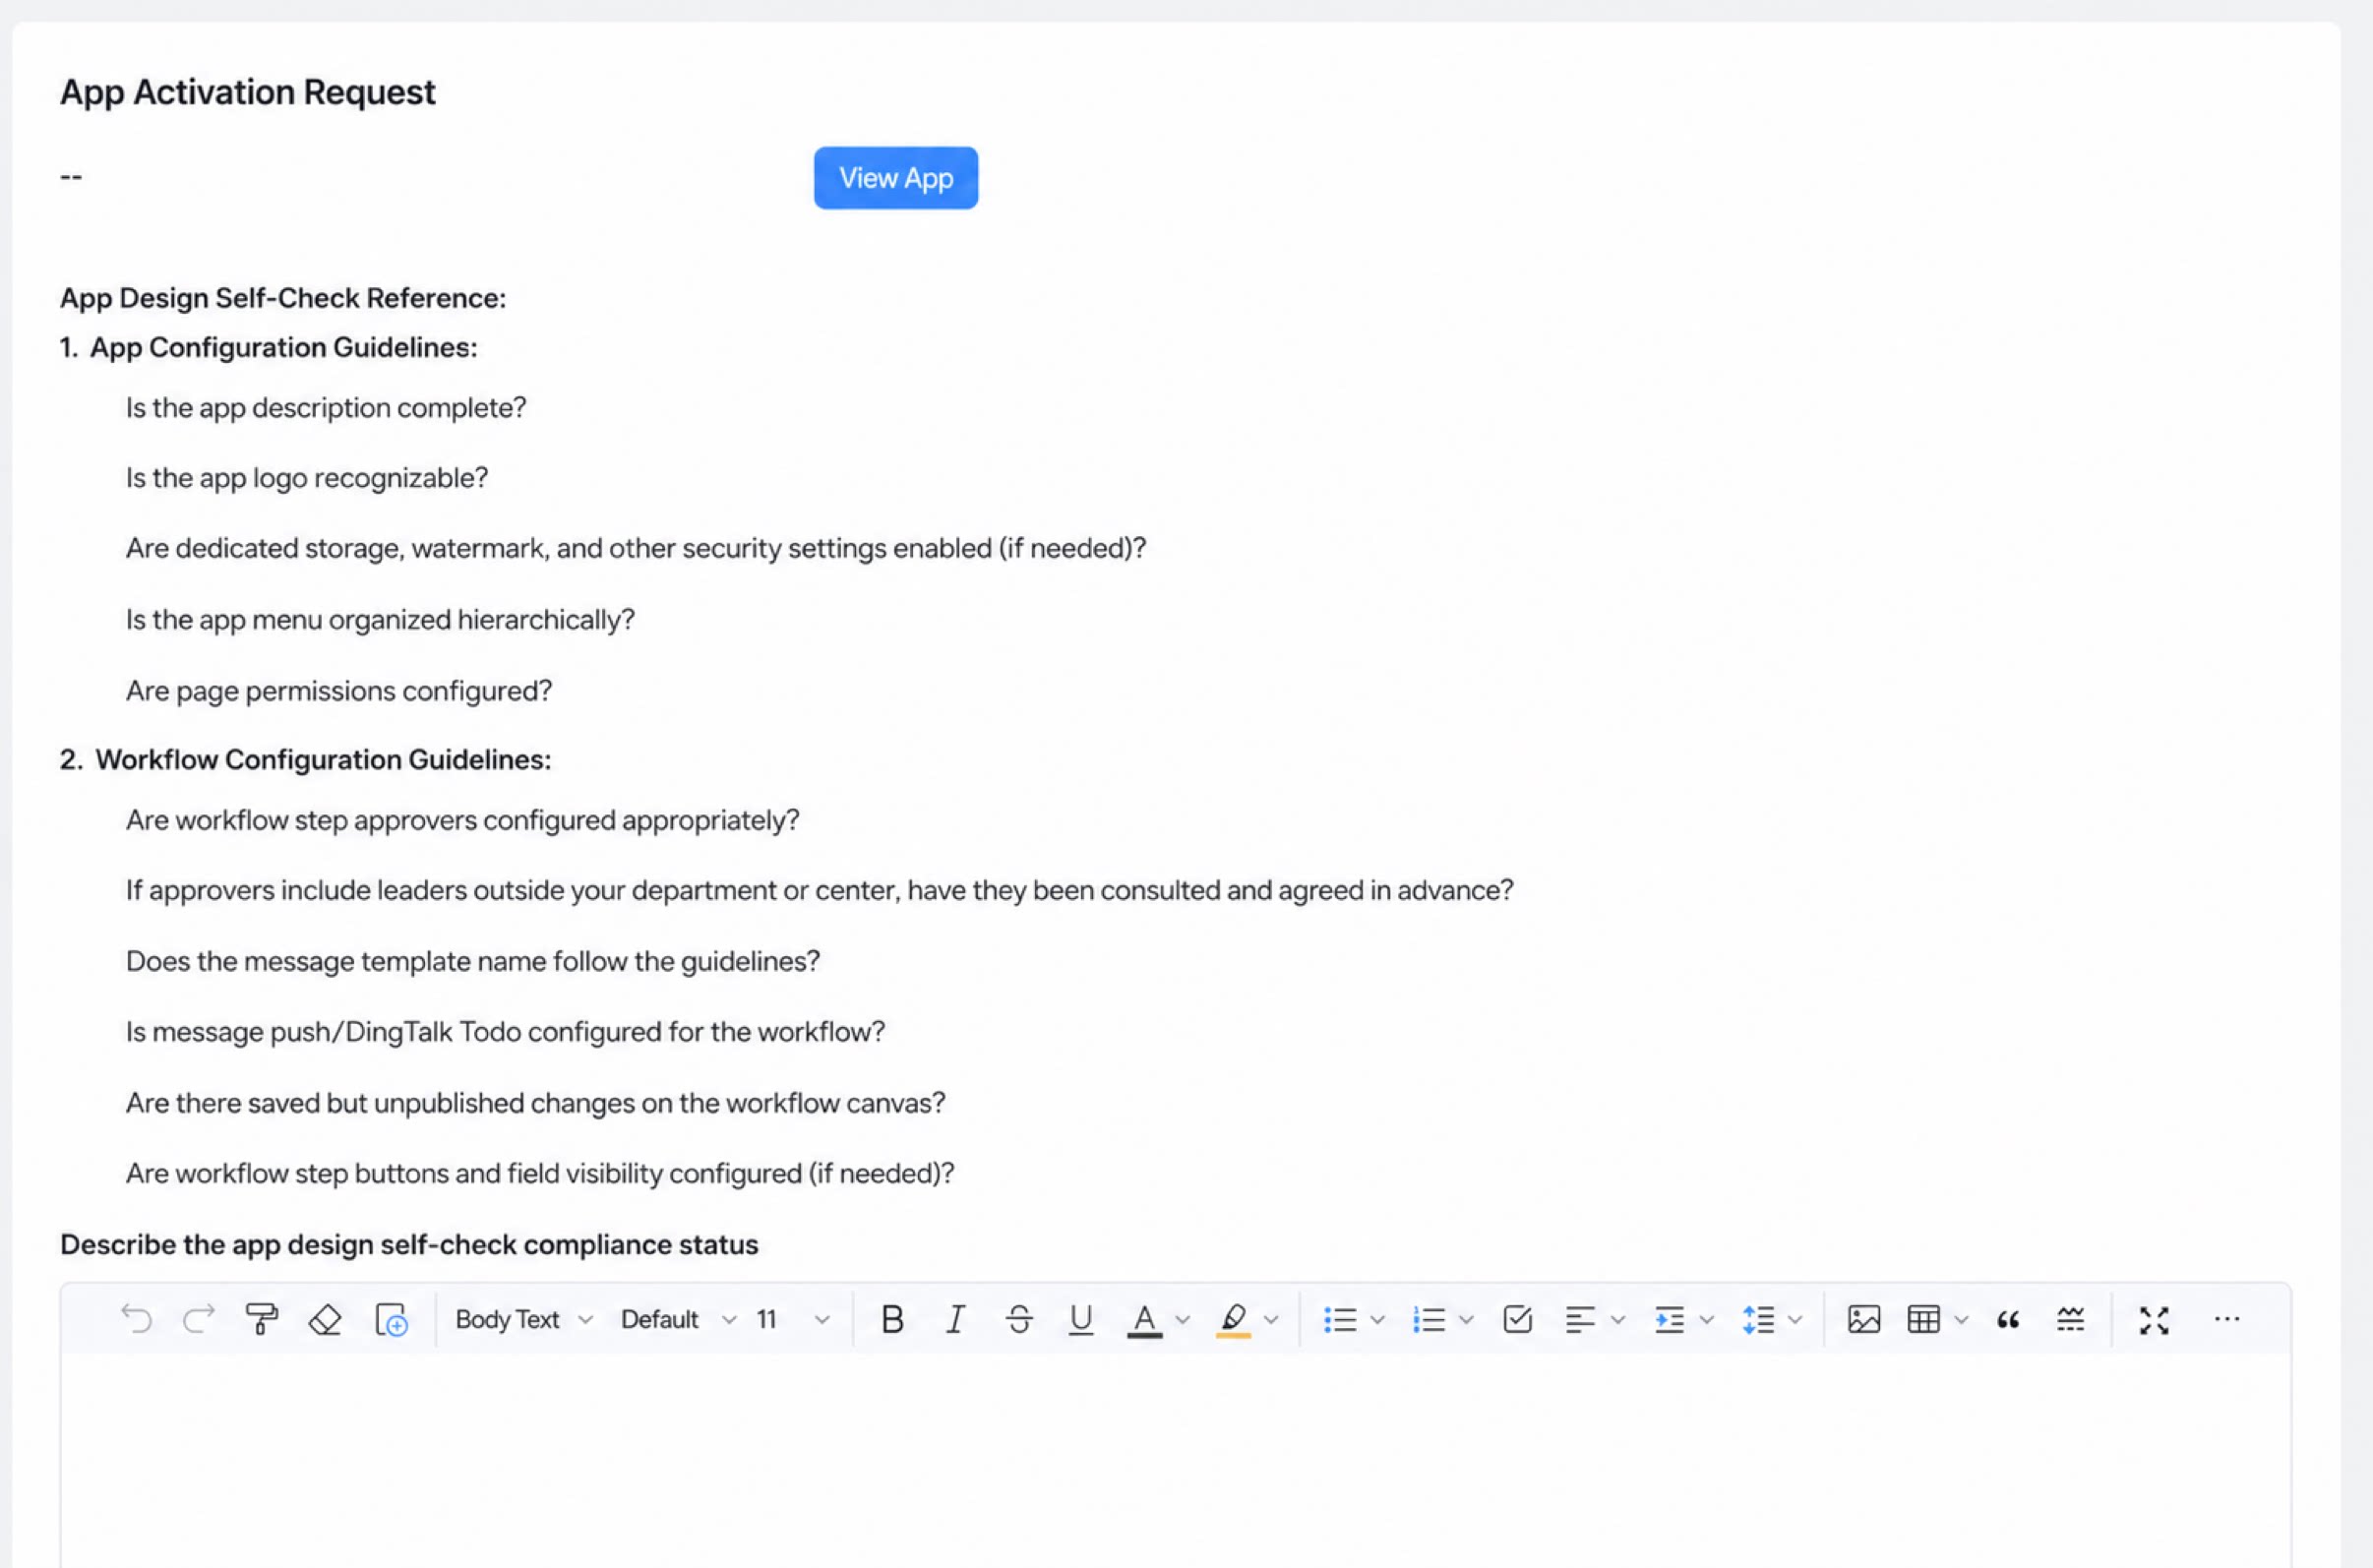
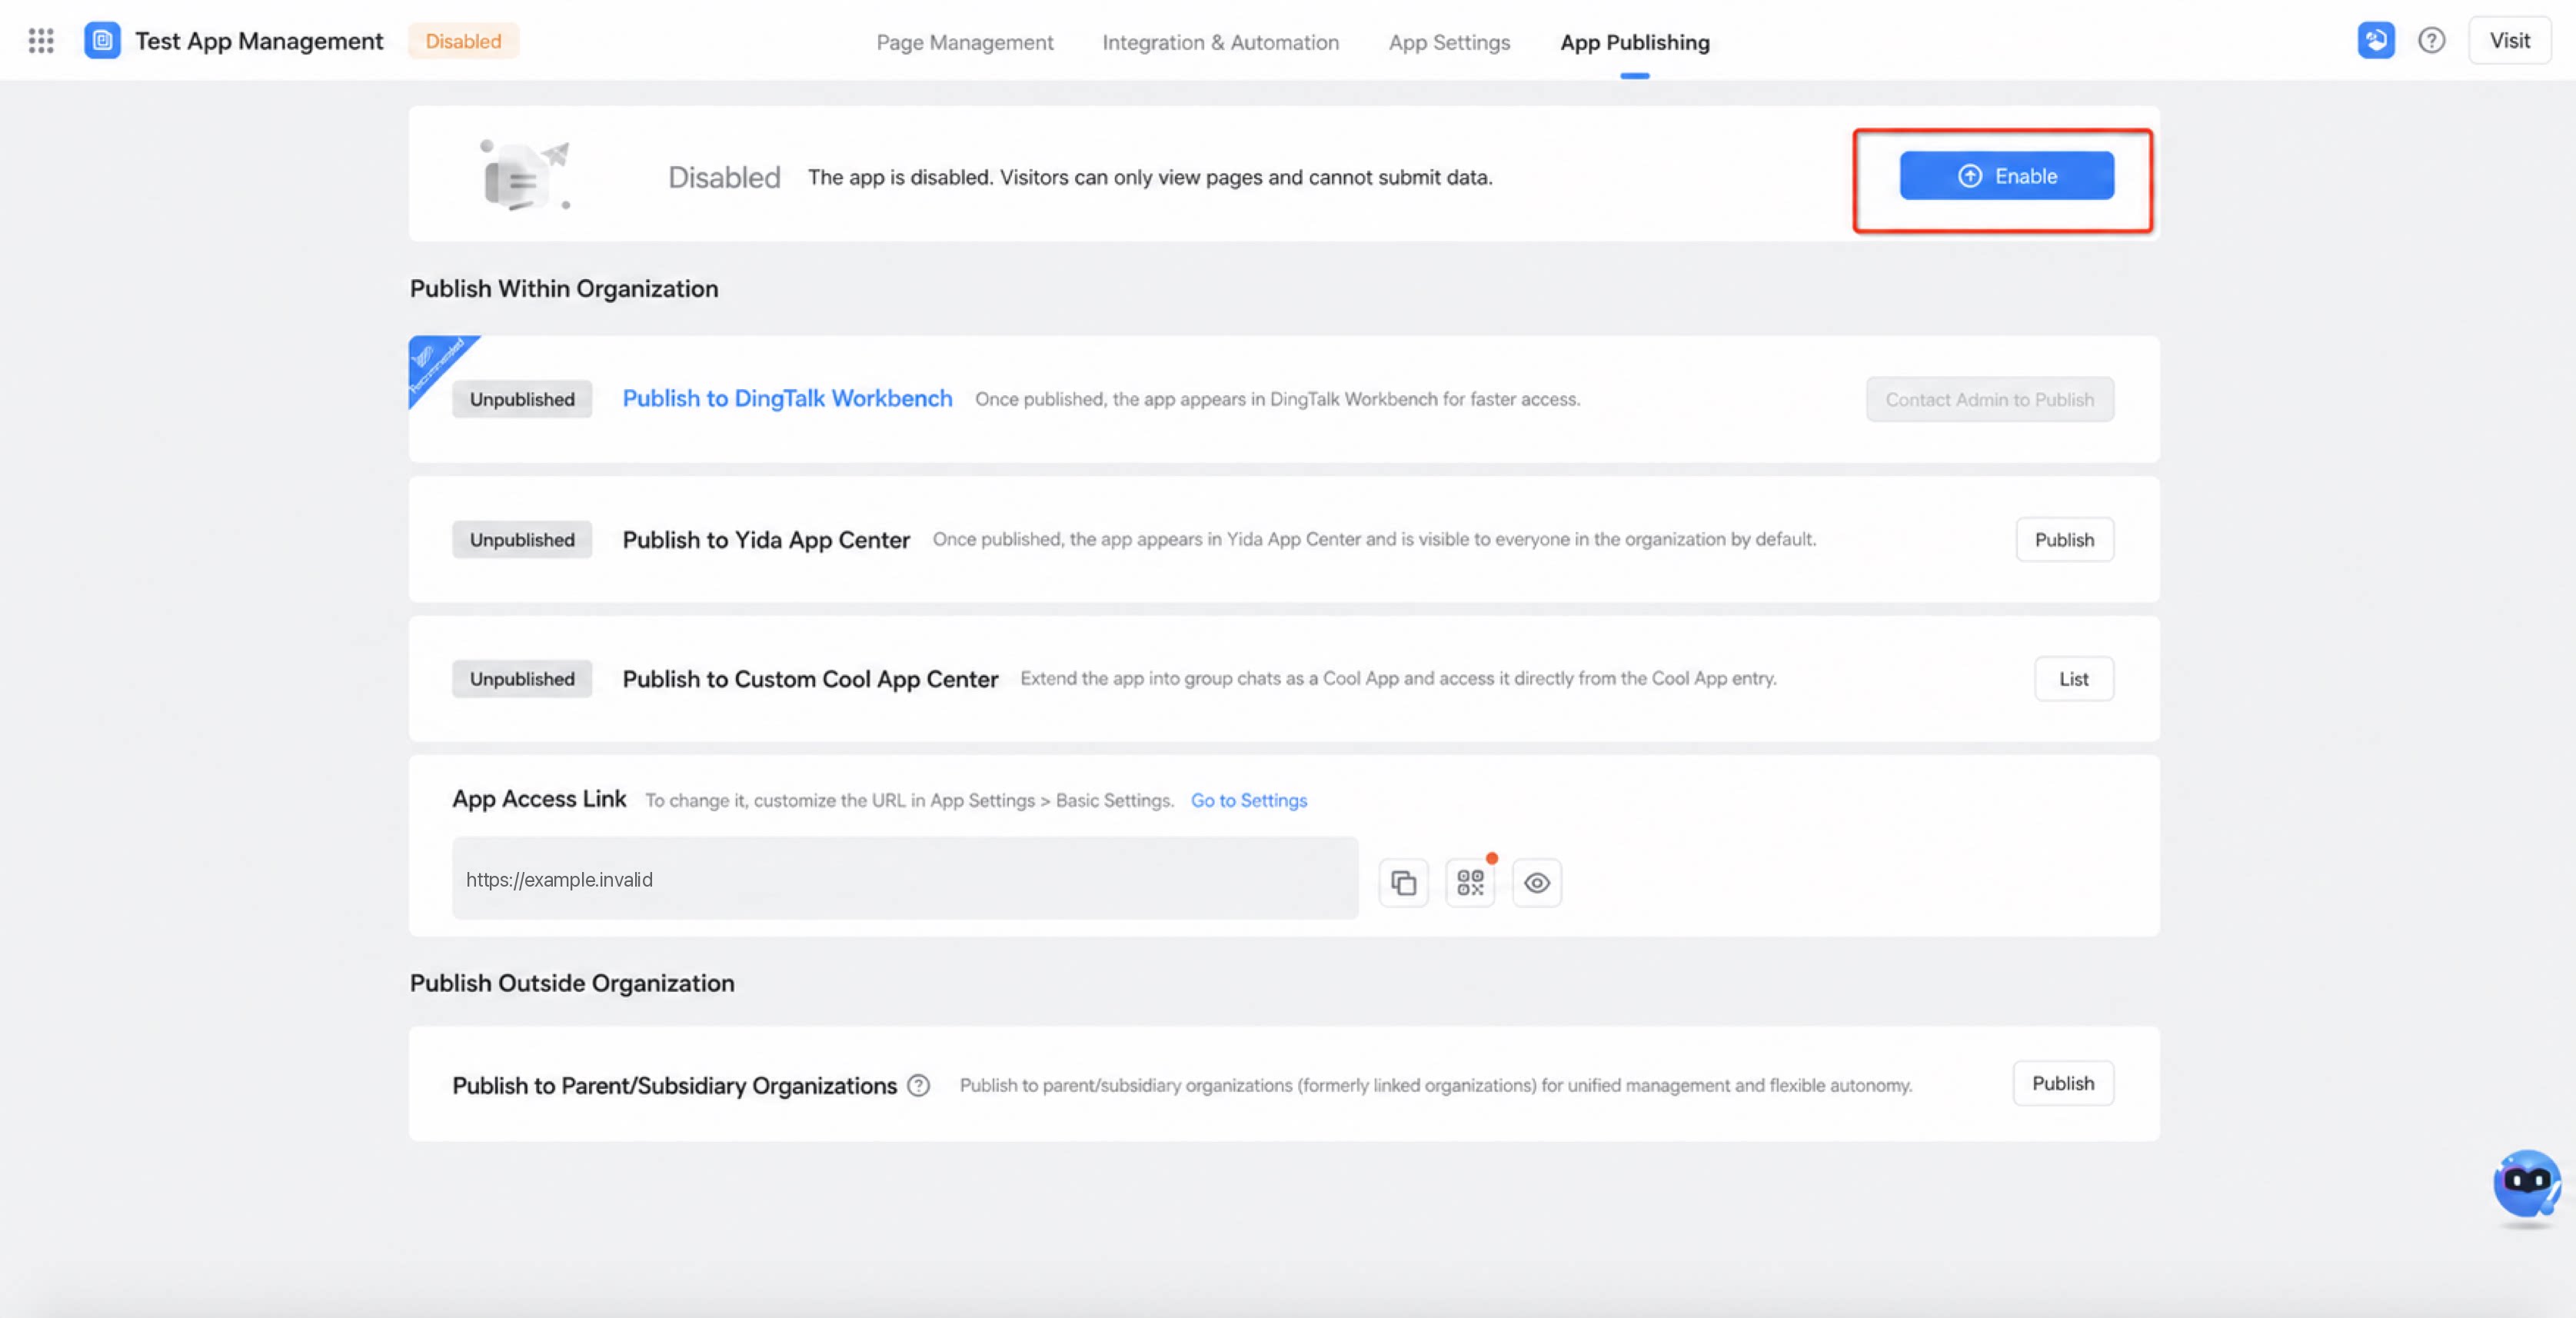
After an admin turns On “Enable governance”, apps newly created by users within the governance scope default to the “Disabled” state. Users outside the governance scope are unaffected, and their apps remain enabled by default. To make it easier for app admins to test apps during development, app admins subject to enable governance can Submit Data for app testing before the app is enabled. To enable an app, the app admin must first submit an “Enable request”. The app can be enabled only after the request is approved.1
Submit an enable request
2
The app Admin fills in the Form and submits the request. The Approval process follows the rules configured by the platform Admin.
3
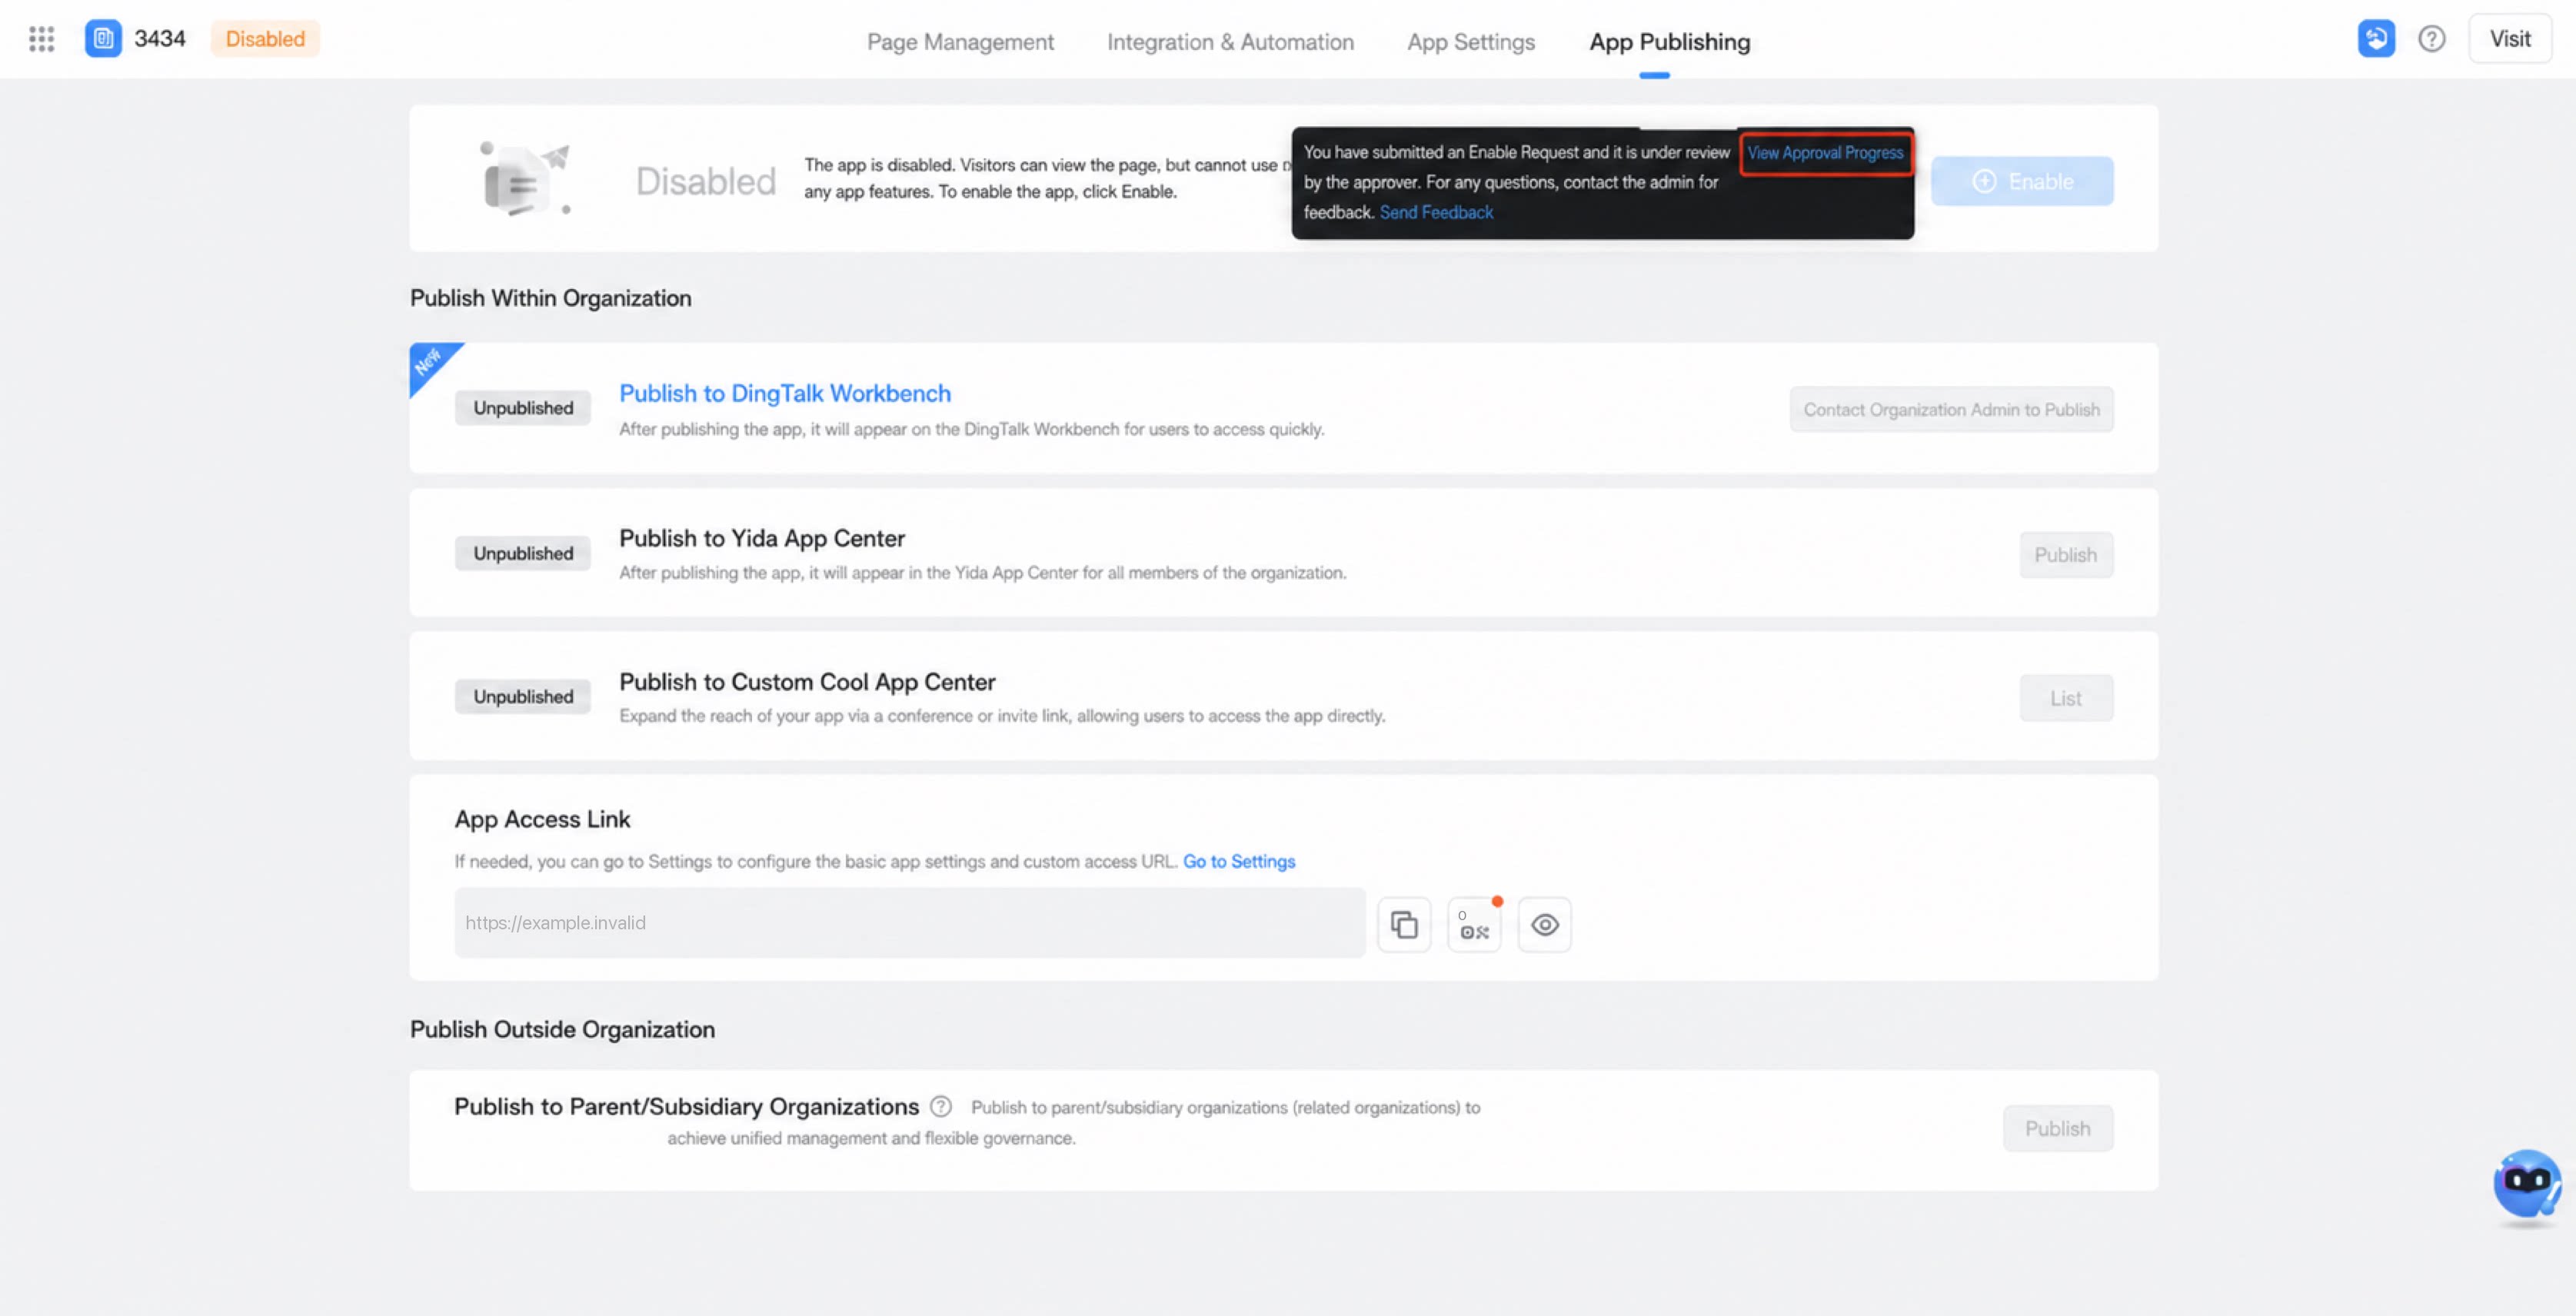
Enable approval in progress
4
Once approved, the app can be enabled
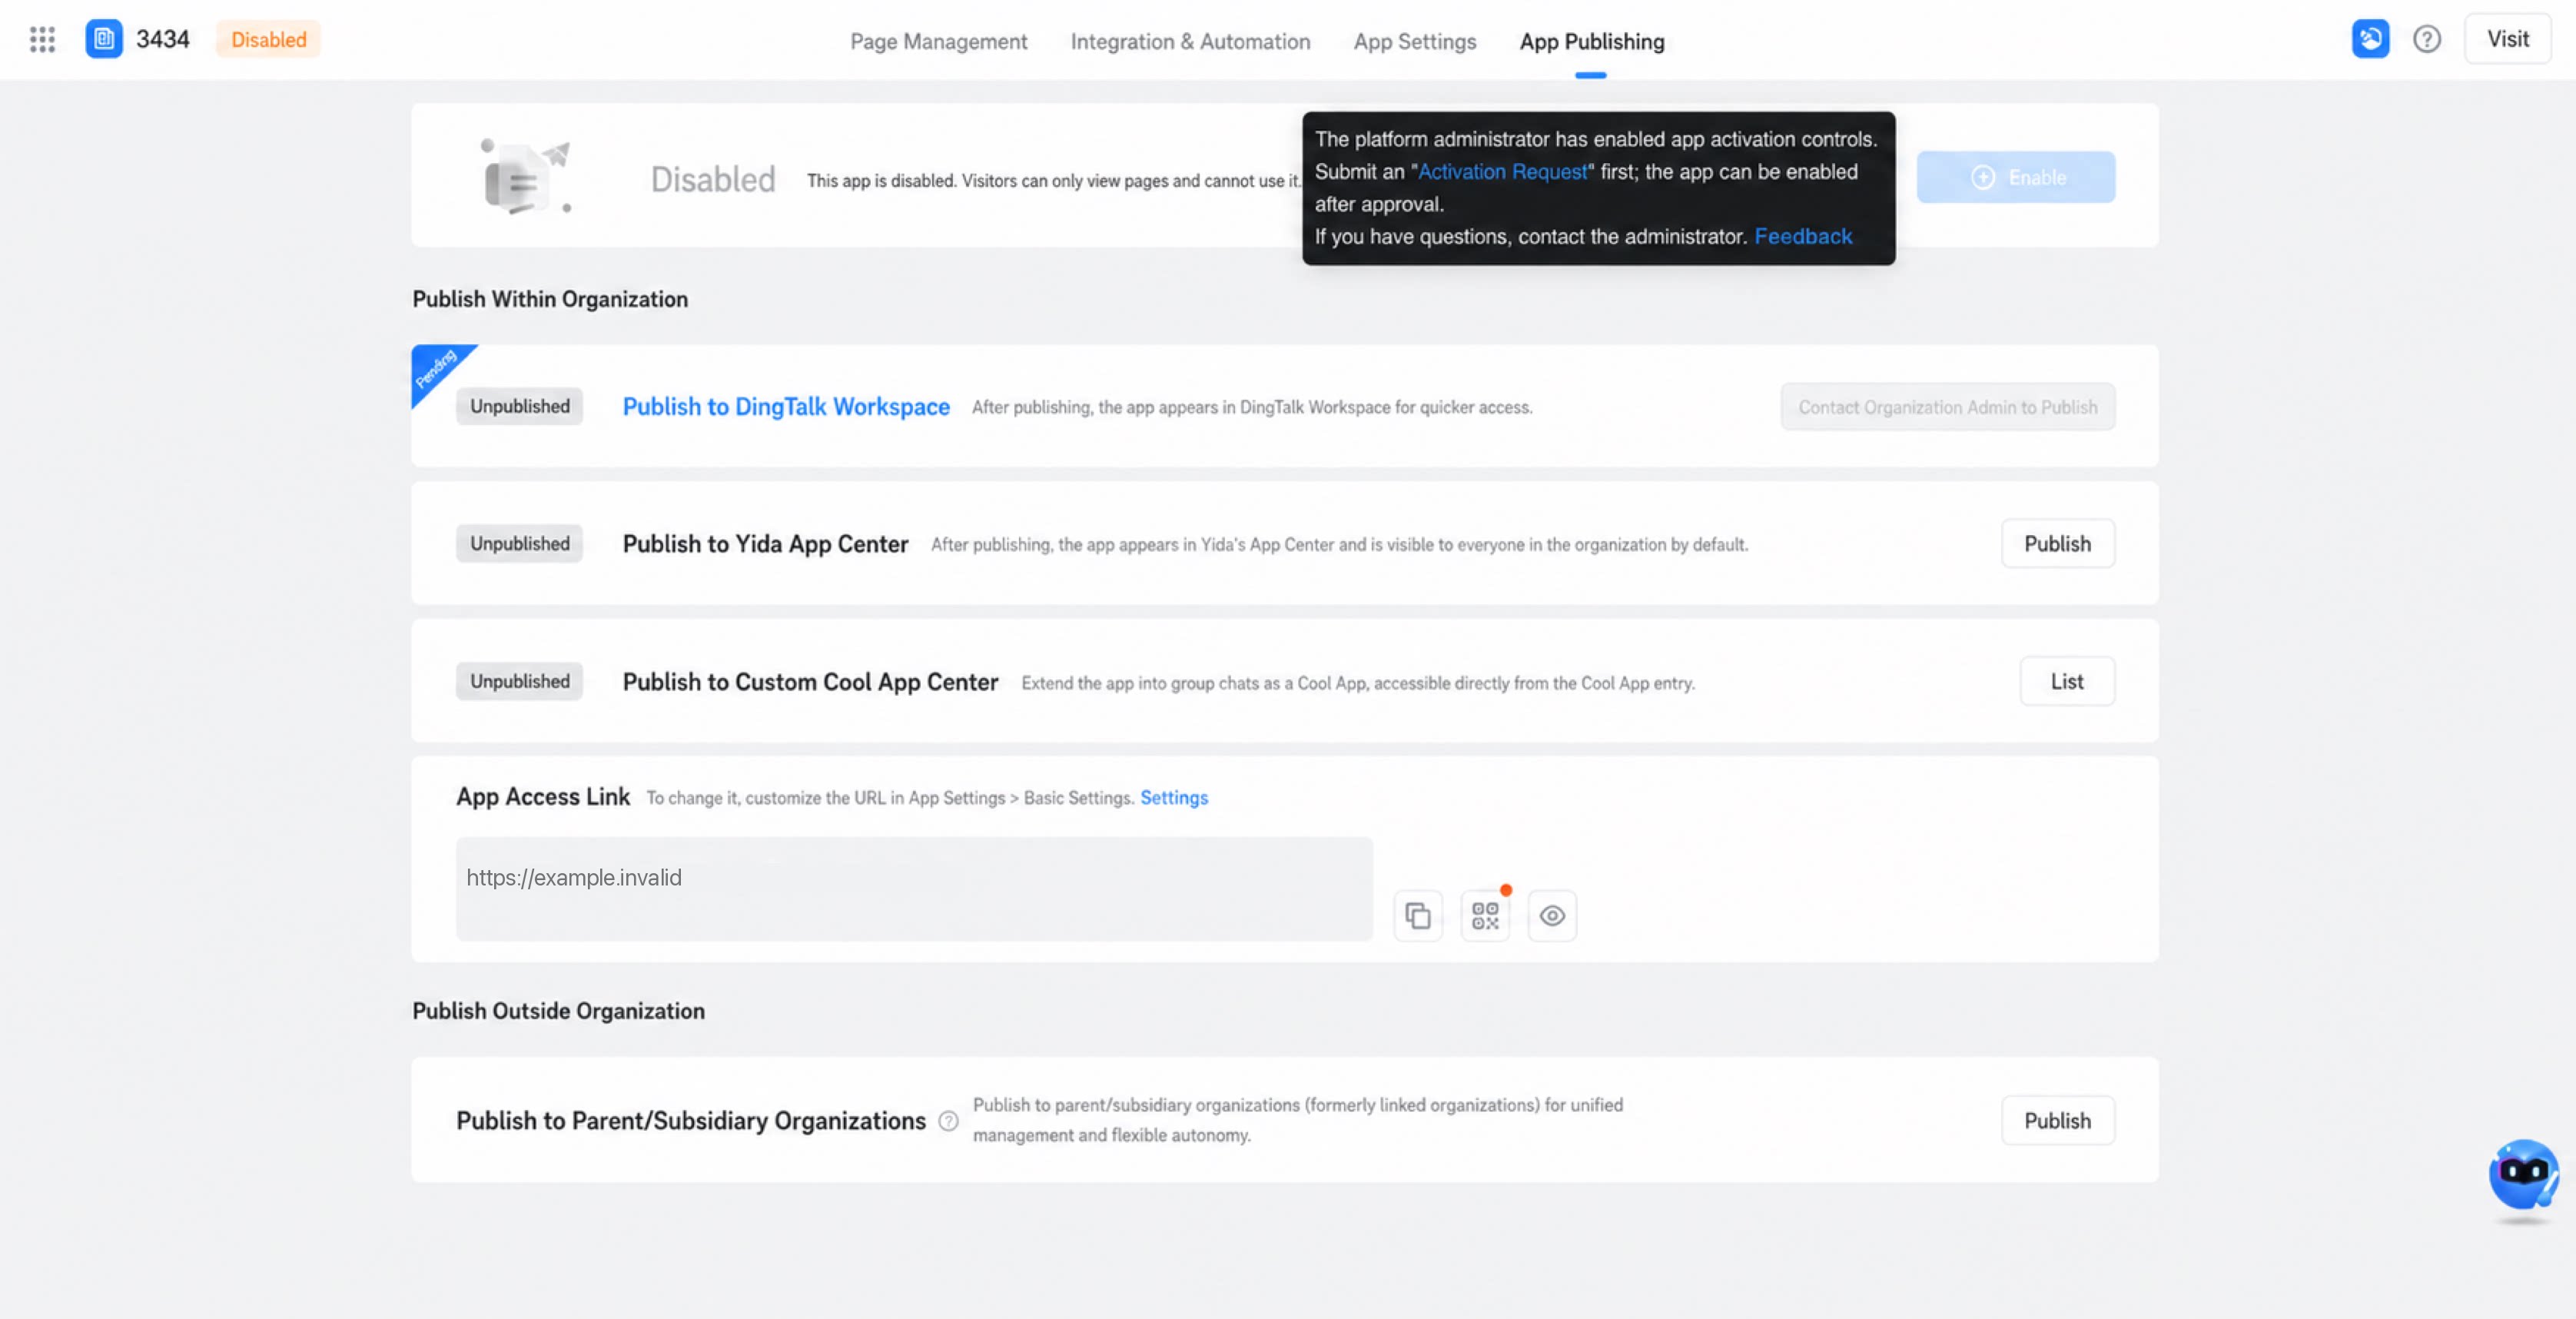
Approval for Publish Requests