

 Chats
Chats Calendar
 Meetings
 Contacts
 Mail
Mail Docs
Docs Drive
Drive AI Table
 AI Minutes
 Attendance
 Approval
 YiDA
YiDA Admin Console
1. Create a Data Source
1.1 How to Create a Data Source
Click Add to start creating a new Data Source. Data Sources fall into three categories, and you can select one when creating. Once created, the type cannot be changed.- Variable: a local variable.
- Remote request: data fetched from a server-side API.
- Parameter Data Source: The system passes this Data Source in by default to retrieve the parameters in the current URL. For example, when the URL is
a.html?key1=value1&key2=value2, the value of the parameter Data Source is:
1.2 Variable Data Source
Variable Data Sources are typically used to store configuration items (such as the remote API prefixapiUrlPrefix), page-level temporary variables, and similar data. They support all JS data types, including string, object, array, number, and boolean.
1.3 Remote Request
API response Data format Remote Data Sources have a few required constraints on the data format:content and success layers are stripped in the request’s response callback functions (such as didFetch and the value ultimately stored in the data pool).
For data returned by non-standard APIs, add a fit layer so the Data Source can recognize the response. fit converts the raw response content into a format that conforms to the YiDA RPC response spec before didFetch (data fetching) runs. For details, see the fit usage notes below 👇.
If you use your own API service, watch out for cross-origin issues. You need to use JSONP or configure your API service to allow cross-origin requests. The API-service configure approach is recommended. See Cross-Origin Resource Sharing. Note: All YiDA apps use HTTPS, so you must configure the specified domain: Access-Control-Allow-Origin: https://www.yidaapps.com.
HTTP method
Three HTTP methods are available for loading remote Data Sources:
- GET
- POST
- JSONP. This method requires server-side support.
1.4 Auto-Load
Data Sources with auto-load enabled request remote APIs before the page renders. The page starts rendering only after all auto-loaded Data Sources finish loading. This is typically used for initial page data loading. Note: Too many auto-load Data Sources prolong page rendering time. Do not overuse this option.1.5 Load Method (Turn On Auto-Load First)
Serial: All serial Data Sources run from top to bottom. If dependencies exist, place the depended-on Data Source first. Parallel: All parallel Data Sources run simultaneously. If you do not want to enable auto-load (to avoid blocking page rendering with requests) but still want serial loading, manually trigger Data Source loading in the “on Page load Complete” function. Code example: trigger the first remote Data Source request, and after it returns, trigger the second remote Data Source request.1.6 Whether to Request
Accepts a boolean value that determines whether the request should be sent. This input field also accepts variable expressions that decide whether to send the request.1.7 willFetch
Pre-request handler function. willFetch lets you modify various request parameters before sending a request. Code example:1.8 Fit
Data adapter for the request response. fit lets you modify the raw response to match the required data request format. Code example:1.9 didFetch
Request completion callback function. didFetch lets you modify the received data. Unlike fit, it runs only whensuccess returned by the API is true. Code example:
1.10 onError
Request error handling function. onError catches API errors from the remote Data Source. It runs whensuccess returned by the API is false. Code example:
1.11 Default Data
Default Data is typically used for first-screen rendering. It provides an initial default value before the remote Data Source request returns. Note: The data format of Default Data matches the data format returned at the didFetch layer, and can be bound and used directly.1.12 Connector Data Source (NEW)
In a Connector Data Source, a connector serves as the Data Source. This is designed to break through cross-origin and authentication restrictions between systems and web pages. For details, see Use a Custom Connector to resolve cross-origin issues.2. Use a Data Source
2.1 Bind Within a Component
In the Attribute Settings panel of YiDA components, you can bind a variable to an attribute to create dynamic behavior. Follow these steps:- All attributes that support variables display the icon shown below. Click the icon to open the Variable Binding panel.
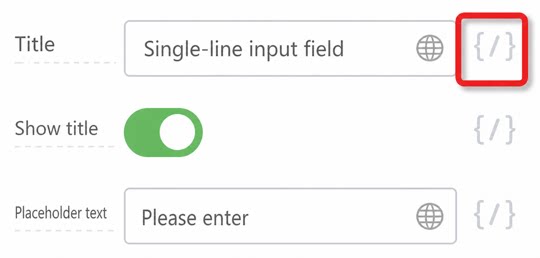
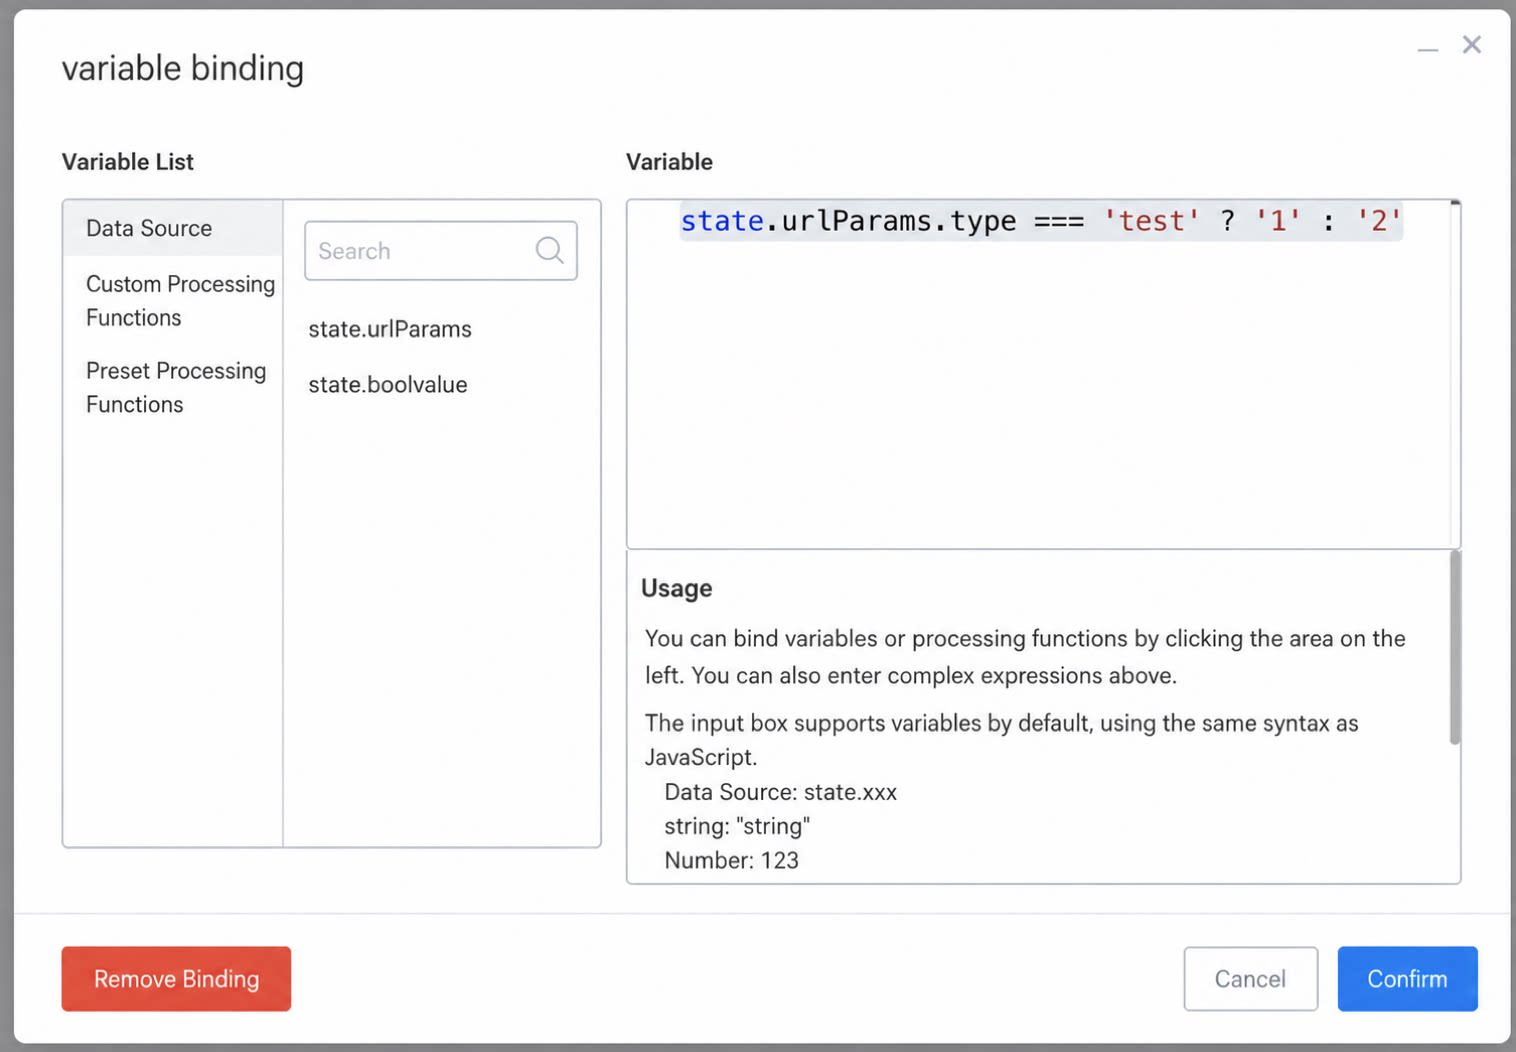
- The Variable Binding panel supports binding the following types of variables. Click a variable to use it directly:
state.urlParams.type === 'test' ? '1' : '2'
2.2 Developer Center Hands-On Trial
- Click this Link to try it out.
3. FAQ
3.1 No Data Returned After the Data Source Request
Check the following:- Your API path and HTTP method are correct.
- Default request is enabled, or manual invocation has taken effect.
- The server hosting the API service does not enforce an access allowlist restriction.
- The input parameter format is correct.
- Your API supports cross-origin access from
www.yidaapps.com. - Your API uses HTTPS and the certificate is valid (“Secure”).
3.2 Troubleshooting Approach
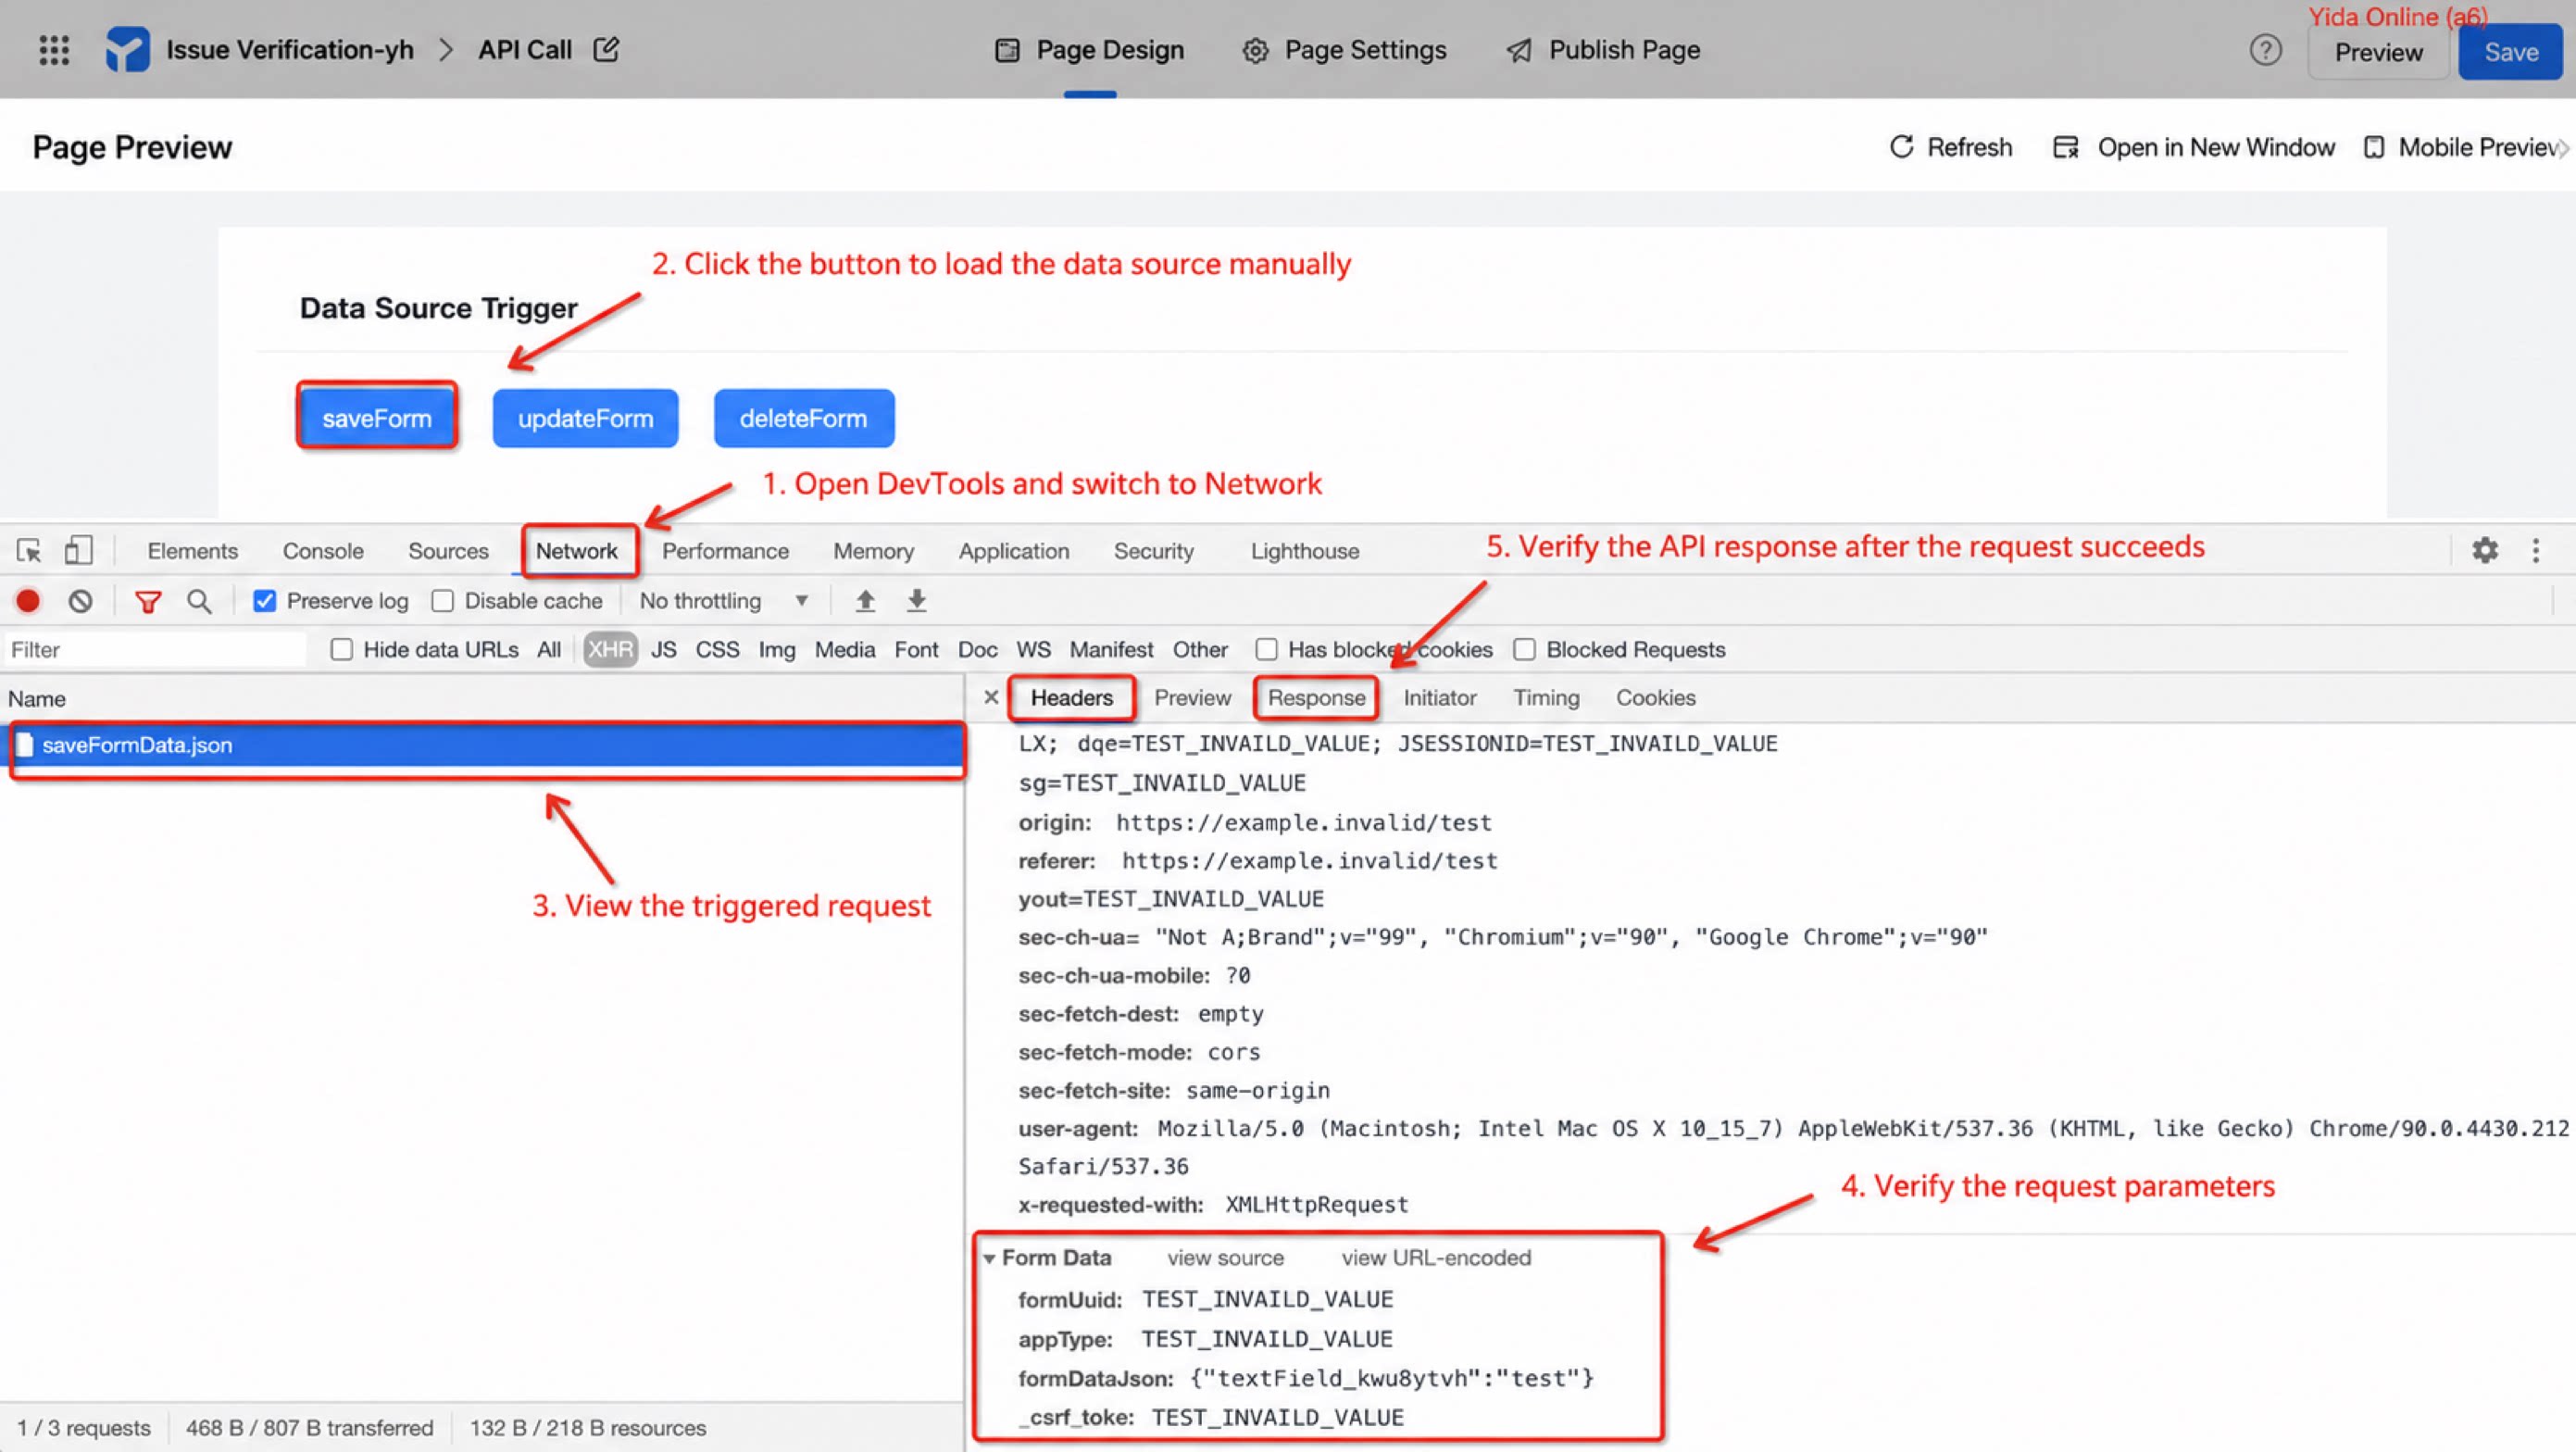
- Determine whether the Data Source loads manually or automatically. For manual loading, set a breakpoint at the Data Source loading code for debug.
- Preview or access the page.
- Open the browser console.
- Trigger Data Source loading.
- Check the corresponding request information in the console to troubleshoot.
3.3 Error 307 When Calling YiDA Platform APIs
Check whether your organization has enabled a second-level domain. If so, change the API access address fromwww.yidaapps.com/... to the relative address /dingtalk/web/APP_X1X2X3X4/v1/process/startInstance.json to avoid this error.