

 Chats
Chats Calendar
 Meetings
 Contacts
 Mail
Mail Docs
Docs Drive
Drive AI Table
 AI Minutes
 Attendance
 Approval
 YiDA
YiDA Admin Console
Preparation
Before you create an aggregate table, create at least two regular forms that share a common field. This shared field serves as the association between the forms in the aggregate table.Create an Aggregate Table
- Sign in to the YiDA workbench, select the app in which you want to create an aggregate table, and open the app builder.
- Click the + icon and select Create aggregate table.
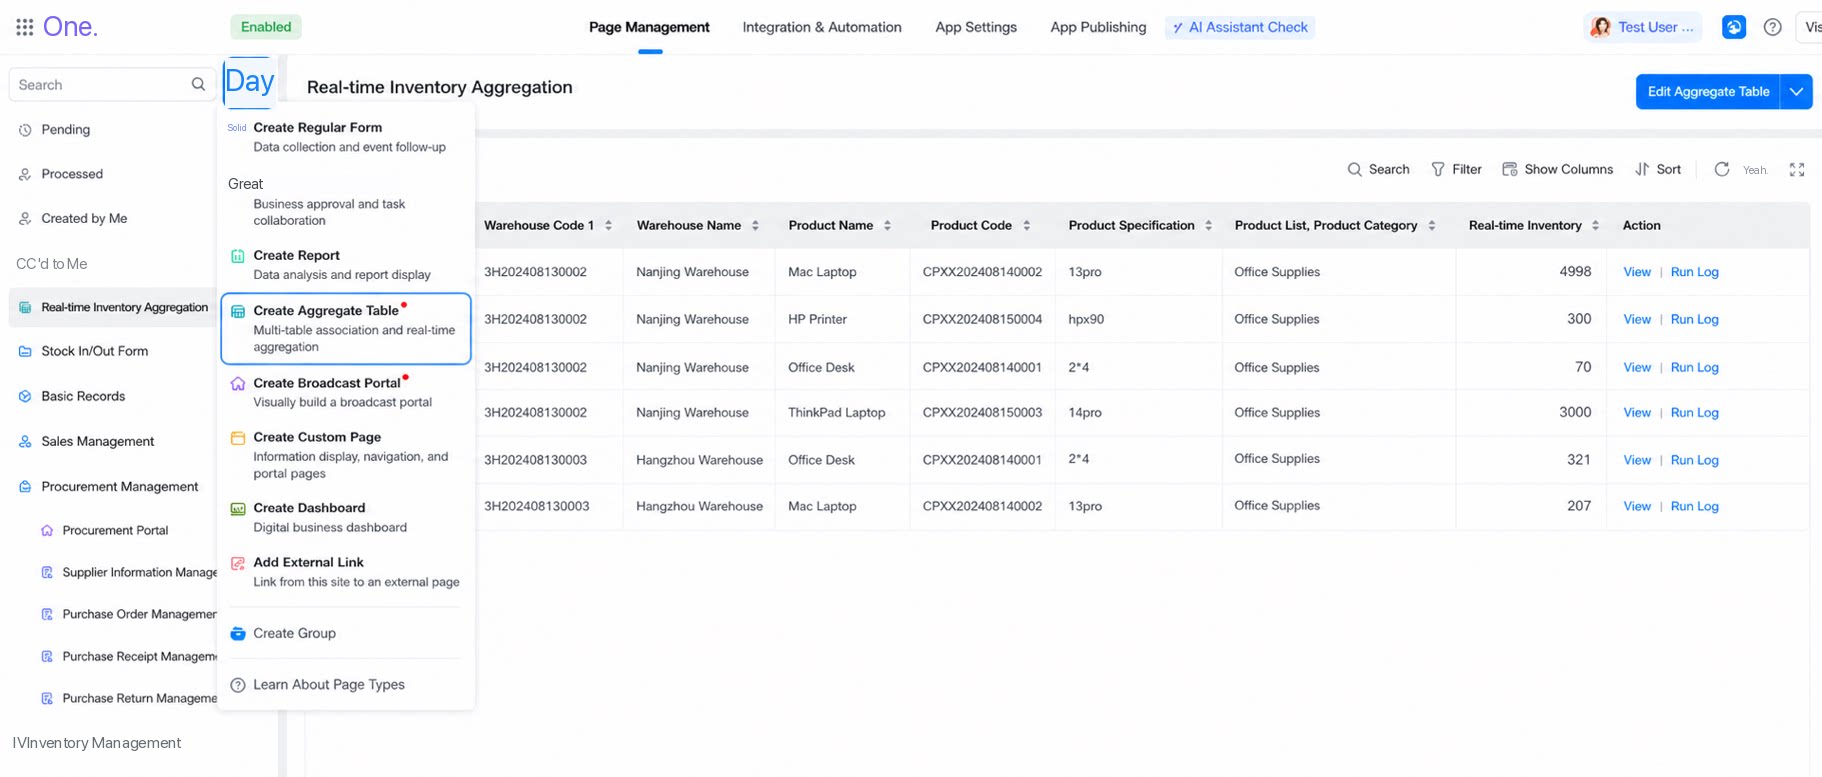
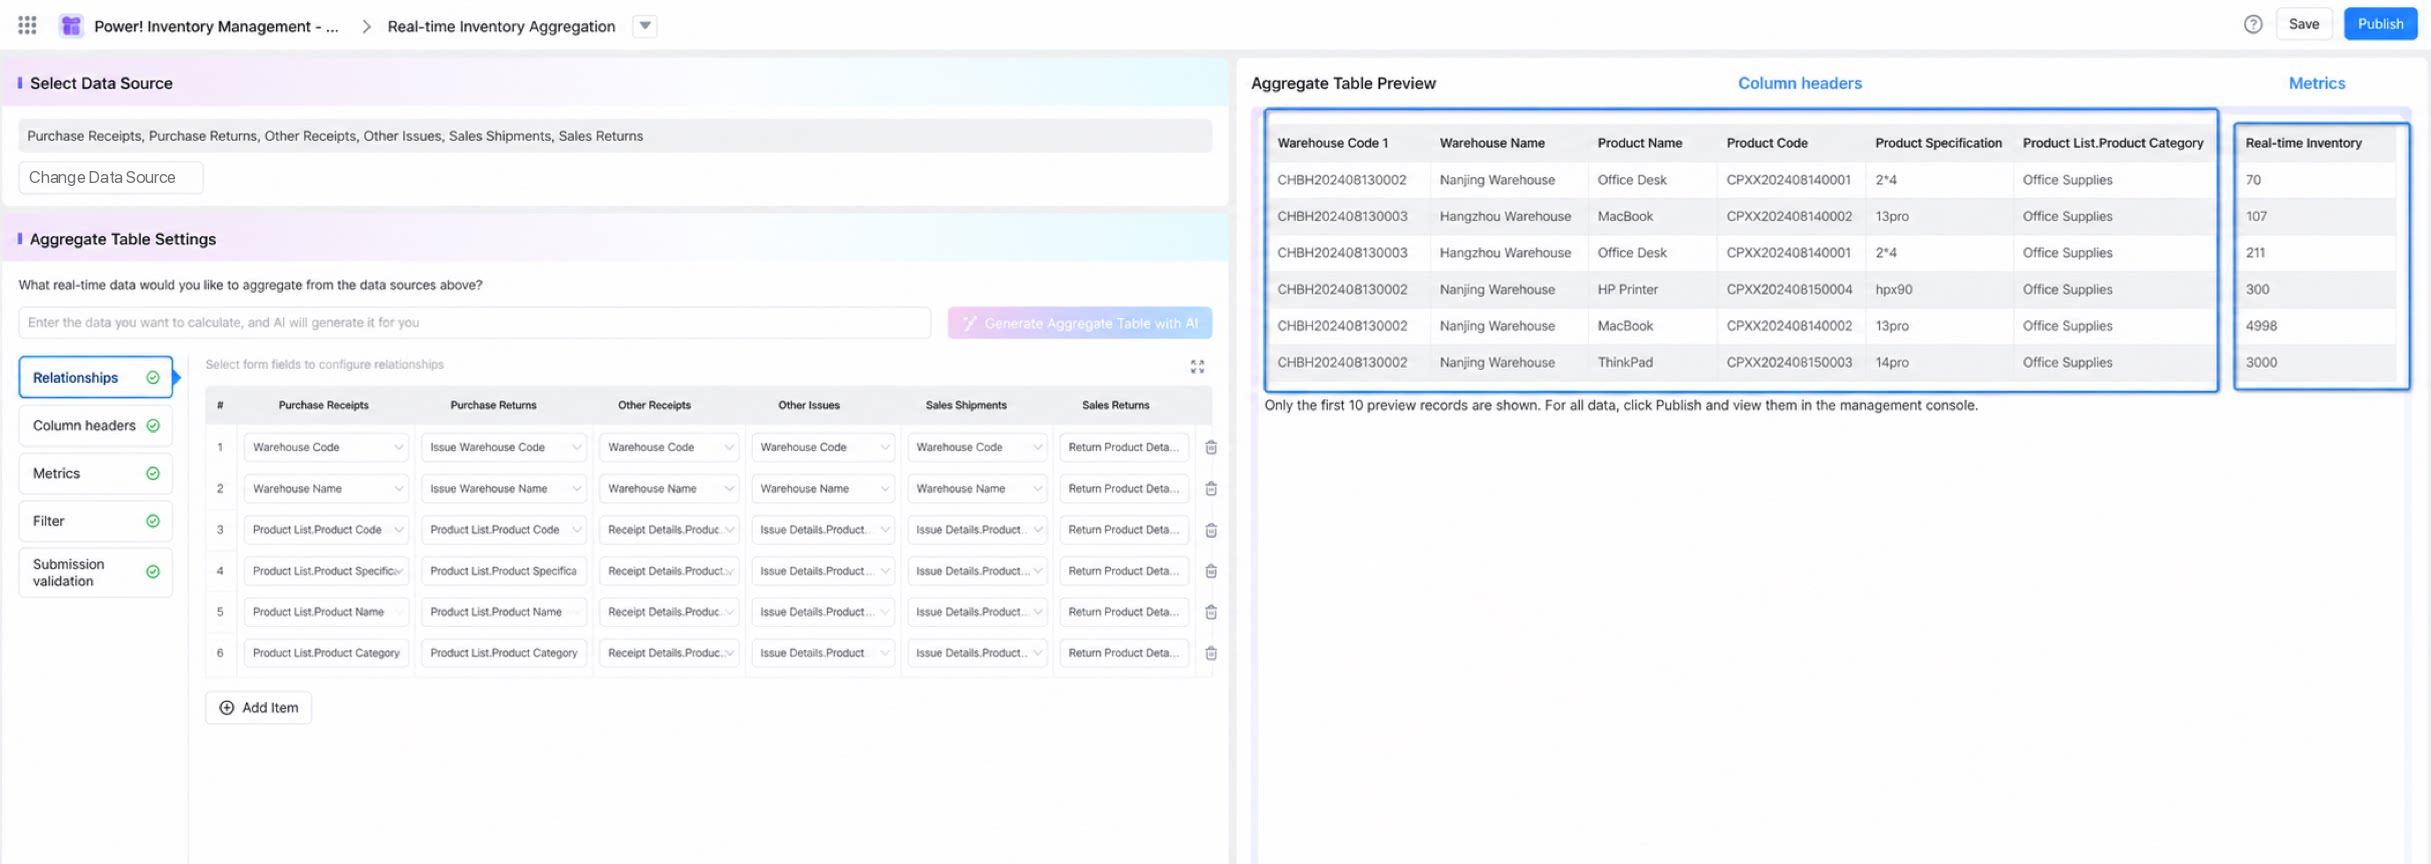
- The calculation result of an aggregate table consists of column titles and metrics.
Select Data Sources
- The data source is the form that provides data for aggregate calculation. For example, to calculate real-time inventory, use the inbound/outbound form as the data source.
- Click Configure data source, select a form, and click Confirm.
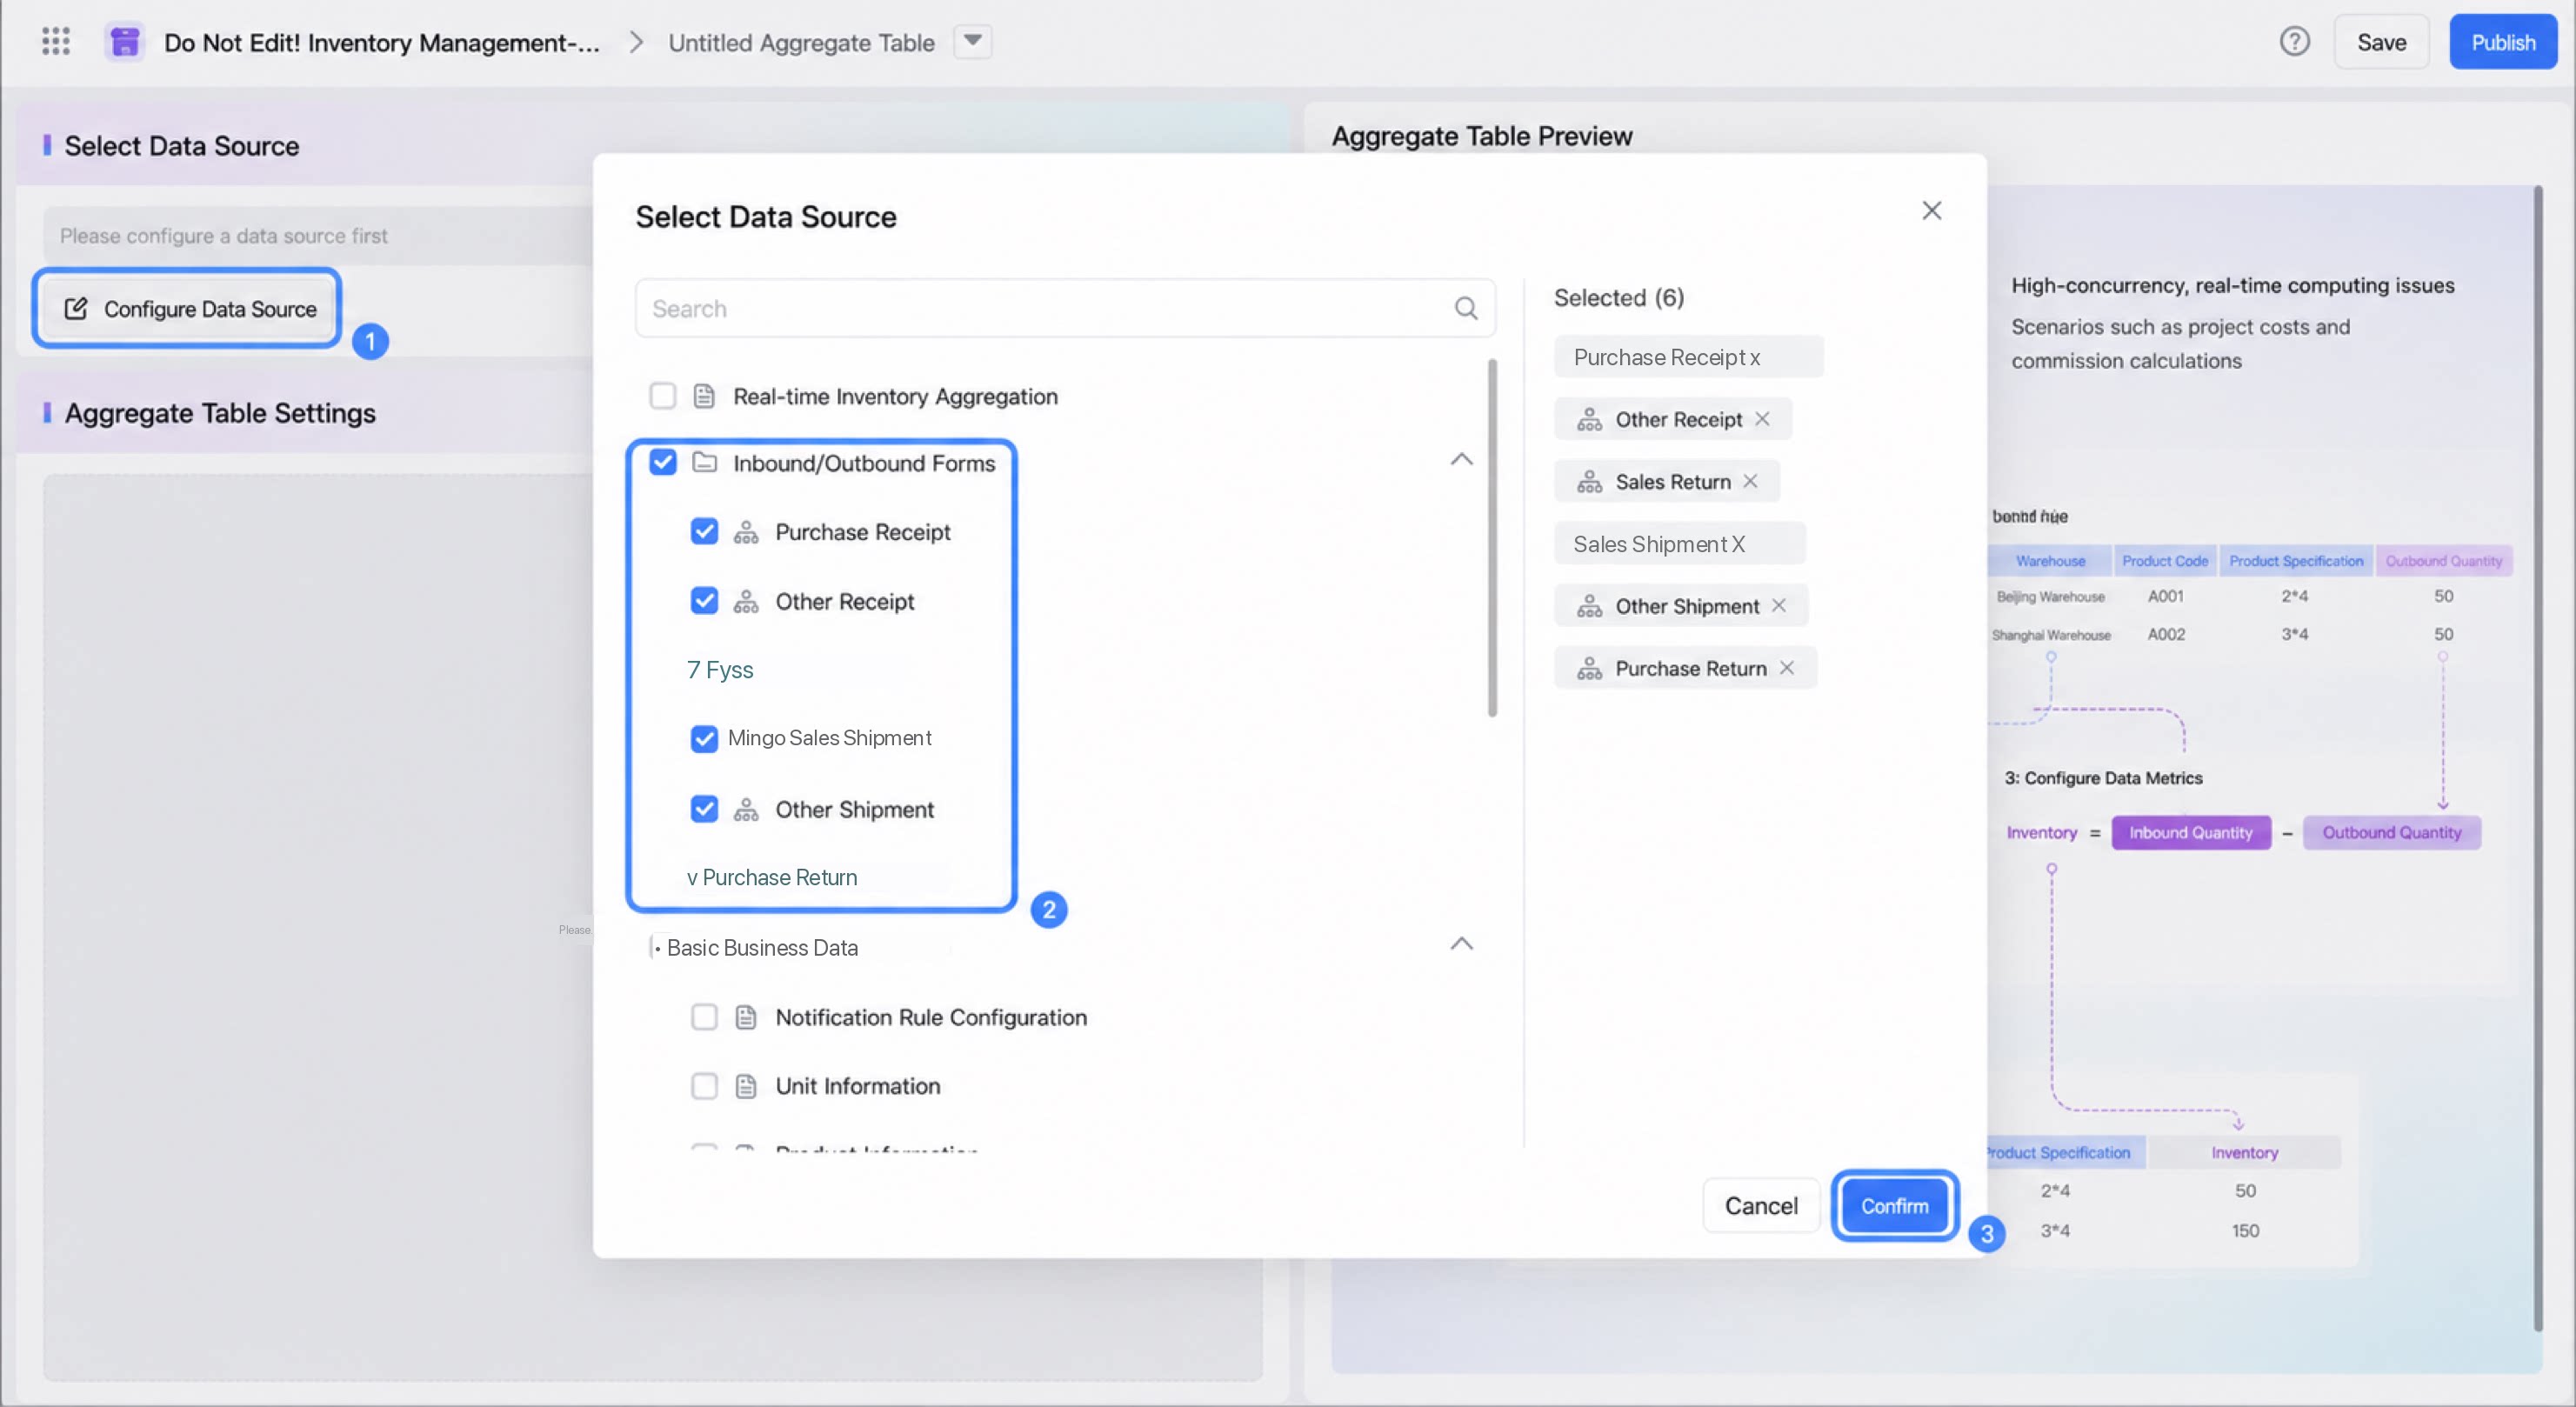
- You can select regular forms and workflow forms from the current app.
- You can select a single form or multiple forms.
Configure Associations
- When multiple forms are used as data sources, use a shared field across the forms as an association condition to aggregate data from those forms.
- Click Association and select linked fields from the data source forms to form an association group. An aggregate table can contain multiple association groups.
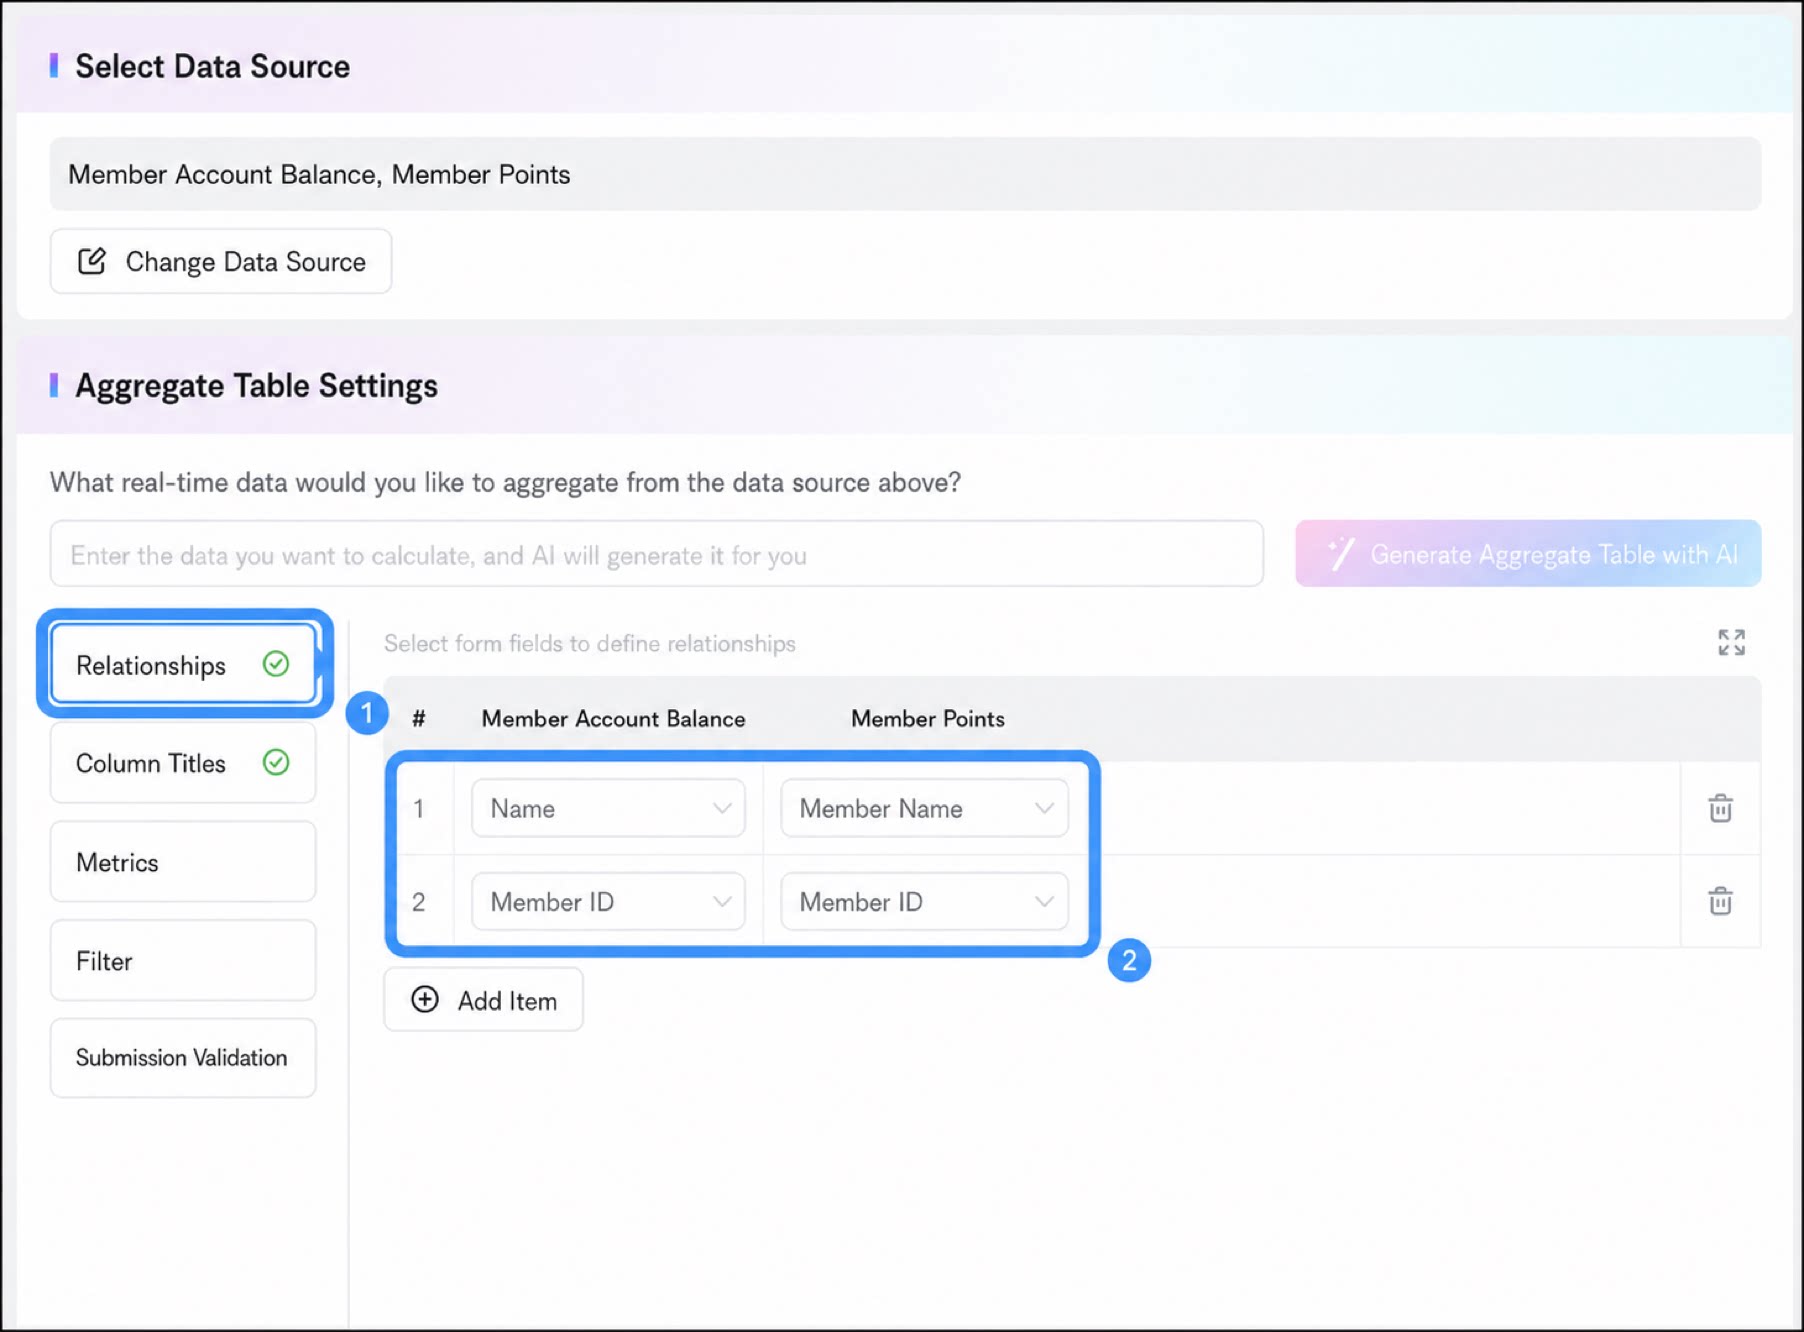
Notes:
- Field type: Single-line text, radio button, single-select drop-down, serial number, User, Department, Numerical, and Date components can be used as linked fields. Other field types are not supported.
- Date component: When a Date component is used as a matching condition, pay attention to the date precision submitted in the form. Dates with different precision are treated as different field values. For example, September 9, 2024 and September 9, 2024 08:00:00 are treated as unequal values.
Configure Column Titles
1
Step 1
Association fields are generated as column titles by default. The column title is named after the linked field of the first data source.
2
Step 2
Click Column title > Edit to change the display name of the column title. 
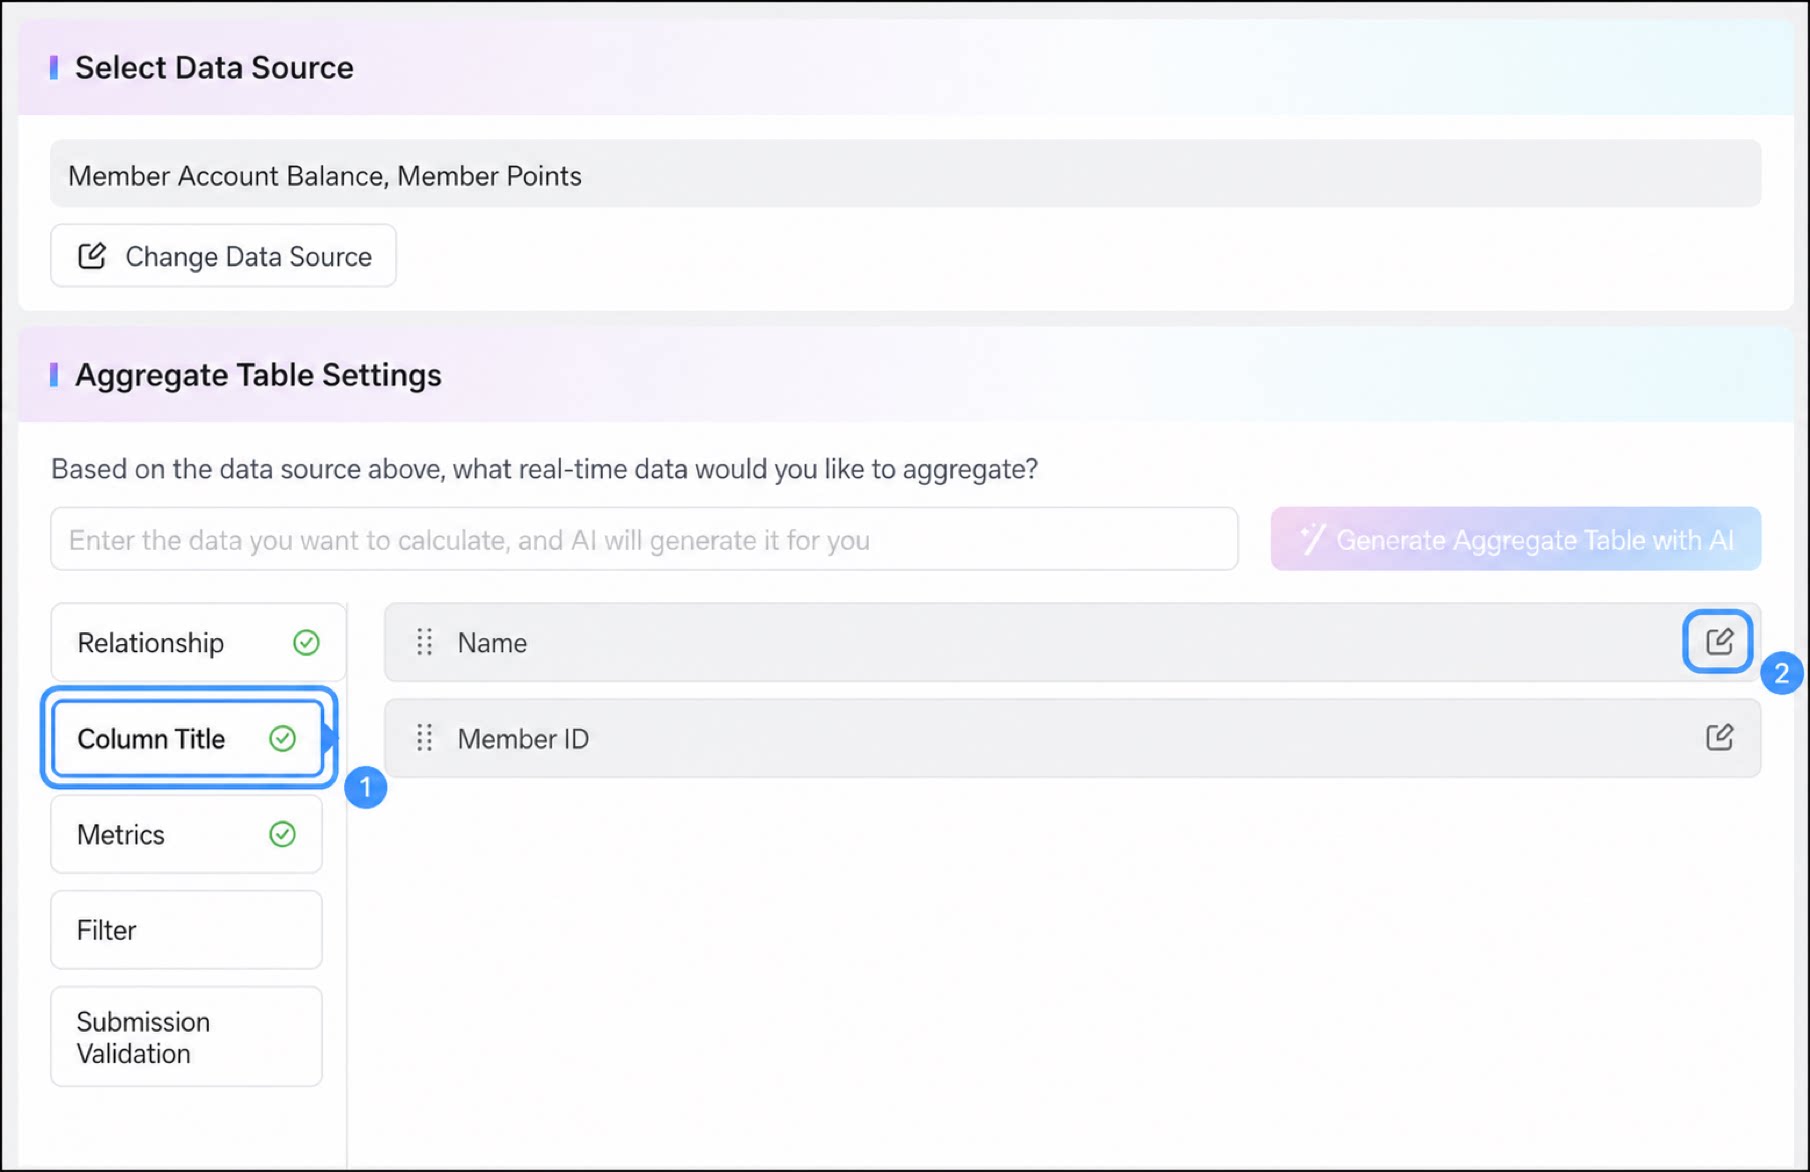
- If a linked field is deleted, the corresponding column title field is deleted at the same time.
- If the column title field of a record is empty, the record is filtered out and does not appear in the aggregate table.
- When a Select component is used as a linked field: values of the linked field are matched and displayed based on the options of the Select component.
- When User or Department is used as a linked field: associations are matched by user or department ID and displayed by user or department name. If display values differ across forms, the display value from the first data source form is used.
Configure Metric Calculation
- Click Metric > Add.
- Enter a Metric name, use a formula to calculate the Metric result, and click Confirm.
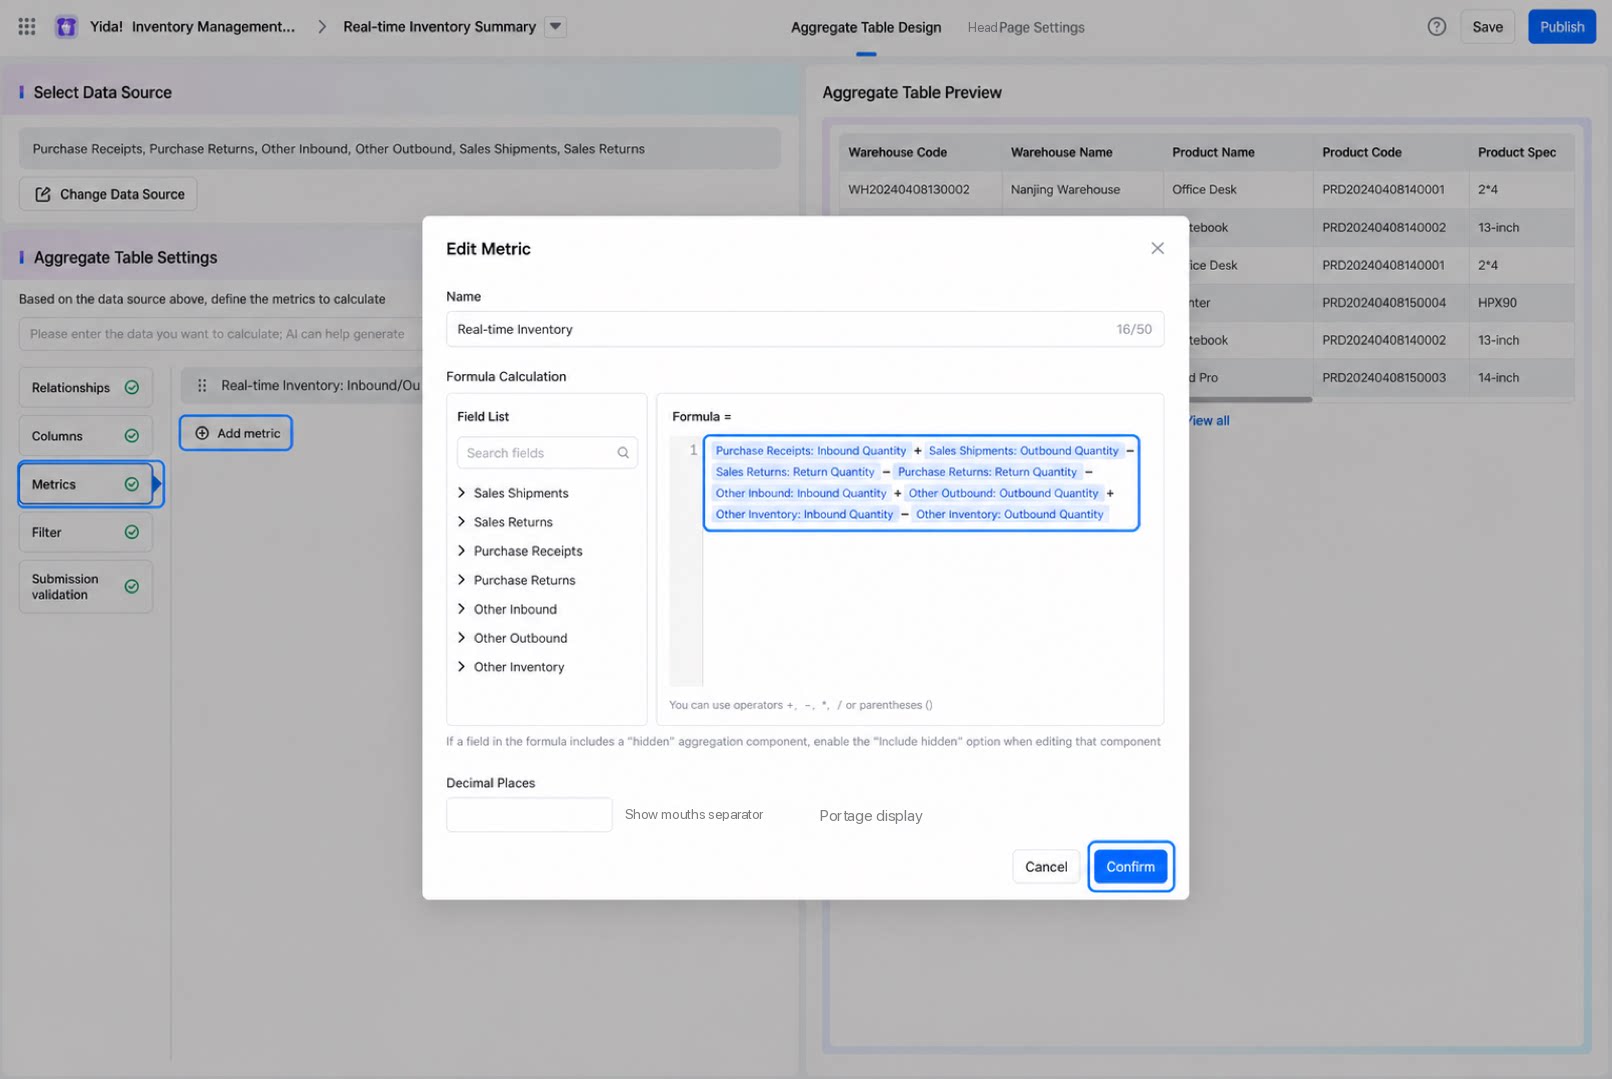
- A metric is data derived from fields in the data source form through calculation. Only summary metrics are currently supported.
- Metric formulas support only addition, subtraction, multiplication, and division between fields. Only Number fields can be added to metrics.
- If a formula contains only a specific Number field, it represents the summary calculation of that field.
- If a field involved in the calculation is empty, 0 is used instead.
Configure Filters
- Click Filter, select the field to filter by, and click Filter.
- In the dialog box, set the filter conditions and click Confirm.
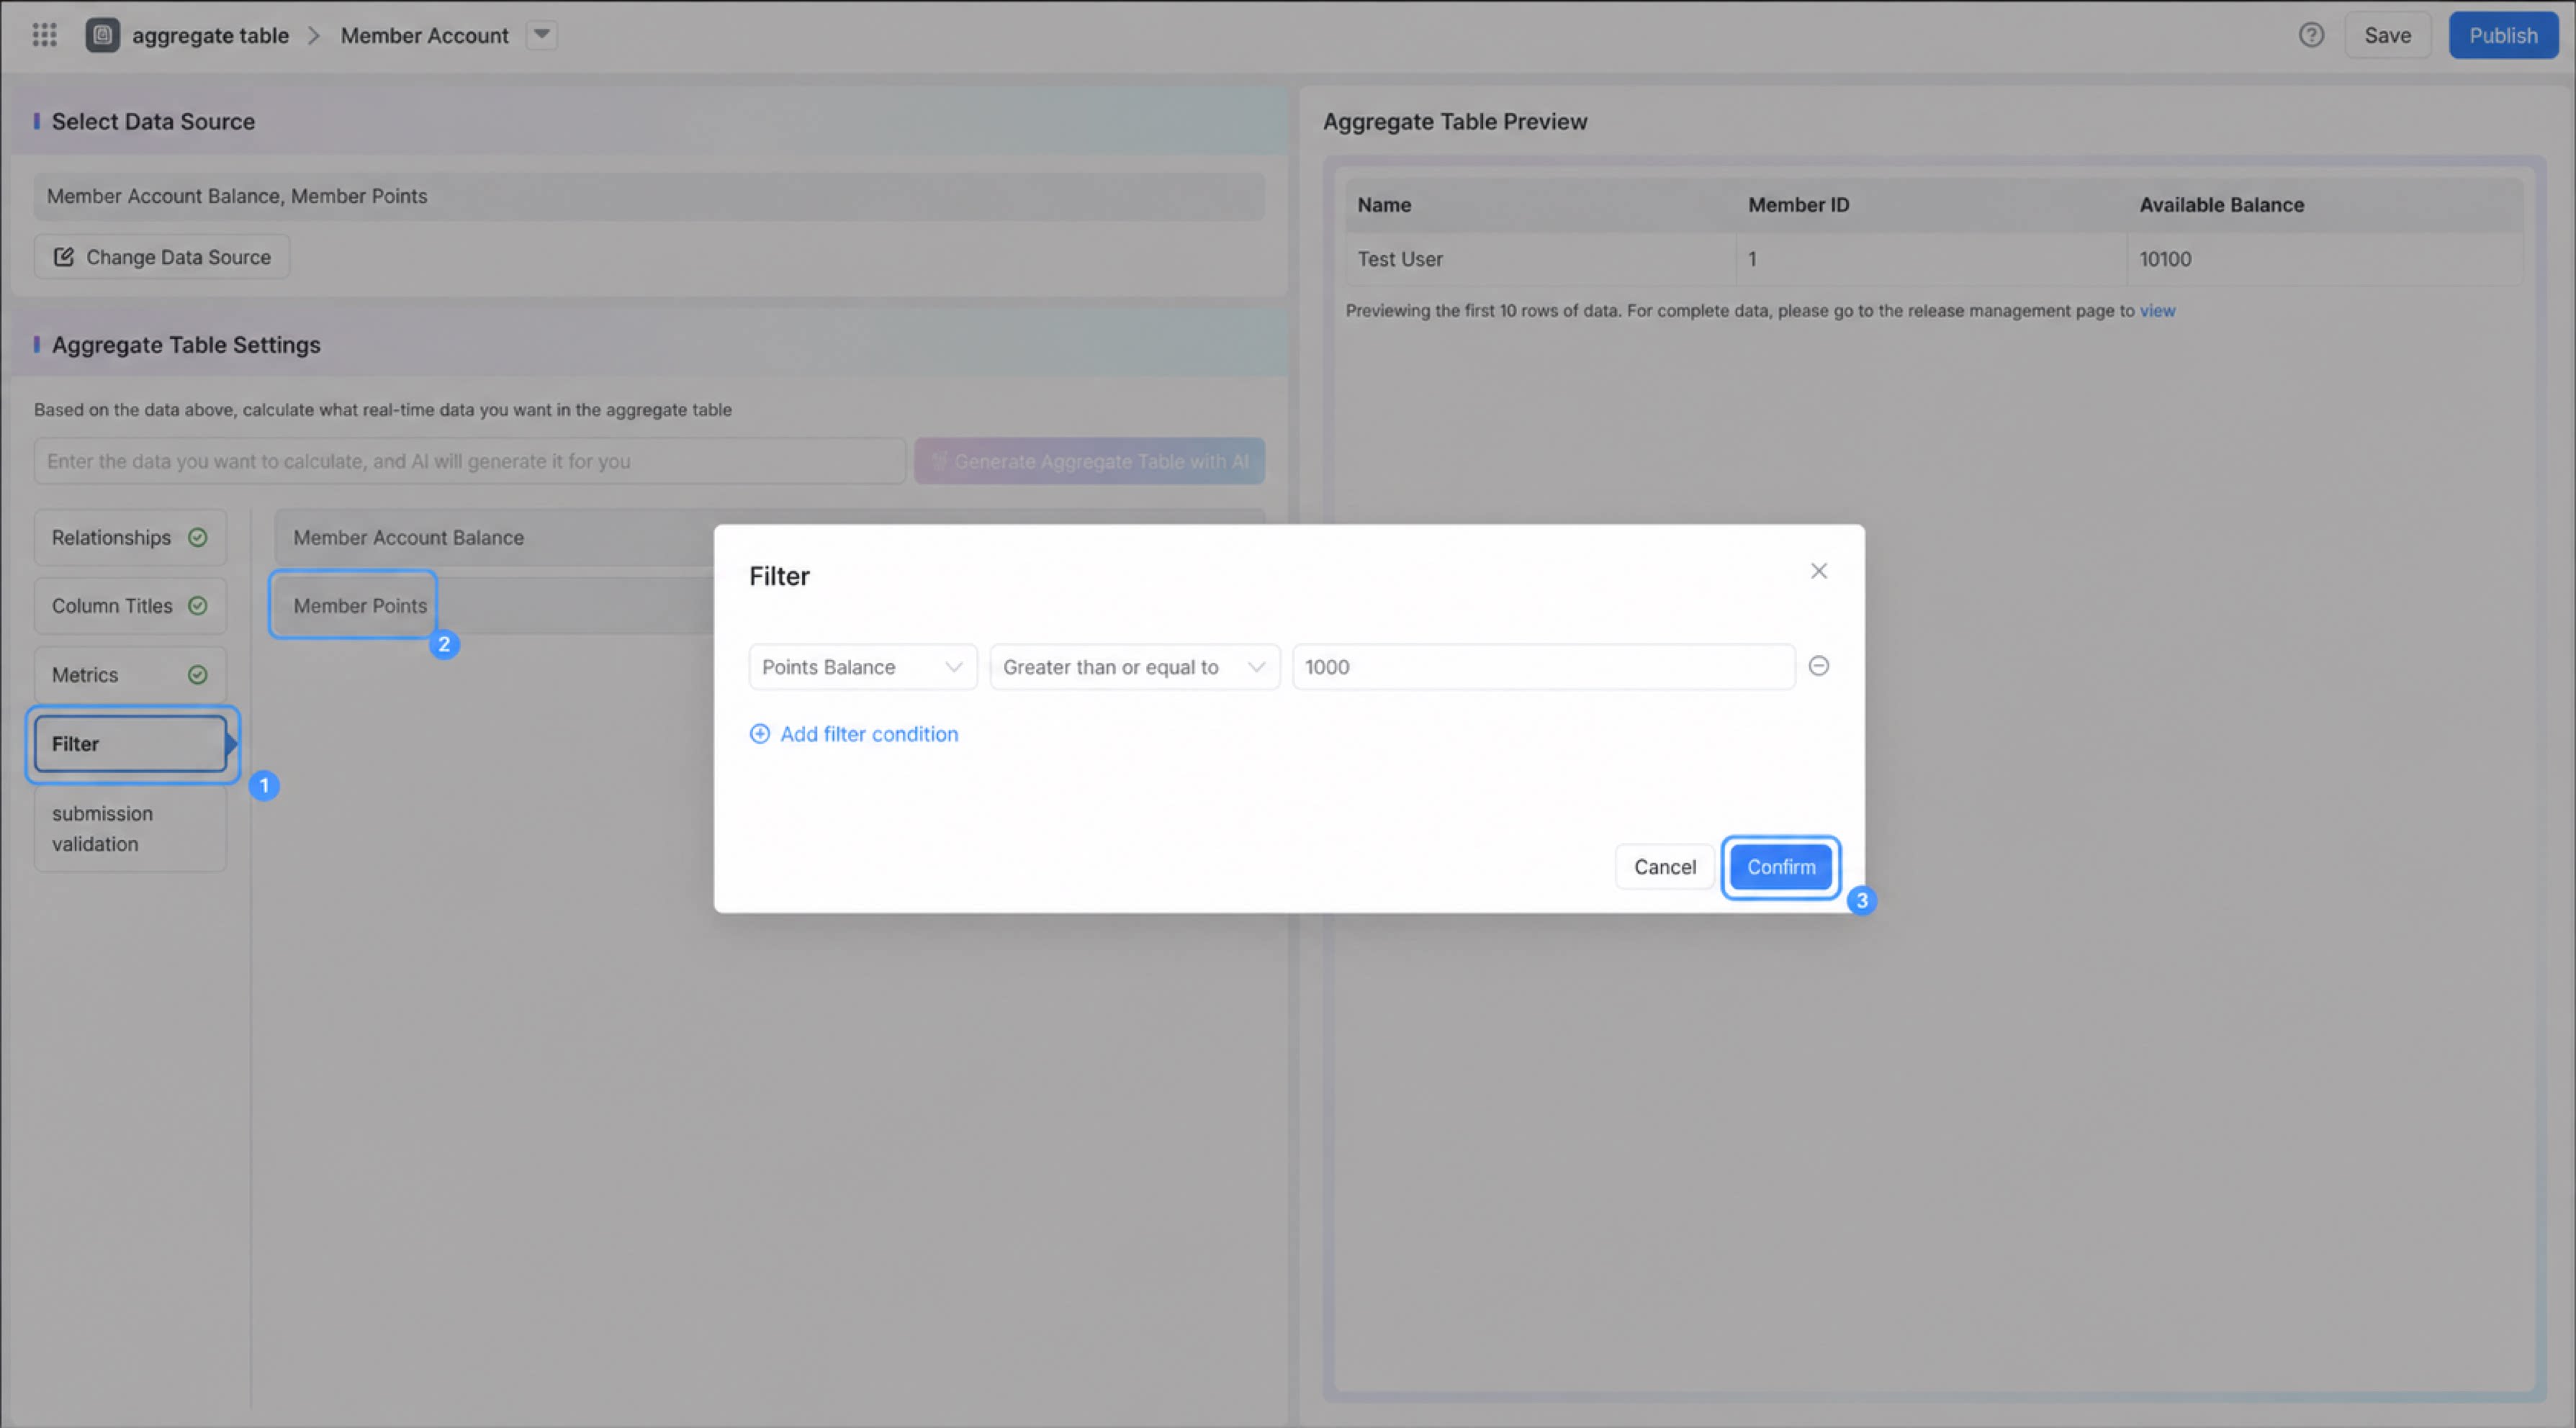
- Filters select records from the data source that meet the conditions for aggregation.
- Both form business fields and form system fields can be used for filtering.
- Approval results from approval process steps can be used for filtering. Only the last step of the main process can be selected, and the approval result must be Accept.
Configure Submission Validation Rules
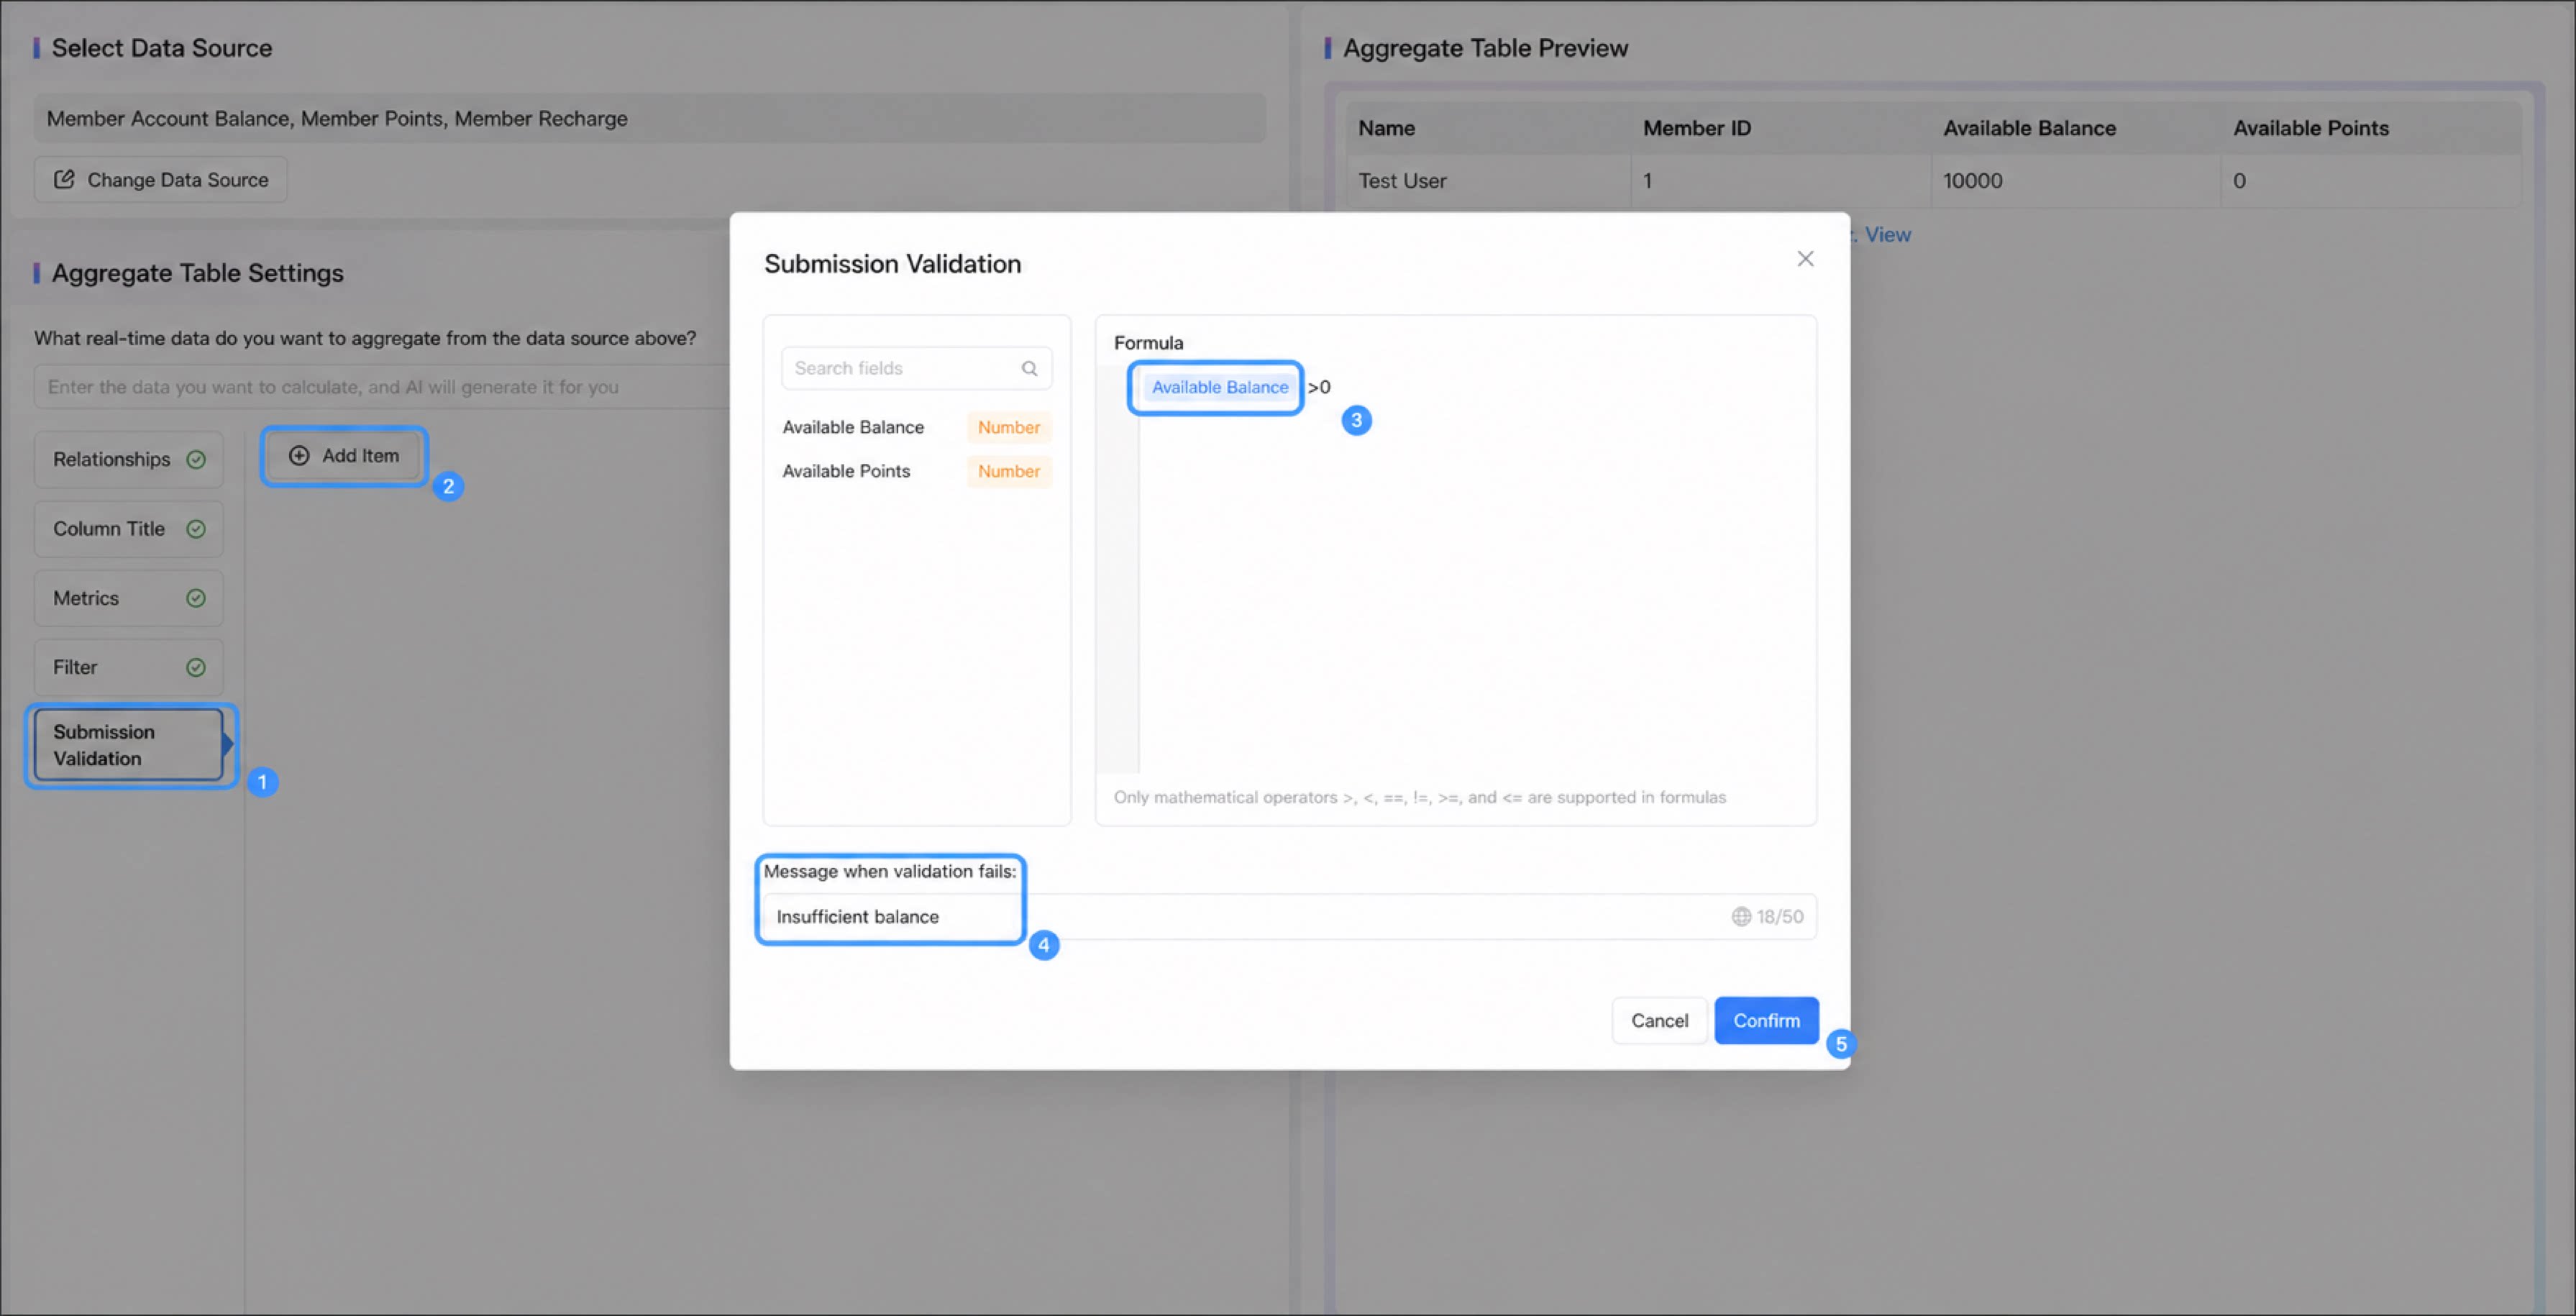
- Click submission validation > Add.
- Configure the submission validation rules for the metric values.
- Click Confirm to complete the configuration. Submission validation is typically used together with metrics to block form submission or perform logic validation.
- Validation formulas support only >, <, ==, !=, >=, and <=.
- The prompt text shown when validation fails can be customized, up to 50 characters.
- Available variables are metric fields or numbers.
Publish the Aggregate Table
1
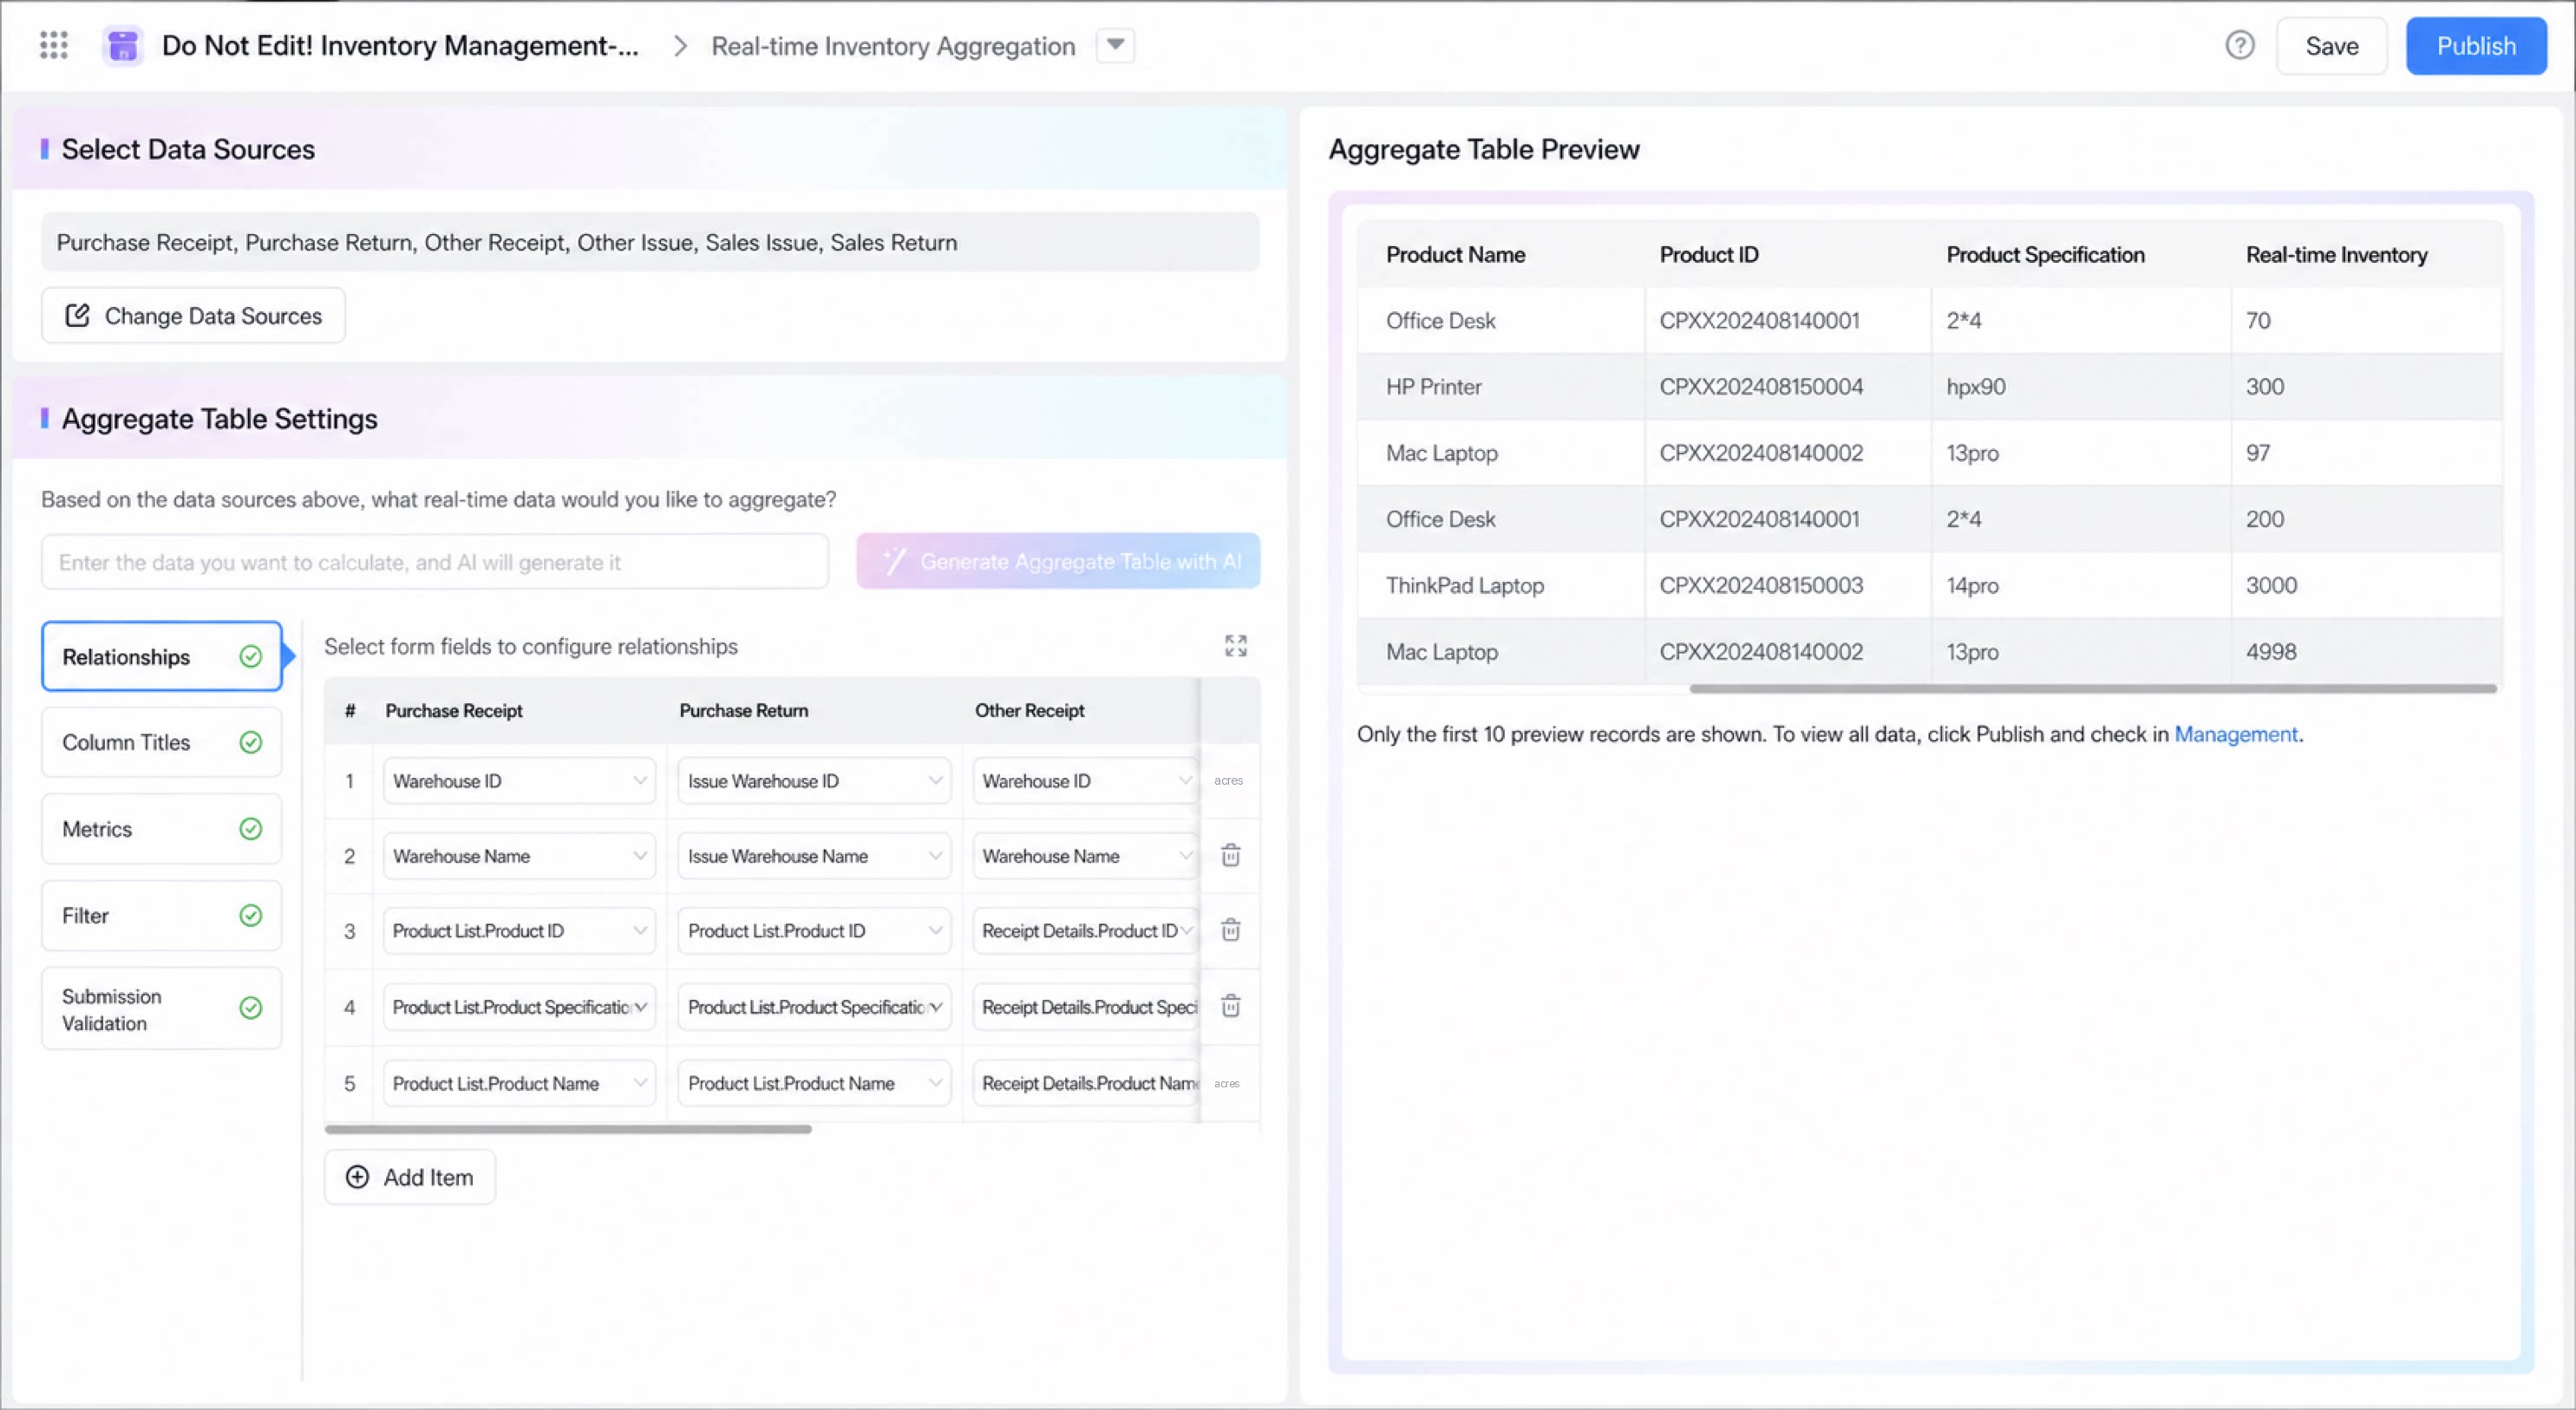
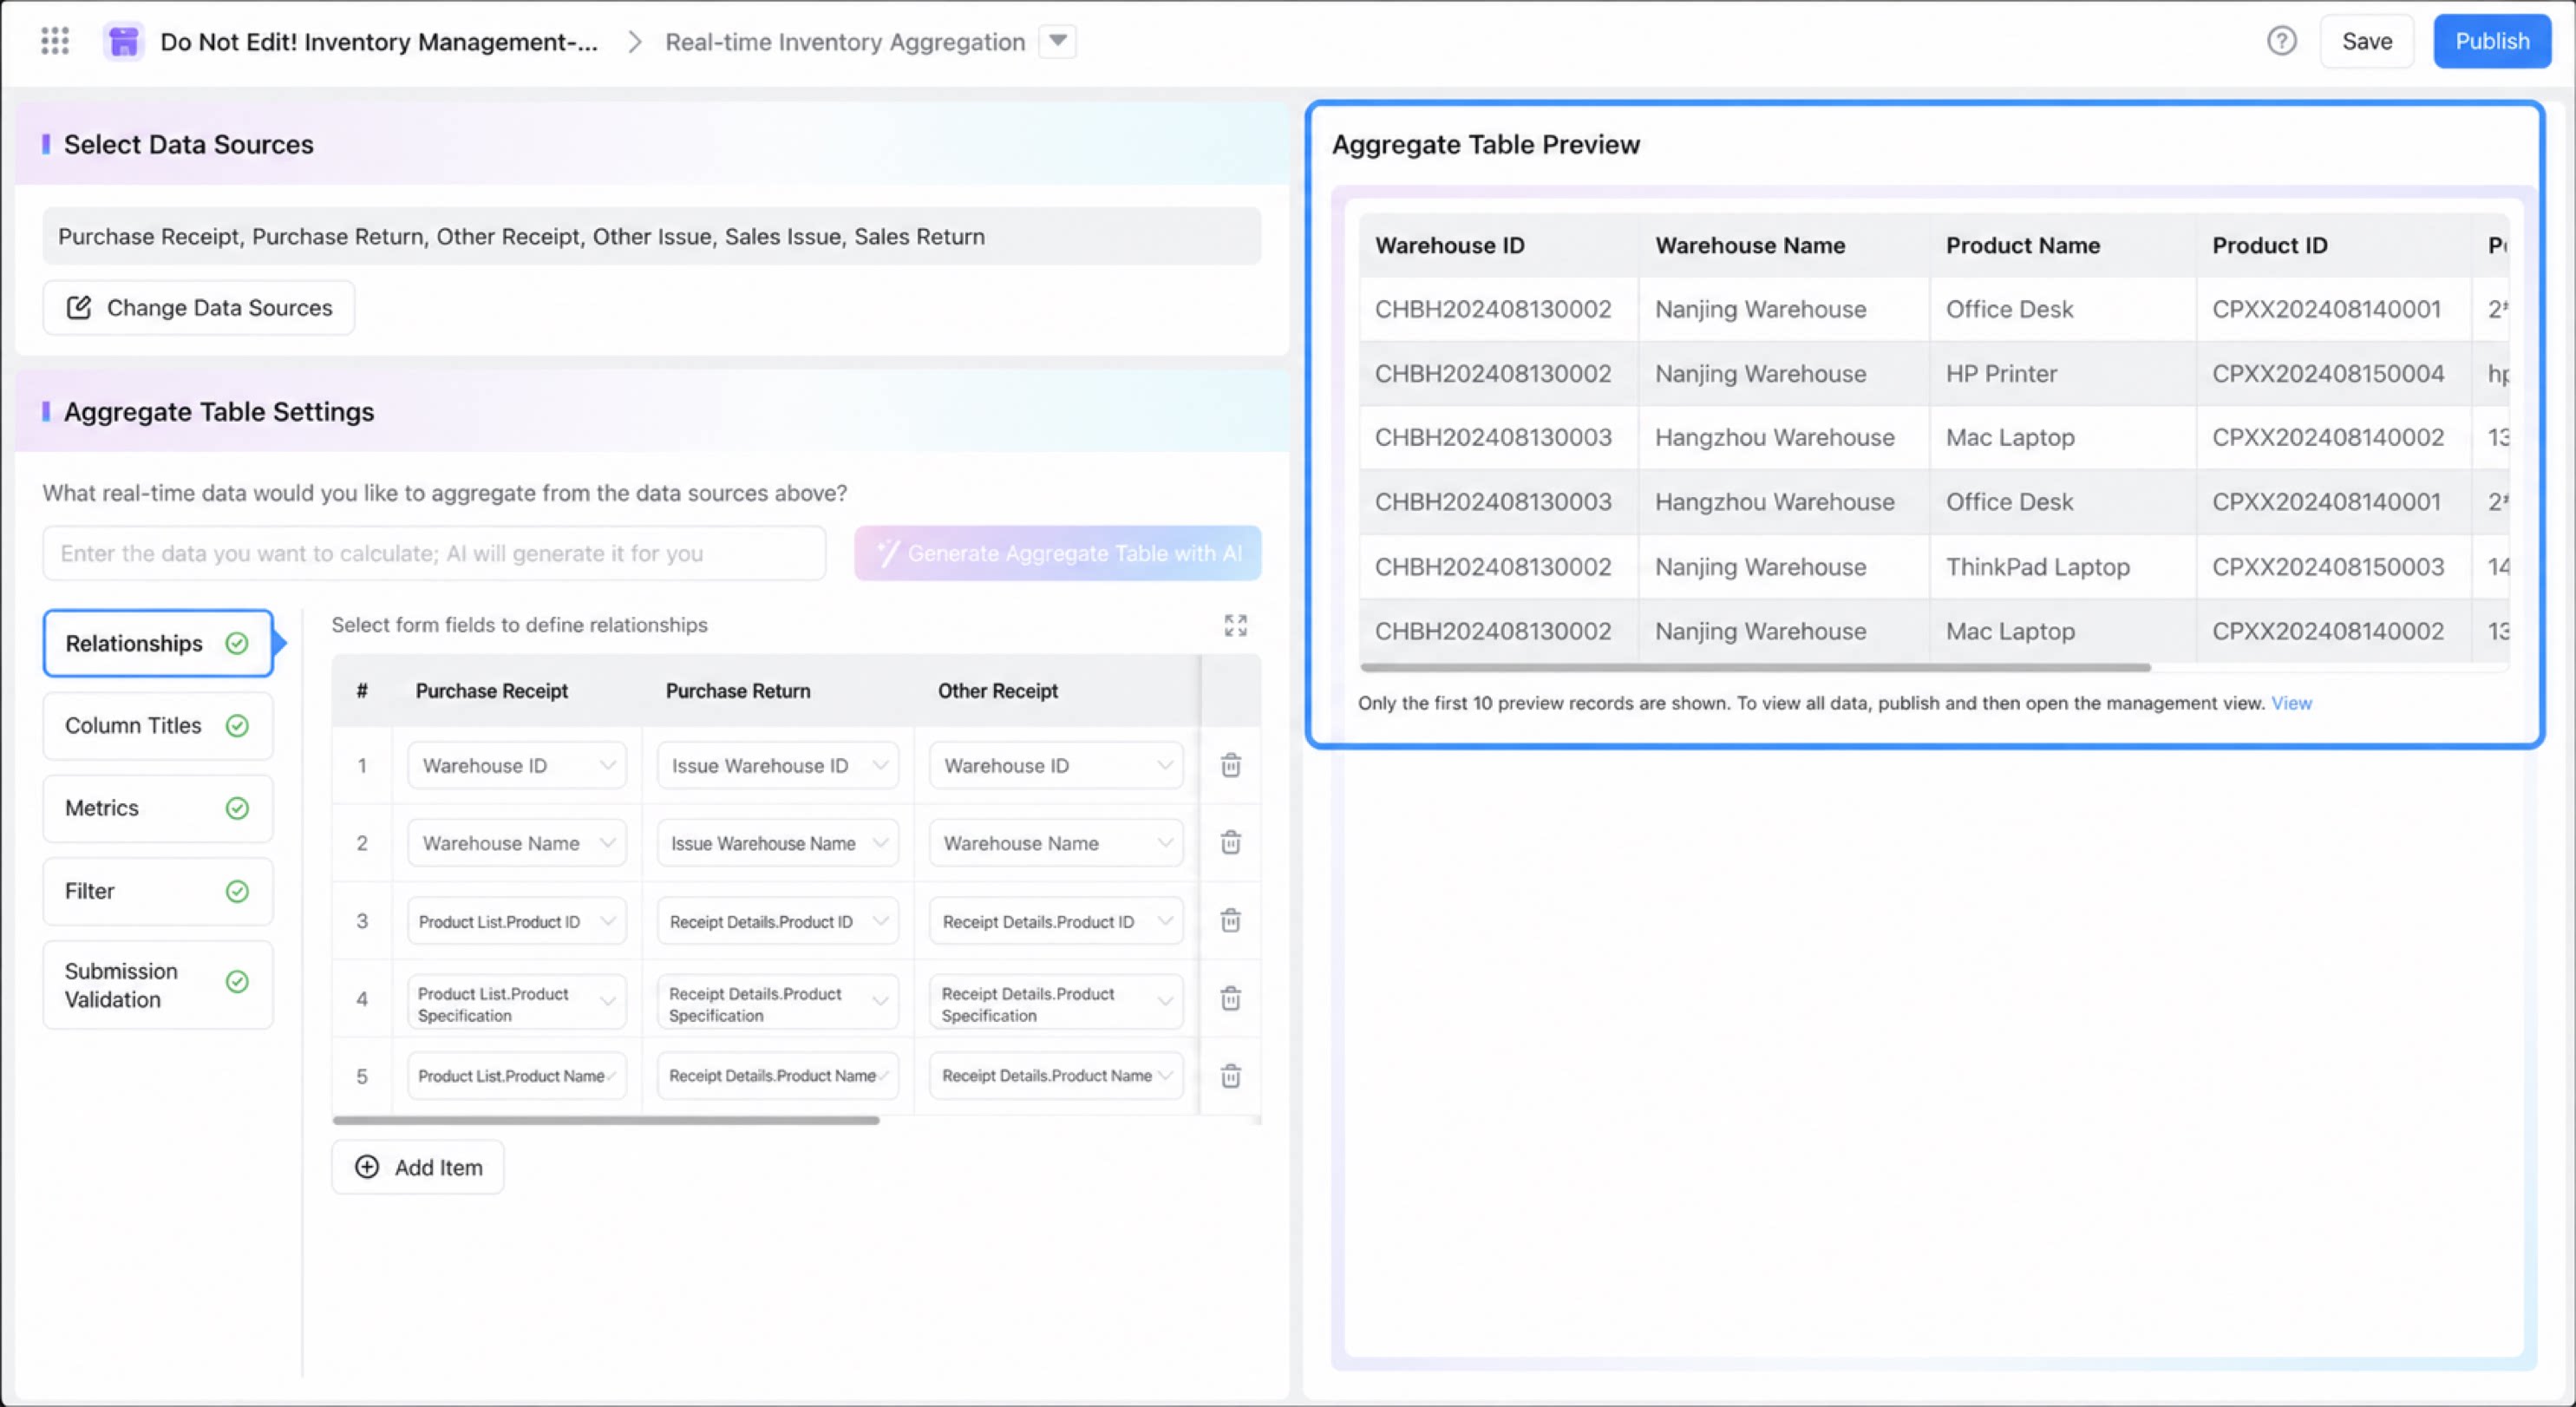
After configuration, preview the data on the right side of the page
2
Click Save and Publish in the upper-right corner to complete publishing
3
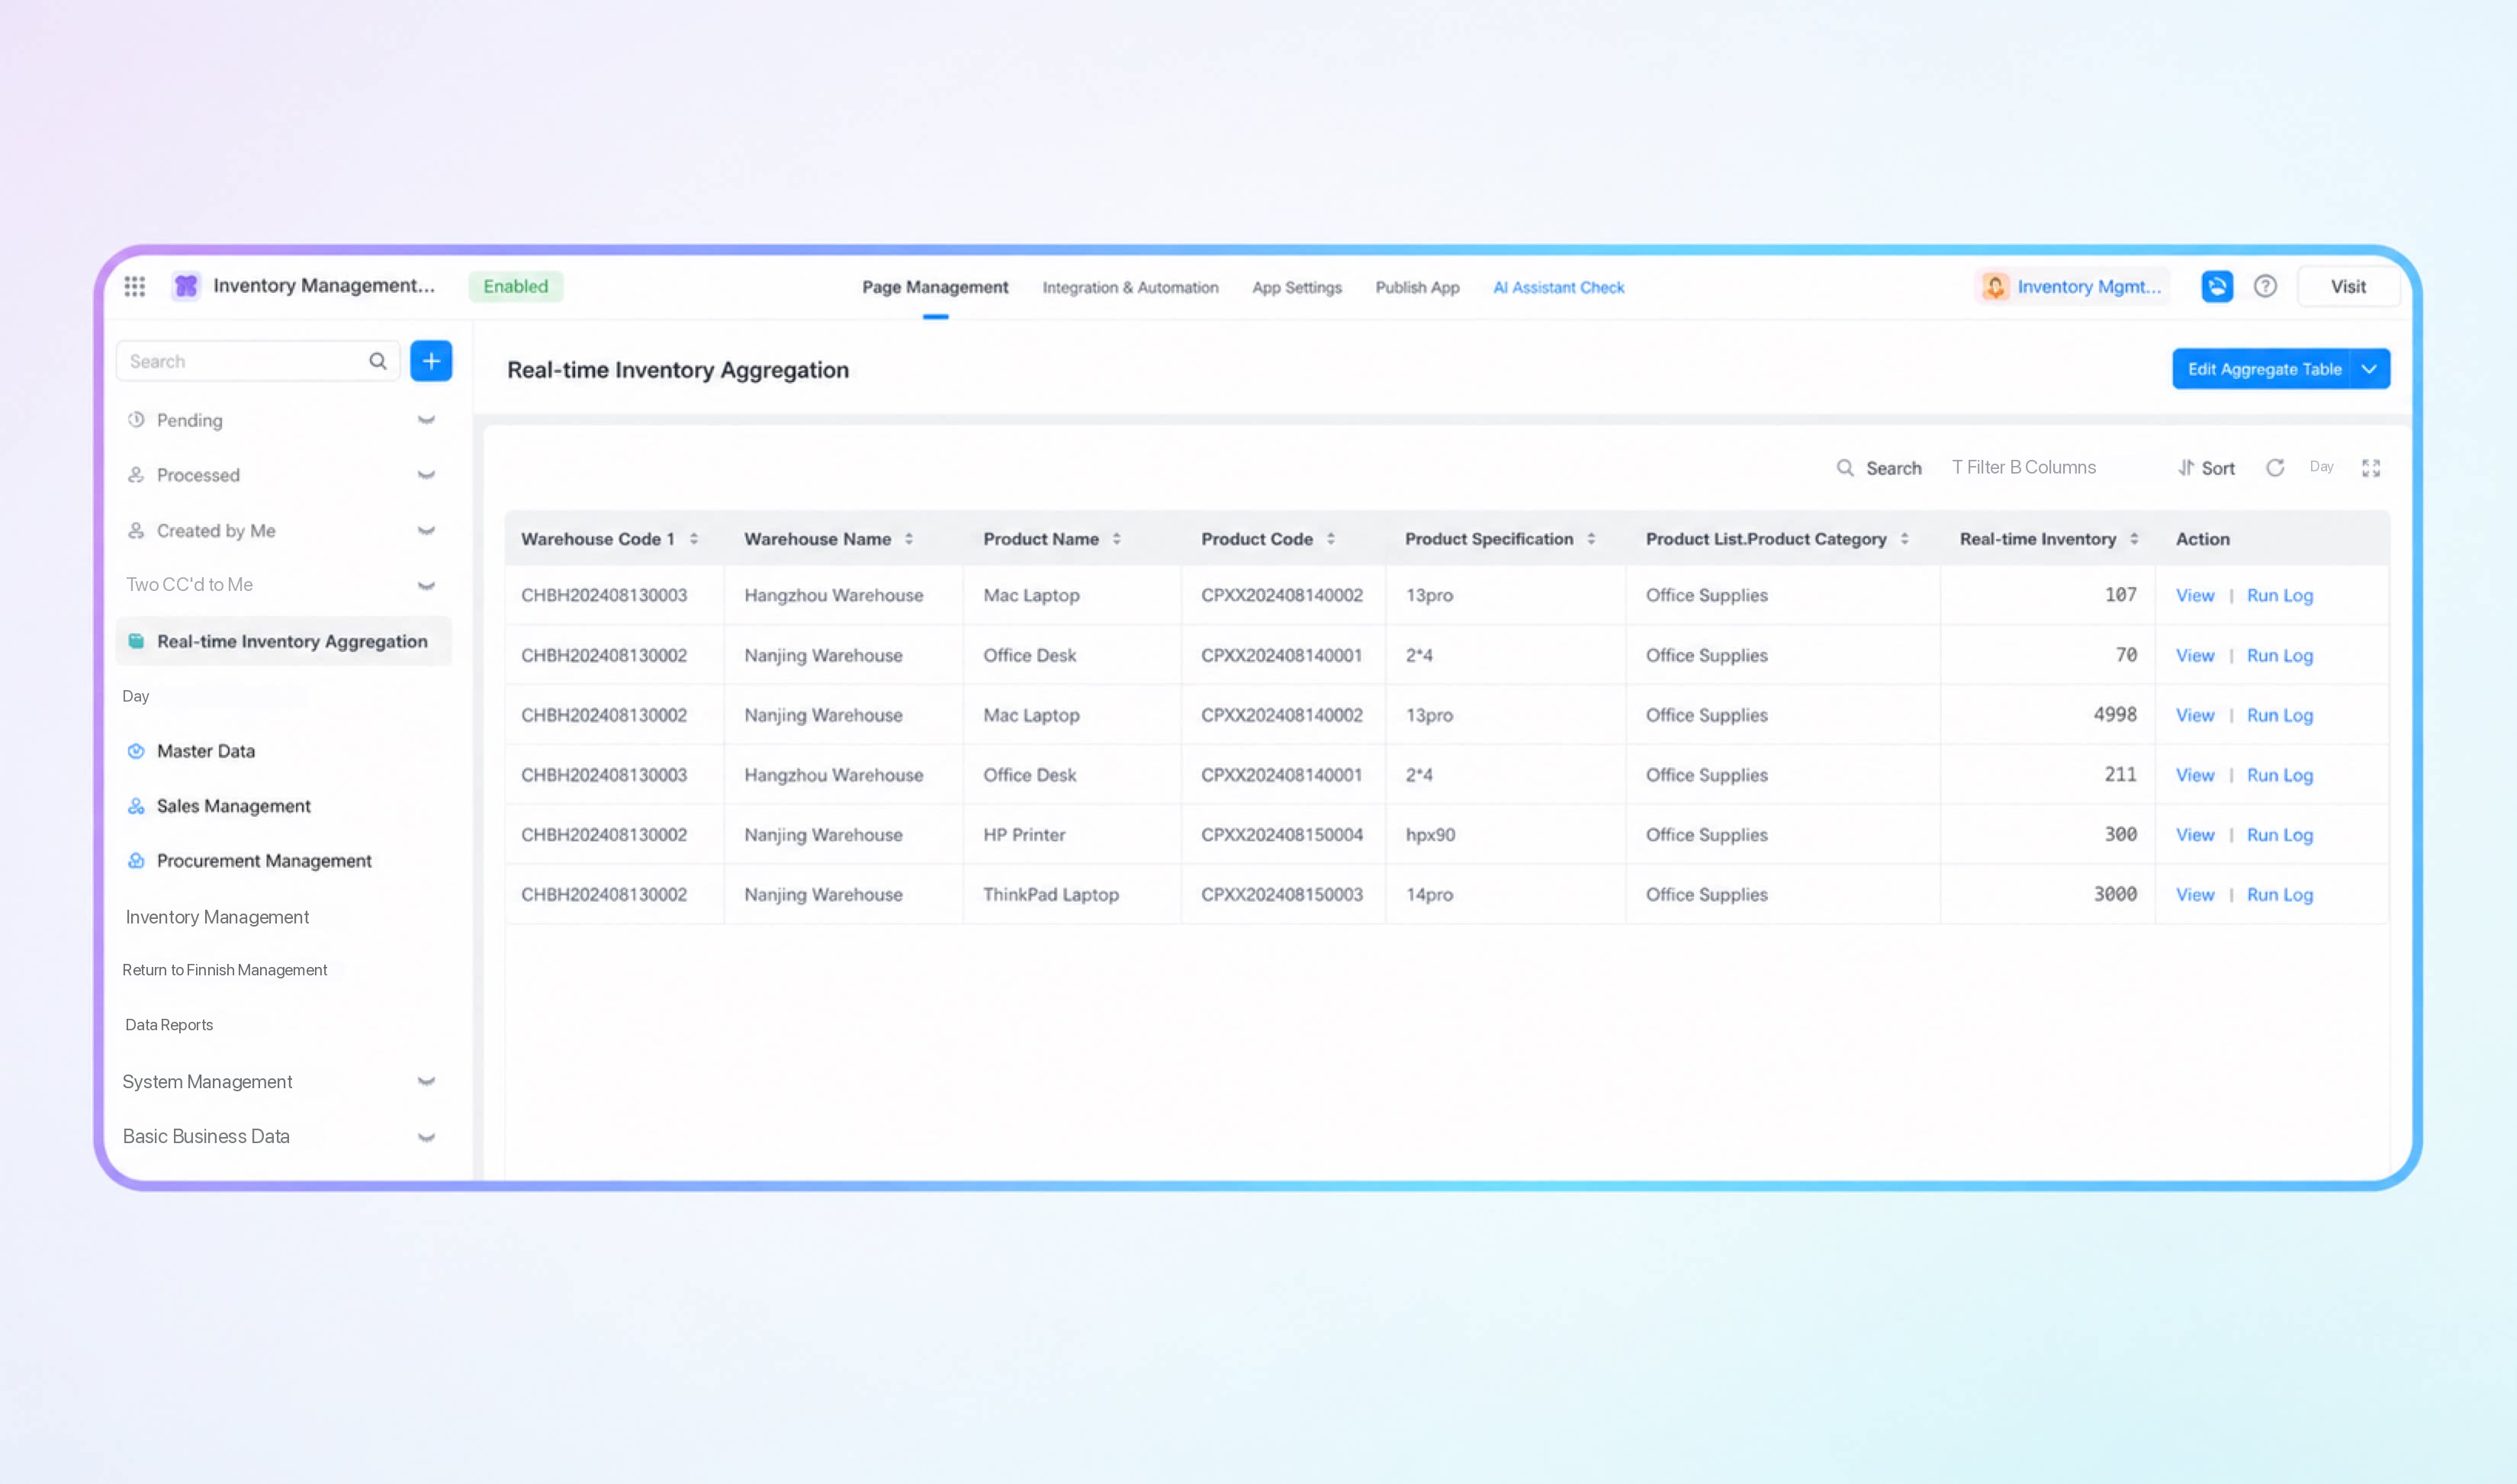
After publishing, view the calculation results of the aggregate table
4
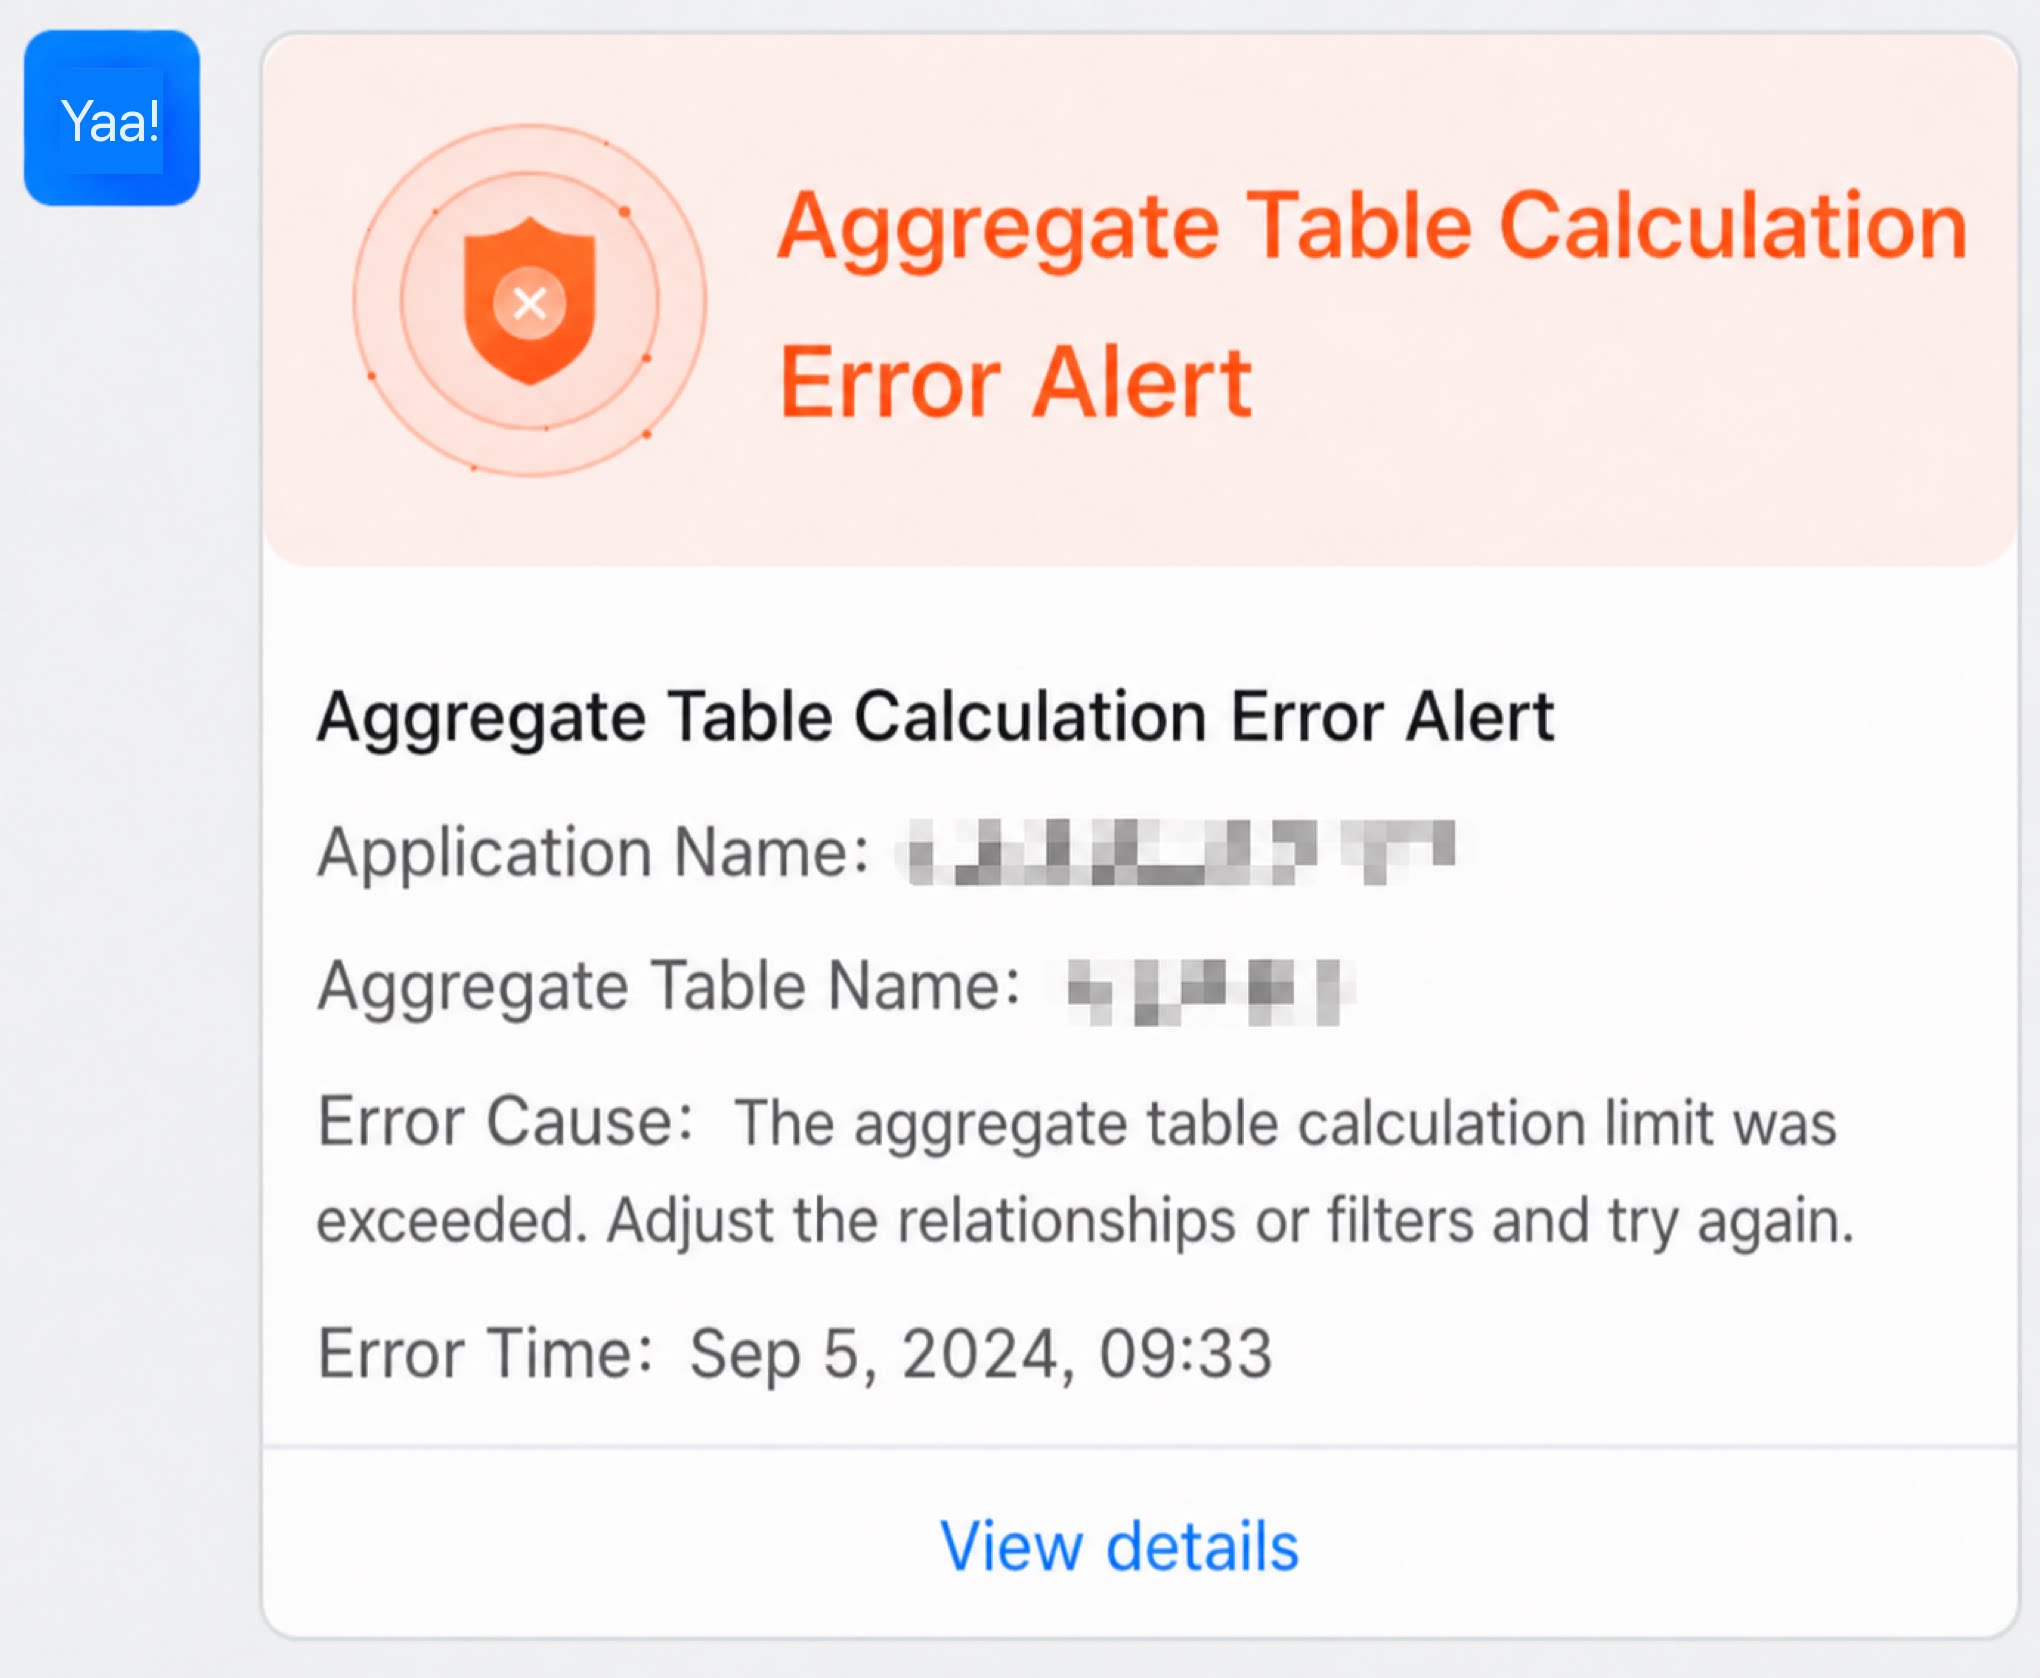
If publishing fails due to network errors, calculation timeouts, or other issues, a Work Notifications message is sent to the app Admin
Configure Aggregate Table Permissions
Aggregate tables support Custom permission settings. By default, all users can view all data. Admins can change the list of visible users and use aggregate table fields to define data that meets the filter conditions.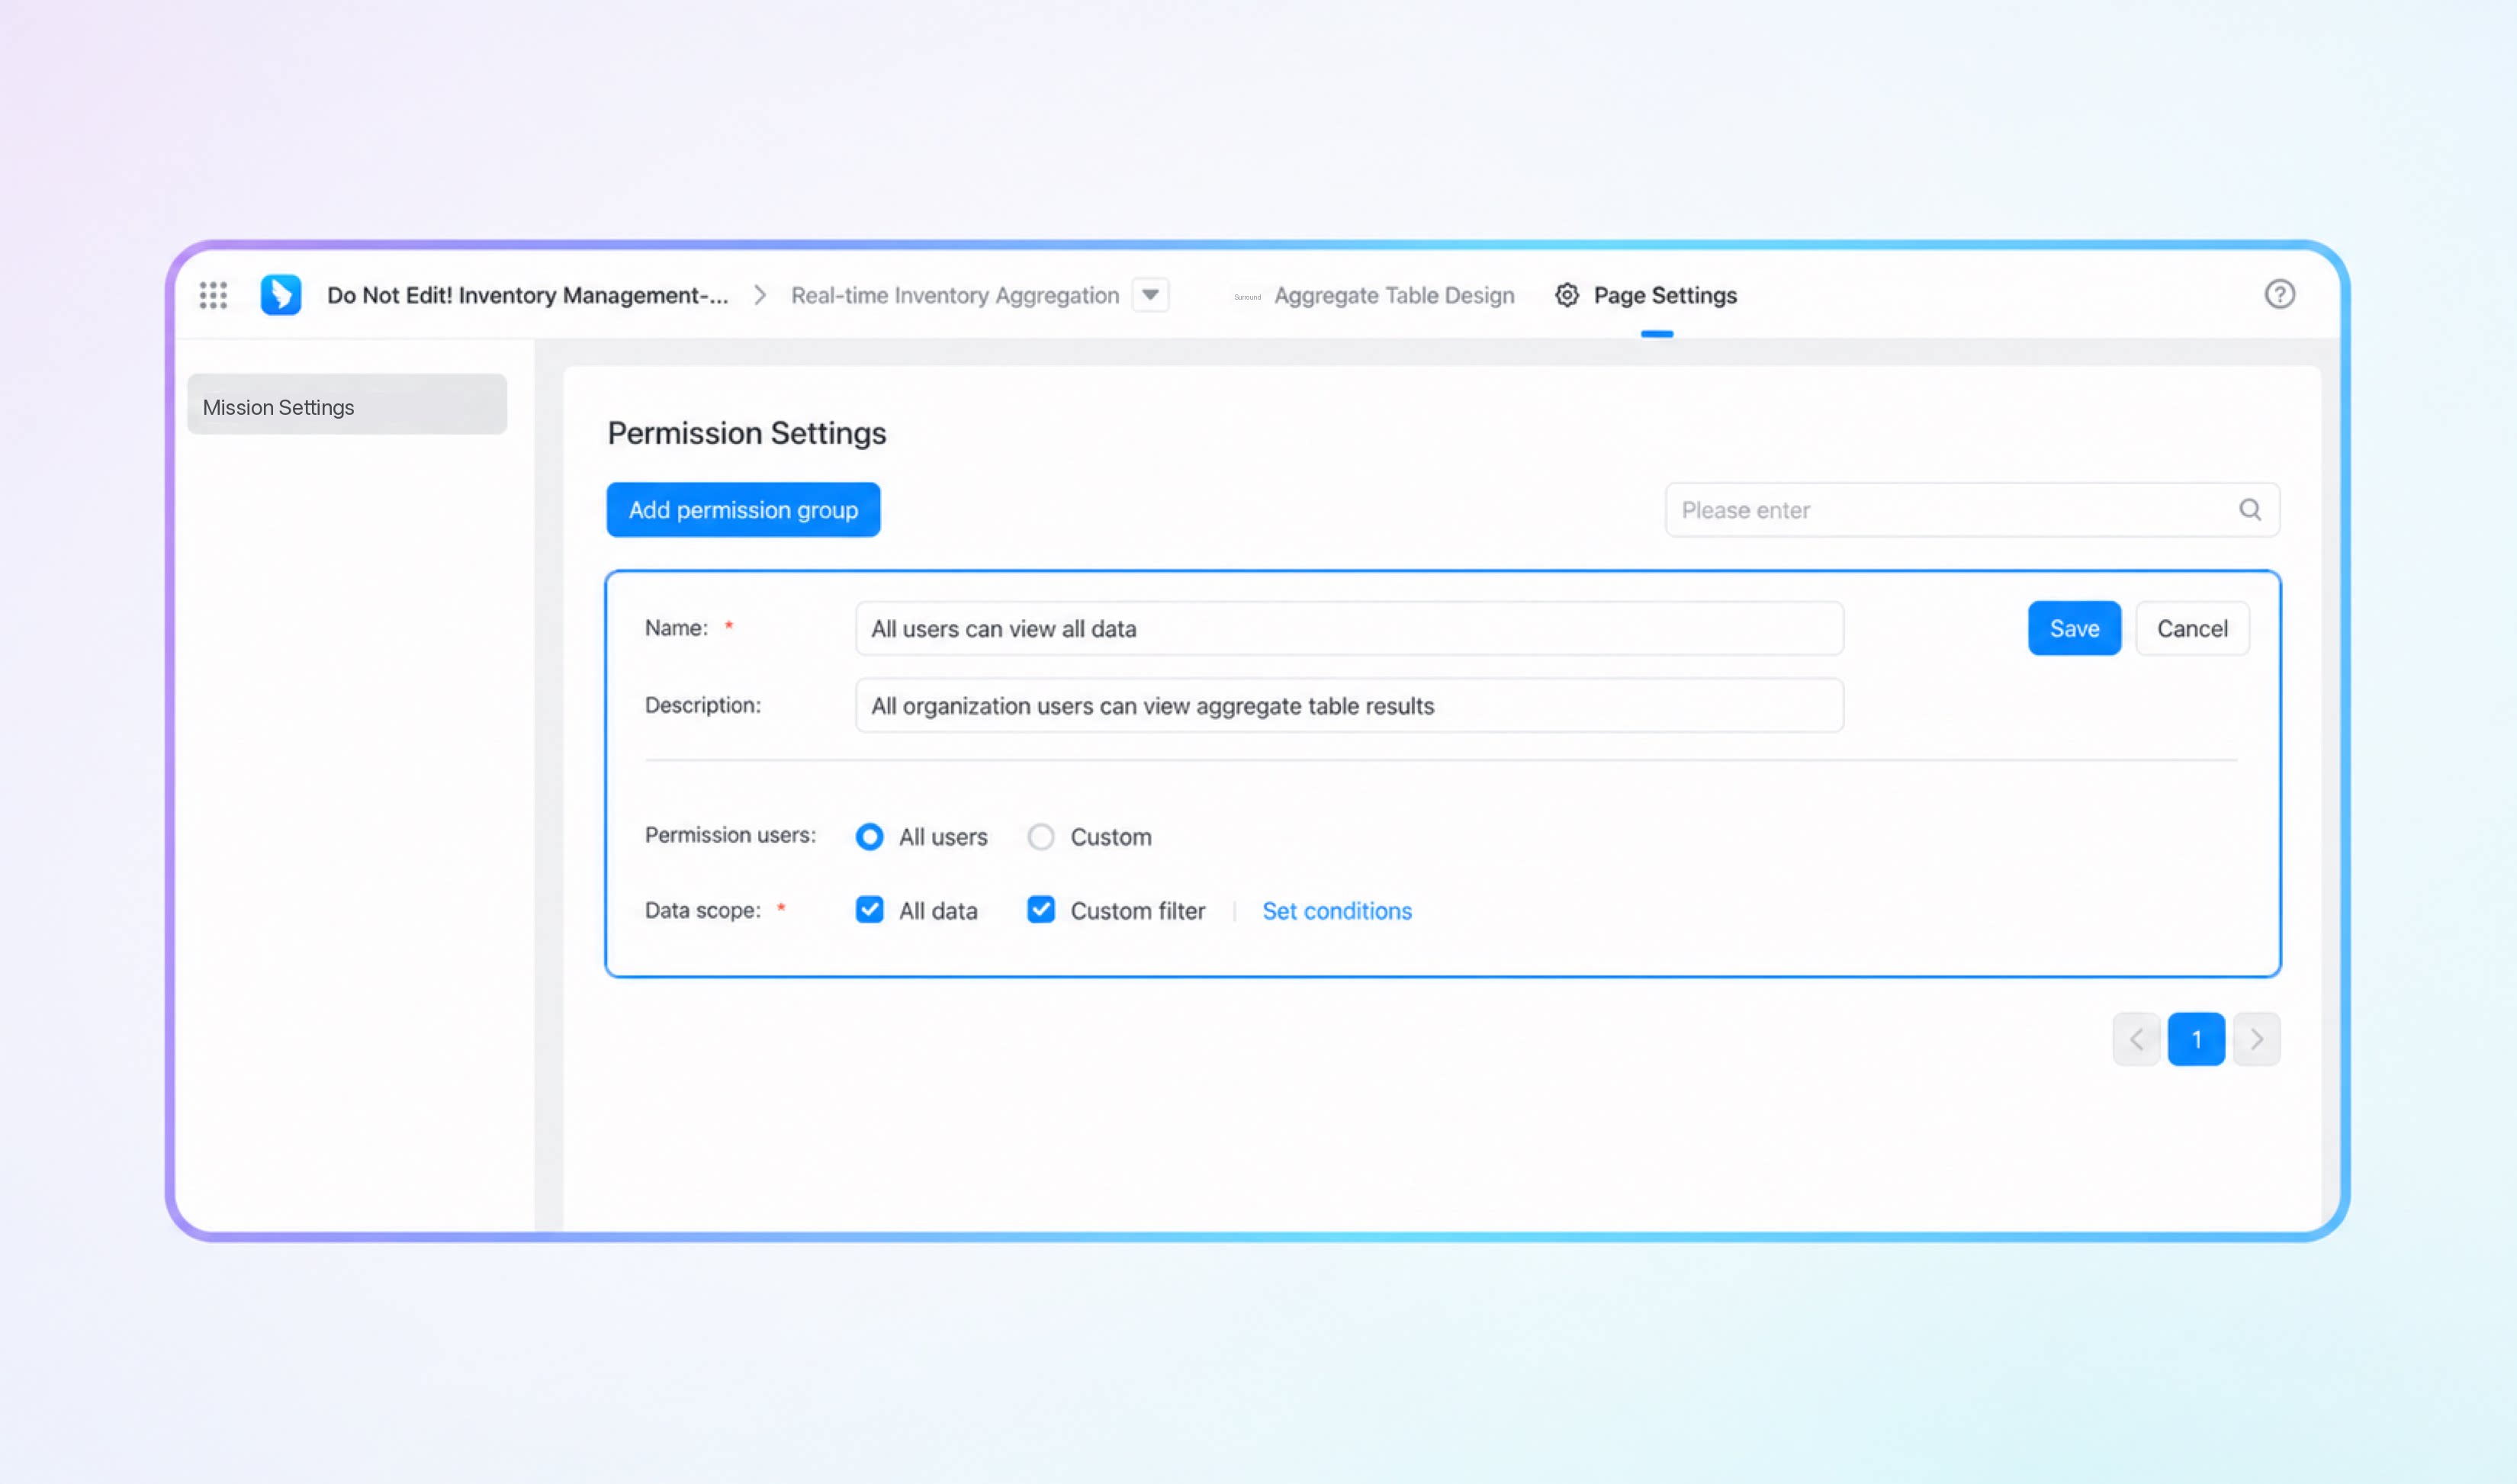
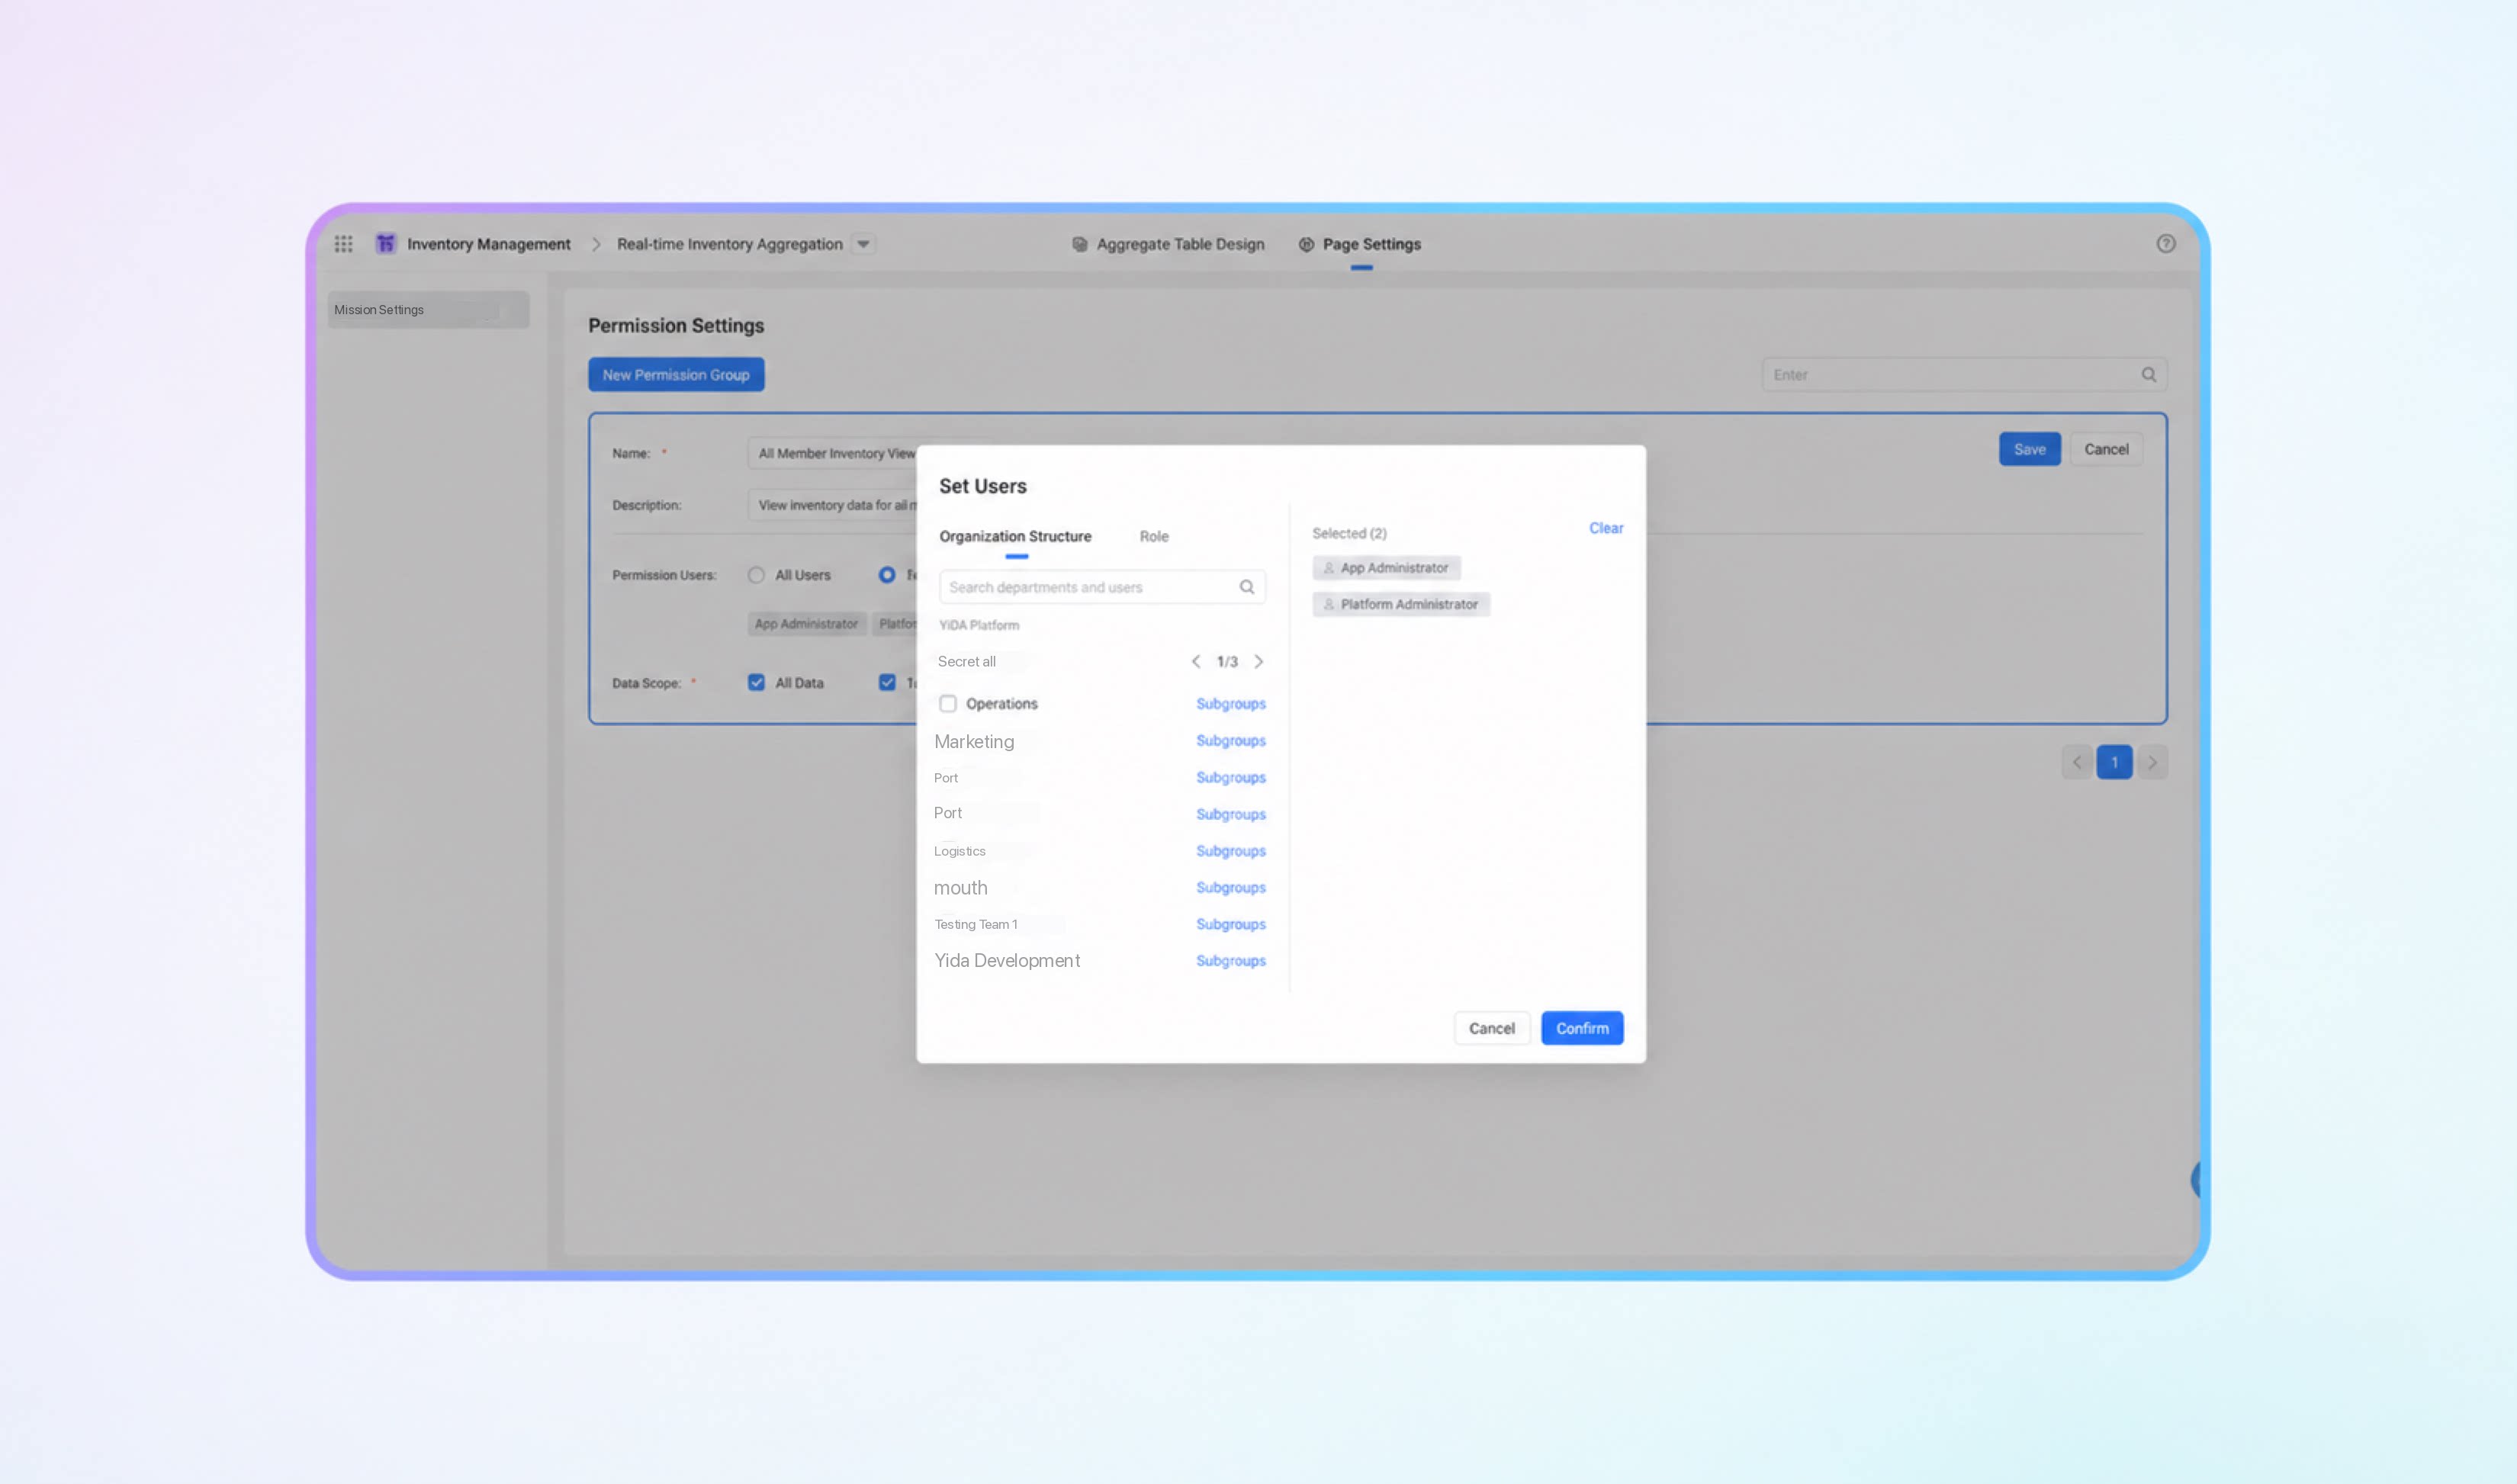
- Authorized users: select users, roles, or departments within the organization.
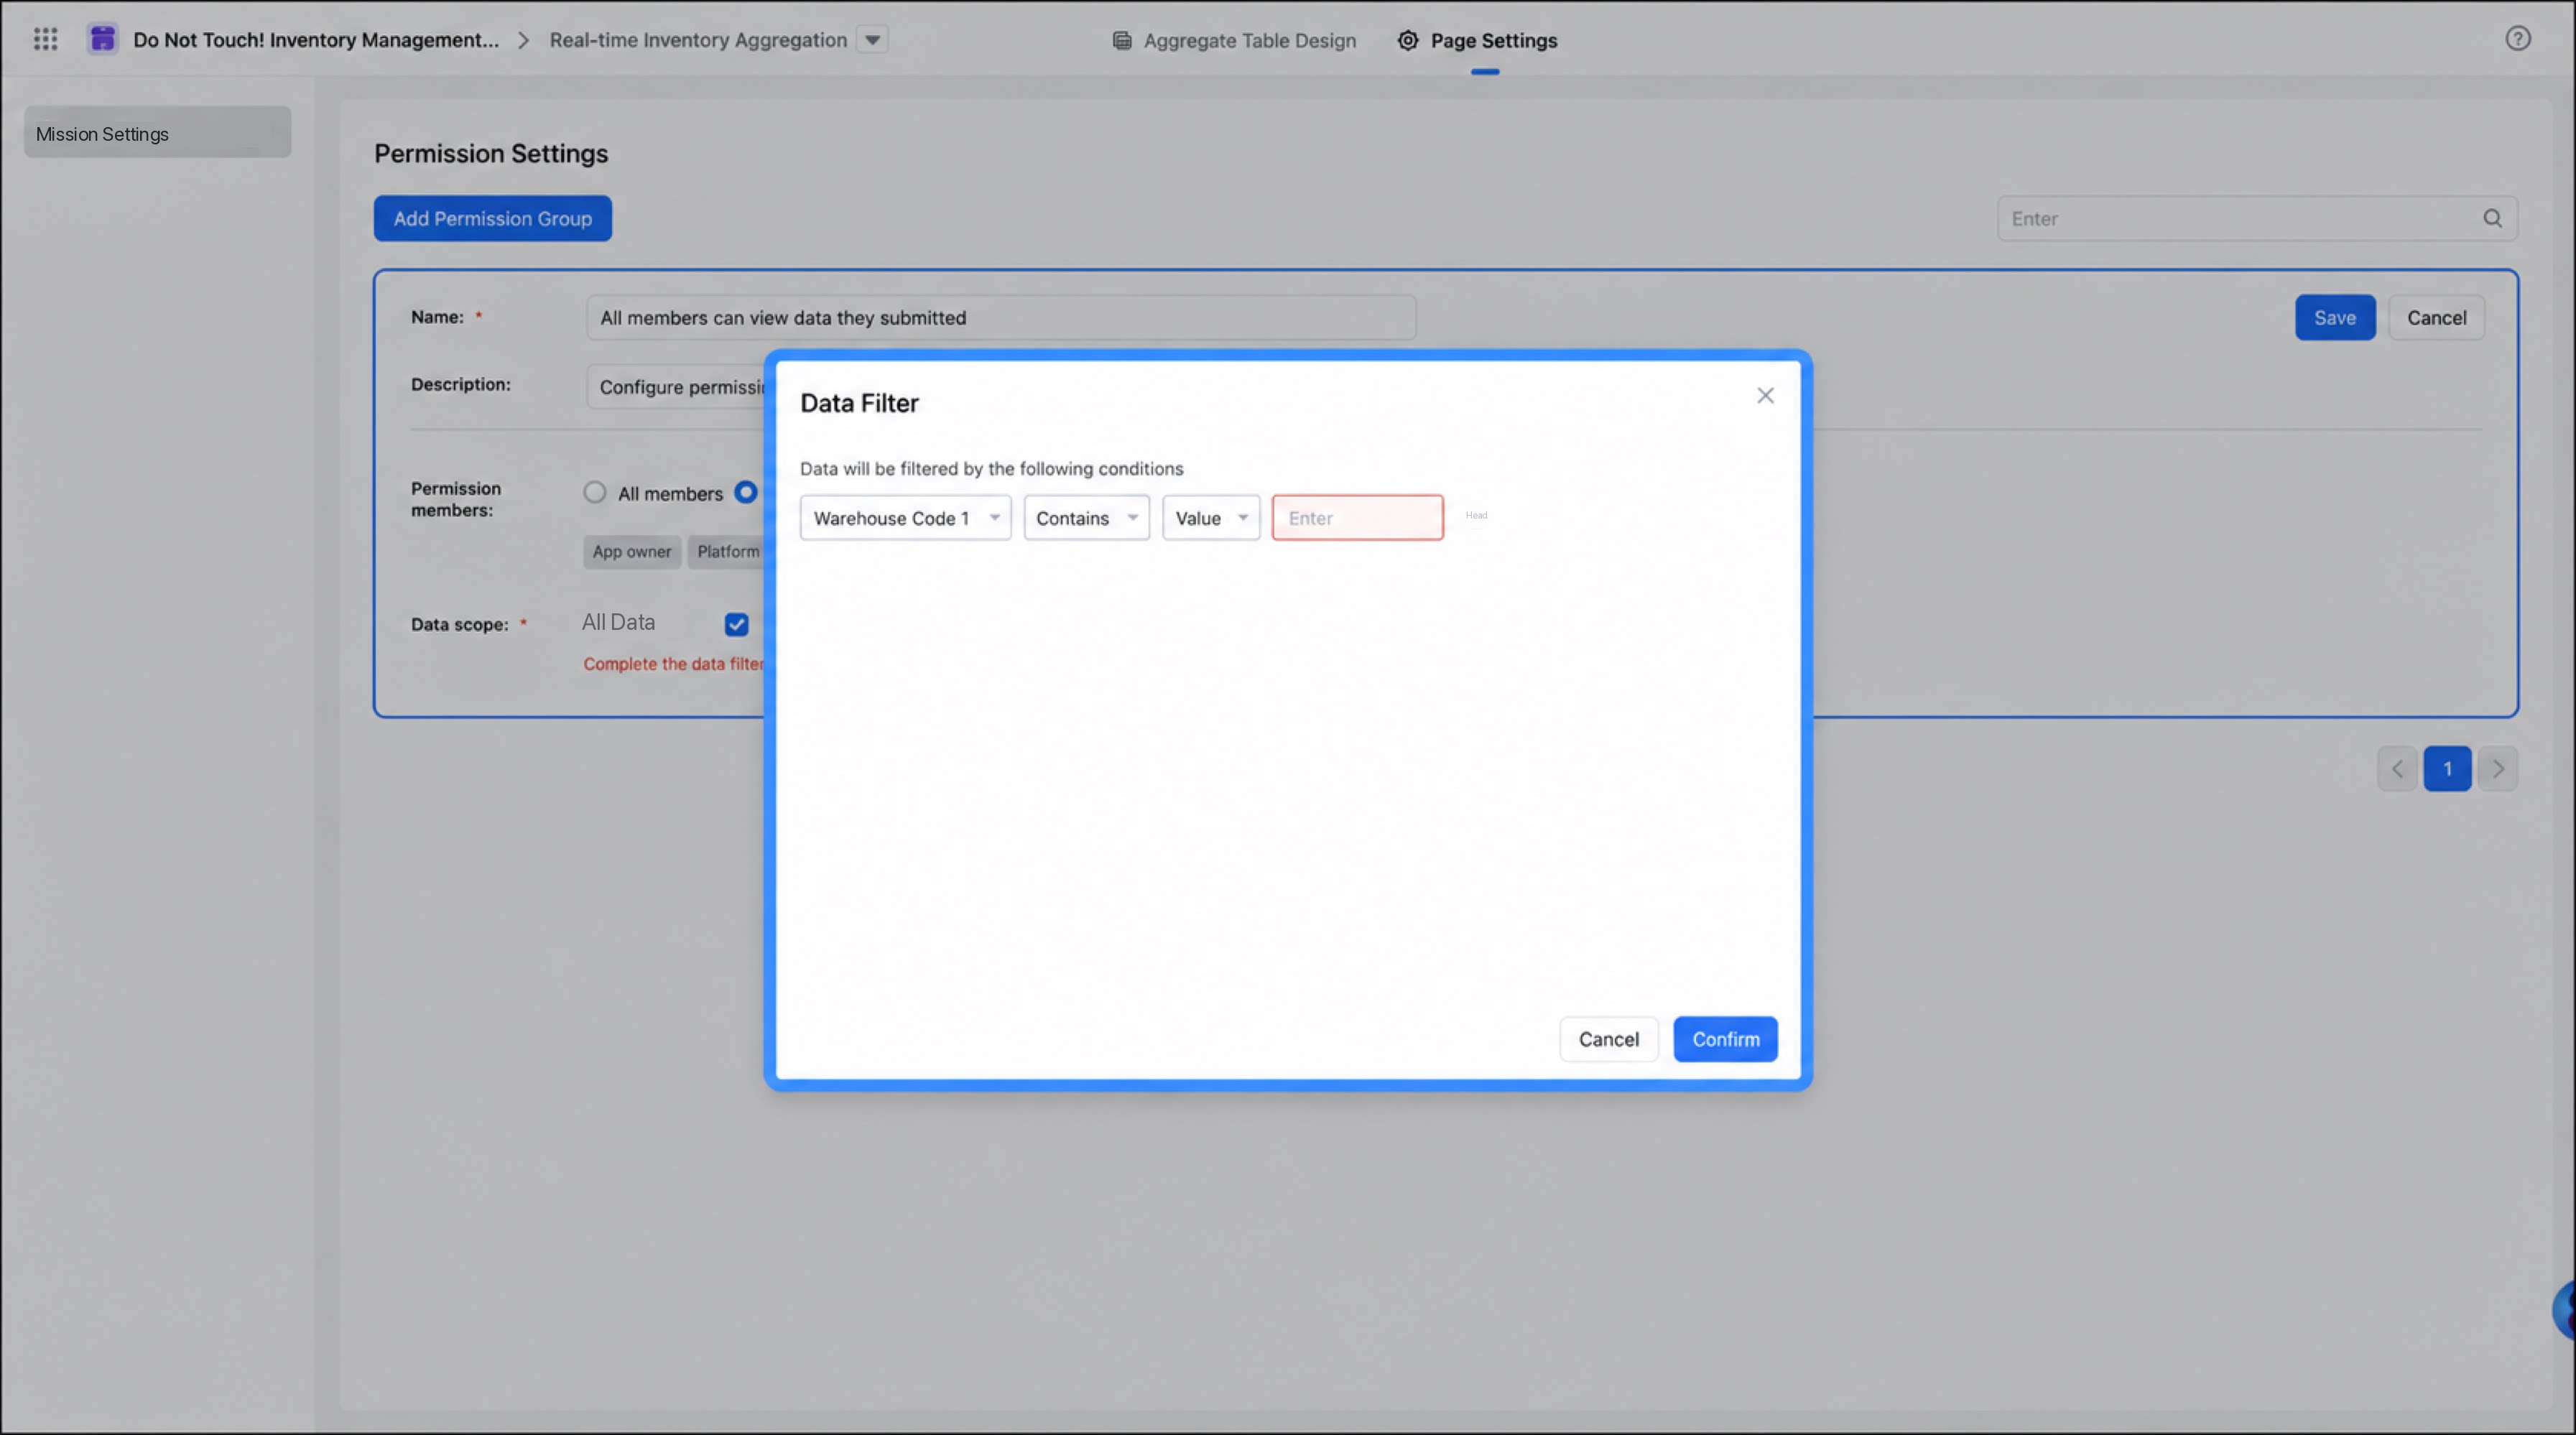
- Data scope: uses column field conditions of the aggregate table for filtering.
FAQ
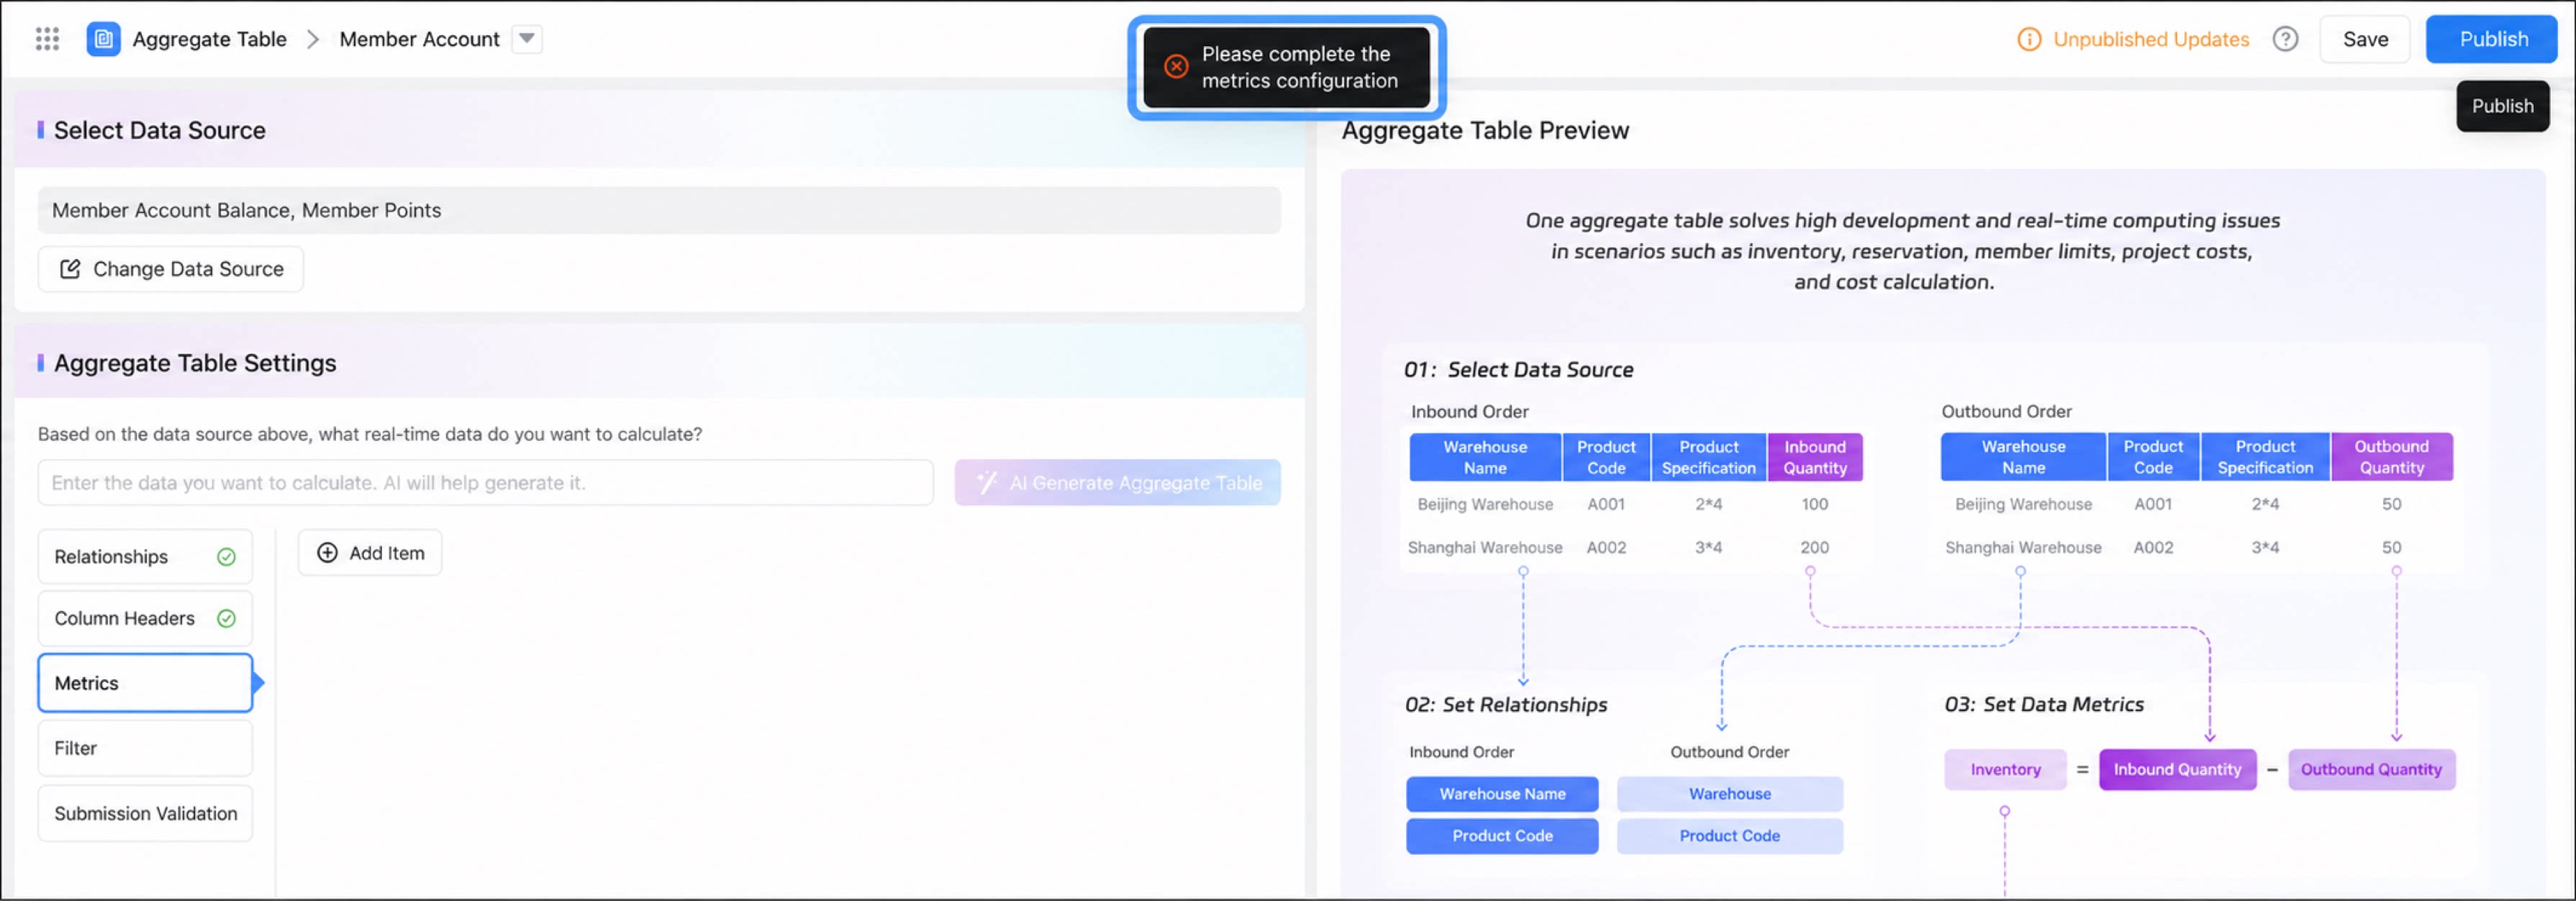
- Q: When publishing the aggregate table, the error “Please complete the metric configuration” is displayed.
- Q: When publishing the aggregate table, the error “Publish failed: The metric uses only some of the data sources. Data cannot be aggregated properly. Delete the unnecessary data sources or modify the metric calculation.” is displayed.