Chats
Chats Calendar
 Meetings
 Contacts
 Mail
Mail Docs
Docs Drive
Drive AI Table
 AI Minutes
 Attendance
 Approval
 YiDA
YiDA Admin Console
Prerequisites
Before using the Mail Notification feature in an Approval process, add a Mail account first. For details, see Mail management.Add a Mail Notification Node
1
Step 1
Sign in to the YiDA workbench, select the target App, and open the Page management page.
2
Step 2
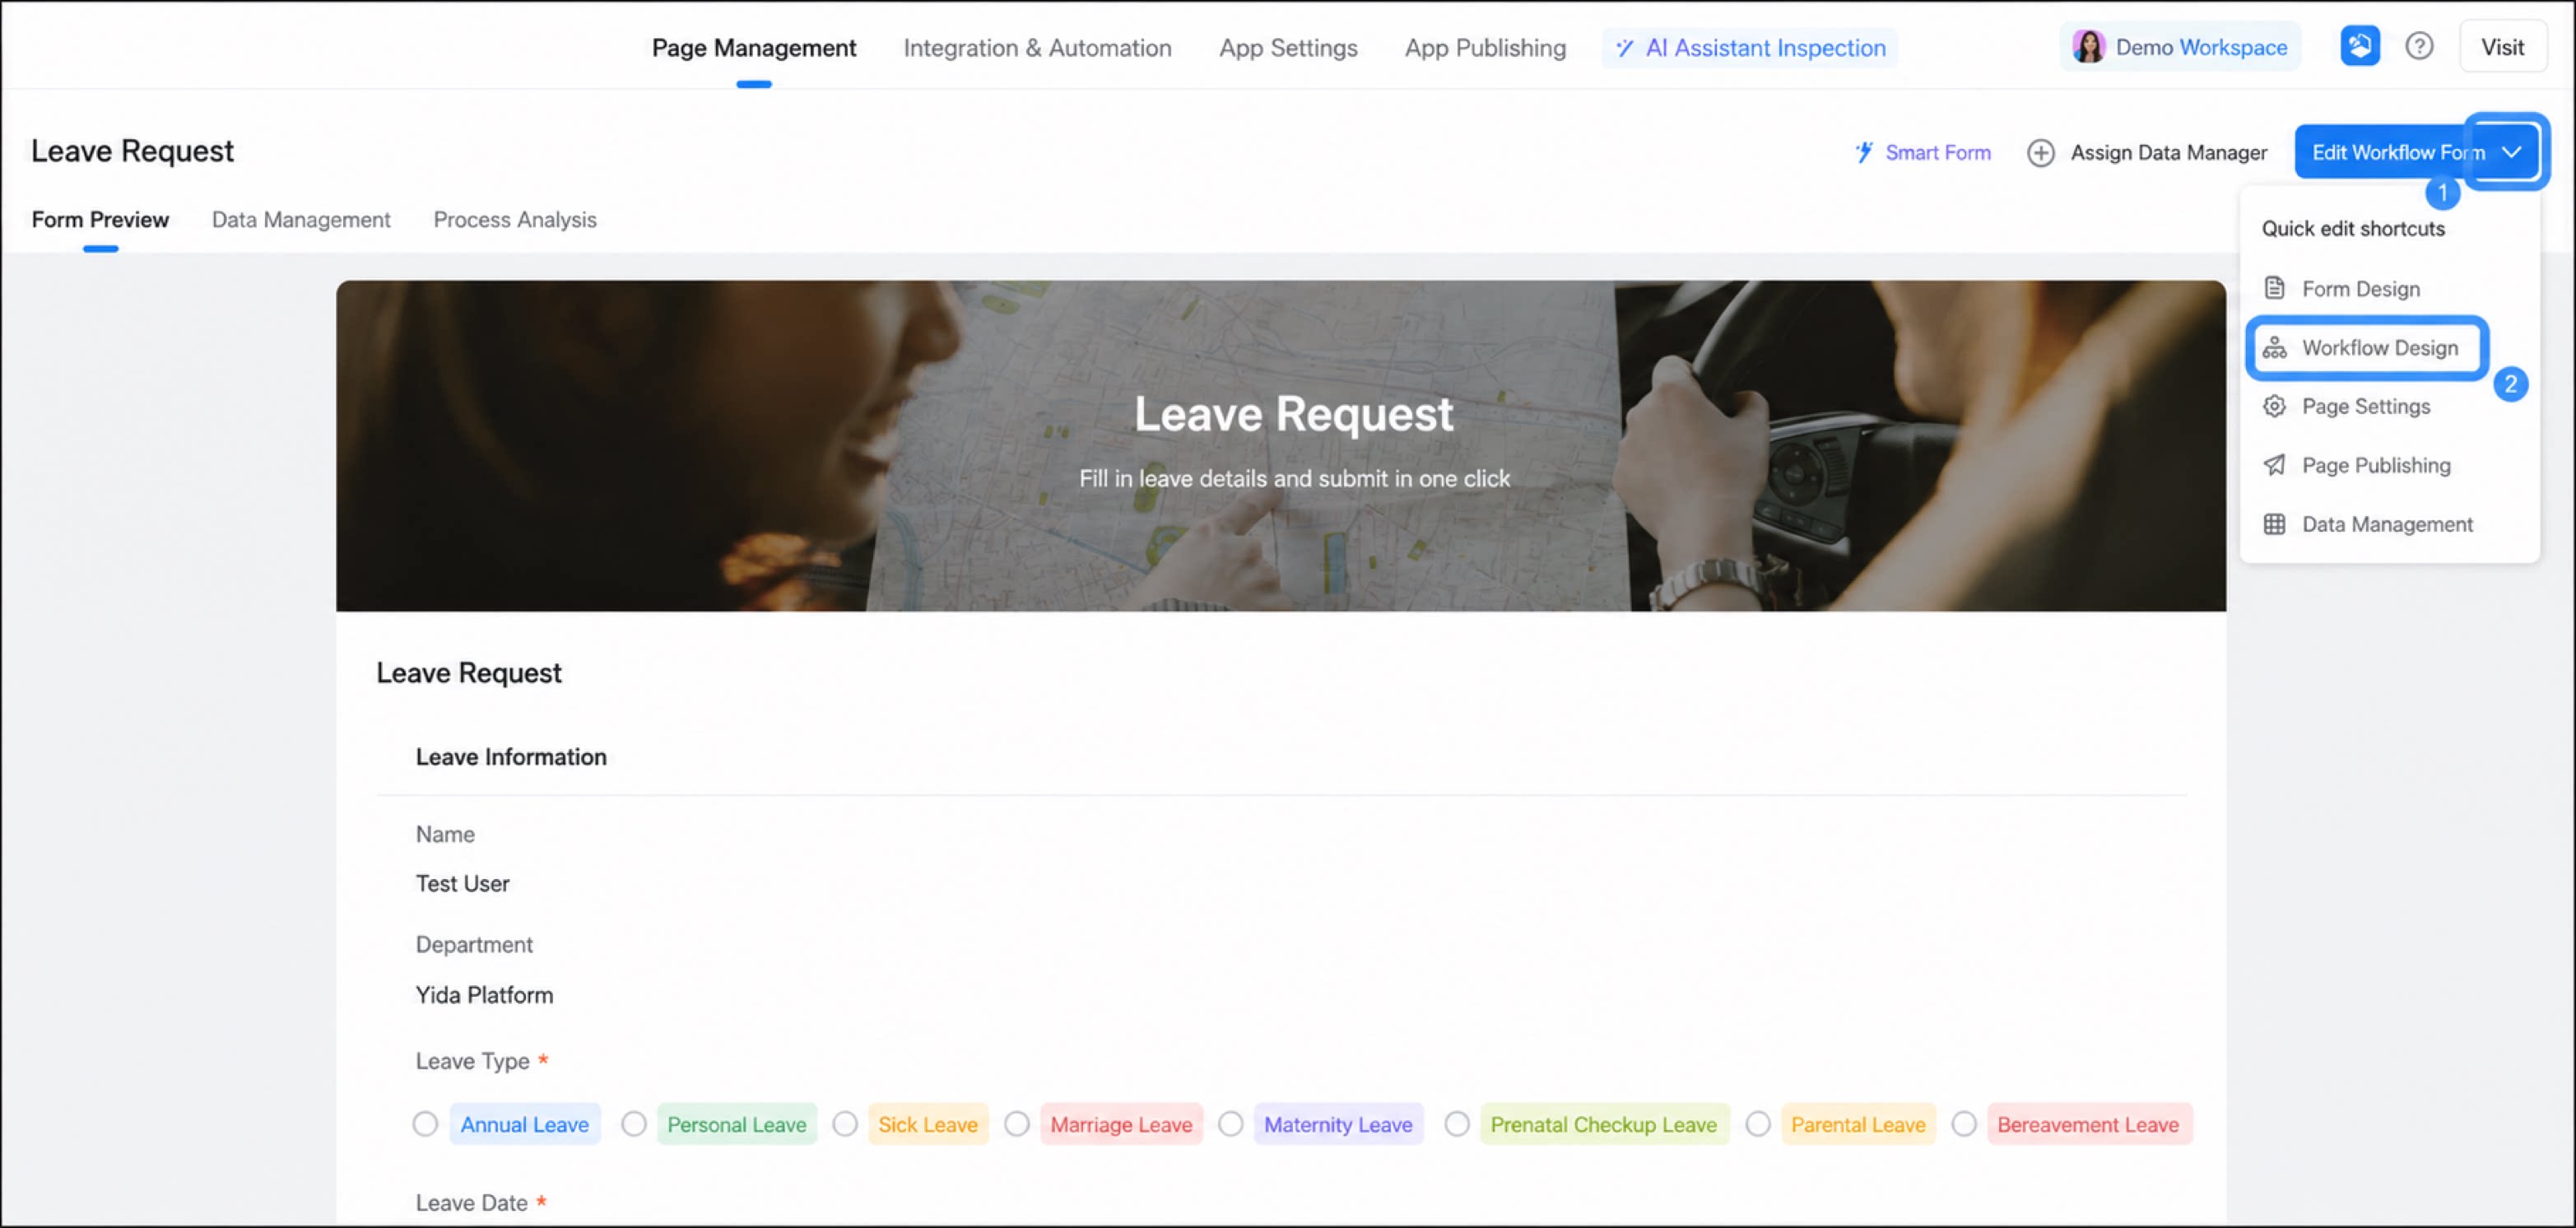
Select the workflow form, click the down arrow next to Edit workflow form, and then click workflow design. 
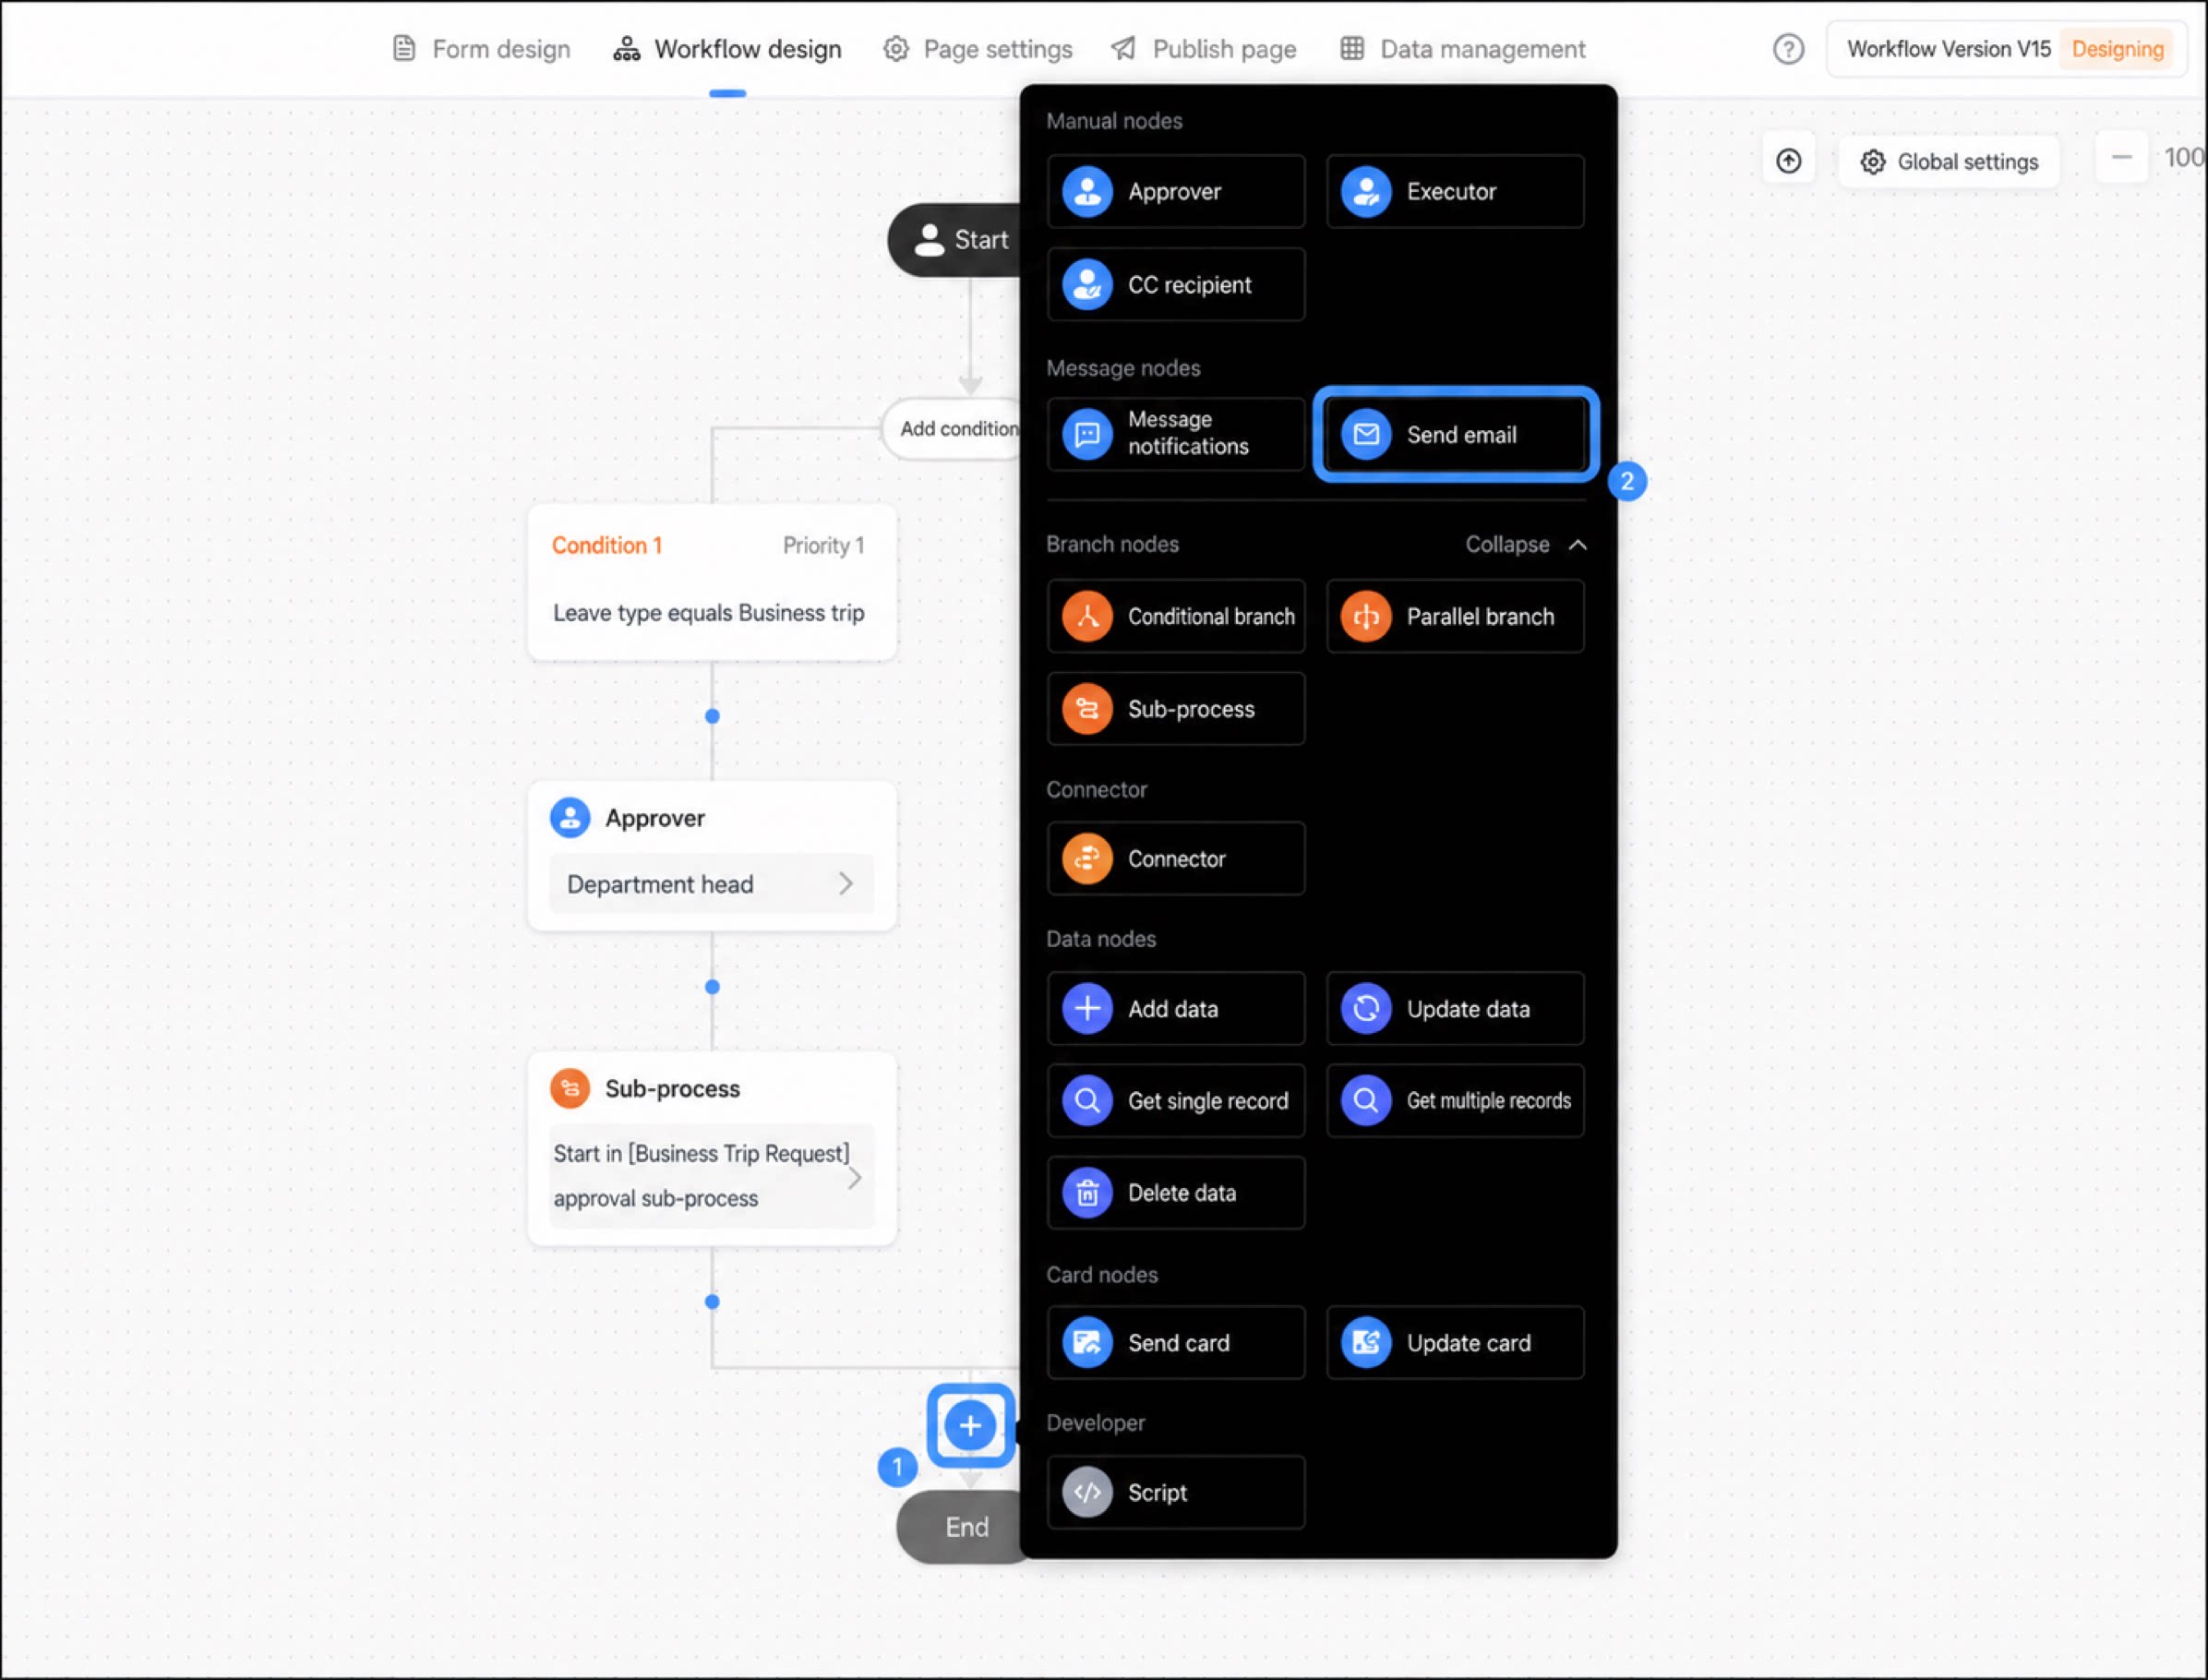
- Move the cursor to the connection line between Steps. When the + Button appears, click +, and then select Message node > Send Mail.
Configure the Mail Notification Node
Follow the steps below to configure the Mail Notification node.1
Select the Send Mail node, and set the Mail address in the node configuration panel on the right
If you have not added a Mail account, click Account management on the right to add one. For details, see Mail management.
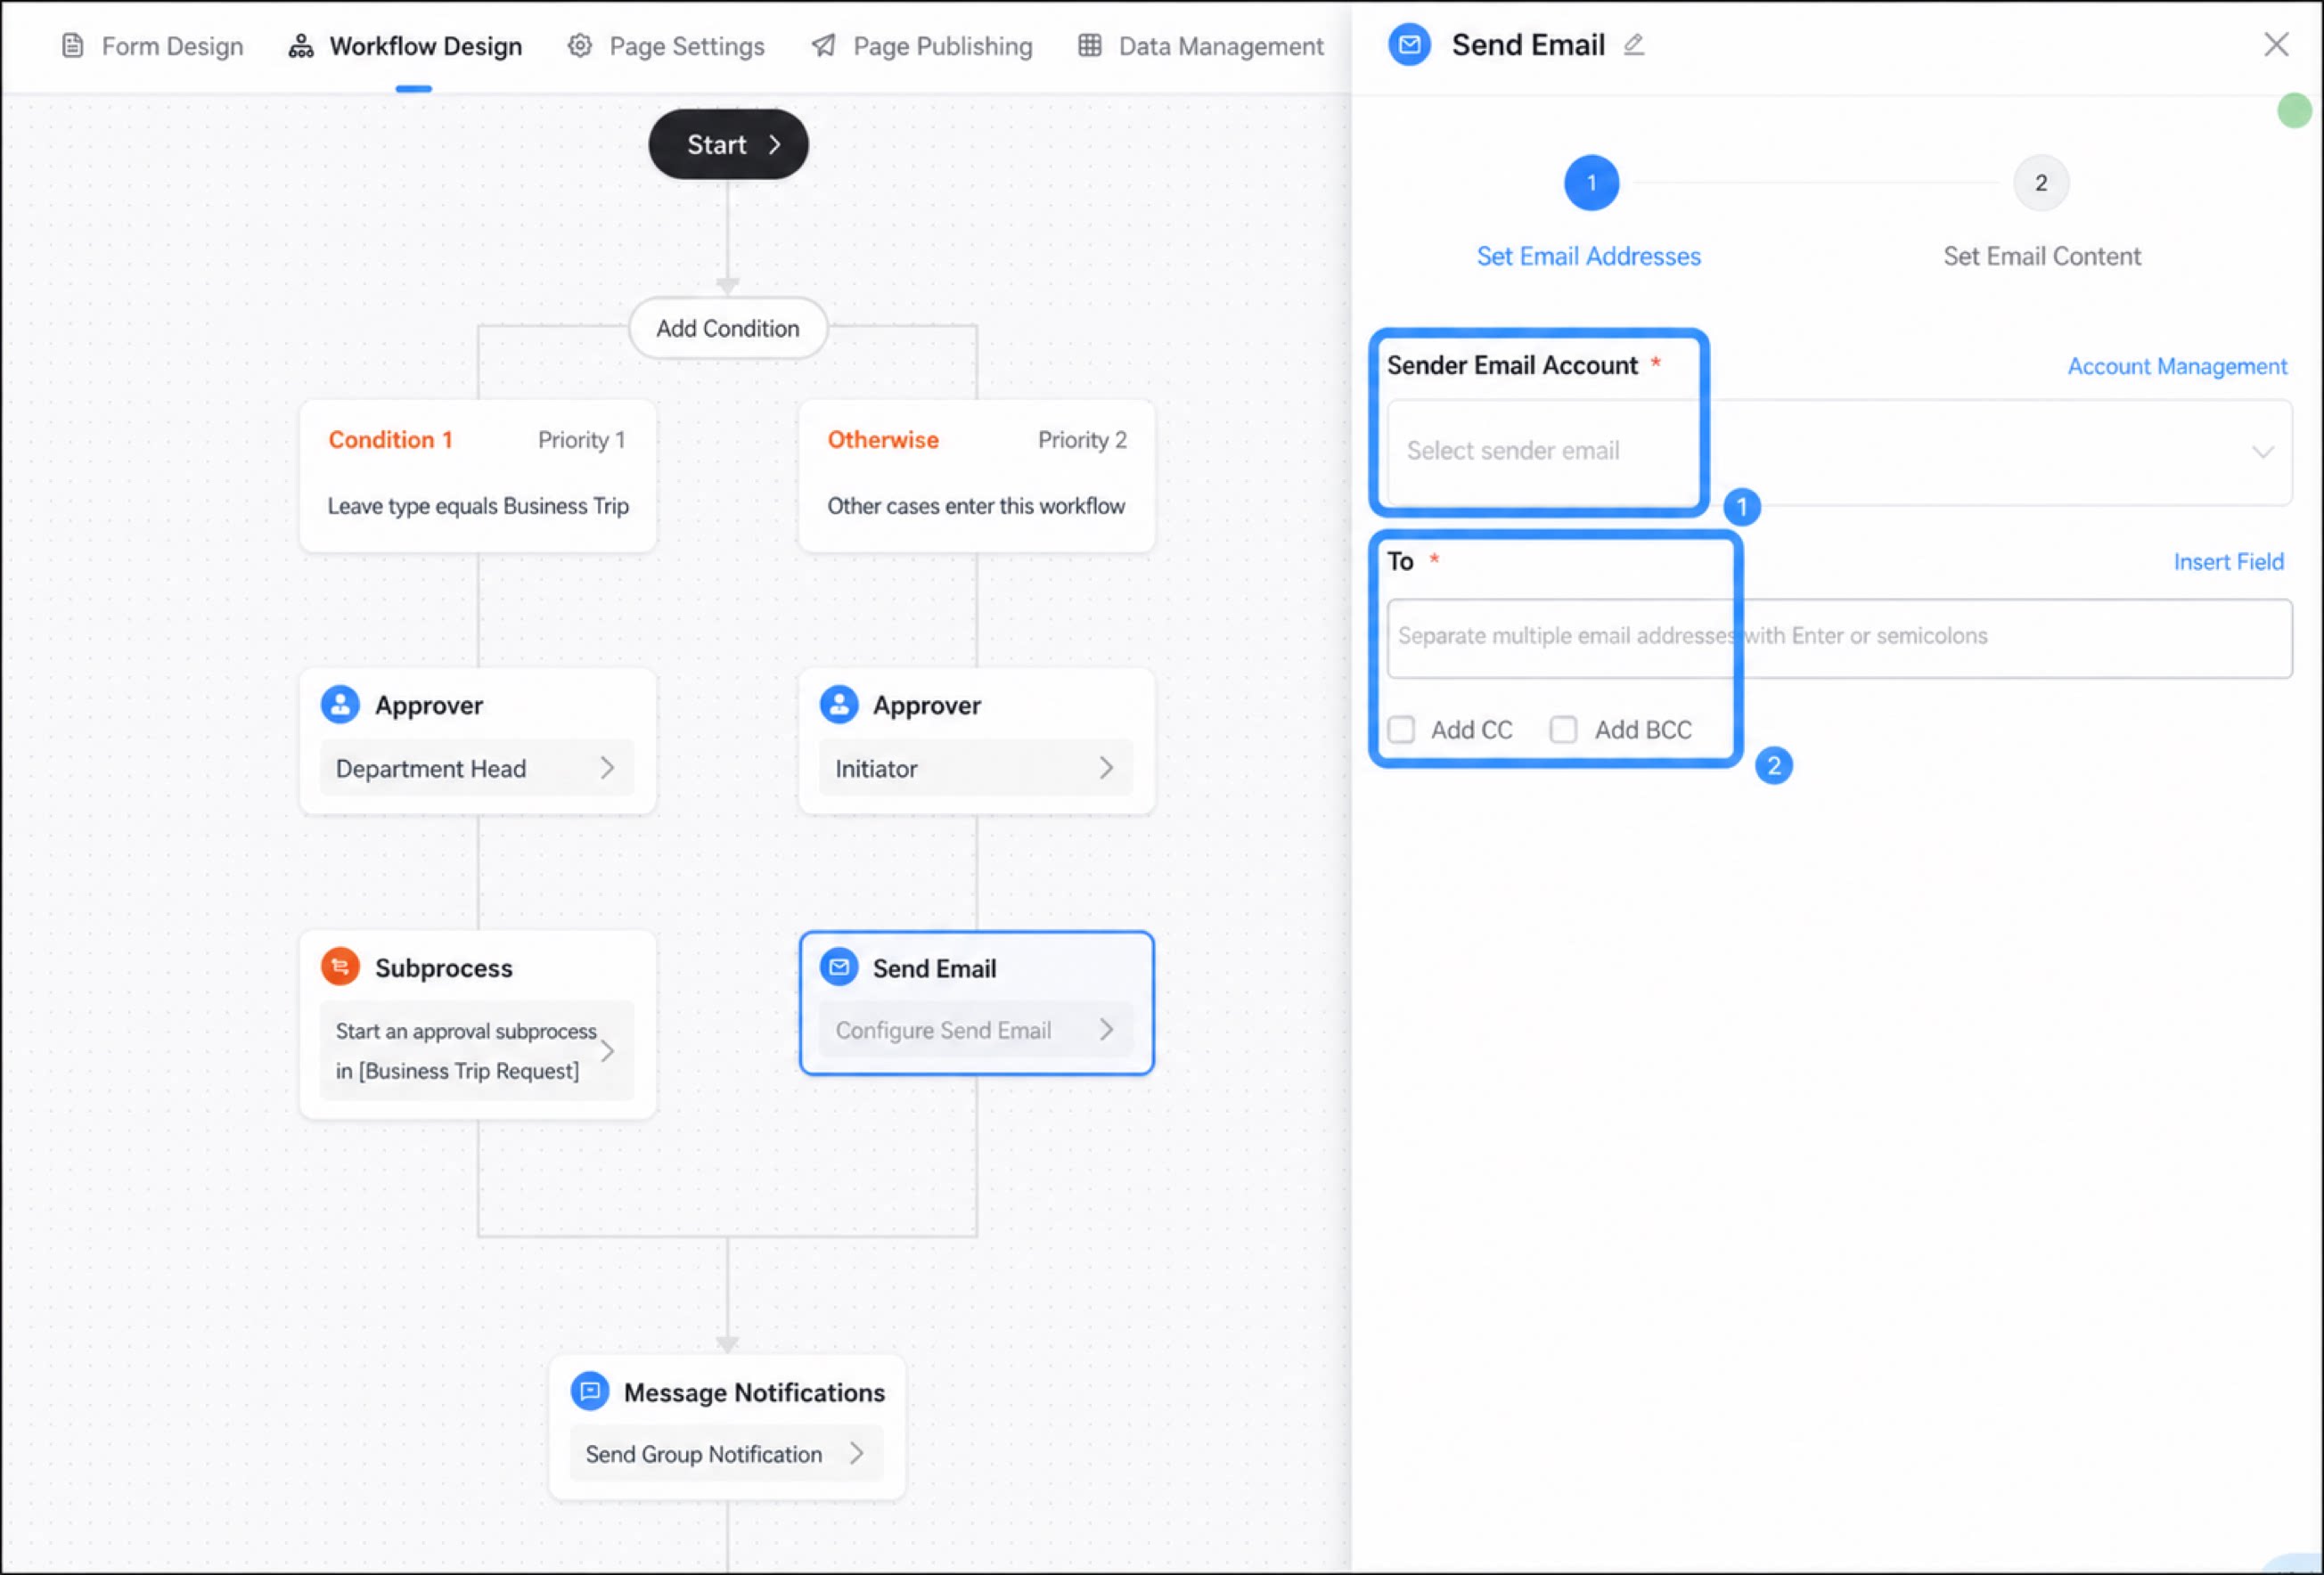
The To field supports Fields from the Form.
2
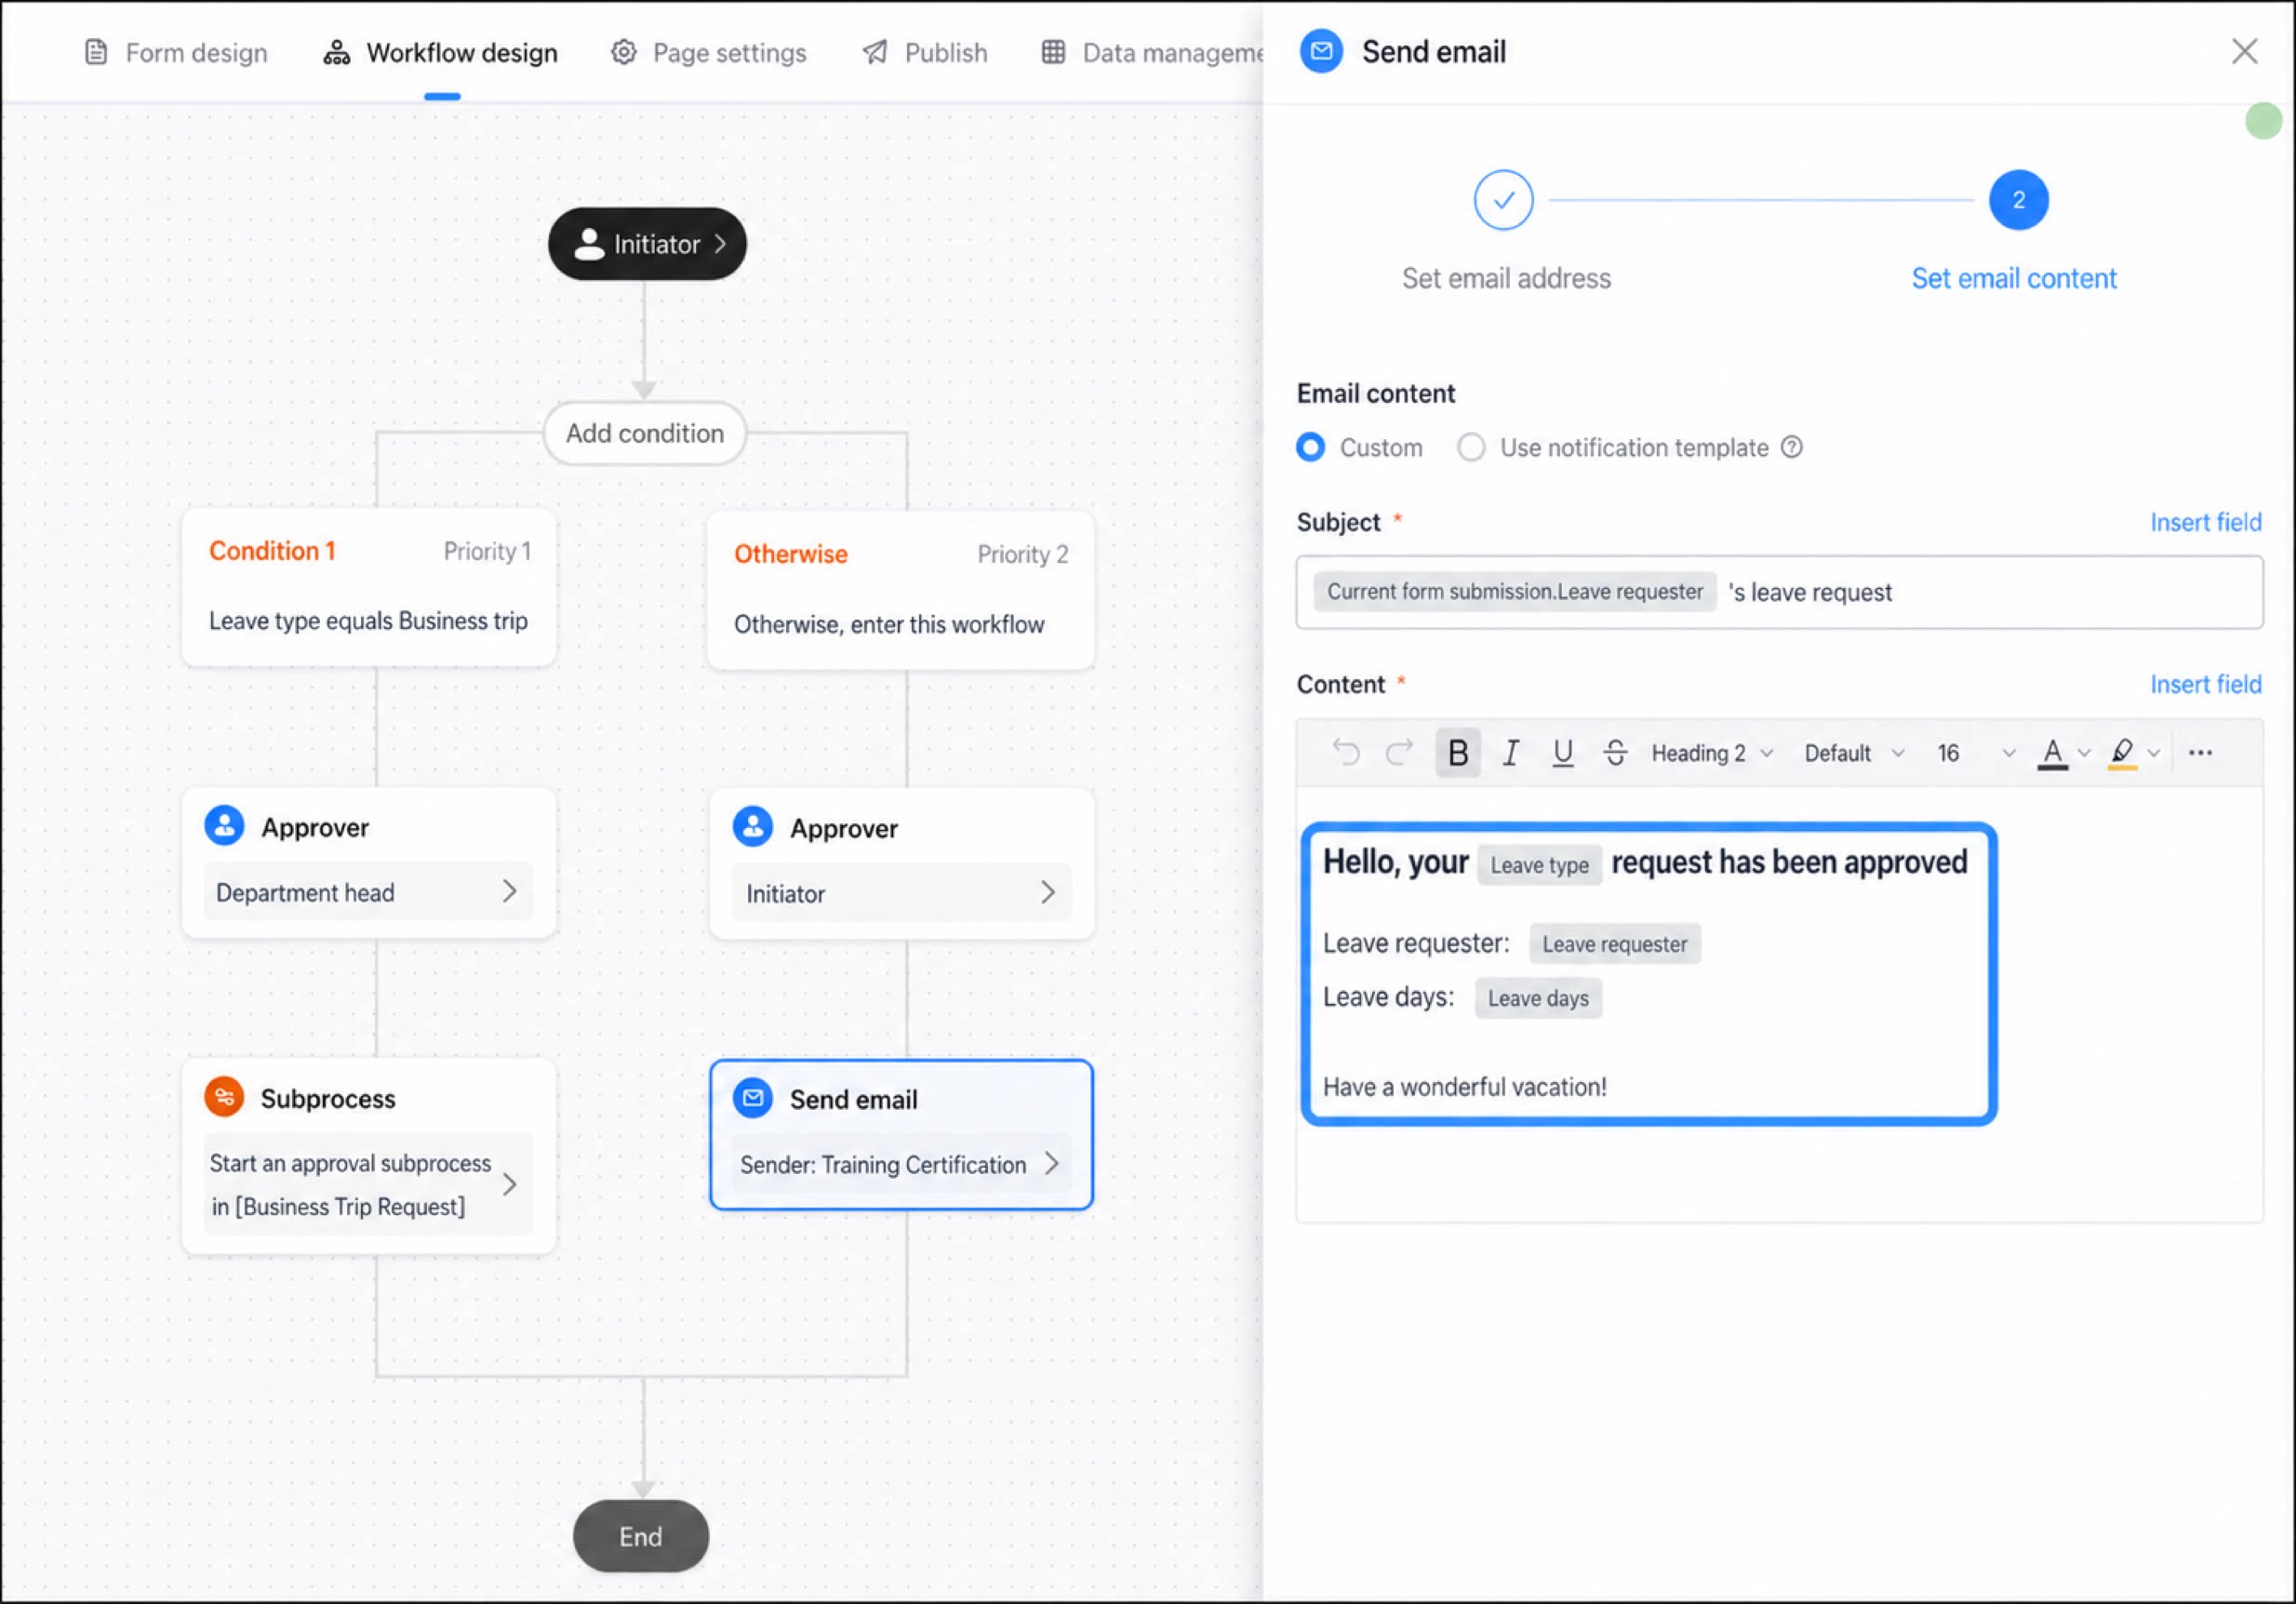
Set the Mail Content. Two modes are supported: Custom and message Template
Fields from the Form can be inserted for concatenation.
3
After configuration, click Save.