

 Chats
Chats Calendar
 Meetings
 Contacts
 Mail
Mail Docs
Docs Drive
Drive AI Table
 AI Minutes
 Attendance
 Approval
 YiDA
YiDA Admin Console
Use Cases
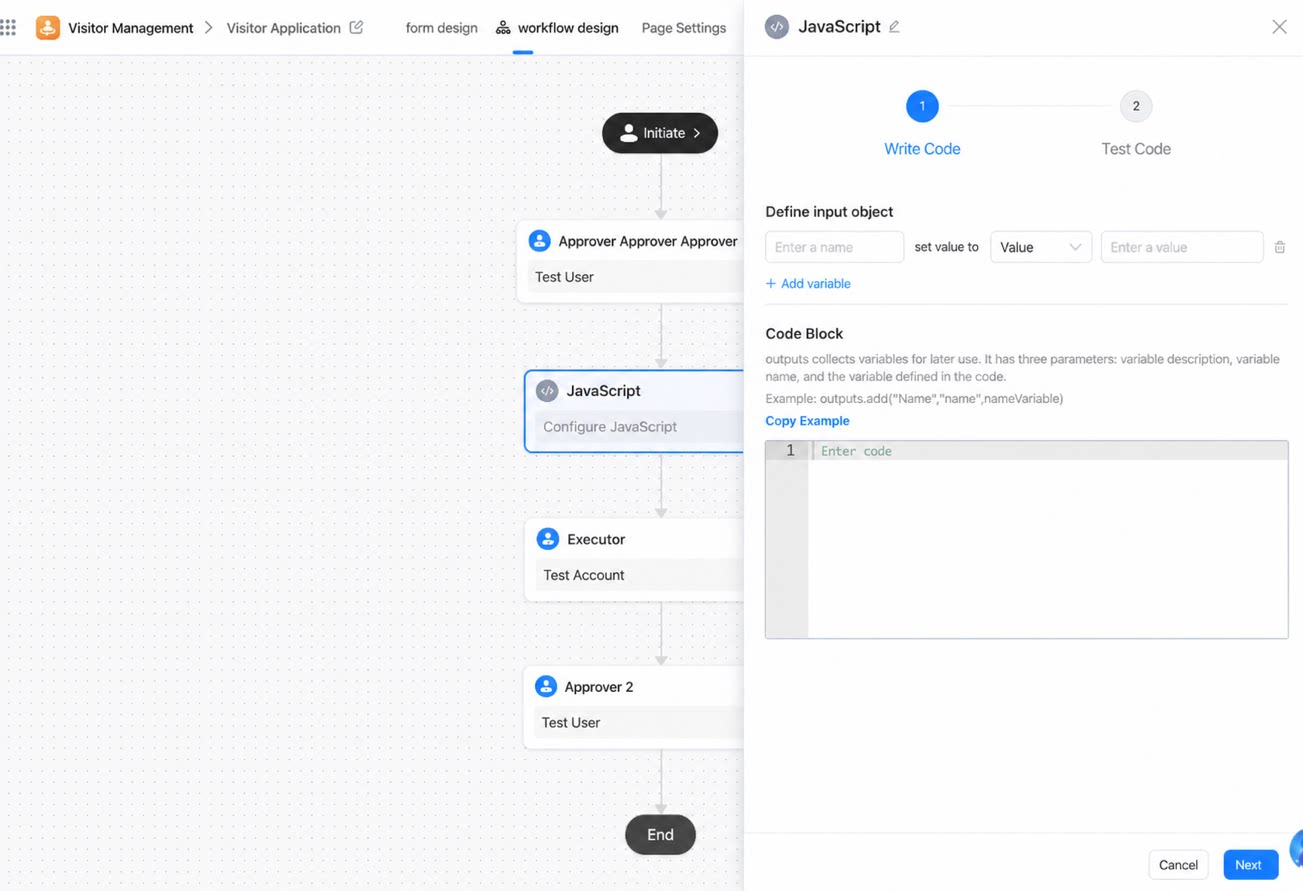
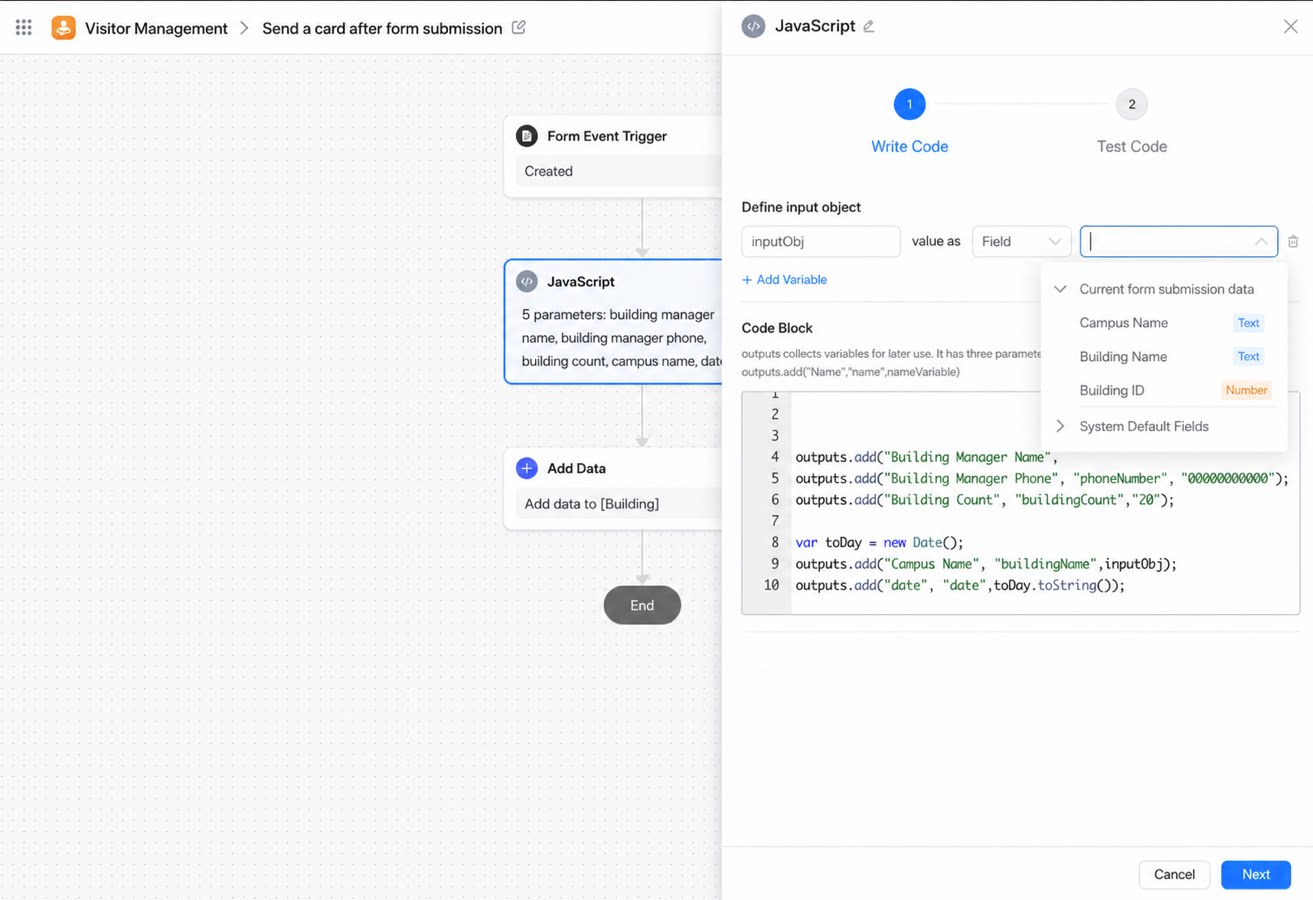
At design time, add a script node and write JavaScript to read input data, process intermediate data, and inject the results through the built-in output object. This enables scripted data processing within business flow orchestration.Access the Script Node
- Option 1: Edit a workflow form, open the workflow design page, and select Developer node > Script node.
- Option 2: Edit an app, go to Integration & Automation, select the target automation flow, open its design configuration, and add a script node.
Use the Script Node
1
Add a script node
2
Write a JavaScript script
3
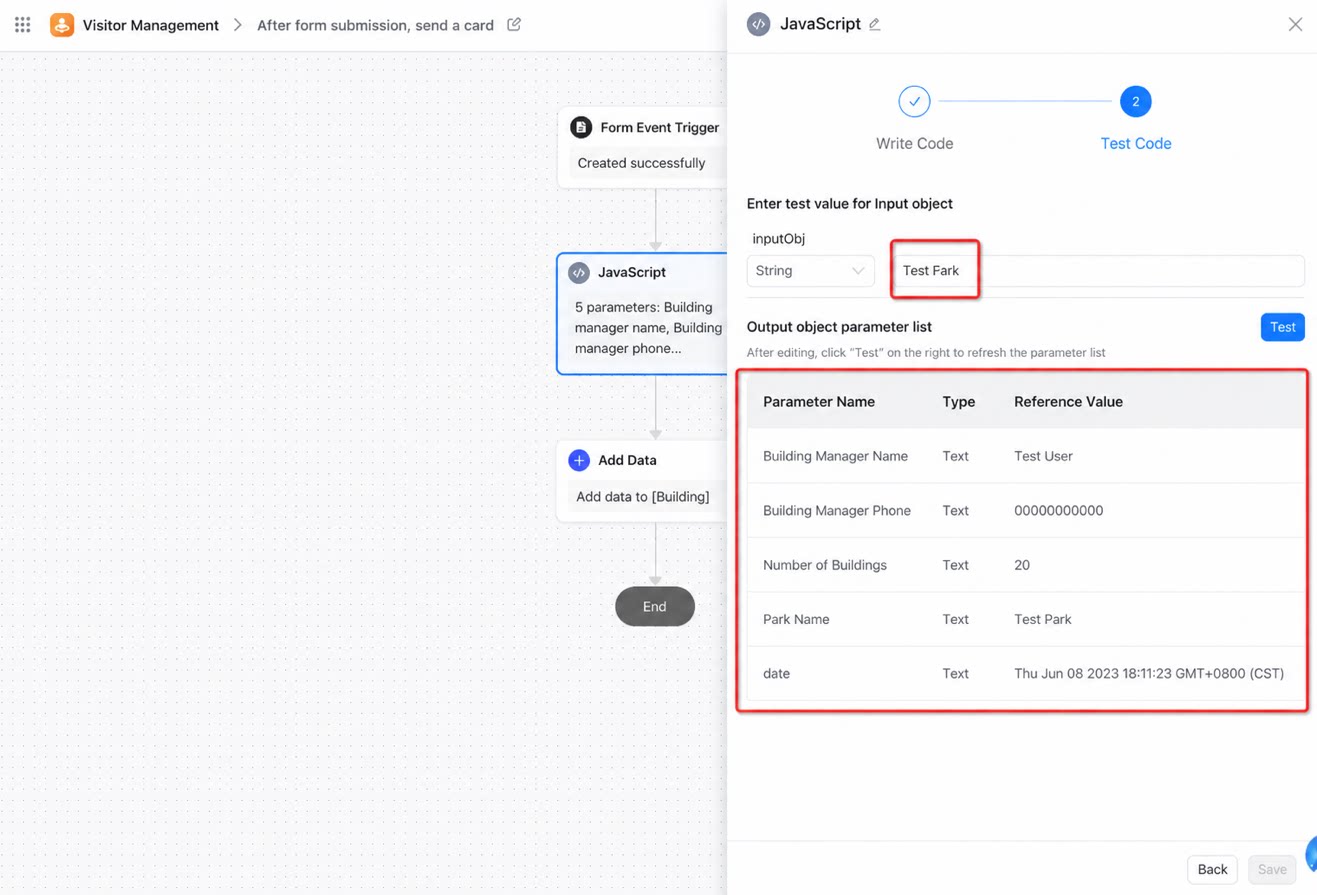
Test the code by entering test data in inputObj and clicking Test to view the output
Consume Script Data
In downstream nodes, when you select a field type, the output fields from the preceding script node are available for selection.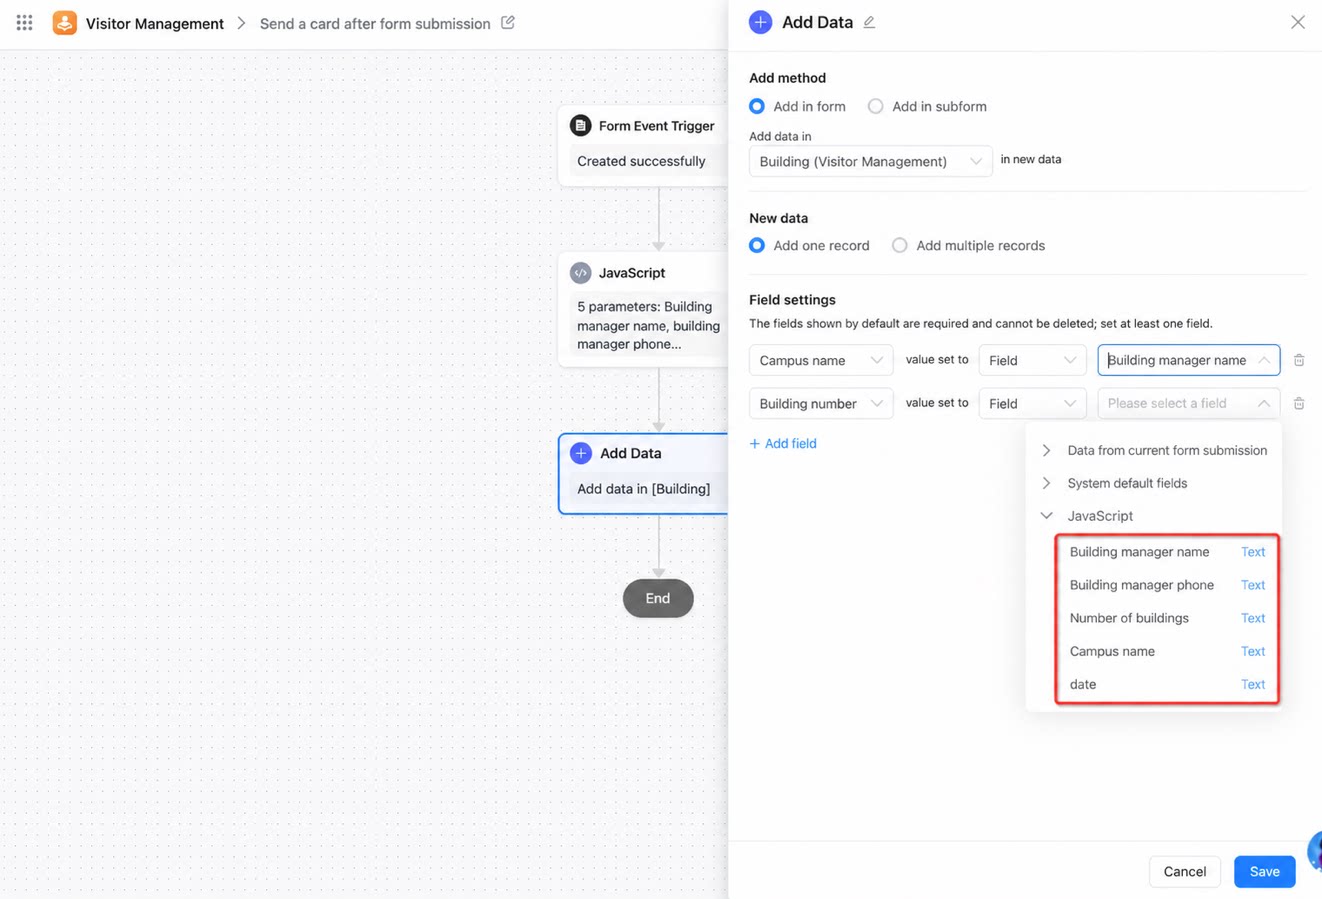
Notes
- The new script node replaces the previous Groovy node, making scripting accessible to a broader range of developers.
- Script nodes support ES5 syntax only. ES6 and later are not supported.
- Batch update node handling is not yet supported.
- Avoid data processing that requires large amounts of memory. Exceeding 10 MB (tentative; YiDA may adjust this limit) triggers a memory-overrun error. CPU usage exceeding 5 seconds (for example, from an infinite loop) triggers the automatic protection mechanism and raises an error.
- Network requests such as XHR and fetch are not supported. Top-level objects and functions such as
window,console, andprintare not supported. - Defining functions inside the code block is supported.
- Do not add return statements outside a function.