

 Chats
Chats Calendar
 Meetings
 Contacts
 Mail
Mail Docs
Docs Drive
Drive AI Table
 AI Minutes
 Attendance
 Approval
 YiDA
YiDA Admin Console
What Is a Card Node
Card nodes are one of the hallmarks of an app with Cool App enabled. A YiDA interactive card is a lightweight, real-time, multi-user, data-driven card. It lets the system automatically send interactive cards during a workflow. When a user clicks a button on the card, the card runs various business shortcuts based on the actions configured in advance. It suits common collaboration scenarios such as ticket alerts and project risk management.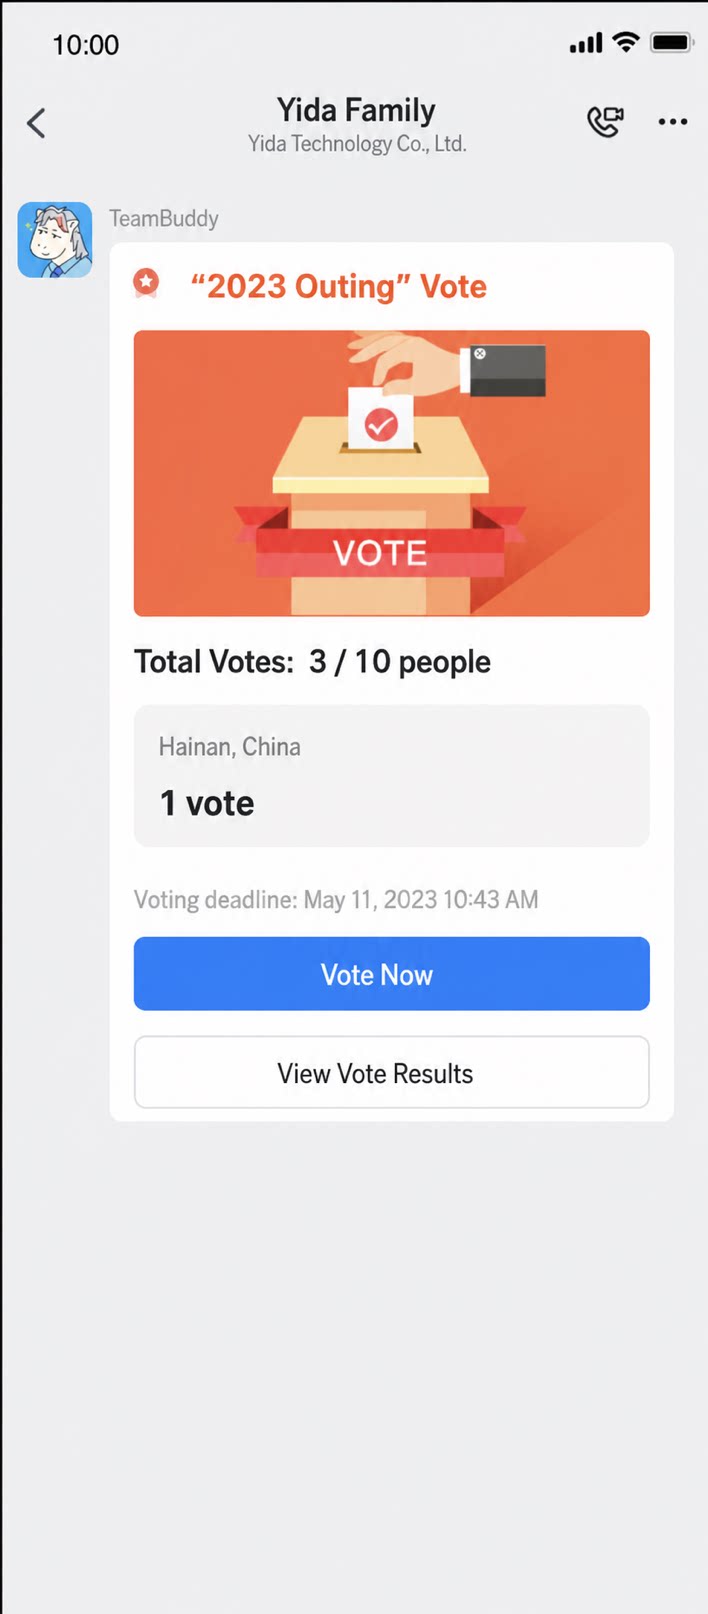
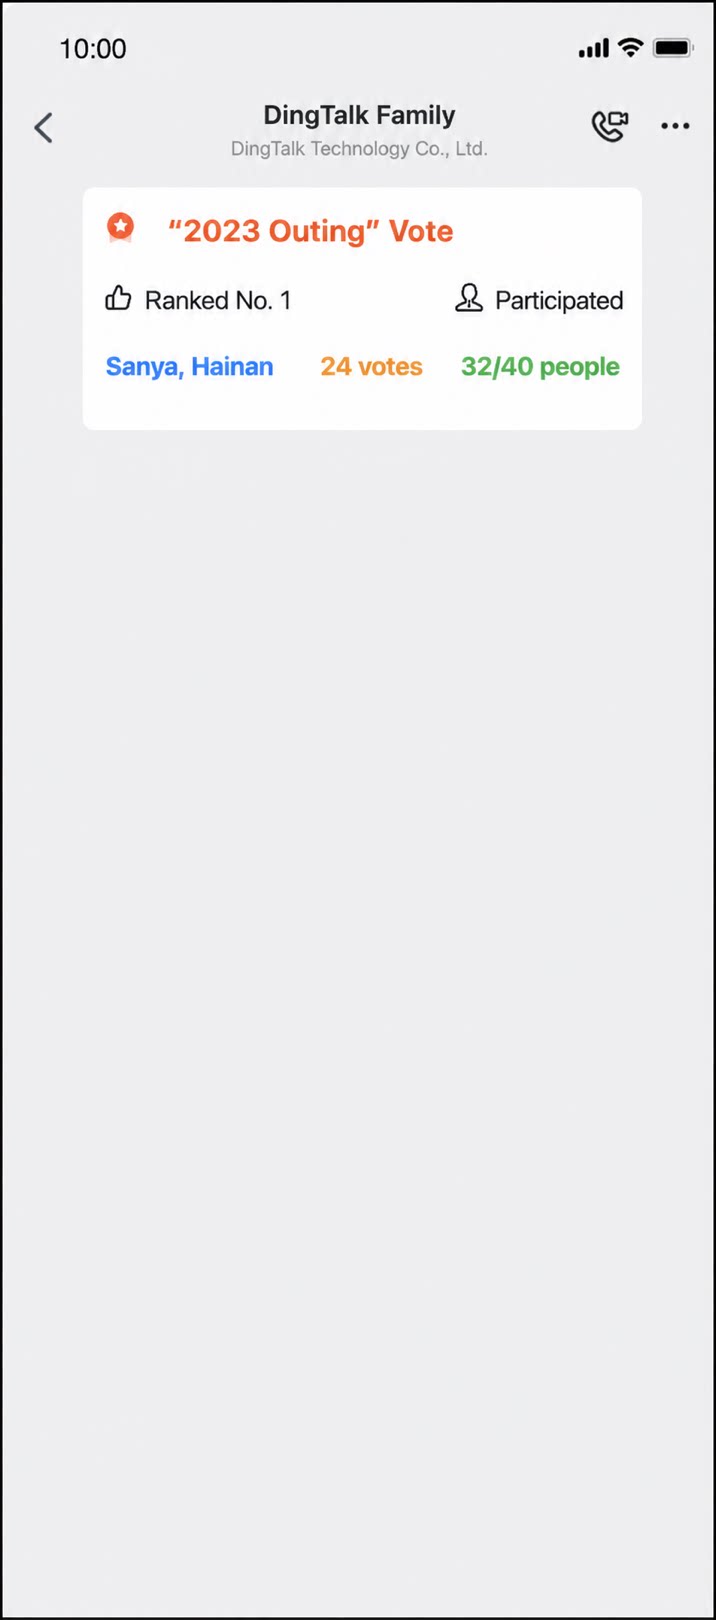 Interactive card
Pinned card
Interactive card
Pinned card
Using Card Nodes
Before you use a Card node in a workflow to send a Cool Card, you must first publish the app to the custom Cool App center and enable the Cool App in at least one group. For details, see Cool App.
- Sign in to the YiDA workbench. Select the target app and go to its Page Management page.
- Click the + icon in the upper-left corner, select Create workflow form > Create from template > Repair Request template, and click Use.
- On the form design page, click Workflow design at the top.
-
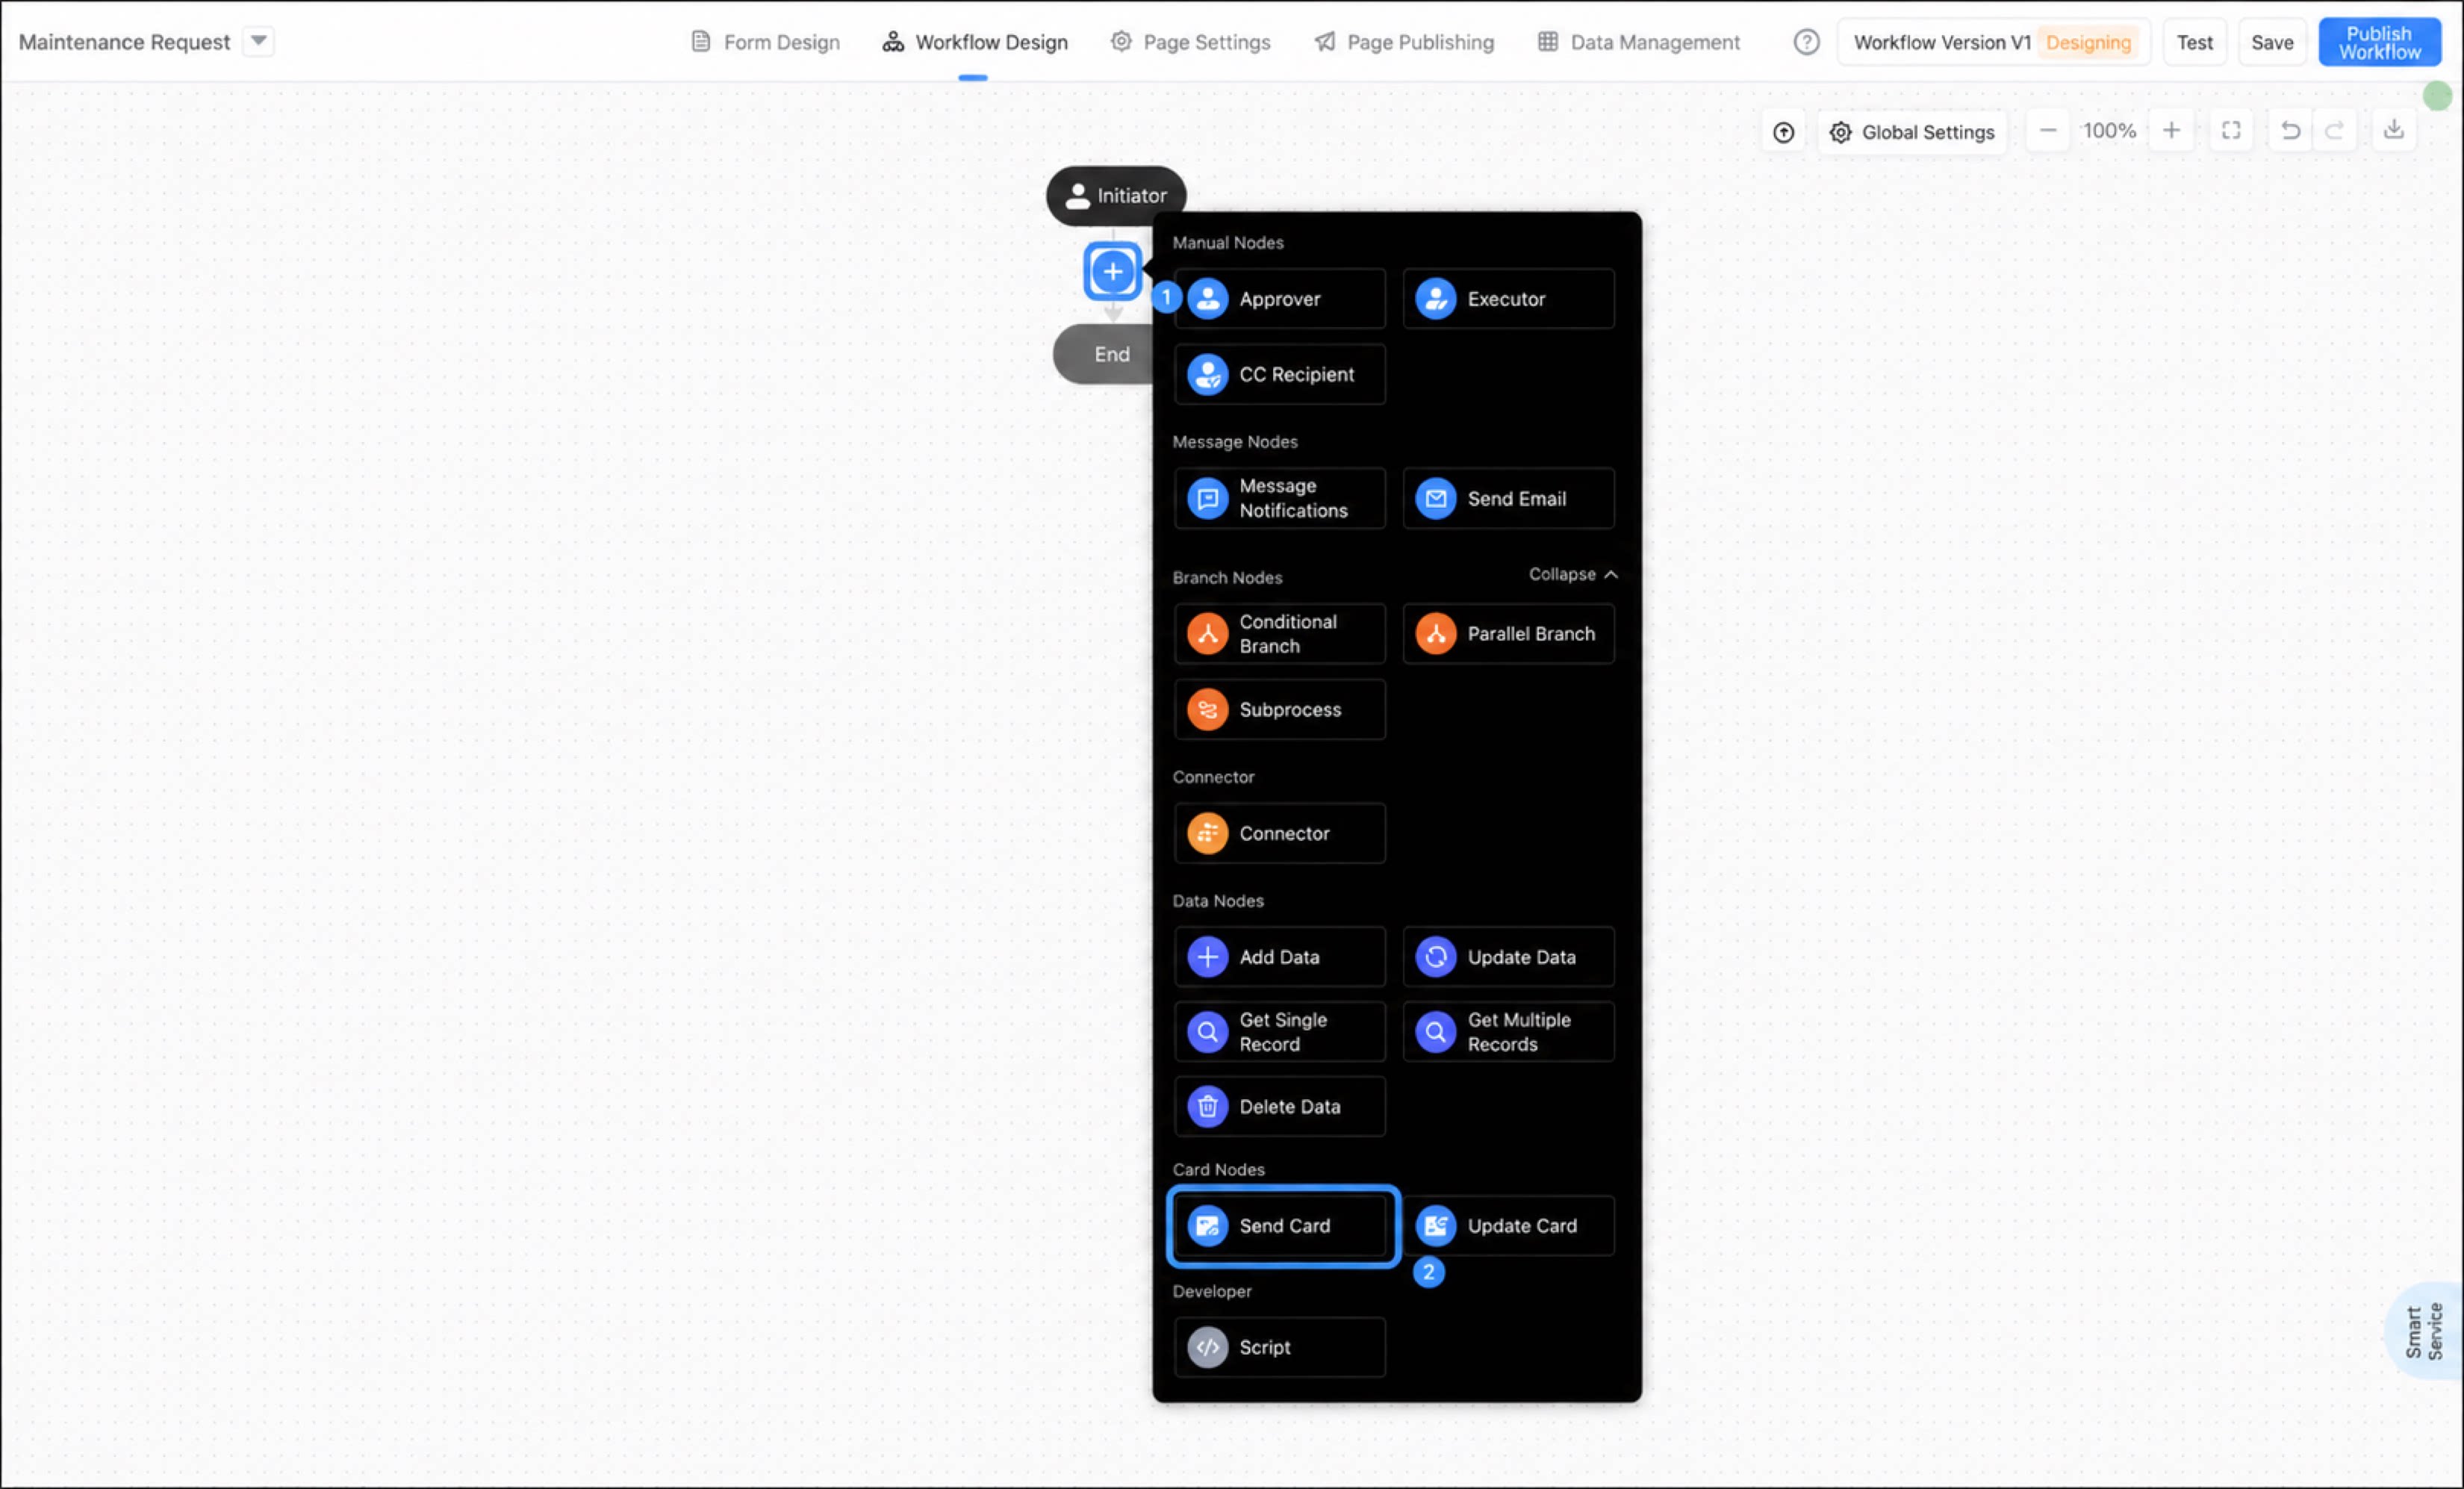
Hover over the connecting line between workflow steps. A + button appears. Click + and select Card node > Send Card node.
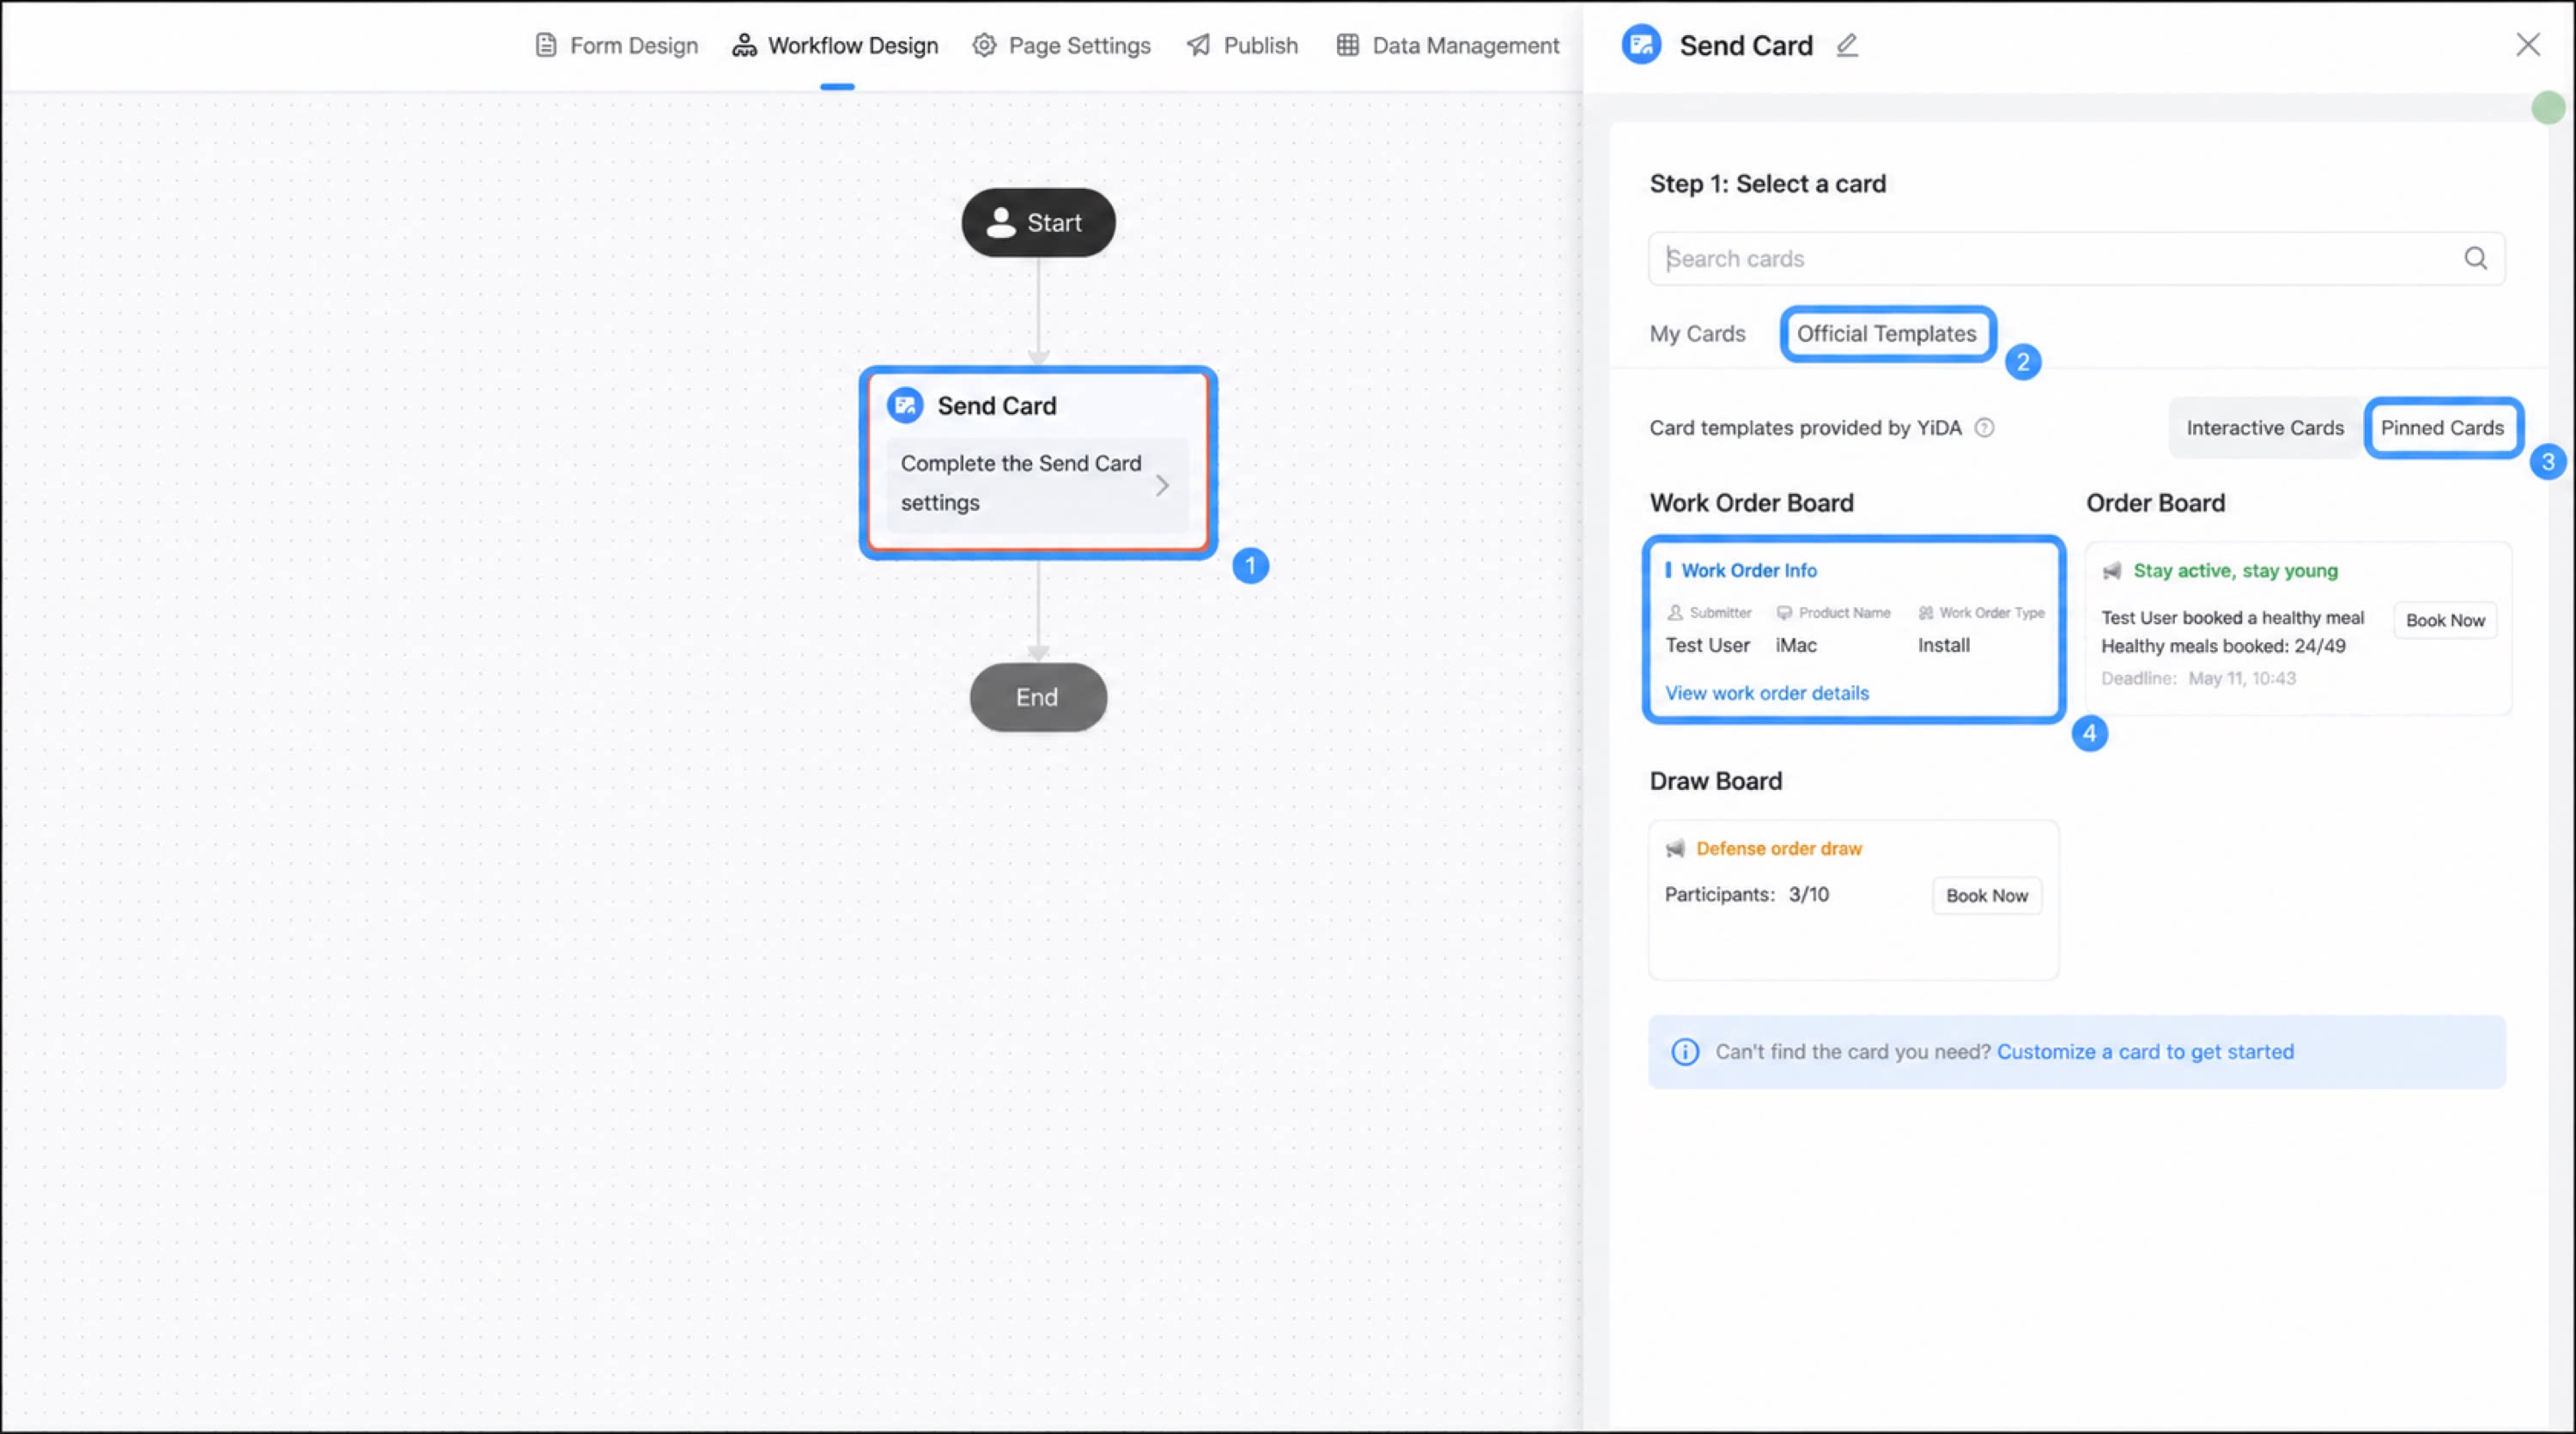
1
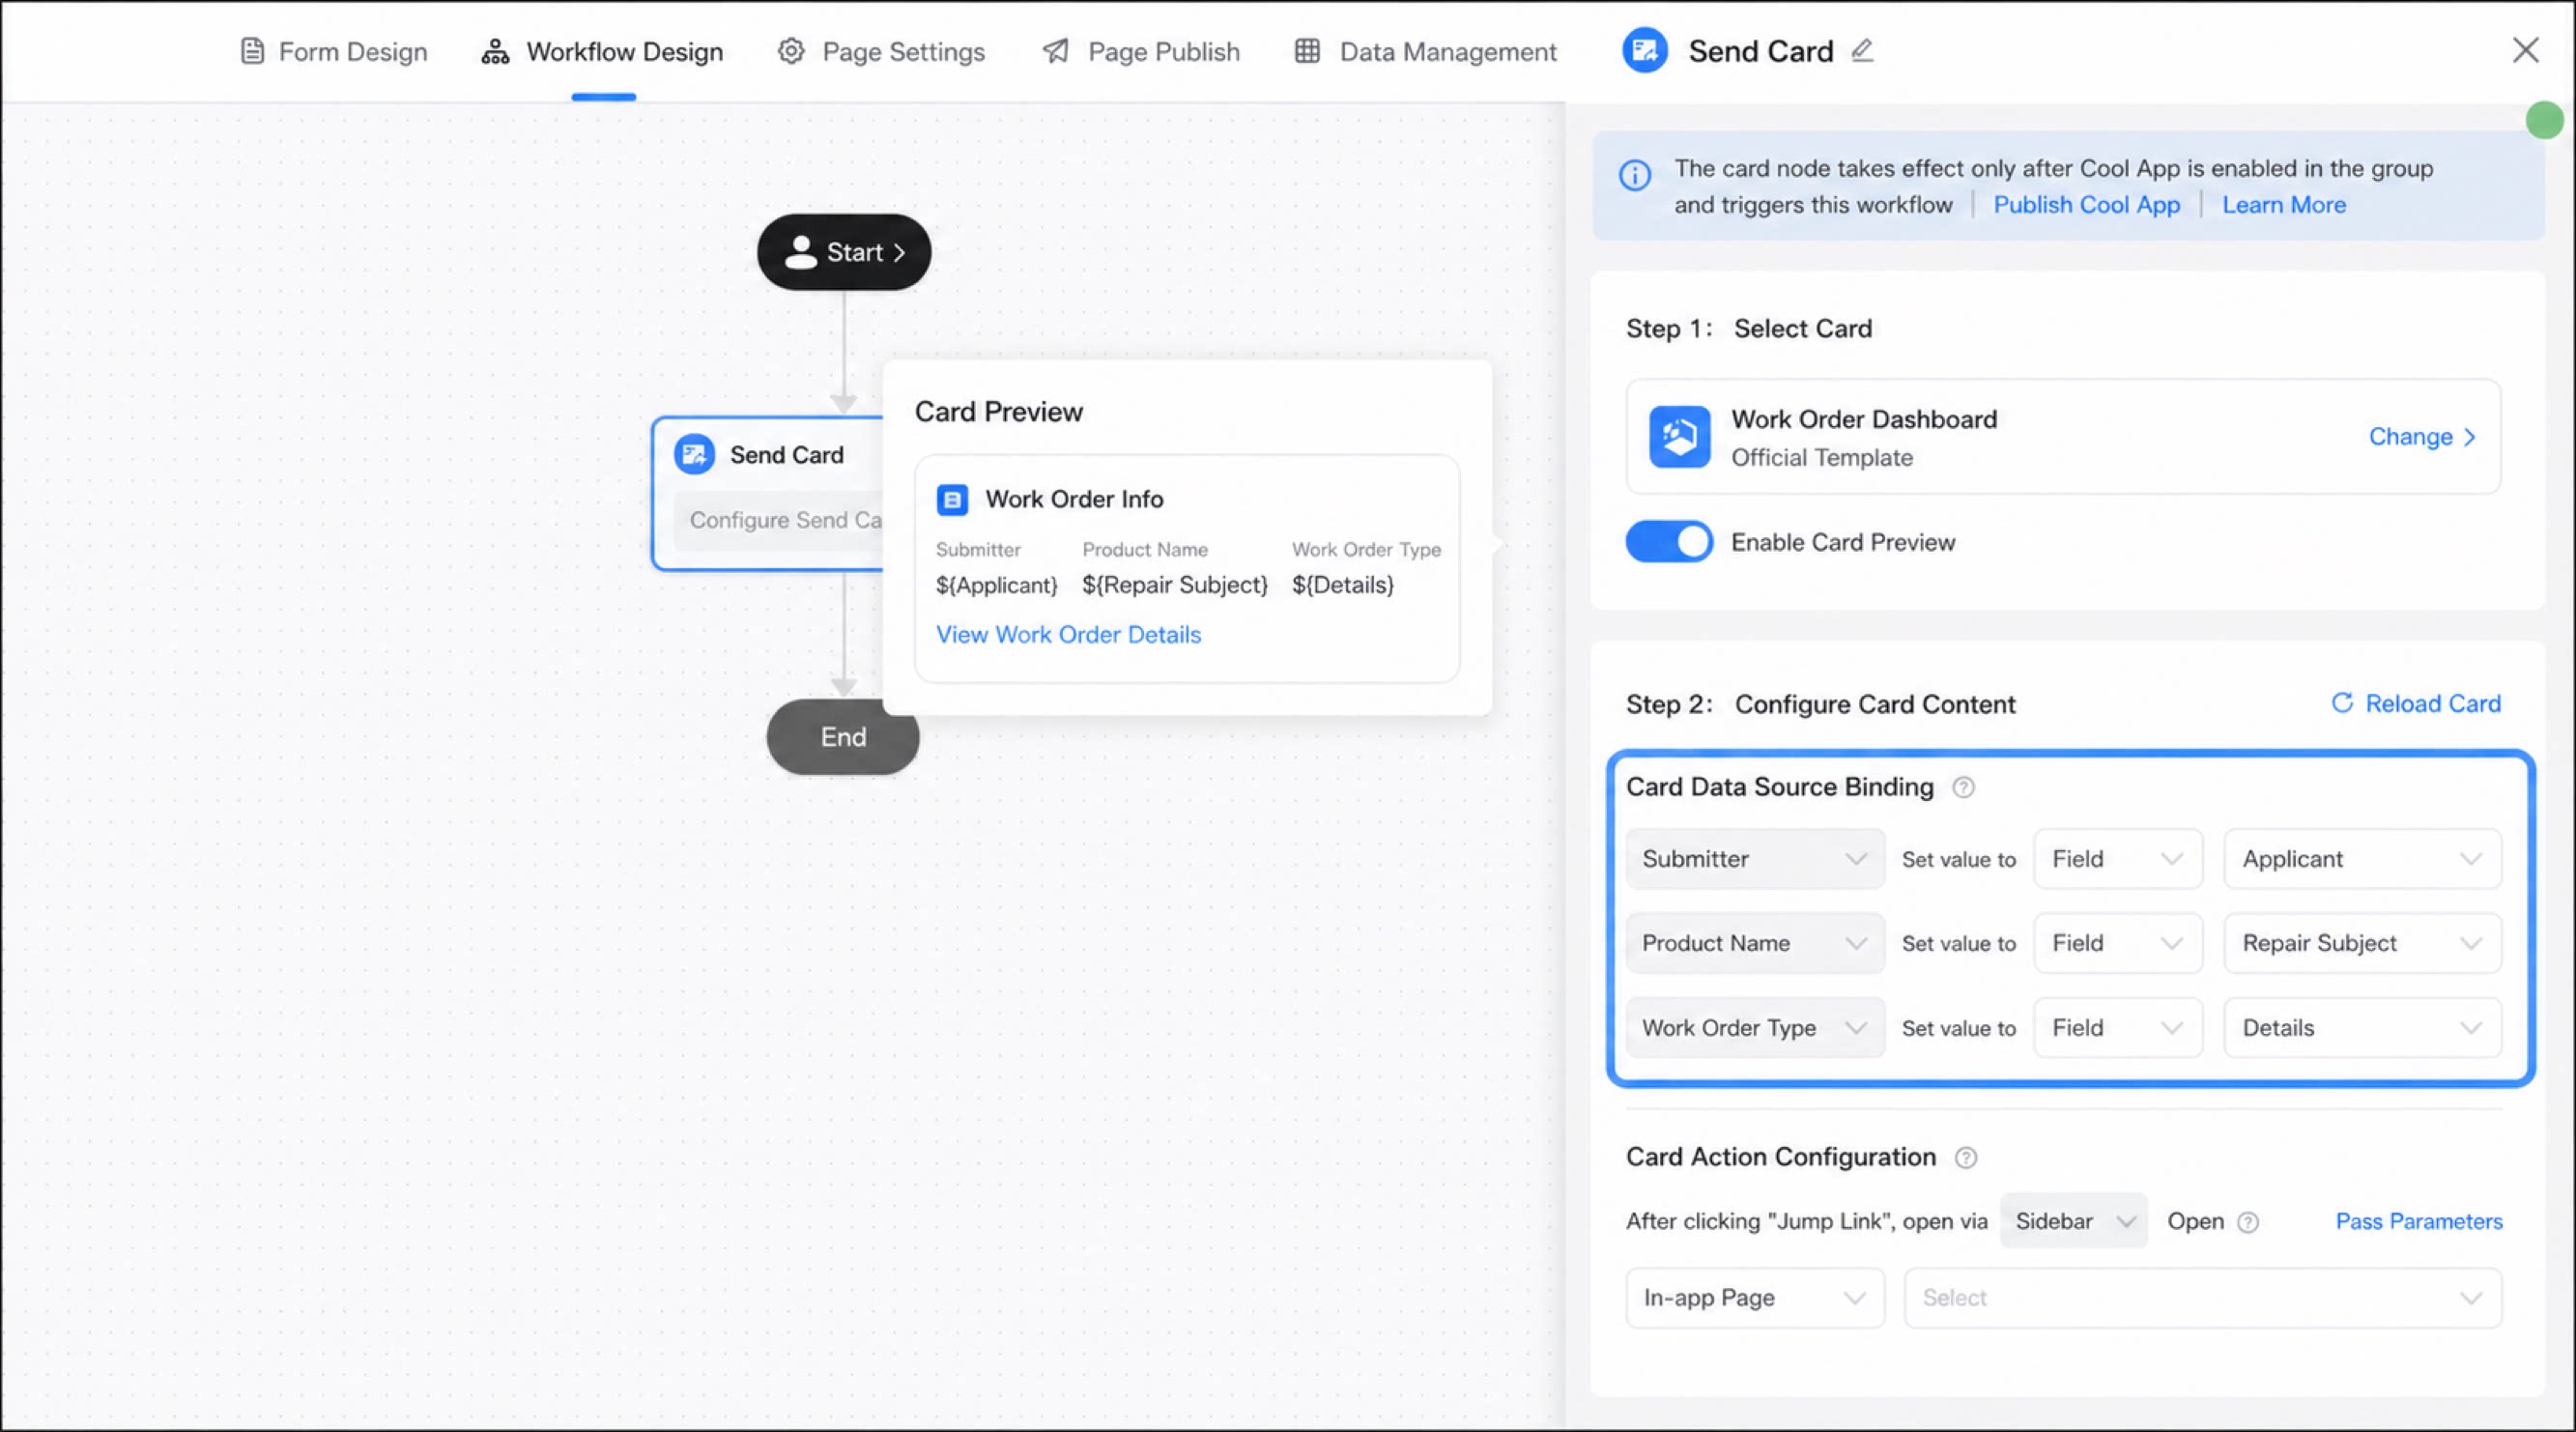
Select the Send Card node, then in the right panel select Official templates > Pinned card > Ticket kanban, and click Use
2
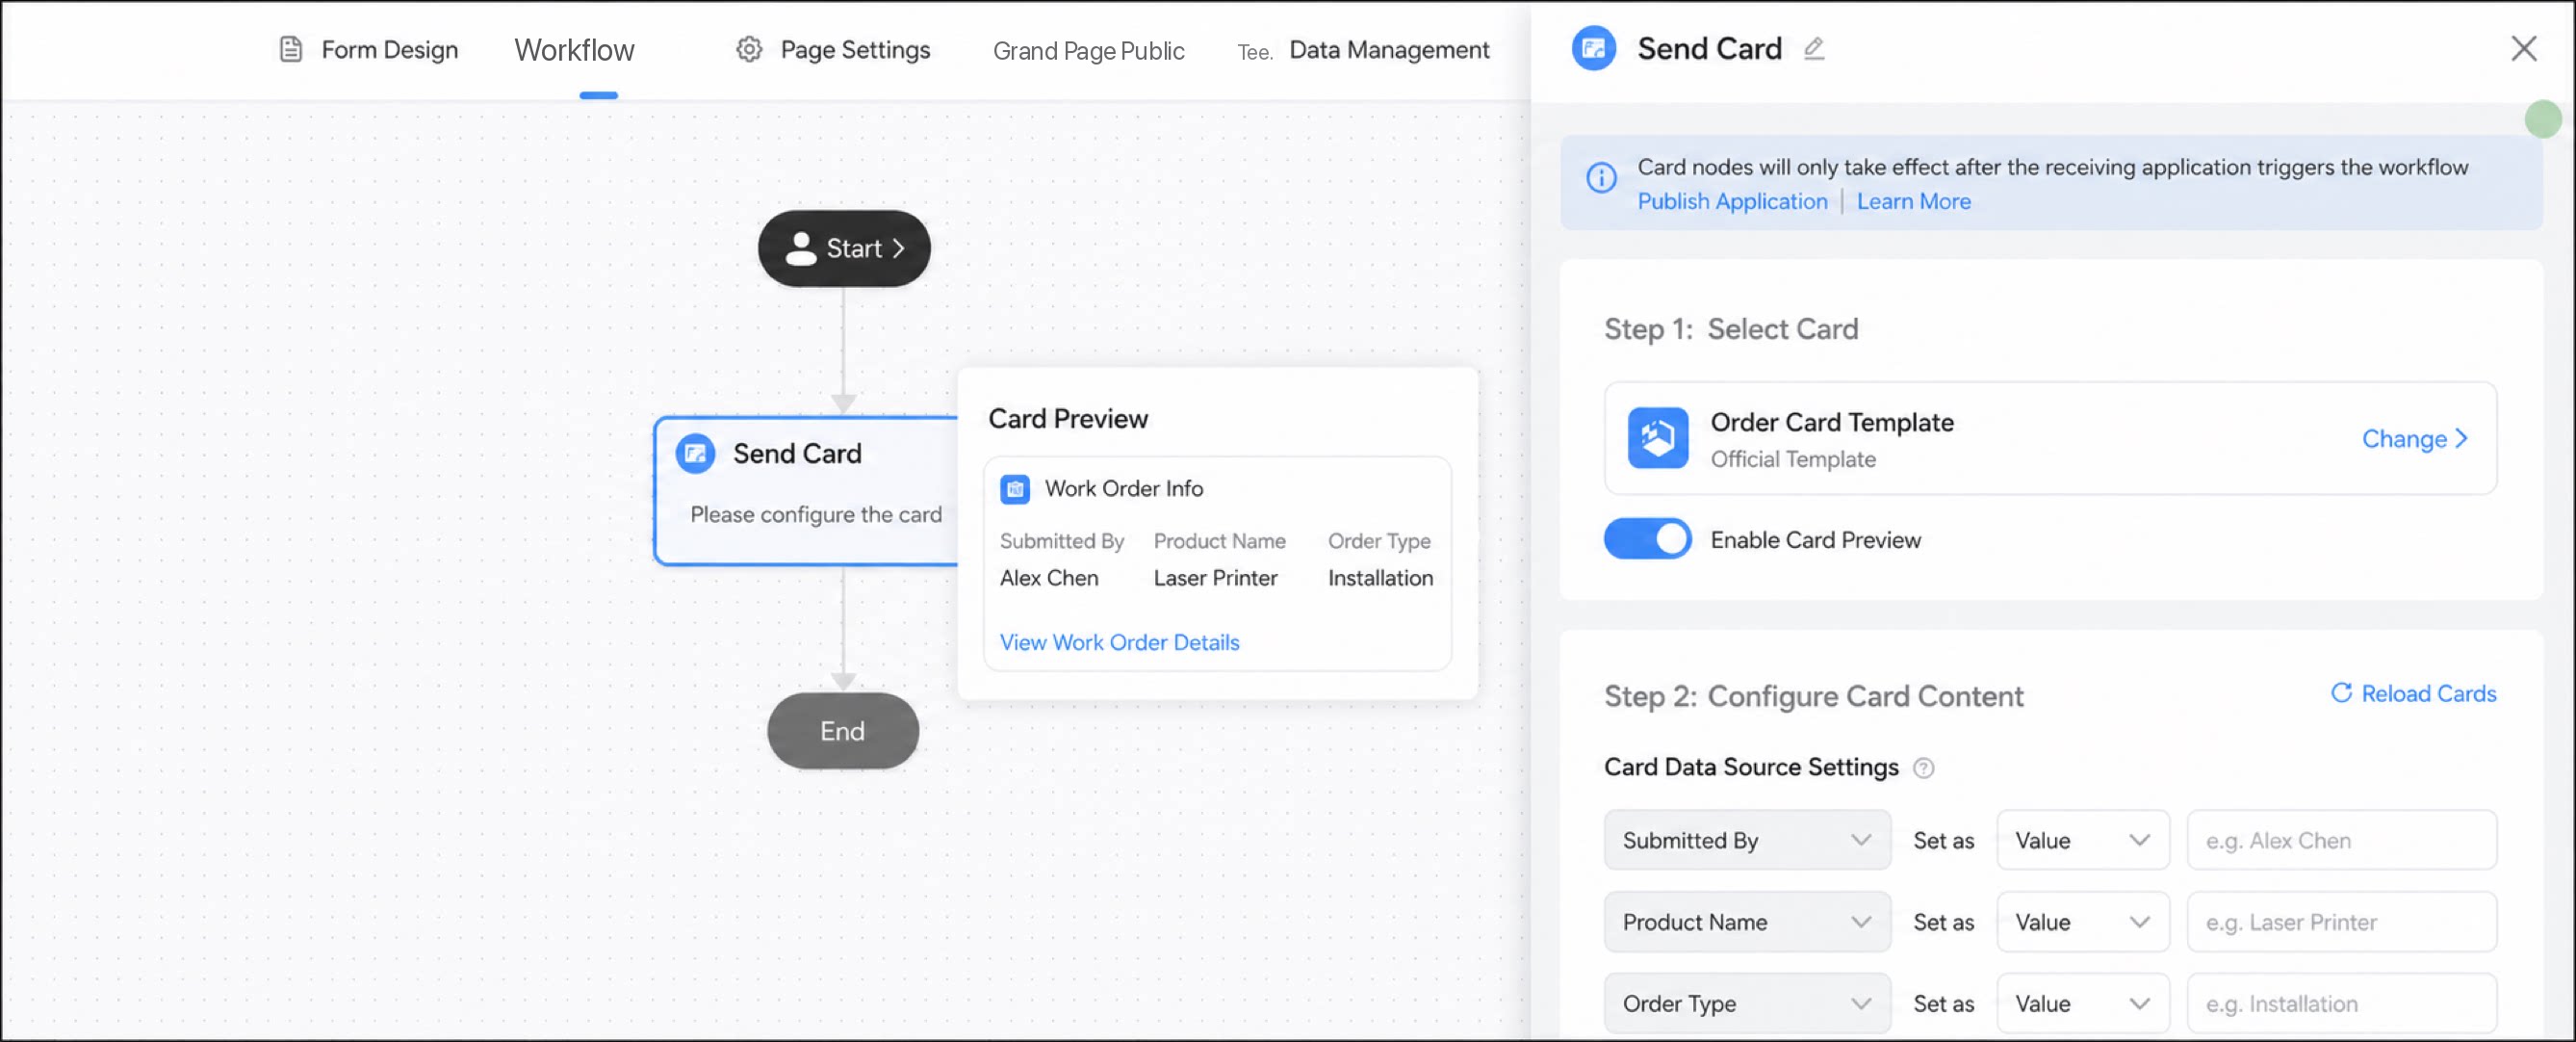
Below the selected card, click Open card preview
3
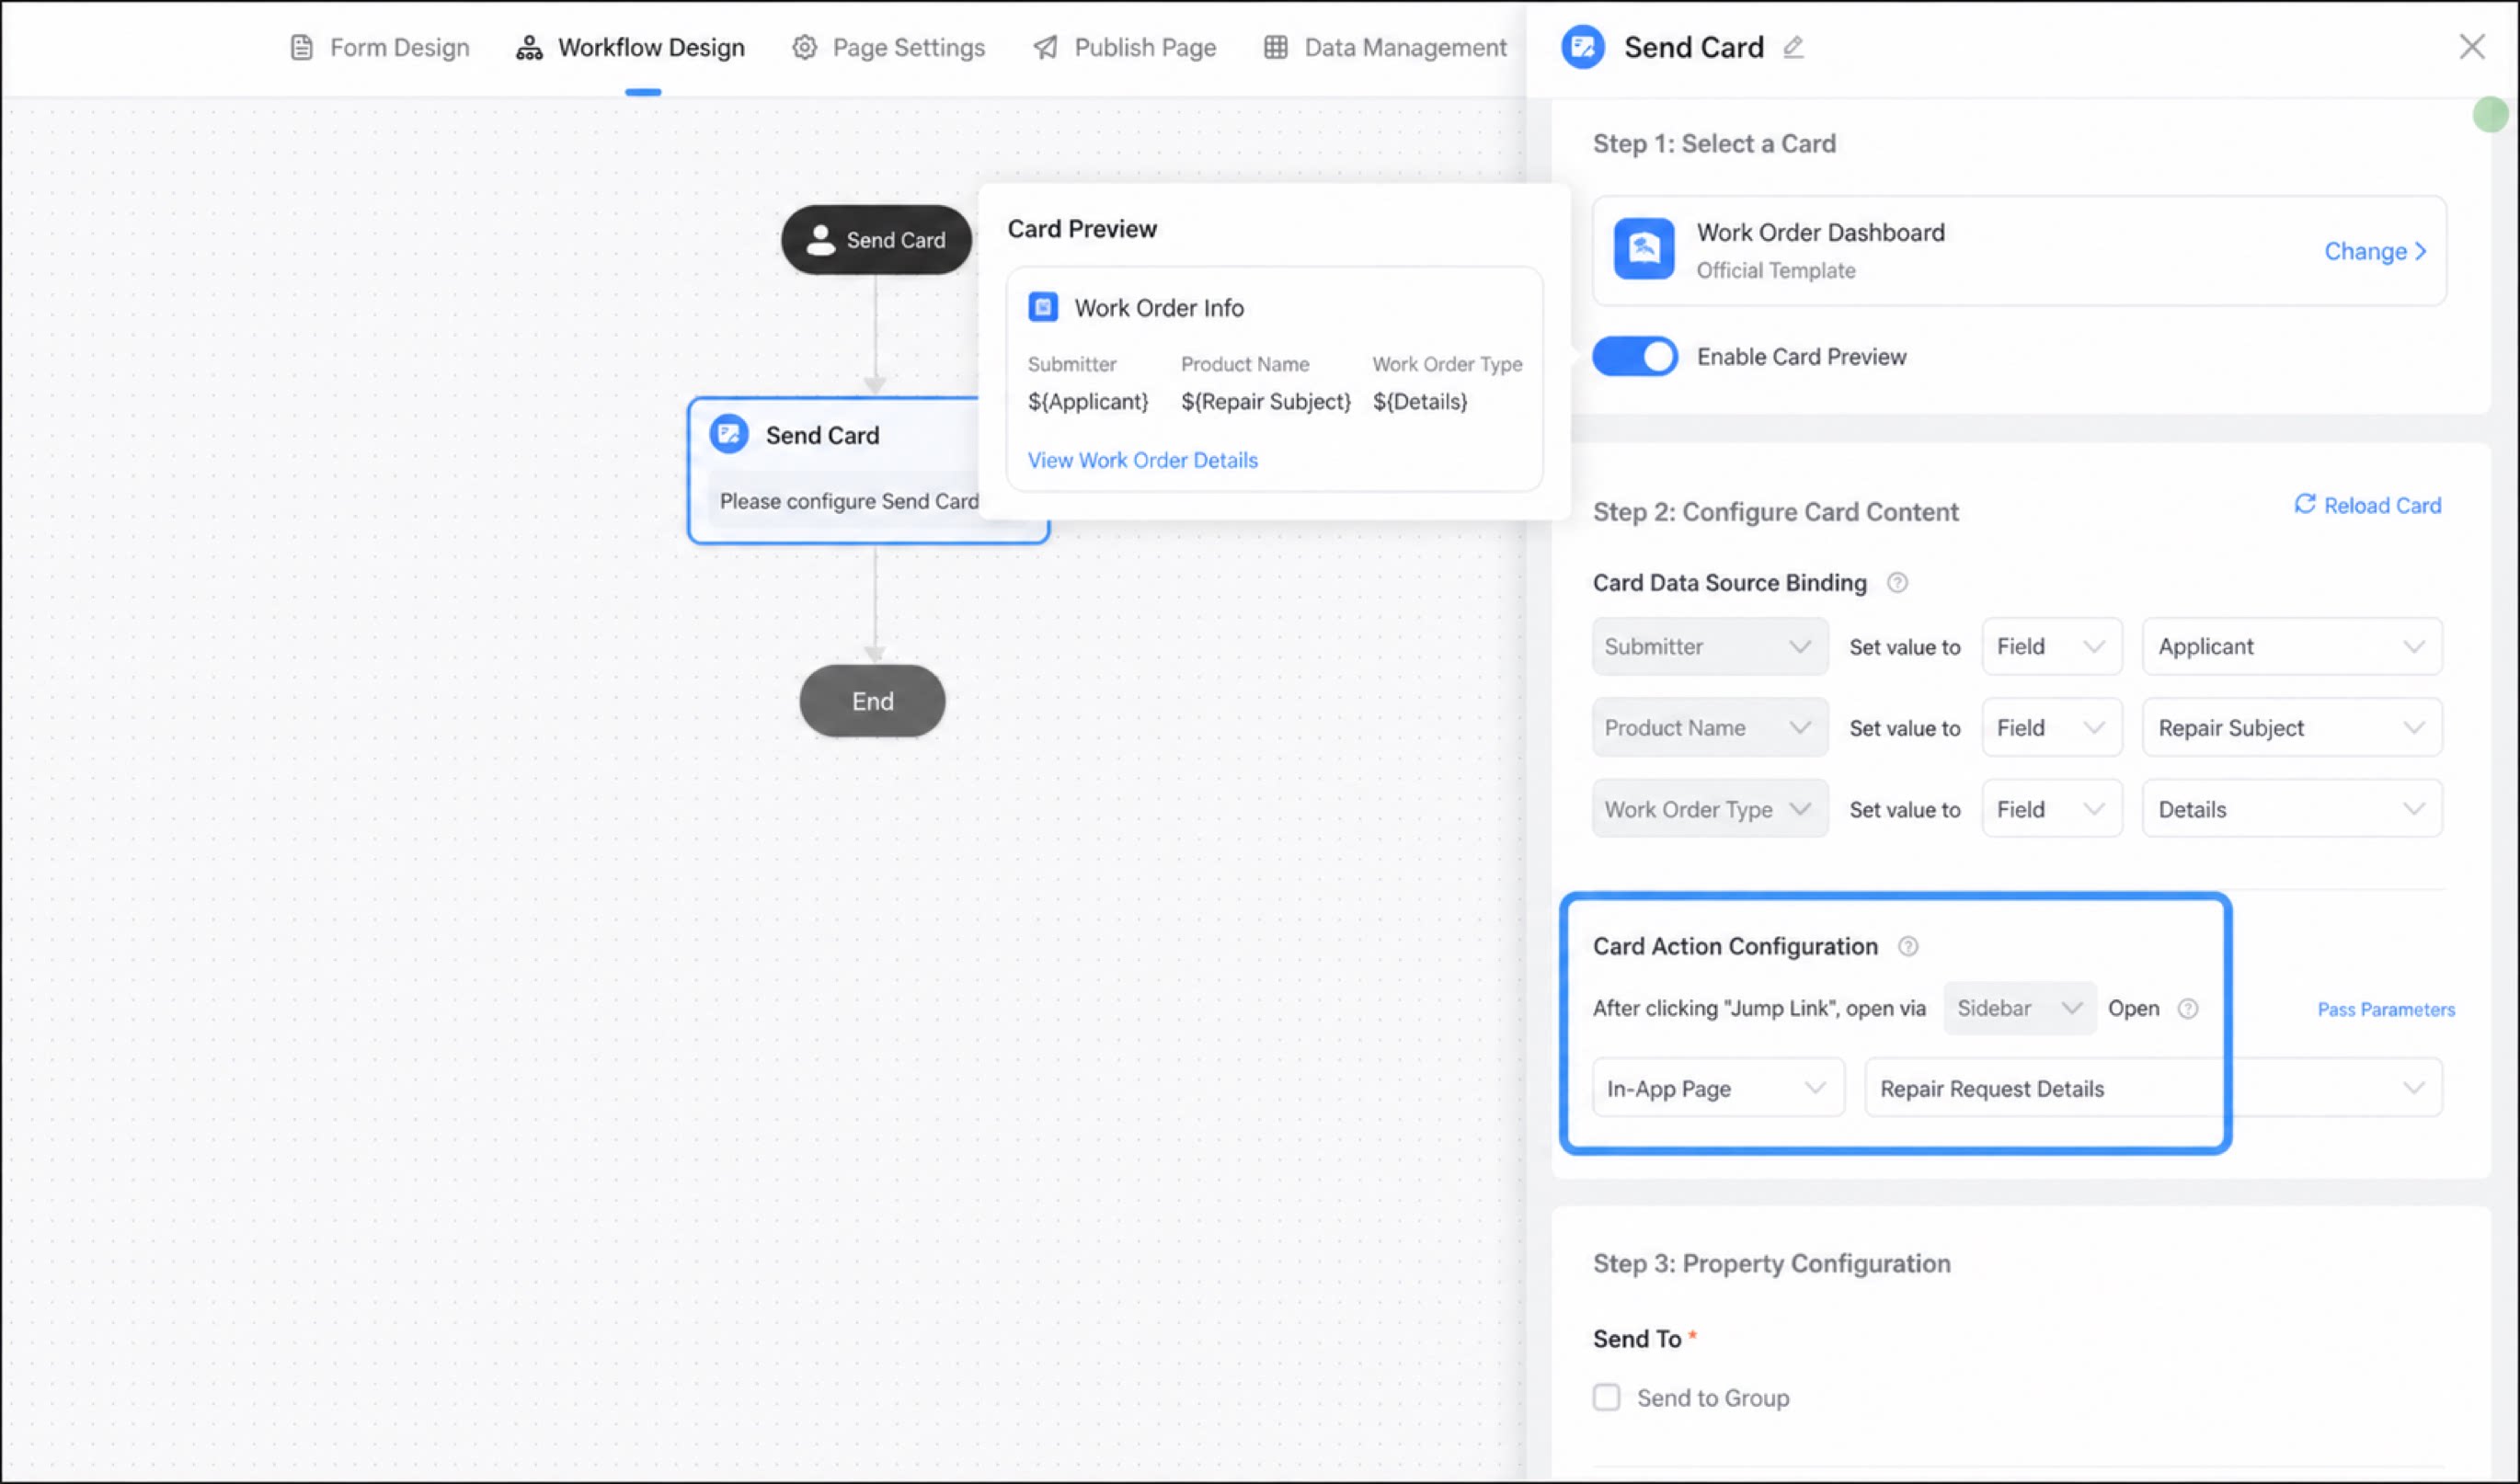
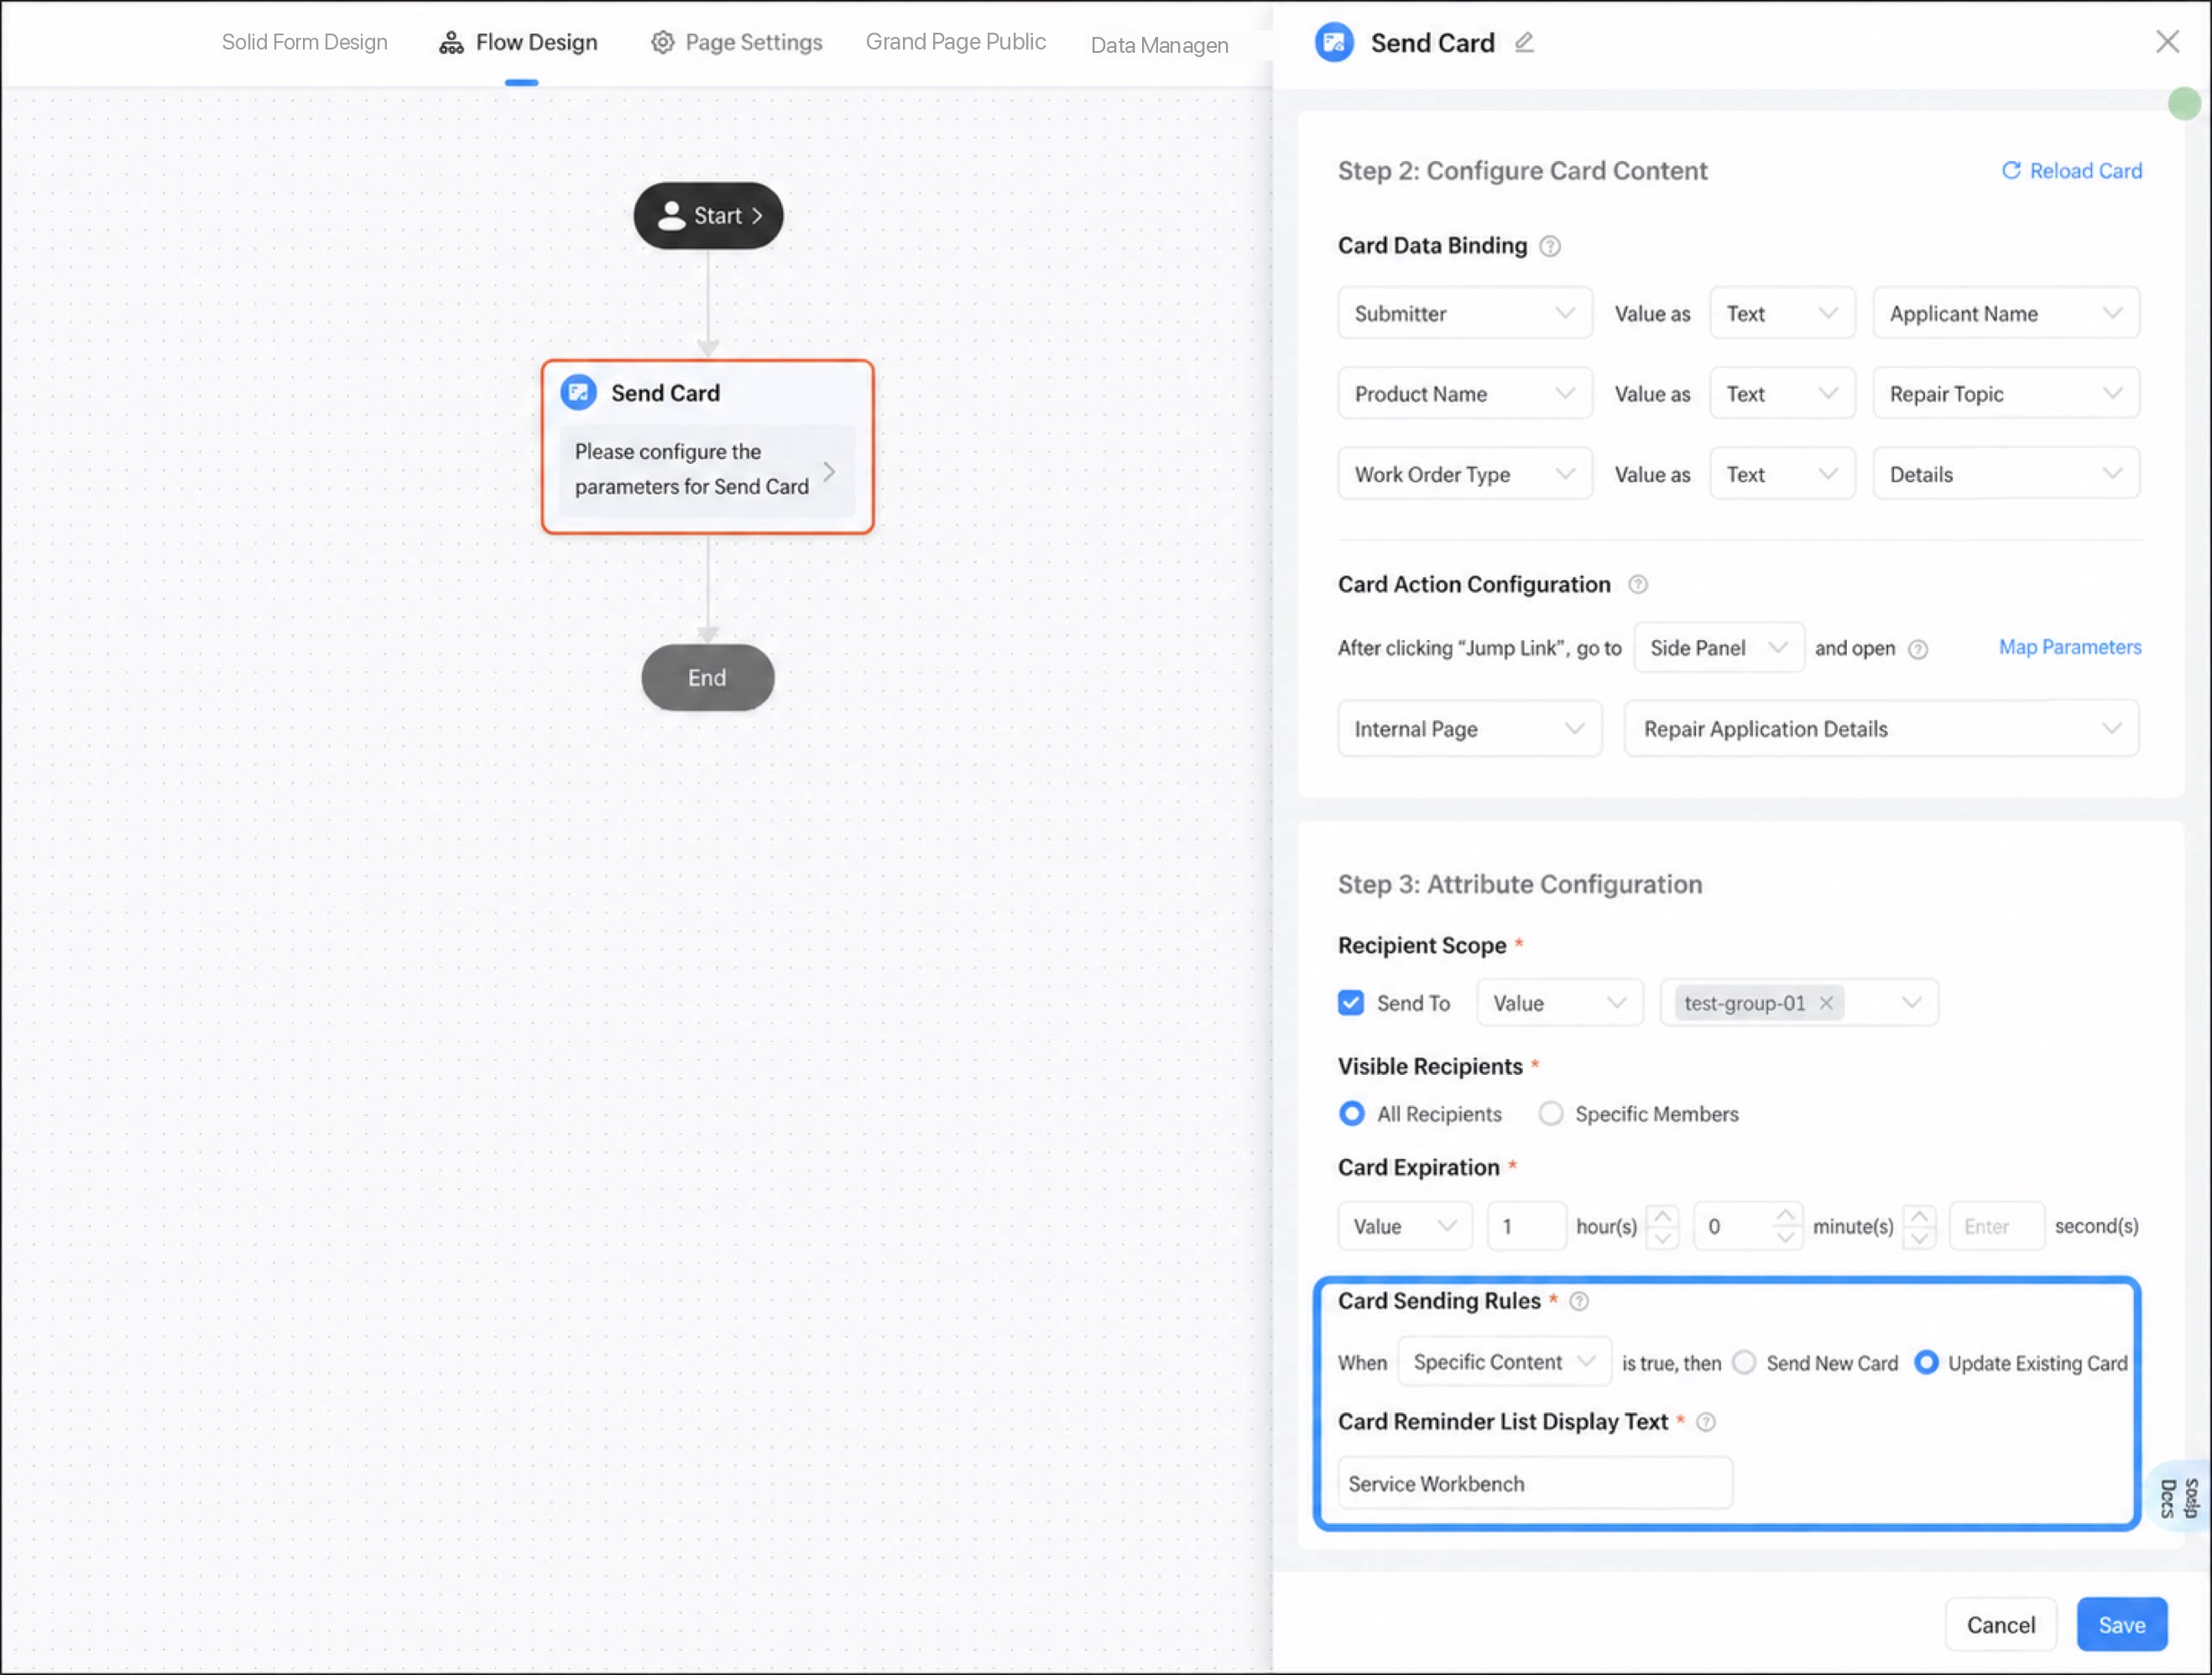
Set Submitter to the workflow Applicant, Product name to Repair subject, and Ticket type to Details
4
Configure the card action to open the App internal page via the Sidebar, with the Repair Request Details page as the target
5
Step 5
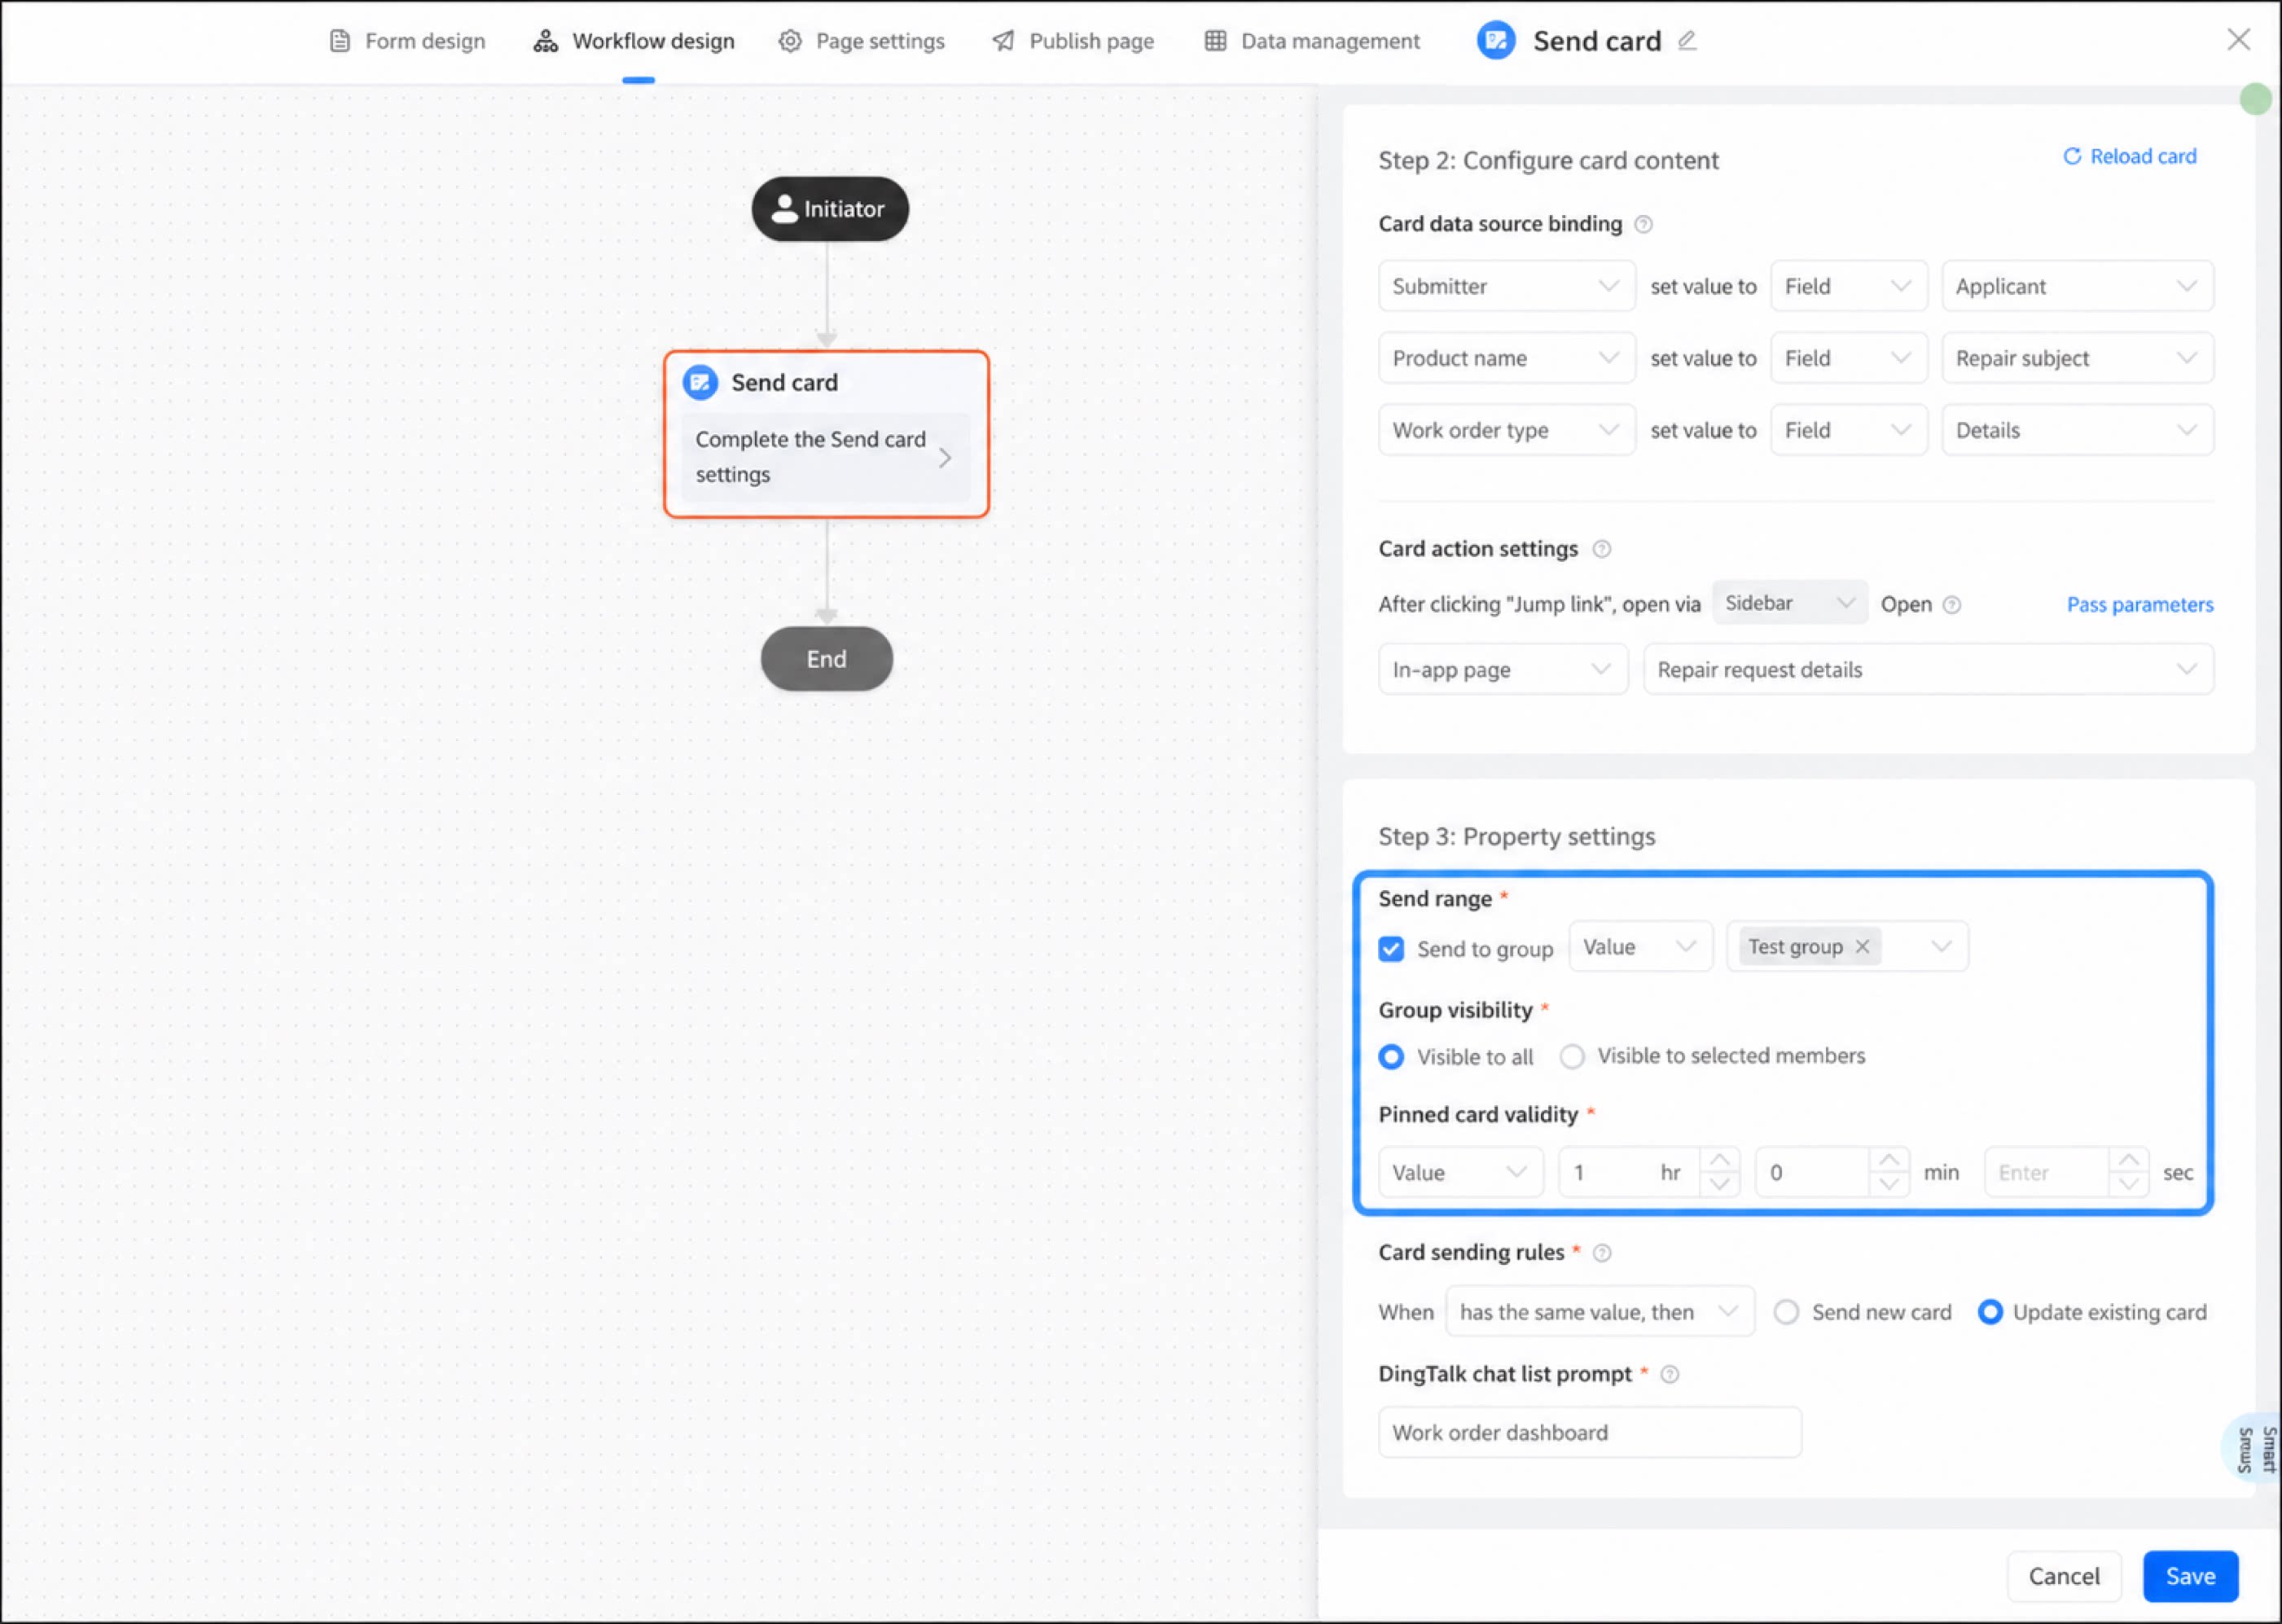
Set the card Send scope to any group with Cool App enabled, set Group visibility to Visible to all, and set the Pinned card duration to 1 hour.
6
Set the card send rule so that when the Details value is the same, Update the existing card, and set the DingTalk chat list prompt to Ticket kanban
7
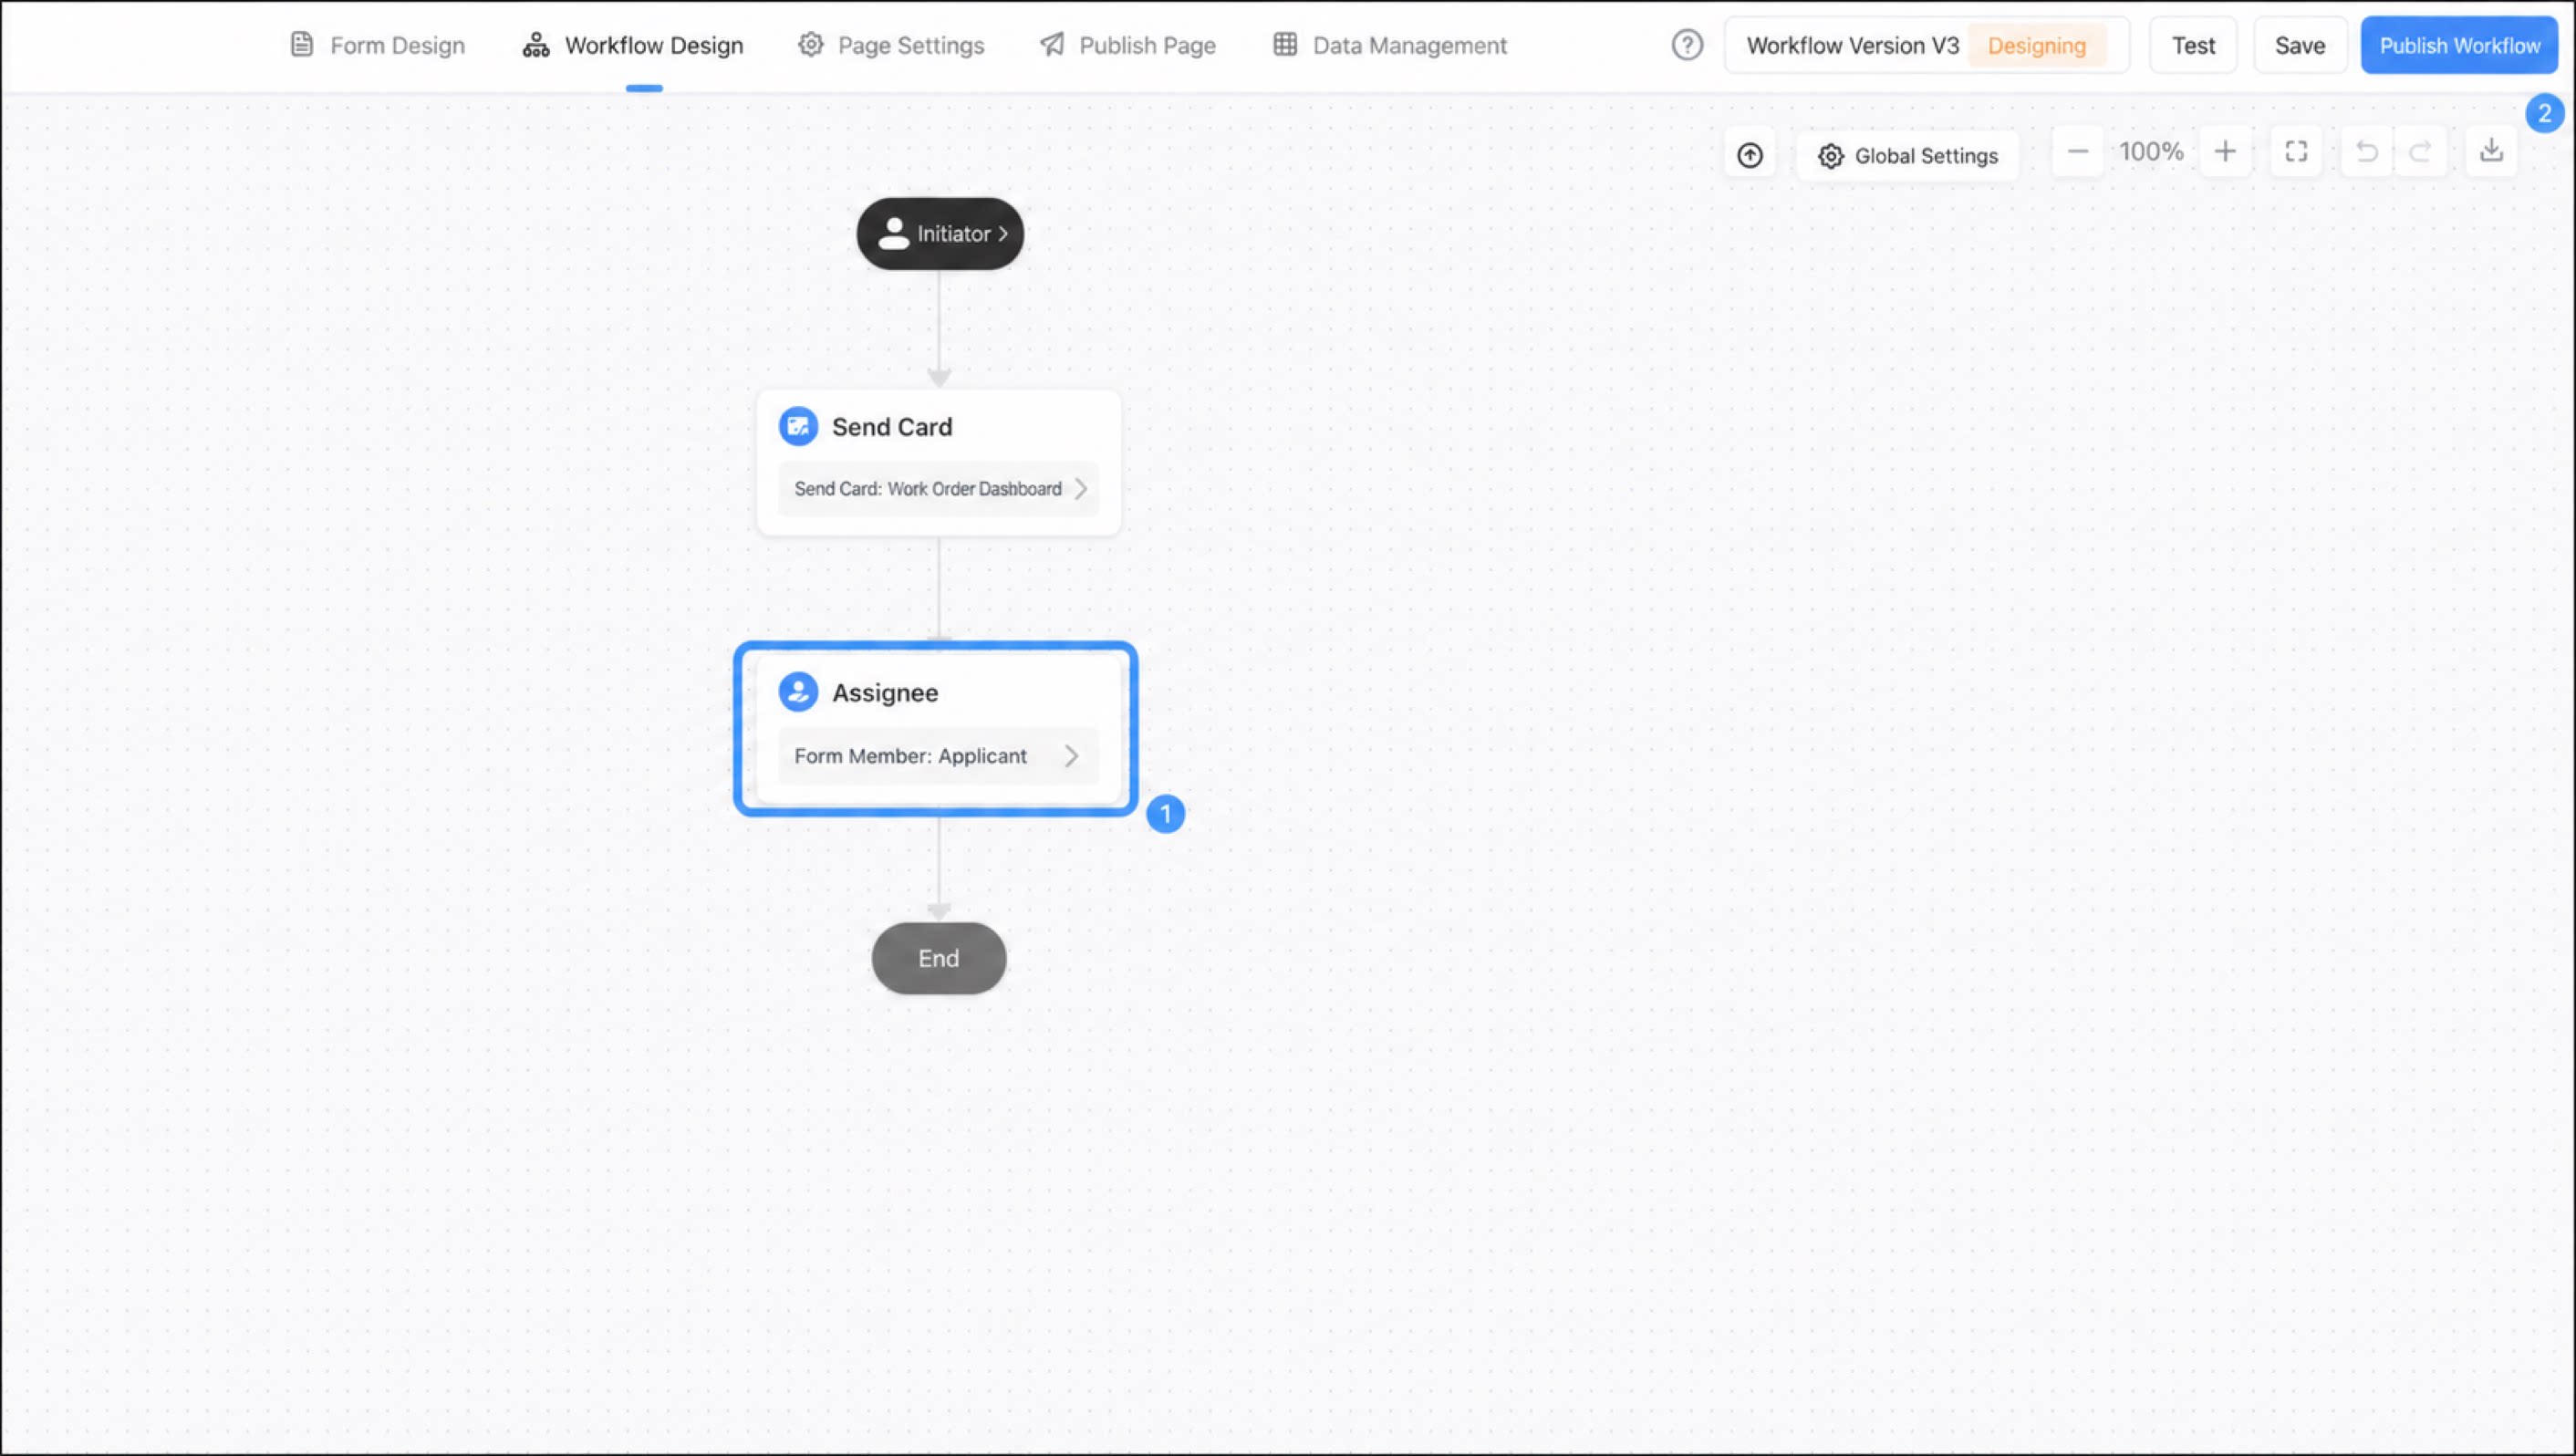
After the Send Card node, add an Assignee node and set the Assignee to Applicant
 After adding the node, click Publish workflow.
- Access the app and submit a record.
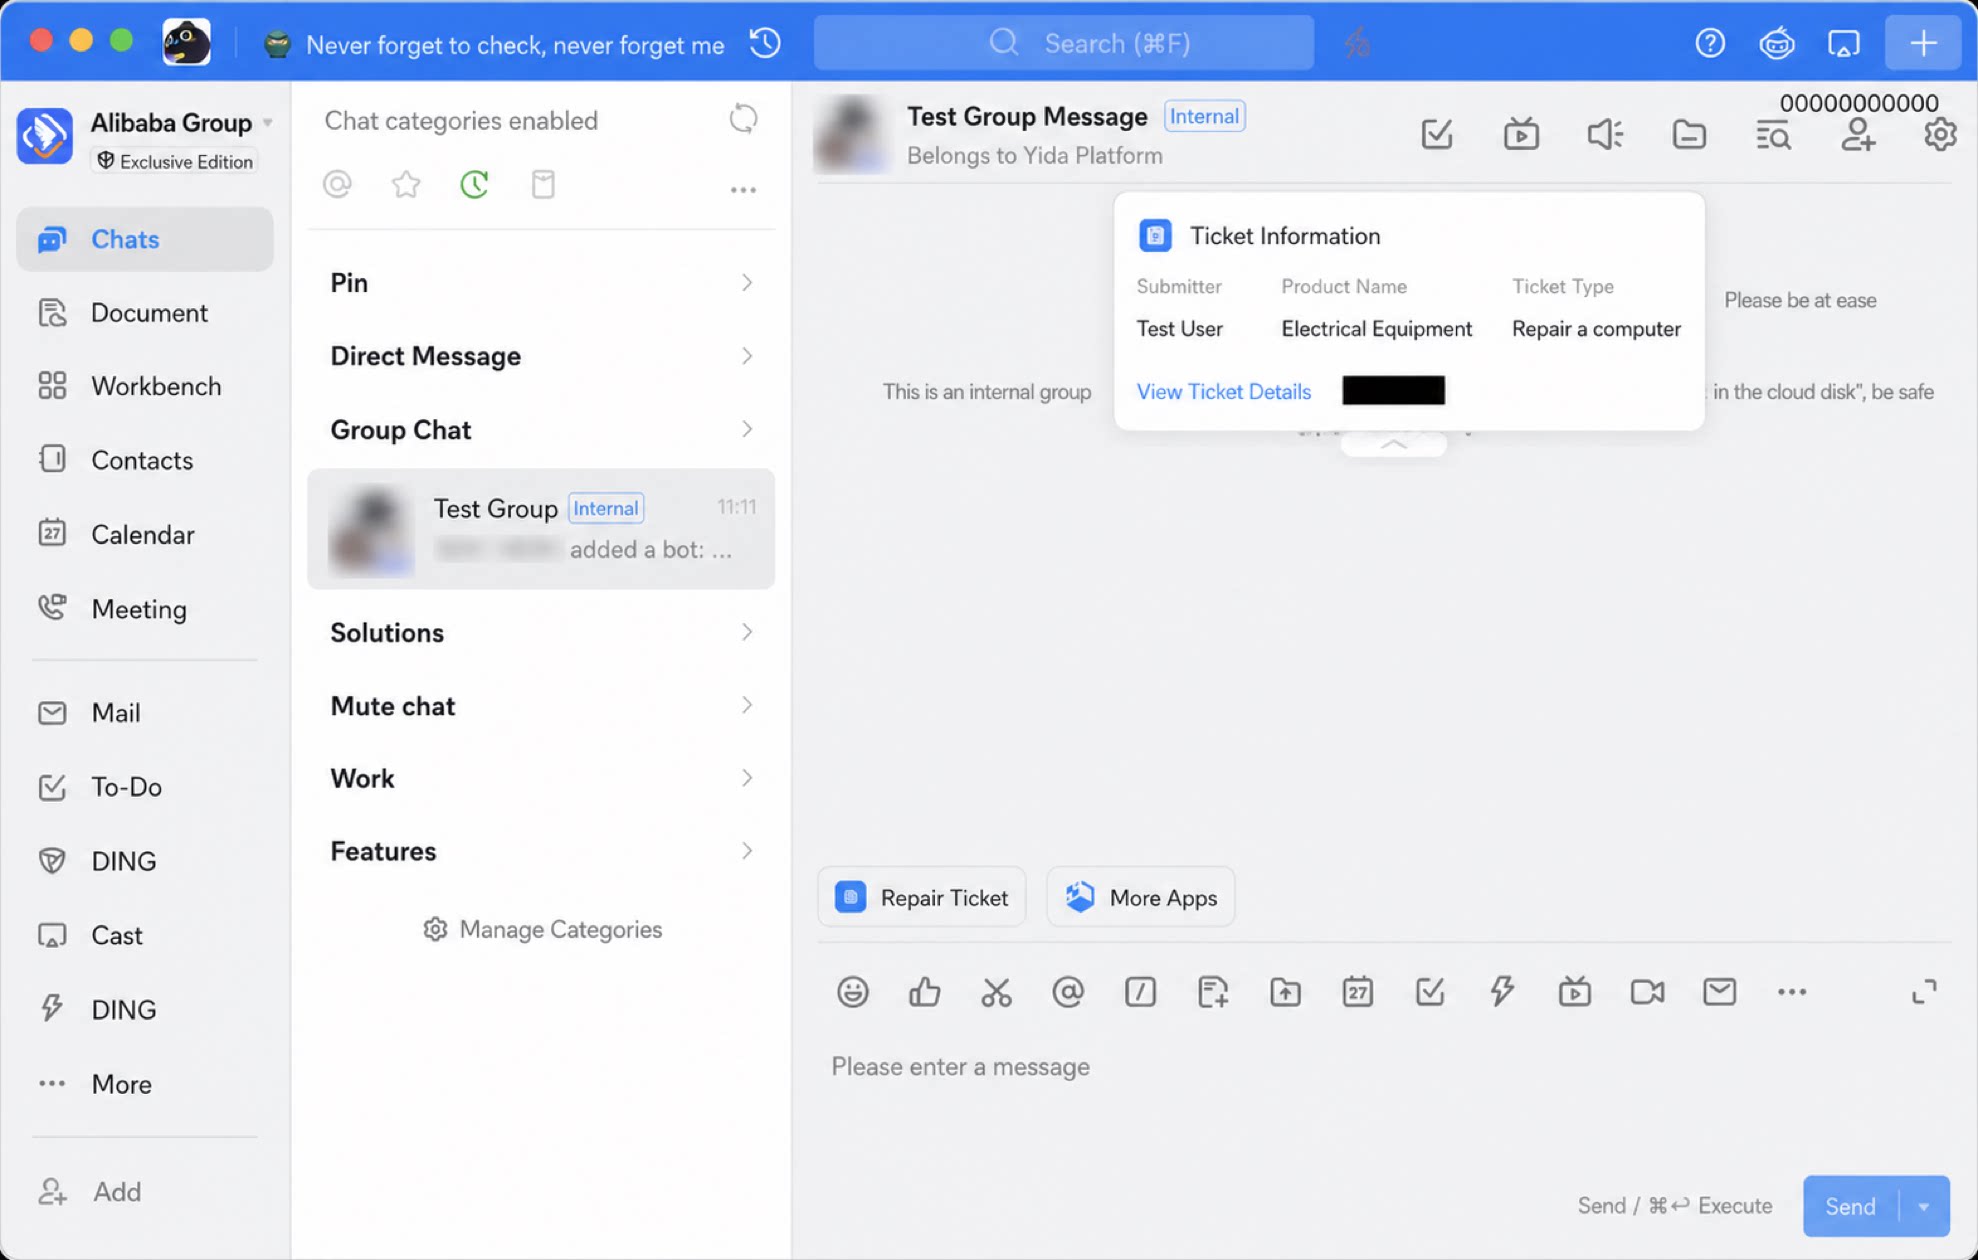
- Open the configured notification group to check whether the pinned card was sent successfully.
Related Topics
- Cool App design guide
- Cool Card design
- Card editor overview