Chats
Chats Calendar
 Meetings
 Contacts
 Mail
Mail Docs
Docs Drive
Drive AI Table
 AI Minutes
 Attendance
 Approval
 YiDA
YiDA Admin Console
About Cool Card Workflows
Cards are sent and updated through Integration & Automation. The following sections walk through the “team-building feedback collection” scenario to show how to implement it with integration & automation.Business Scenario
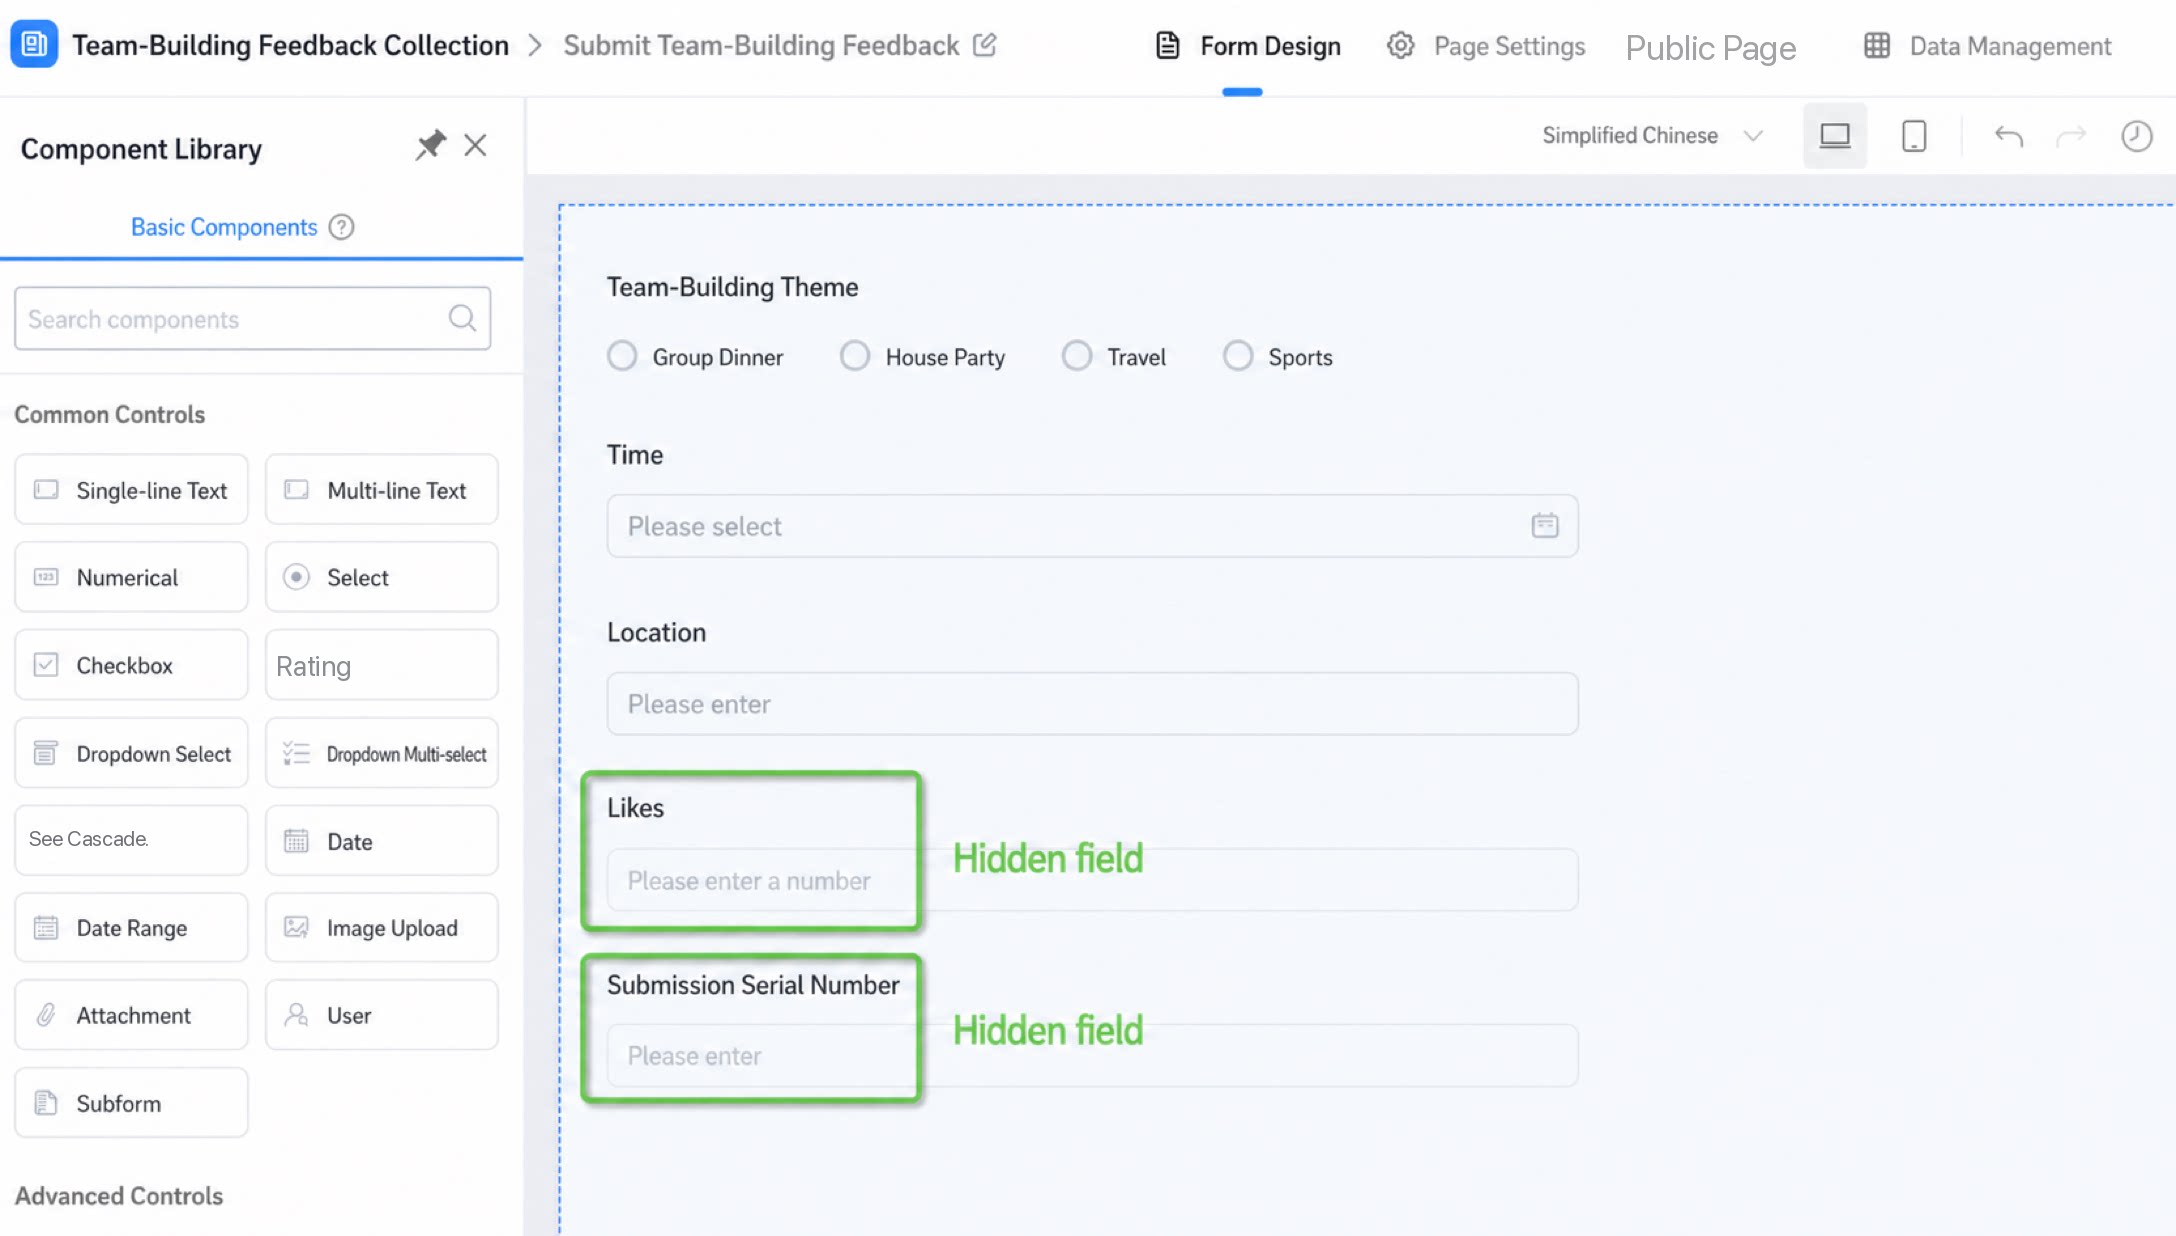
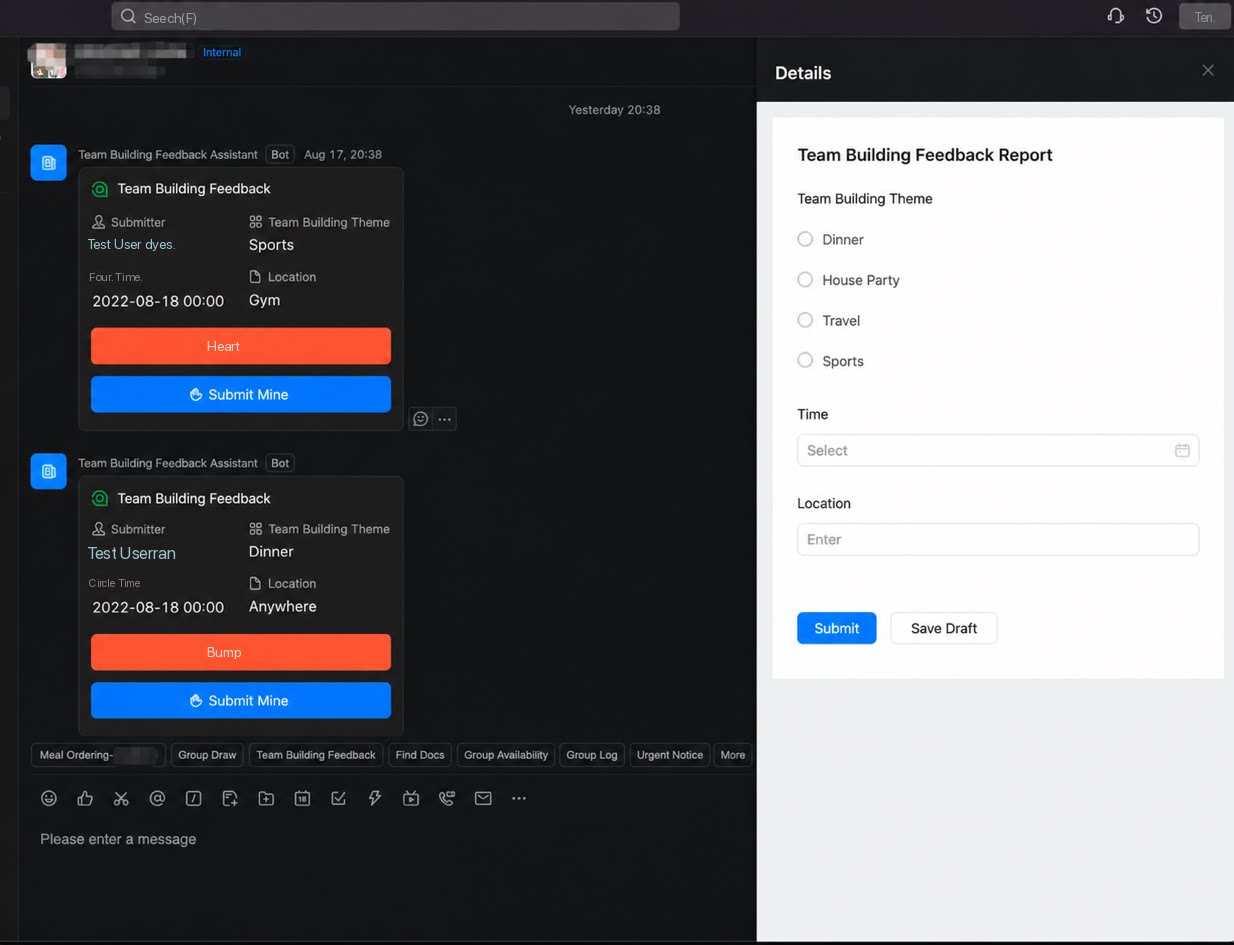
- A “Team-building feedback collection” form is available. After an employee submits the form, the submitted content is sent to a group chat as a card.
- Other employees can see the card in the group, like it, or submit their own team-building feedback.
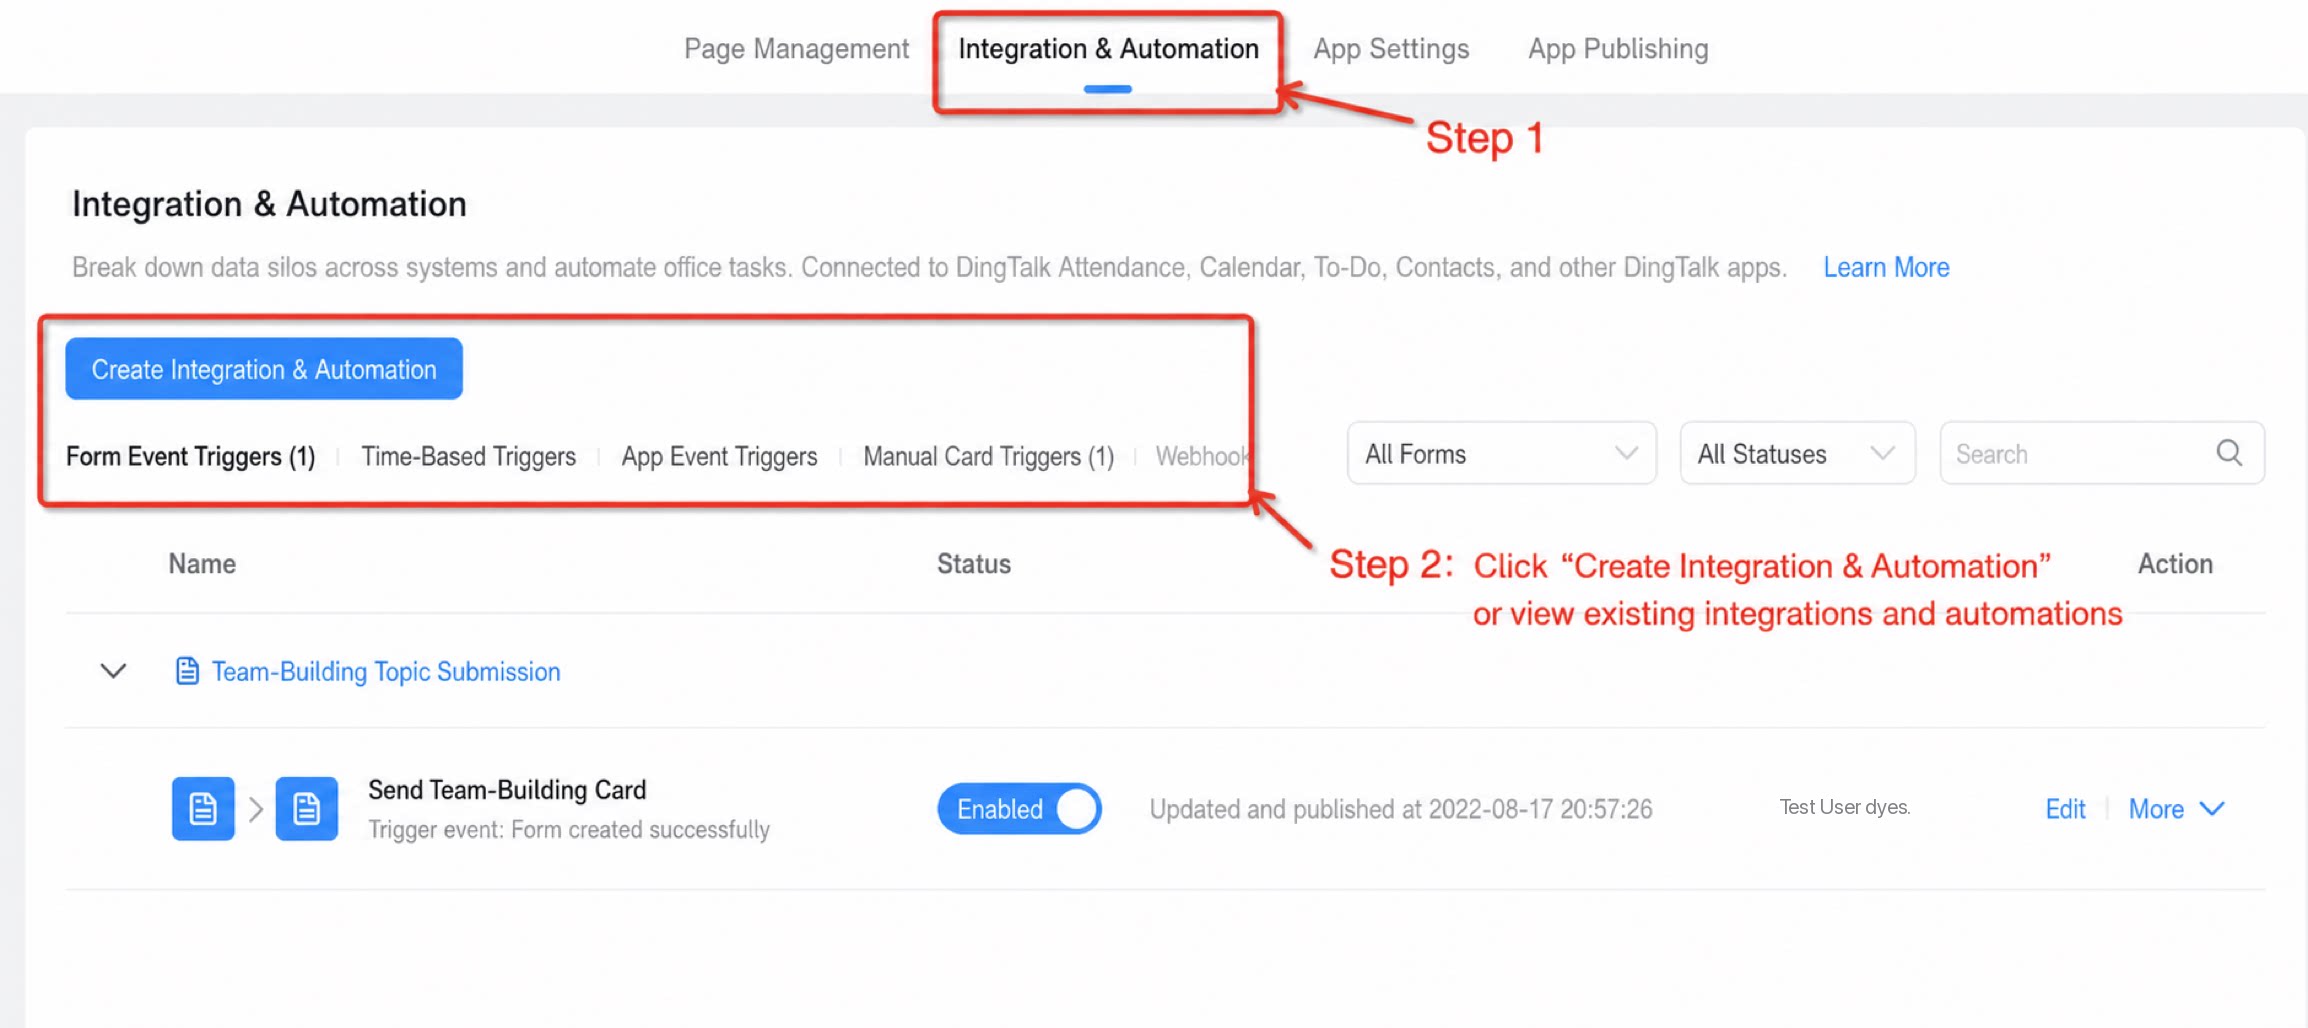
1. Integration & Automation
Integration & Automation: a business orchestration/workflow triggered by an event. Submitting the “Team-building feedback” form and sending a card to the group — in this scenario, form submission is the “event”, and sending the card to the group is the “workflow”.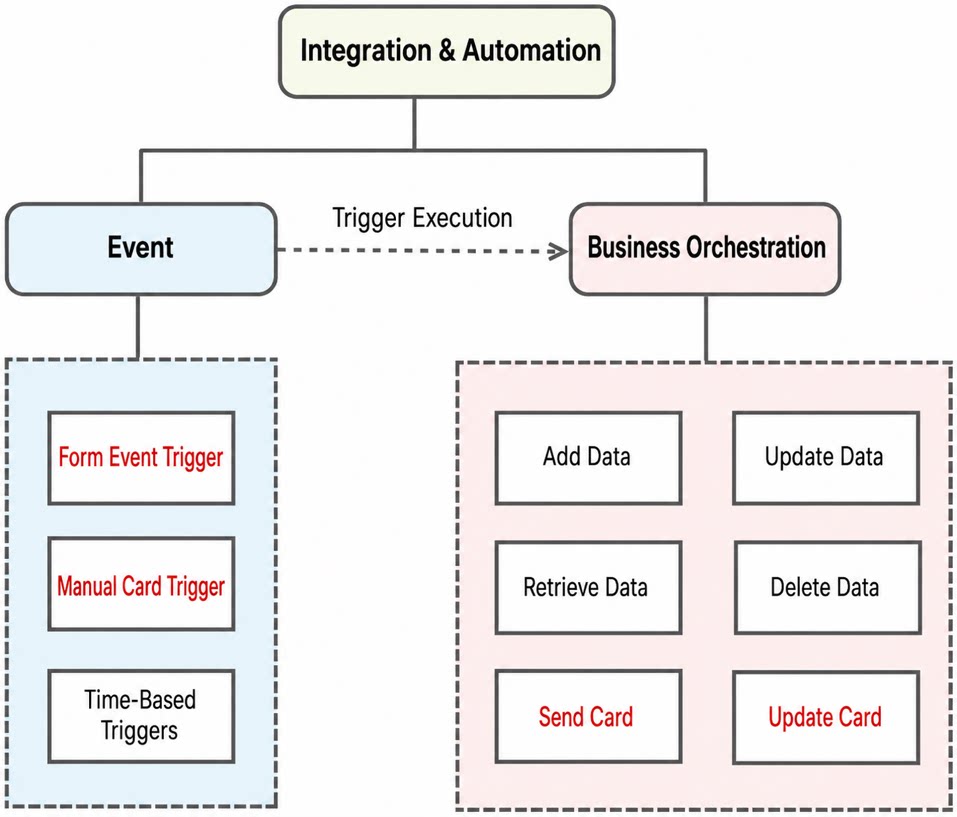
2. Form Event Trigger
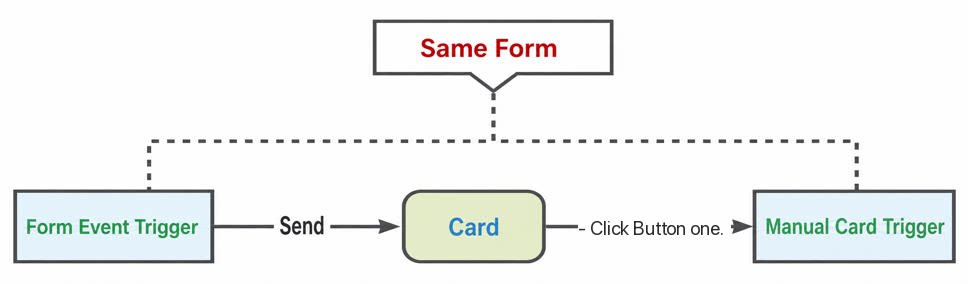
Feature: triggers a workflow when a form is submitted, updated, or deleted. Example scenario: A “Team-building feedback collection” form is available. After an employee submits the form, the submitted content is sent to a group chat as a card.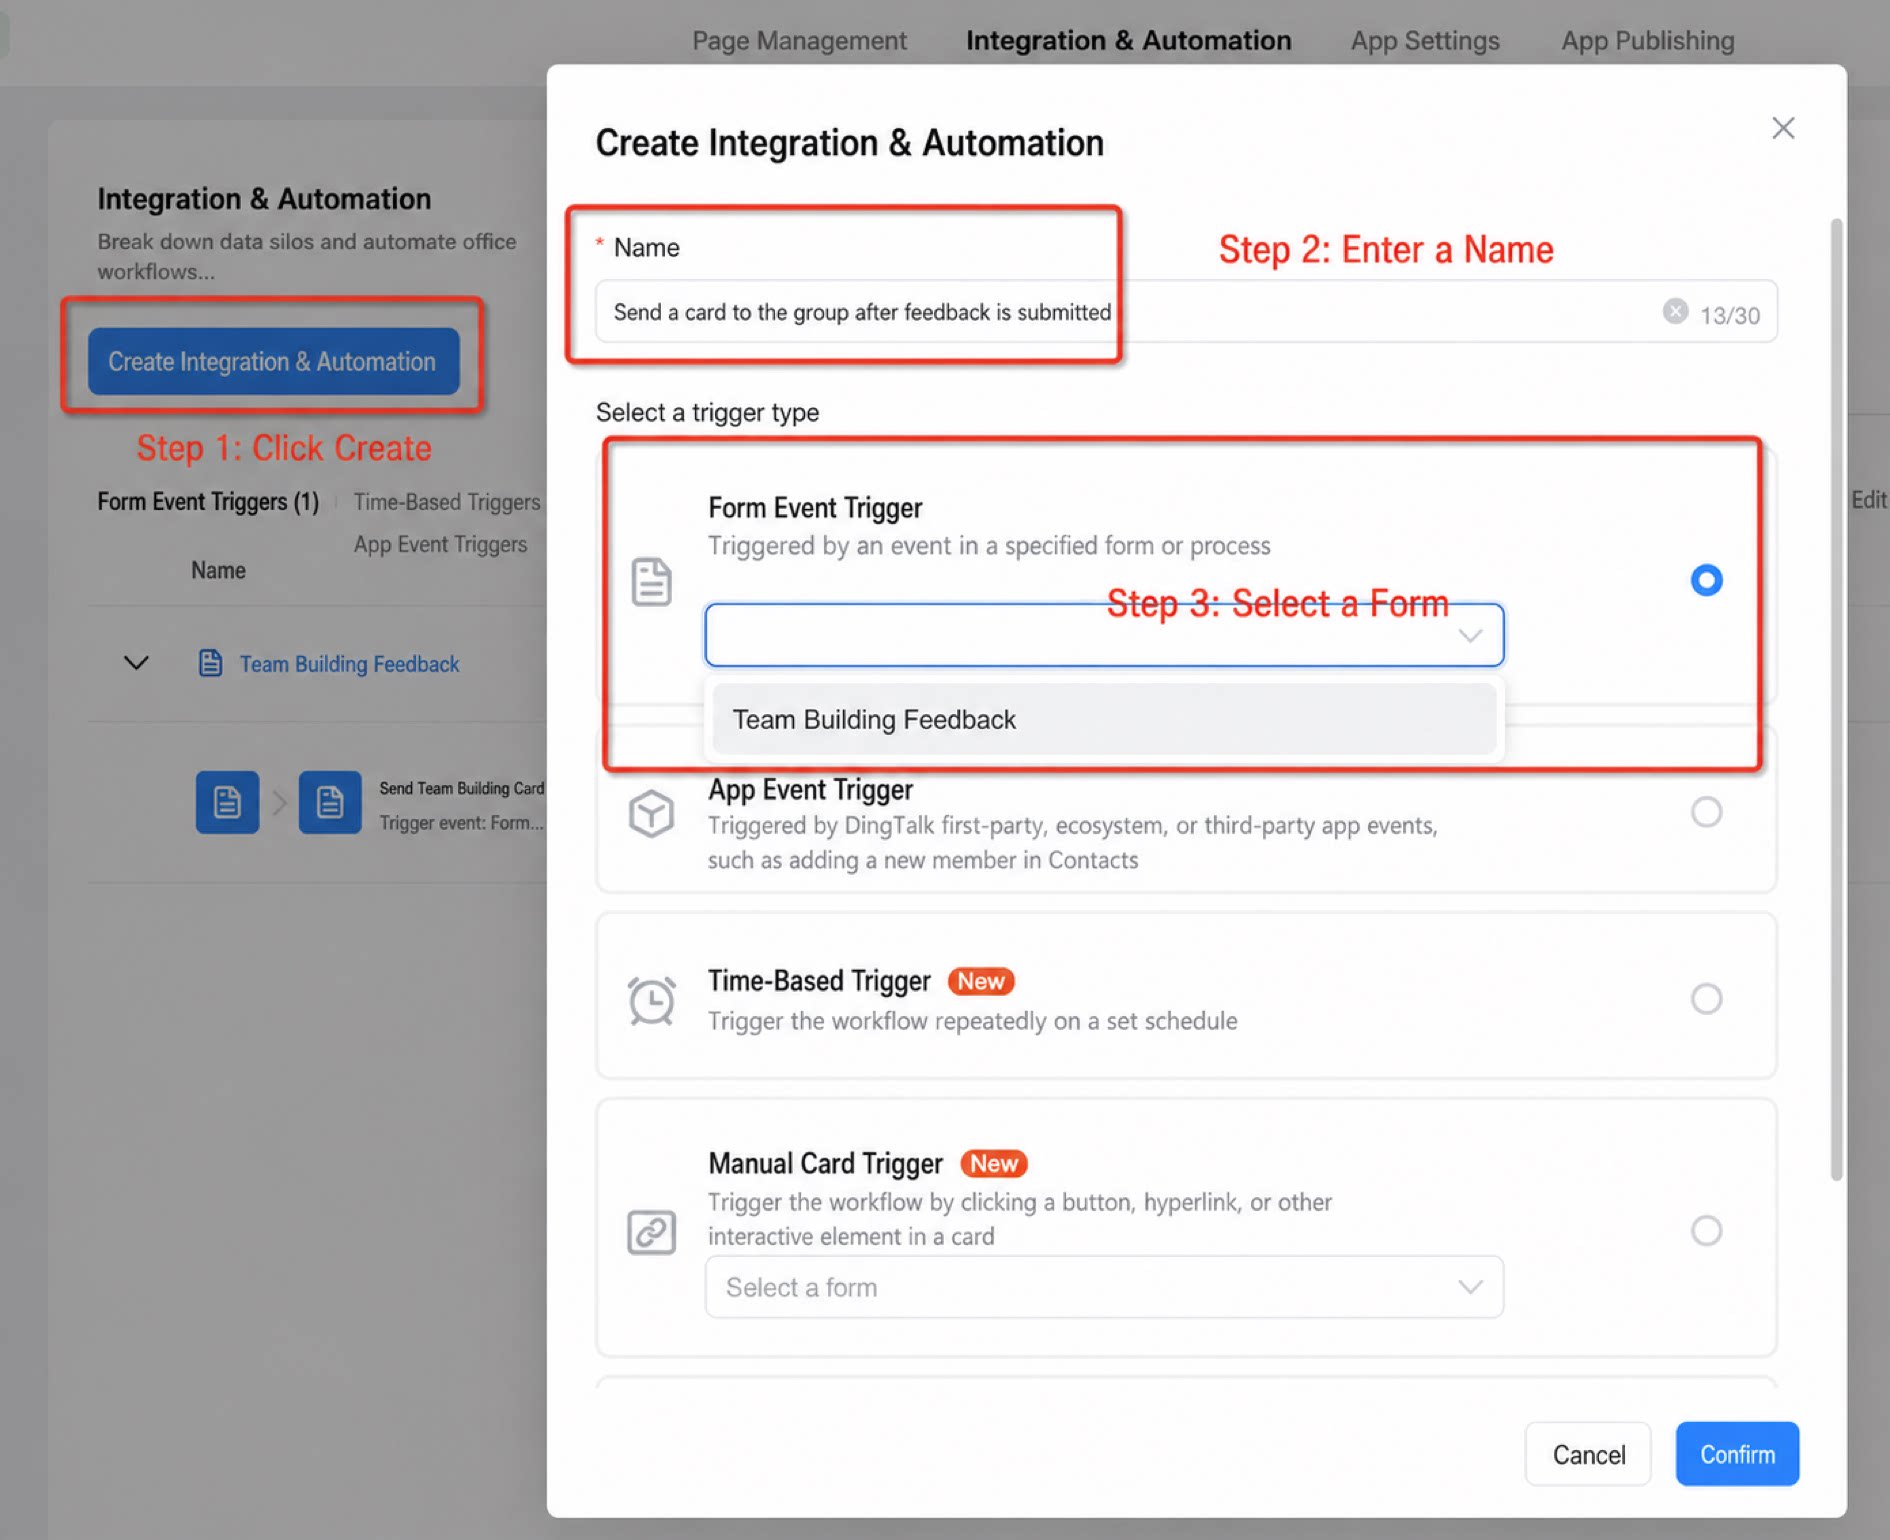
- Create an integration & automation with a “Form event trigger”: click Create > enter a name > select the “Team-building feedback submission” form.
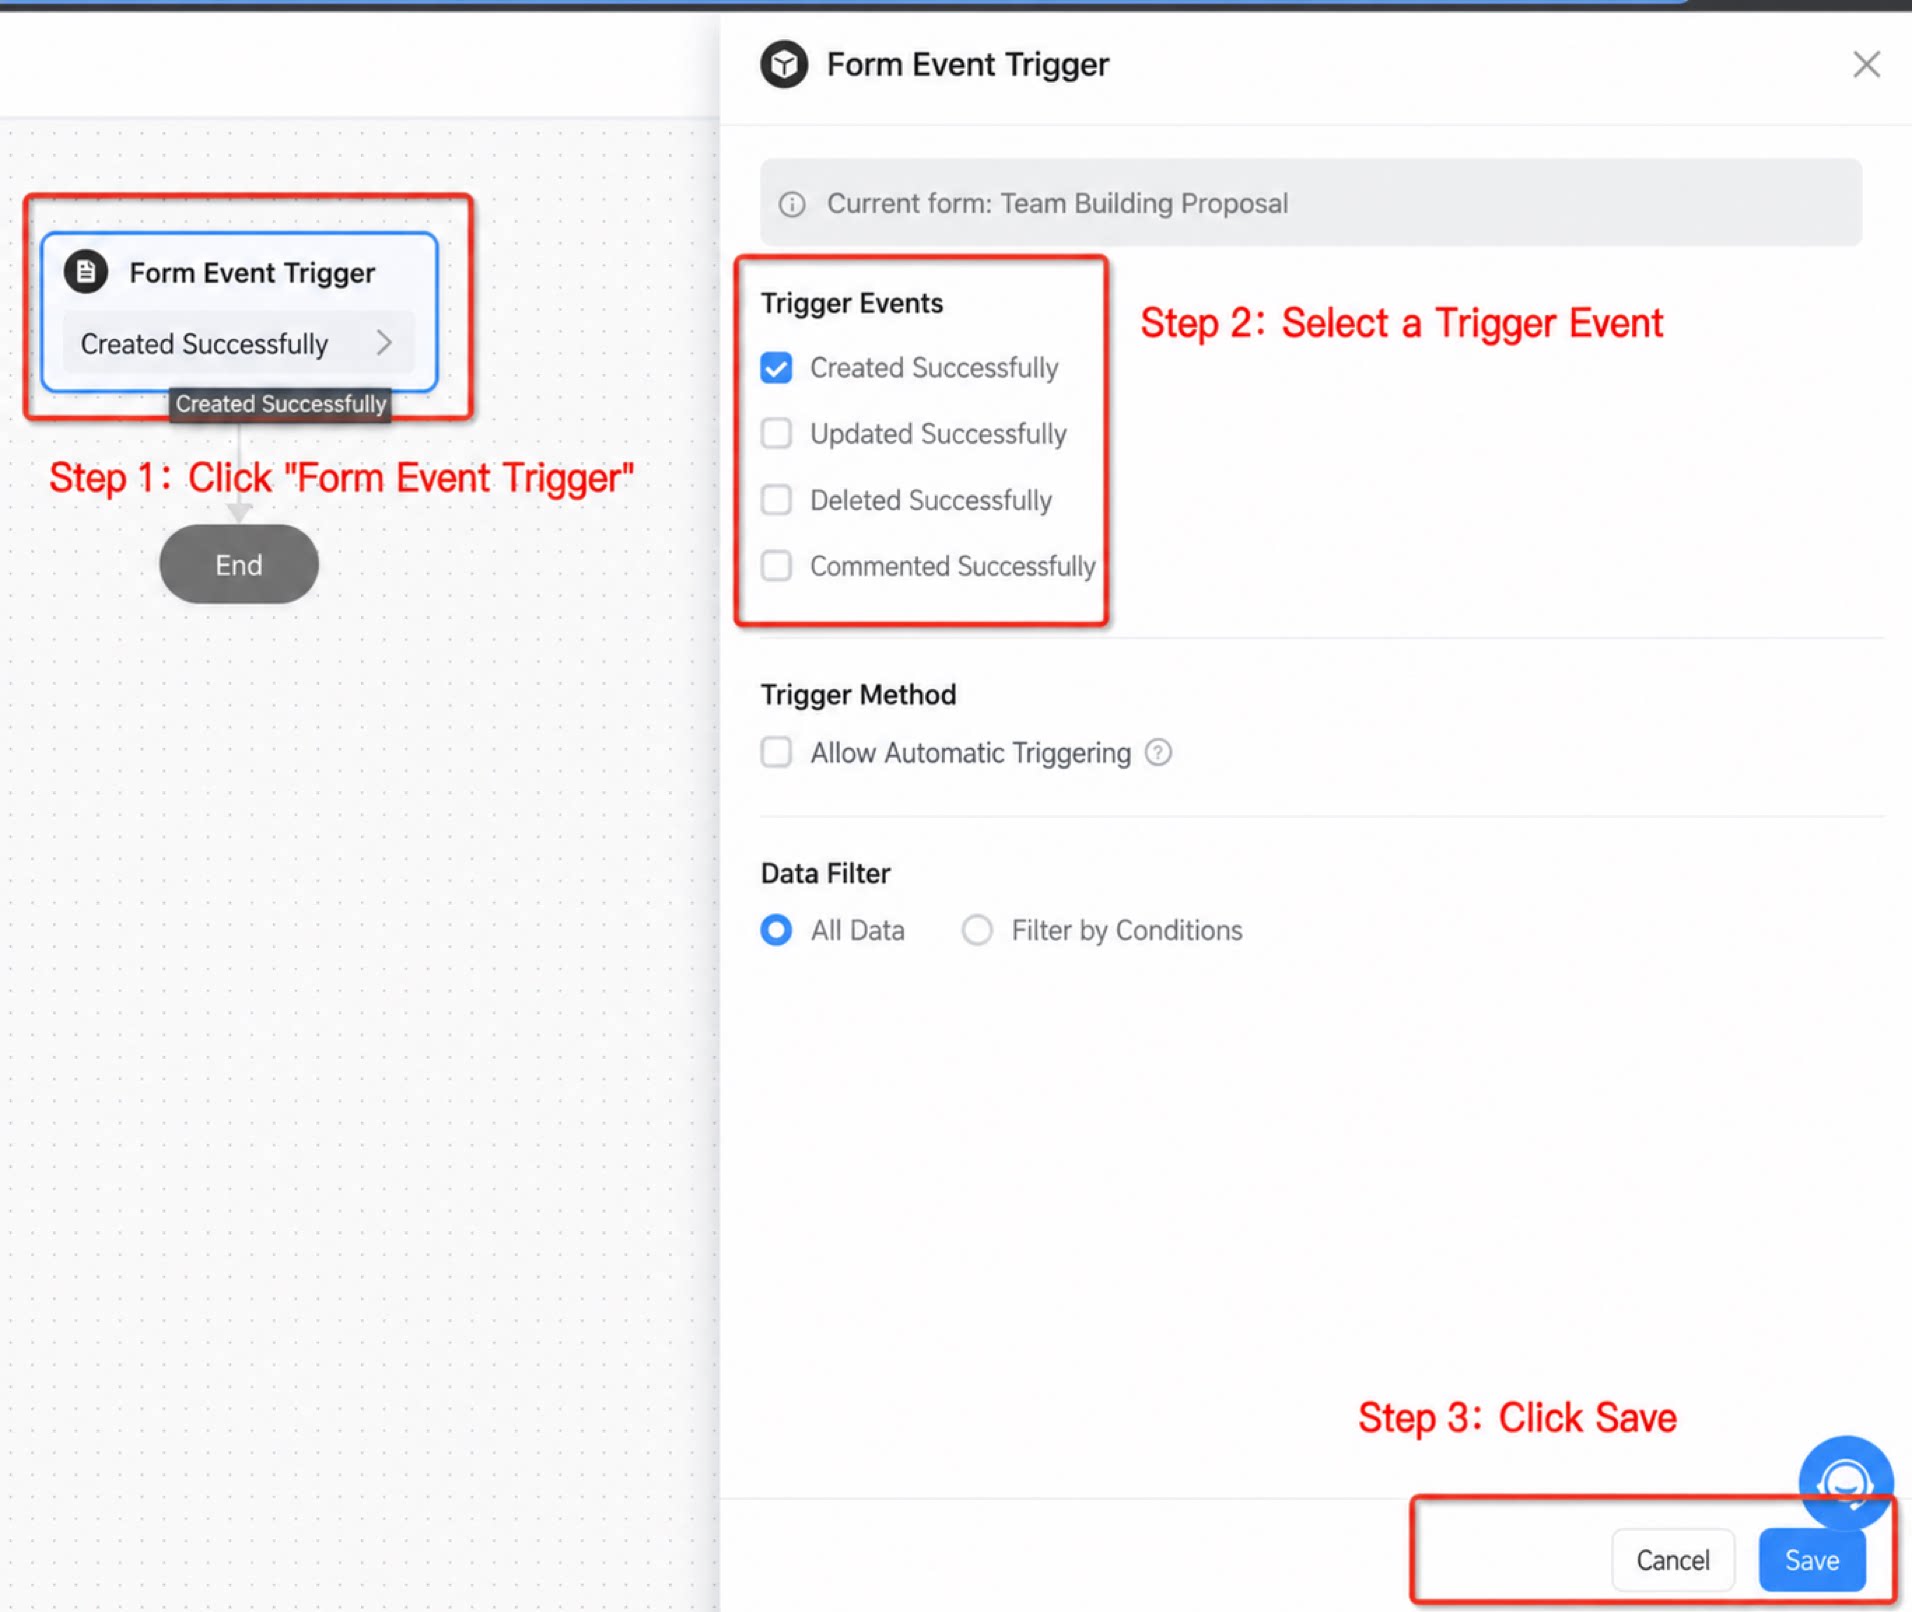
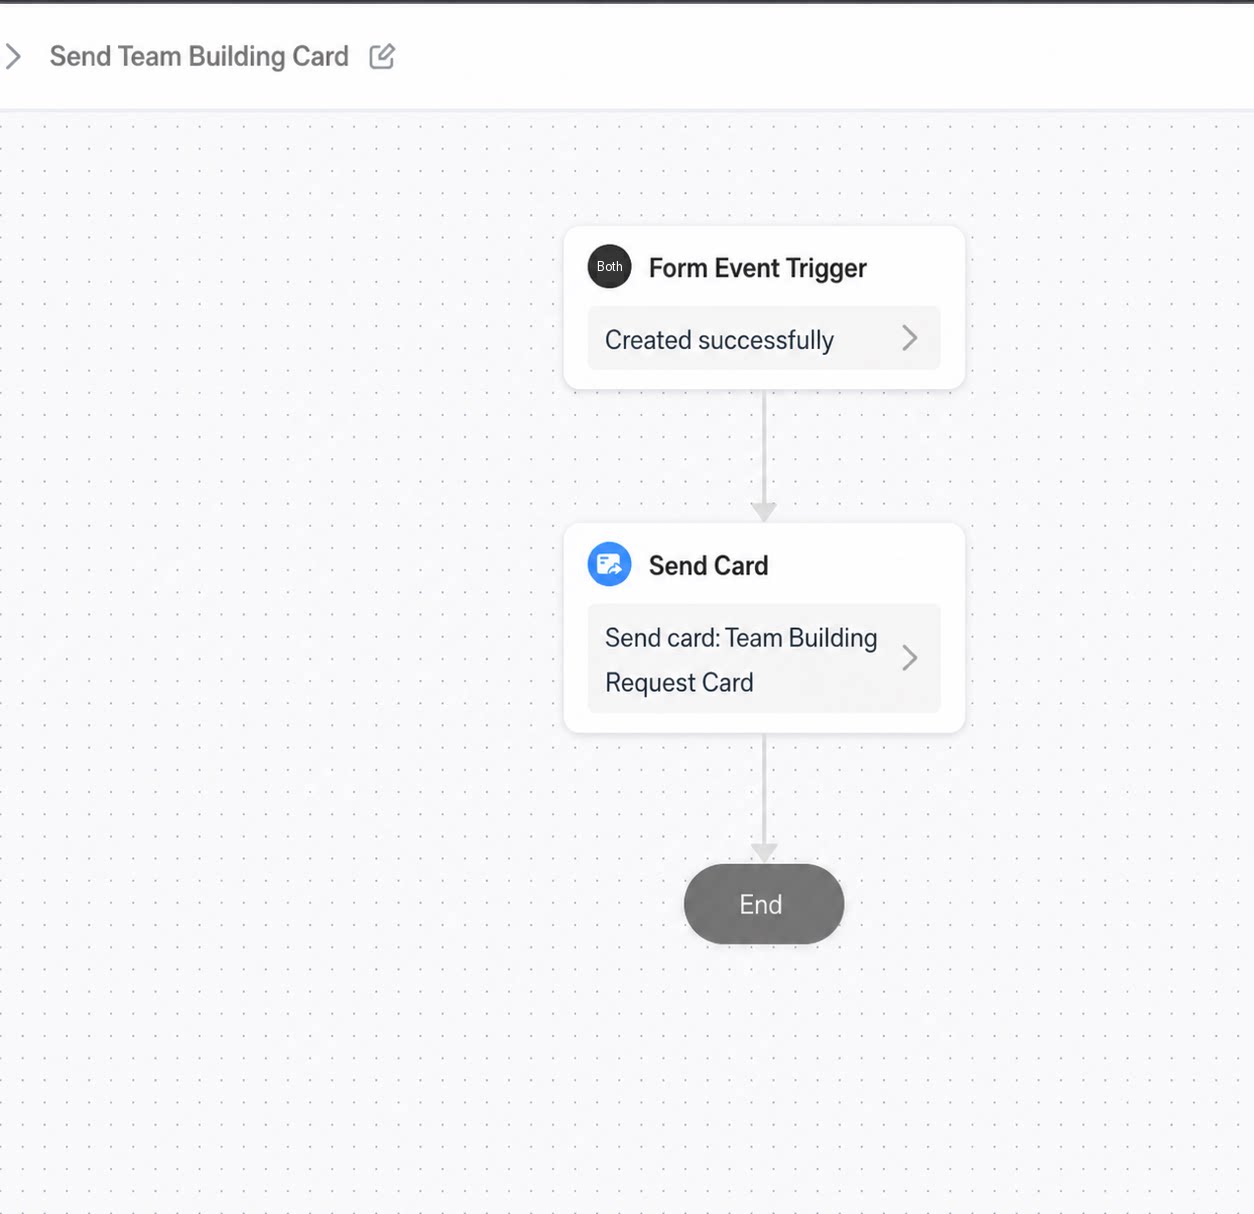
- Enter the workflow designer and select the form event trigger.
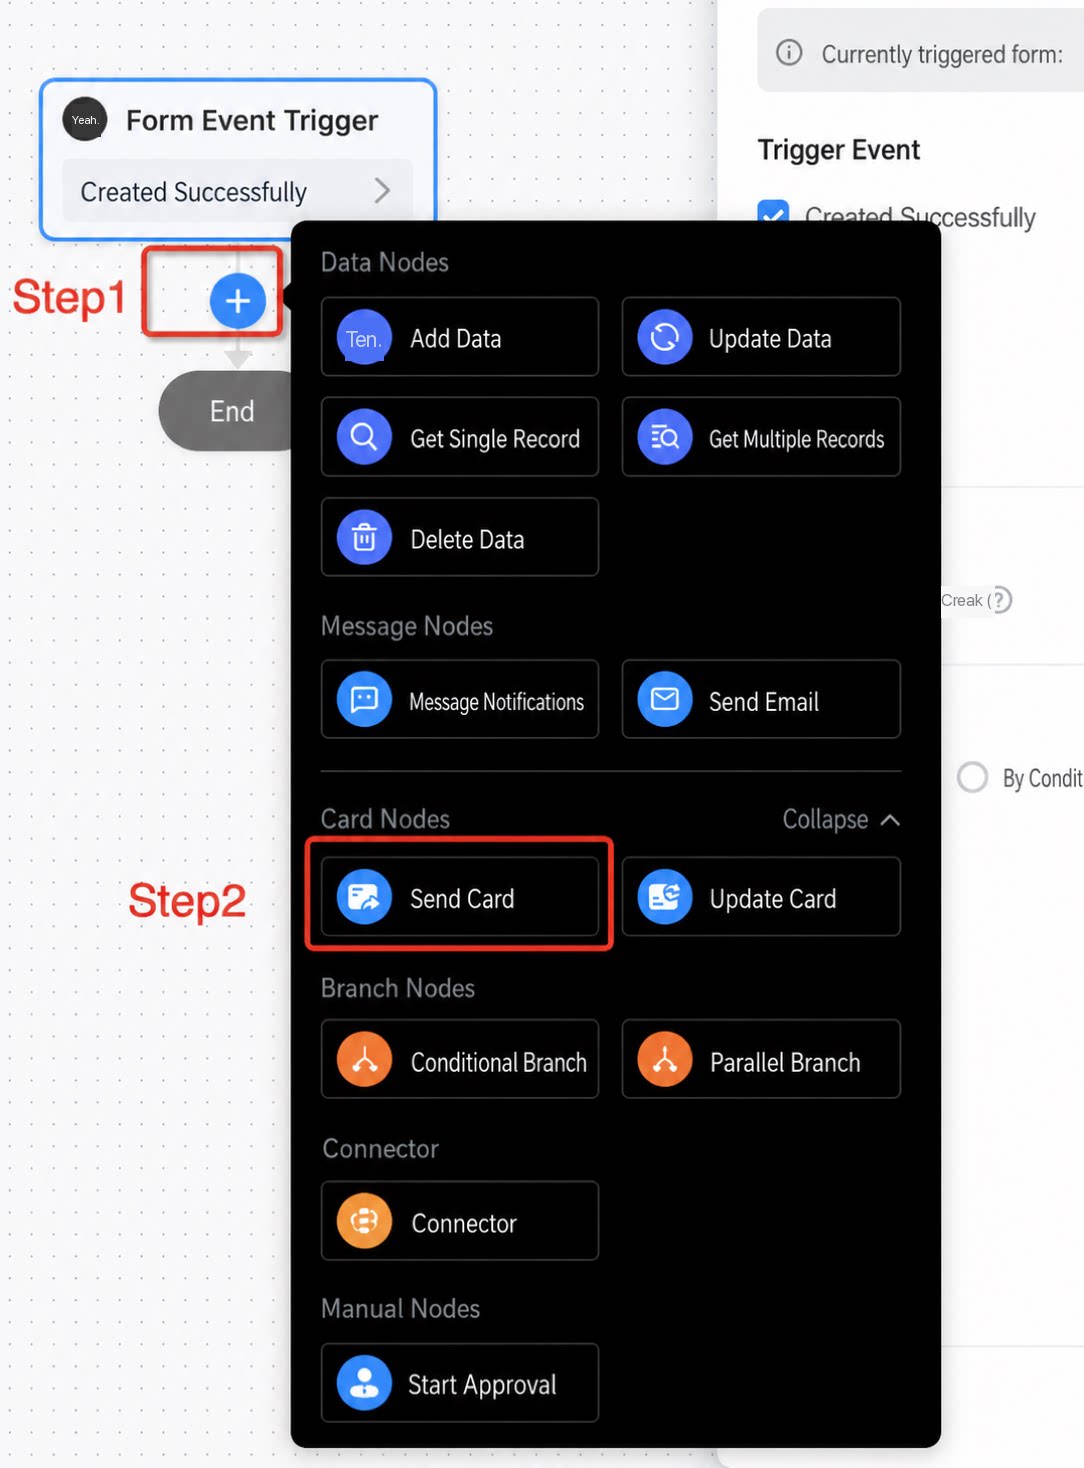
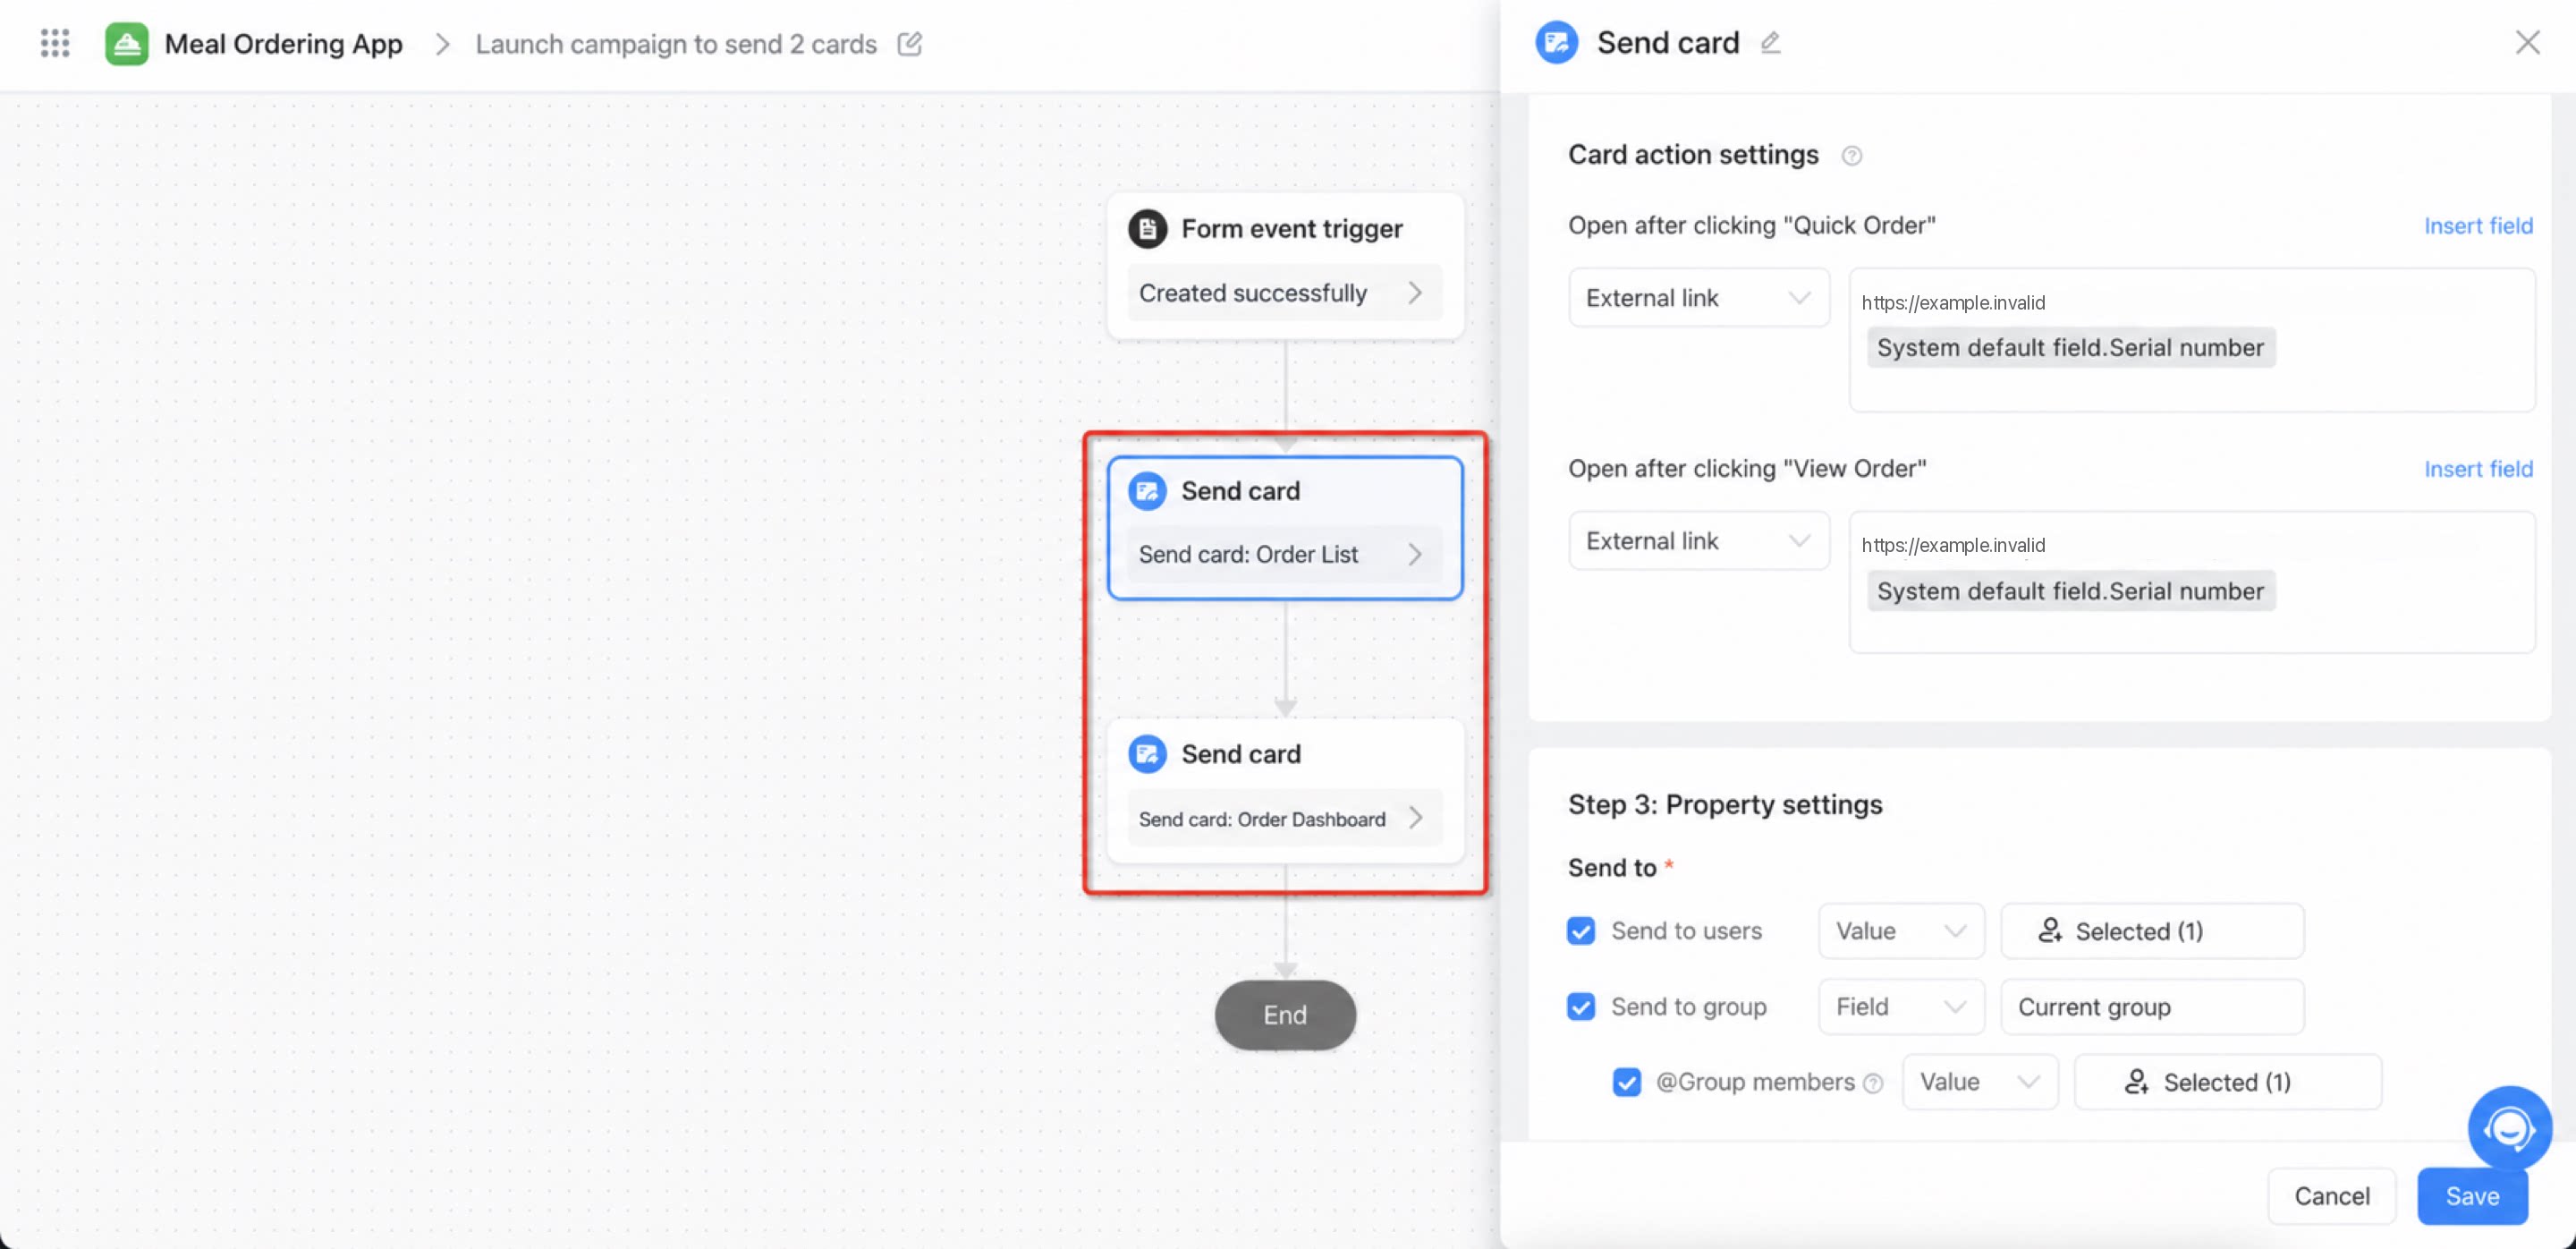
- Add a “Send card” node.
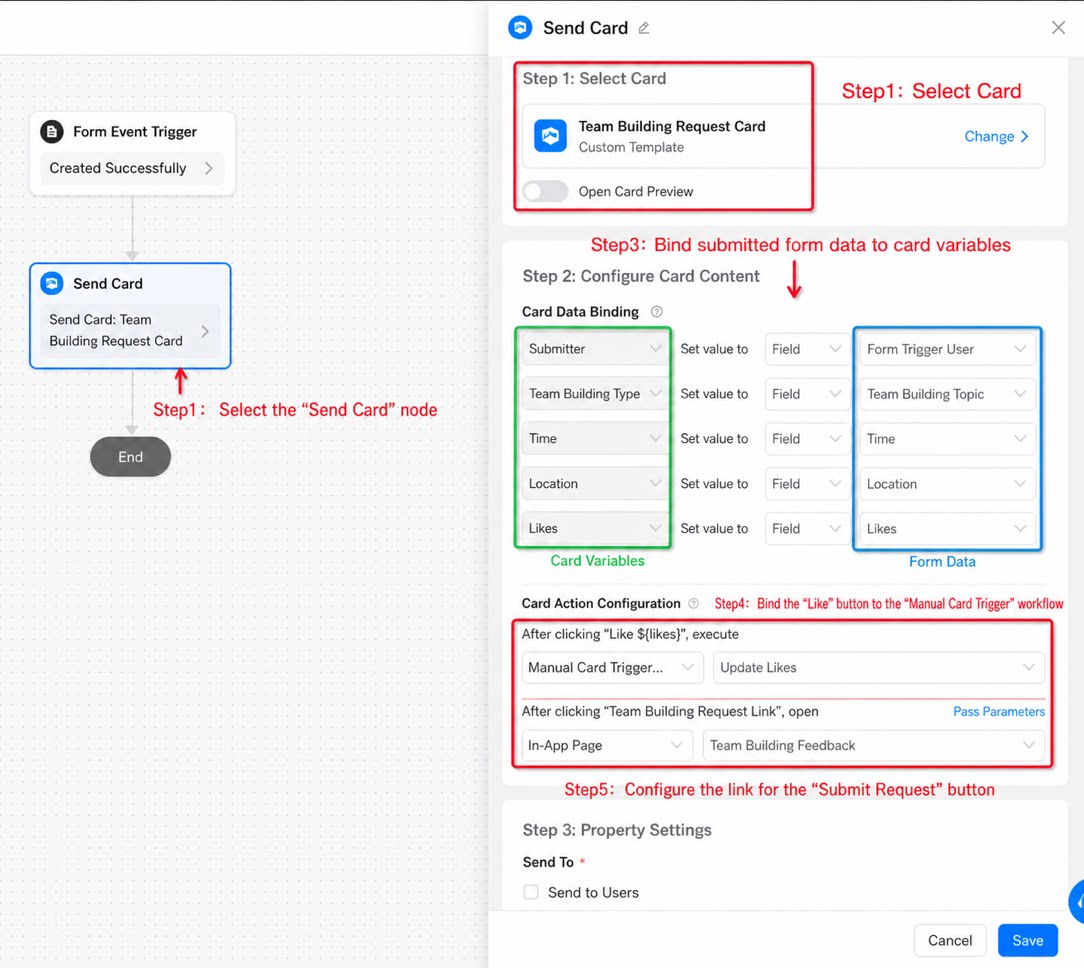
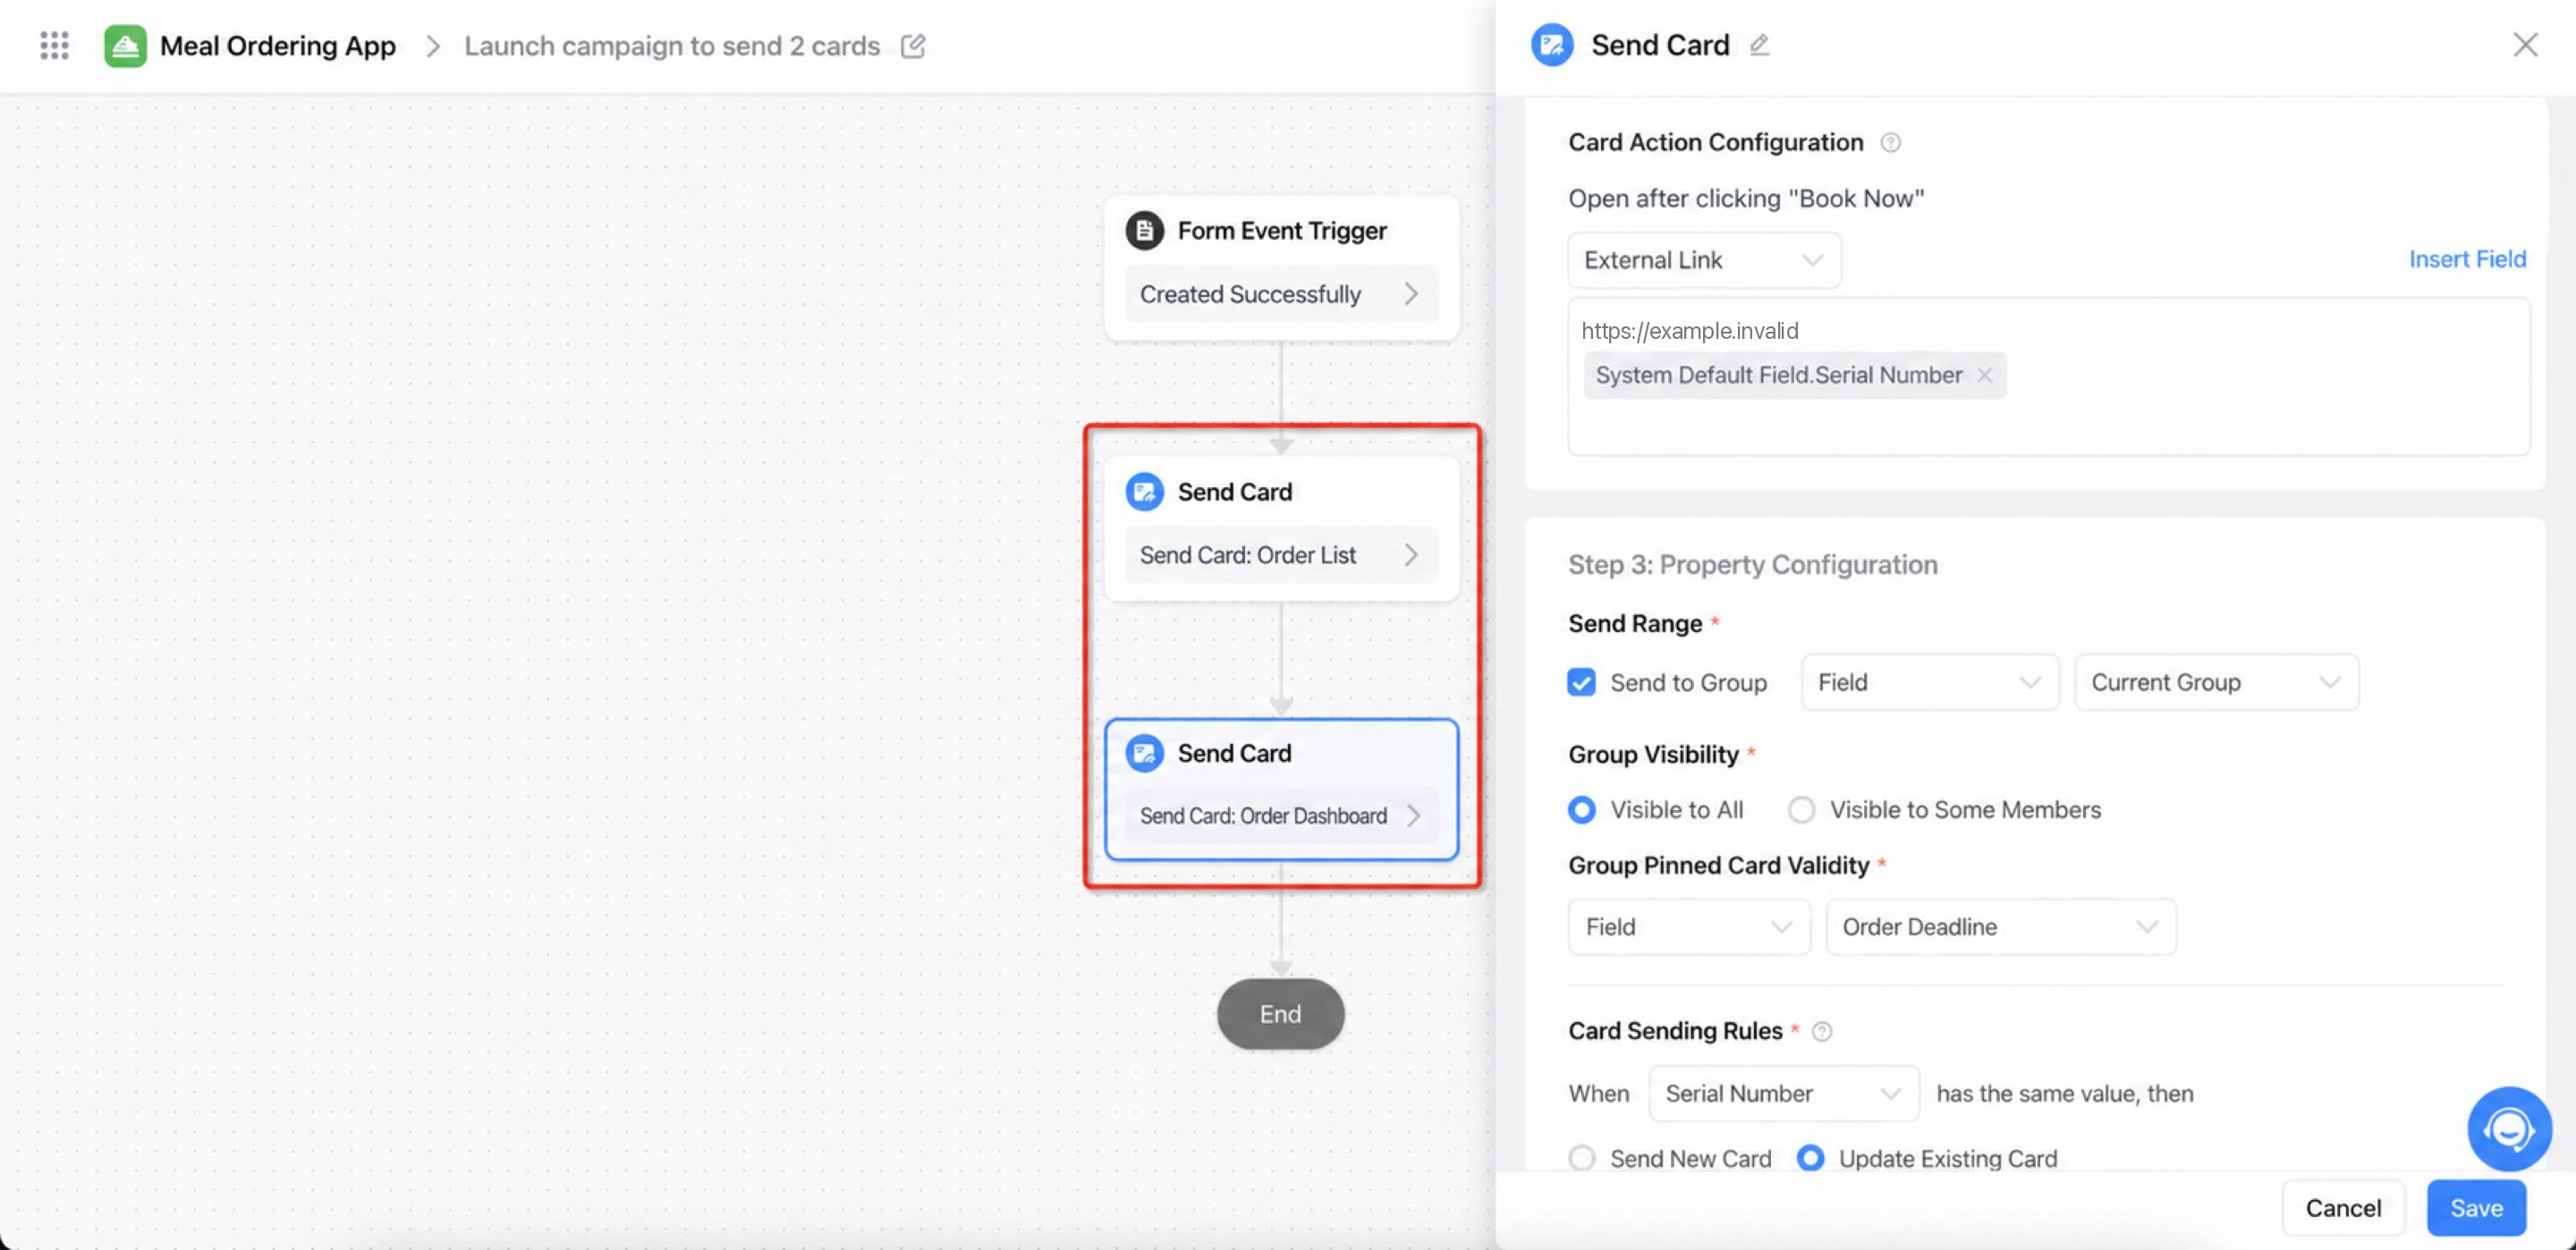
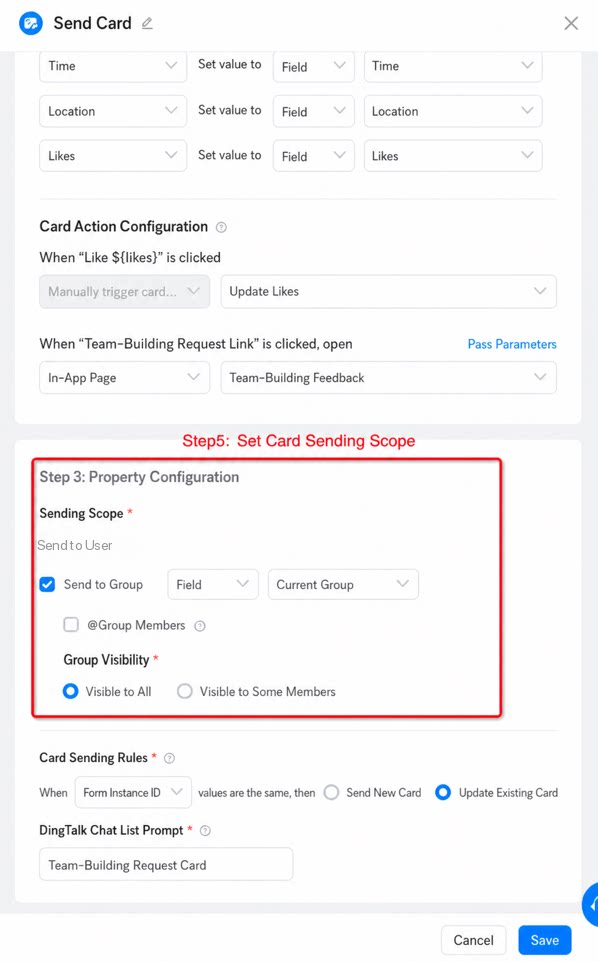
- Configure the “Send card” node, including “Select card” -> “Configure card content” -> “Attribute configuration”. For details on each configuration item, see section 4, “Send card node configuration”.
3. Manual Card Trigger
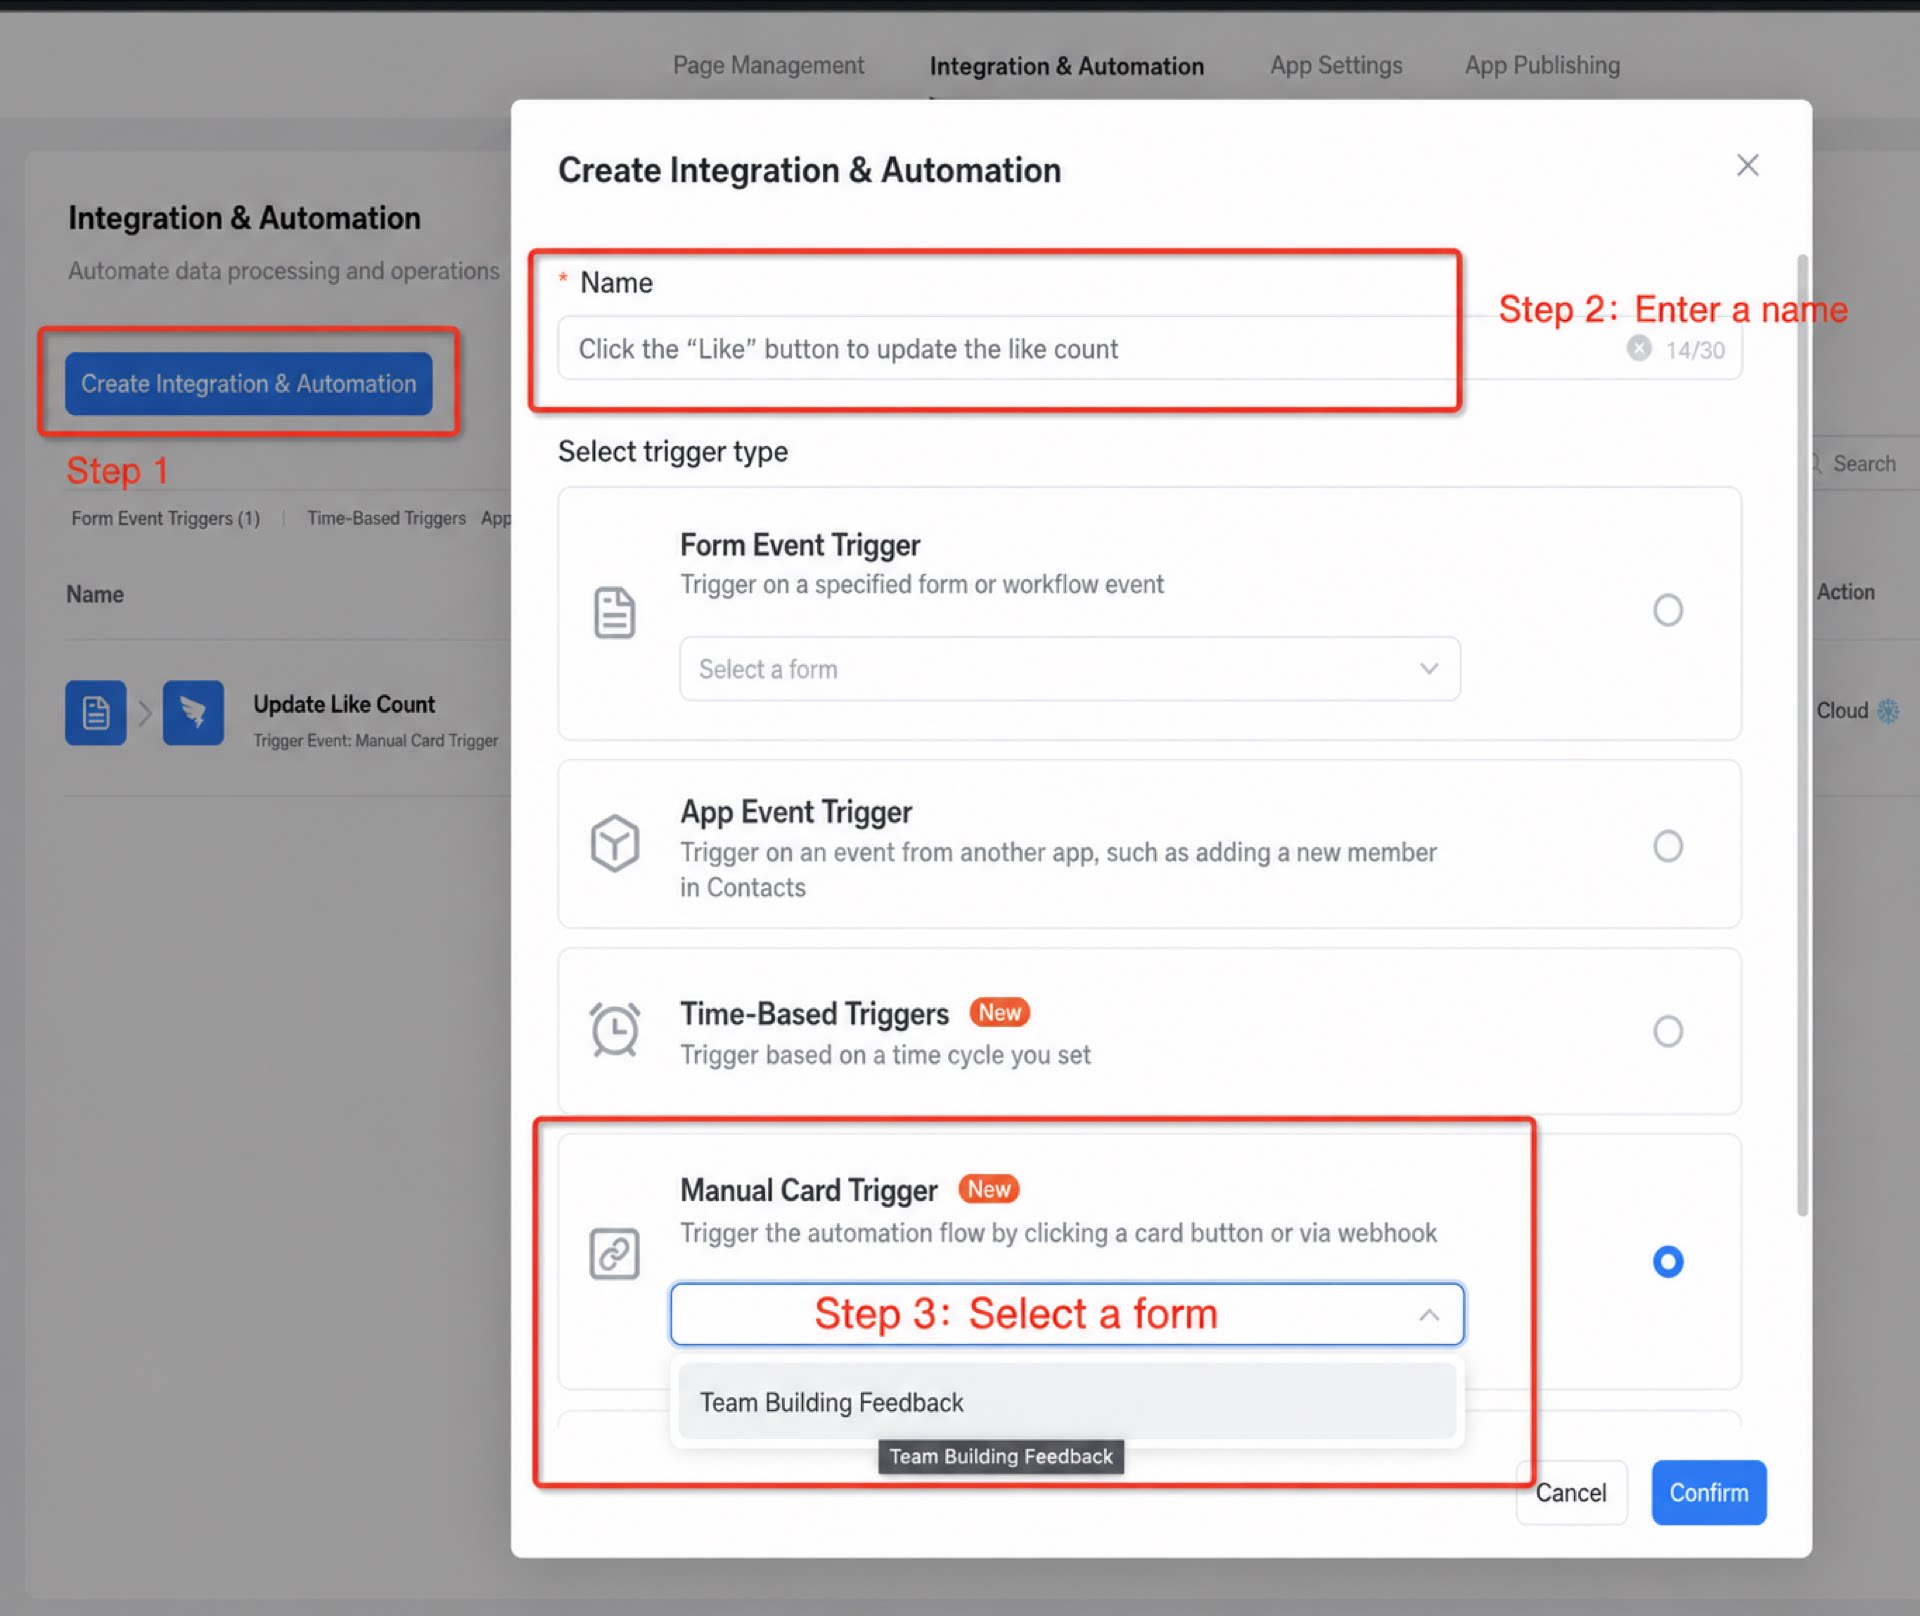
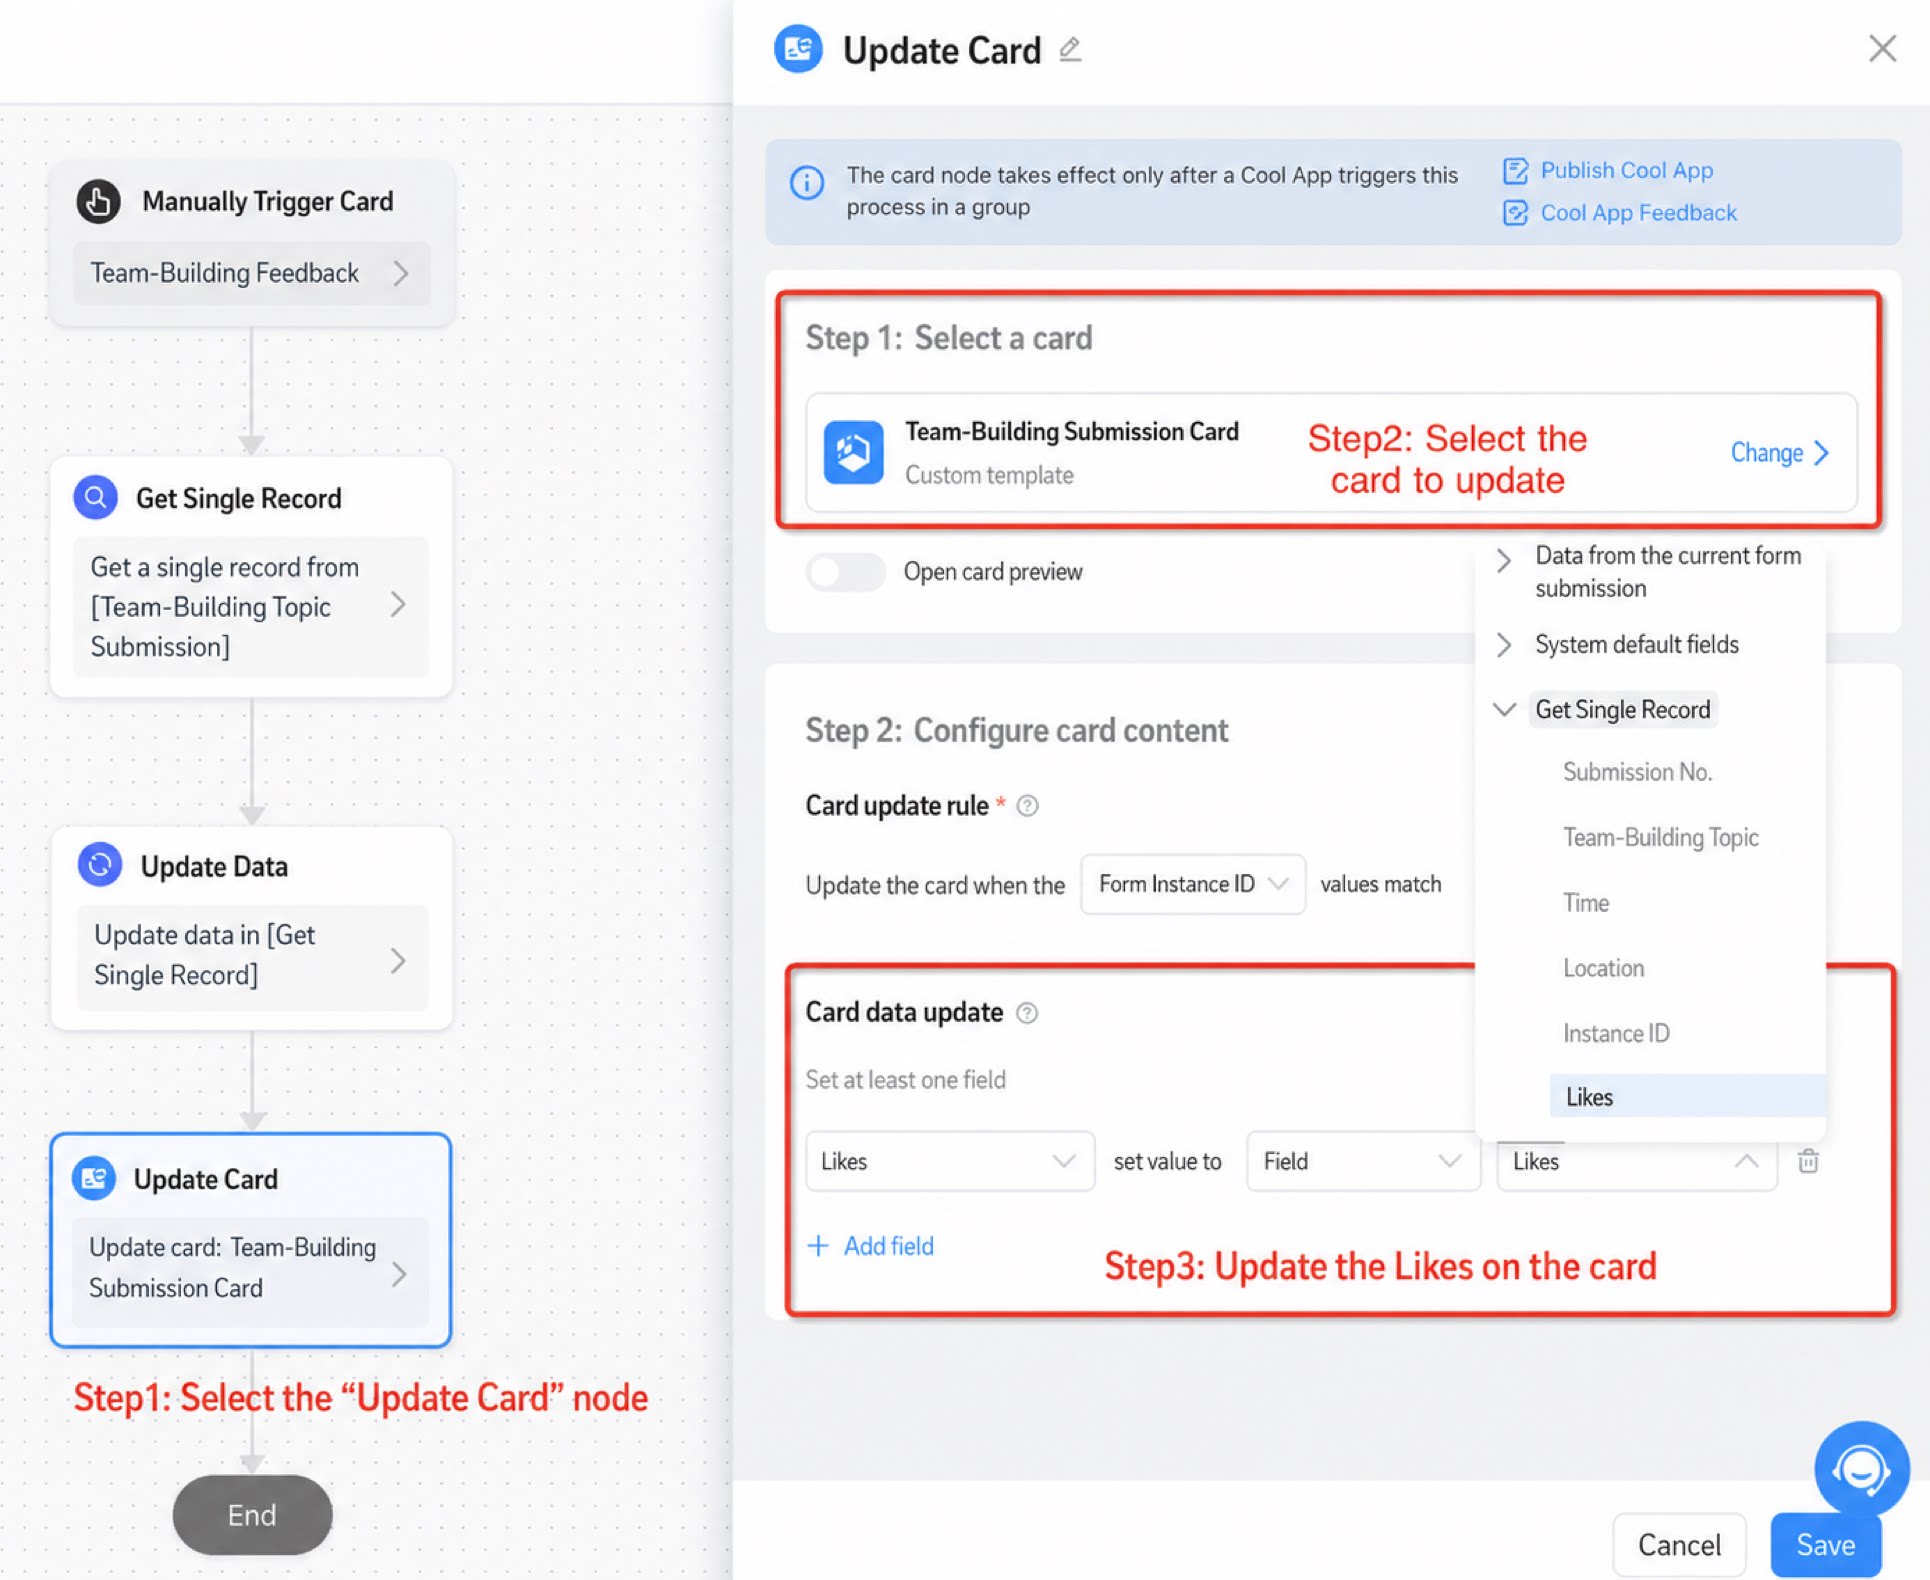
Feature: triggers a workflow when a button on a card is clicked. Example scenario: an employee sees the team-building feedback card in the group and clicks the “Like” button to add a like.- Create an integration & automation with a “Manual card trigger”: click Create > enter a name > select the “Team-building feedback submission” form.
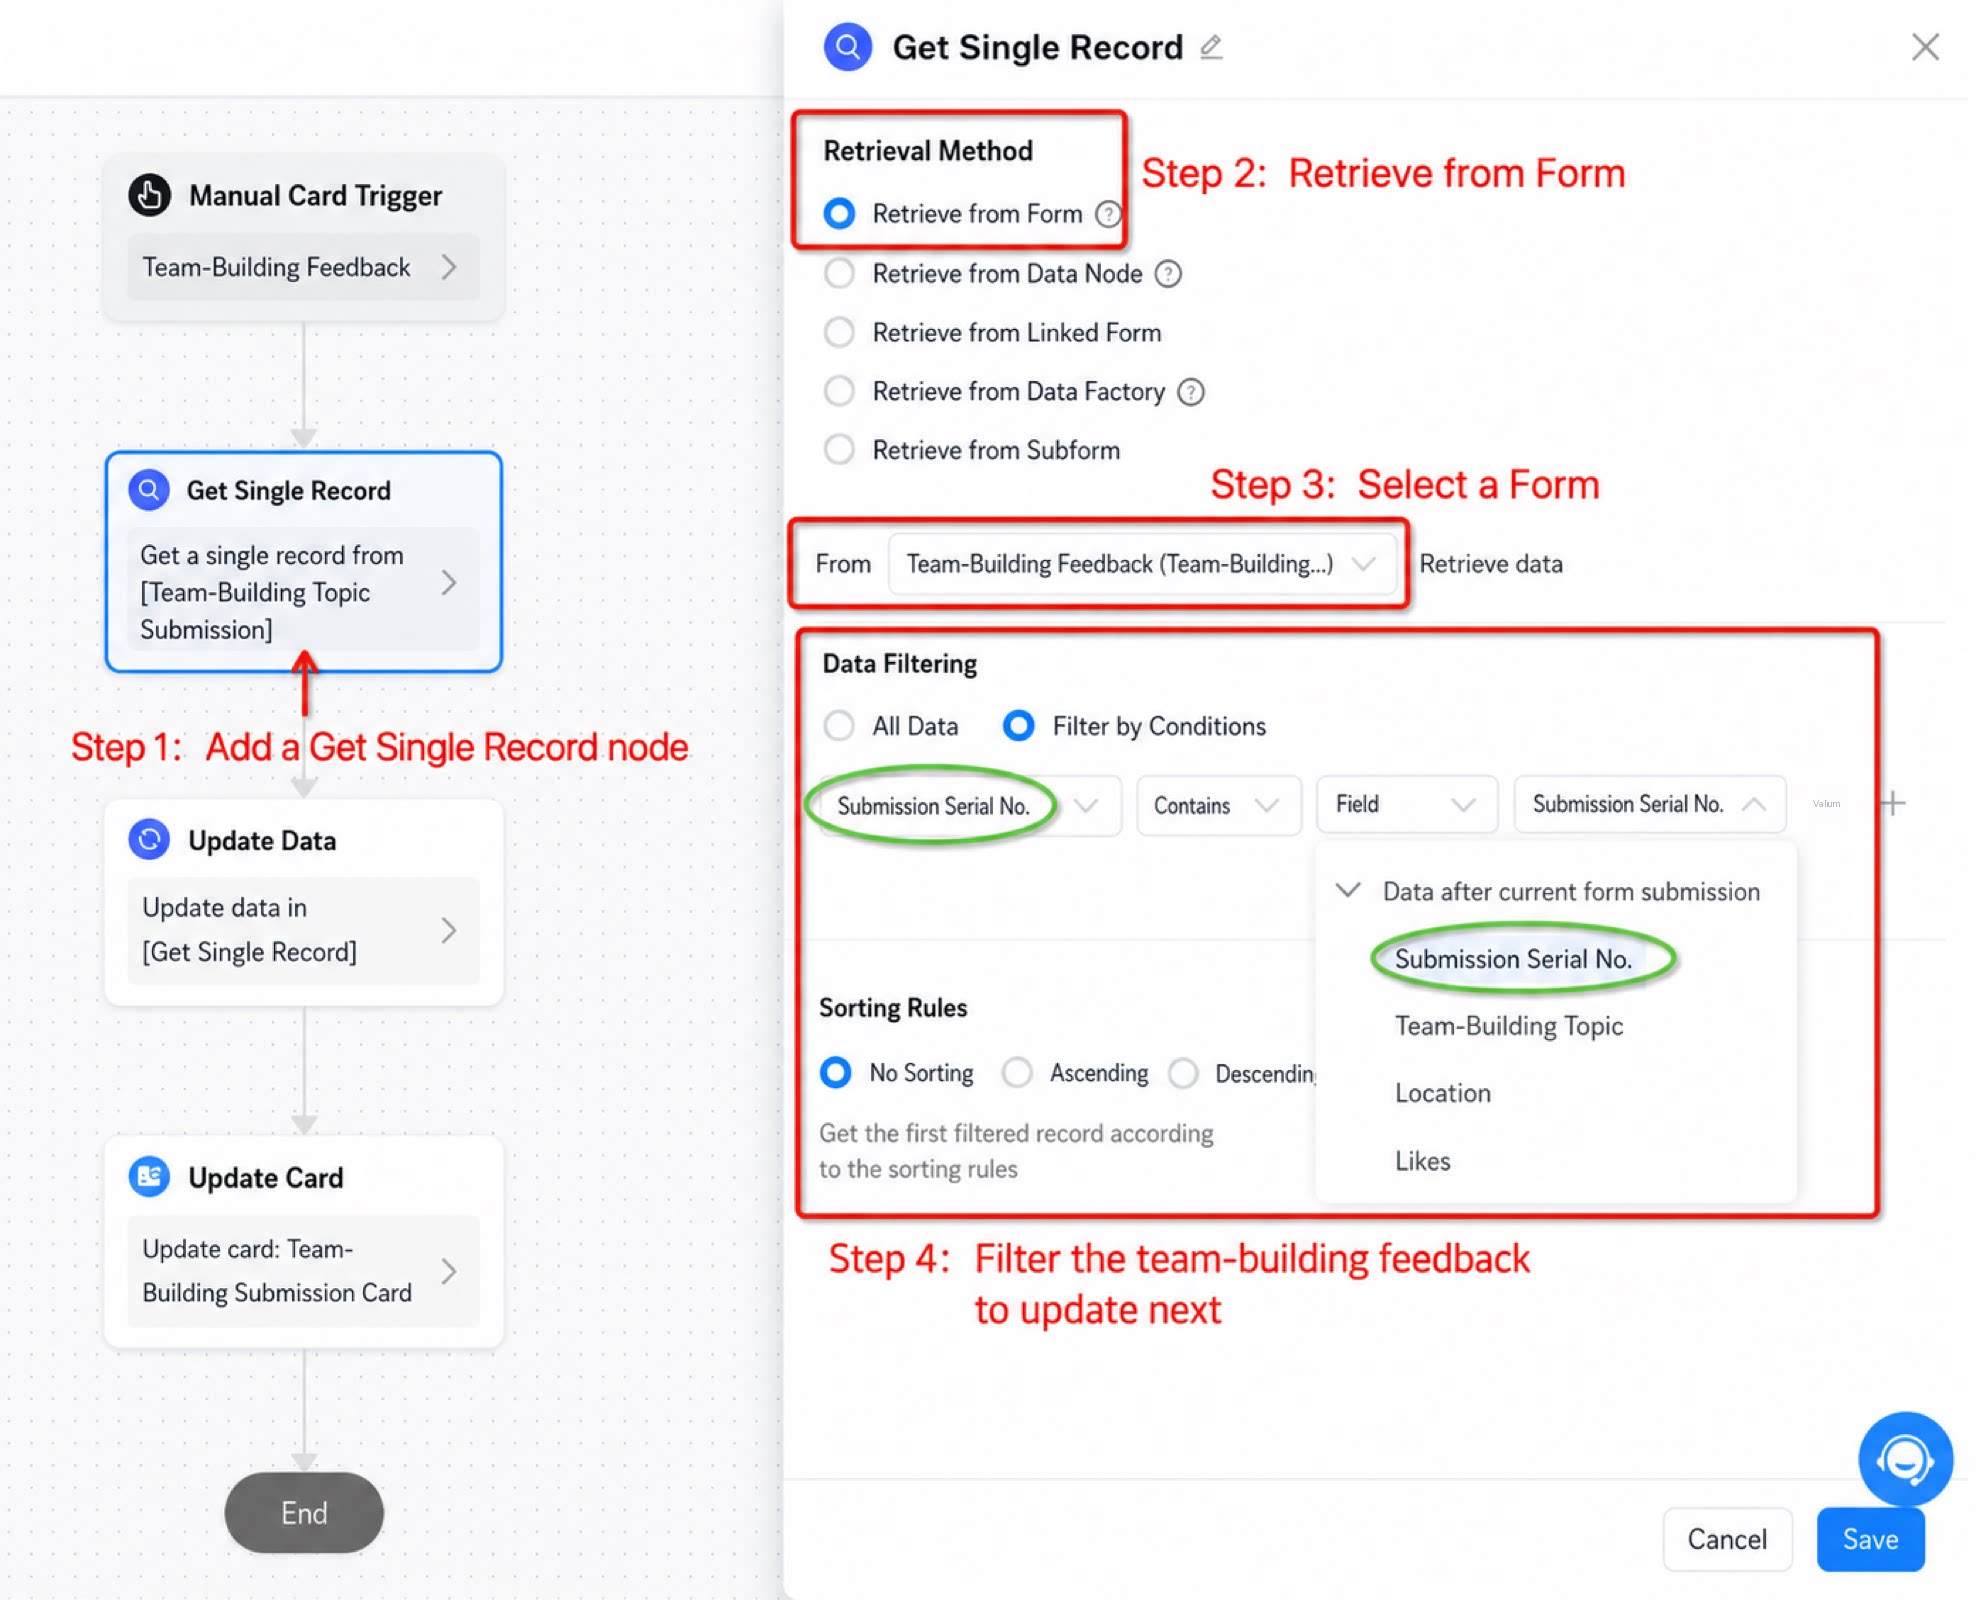
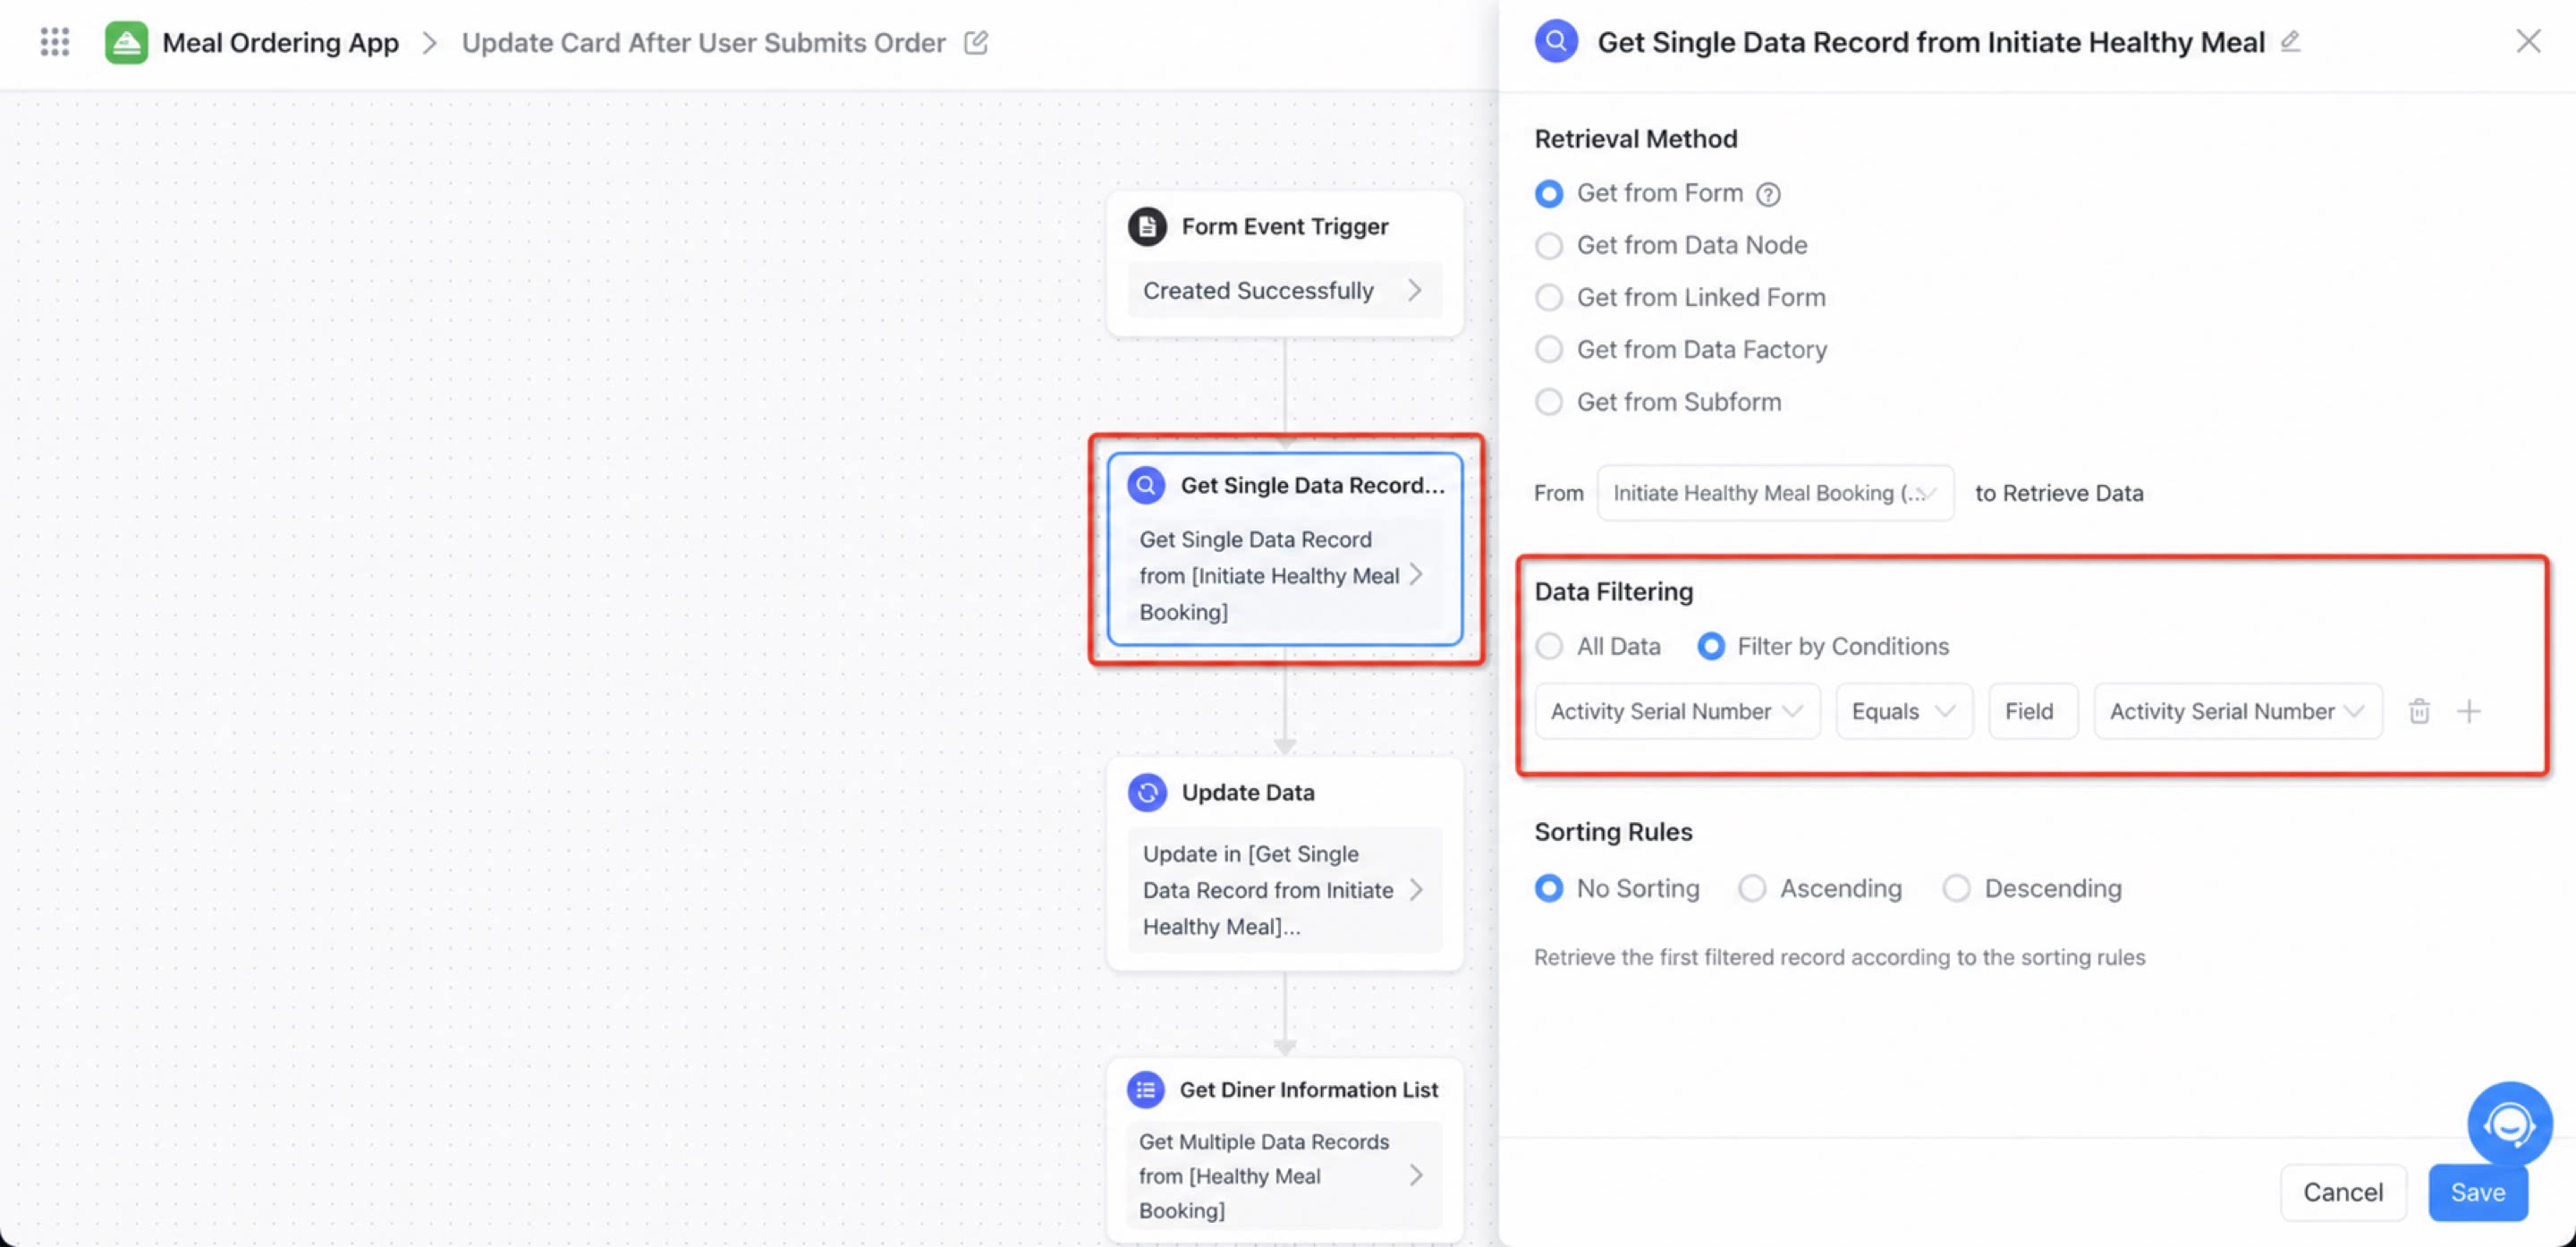
- Enter the workflow designer and add a “Get single record” node to filter out the team-building feedback record whose like count is about to be updated.
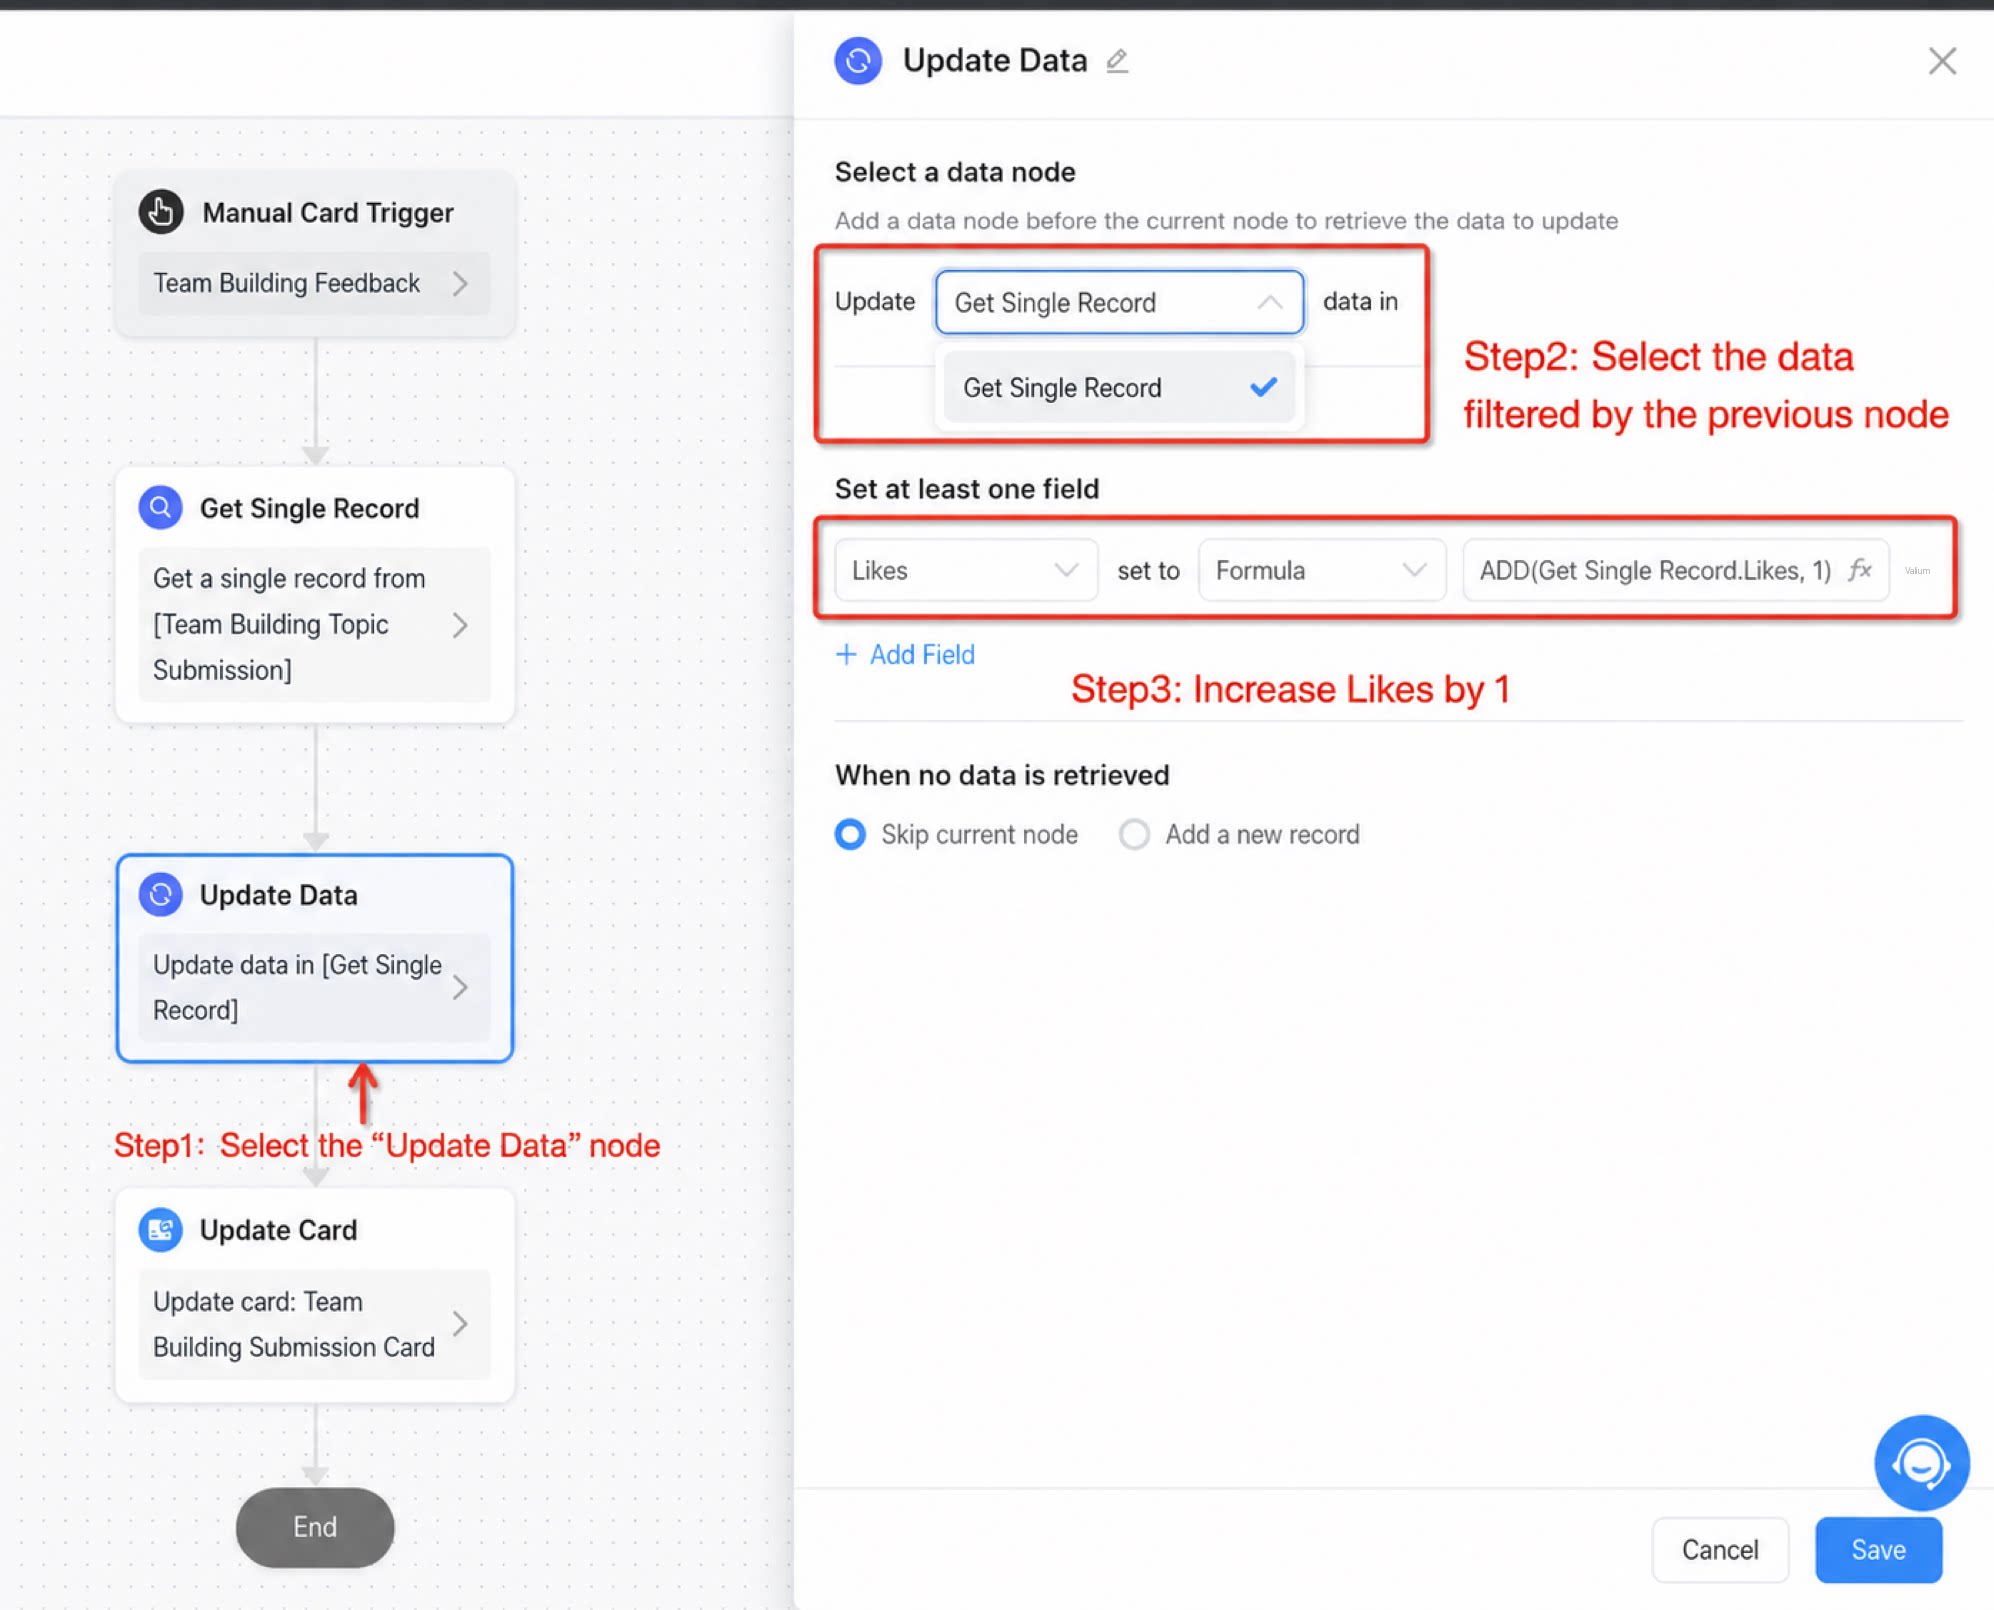
- Add an “Update data” node to update the like count of the team-building feedback filtered in the previous “Get single record” node.
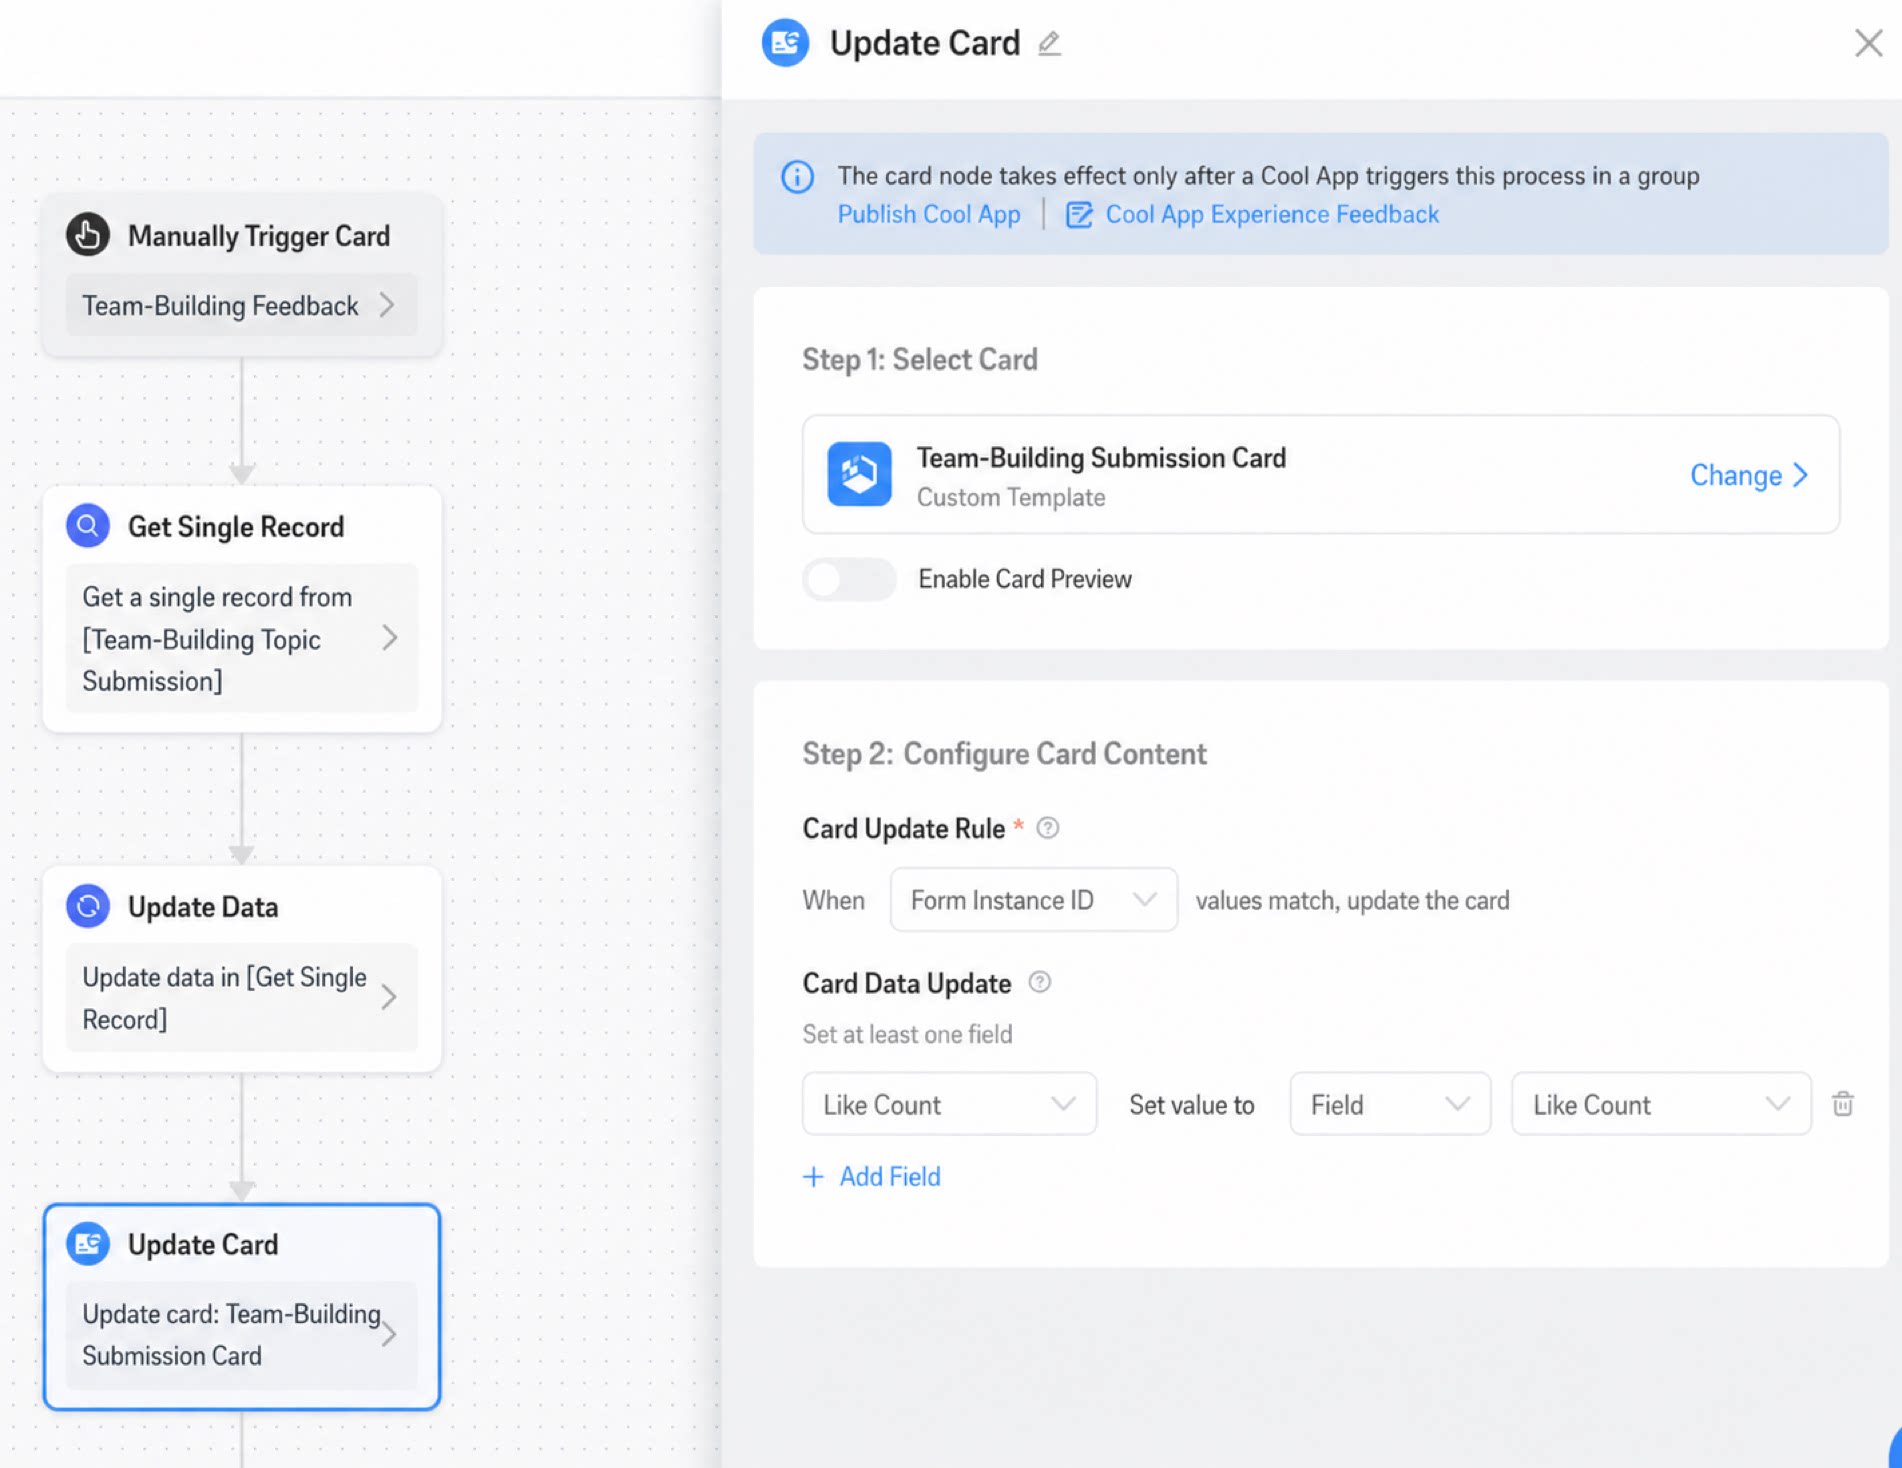
- Add an “Update card” node to update the like count on the corresponding card in the group to the latest value.
4. Send Card Node Configuration
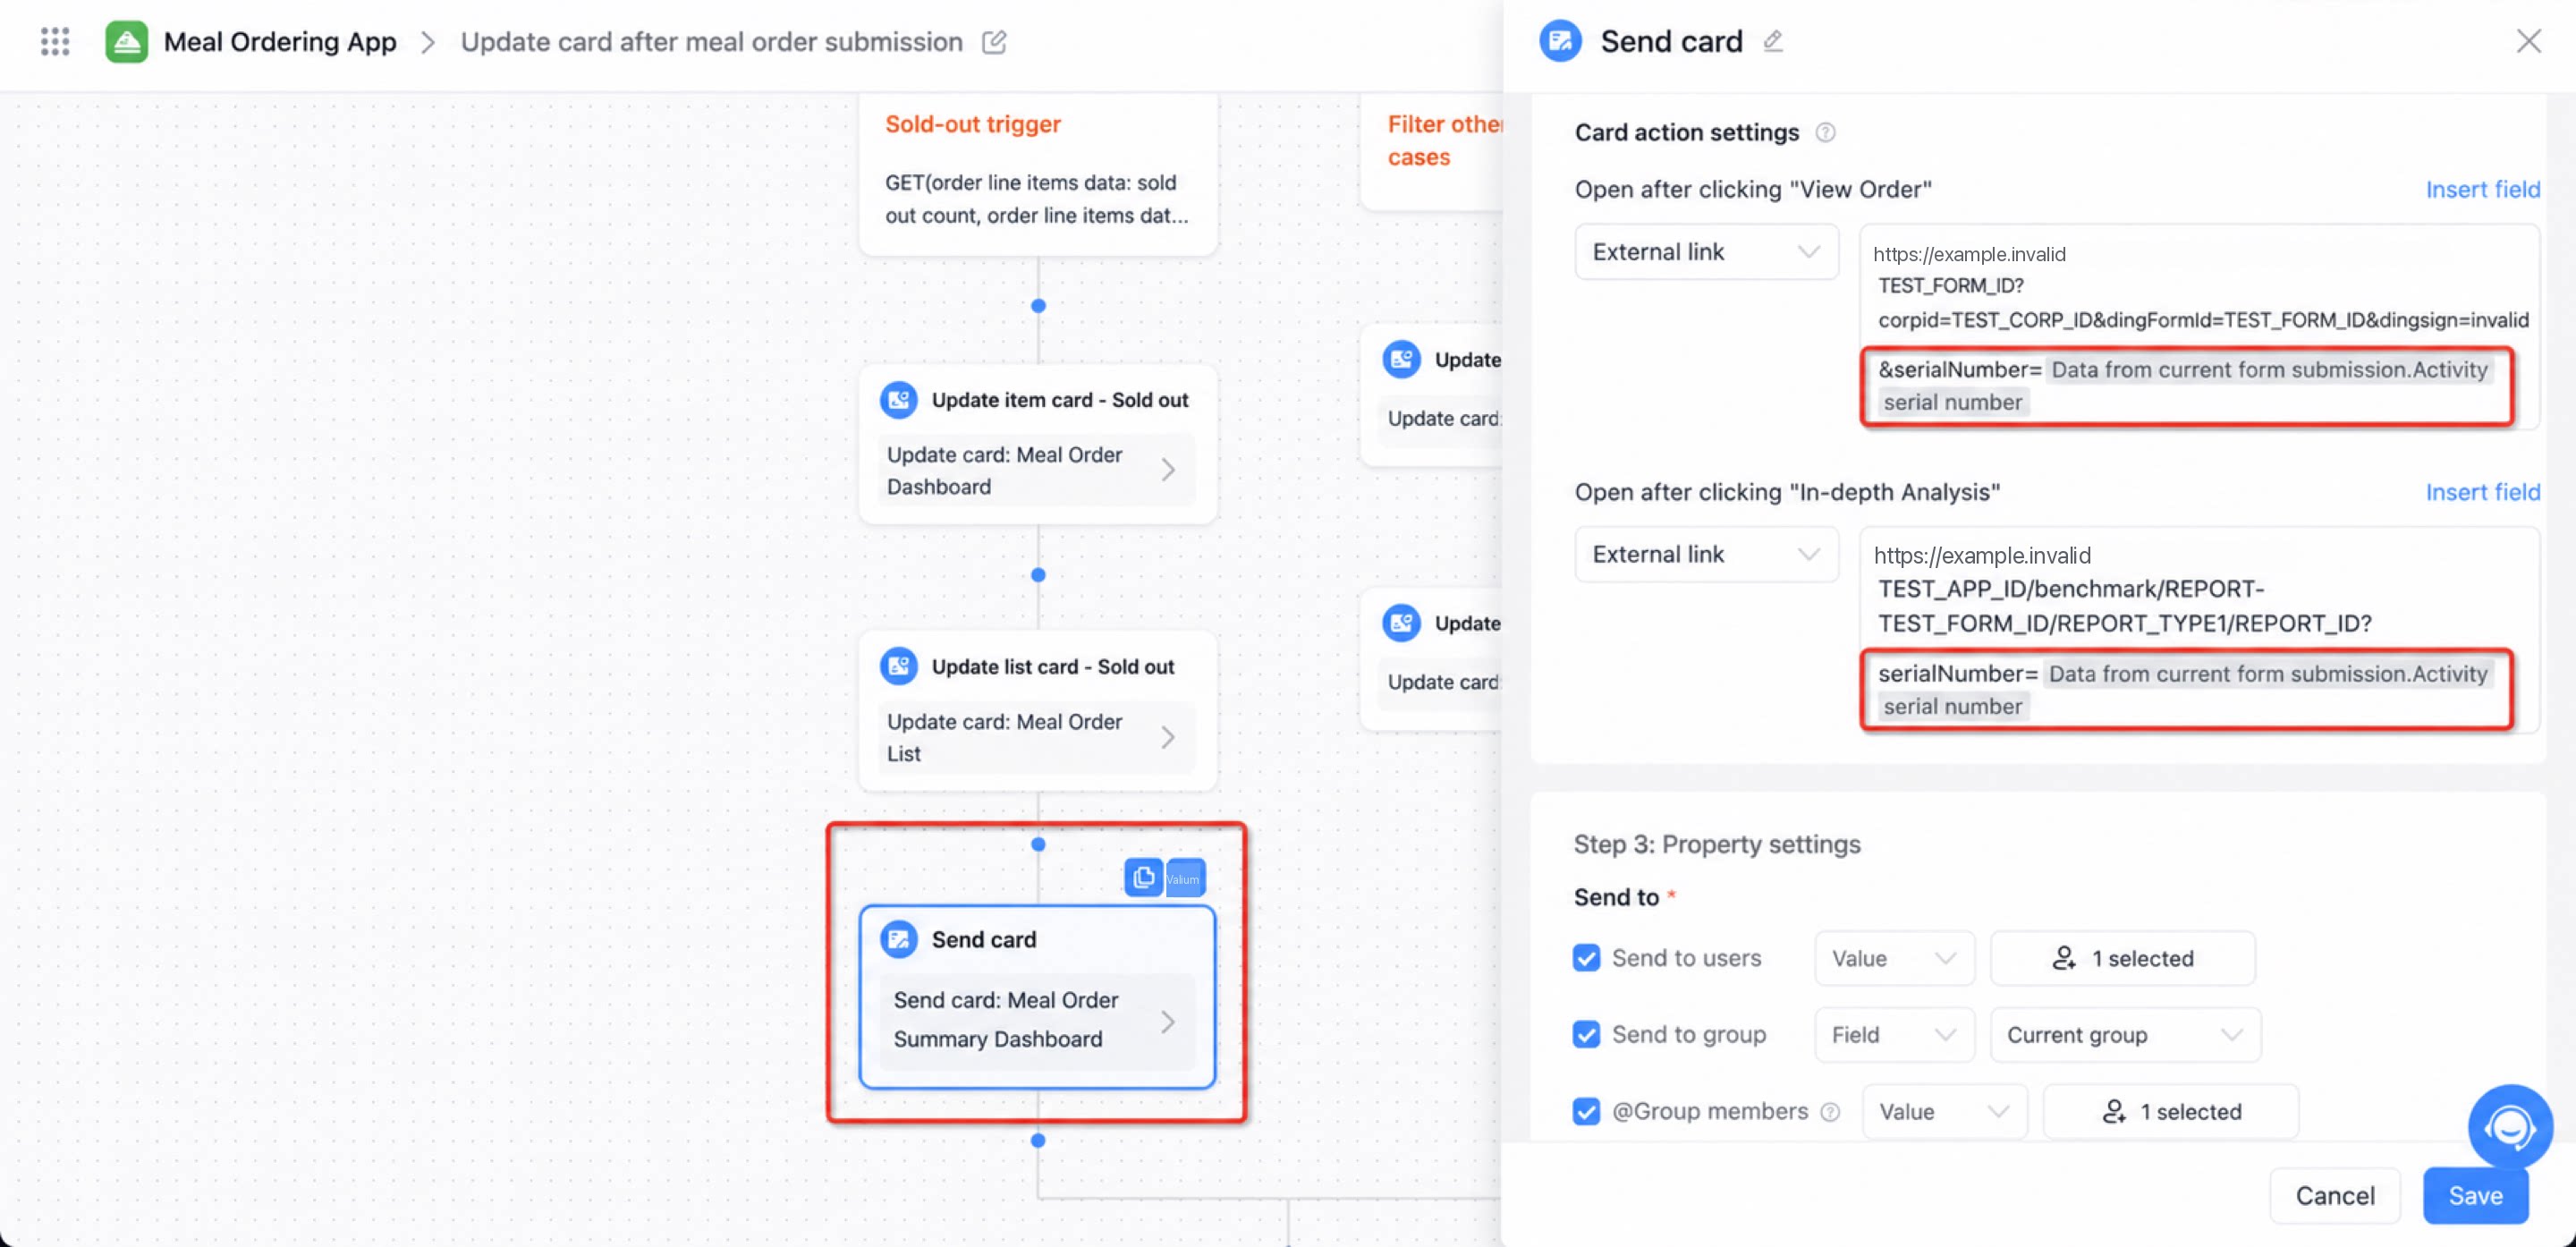
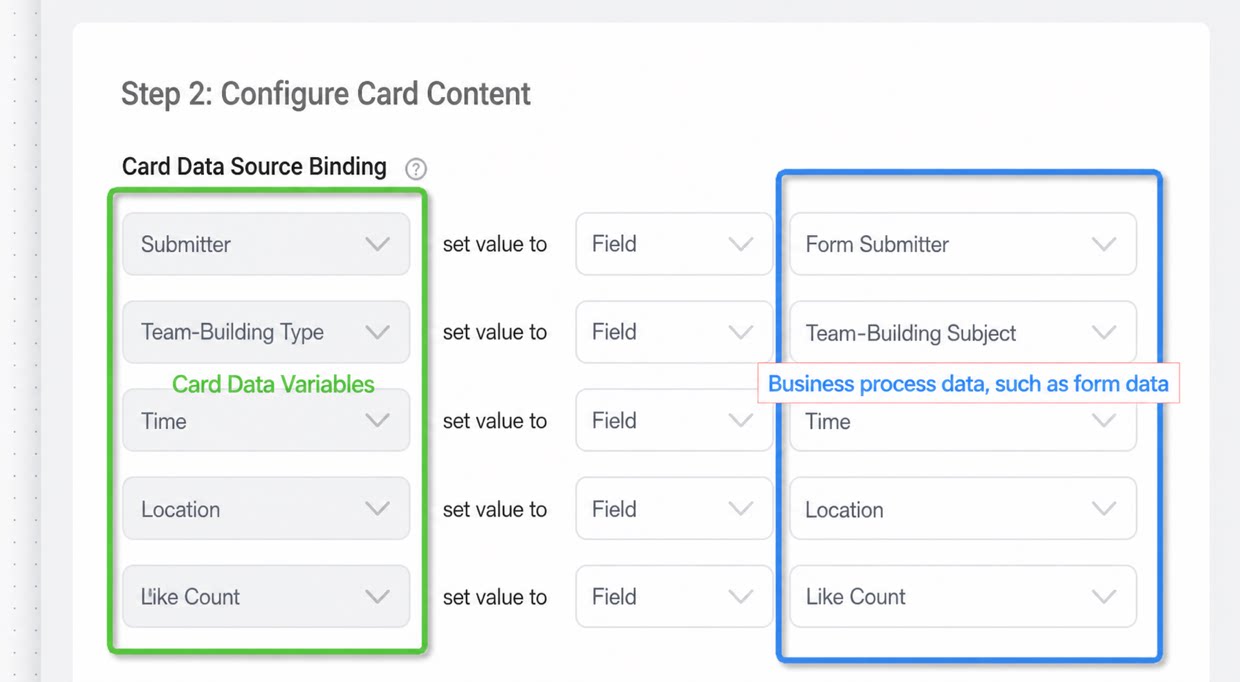
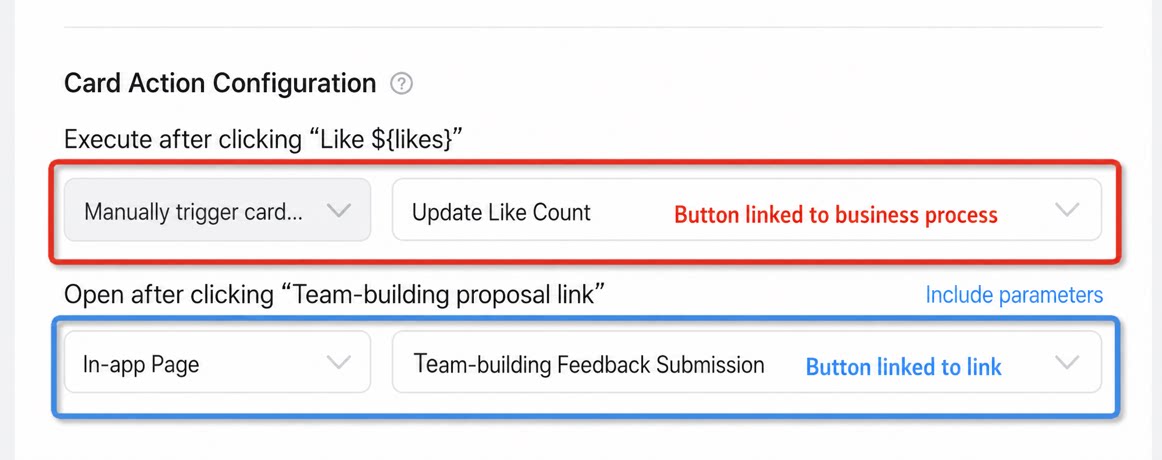
This section focuses on card node configuration. Note that this covers card configuration, not card design. For card design, see the Cool card design document. A card has three elements: style, data, and buttons/links. Card design mainly handles style, while card configuration focuses on the other two elements (data, and buttons/links). Configuration steps: 1) select the card to send/update; 2) bind data to the card; 3) configure the actions of card buttons/links; 4) define the send scope and rules. 1) Select the card to send/update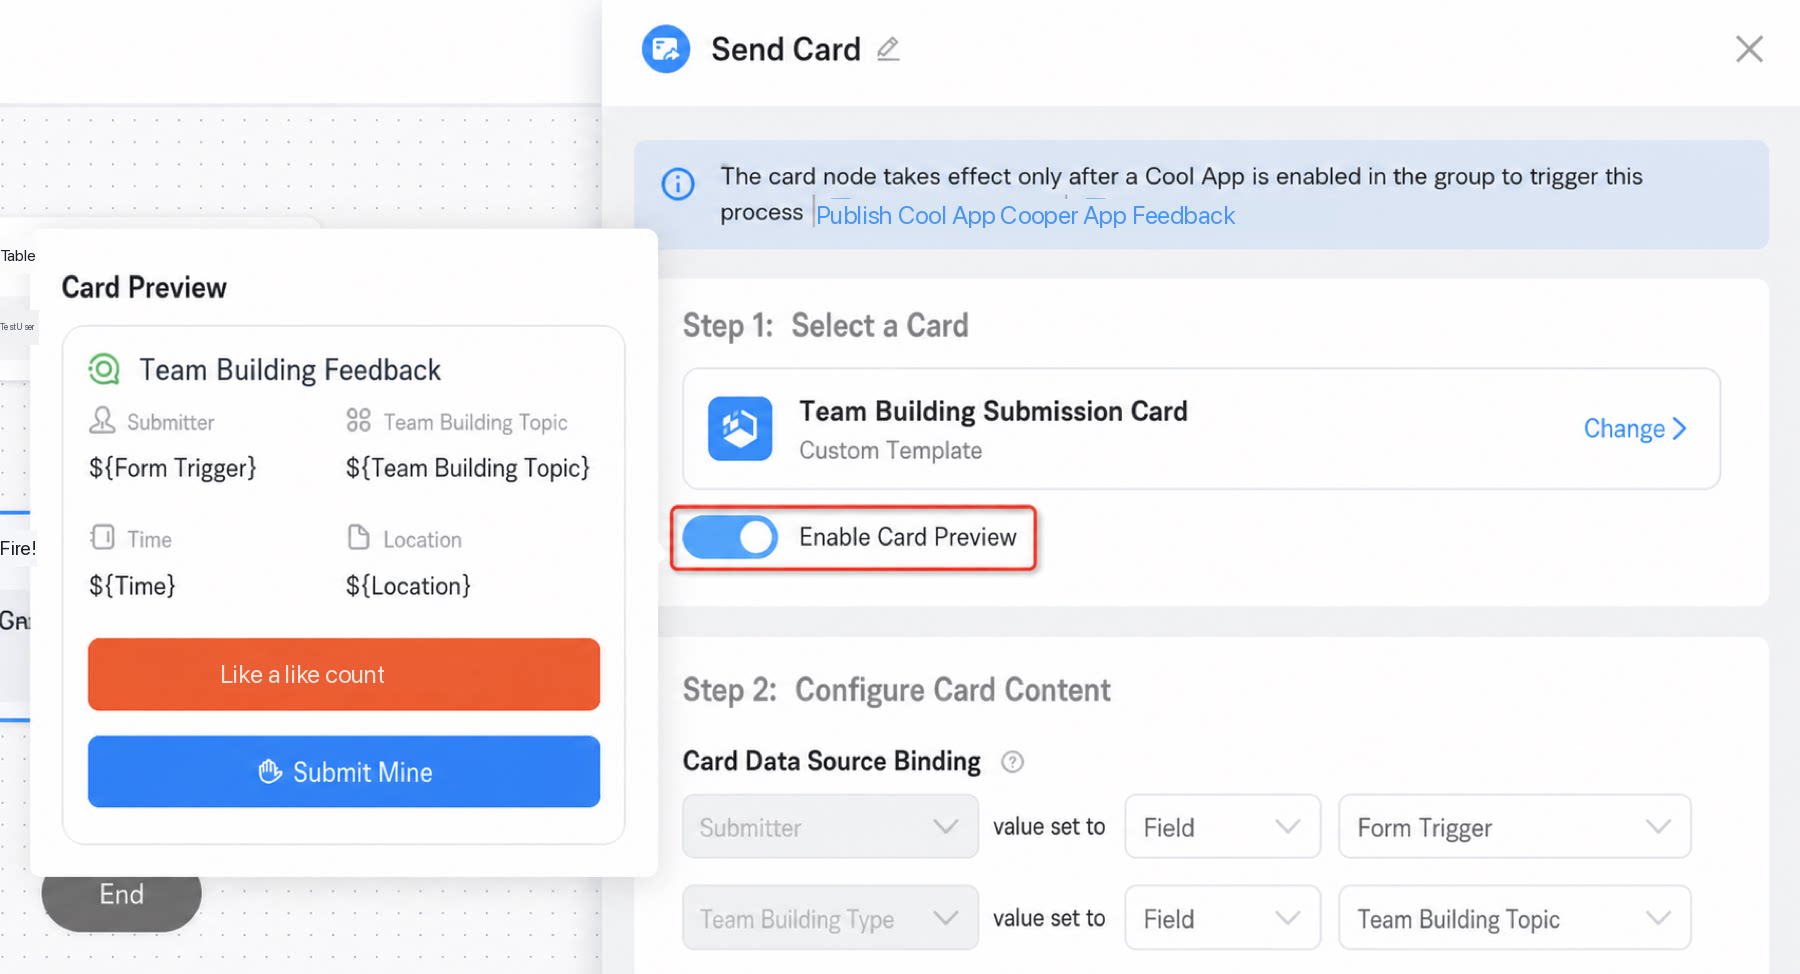
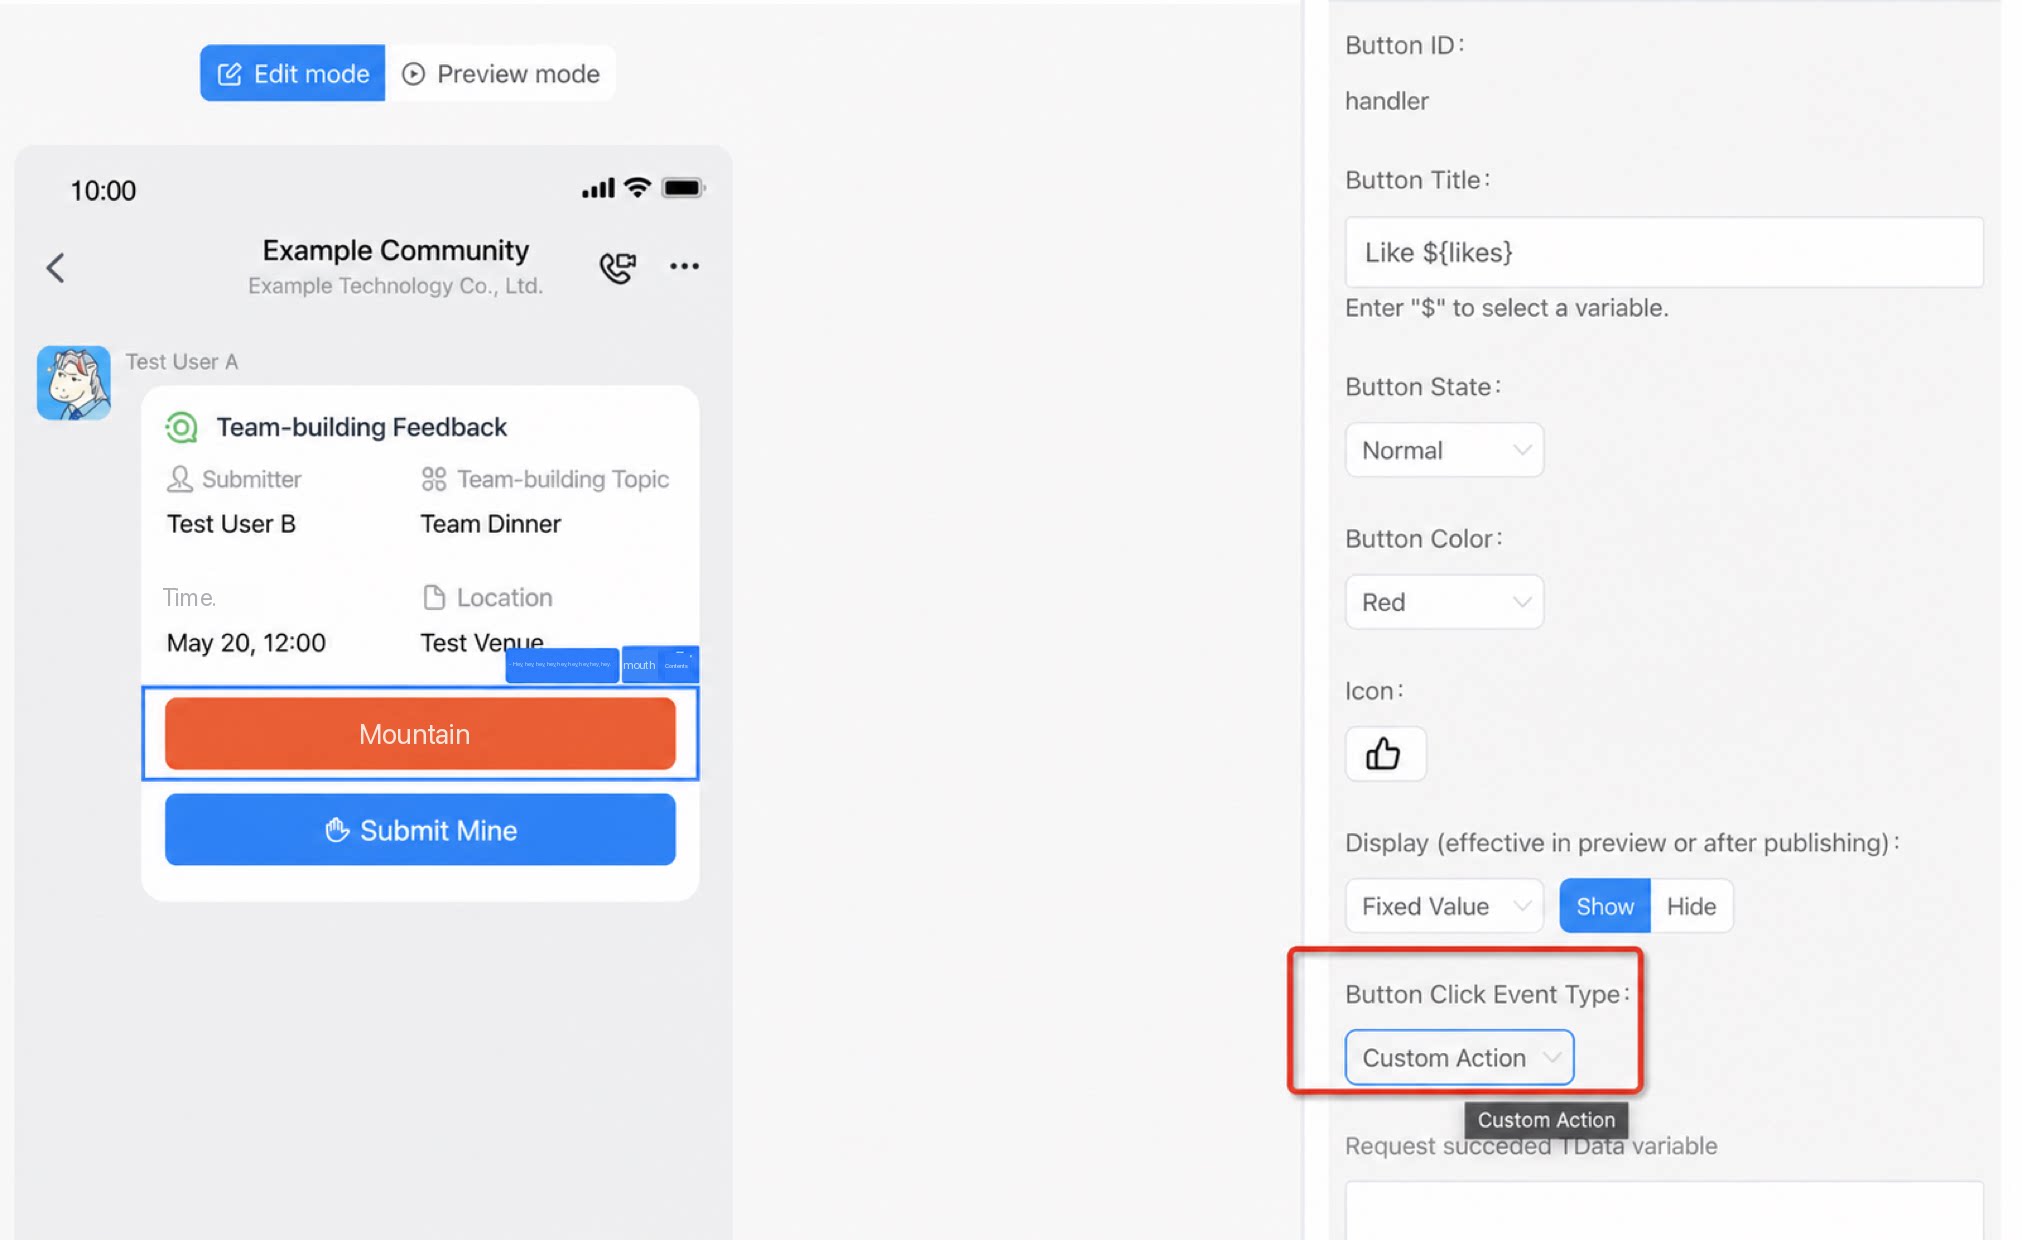
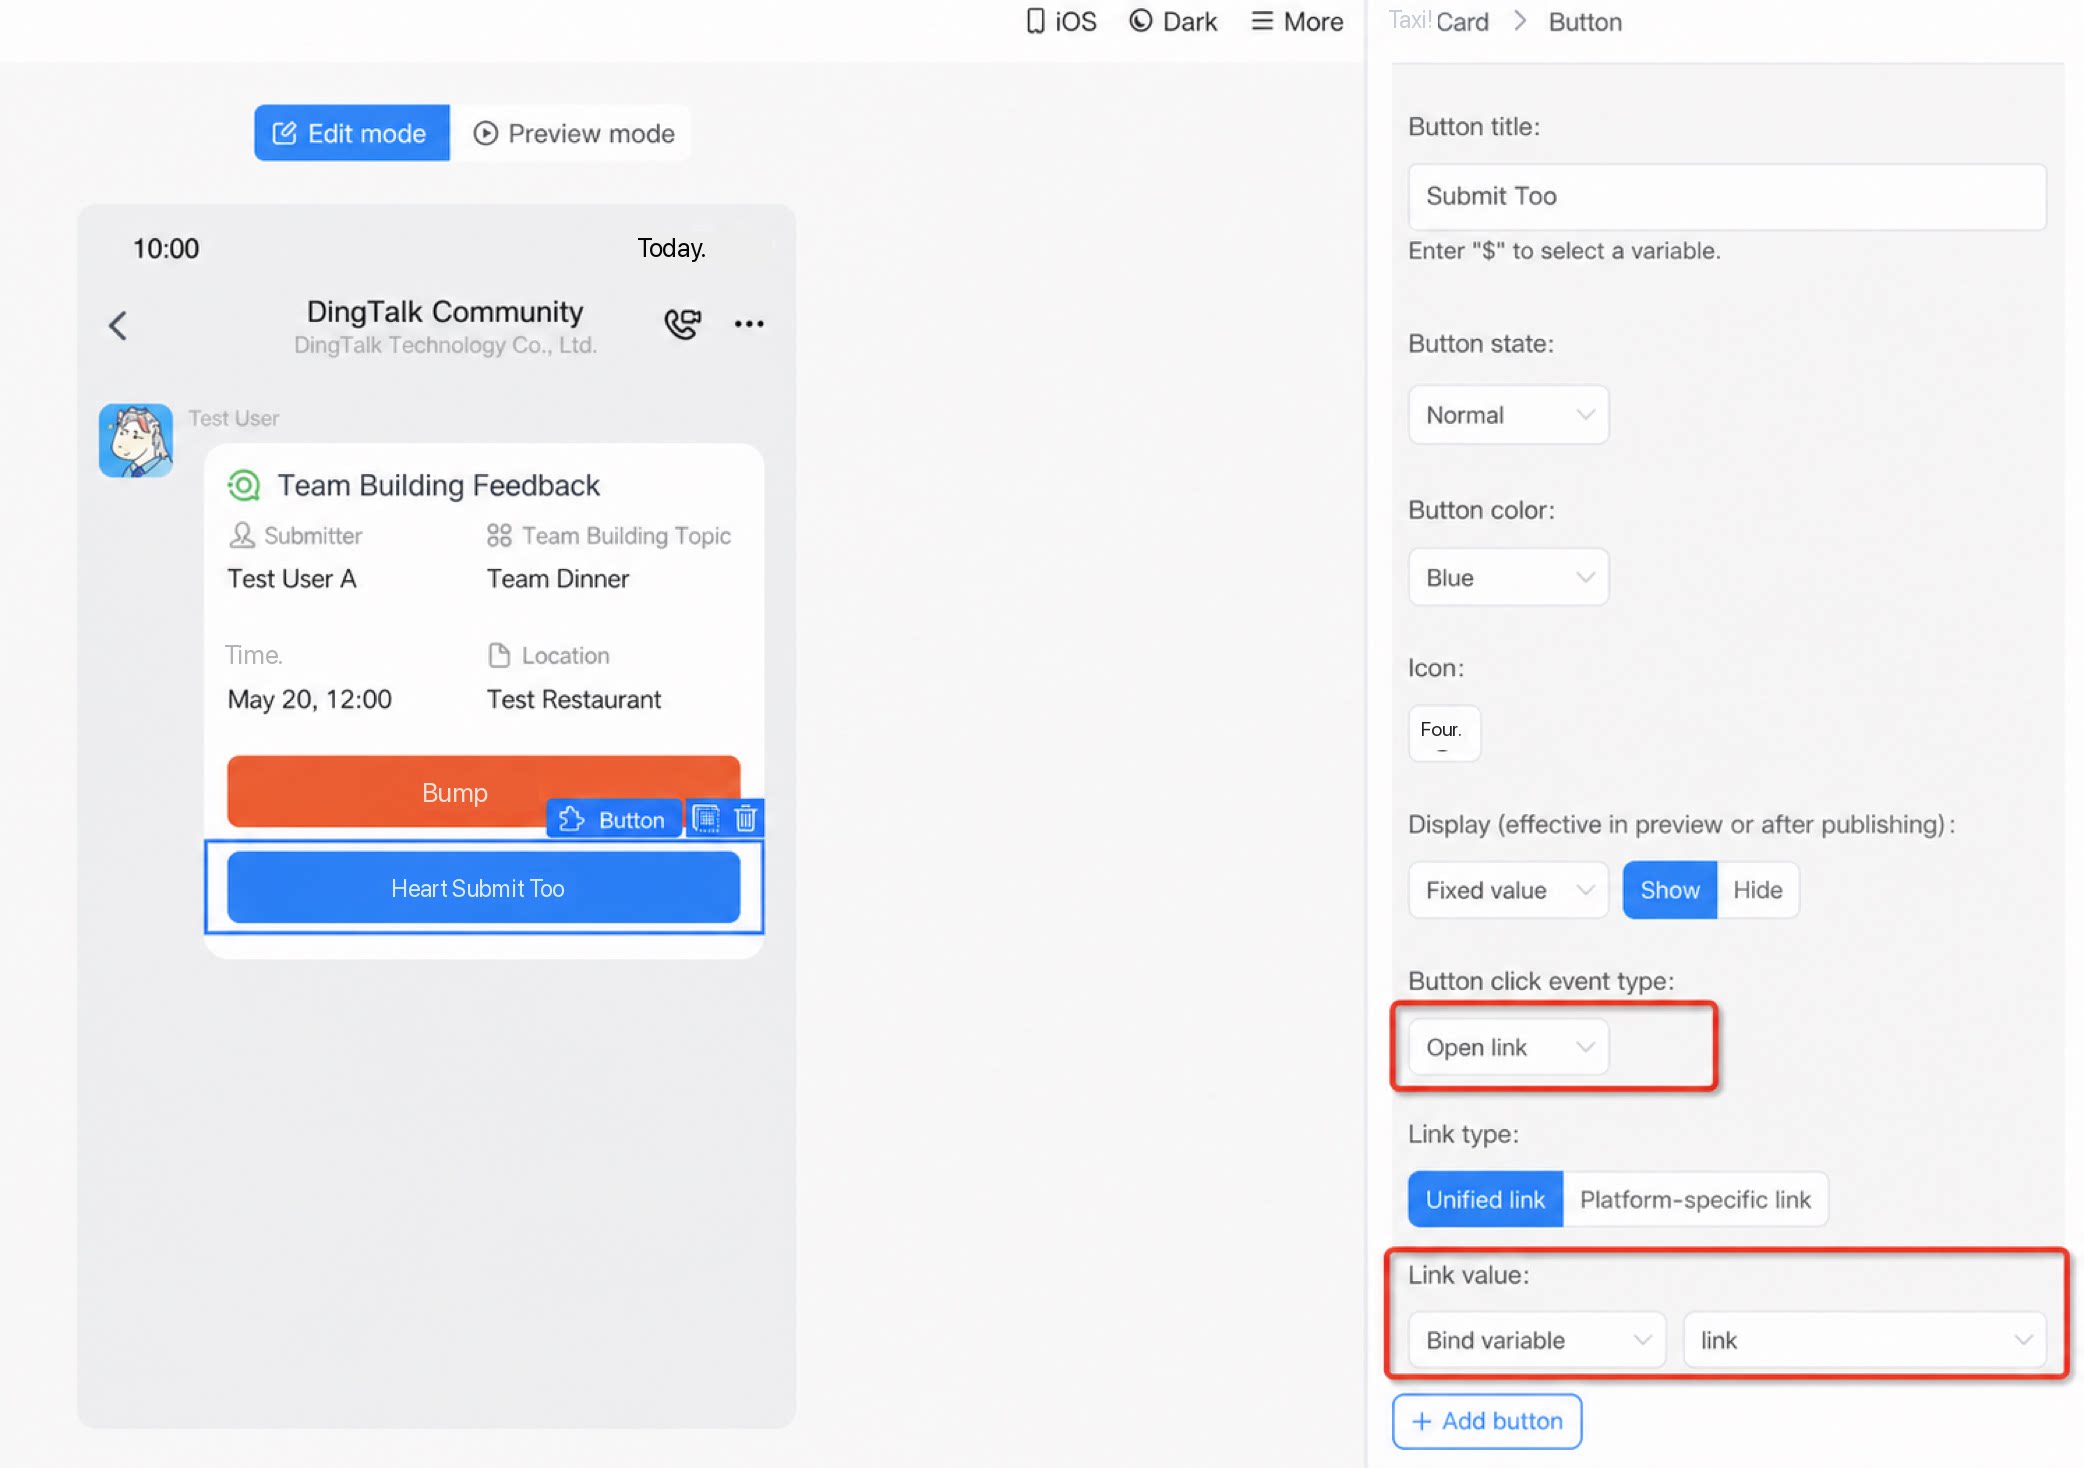
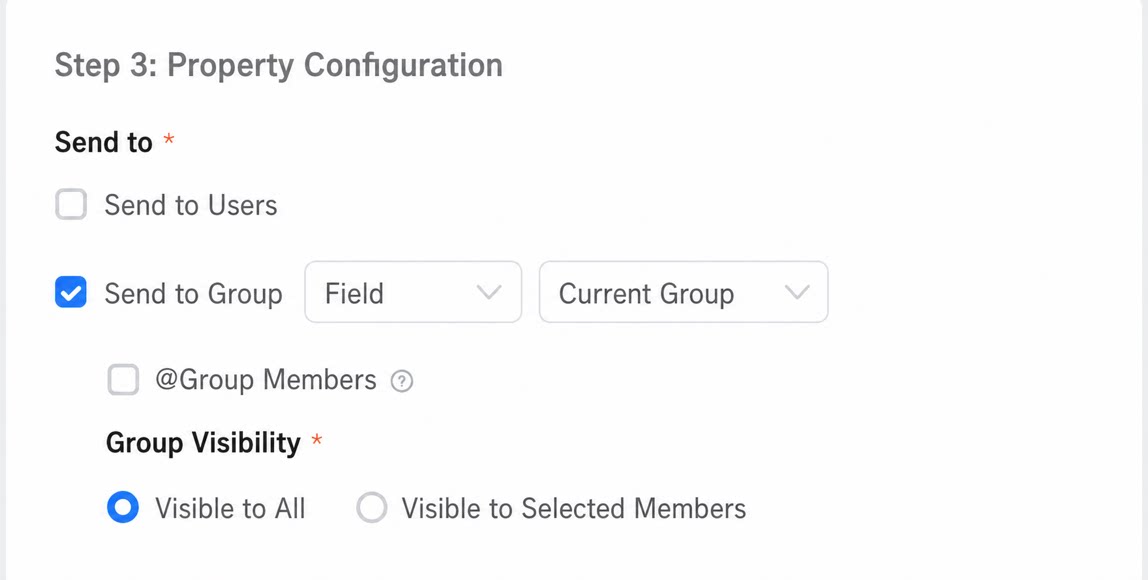
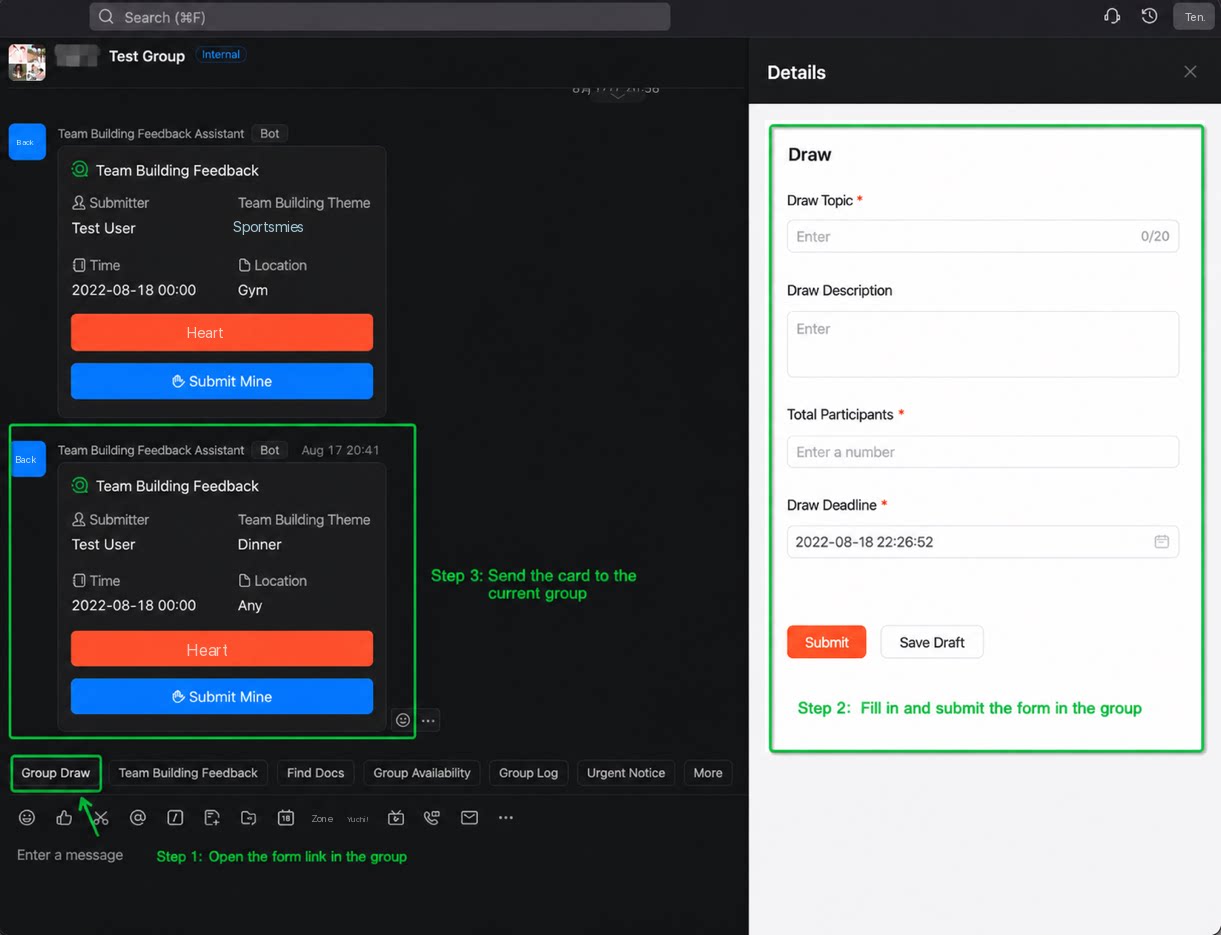
5. Update Card Node Configuration
Cards have one distinctive feature: their content can be updated. This is what sets them apart from ordinary chats and prevents the group from being flooded. Update card configuration steps: 1) select the card to update; 2) define the card update rule; 3) configure the data to update. Two key points:- A card must be sent before it can be updated.
- The field configured in the card update rule must match the field configured in the card send rule of the Send card node, so that the correct card is updated.
Other Best Practices (Order-Meal Activity Configuration as Example)
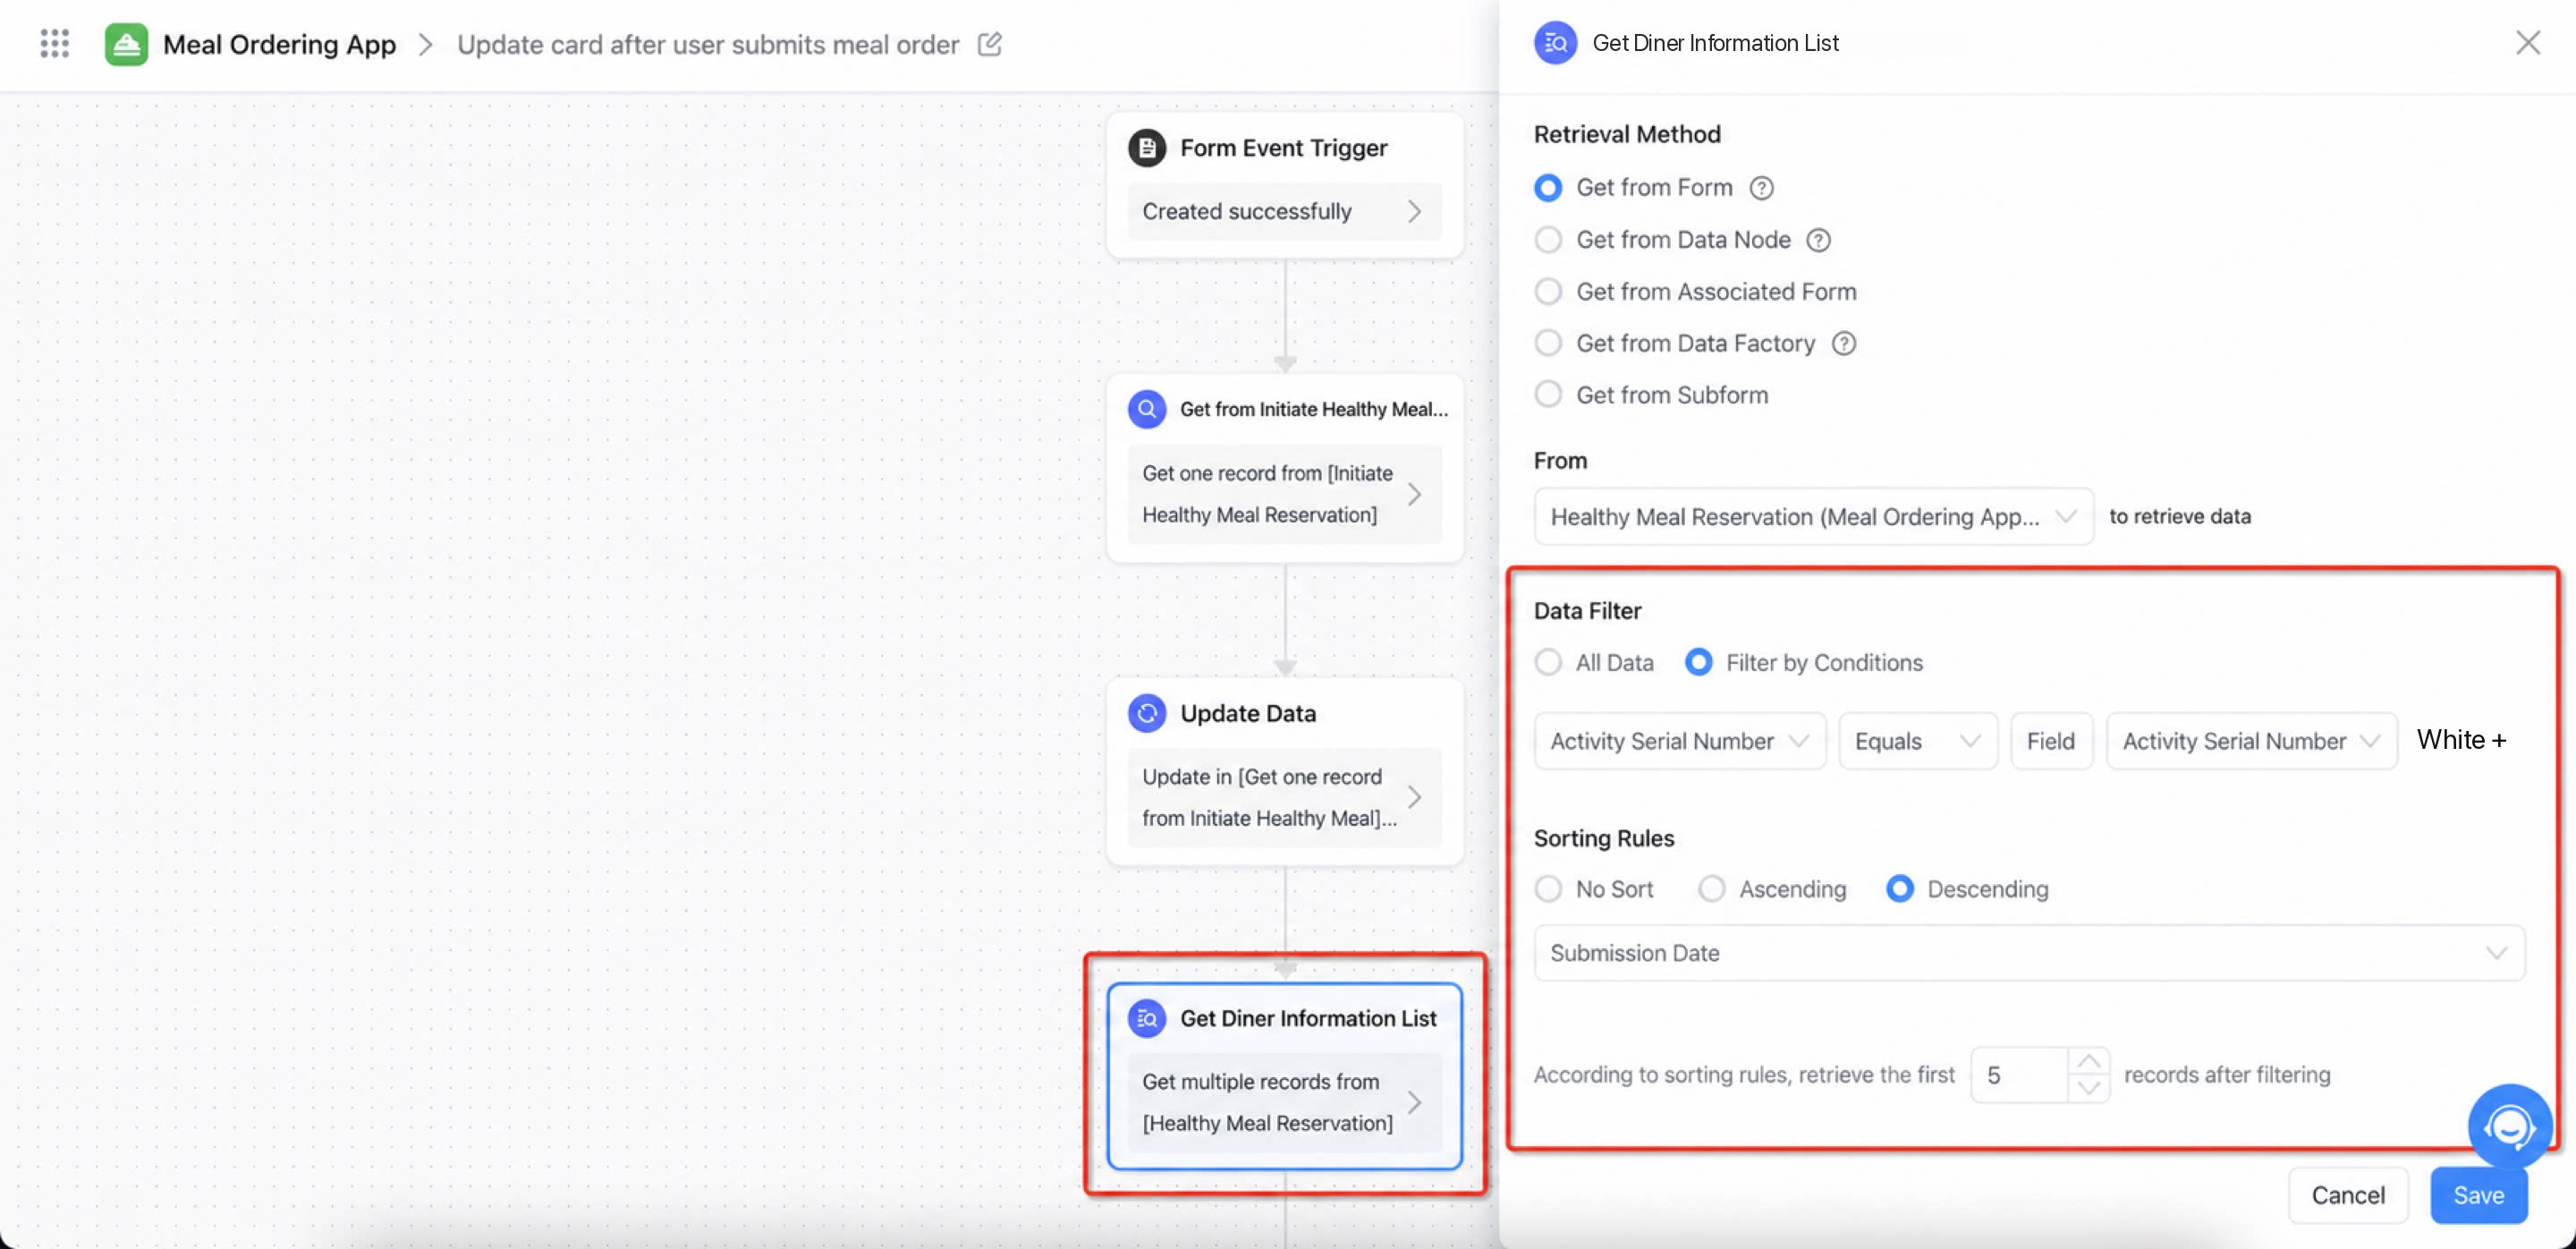
In the “Order-meal Cool App”, both “Start a healthy meal booking activity” and “Join a healthy meal booking activity” need a unique identifier (serial number) to link and mark the activity. Here is how to configure this serial number. 1. Start a healthy meal booking activity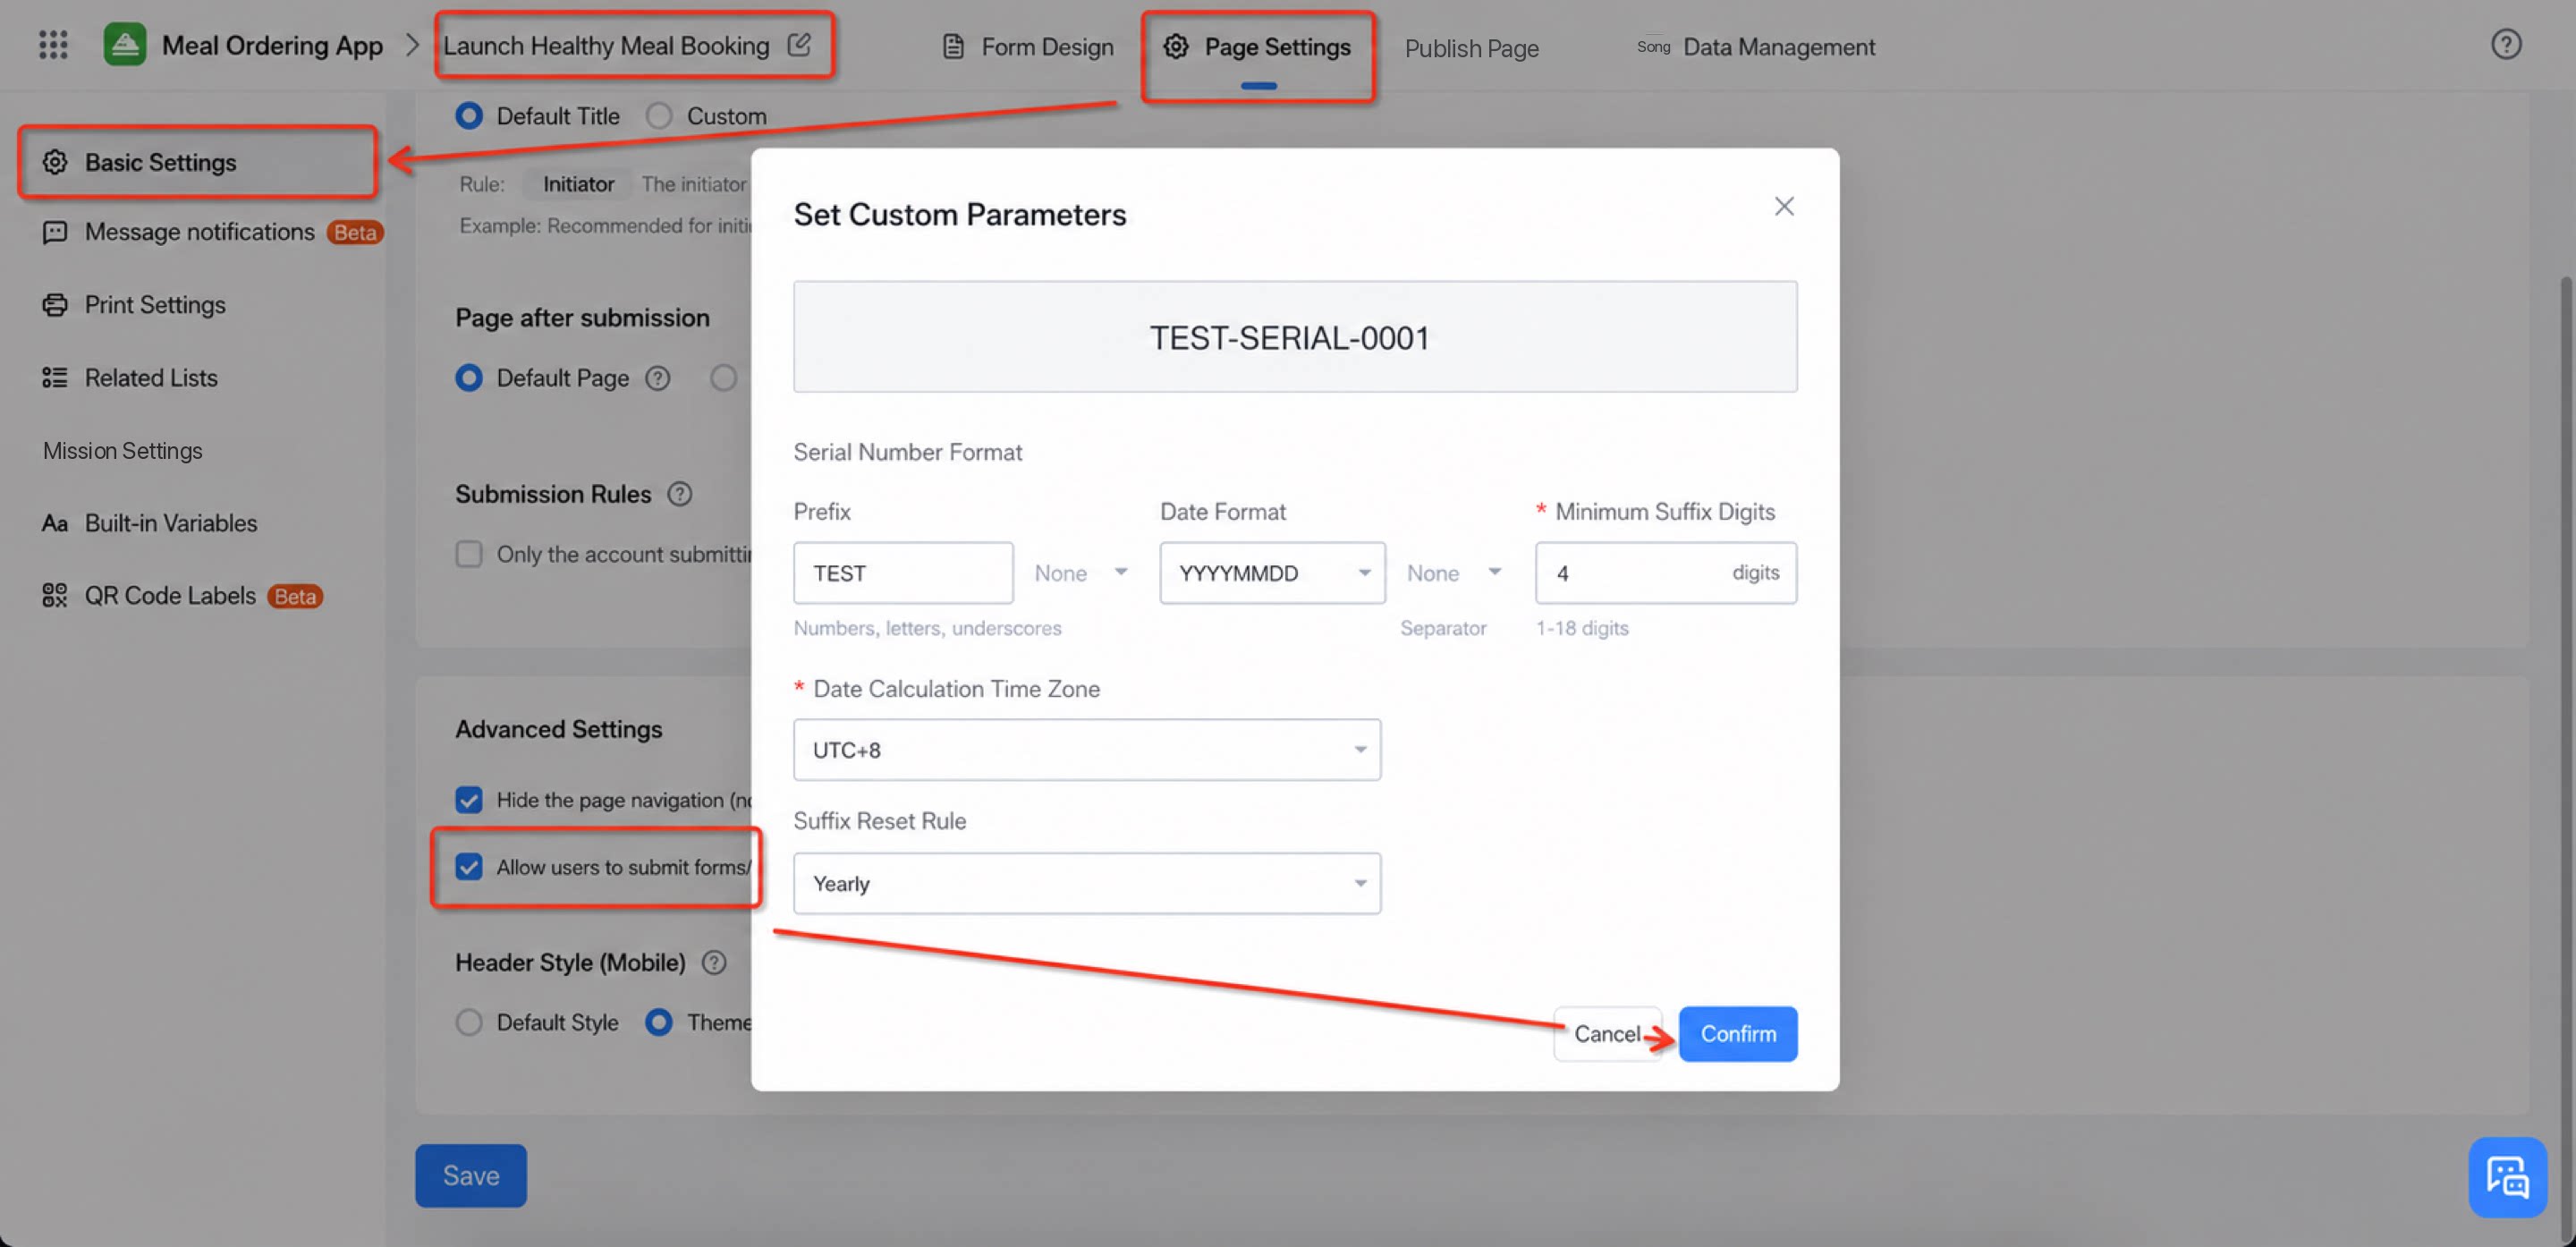
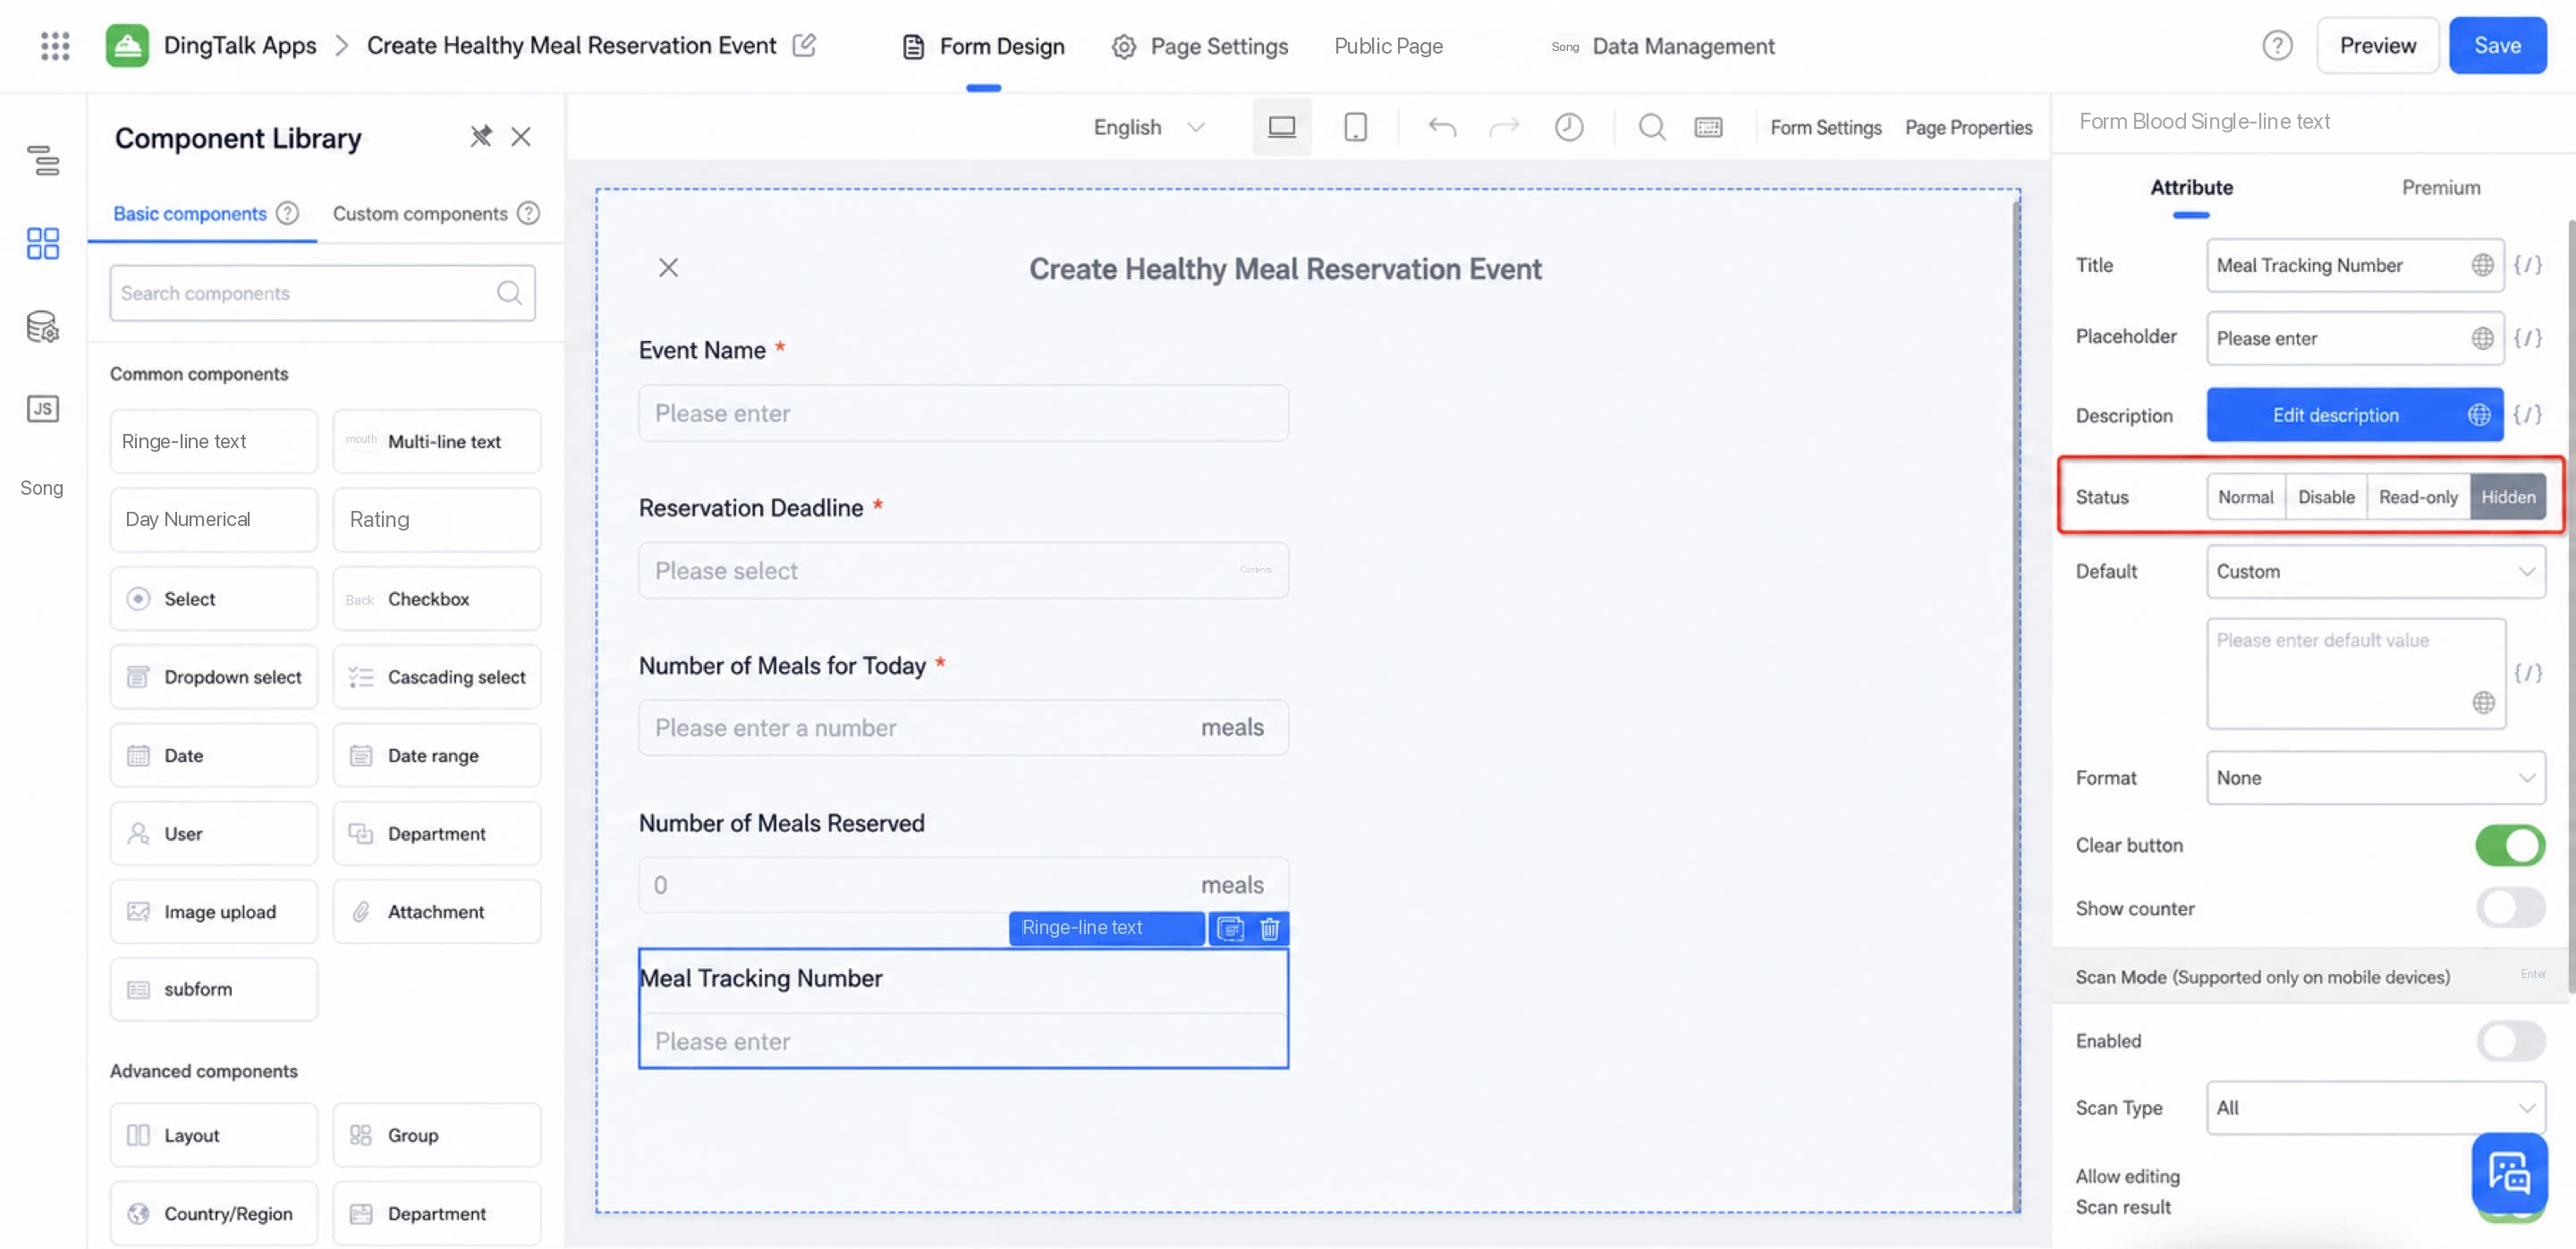
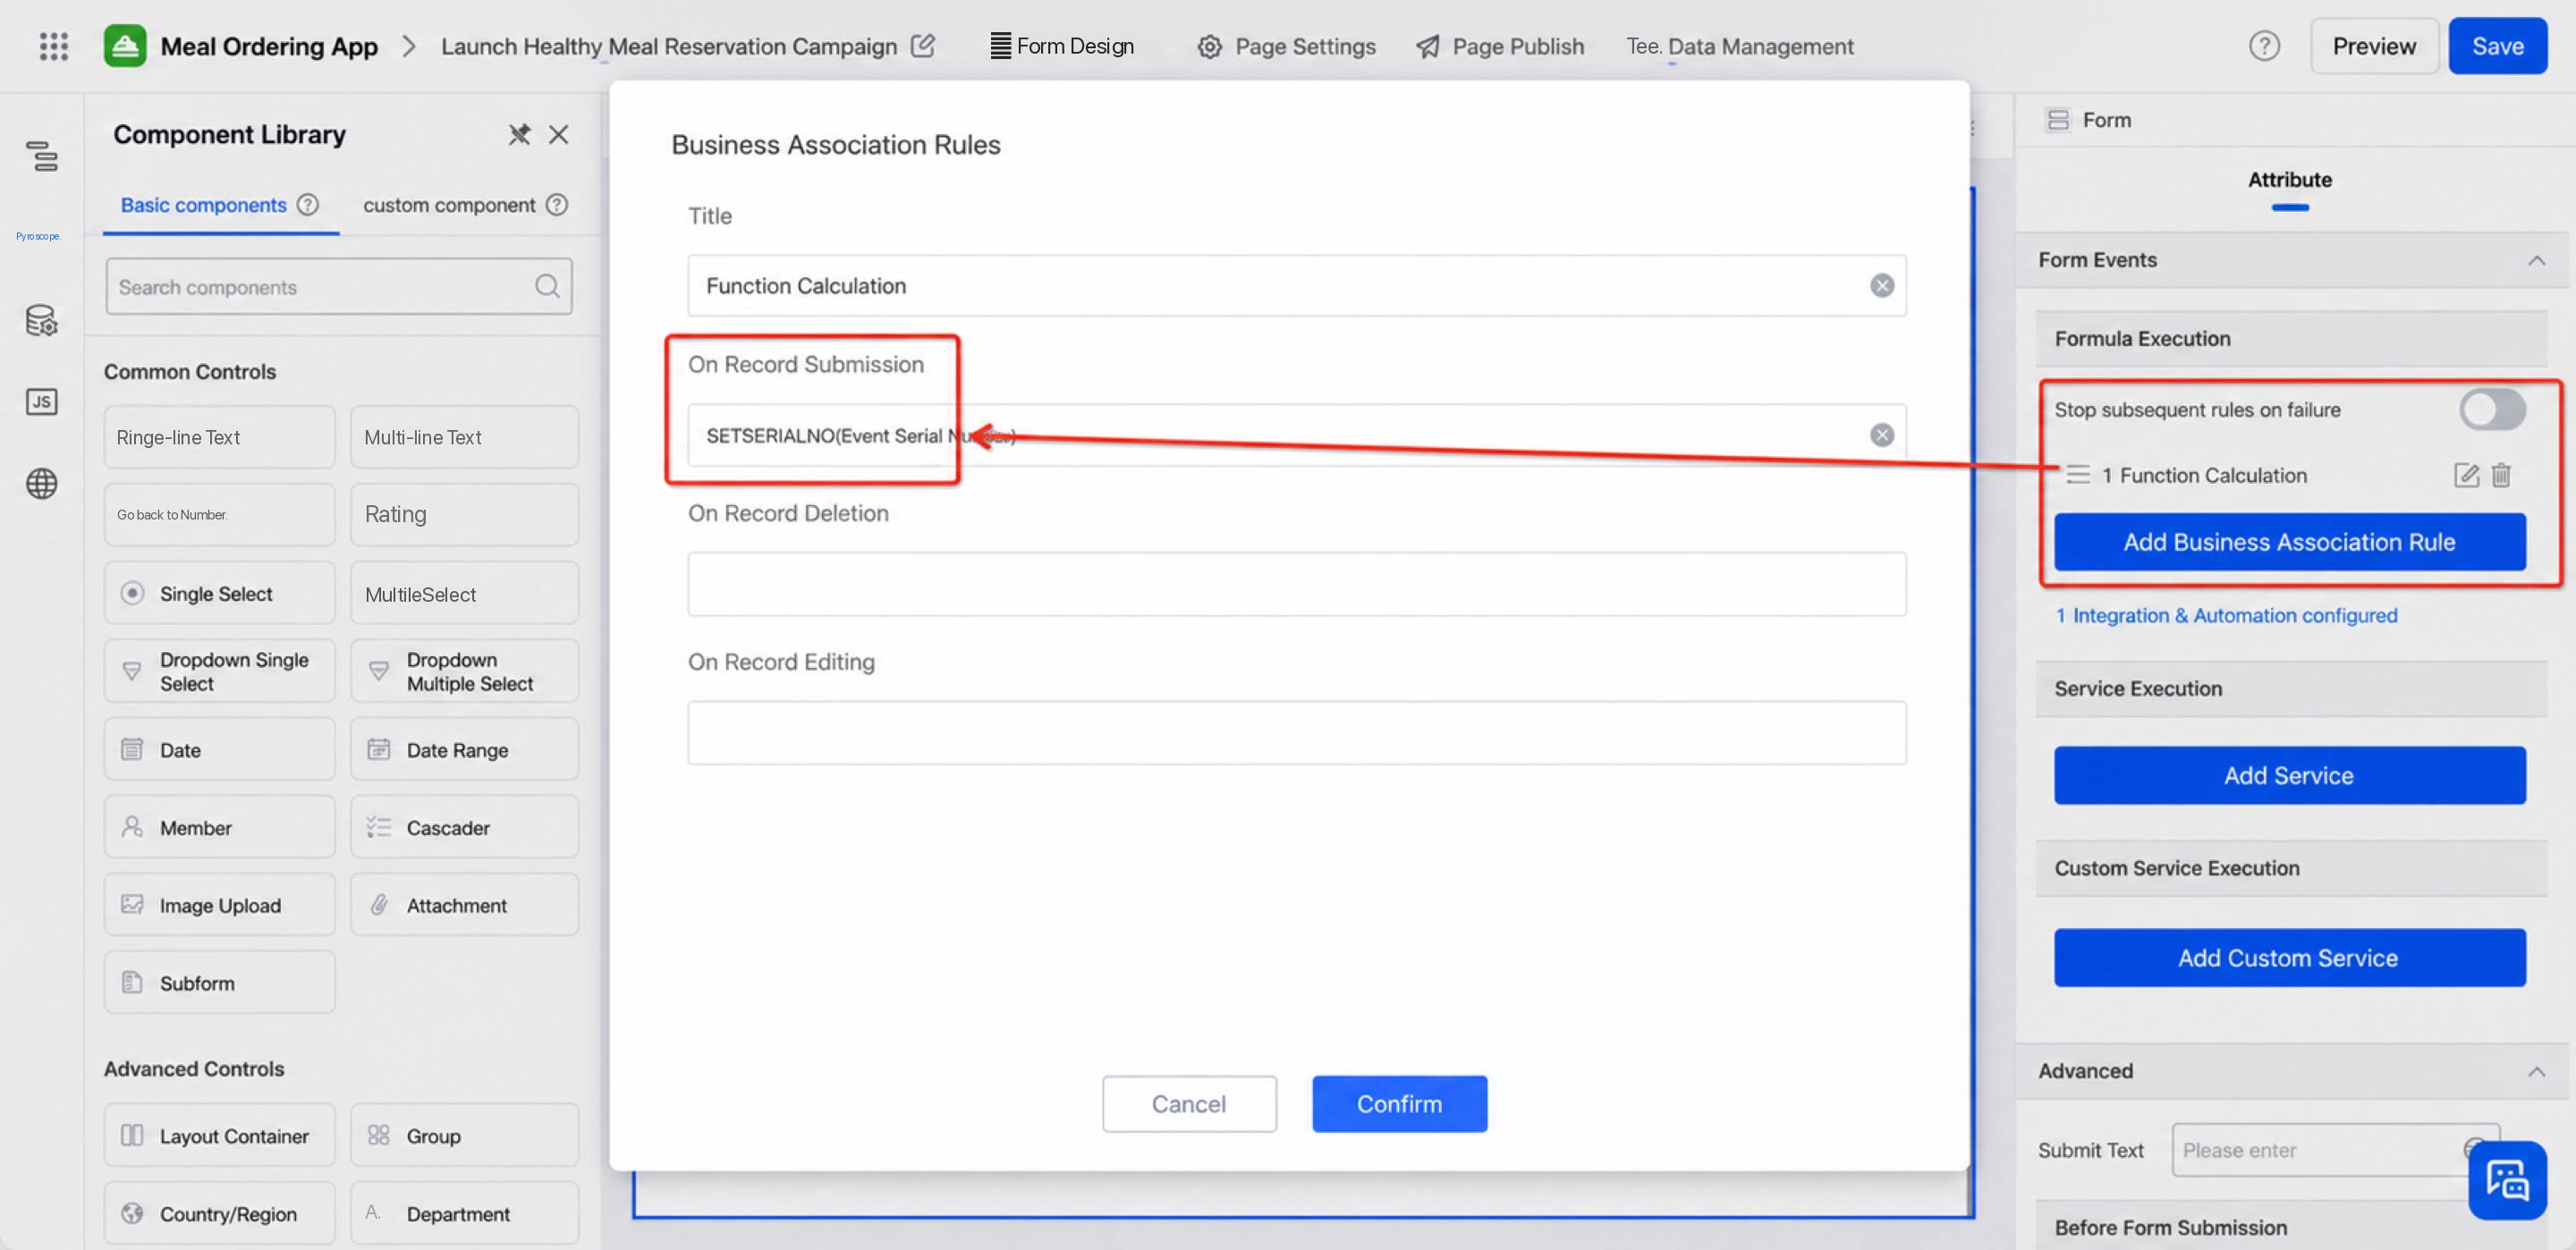
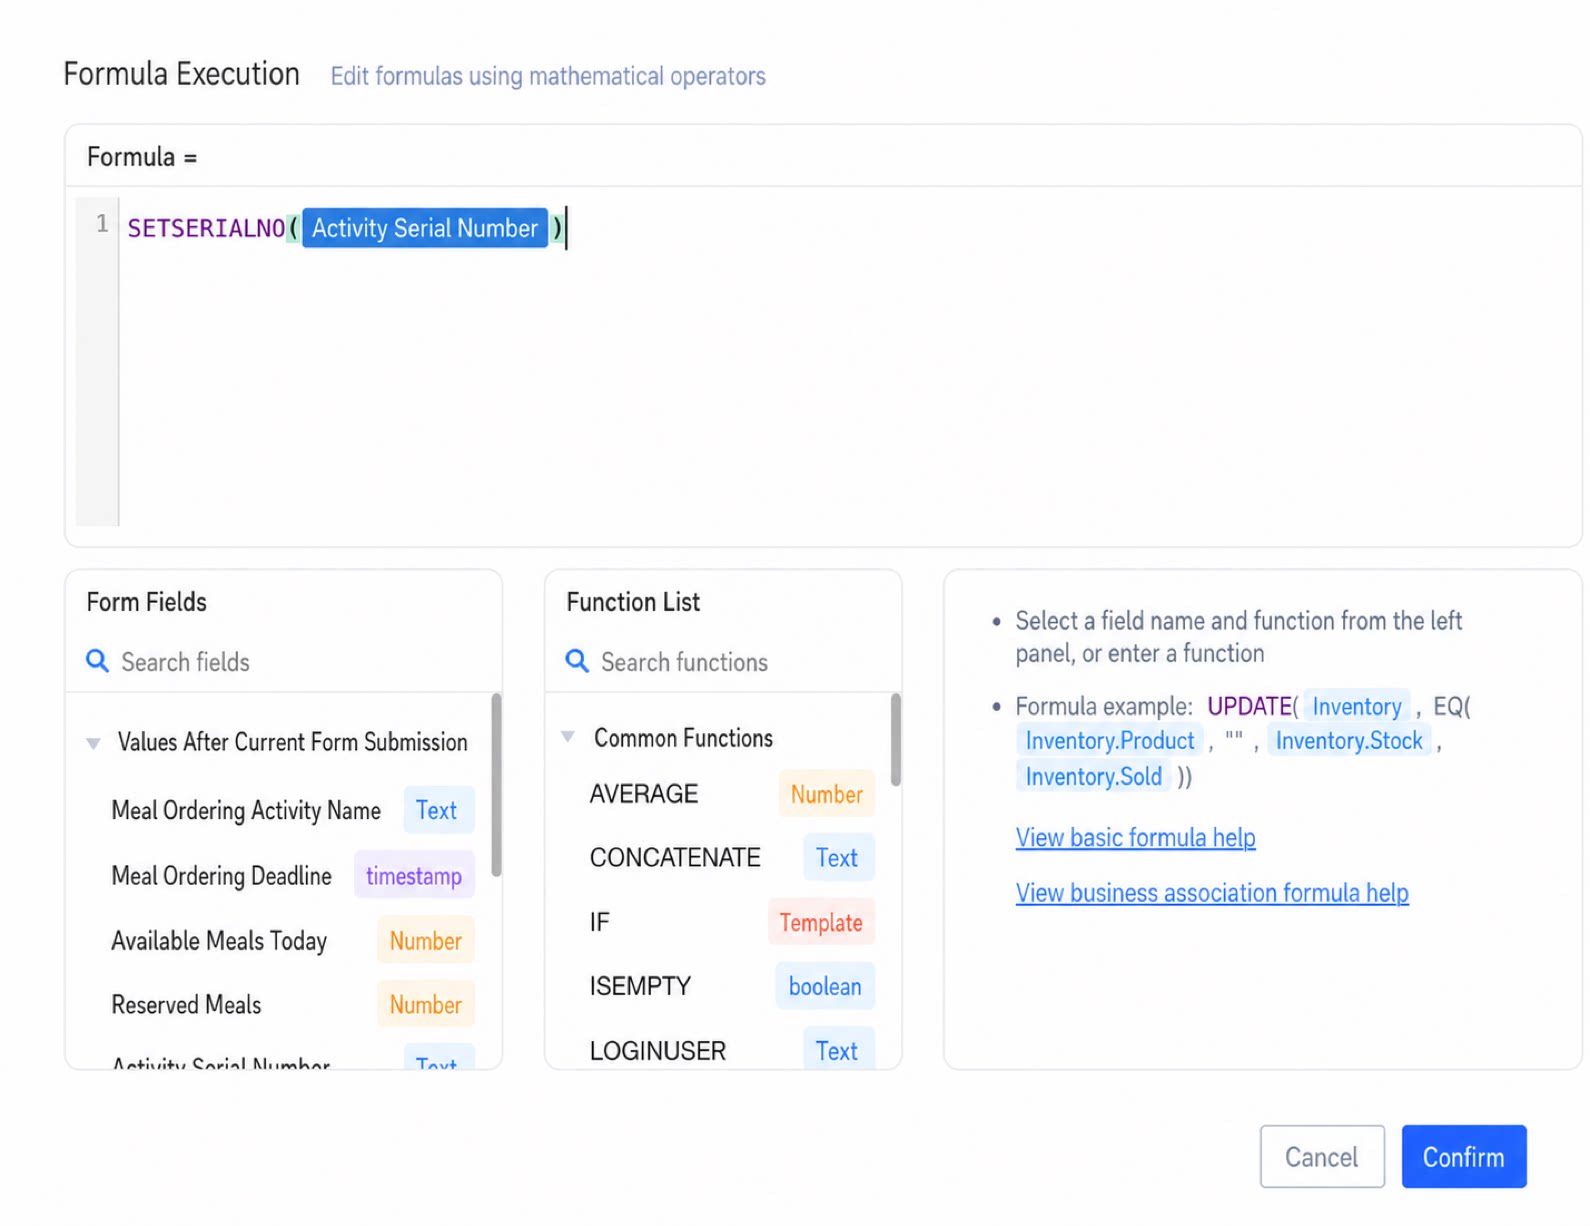
SETSERIALNO(Activity serial number) to automatically generate a serial number. After a new form instance is submitted, the system automatically generates a serial number and fills its value into the text box. All subsequent settings match and associate records based on this serial number.
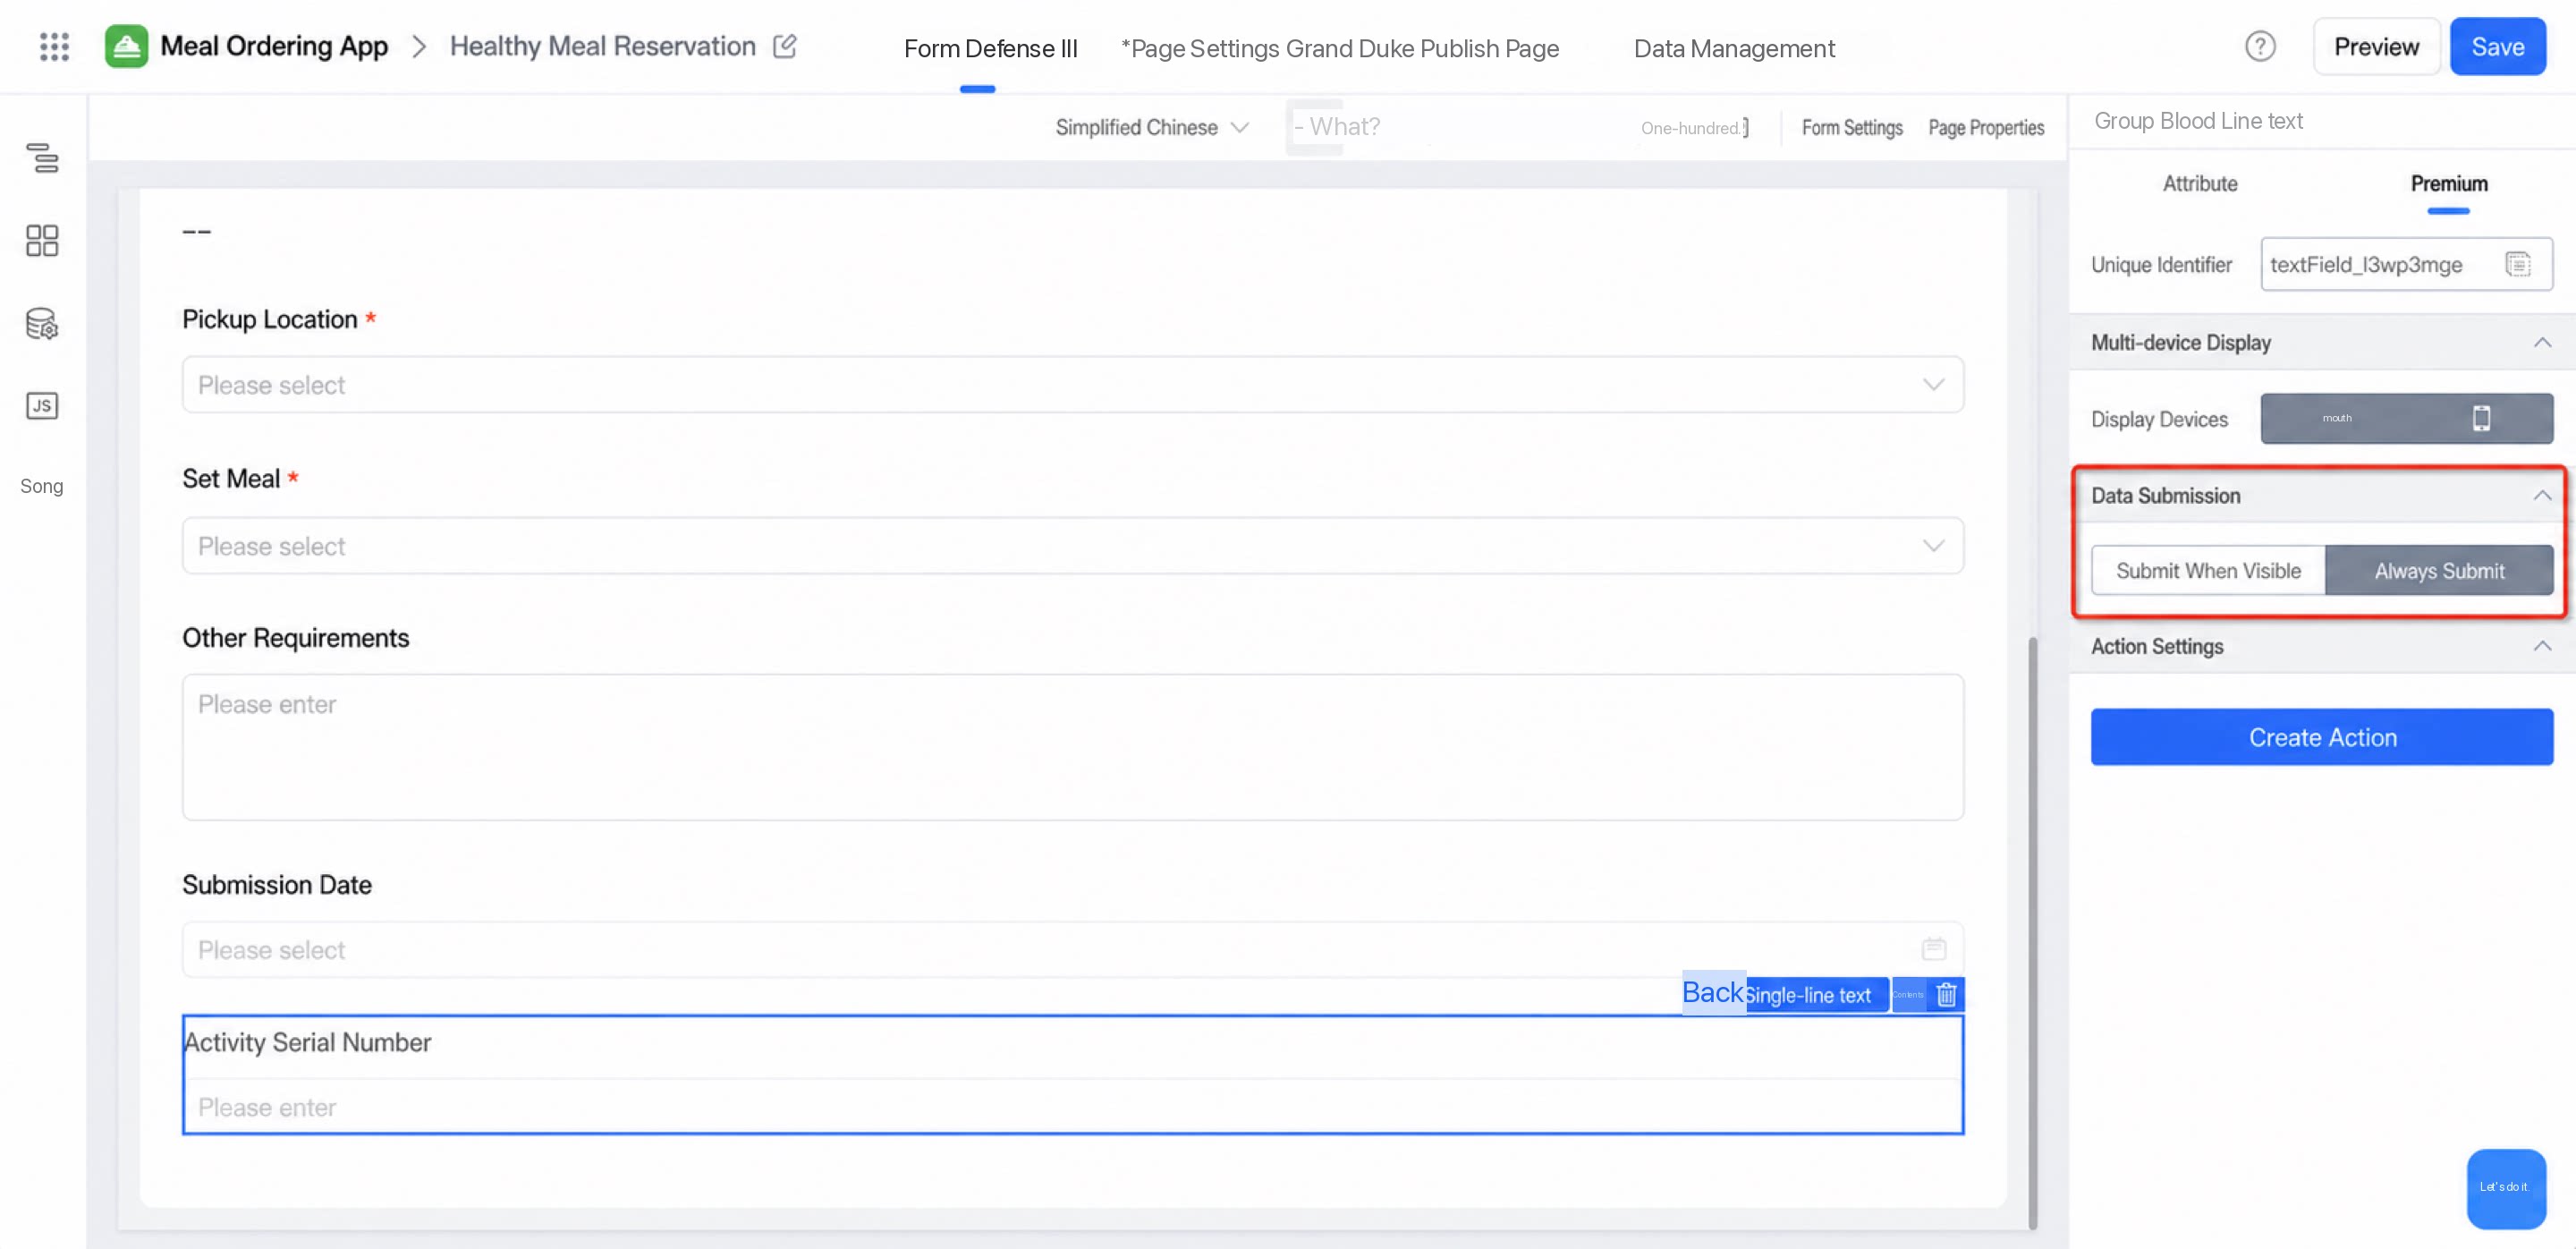
didMount function, get the serialNumber parameter from the url and assign its value to the “Activity serial number” component. Here, textField_l3wp3mge is the fieldId of the “Activity serial number” component.