Chats
Chats Calendar
 Meetings
 Contacts
 Mail
Mail Docs
Docs Drive
Drive AI Table
 AI Minutes
 Attendance
 Approval
 YiDA
YiDA Admin Console
1. Use Cases
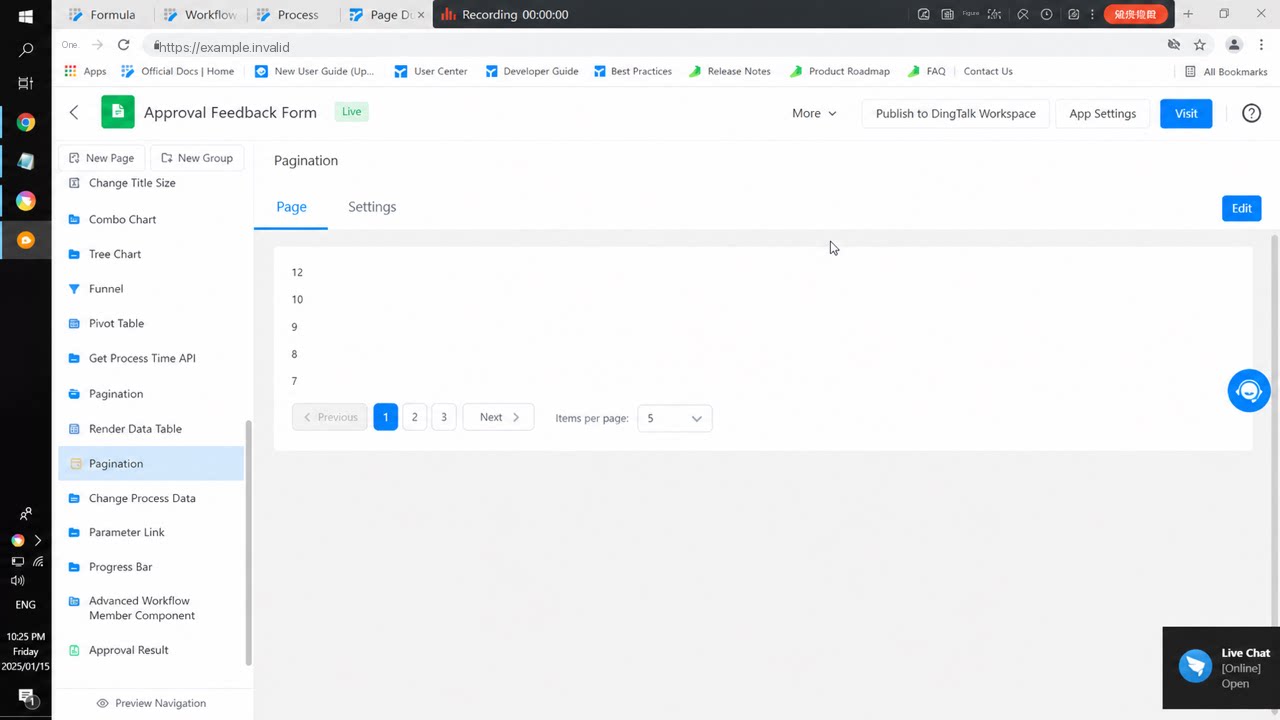 Use the Pagination component when a custom page contains data that you want to display across multiple pages.
For component attributes, usage, and examples, see the Pagination component reference.
3. Steps
3.1 Create a Regular Form
Drag a Single-line text component into the form and click Save. Return to the app home page and add some sample data to the form.3.2 Create a Custom Page
Drag a container component onto the custom page, then add a text component and a Pagination component inside the container. Use the outline tree to review how the components are nested. Custom page3.3 Create a Remote Data Source
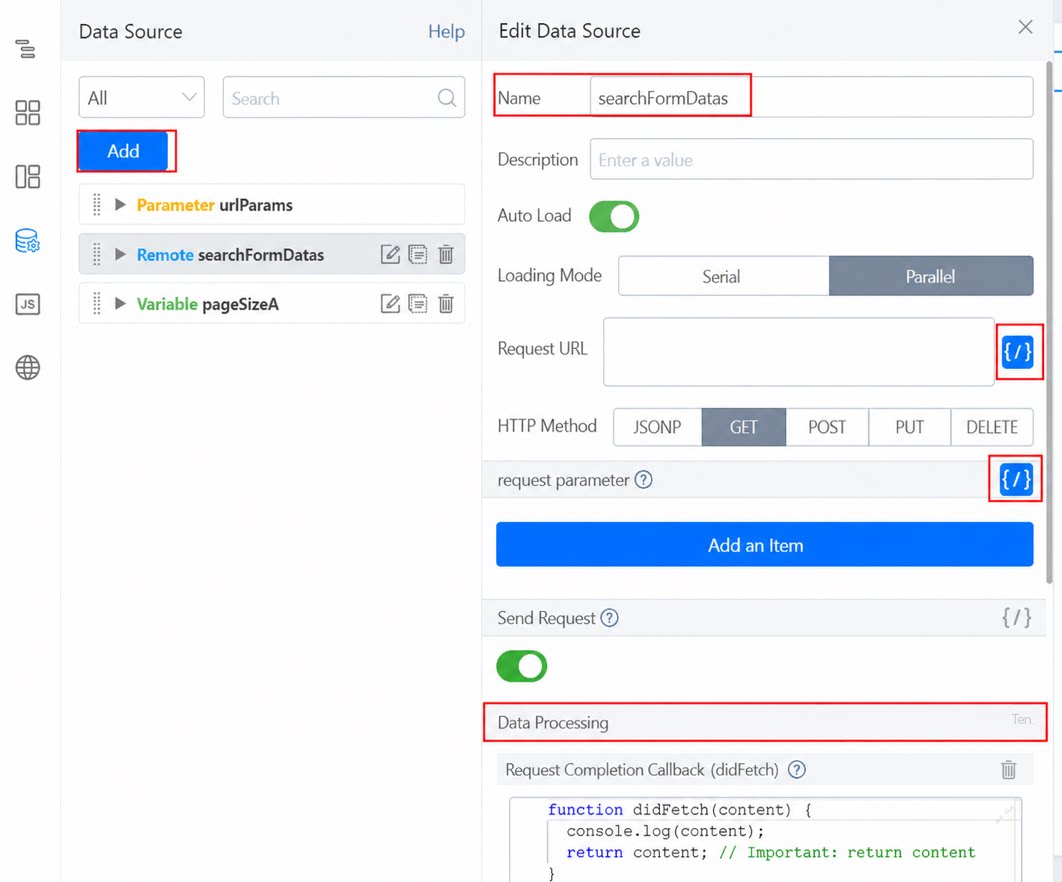
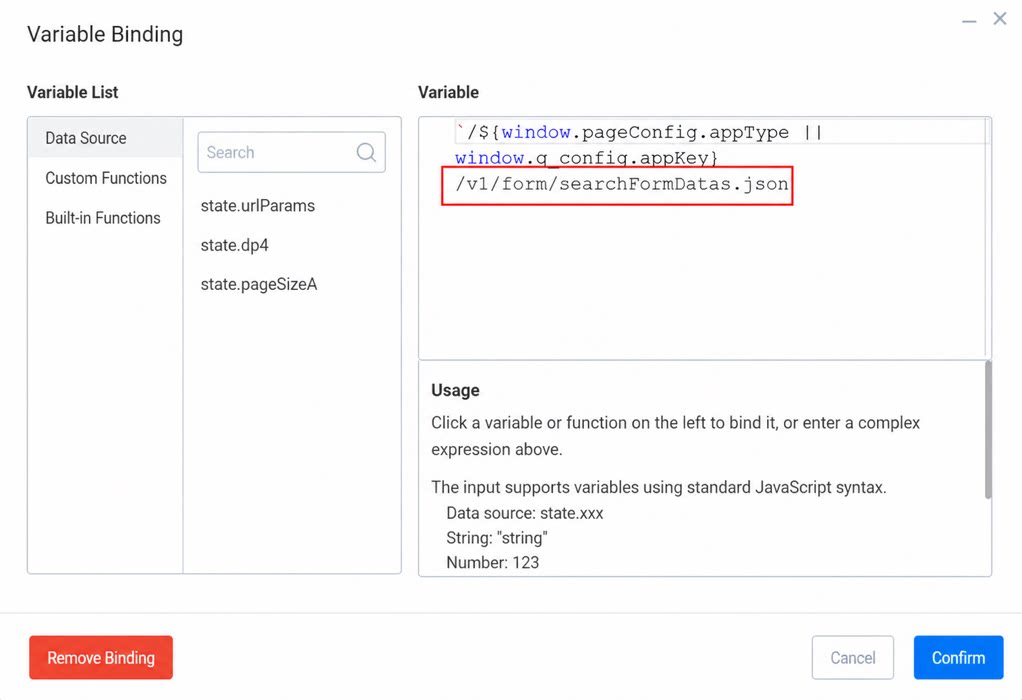
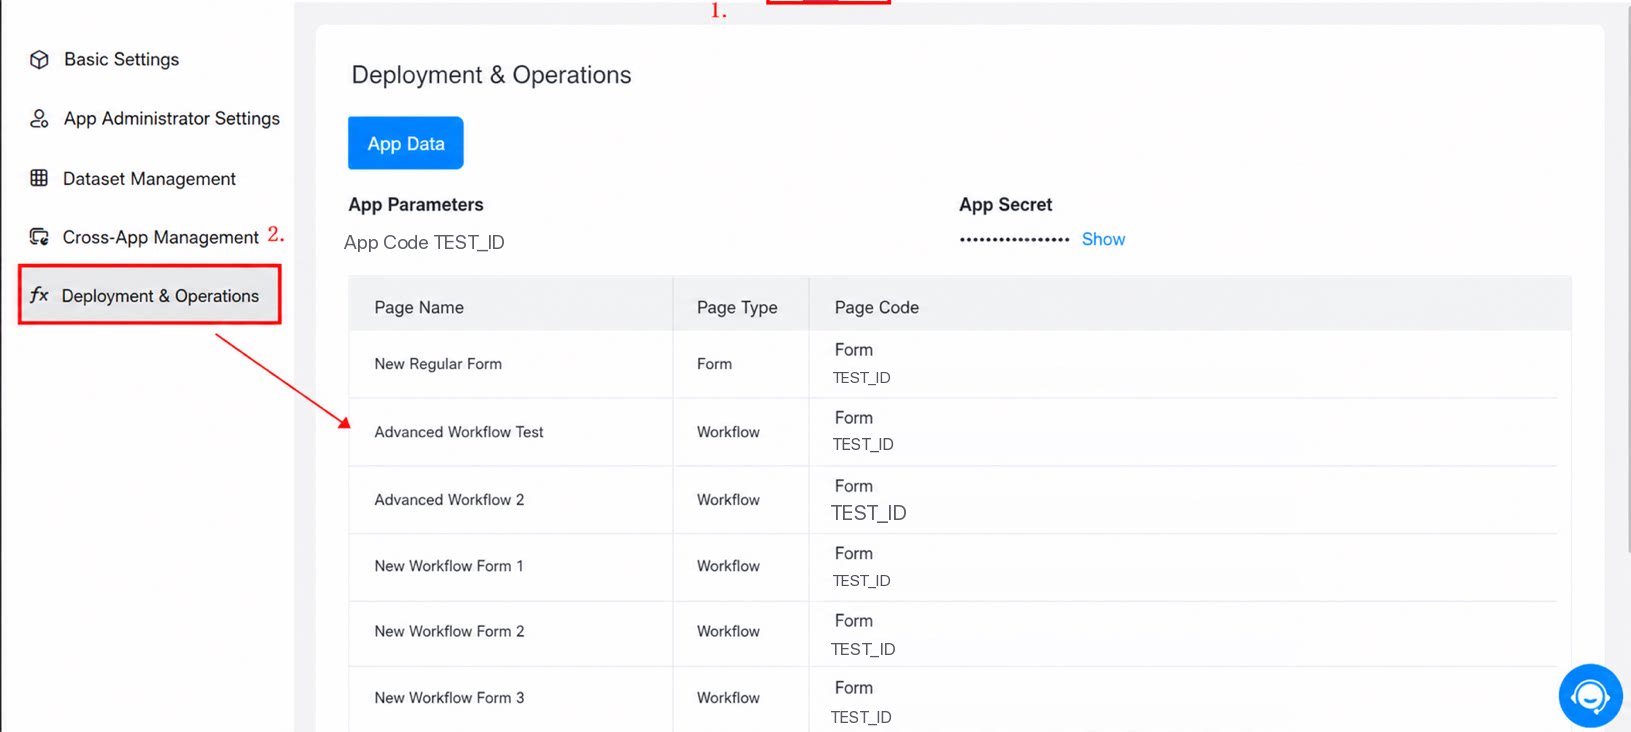
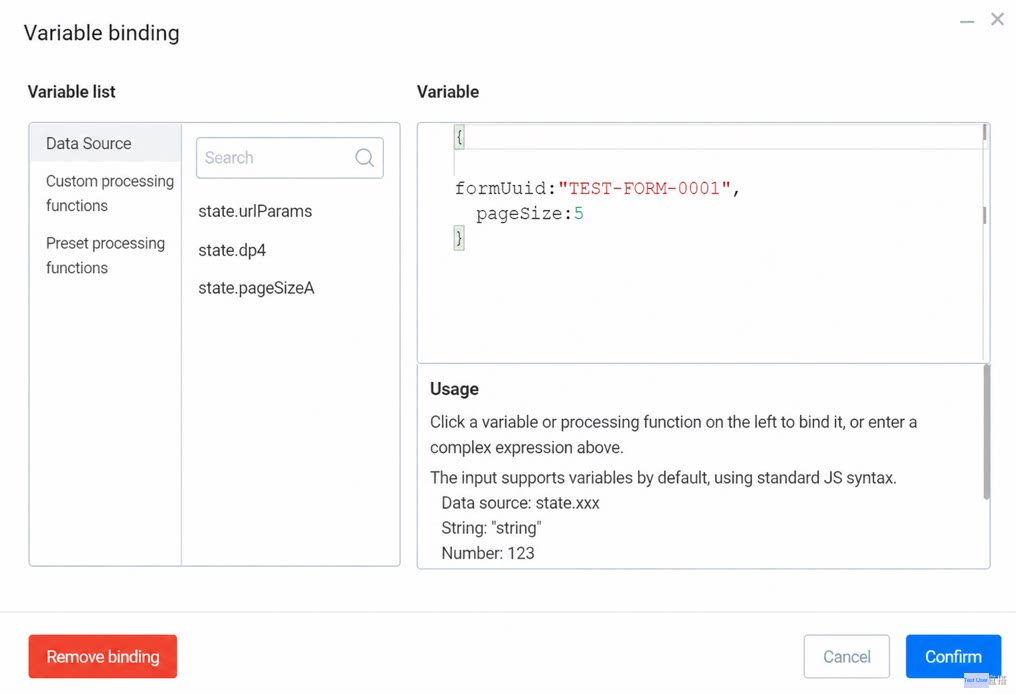
On the custom page, click Data Source on the left, select Add, and create a remote API. Rename it as needed. Custom page Data Source Click the request URL and change it to the required API endpoint: ’/${window.pageConfig.appType || window.g_config.appKey}/v1/form/searchFormDatas.json’ For details, see the API documentation: YiDA platform APIs (callable directly from page Data Sources) Modify the request parameters, or click Add to add a new one. As shown in the documentation, the parameter name is formUuid.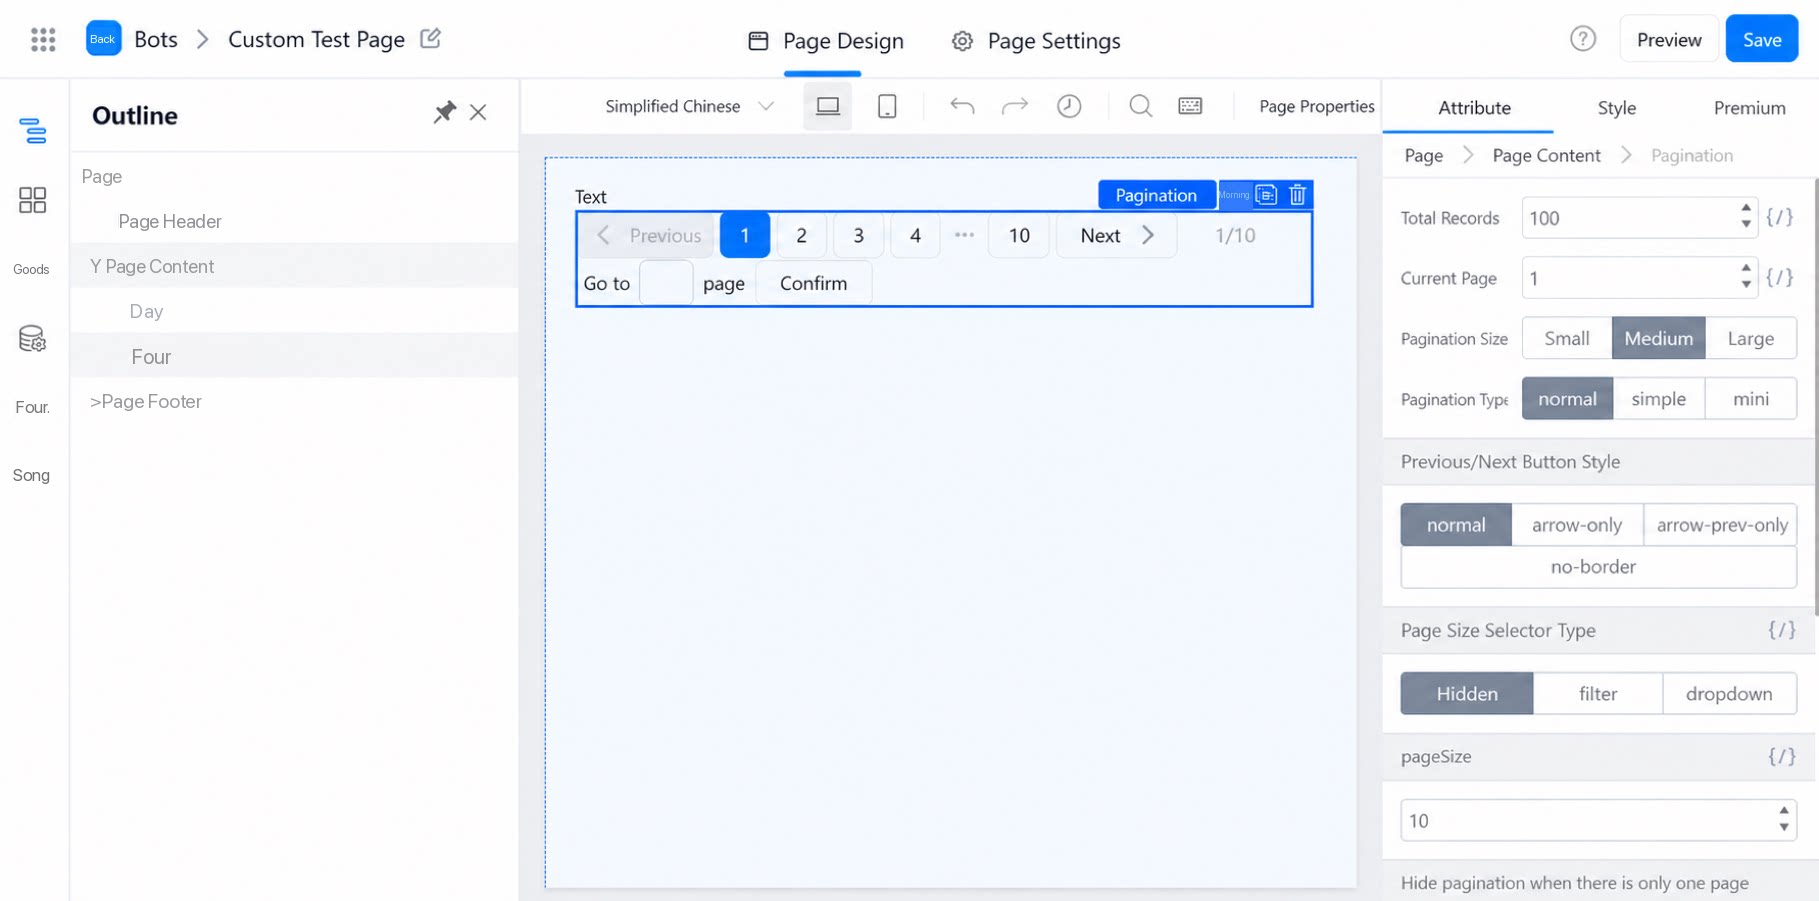
3.4 Set Loop Data for the Container Component
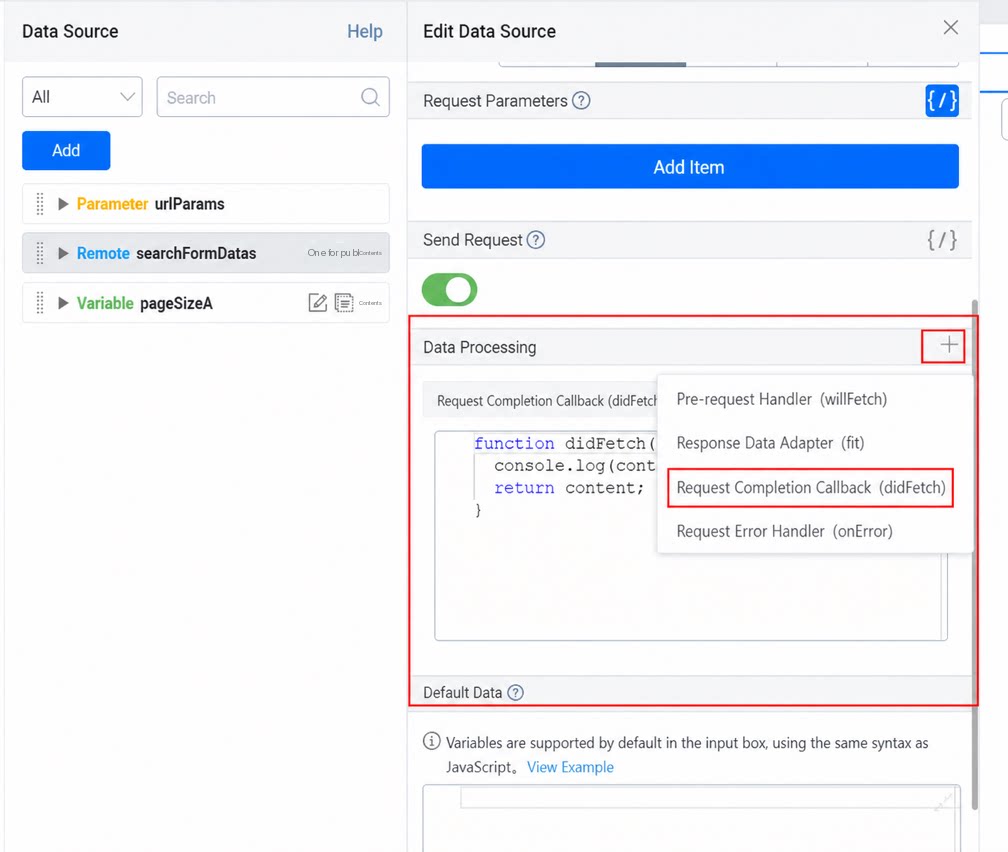
3.5 Bind Variables
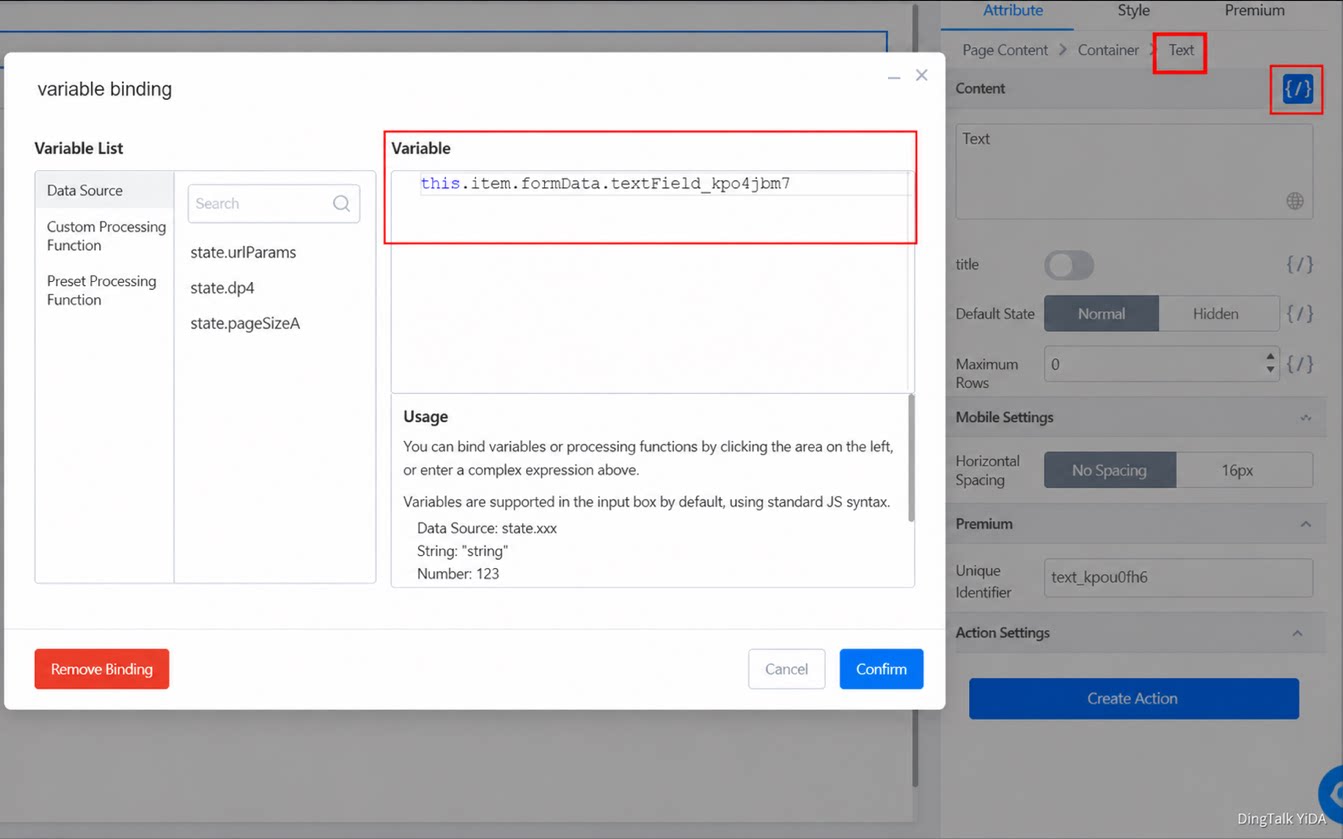
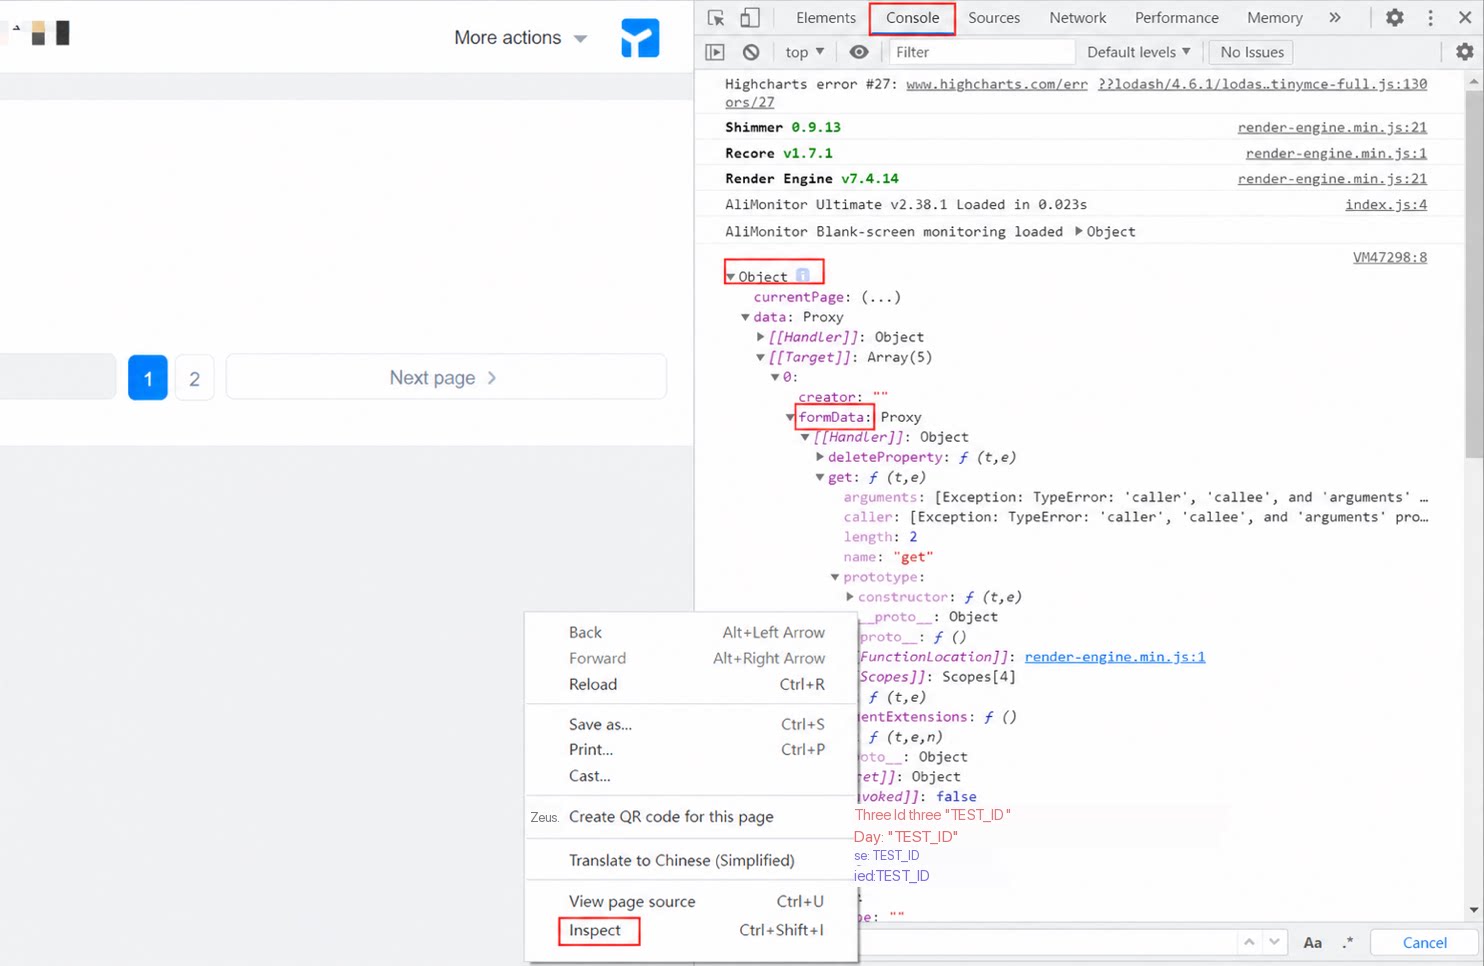
Click the text component on the custom page and locate the variable binding for Content on the right. Enter this.item.formData. followed by the unique identifier of the Single-line text component in the regular form. To find formData: on the edit page, click Preview, right-click and select Inspect, open the console, and locate formData.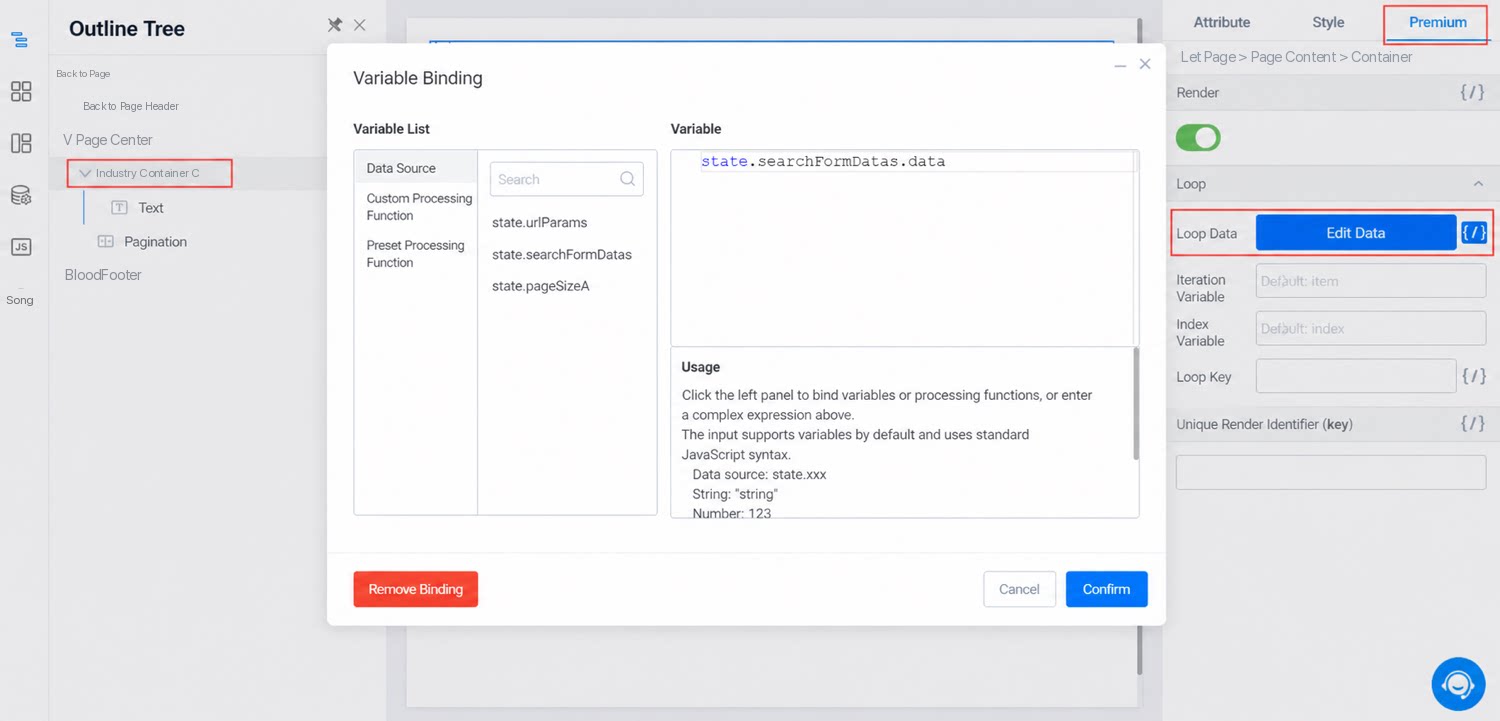
3.6 Create a Variable Data Source
3.7 Create Actions
Click the Pagination component and locate Action Settings in the lower right. Click Create Action and create two actions (in this example, page number change and page size change). Once the actions are created, the JS panel opens automatically on the left. Write code there to reload the Data Source.3.8 Bind Variables (Total Record Count and Current Page Number)
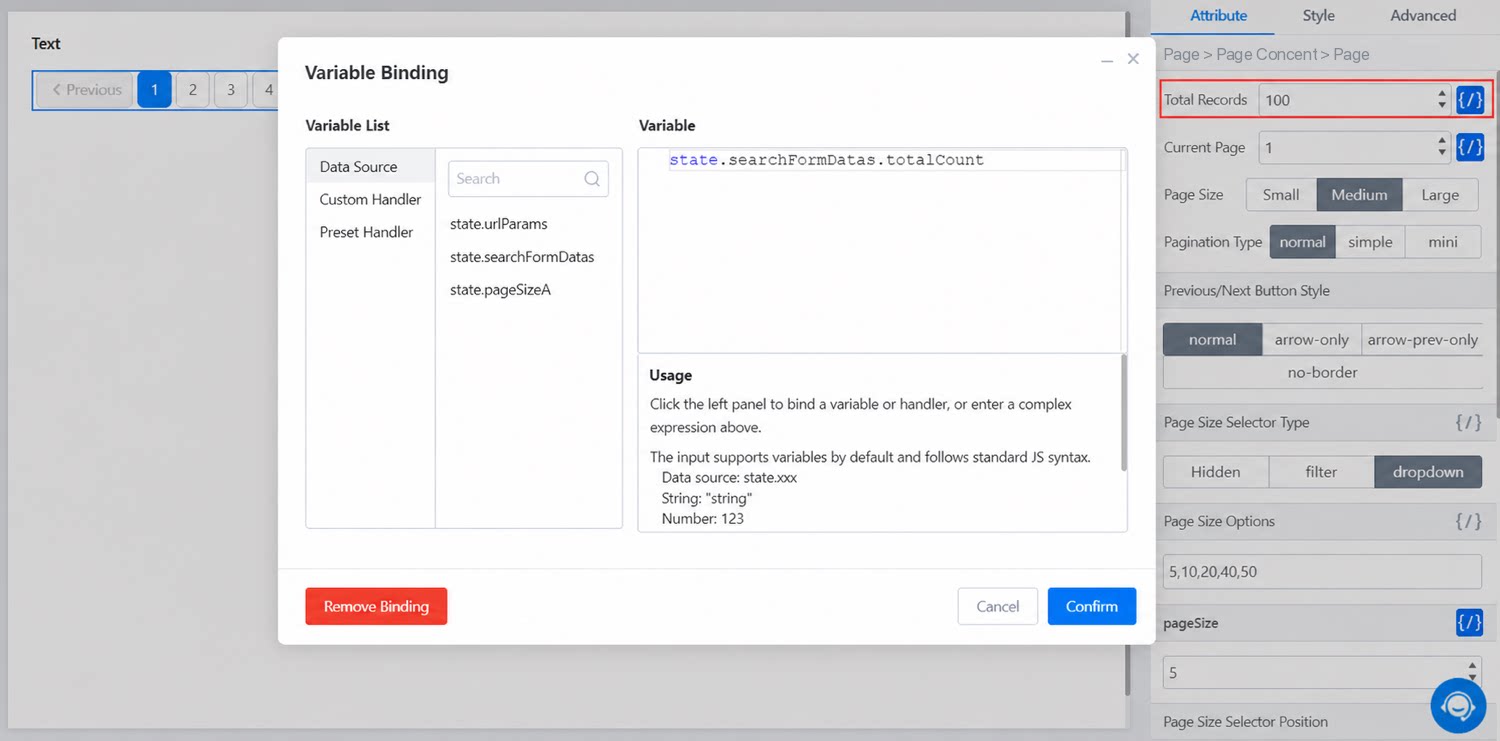
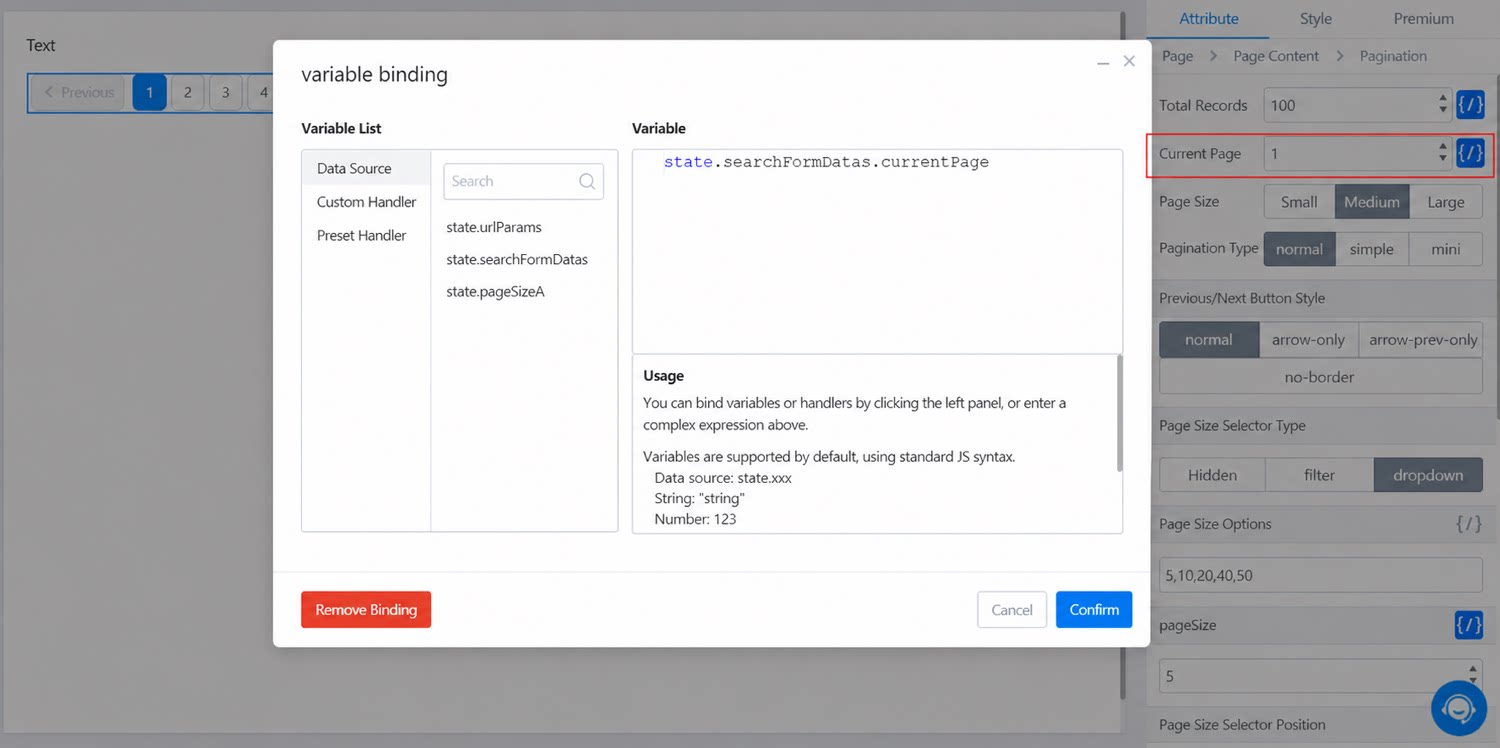
(1) Click the variable binding for the total record count on the right of the Pagination component and enter state.searchFormDatas.totalCount (totalCount is the total number of records). Click Confirm.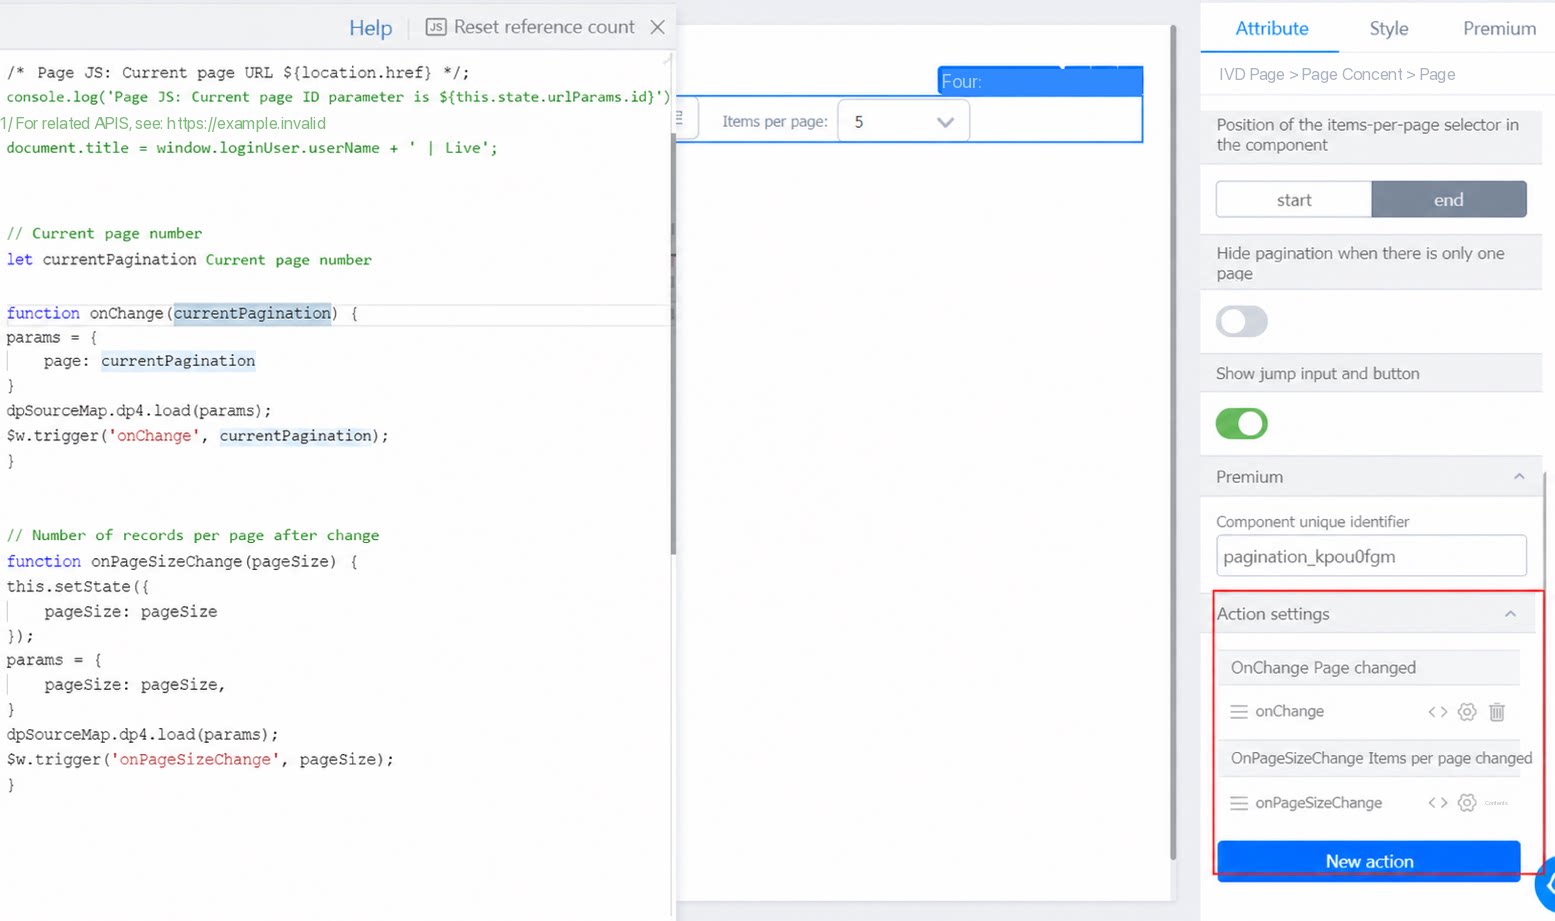
3.9 Bind the pageSize Variable
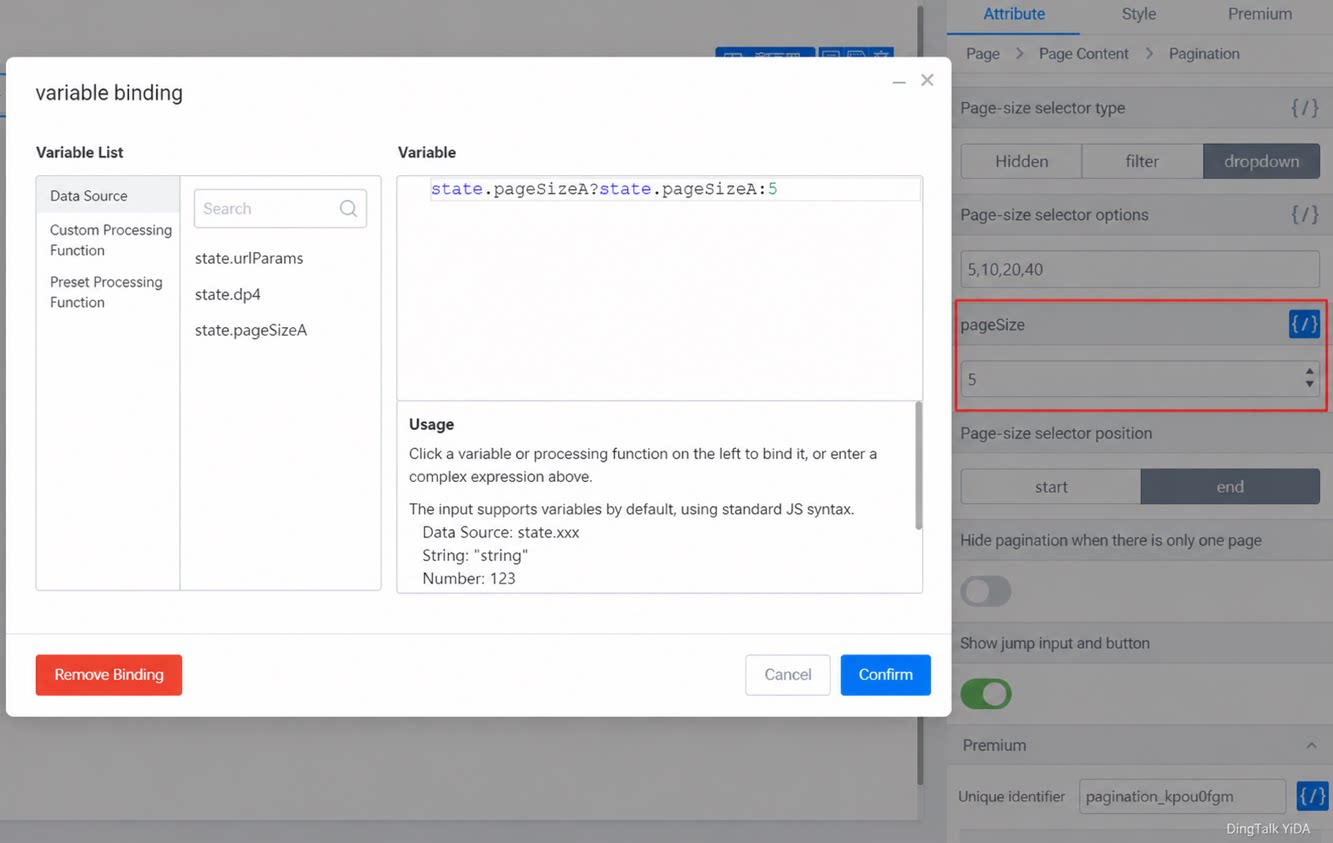
Click the variable binding for pageSize and use a ternary expression in the JS code: state.pageSizeA?state.pageSize:5 to determine how many records the current page can display.