Chats
Chats Calendar
 Meetings
 Contacts
 Mail
Mail Docs
Docs Drive
Drive AI Table
 AI Minutes
 Attendance
 Approval
 YiDA
YiDA Admin Console
Steps
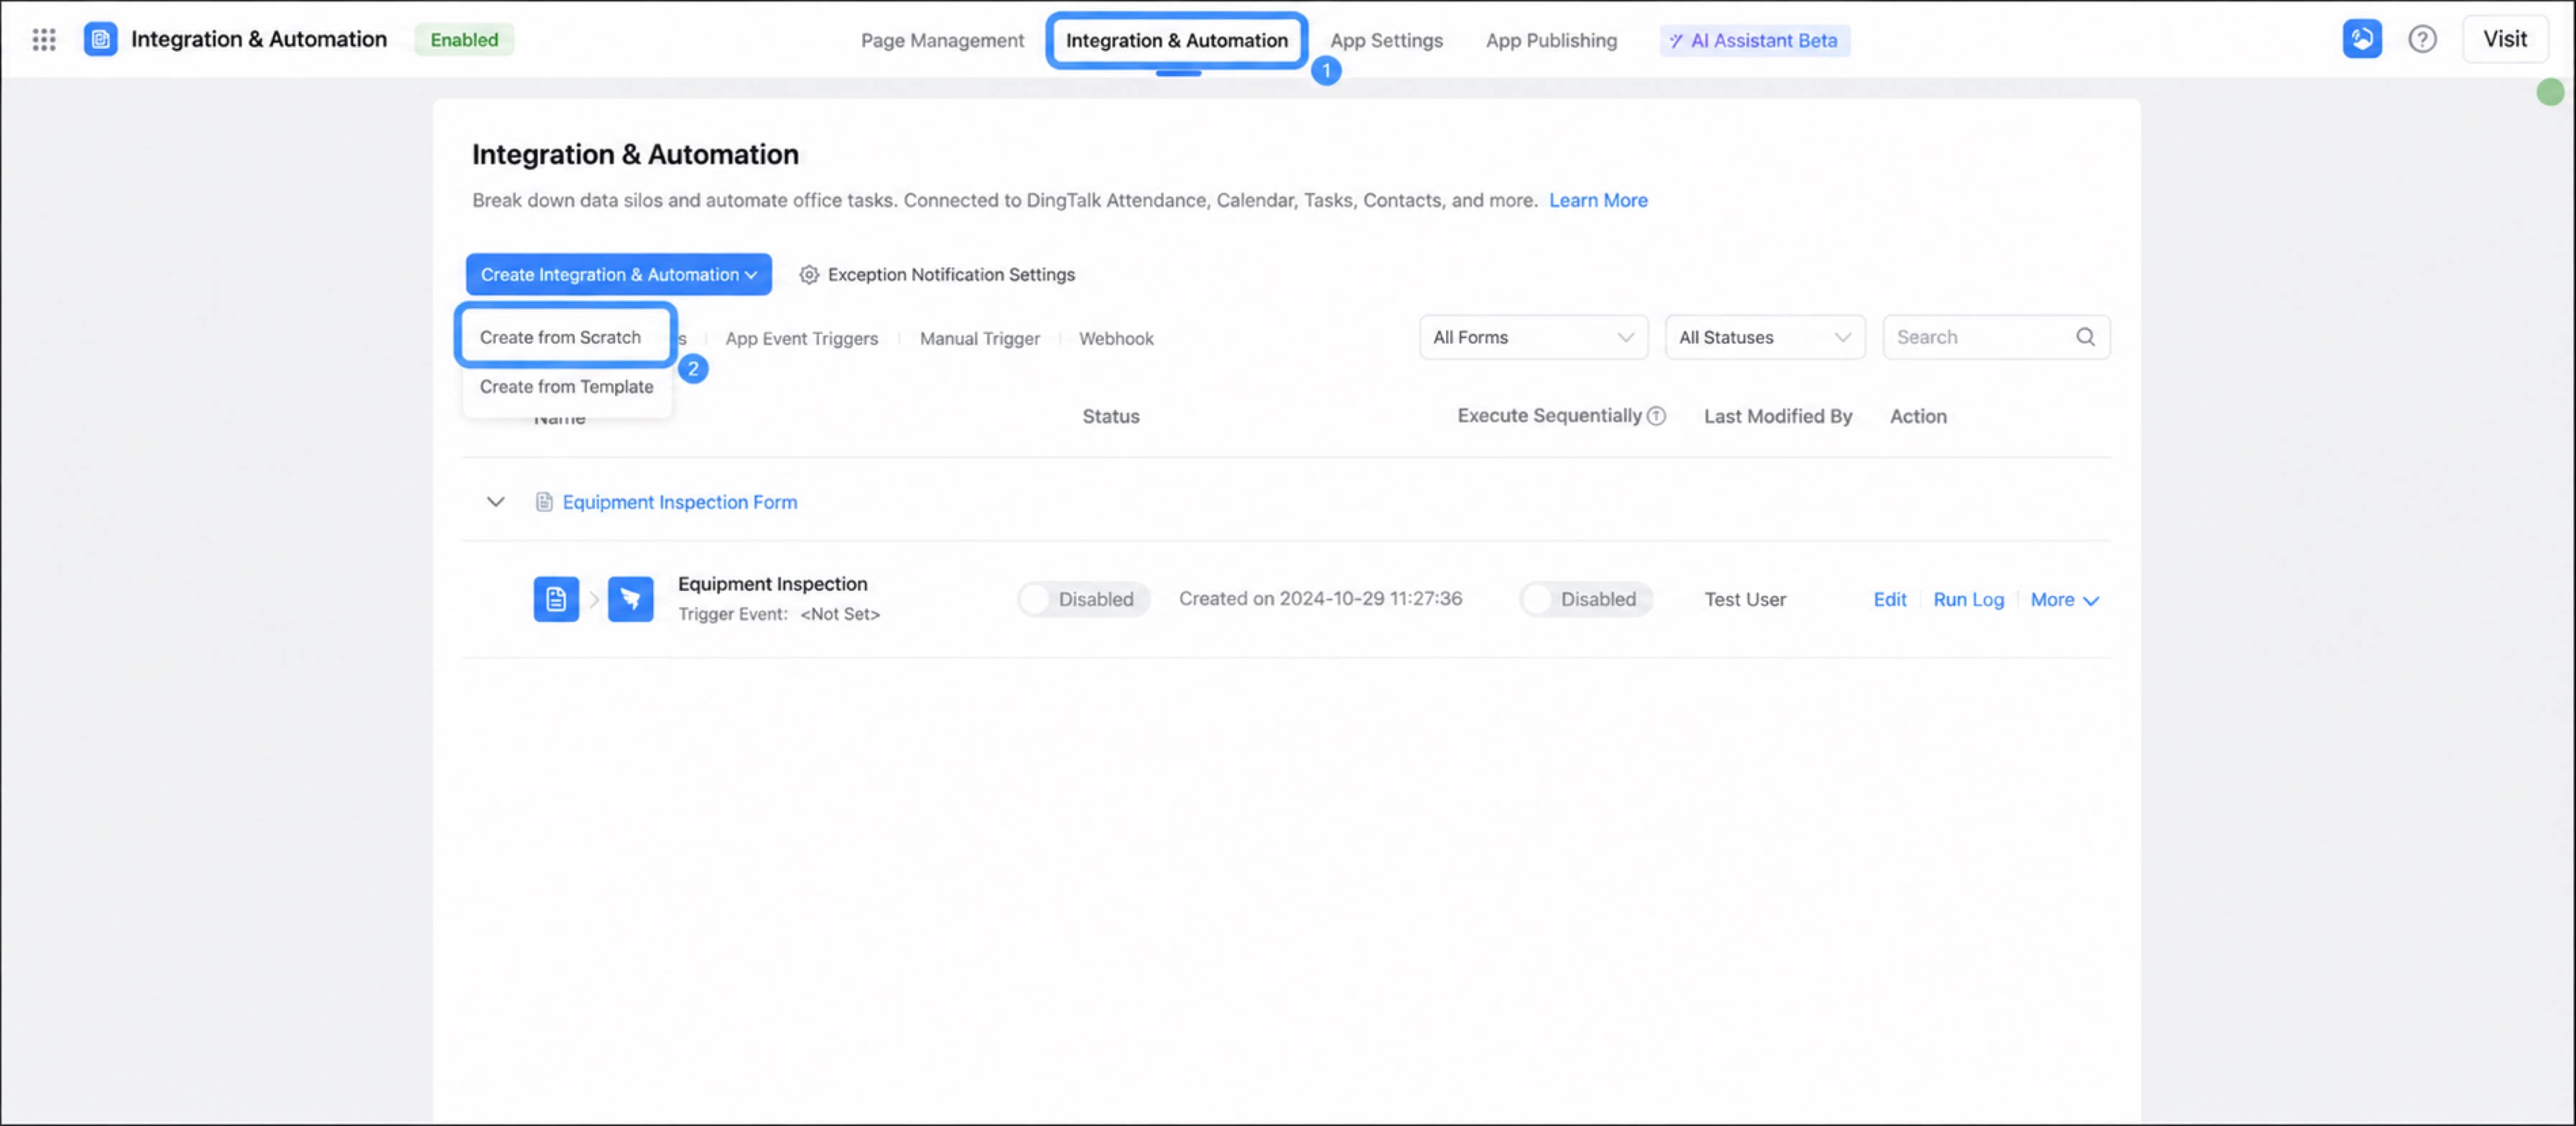
Follow these steps to create an integration & automation with a time-based trigger.- Sign in to the YiDA workbench and click My Apps.
- Select the app for which you want to create an integration & automation to open the App settings page.
- Click Integration & Automation, then select Create Integration & Automation > Create from blank.
1
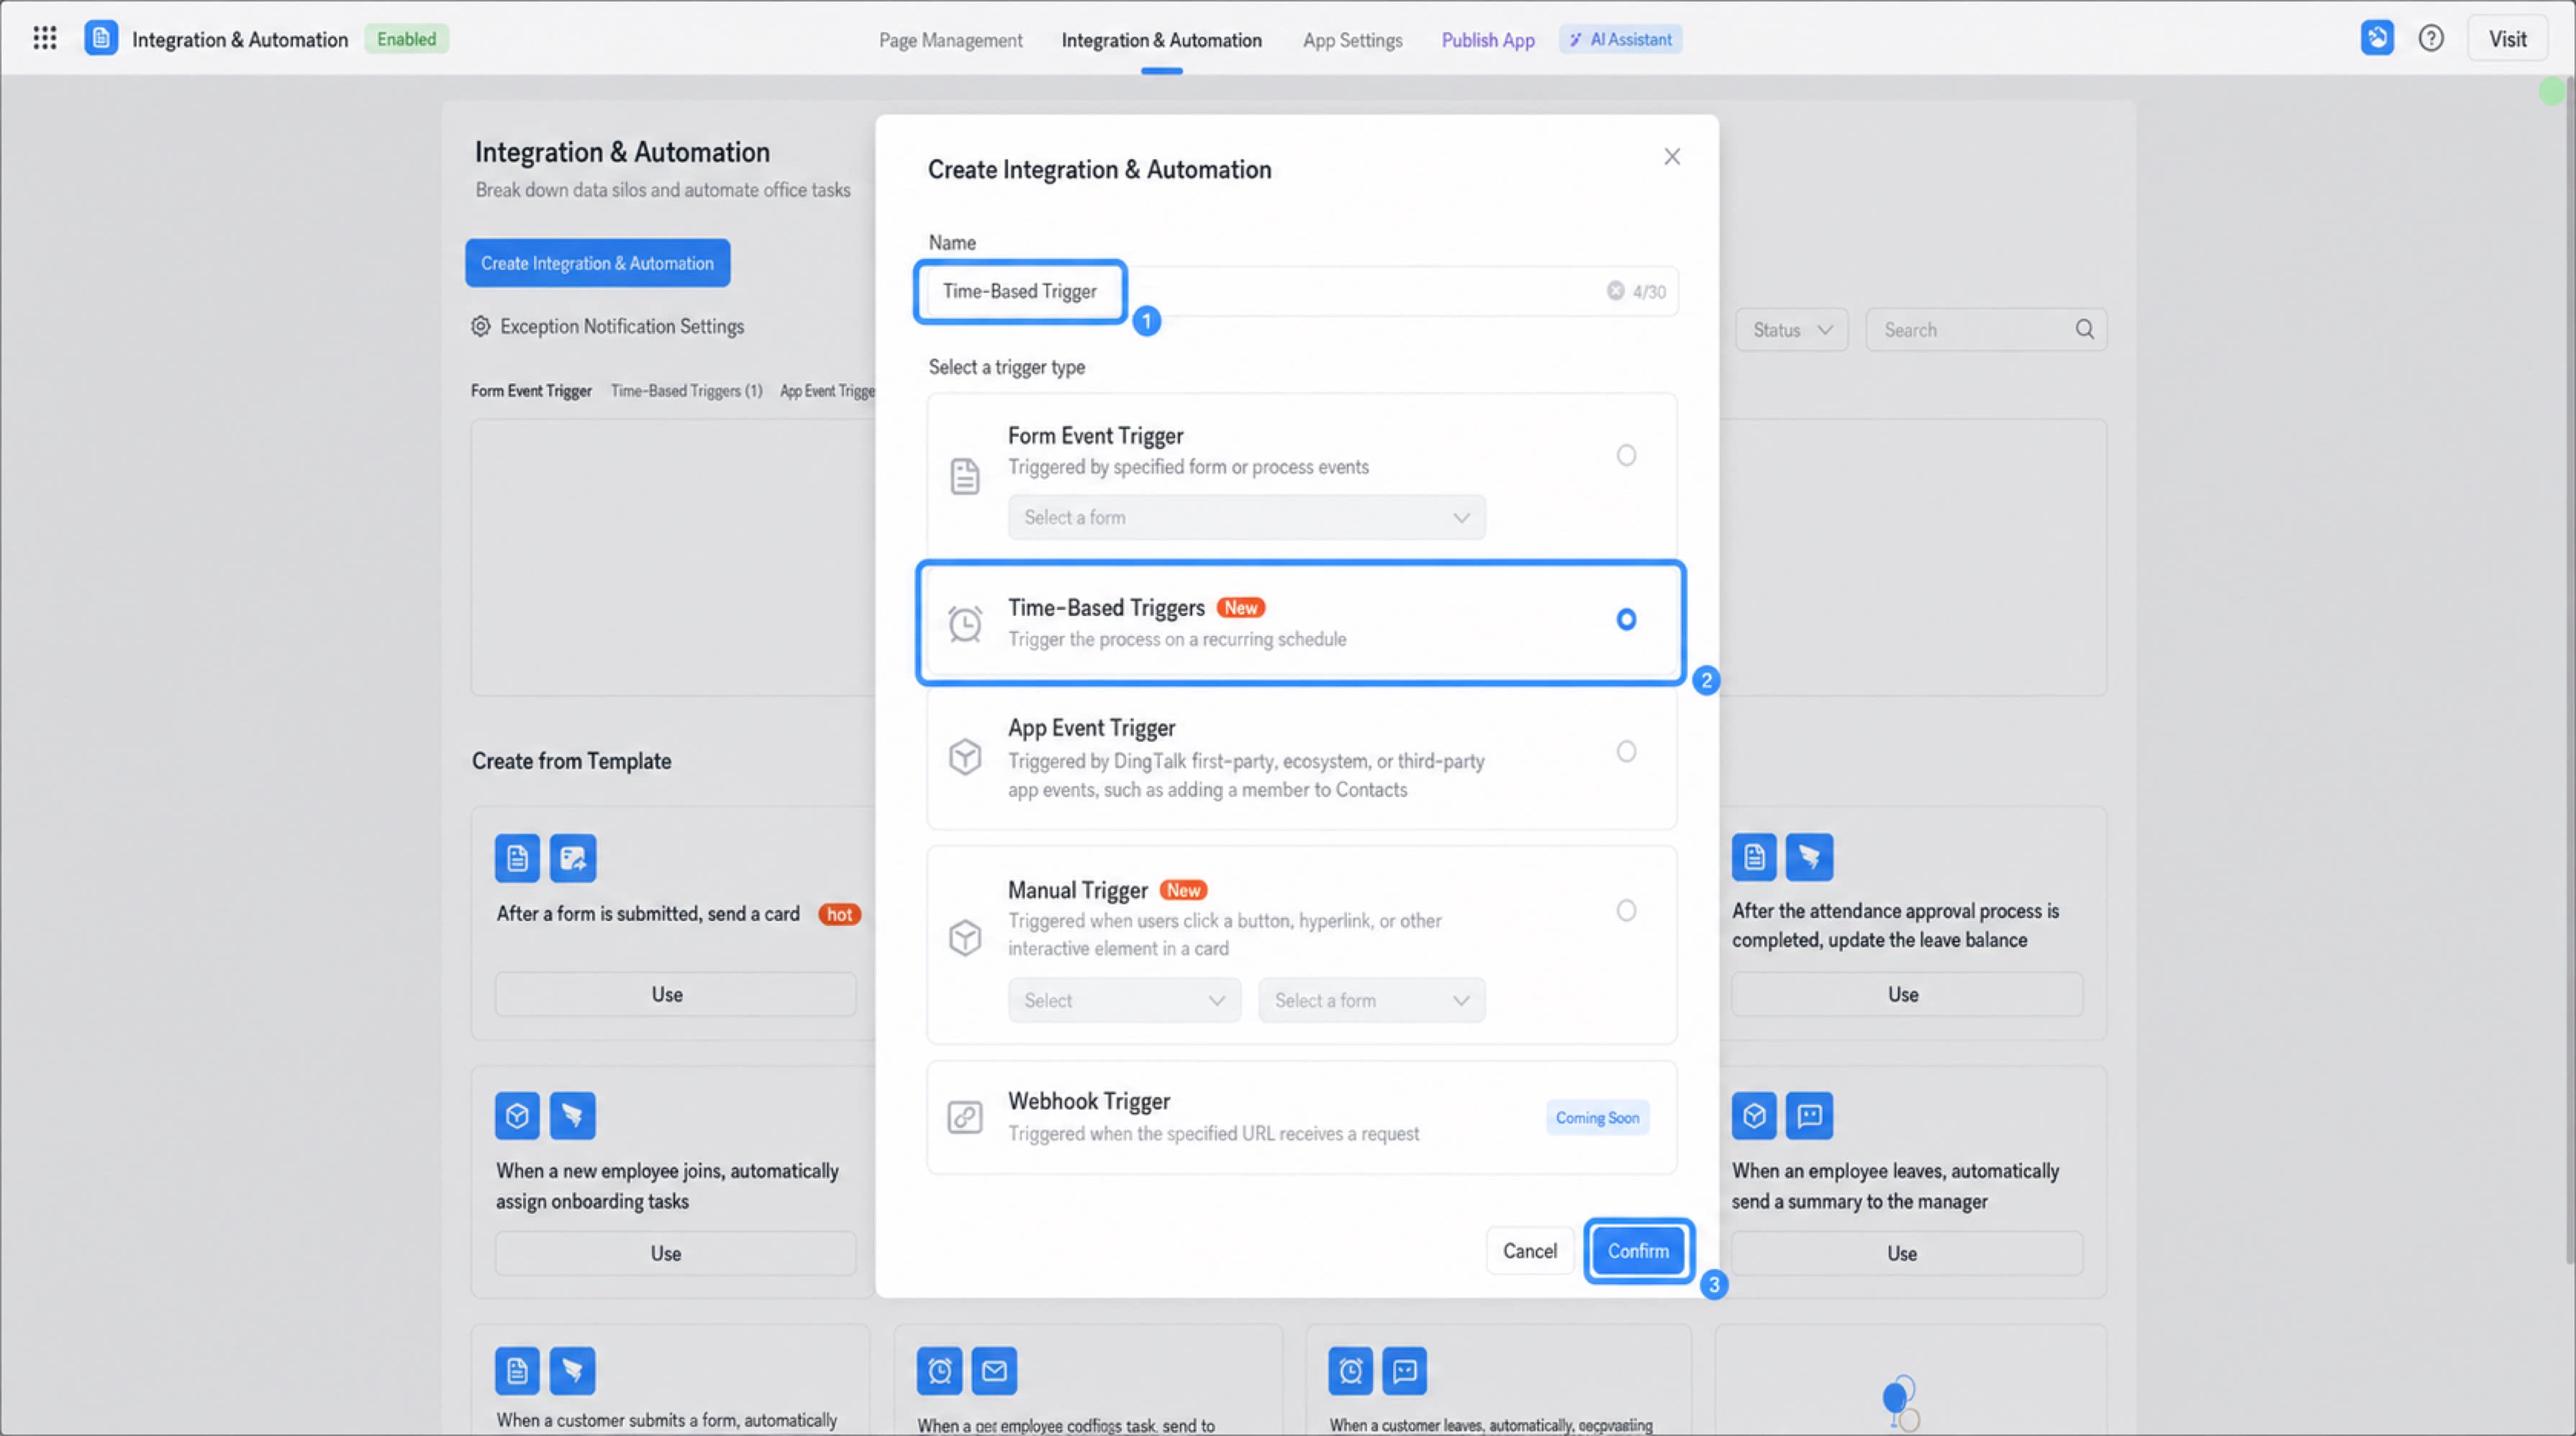
In the dialog box, enter a name for the integration & automation, select Time-Based Triggers as the trigger event, and click Confirm.
2
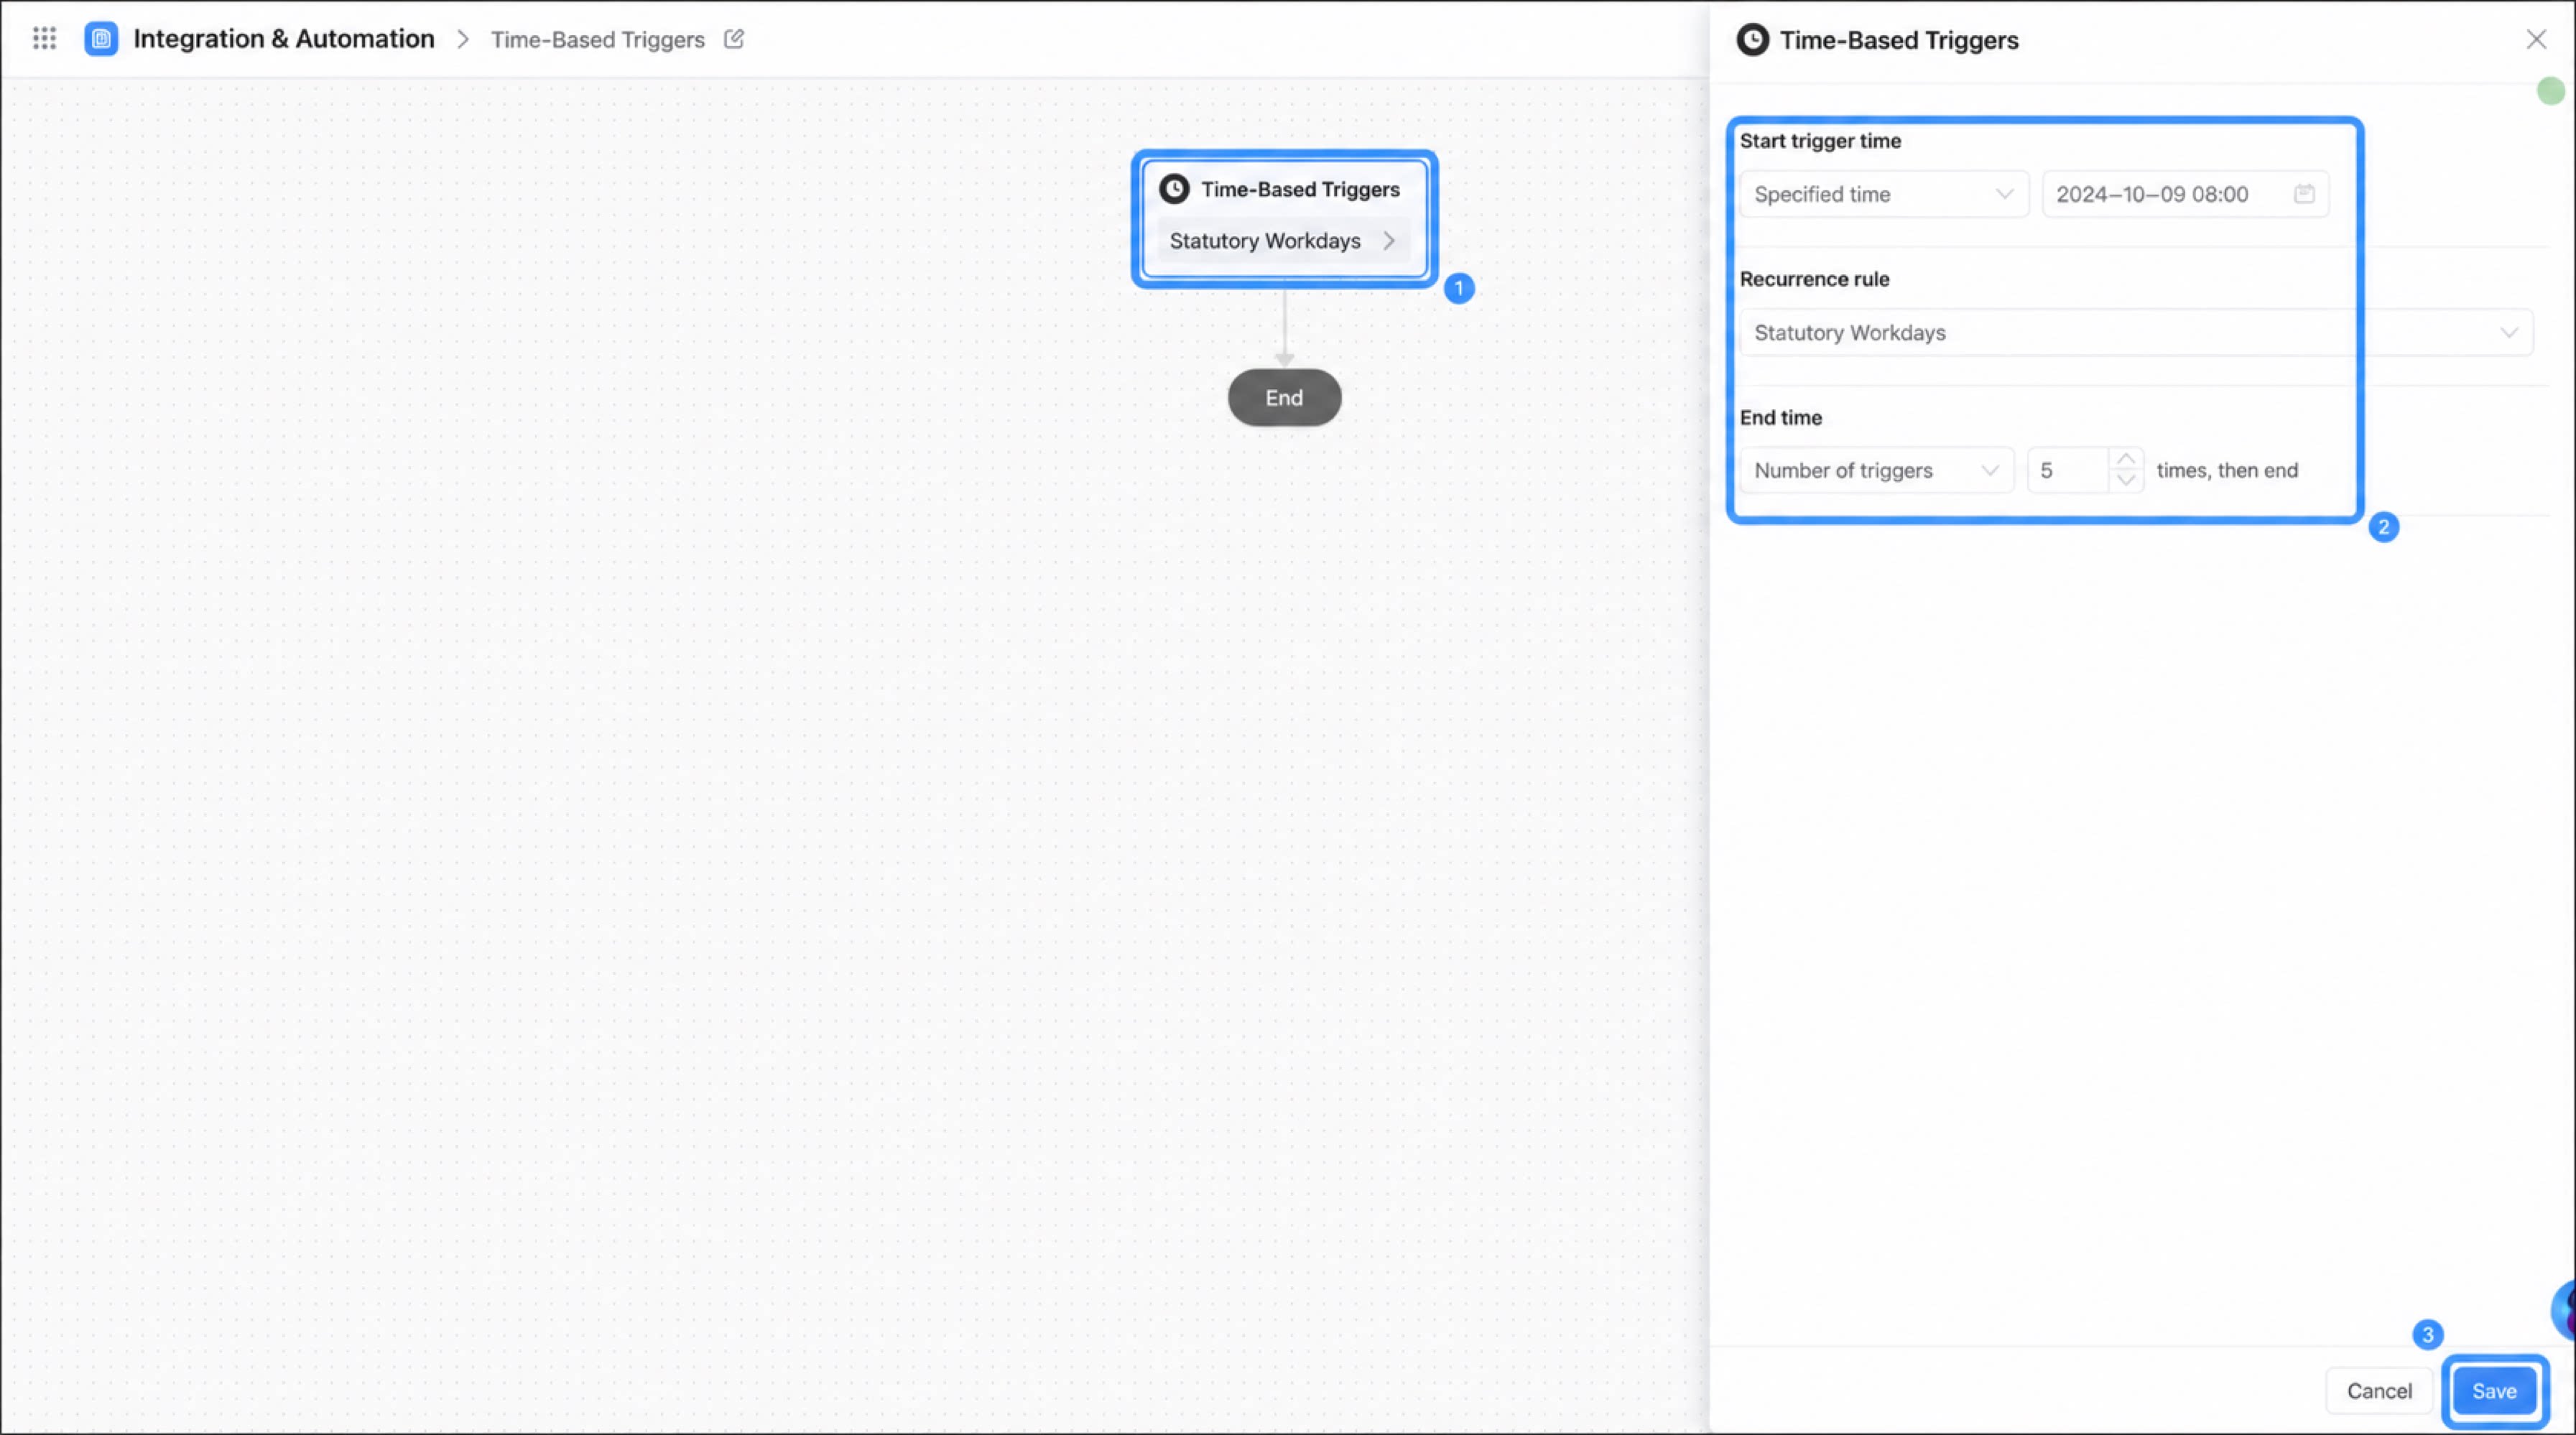
On the integration & automation editor page, click Time-Based Triggers. In the dialog box, configure the Start time, Repeat rule, and End time.
3
Click Save when configuration is complete.
Repeat Rules
Integration & automation supports the following repeat rules:- Trigger once only.
- Fixed repeat rule.
- Repeat rule based on the first trigger time of the automation.
- Custom repeat rule: when the repeat rule is set to Custom, use Preview trigger time to verify whether the custom rule is correct.
Preview trigger time shows only the next 5 trigger times.
End Time
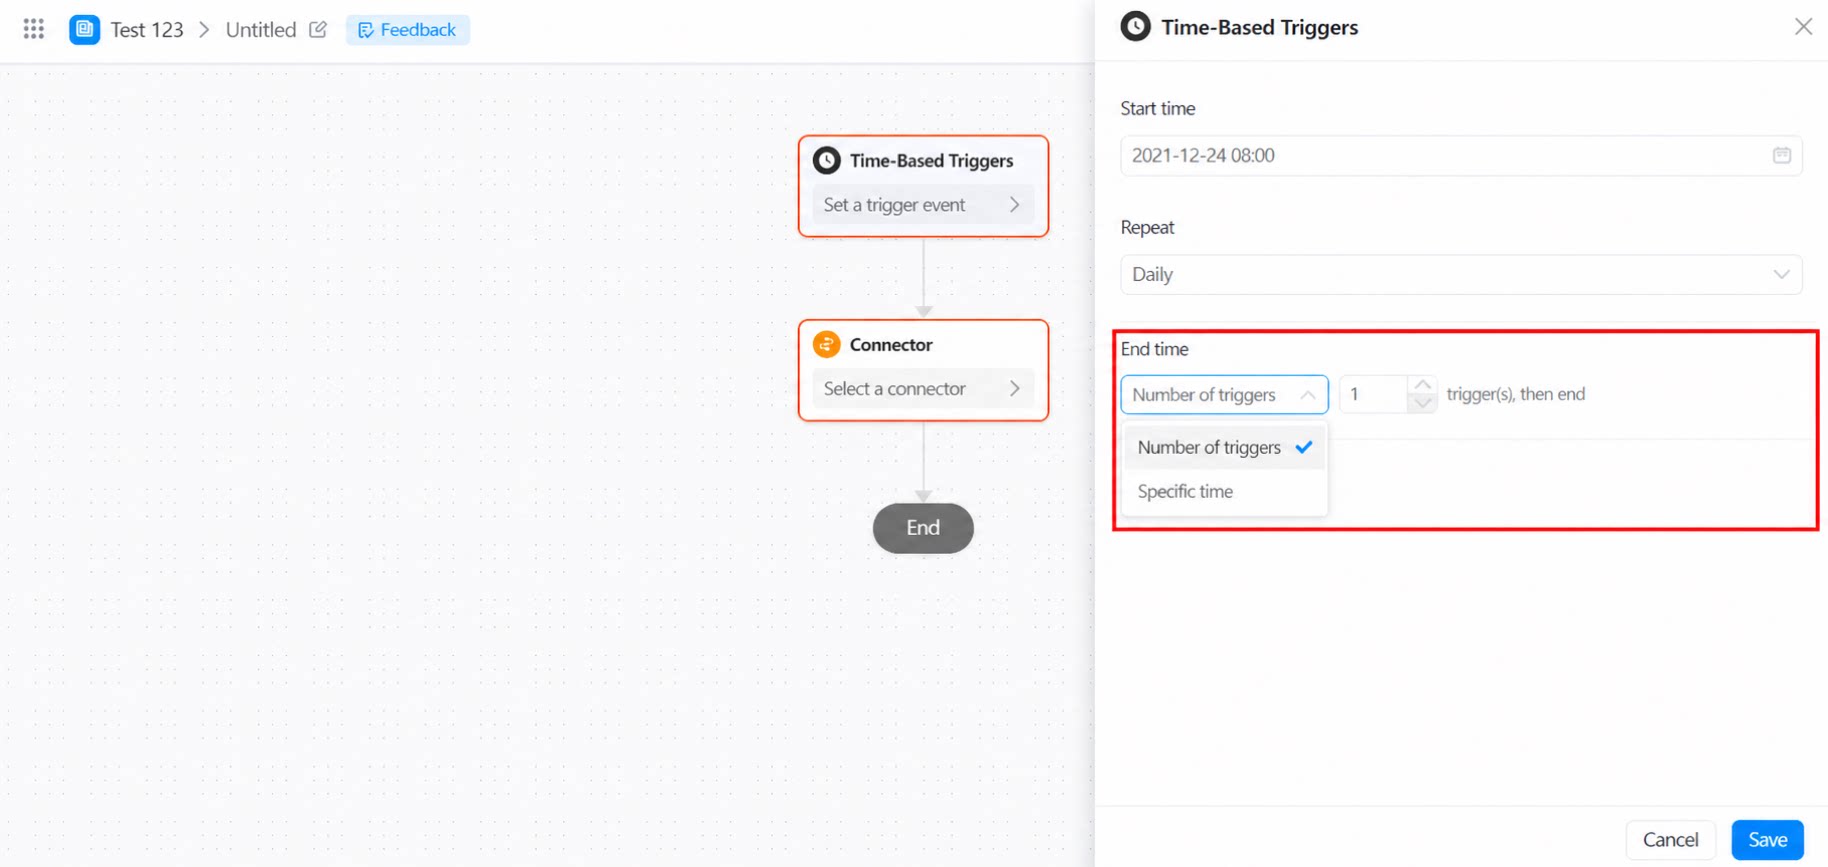
The following two end rules are supported:- Trigger count: the total number of times the integration & automation runs. This is unrelated to the number of nodes in the trigger flow or the recipients and groups being notified.
- Specified time: regardless of the repeat rule, the integration & automation stops triggering once the current time reaches the specified end time.