

 Chats
Chats Calendar
 Meetings
 Contacts
 Mail
Mail Docs
Docs Drive
Drive AI Table
 AI Minutes
 Attendance
 Approval
 YiDA
YiDA Admin Console
Configure Integration & Automation
Follow these steps to configure a manually triggered integration & automation flow.- Sign in to the YiDA workbench and click My Apps.
- Select the app for which you want to create an integration & automation flow, and open the App Settings page.
- Click Integration & Automation, then select Create Integration & Automation > Create from Blank.
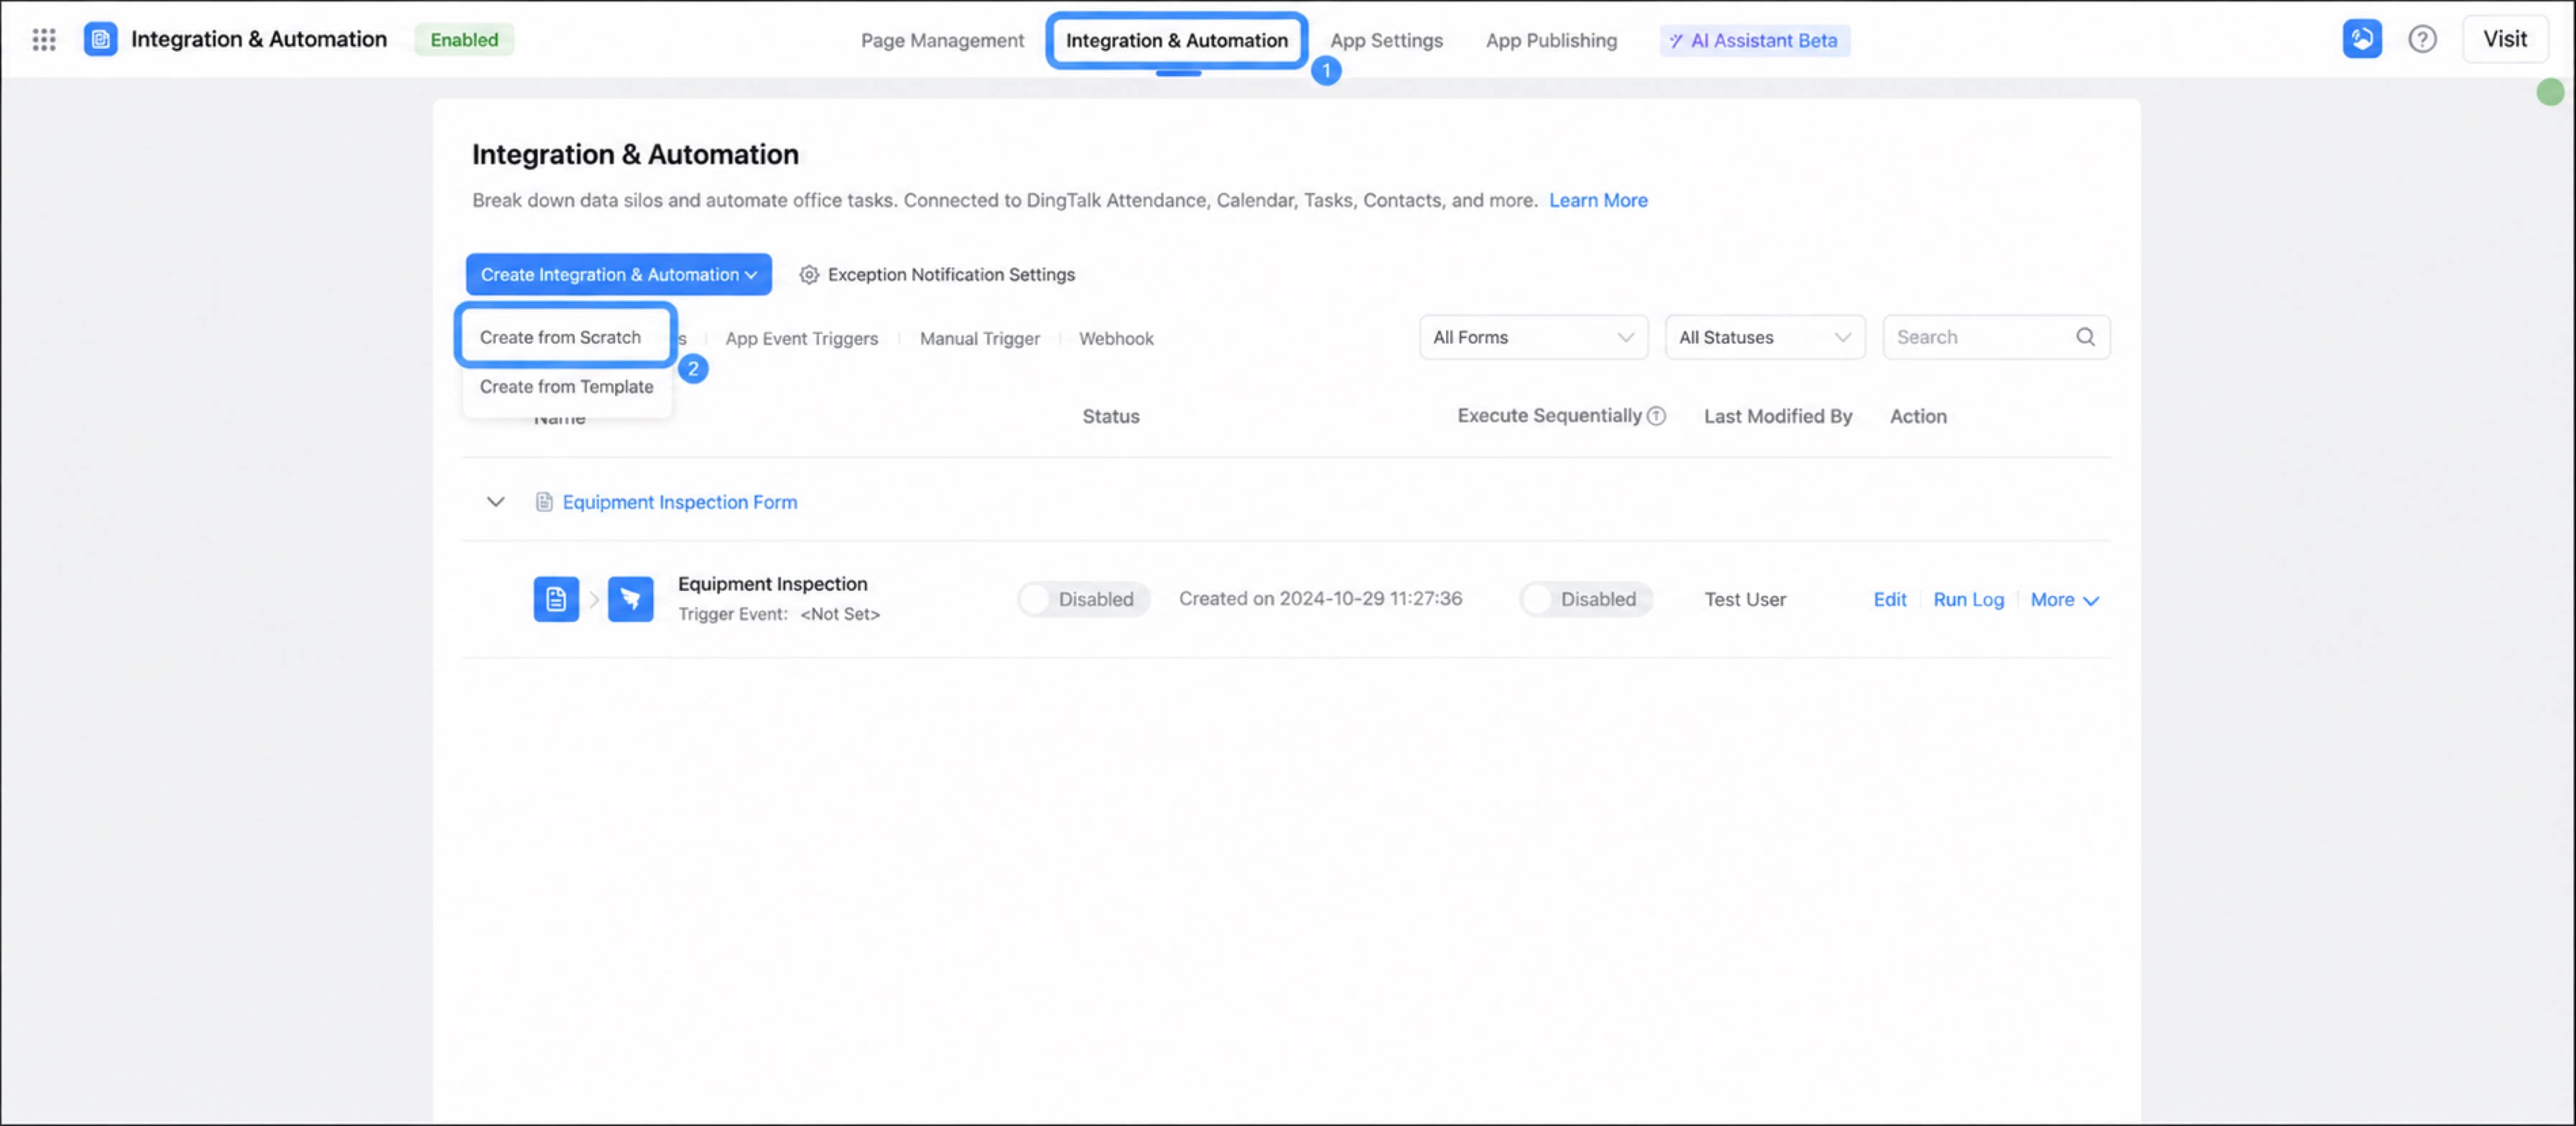
1
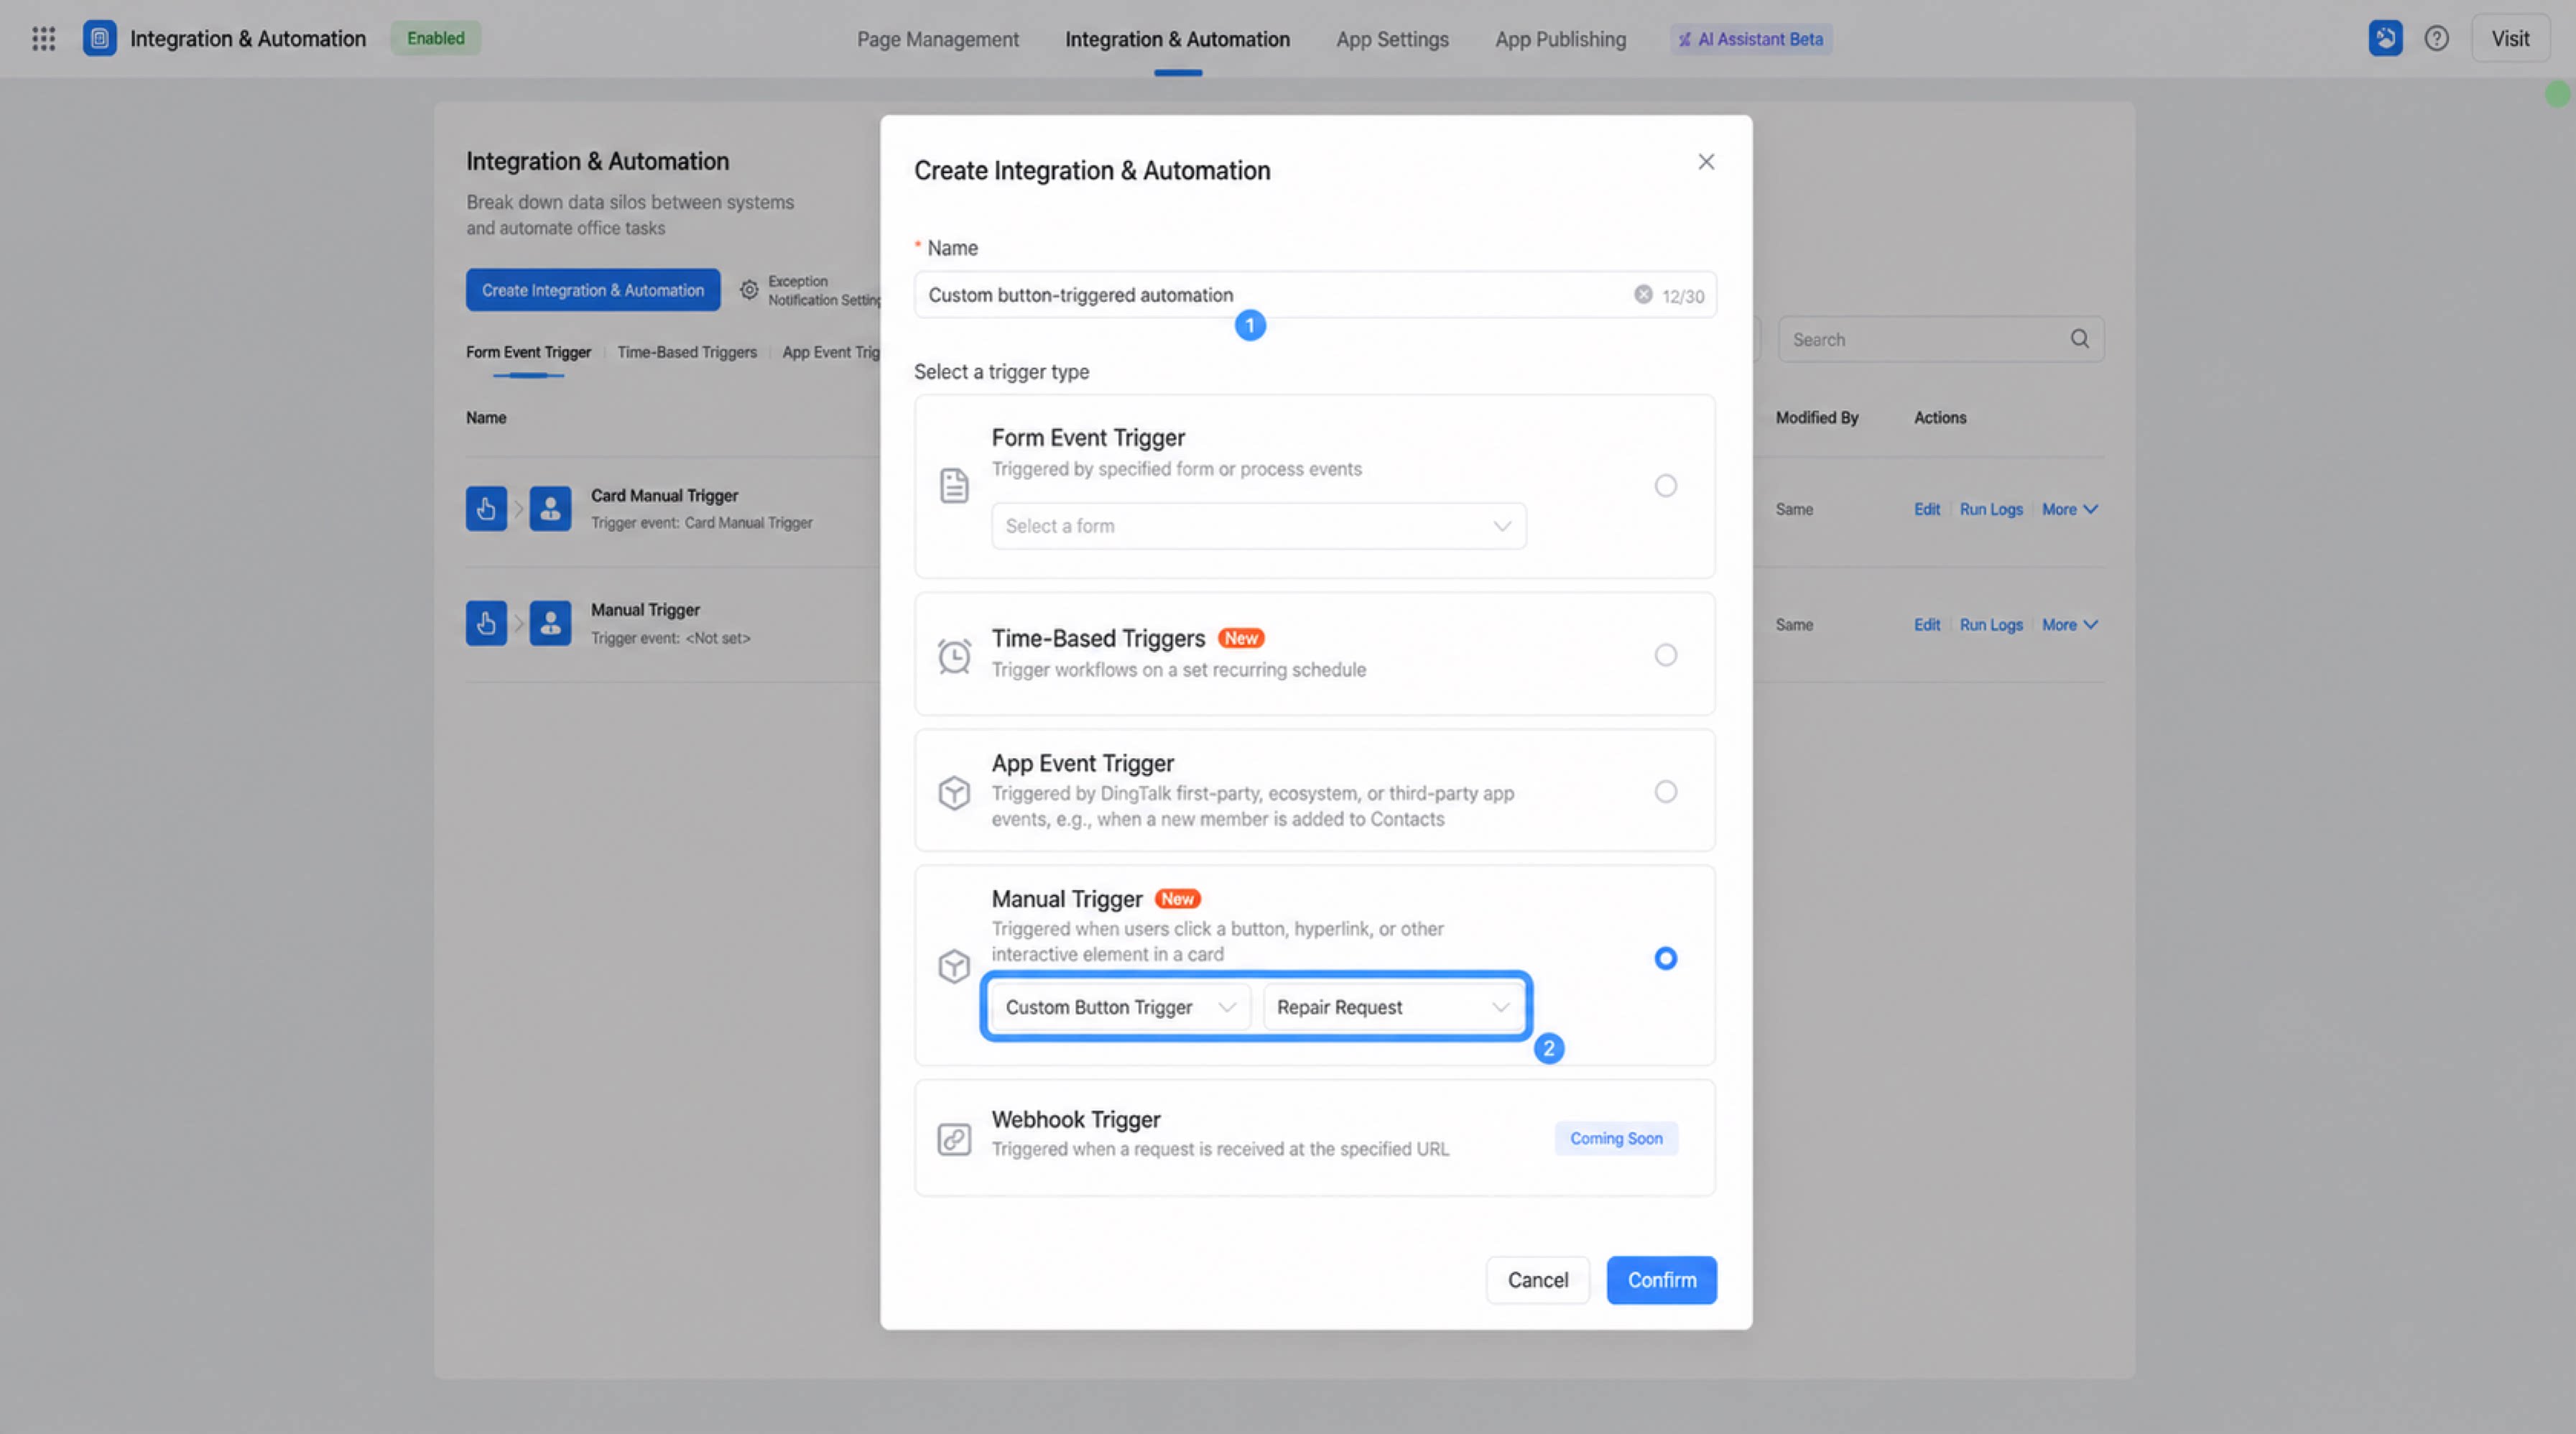
In the dialog, enter a name for the flow, set the trigger event to Manual trigger > Custom button trigger, choose the form to trigger, and click Confirm.
2
On the integration & automation editing page, add a step and complete its configuration.
- Once configured, click Publish in the upper-right corner to finish the setup.
Configure a Custom Button
1
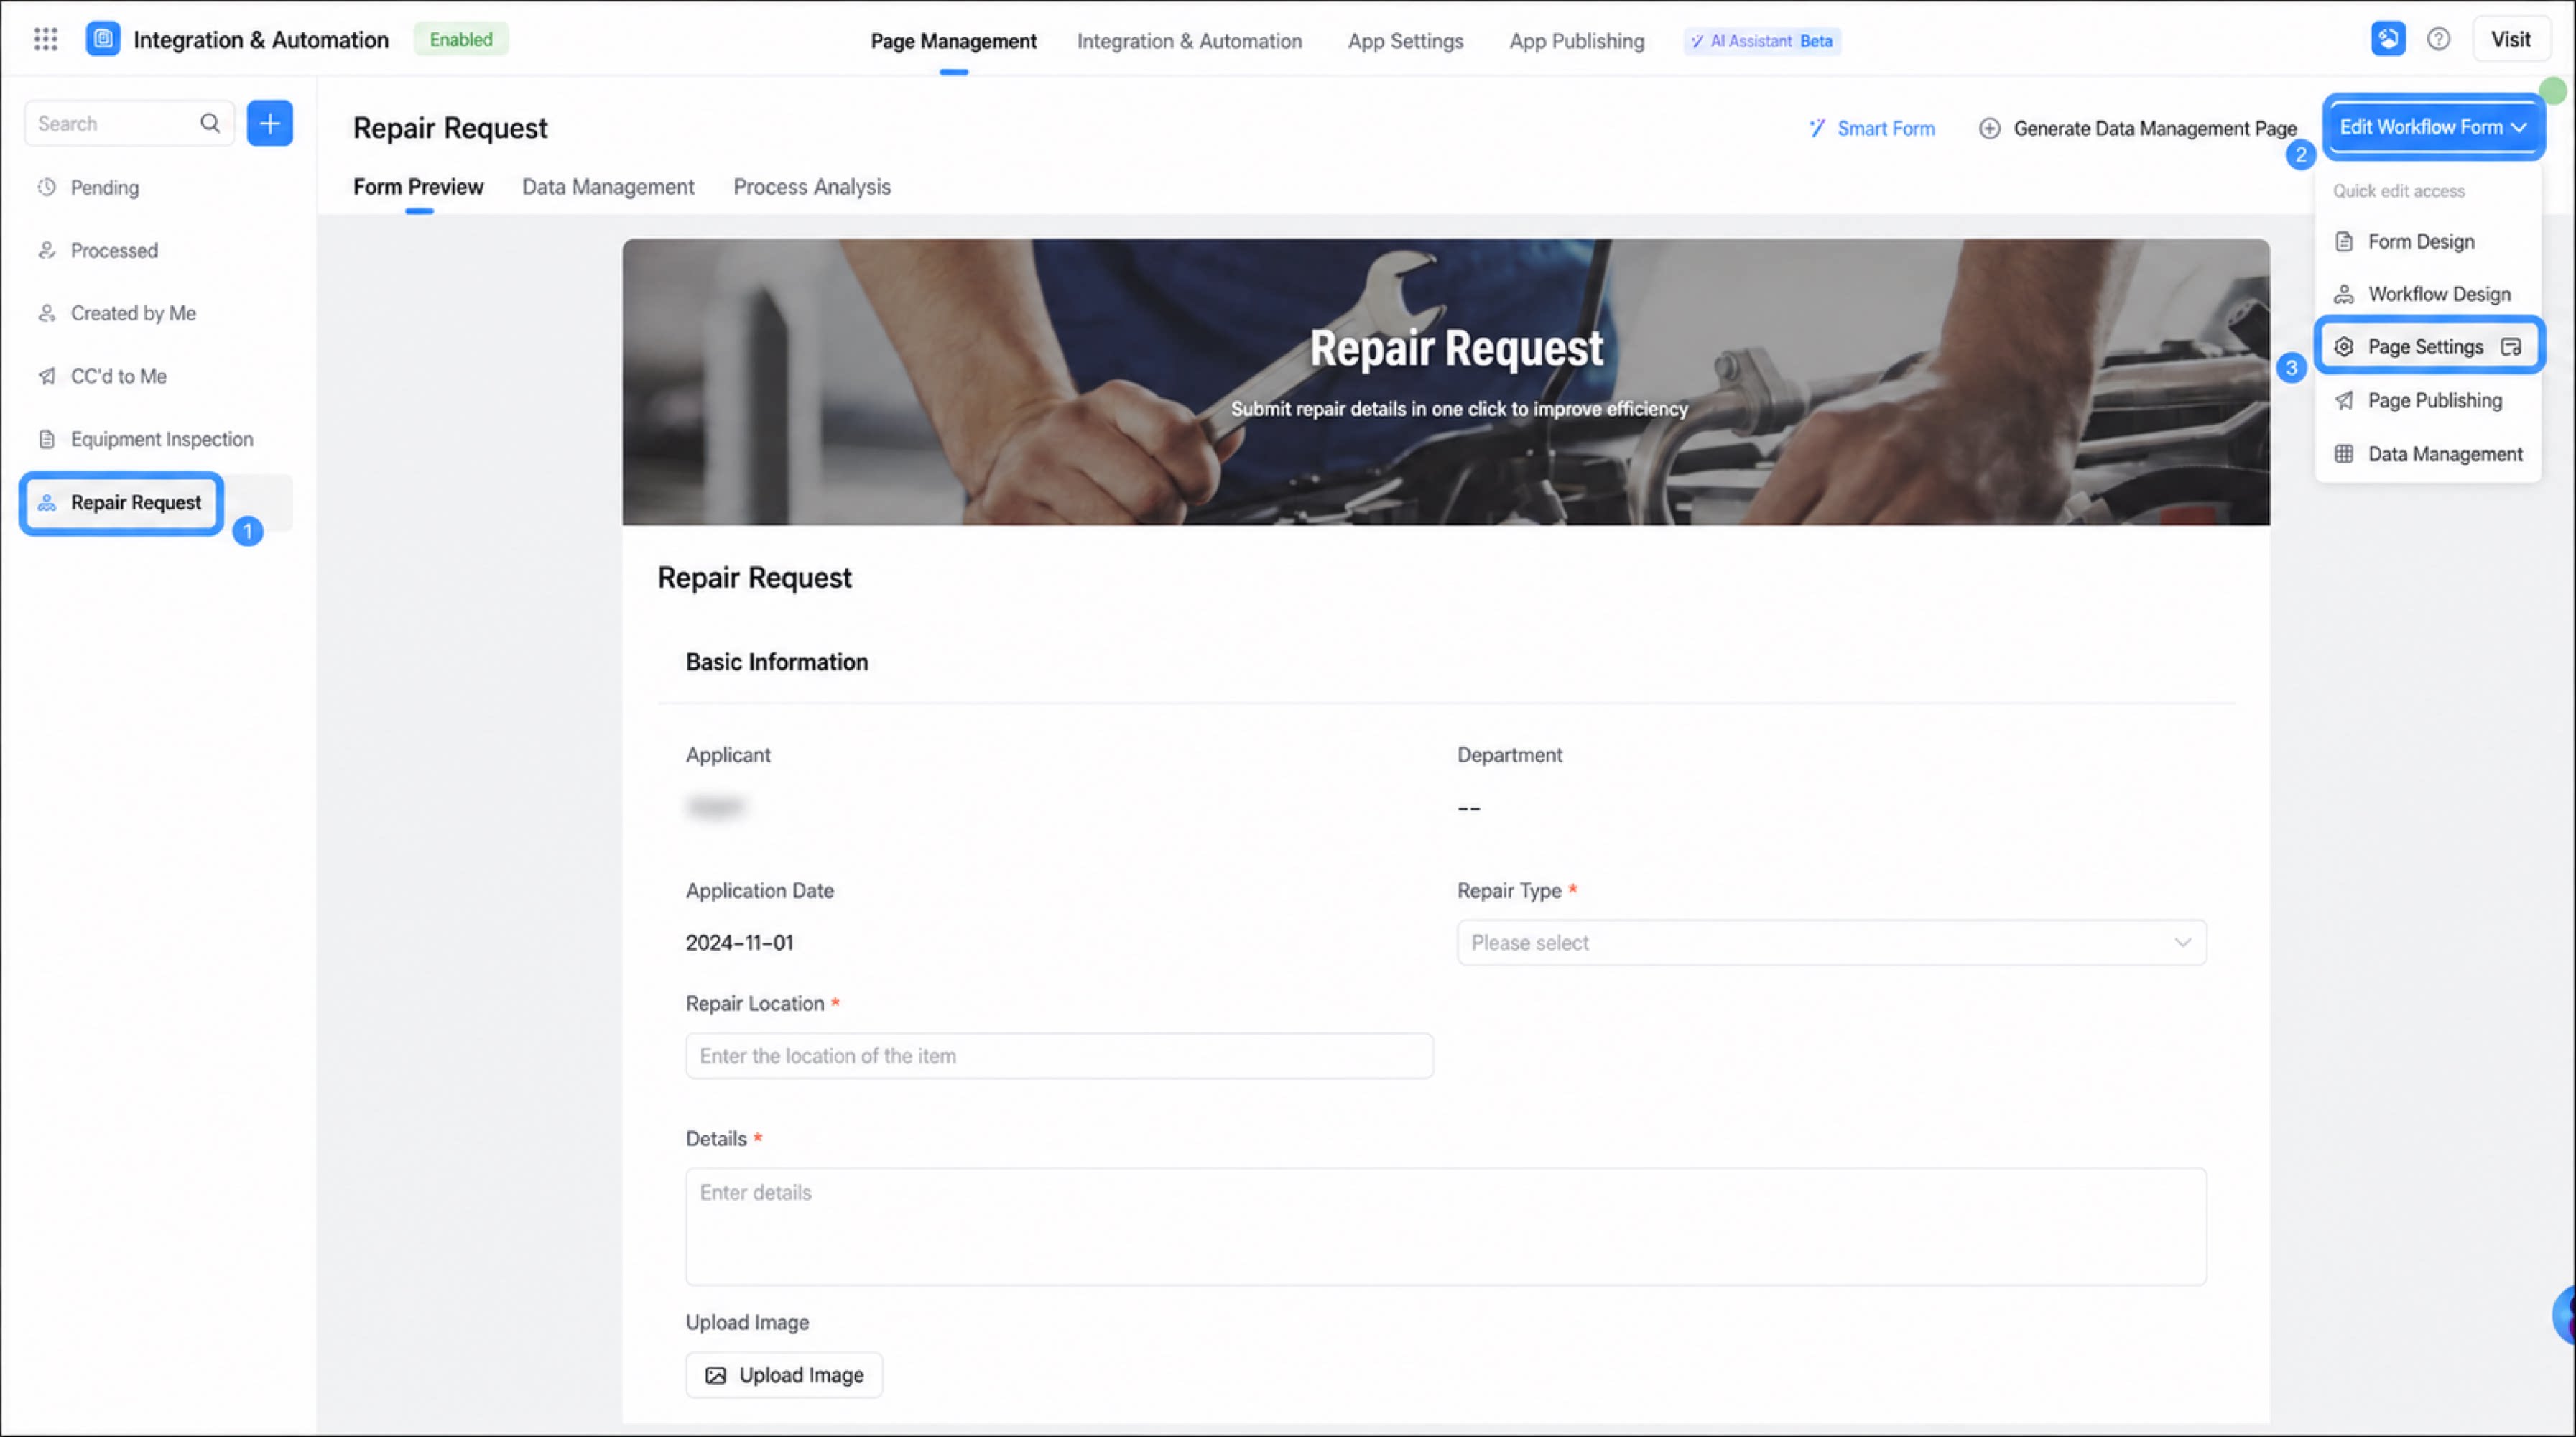
Open the form editing page of the app, select the form that triggers the flow, and click Edit Workflow Form > Page Settings in the upper-right corner.
2
Create the custom button
Click Custom Button > Create Custom Button. In the dialog, enter a name for the button, set Available Condition to All Data, set Action Type to Run Automation Flow, and select the flow you created.
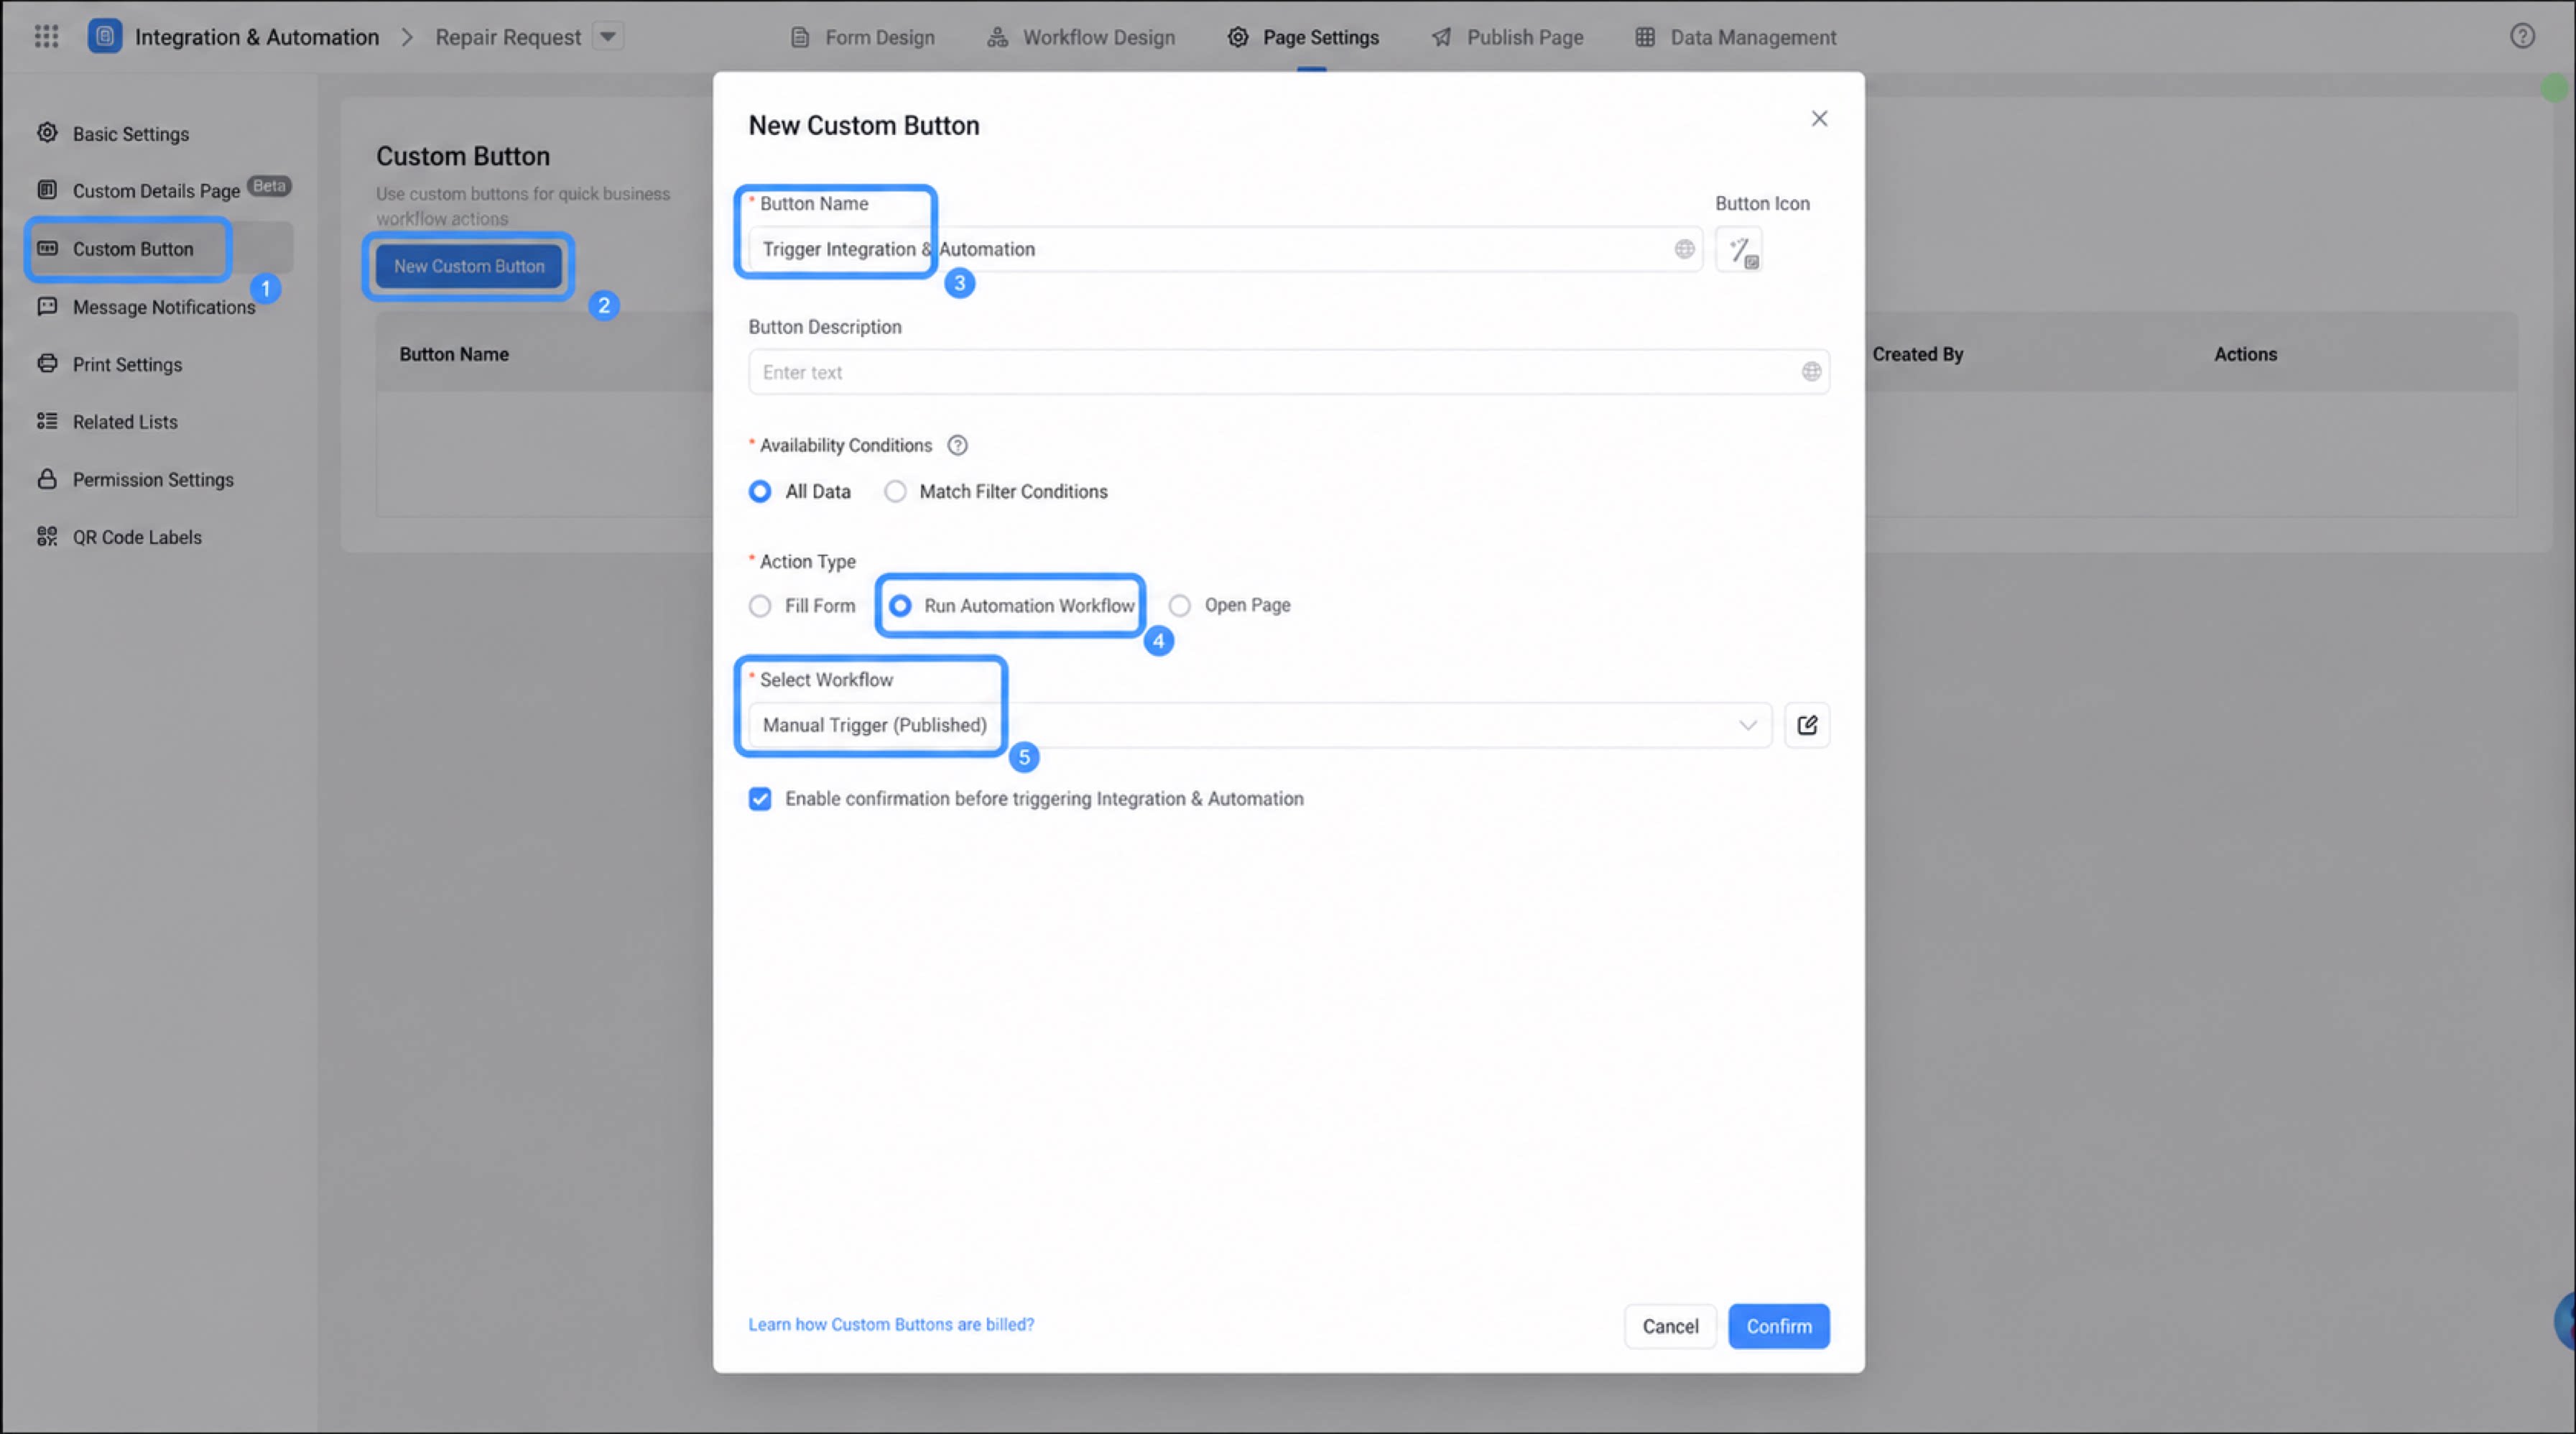
- Click Confirm to complete the configuration.
- On the page settings page, select Custom Detail Page > Create Custom Detail Page.
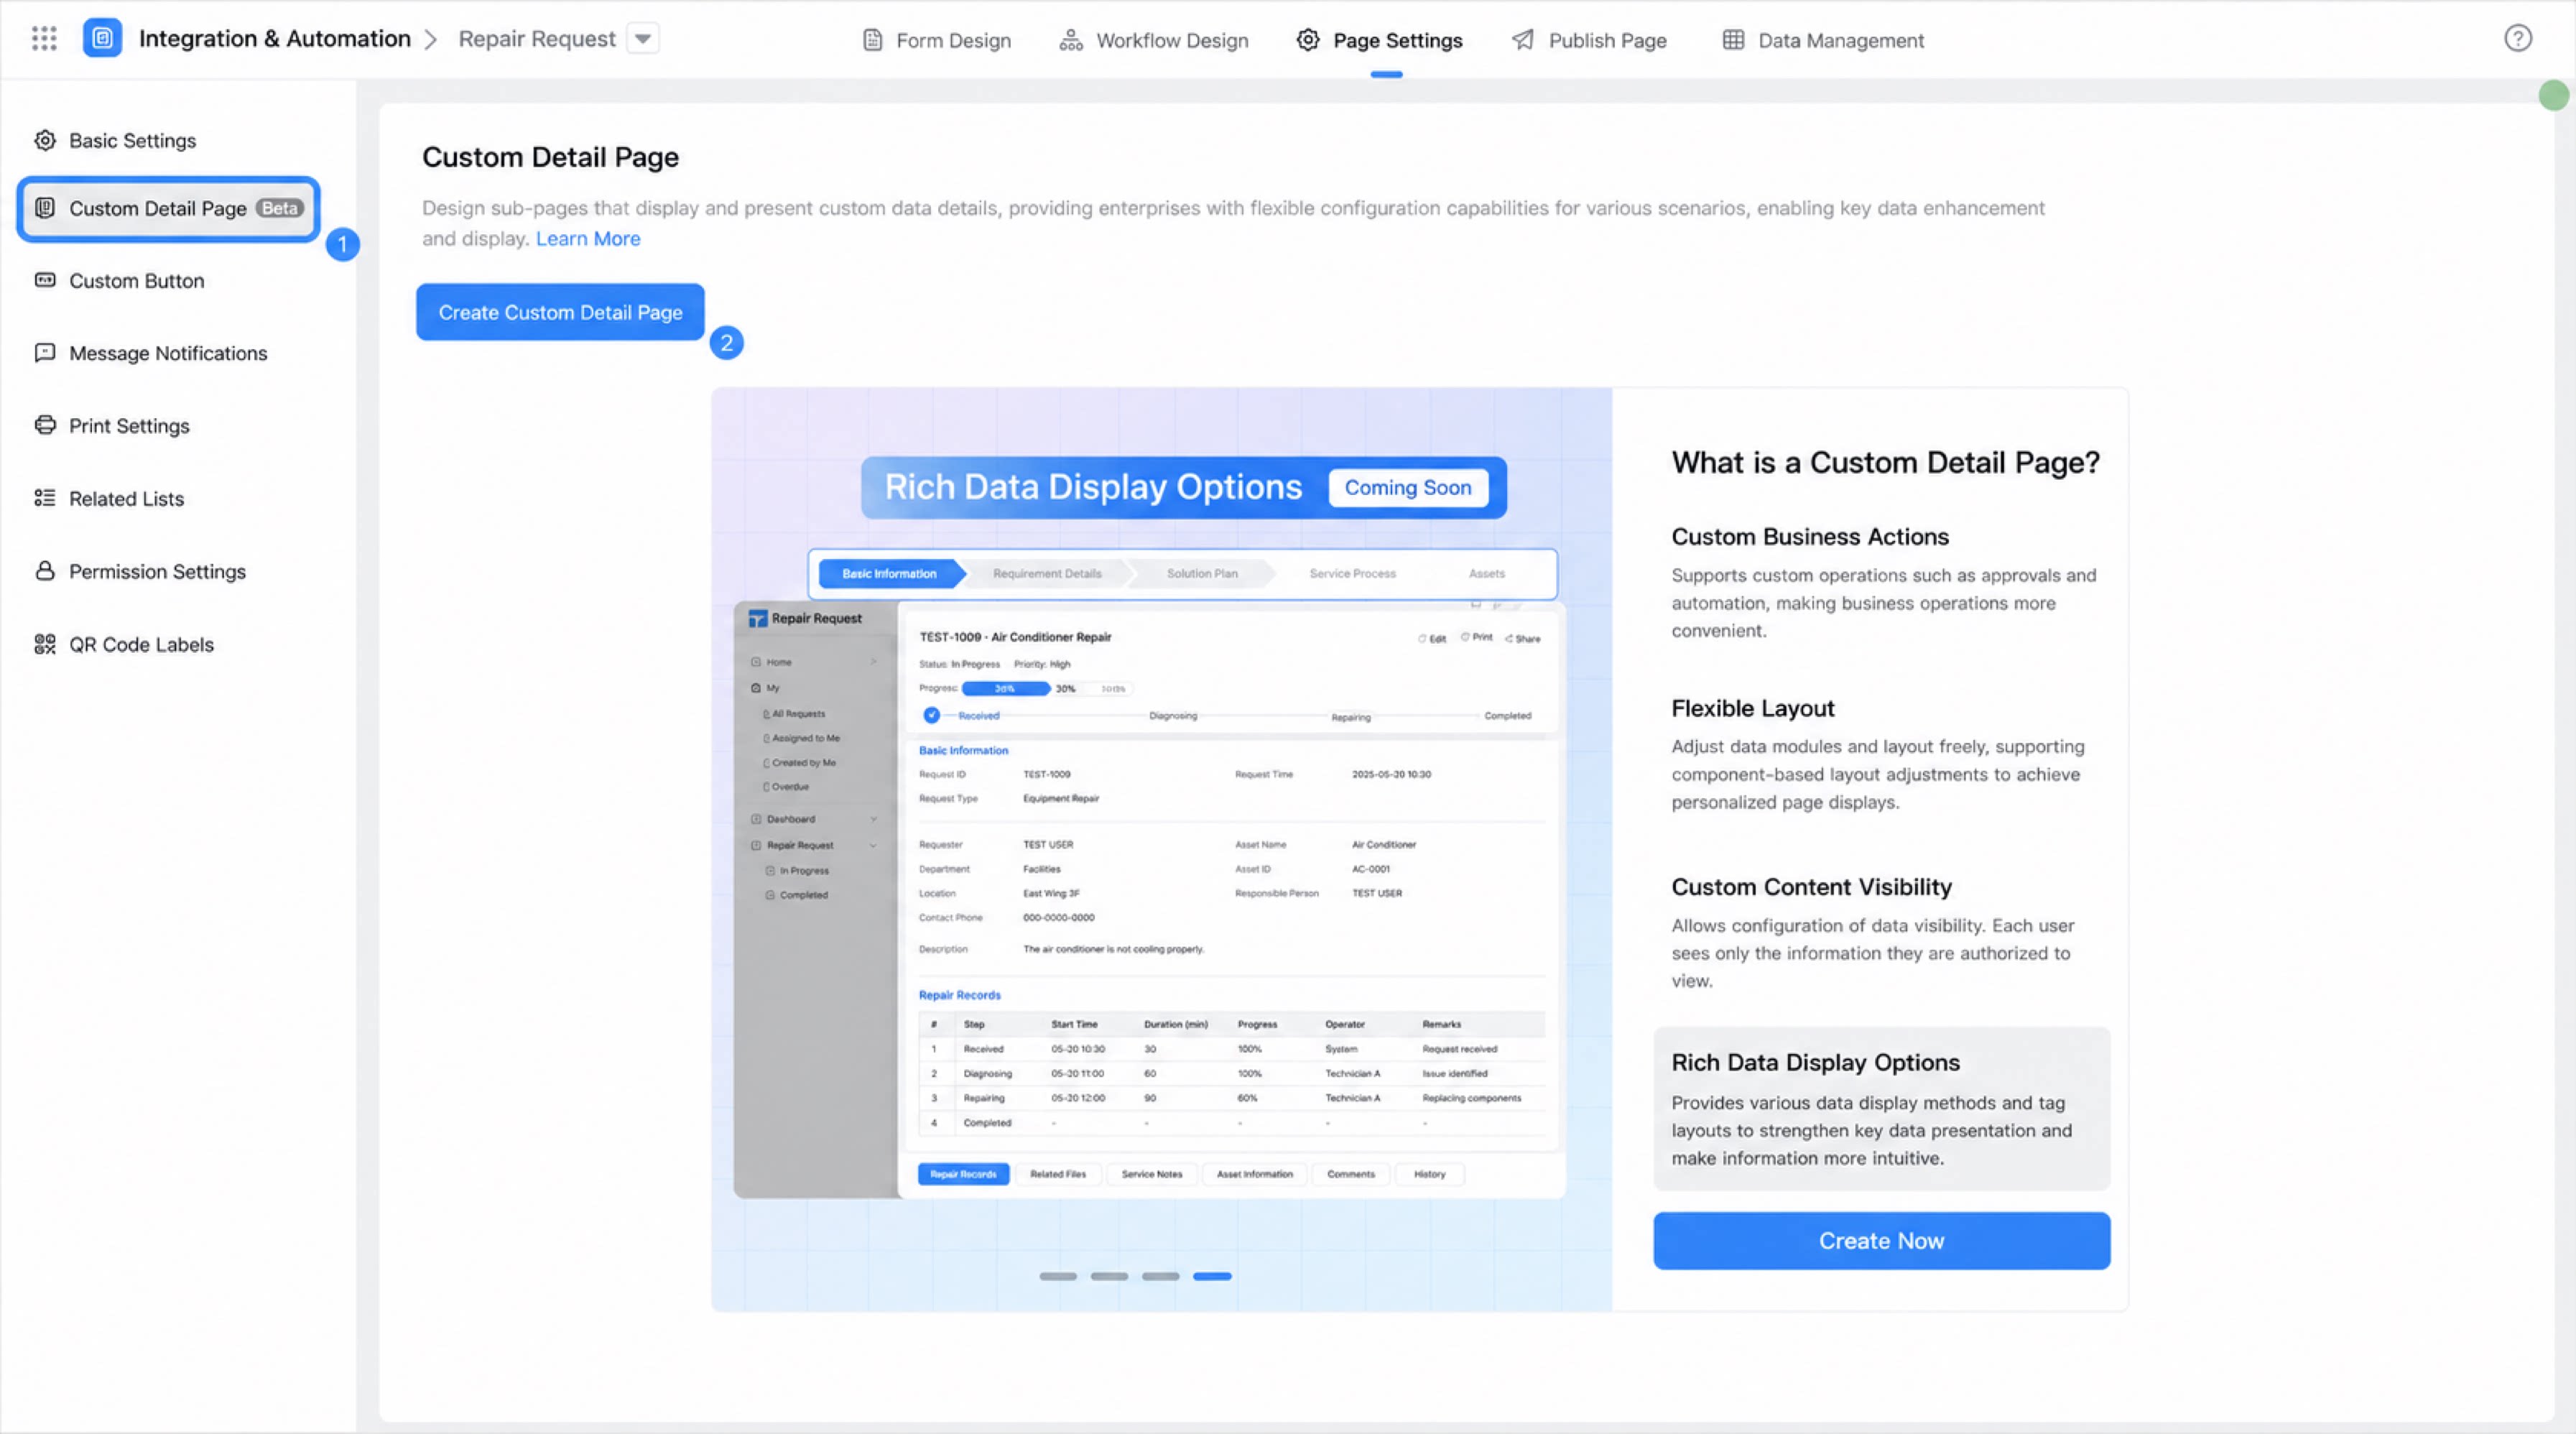
1
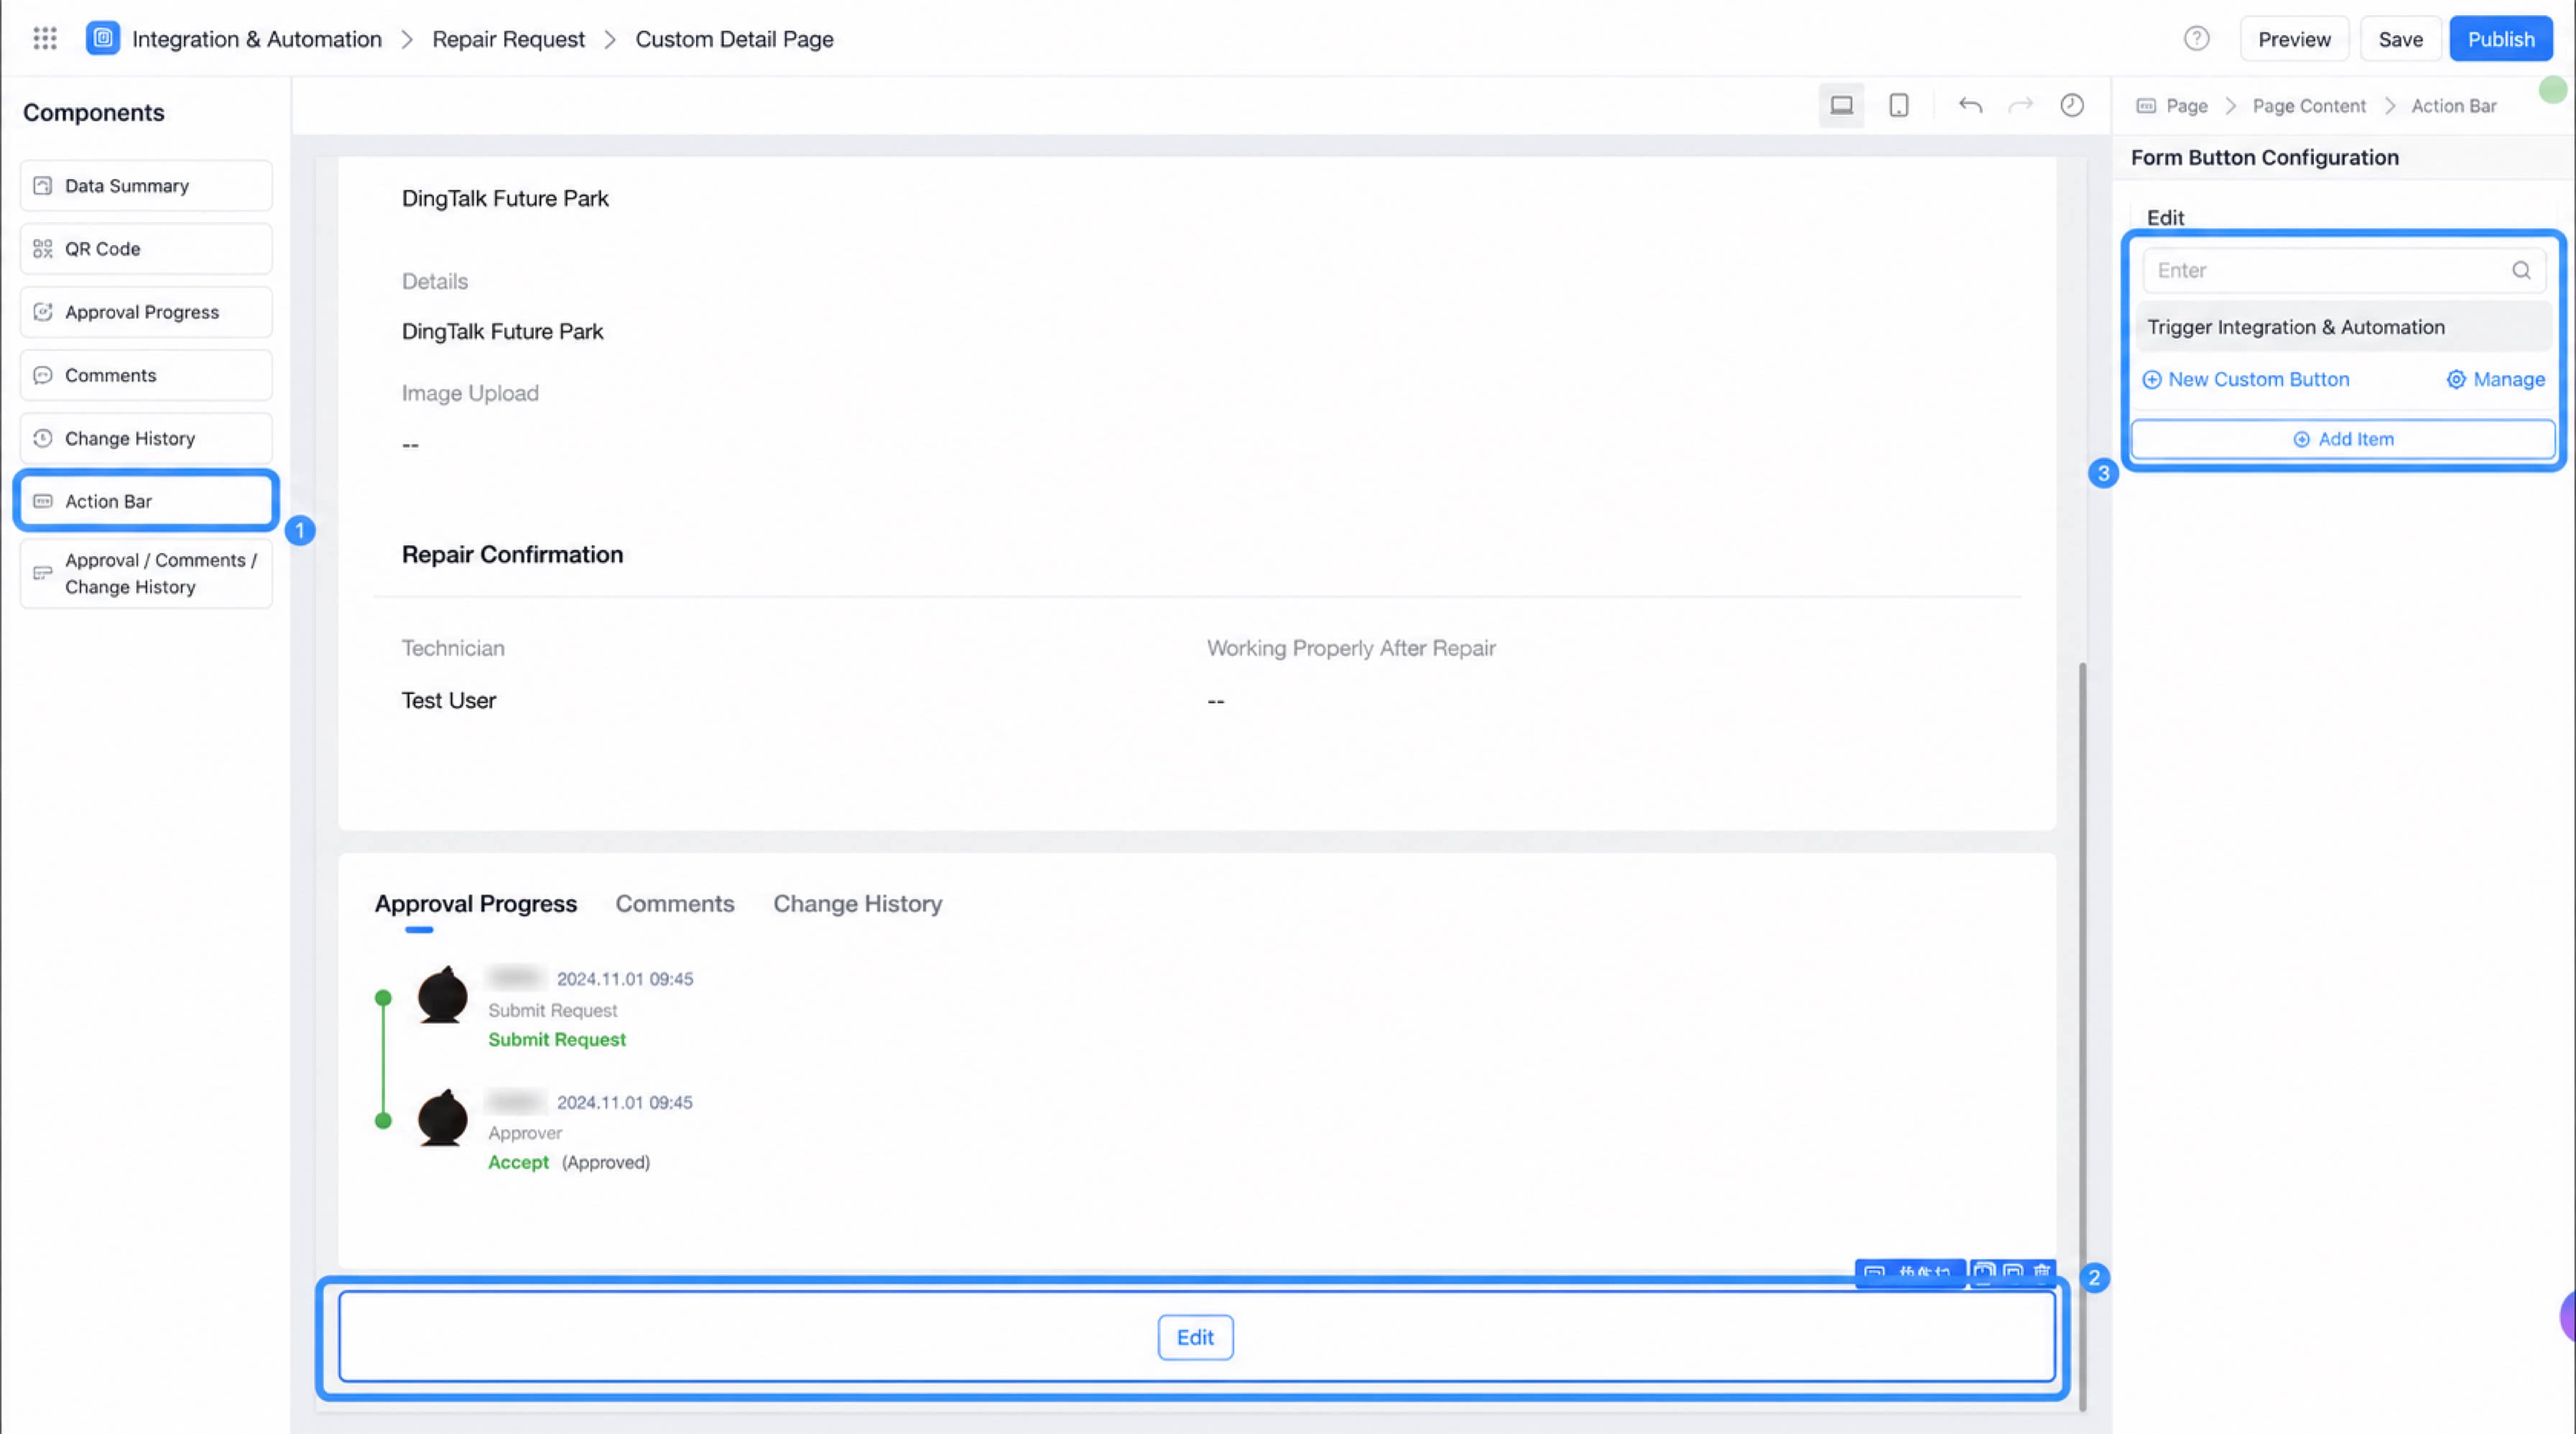
On the custom detail page editing page, select the Action Bar component. In the Attribute panel on the right, click Add Item and add the custom button configured in the previous step to trigger the flow.
2
Click Publish in the upper-right corner to complete the configuration.
Debug
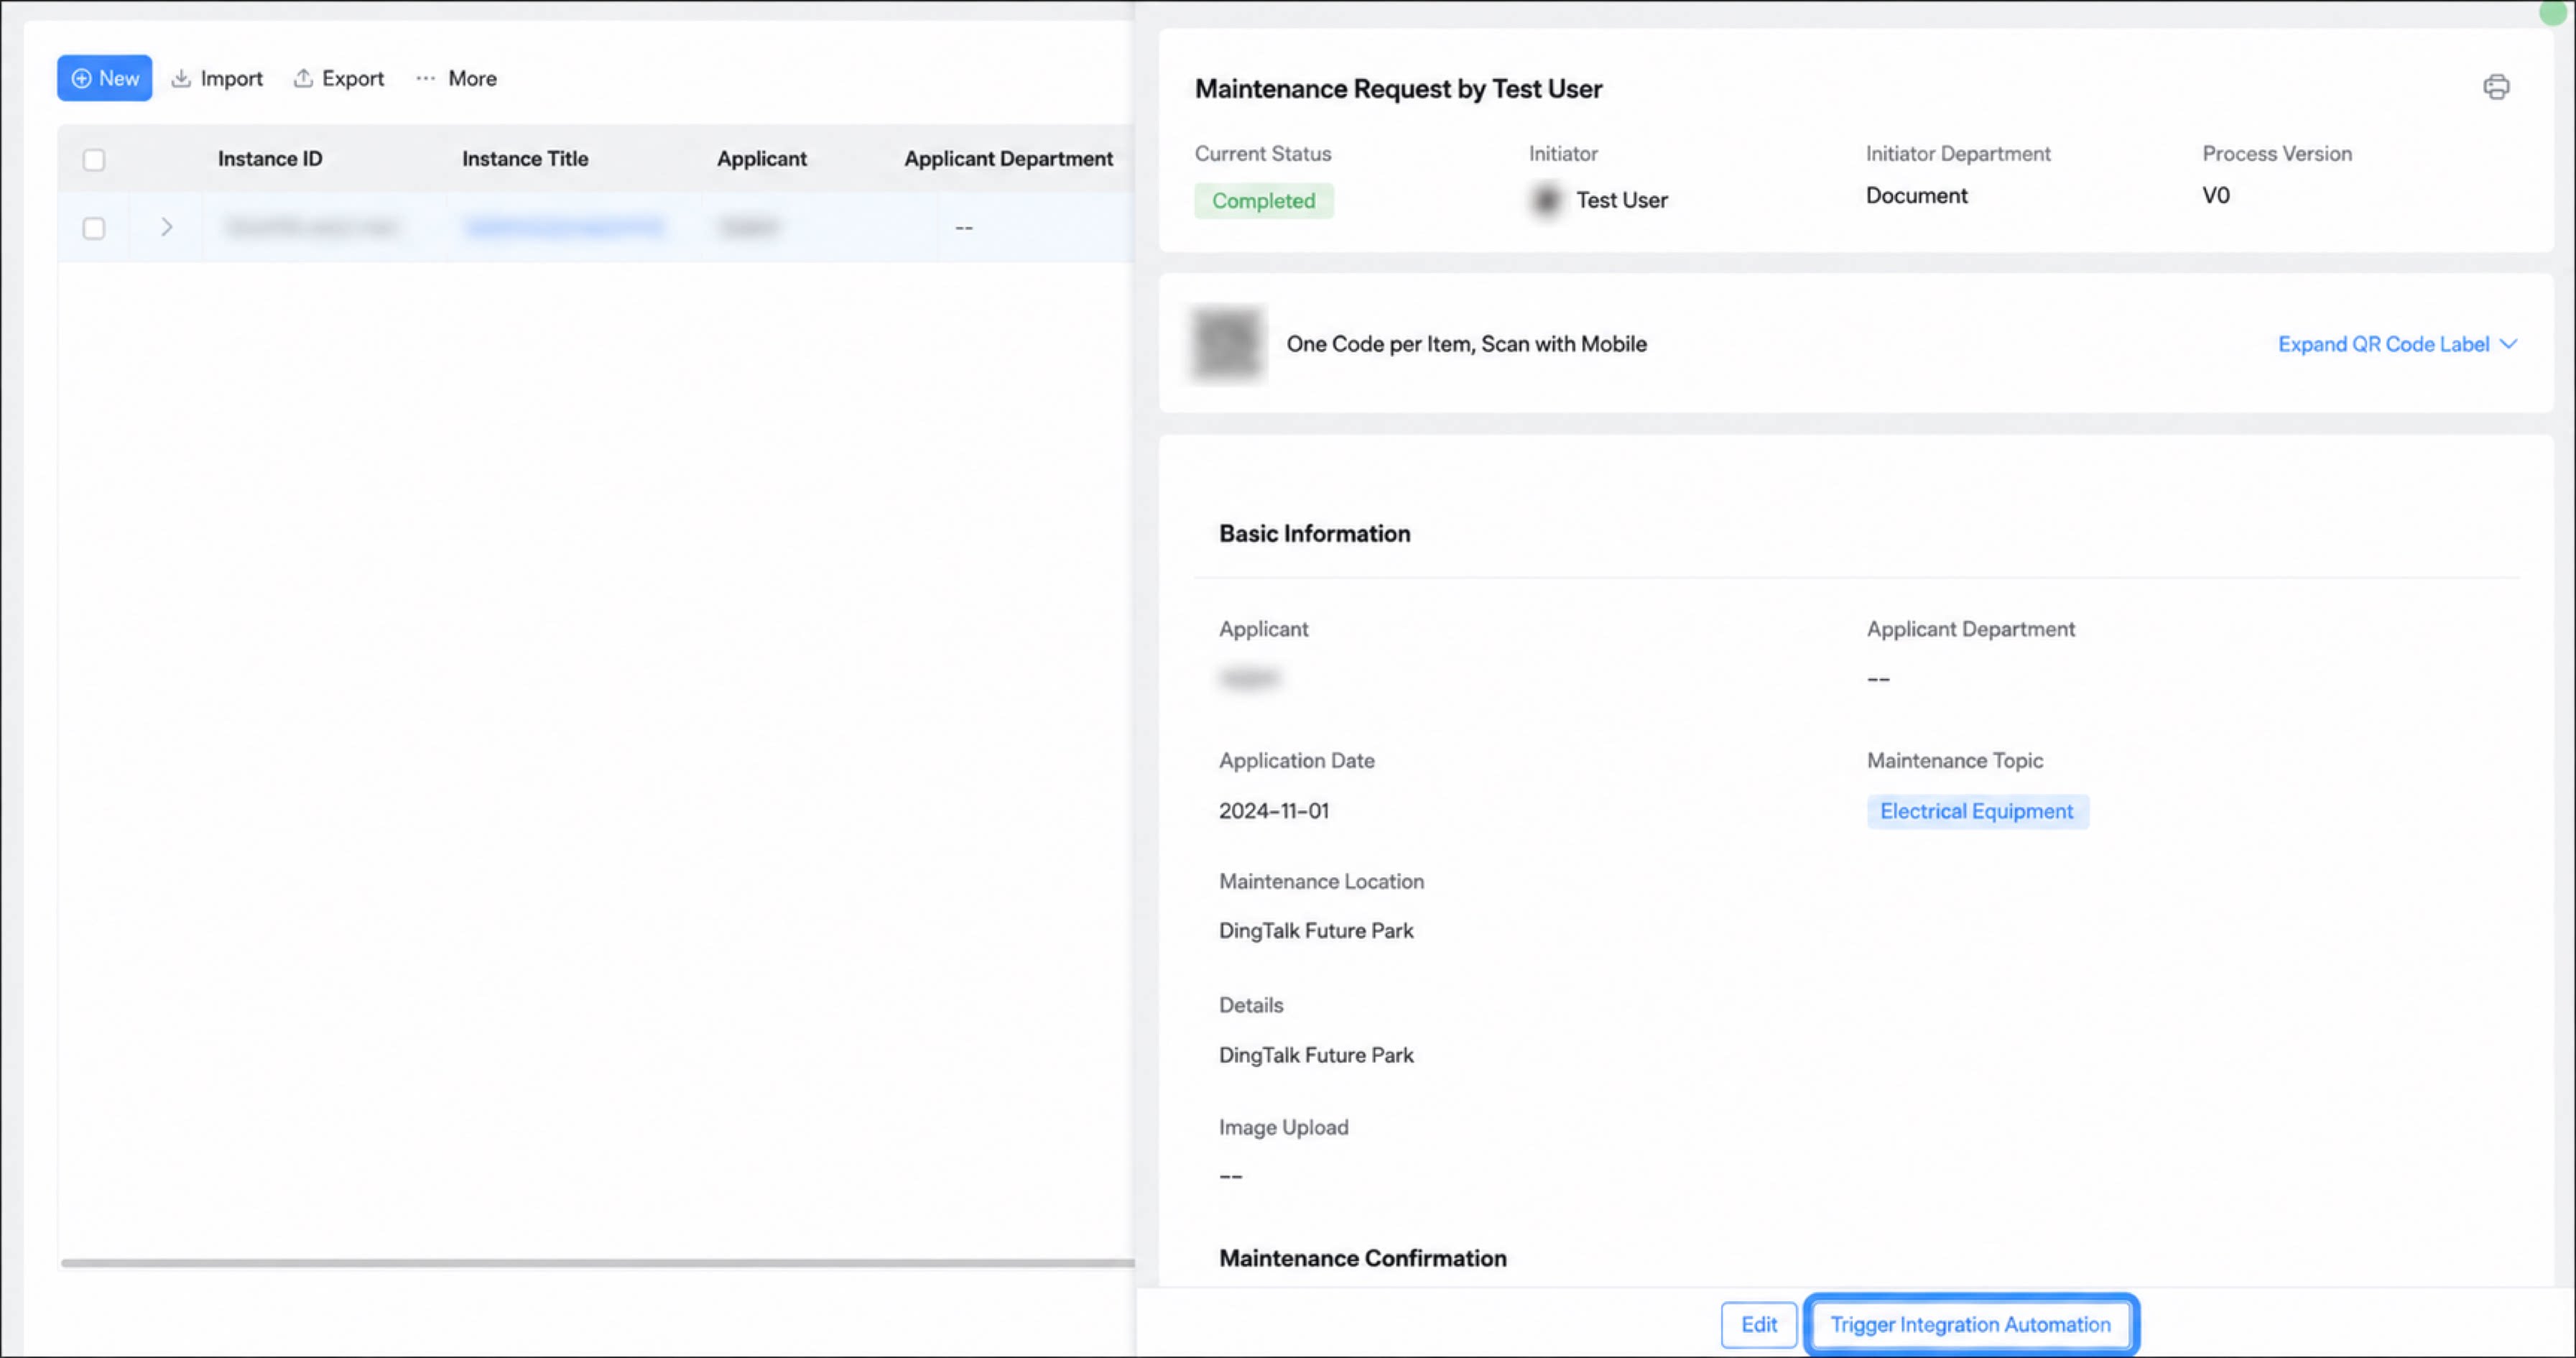
- Open the data management page of the form and add a new record.
- After the record is added, click Details in the action column, then click the custom button you created.
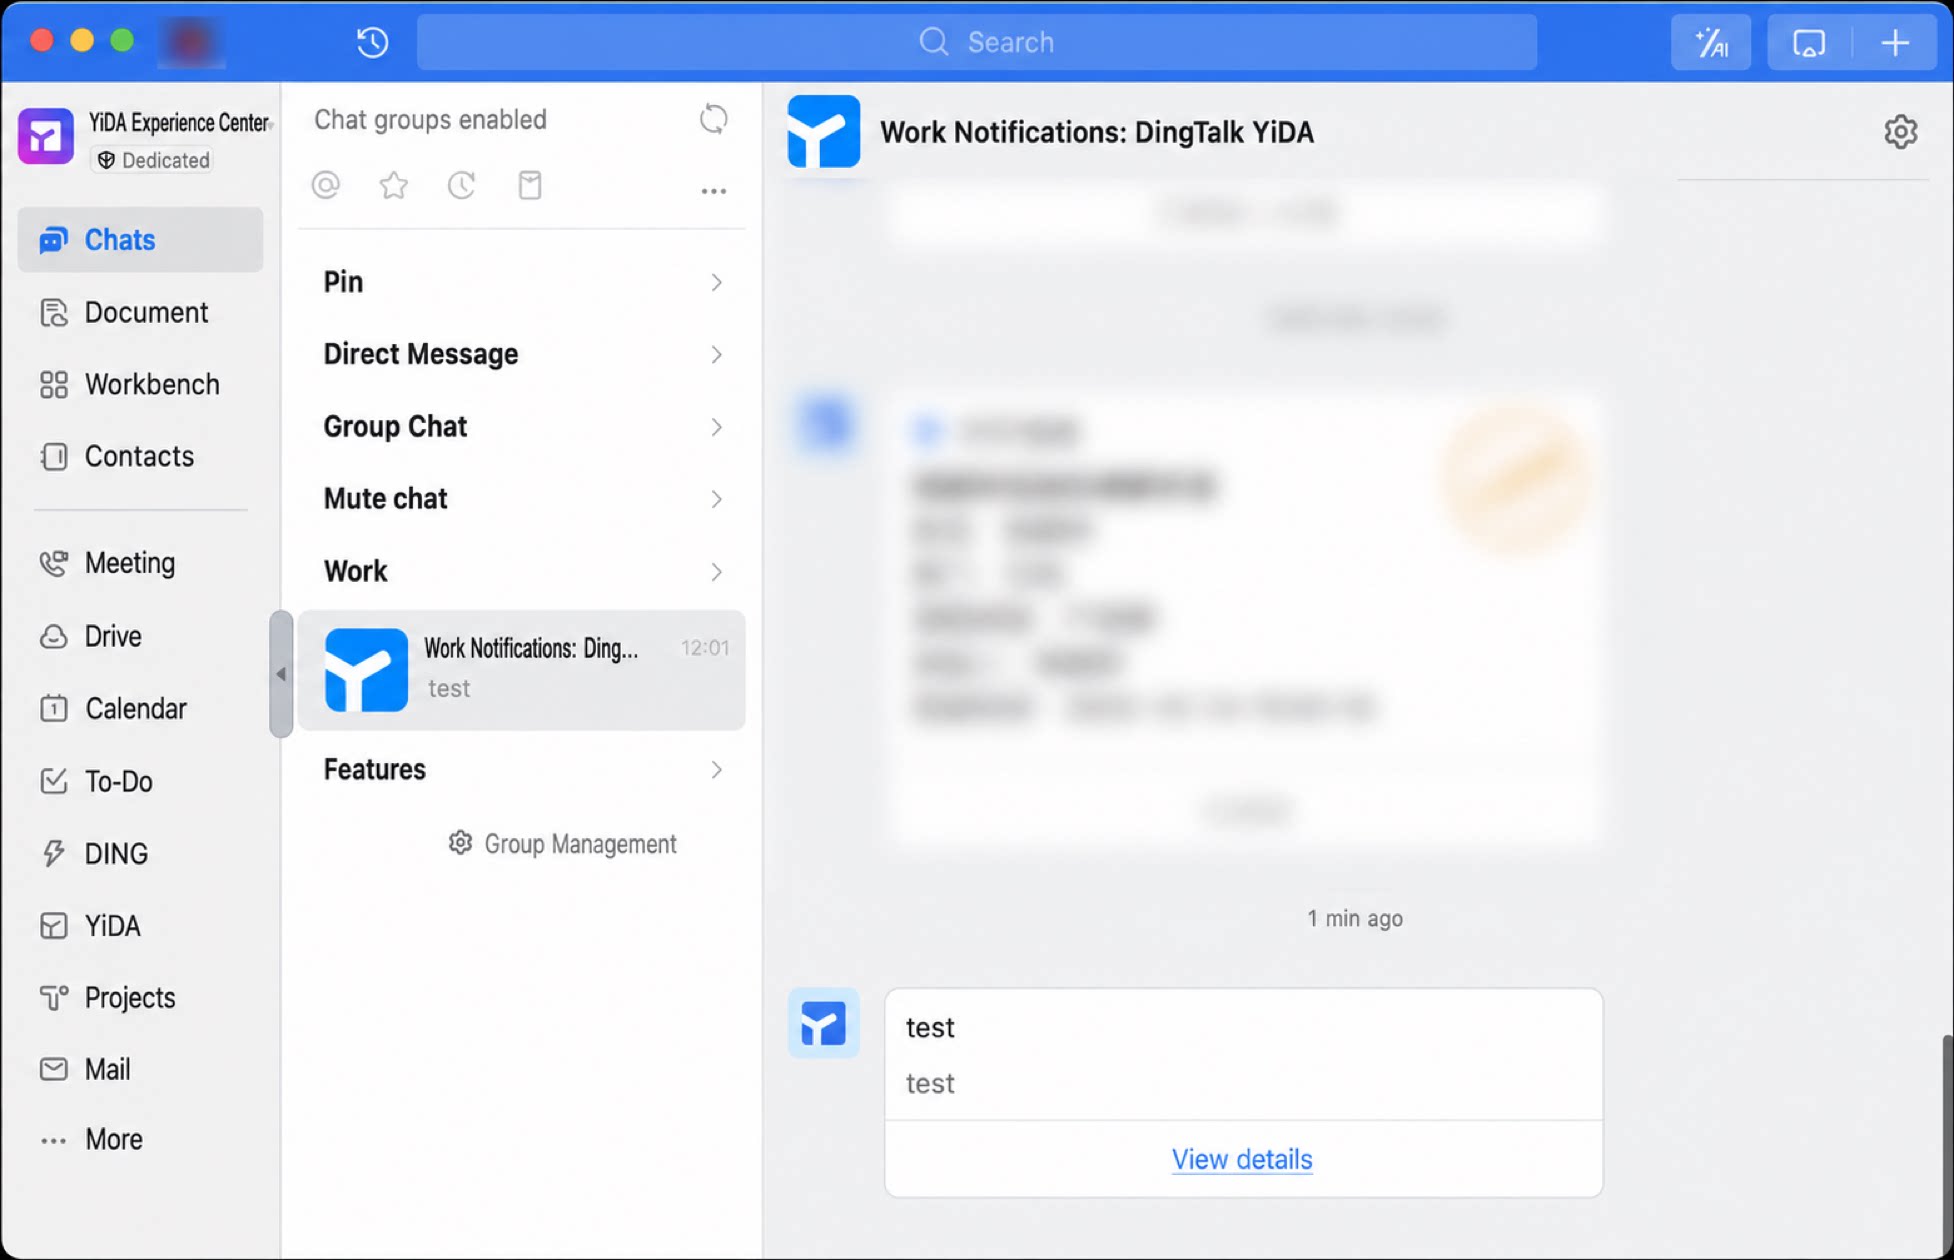
- Open the DingTalk chat window and check for messages.
Related Topics
- Custom button
- Custom detail page