

 Chats
Chats Calendar
 Meetings
 Contacts
 Mail
Mail Docs
Docs Drive
Drive AI Table
 AI Minutes
 Attendance
 Approval
 YiDA
YiDA Admin Console
Steps
Follow these steps to create an integration & automation whose trigger type is form event trigger.- Sign in to the YiDA workbench and click My apps.
- Select the app for which you want to create the integration & automation to open the App settings page.
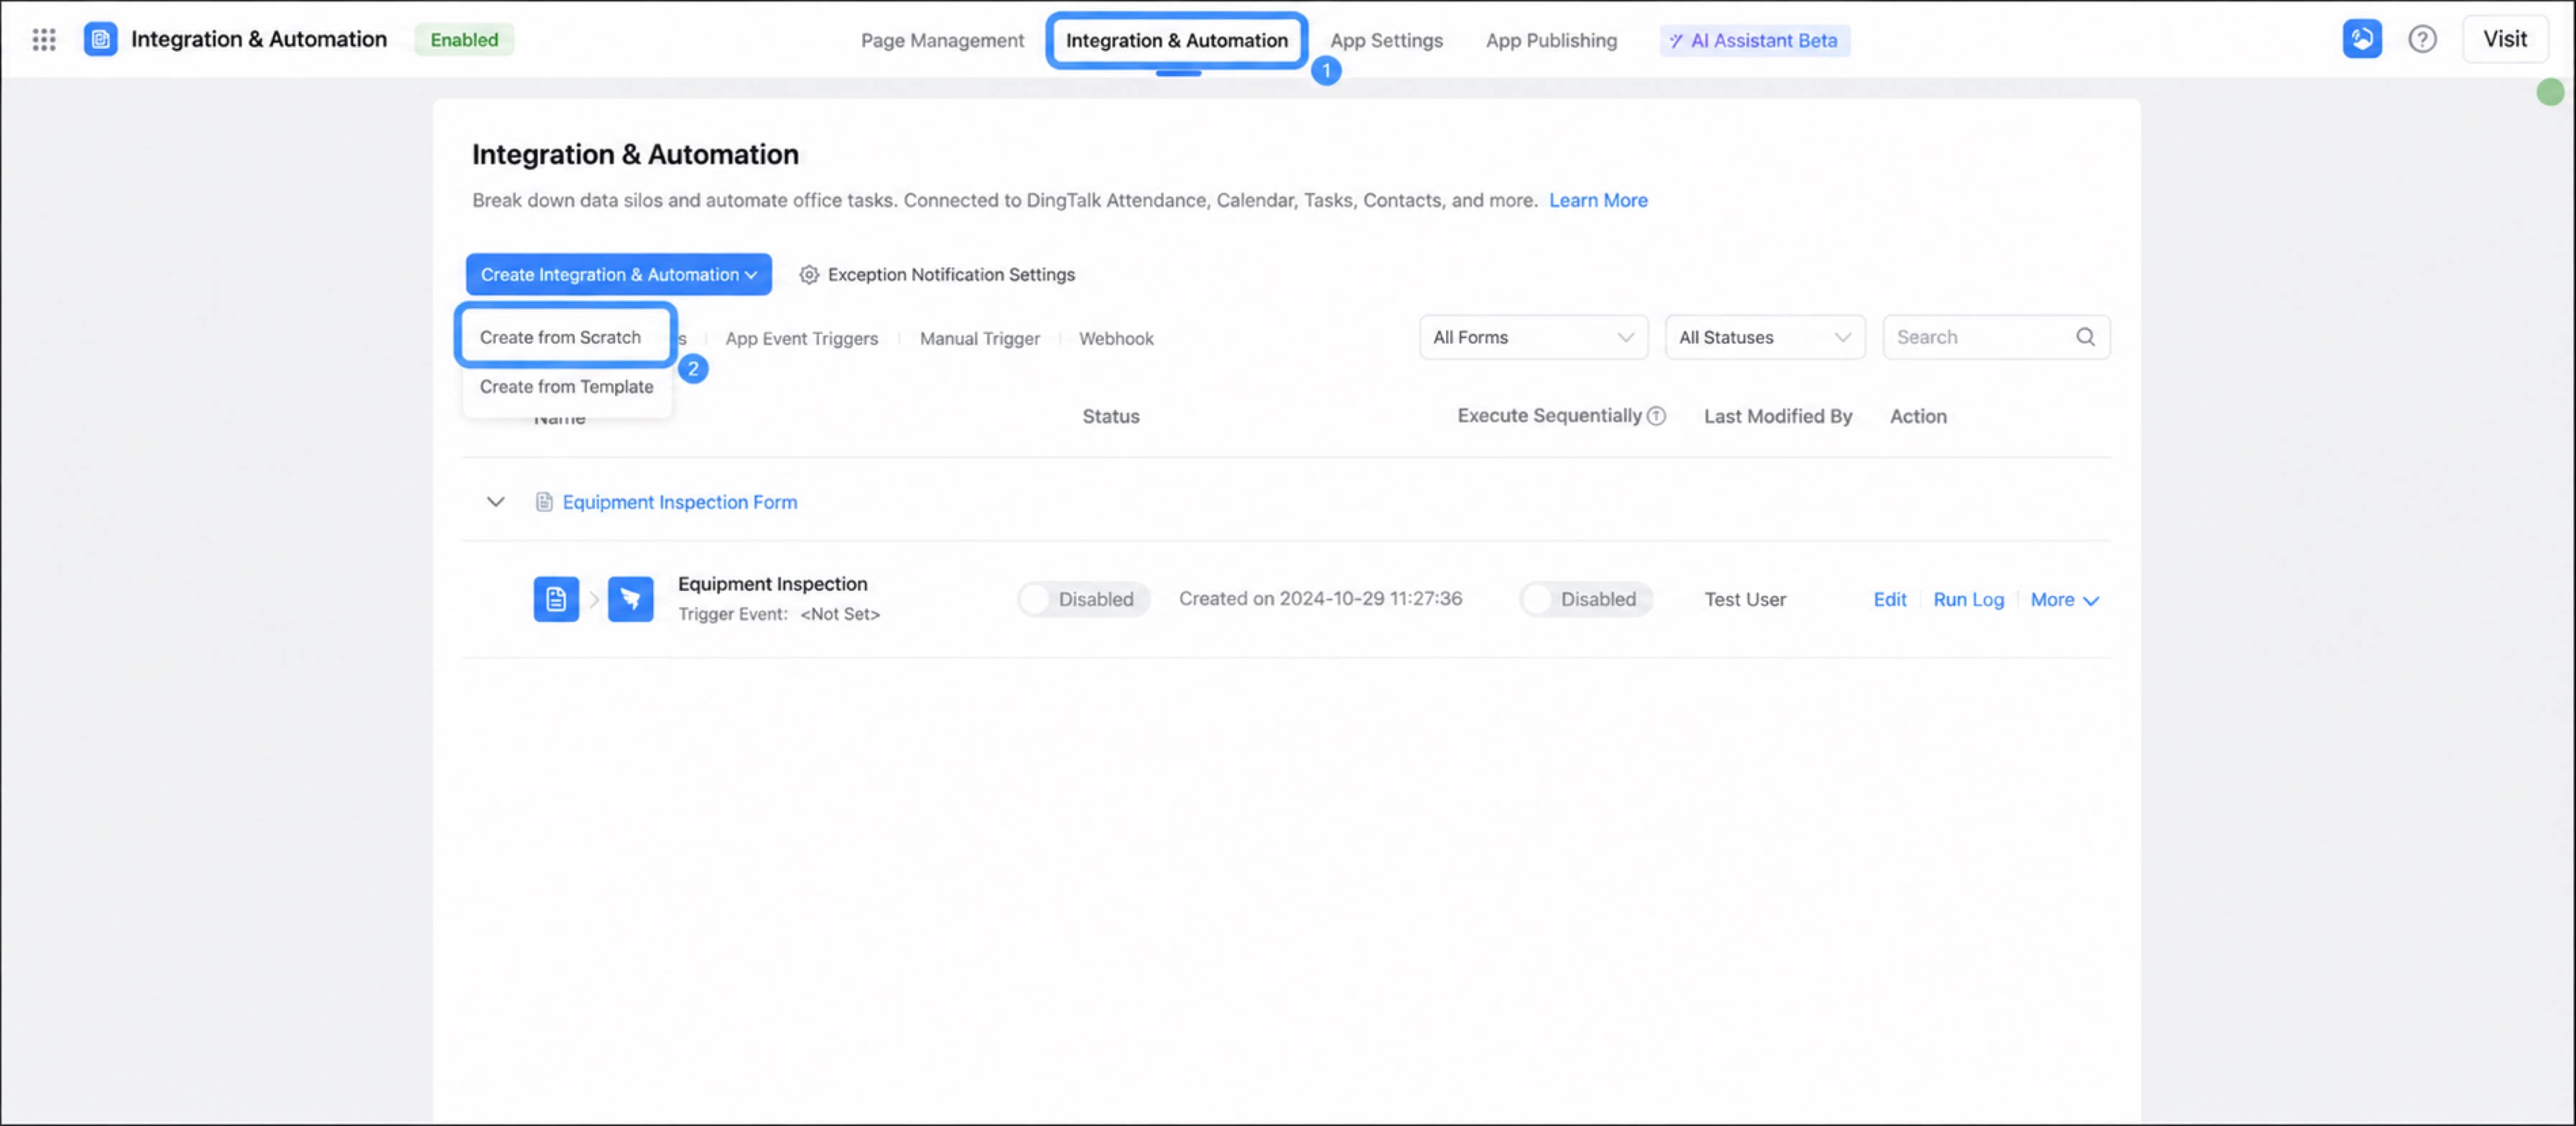
- Click Integration & Automation, and then select Create integration & automation > Create from scratch.
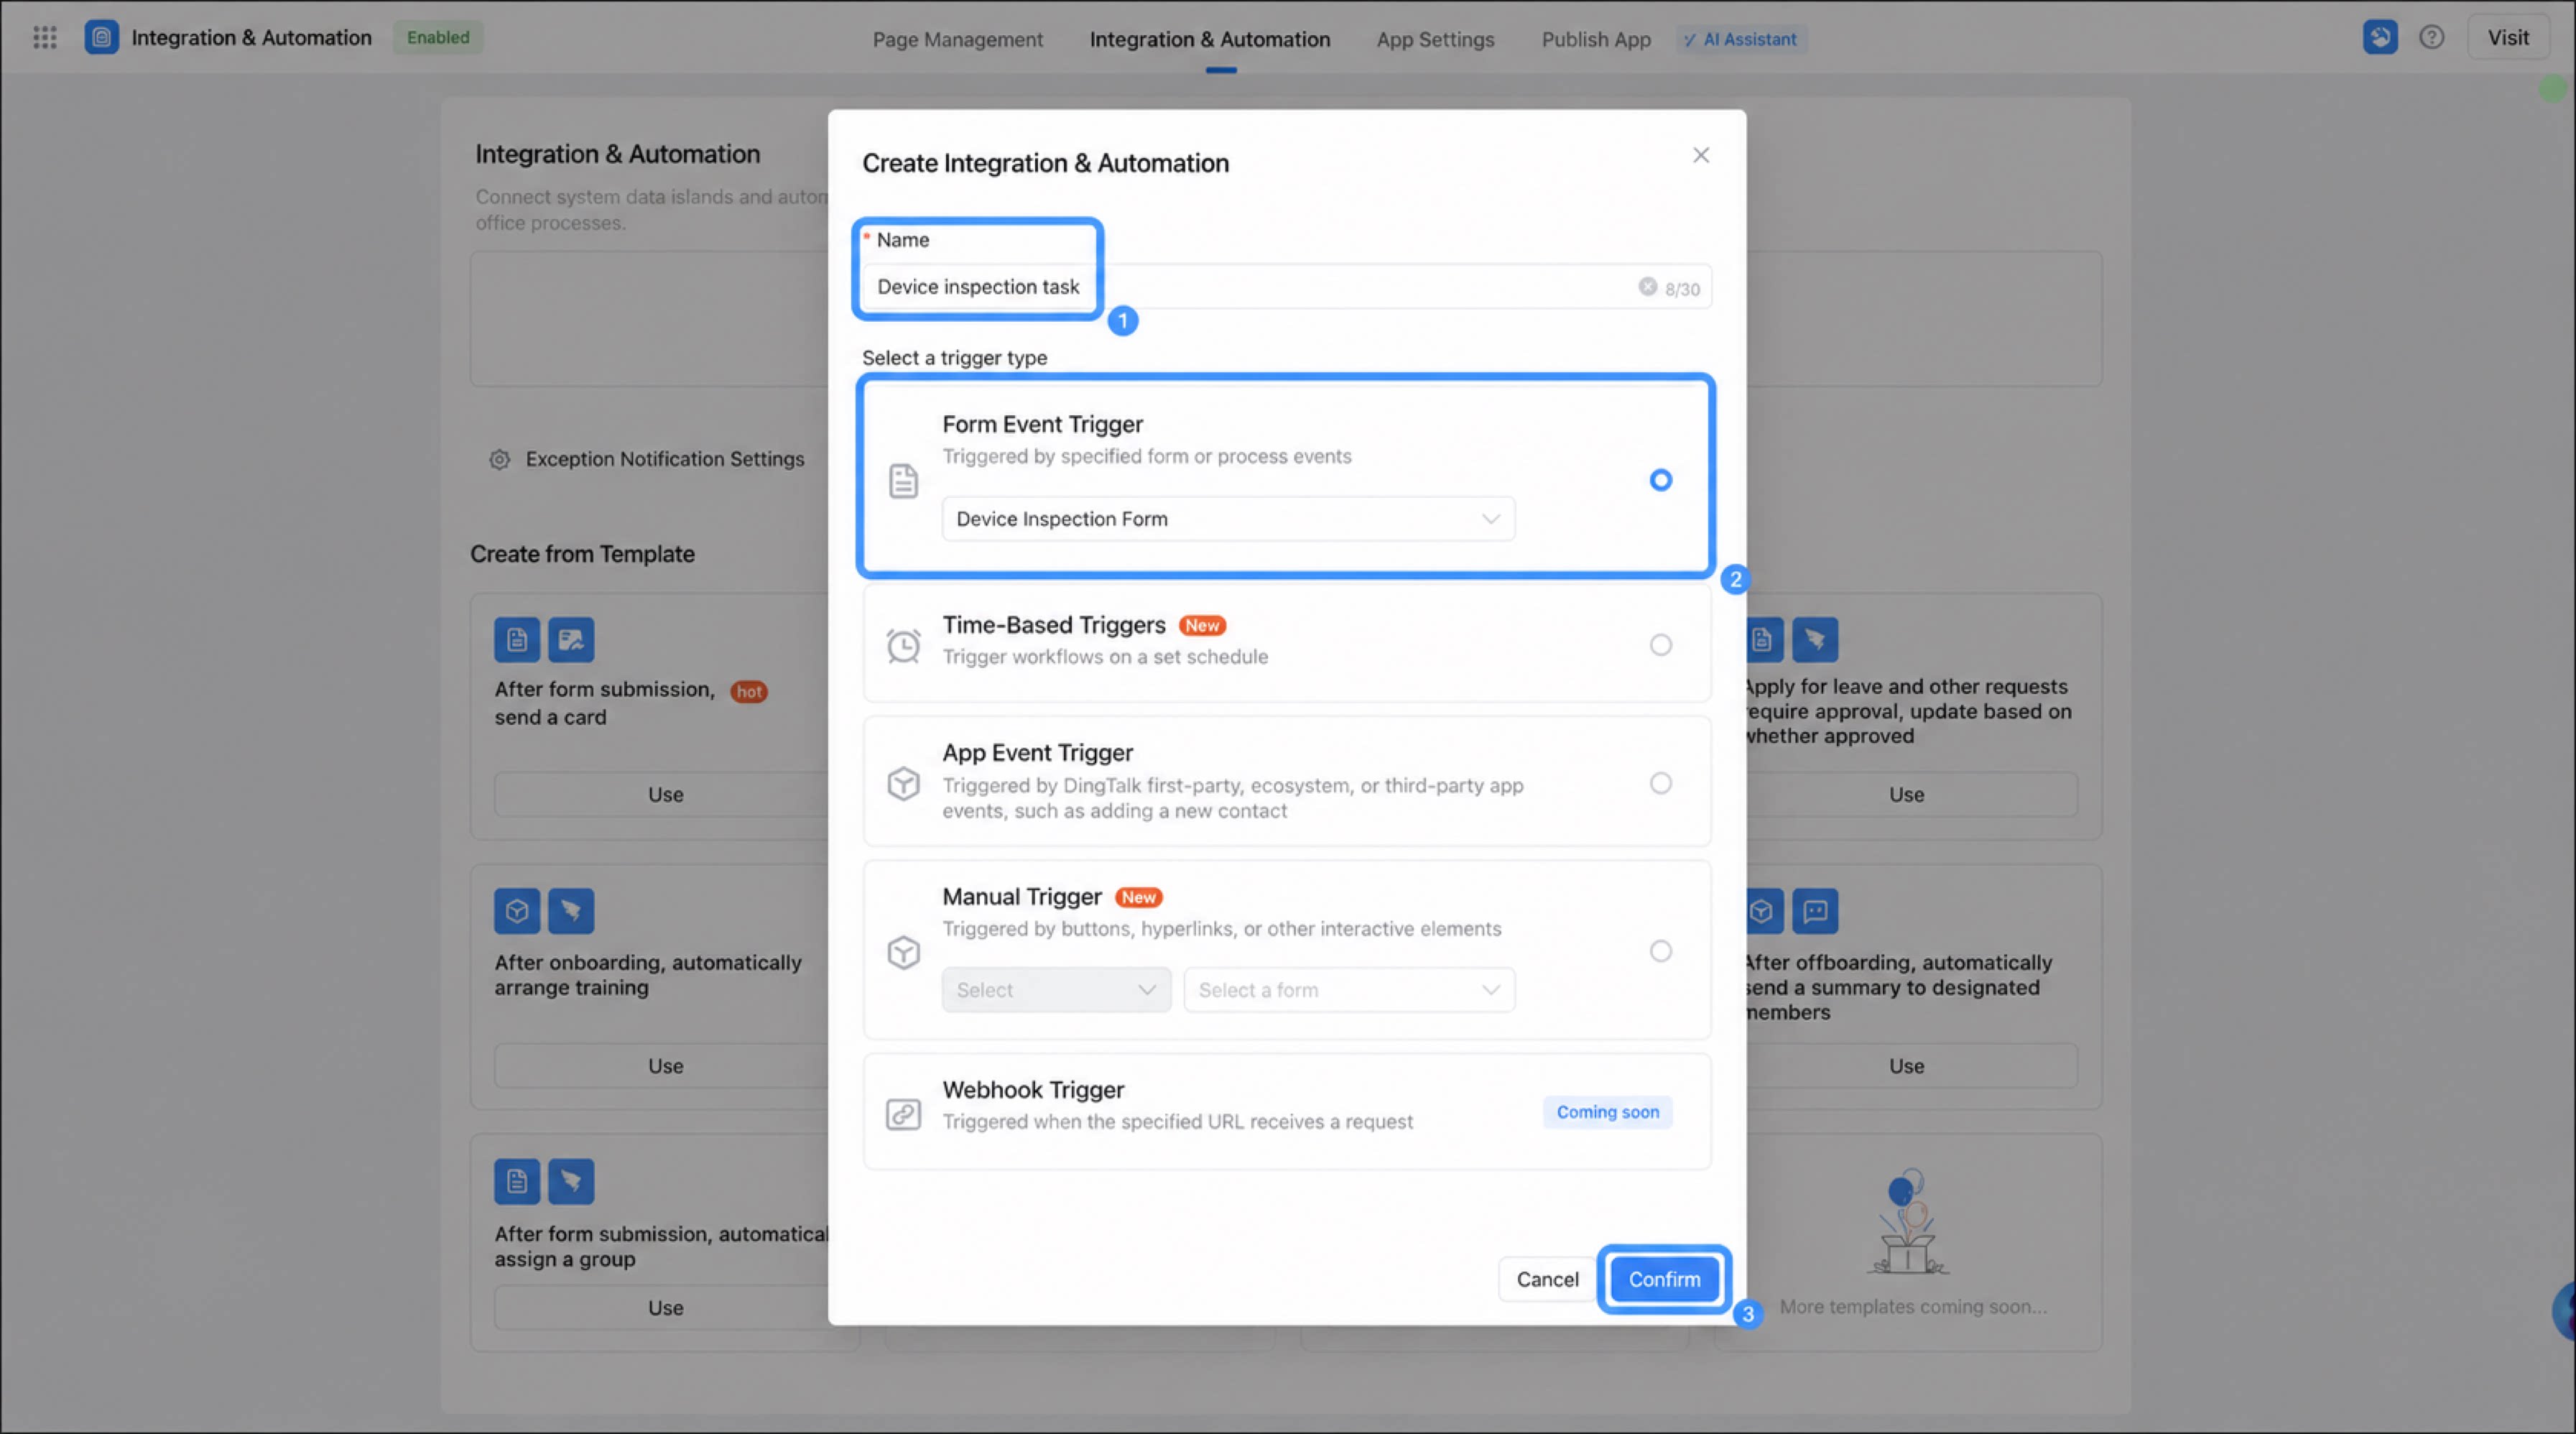
- In the dialog box, enter a name for the integration & automation, select Form event trigger as the trigger event, specify the form that triggers the event, and click Confirm.
- On the integration & automation editing page, click Form event trigger.
- In the settings dialog box, configure the form trigger event.
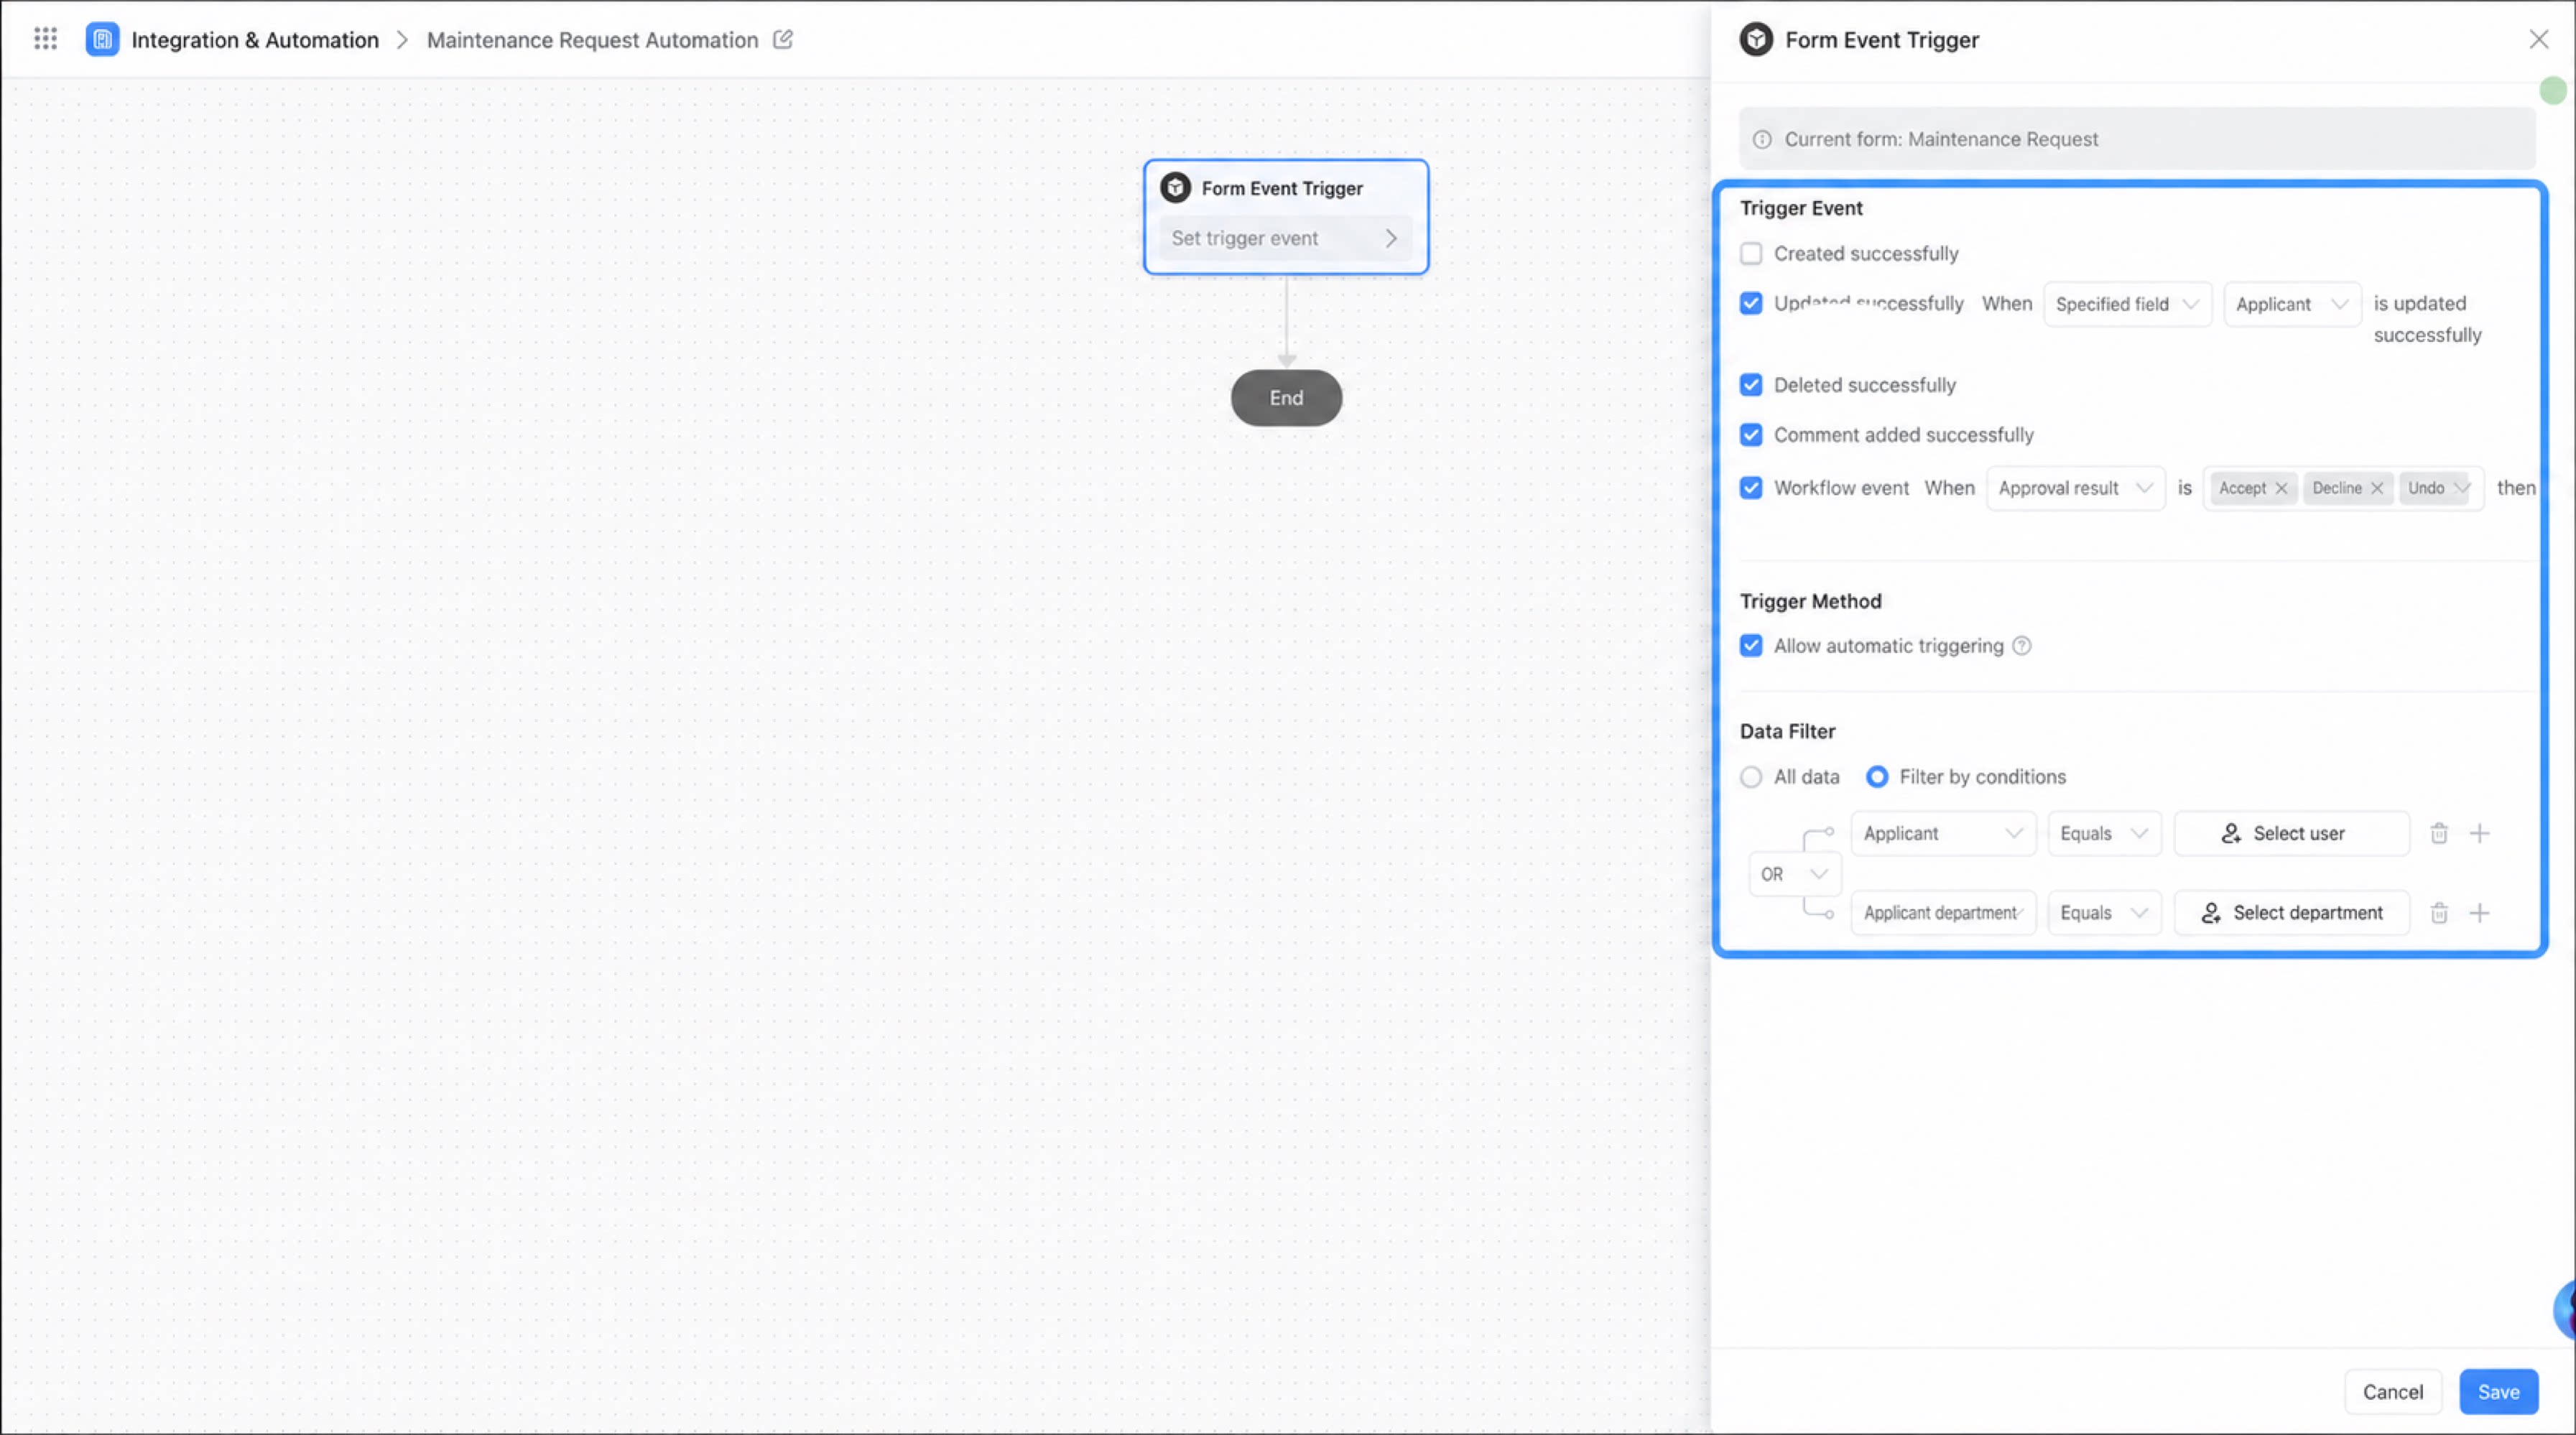
| Configuration item | Description | |
| Trigger event | Create success | Triggers the integration & automation when a user submits a form successfully. |
| Edit success | Triggers when a user edits previously submitted form data. Only edits to regular form data are supported; edits at workflow form Steps do not trigger the event. Two modes are supported: trigger when specific fields are modified, and trigger when any field is modified. | |
| Delete success | Triggers the integration & automation when existing data in the form is deleted. | |
| Comment success | Triggers the integration & automation when someone adds a comment to a data record in the form. | |
| Workflow event | When the form that triggers the integration & automation is a workflow form, triggering by approval result and approval step actions is also supported. For example, after an approval is completed, update fields in the intermediate table if the result is Accept. In a procurement scenario, when a purchase request is approved, the purchase details are added to the procurement information intermediate table. Note: Workflow events support Multiselect. This feature is only available for workflow forms. Premium workflow triggers are only supported in the Professional edition (Premier edition) and the Dedicated edition. If the trigger step configured in the integration & automation has an auto-approval rule, auto-approved tasks do not trigger this automation flow during actual workflow execution. | |
| Trigger method | Automatic trigger | Integration & automation flows support Allow automatic trigger. Once automatic triggering is On, the current flow is triggered when another automation flow or workflow satisfies its trigger event. Note: Automatic triggering supports up to three consecutive levels. That is, Flow A => triggers => Flow B, Flow B => triggers => Flow C, Flow C => cannot trigger ≠> Flow D. Automatic triggering does not take effect in the following cases:
|
| Data filter | All data | All data means no filter is applied and every record is returned. |
| Filter by condition | Filter by condition means only data that meets the specified conditions is returned. Multi-level conditional filtering is supported, along with “AND” and “OR” operators. | |