

 Chats
Chats Calendar
 Meetings
 Contacts
 Mail
Mail Docs
Docs Drive
Drive AI Table
 AI Minutes
 Attendance
 Approval
 YiDA
YiDA Admin Console
In gray releaseAfter creating a workspace, follow the steps in this document to design the space portal home page.
1. Space Portal Design
1.1 Overview
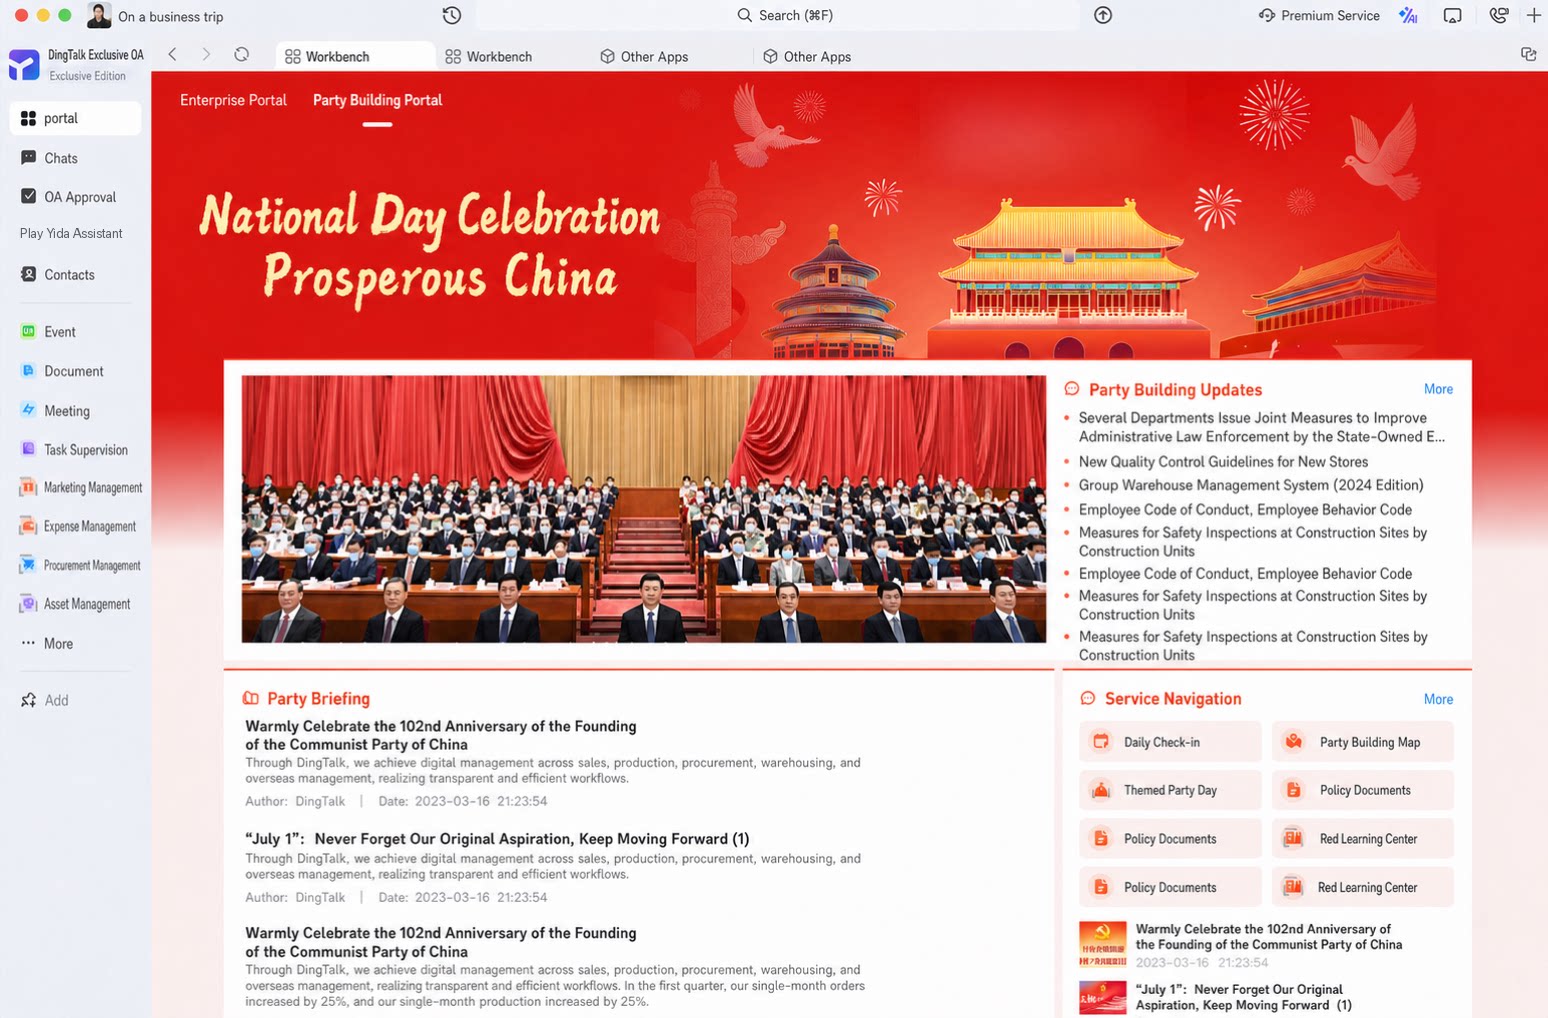
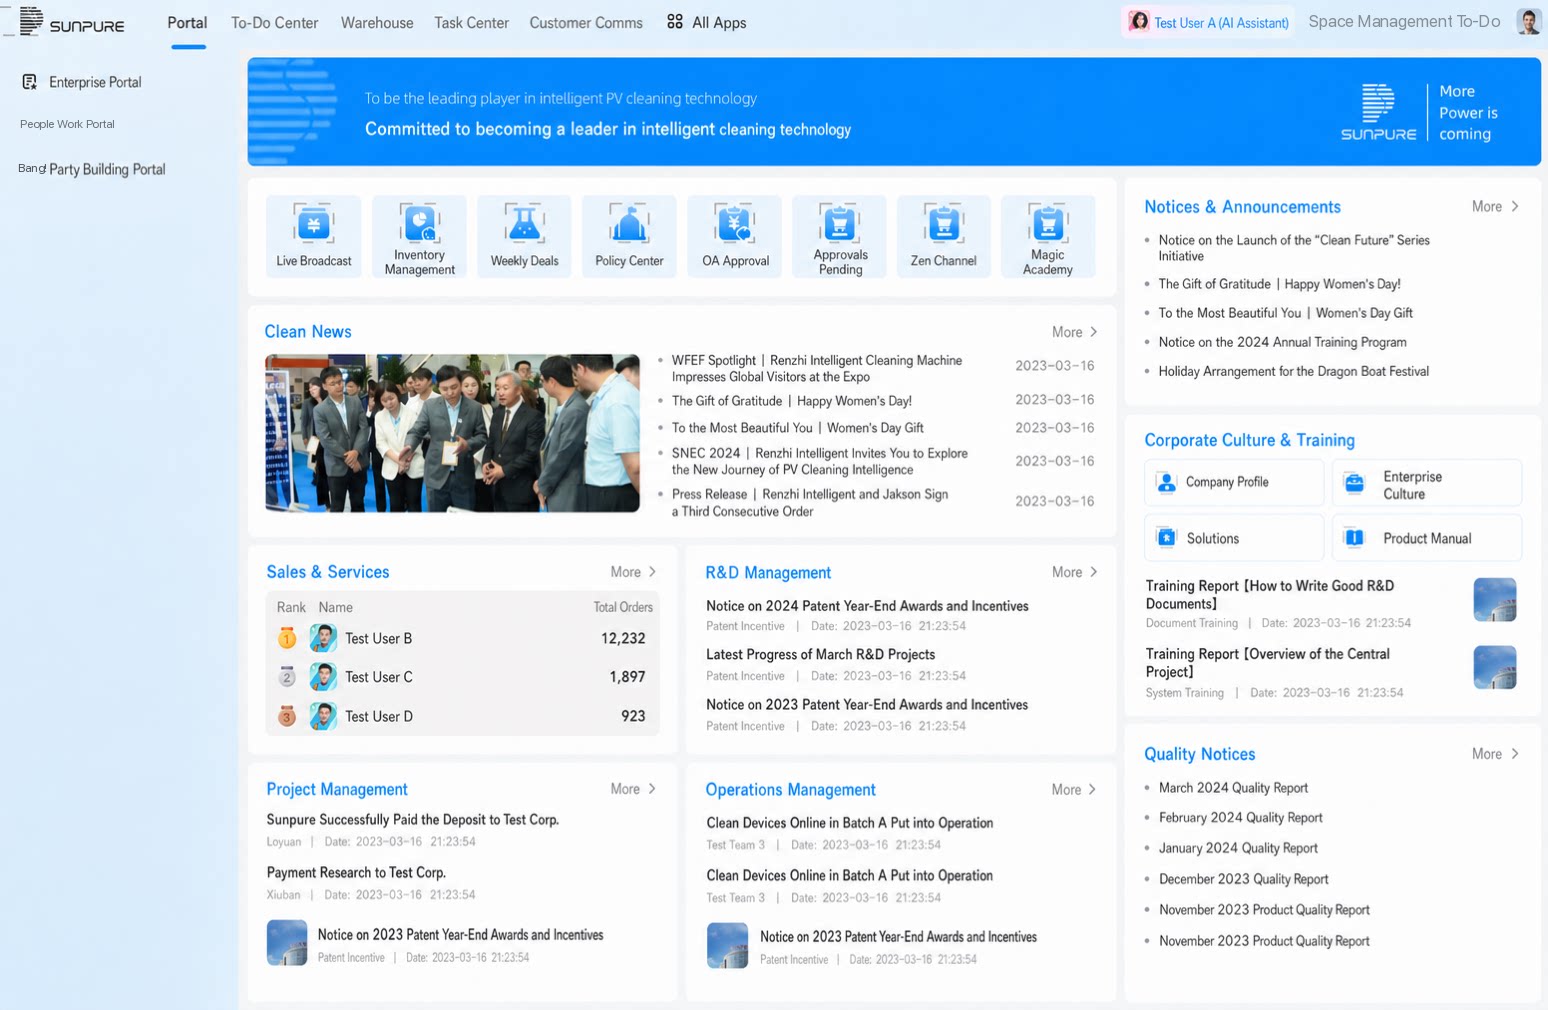
Space portal design lets you tailor the space portal to your business needs. A single space can host multiple portals—such as an office portal, a corporate information portal, or a Party building portal—to serve different scenarios. Space navigation supports custom configuration, and each portal theme can either inherit the space theme or use its own.2. Steps
2.1 Create a Portal
1
Step 1
Sign in to the YiDA workbench as an app admin.
2
Step 2
Click platform management in the upper-right corner to open the platform management page. 
3
Step 3
In the left navigation menu, choose Platform-exclusive customization > Space management, select the space you want to edit, and click Edit.
4
Step 4
Click Space portal settings > Create portal.
Create a Portal from a Template
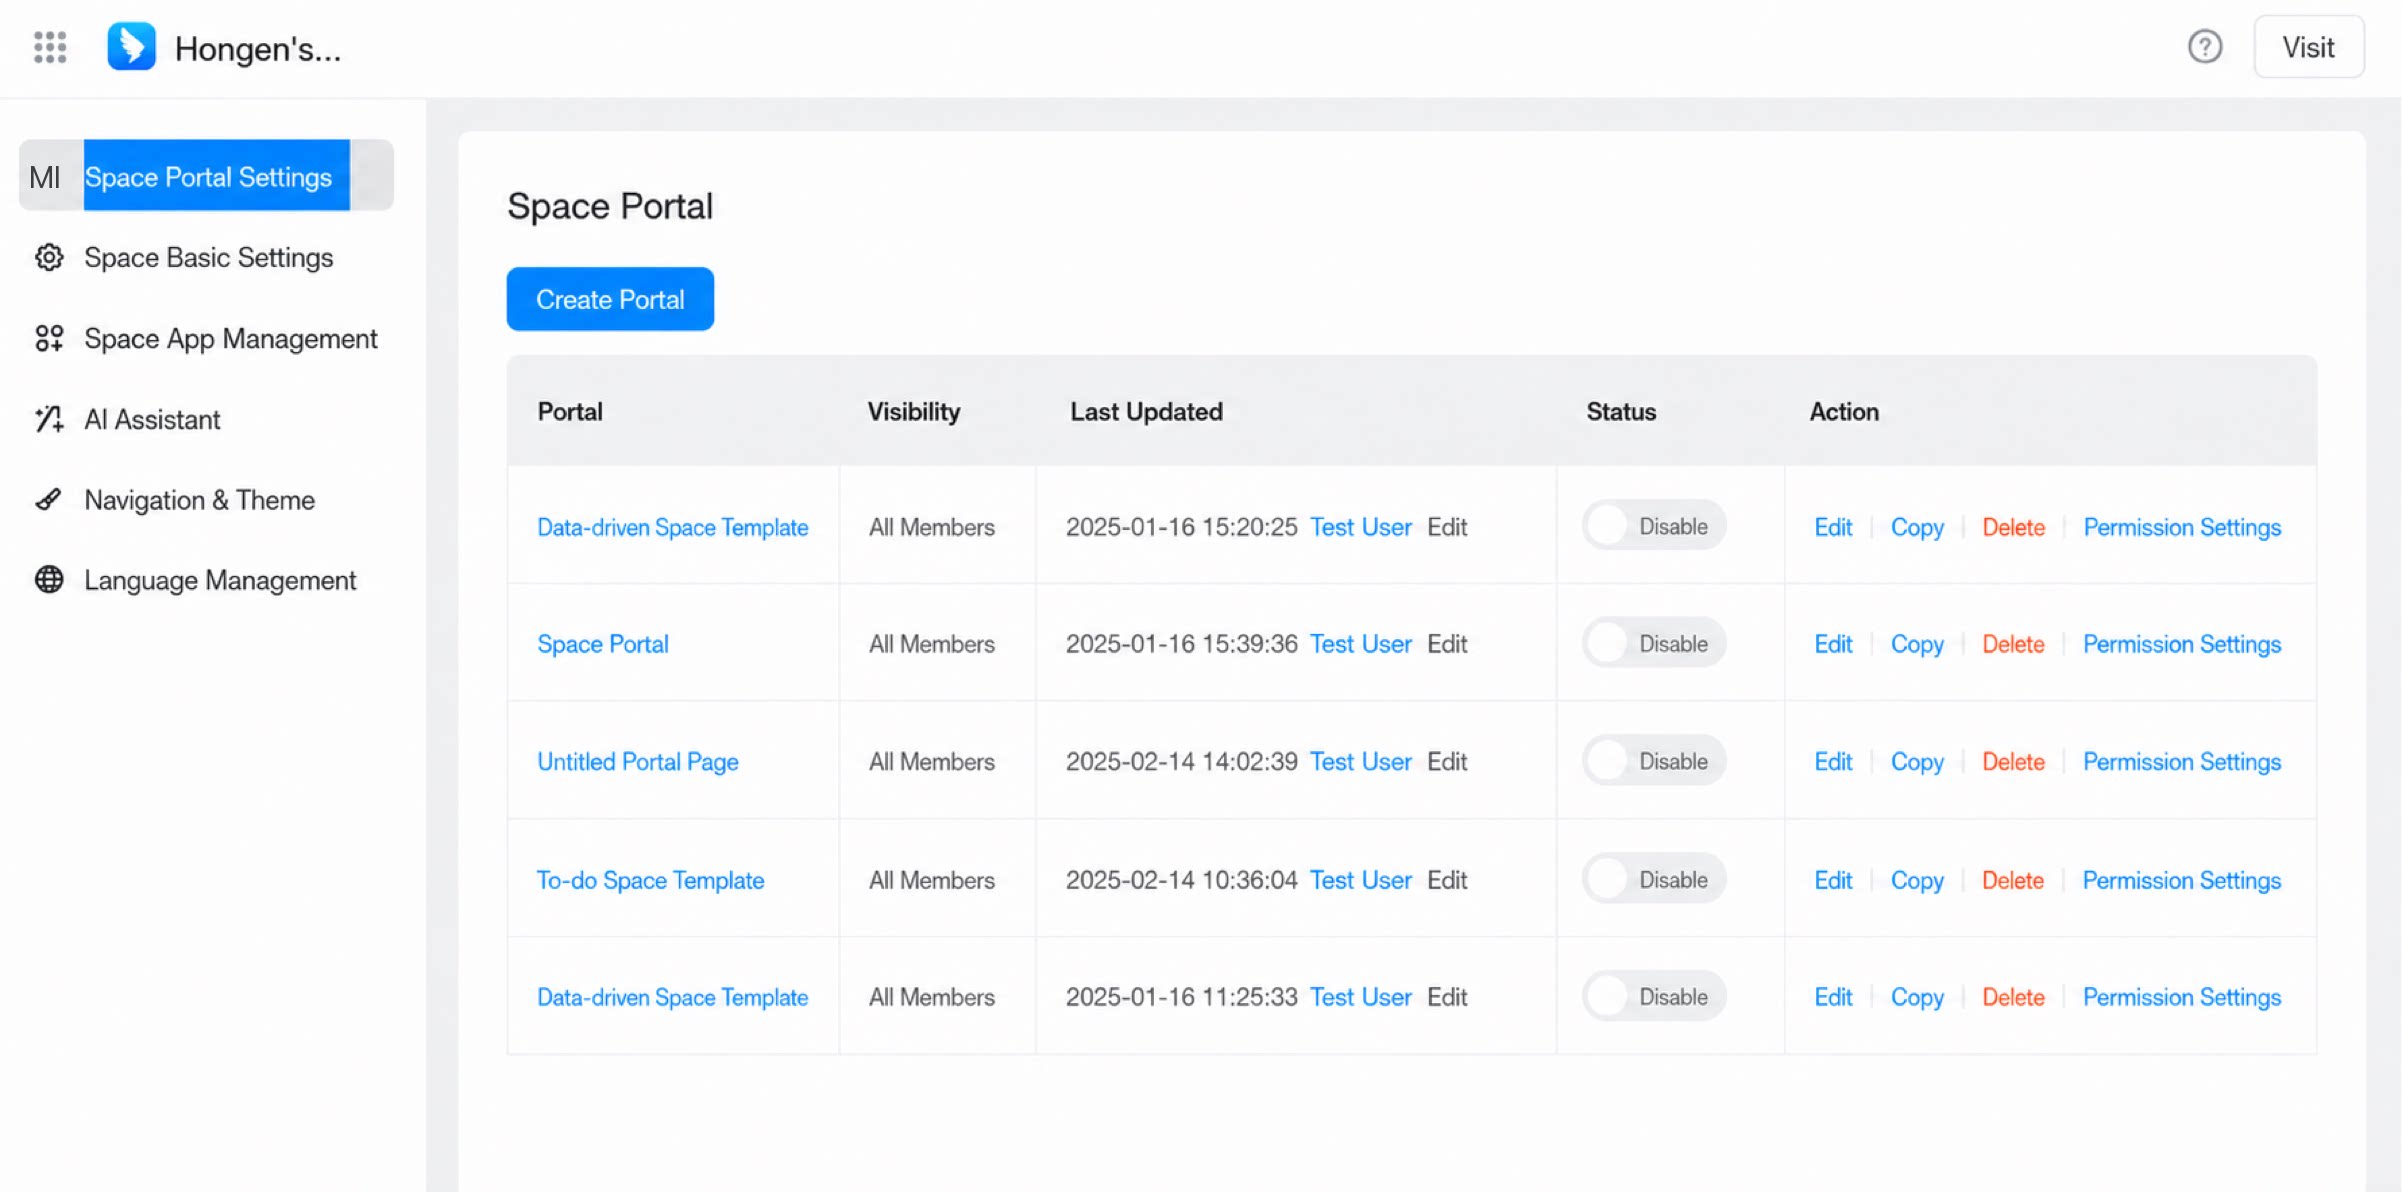
- On the Create portal page, choose Create from template or Create blank page.
- Select a template portal and design the space portal layout on the page.
Workspace portal components are essentially the same as broadcastable portal components. For details, see Portal components.
- When you are done, click Save in the upper-right corner.
Create a Blank Portal
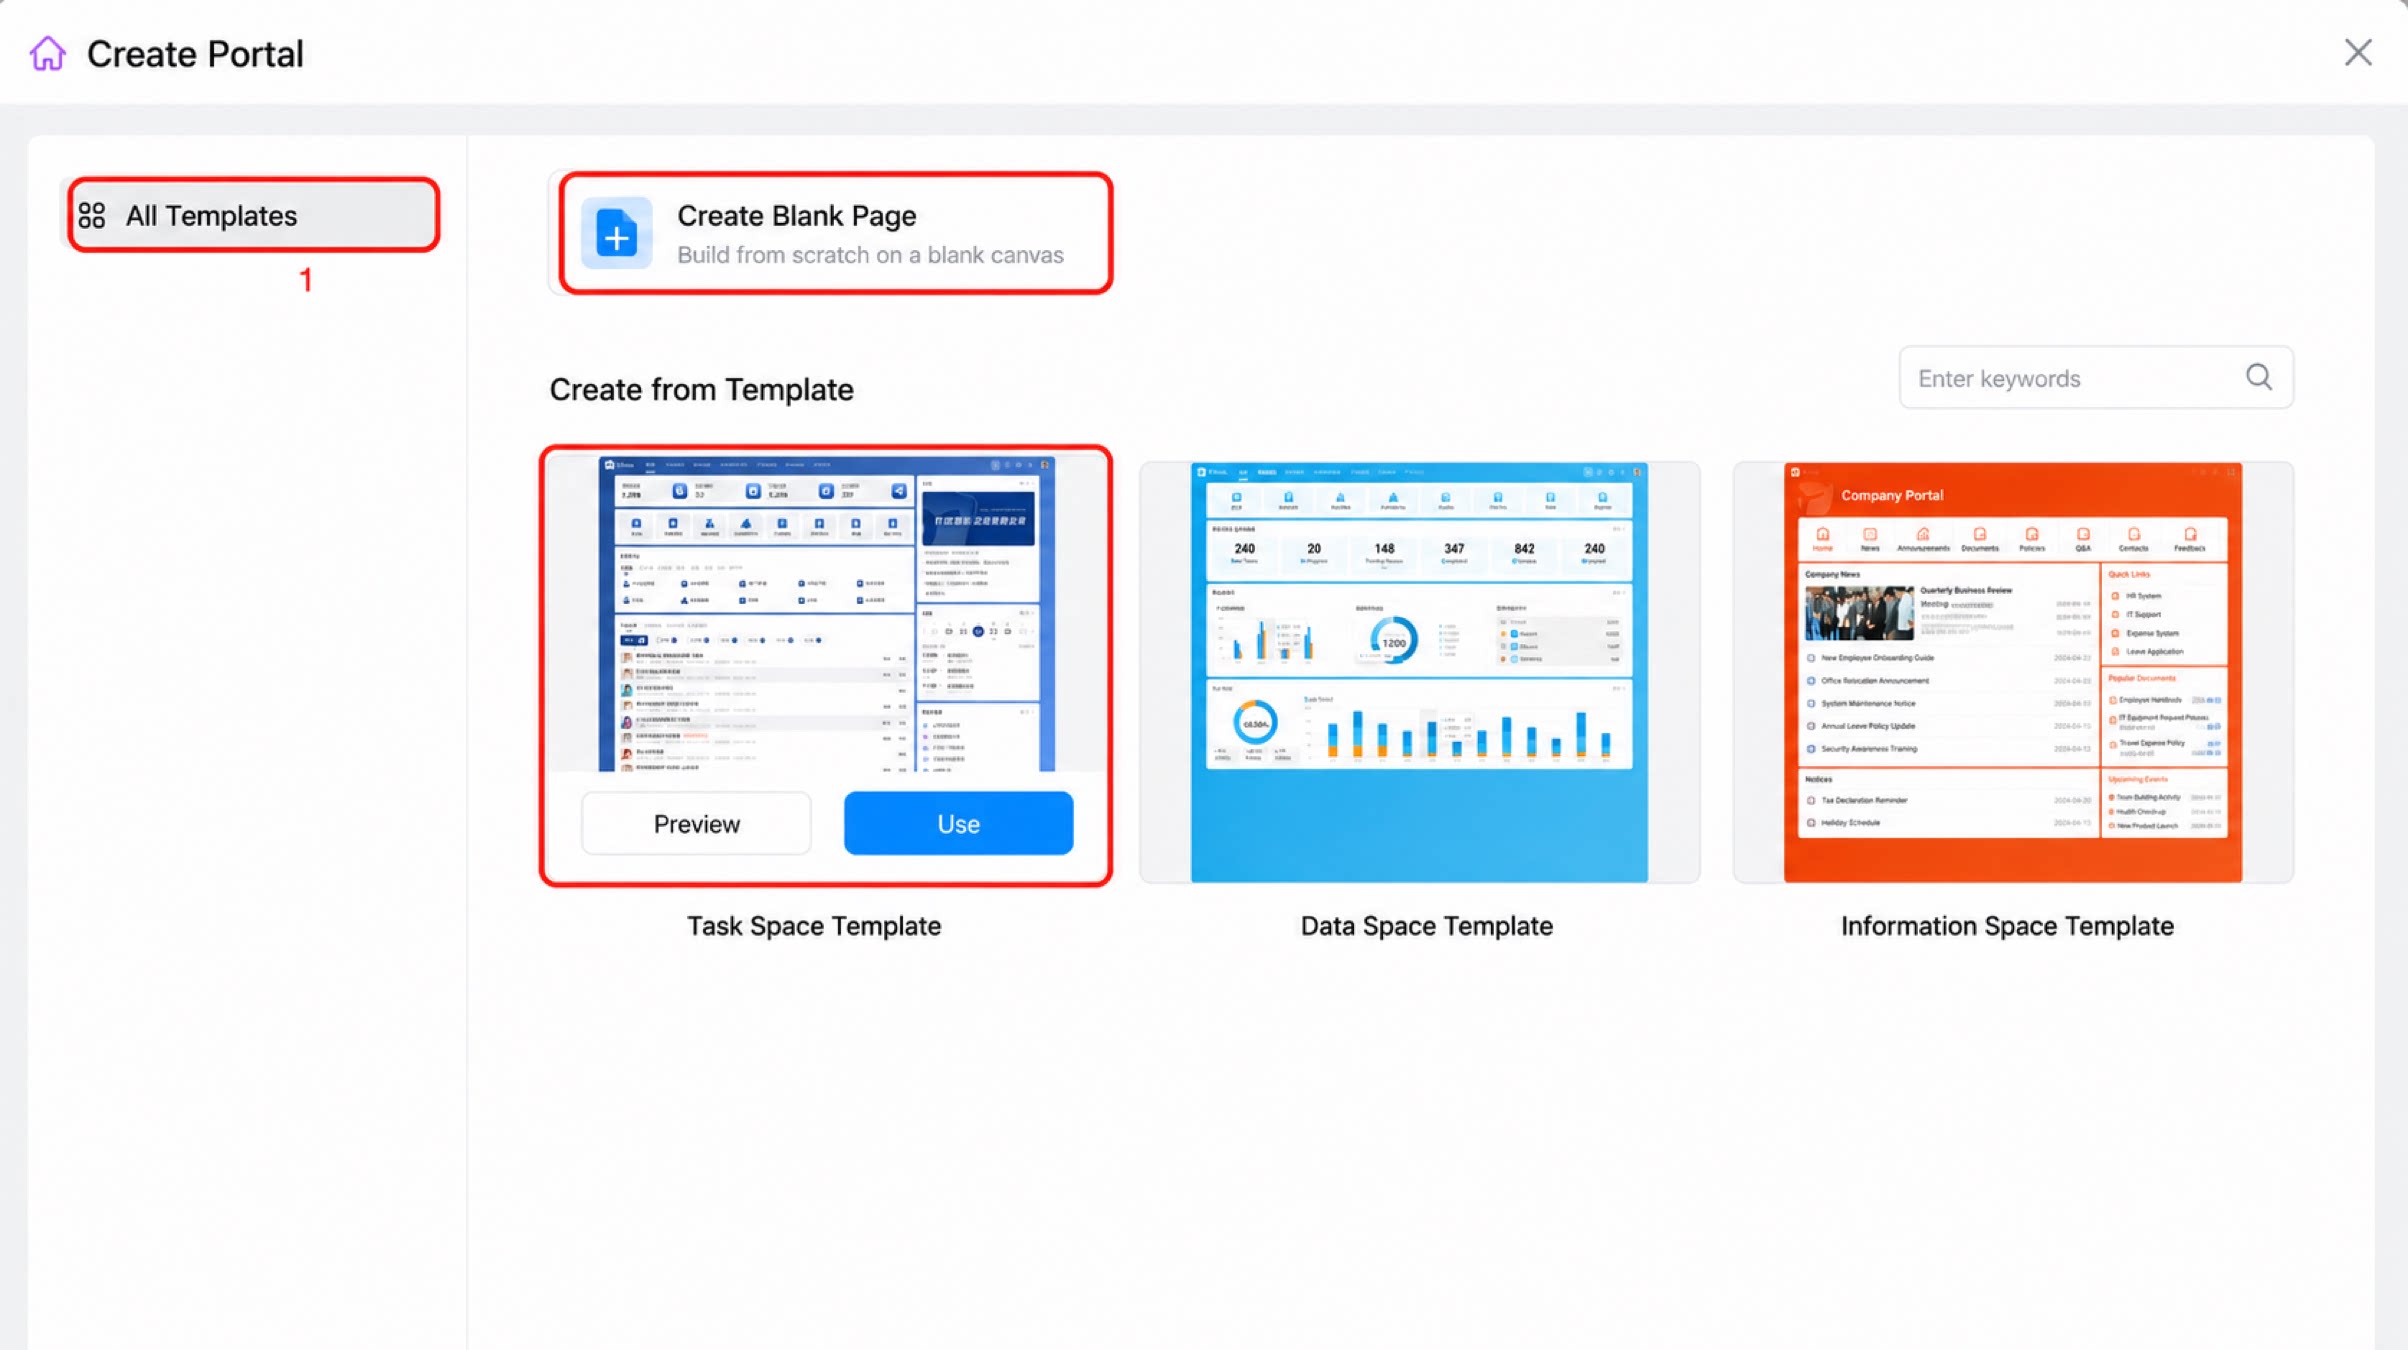
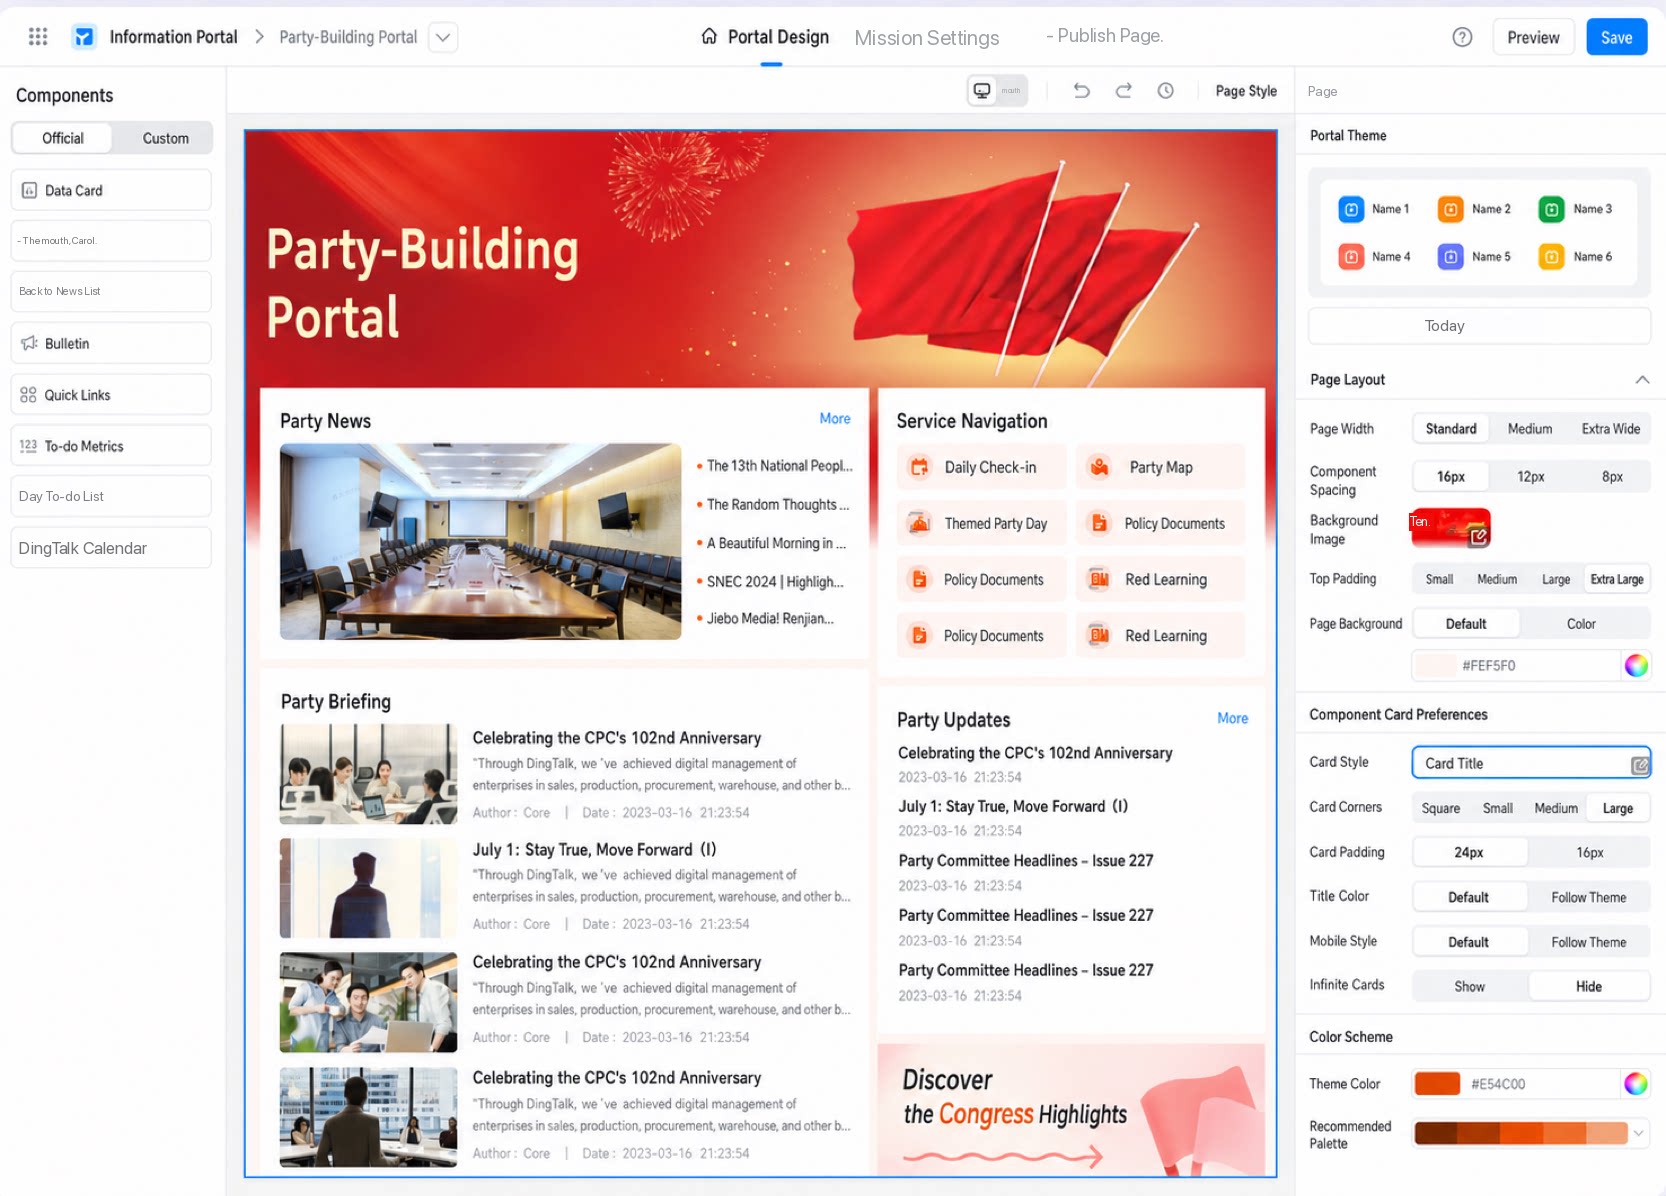
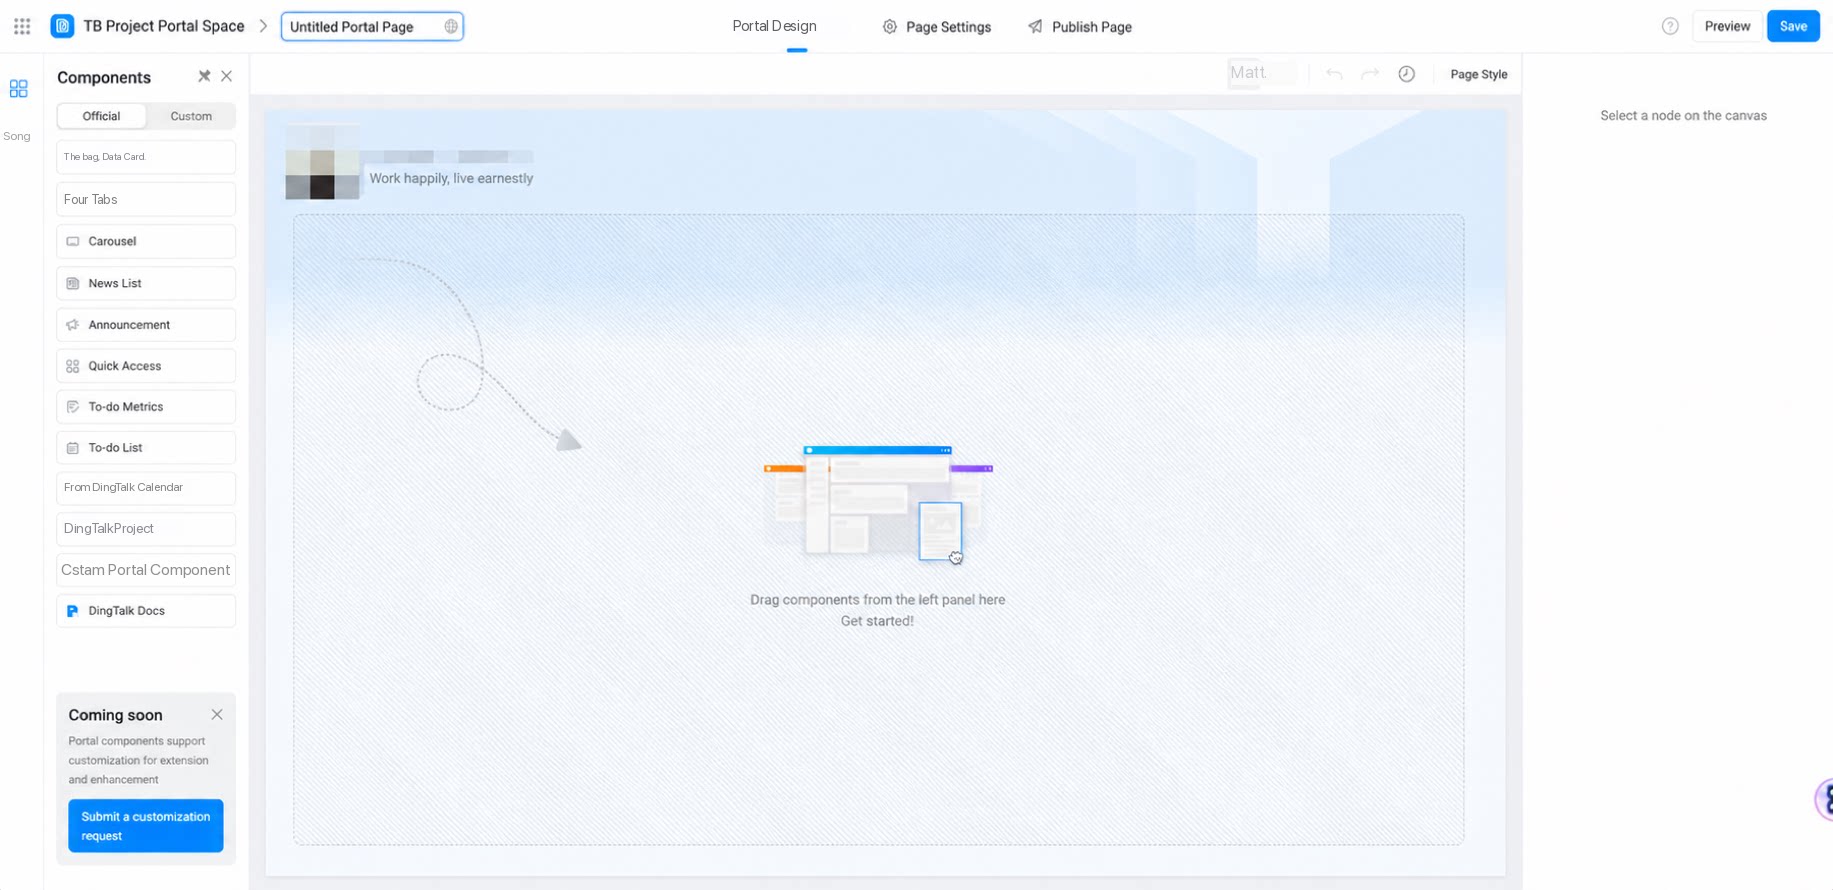
- Click Create blank page to go directly to the new blank portal editing page, as shown below:
2.2 Edit a Portal
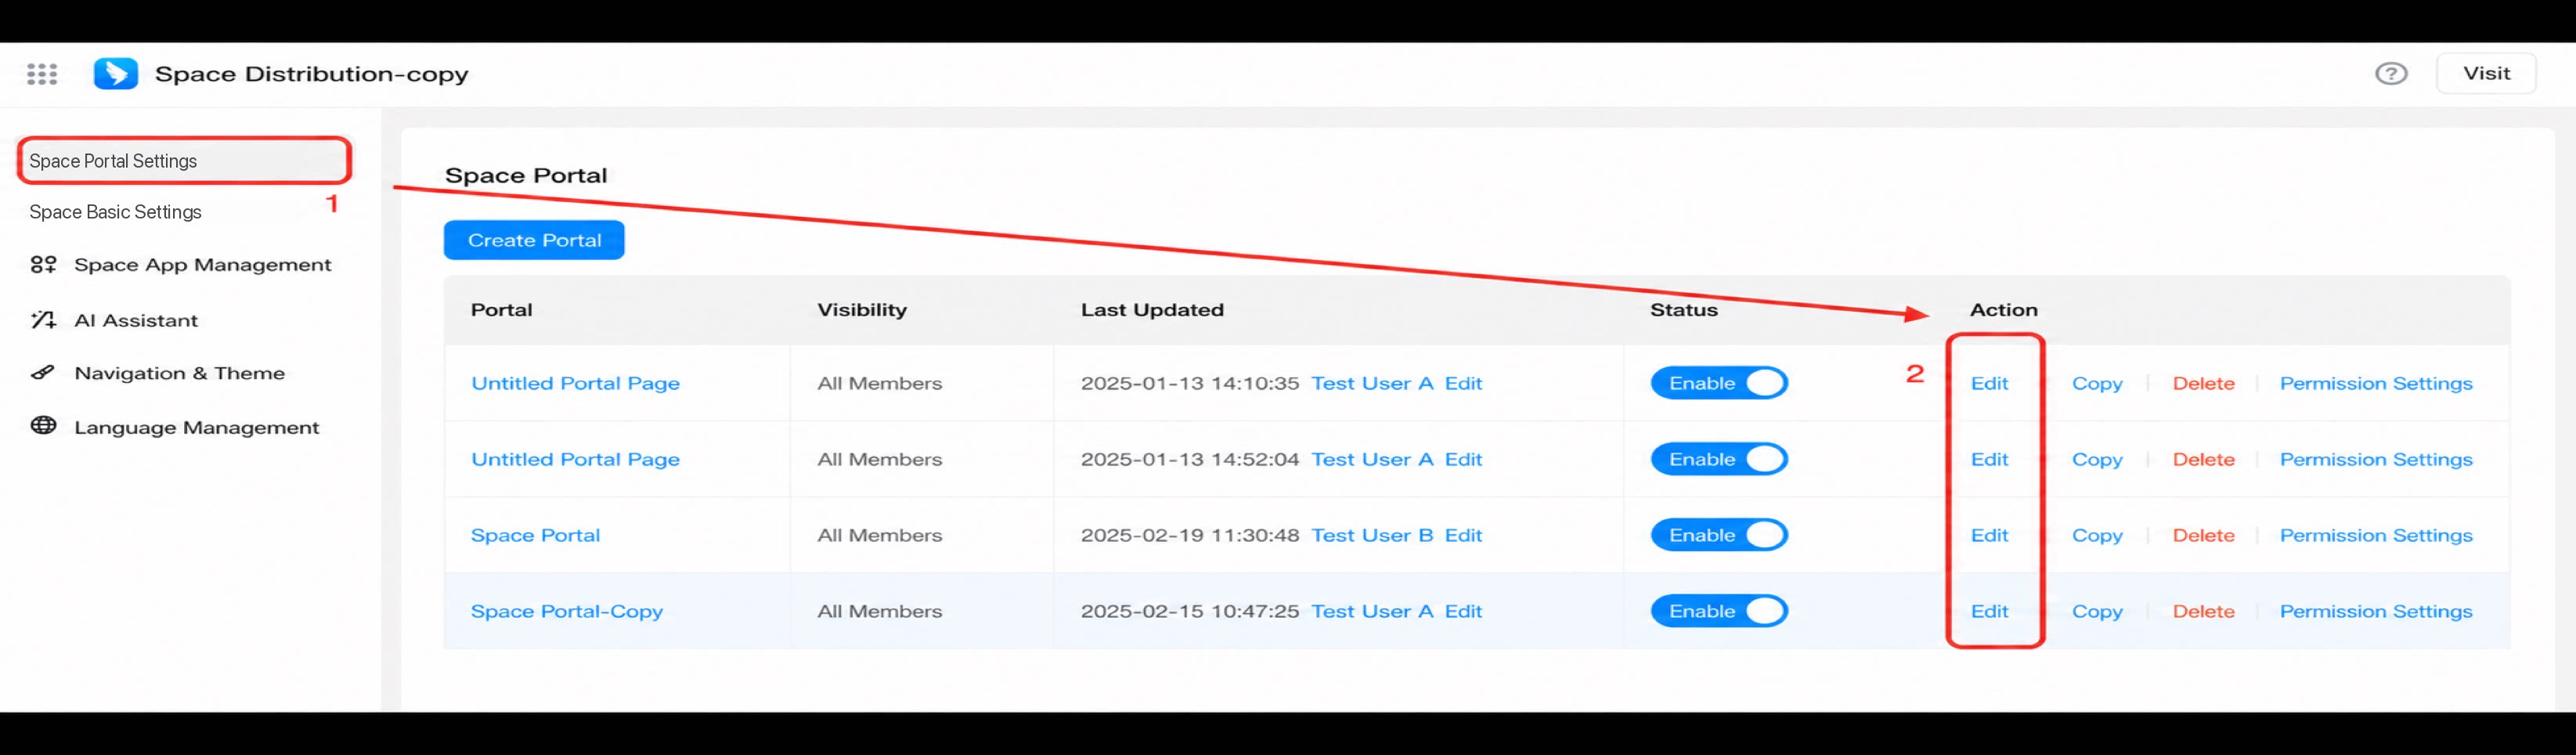
- Open the space editor, choose Space portal settings, select a space portal, and click Edit.
2.3 Portal Management
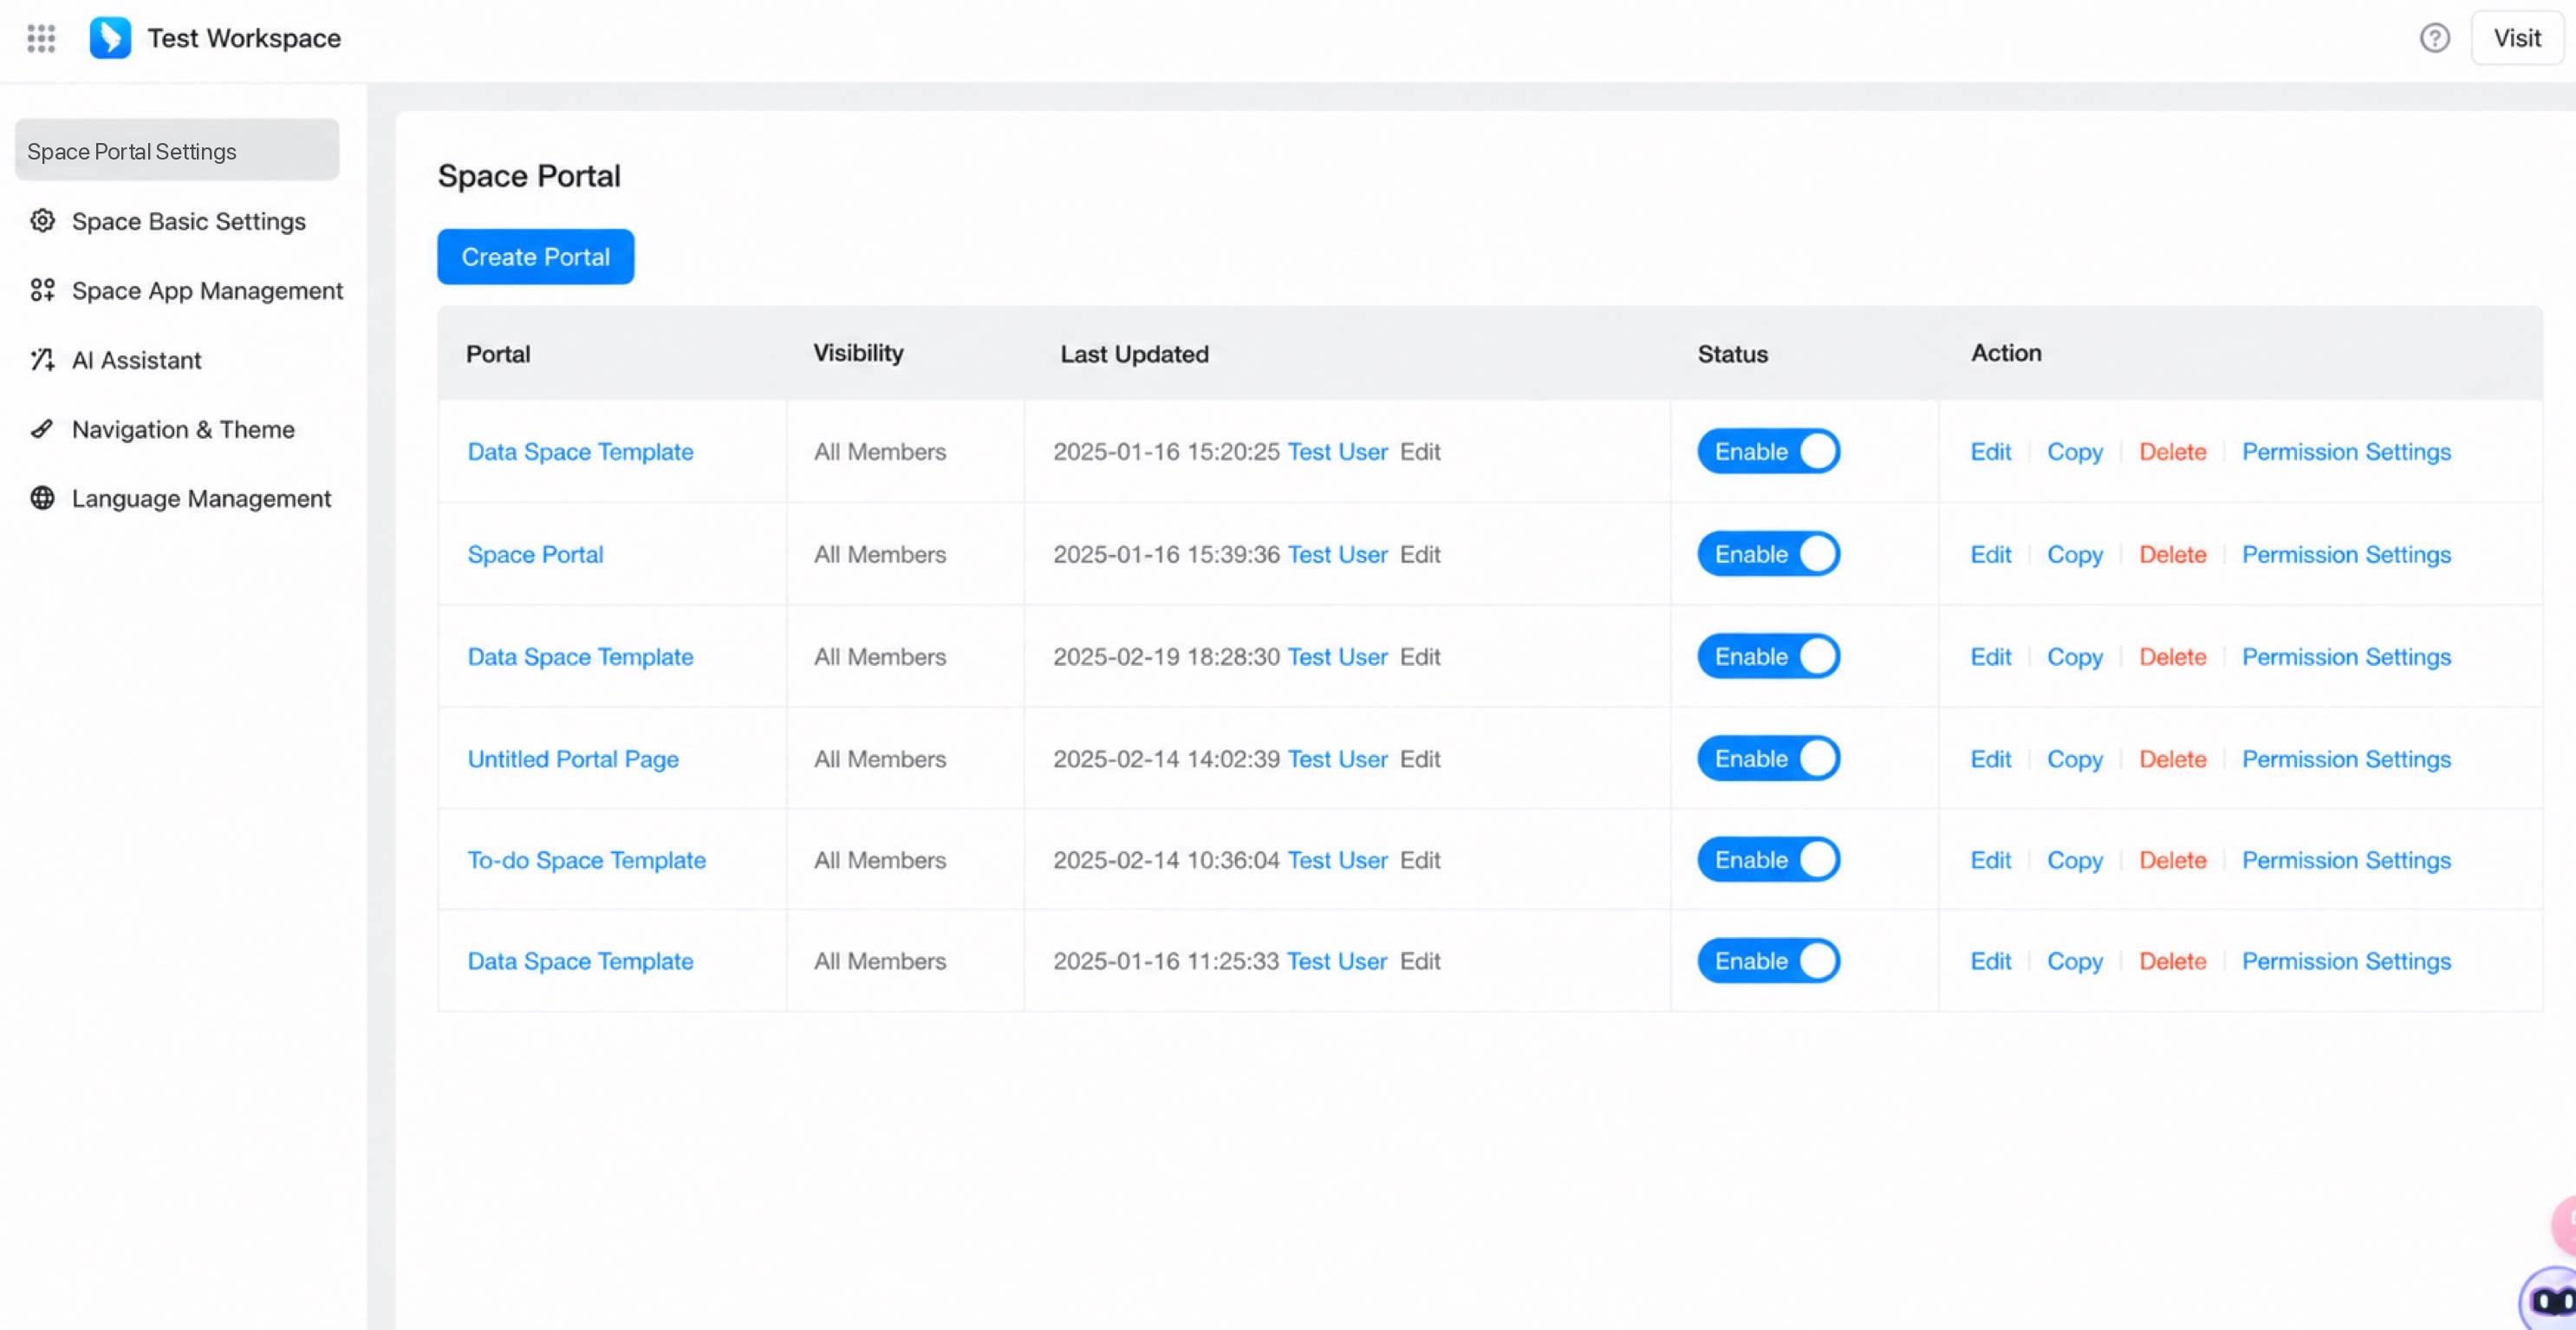
- The Space portal settings page manages multiple portals. The list displays: Portal, View scope, Last modified time and user with action, Portal status, and Actions.
- Click a portal name to open its view page.
- Click Edit to open the portal editing page.
- Click Copy to duplicate a portal.
- Click Delete to remove a portal after a secondary confirmation.
- Click Permission settings to open the permission settings page.
3. Portal Component Reference
Workspace portal components are essentially the same as broadcastable portal components. For details, see Portal components. The differences are described below.
3.1 Space Portals Support the Tabs Component
The space portal supports the Tabs component, so users can switch quickly between modules. Drag the component onto the page and configure its basic properties.| Preview | Property | Description |
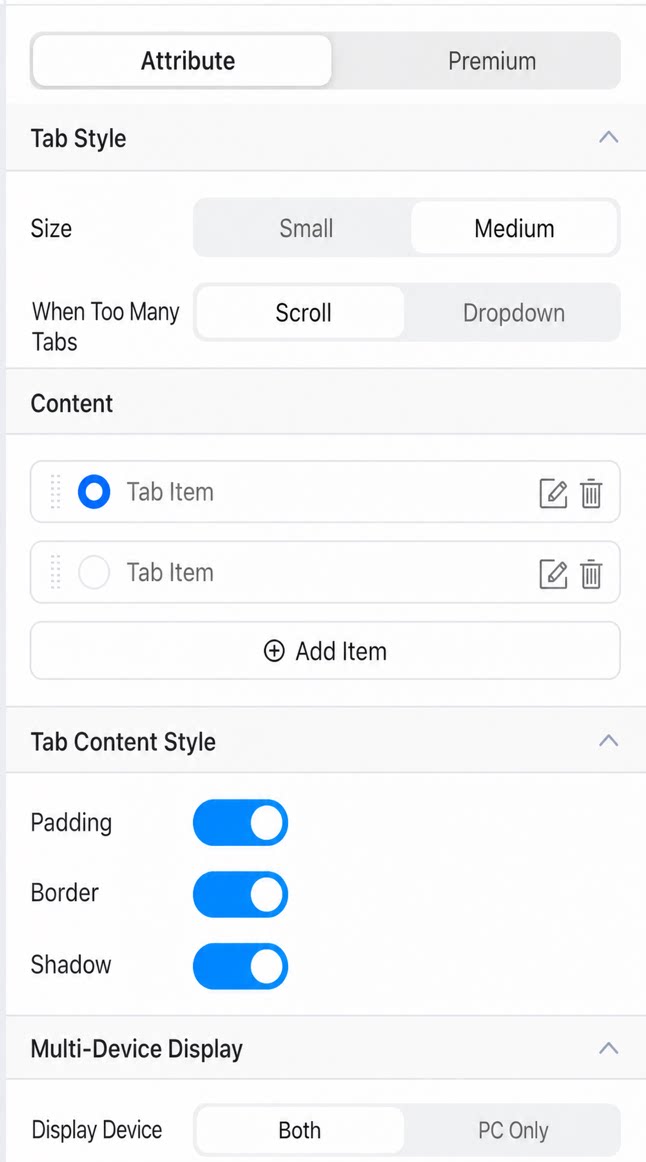 | Size | Small or Medium. Default: Medium. |
| Overflow behavior | Two display modes: scroll or dropdown. | |
| Content | Tab items. Up to 20 tabs. | |
| Padding | Configurable. | |
| Border | Configurable. | |
| Shadow | Configurable. | |
| Display device | Choose both platforms or PC only.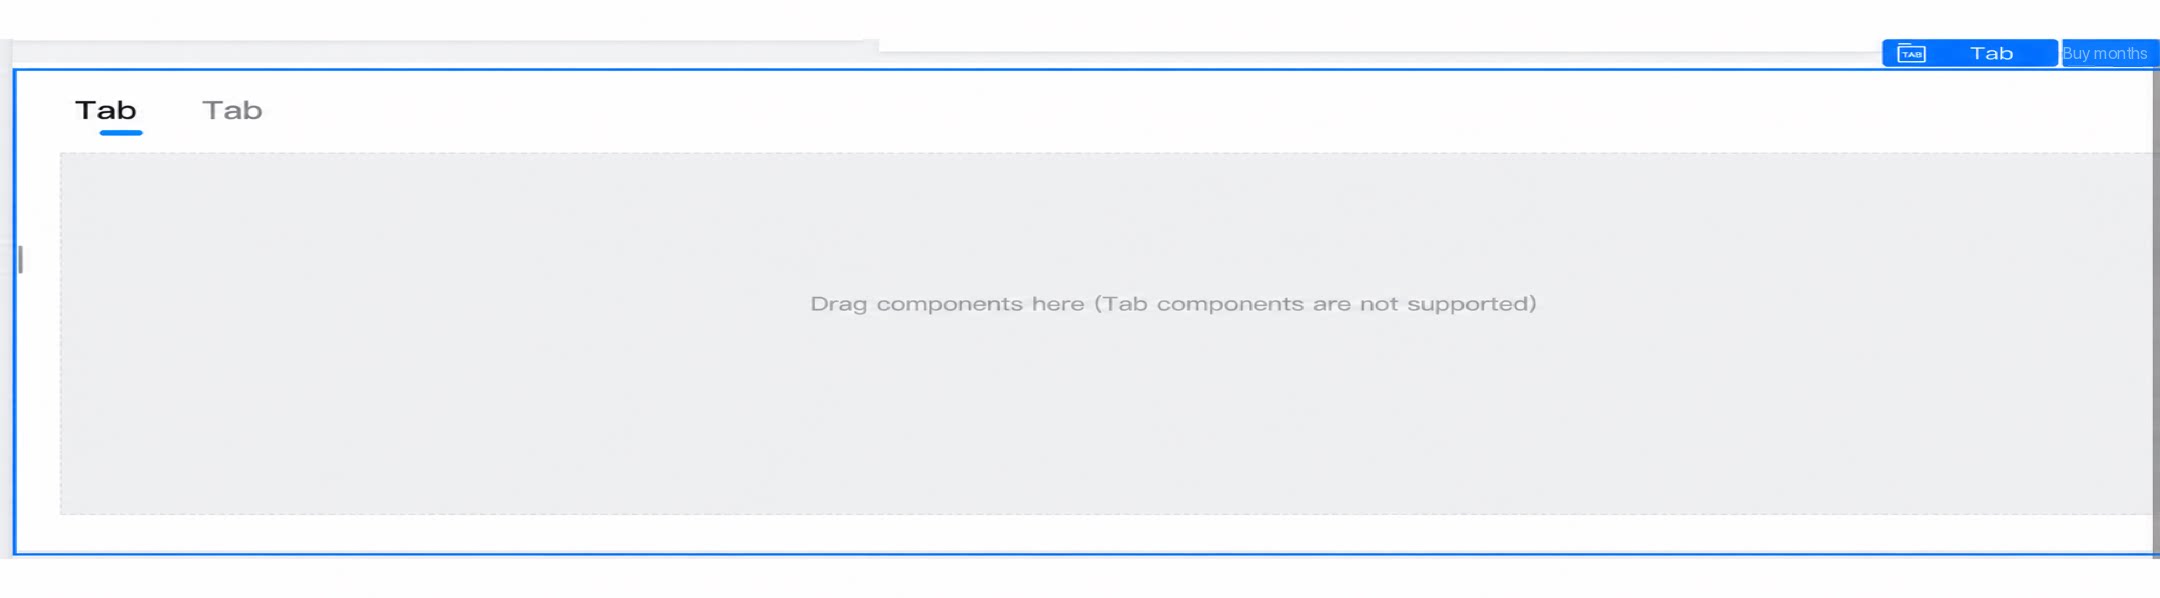 | |
3.2 Space Portals Support the DingTalk Docs Component
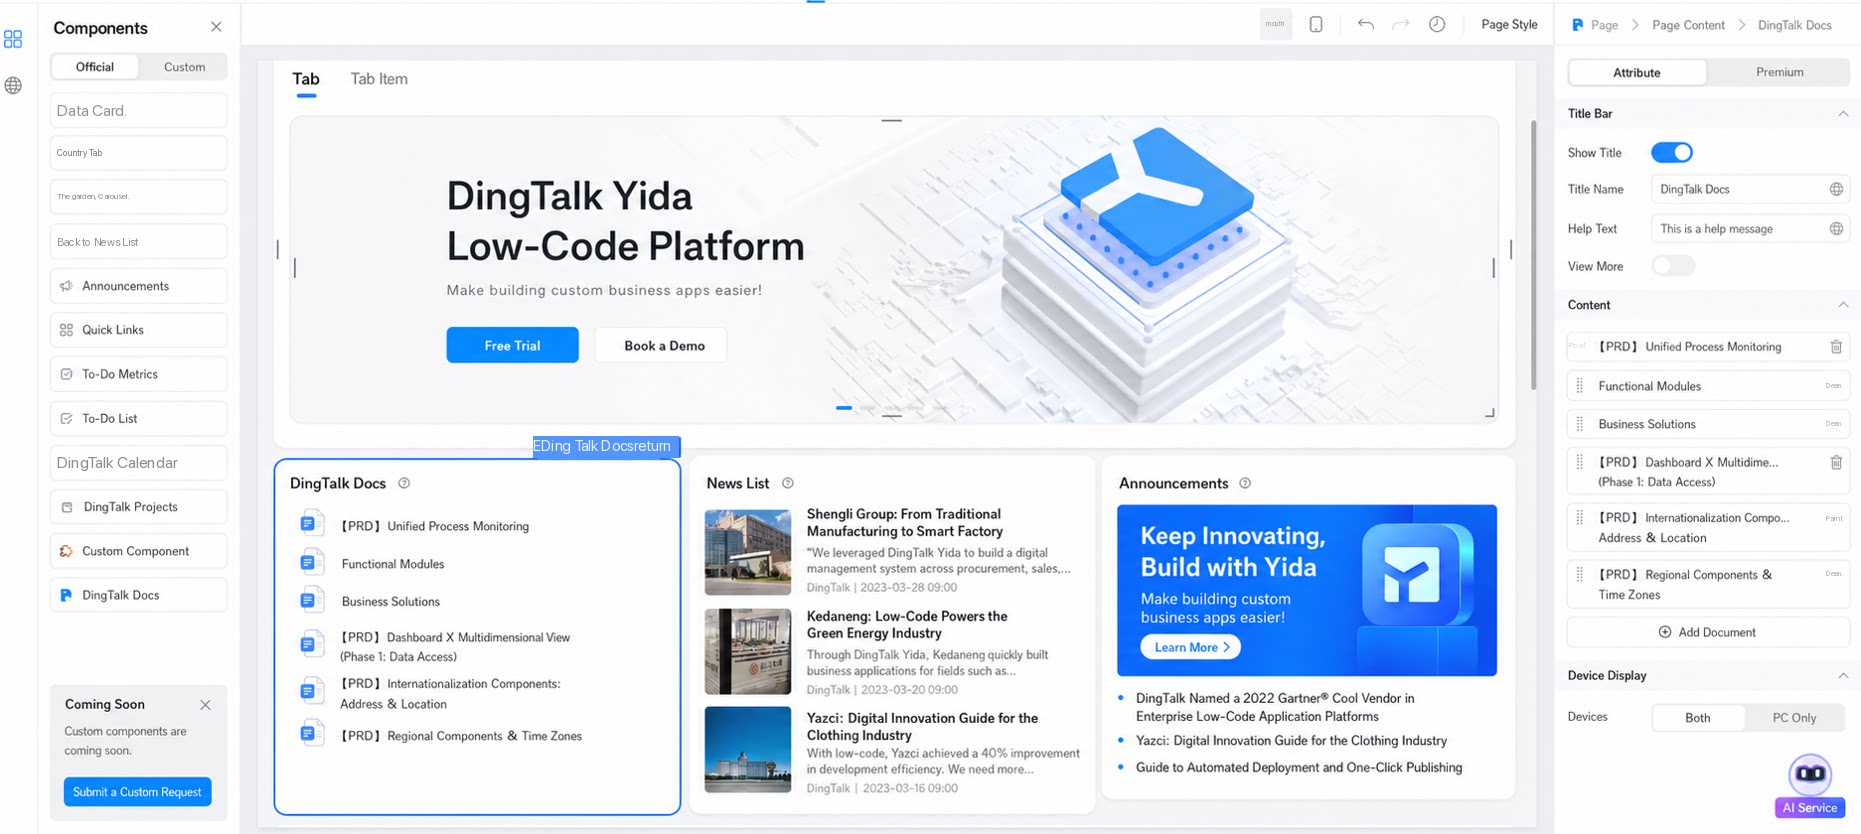
By integrating DingTalk Docs into a YiDA space portal, your organization can centralize document management. All project- and process-related documents are managed and accessed on one platform, reducing the overhead of switching between platforms.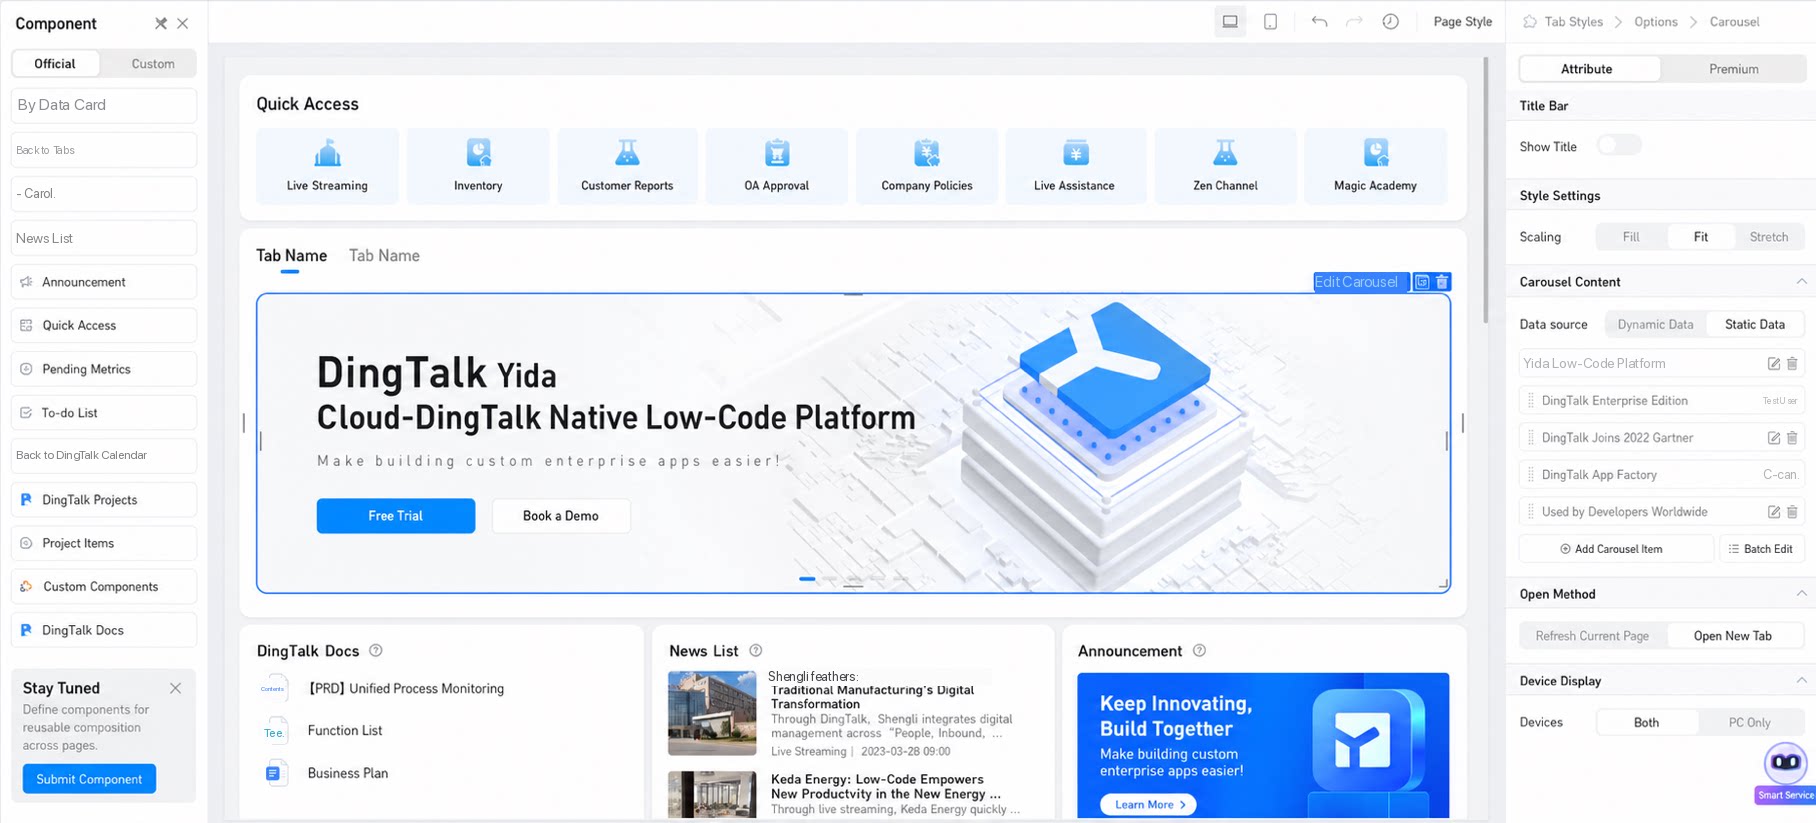
1) Install the Space Portal X DingTalk Docs Component
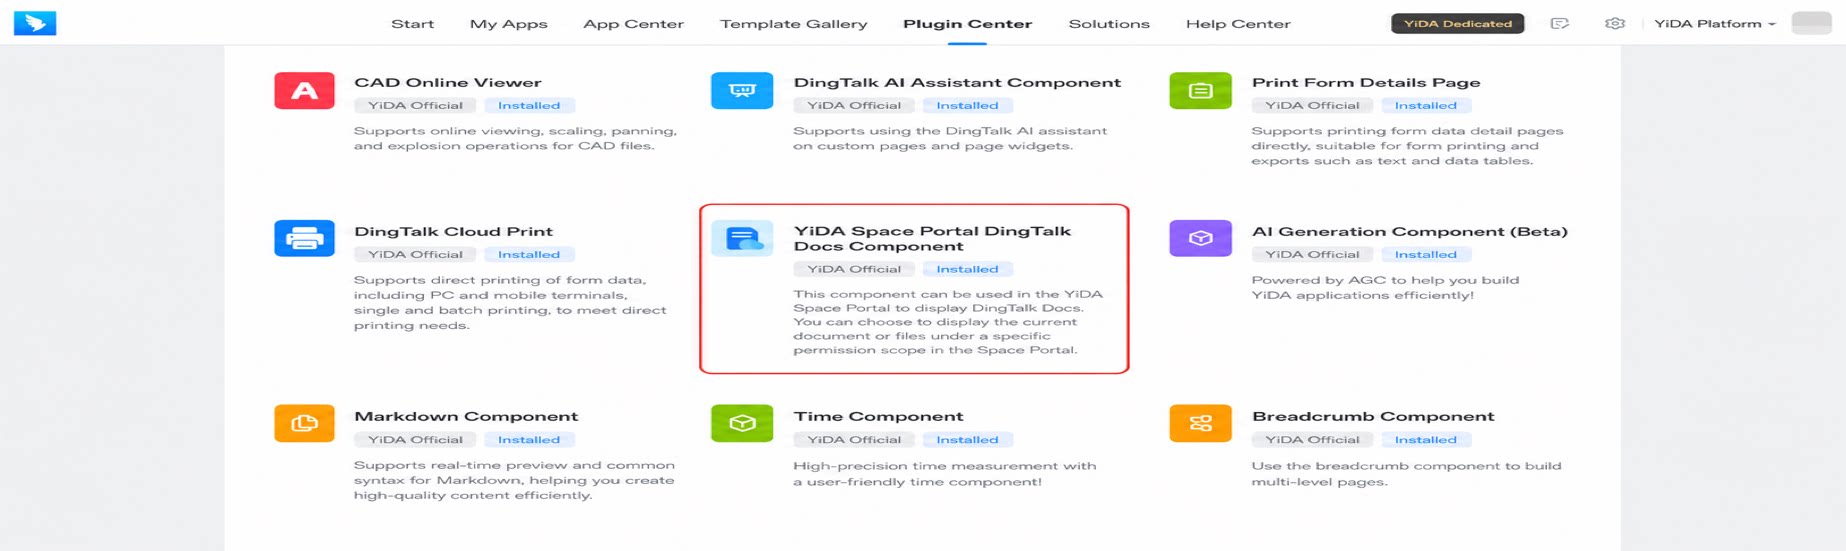
- Go to the YiDA Plugin Center.
- Select the Space portal x DingTalk Docs plugin.
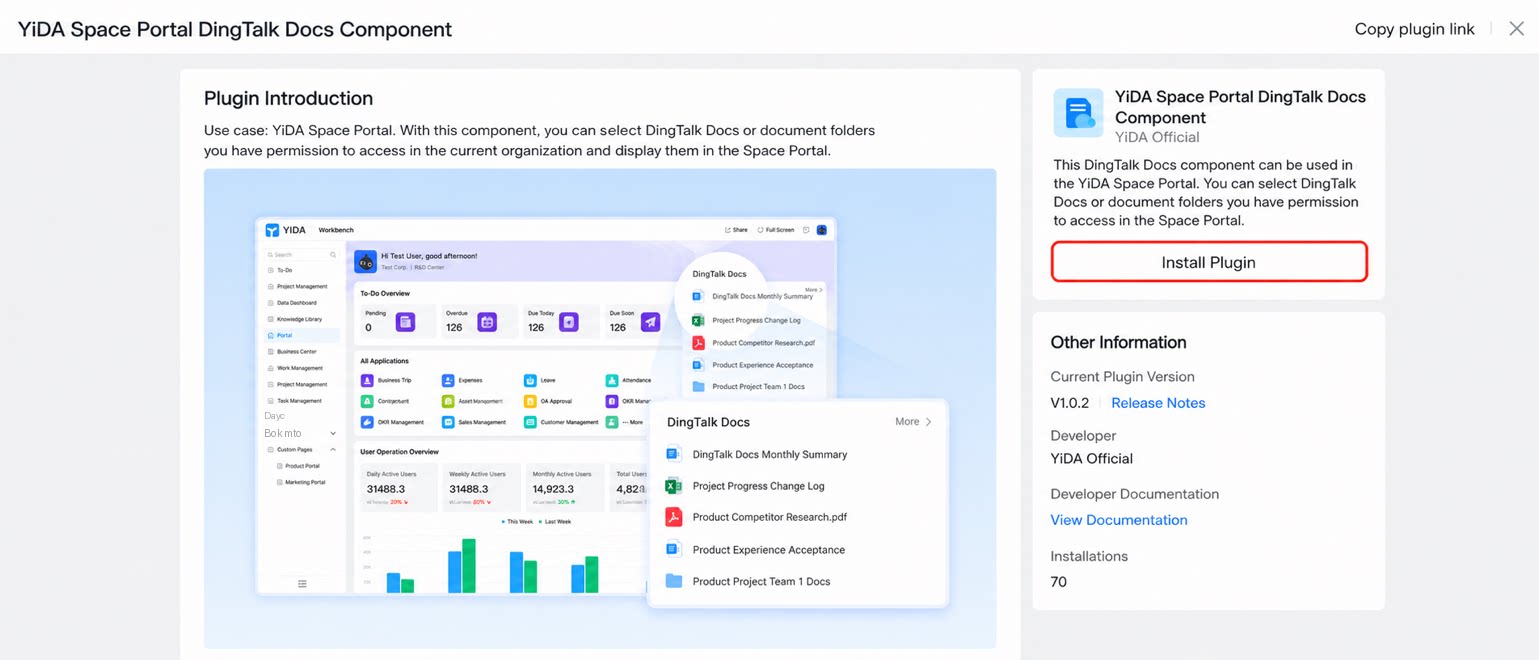
1
Click Install plugin on the right
2
After installation, manage the plugin on DingTalk workbench > platform management page
For details, see Plugin management.
2) Use the Space Portal X DingTalk Docs Component
| Preview | Property | Description |
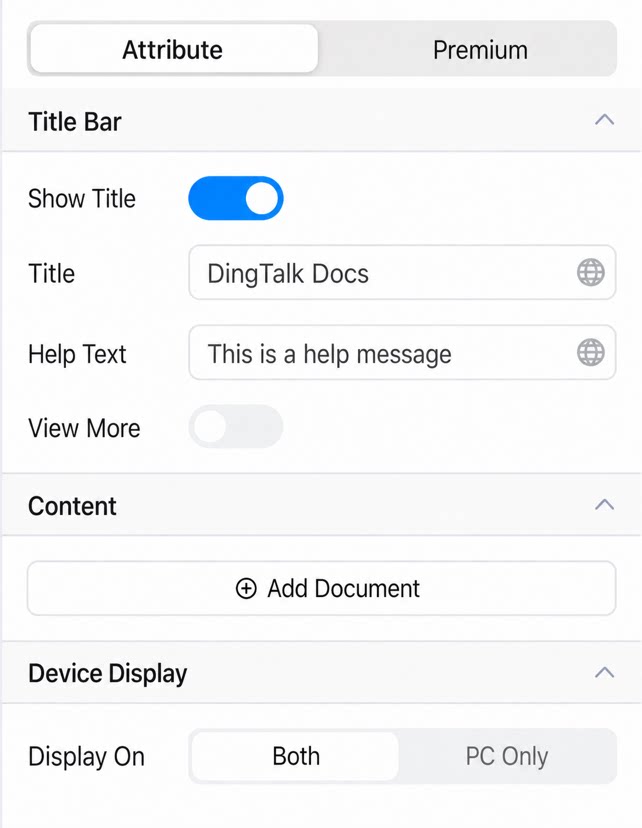 | Show title | Defines the separator between breadcrumbs. Default: ”/”. |
| Title text | Up to 100 characters. | |
| Help tip | Help text that appears next to the ❓ icon when set. | |
| View more | Displays a More button that opens the specified URL when clicked. | |
| Add document | Click to open the DingTalk Docs list and select a document. | |
| Display device | Display device: both platforms or PC only. | |
3.3 Space Portals Support the DingTalk Project Component
By integrating DingTalk Project into a YiDA space portal, project data—such as task status, milestones, and issue records—syncs to the YiDA portal in real time, keeping project teams up to date.| Preview | Property | Description |
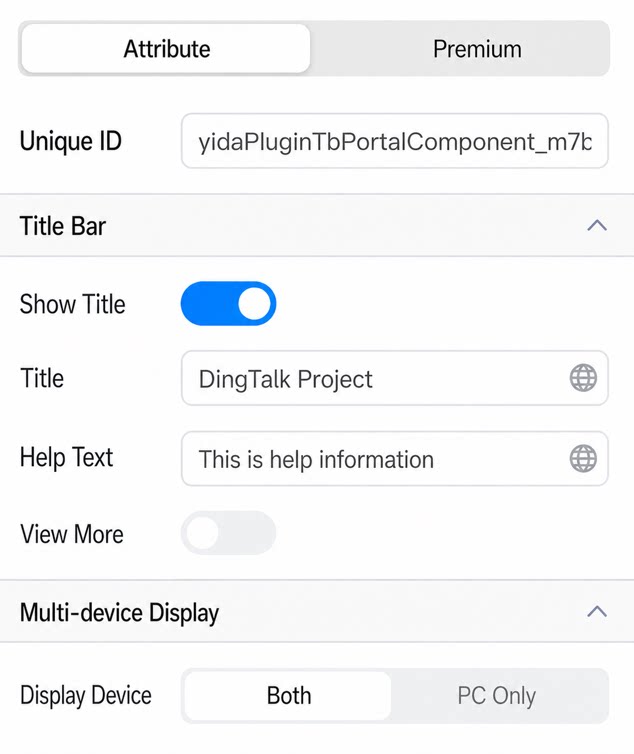 | Unique ID | Auto-generated by the system. |
| Show title | Default: DingTalk Project. | |
| Help tip | Help text that appears next to the ❓ icon when set. | |
| View more | Displays a More button that opens the specified URL when clicked. | |
| Display device | Display device: both platforms or PC only. | |
3.4 Space Portals Support DingTalk Announcement Integration
The dynamic data source of the workspace portal announcement component supports DingTalk announcements. On the YiDA space portal design page, select the Announcement component. In the Attribute panel on the right, set Data source to dynamic data source and set Content source to DingTalk announcements.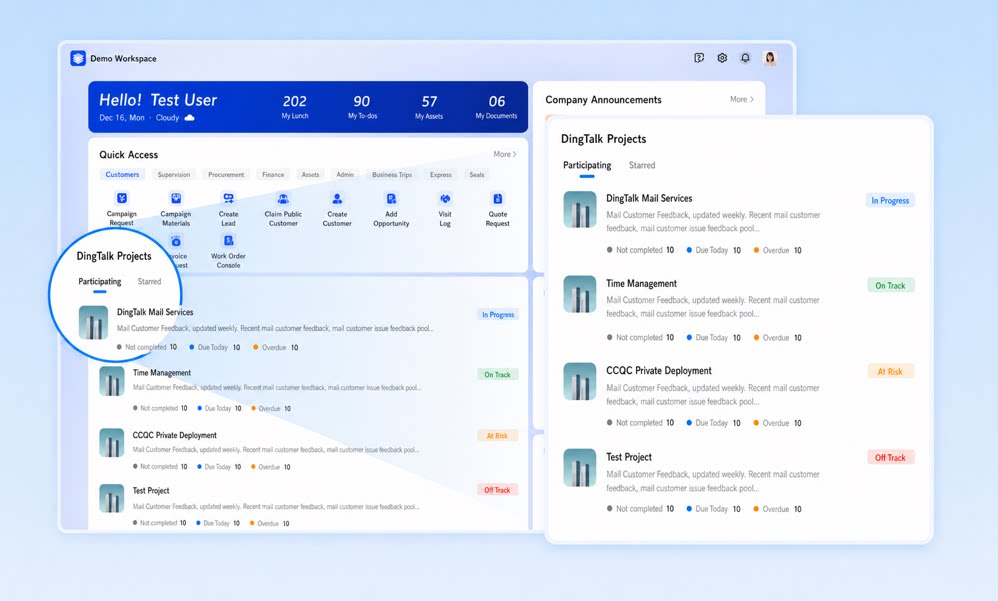
| Announcement preview | Configuration steps | |
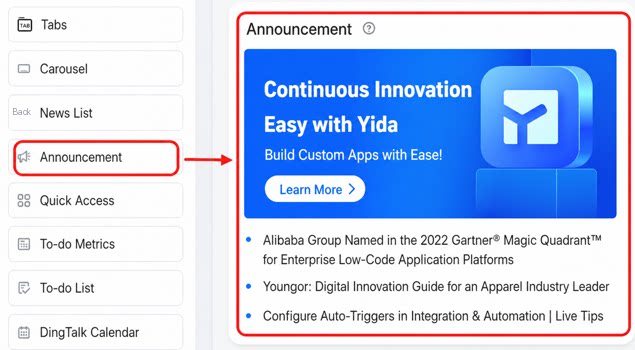 | 1. On the property panel, choose Announcement content > Dynamic data. 2. Set Content source to DingTalk announcements. 3. Multi-select announcement categories. Only categories you have permission to view are available. 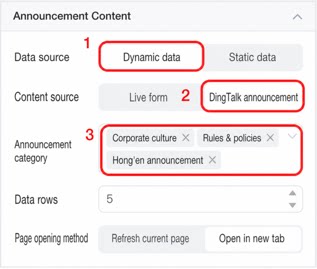 | |
3.5 Space Portals Support DingTalk App Integration
Workspaces let you add DingTalk apps—both internal apps and third-party enterprise apps—that have been published to the DingTalk workbench. You can select DingTalk apps in the static data source of components such as the carousel, article list, announcement, and quick entry. The following sections cover each component:1) Carousel Component
For other basic properties, see this document.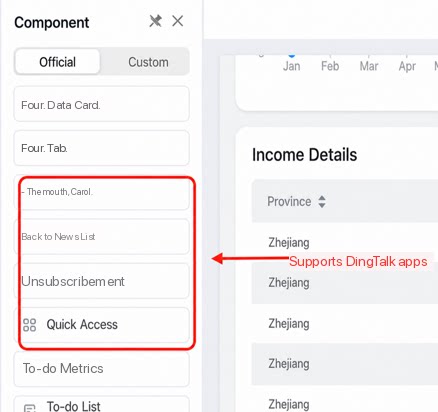
| Carousel preview | Configuration steps | |
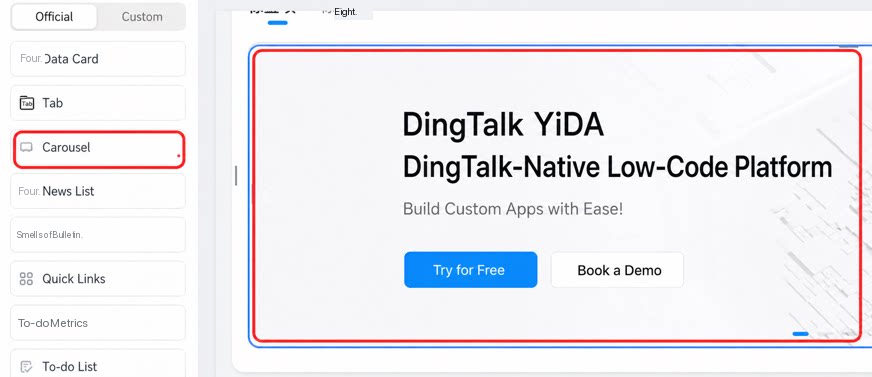 | 1. On the property panel, choose Carousel content > Static data > Edit. 2. For Link type, choose Select app. 3. Click Select app. 4. The app dialog shows YiDA apps and DingTalk apps you have permission to access. 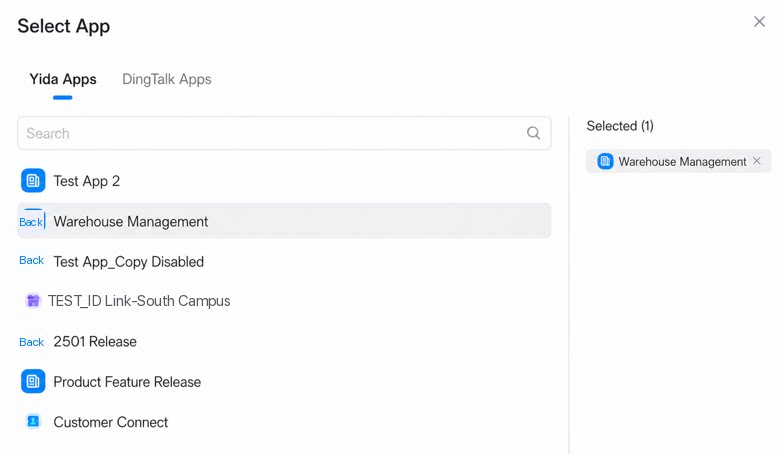 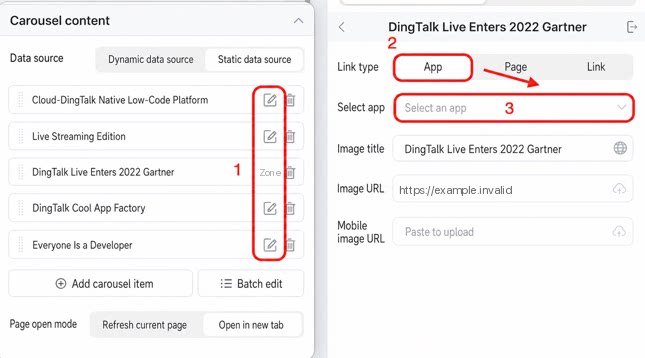 | |
2) Article List
For other basic properties, see this document.| Article list preview | Configuration steps | |
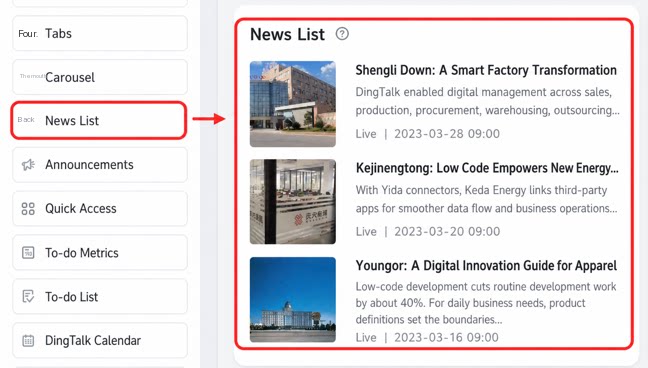 | 1. On the property panel, choose Article content > Static data > Edit. 2. For Link type, choose Select app. 3. Click Select app. 4. The app dialog shows YiDA apps and DingTalk apps you have permission to access. 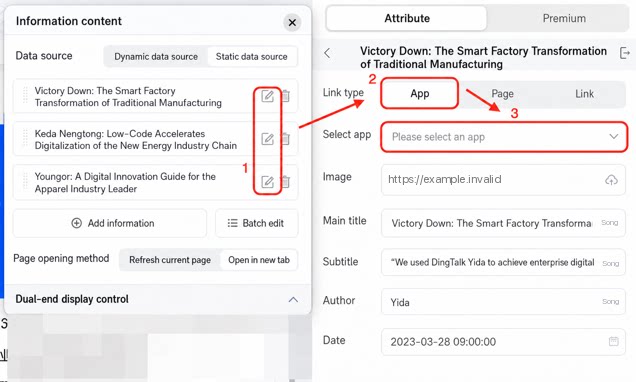 | |
3) Announcement
For other basic properties, see this document.| Announcement preview | Configuration steps | |
| 1. On the property panel, choose Announcement content > Static data > Edit. 2. For Link type, choose Select app. 3. Click Select app. 4. The app dialog shows YiDA apps and DingTalk apps you have permission to access. 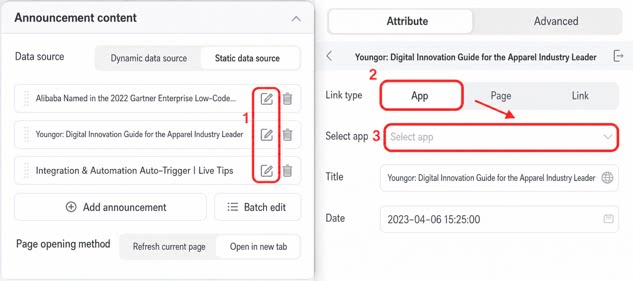 | |
4) Quick Entry
For other basic properties, see this document.| Quick entry preview | Configuration steps | |
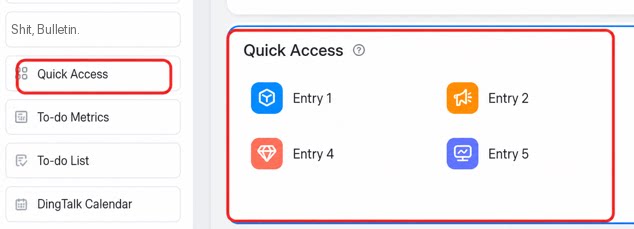 | 1. On the property panel, choose Quick entry > Edit. 2. For Link type, choose Select app. 3. Click Select app. 4. The app dialog shows YiDA apps and DingTalk apps you have permission to access. 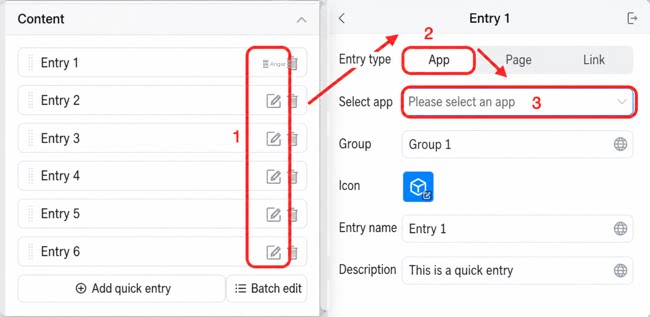 | |
3.6 Space Portals Support DingTalk To-Do Integration
You can integrate DingTalk To-Do into YiDA space portals through two components: To-Do metrics and To-Do list. To-Do list is a tool for managing and tracking tasks or pending items. It appears as a task checklist that helps users organize their work efficiently. To-Do metrics is a statistics and visualization tool for the status of items in the To-Do list. It gives users a data-driven view of overall task progress and encourages goal-oriented completion.1) To-Do List
| Preview | Property | Description |
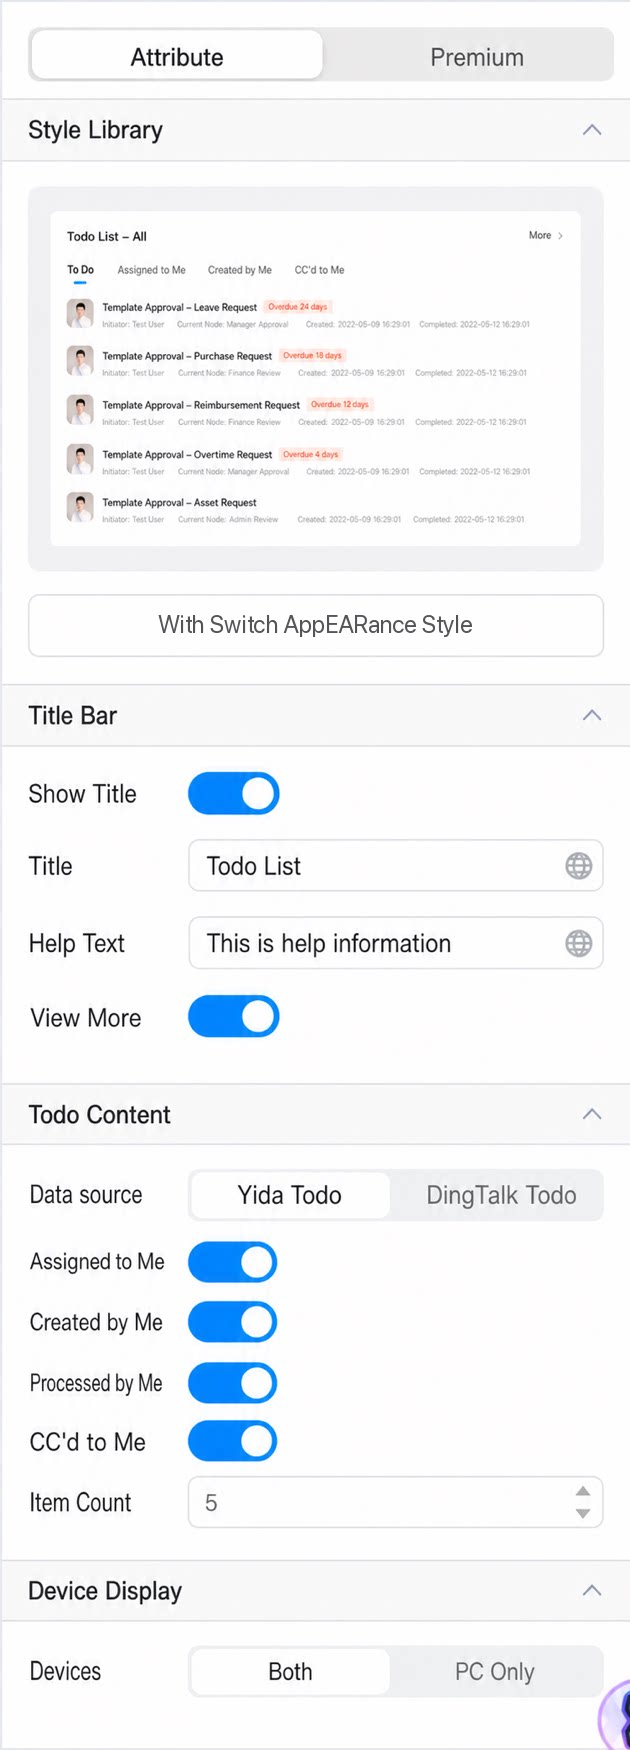 | Style library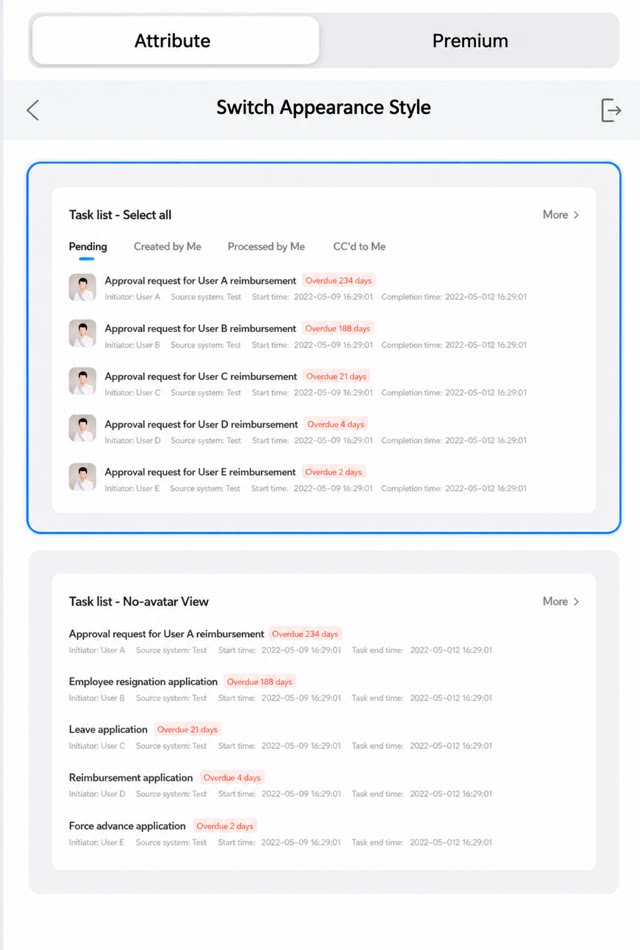 | Switch between list styles. |
| Title bar | On by default. Can be turned off. When on, configure the title text, help tip, and View more. | |
YiDA To-Do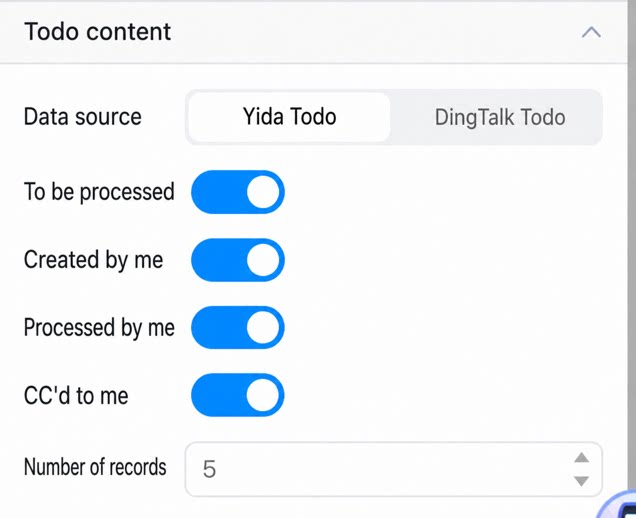 | Set To-Do content to YiDA To-Do. Only workflow task data from YiDA is included.
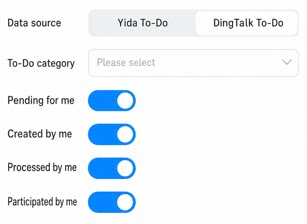 | |
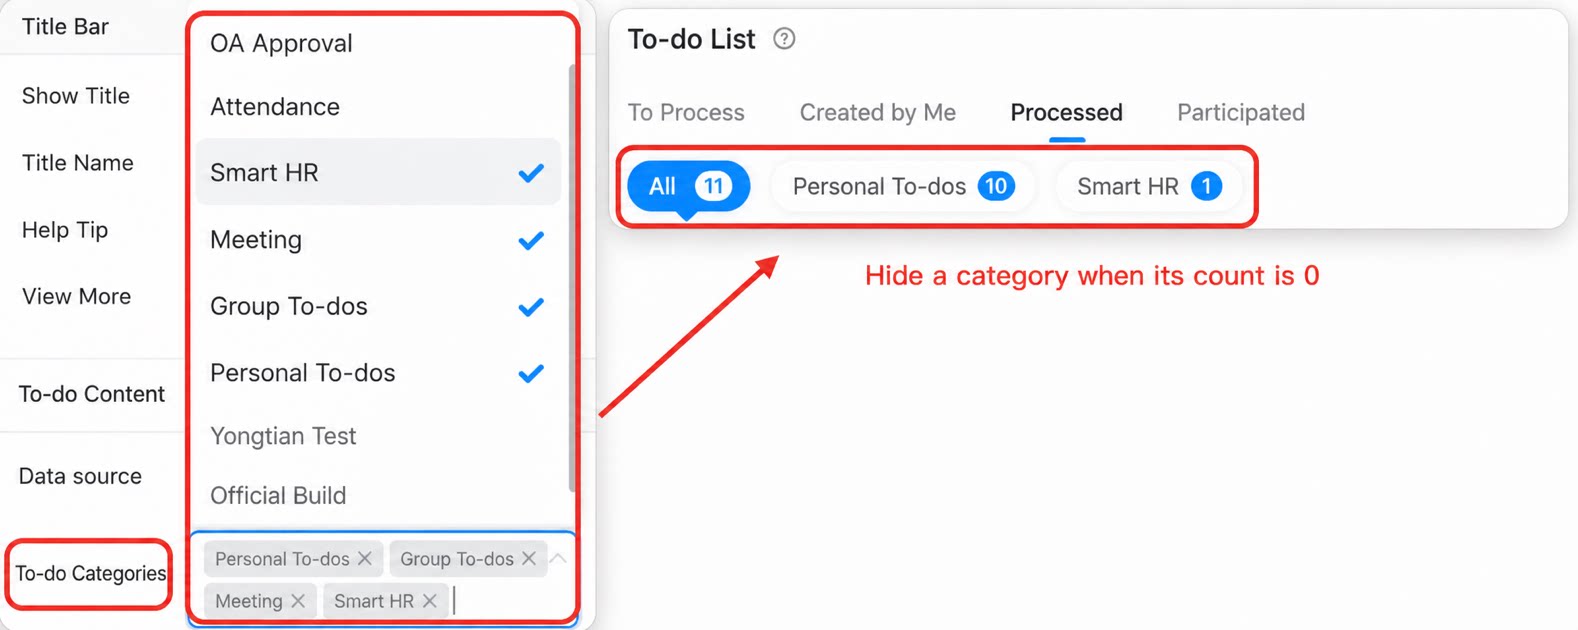
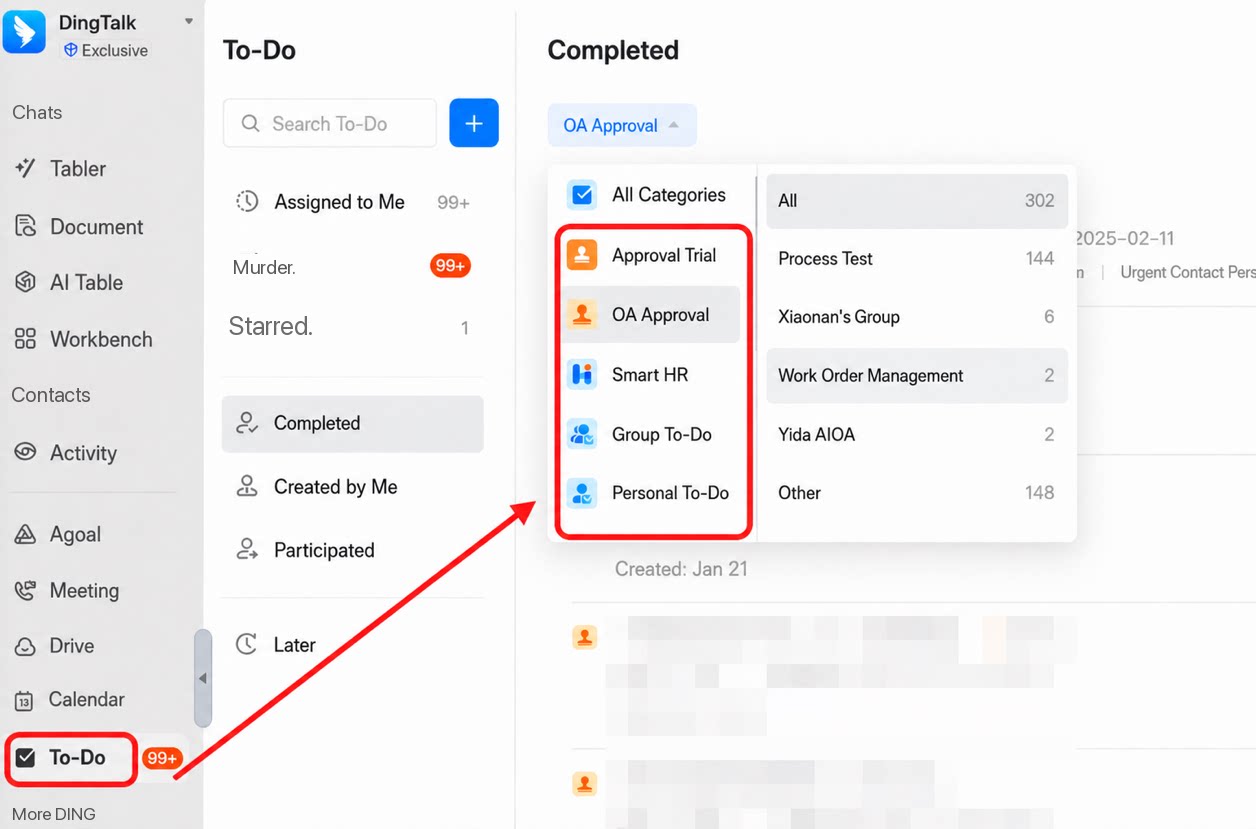
DingTalk To-Do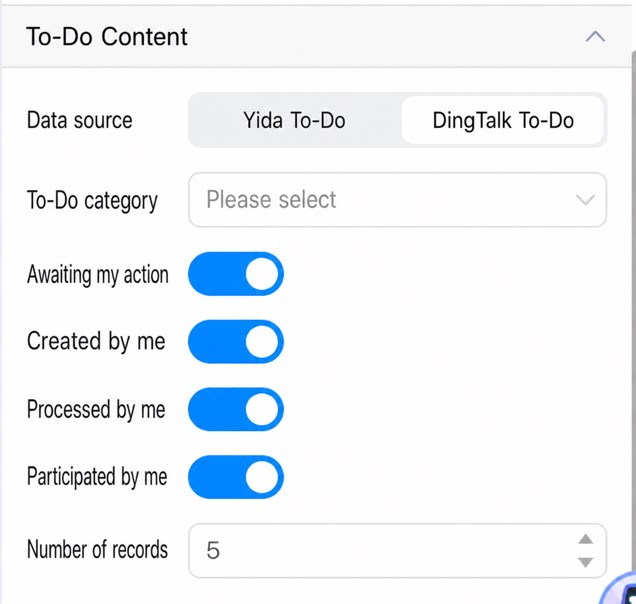 | Set To-Do content to DingTalk To-Do.
To-Do category options match the top-level categories in DingTalk To-Do for the organization, as shown below:
  | |
| Display device | Display device: both platforms or PC only. |
2) To-Do Metrics
| Preview | Property | Description |
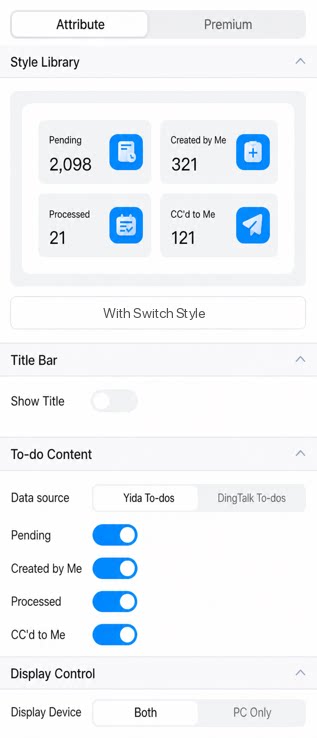 | Style library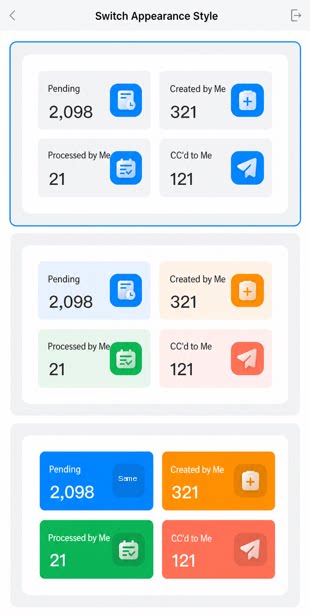 | Blue by default. Switch to other styles as needed. |
Show title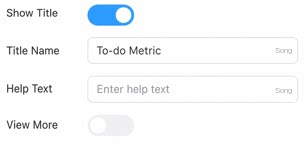 | On by default. Can be turned off. When on, configure the title text, help tip, and View more. | |
YiDA To-Do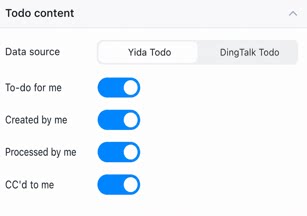 | Set To-Do content to YiDA To-Do. Statistics include only workflow task data from YiDA.
| |
| DingTalk To-Do | Set To-Do content to DingTalk To-Do.
| |
| Display device | Display device: both platforms or PC only. |