Chats
Chats Calendar
 Meetings
 Contacts
 Mail
Mail Docs
Docs Drive
Drive AI Table
 AI Minutes
 Attendance
 Approval
 YiDA
YiDA Admin Console
1. Form Overview
Basic settings cover the following features: ① Page name ② Submission rules ③ Redirect page after submission ④ Push to “Task Center - Created by me” ⑤ Record title ⑥ Form/workflow serial number ⑦ Hide navigation2. Access Path and Usage
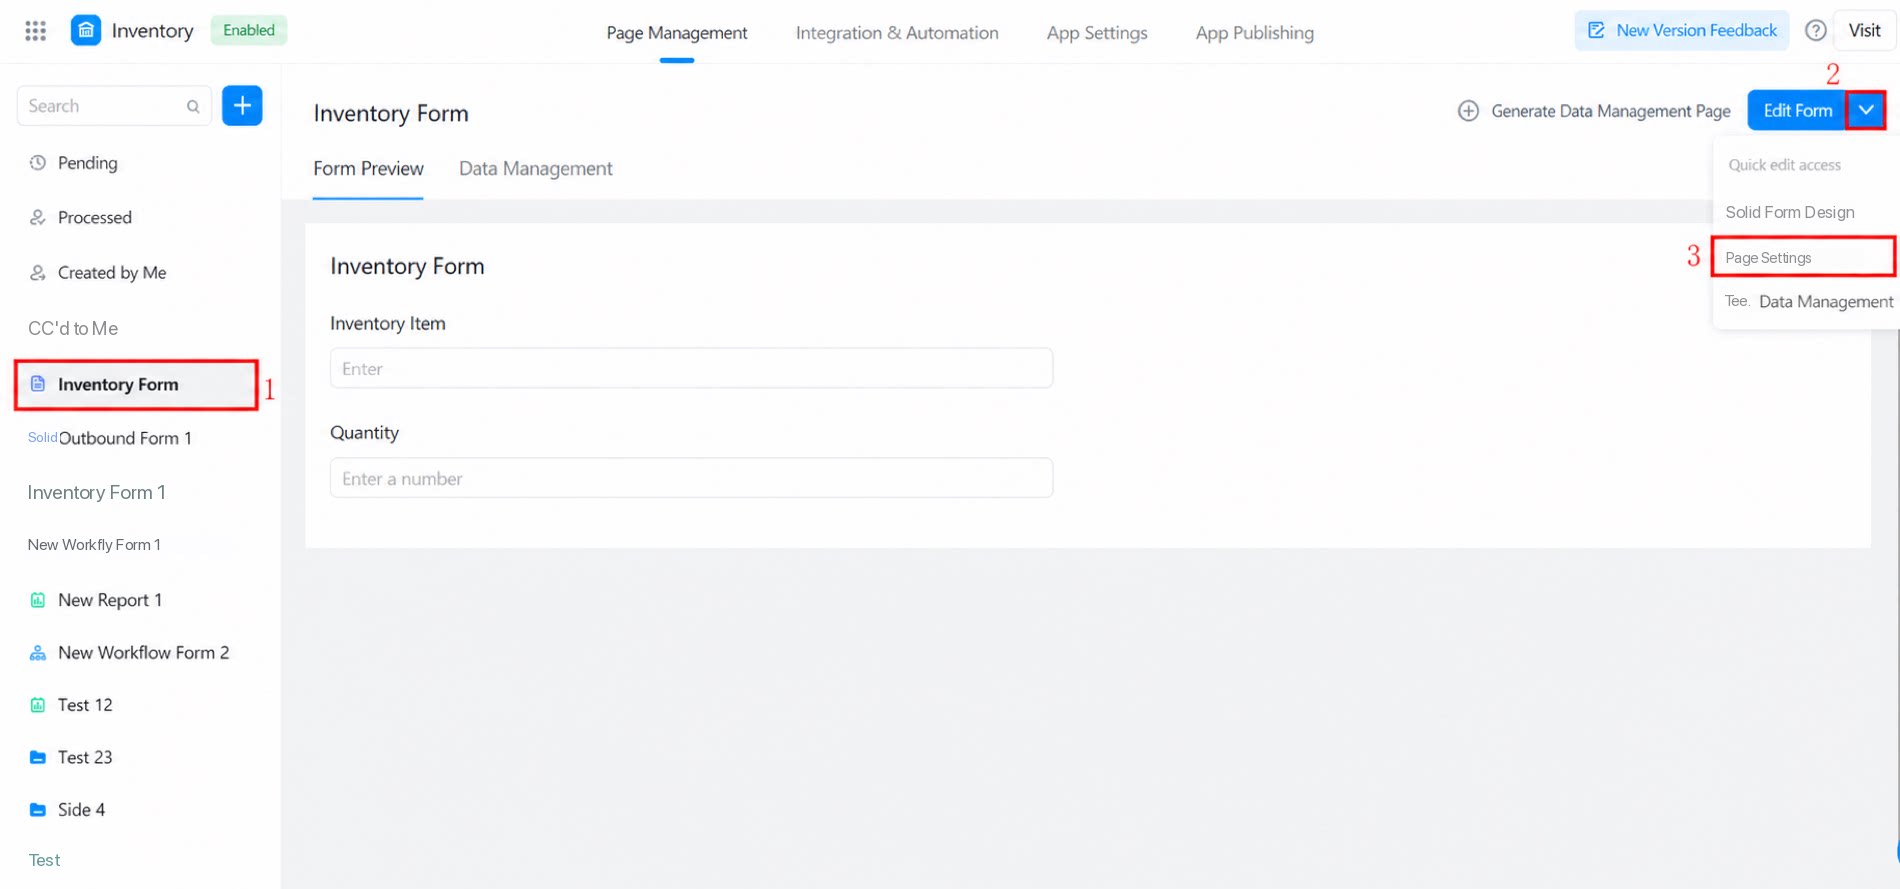
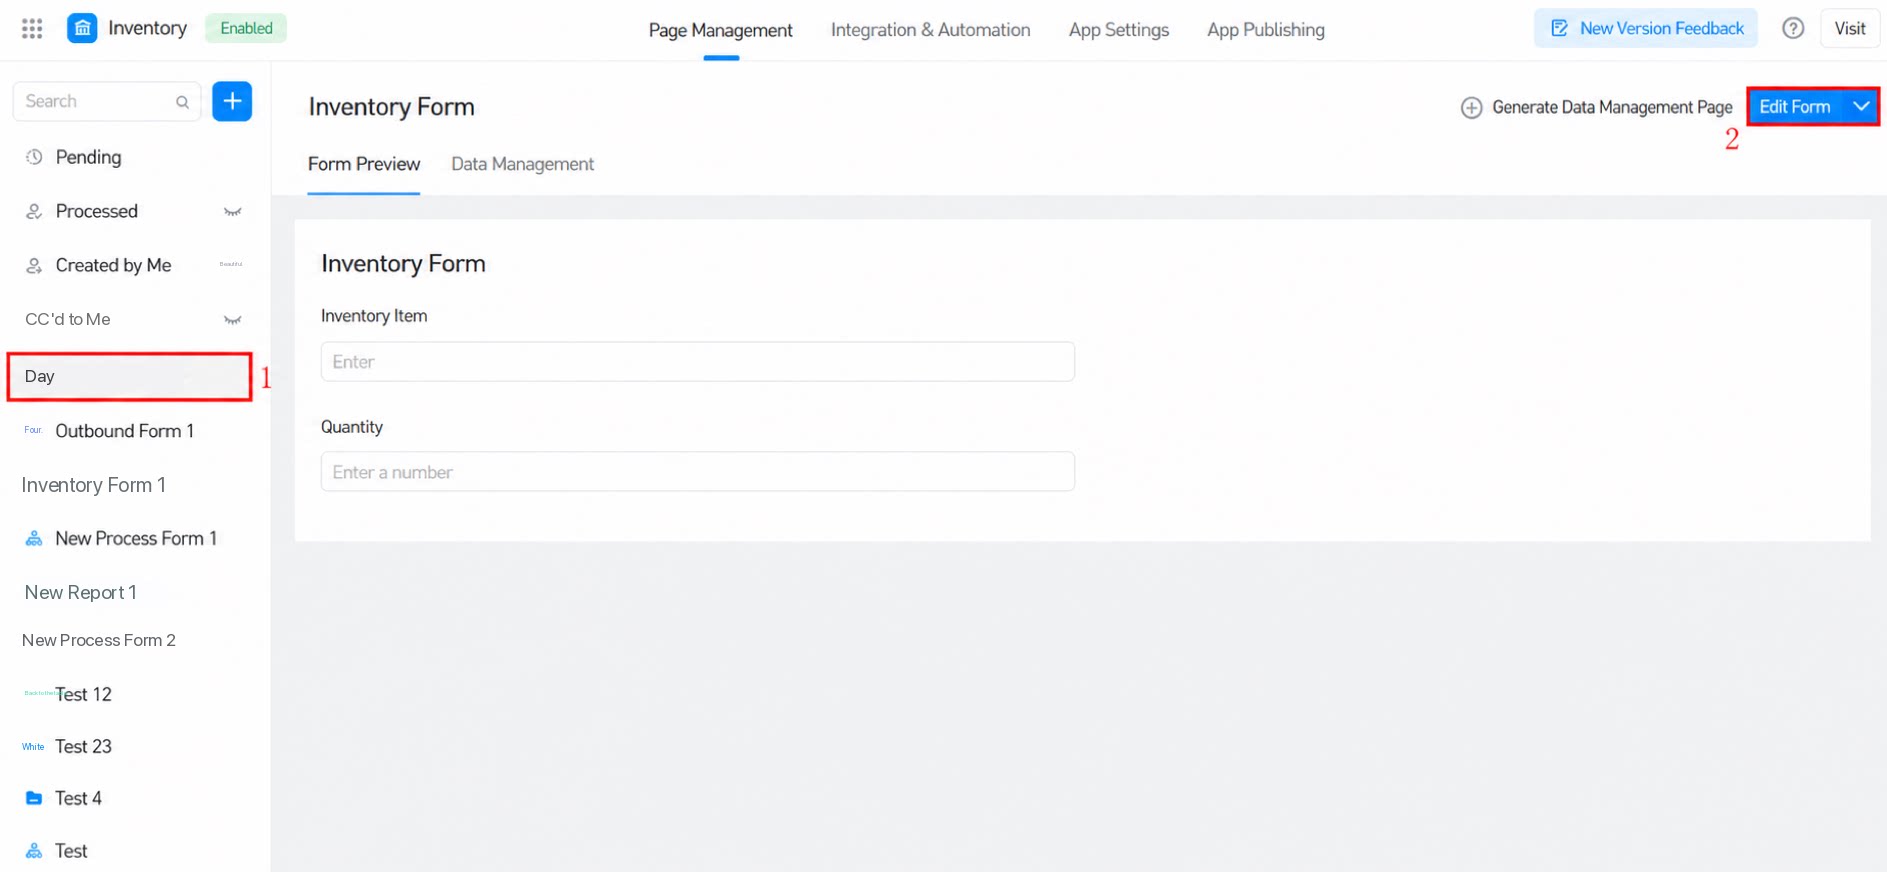
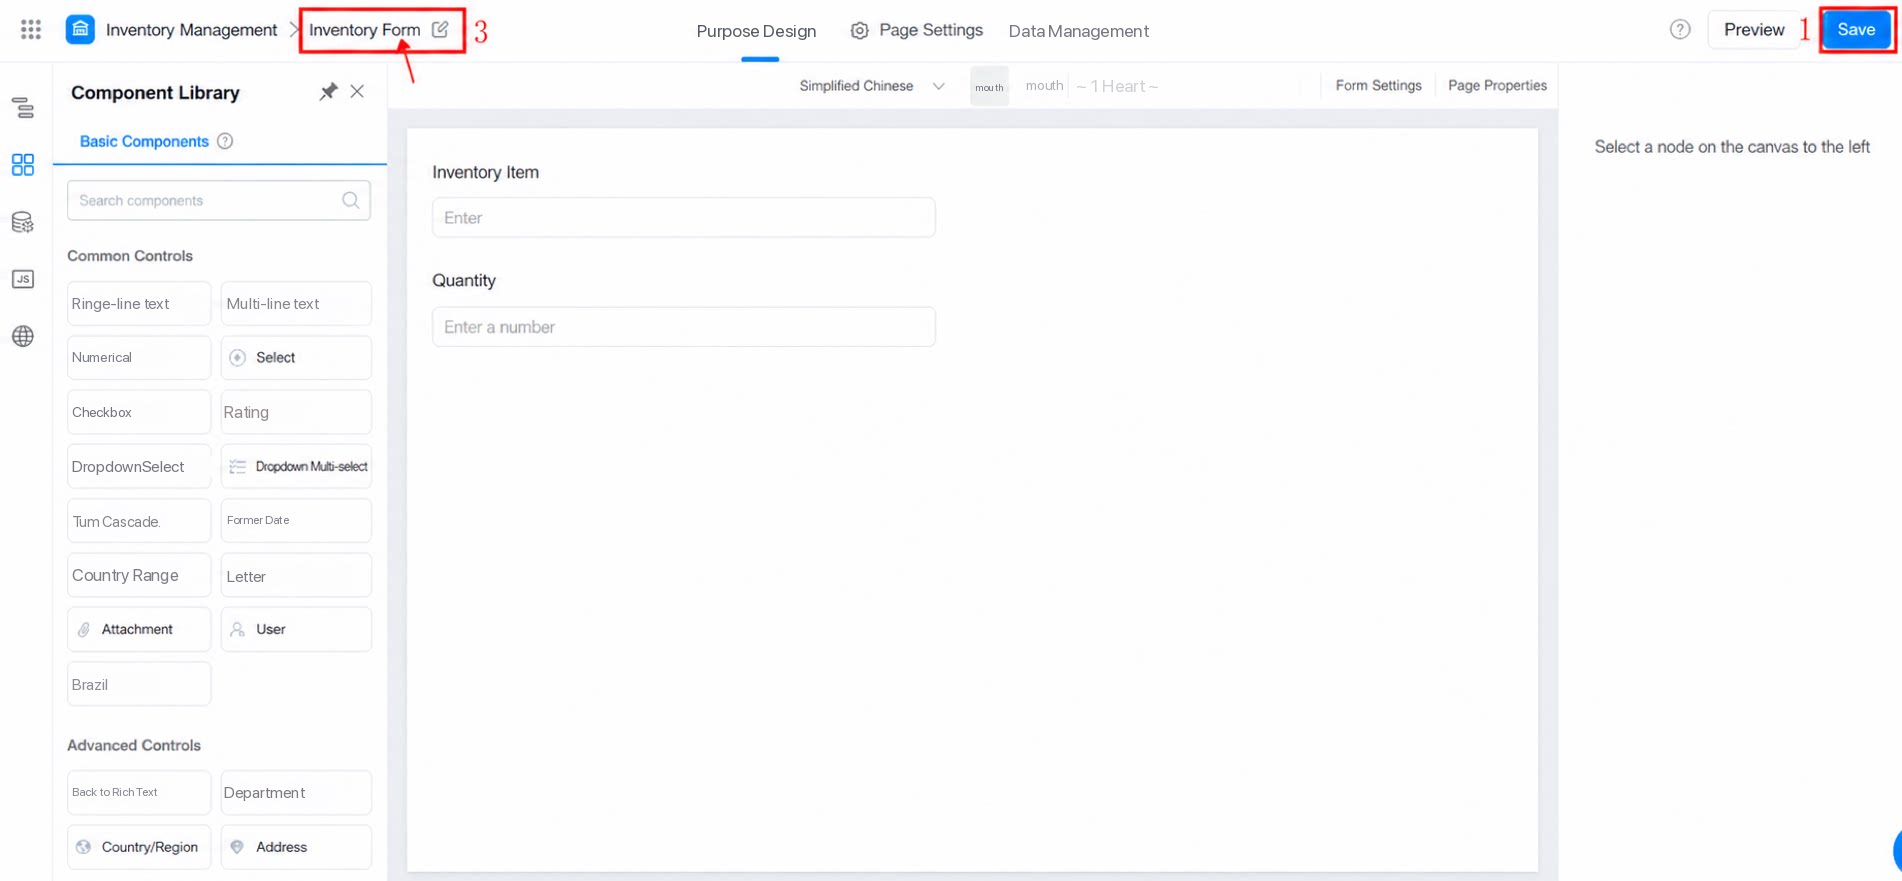
Access path: Open an app >> select the target Form page >> click the down arrow next to Edit Form >> Page settings.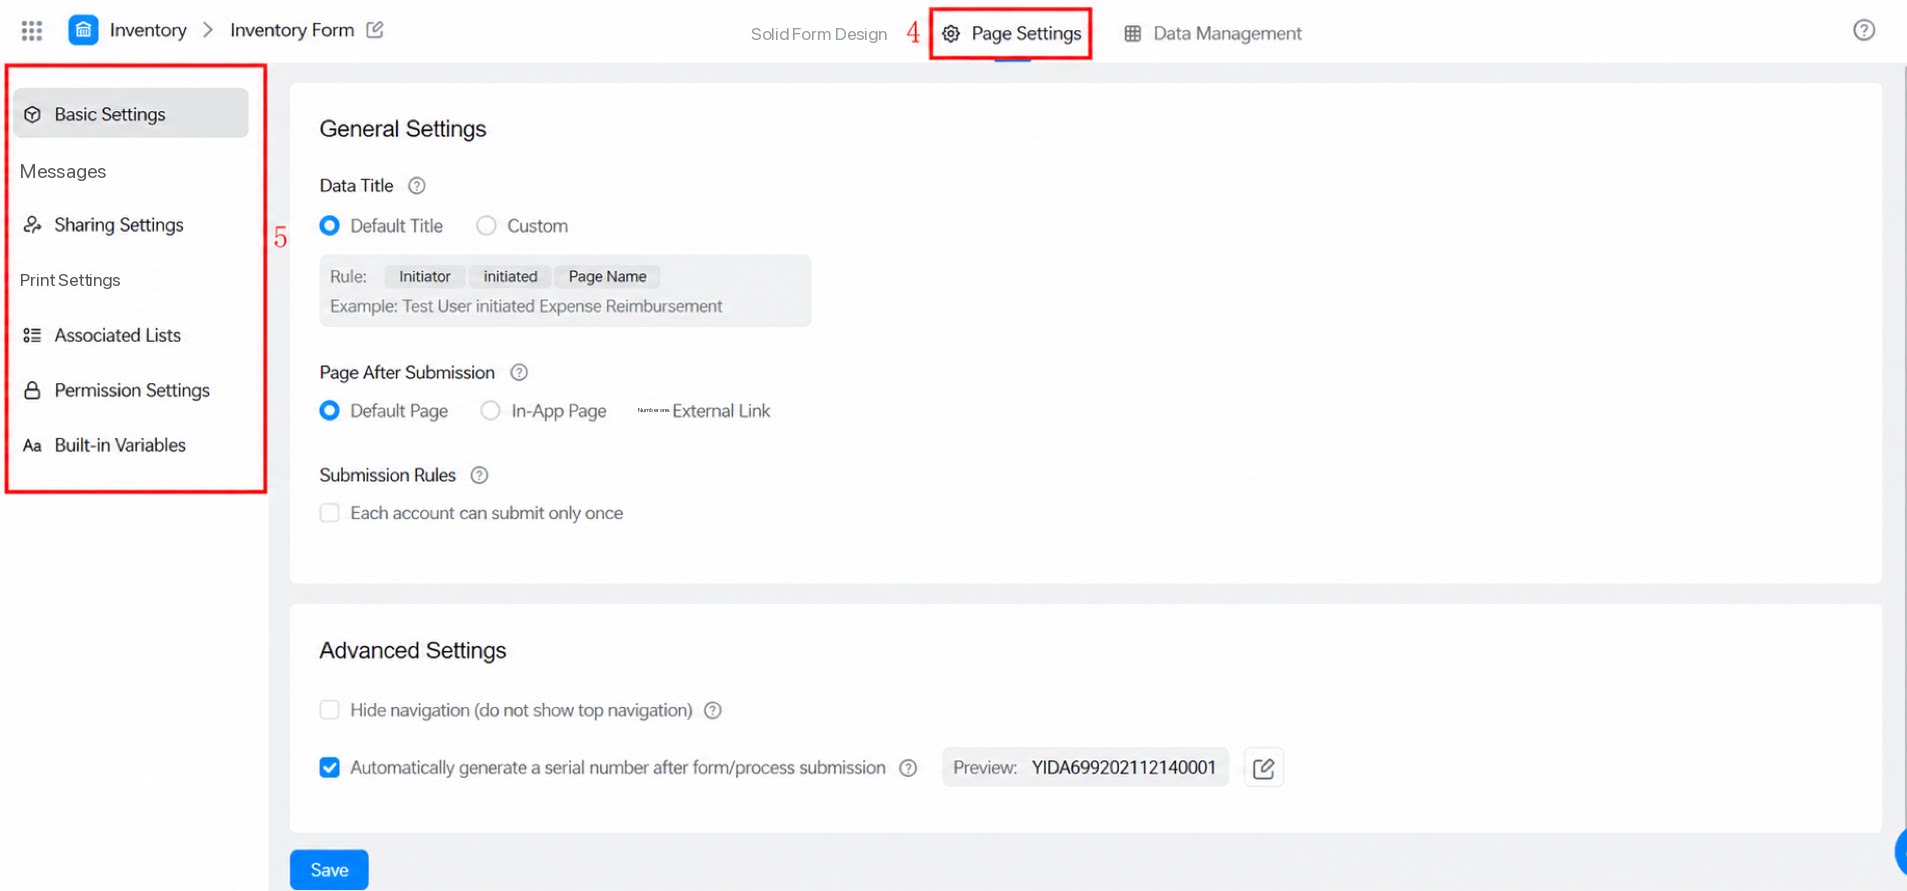
2.1 Usage
2.1.1 Page Name
The record title refers to the Form page name. You can modify it in two ways. Note: Renaming the Form only affects records submitted afterward. Previously submitted Form names remain unchanged.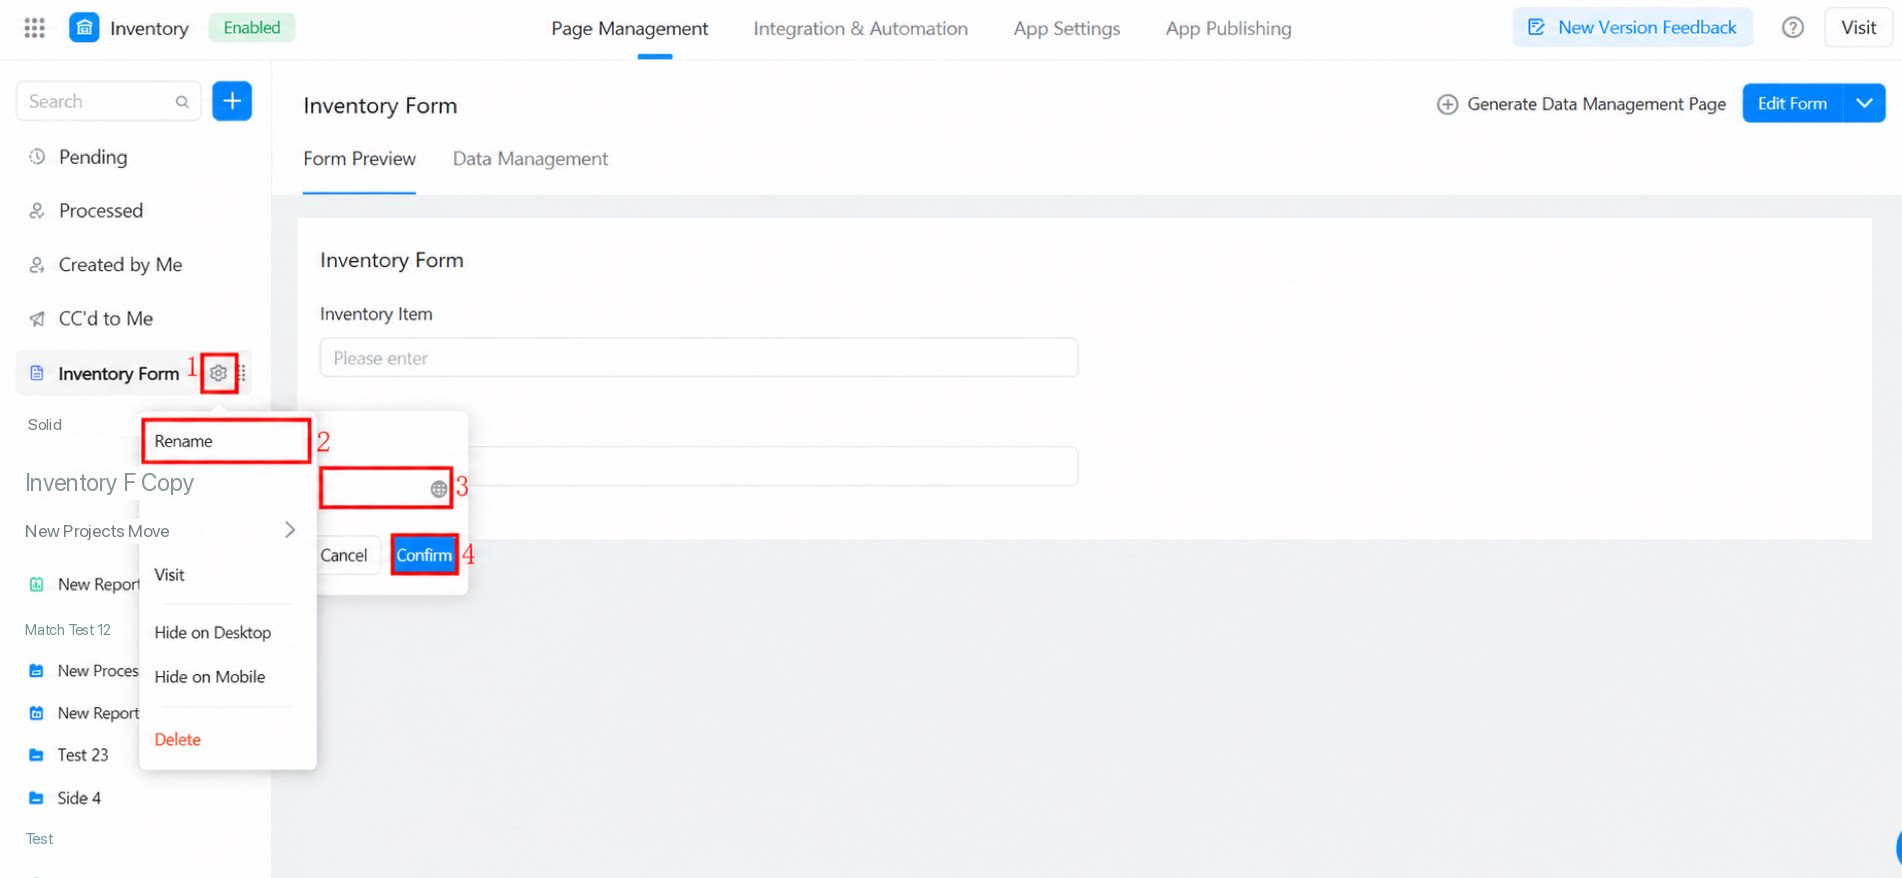
2.1.2 Submission Rules
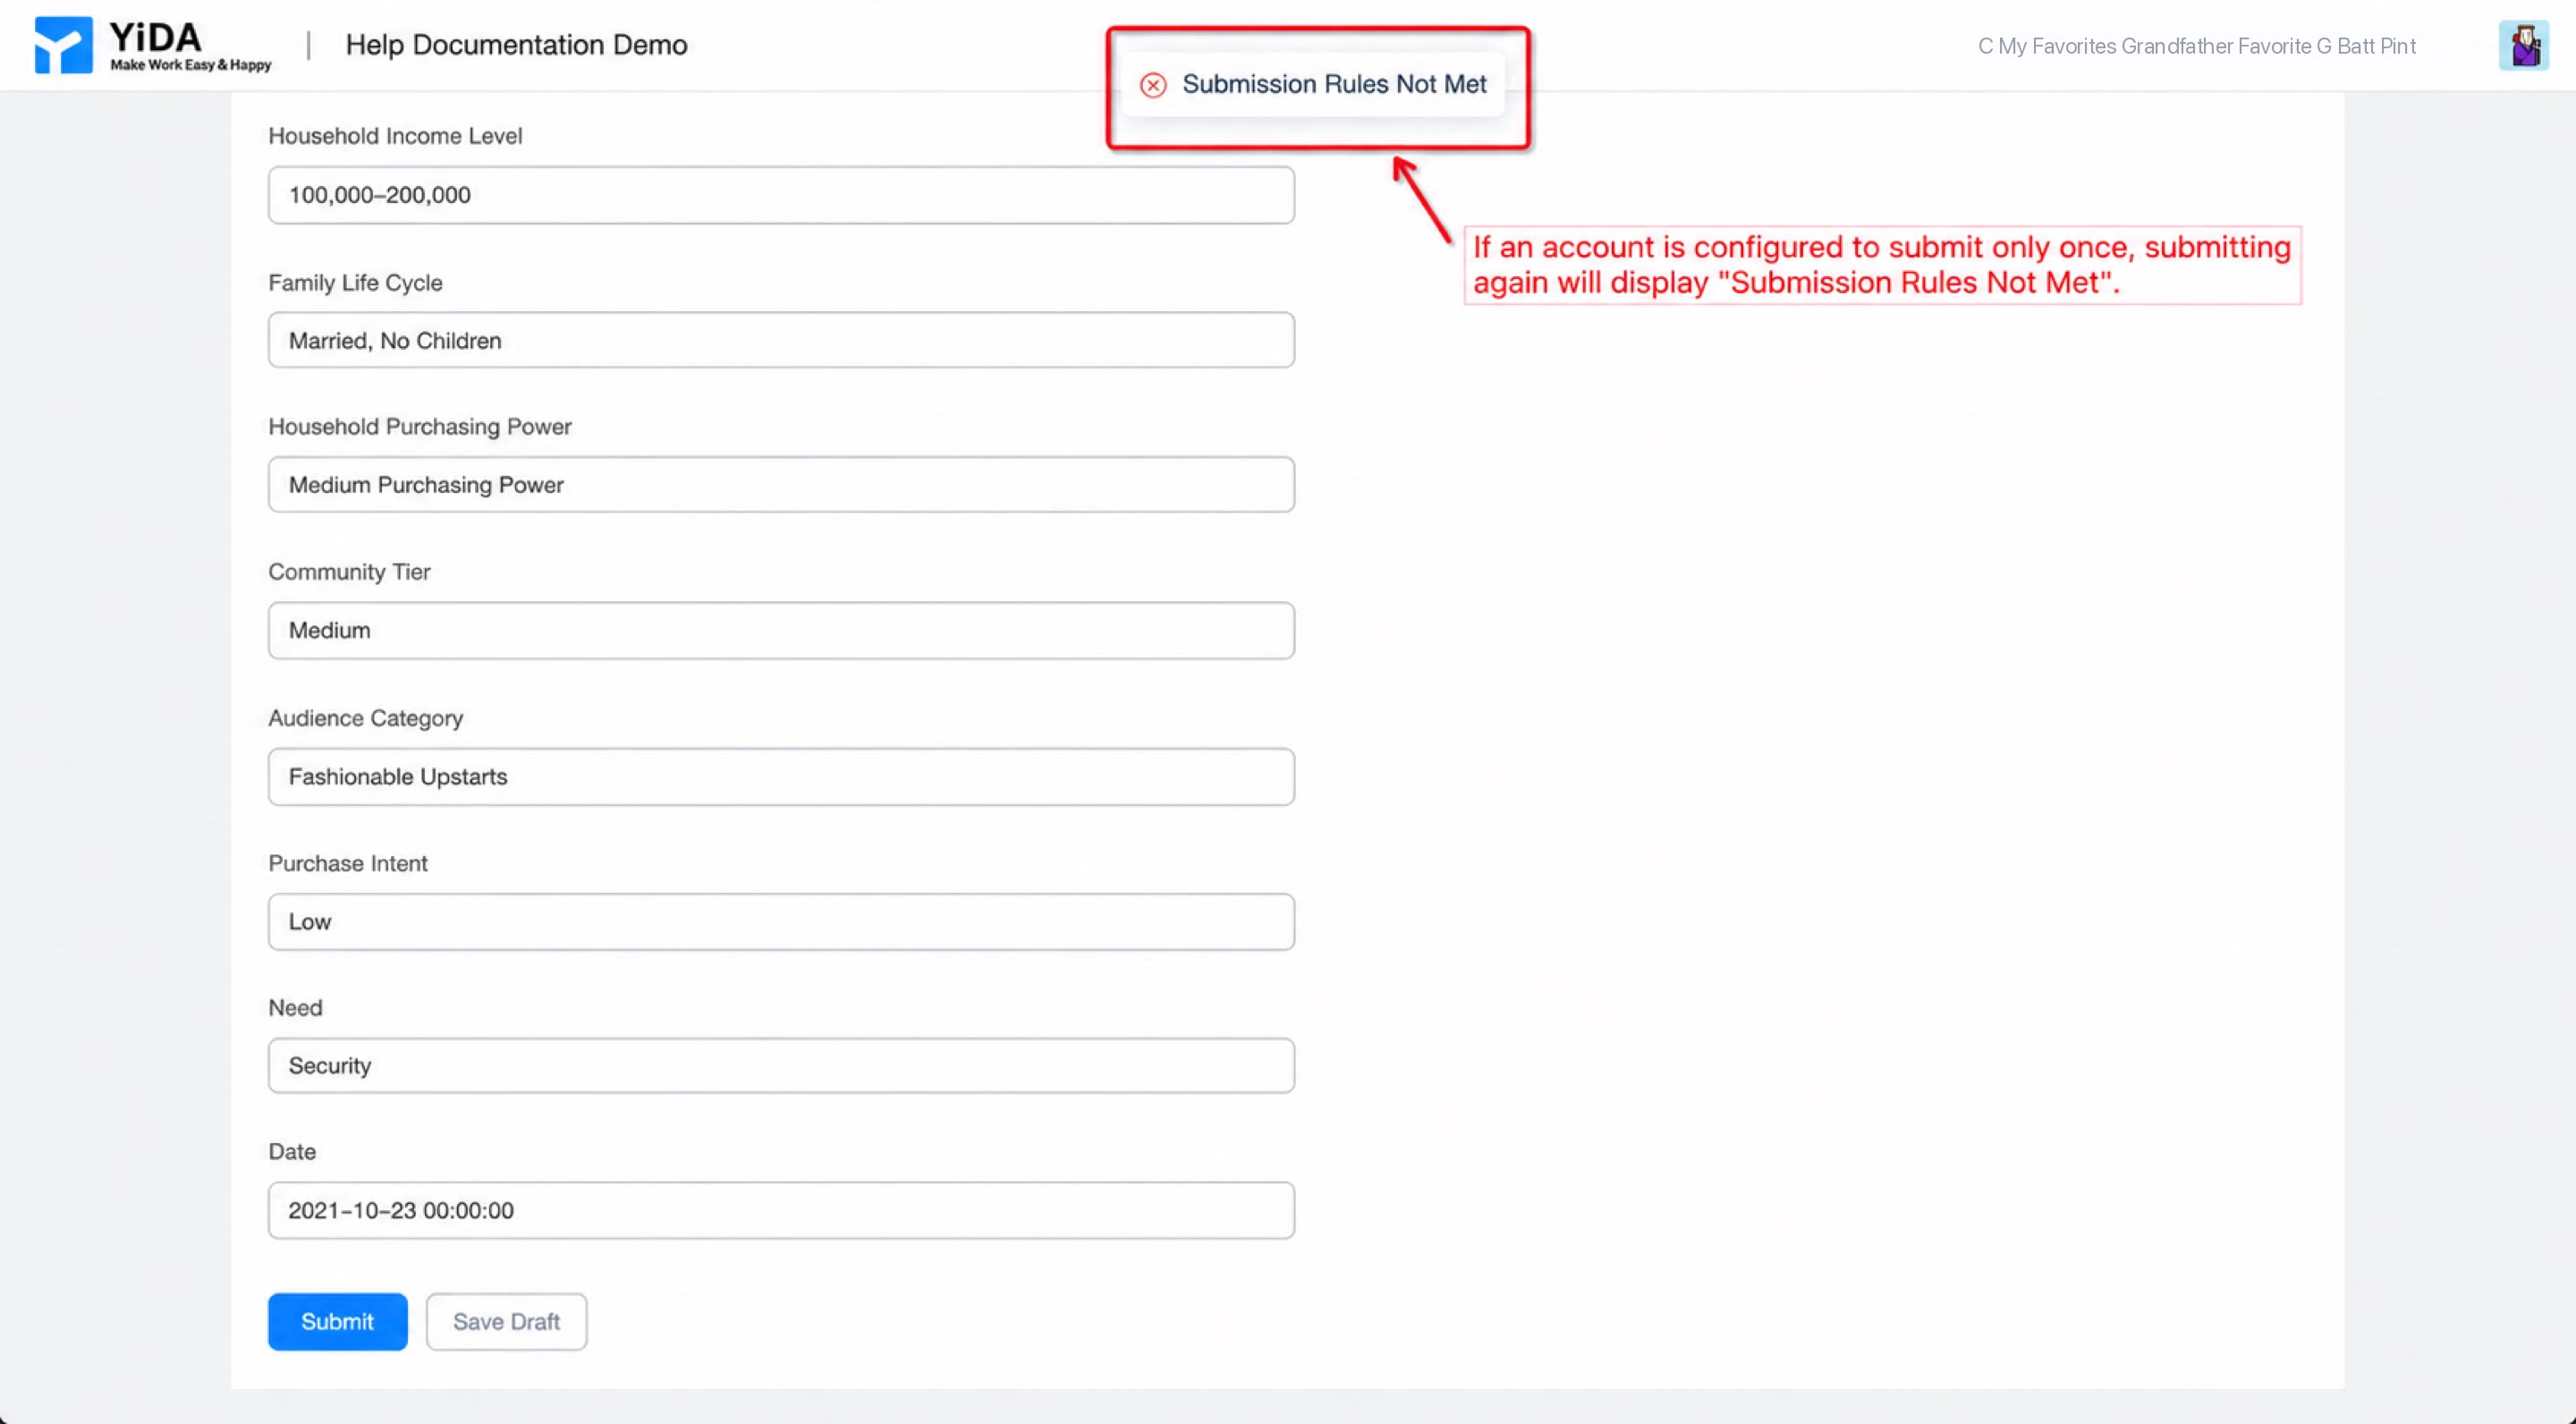
You can set the Form submission rule to “Only one submission allowed per account”. When enabled, the same account cannot submit multiple instances. (This feature is Off by default; enable it manually if needed.) Note: Submission rules do not apply to data imported in bulk from Excel.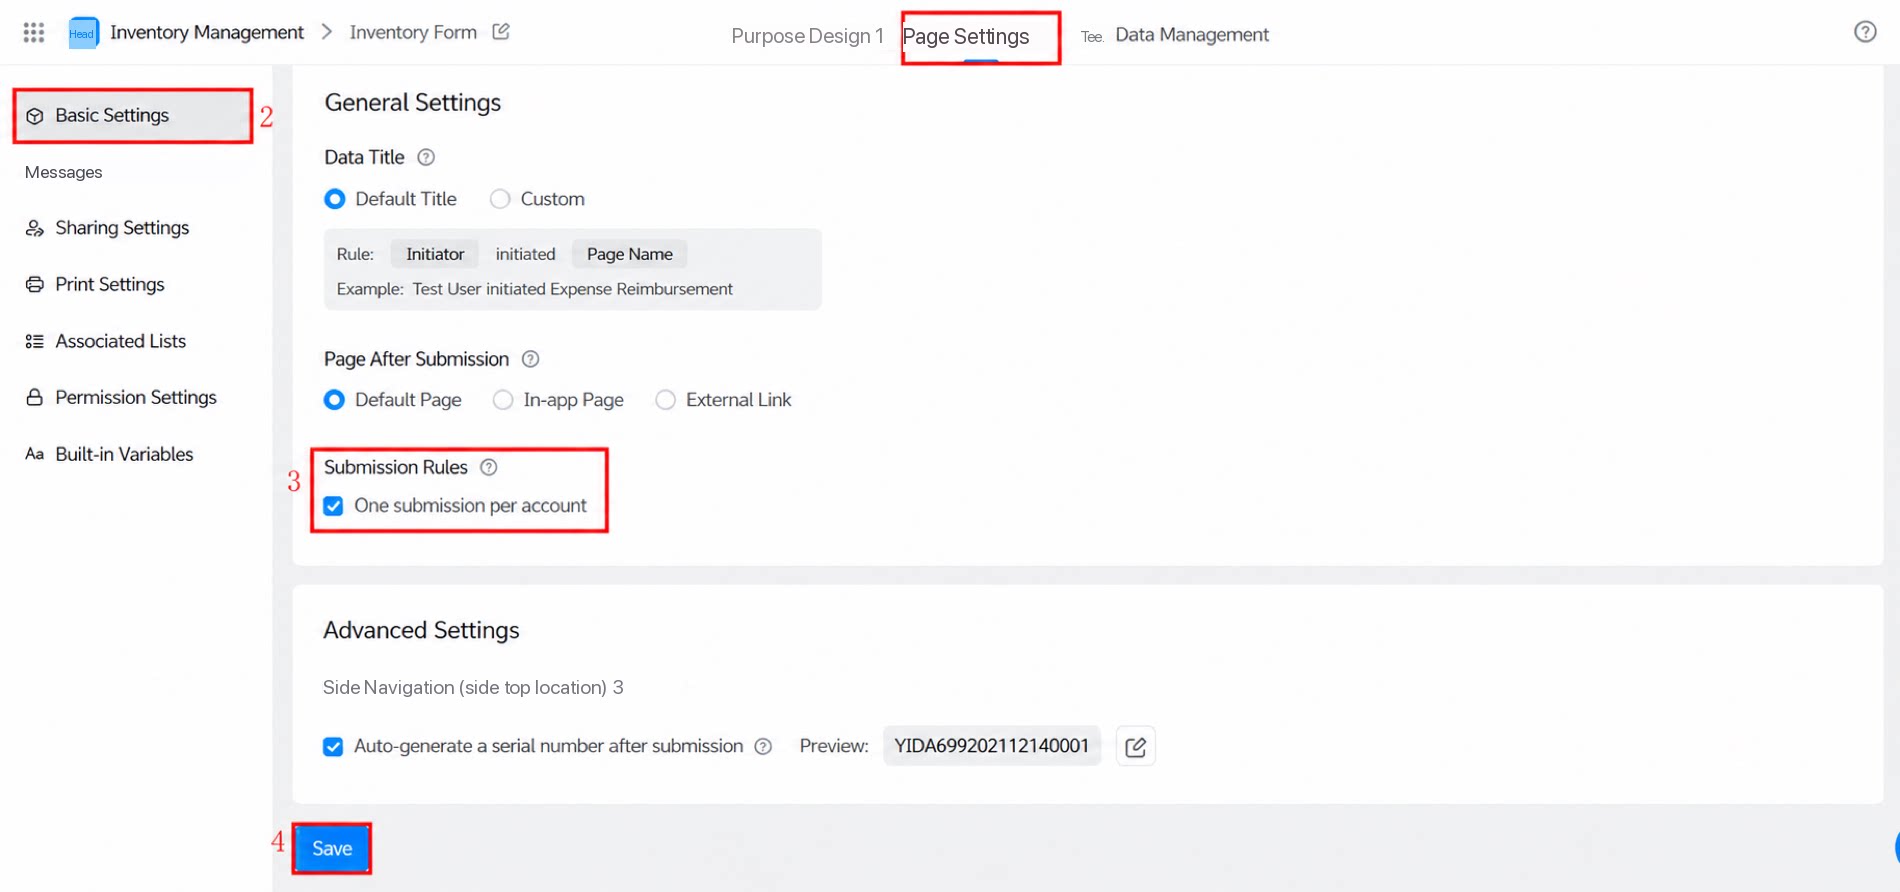
2.1.3 Redirect Page After Submission
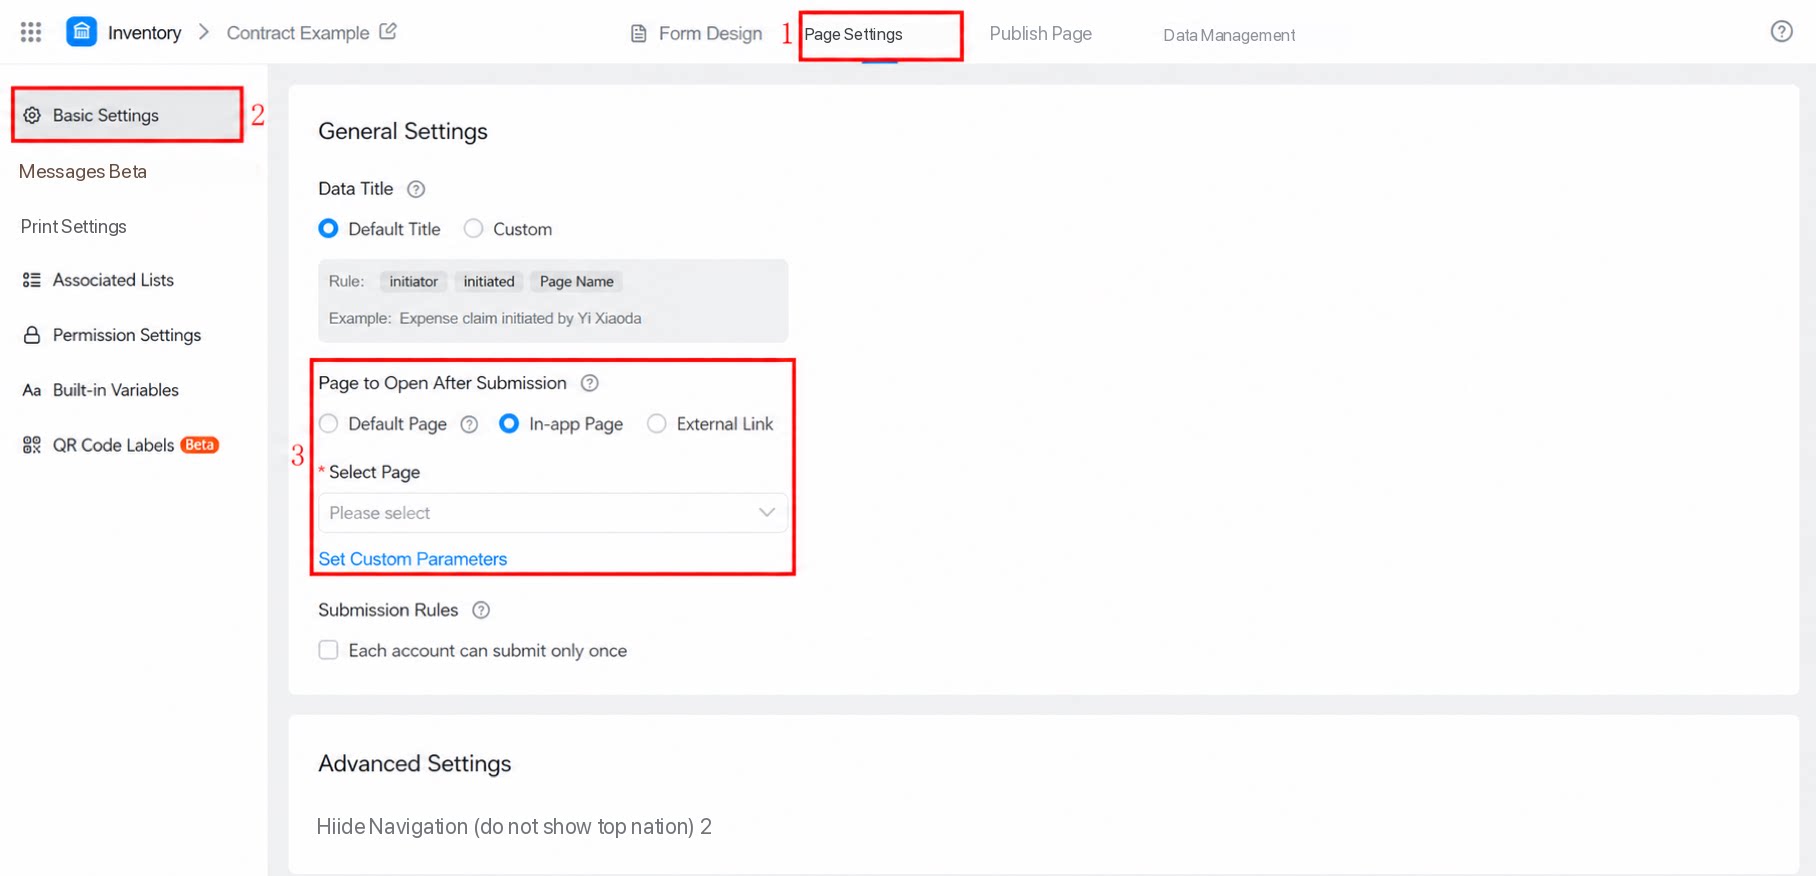
After you enable “Redirect page after submission” and configure the redirect rule, users are redirected to the specified page after submitting the Form. Note: In the redirect rule configuration, Form variables can only be obtained from the following components: Single-line text, Number input, Select, and Dropdown select.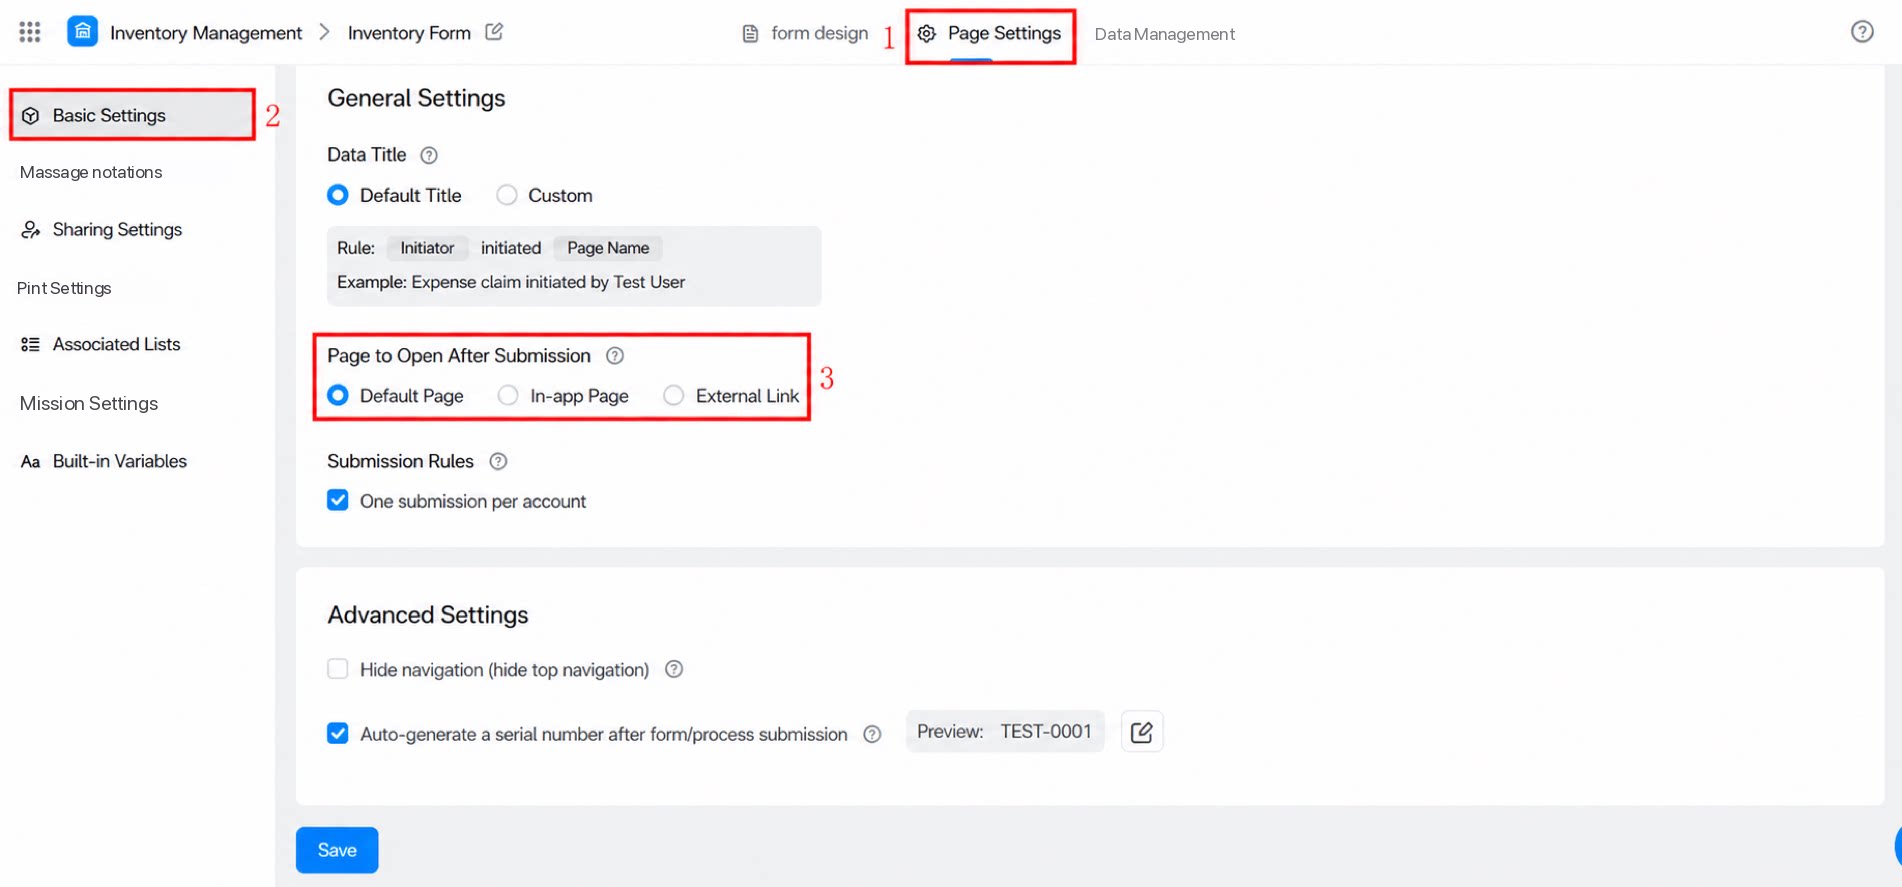
- Example scenario: Redirect to a specified page after submission
- Click the Edit button for Redirect page after submission. The URL editor dialog appears.
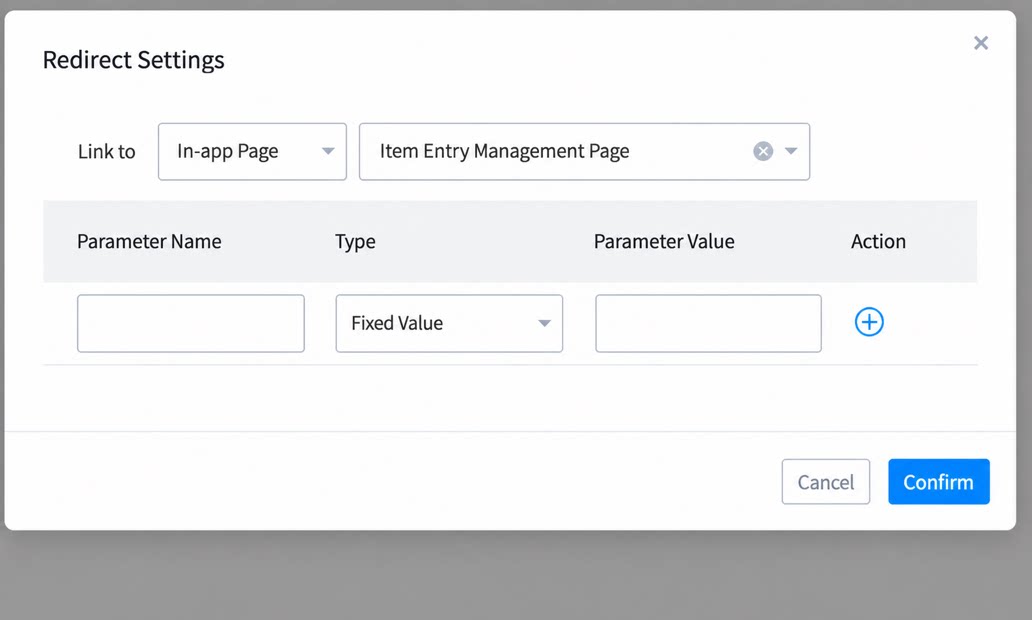
- Since the target is the data management page, choose an in-app page and select the data management page.
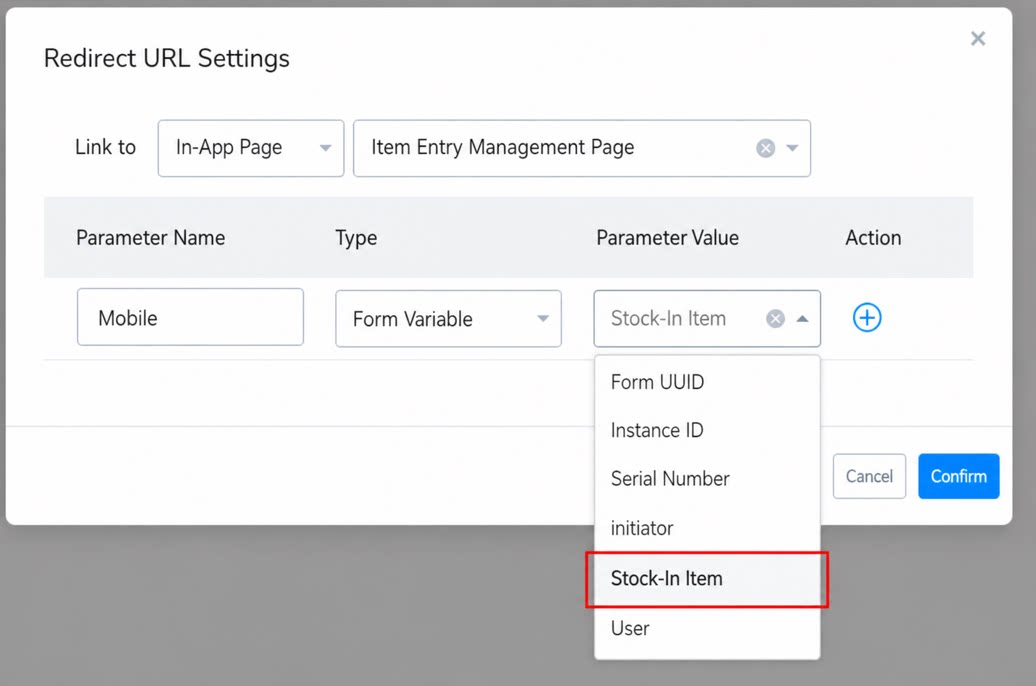
- Configure the parameters (adjust them based on actual needs), as shown below:
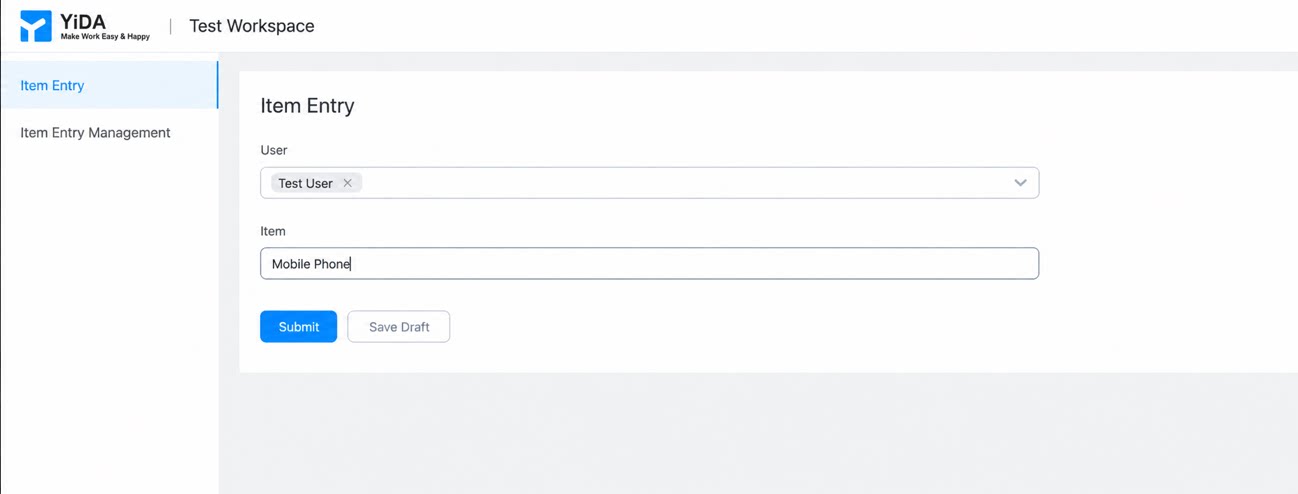
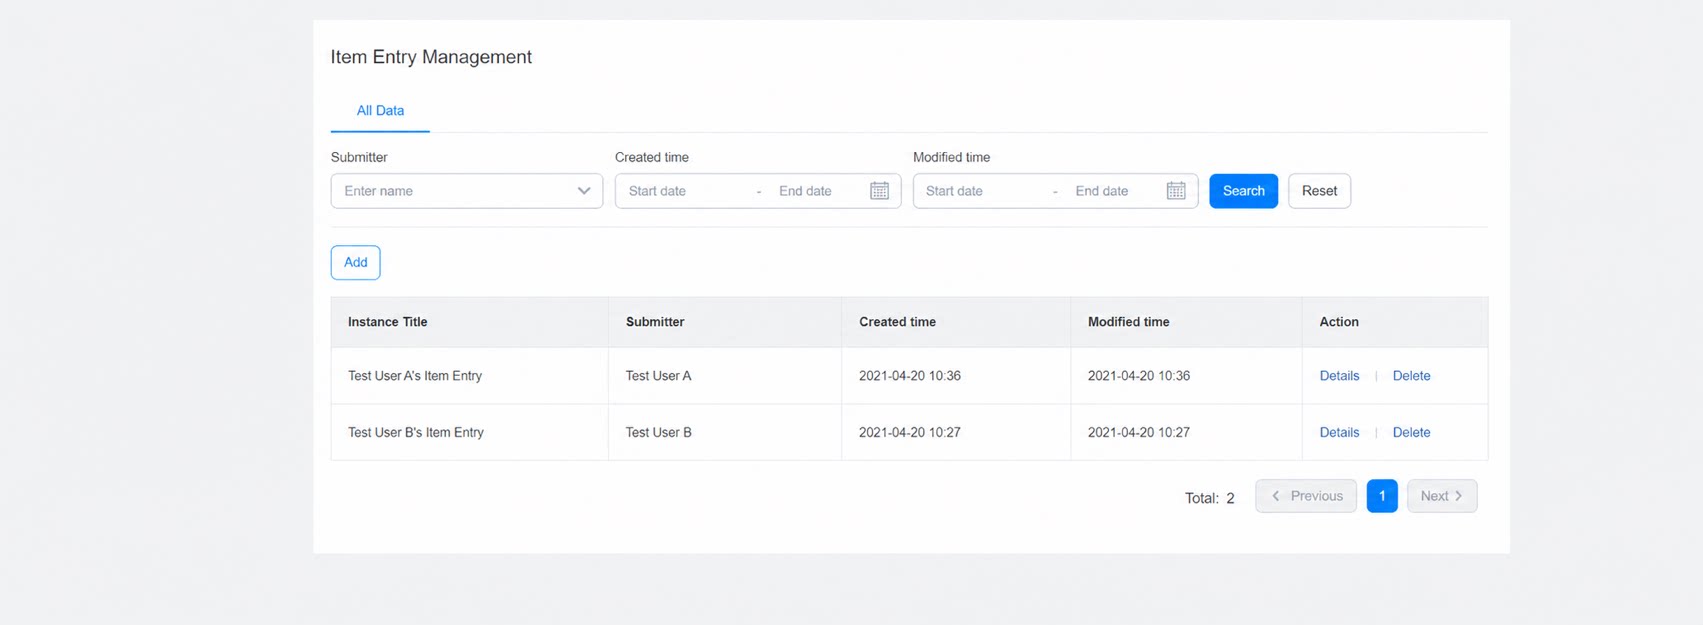
- After entering item information, the page automatically redirects to the data management page, where you can view Source records. Effect:
2.1.4 Push to Task Center
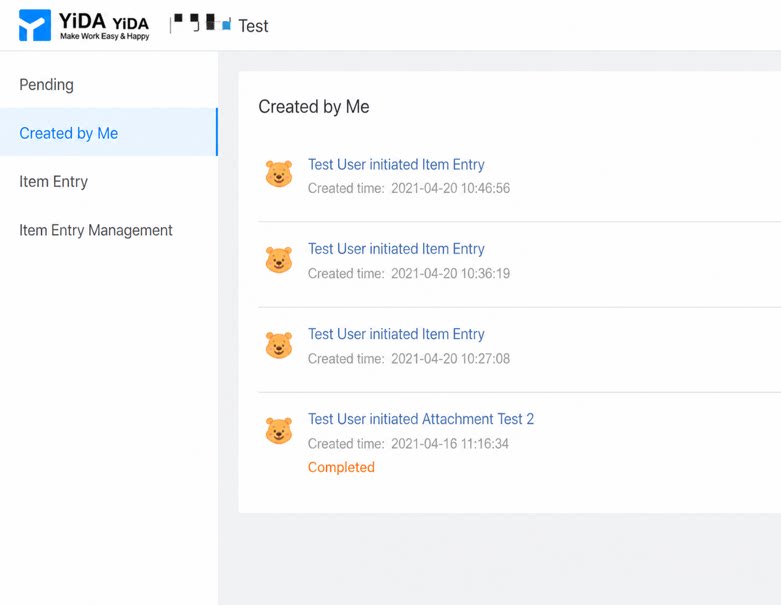
Once Push to Task Center is enabled, the submitted instance appears in the “Task Center - Created by me” list. Path: Form page >> Settings >> select Push to “Task Center - Created by me”.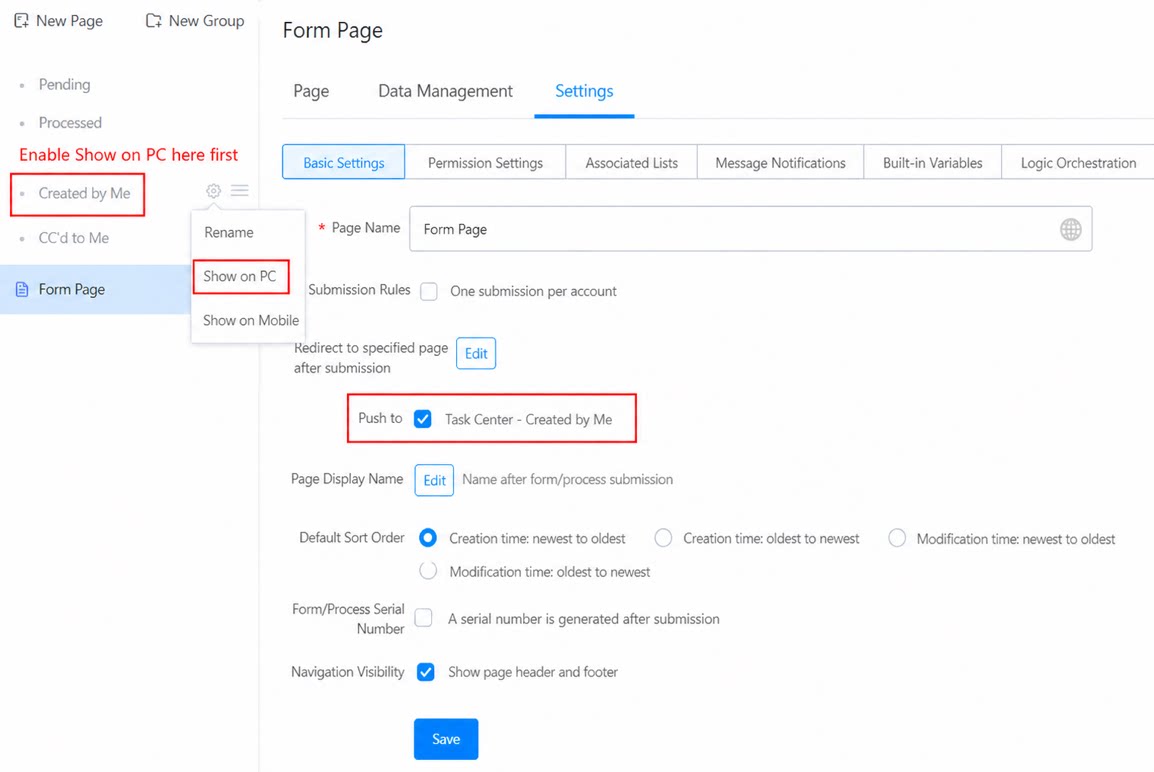
2.1.5 Record Title
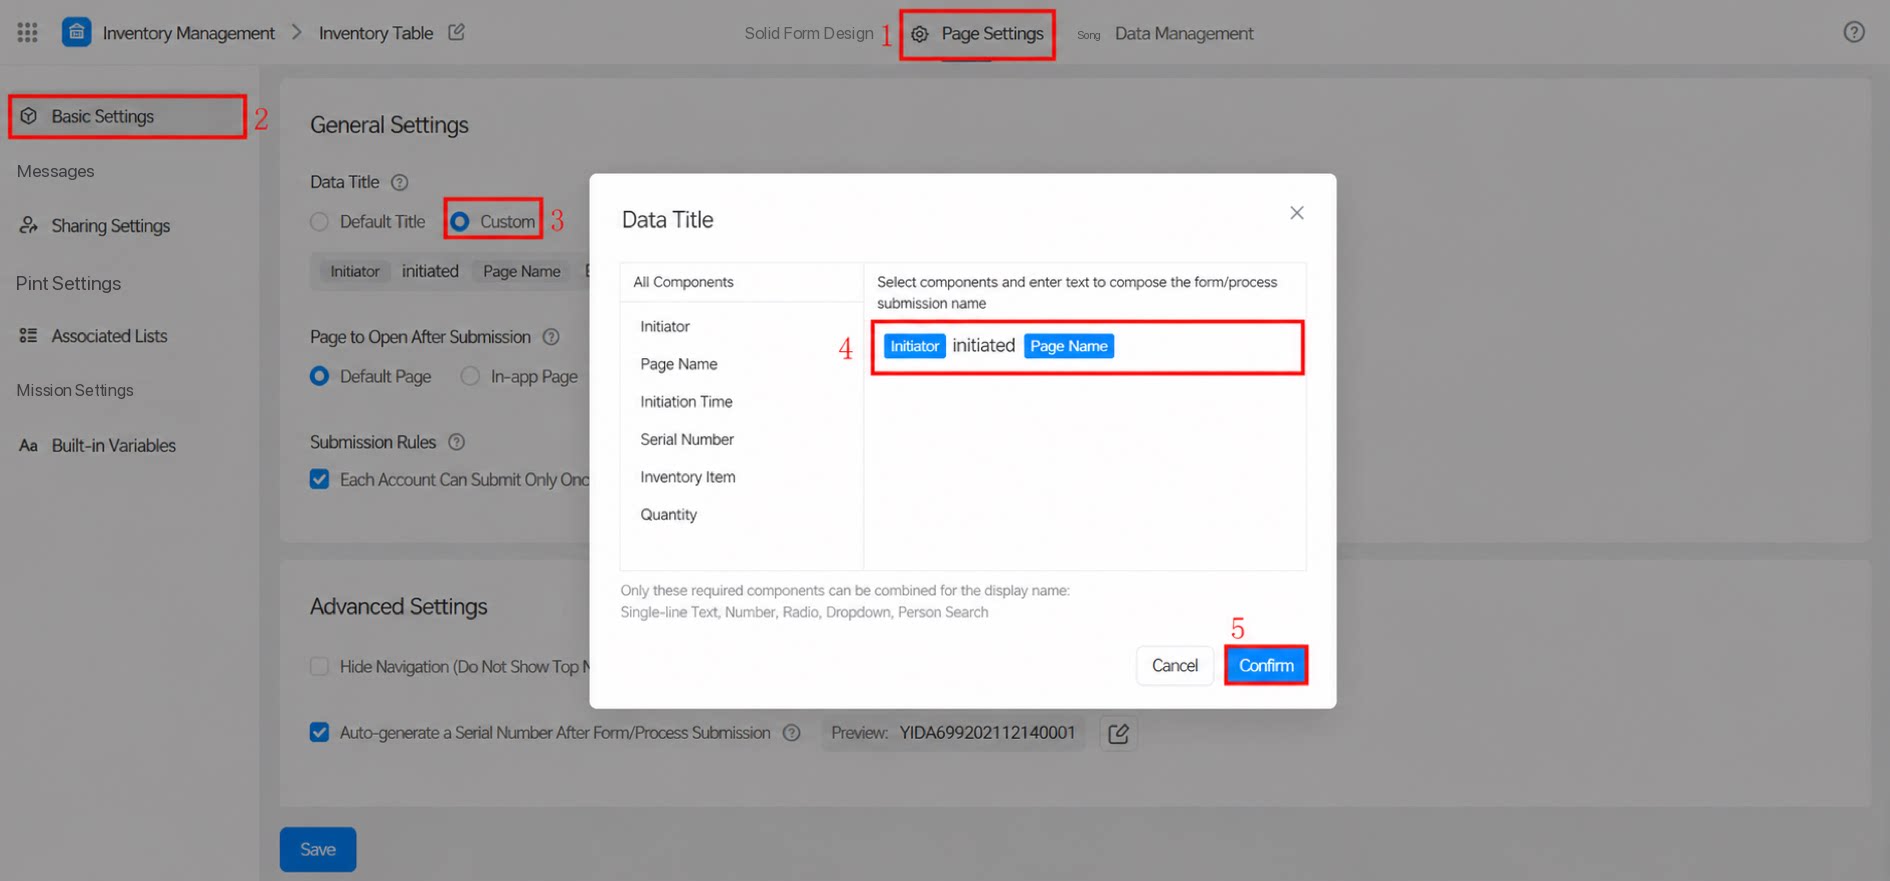
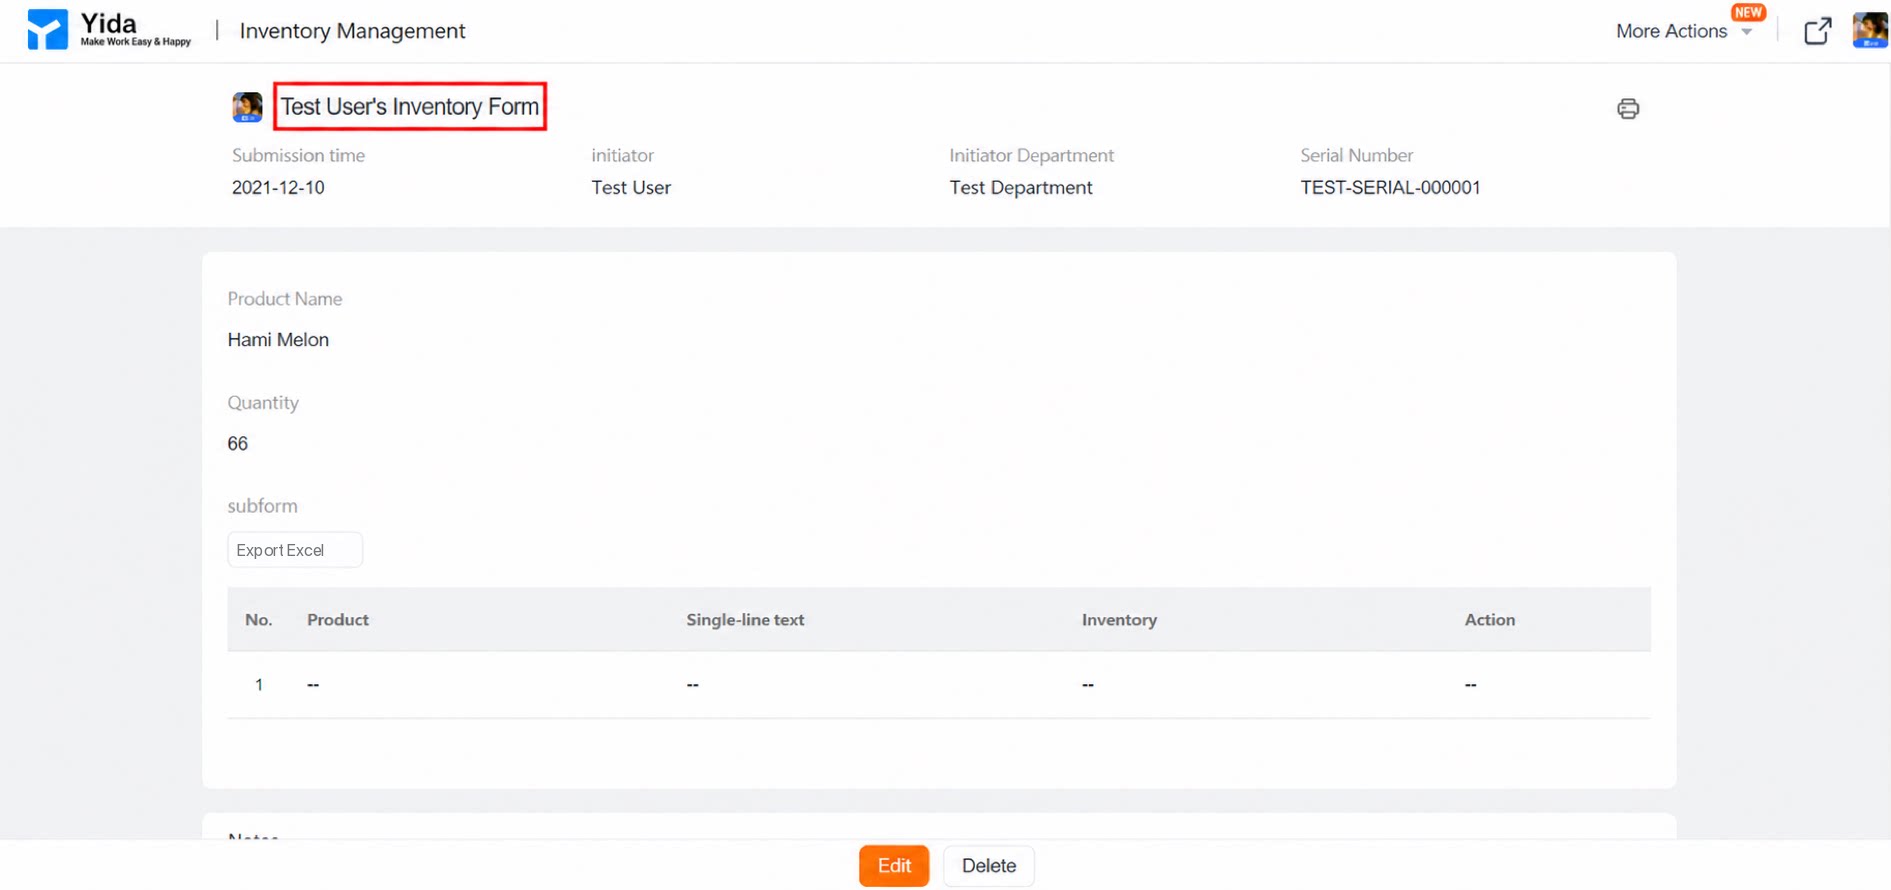
The default page name format is: “[Initiator] initiated [Page name]”. You can customize the page display name. Note:- Only the following components can be used to compose the display name (the component must be set as required): Single-line text, Number, Select, and Dropdown select.
- Changing the page display name only affects newly submitted records. Previously submitted records keep their original page names.
2.1.6 Hide Navigation (Hide Top Navigation Bar)
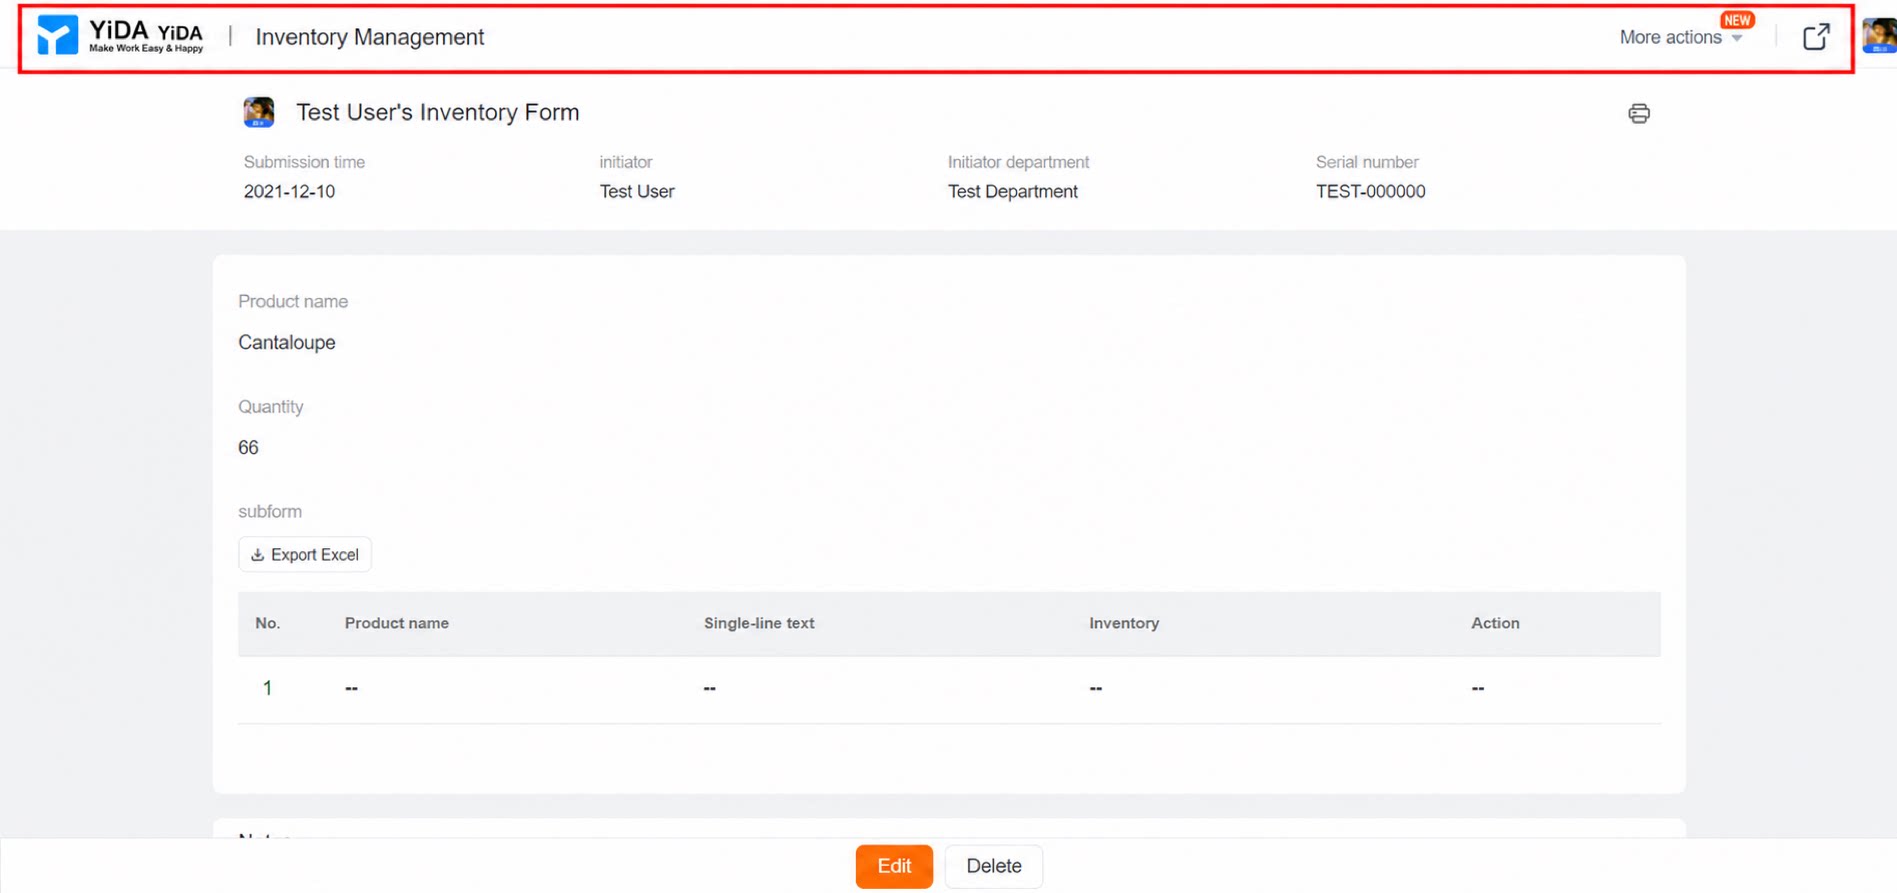
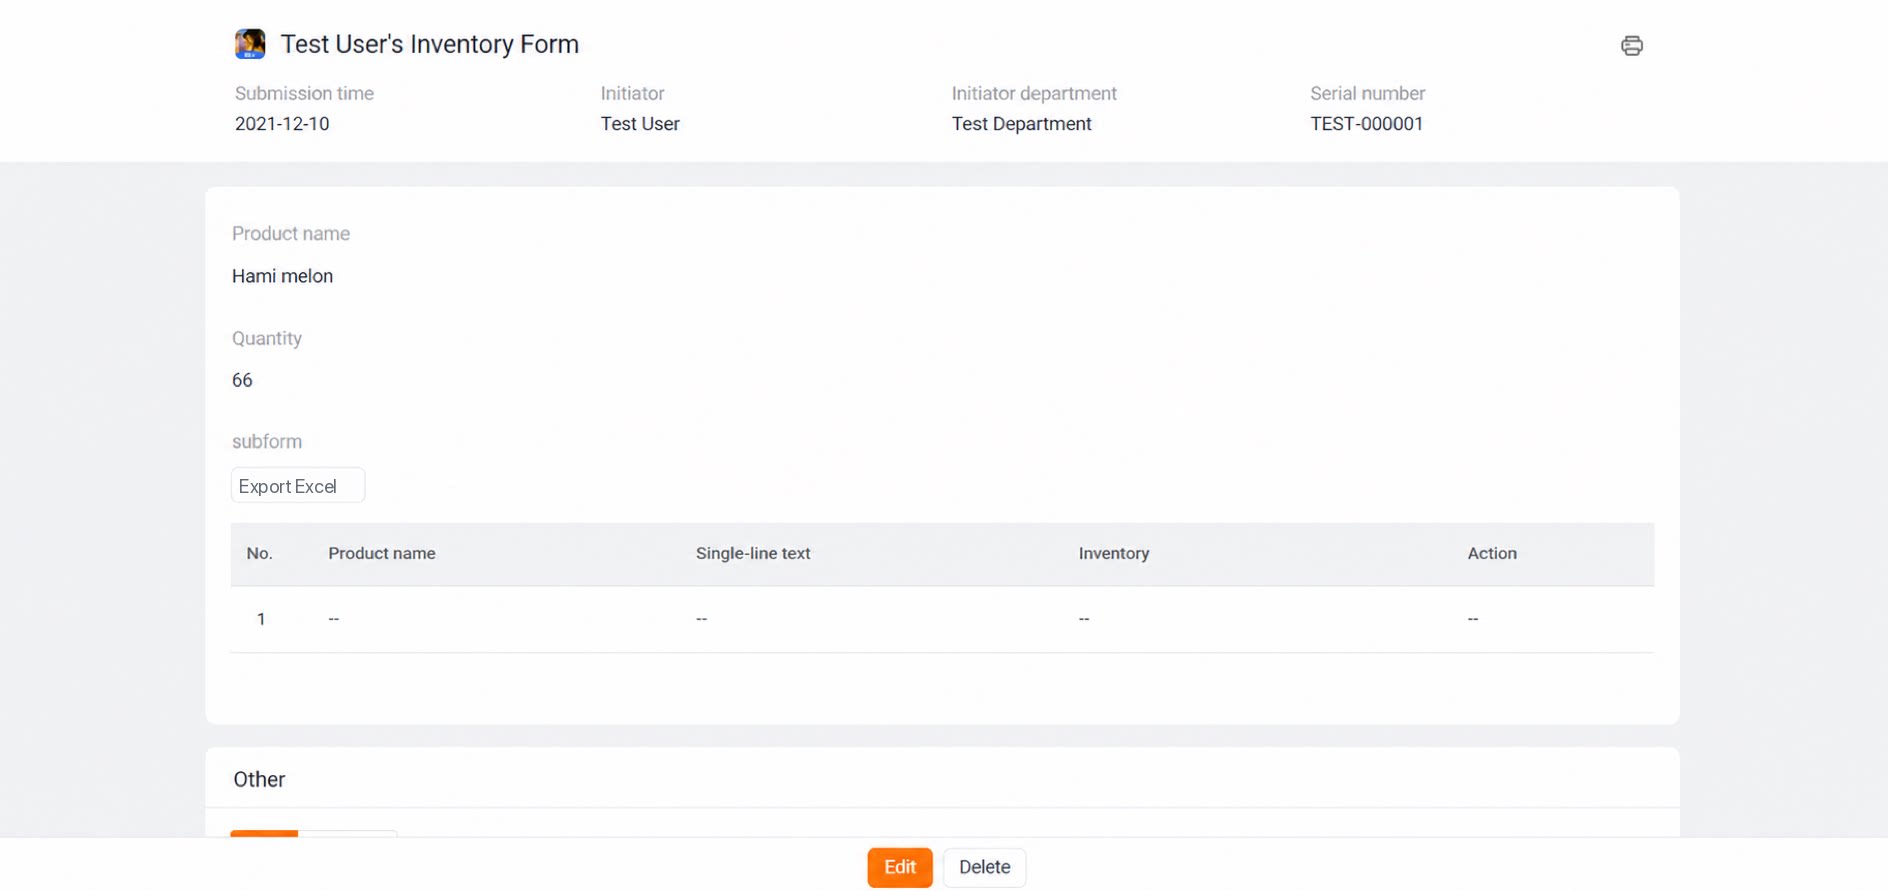
You can show or hide the page navigation in the Basic settings. Effect: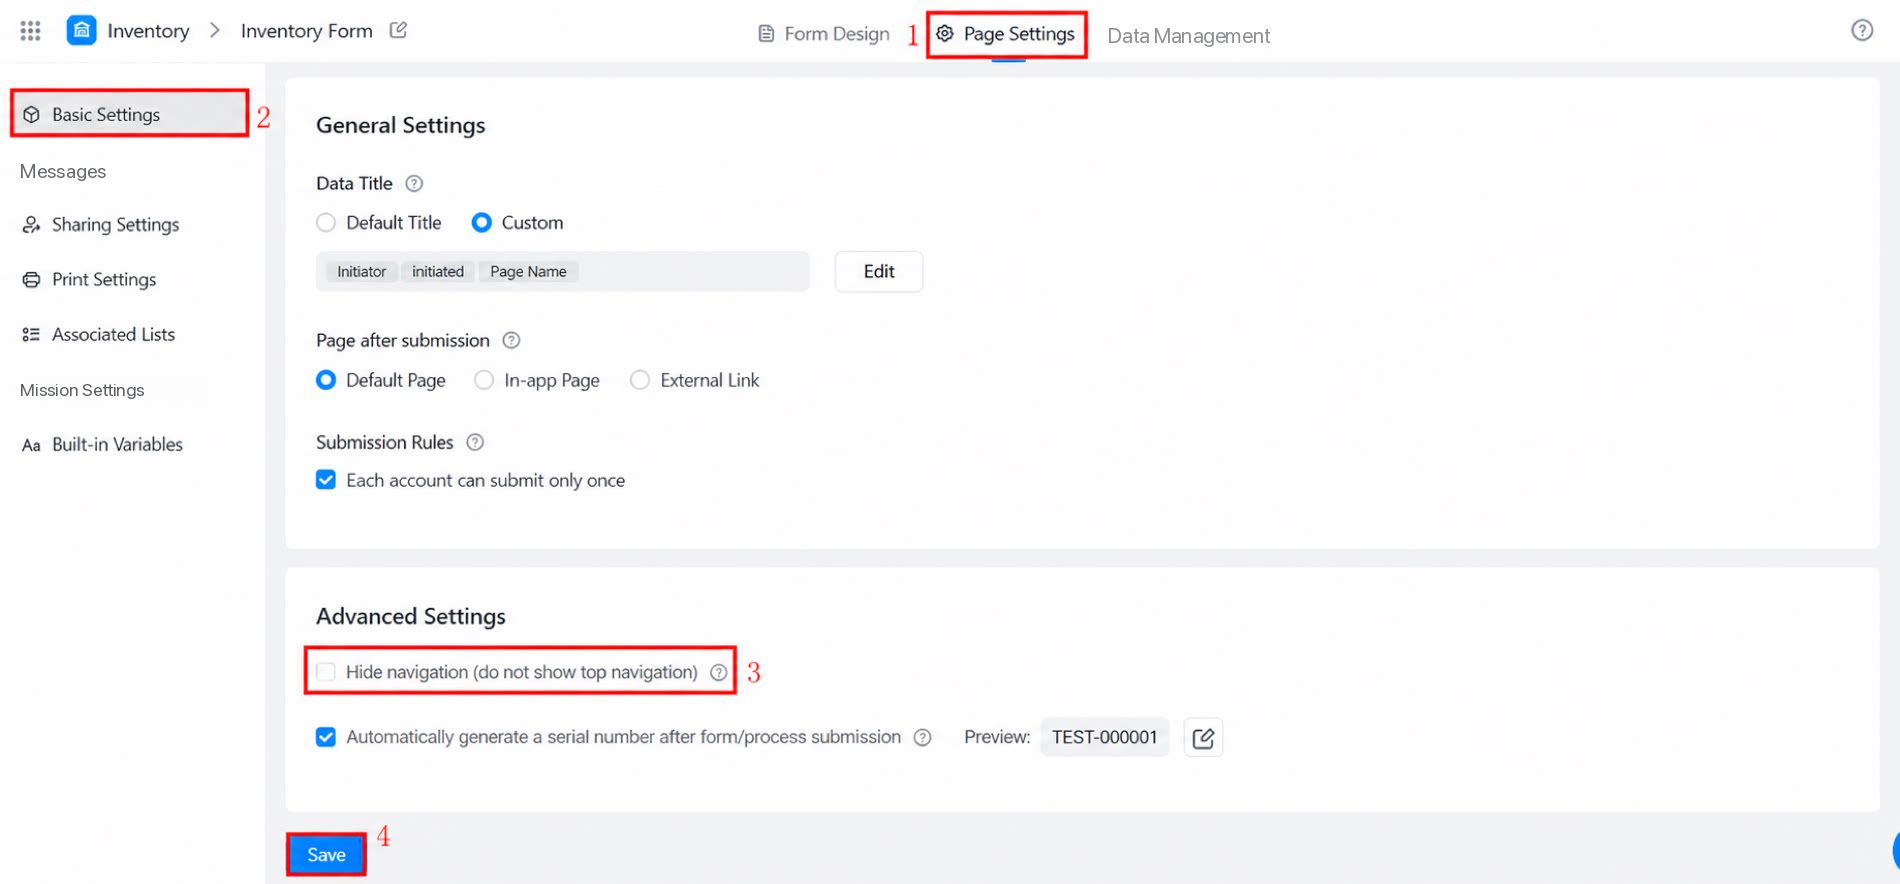
2.1.7 Serial Number
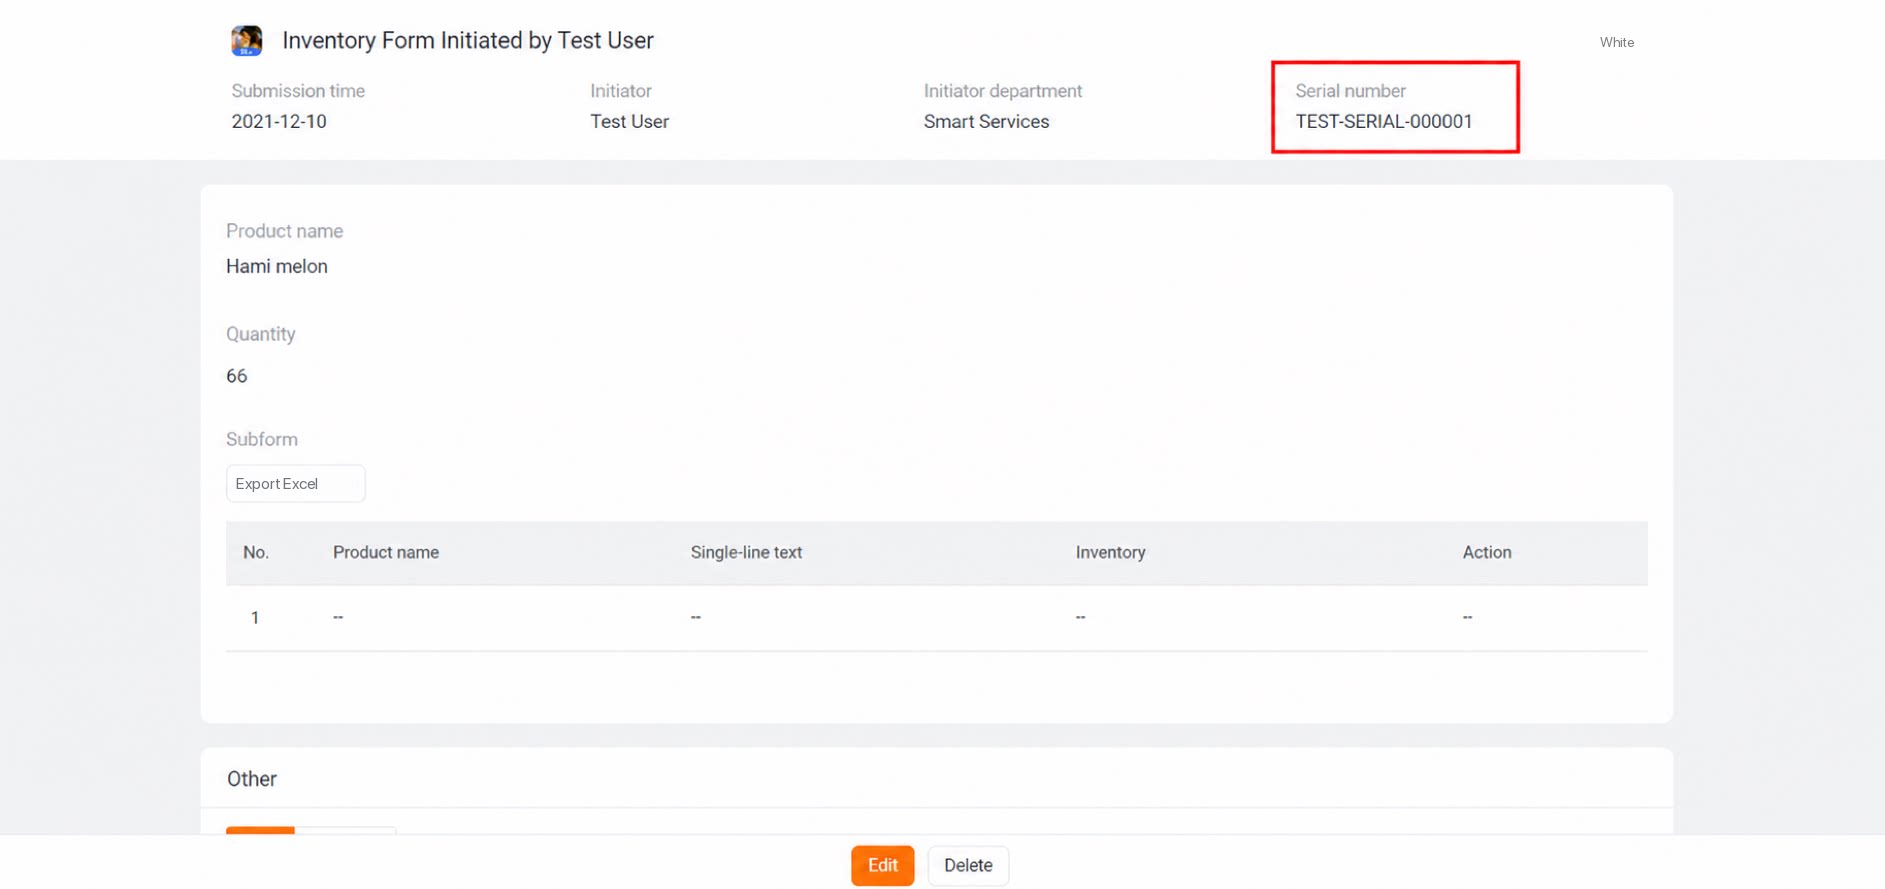
When the serial number is enabled, a serial number is automatically generated each time a new Form instance is submitted. Path: Click the target Form >> Settings >> click the Edit button for Form/workflow serial number. Effect: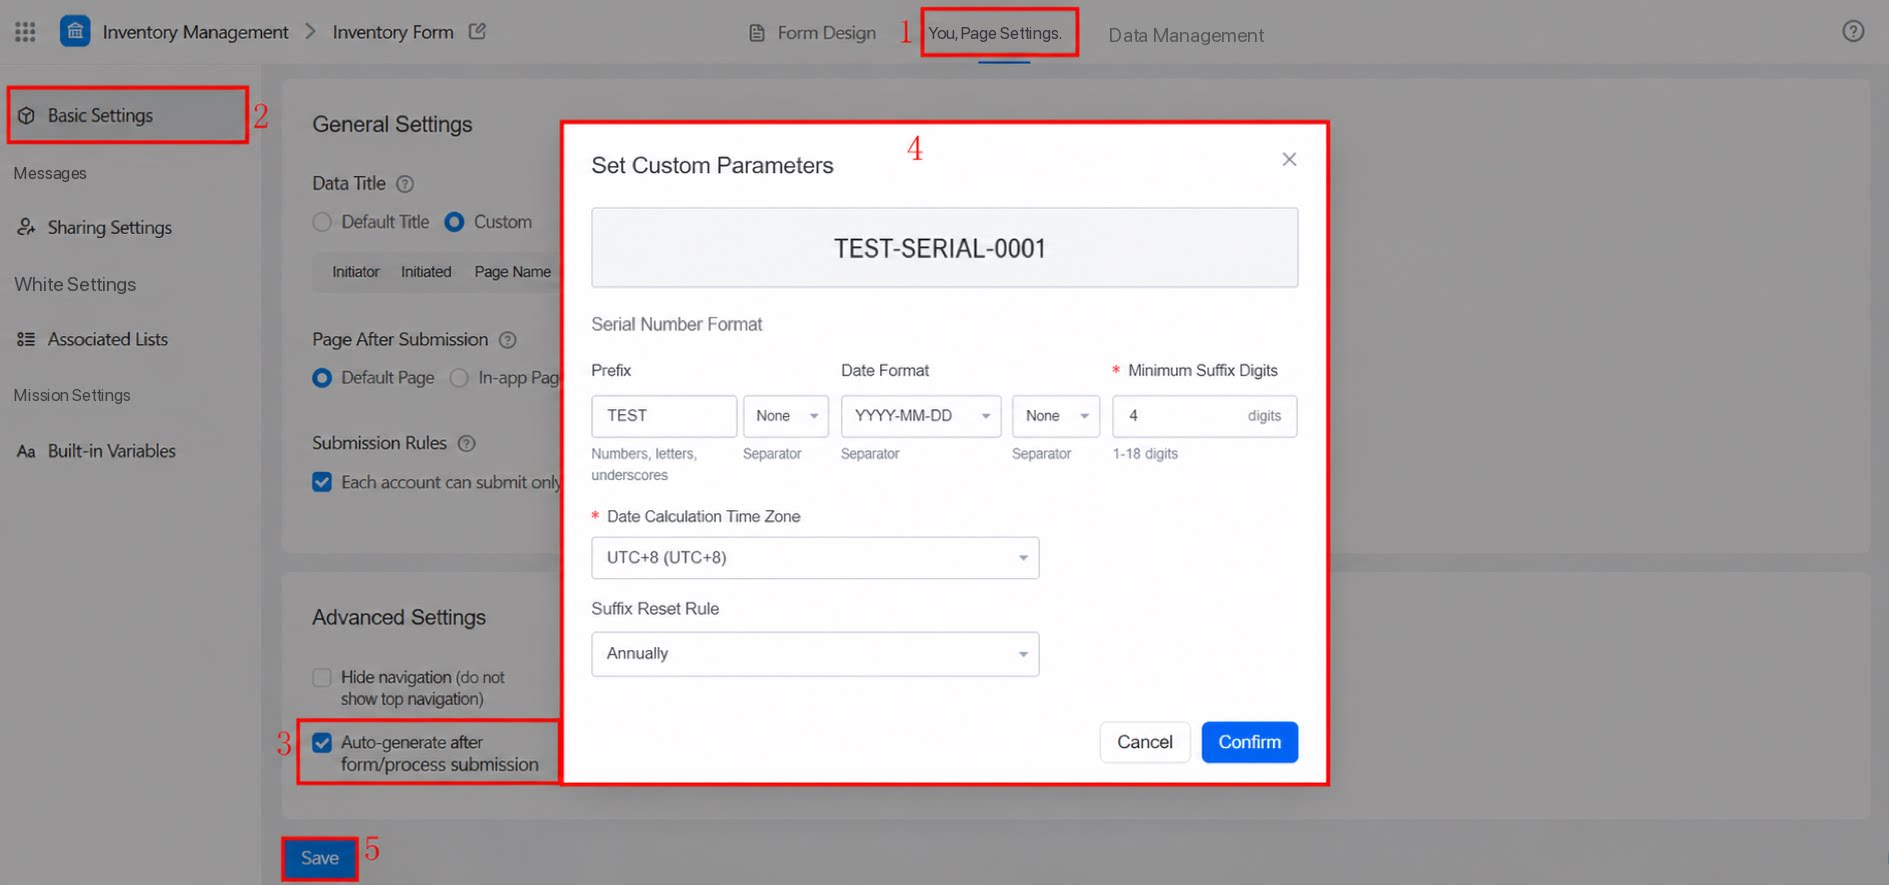
2.2 Settings Specific to Workflow Forms
The following configuration items are available only on workflow form pages, not on regular data Form pages.- Workflow page actions
- Workflow consultation users
- Redirect after Approval action is Completed
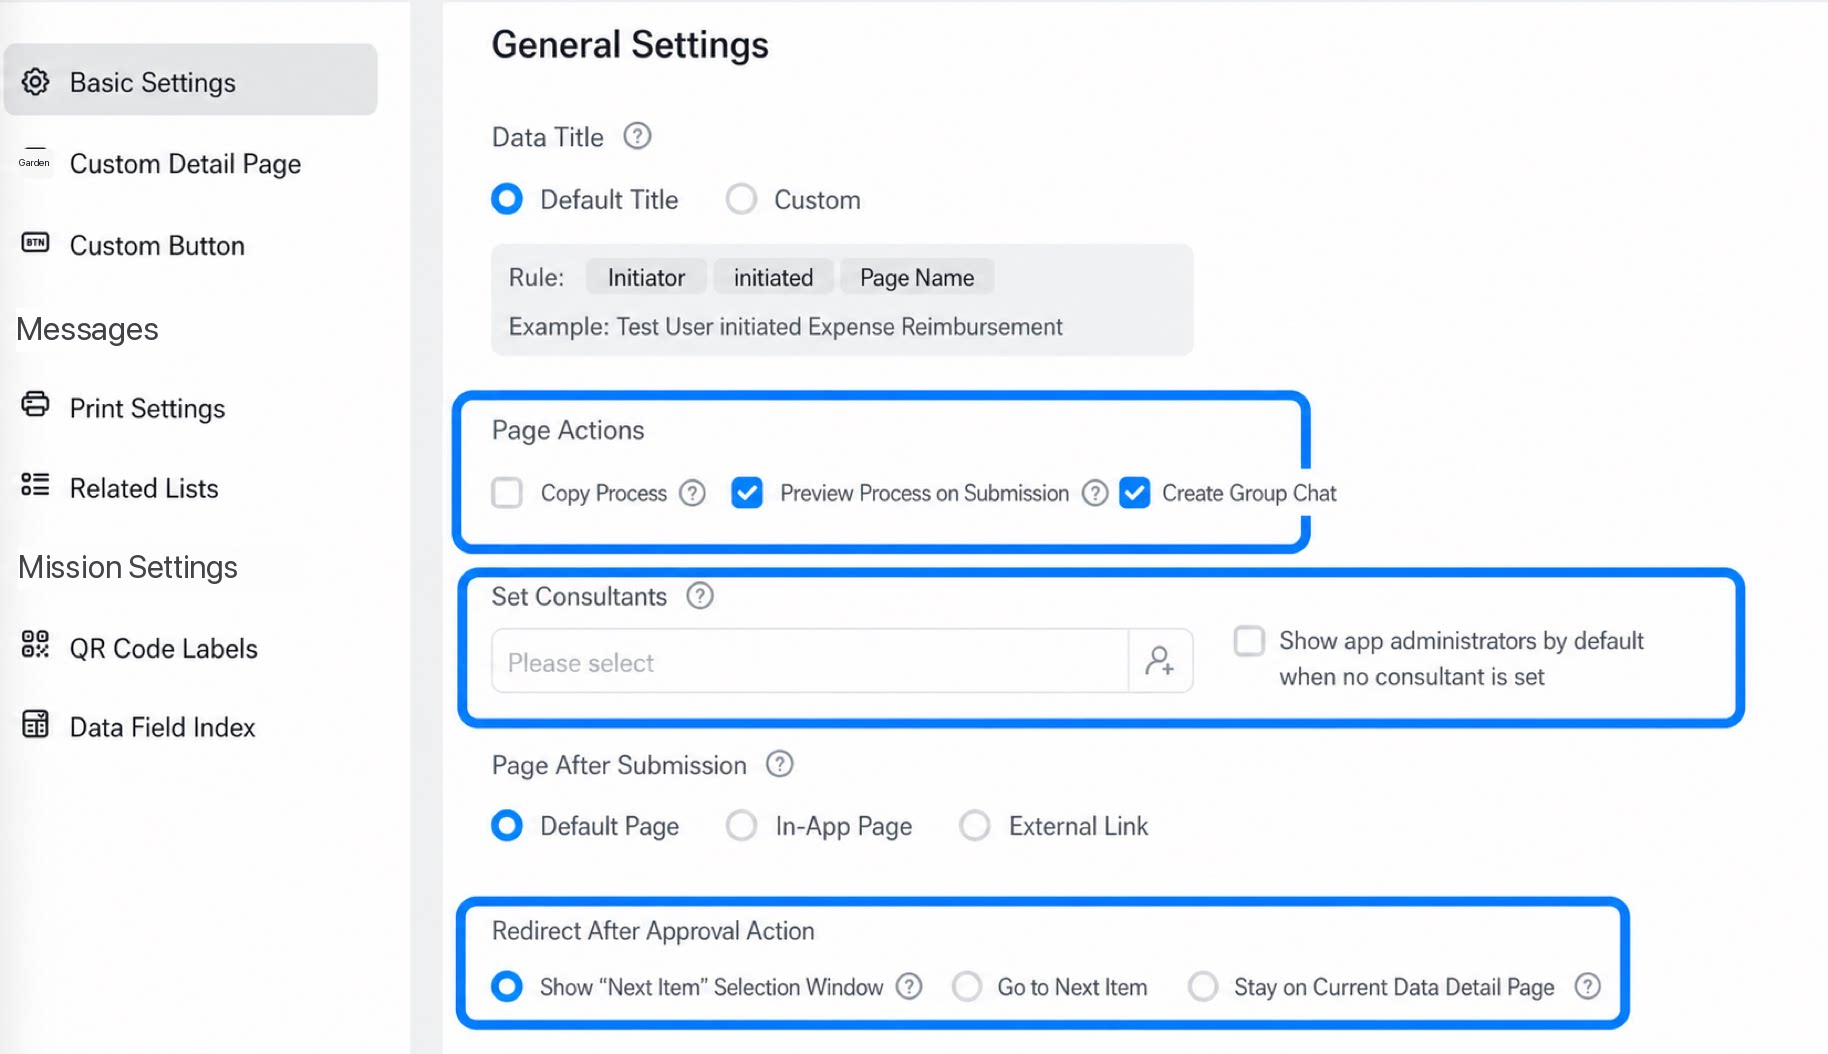
2.2.1 Page Actions
| Feature | Screenshot |
|---|---|
| Copy workflow: Once configured, the workflow initiator sees the Copy workflow button on the workflow details page. | 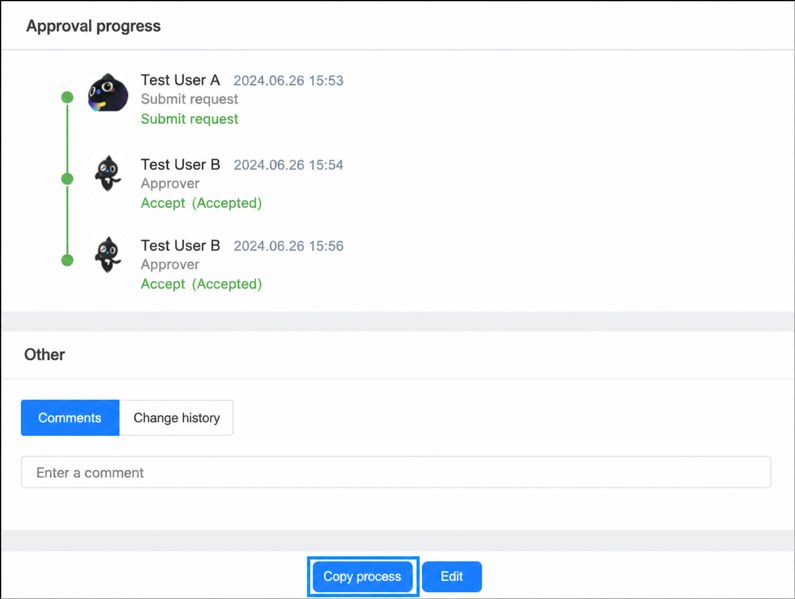 |
| Preview workflow on submission: Once configured, the workflow initiator sees a preview of the workflow route before formally submitting the workflow. | 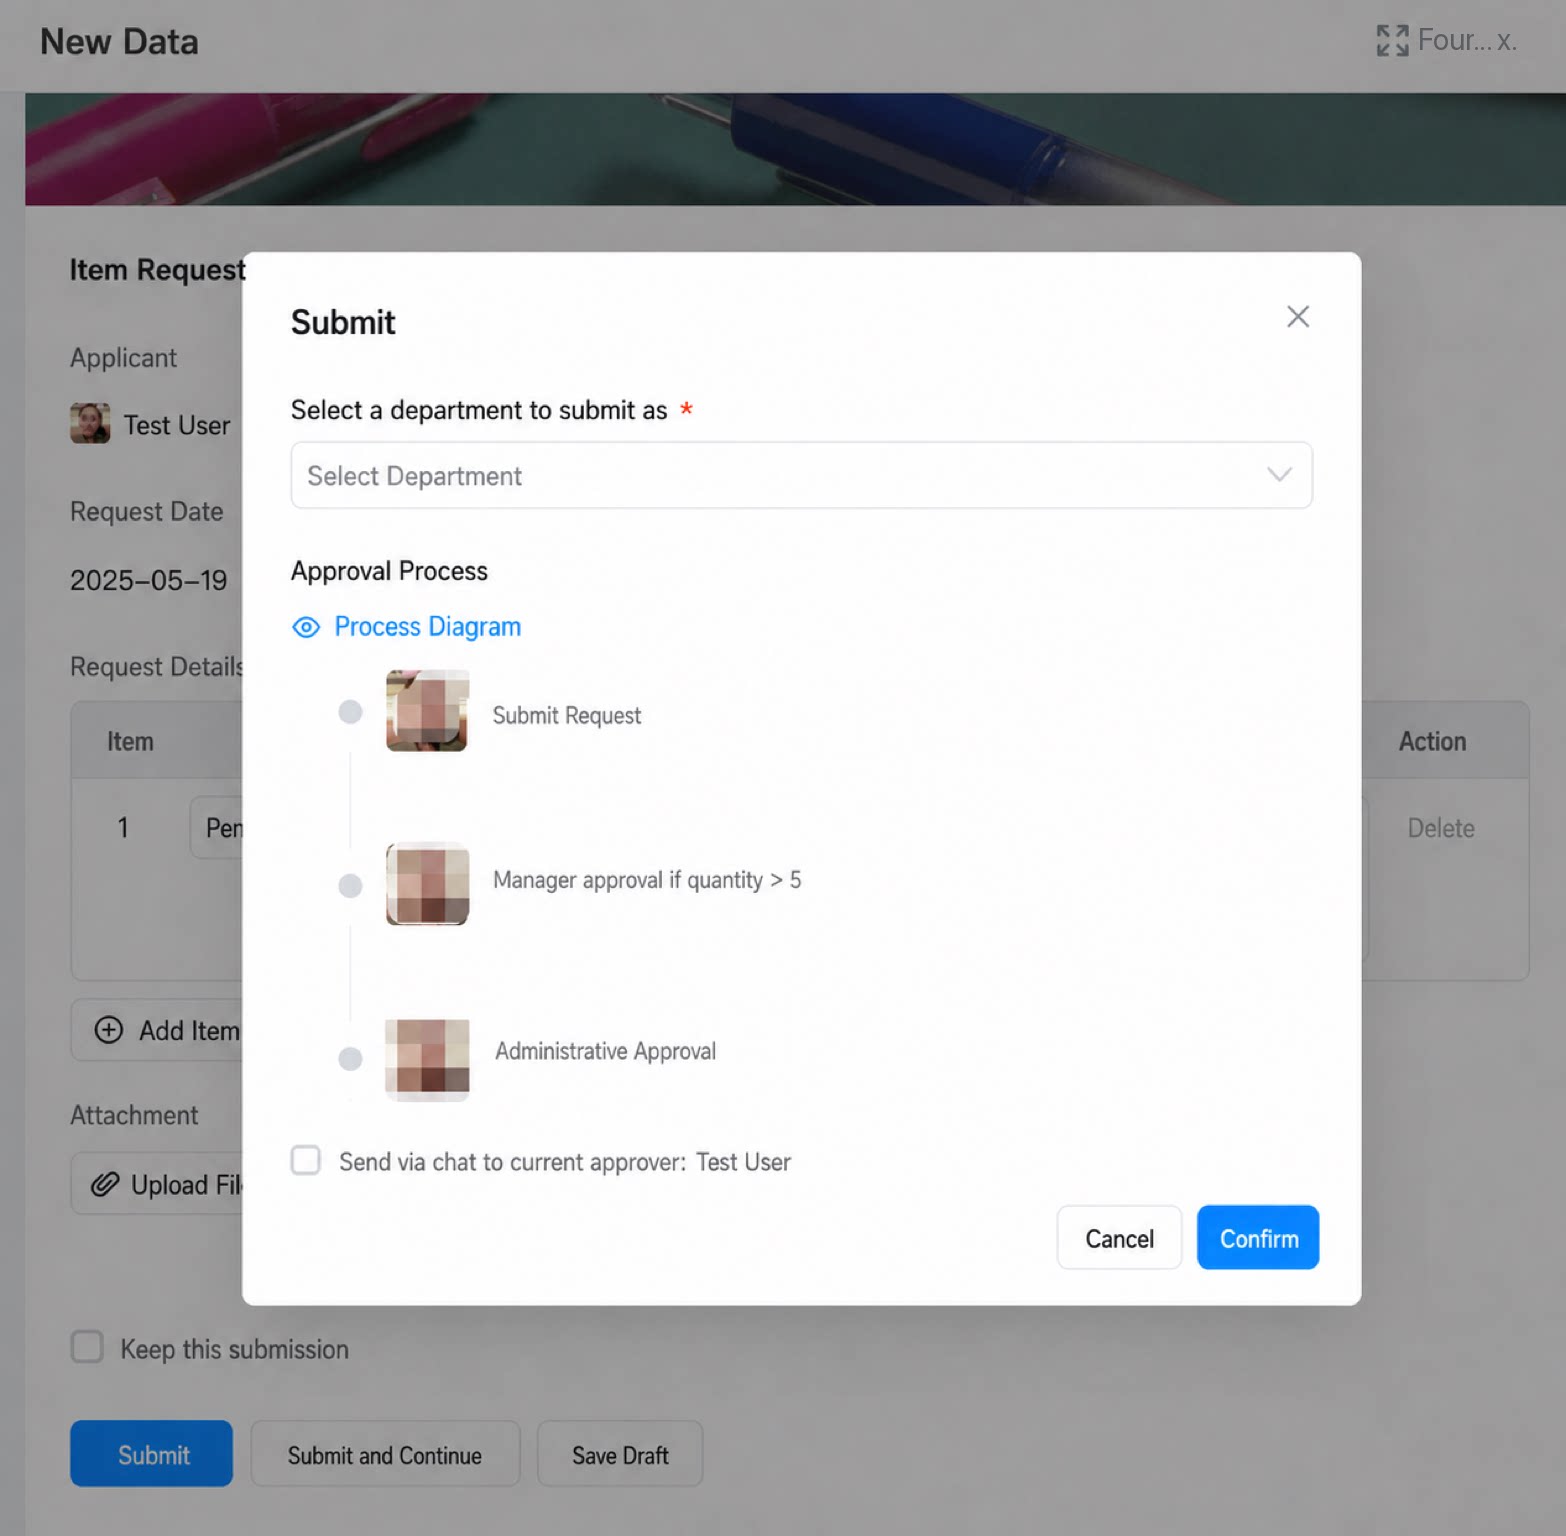 |
| One-click group chat: Once configured, an Enter group discussion entry appears on the workflow details page. Any participant in the workflow can start a New Chat with one click. | 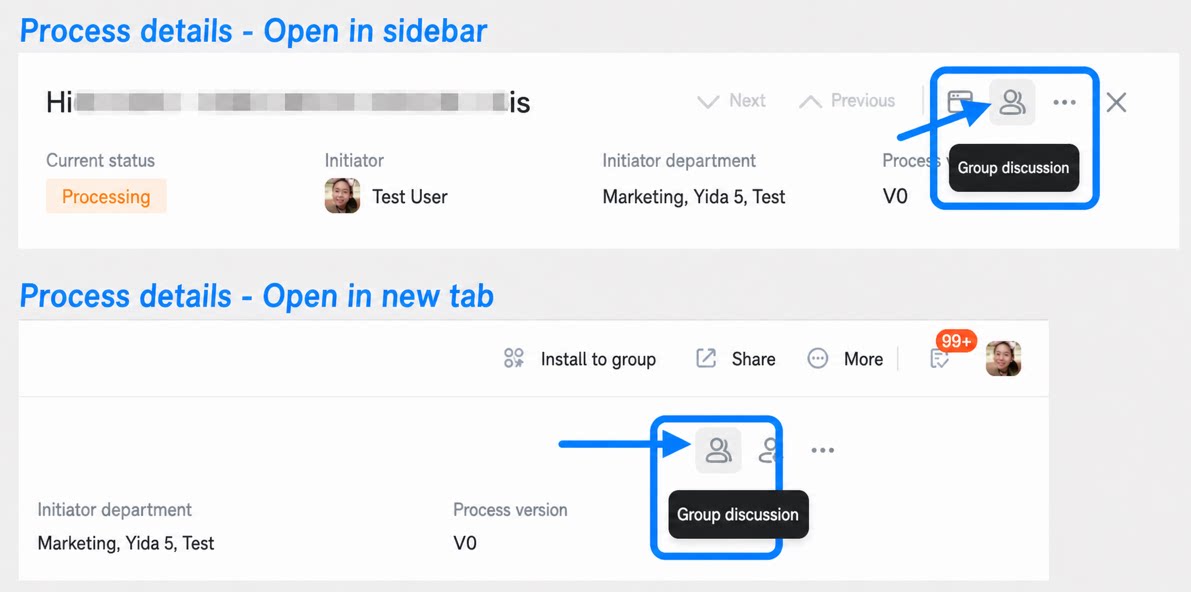 |
3. FAQ
4.1 Why can Admins still see the change history and Comments entry after they are hidden in the page actions of Basic settings?
4.1 Why can Admins still see the change history and Comments entry after they are hidden in the page actions of Basic settings?
Managing comments and hiding change records in the Basic settings does not apply to app admins or system admins. It only takes effect for users with regular permissions.
4.2 Can the Form Delete Button be bound to conditional parameters?
4.2 Can the Form Delete Button be bound to conditional parameters?
Actual scenario: For example, you want to validate a “registered” field—if a record is registered, it cannot be deleted. Scenario: When deleting, check whether the field data is “registered”. If it is “Yes”, the room number must be modified before the record can be deleted; otherwise, deletion is not allowed.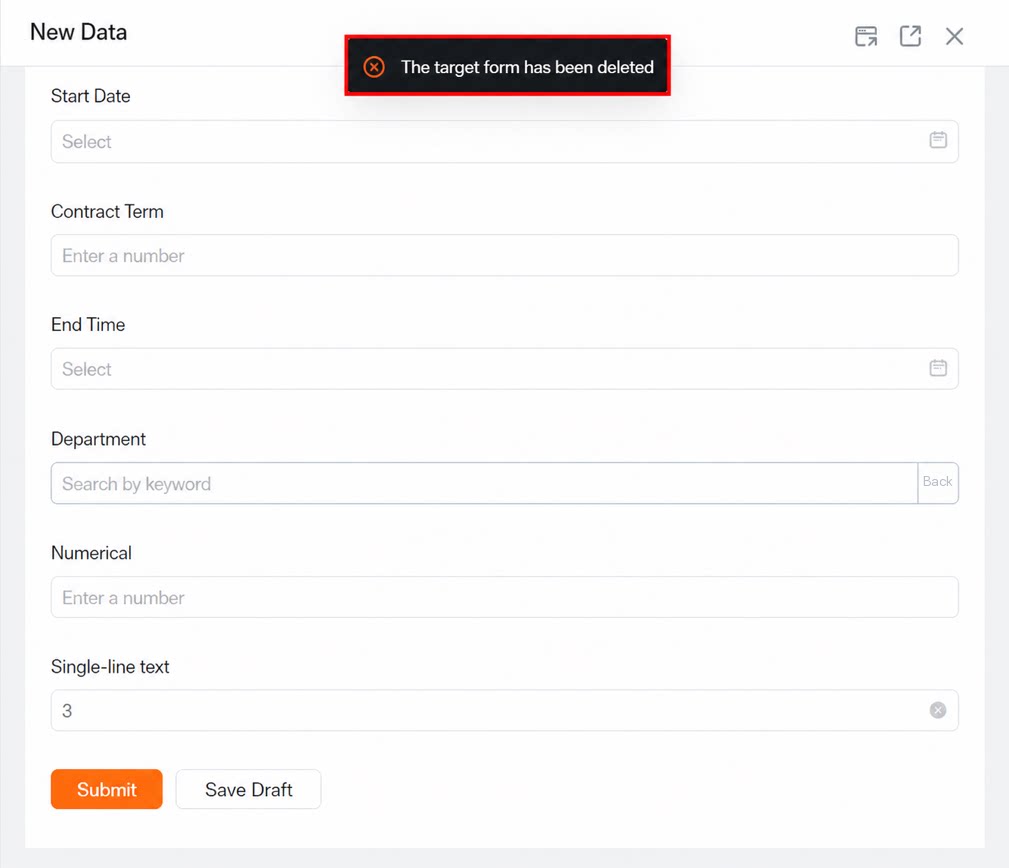 Because the Delete event cannot be captured, this requirement cannot be implemented.
4.3 Why does modifying the page display name have no effect?
4.3 Why does modifying the page display name have no effect?
Changing the instance title does not apply to already-submitted records. Only newly submitted records follow the new instance title rule.
4.4 Why do I get a message saying 'The Target form to redirect to has been Deleted' when submitting a Form?
4.4 Why do I get a message saying 'The Target form to redirect to has been Deleted' when submitting a Form?
Check Form page settings >> Basic settings >> Redirect page after submission, and verify whether a Target form is actually selected.