Chats
Chats Calendar
 Meetings
 Contacts
 Mail
Mail Docs
Docs Drive
Drive AI Table
 AI Minutes
 Attendance
 Approval
 YiDA
YiDA Admin Console
1. Overview
When the default template does not meet your needs, create a custom print template to choose the layout and data fields you want. Note: The print template name cannot exceed 40 characters (20 Chinese characters) and cannot contain the following special characters.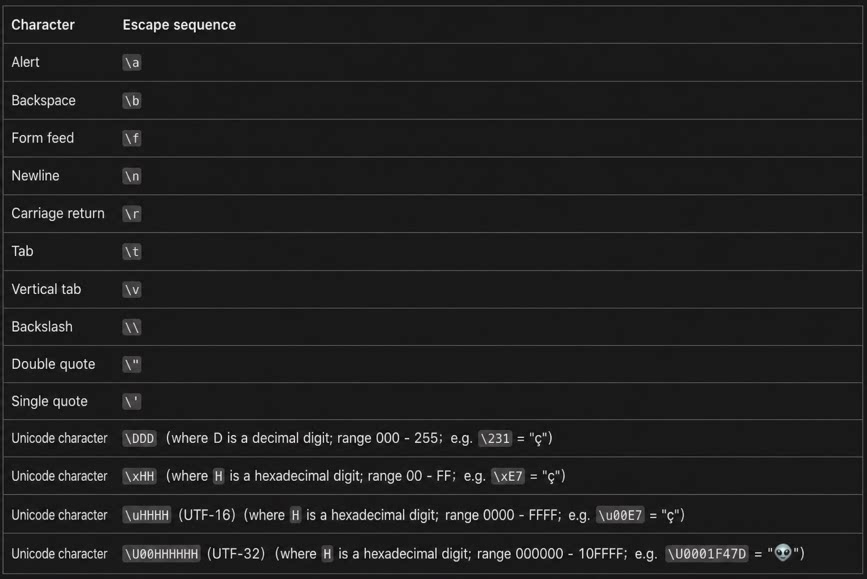
2. Set up a Print Template
2.1 Configuration Path
Path: Open the target form or workflow form >> Settings >> Page Settings >> Print Settings >> Add print template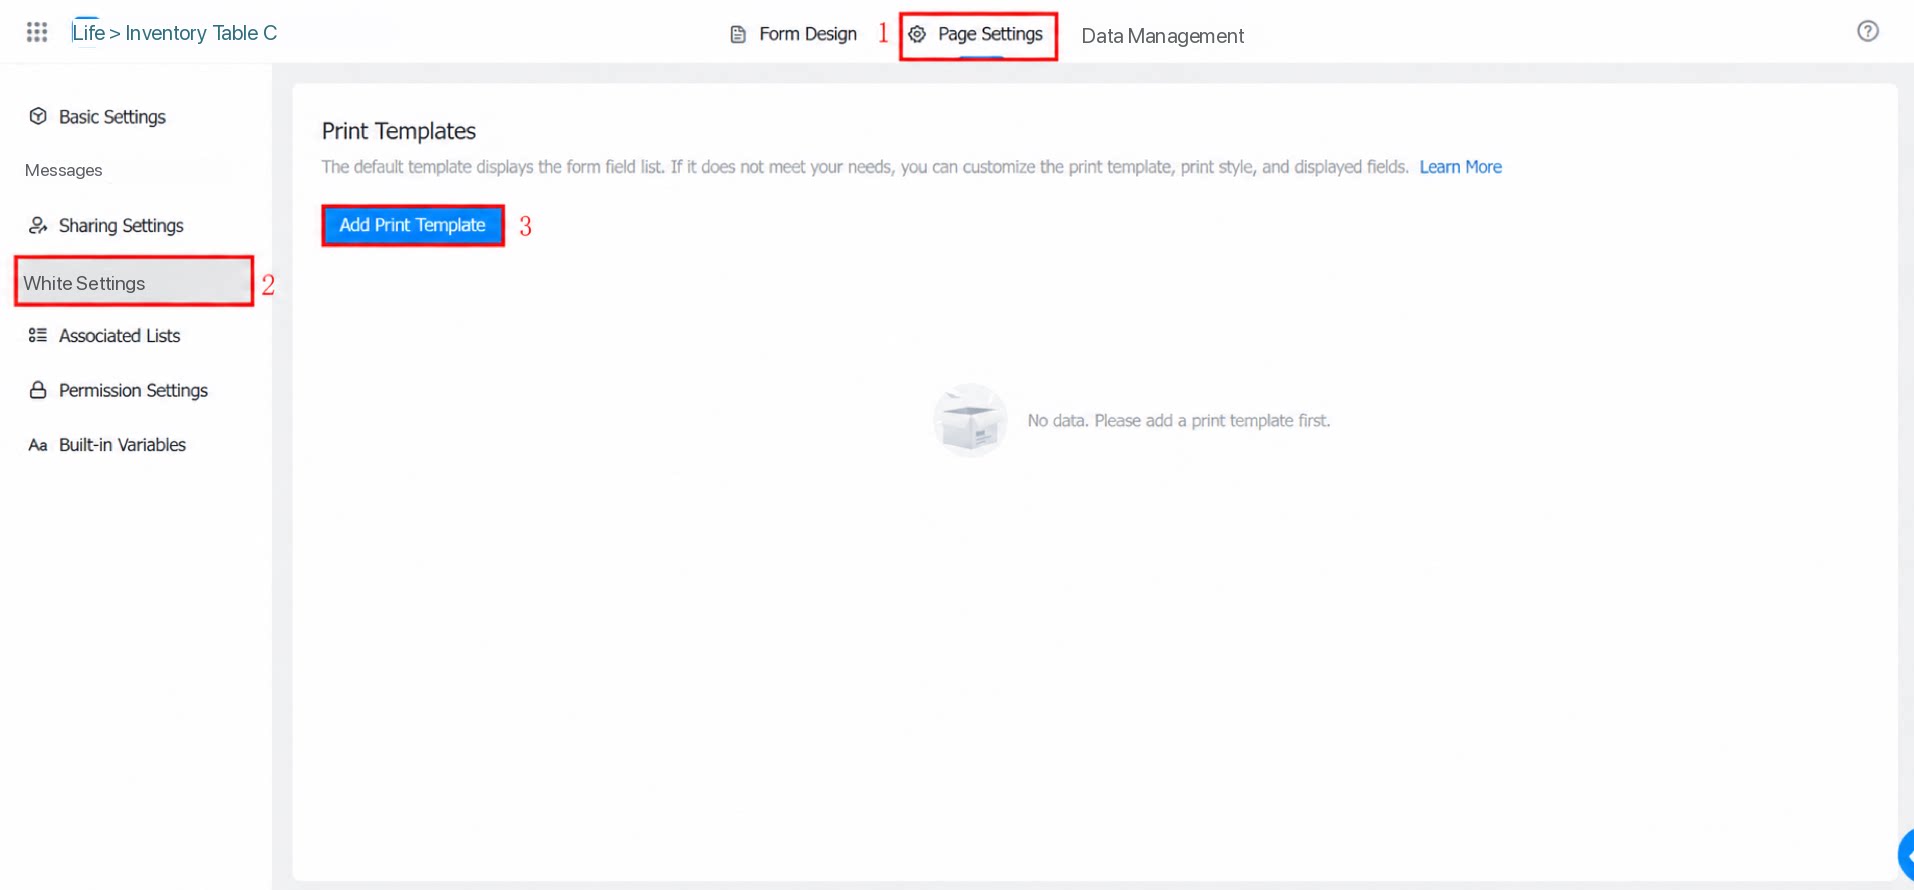
- Create from scratch: The page starts blank, letting you design the entire layout freely. This mode is flexible and suits highly customized scenarios, but efficiency is lower because you start from an empty page.
- Start from the default template: The template is preloaded with the default print template content. You can add or remove elements as needed. This mode suits beginners, offers higher efficiency, and is the officially recommended approach.
2.2 YiDA Print Template
The official print capability from YiDA, exclusive to paid editions, with unlimited print counts.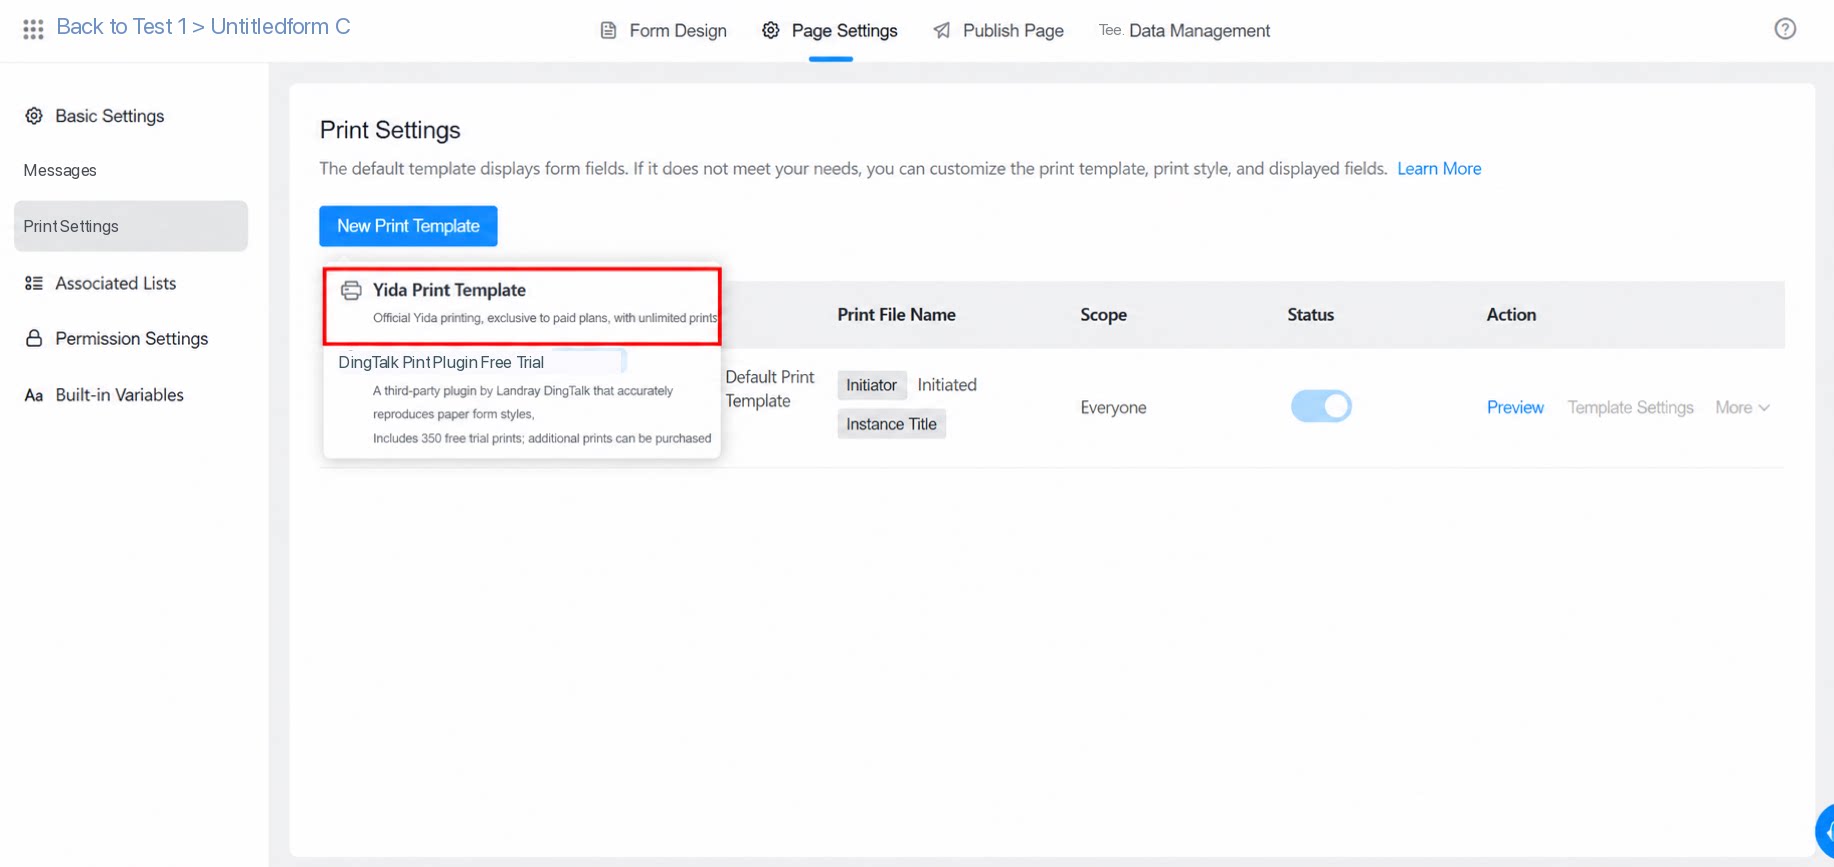
2.2.1 Print Template Editor
The template editor consists of three parts: the toolbar, the field selection area, and the content editing area.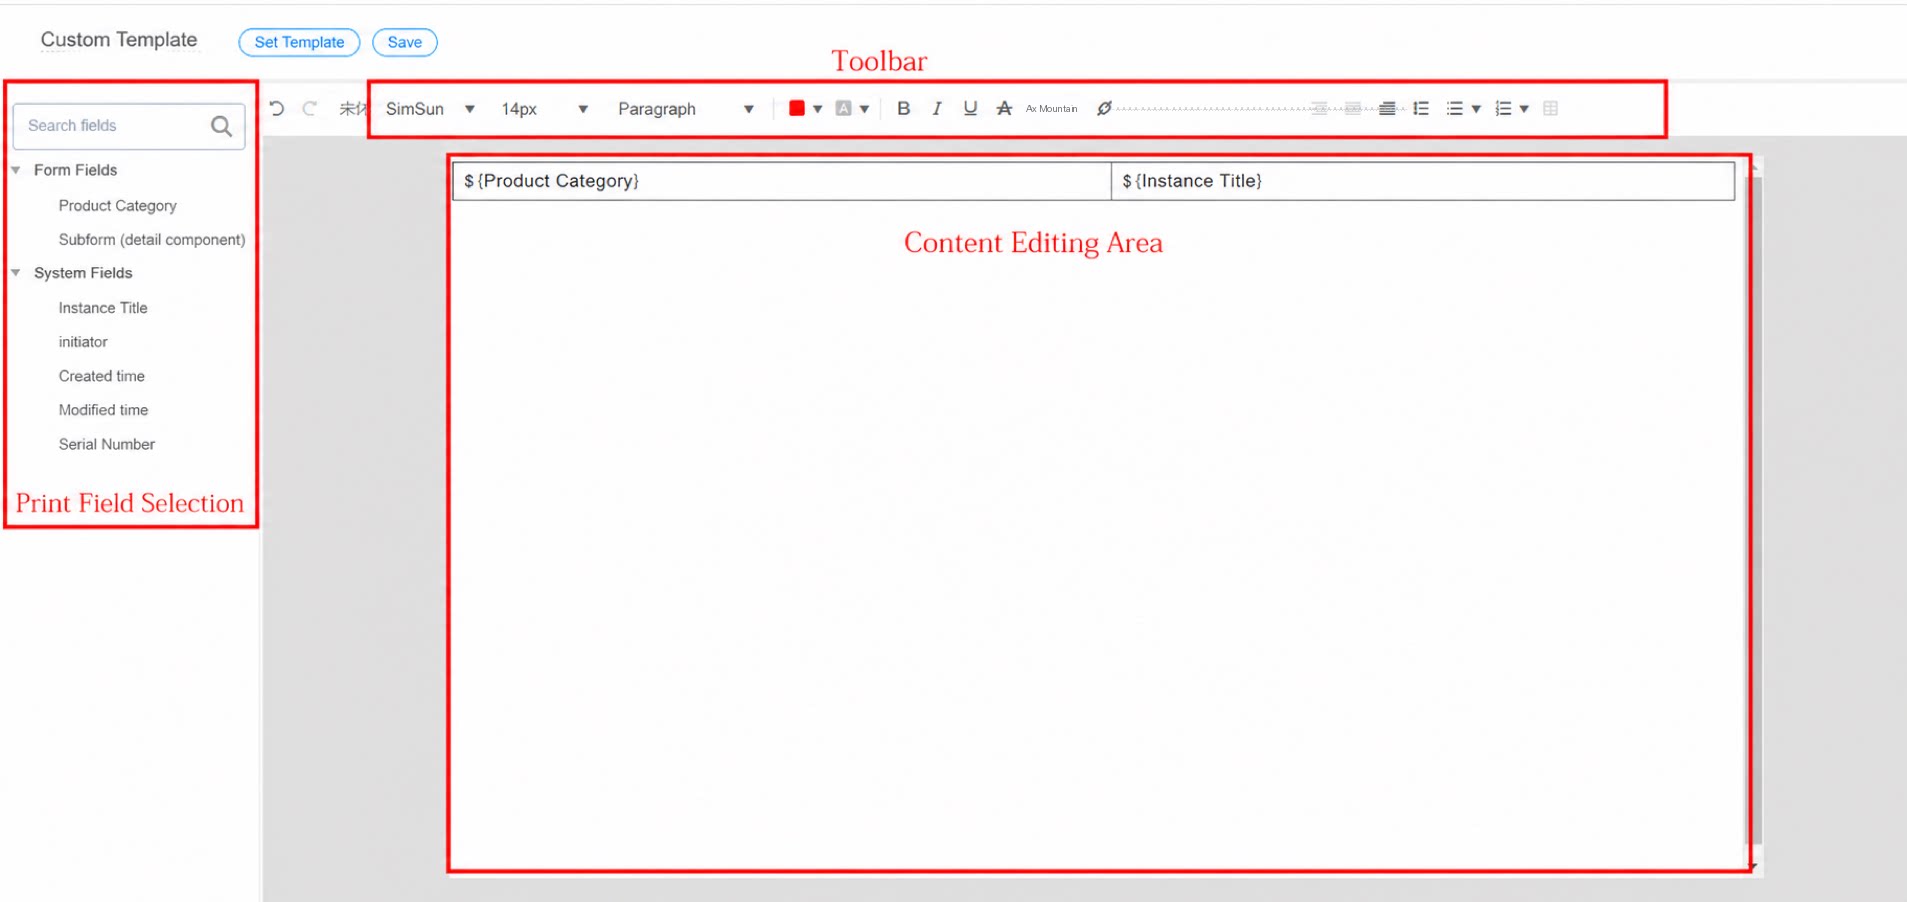
(1) Toolbar
The editor toolbar is a general-purpose rich text toolbar that lets you configure text layout, font size, font color, numbered lists, table drawing, and more. The following fonts are supported:- SimSun (default)
- Arial
- NSimSun
- Microsoft YaHei
- SimHei
(2) Print fields
The template editor supports two types of fields: regular fields and details fields.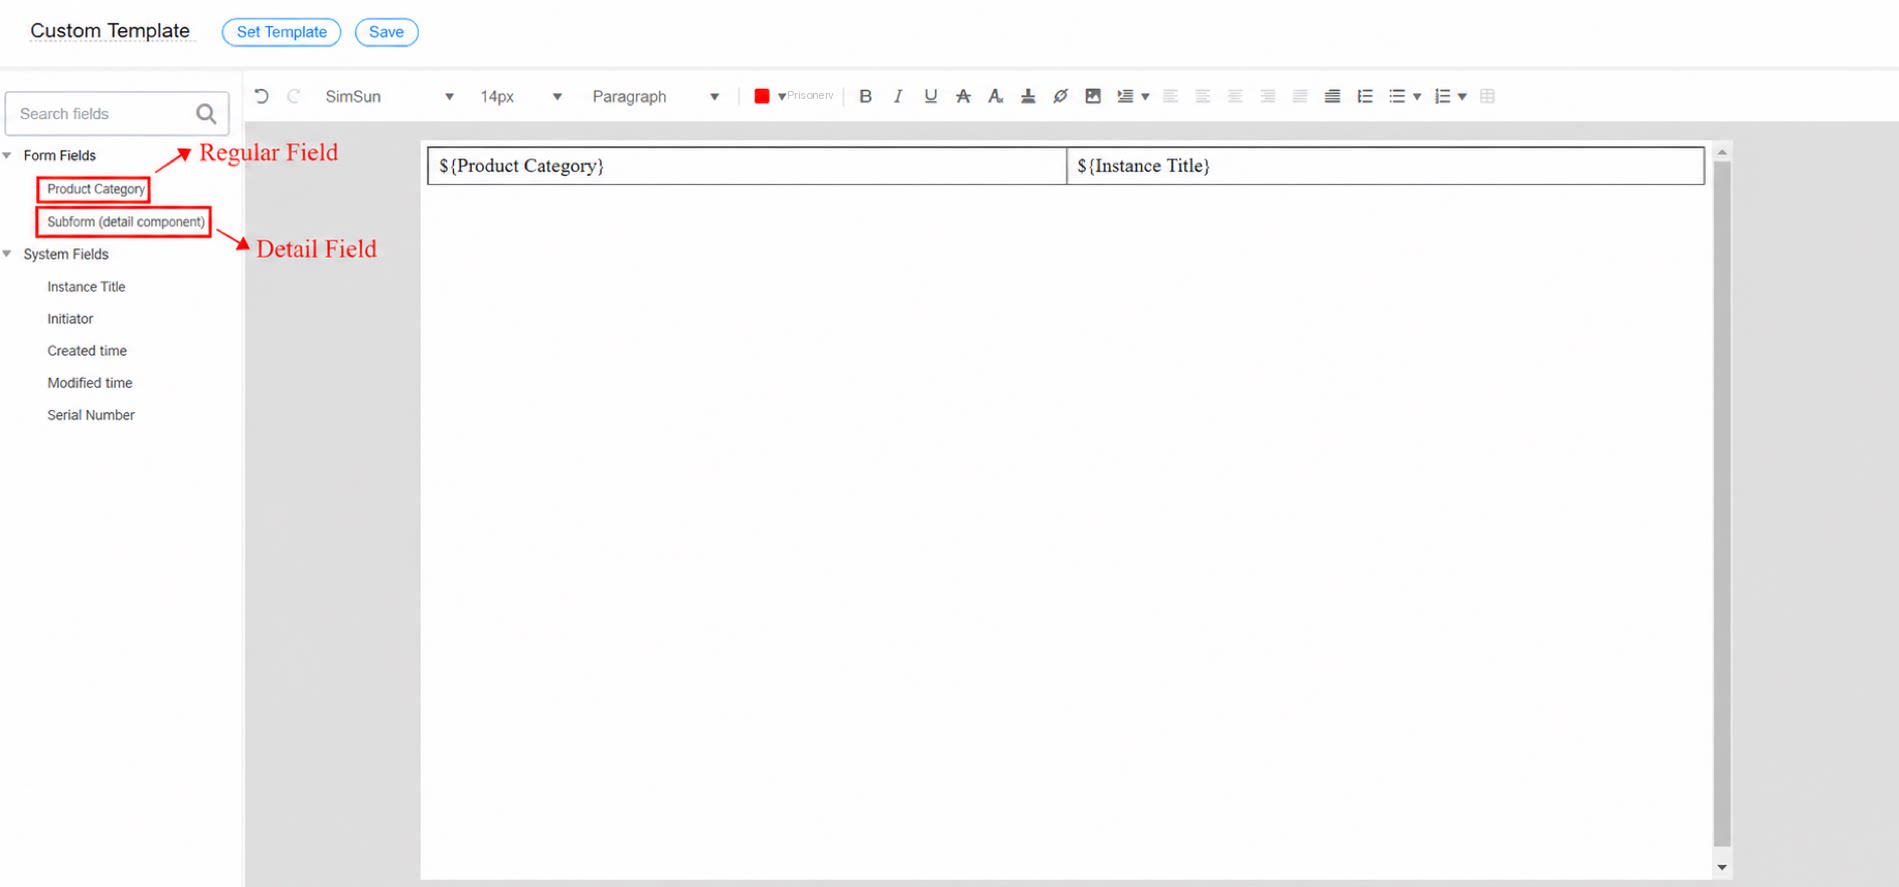
${Component name} and prints the value of the corresponding component.
Note: Regular fields can be inserted into regular tables (tables created via the toolbar), but not into details tables (subforms on the page). See the example below.
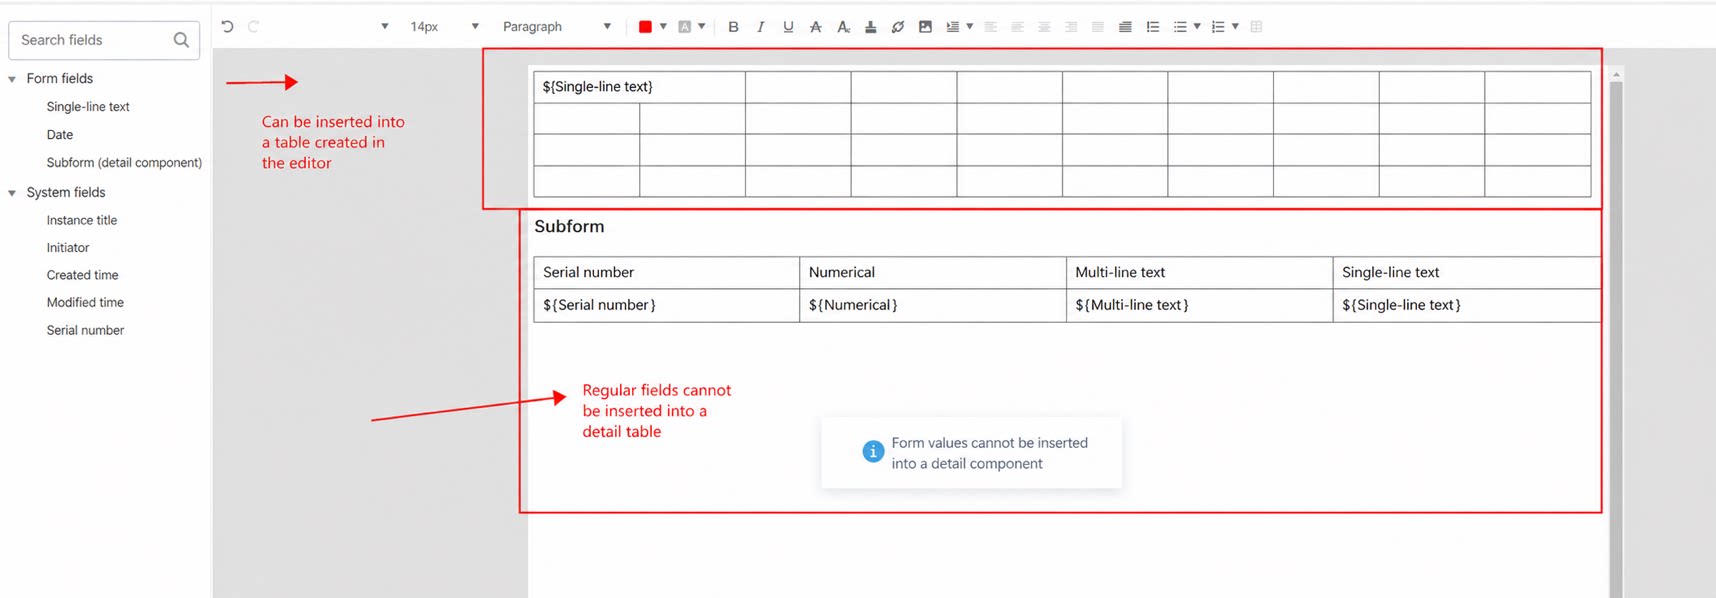
(3) Configure workflow approval records (workflow form only)
The approval record field is specific to workflow pages and is not available in regular form print templates. It renders as a details table in the print template. When creating an approval record, you can select and sort the subcomponents within the approval field.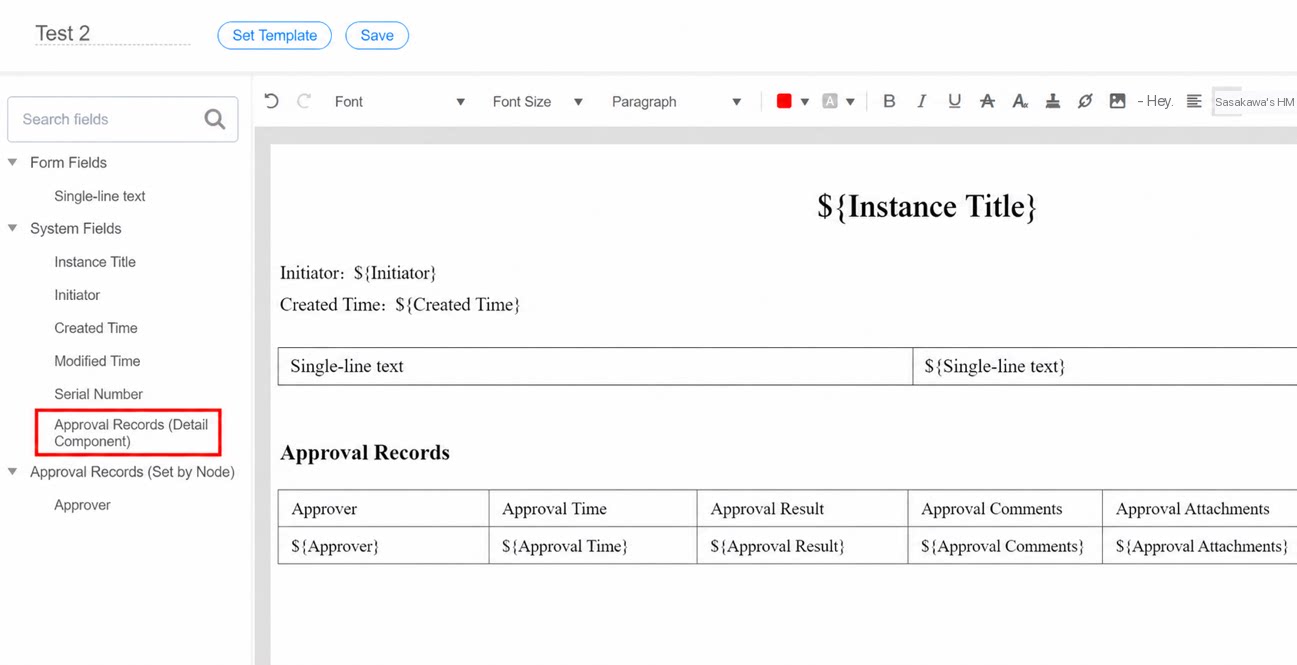
(4) Configure step-based approval records
Print templates can configure approval records by step. Click Approval records (set by step) on the left to configure the corresponding print fields. Note: Signature cannot be empty.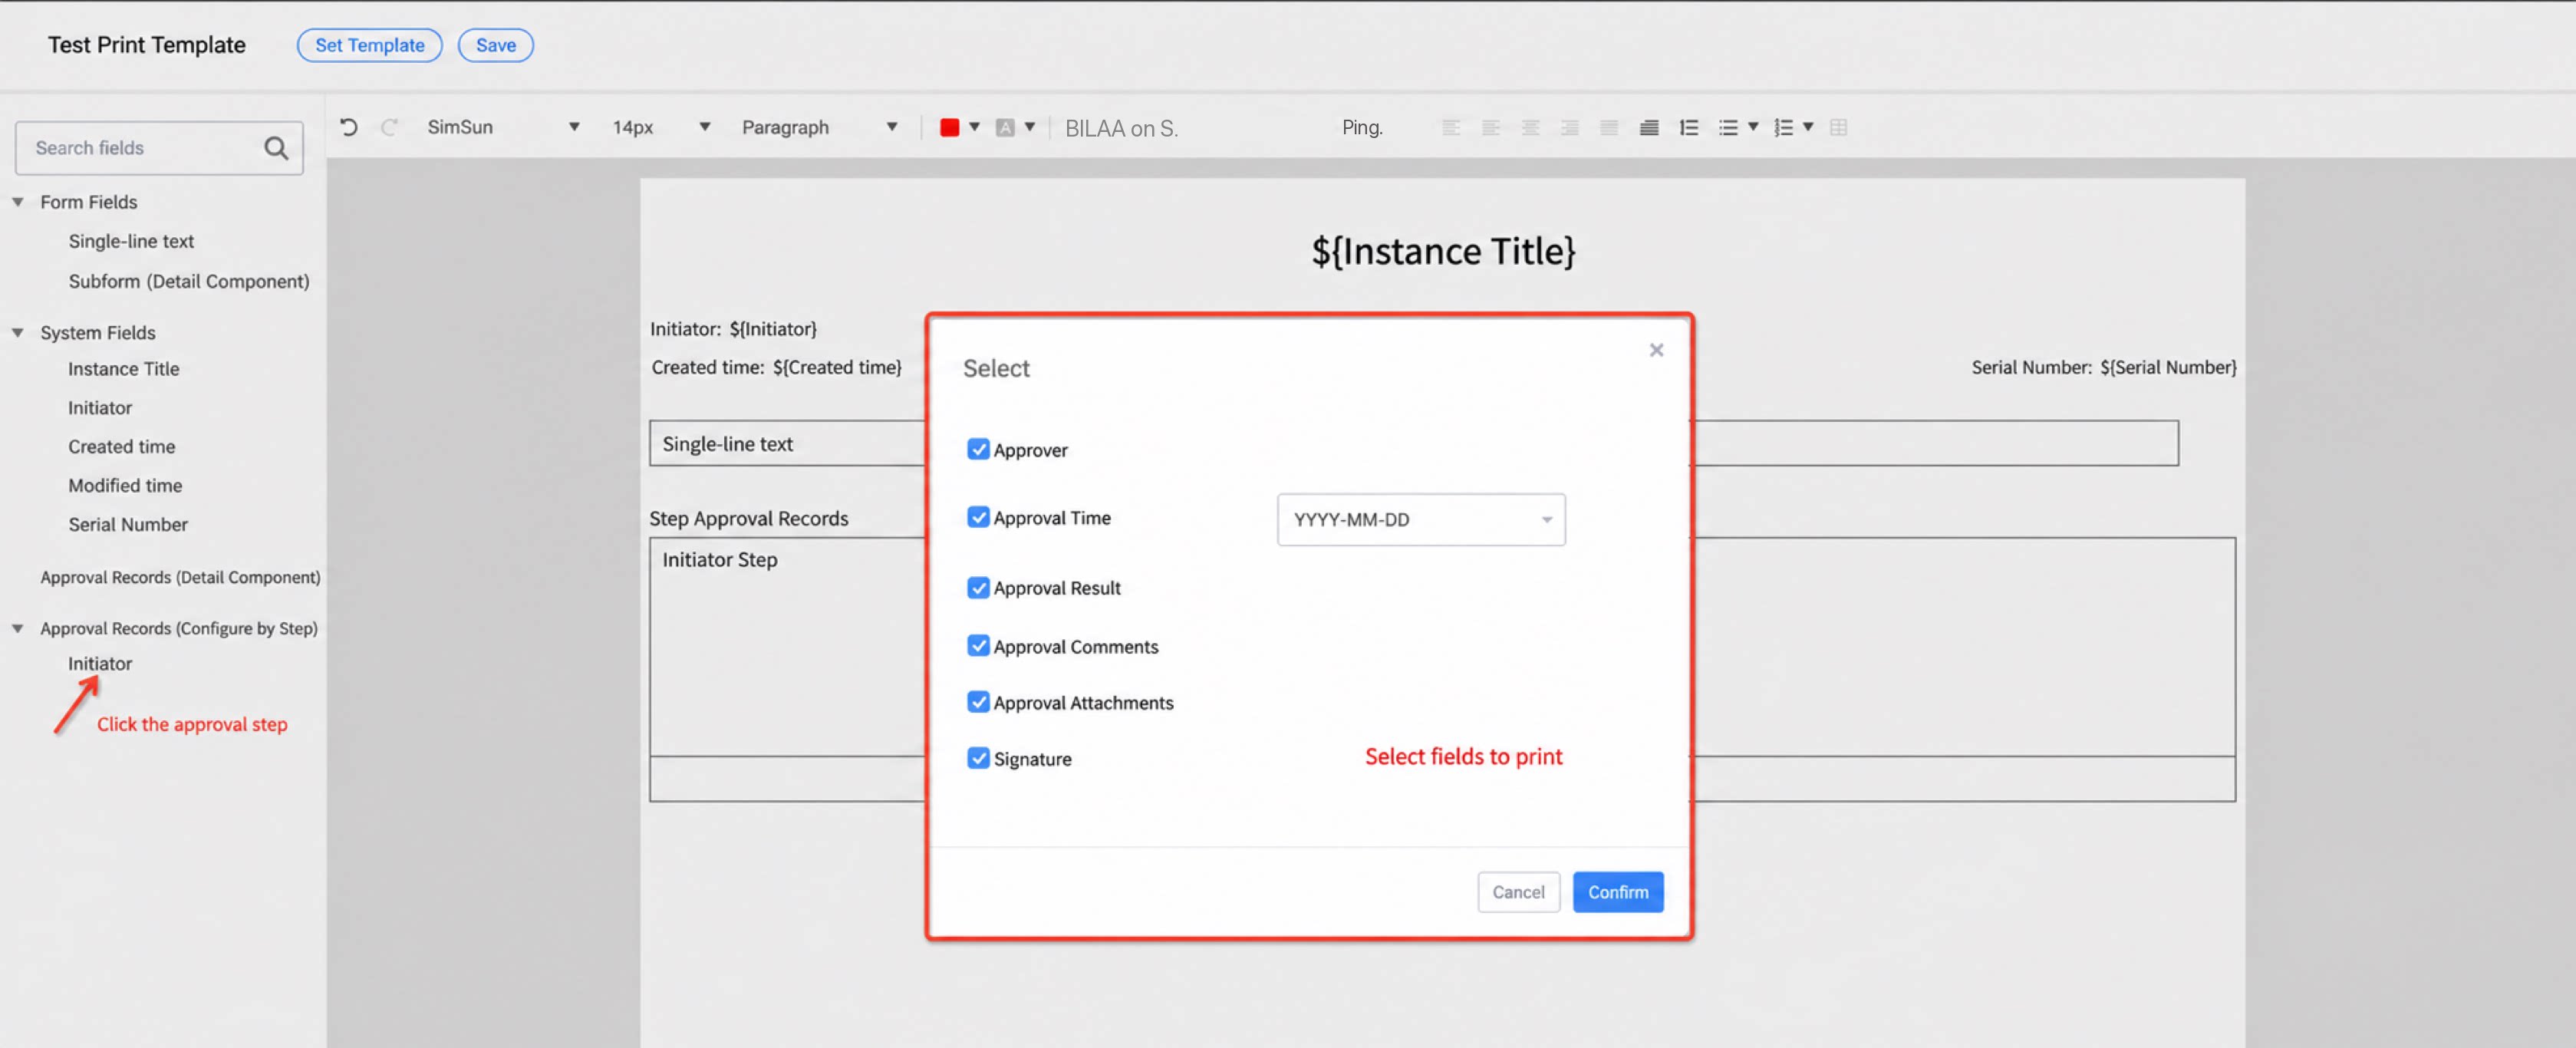
2.3 Dingdang Print Plugin (Free Trial Available on All Editions)
A third-party plugin developed by Landray Dingdang that accurately replicates paper form styles. It offers 350 free trial prints; additional prints require a paid edition.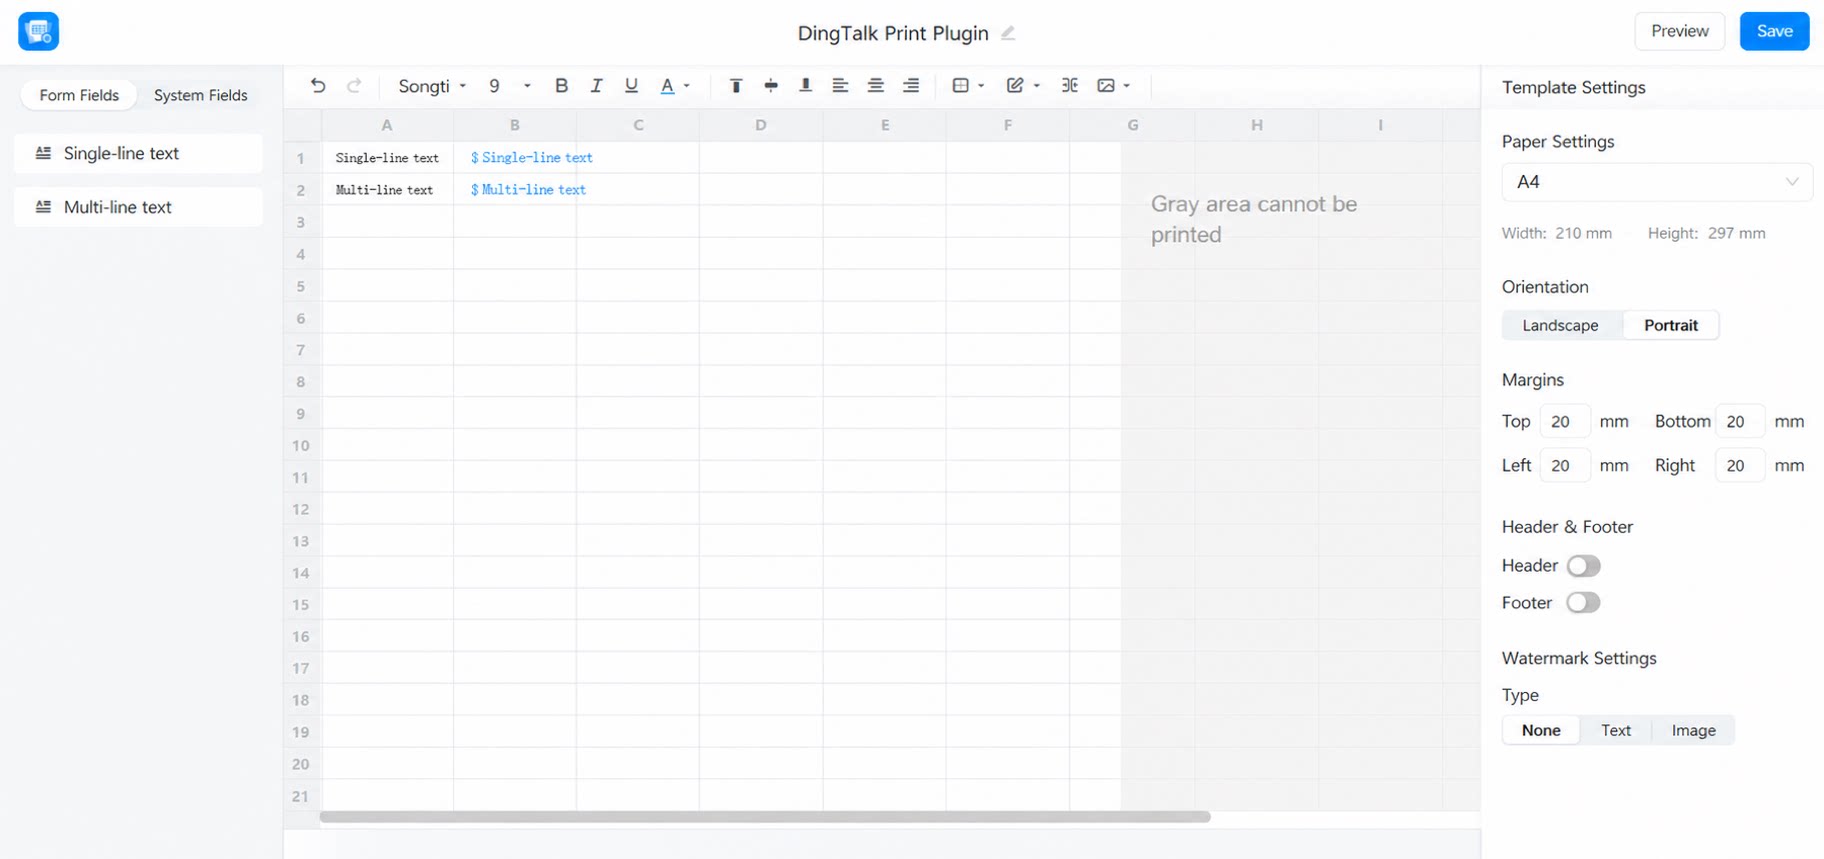
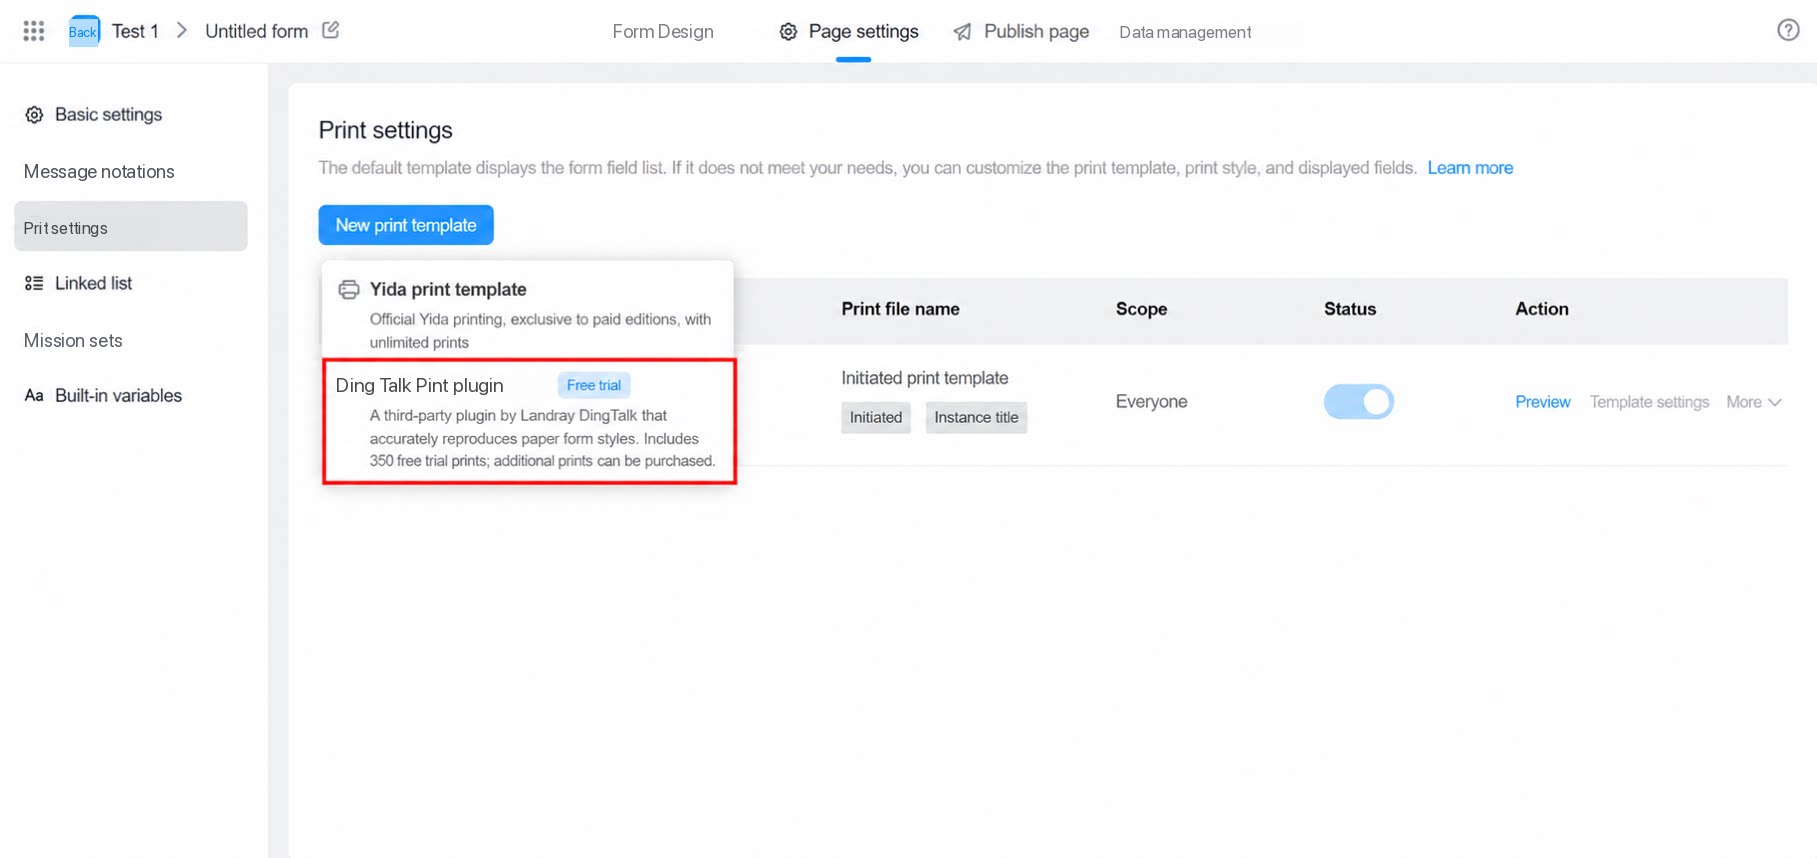
2.3.1 Dingdang Print Plugin Capabilities
The Landray Dingdang print designer provides the following capabilities:- Upload background images, floating images, and embedded images.
- Configure paper size and margins (A3, A4, A5, B3, B5, Custom).
- Set paper orientation to portrait or landscape.
- Design print content across multiple pages.
- Support QR Code components (which can display the source records page, form submission page, or a custom link page).
- Configure header and footer content (initiator, initiation time, print time, page).
- Print handwritten Signatures.
- Support watermarks (text watermark, image watermark).
- Print approval result seals.
- Configure thousand separators for Number components.
- Configure print fonts.
- Support the “Printed by” and “Print time” system variables.
2.4 Print Template Management
| Feature | Description |
|---|---|
| Sort print templates | When multiple print templates exist, sort them in a custom order.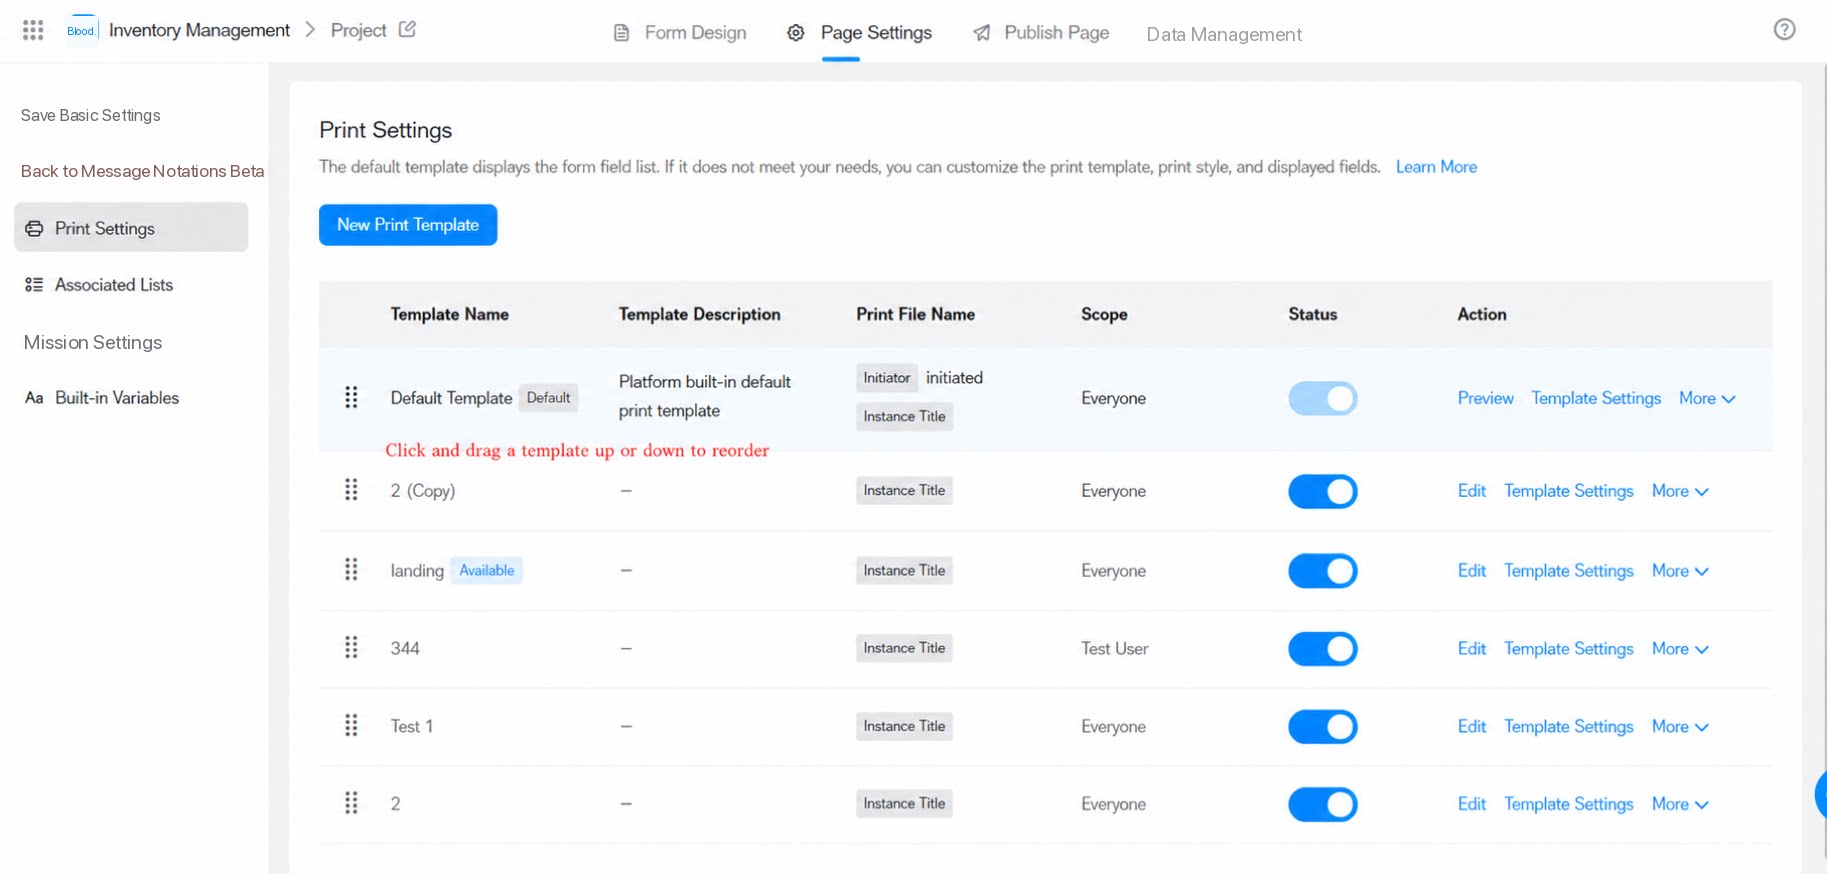 |
| Enable/disable print template | If a template is not currently in use but you do not want to delete it, disable it.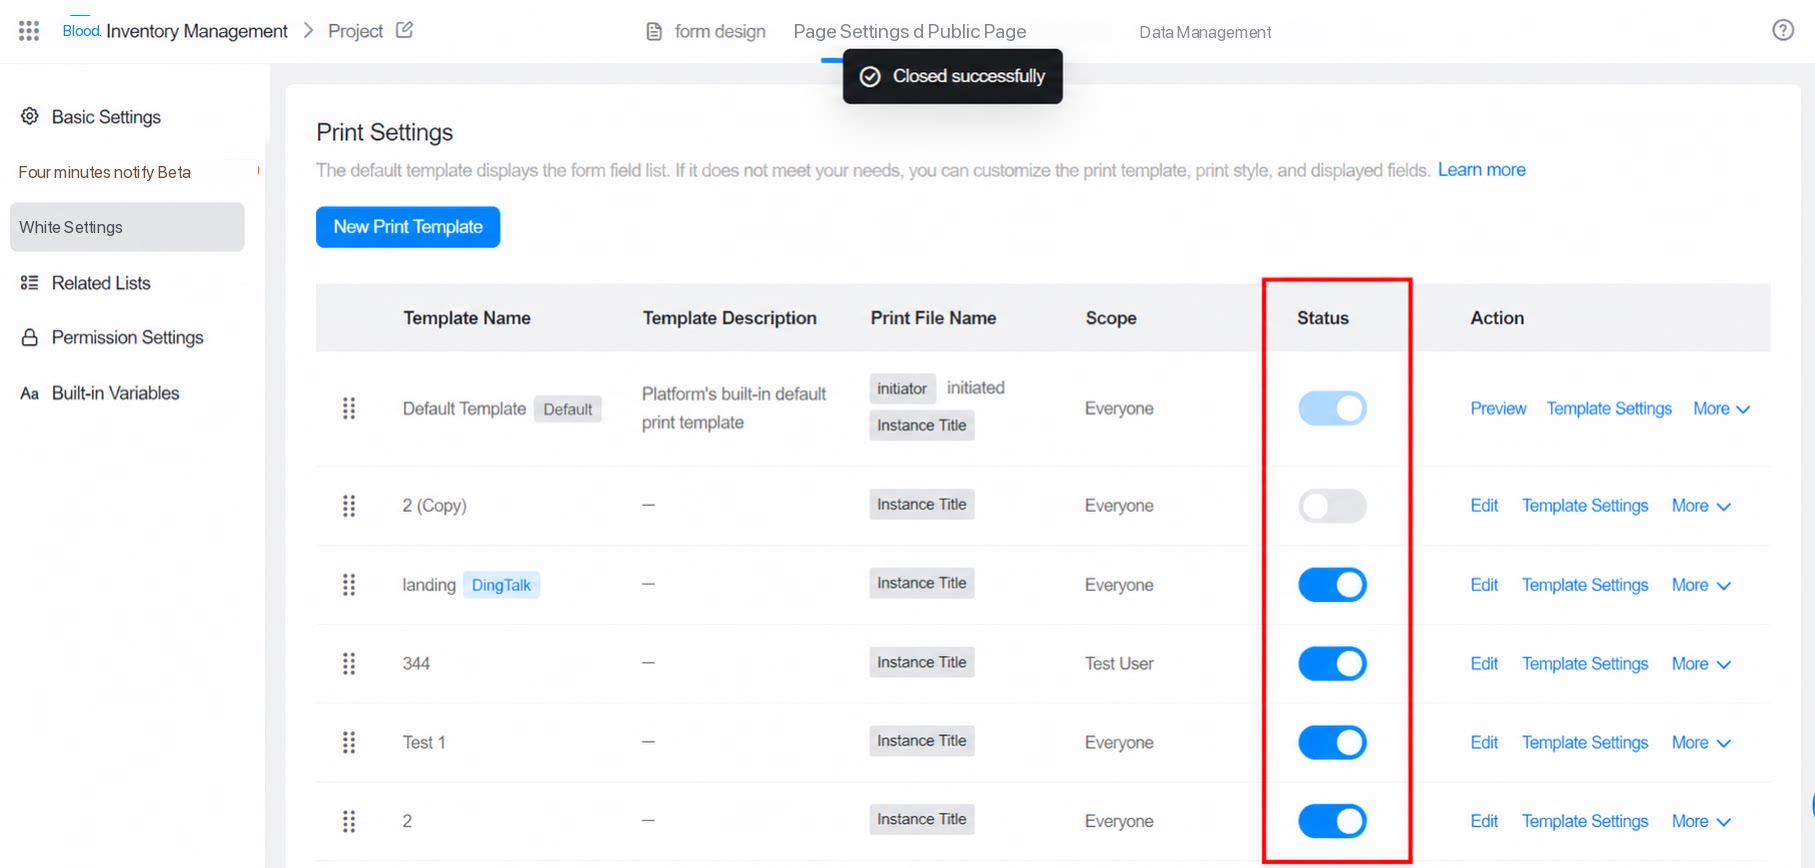 |
| Default Template Preview | Only the default template supports previewing the actual effect. Custom print templates cannot be previewed.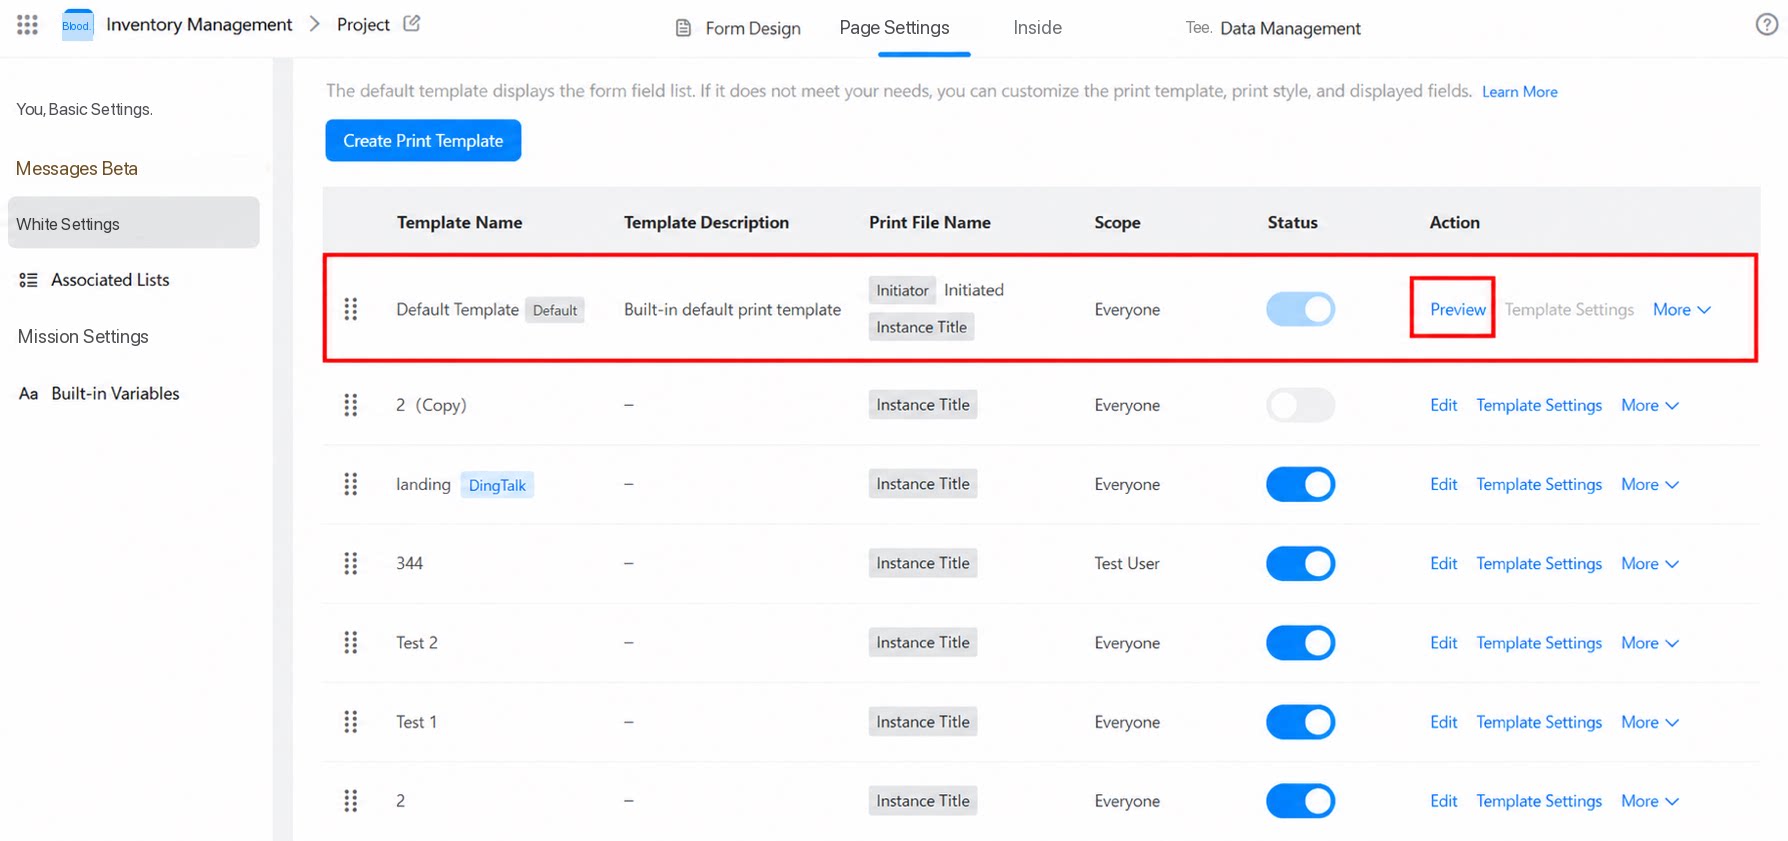 |
| Copy print template | Copy an existing template.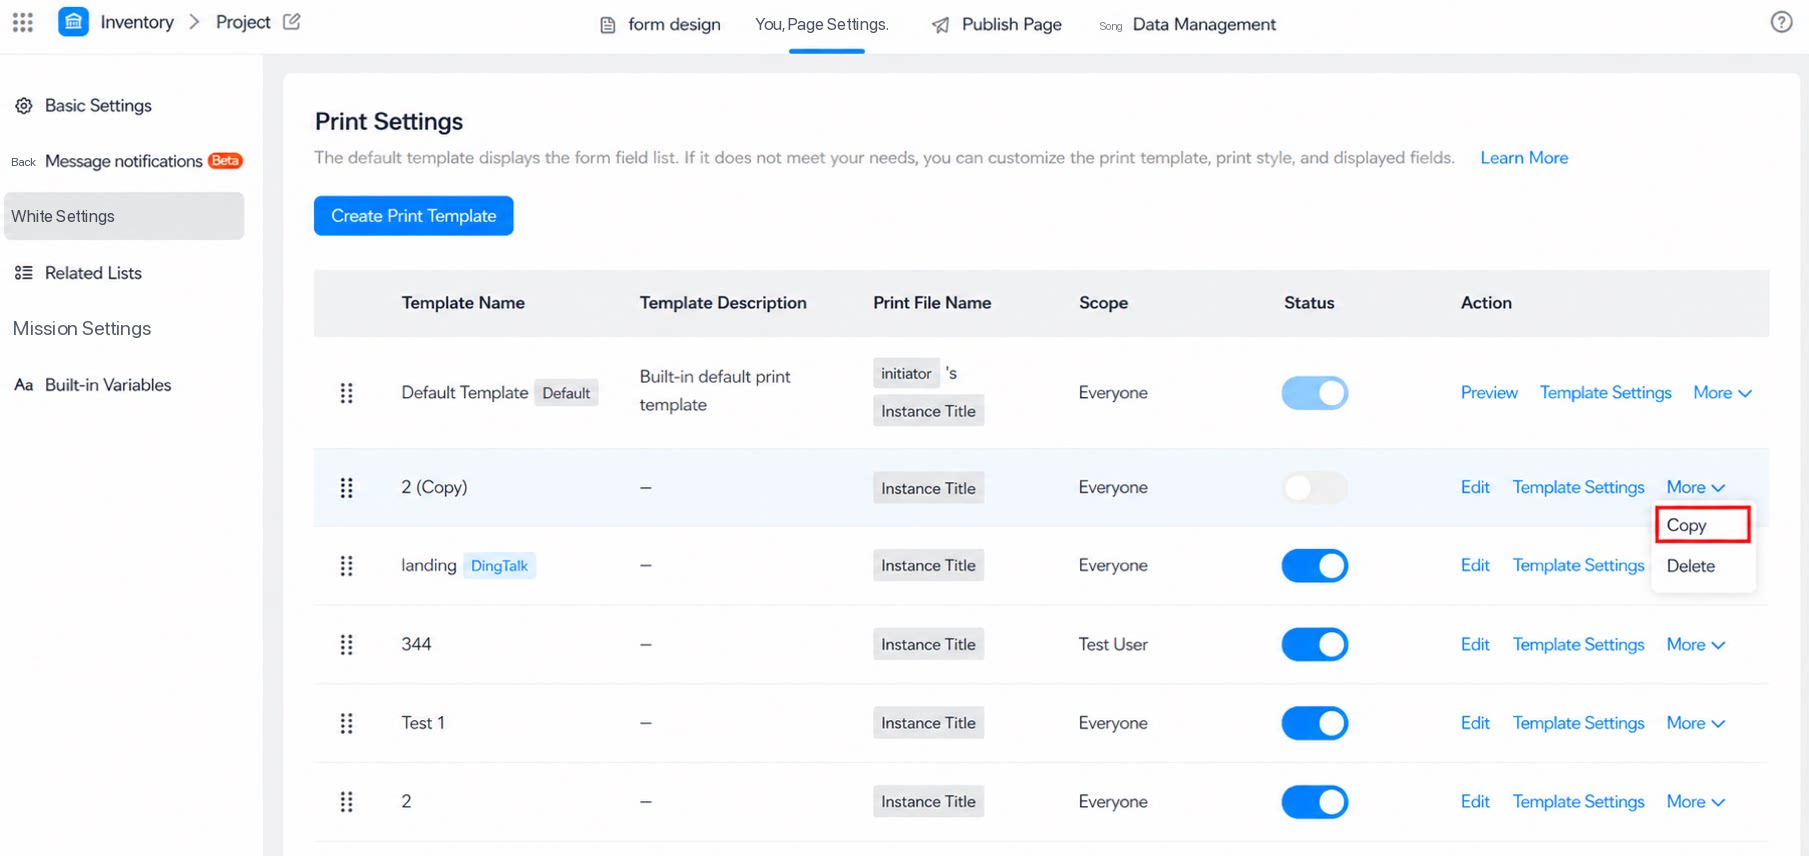 |
| Usage scope | After a custom print template is set up, the default usage scope is all users. To restrict who can use the template, modify the usage scope in the template settings.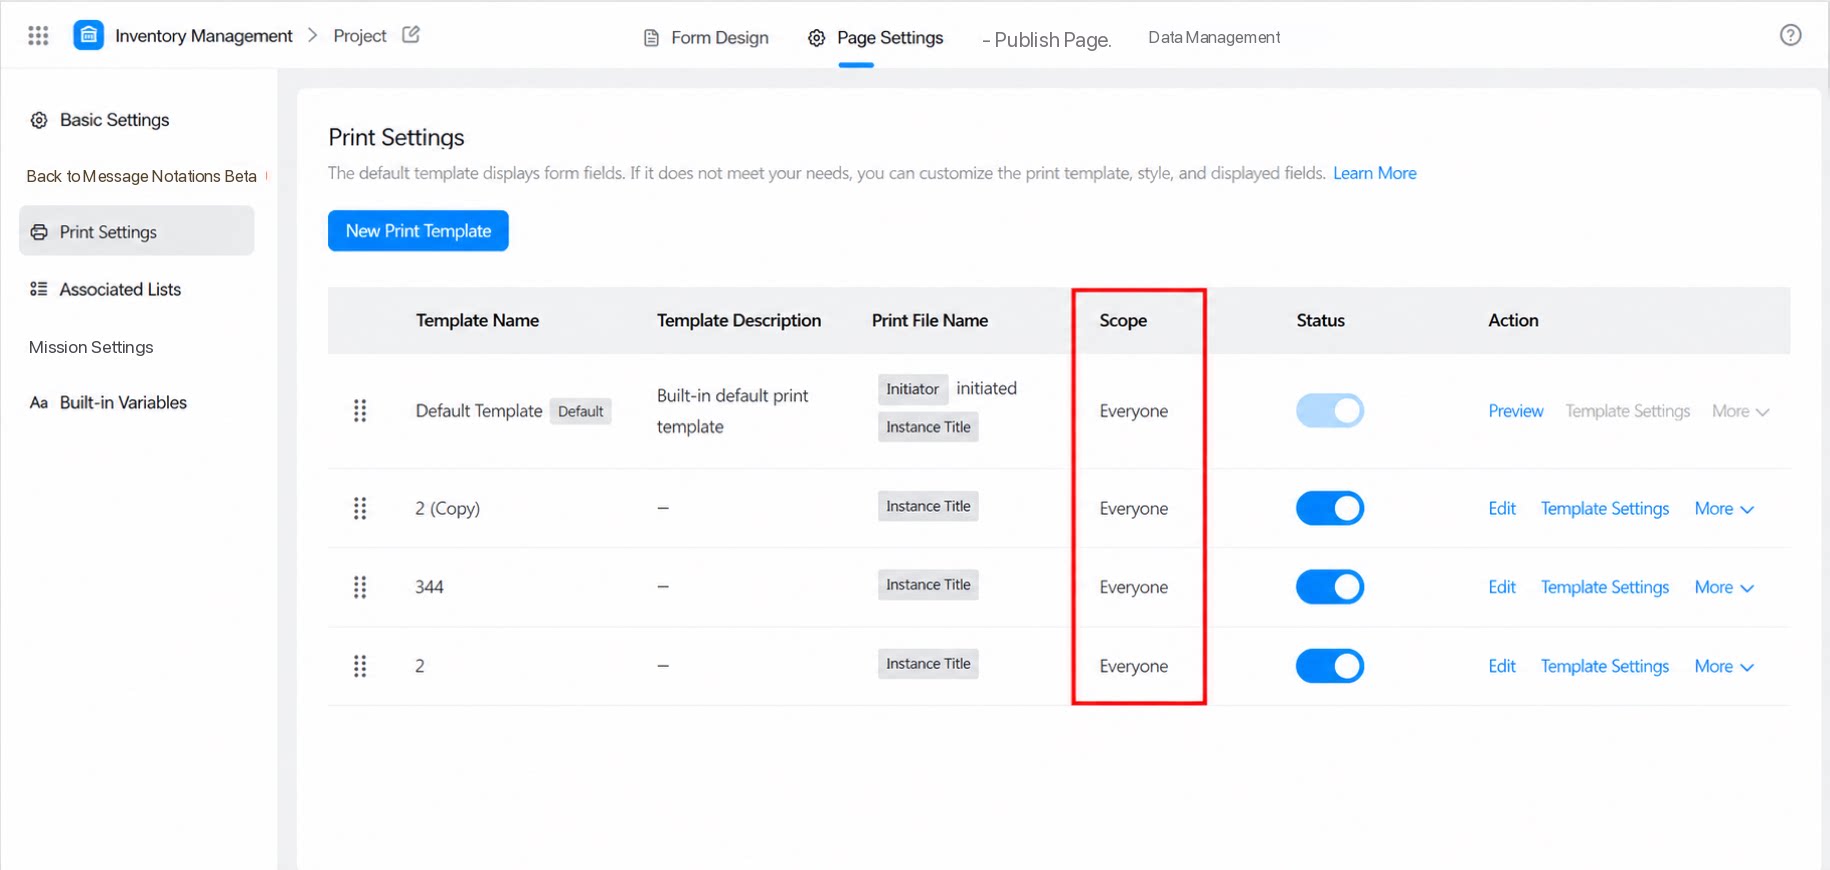 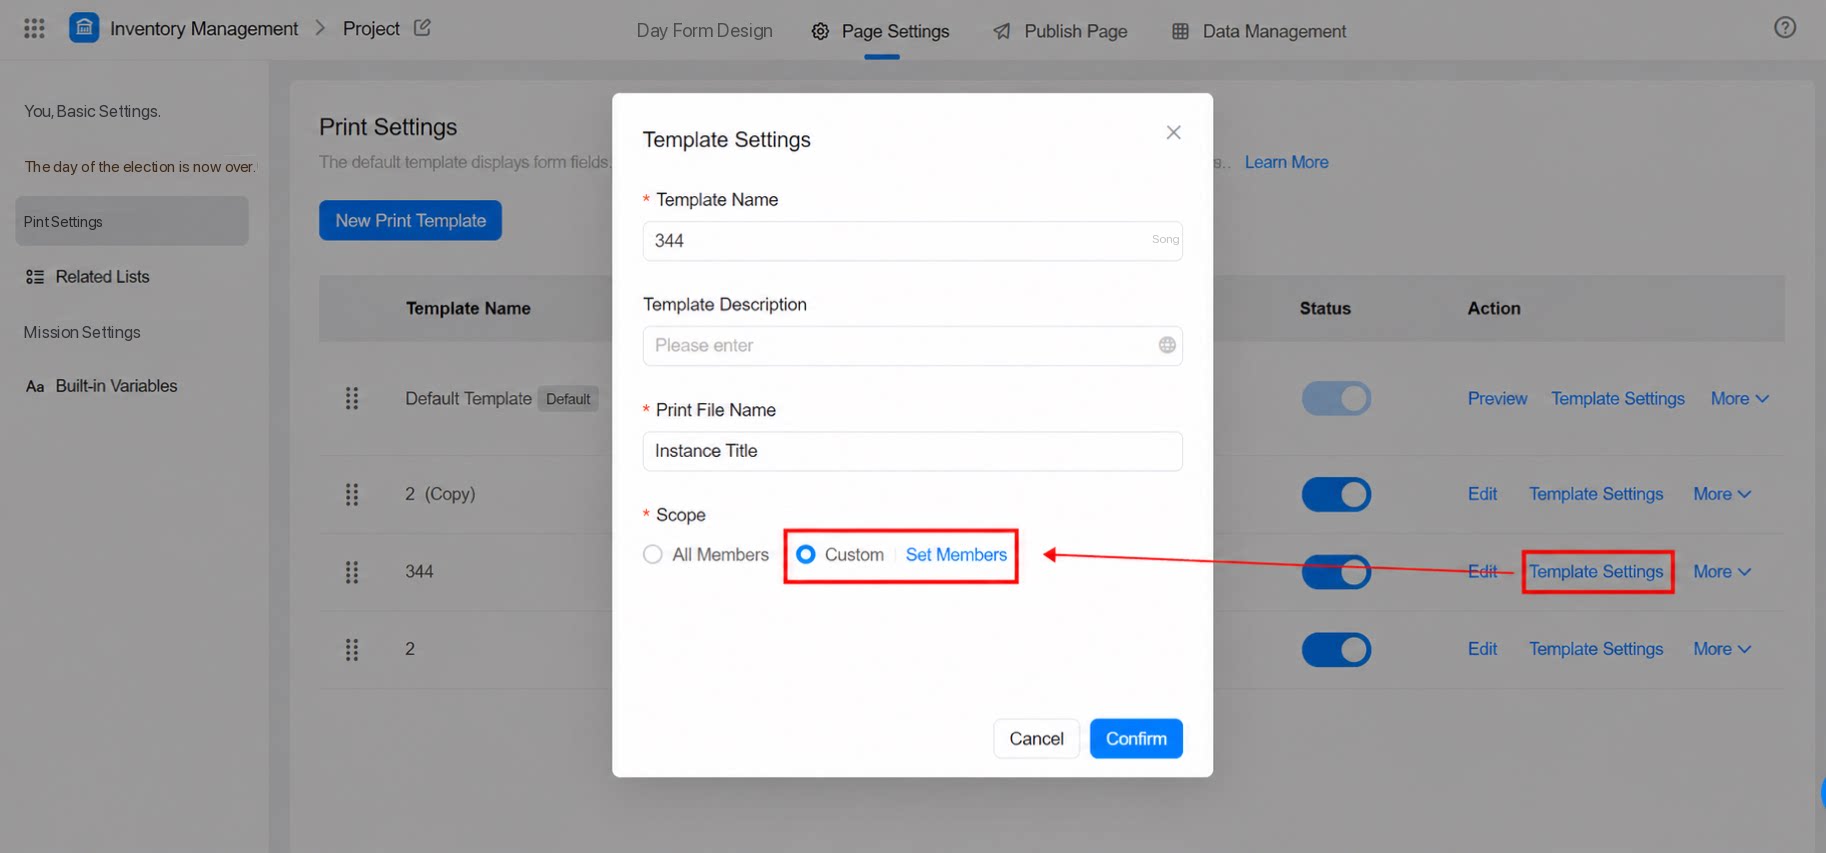 |
3. FAQ
3.1 How do I set the size of an uploaded image control in the print template?
3.1 How do I set the size of an uploaded image control in the print template?
When you select an image upload in a custom template, a cell is generated automatically. Resize the cell by dragging its borders, and the cell size equals the printed image size.
3.2 Printed Content Is Blank, or Only Numbers Are Printed
The content area of custom templates currently supports only five fonts: SimSun, Arial, NSimSun, Microsoft YaHei, and SimHei. If you copy and paste content from a .doc file or another source, the font may fall outside this list and therefore cannot be printed. Select all the content on the page and click the font option in the top-left corner to unify the formatting.3.3 How Do I Provide Feedback on Issues with Dingdang Print?
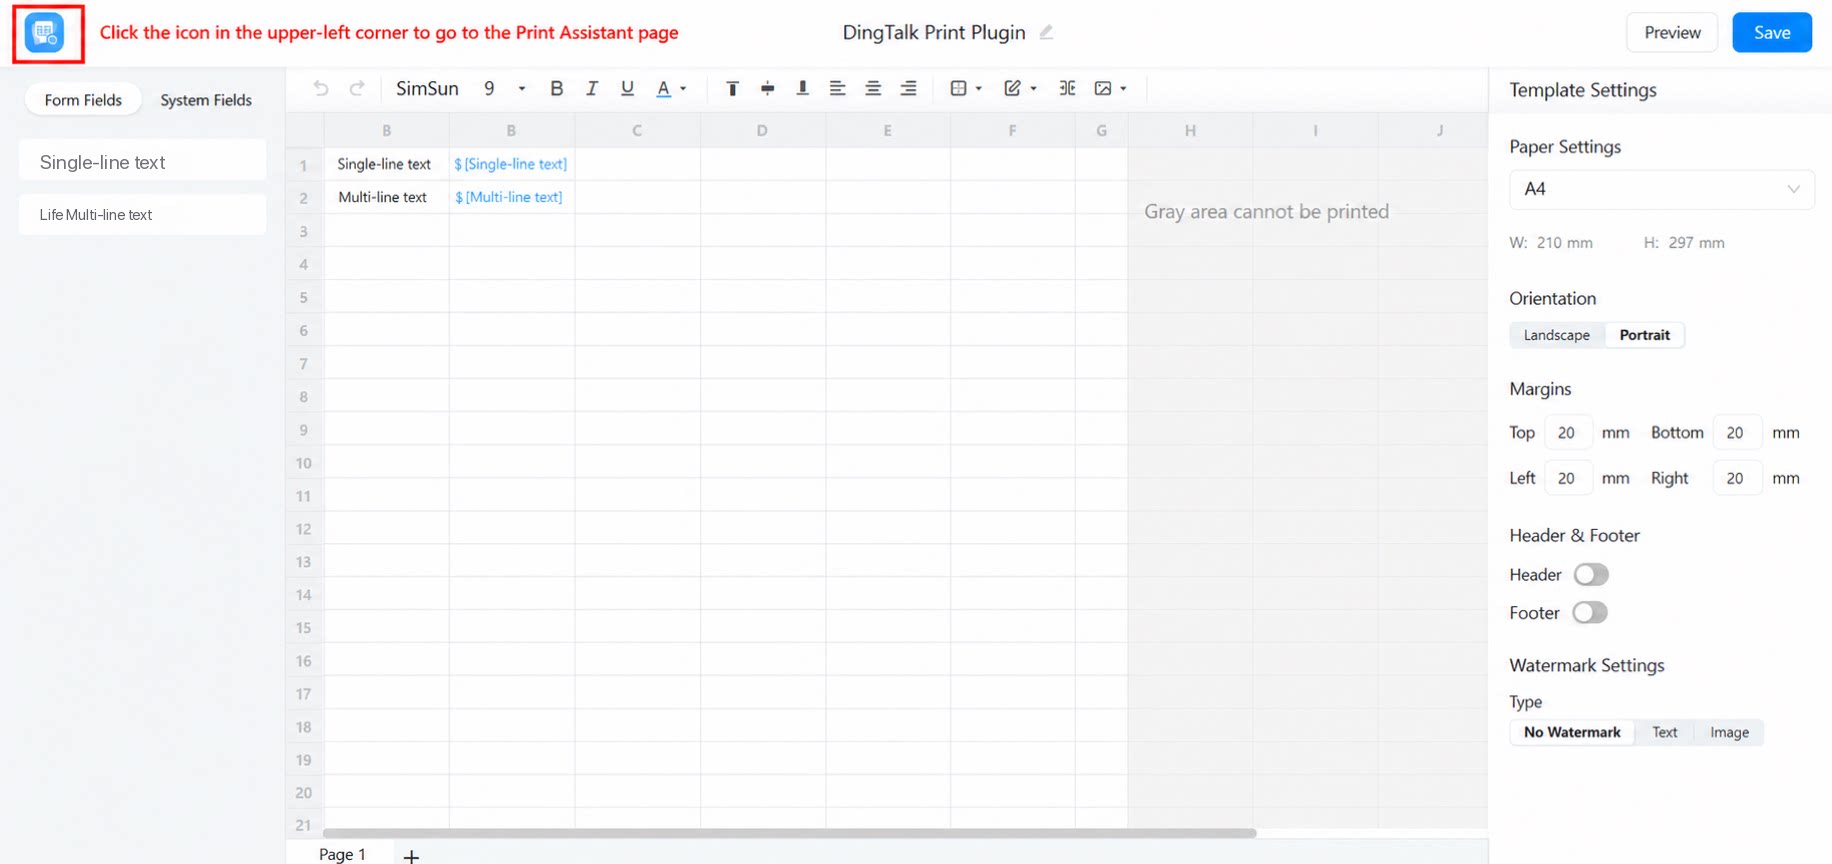
On the Dingdang print template settings page, click the icon in the top-right corner >> Print Treasure >> Help, and select the service you need.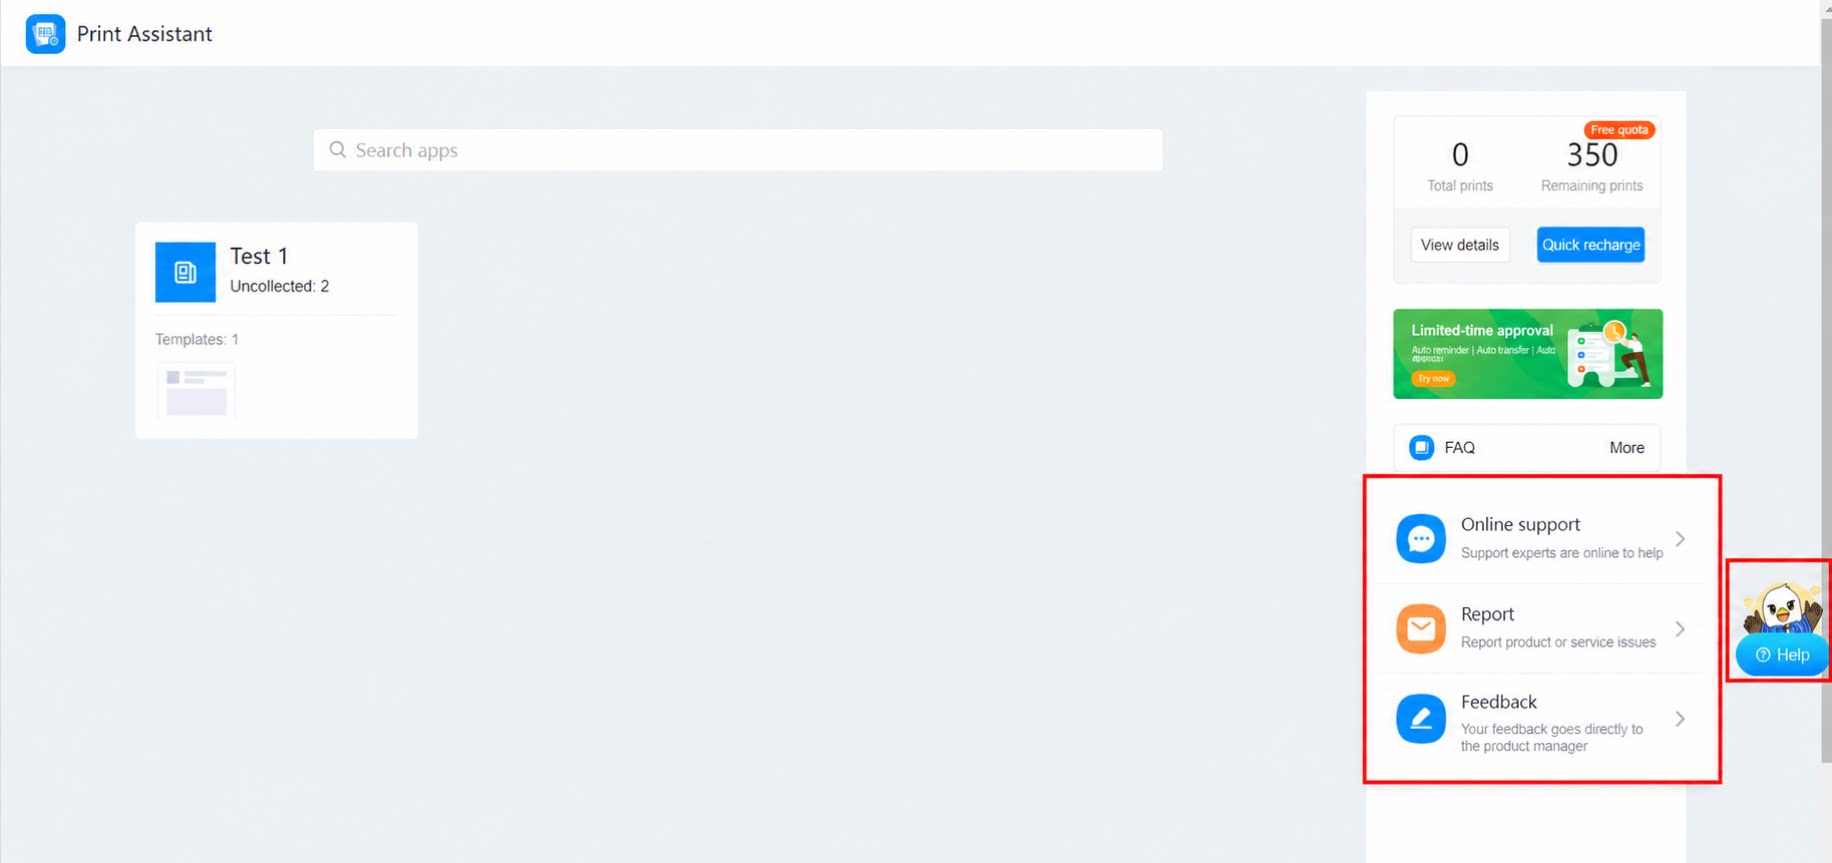
3.4 Why can't Rich Text be printed?
3.4 Why can't Rich Text be printed?
The Rich Text component does not support printing.
3.5 Why can't the browser paginate when printing the source records page?
3.5 Why can't the browser paginate when printing the source records page?
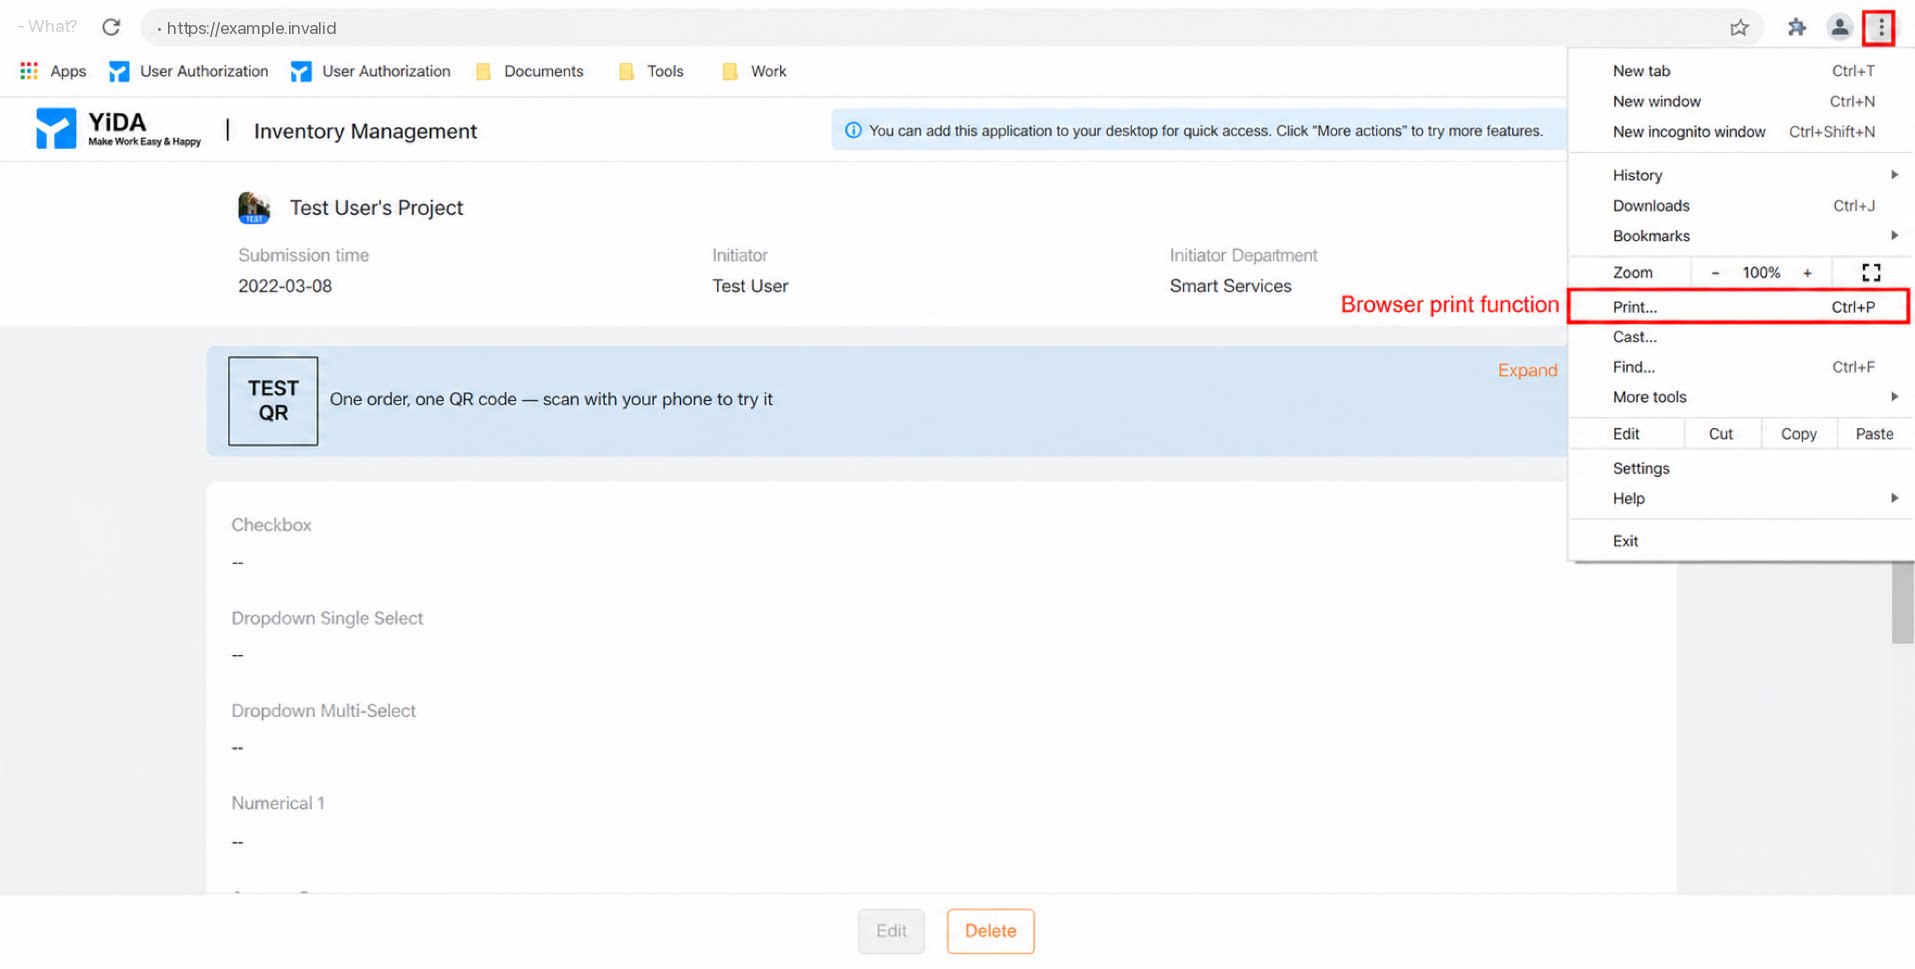
YiDA does not support printing the current page view. Use the built-in template printing instead.
3.6 Are Stickers supported for printing?
3.6 Are Stickers supported for printing?
No. For example, Stickers of this type are not supported.
3.7 Why does printing change when SimSun is bolded?
3.7 Why does printing change when SimSun is bolded?
Printing is not supported when the font is SimSun with Bold applied.