Chats
Chats Calendar
 Meetings
 Contacts
 Mail
Mail Docs
Docs Drive
Drive AI Table
 AI Minutes
 Attendance
 Approval
 YiDA
YiDA Admin Console
Configure a Branch Node
- Go to the Premium workflow design page and drag a branch node onto the canvas.
- Click the branch node. In the Attribute panel on the right, click the Settings button next to Branch rules.
- Configure the branch rules.
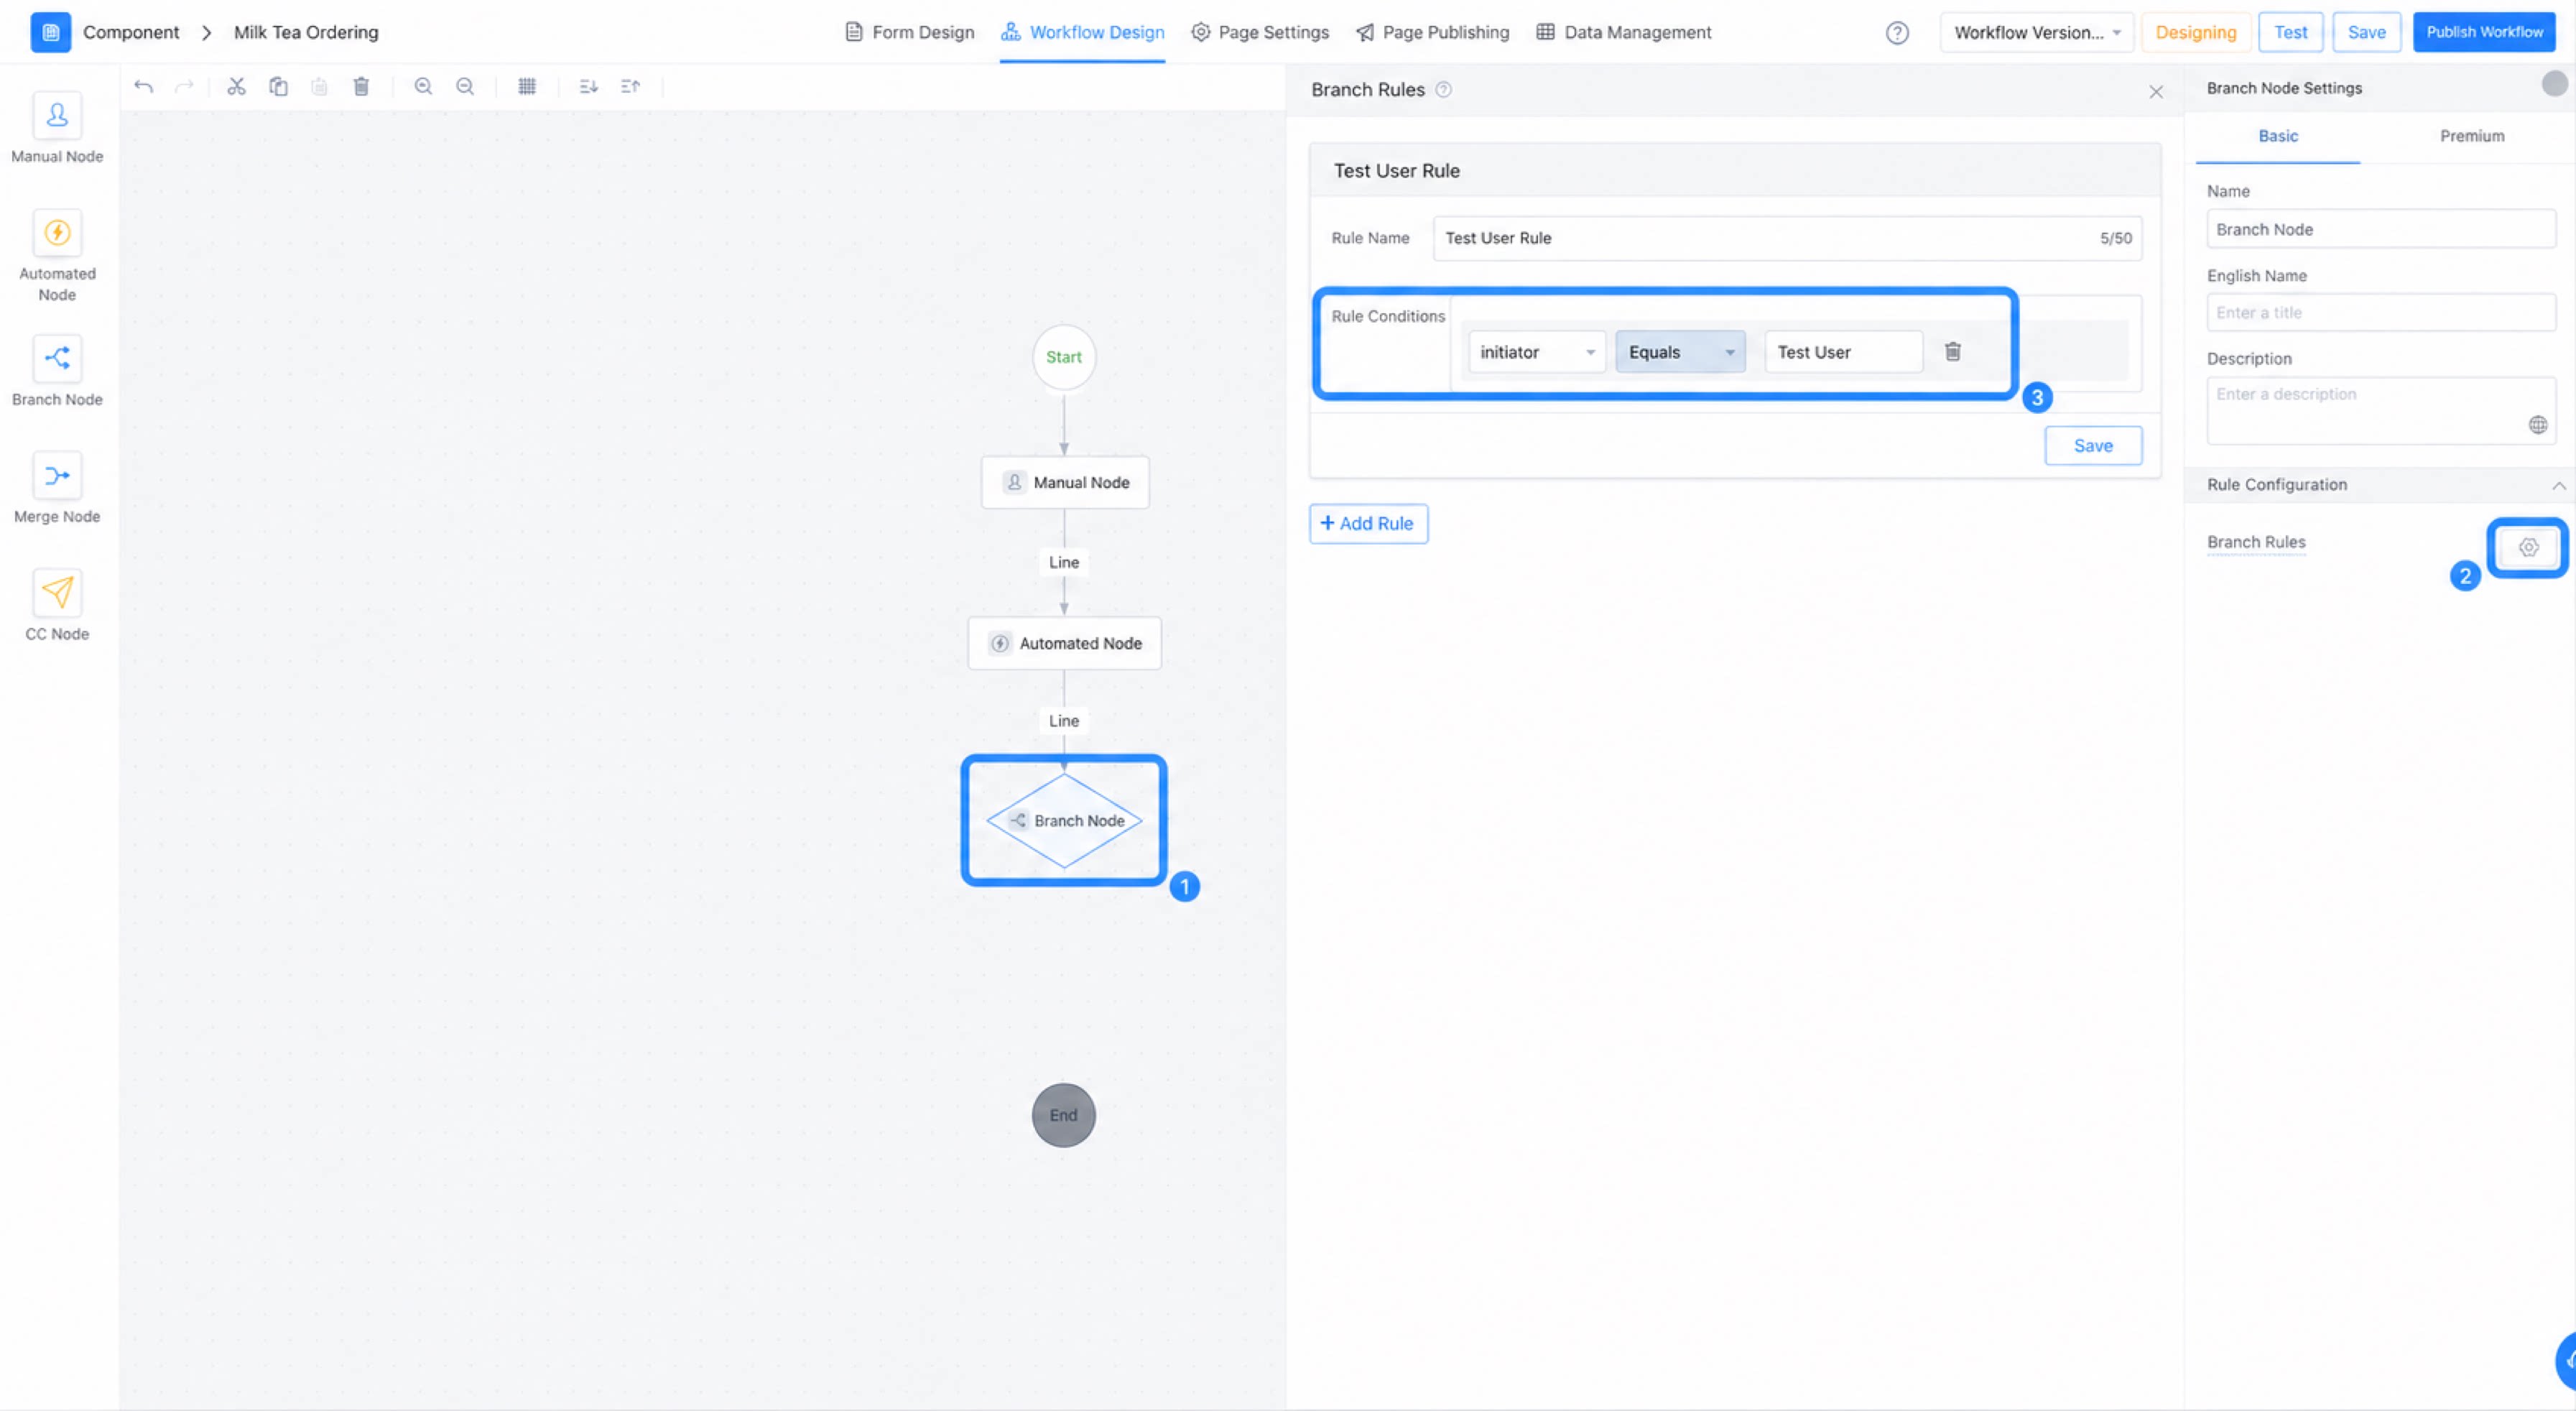
- Click Save to complete the configuration.
Configure Branch Node Connection Lines
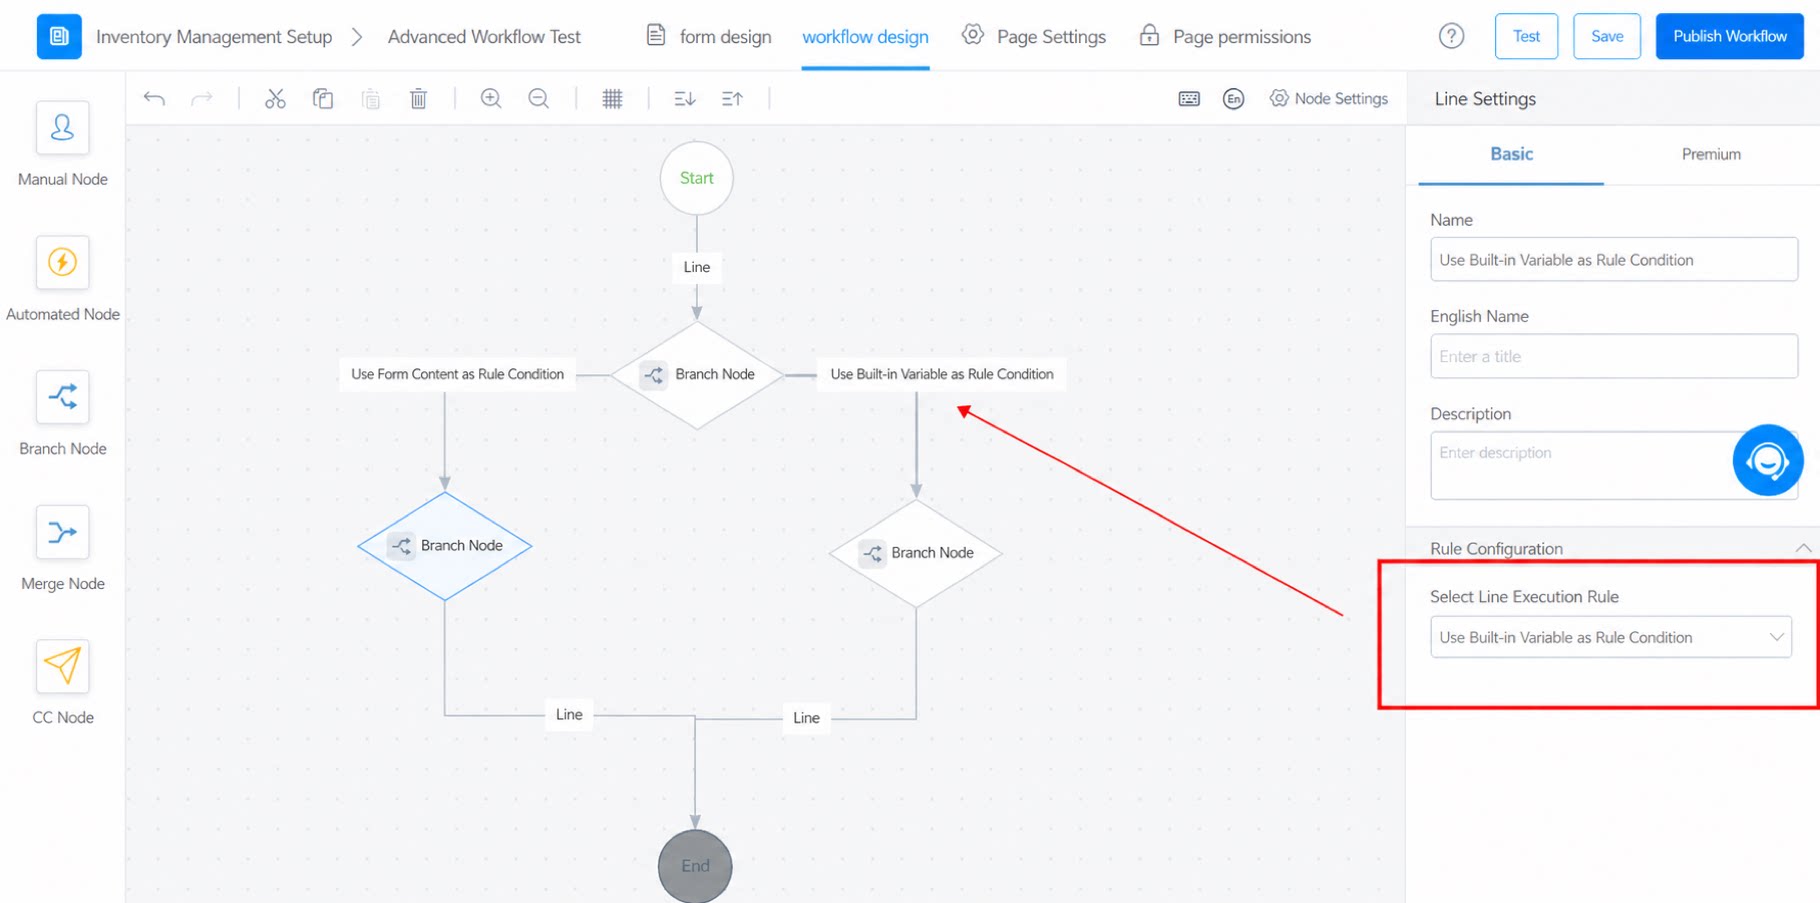
Each outgoing line from a branch node must be associated with a branch rule. The node after that line is activated only when the rule is met. If the rules of multiple outgoing lines are satisfied at the same time, all nodes after those matching lines are activated. If an outgoing line has no rule configured, it is activated by default. If no outgoing line’s rules are met, none of the nodes after the branch node are activated. If there are no other running nodes at that point, the entire workflow is completed.