1.1 Feature Overview
By customizing the displayed fields, you can view only the fields relevant to your work, reduce information noise, and focus on key data. Select the fields you want to display based on your needs to improve the efficiency of data viewing and operations.
1.2 Usage
1) Entry Point
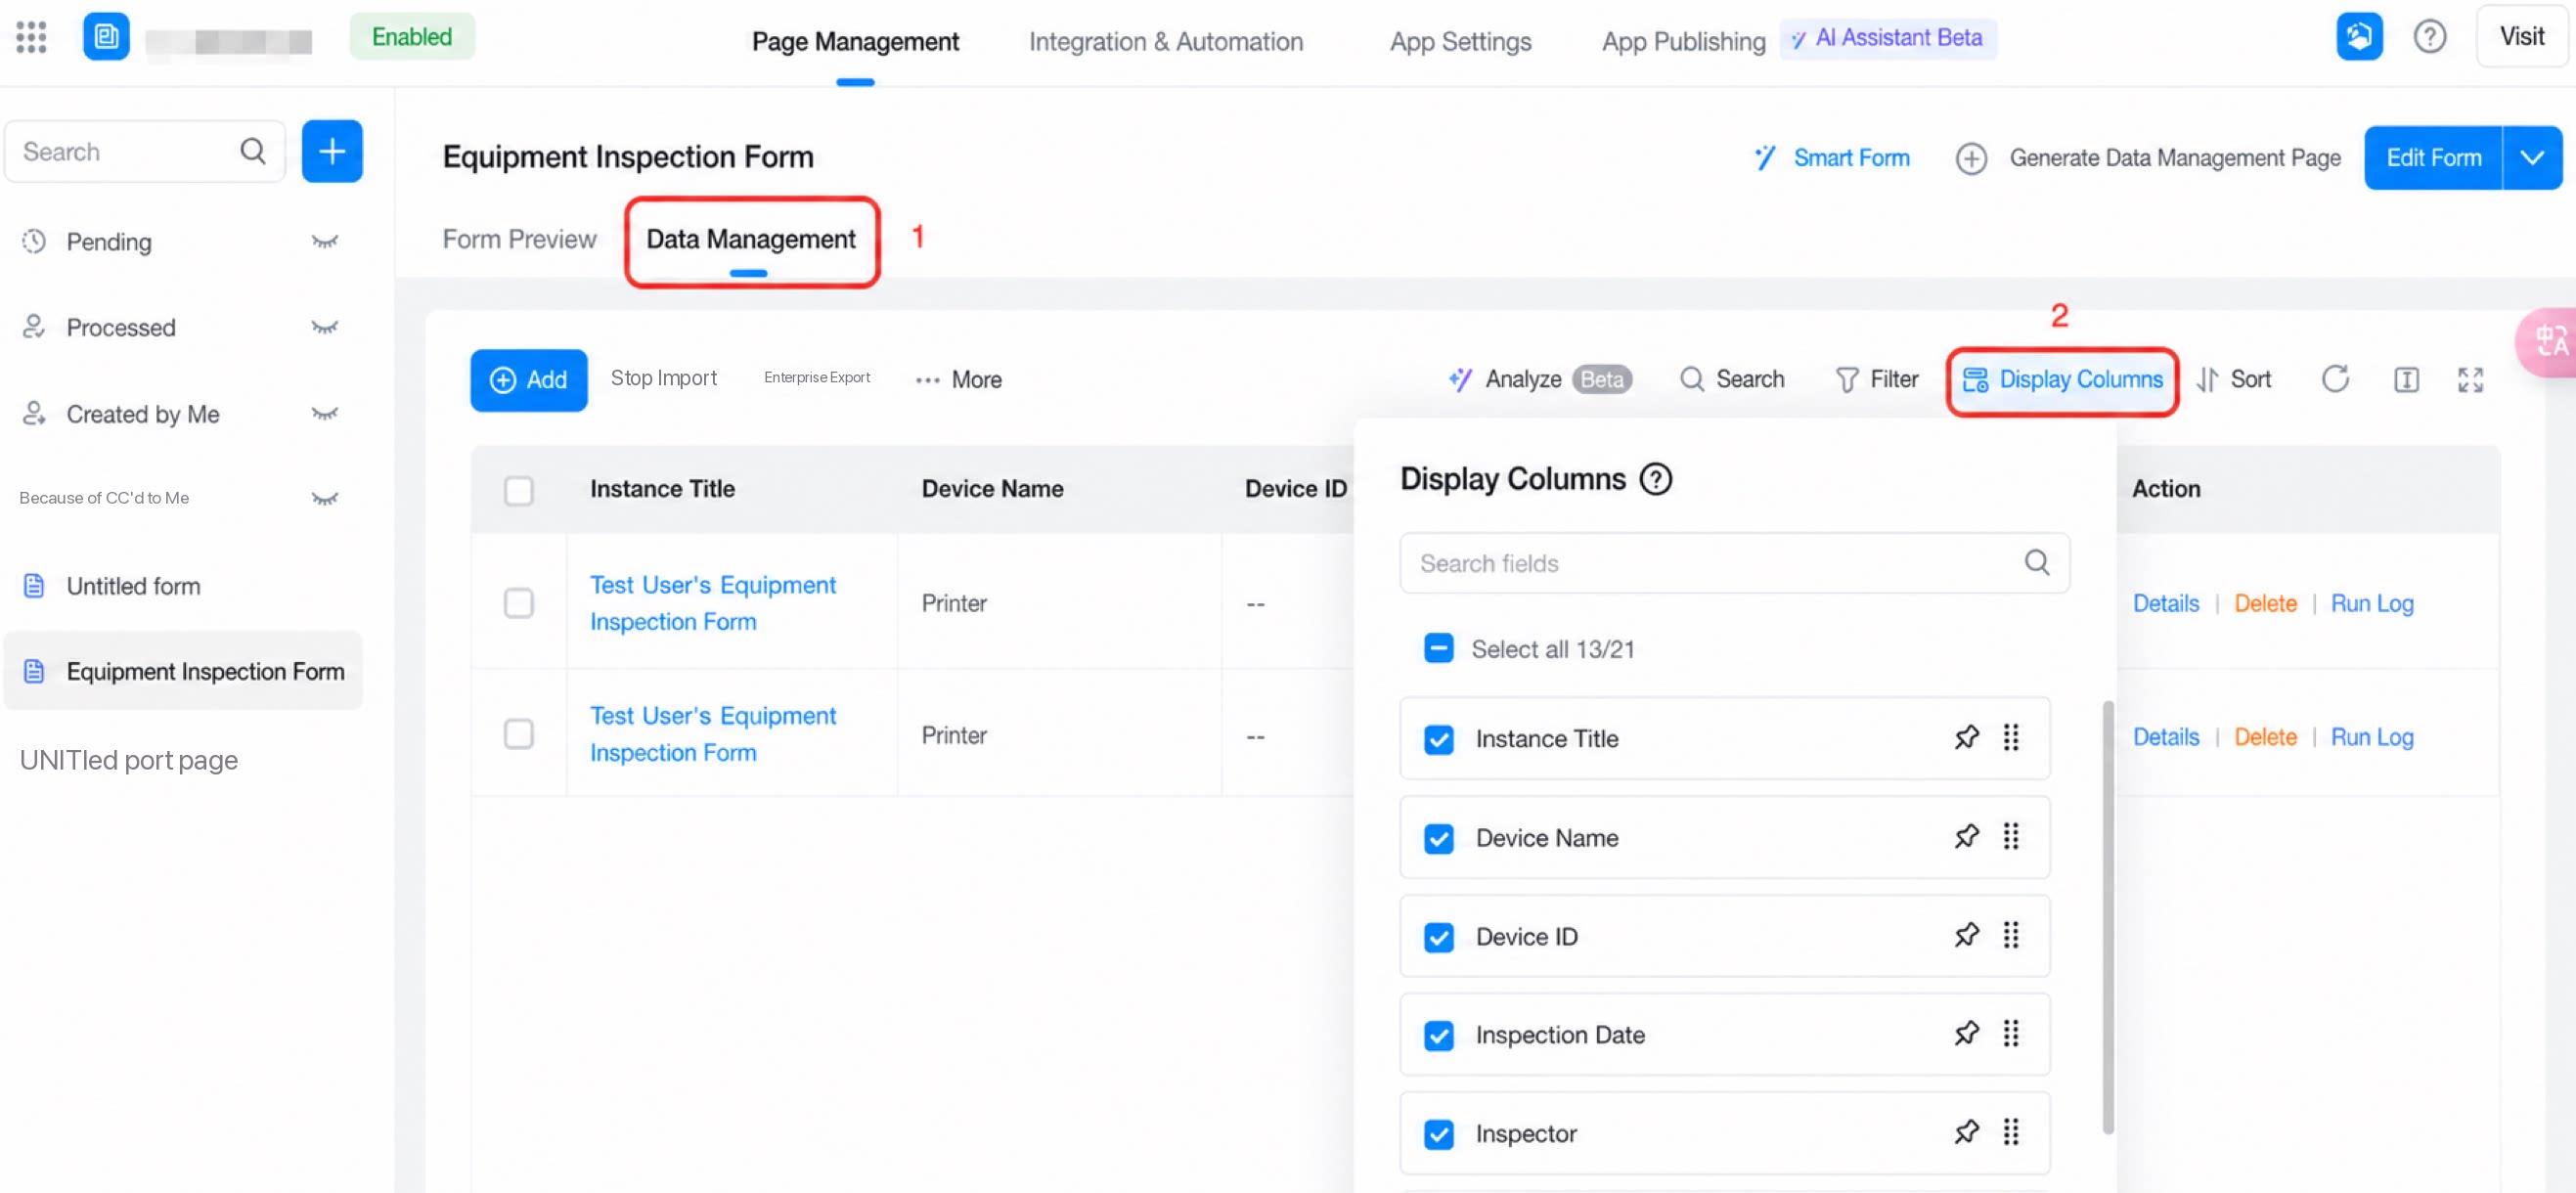
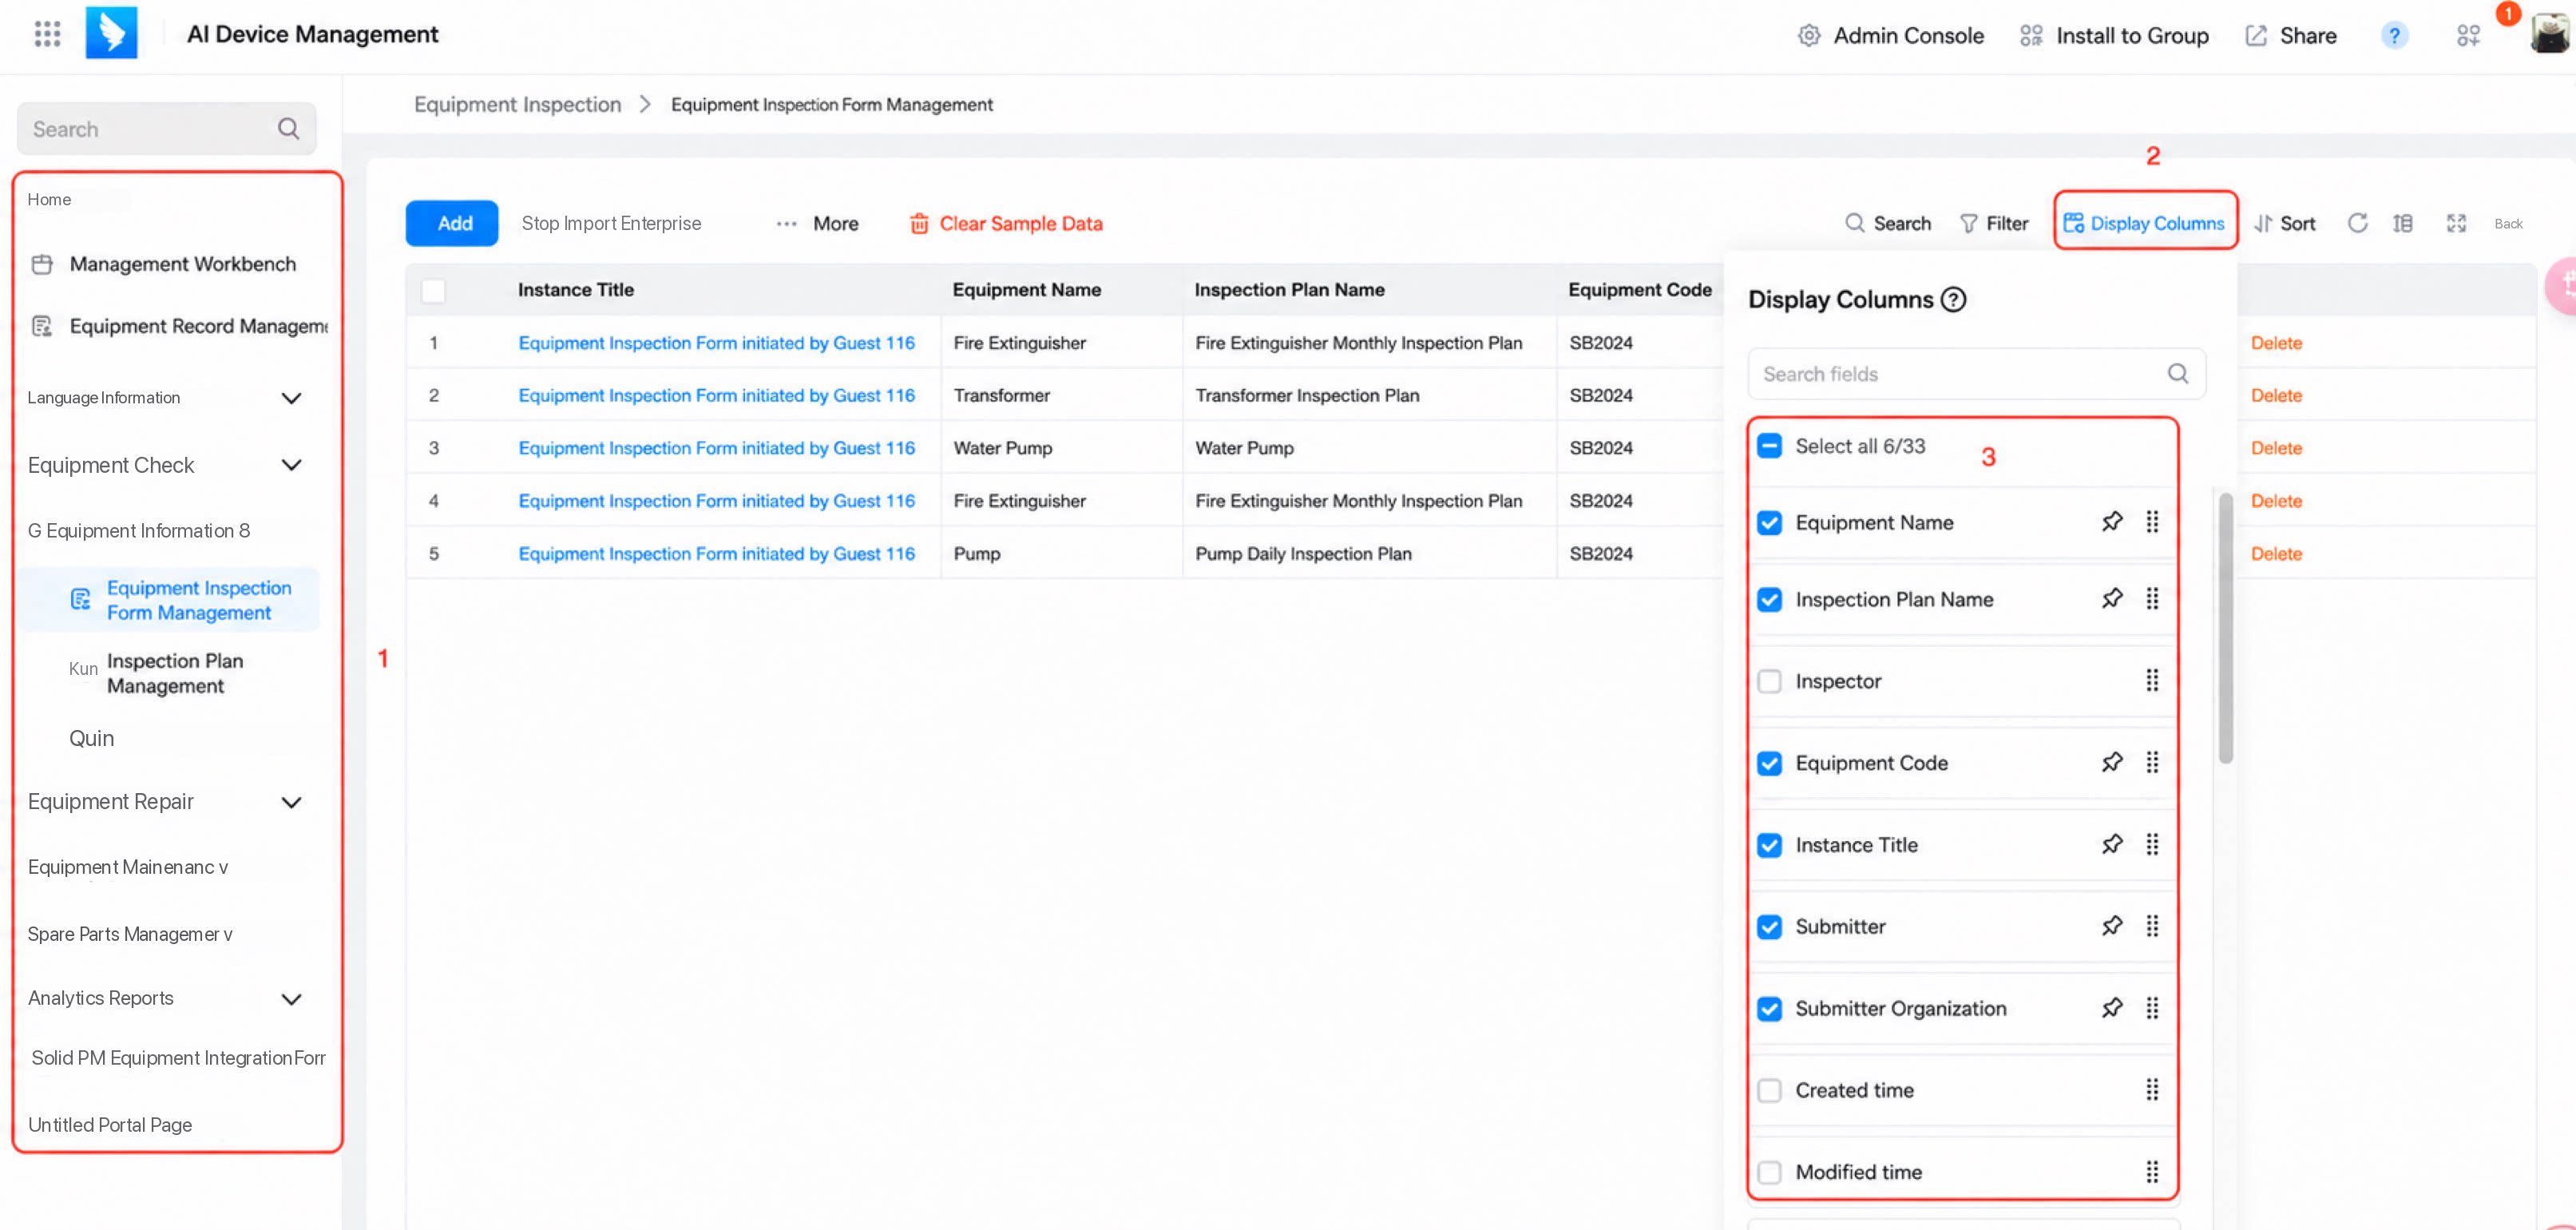
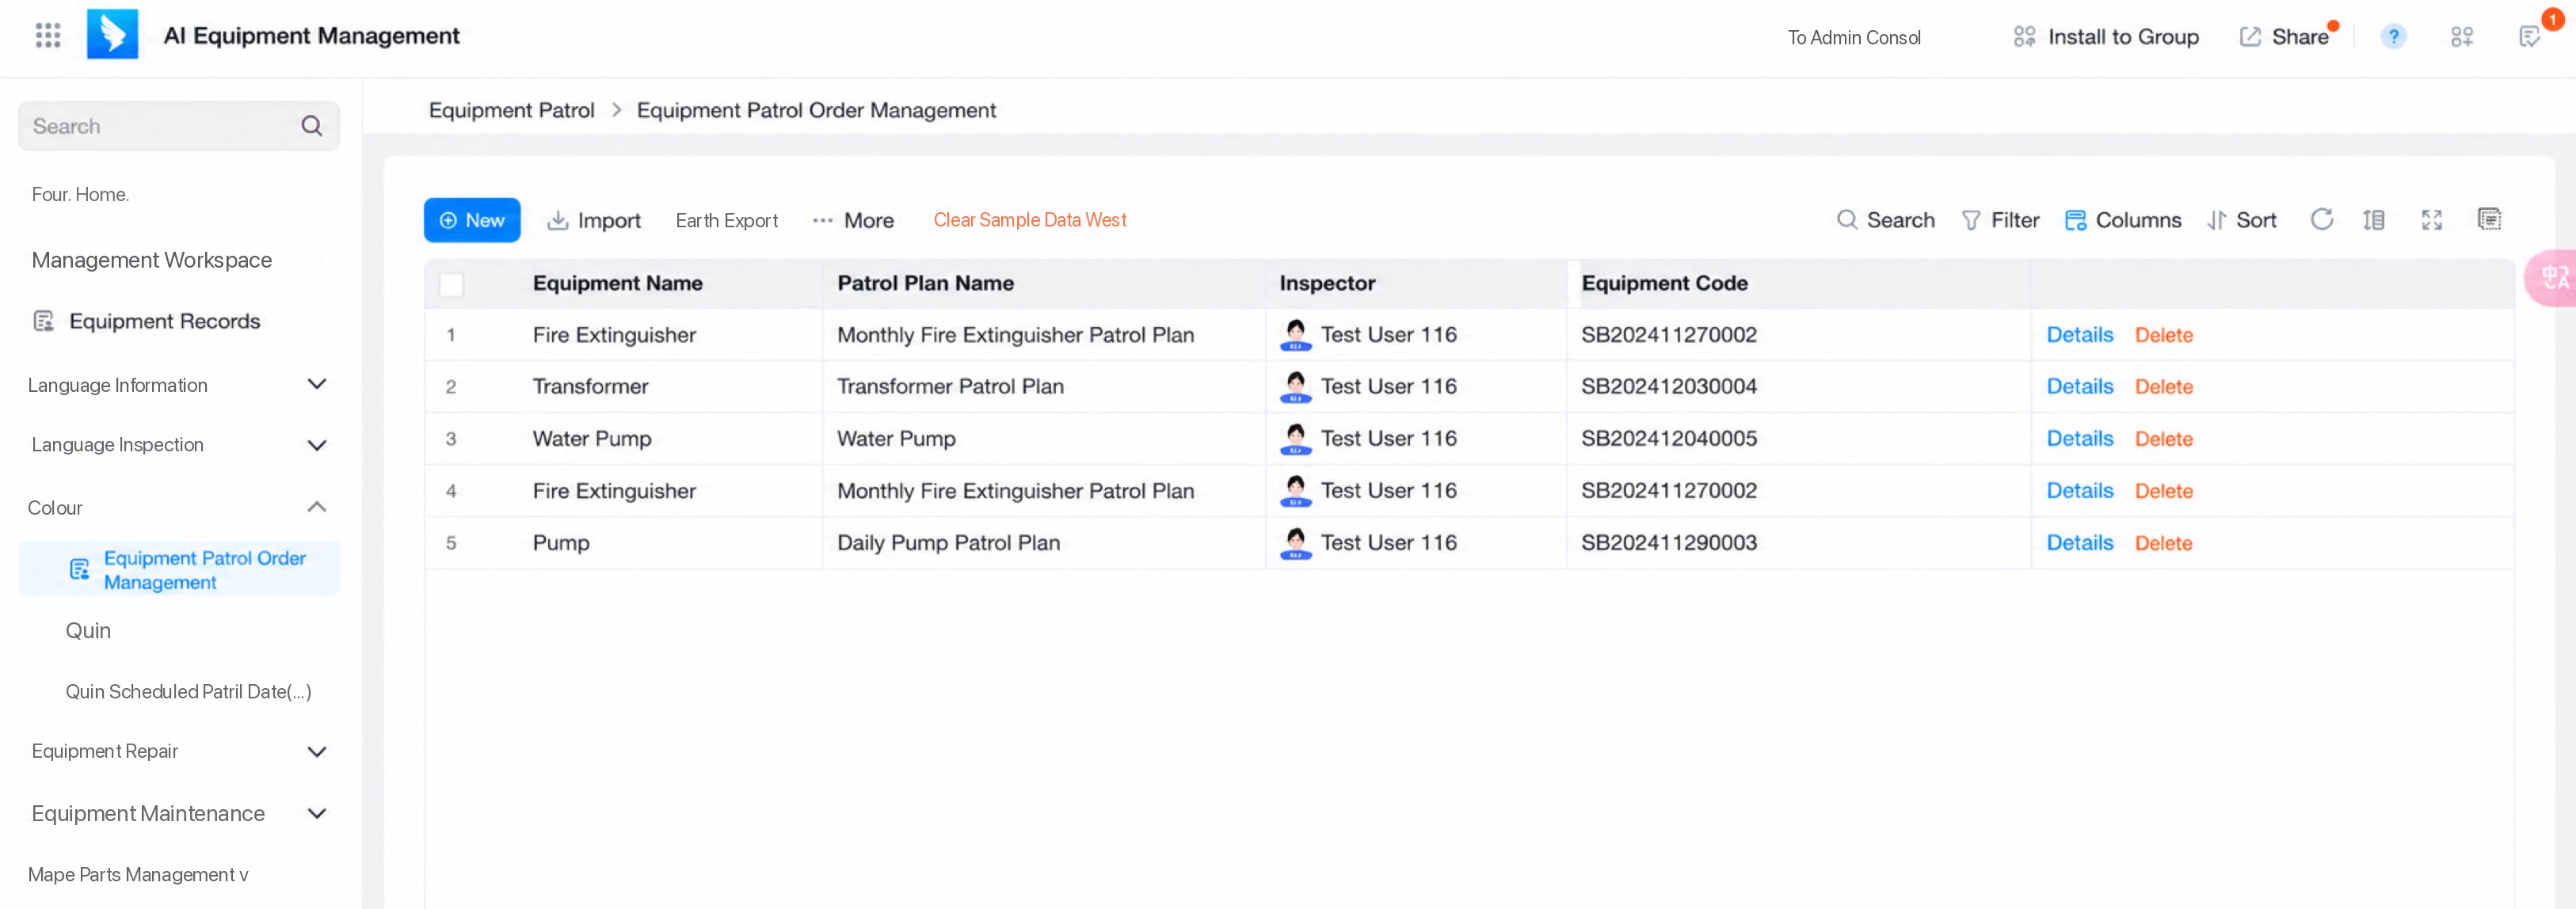
- App editors: sign in to the YiDA workbench, go to the data management page, and click Show columns. The field display settings dialog appears.
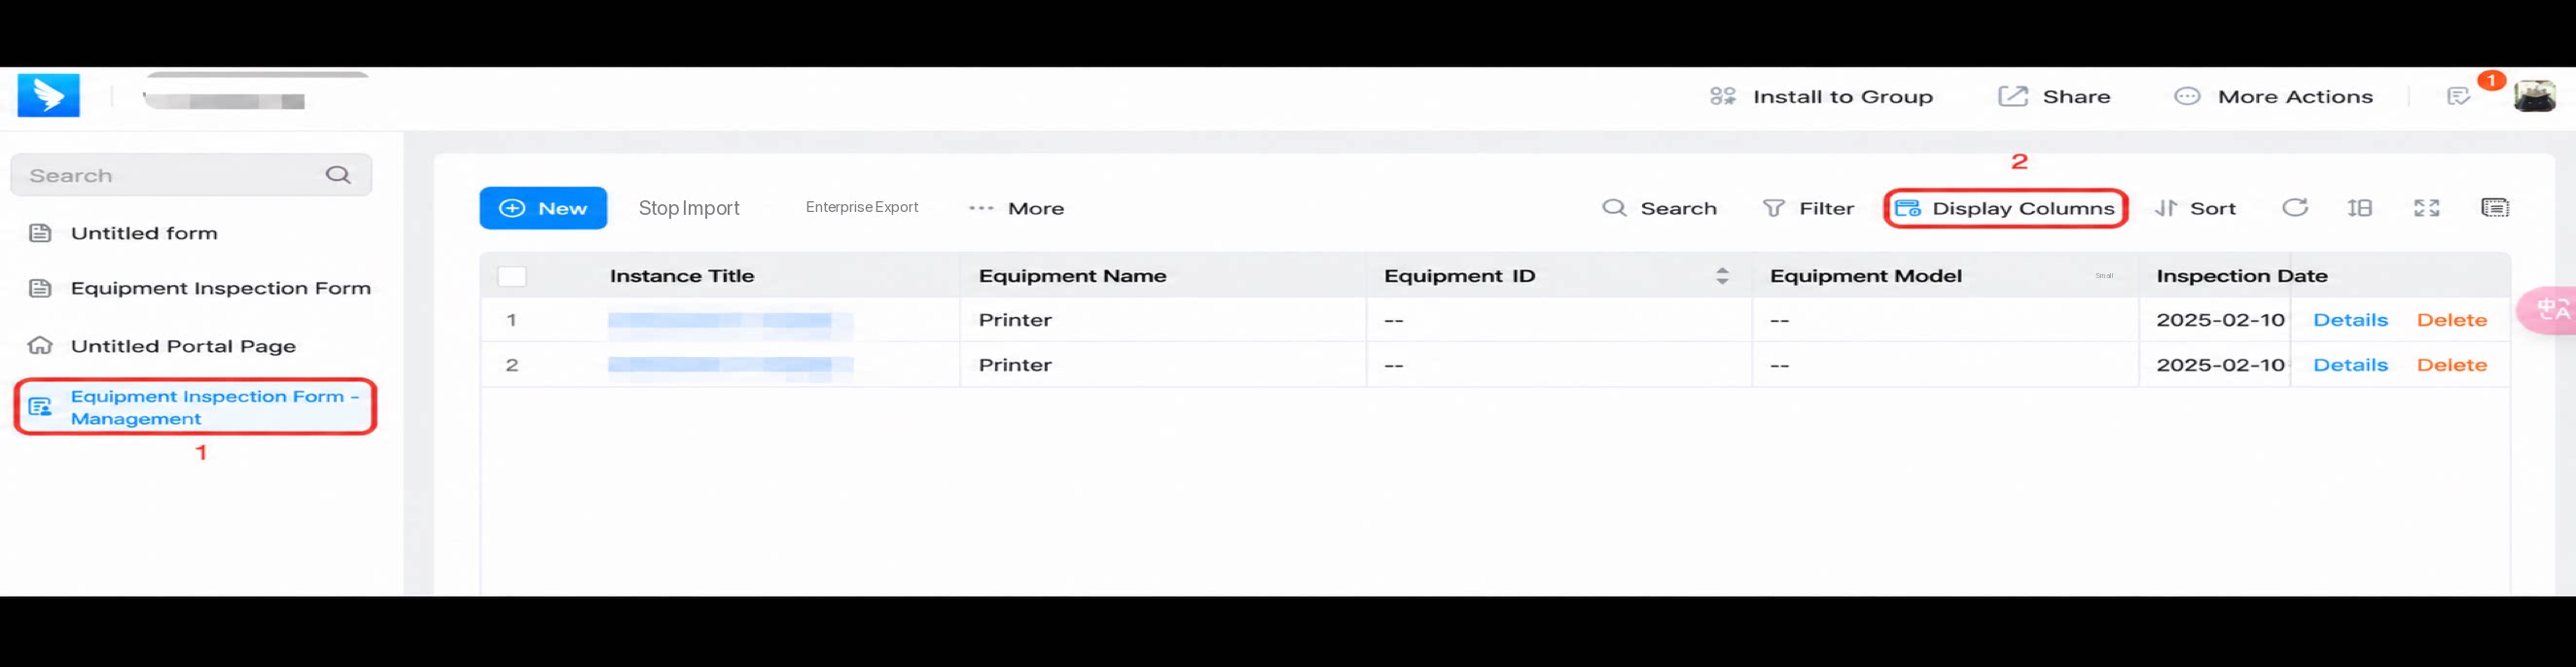
- App users: sign in to the YiDA workbench and click Show columns. The field display settings dialog appears.
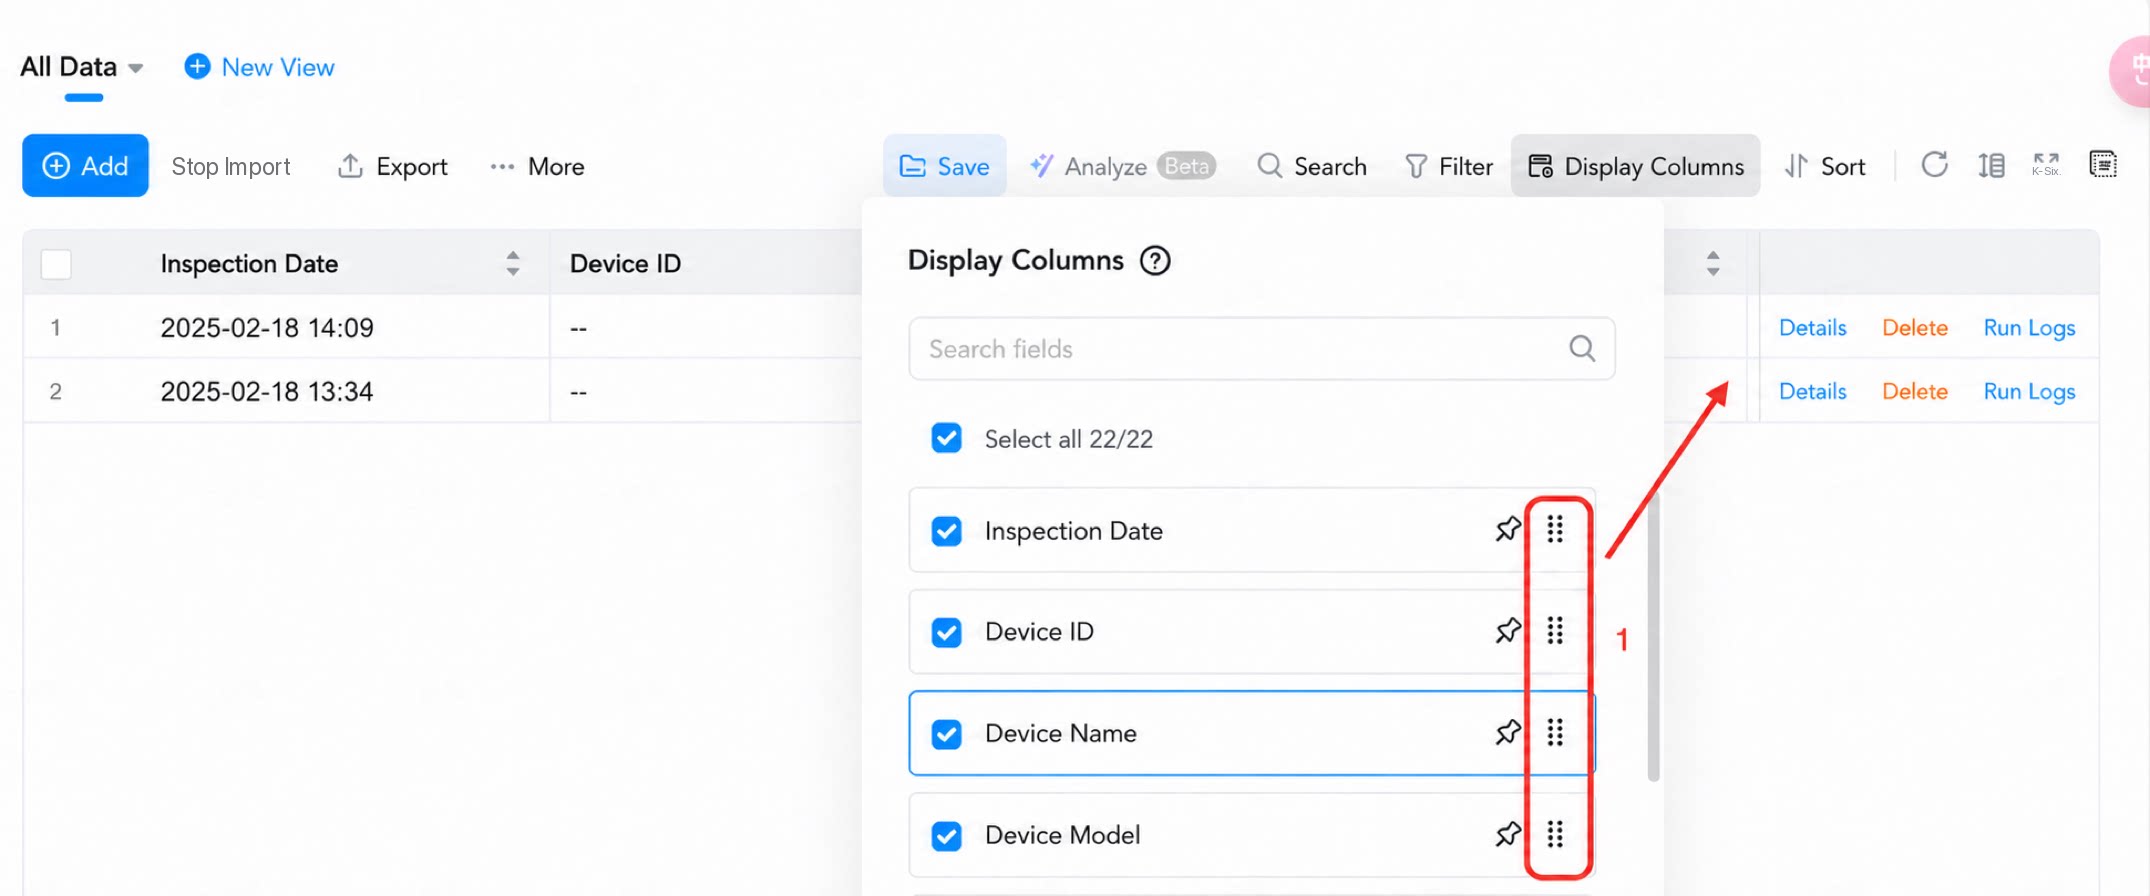
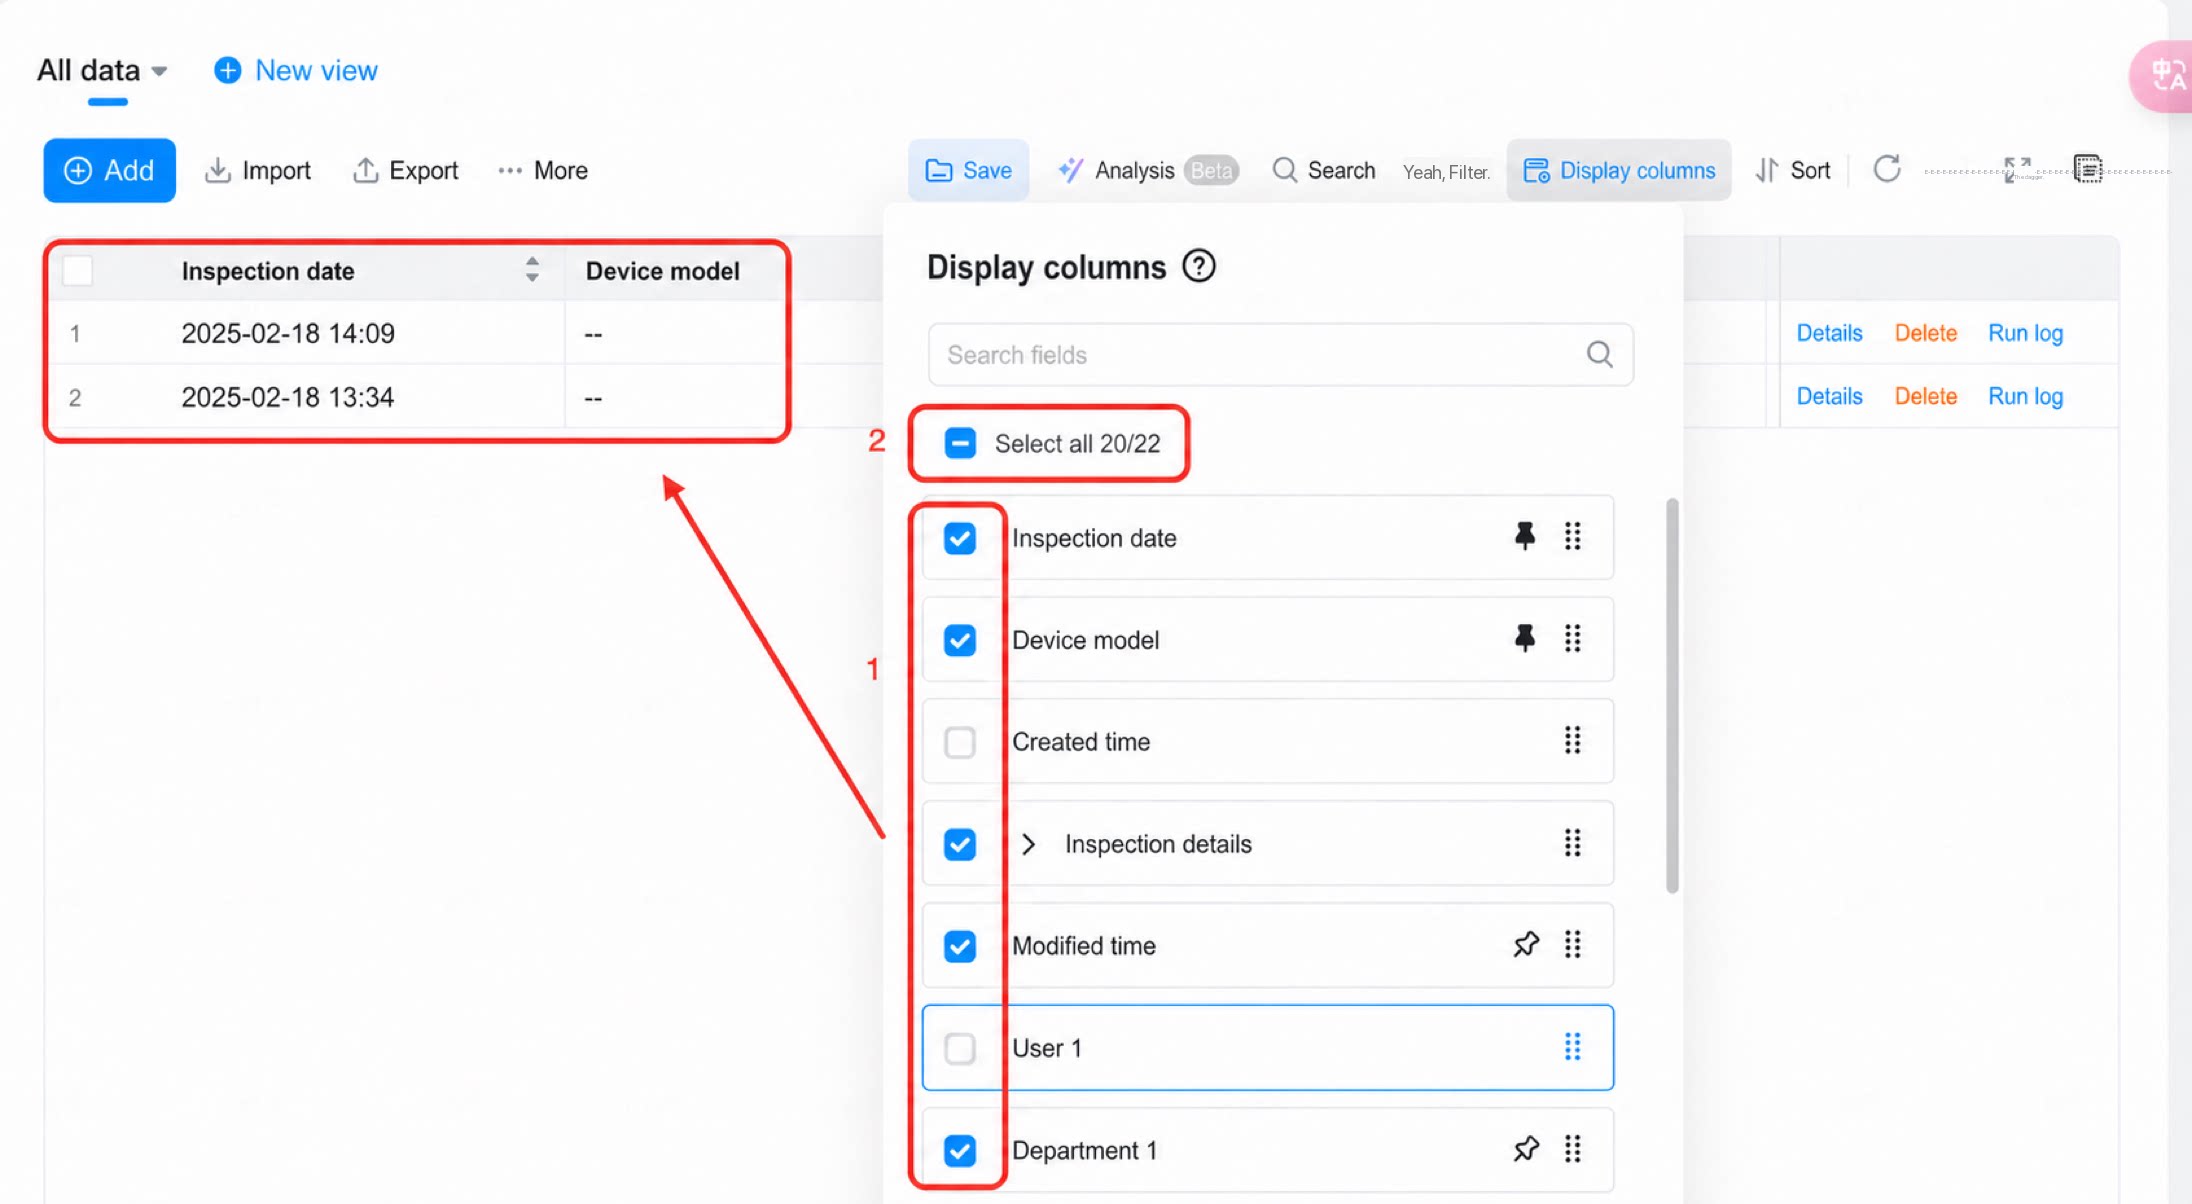
- Select Drag to sort at position 1. The field order of the current form data updates immediately based on the drag order.
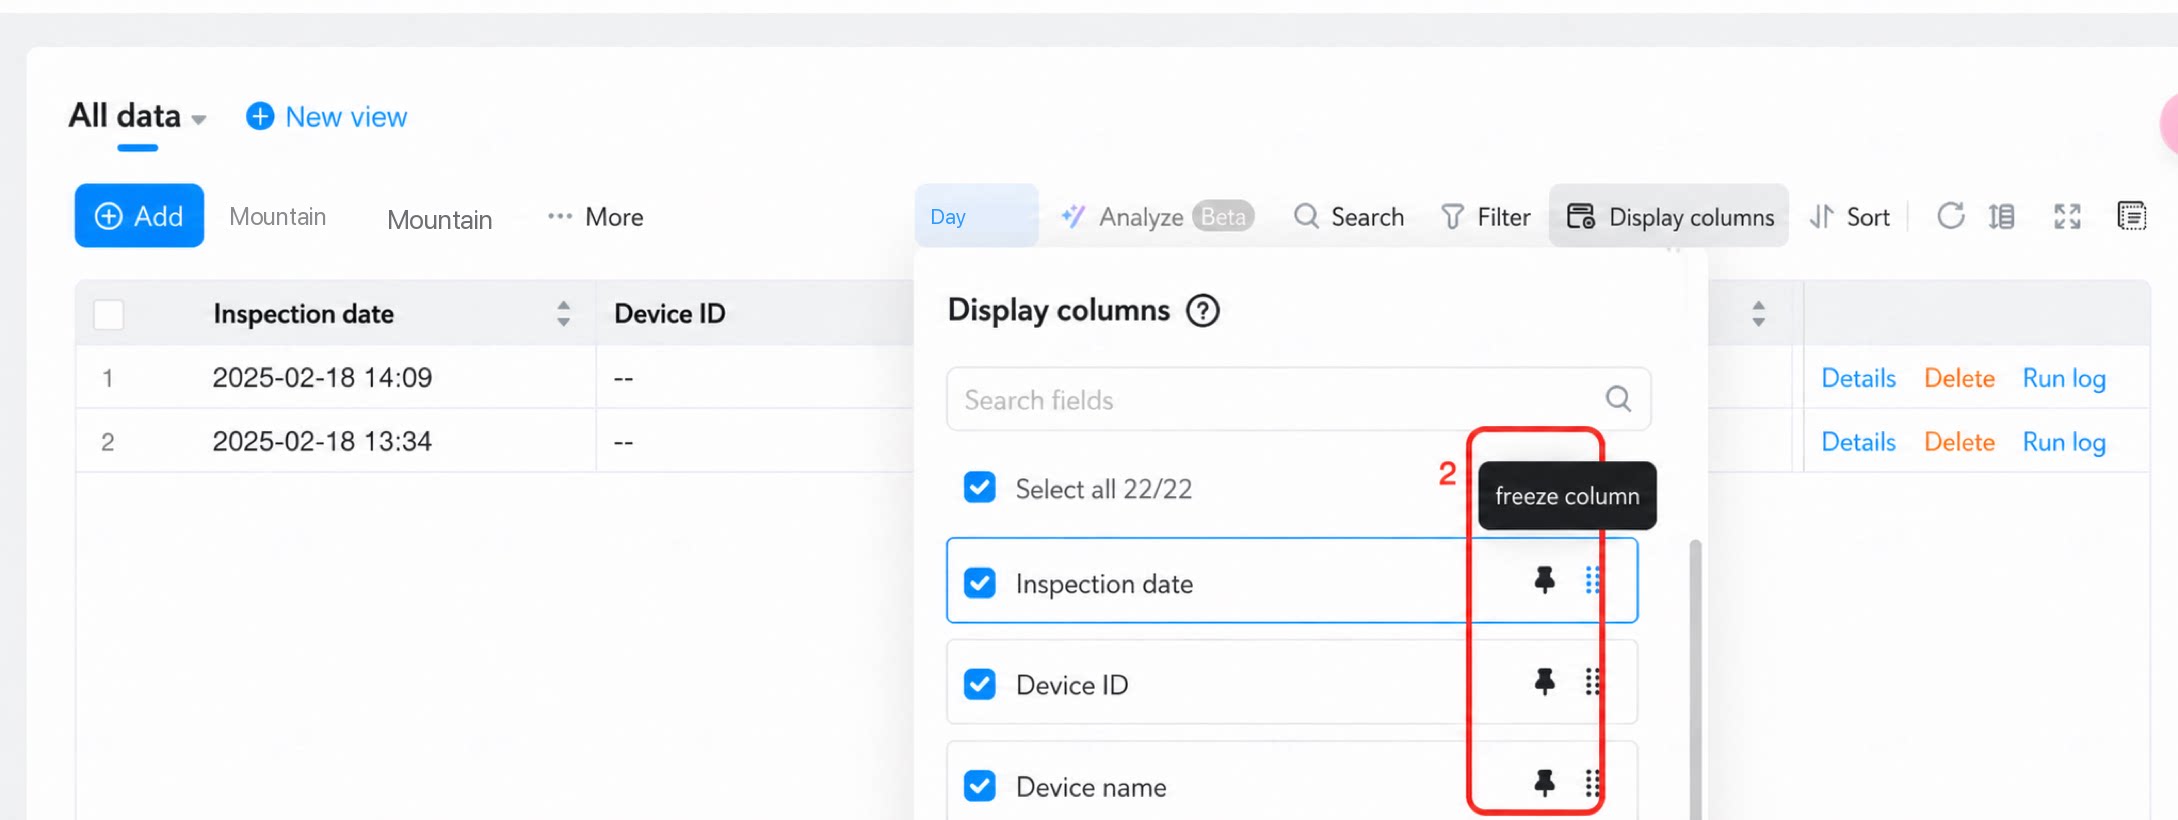
- Select Freeze column at position 2. The current form data field becomes a frozen column immediately. As you scroll the spreadsheet, the specified columns remain visible and do not move with horizontal scrolling. These columns usually contain key information such as identifiers, names, and dates, so you can always see this critical information while browsing data in other columns.
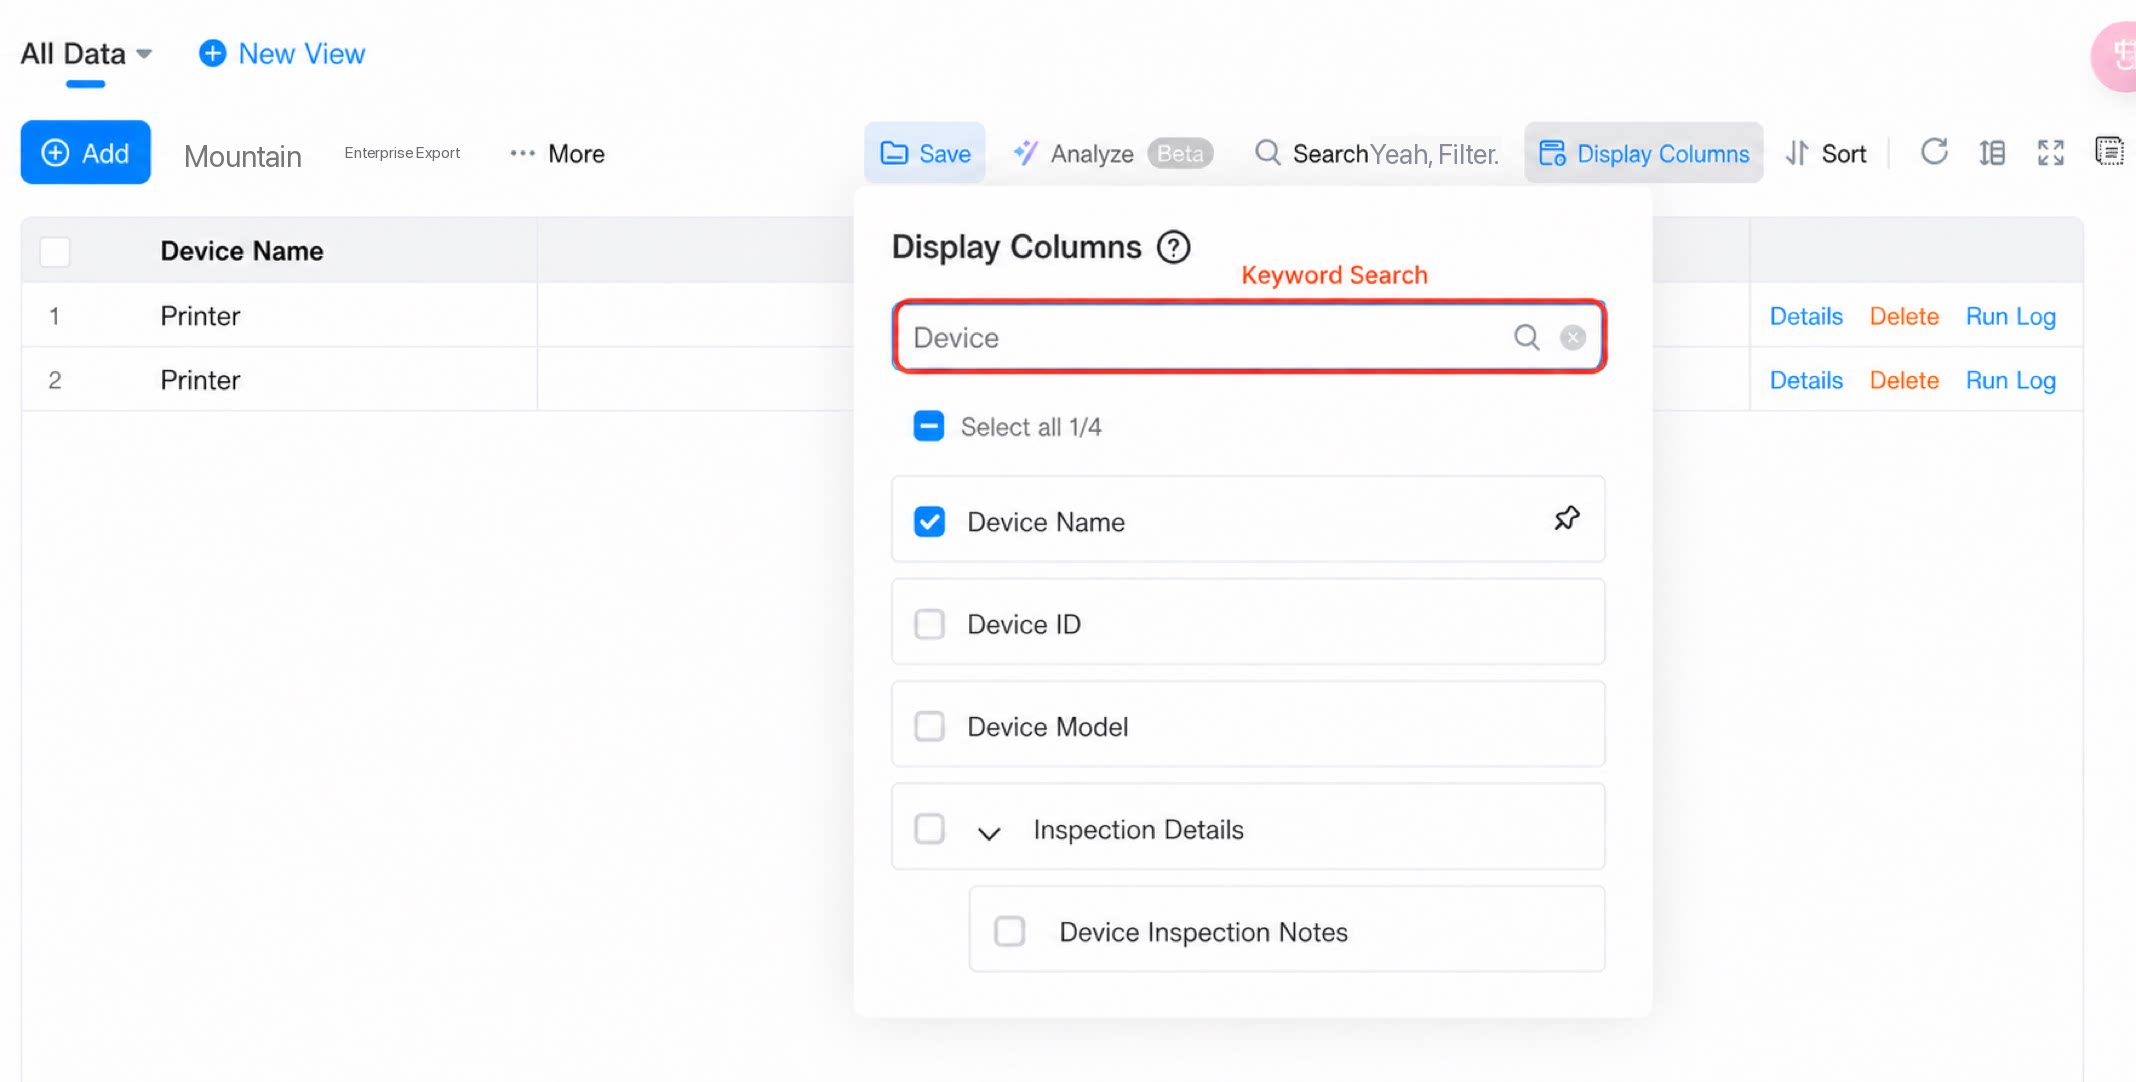
- Enter a keyword in the search box to search fields in real time based on your input, as shown below:
- Select or clear other fields to customize the displayed content. These fields come from the component fields of the current form. The displayed fields update in real time based on your selection.
- Select all or clear all is supported, making it easier to configure displayed fields in bulk.
4) Confirm the Settings
1. Edit mode - App editor
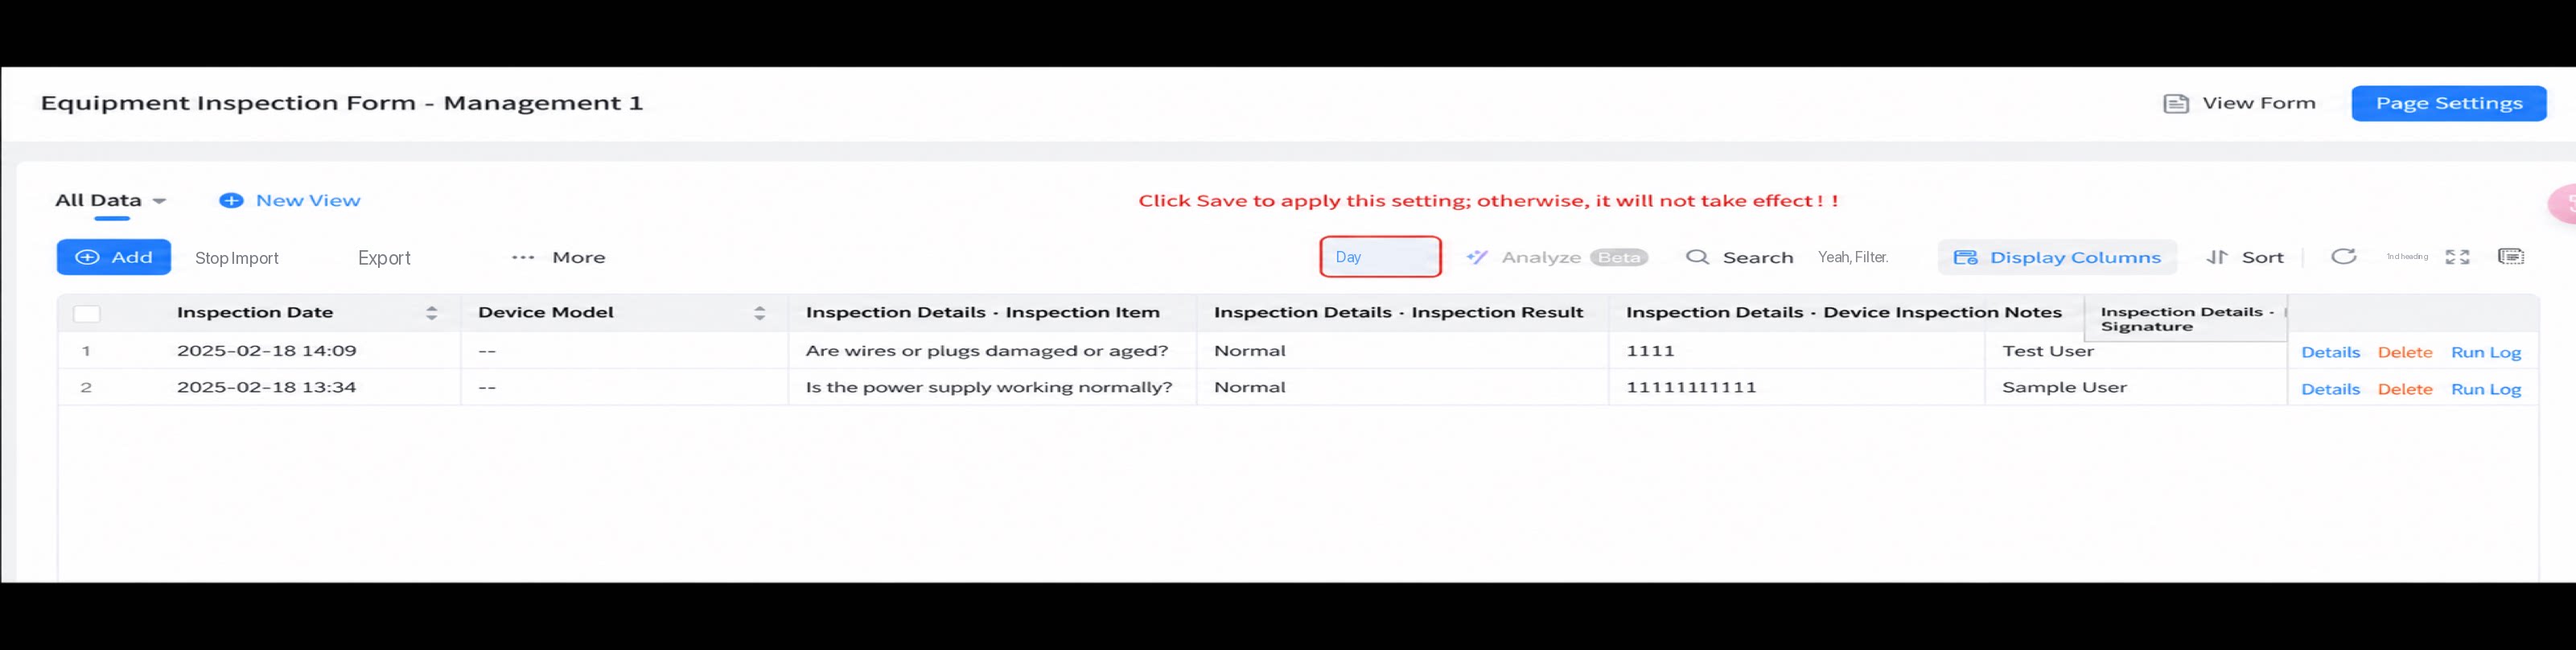
- After you click a blank area, the customized display items appear in the data instance display columns. The column content comes from the data values submitted through the corresponding component fields on the form or process page.
- After you click Save, the current settings are saved and applied to view mode.
2. View mode - App user
- Open the app and go to the data management page. By default, the form display settings saved by the app editor are shown.
- Click Show columns to make the relevant configurations. See steps 2 and 3 for details.
- Click Show columns again to close the settings dialog.
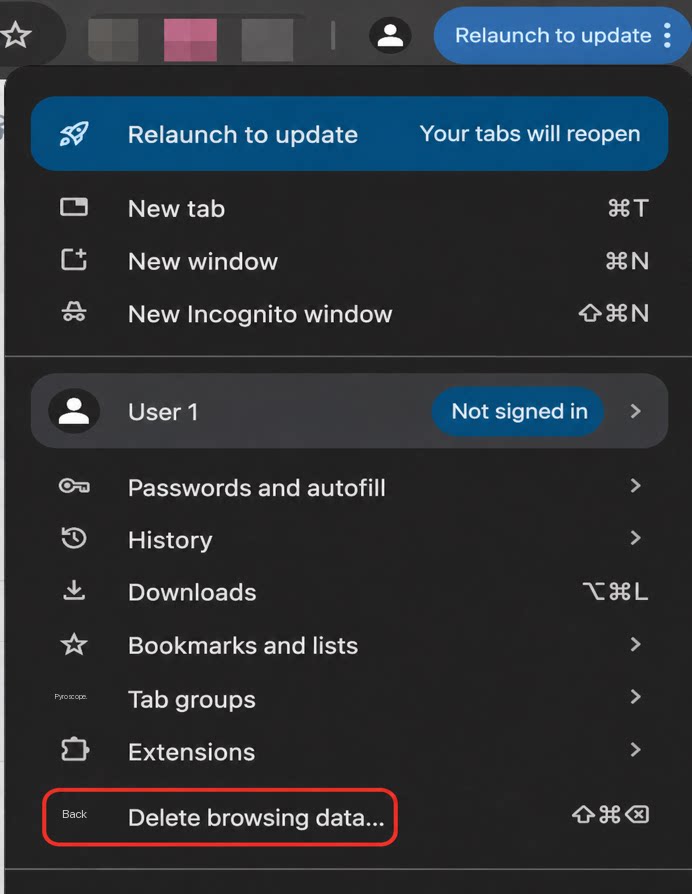
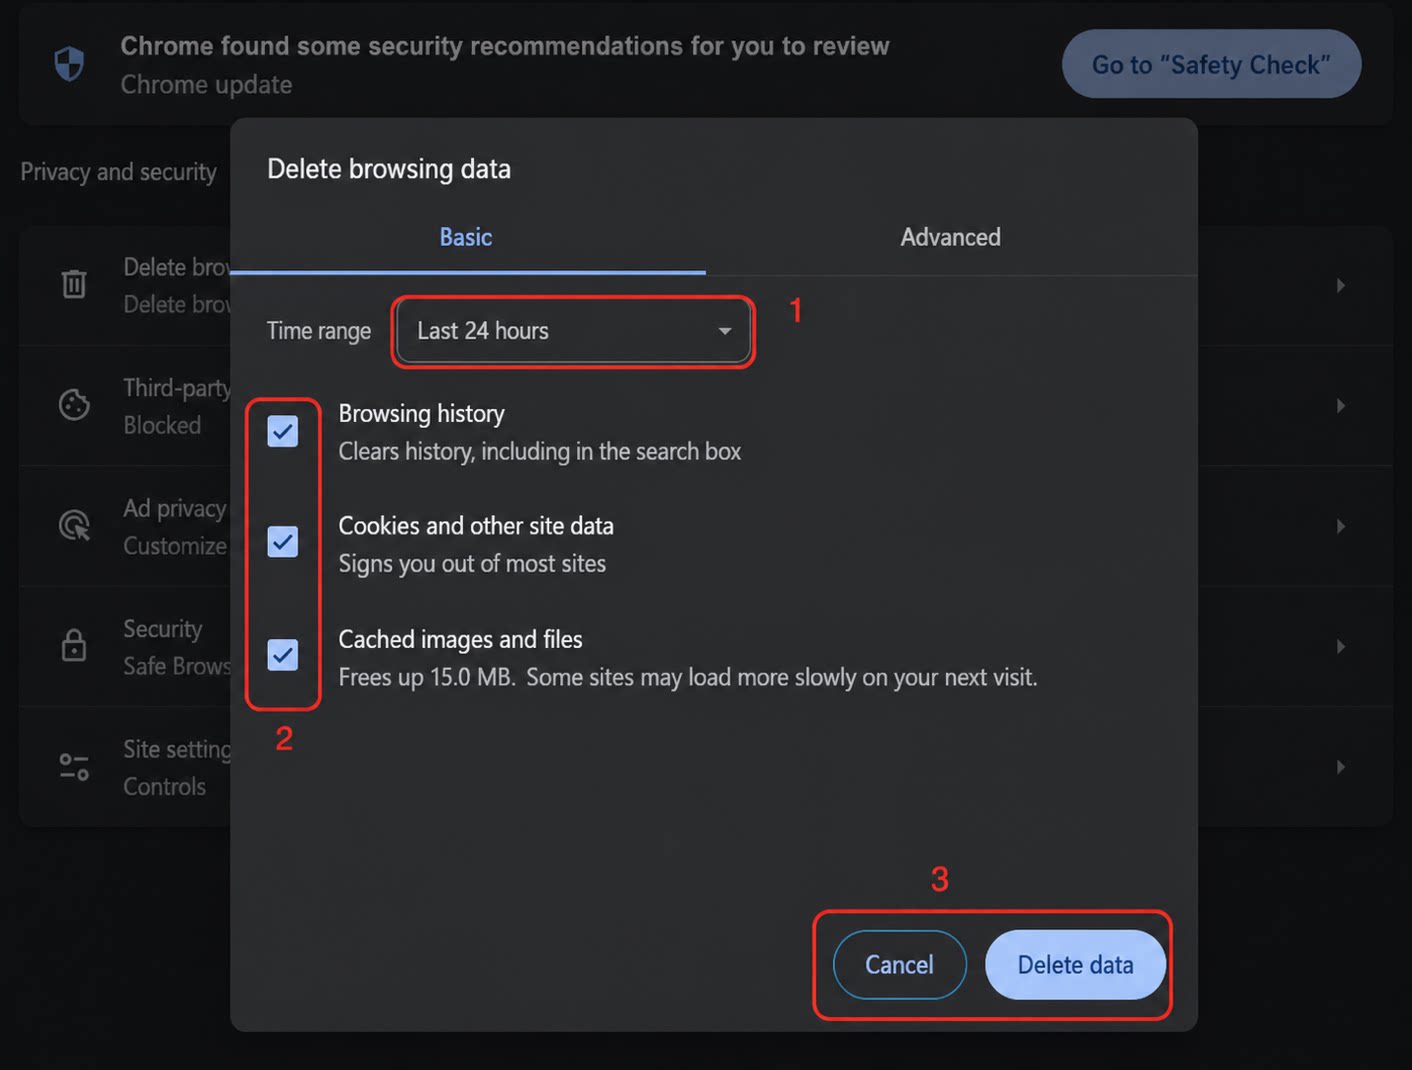
After the app user refreshes the page, the current form order settings remain unchanged. To restore the default settings (the order uniformly set by the app editor), open your browser and clear the cache. Take Chrome as an example. The steps are as follows:
1.3 Component Support
The following table shows which component types support configuring show columns:
| Component type | Component name | Show columns supported |
| Common components | Single-line text | |
| Multi-line text | |
| Numerical | |
| Rating | |
| Single select | |
| Multiple select | |
| Date range | |
| Date | |
| User | |
| Image upload | |
| Attachment | |
| Subform | |
| ID number | |
| Phone number | |
| Premium components | Dropdown single select | |
| Dropdown multiple select | |
| Cascading select | |
| Group | |
| Country/Region | |
| Department | |
| Address | |
| Location | |
| Associated form | |
| Associated query | ❌ Not supported |
| Serial number | |
| Word template | |
| Signature | |
| Organization | |
| UnionPay | |
| Smart invoice | |
| Budget control | |
| Rich Text | ❌ Not supported |
| Image and text display | ❌ Not supported |


 Chats
Chats Calendar
 Meetings
 Contacts
 Mail
Mail Docs
Docs Drive
Drive AI Table
 AI Minutes
 Attendance
 Approval
 YiDA
YiDA Admin Console