Chats
Chats Calendar
 Meetings
 Contacts
 Mail
Mail Docs
Docs Drive
Drive AI Table
 AI Minutes
 Attendance
 Approval
 YiDA
YiDA Admin Console
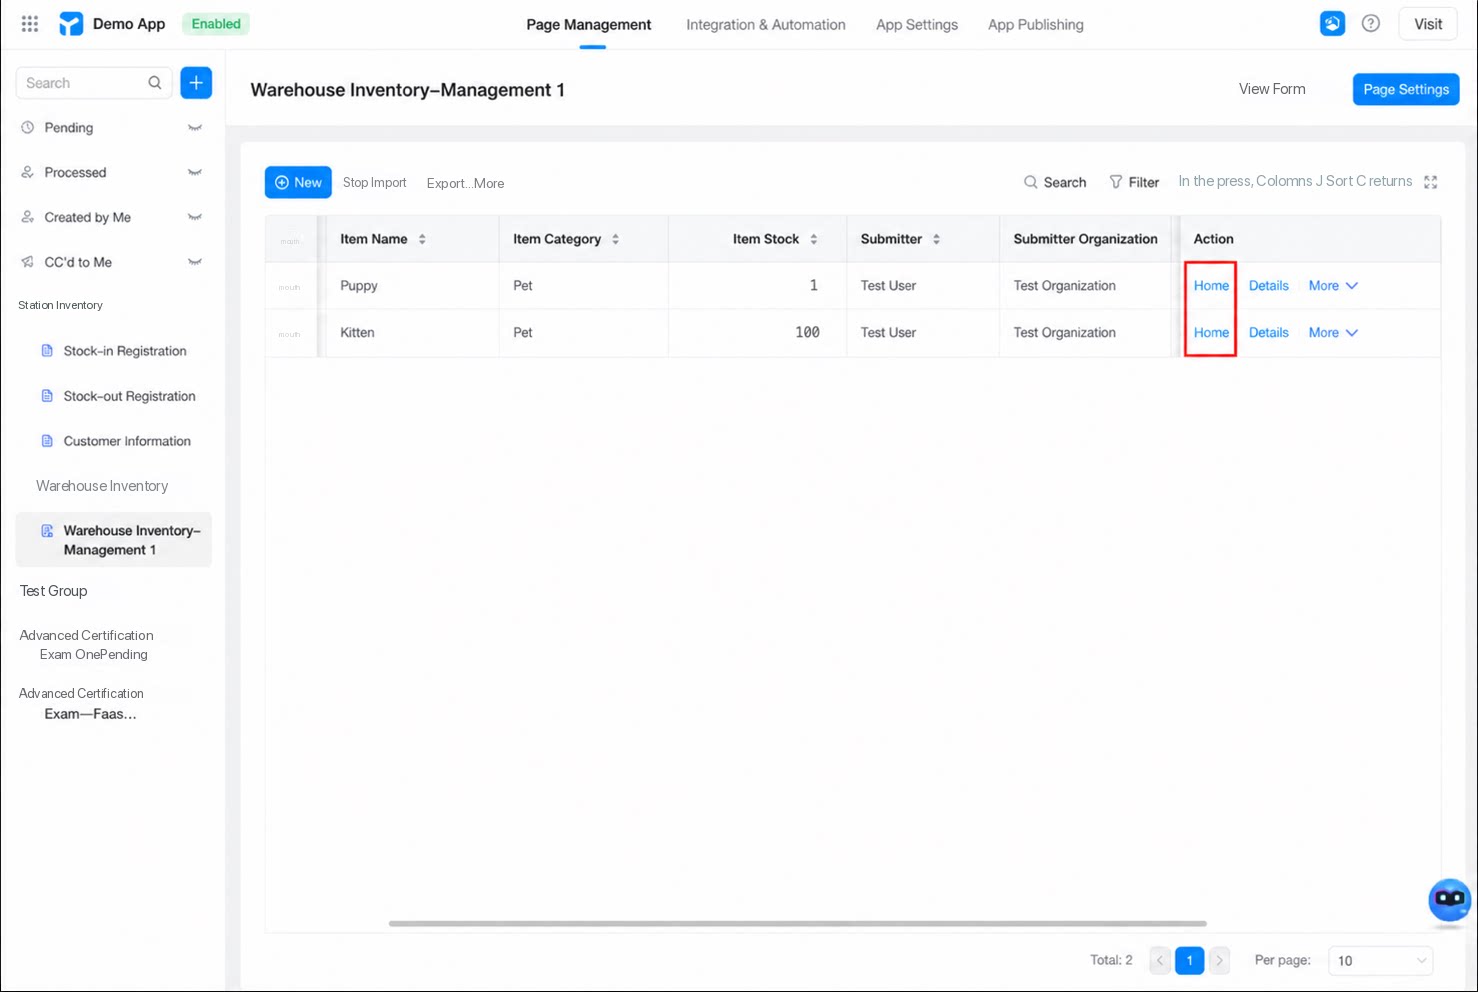
The action buttons on the data management list page are management and configuration actions for data details. You can set custom action items based on your business needs.
Steps
- Sign in to the YiDA workbench and click My Apps.
- Select the app you want to edit and click it to enter the App Management page.
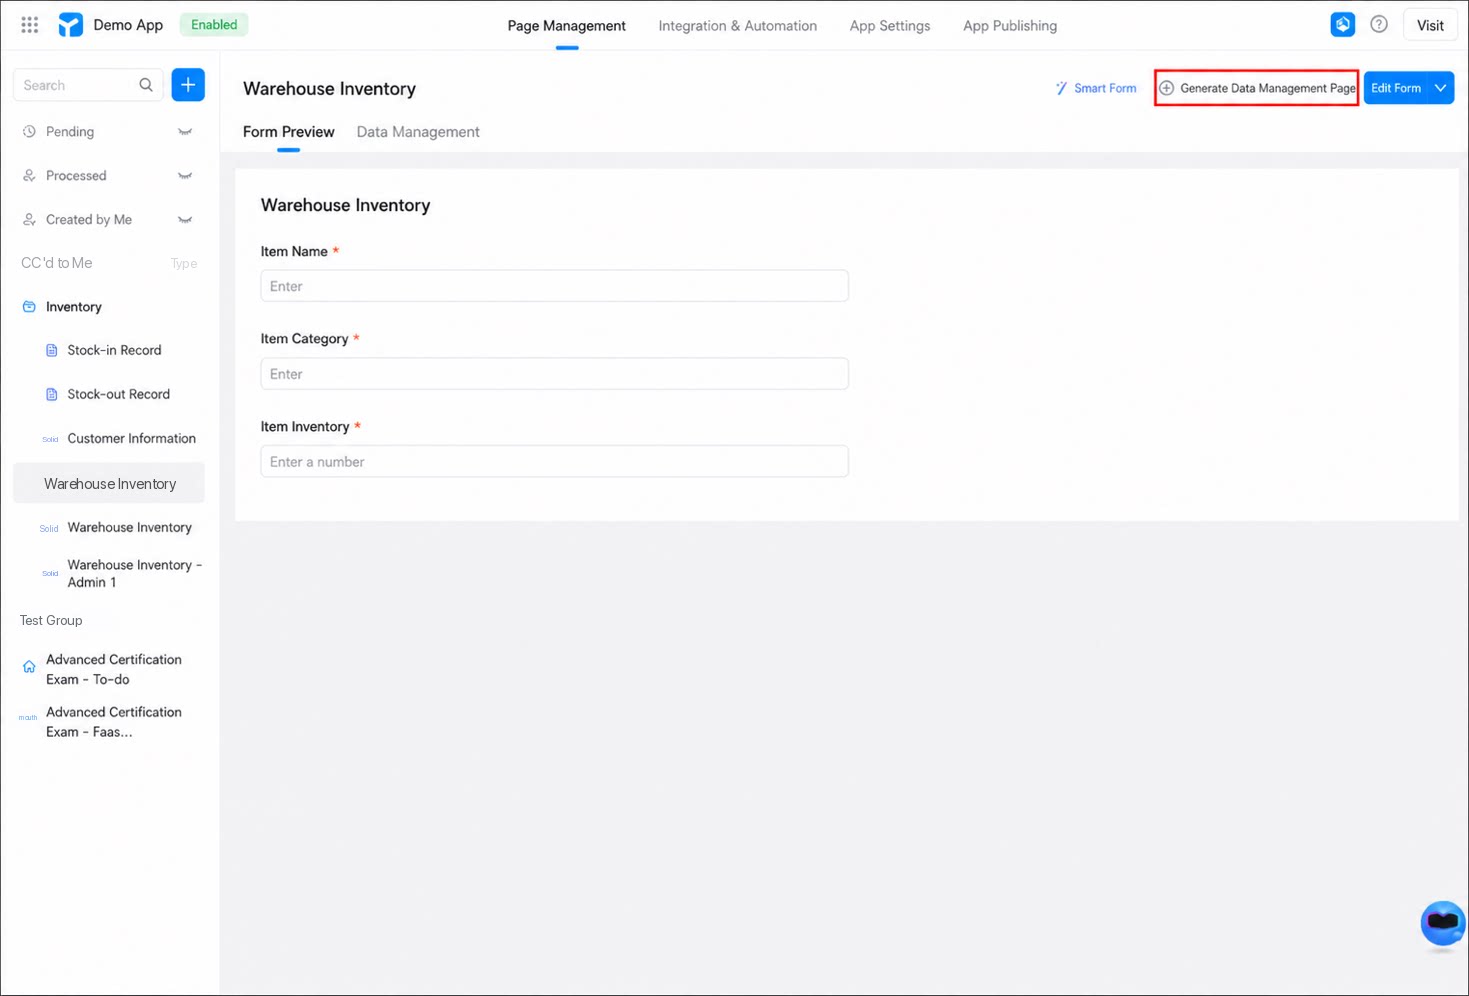
- Select the target form, then click Generate data management page.
1
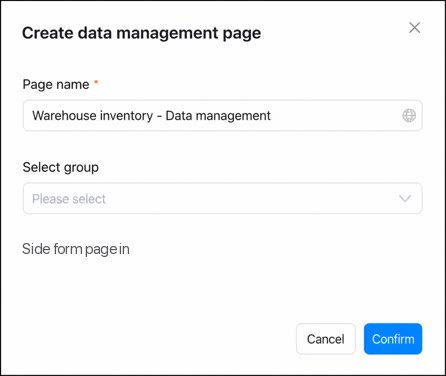
In the dialog box that appears, set the data management page name, then click Confirm
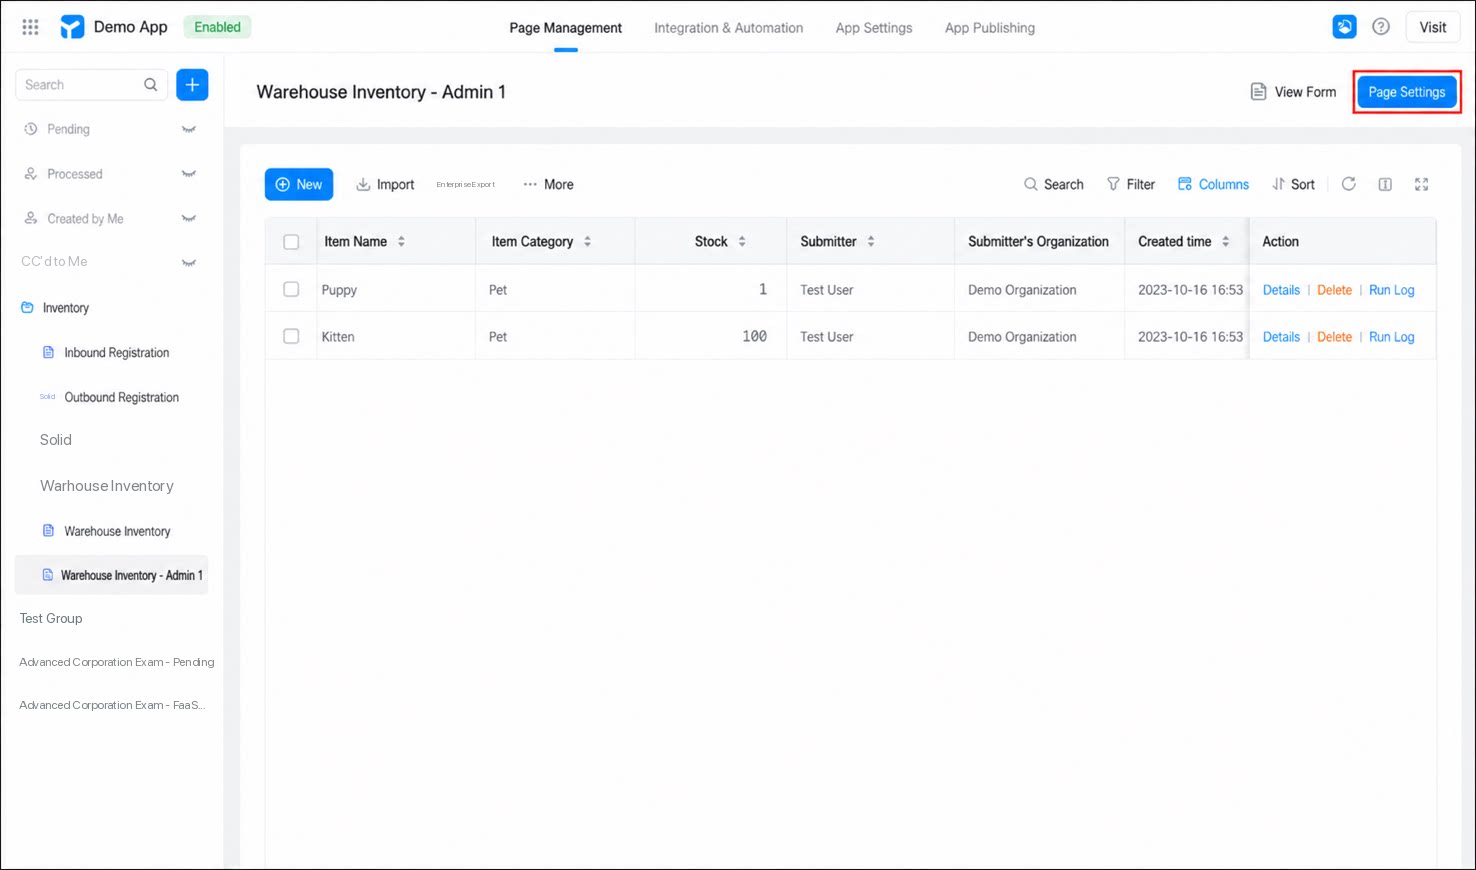
2
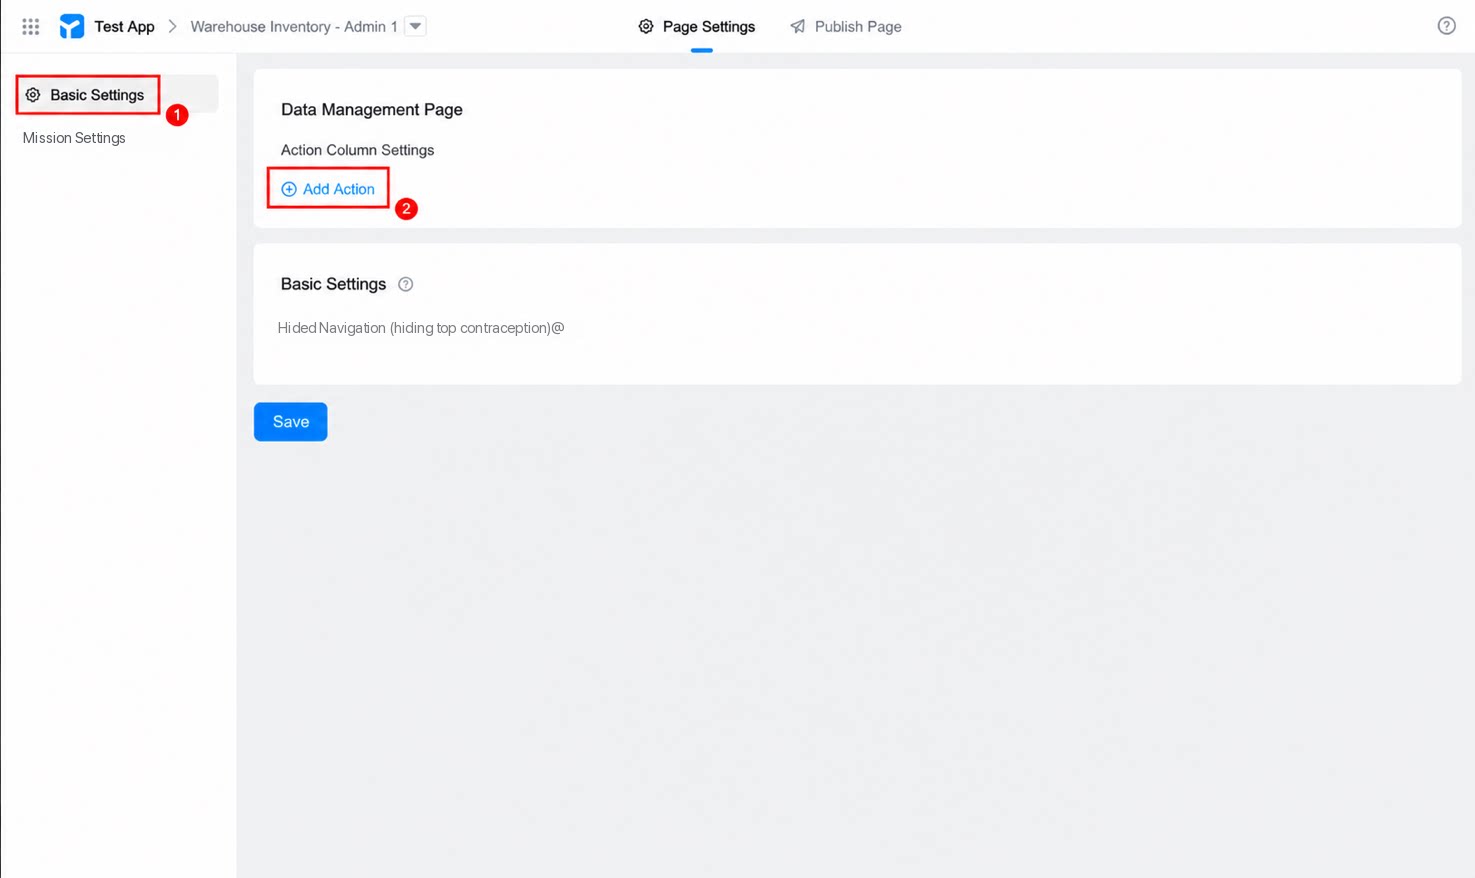
On the data management page, click Page settings
3
Select Basic settings, then click Add action
4
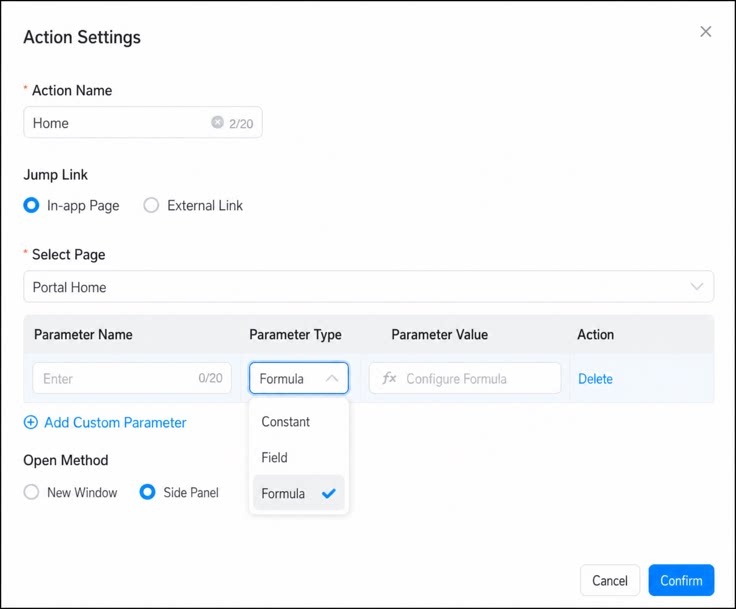
In the Action settings dialog box that appears, configure the following information, then click Confirm
- Click Save to complete the configuration.
- Return to the data management page to view the configured custom action button.