Chats
Chats Calendar
 Meetings
 Contacts
 Mail
Mail Docs
Docs Drive
Drive AI Table
 AI Minutes
 Attendance
 Approval
 YiDA
YiDA Admin Console
1. What Is a Subform
An advanced container component that lets you add Text, Numerical, Date, and other components inside it. For example, use a subform when you need to add multiple product entries during product data entry.2. Use Cases
Subforms are commonly used for data entry scenarios such as outbound orders, inbound orders, and sales orders. Product details in these scenarios can be recorded in a subform, and you can add rows as needed based on the data to enter.3. Basic Features
| Upgrade item | Before | After |
|---|---|---|
| Settings panel | Settings are mixed together with no categorization, making them hard to find.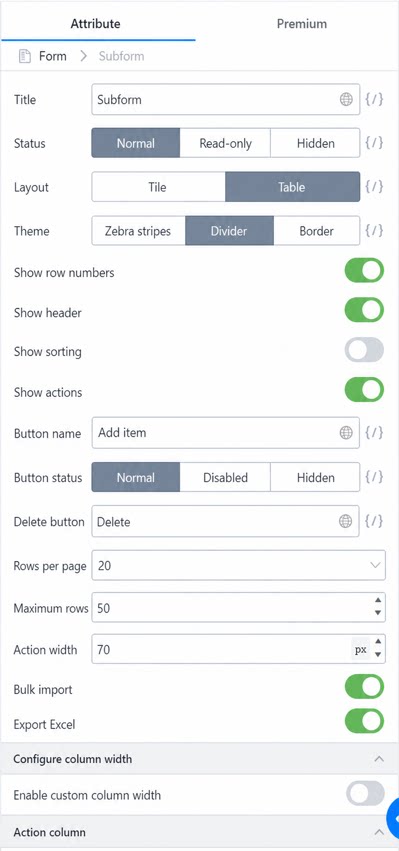 | Settings are grouped by subform configuration logic for easy discovery. Based on frequent user feedback, additional configuration options have been added. 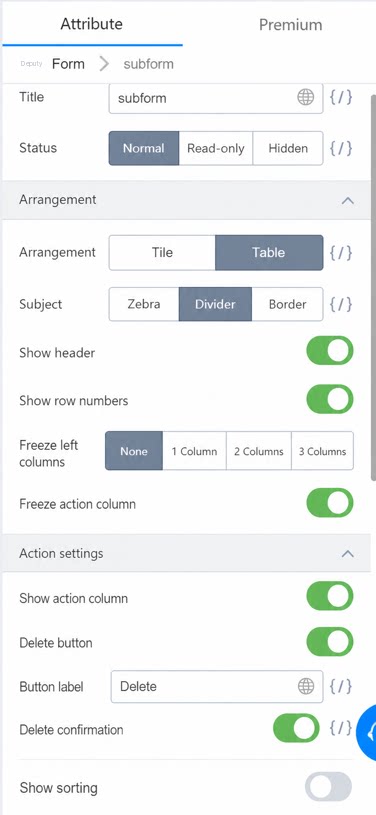 |
| Subform action button order (edit mode) | Newly added actions are shown first, and there is no Copy button.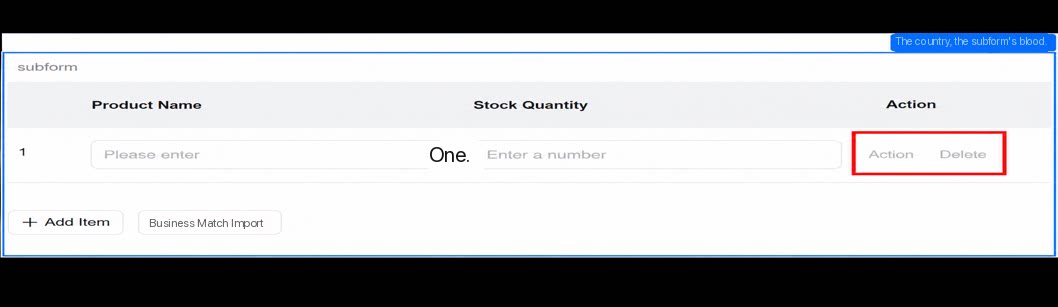 | Once enabled, the “Copy” and “Delete” buttons become the primary buttons at the front, followed by user-defined action buttons, and finally the “Move up/down” buttons (shown when enabled). In edit mode, all buttons are shown by default. Note: The Copy button has not been fully rolled out. 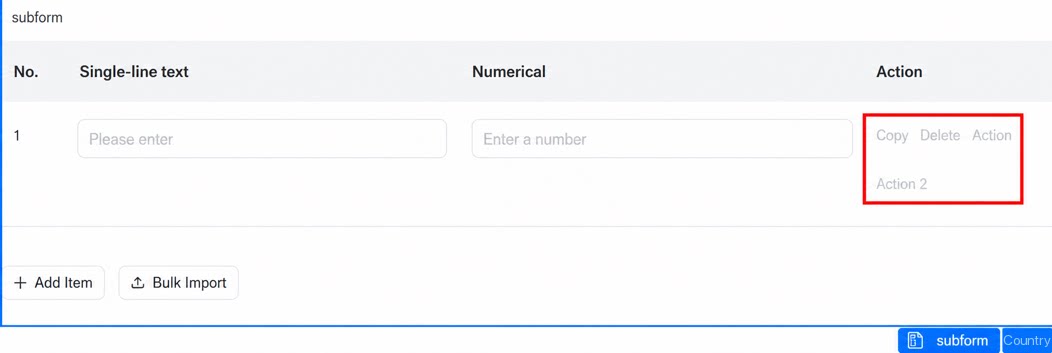 |
| Subform action button order (submit mode) | Copy action is not supported, and sort buttons are shown by default.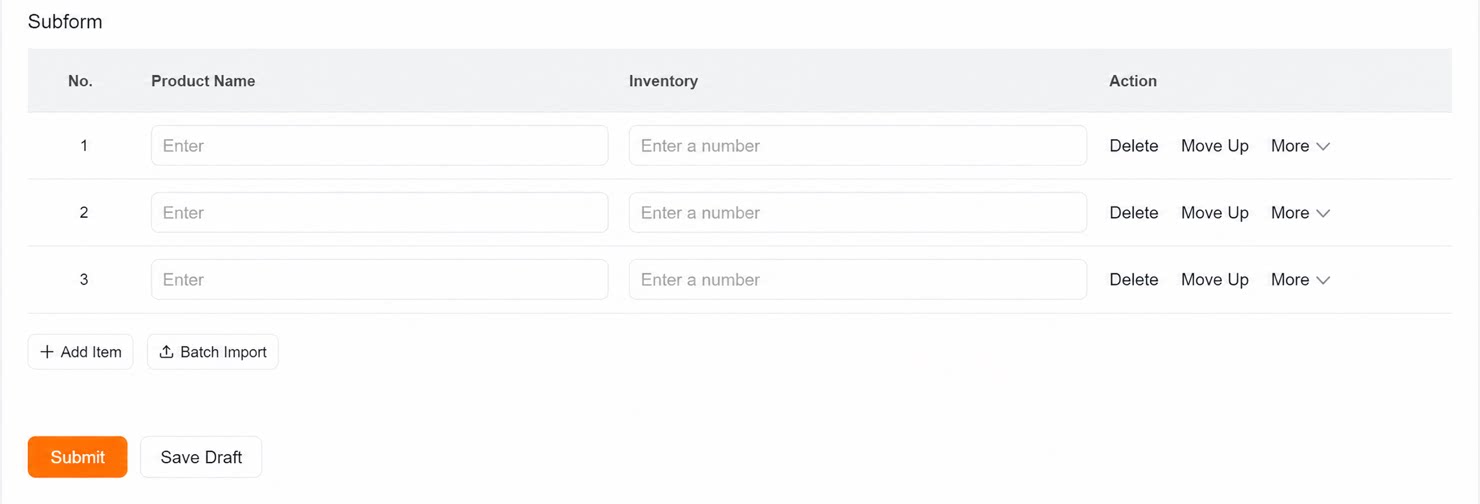 | Initial state (only one record): Delete is not available.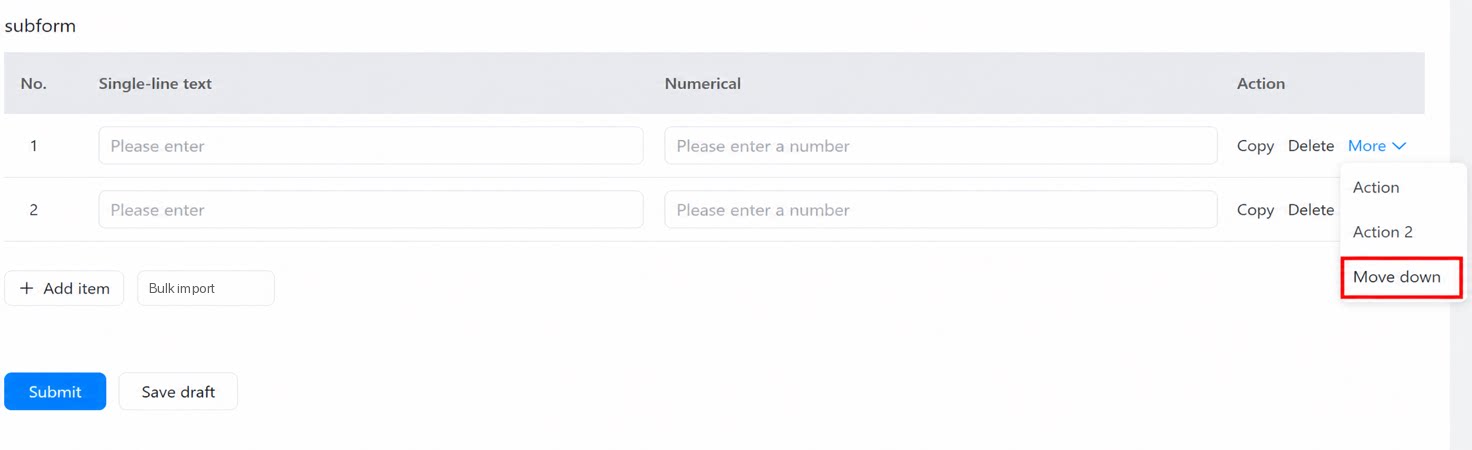 |
| Collapse/expand added to tiled mode | All records are displayed. If there are more than 20 records, they are paginated.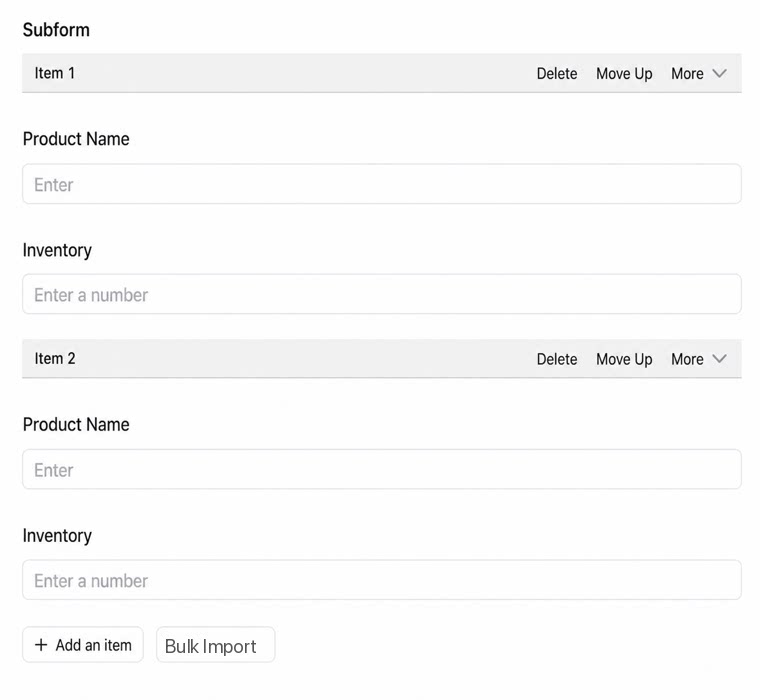 | In tiled mode, click the icon outlined in red below to toggle expand/collapse.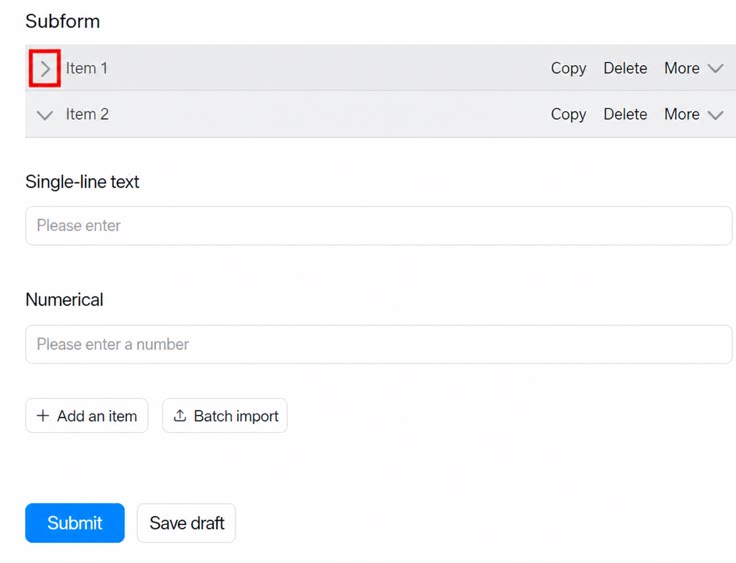 |
| Freeze columns (spreadsheet mode) Currently, only freezing the leading columns on PC is supported. | Freeze column is not supported.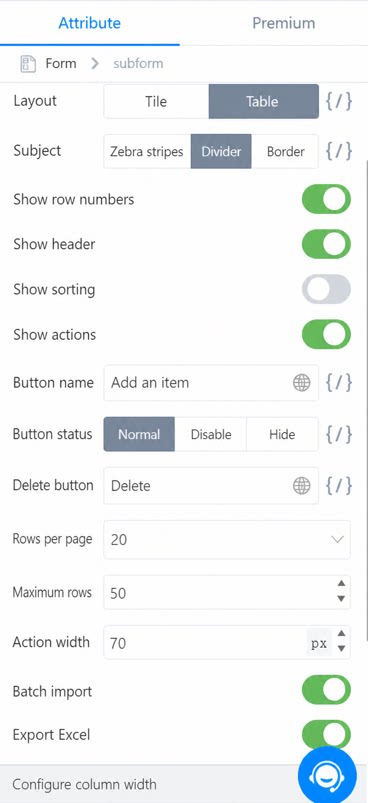 | Custom column freezing is supported, with up to 5 columns. The row number counts as 1 column. Default: none 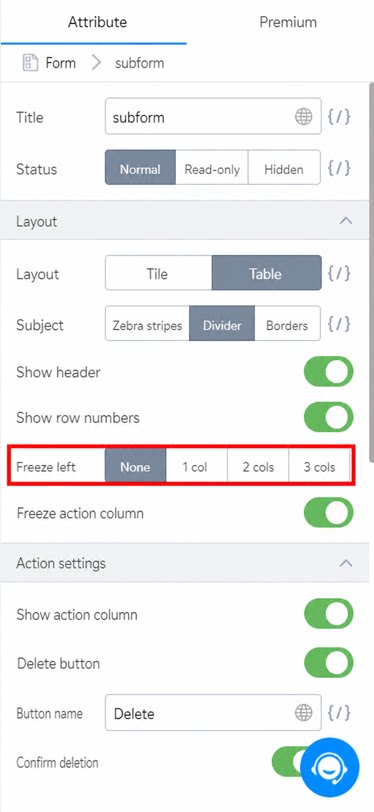 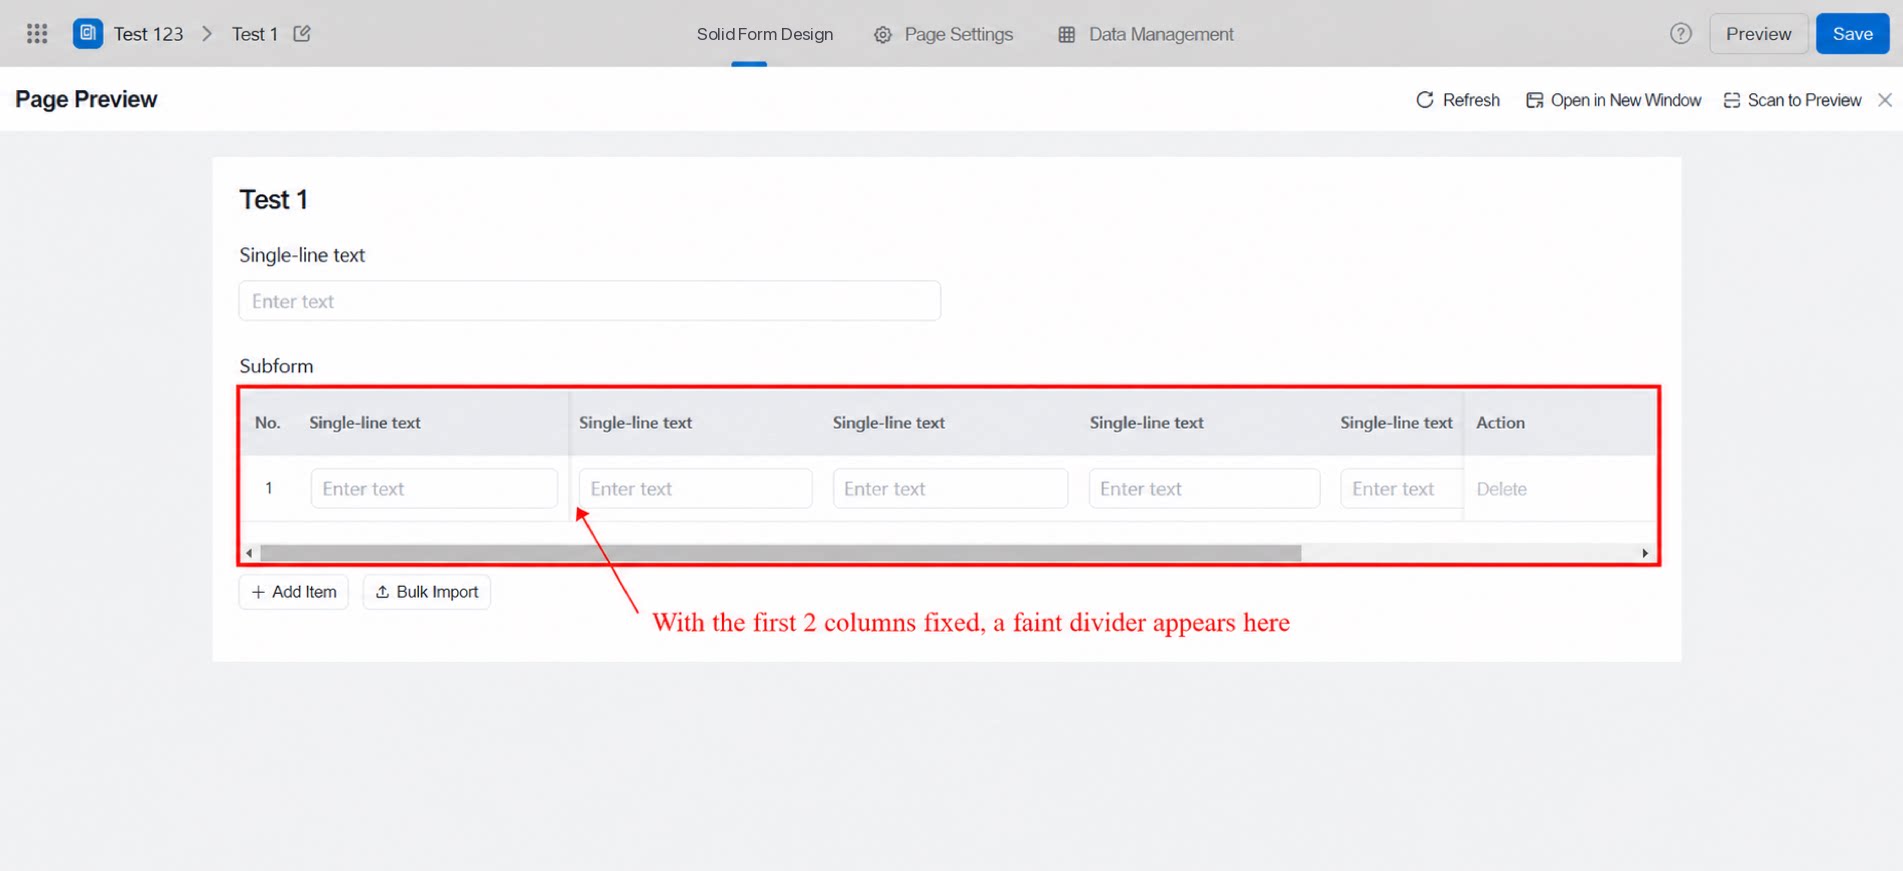 |
| Custom row number name (tiled mode) | No setting for the row number name.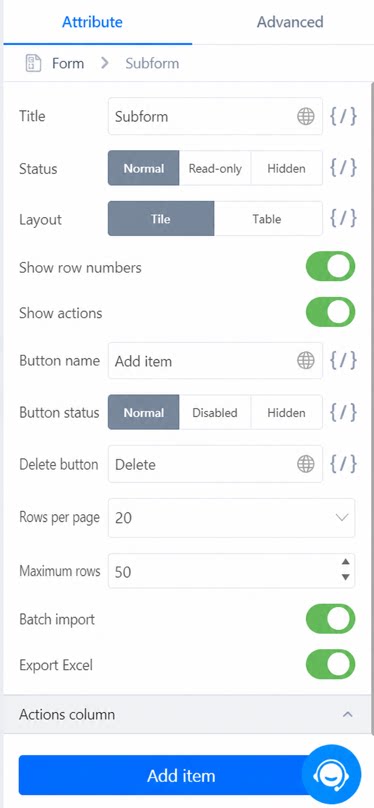 | The row number name can be customized.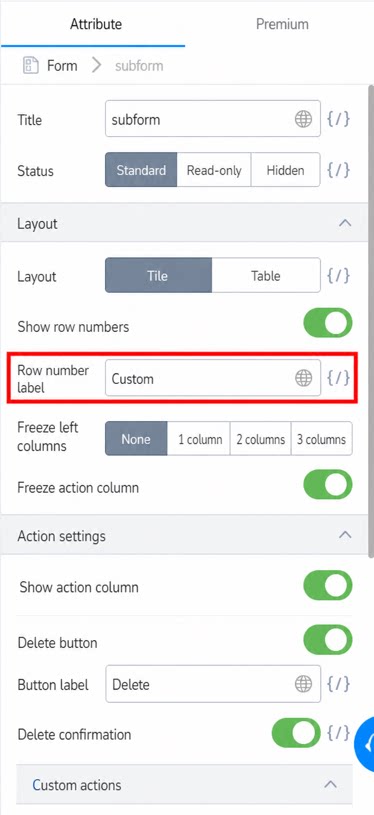 |
3.1 Layout Mode
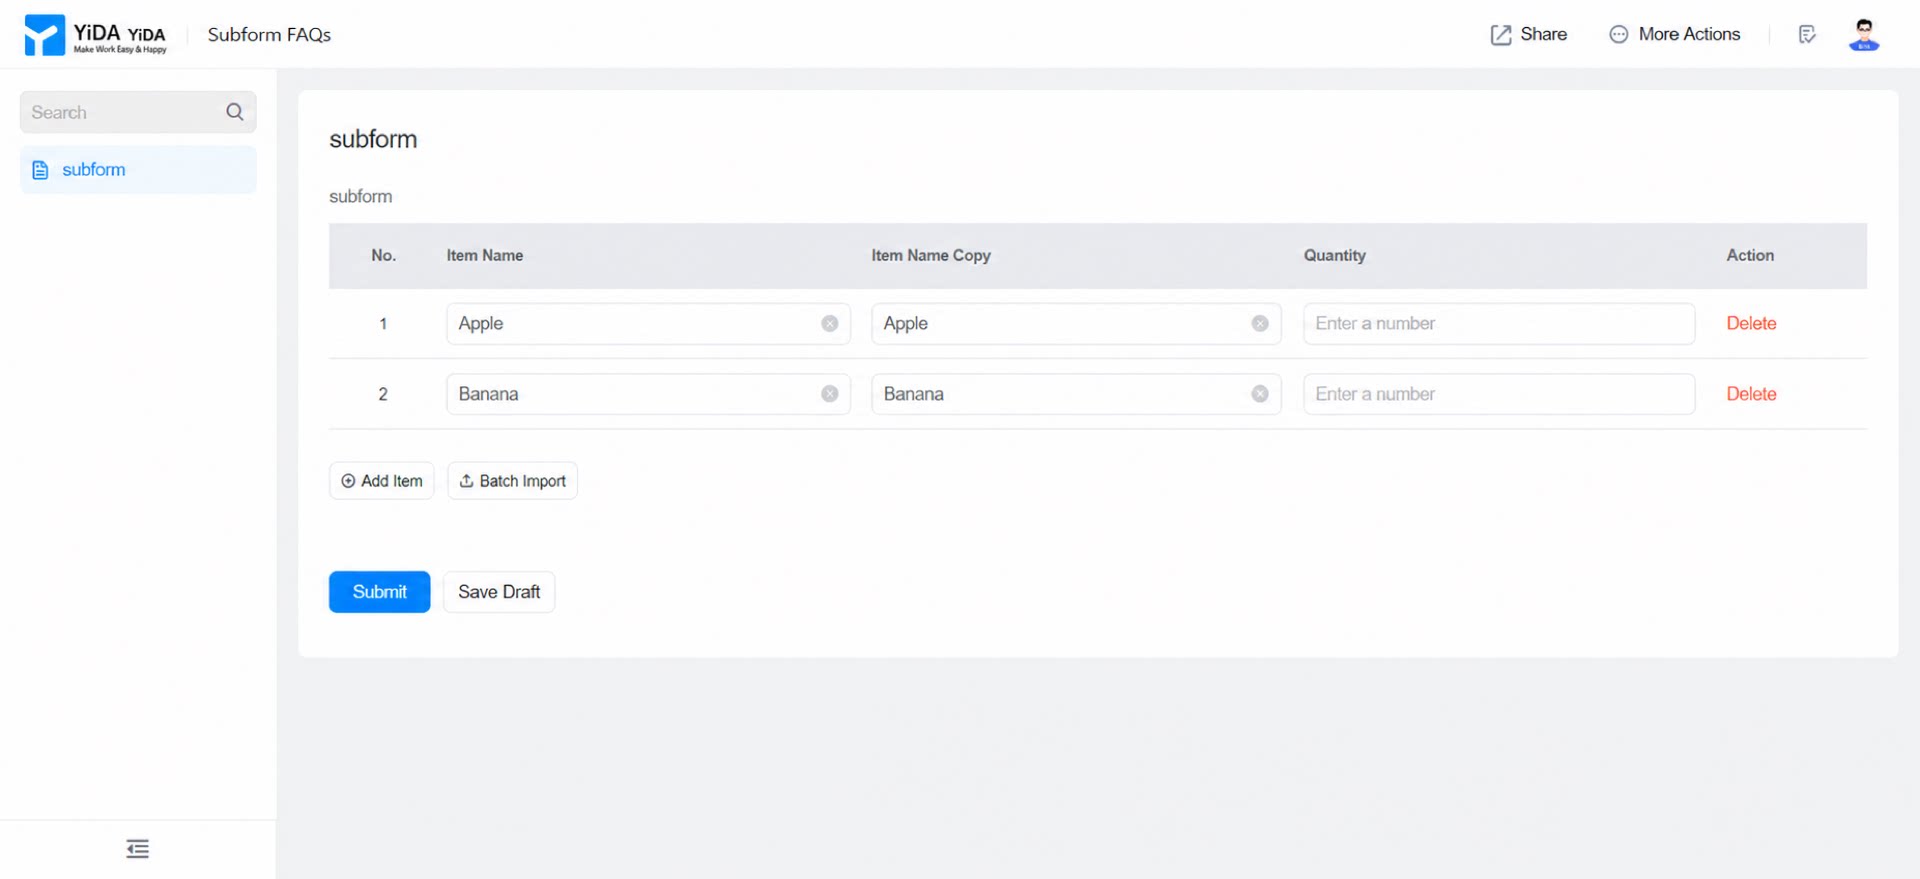
Set the layout of the subform. Spreadsheet mode is used by default.3.1.1 Spreadsheet Mode
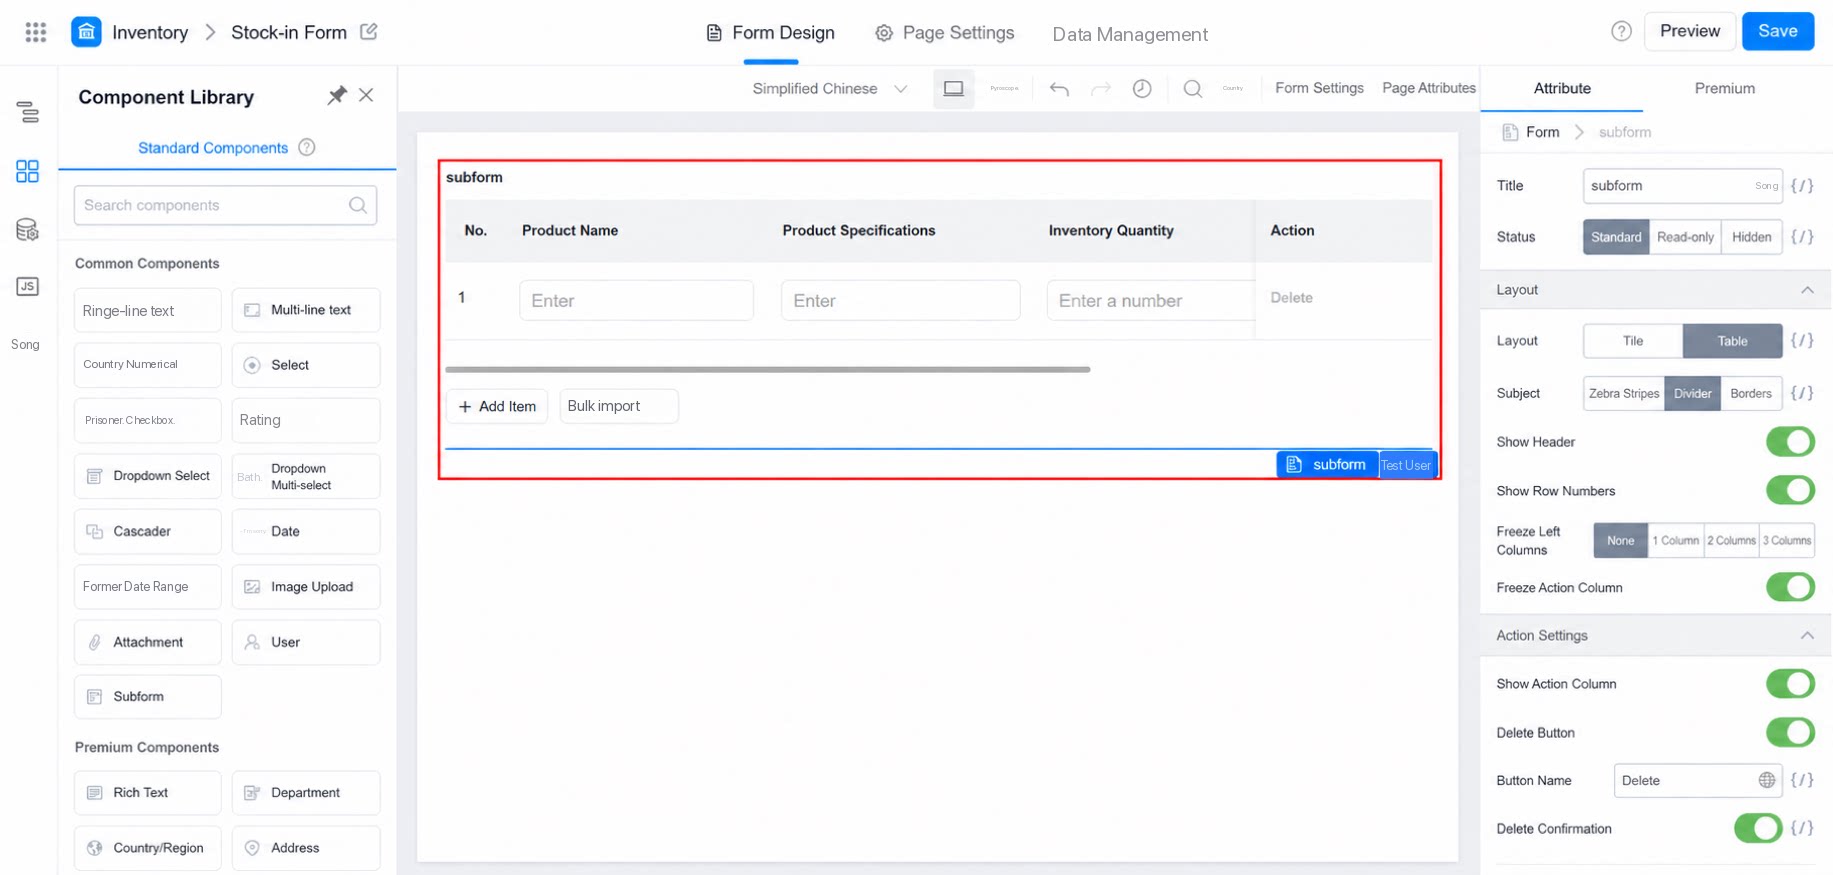
3.1.2 Tiled Mode
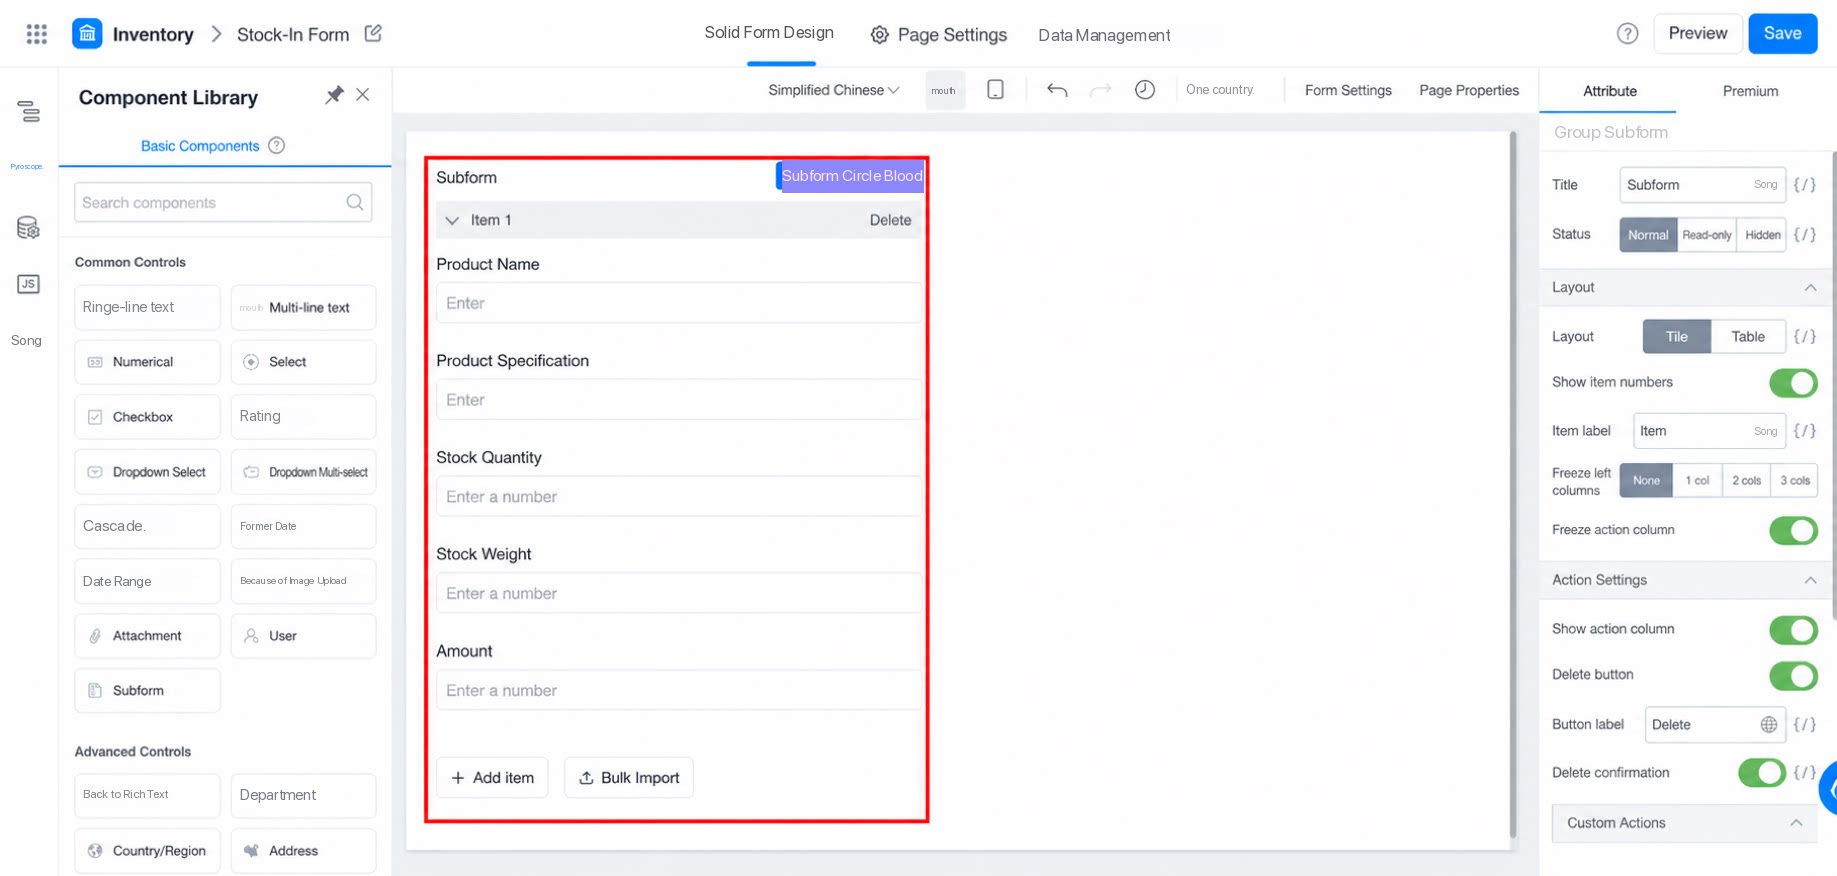
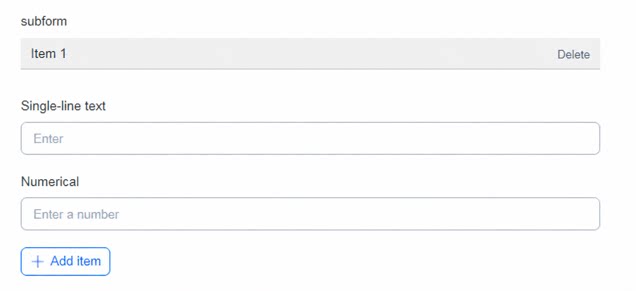
3.2 Set the Add Button Name
The Add button is named “Add one” by default. You can customize the name. Example: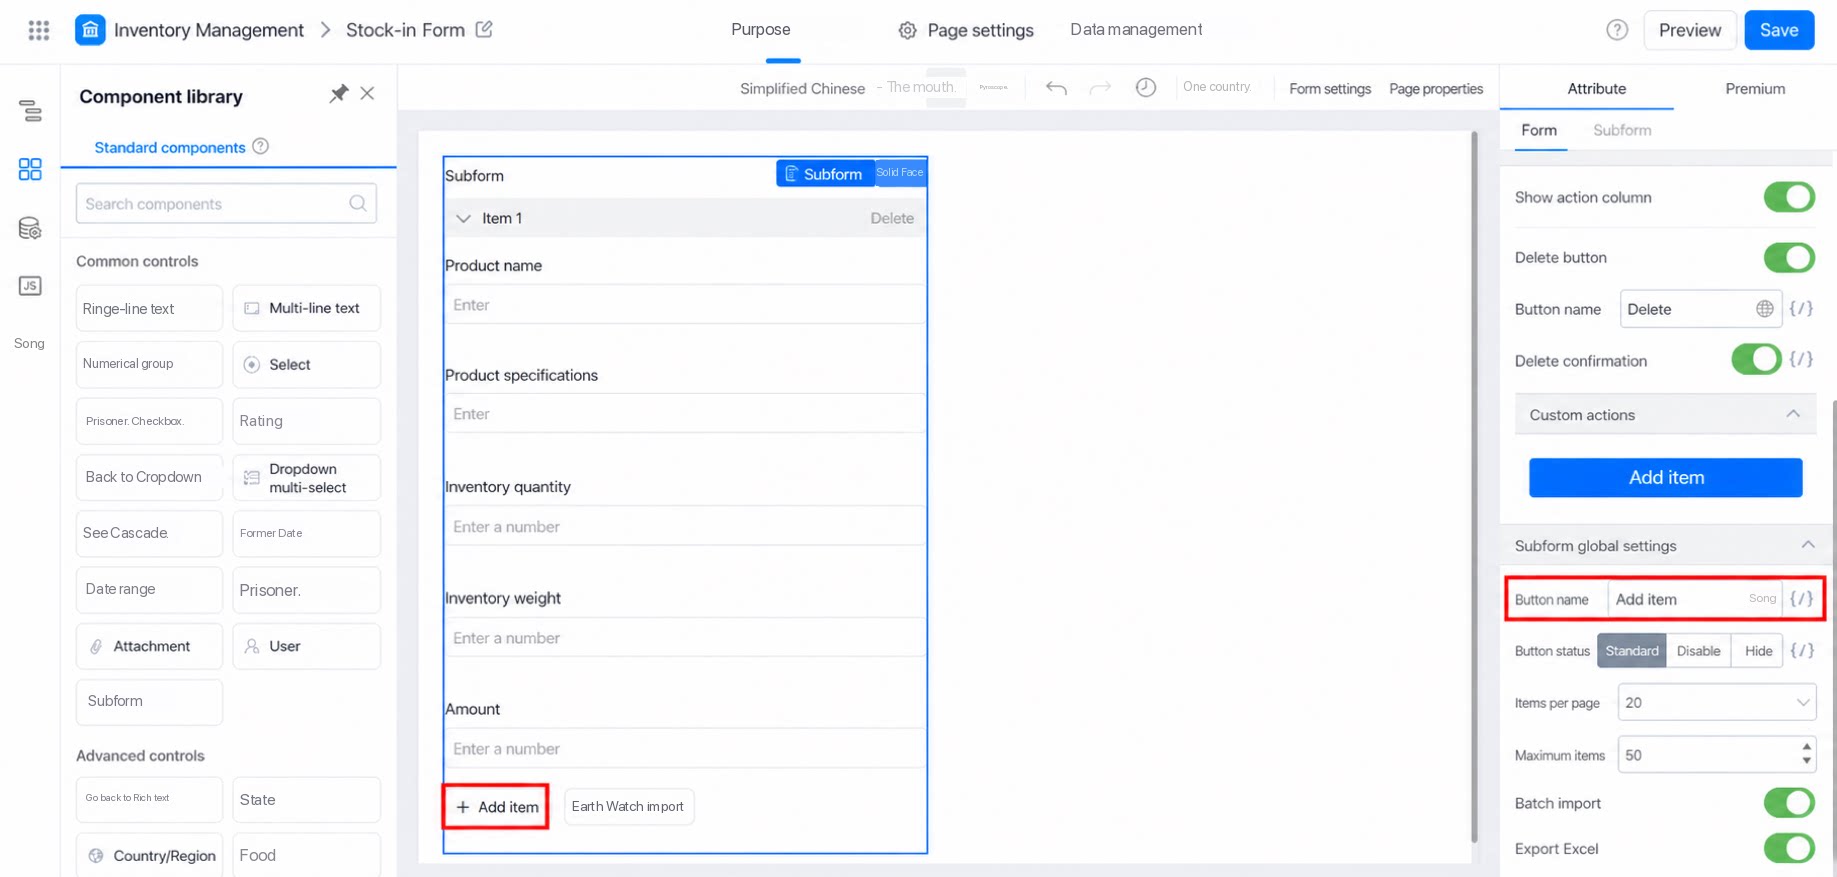
3.3 Set the Delete Button Name
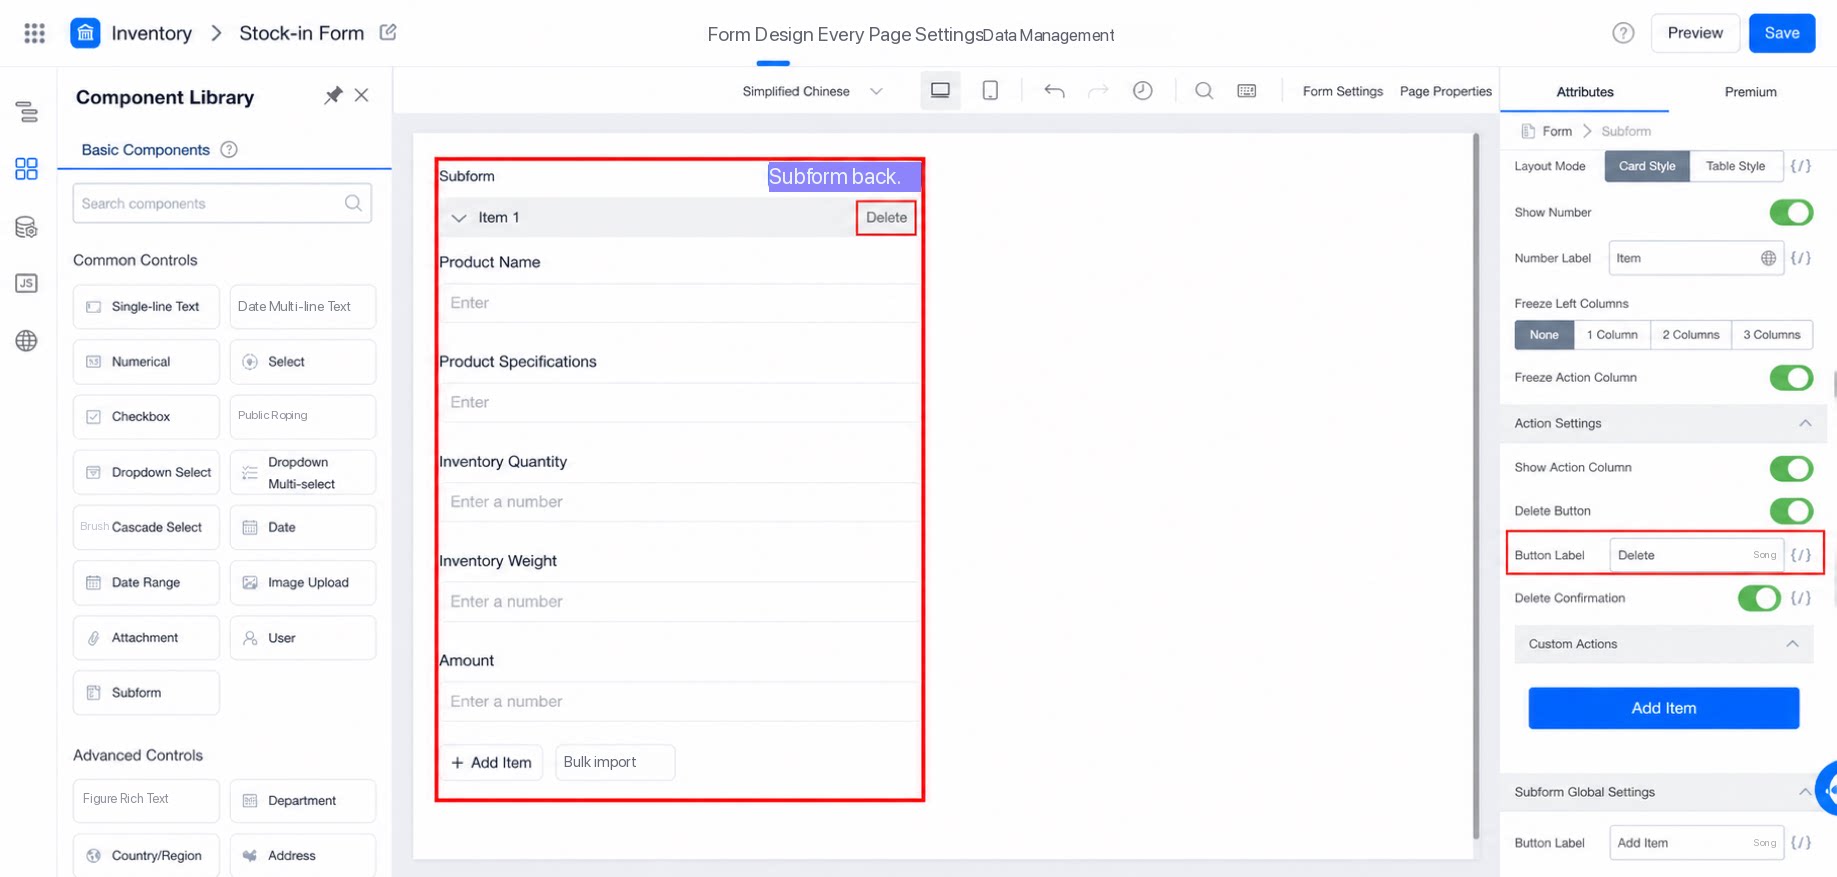
3.4 Maximum Number of Records That Can Be Added
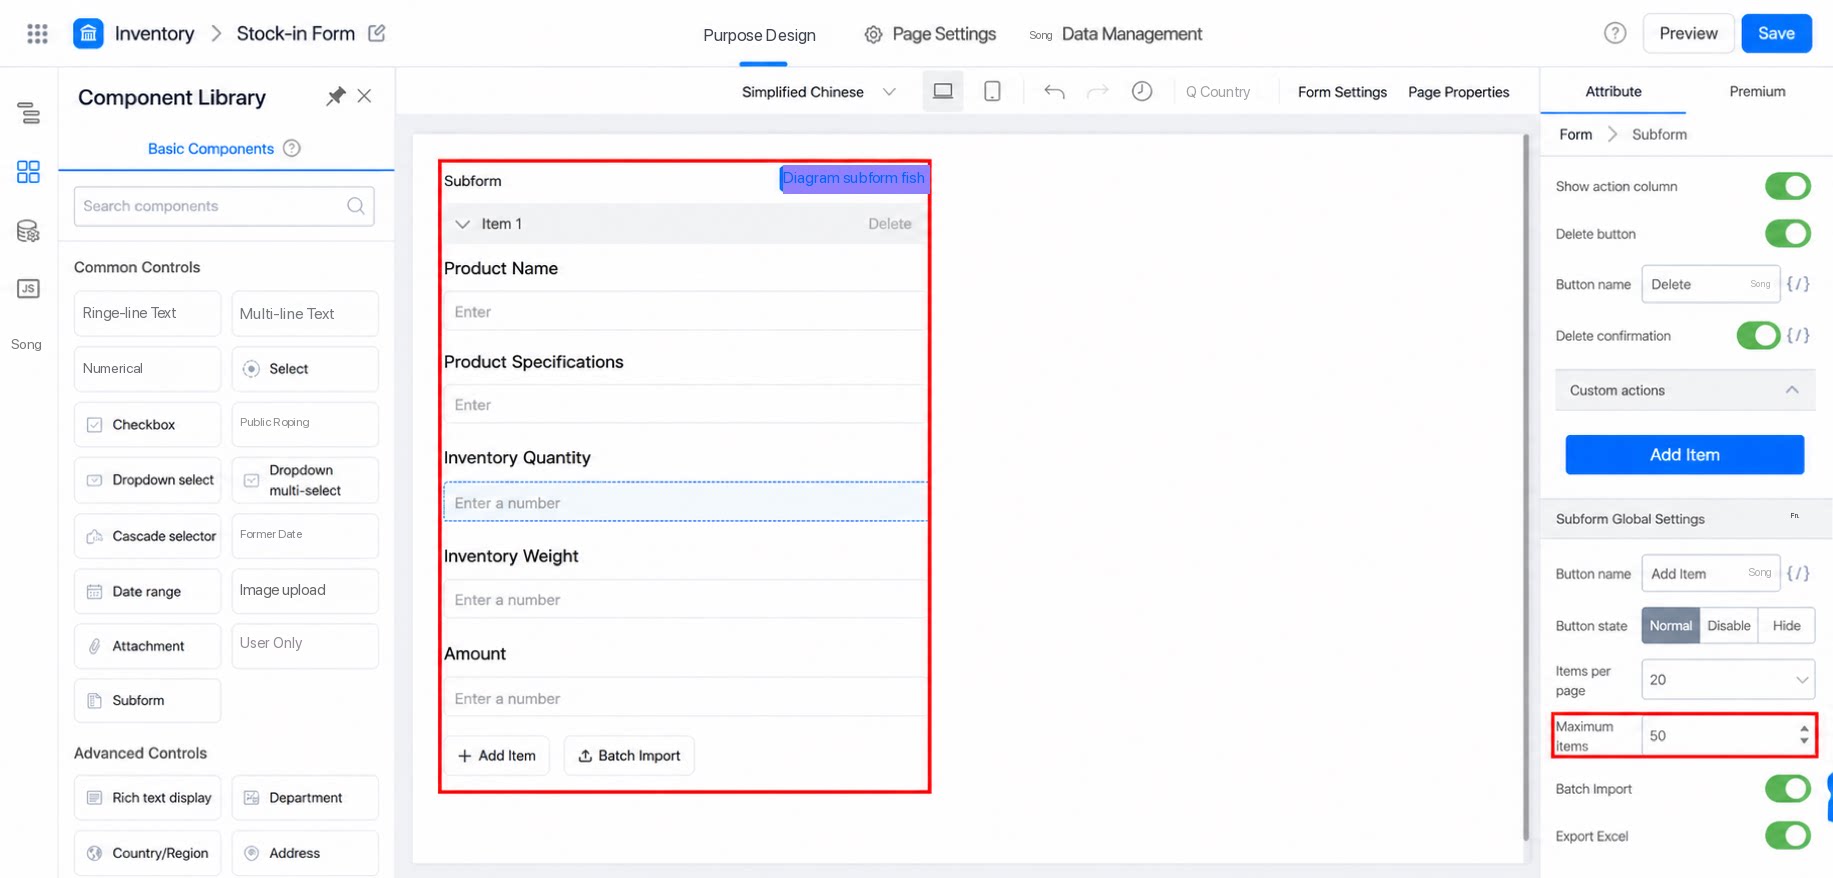
3.5 Subform Column Width
Column width is customizable, so even long content displays properly.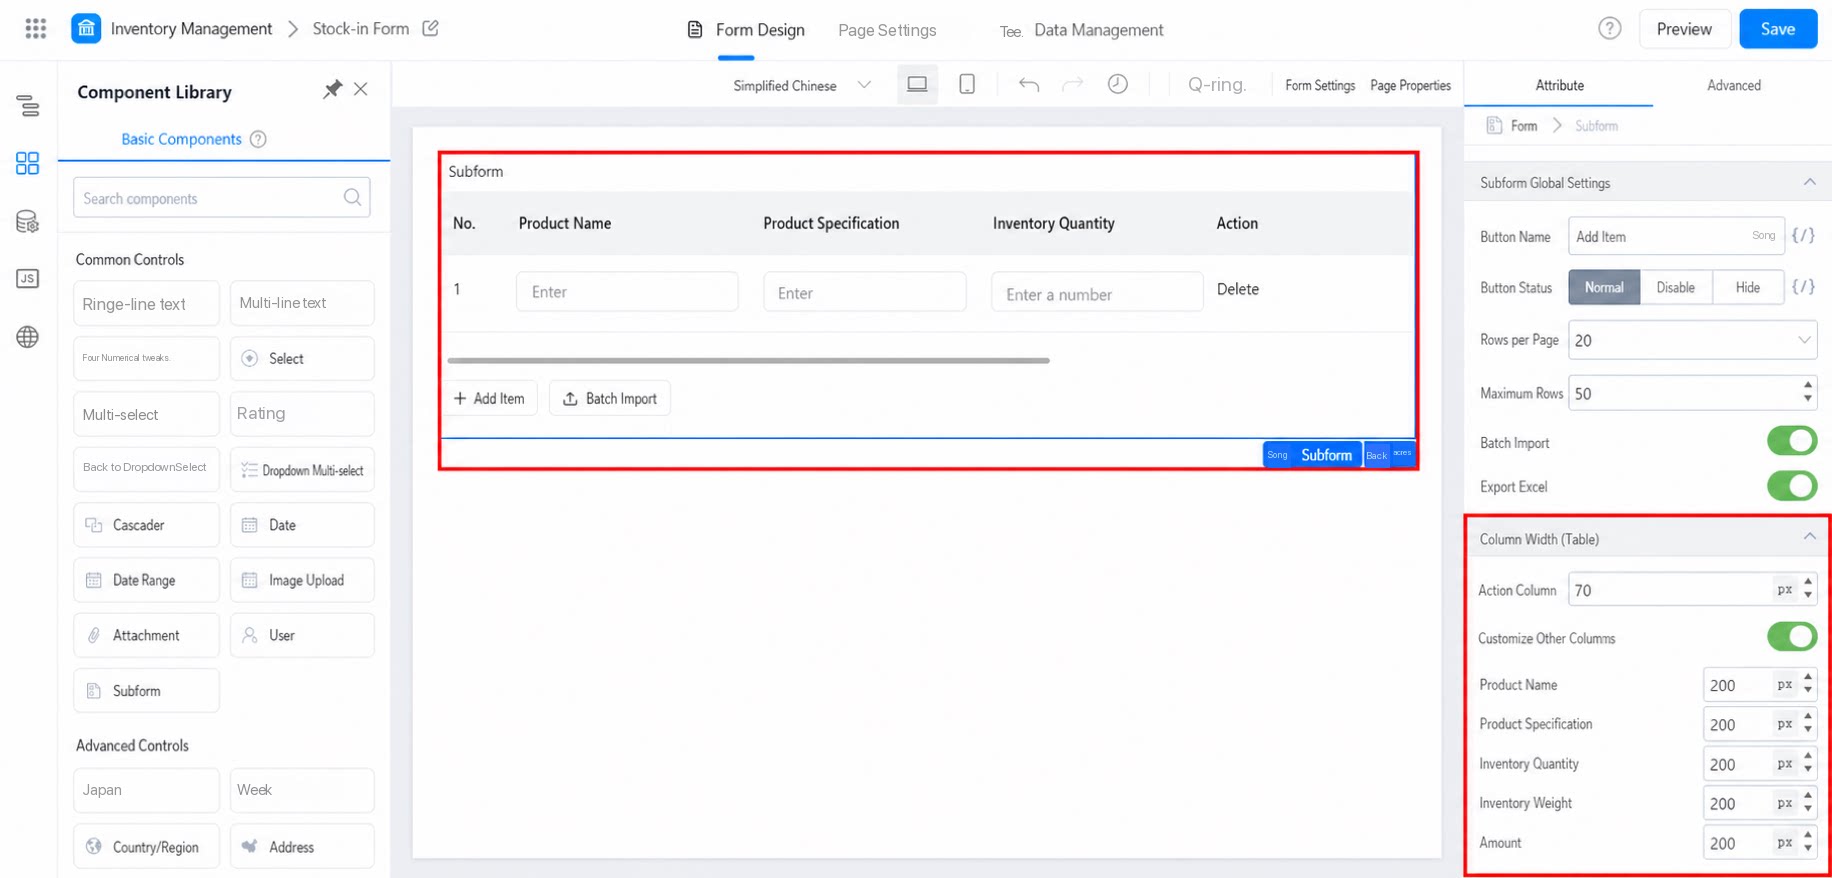
3.6 Batch Import
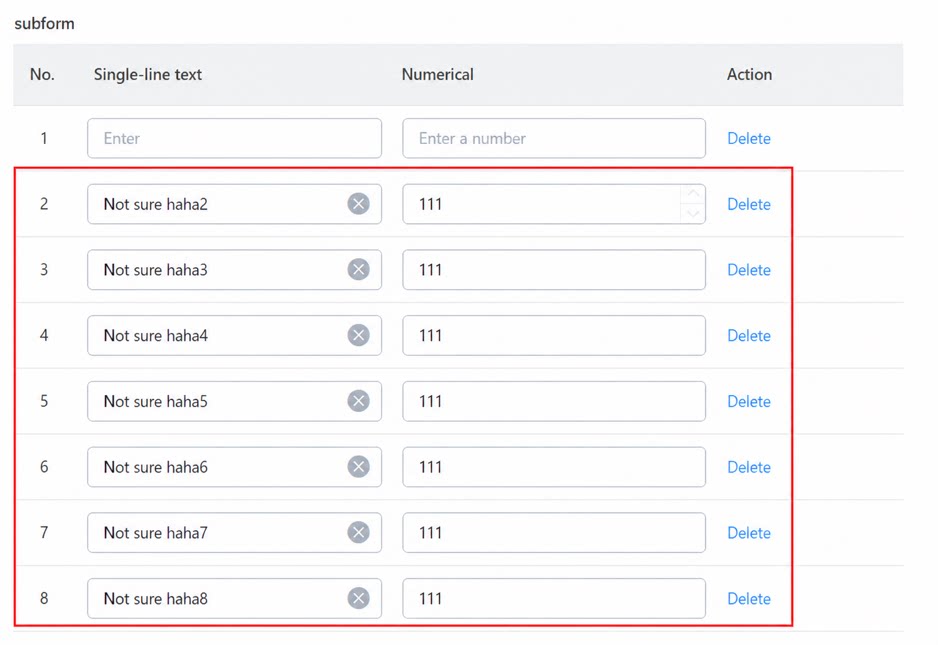
Path: Open a form and you will see a Batch import button under the subform. Click Batch import to proceed. (If the form has public access (silent login) enabled, subforms within the form do not support batch import.)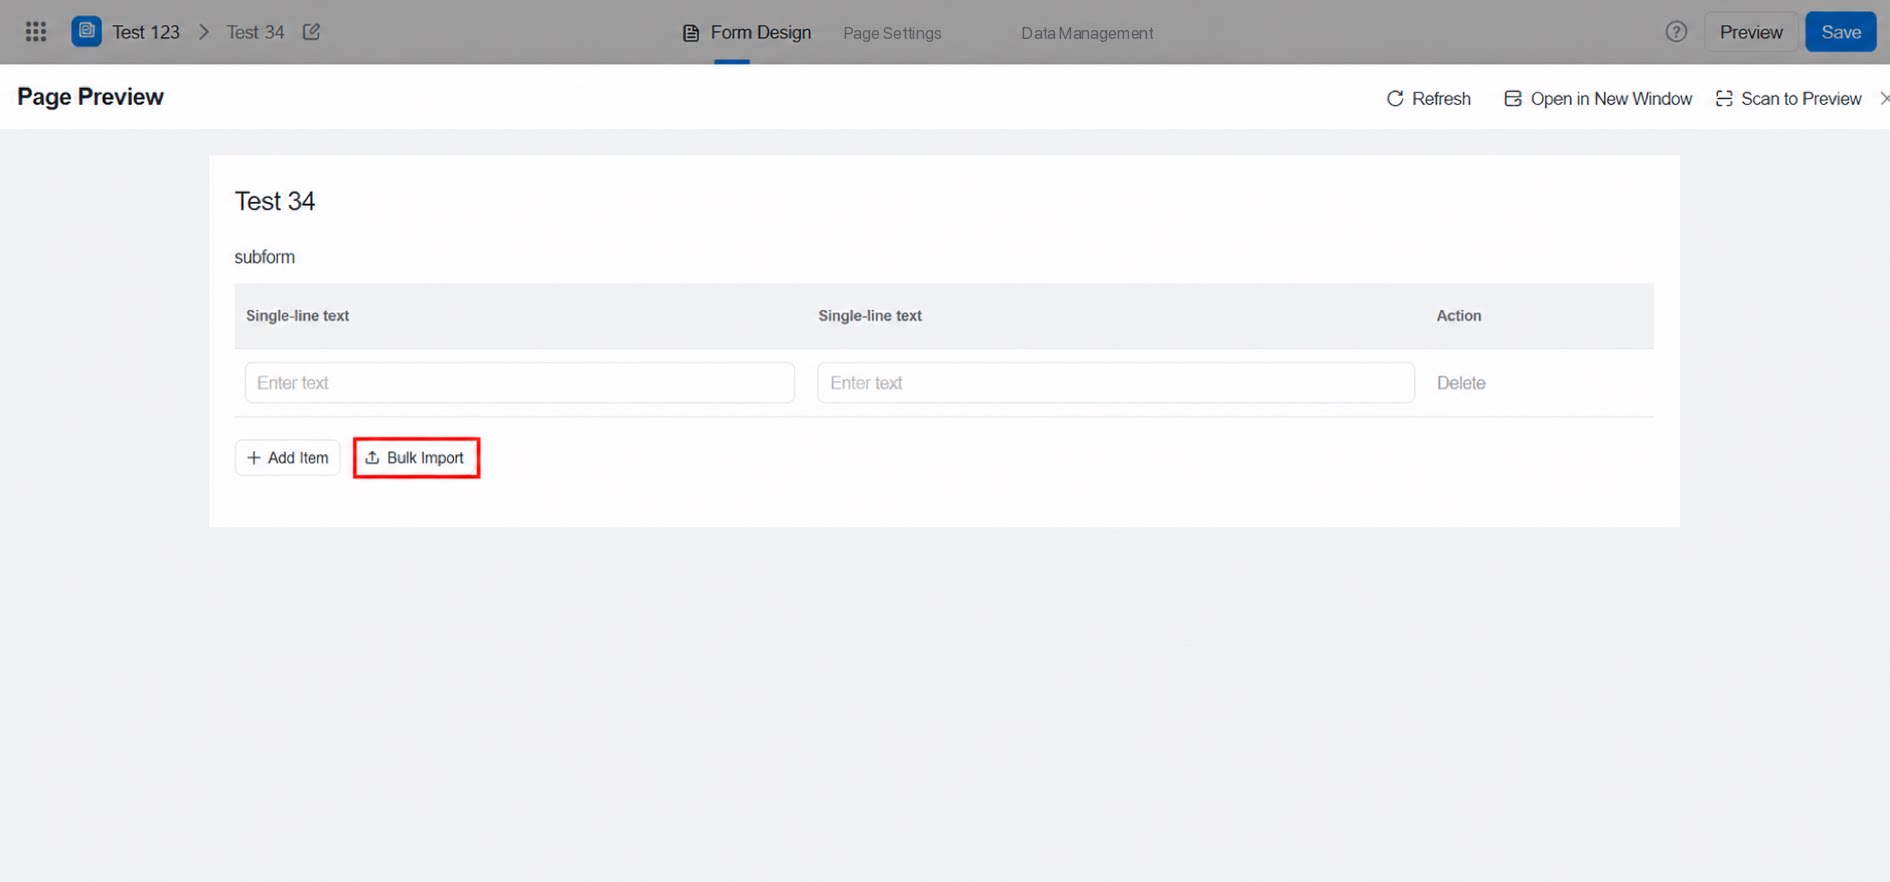
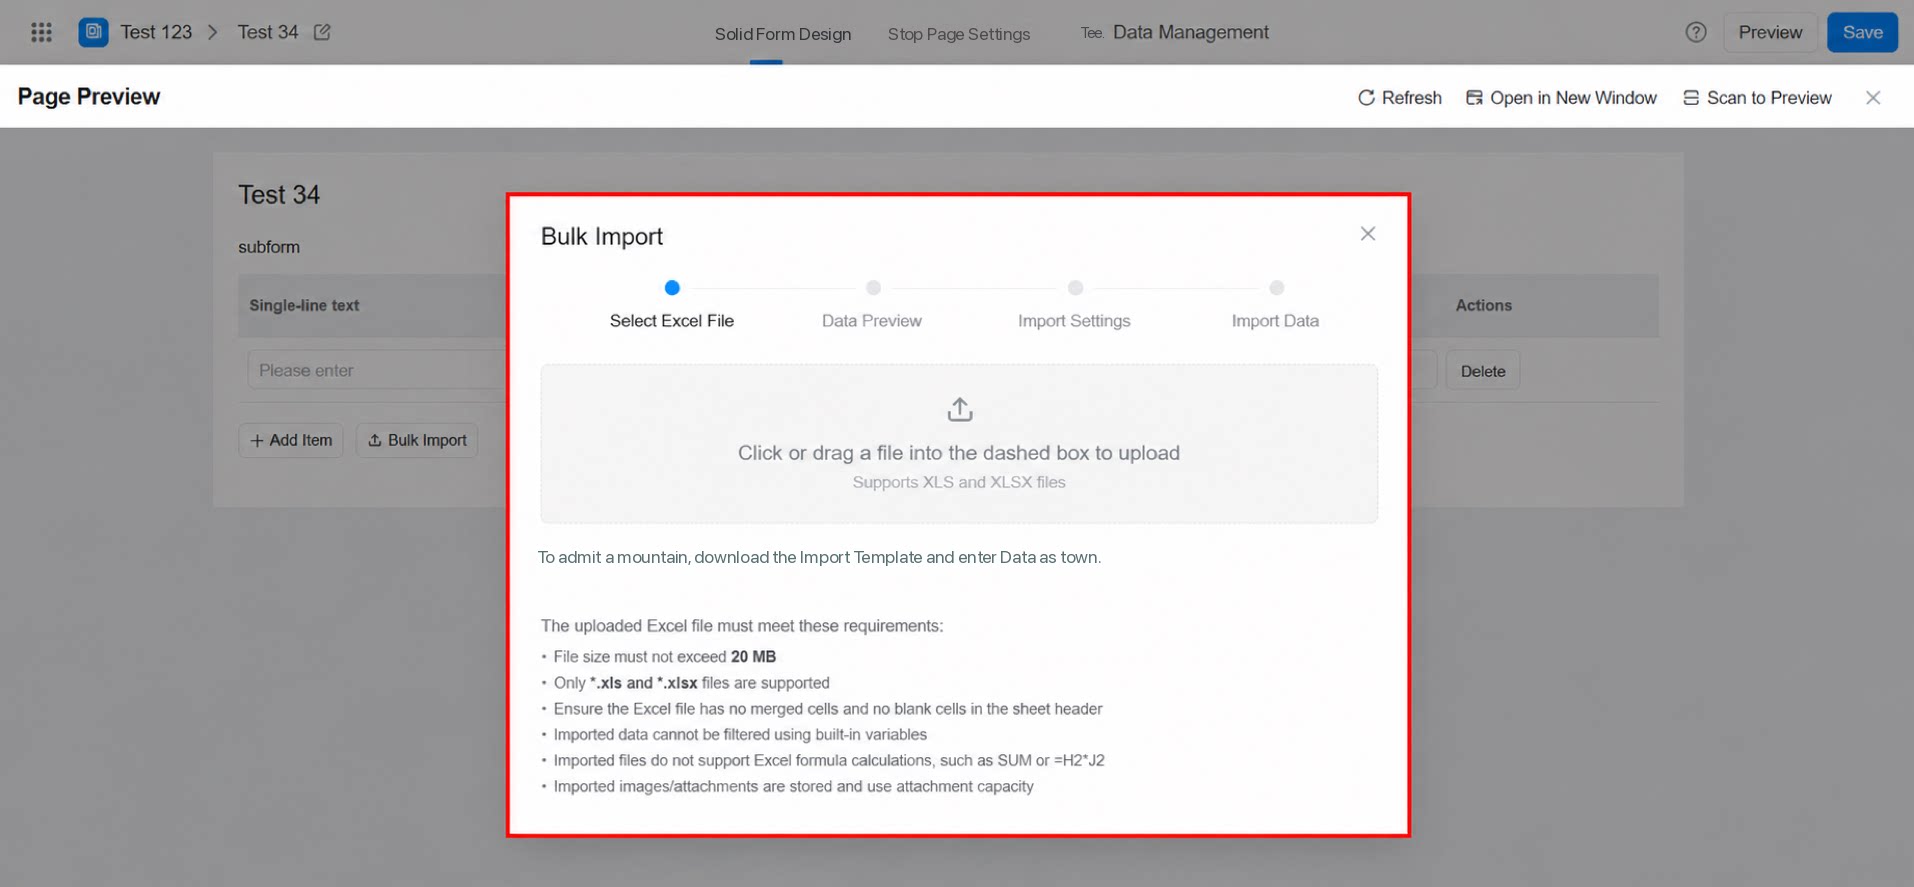
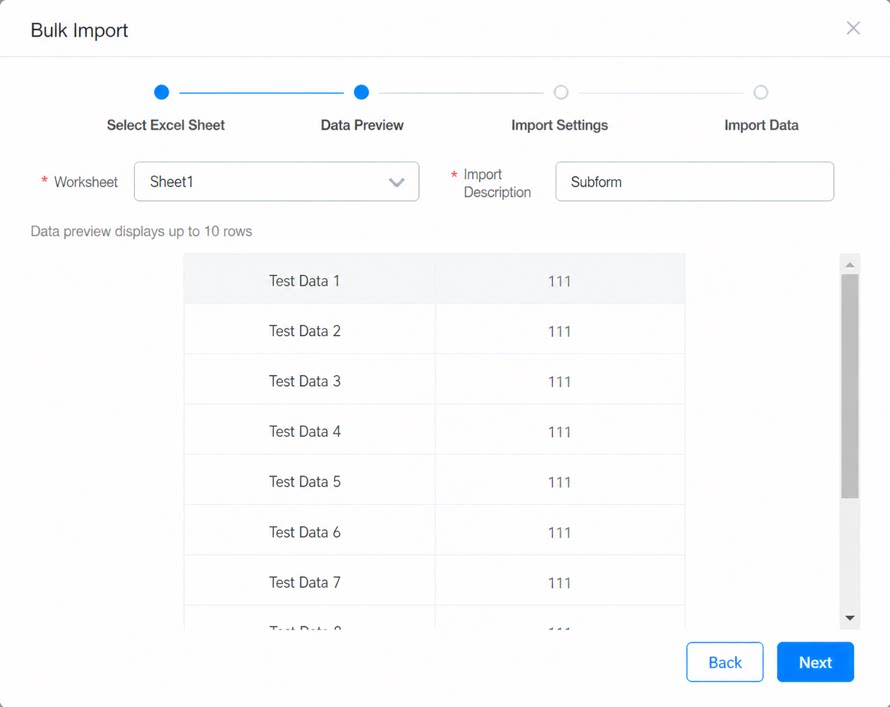
- Efficient subform data entry: supports batch import via Excel.
3.7 Batch Export
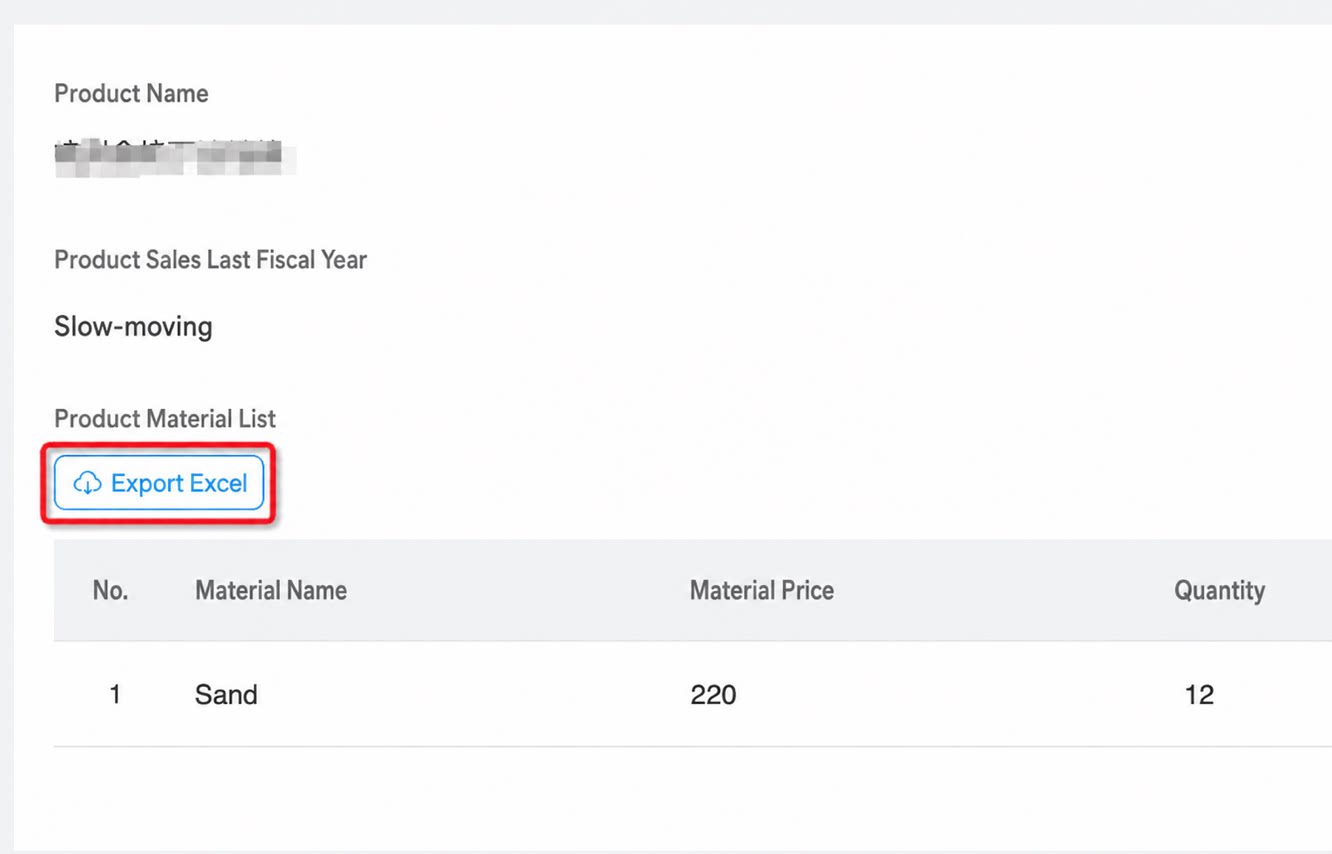
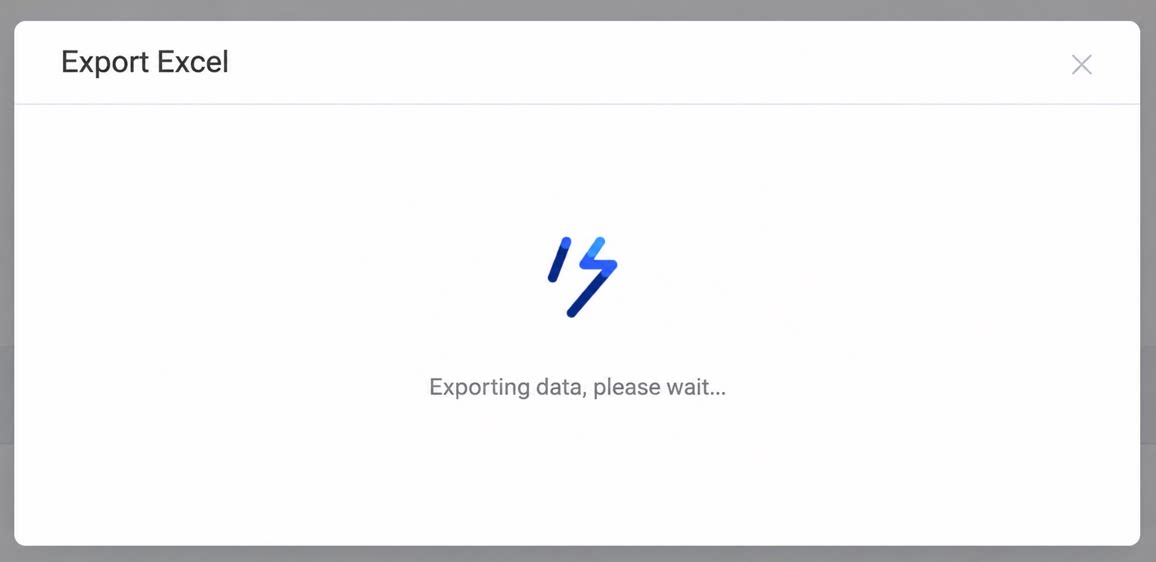
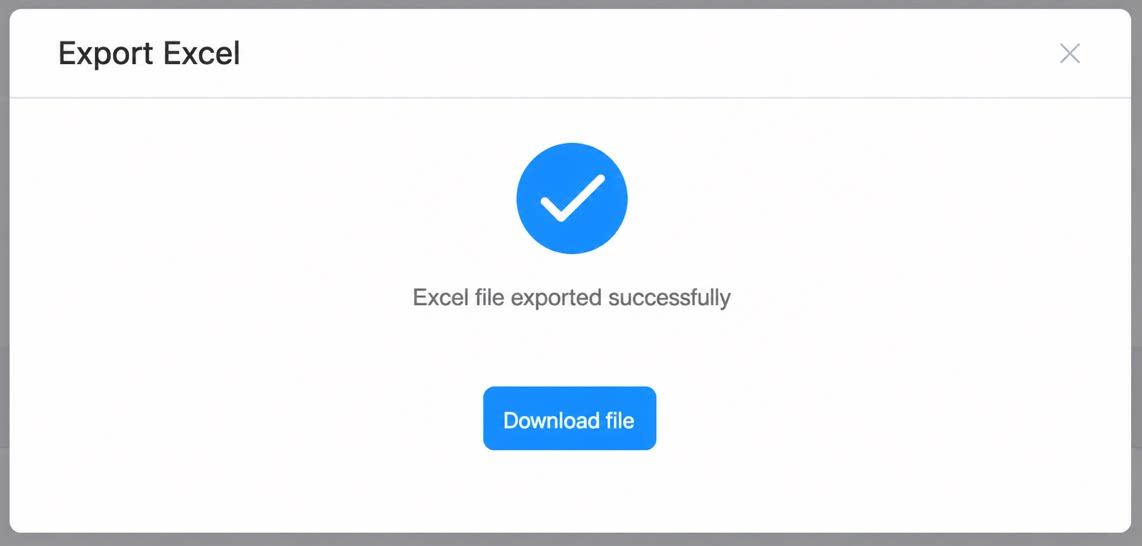
- Quickly export subform data:
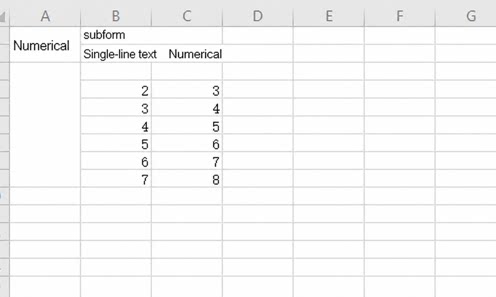
3.8 Export Main Form and Subform Content Together to Excel
- Supports exporting main form data and subform data together.
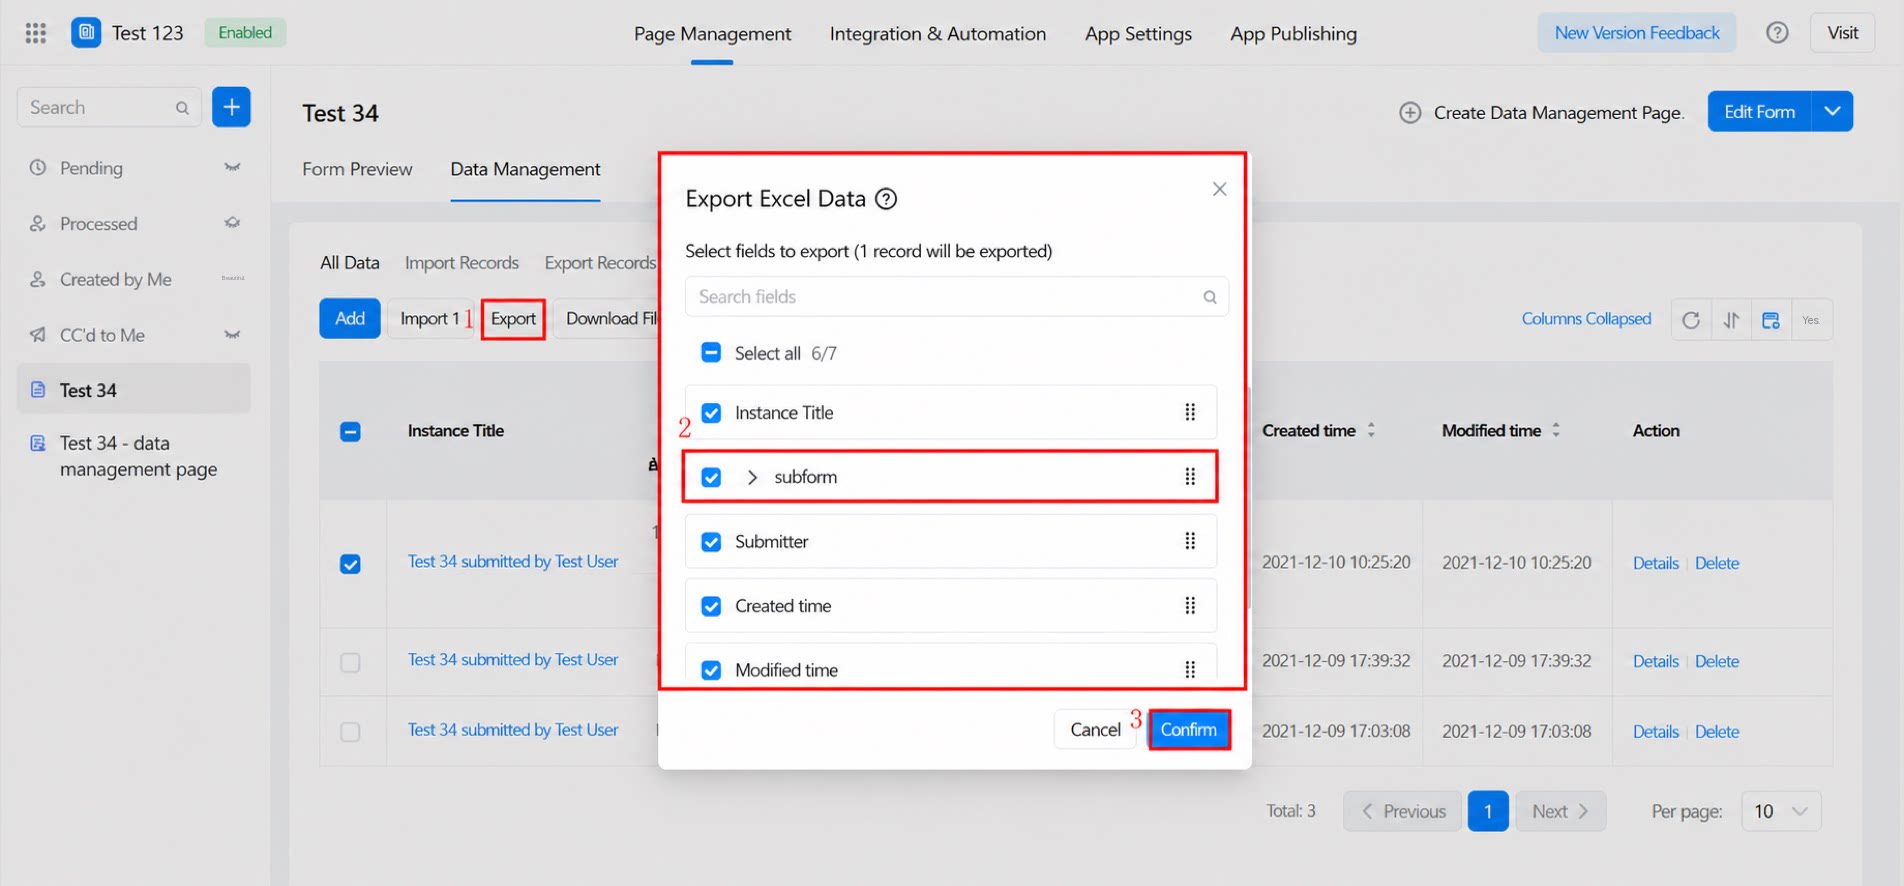
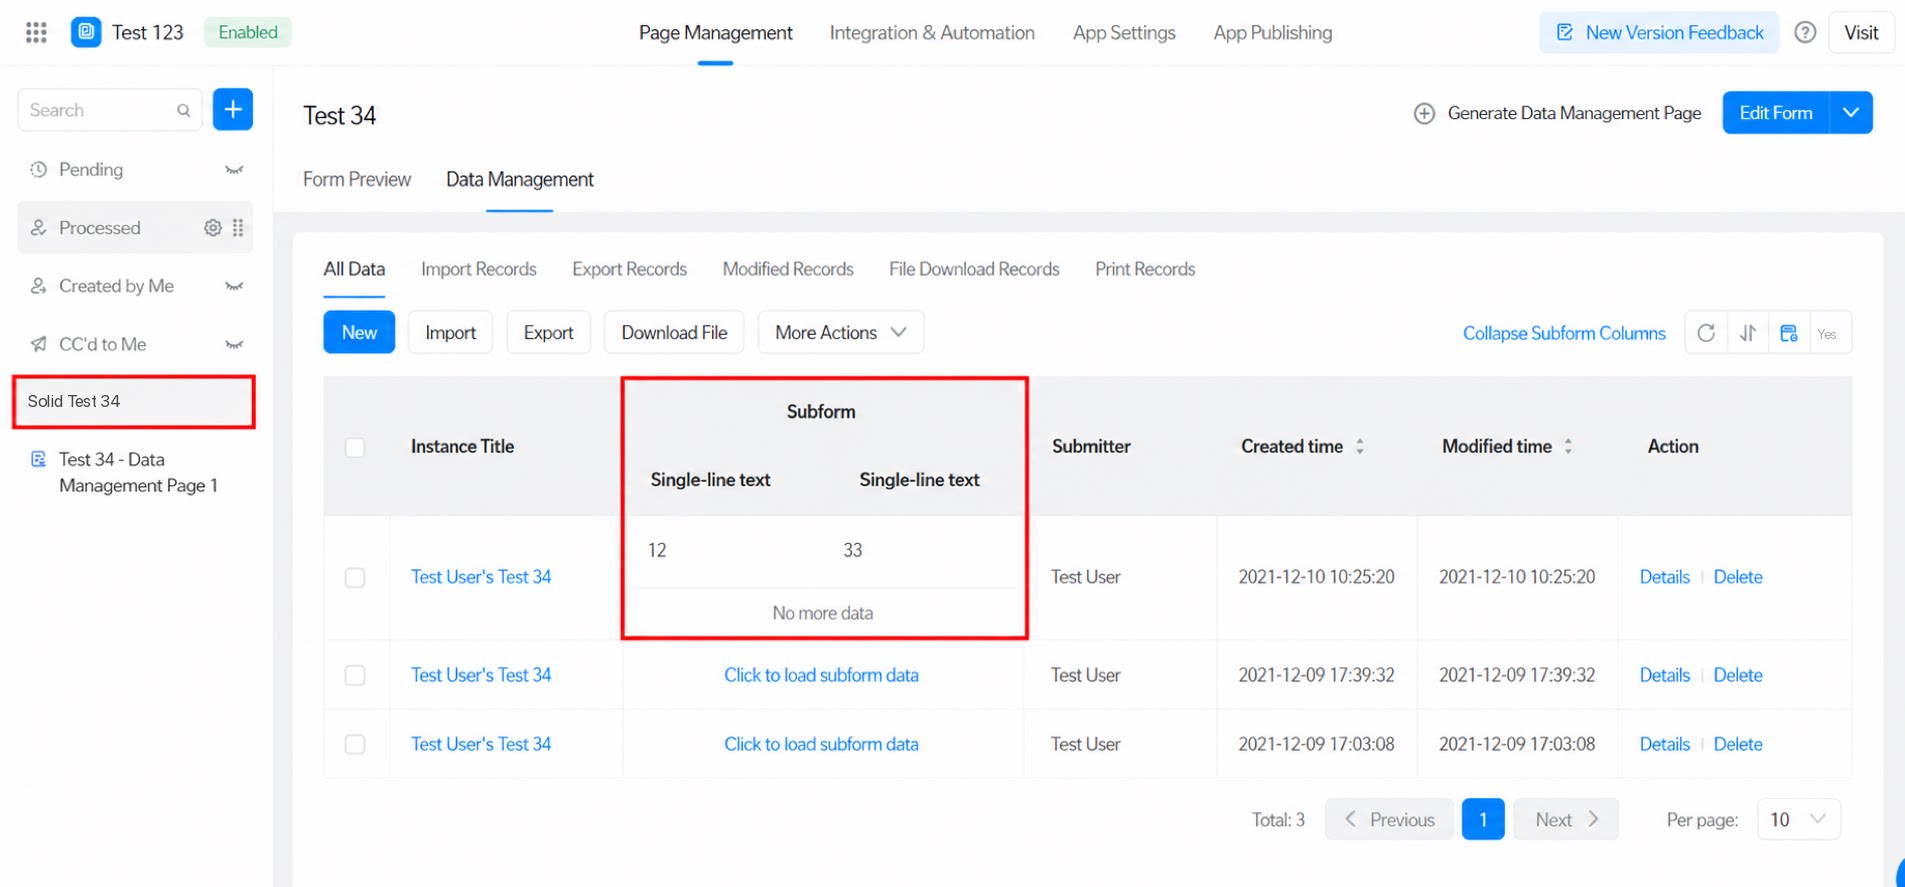
- New export capabilities:
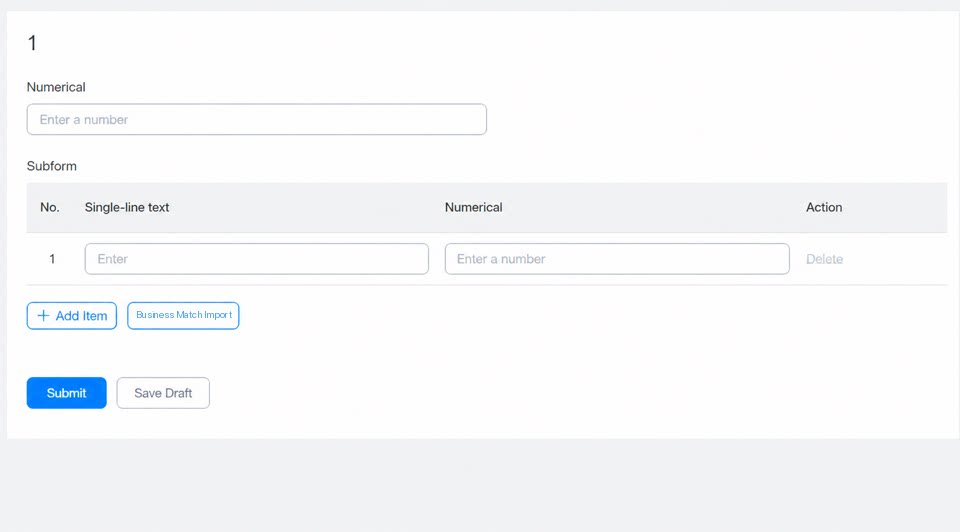
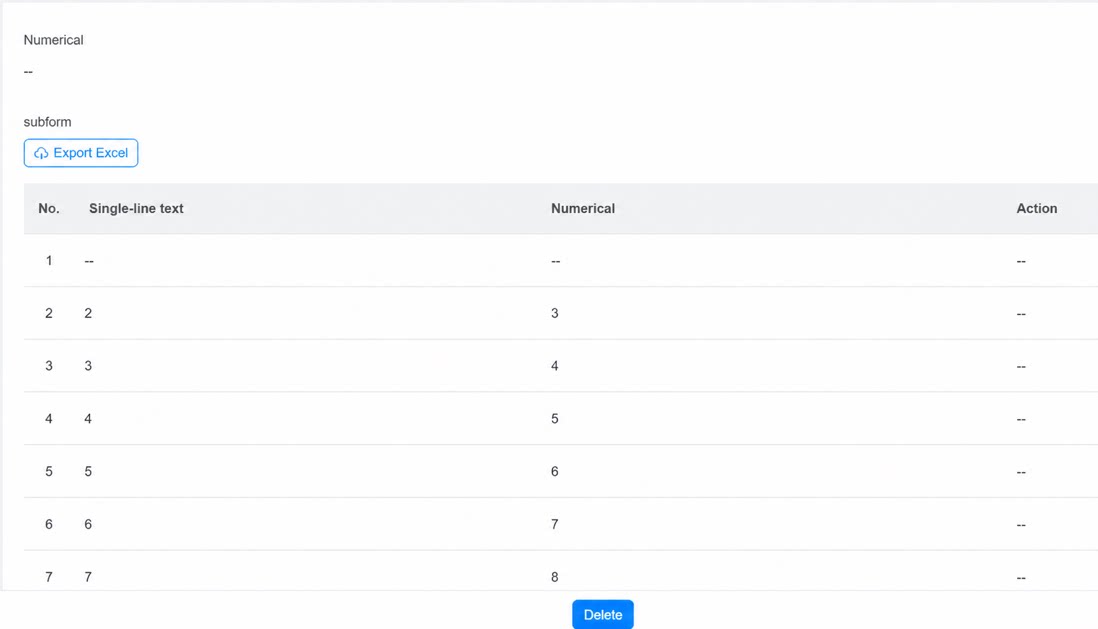
4. Advanced Features
4.1 Action Column
4.1.1 Create an Action Column
After you create an action column, click Edit to bind actions.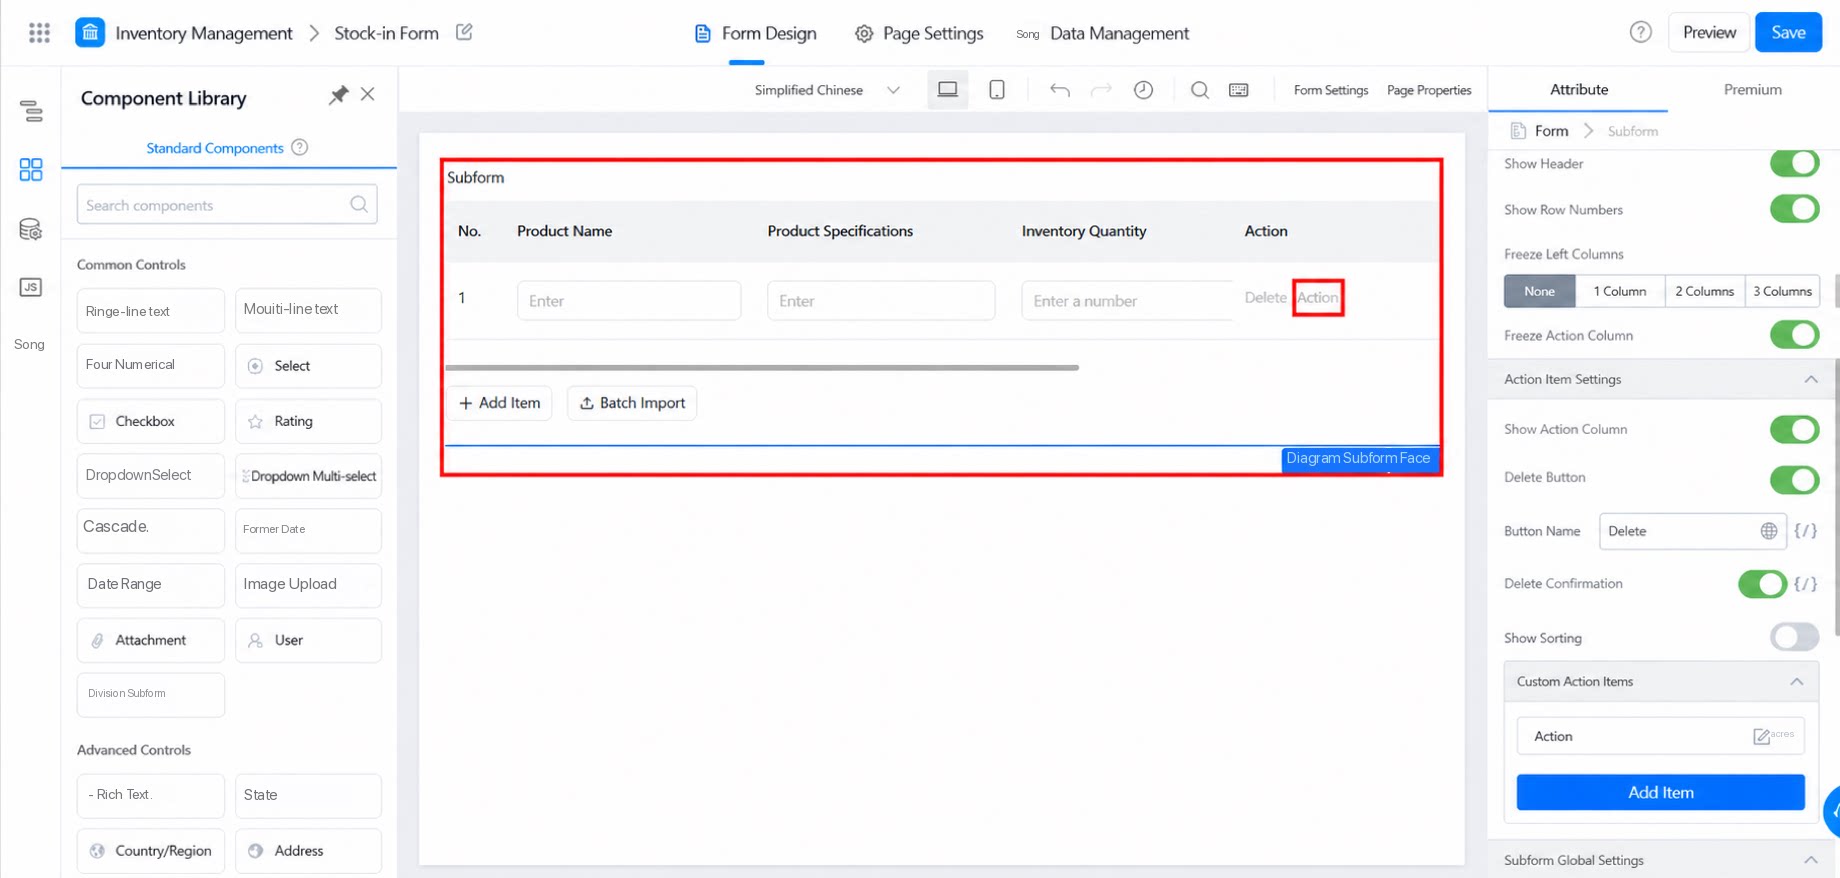
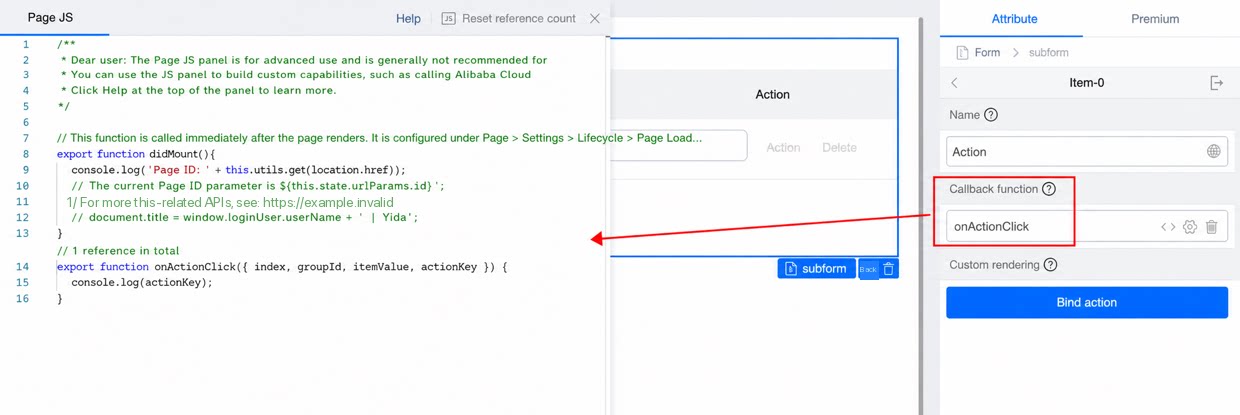
4.1.2 Callback Function
See Action settings.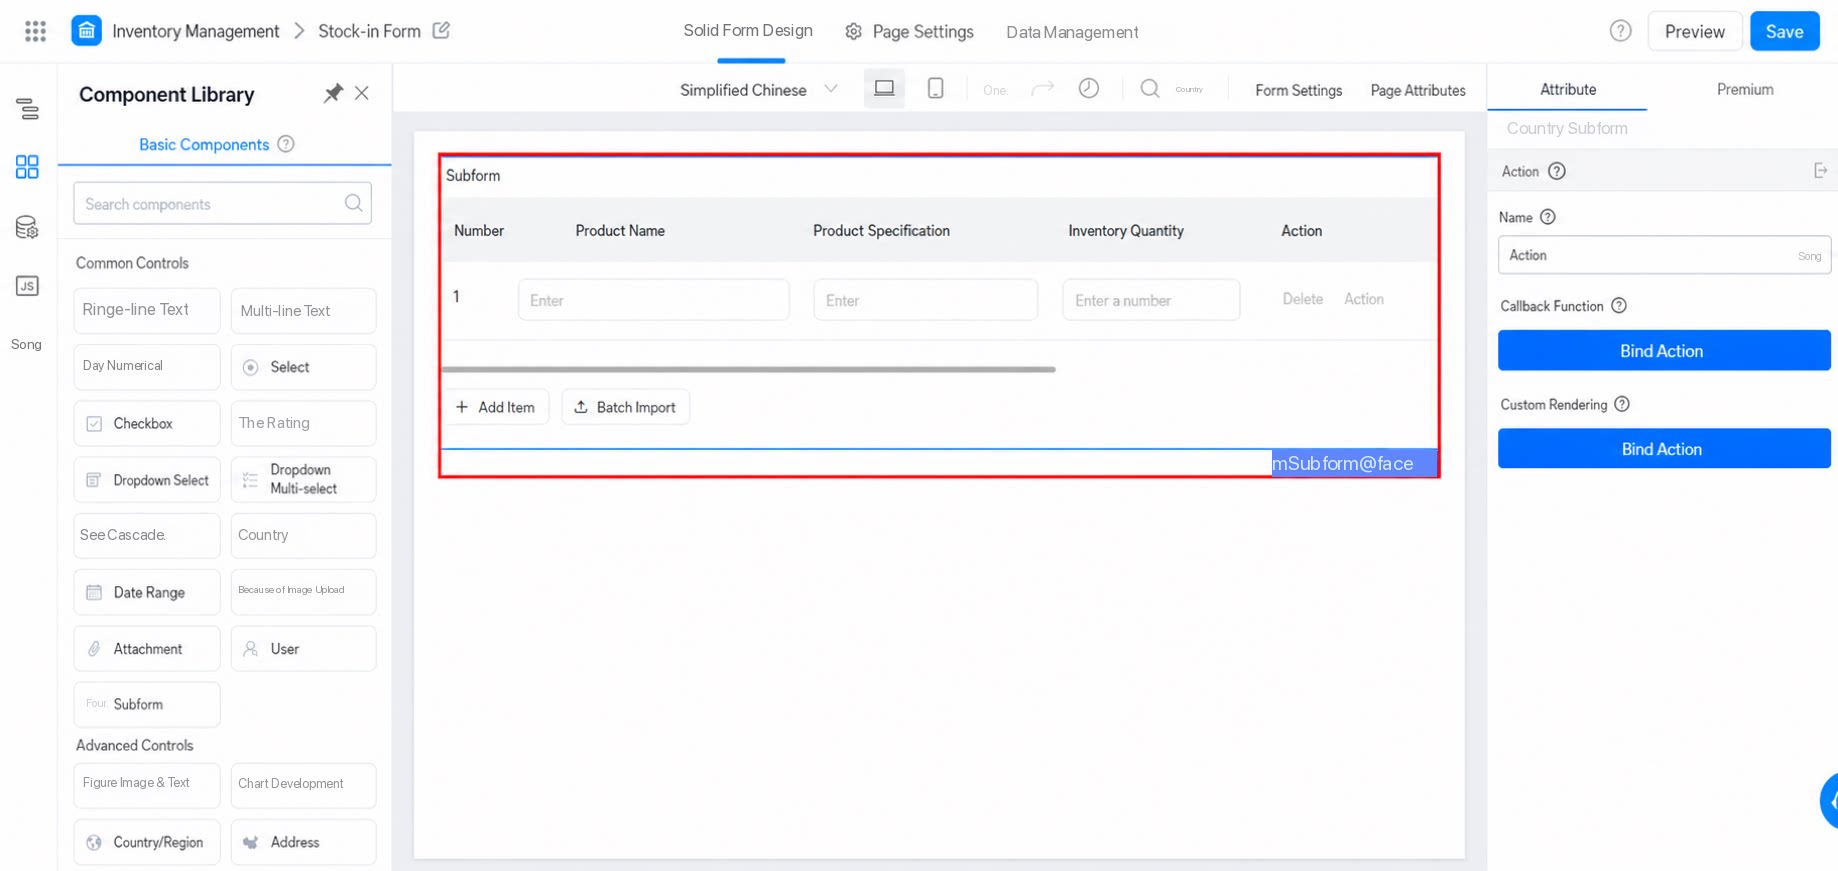
4.1.3 Custom Rendering
JSX is supported. Custom rendering - bind action Effect:5. FAQ
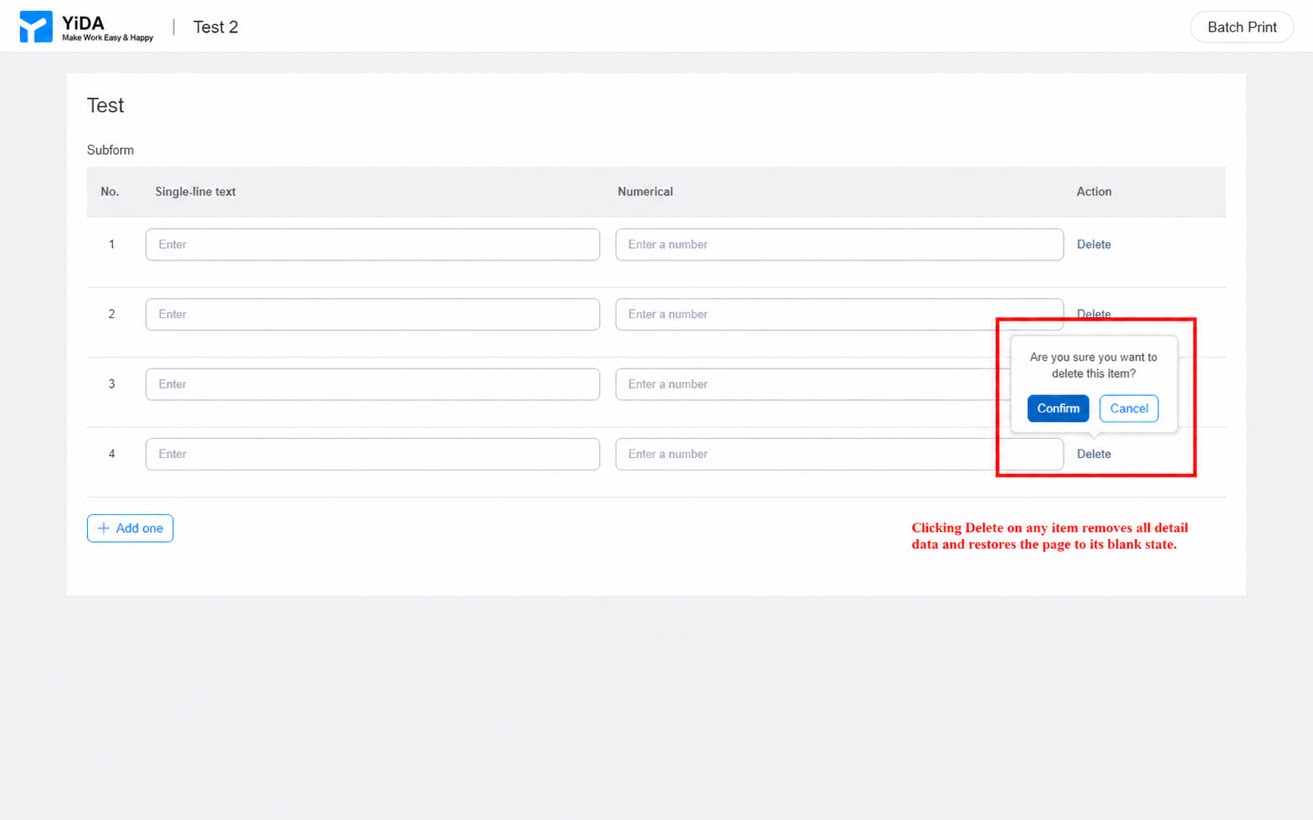
5.1 How do I batch delete records in a subform?
5.1 How do I batch delete records in a subform?
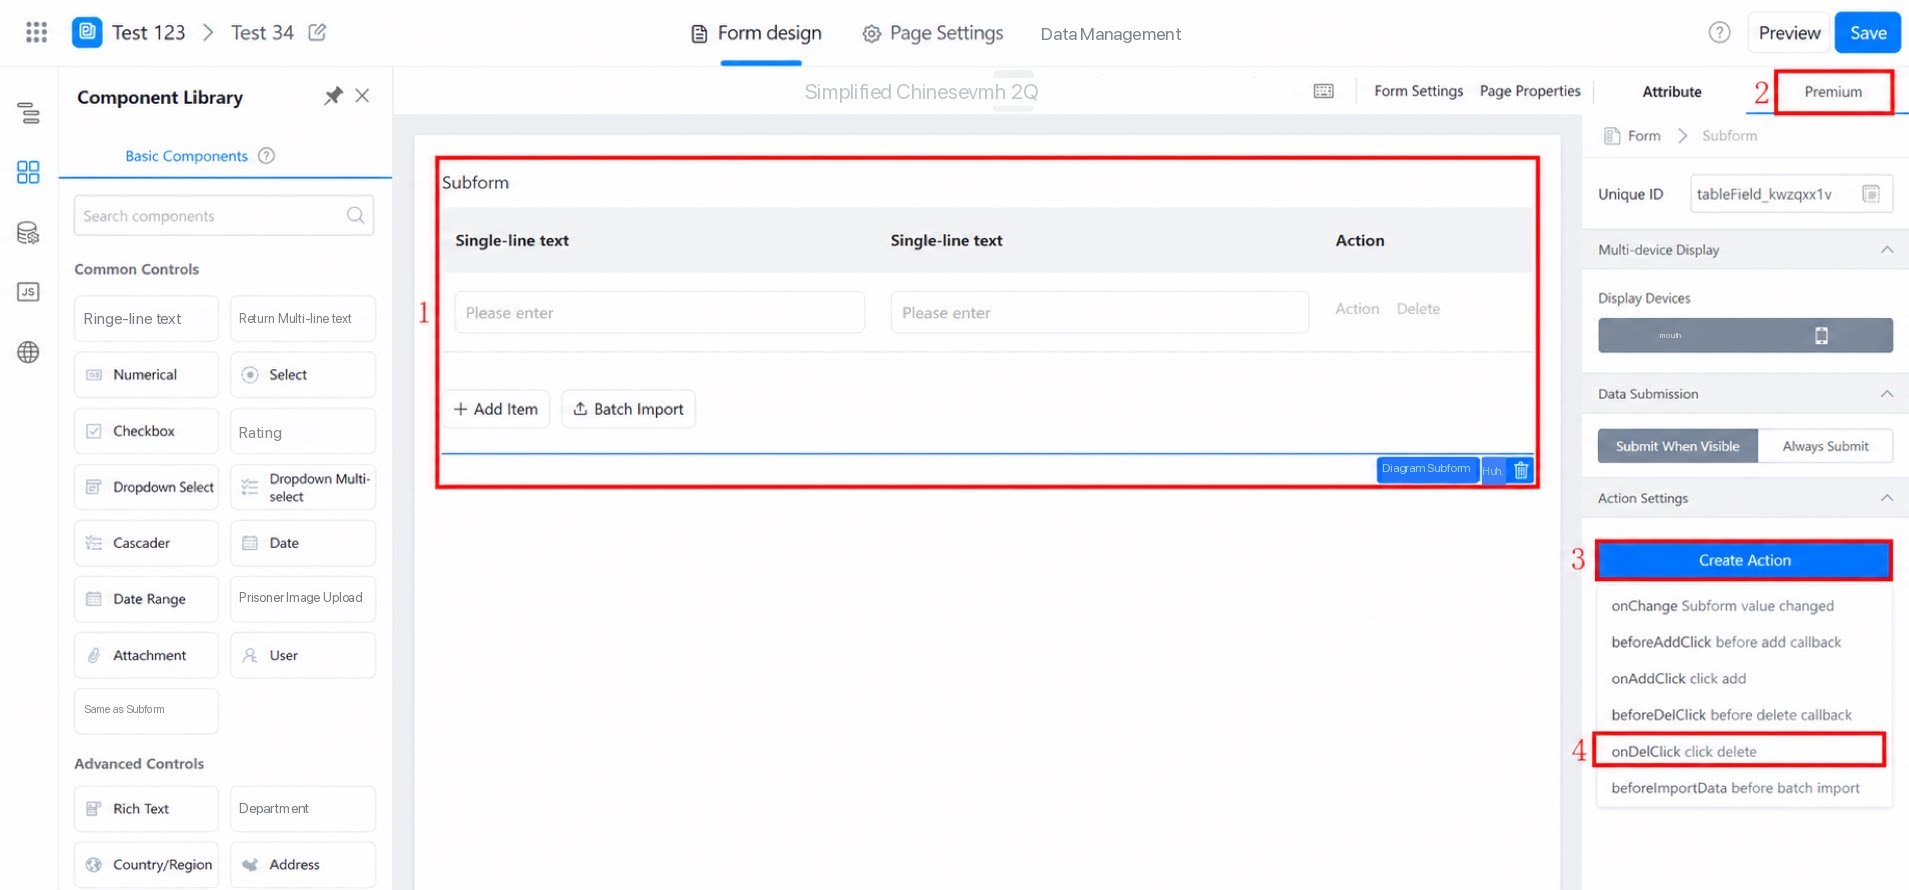
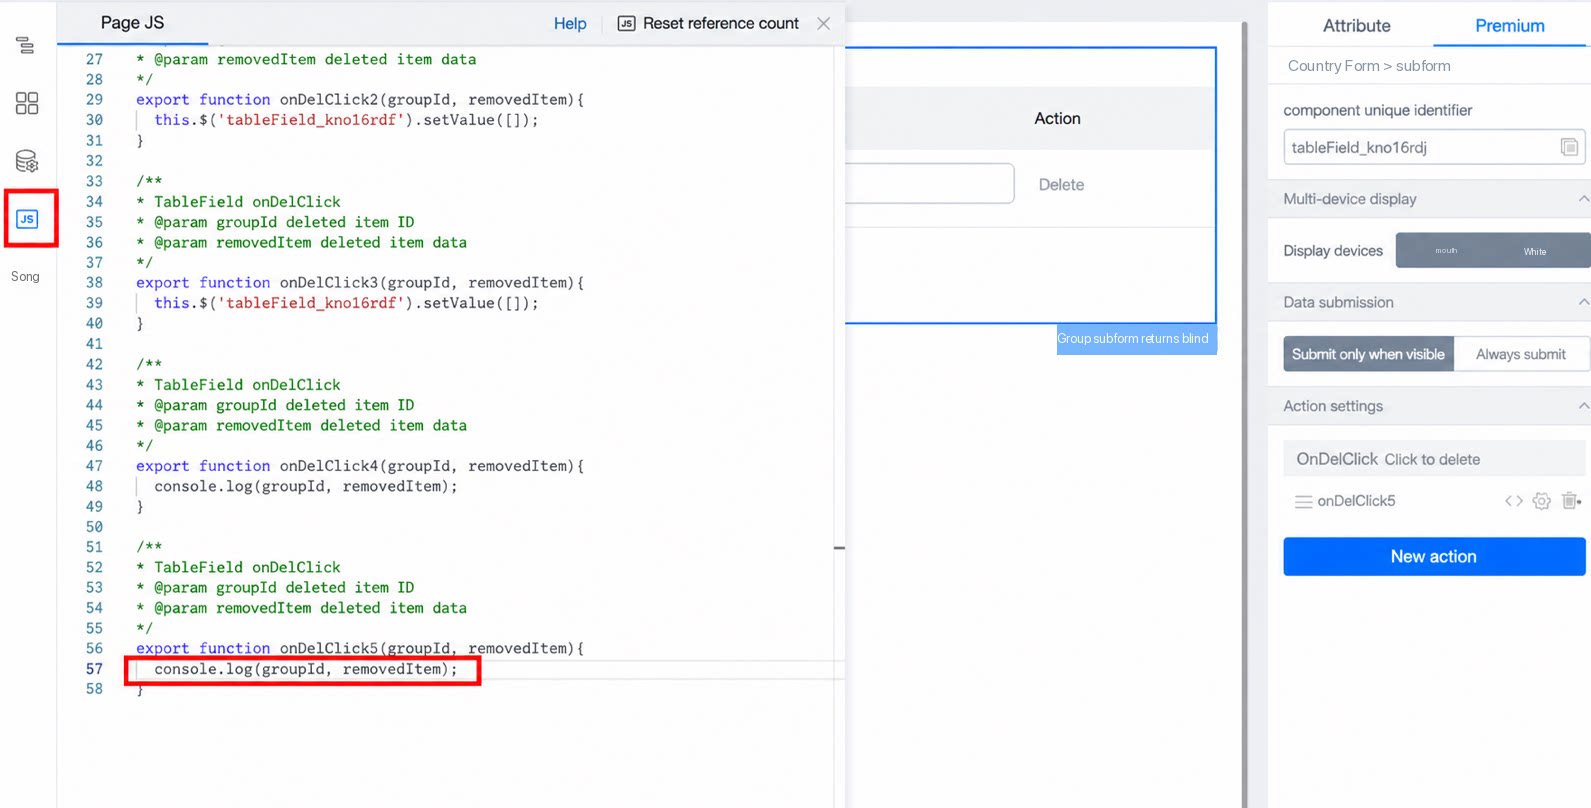
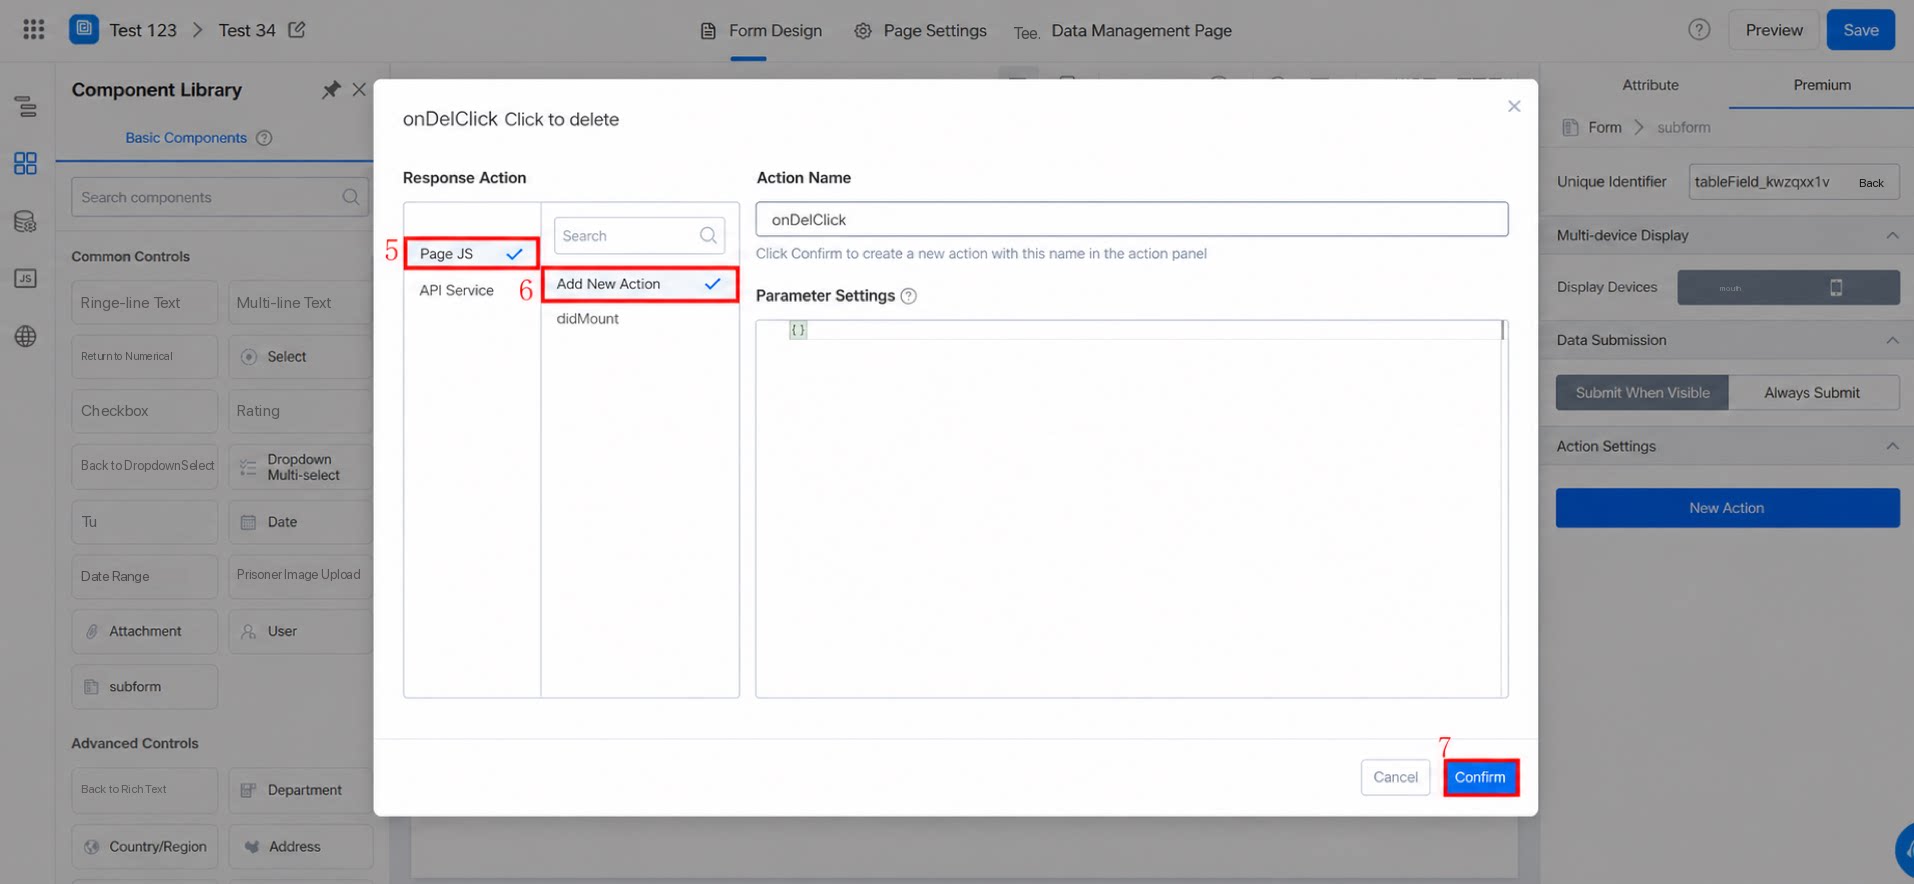
5.2 How do I get the value of a specific component inside a subform?
5.2 How do I get the value of a specific component inside a subform?
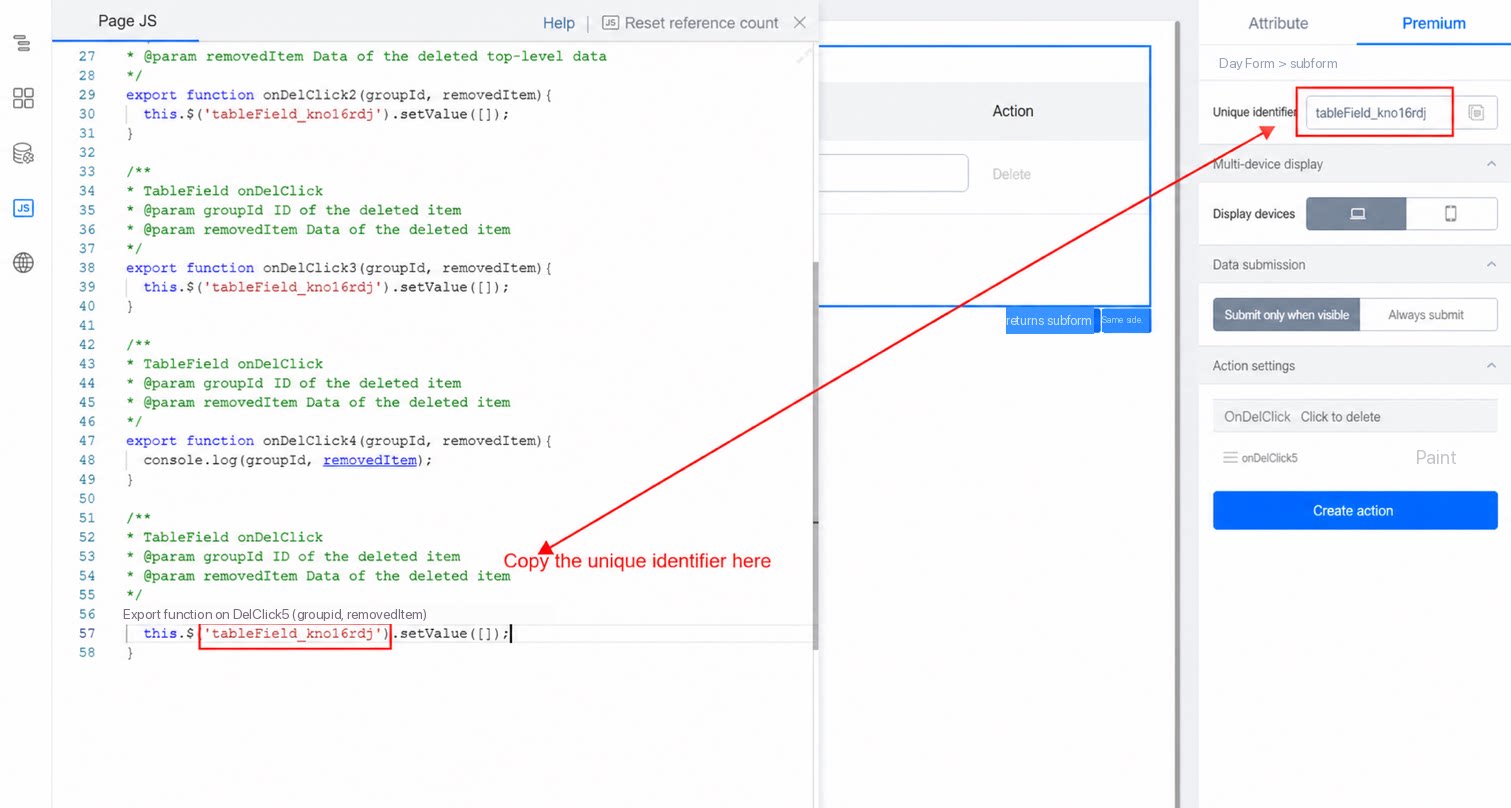
5.3 Subform associated with a subform & subform assignment
5.3 Subform associated with a subform & subform assignment
5.4 Subform data export & report analysis on subform data
5.4 Subform data export & report analysis on subform data
5.5 If I set up a redirect function in a subform, can the button that runs the function be hidden after being clicked once?
5.5 If I set up a redirect function in a subform, can the button that runs the function be hidden after being clicked once?
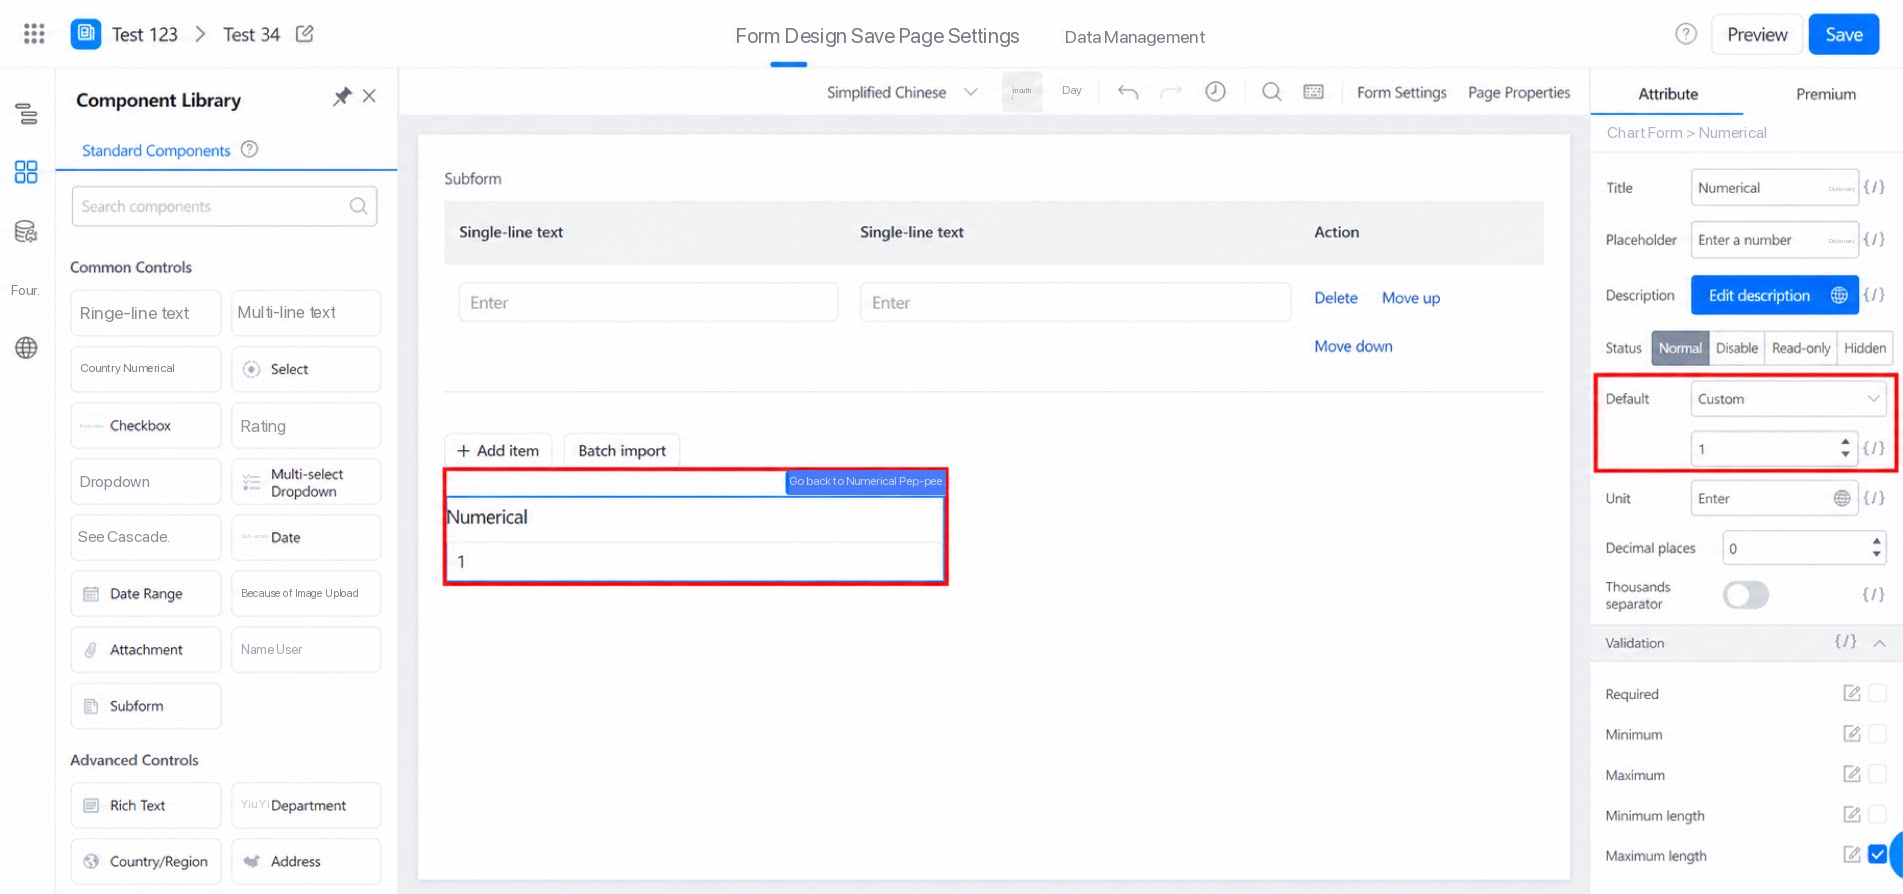
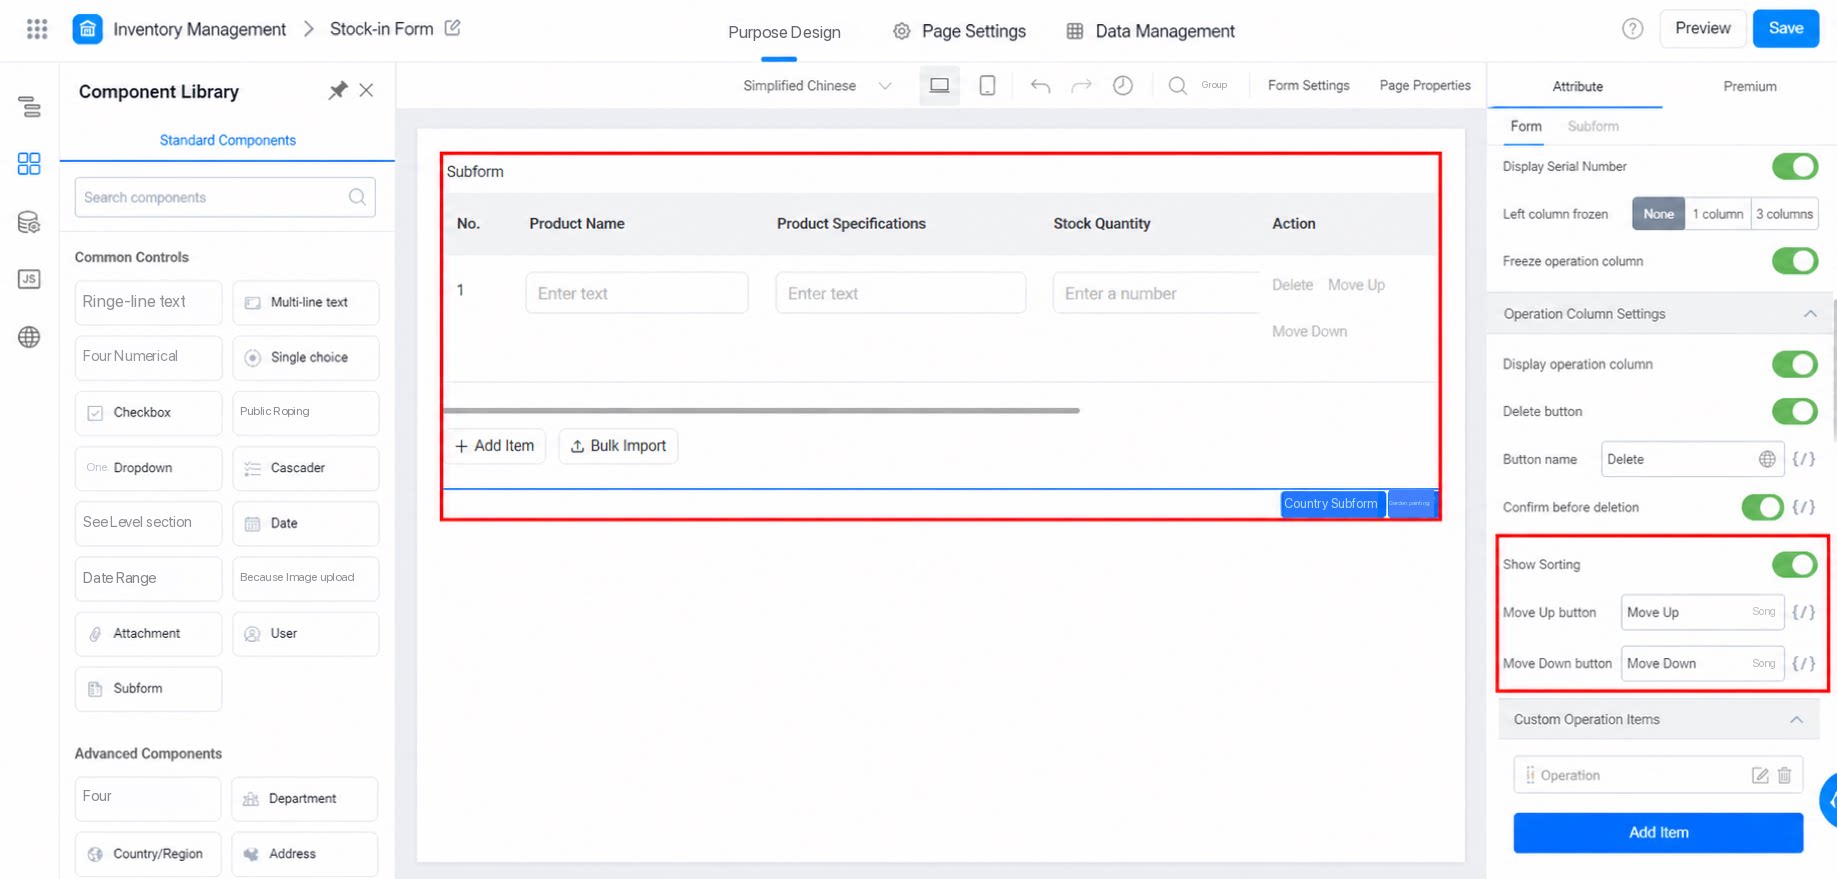
5.6 How do I set up the move up/down buttons for a subform?
5.6 How do I set up the move up/down buttons for a subform?
5.7 Can I validate the uniqueness of one row of text in a Multi-line text component within a subform?
5.7 Can I validate the uniqueness of one row of text in a Multi-line text component within a subform?
5.8 How do I automatically get the total number of records in a subform?
5.8 How do I automatically get the total number of records in a subform?
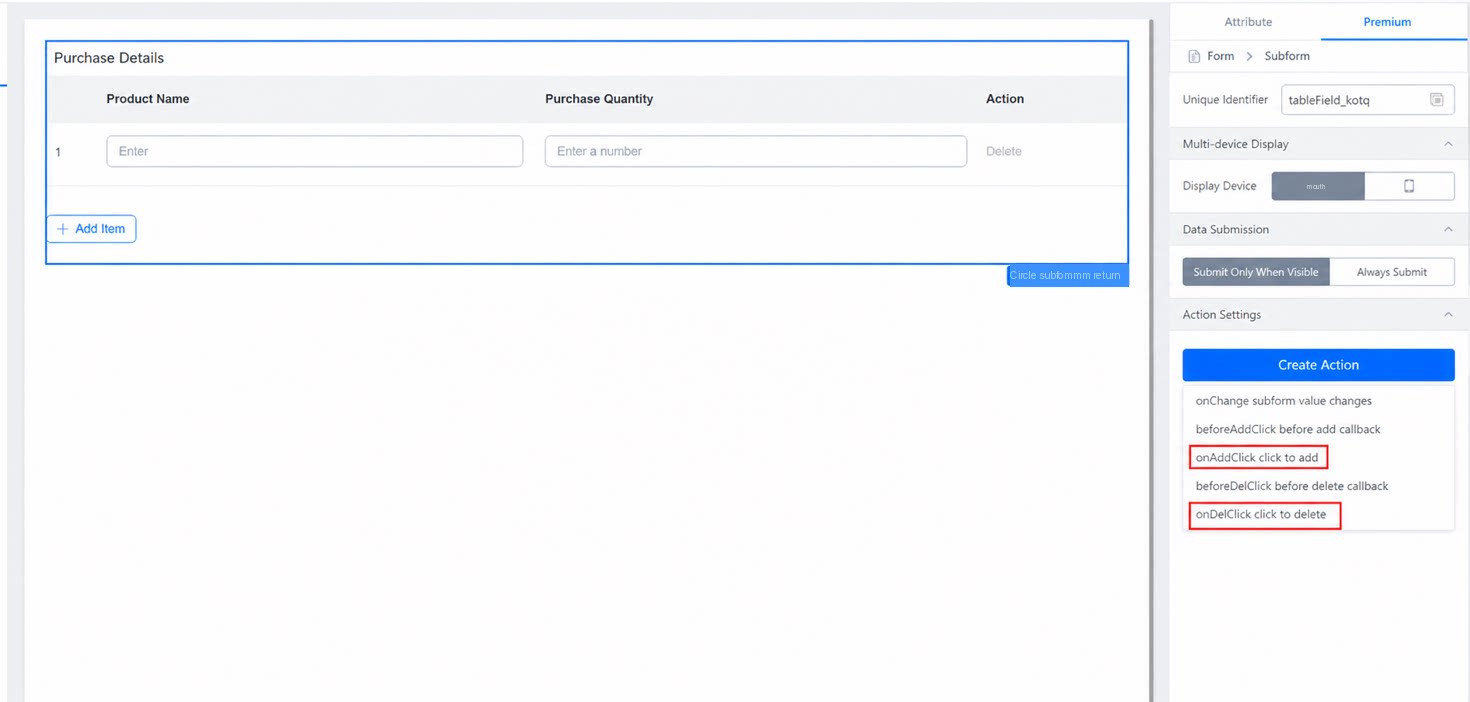
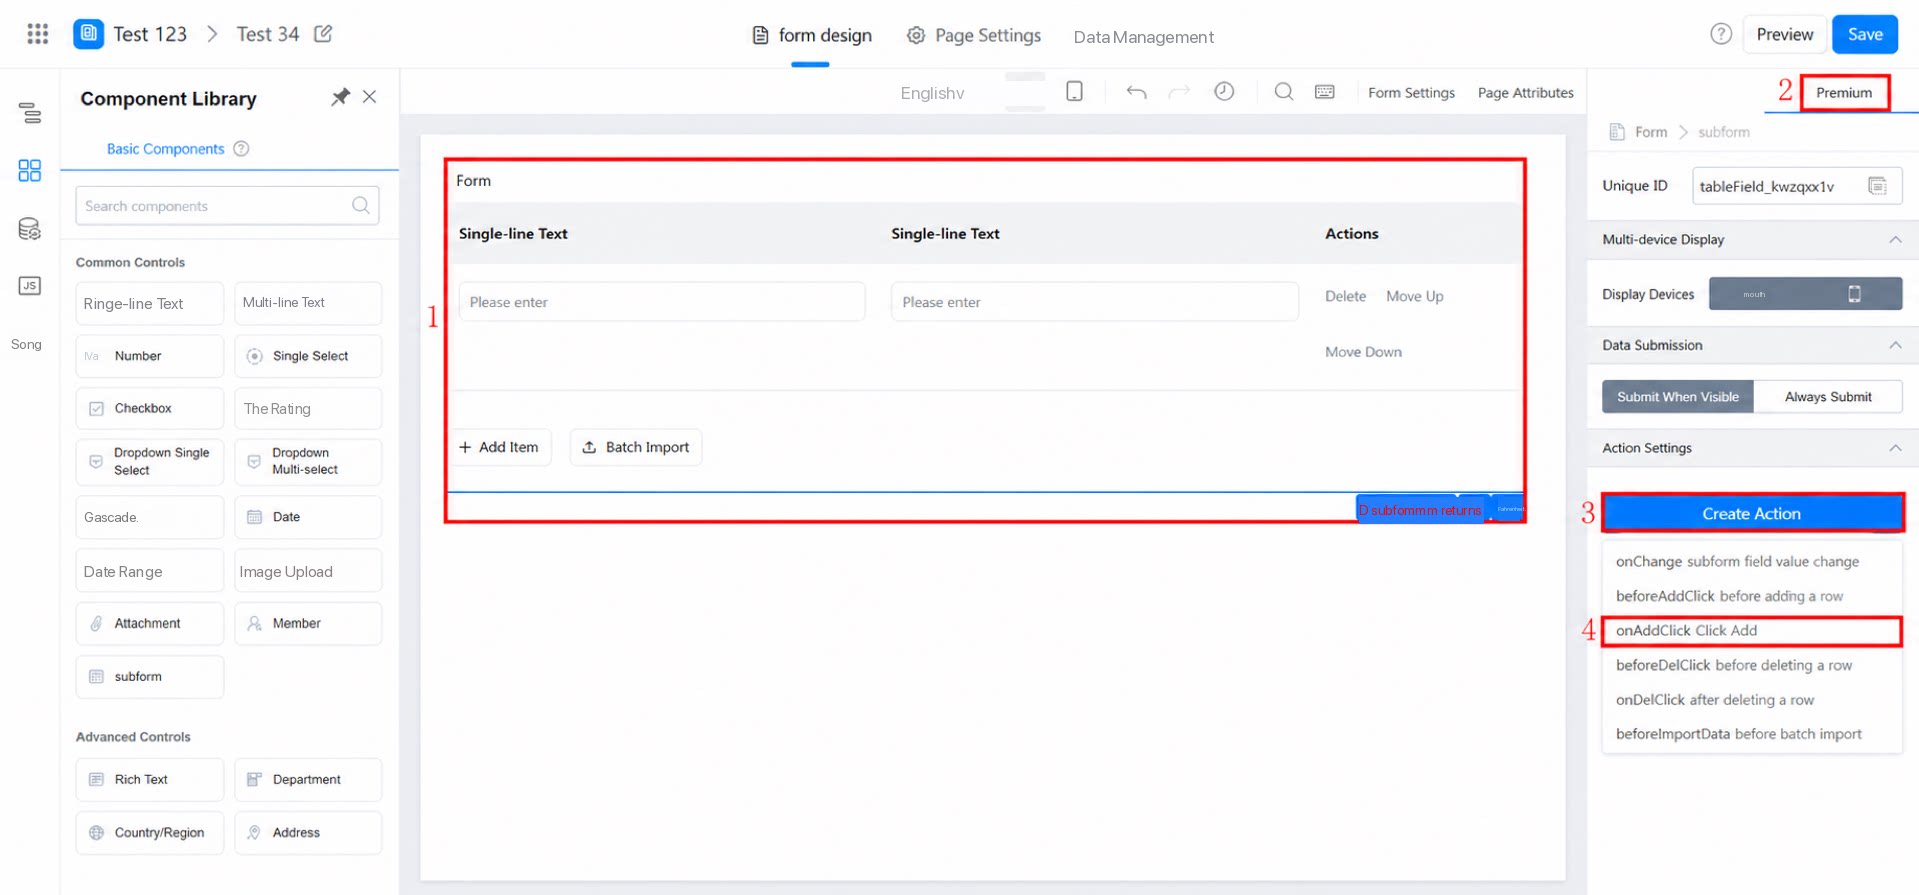
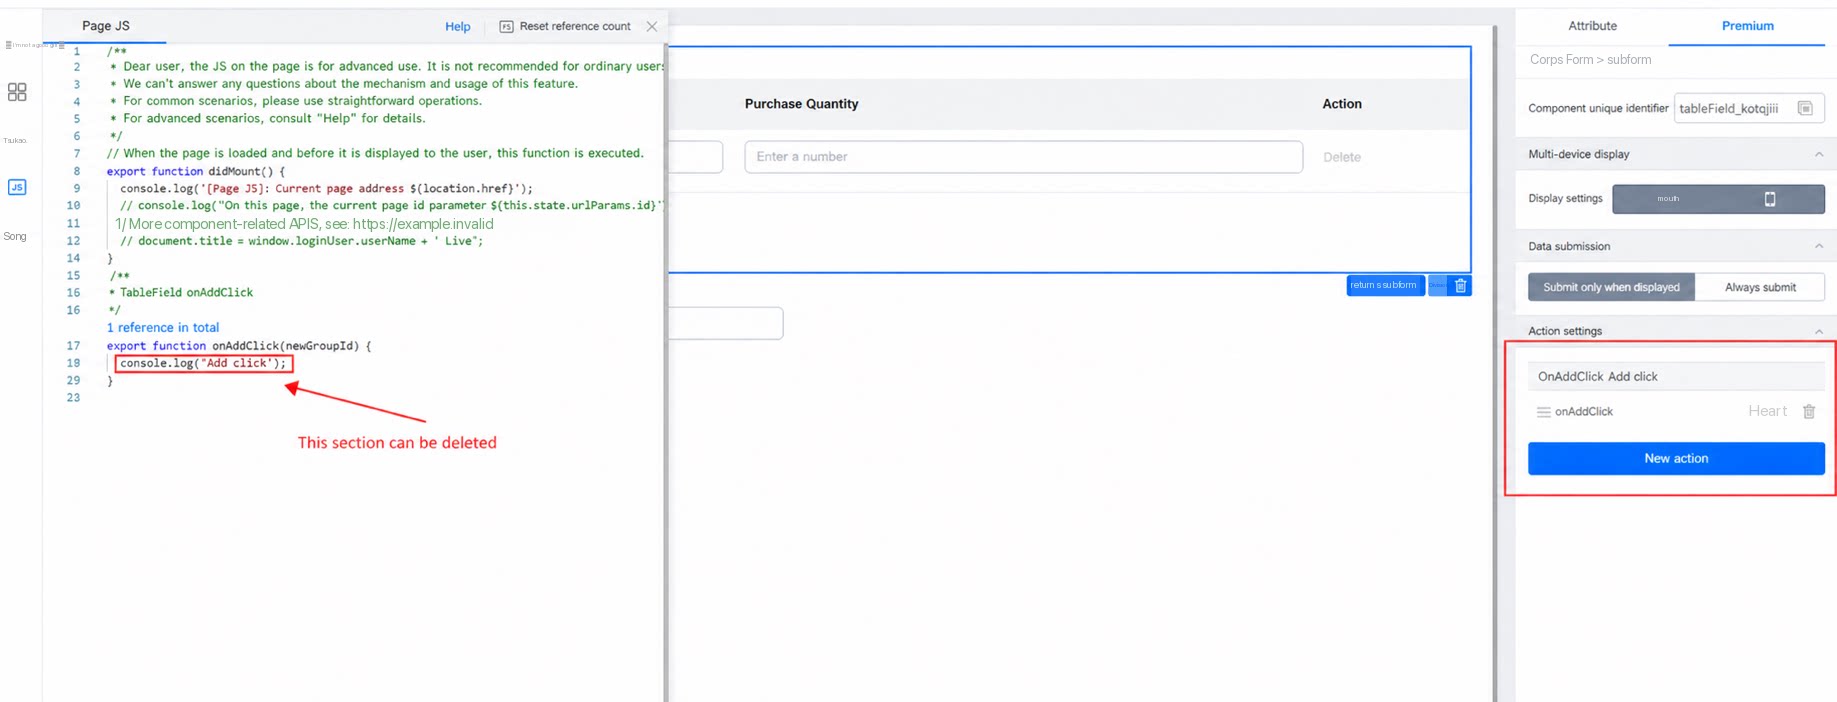
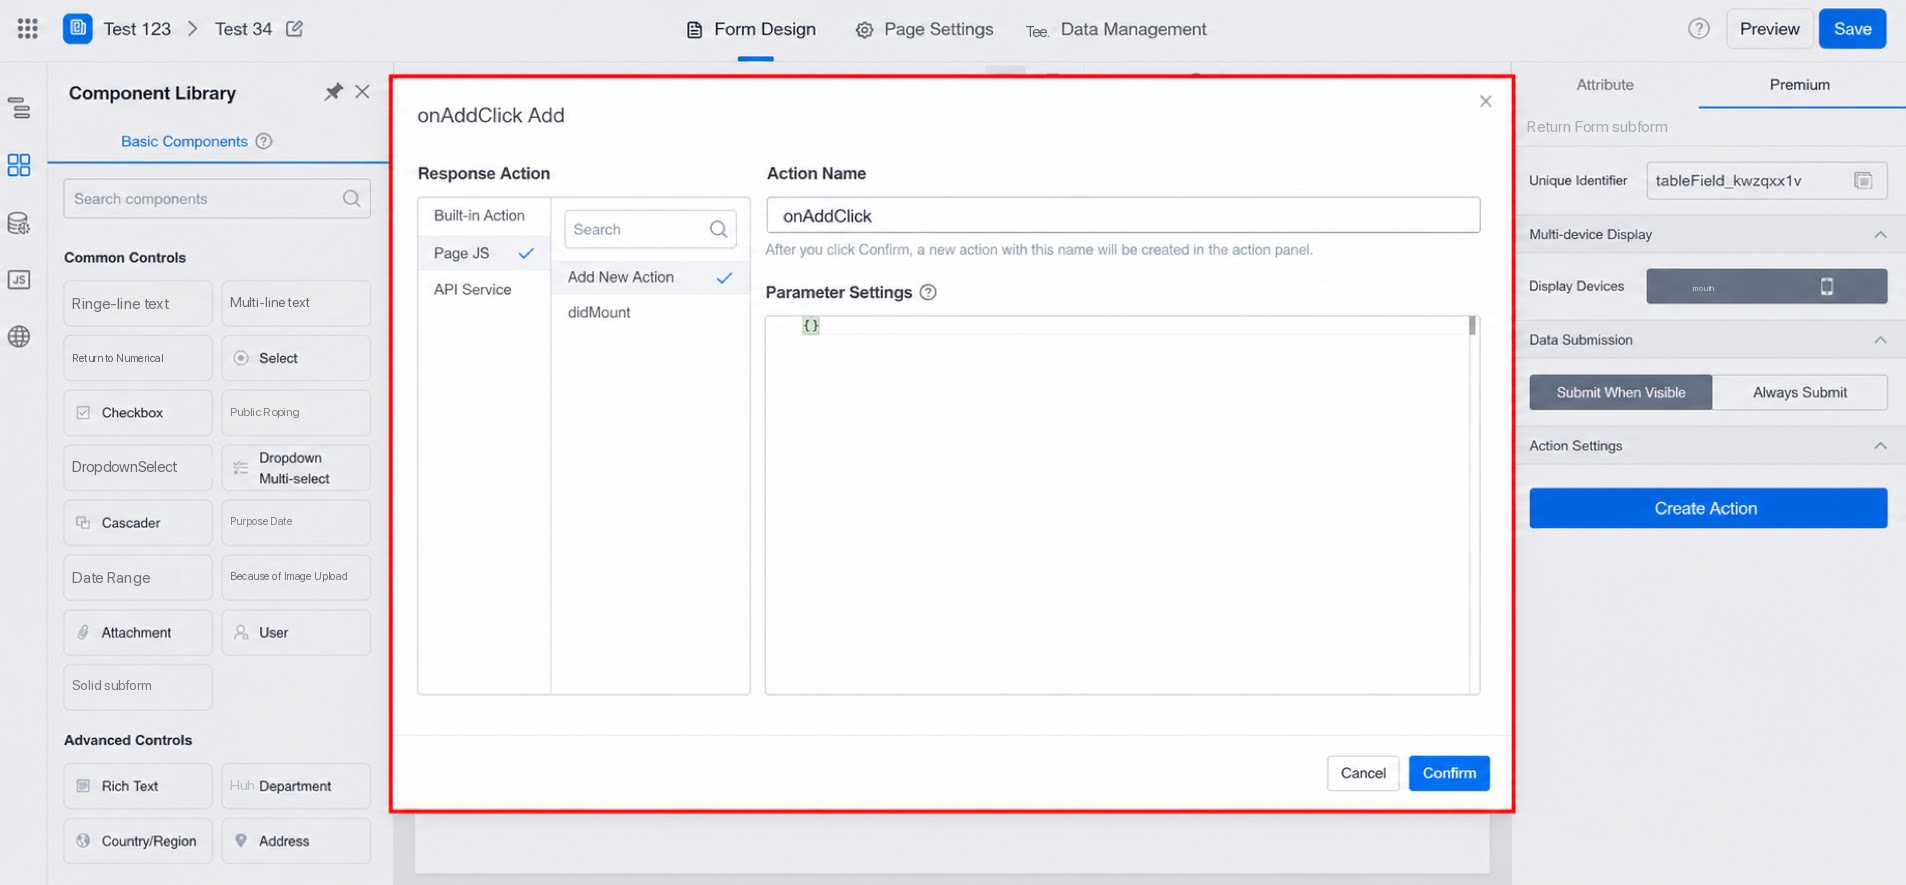
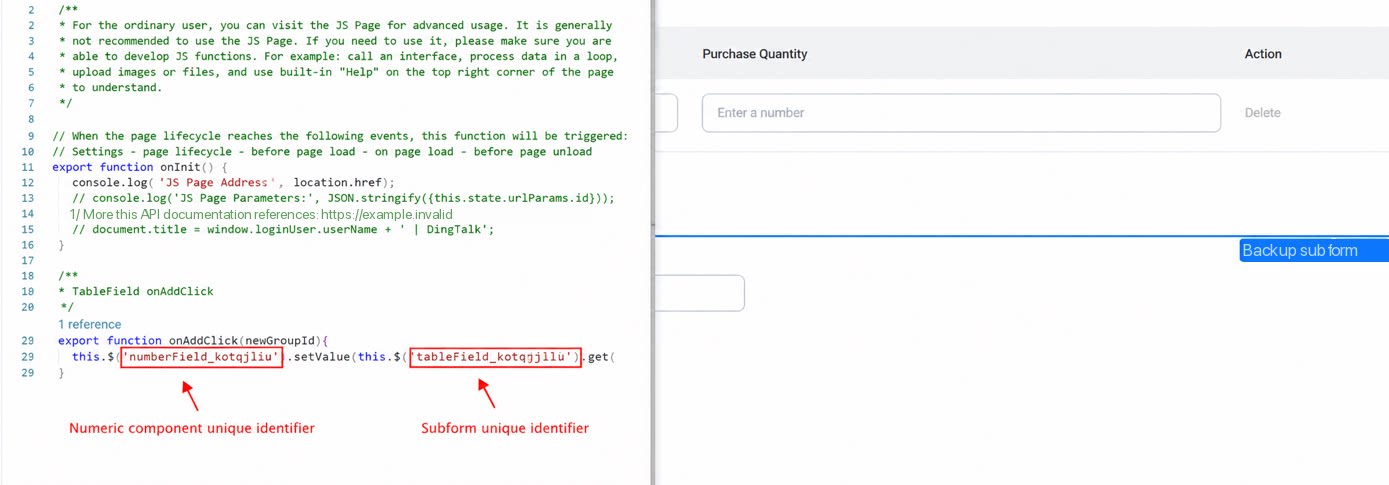
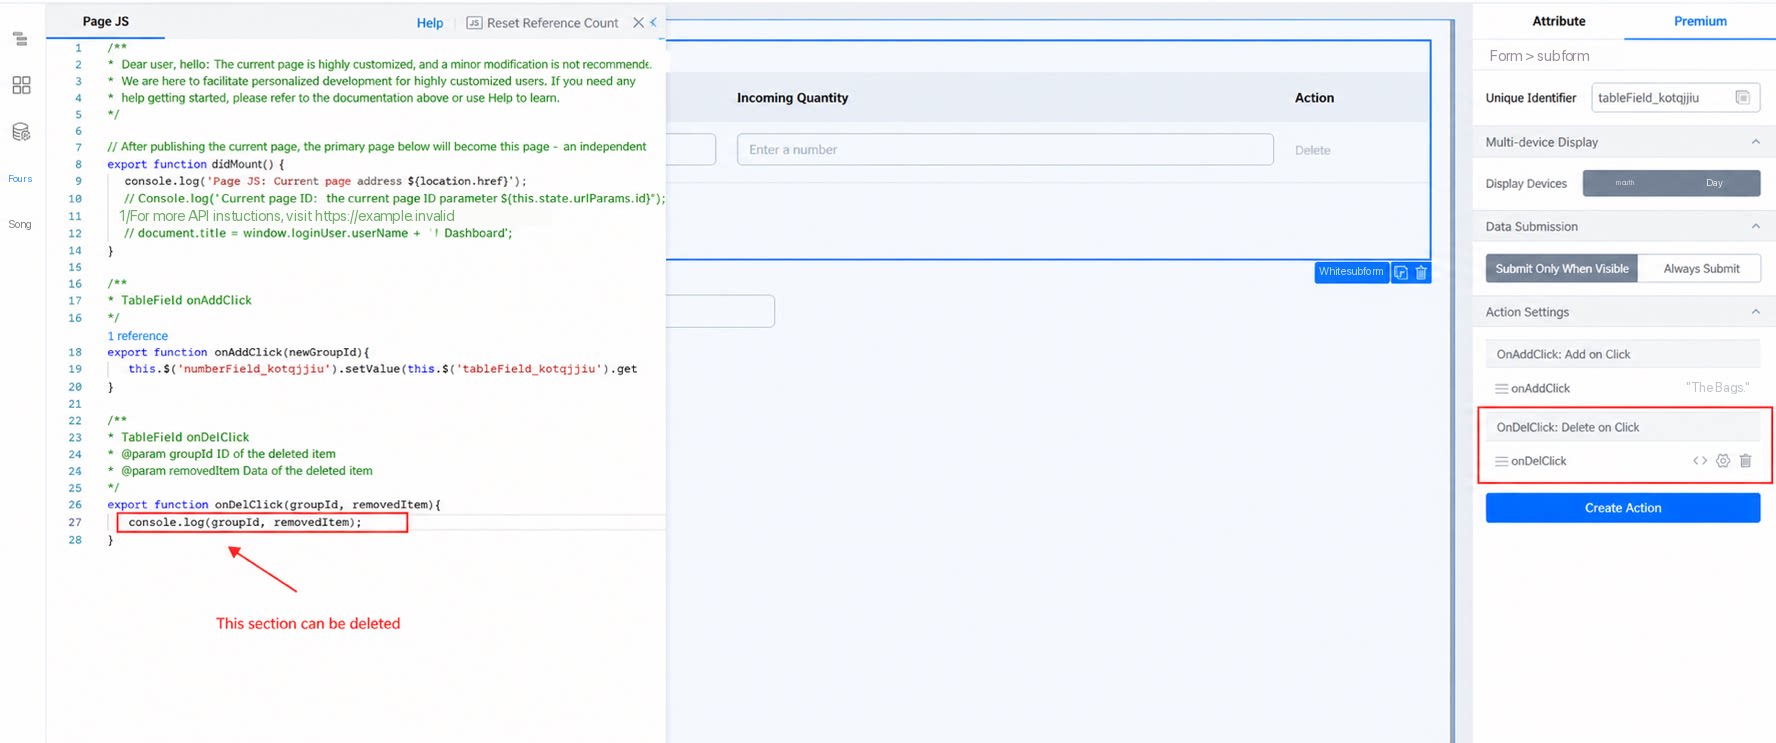
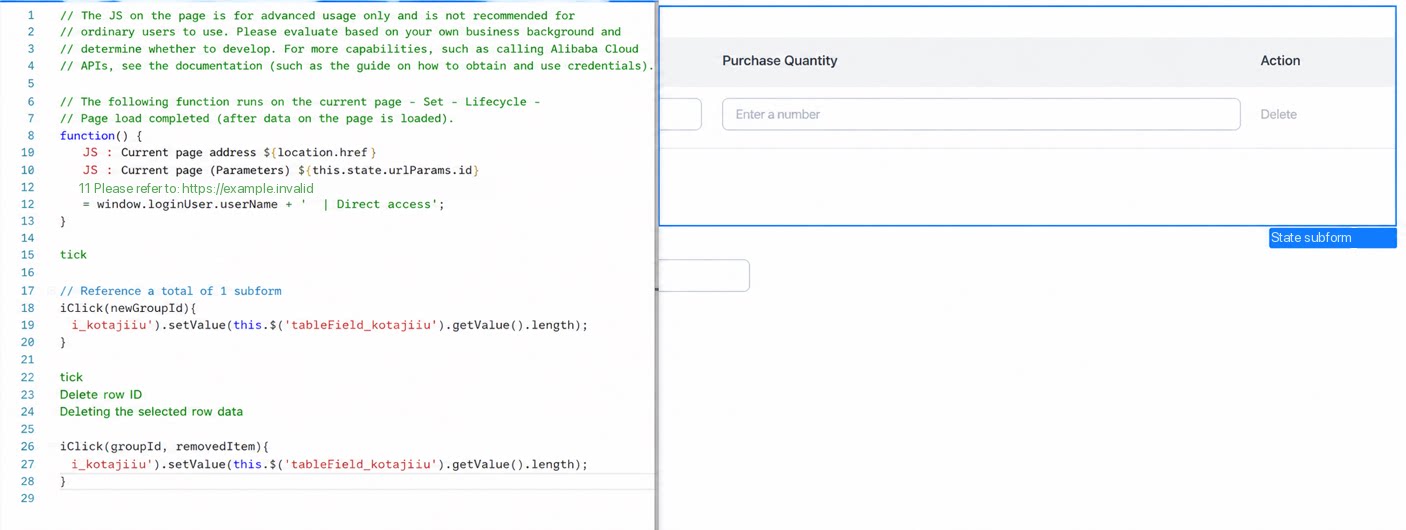
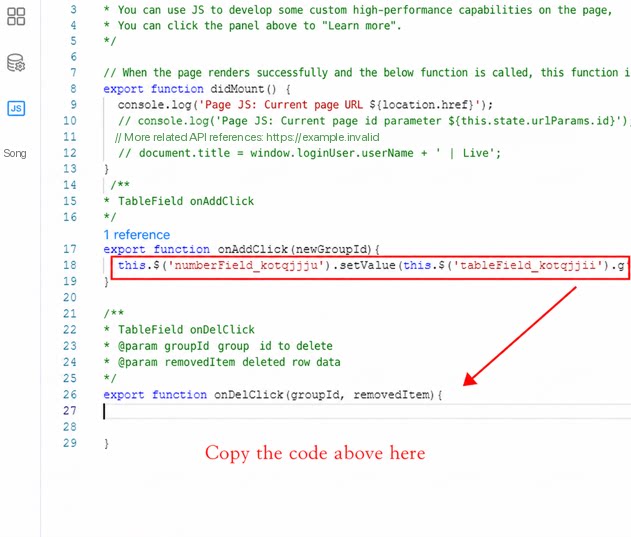
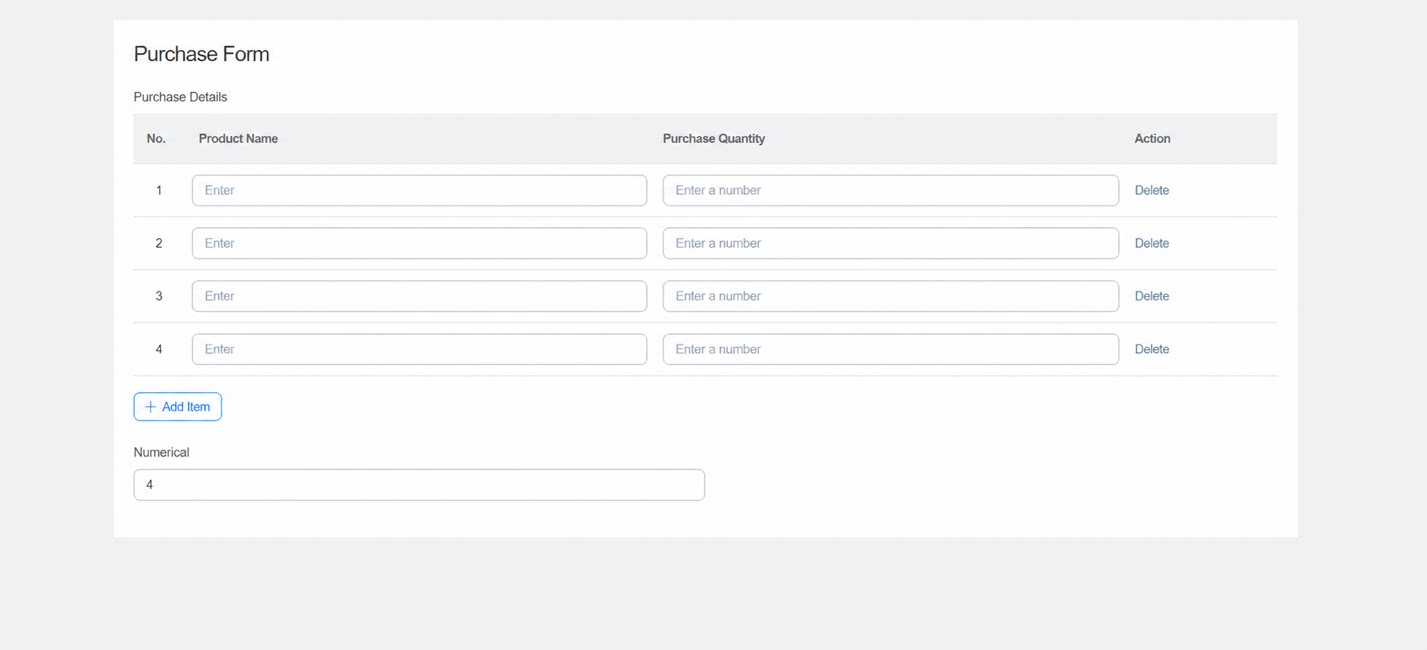
5.9 How do I control the number of subform records with a variable?
5.9 How do I control the number of subform records with a variable?
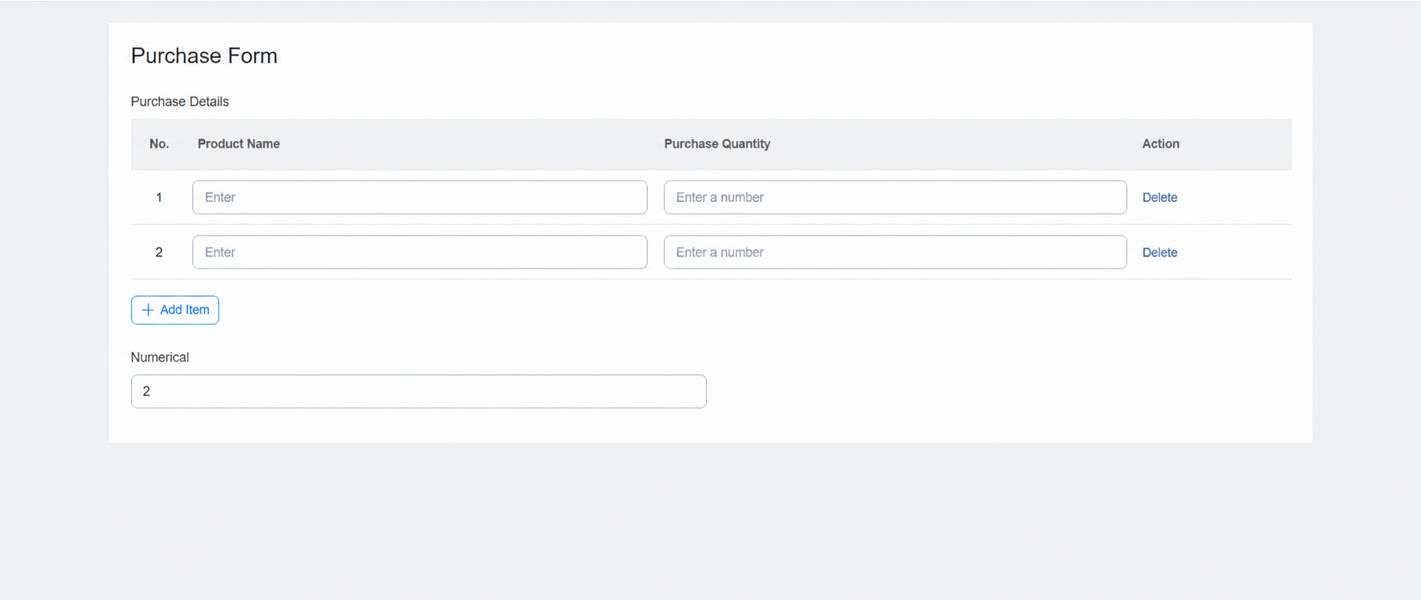
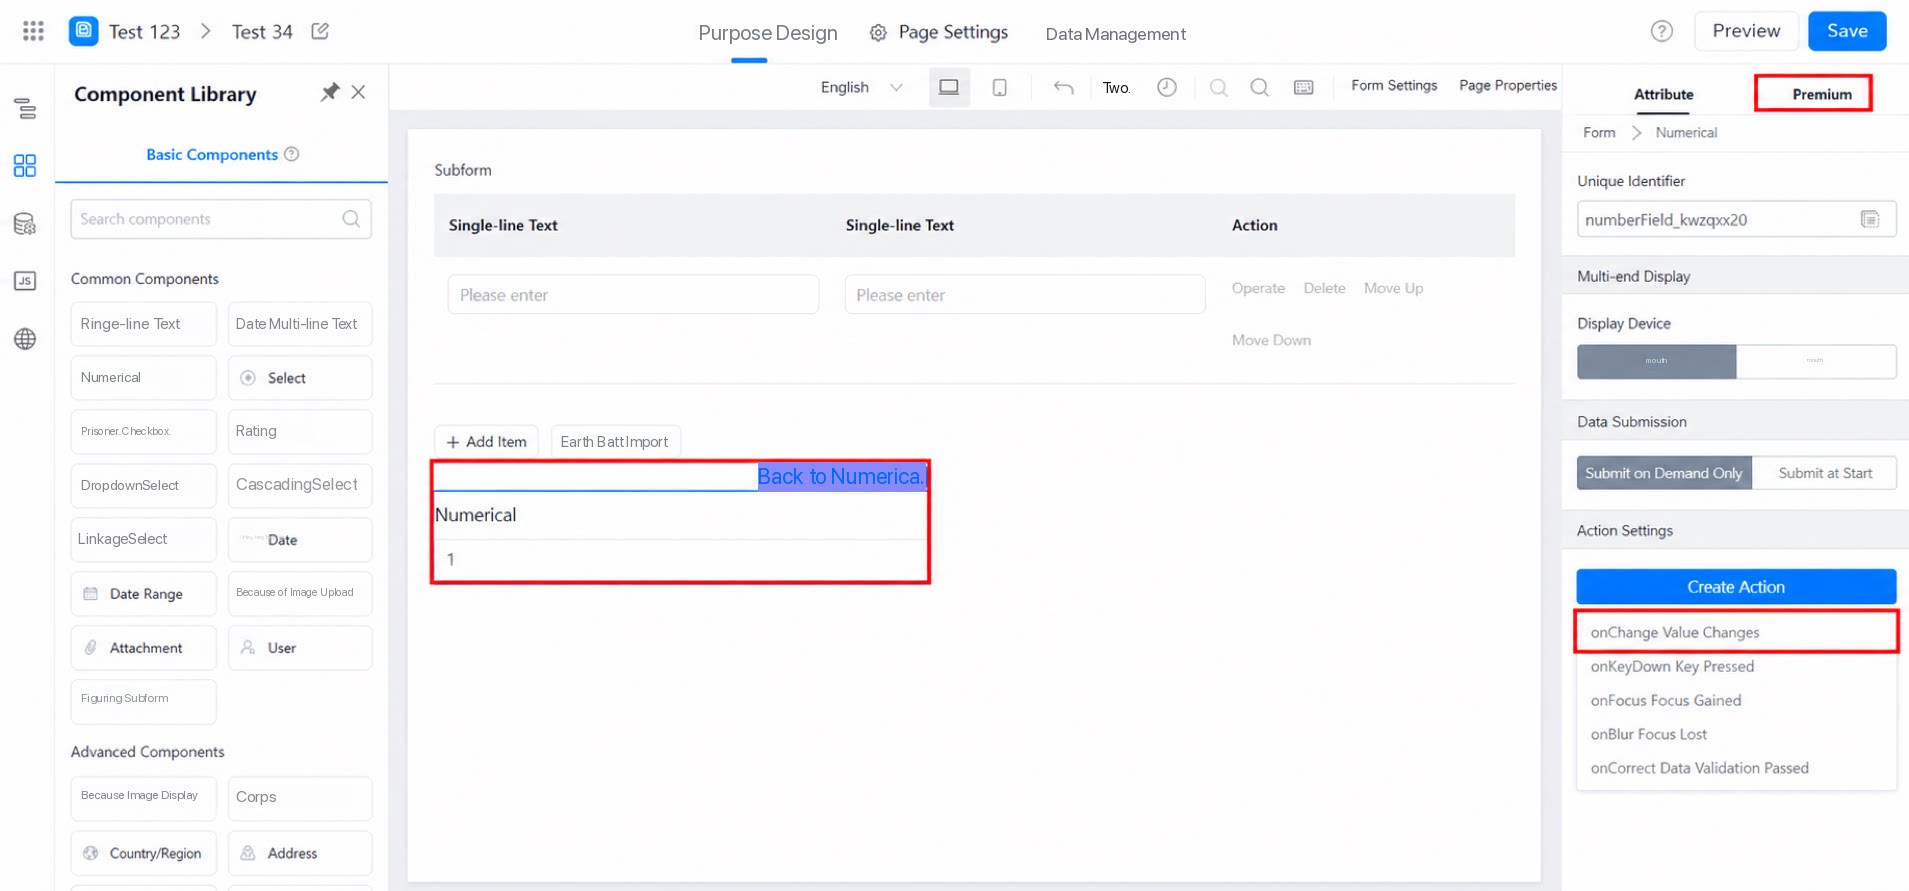
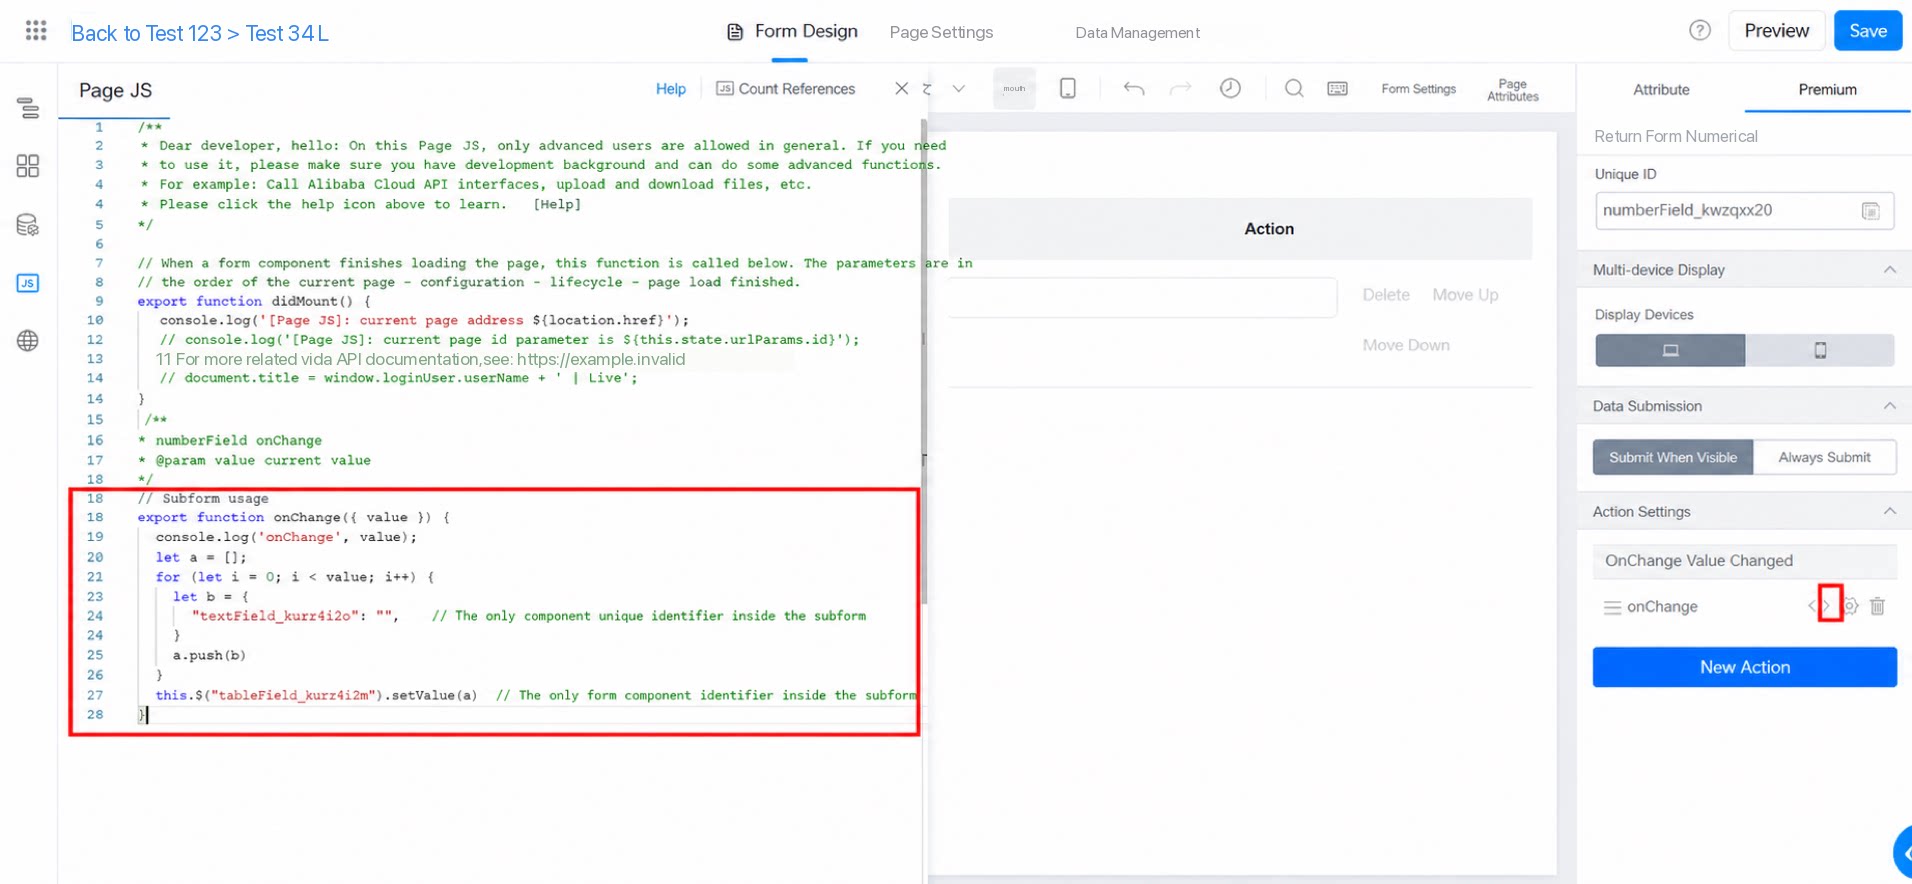
5.10 A Hidden Component in a Subform Returns Null
When processing a subform, thevalue of a hidden attribute is reset. It is configured as null, so assigning a hidden-state subform to another subform returns null.
5.11 How do I control the show/hide state of subform components based on the value of a main form field?
5.11 How do I control the show/hide state of subform components based on the value of a main form field?
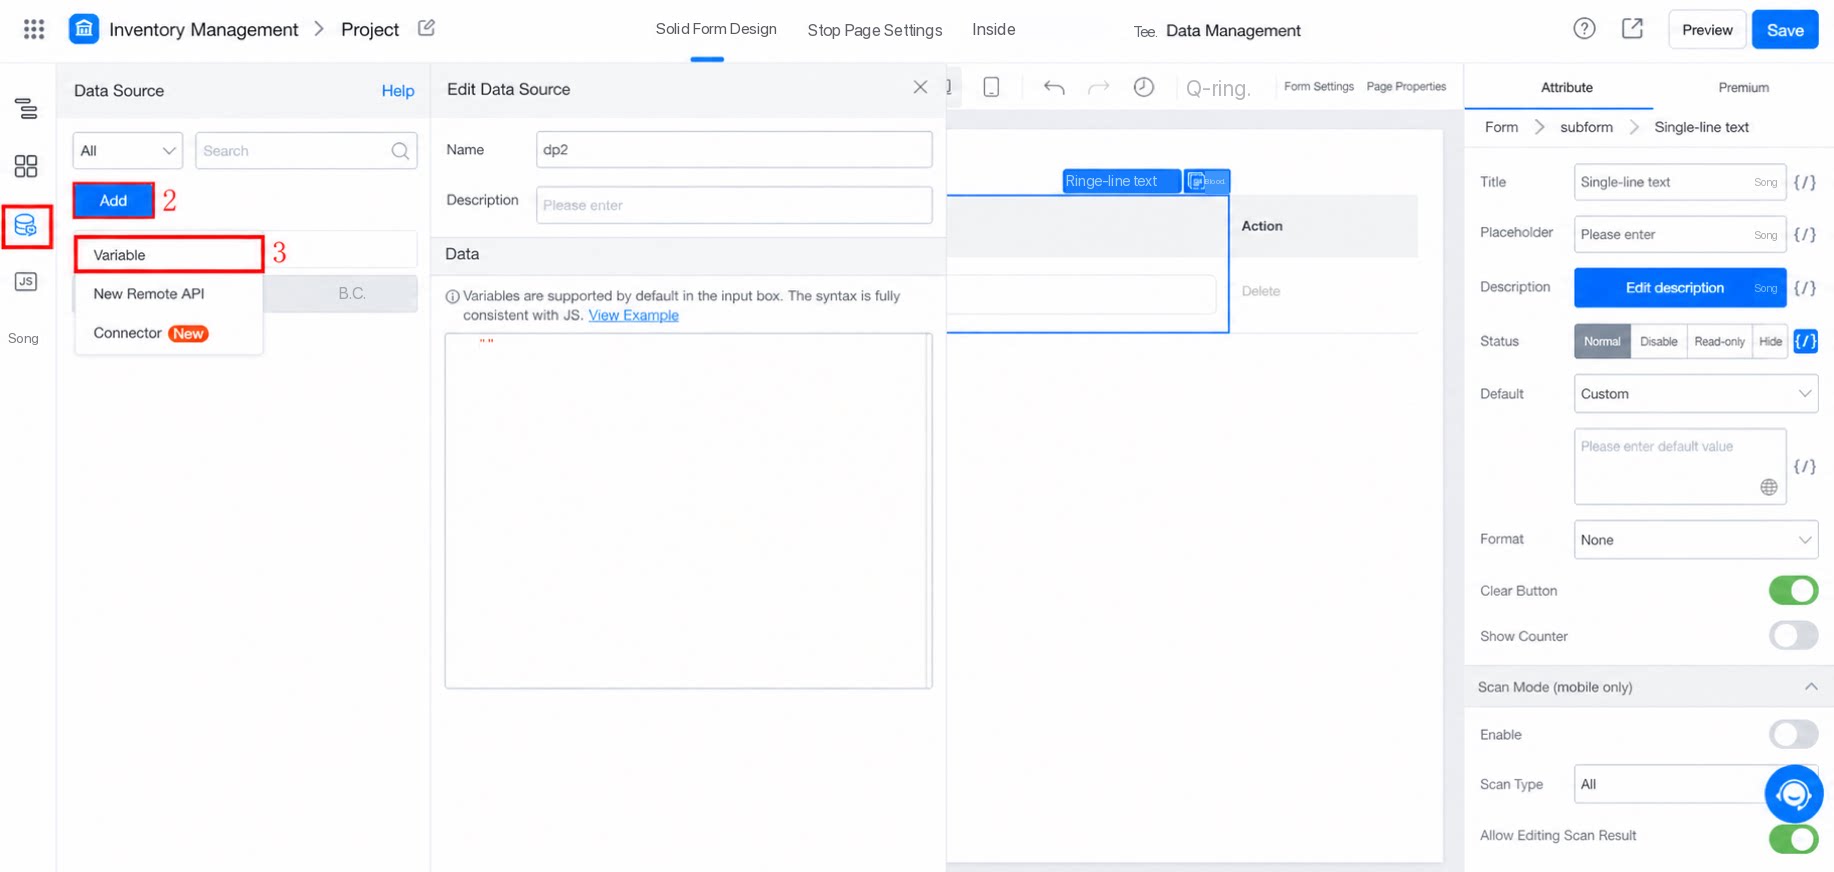
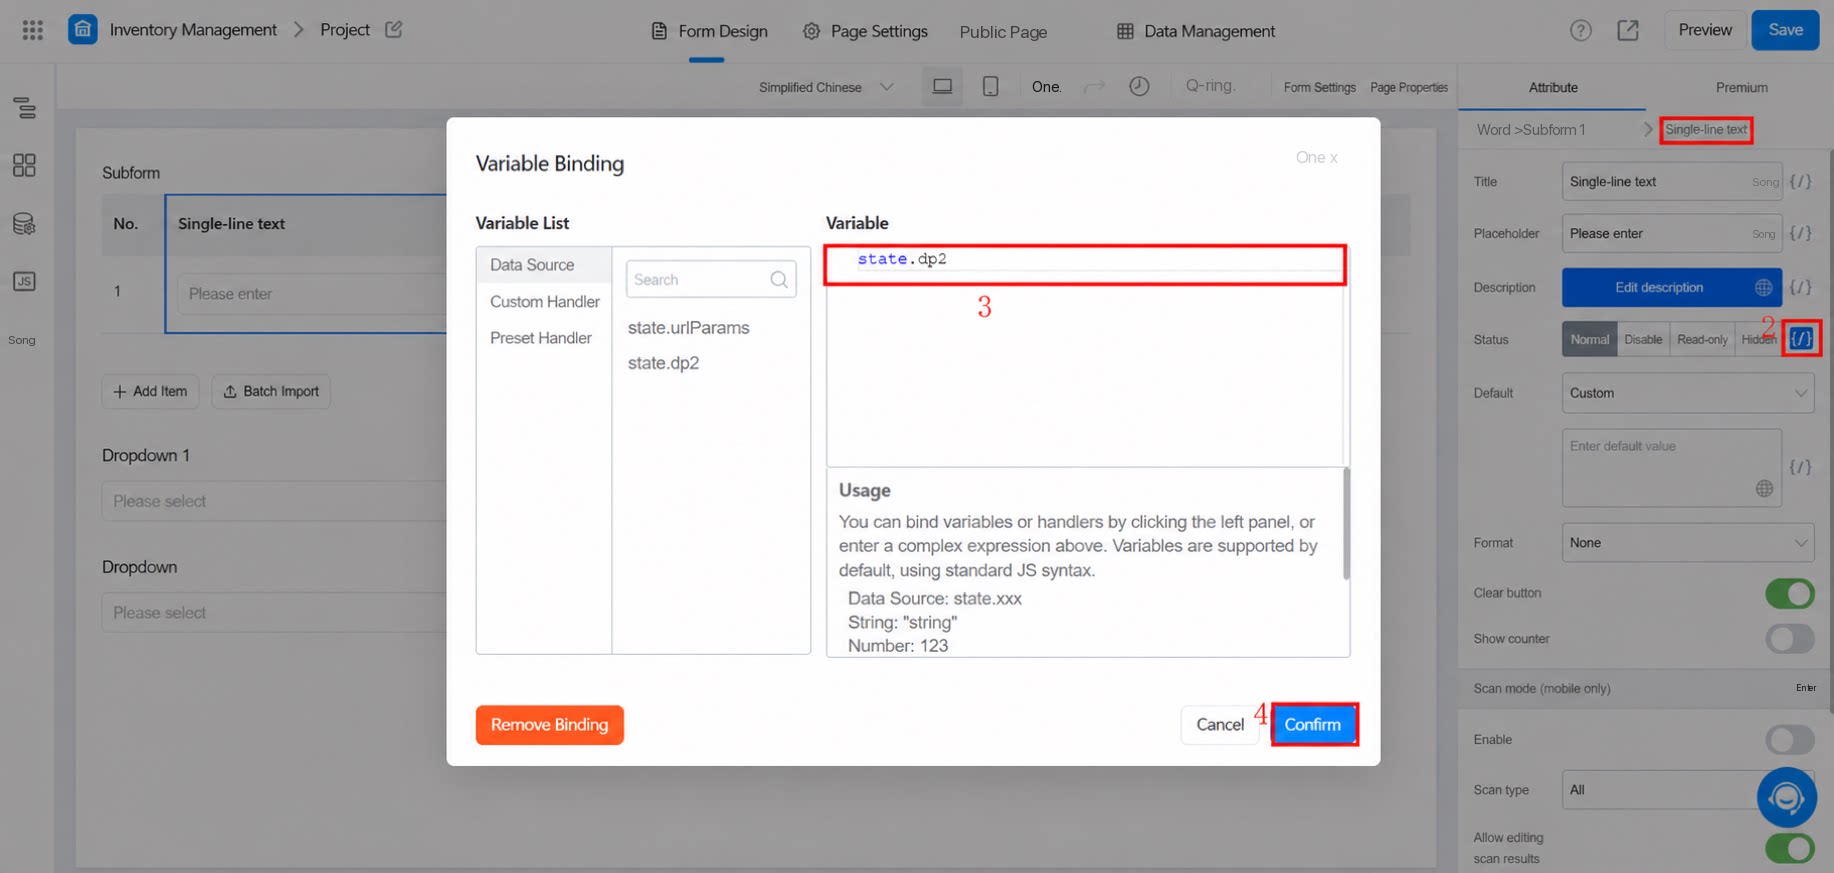
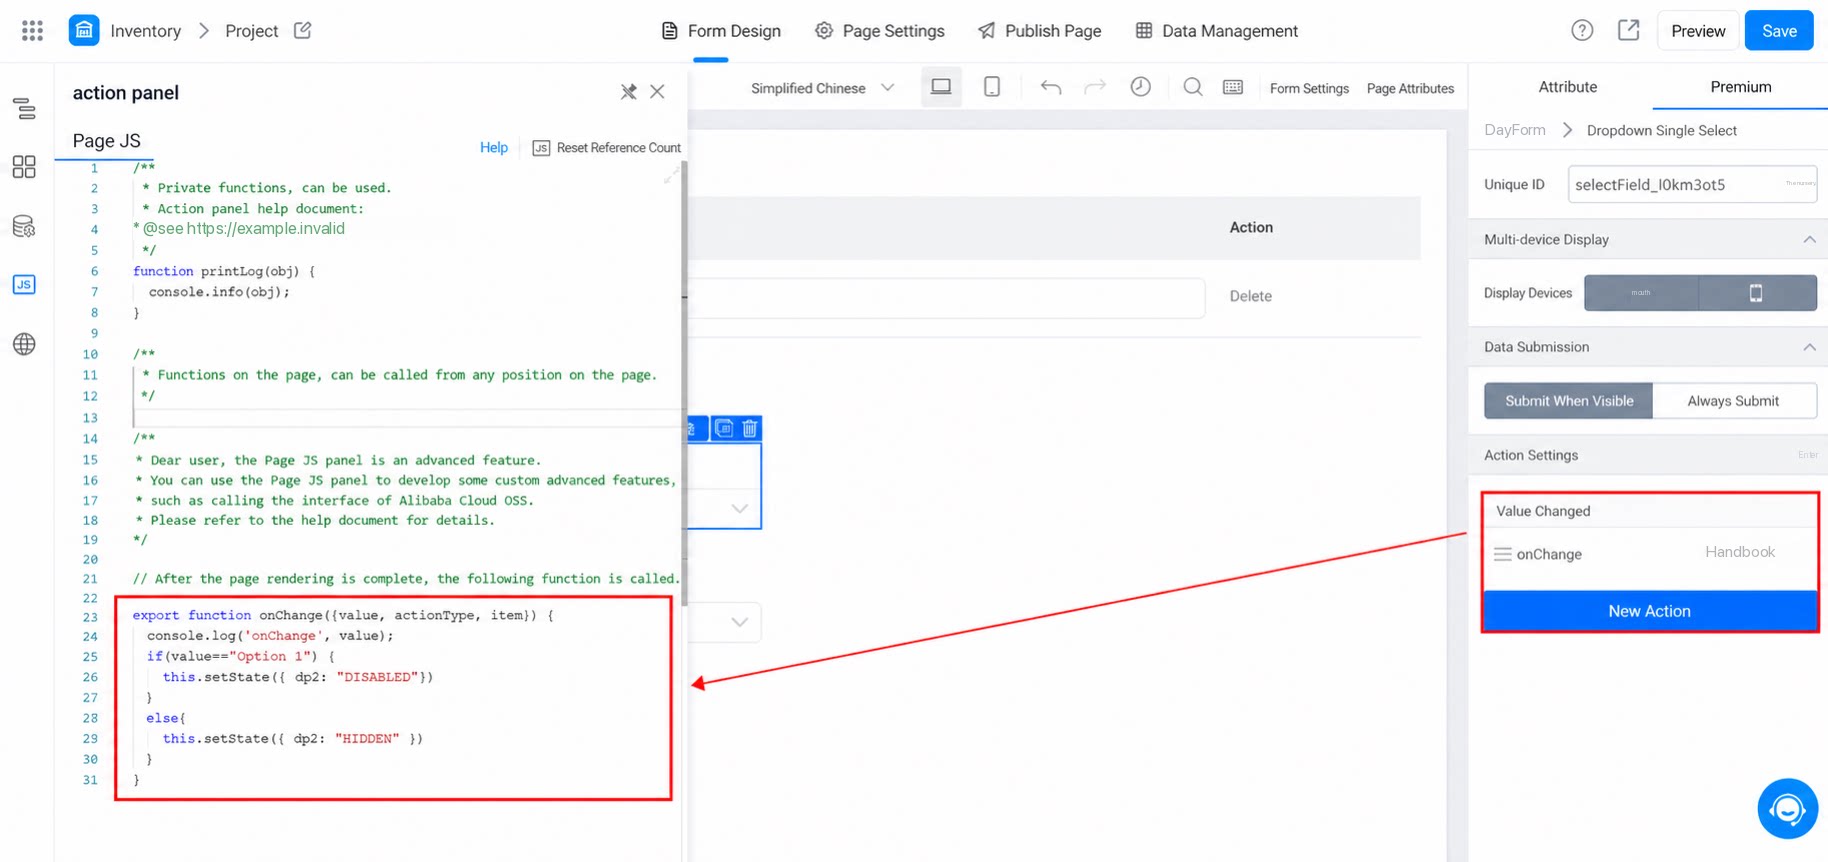
5.12 How do I populate a Multiselect member component in the main form into multiple records in a subform?
5.12 How do I populate a Multiselect member component in the main form into multiple records in a subform?
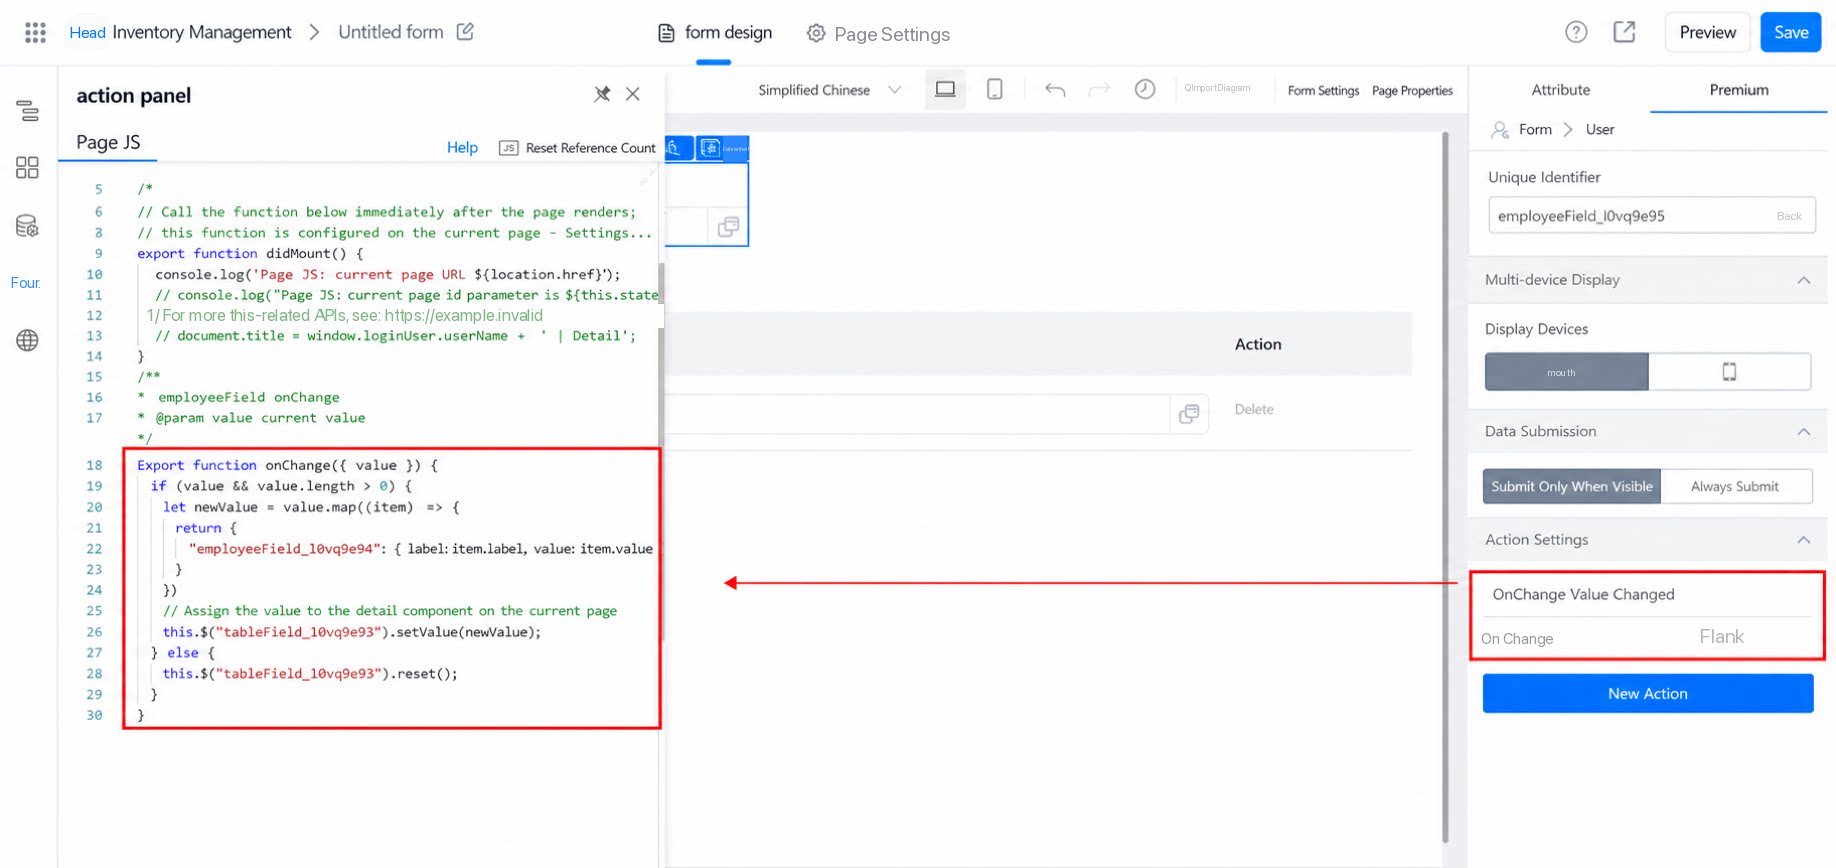
5.13 How many component fields can be placed in a single subform?
5.13 How many component fields can be placed in a single subform?
5.11 How Do I Get Subform Data
Use the common component APIgetValue to get subform data.
Sample code:
5.12 How Do I Get Subform Row Identifiers
Use the subform APIgetItems to get the subform row identifiers.
Sample code:
5.13 How Do I Get the Data of a Specific Row in a Subform
Use the subform APIgetItemValue to get the data of a specific row in the subform.
Sample code:
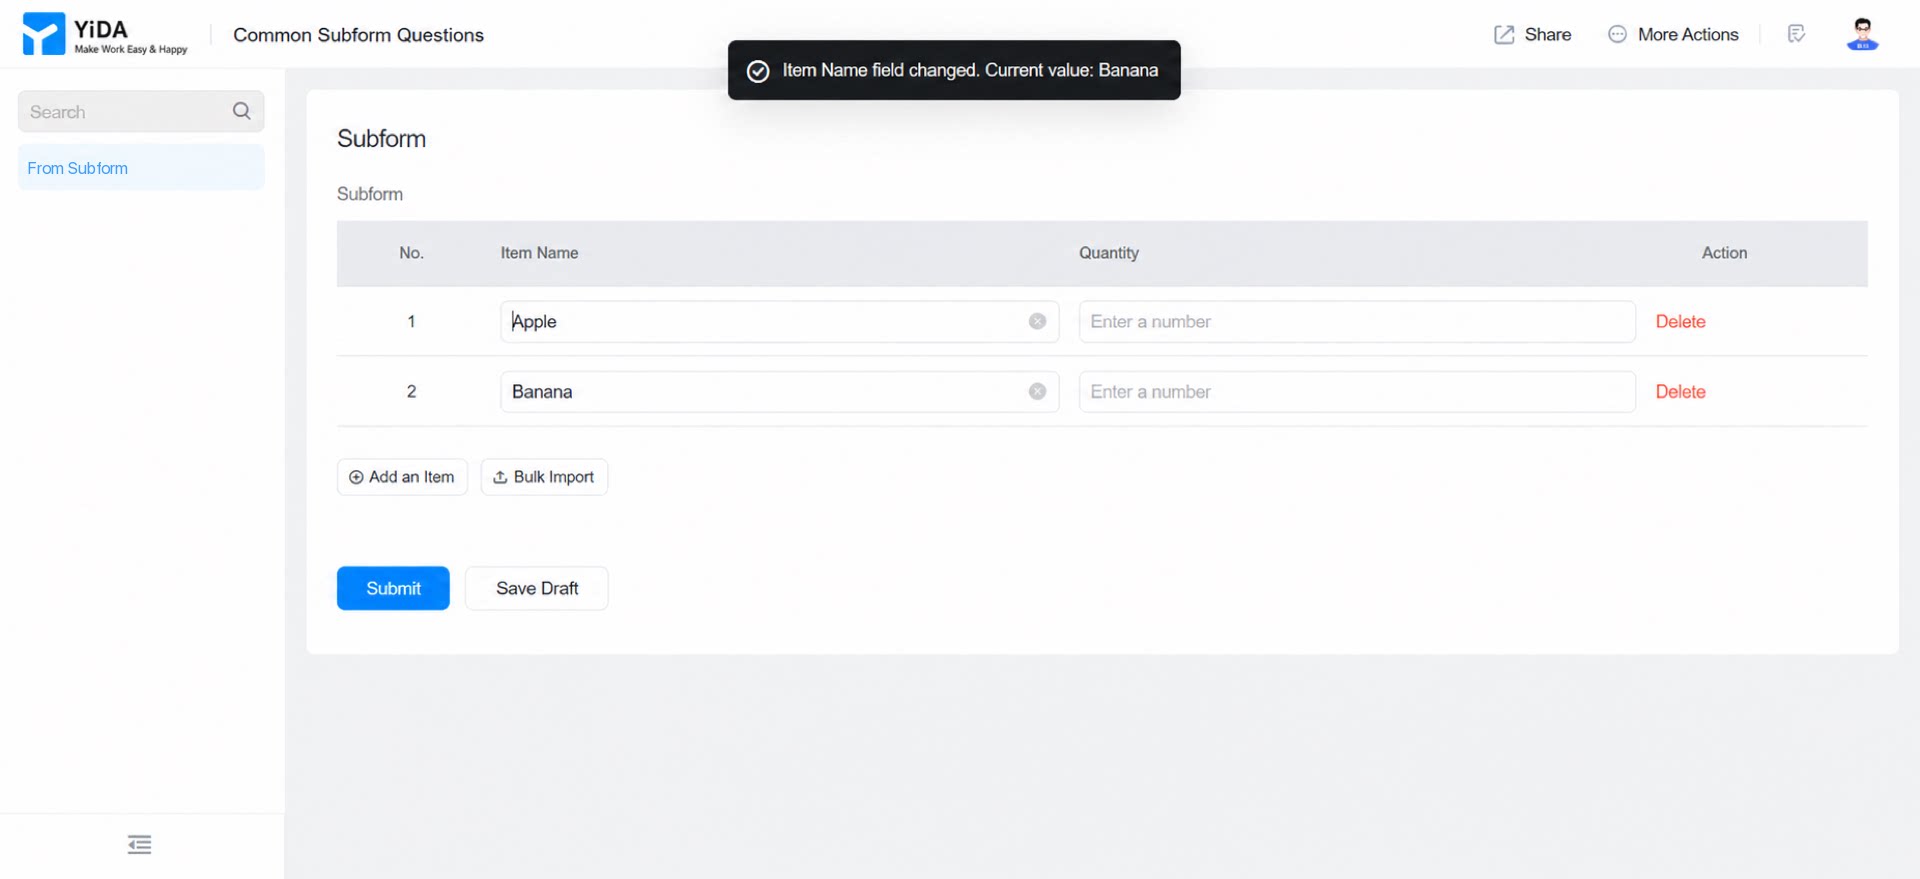
5.14 How Do I Get the Currently Changed Field When a Subform’s onChange Fires
When subform data changes, the subform’s onChange event is triggered not only by cell edits but also by formula calculations, data linkage, or external assignments. To identify the change, use theextra parameter of the subform’s onChange event to get the currently changed field, and the changes parameter to get its value.
Sample code:
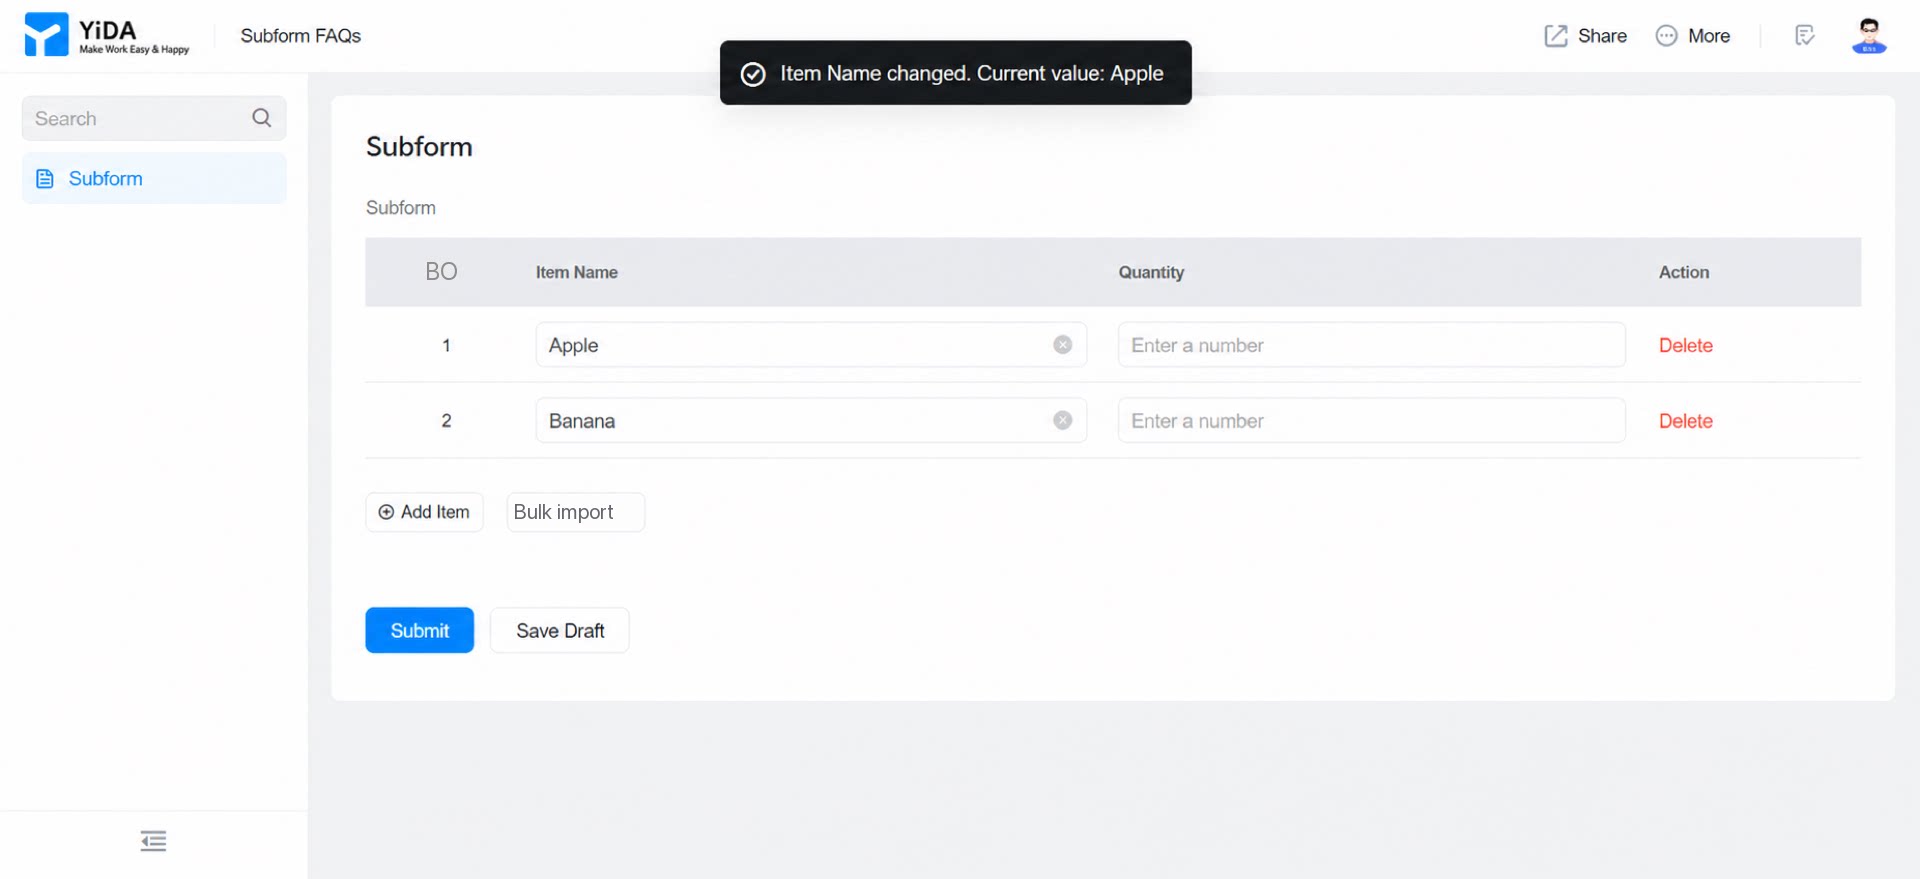
5.15 How Do I Update Other Fields in the Current Row When a Component Inside the Subform Changes
Use the subform APIupdateItemValue to update other fields in the current row of the subform.