

 Chats
Chats Calendar
 Meetings
 Contacts
 Mail
Mail Docs
Docs Drive
Drive AI Table
 AI Minutes
 Attendance
 Approval
 YiDA
YiDA Admin Console
Free uses: A set number of free uses is granted to customers on each edition for trial purposes. (Limited to one grant per organization.)Additional purchase: You can purchase more uses on the YiDA platform management > Basic information page.Performance parameters: QPS limits — 5 QPS per user and 100 QPS overall. (QPS refers to the maximum call count per second.)
1. Feature Overview
The AI component combines the YiDA AI Connector with OCR capabilities to deliver an upgraded connector experience. It reduces configuration effort while ensuring the intended outcome, and supports scenarios such as daily reimbursements, returns to work, and returns to school. It lowers operational cost on YiDA and improves efficiency in data query and management. Available components include Chinese-English translation, flight itinerary recognition, business license recognition, driver’s license recognition, vehicle license recognition, license plate recognition, motor vehicle invoice recognition, taxi invoice recognition, train ticket recognition, and VAT invoice recognition.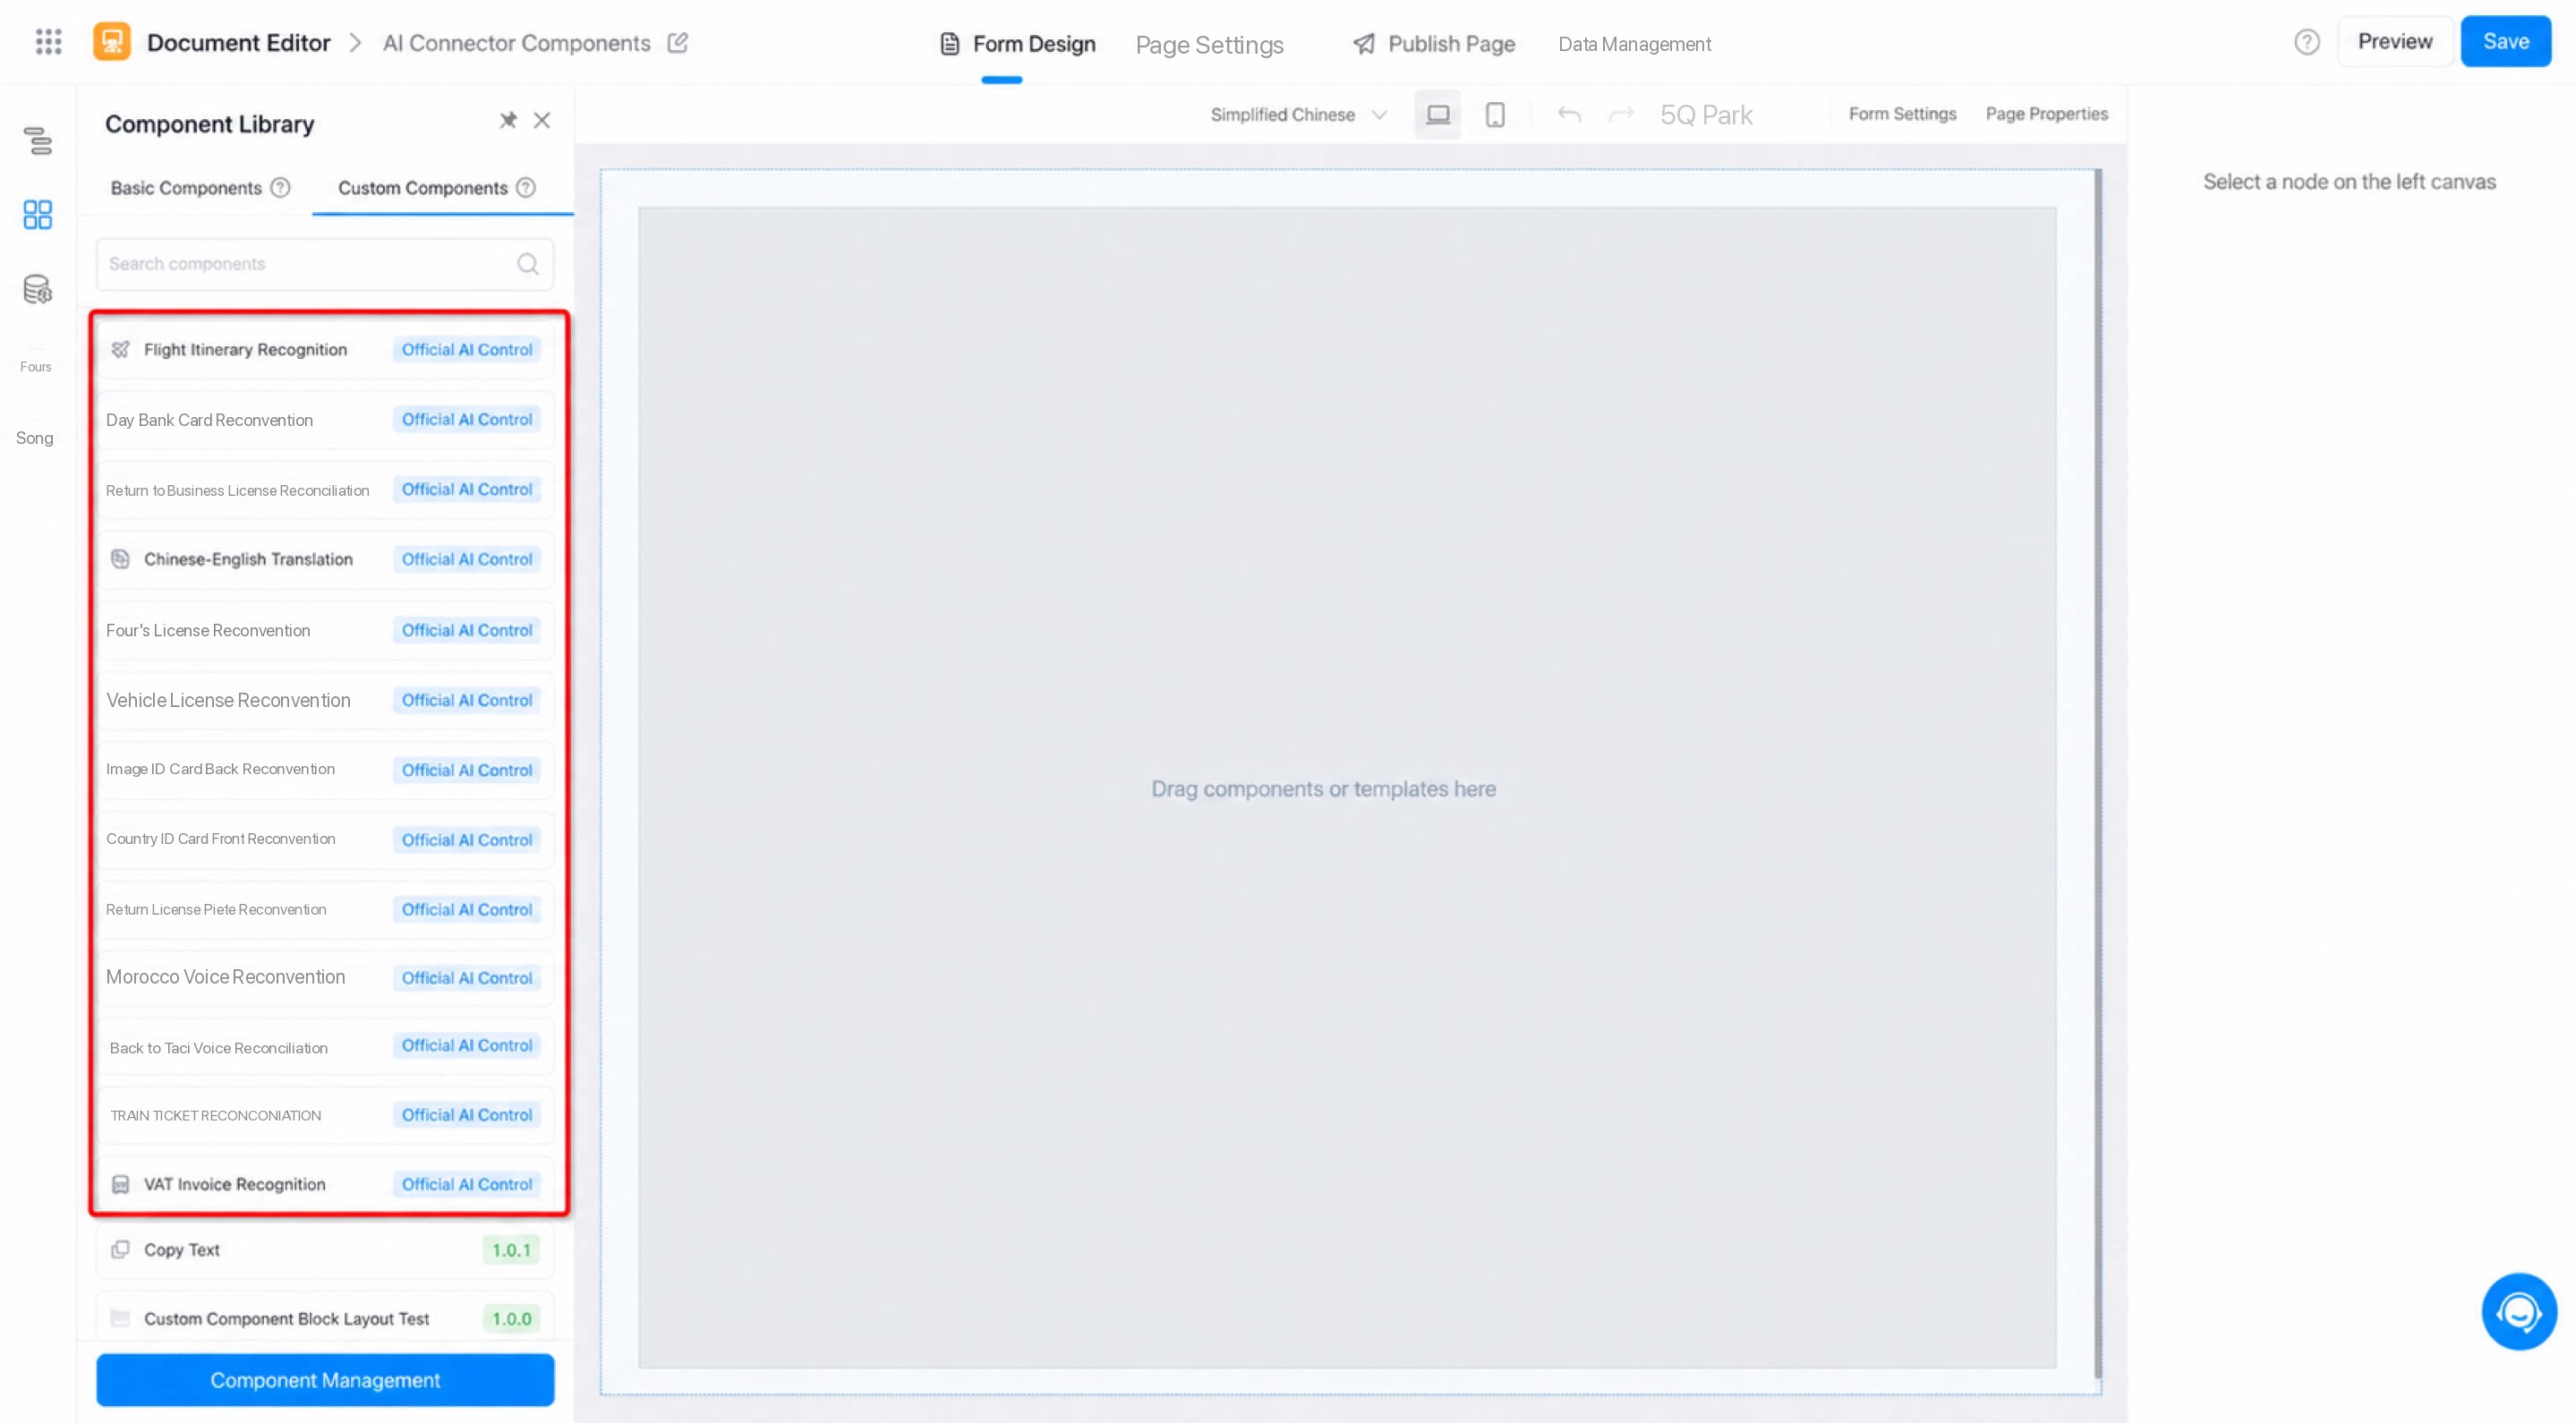
2. User Guide
This document uses the Chinese-English translation and train ticket recognition components as examples to walk you through the feature.2.1. Preview
2.1.1. Chinese-English Translation Component Preview
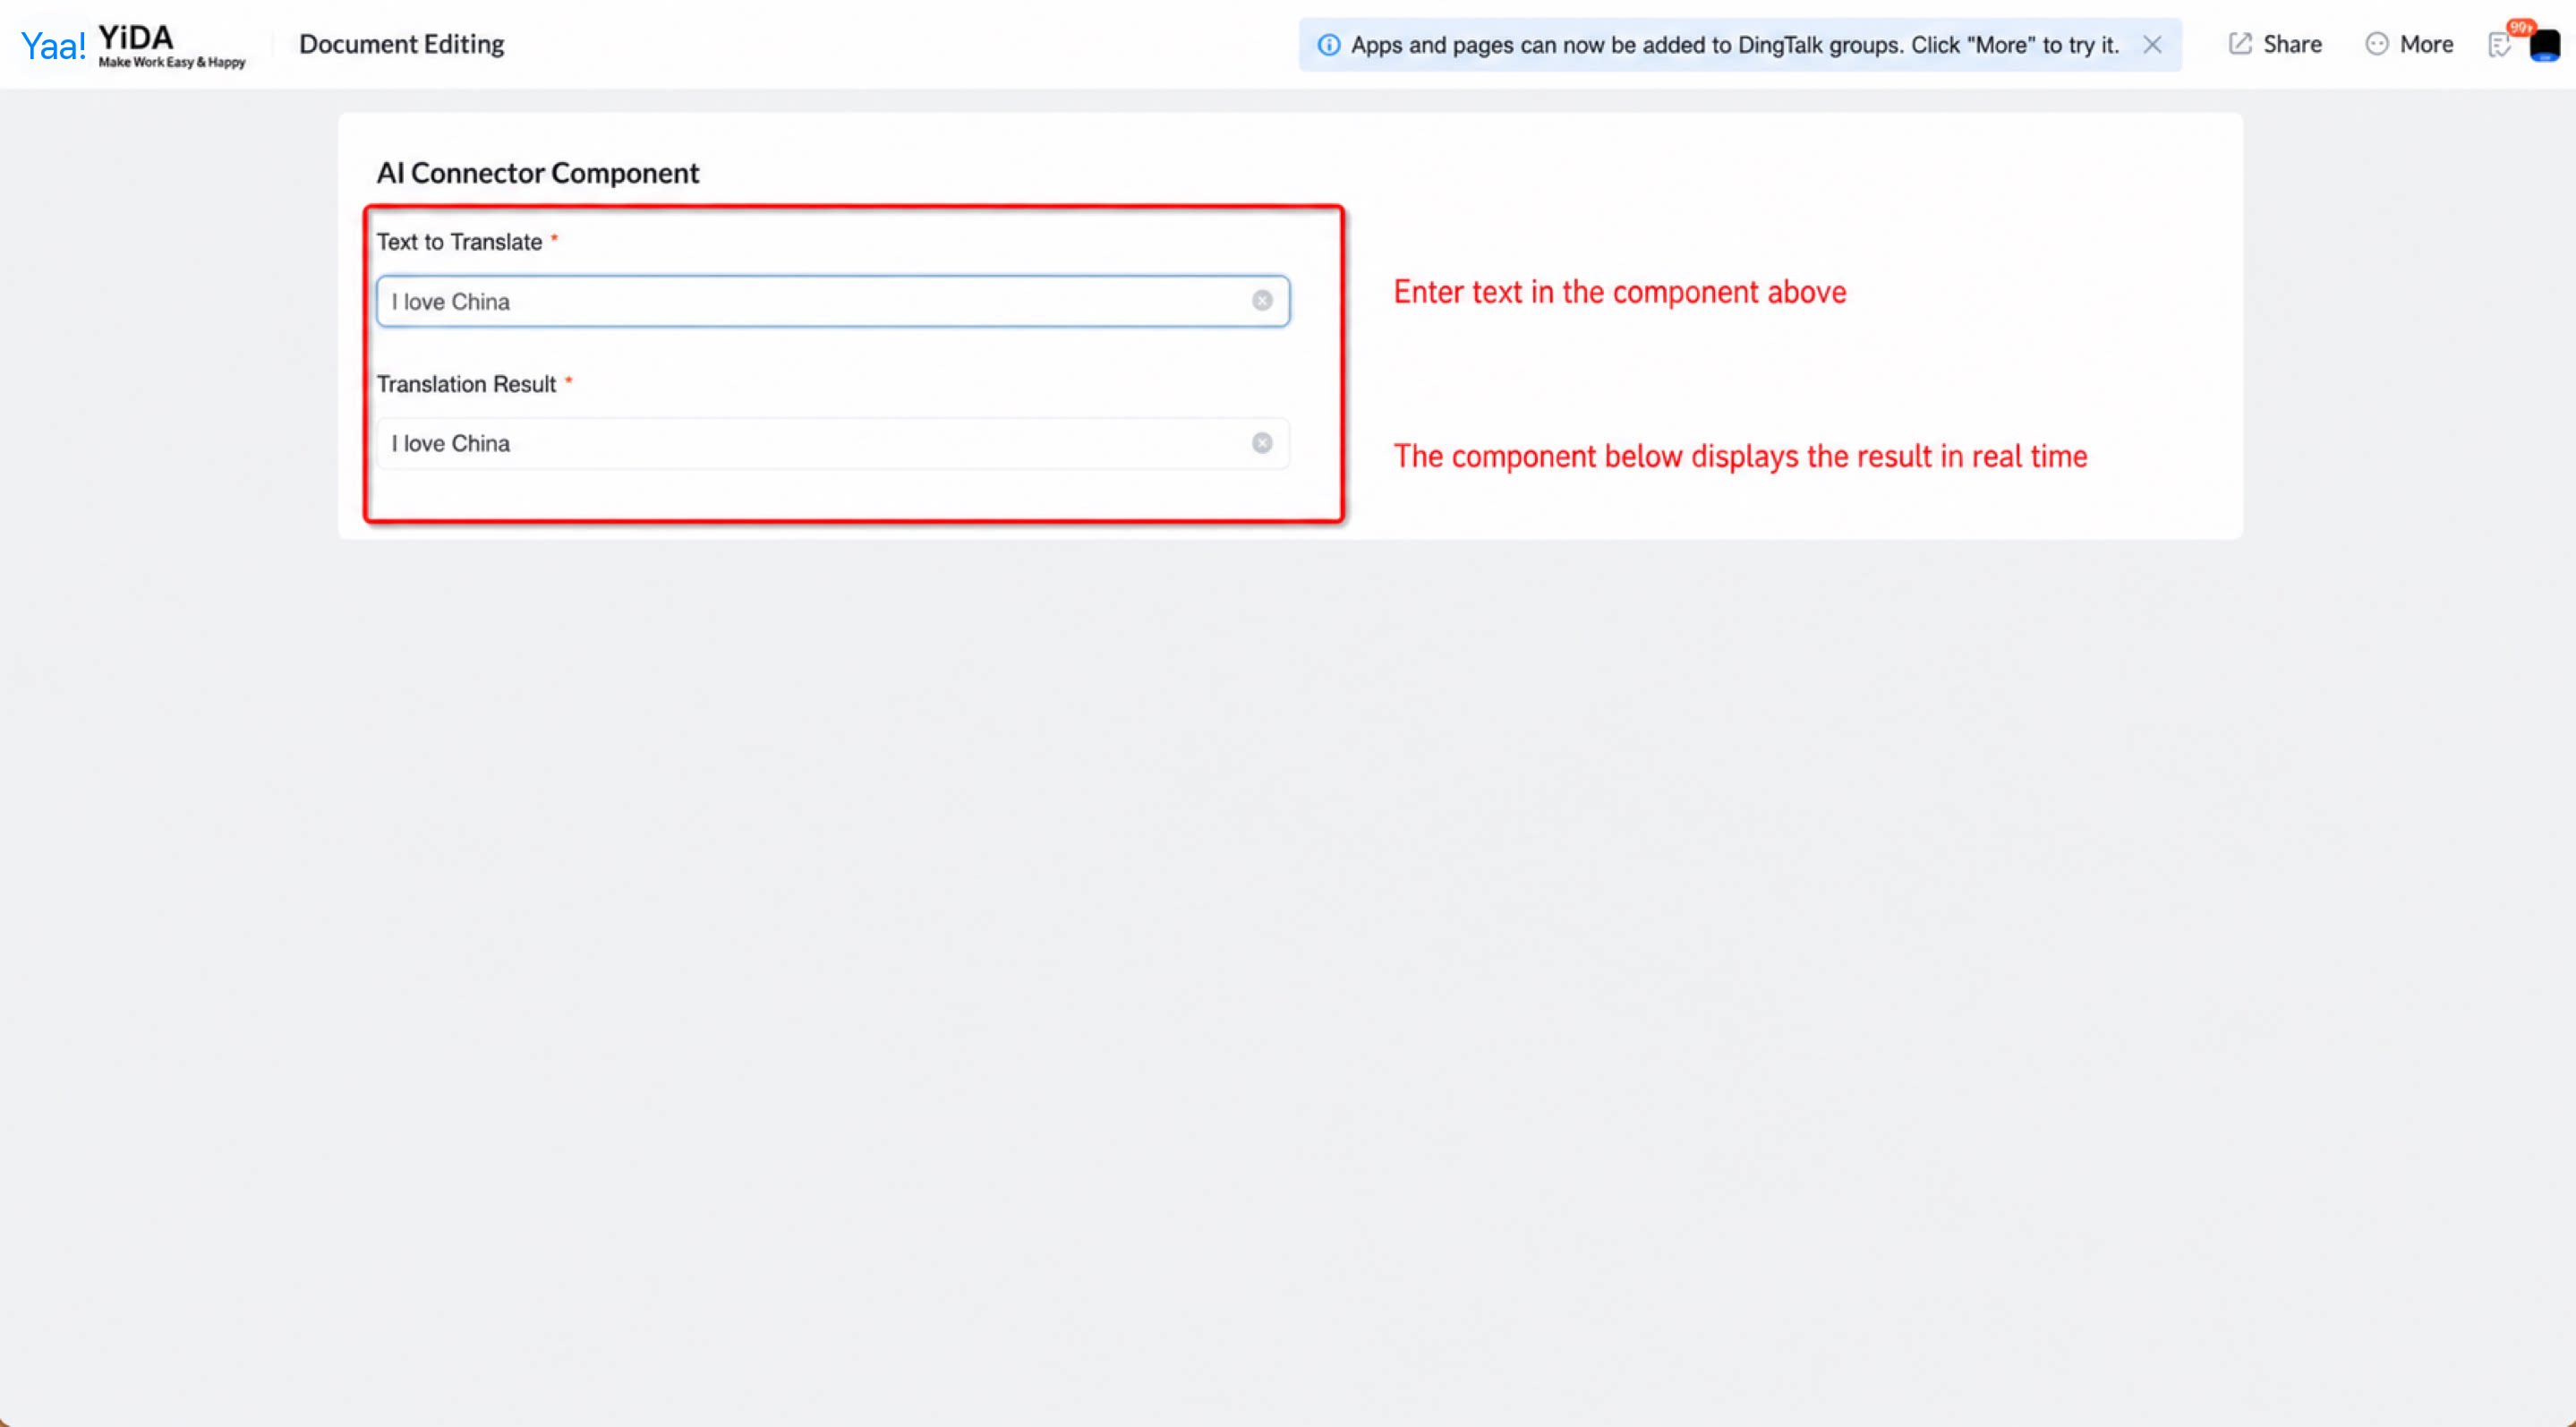
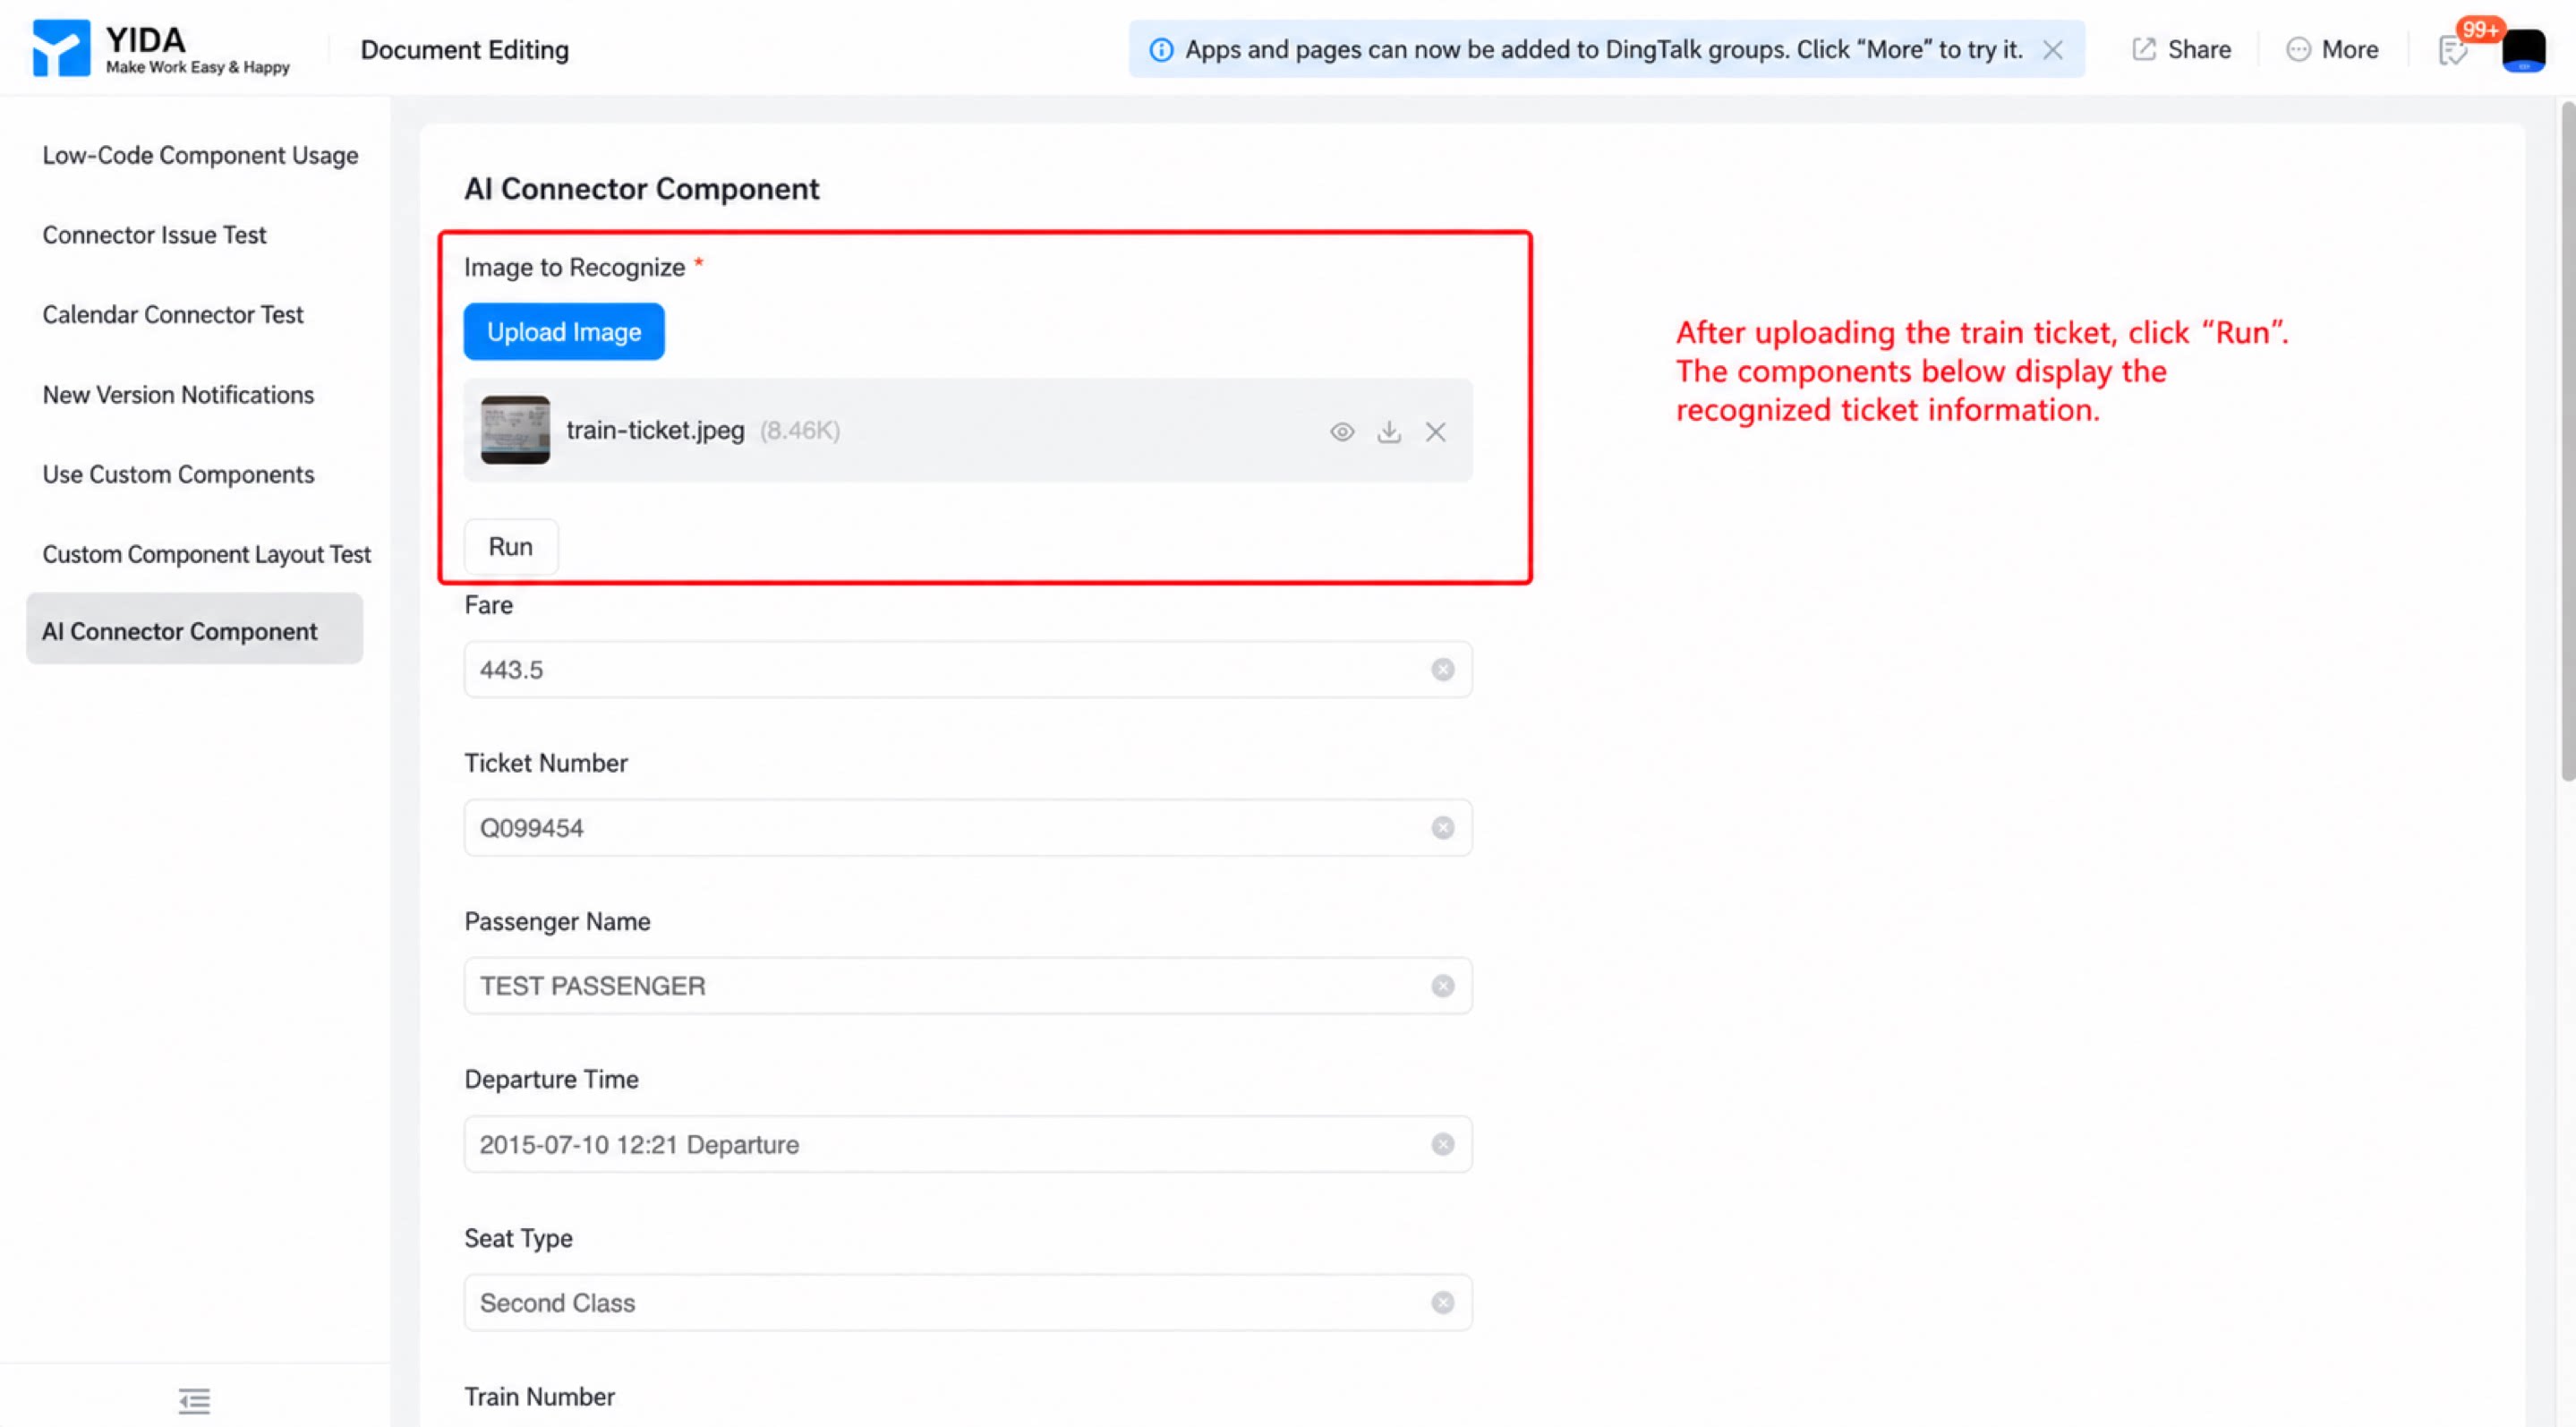
2.1.2. Train Ticket Recognition Preview
2.2. Using the AI Component
2.2.1. Using the Chinese-English Translation Component
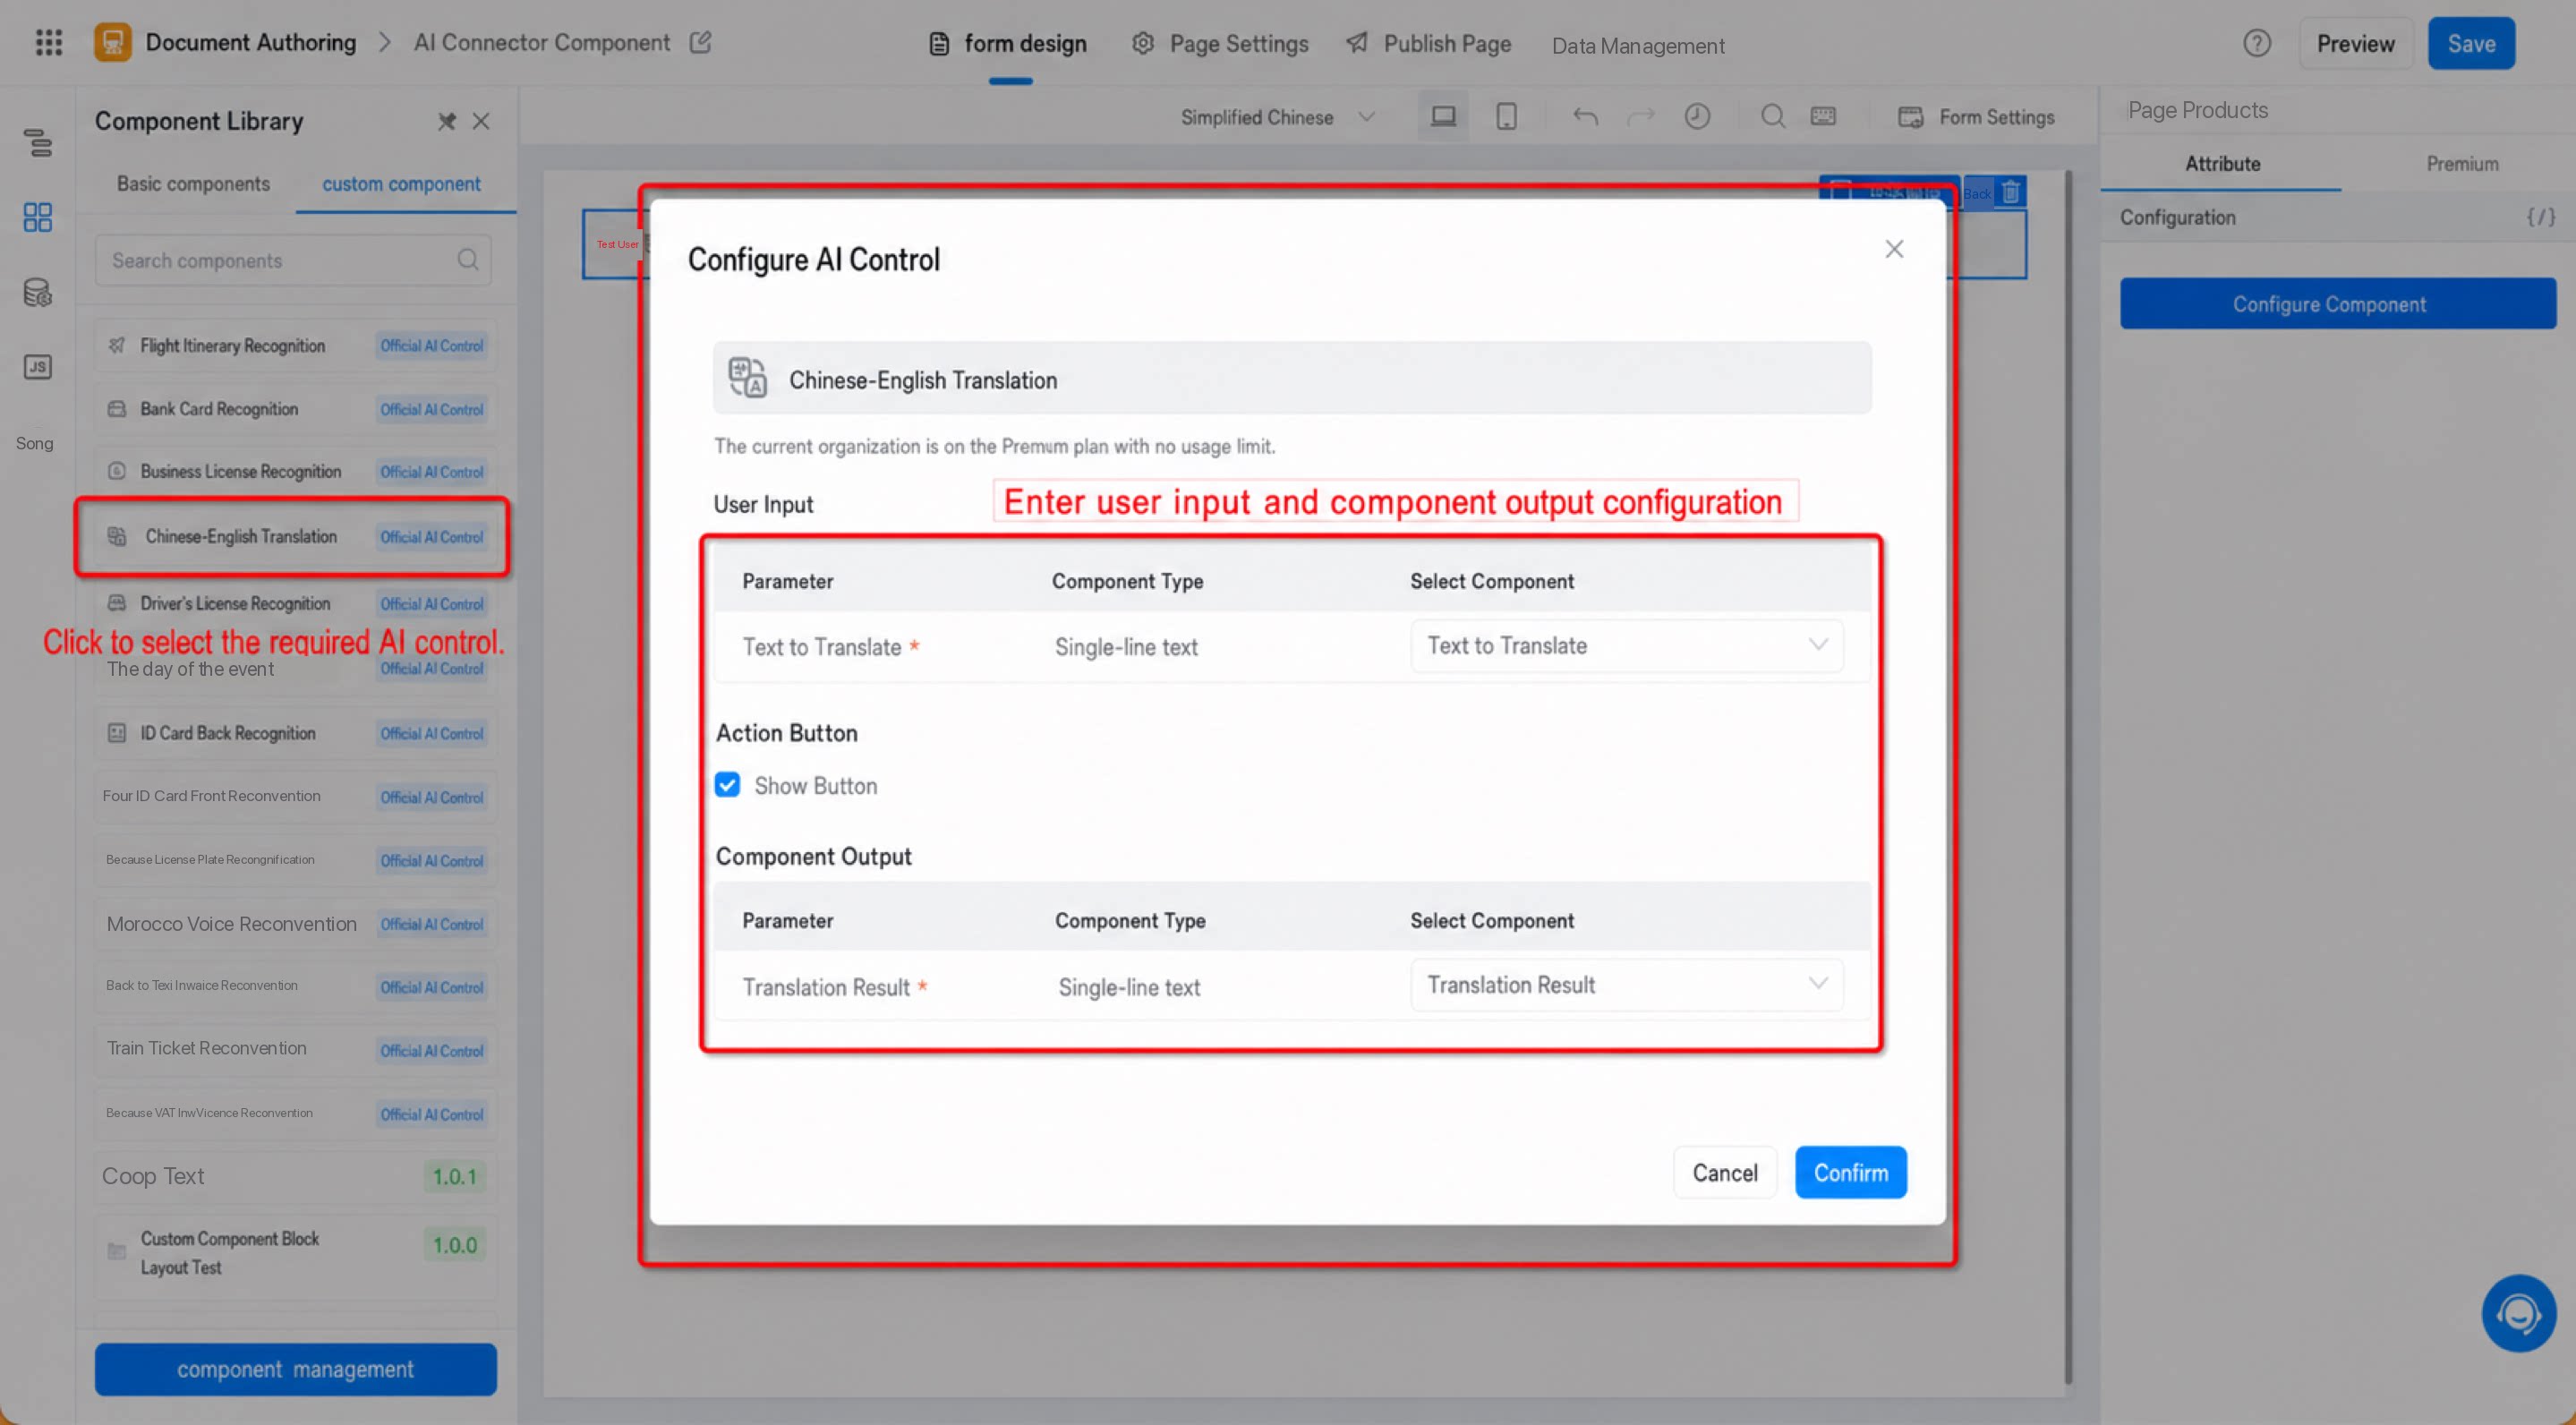
Steps:- Add: Go to Form design page >> Component library >> Custom components, and select the AI component that meets your needs.
- Configure: Fill in the required parameters for the AI component and select the component that will receive the returned data (see Figure 2.2-1).
Configuration notes:
- Edition entitlements: Shows the entitlements of your current YiDA edition. AI component features vary by edition. Upgrade your YiDA edition as needed.
- User input: The parameter required by the connector. By default, the component specified by the AI component is used. You can replace it with another component if needed (not recommended, as it may cause data format inconsistencies).
- Execute button (optional): Selected by default. When enabled, an Execute button appears on the AI component in the canvas. The connector only runs and returns data after you click Execute. If you need the connector to return data in real time (for example, for Chinese-English translation), clear the Execute button option.
- Component output: Receives the data returned by the AI component. By default, the component specified by the AI component is used. You can replace it with another component on the page as needed.
- Click Confirm to finish adding the component (see Figure 2.2-2).
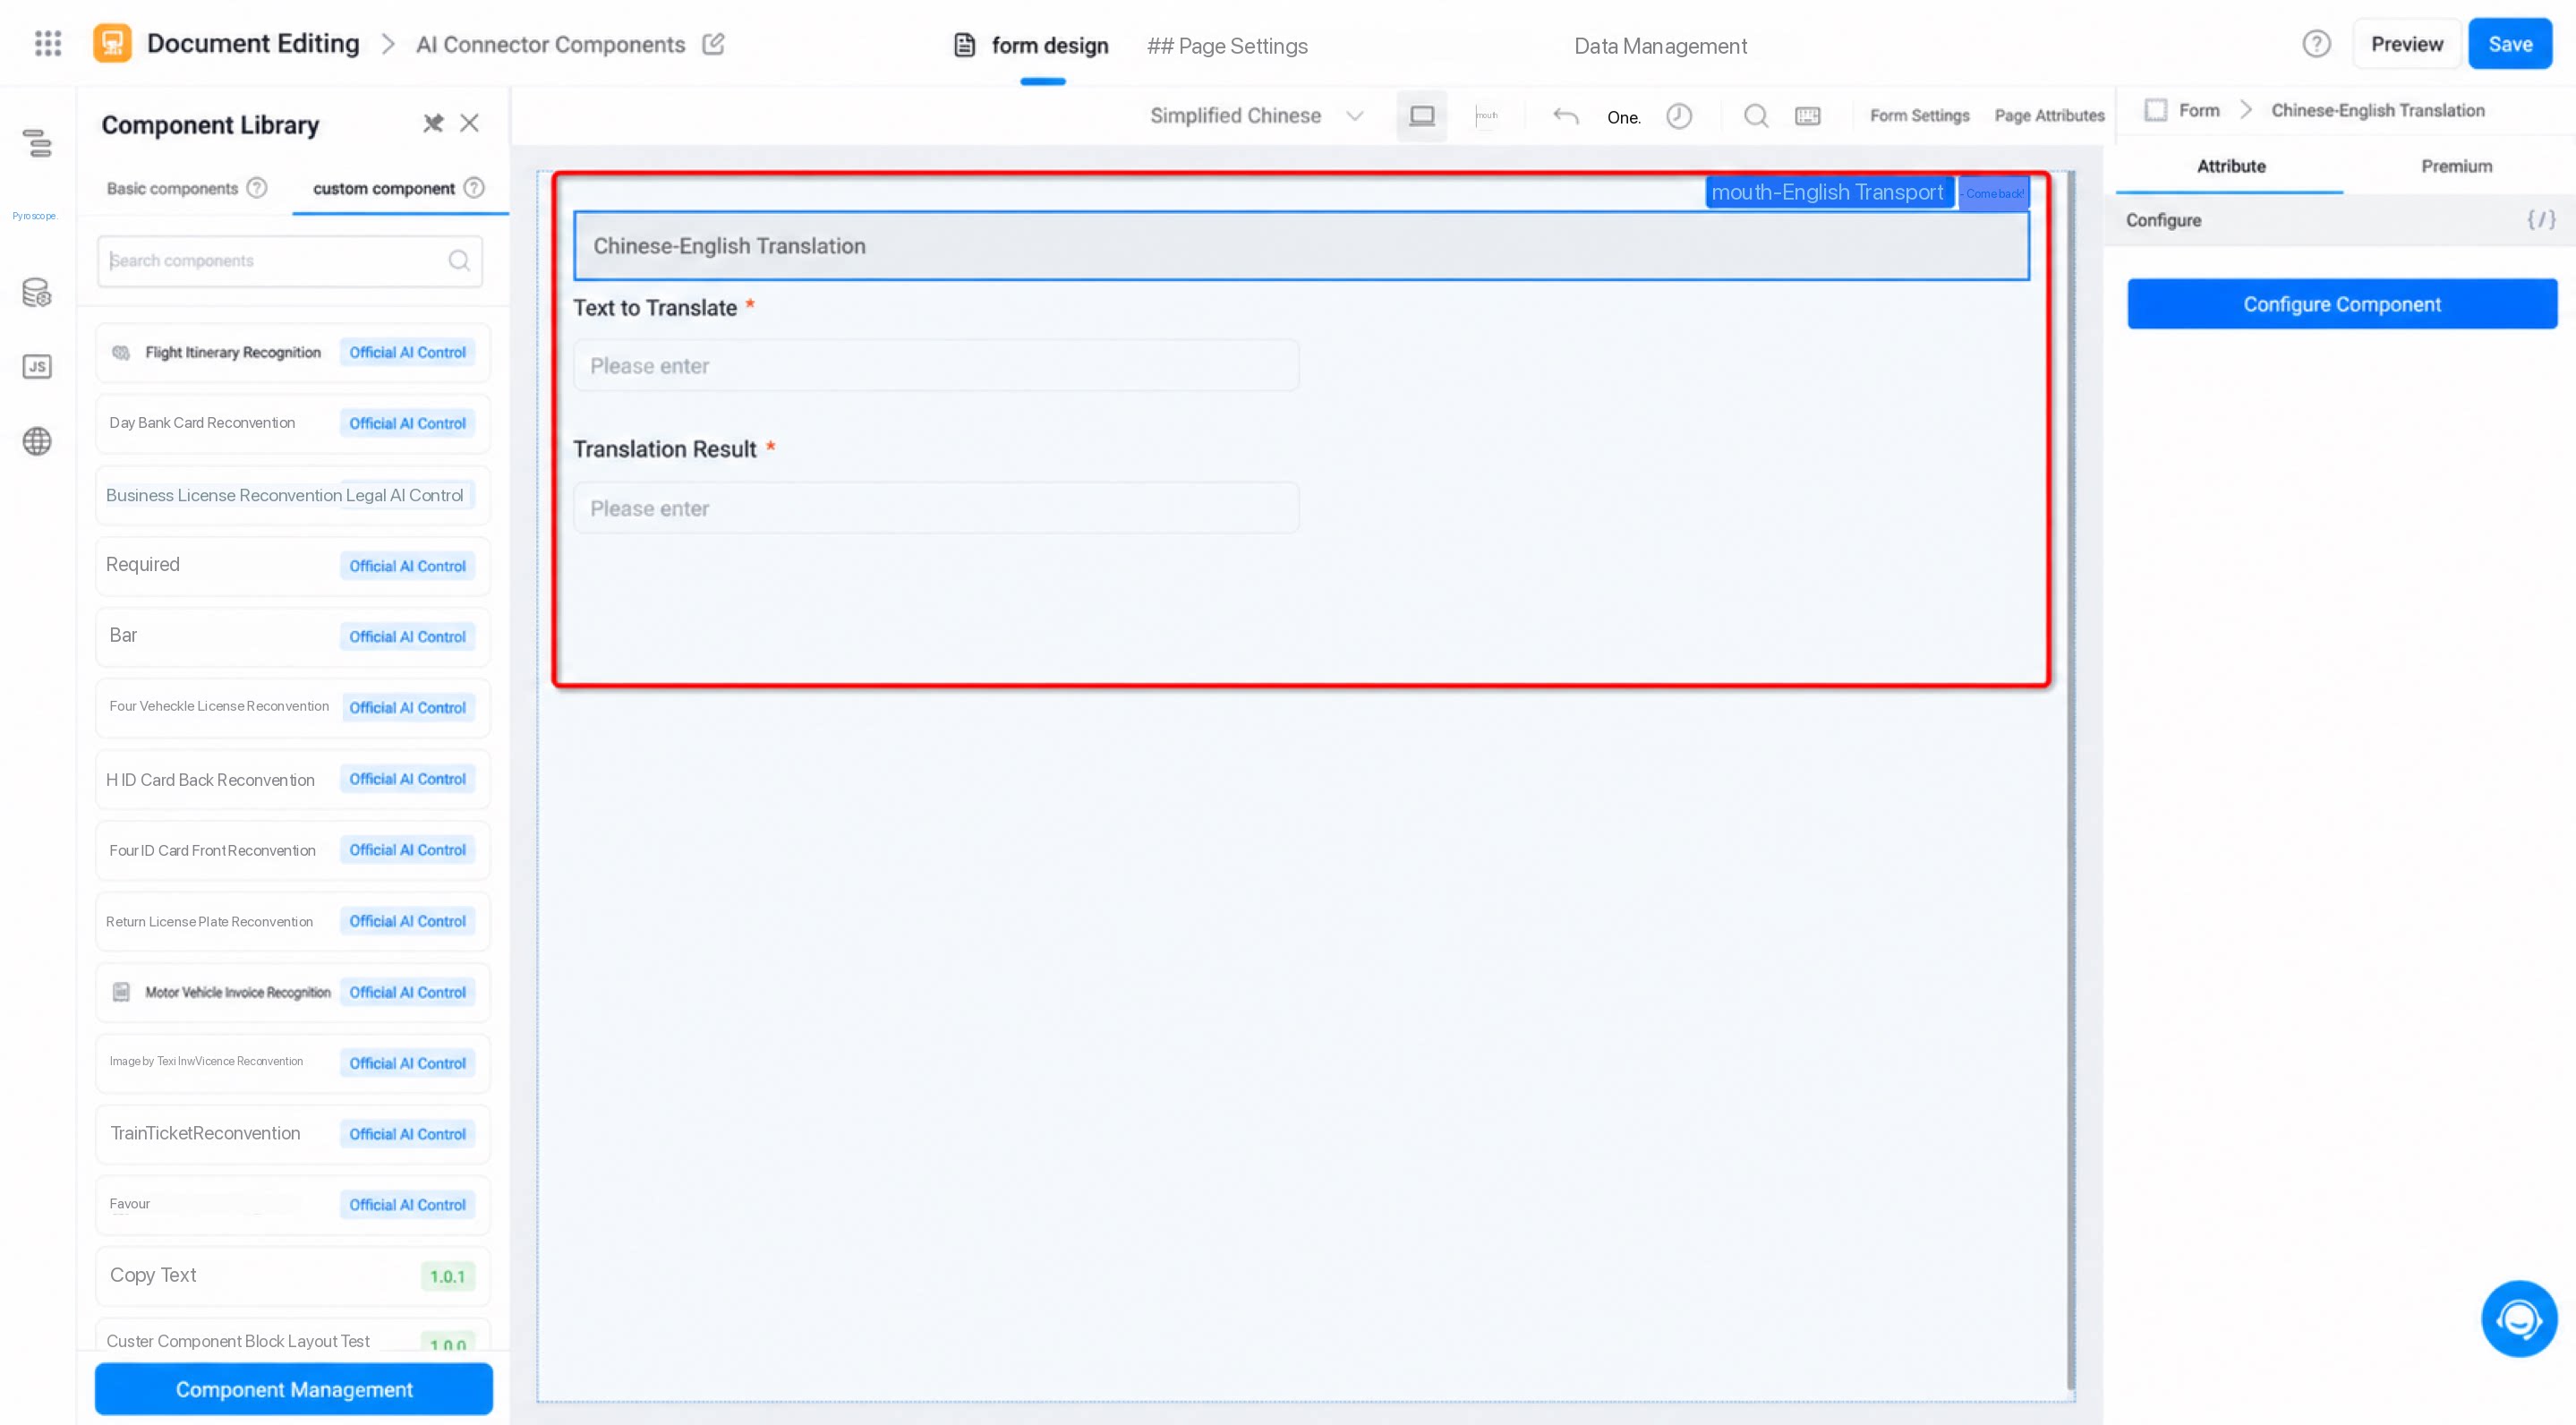
- After saving, open the page and enter data to see the result.
2.2.2. Using the Train Ticket Recognition Component
Steps:- Go to Form design page >> Component library >> Custom components, add the Train ticket recognition component, and configure the AI component (see Figure 2.2-3).
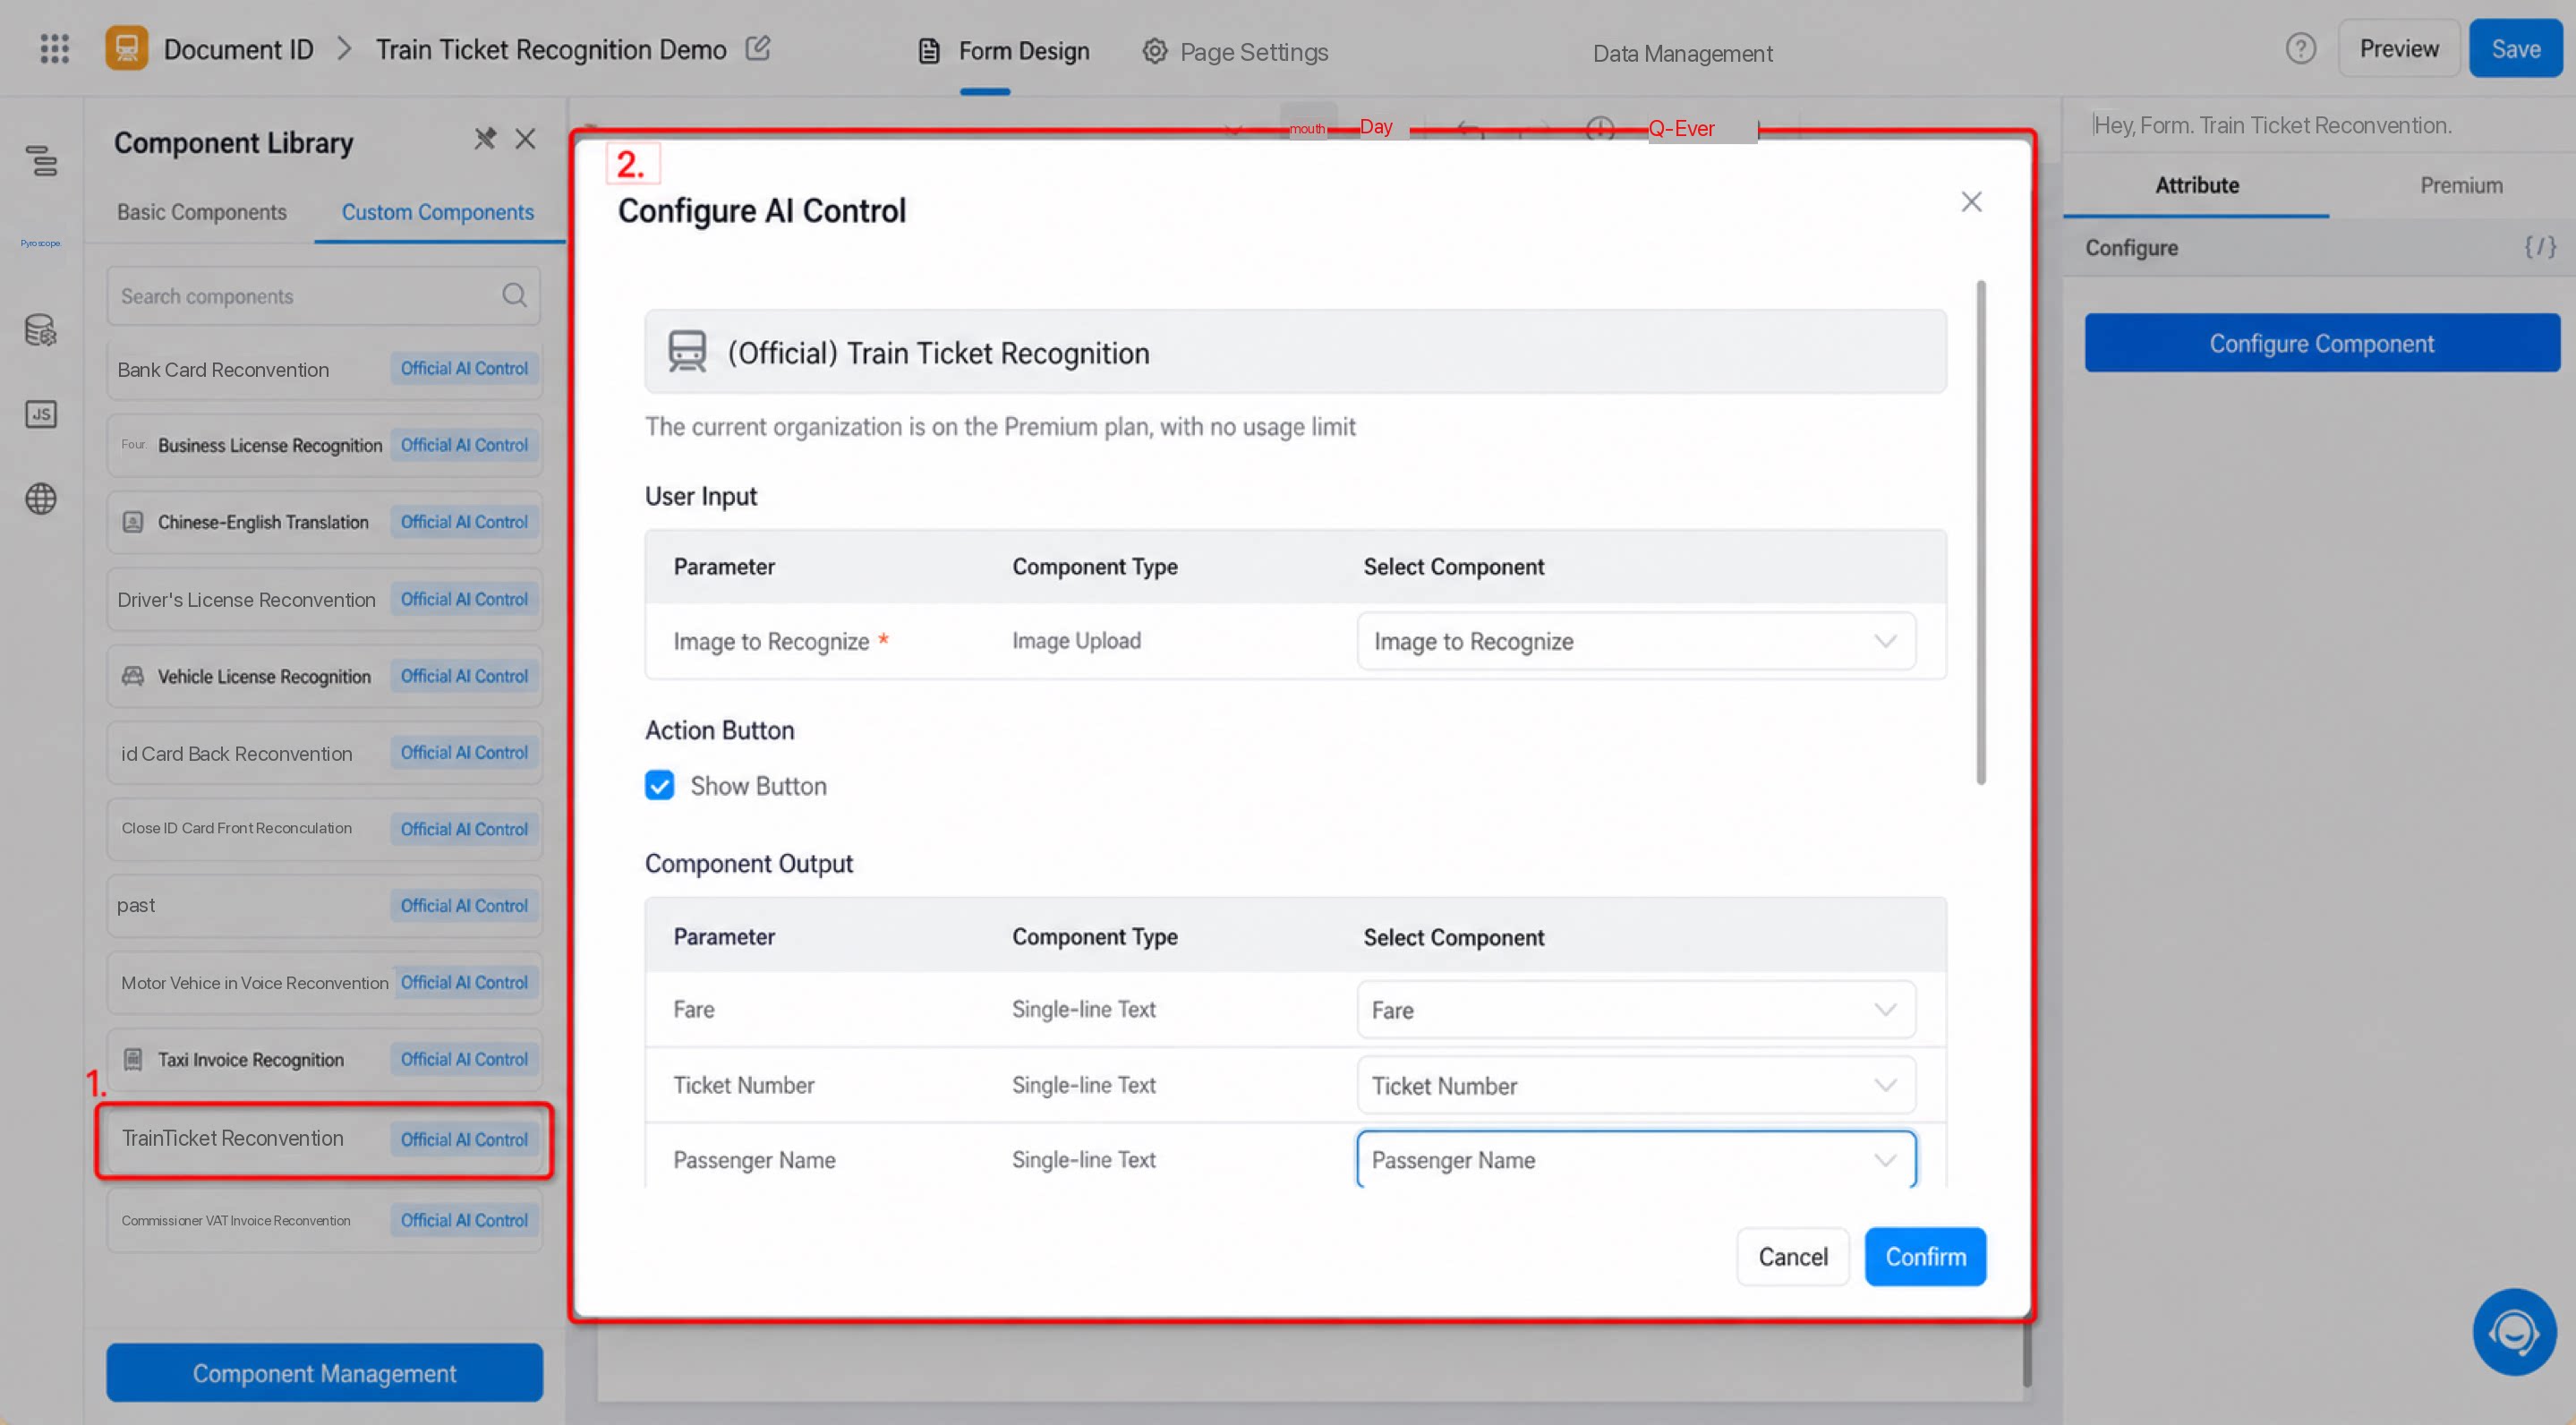
Configuration notes:
- Edition entitlements: Shows the entitlements of your current YiDA edition. AI component features vary by edition. Upgrade your YiDA edition as needed.
- User input: The parameter required by the connector. By default, the component specified by the AI component is used. You can replace it with another component if needed (not recommended, as it may cause data format inconsistencies).
- Execute button (optional): Selected by default. When enabled, an Execute button appears on the AI component in the canvas. The connector only runs and returns data after you click Execute. If you need the connector to return data in real time (for example, for Chinese-English translation), clear the Execute button option.
- Component output: Receives the data returned by the AI component. By default, the component specified by the AI component is used. You can replace it with another component on the page as needed.
- Click Confirm to finish adding the AI component (see Figure 2.2-4).
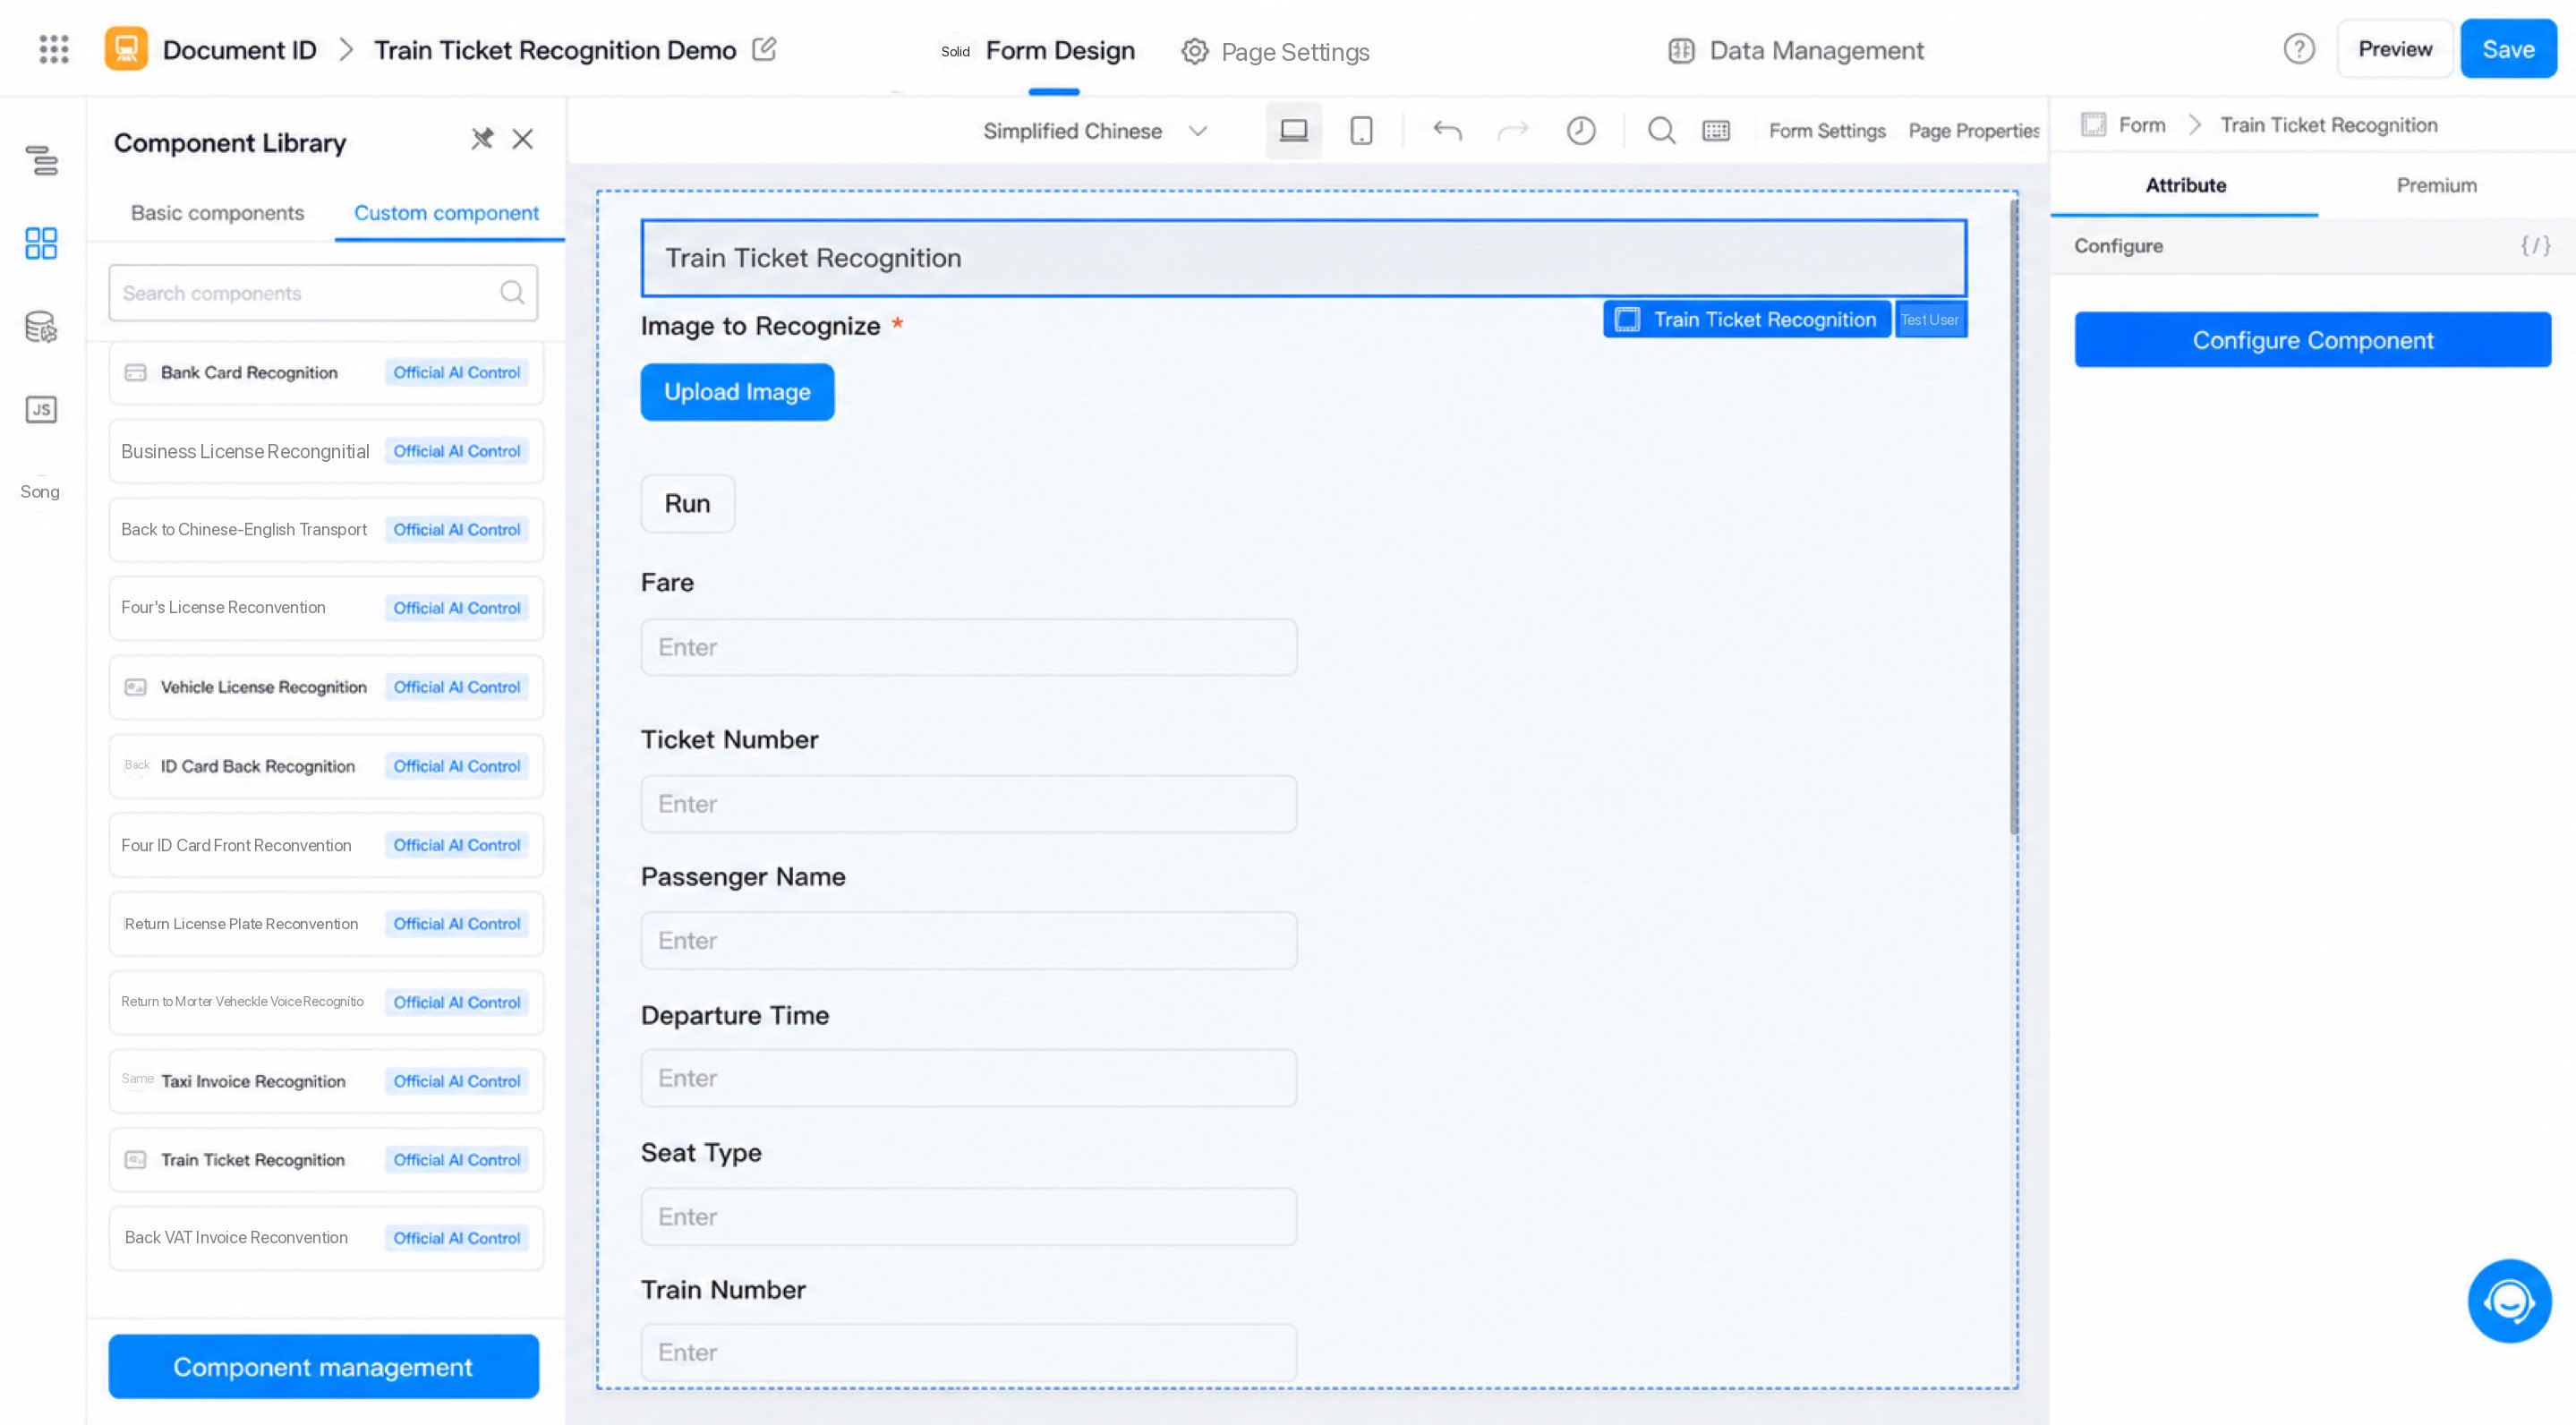
- On the page, upload a train ticket image and click Execute to run the recognition.
3. Configuration Options
The AI component is configured when it is added. You can also edit the configuration later using the Configure component button in the page attribute panel (see Figure 3-1).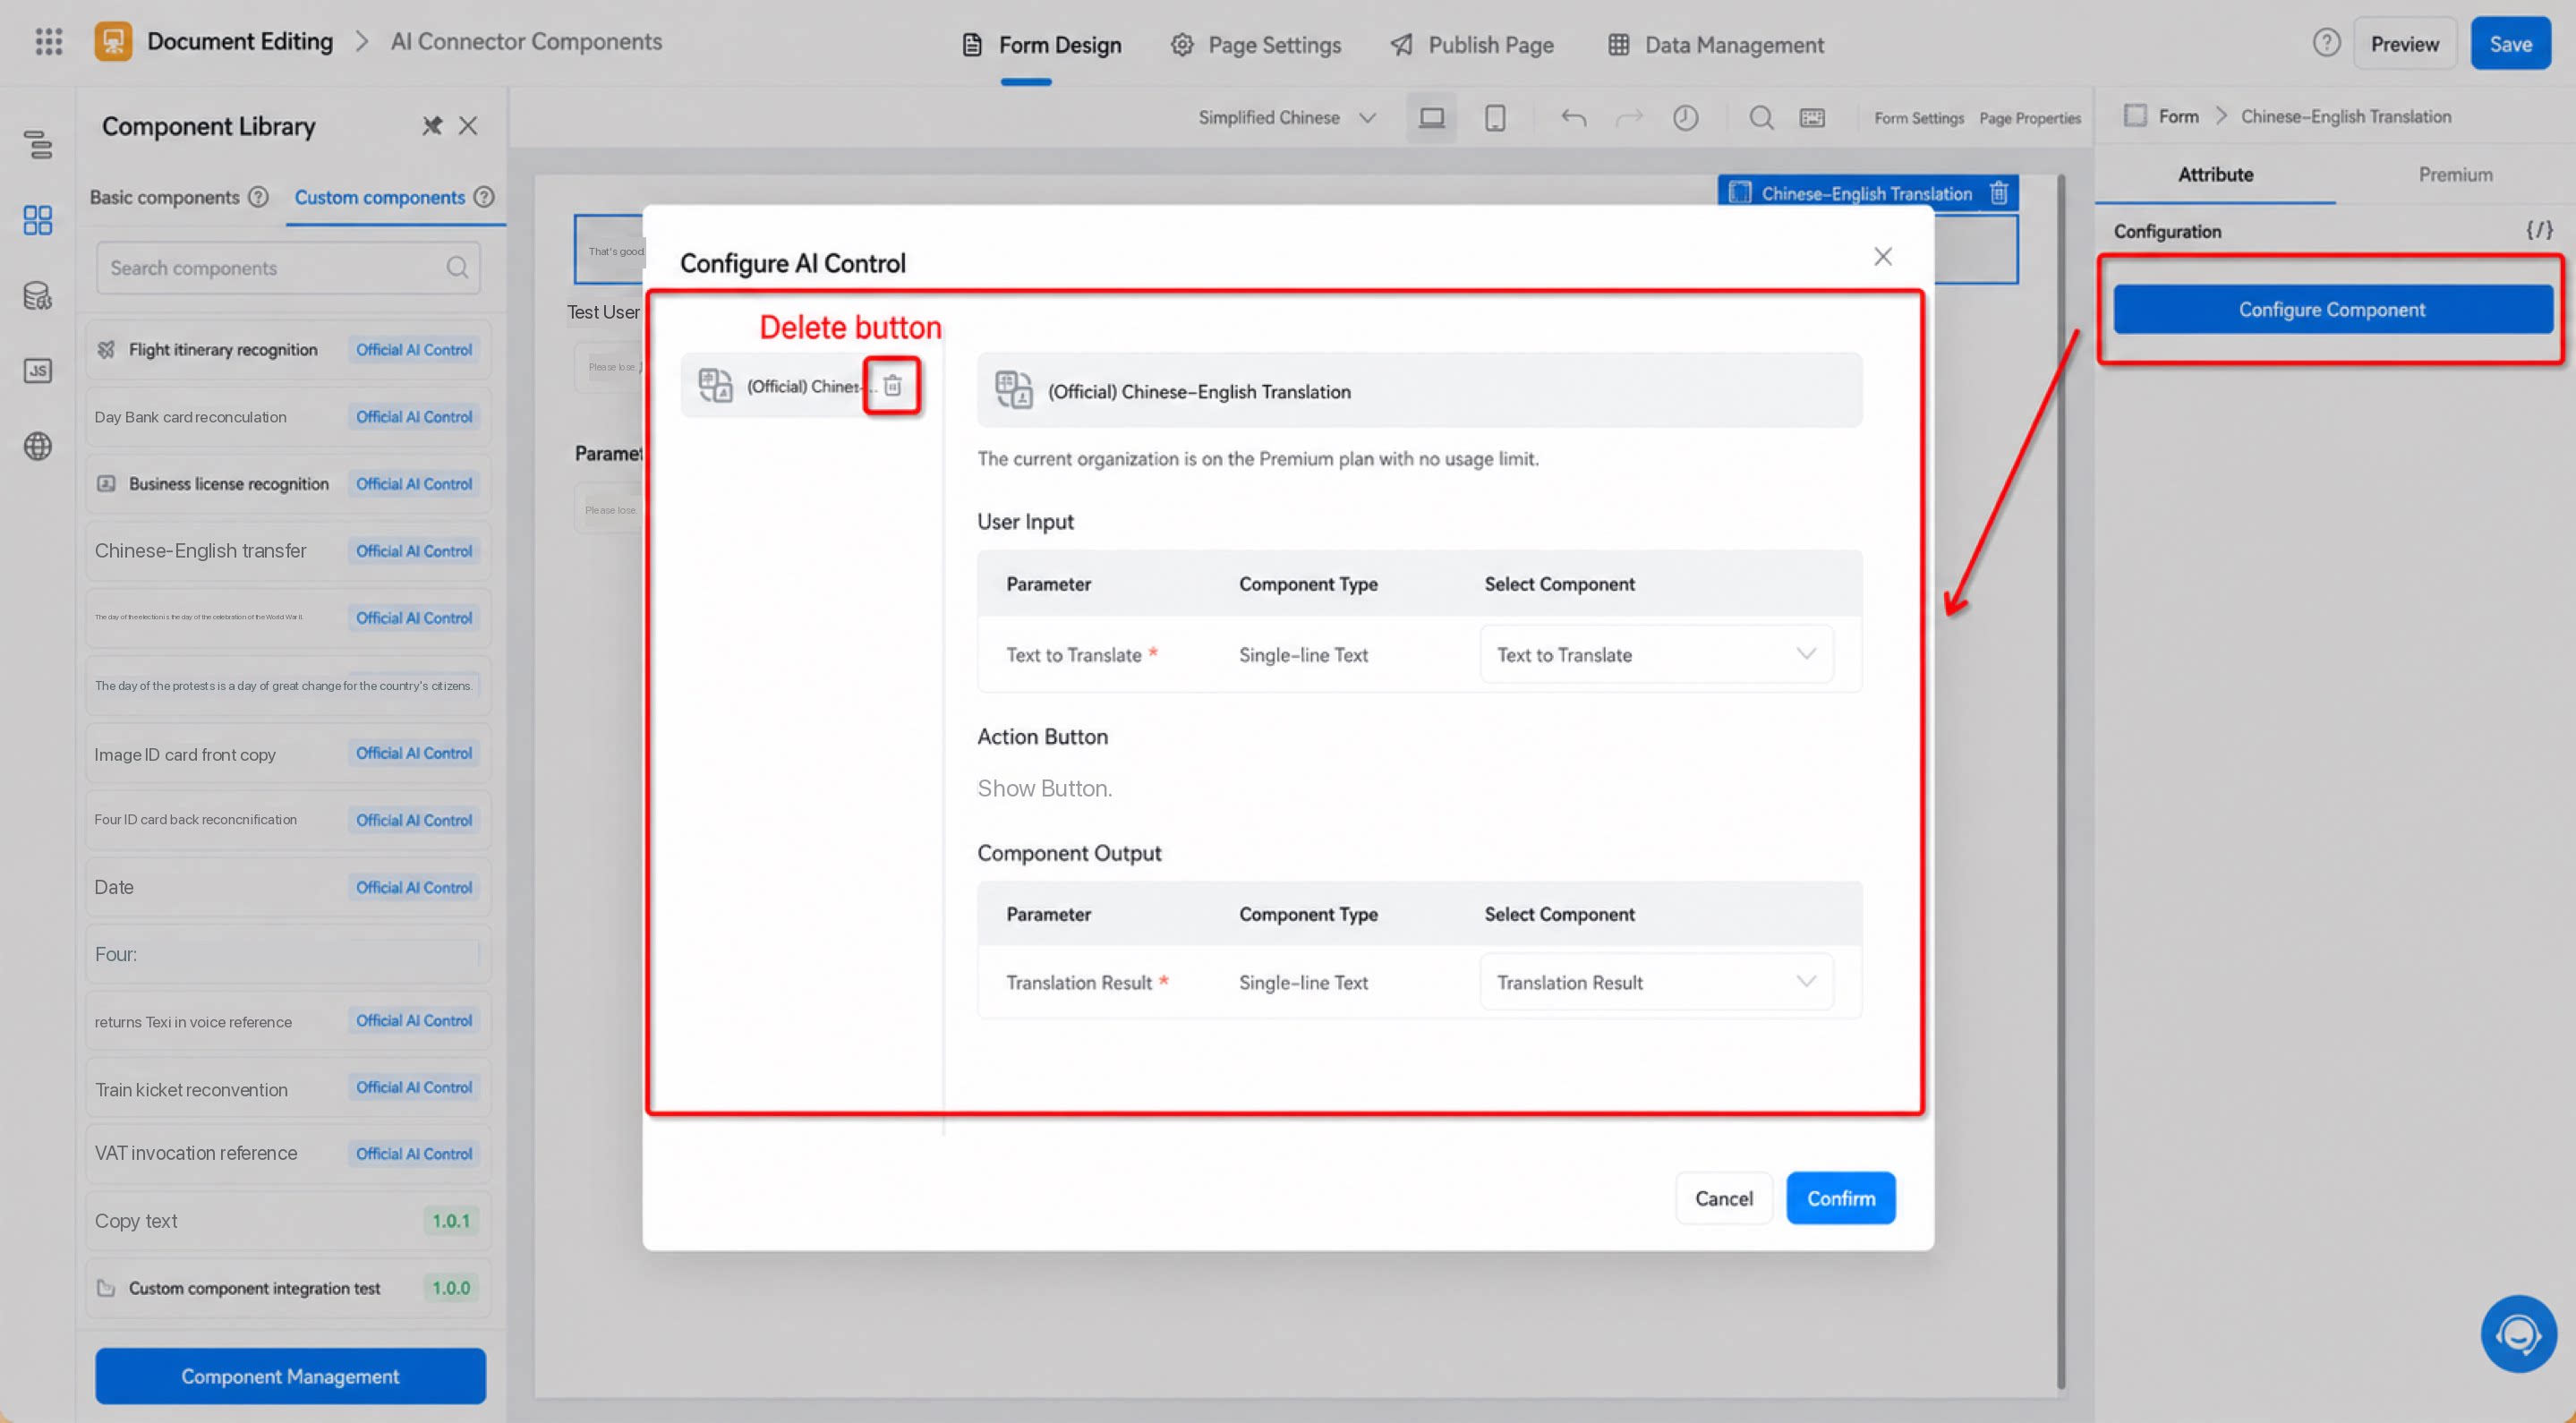
Important:
- When configuring components, the Delete button only removes the relationship between components; it does not delete the components themselves.
4. Supported Receipt Types
5. FAQs
5.1. The Component Has Been Added to the Canvas, but the Expected Result Is Not Returned. What Should I Do?
Check whether the component relationships on your page have been deleted. The Delete button in the component configuration only removes the relationships between components, not the components themselves.5.2. Why does an error appear even when the component is configured correctly?
5.2. Why does an error appear even when the component is configured correctly?
- The message “Connector component ran into an error. Please check the component configuration or contact us” typically appears during receipt recognition. Common causes include the following:
5.3. Why is only one ticket recognized when multiple ticket images are uploaded?
5.3. Why is only one ticket recognized when multiple ticket images are uploaded?
Currently, the OCR feature can recognize only one ticket at a time. Upload and recognize tickets one by one.