Chats
Chats Calendar
 Meetings
 Contacts
 Mail
Mail Docs
Docs Drive
Drive AI Table
 AI Minutes
 Attendance
 Approval
 YiDA
YiDA Admin Console
1. Introduction
1.1 Feature Overview
As enterprise digital transformation accelerates, demand for data processing and analysis keeps growing. Traditional reporting tools increasingly show their limits when handling large data volumes and complex business logic, especially in the following areas:1.2 Use Cases
- Financial reporting and analysis: Finance teams regularly generate reports such as income statements, balance sheets, and cash flow statements. QBI automates data collection and report generation, improving both accuracy and efficiency.
- Sales and marketing analysis: Sales teams track market trends, customer behavior, and sales patterns to refine their strategies. QBI helps them access this information quickly and perform in-depth analysis.
- Operational performance monitoring: Operations teams need real-time visibility into metrics such as production efficiency, inventory levels, and supply chain status. QBI provides real-time dashboards and alerts so teams can spot issues promptly and take action.
2. Procedure
2.1 Enable Premium Data Reports
2.1.1 Enable for Existing Apps
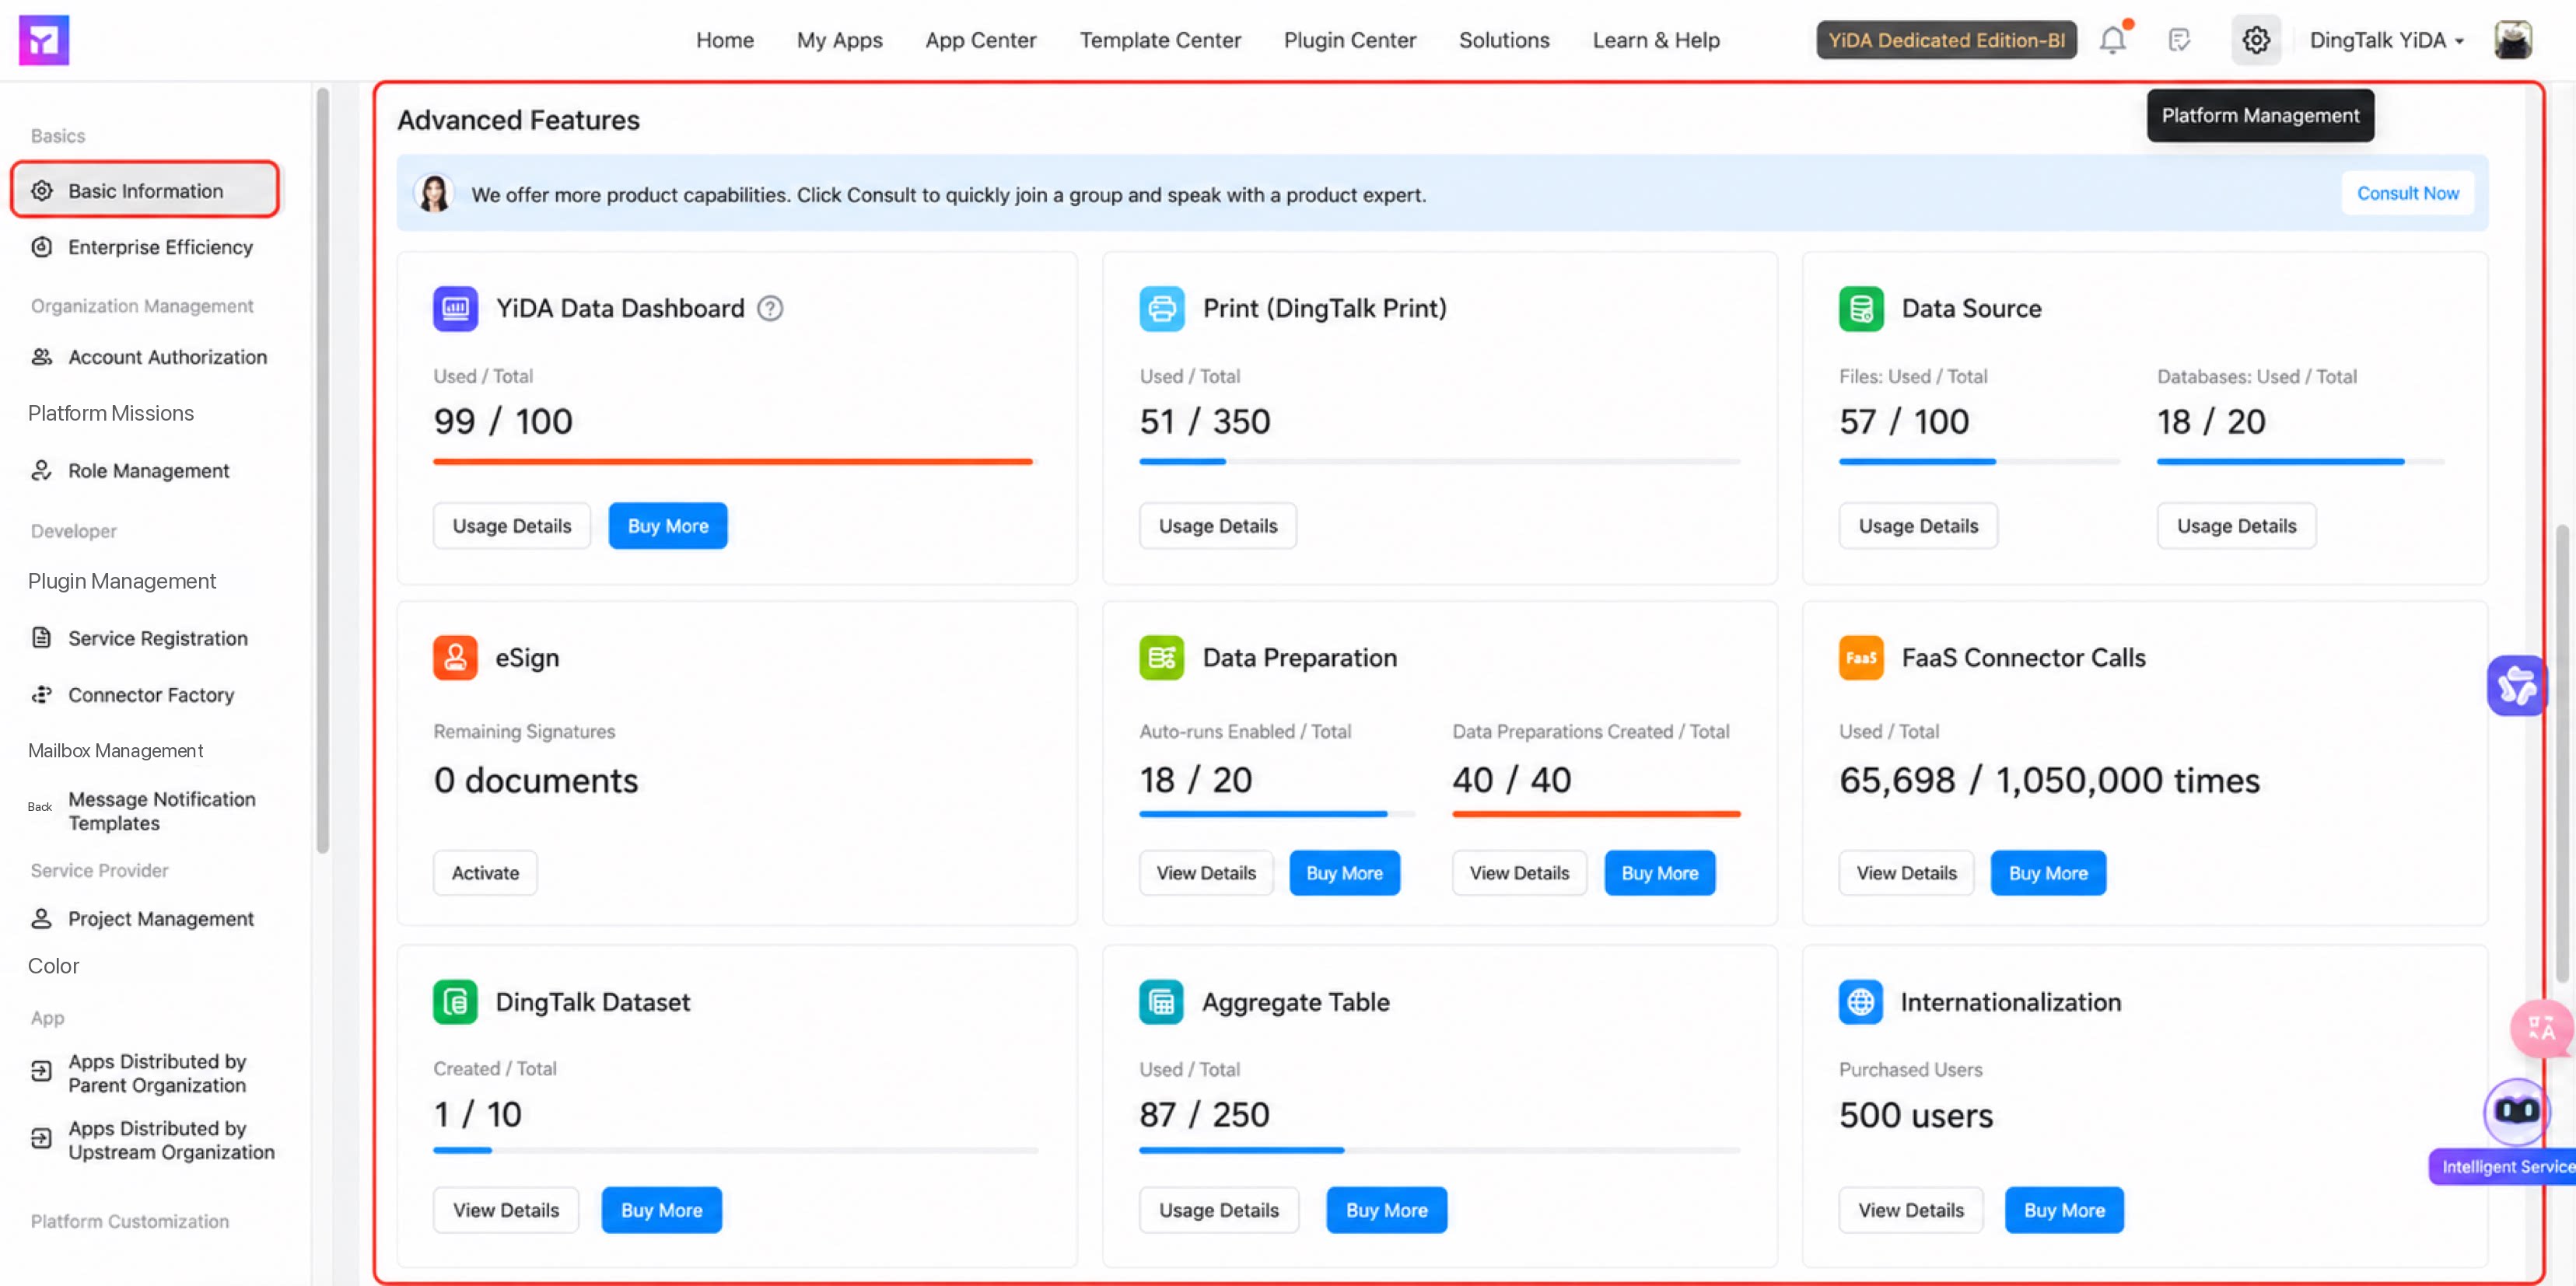
- After the customer places an order in the Entitlement Center, the YiDA support team manually enables or disables premium data reports in the backend.
- Location: Platform Management > Basic Information > Premium Features.
2.1.2 Enable When Creating an App
- Open the YiDA App Management backend and click Create App.
- Enter the basic app information in the dialog box.
- In the Create dialog, click More App Settings and enable App-Dedicated Storage, App-Dedicated Physical Columns, App-Dedicated Environment, and Premium Reports Isolated Database.
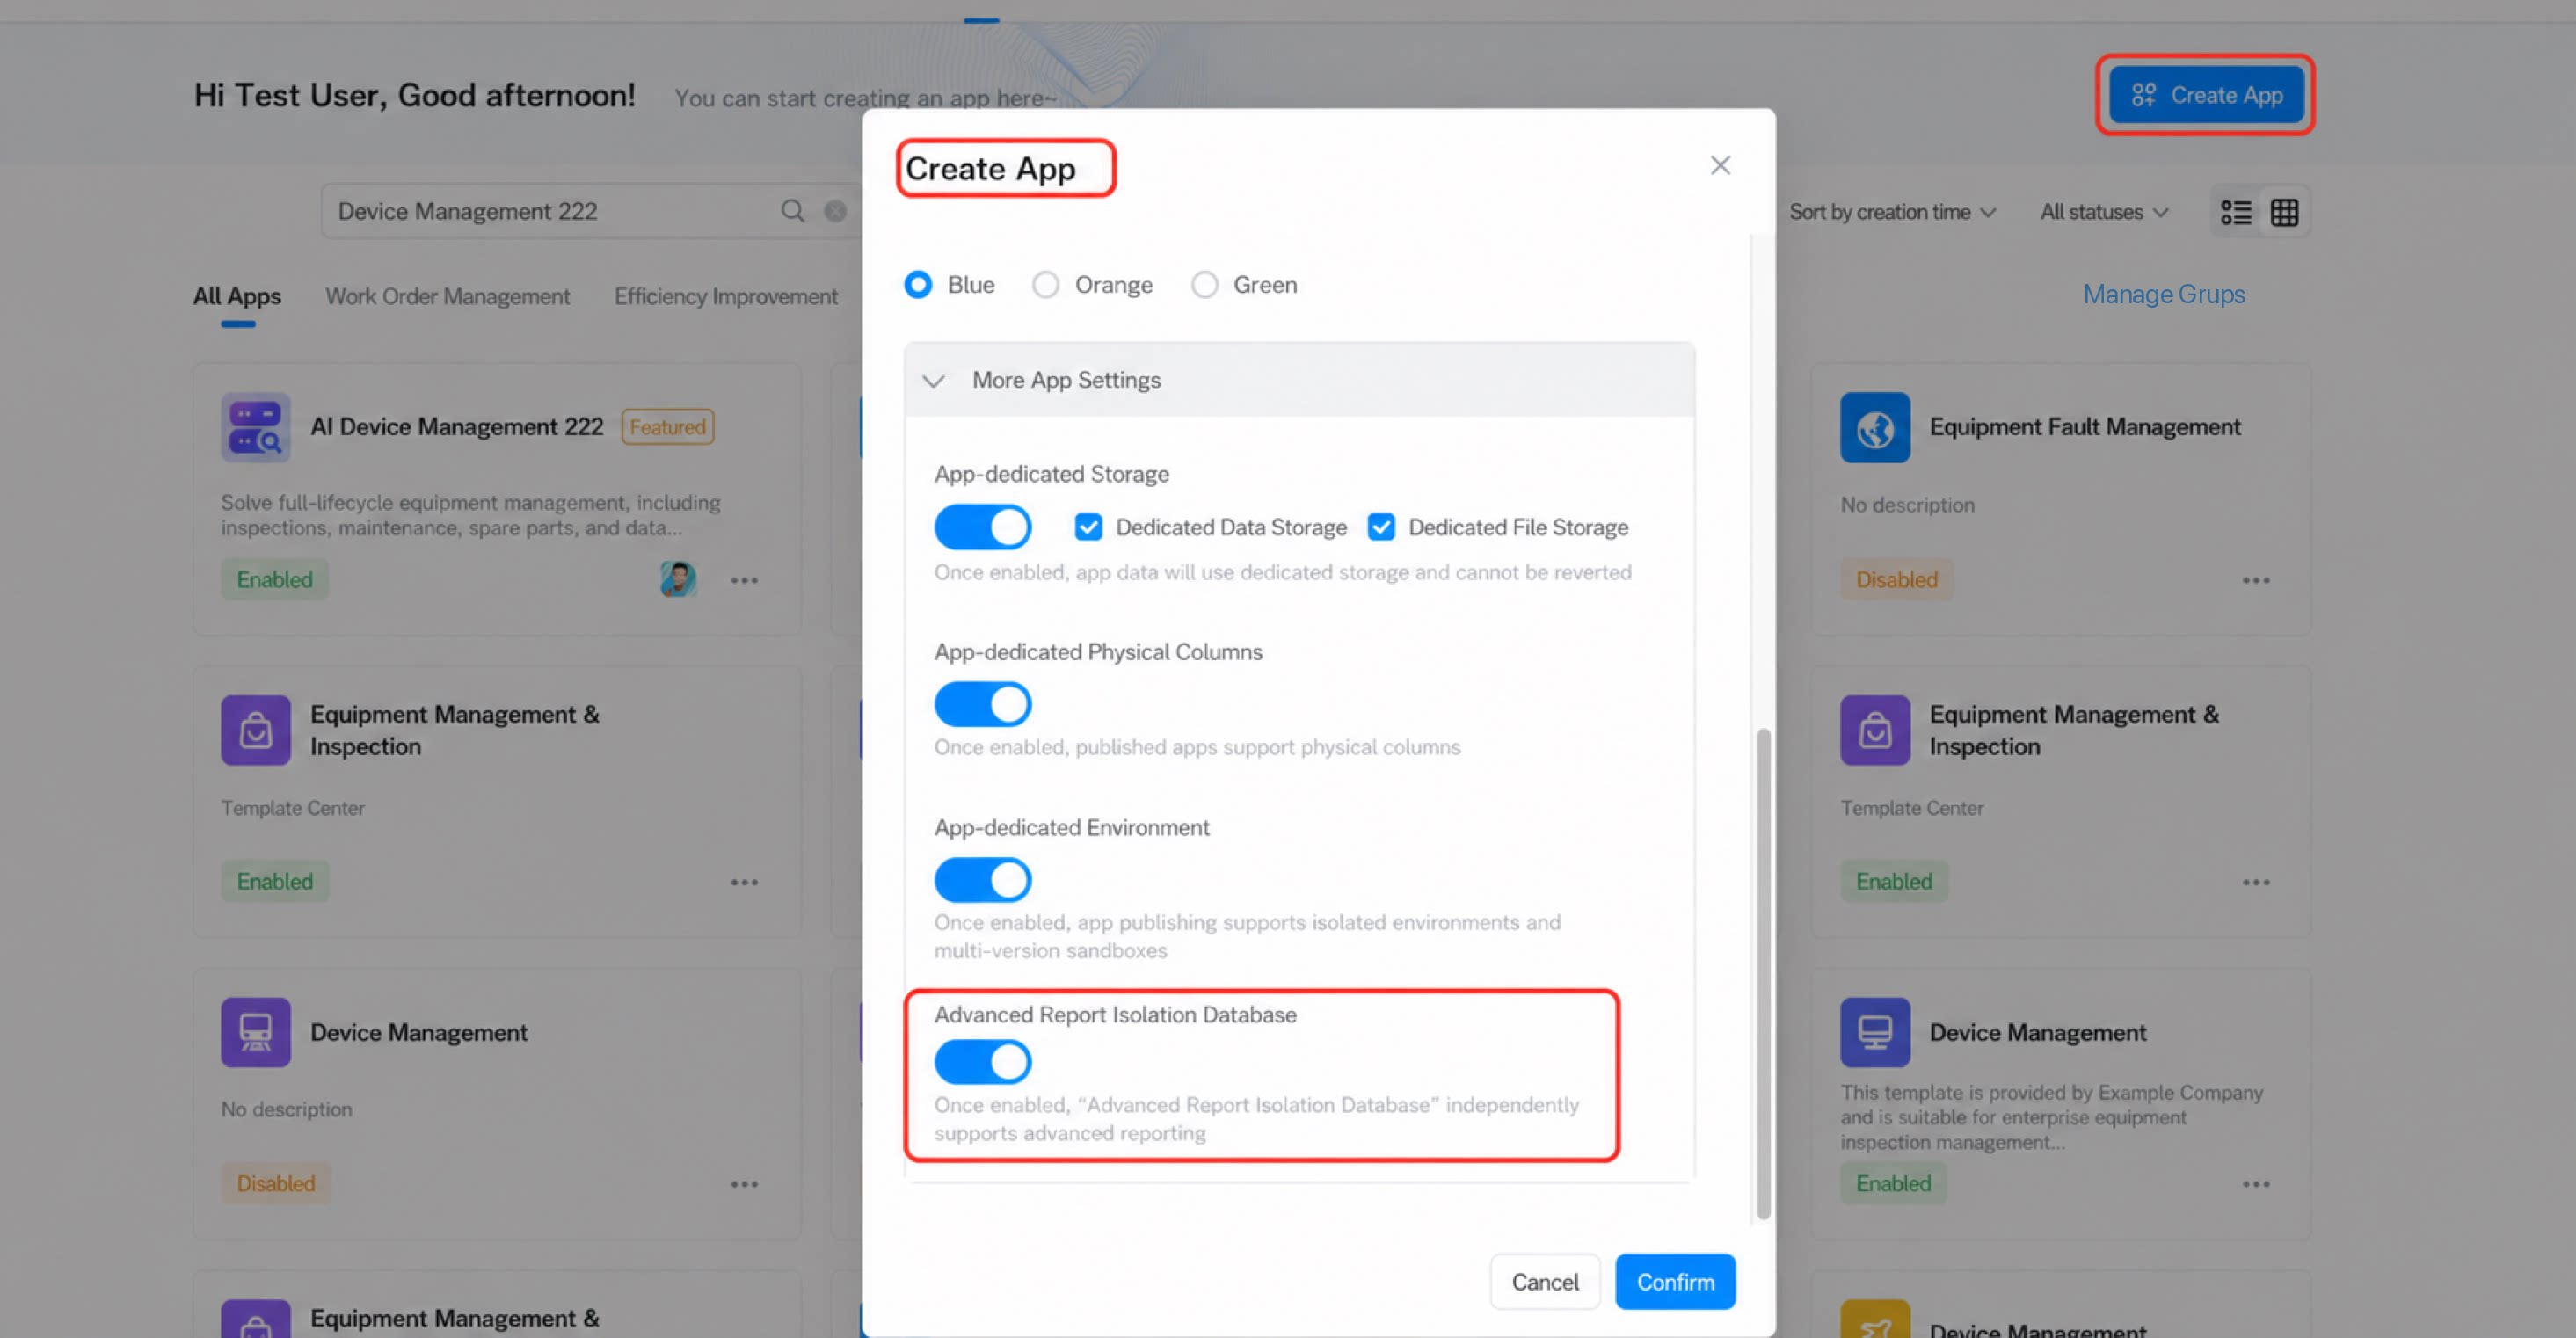
- Once App-Dedicated Storage is enabled, app data is stored in dedicated storage mode and cannot be reverted.
- Once App-Dedicated Physical Columns is enabled, app releases support physical columns.
- Once App-Dedicated Environment is enabled, app releases support independent environment deployment and multi-version sandbox capabilities.
- Once Premium Reports Isolated Database is enabled, the isolated database independently supports premium report capabilities.
2.2 Permission Settings
1
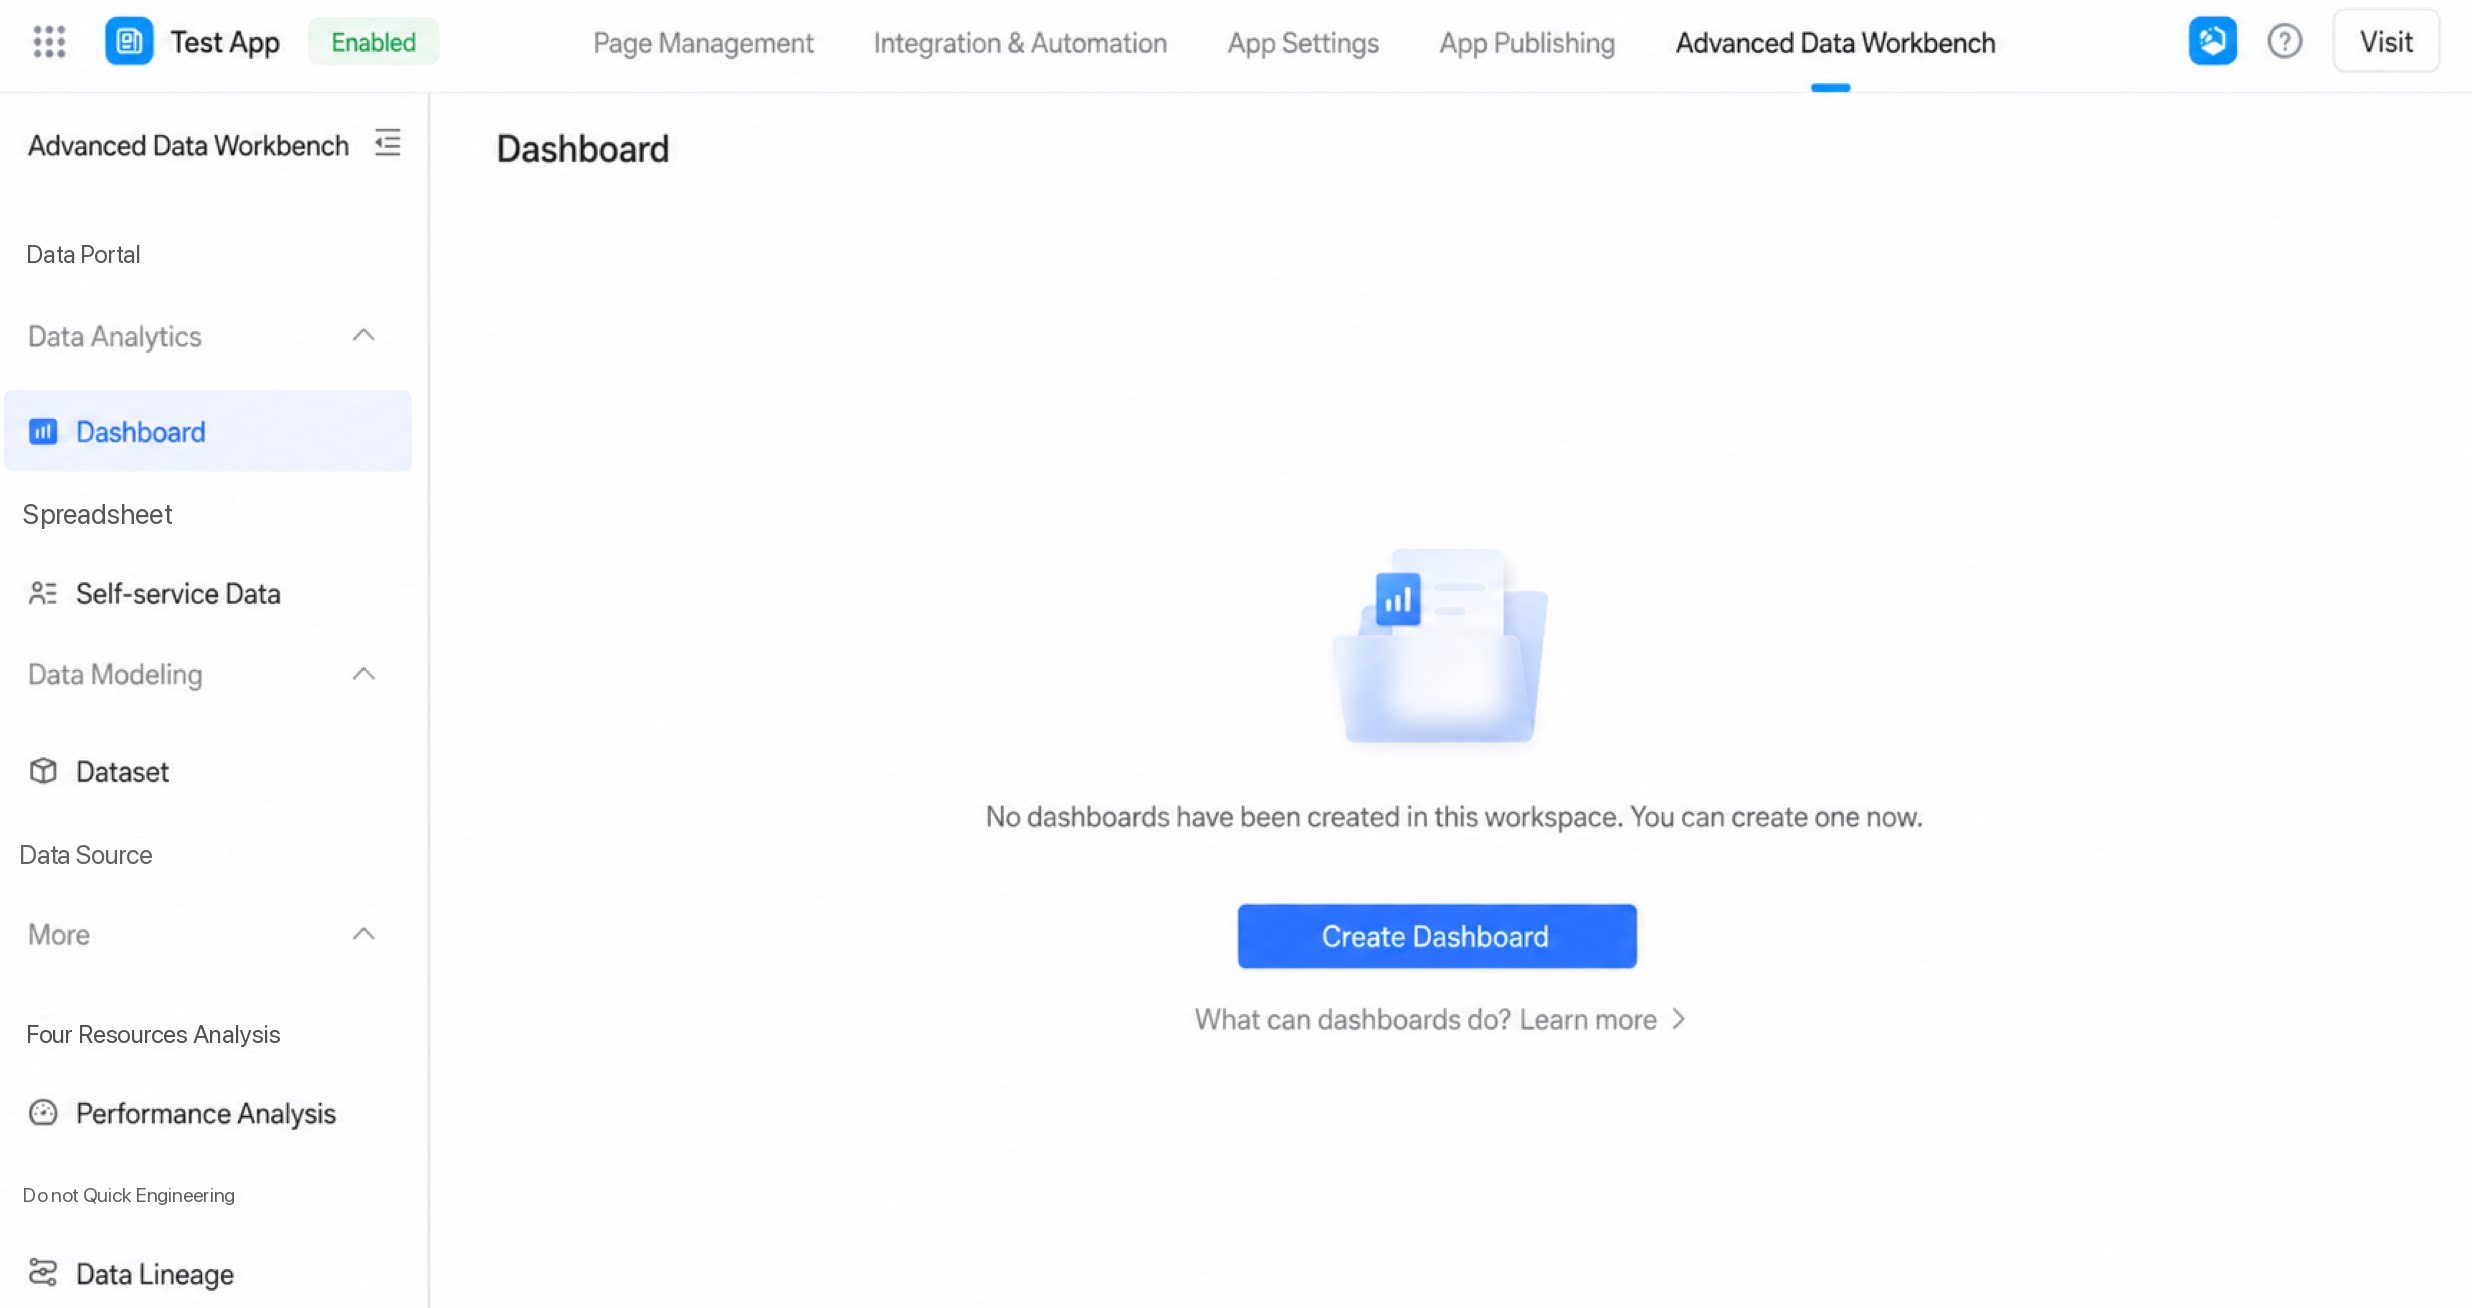
Location: After enabling this feature, click an app to enter the YiDA App Management backend > Premium Data Workbench
2
Procedure:
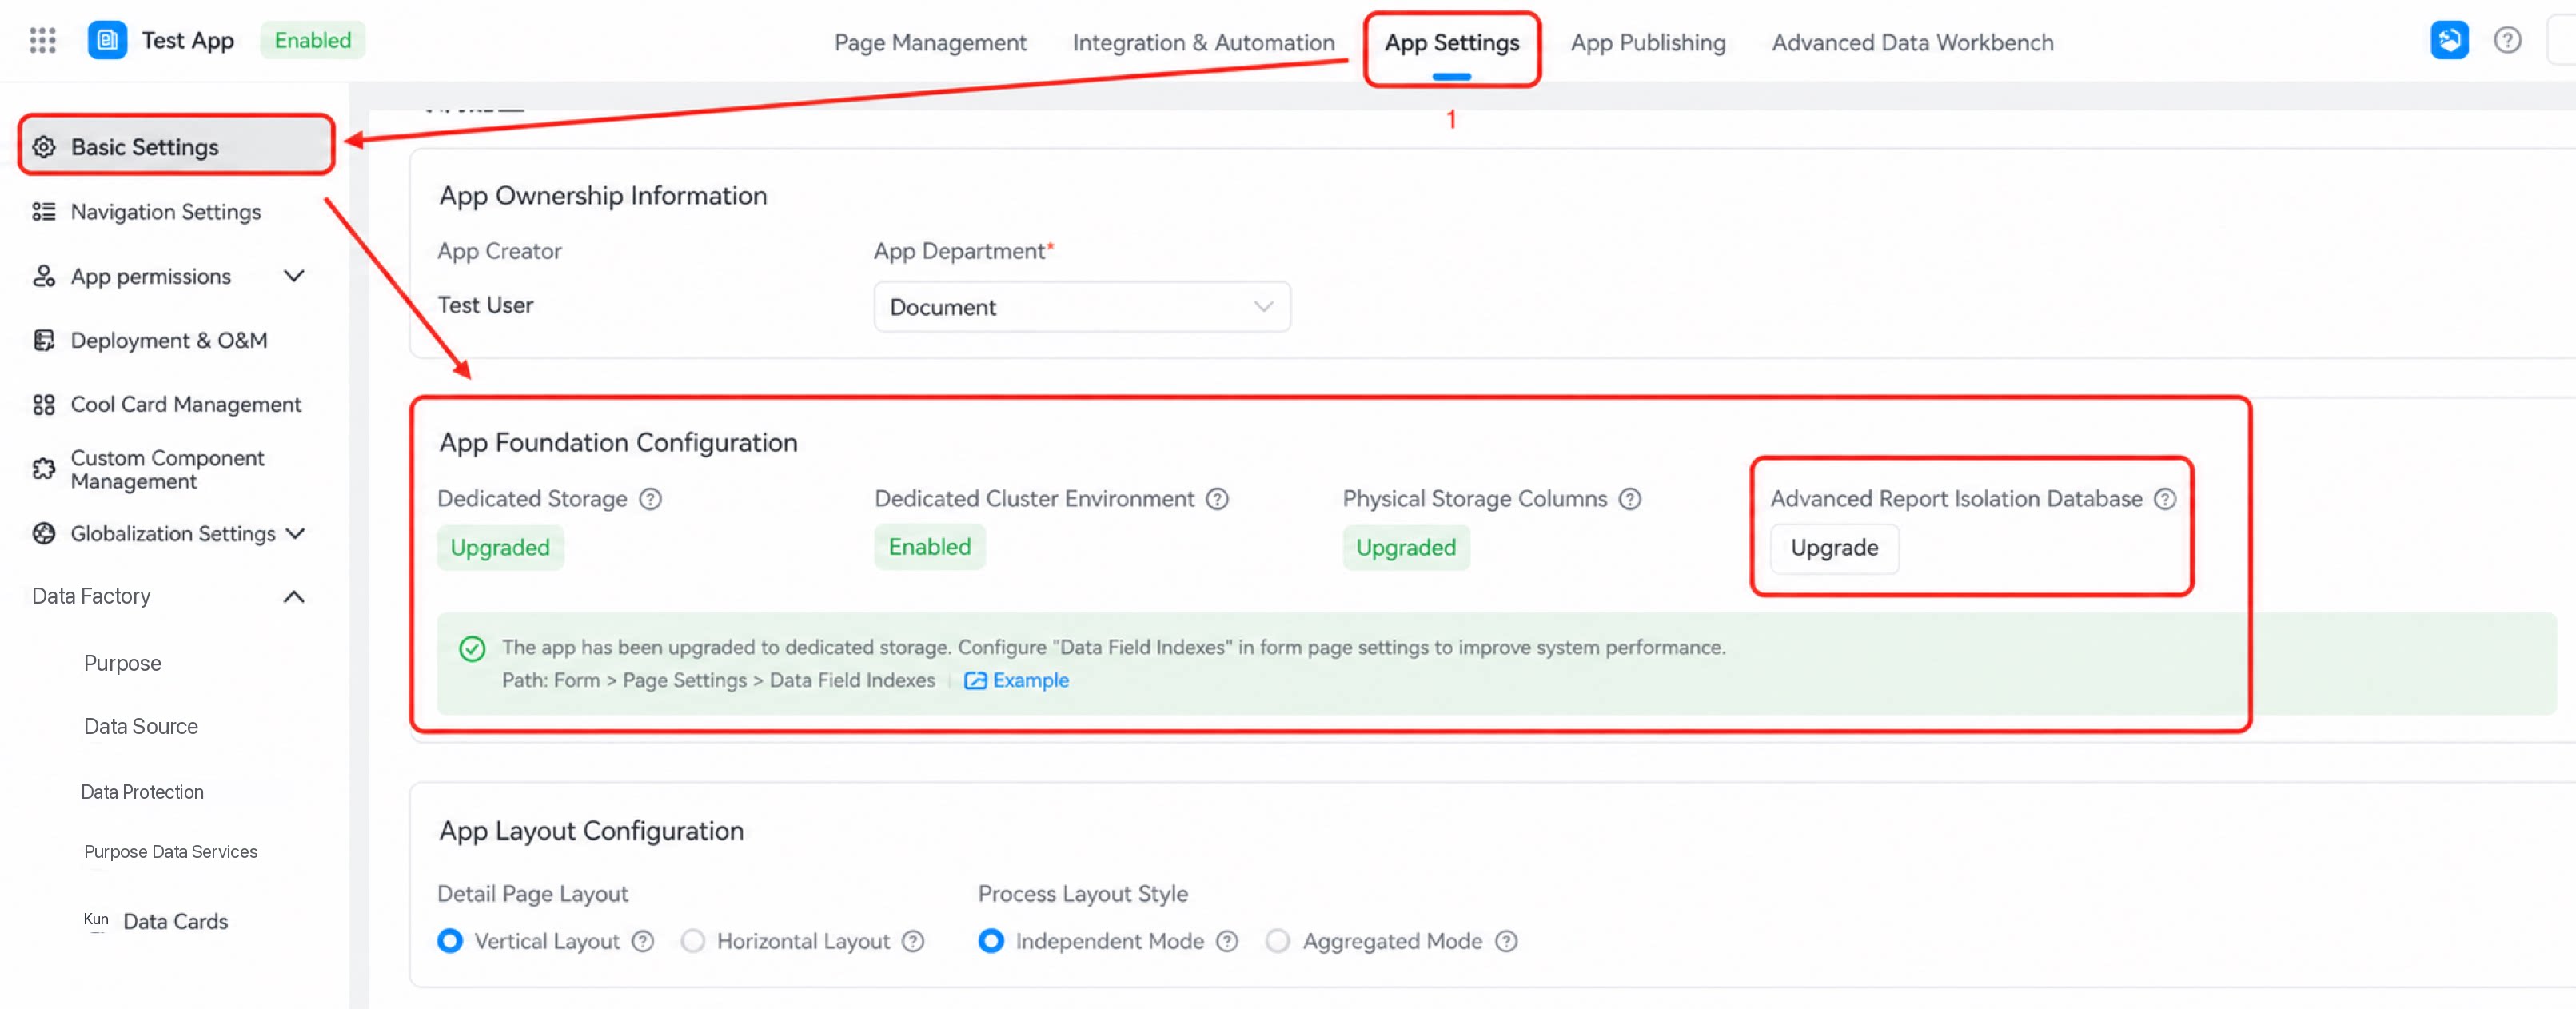
2.3 Upgrade Framework Configuration
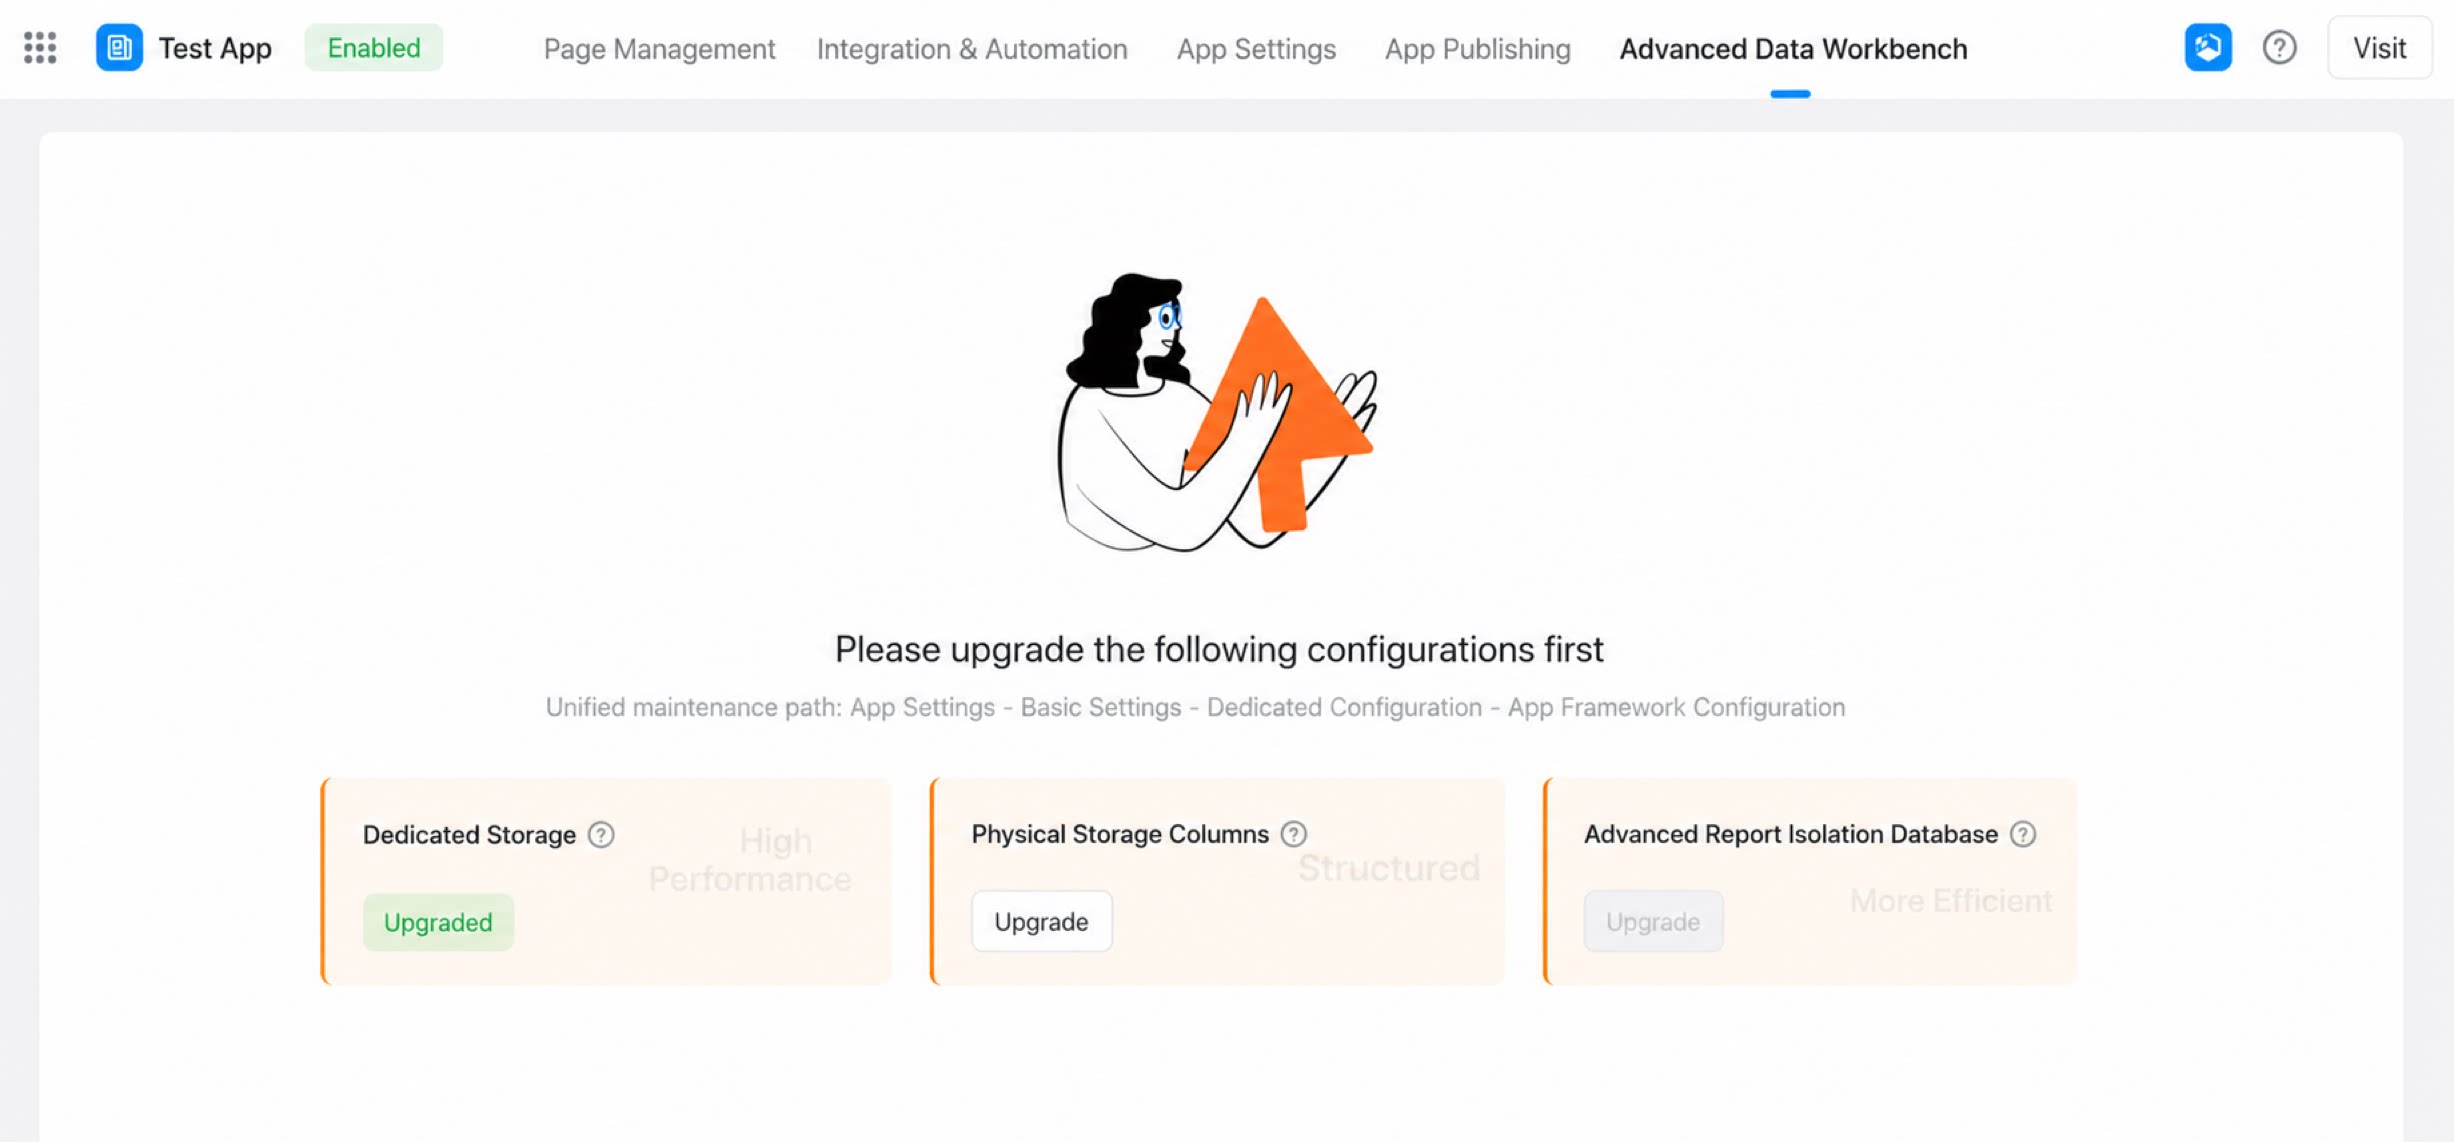
1
Location:
2
Procedure:
2.4 Manage Data Sources
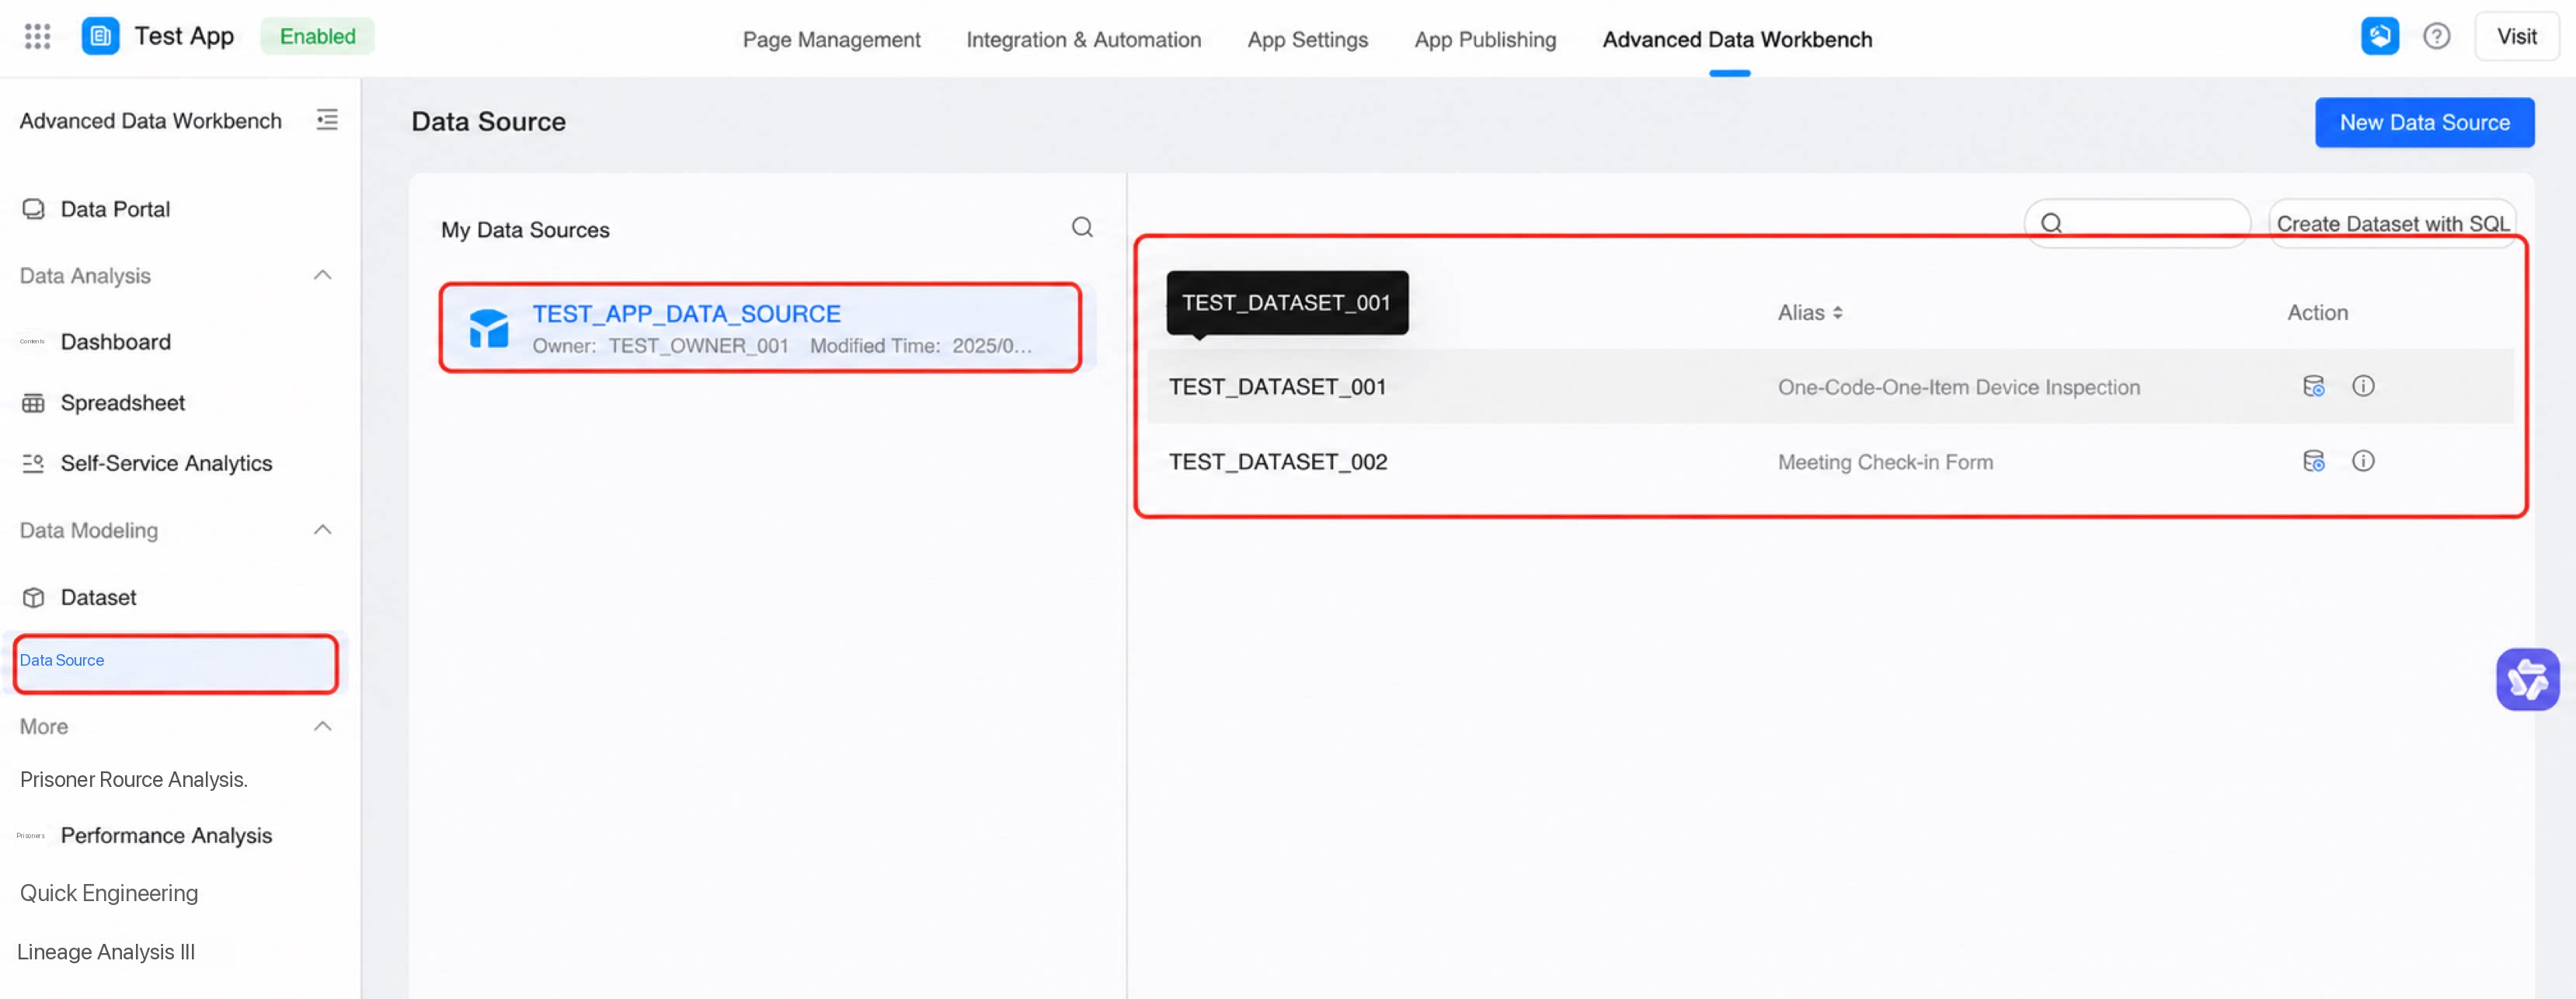
- Location: YiDA App Management backend > Premium Data Workbench > Data Build > Data Source.
- Select a data source: Click My Data Sources—the current app is selected by default—then click a form data source within the app, as shown below:
- Create a data source:
2.5 Manage Datasets
- Location: YiDA App Management backend > Premium Data Workbench > Data Build > Datasets > Create Dataset.
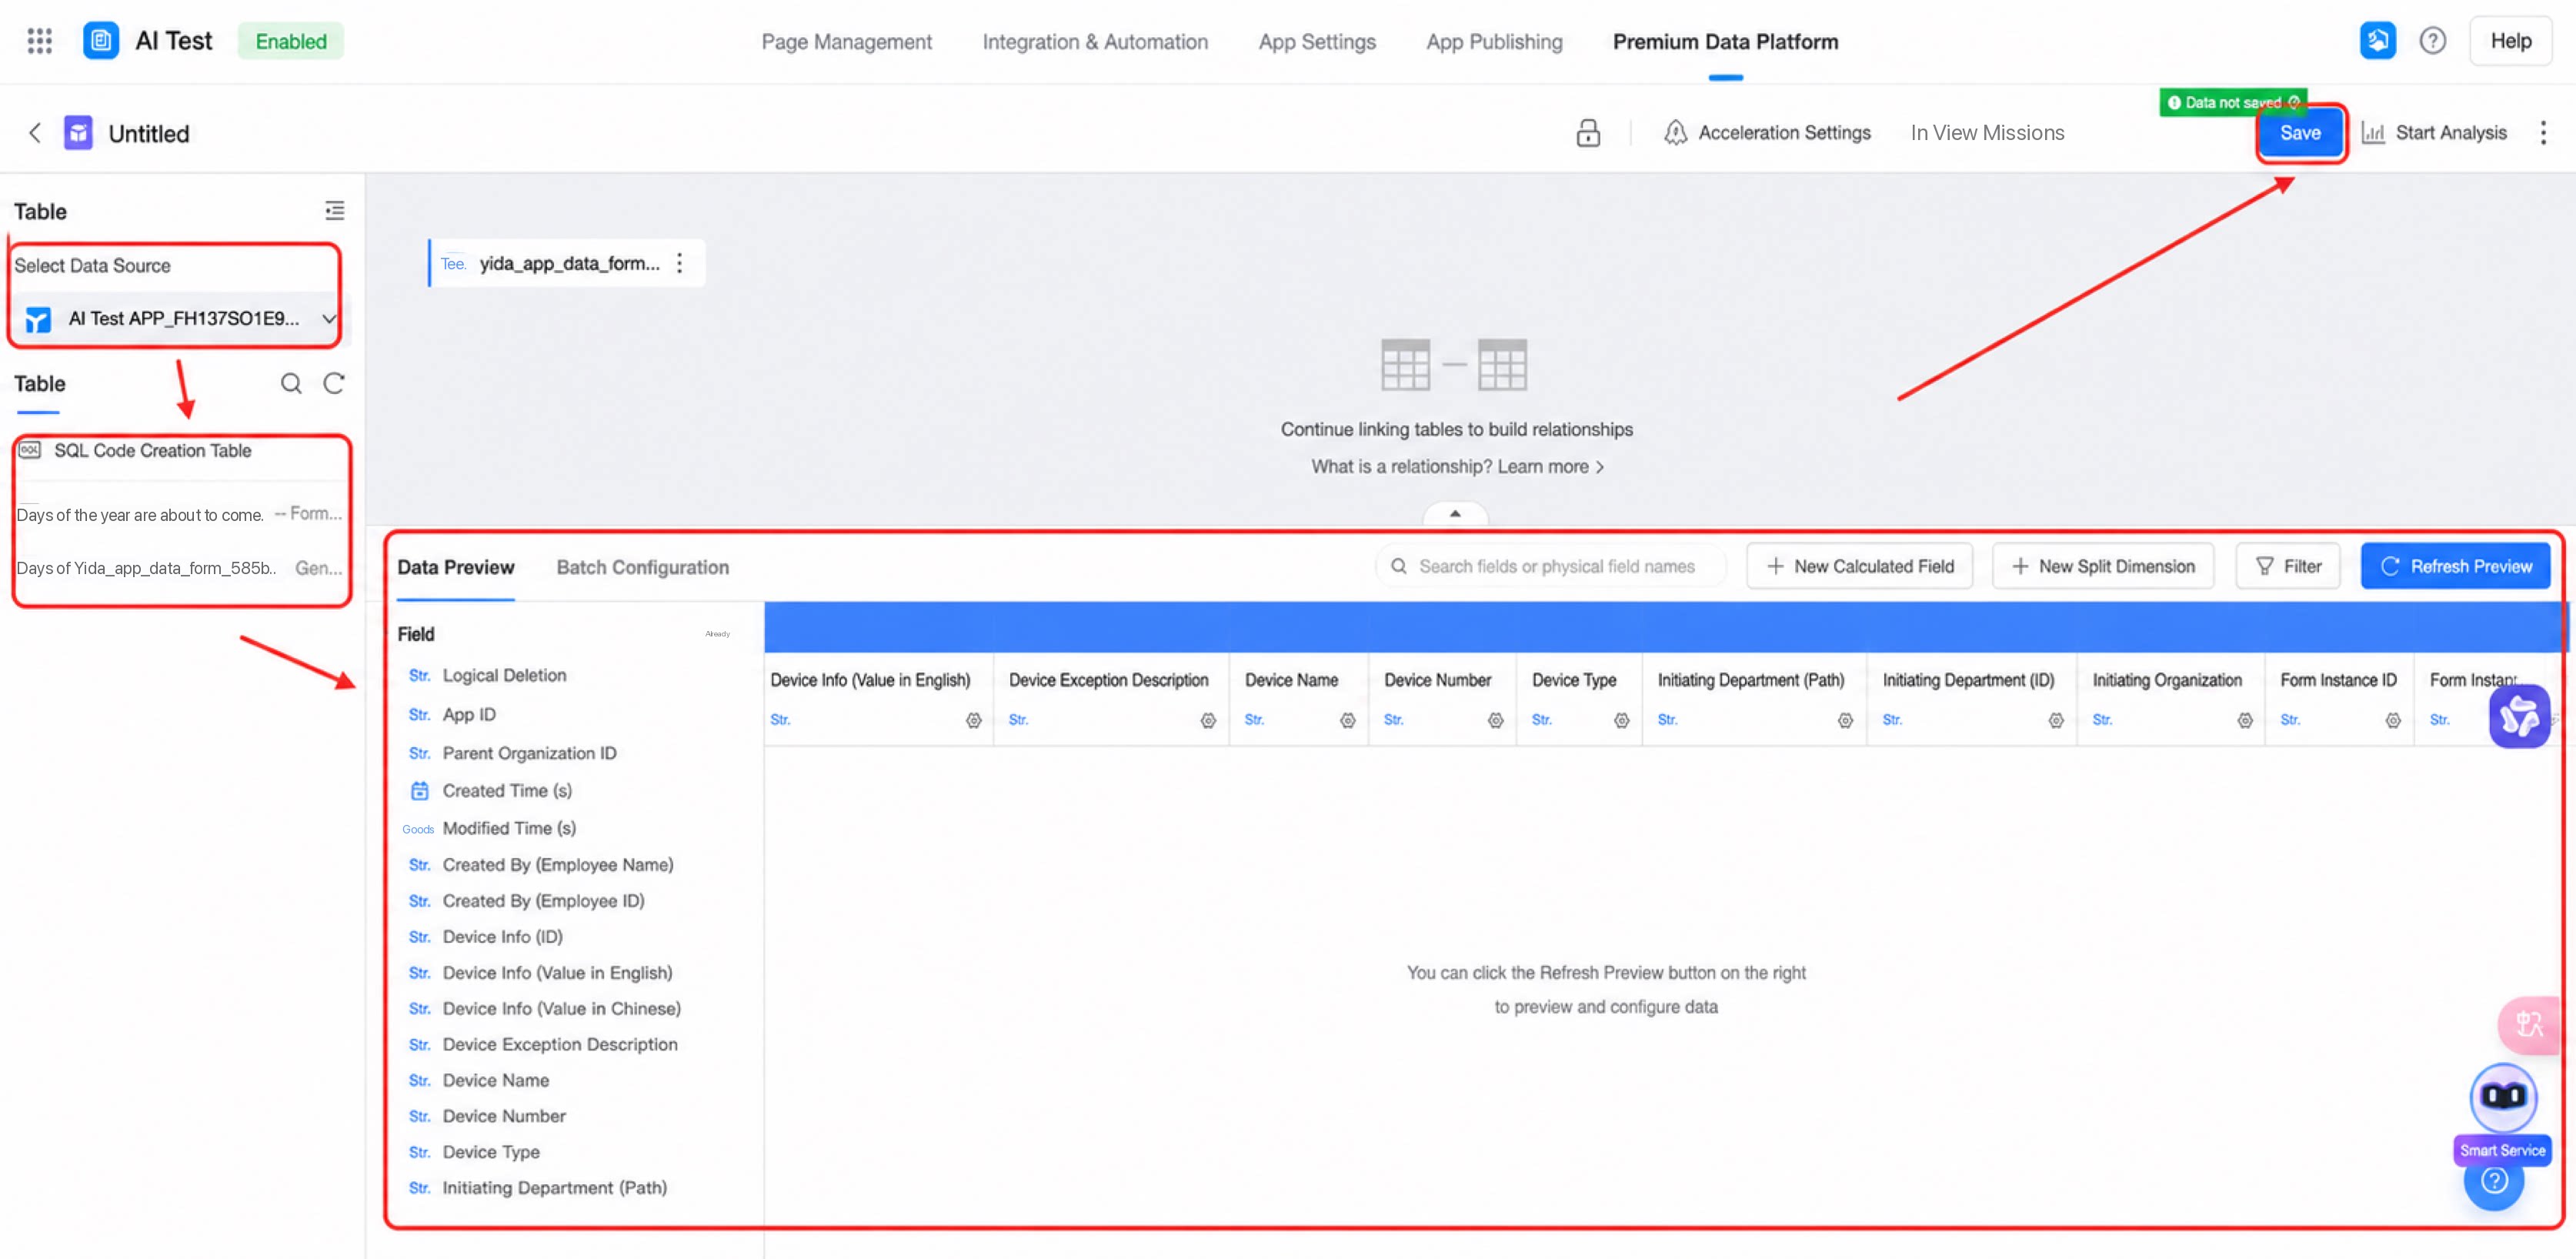
- Create a dataset: Select a data source, select a table, and configure the data, as shown below:
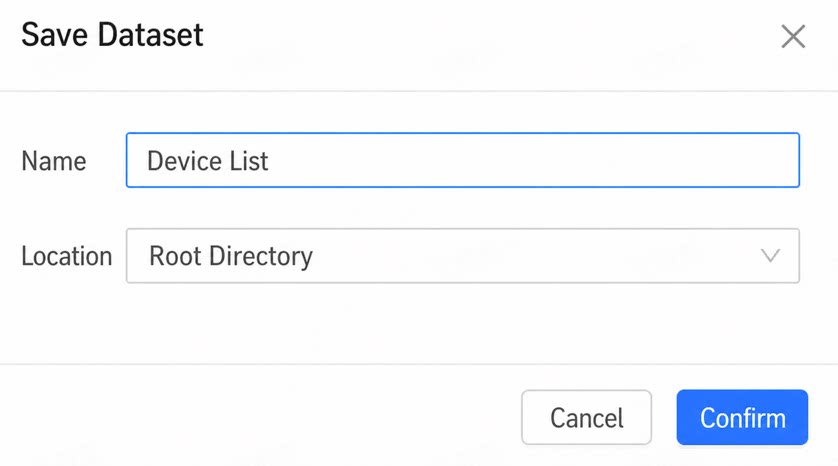
- Save the dataset: When configuration is complete, click Save, enter a name and a save location, and click Confirm.
2.6 Apply Data
2.6.1 Build a Dashboard
- Location: YiDA App Management backend > Premium Data Workbench > Dashboard > Create Dashboard.
- Create a dashboard:
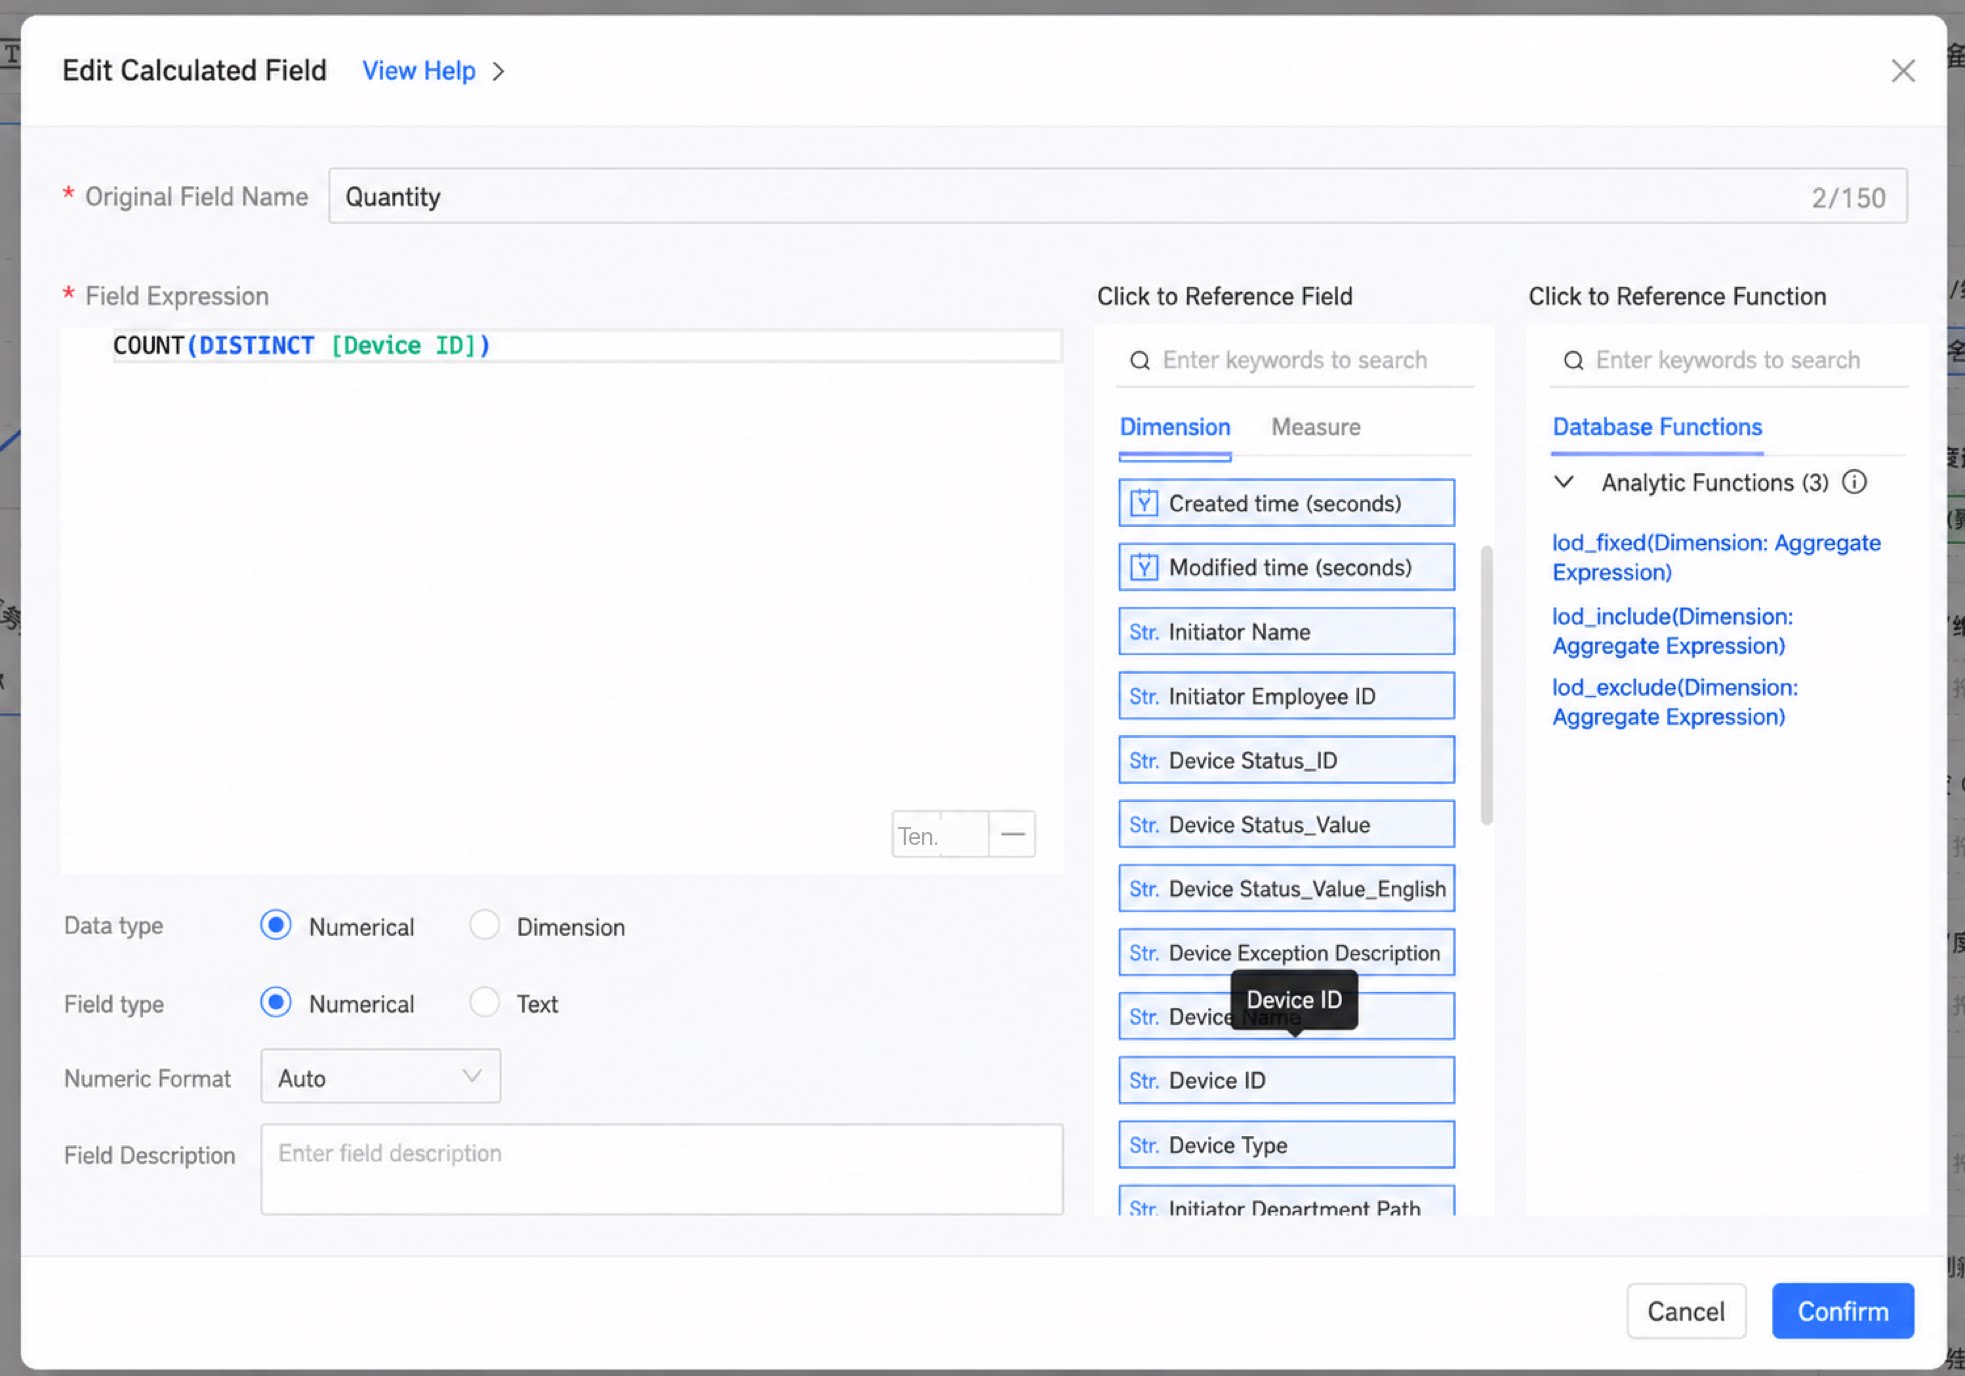
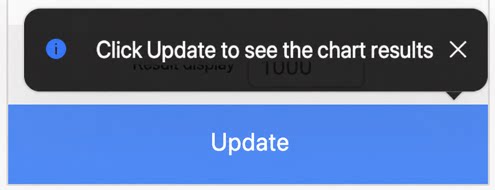
- Configure charts:
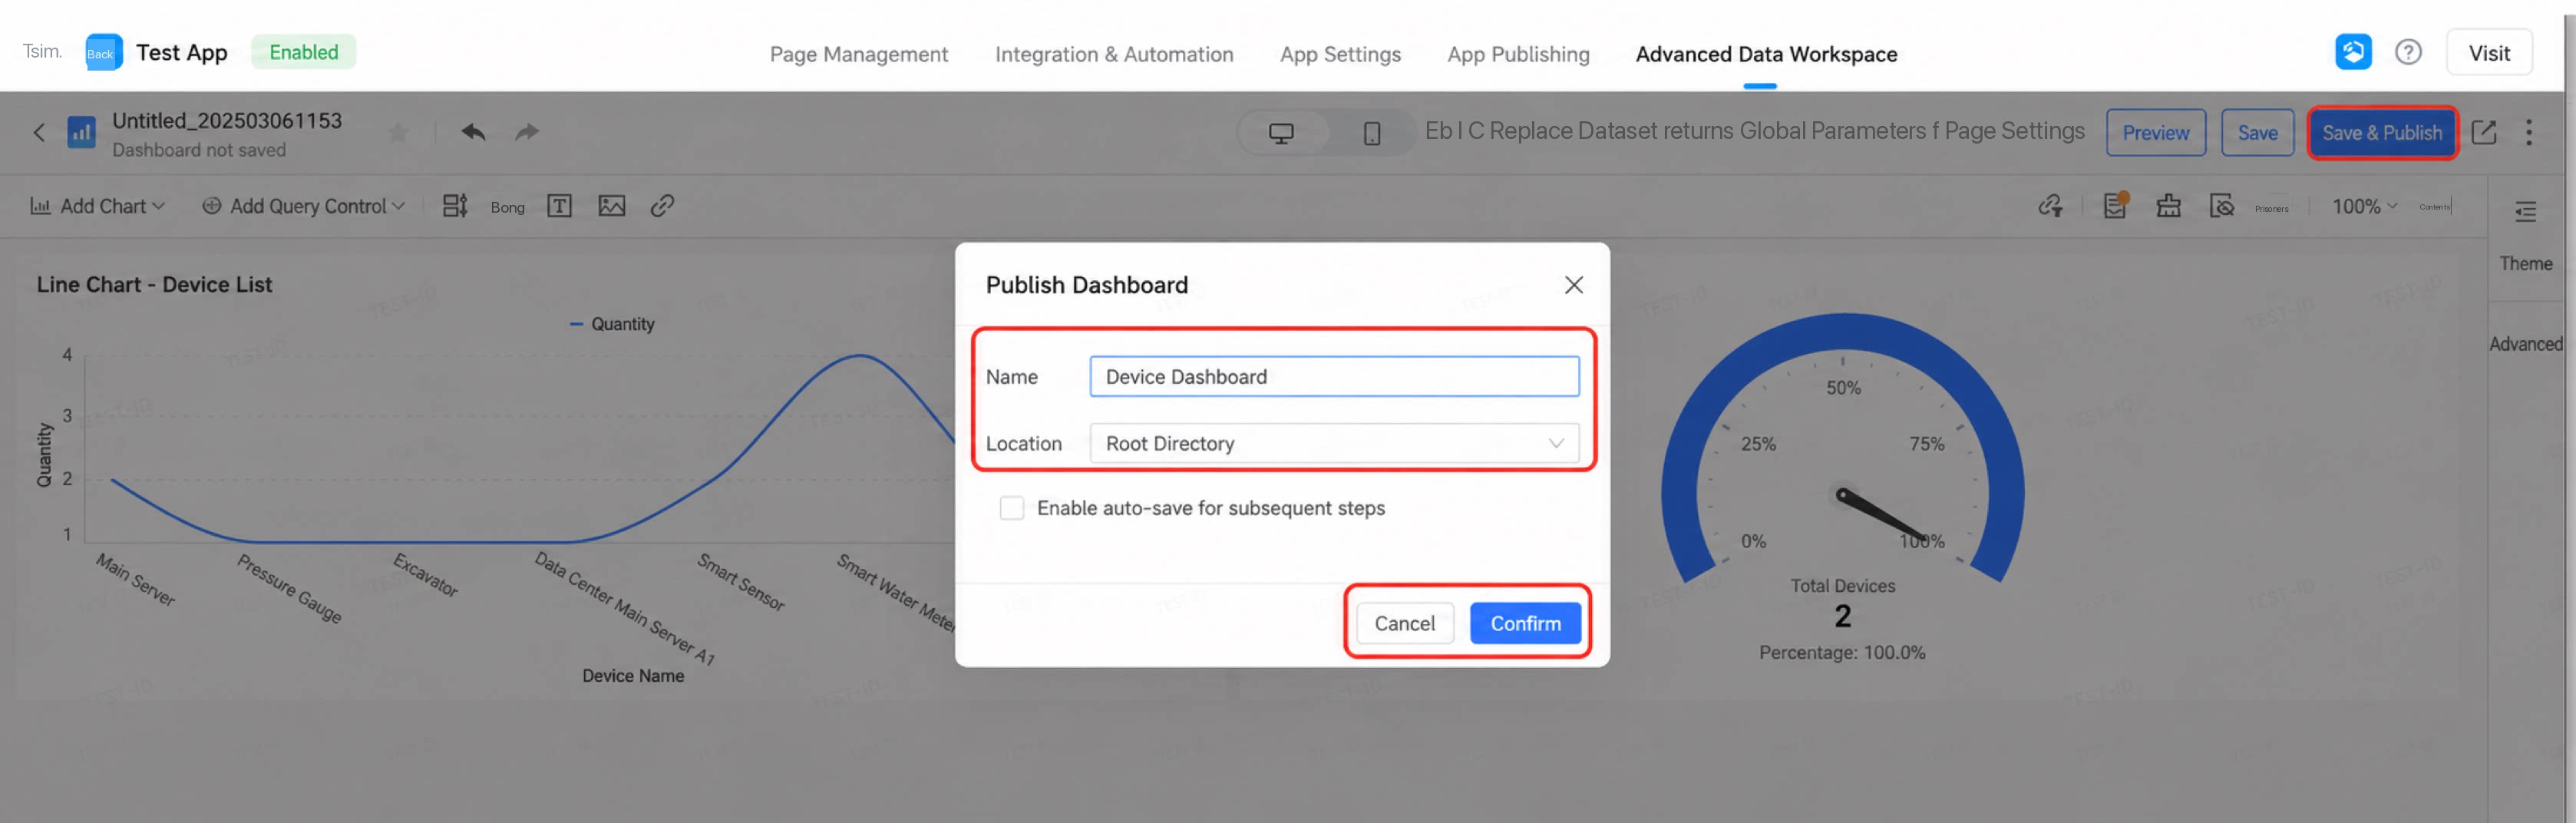
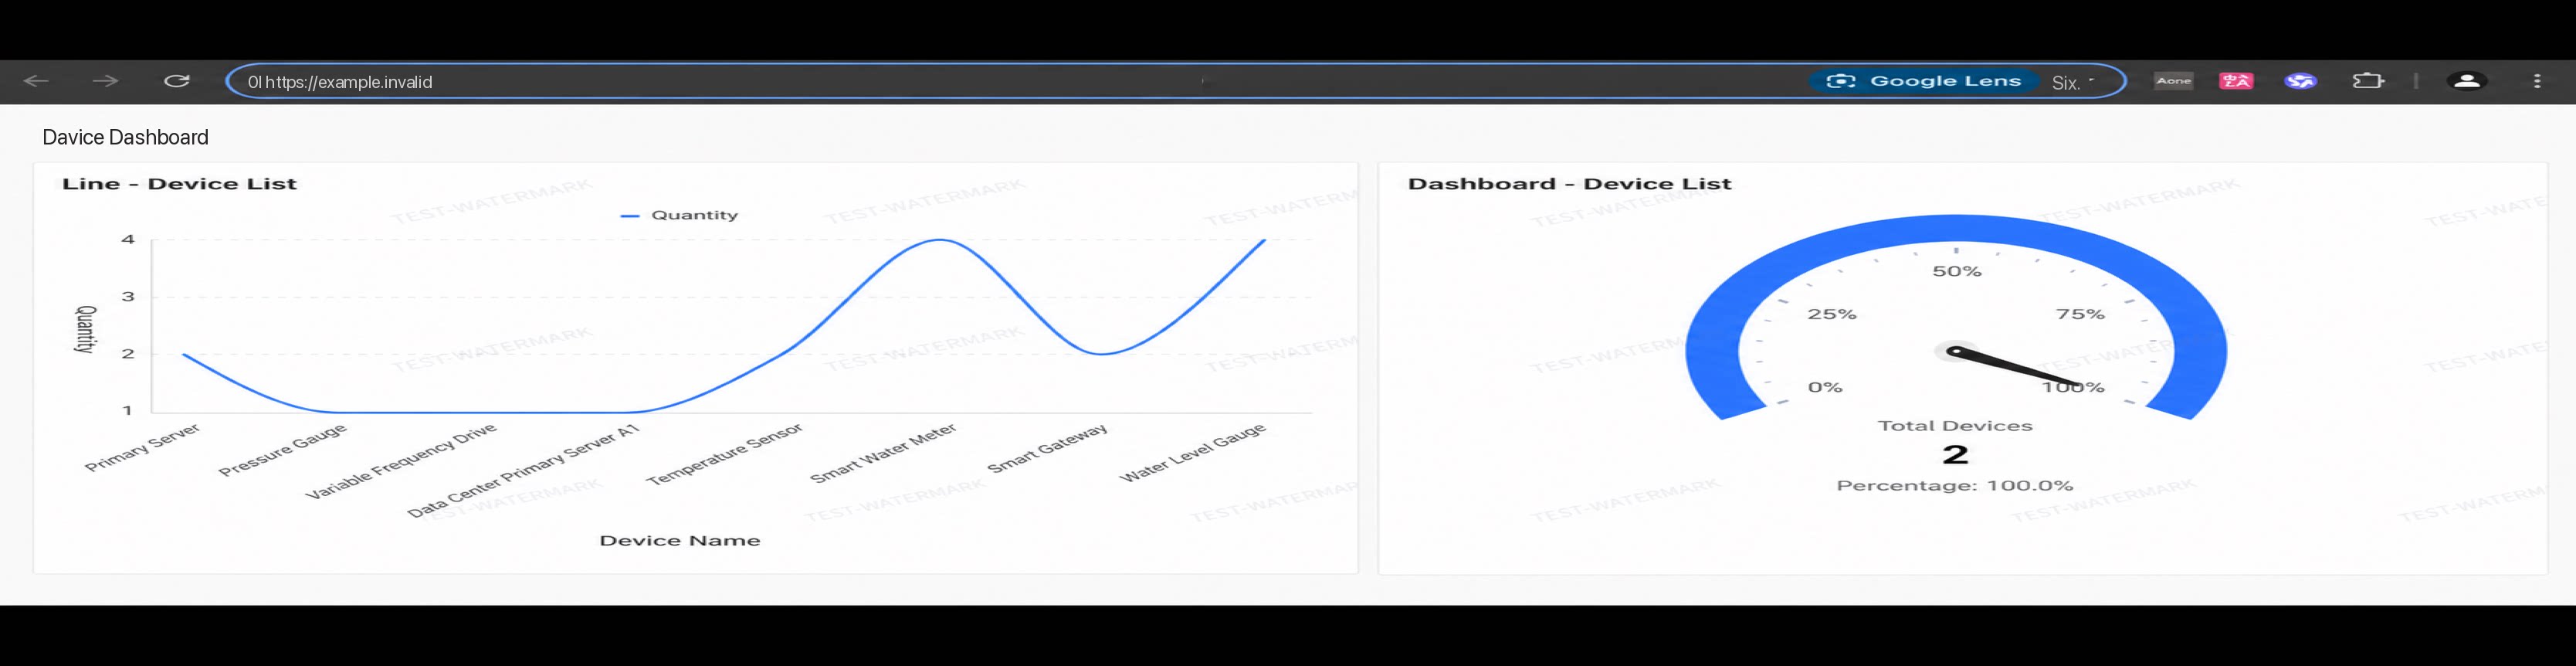
- Publish the dashboard:
2.6.2 Create a Data Portal
- Location: YiDA App Management backend > Premium Data Workbench > Data Portal.
- Create a data portal:
2.6.3 Create a Spreadsheet
- Location: YiDA App Management backend > Premium Data Workbench > Data Analysis > Spreadsheet.
- Procedure: Refer to Spreadsheet.
2.6.4 Create Self-Service Data Extraction
- Location: YiDA App Management backend > Premium Data Workbench > Data Analysis > Self-Service Data Extraction.
- Procedure: Refer to Self-Service Data Extraction.
2.7 Send a Dashboard to YiDA
- Location: YiDA form page > Add Page.
- Procedure: