Chats
Chats Calendar
 Meetings
 Contacts
 Mail
Mail Docs
Docs Drive
Drive AI Table
 AI Minutes
 Attendance
 Approval
 YiDA
YiDA Admin Console
1. What Is Data Preparation
Before exploring how to use the data preparation feature, let’s first look at what data preparation actually is and when you need this premium capability. YiDA provides data processing, data visualization, and embedded BI services for building data analysis pages. Data preparation refers to a series of operations performed on a data source or dataset — such as joining multiple tables or transforming data — before visual analysis. It is the step that precedes visual analysis. In short, before creating a report and analyzing data, you can first process the data source or dataset.2. How to Configure Data Preparation
2.1 Enter Data Preparation
Path: Open the app page >> Create report >> Drag a display component >> Select dataset >> Data preparation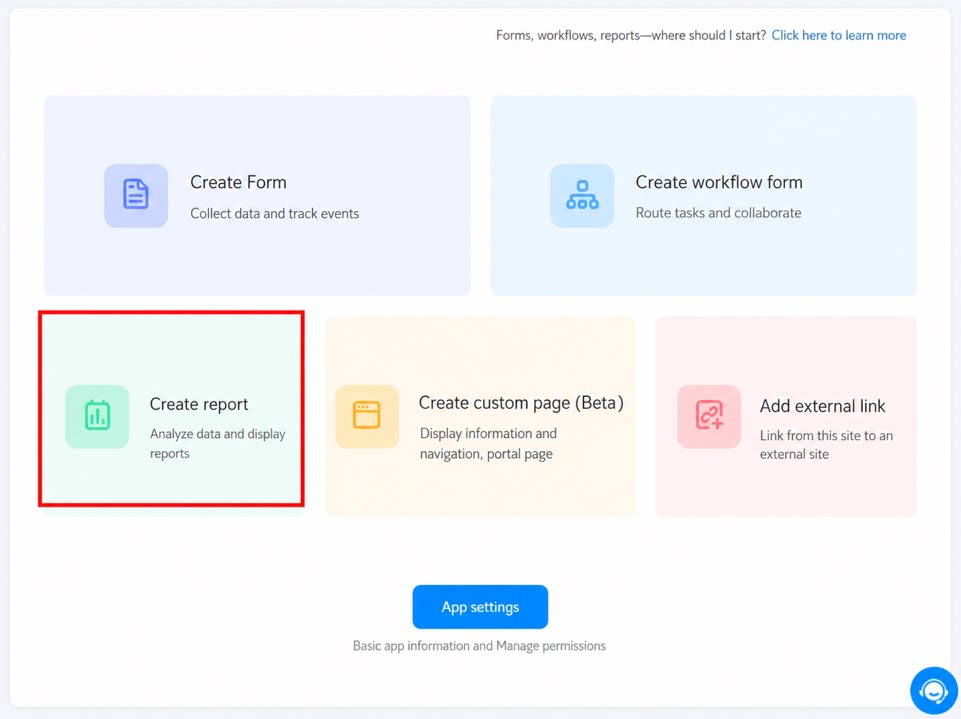
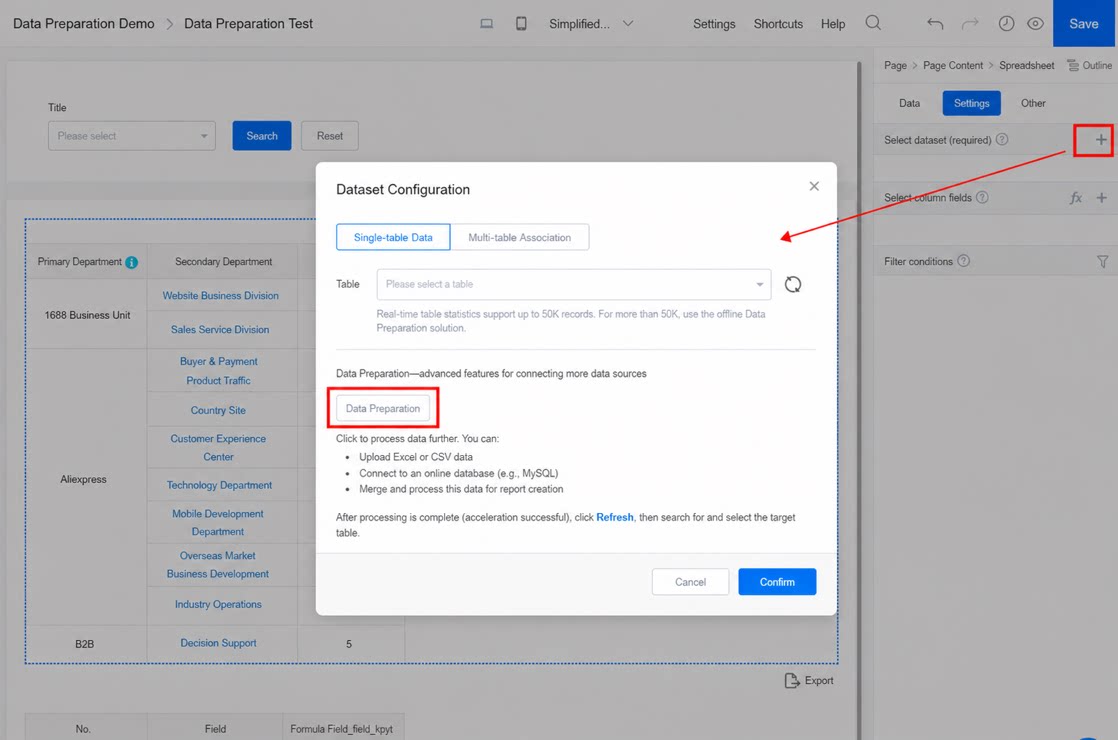
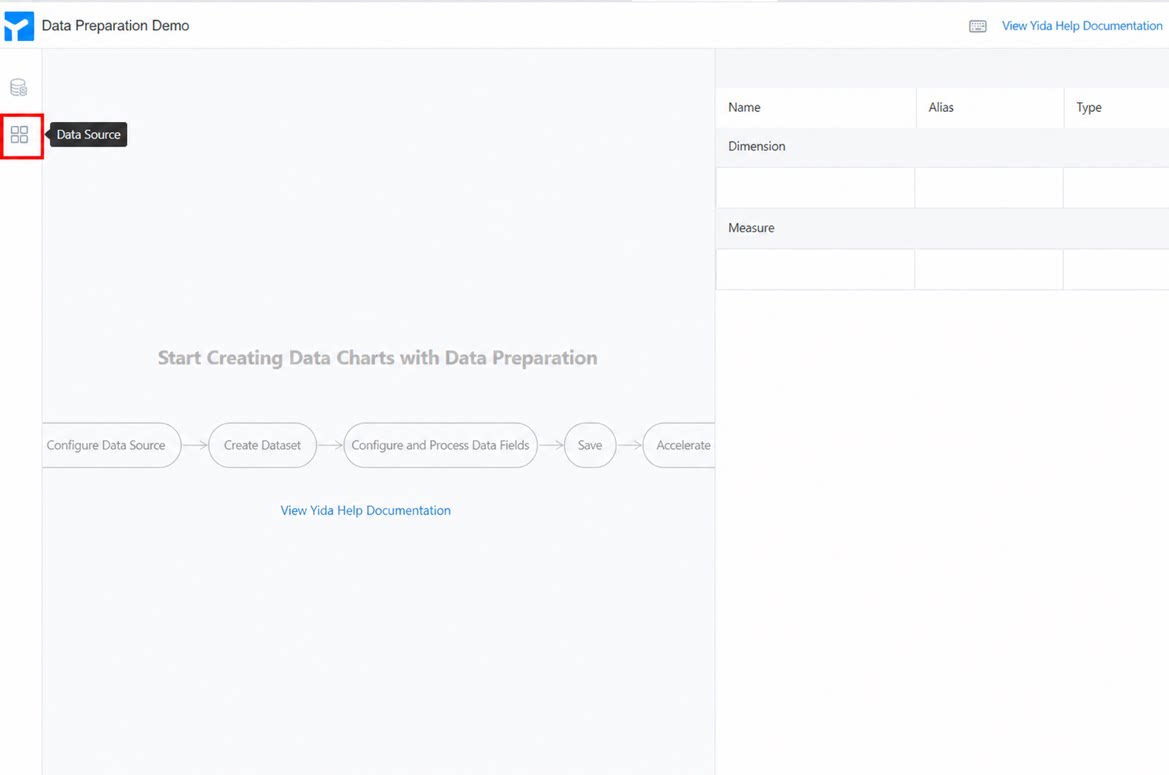
2.2 Configure a Data Source
In data preparation, there are two ways to upload your data: import local files (Excel/CSV), or connect to a server such as MySQL or a YiDA data source. Note: Data from YiDA apps appears in the first row by default, with the display type shown as YiDA data source.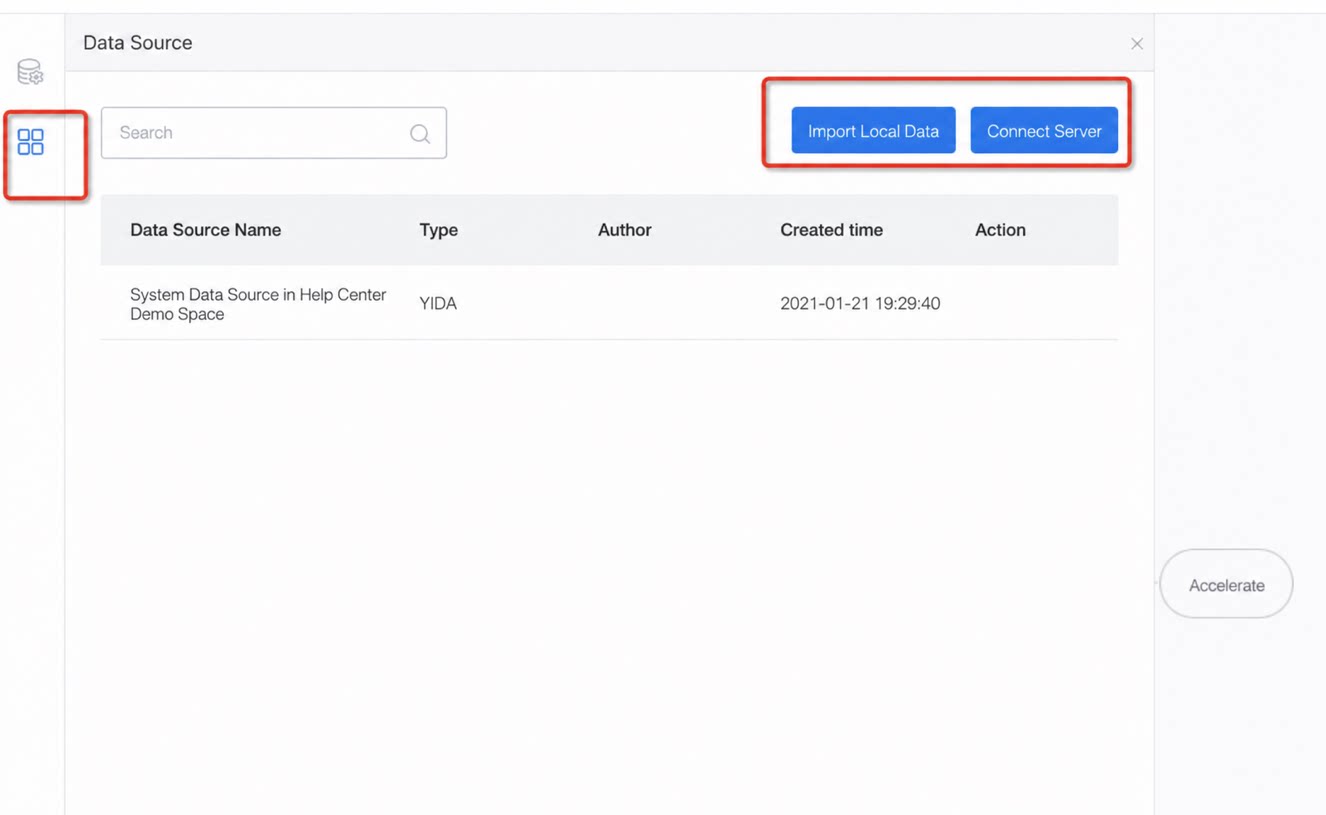
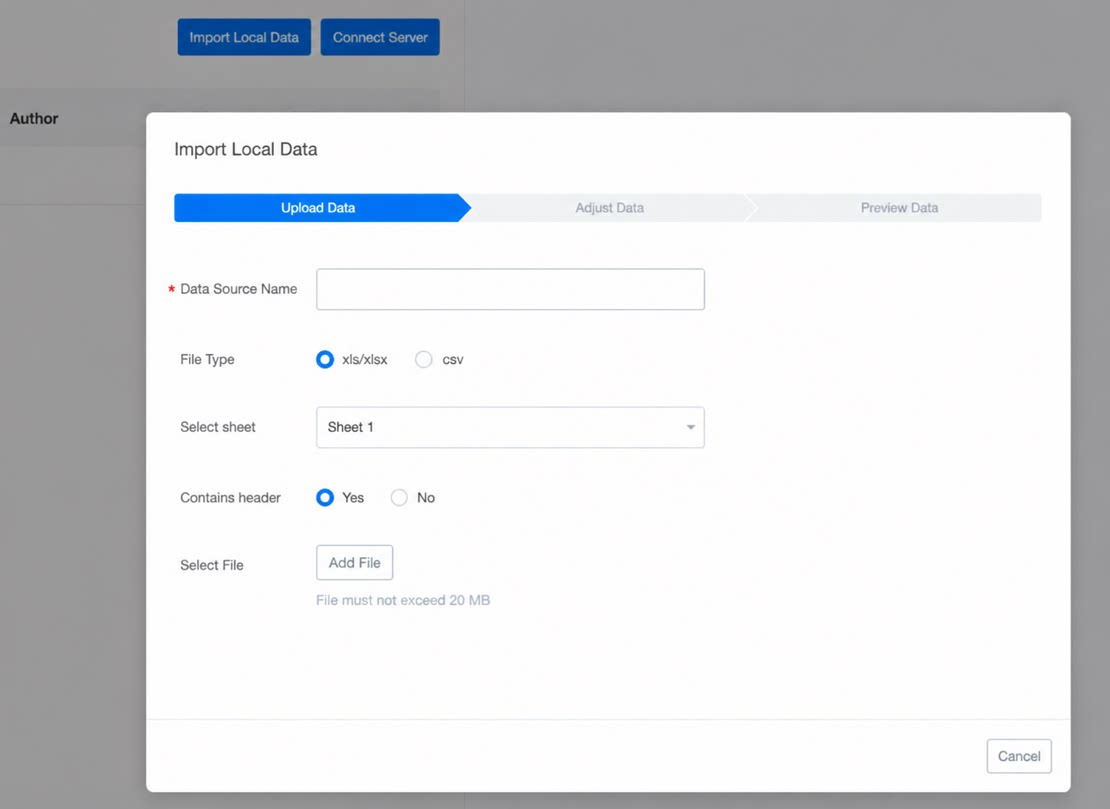
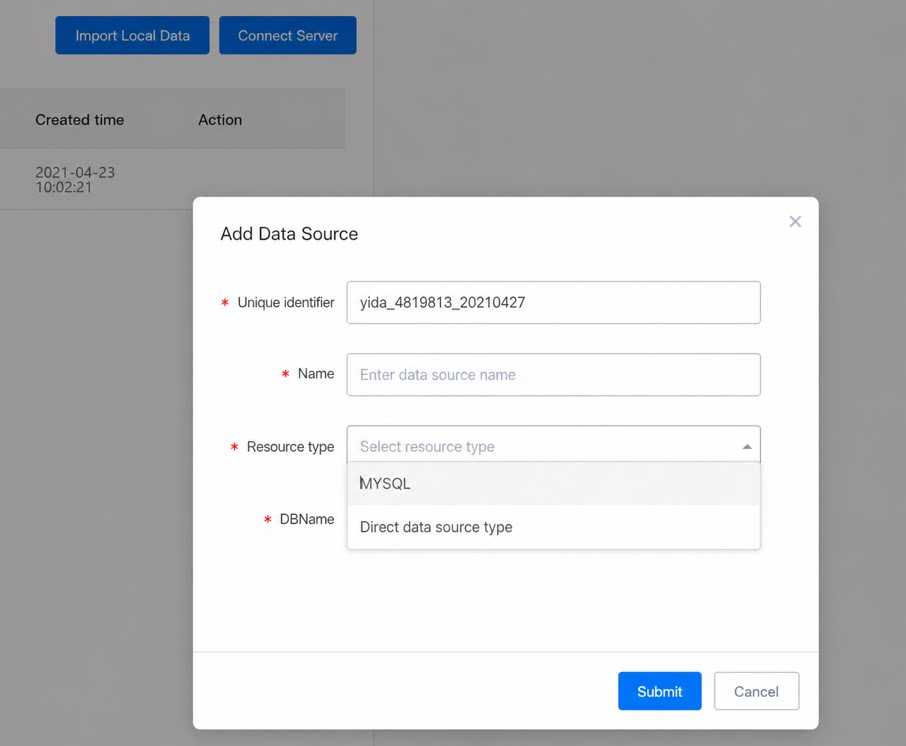
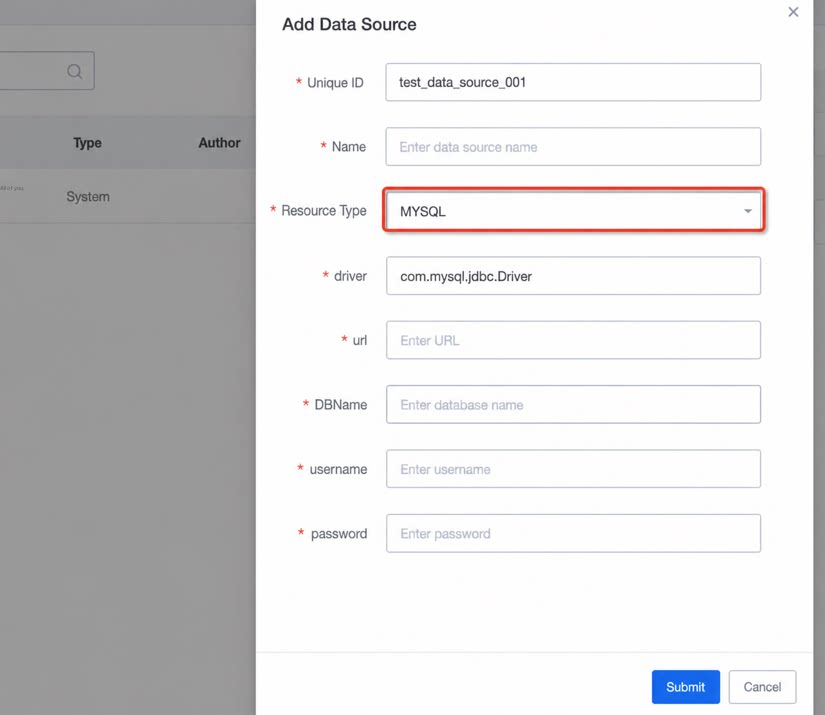
2.3 Create a Dataset
Two modes are provided: Detail and Summary.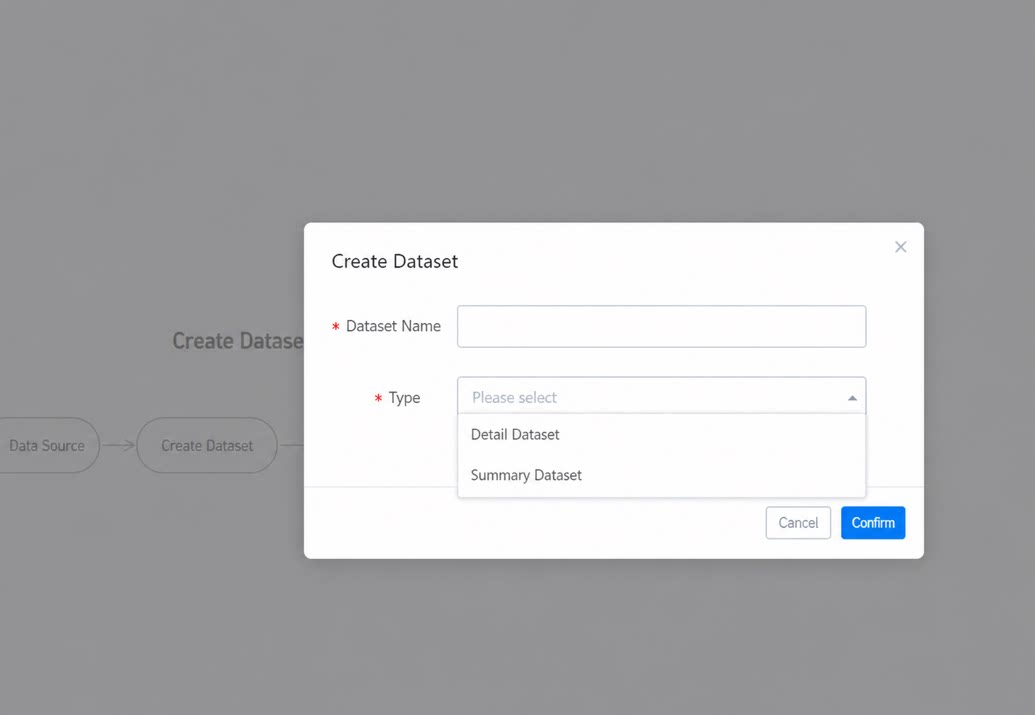
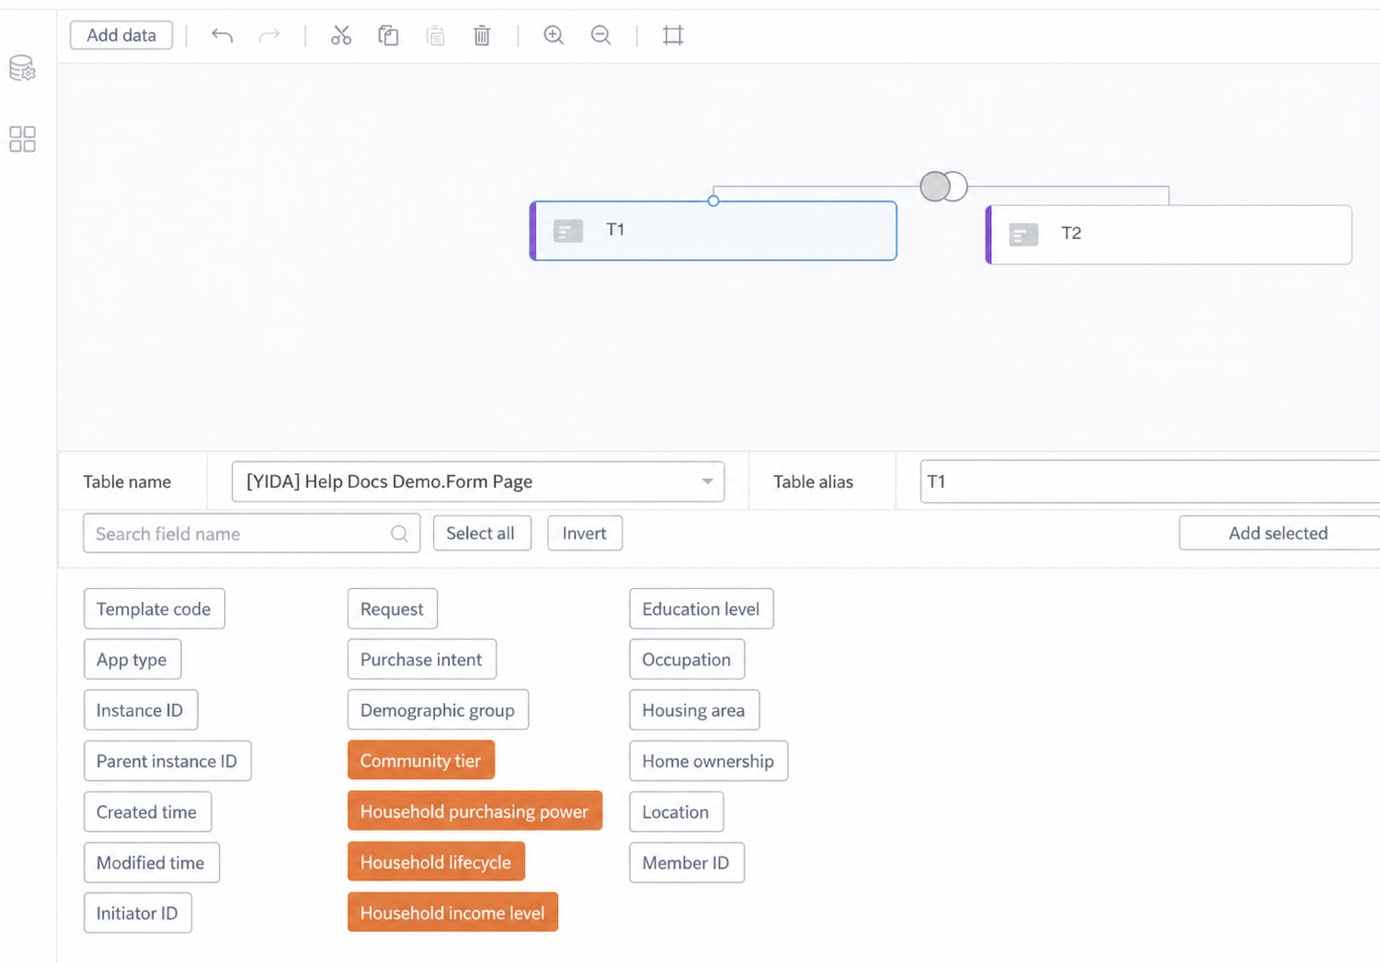
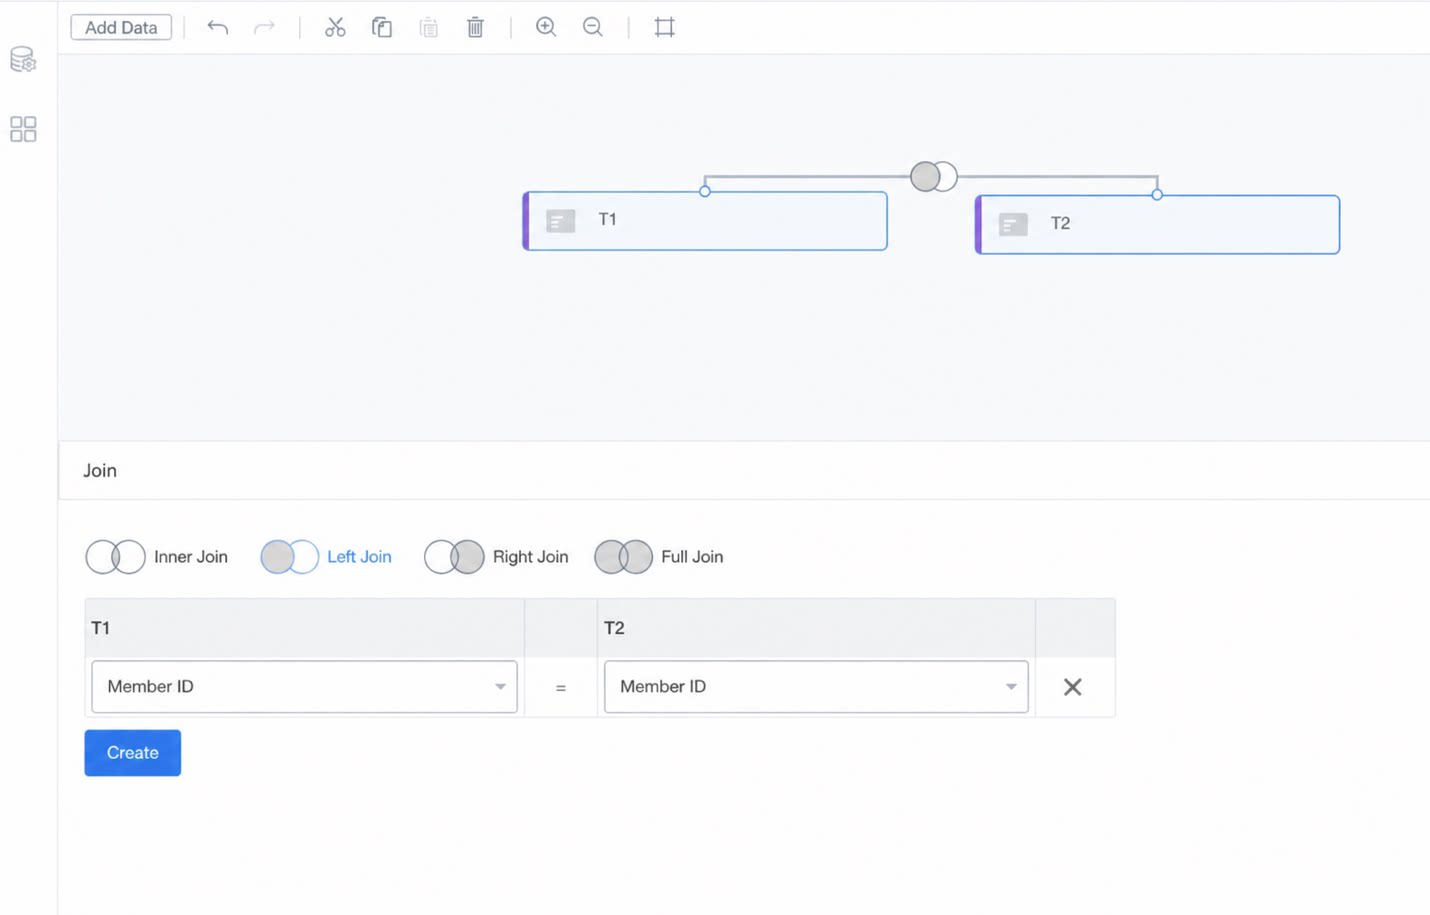
Tips:
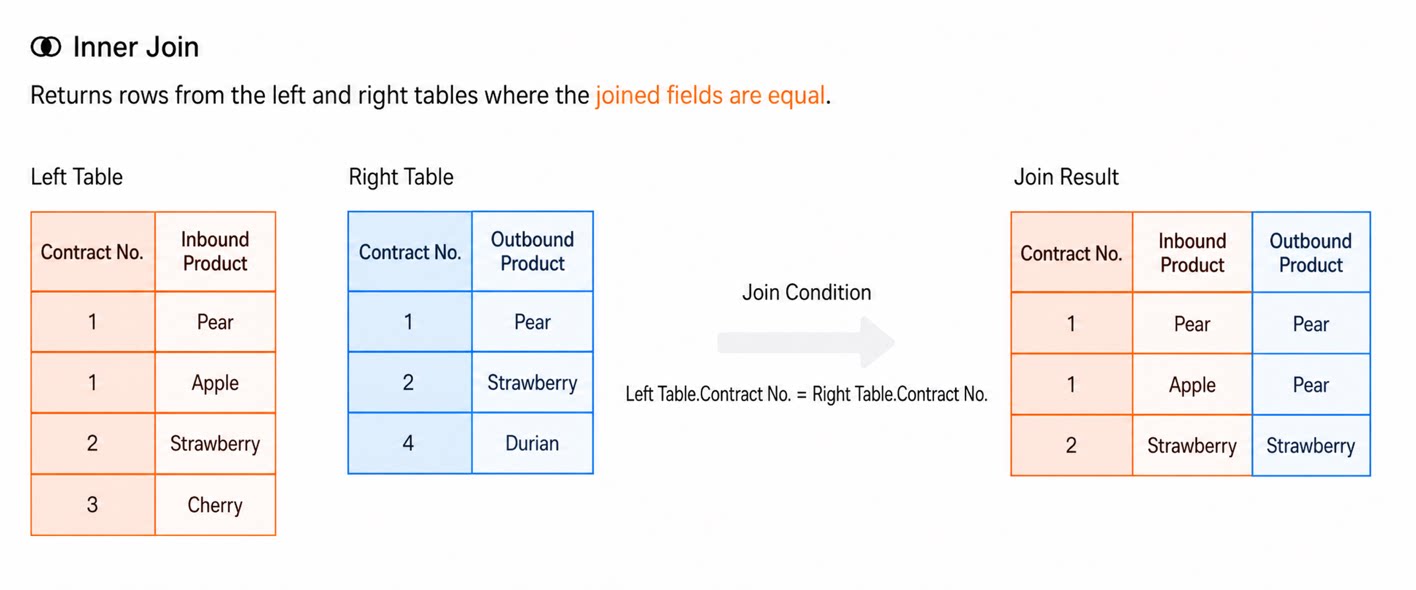
Join is a common operation in database queries, used to combine data from two or more tables based on specified conditions.There are four main types of joins: inner join, left join, right join, and full outer join. Examples of how to set up each are provided below.Inner join
- Definition: An inner join returns only the records that satisfy the join condition in both tables.
- Use case: Use an inner join when you only want records that exist in both tables. For example, given a customer table and an order table, you may want only the records that appear in both.
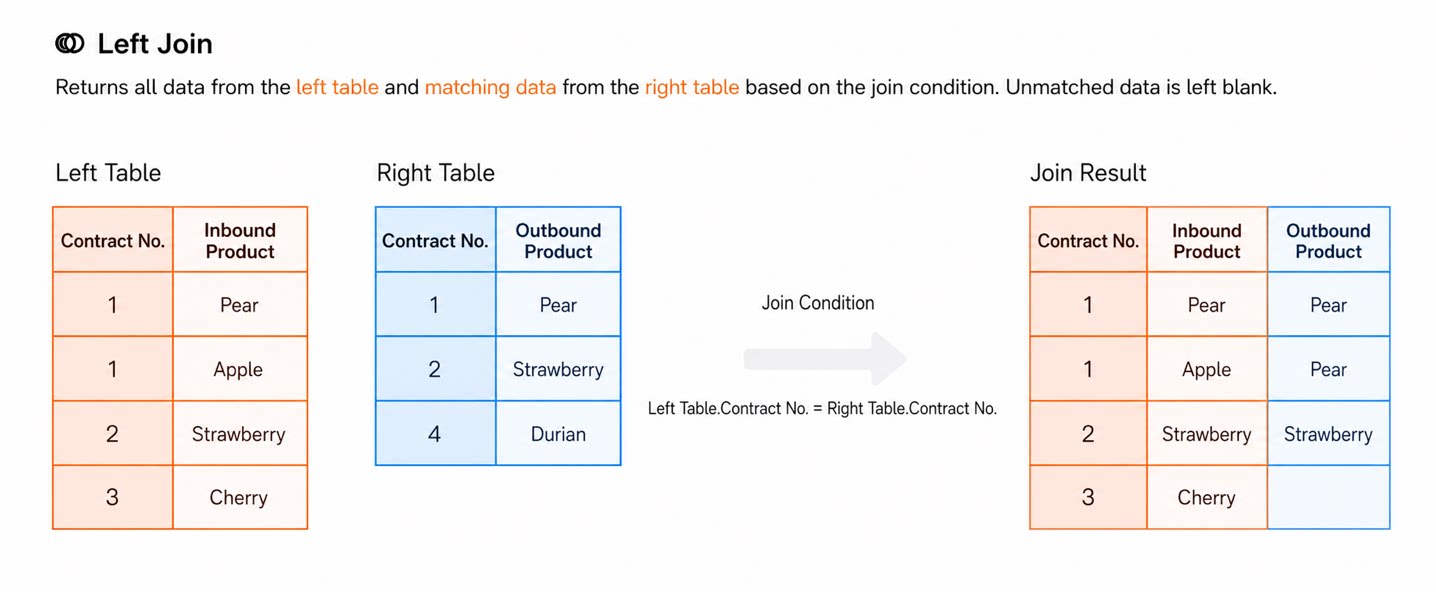
Left join
- Definition: A left join returns all records from the left table, plus the records from the right table that satisfy the join condition. If there is no match in the right table, the corresponding columns are null.
- Use case: Use a left join when you want every record from the left table to appear in the result set, even if there is no match in the right table. For example, list every customer along with their orders, including customers who have not placed any orders.
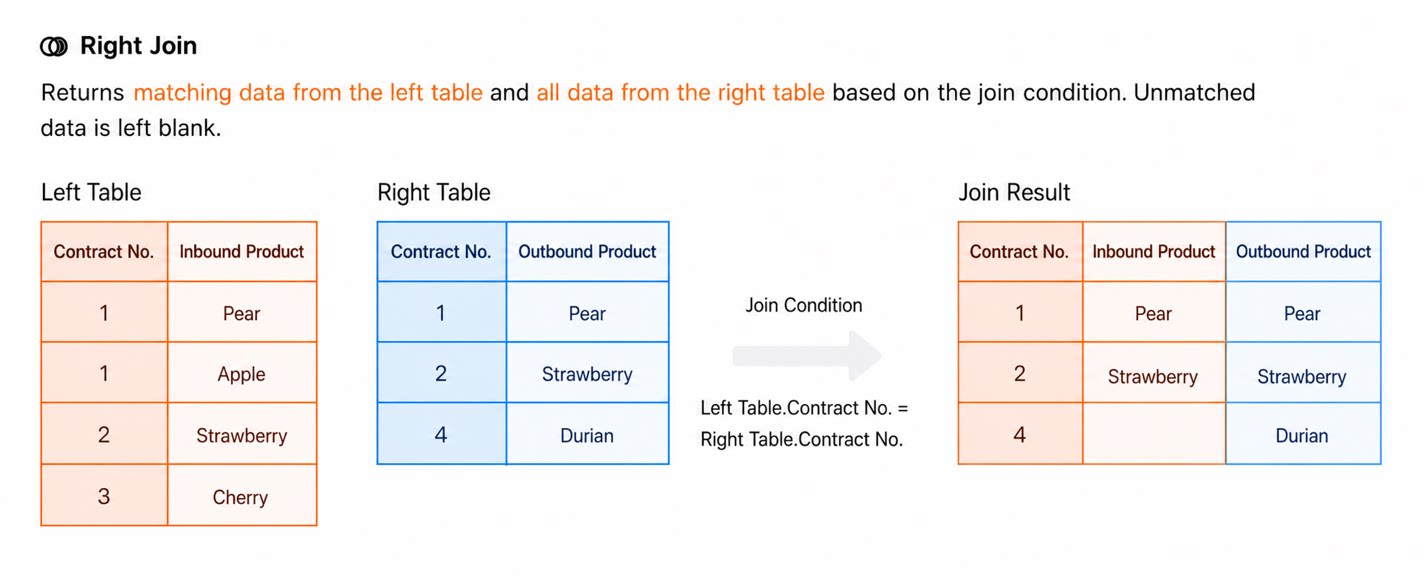
Right join
- Definition: A right join returns all records from the right table, plus the records from the left table that satisfy the join condition. If there is no match in the left table, the corresponding columns are null.
- Use case: Similar to a left join, but in the opposite direction. For example, list every order along with the customer information, even when the customer information is missing for some orders.
Full outer join
- Definition: A full outer join returns all records from both the left and right tables that satisfy the join condition. When there is no match in either table, the corresponding columns are null.
- Use case: Use a full outer join when you want all records from both tables regardless of whether a match exists in the other. For example, list every customer and every order, including customers without orders and orders without customer information.
2.4 Accelerate Data
The final step of data preparation is accelerating your data. After saving, click Accelerate, and the backend automatically selects the acceleration method best suited to your data.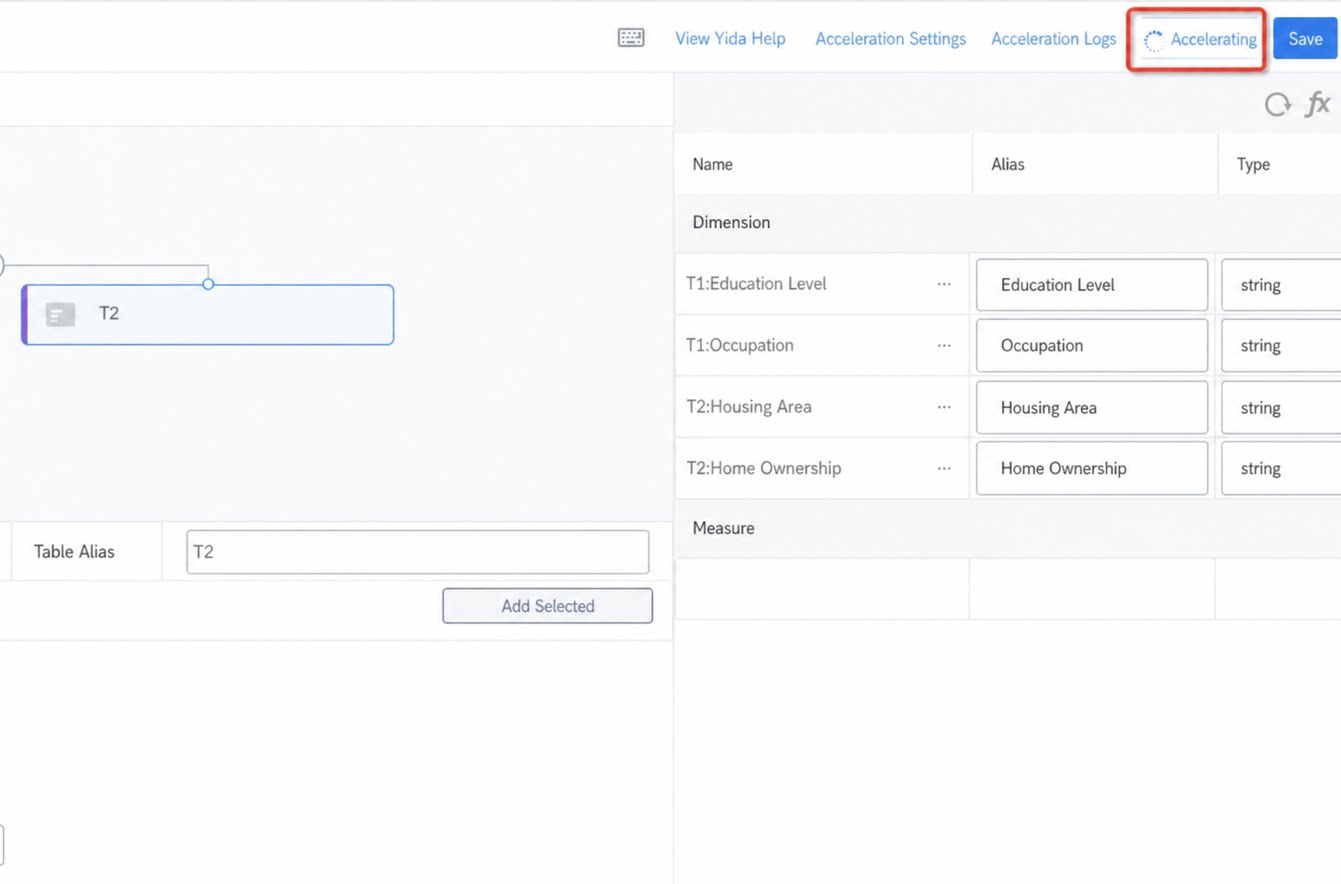
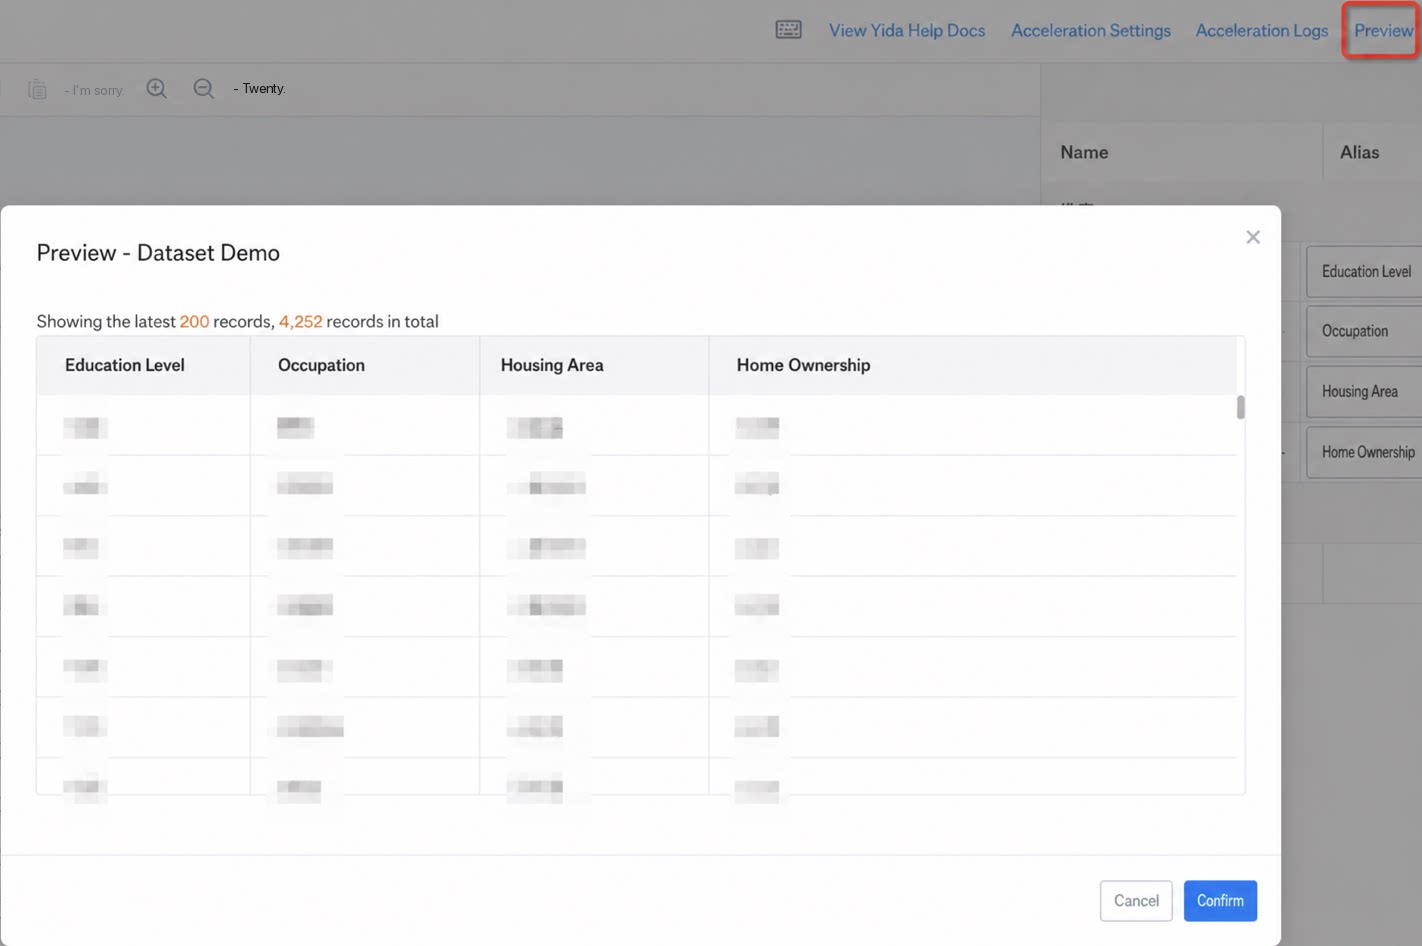
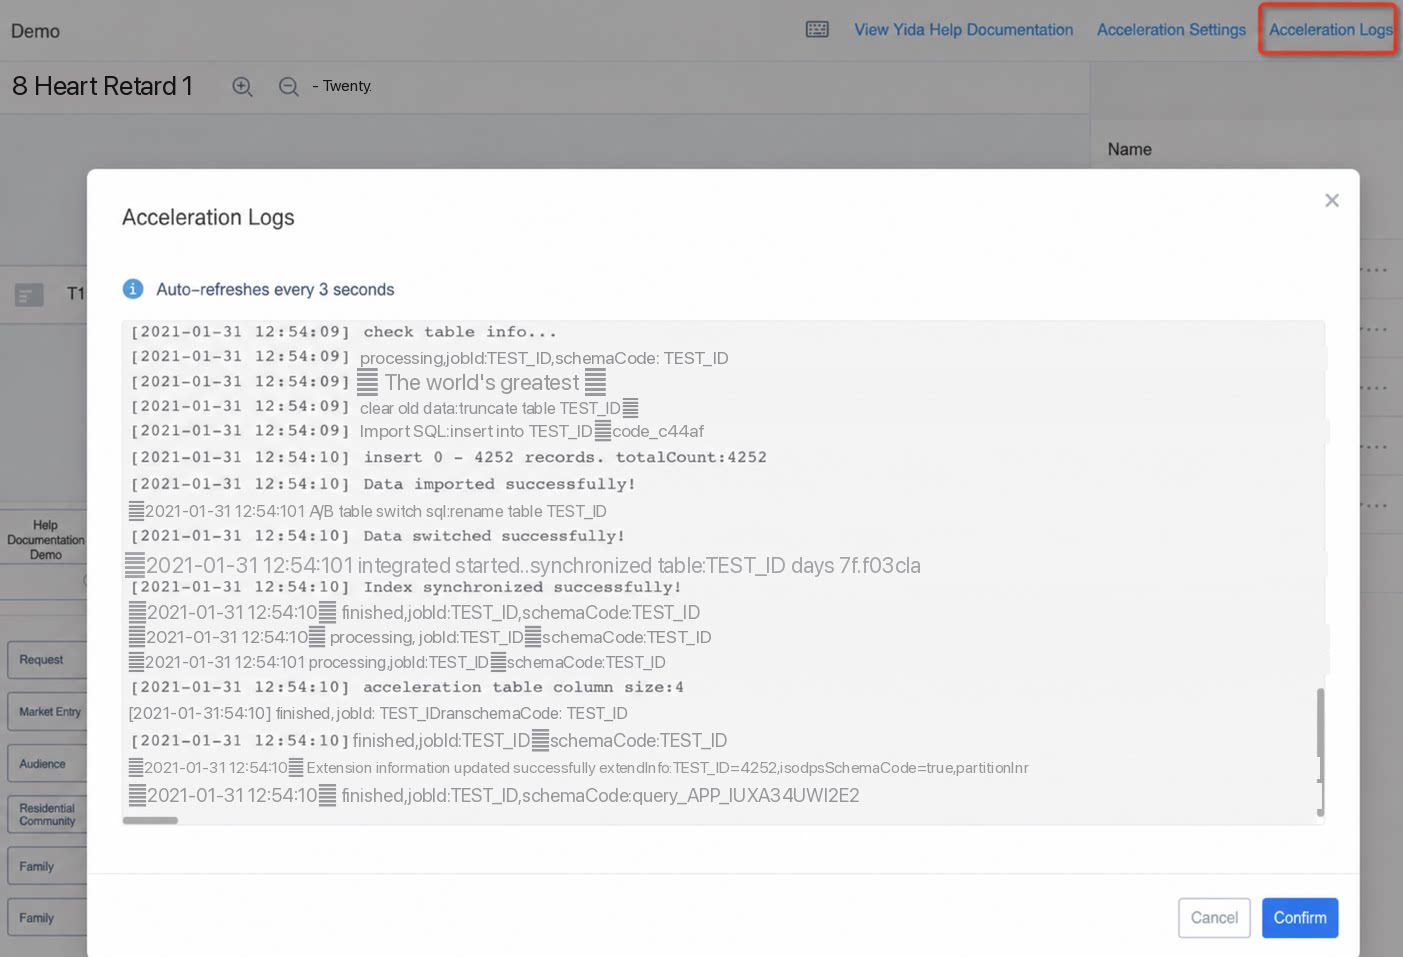
2.5 Report Analysis
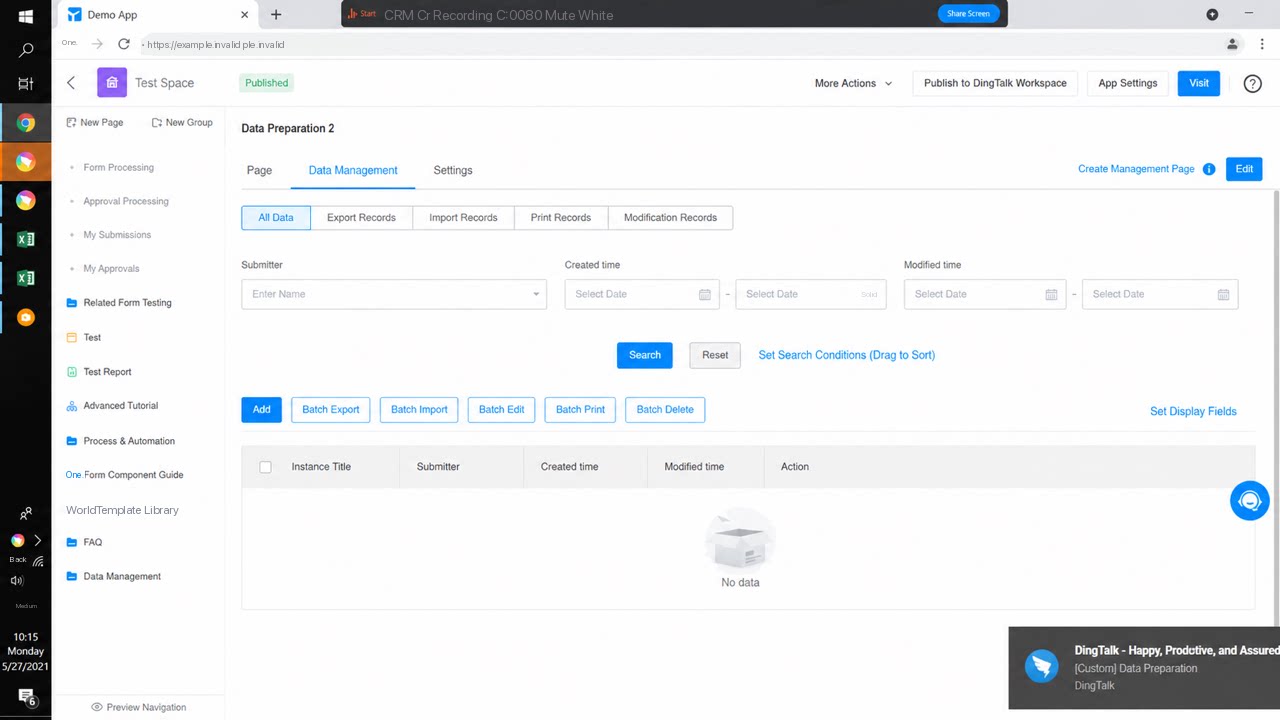
Go back to the data analysis editing page and click Refresh. The dataset you just generated is now available in single-table data or multi-table associations.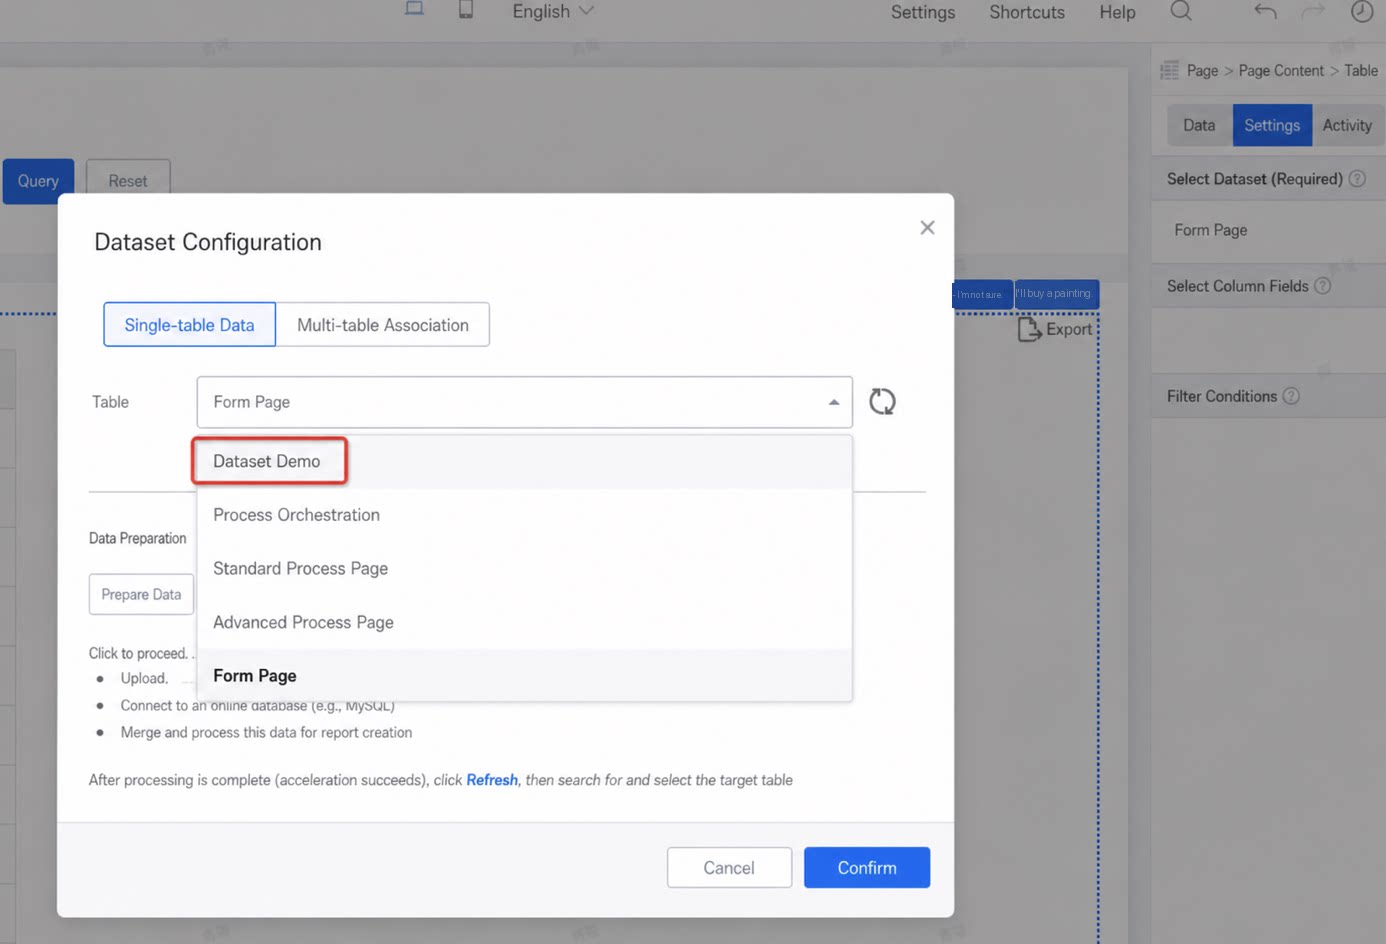
4. FAQ
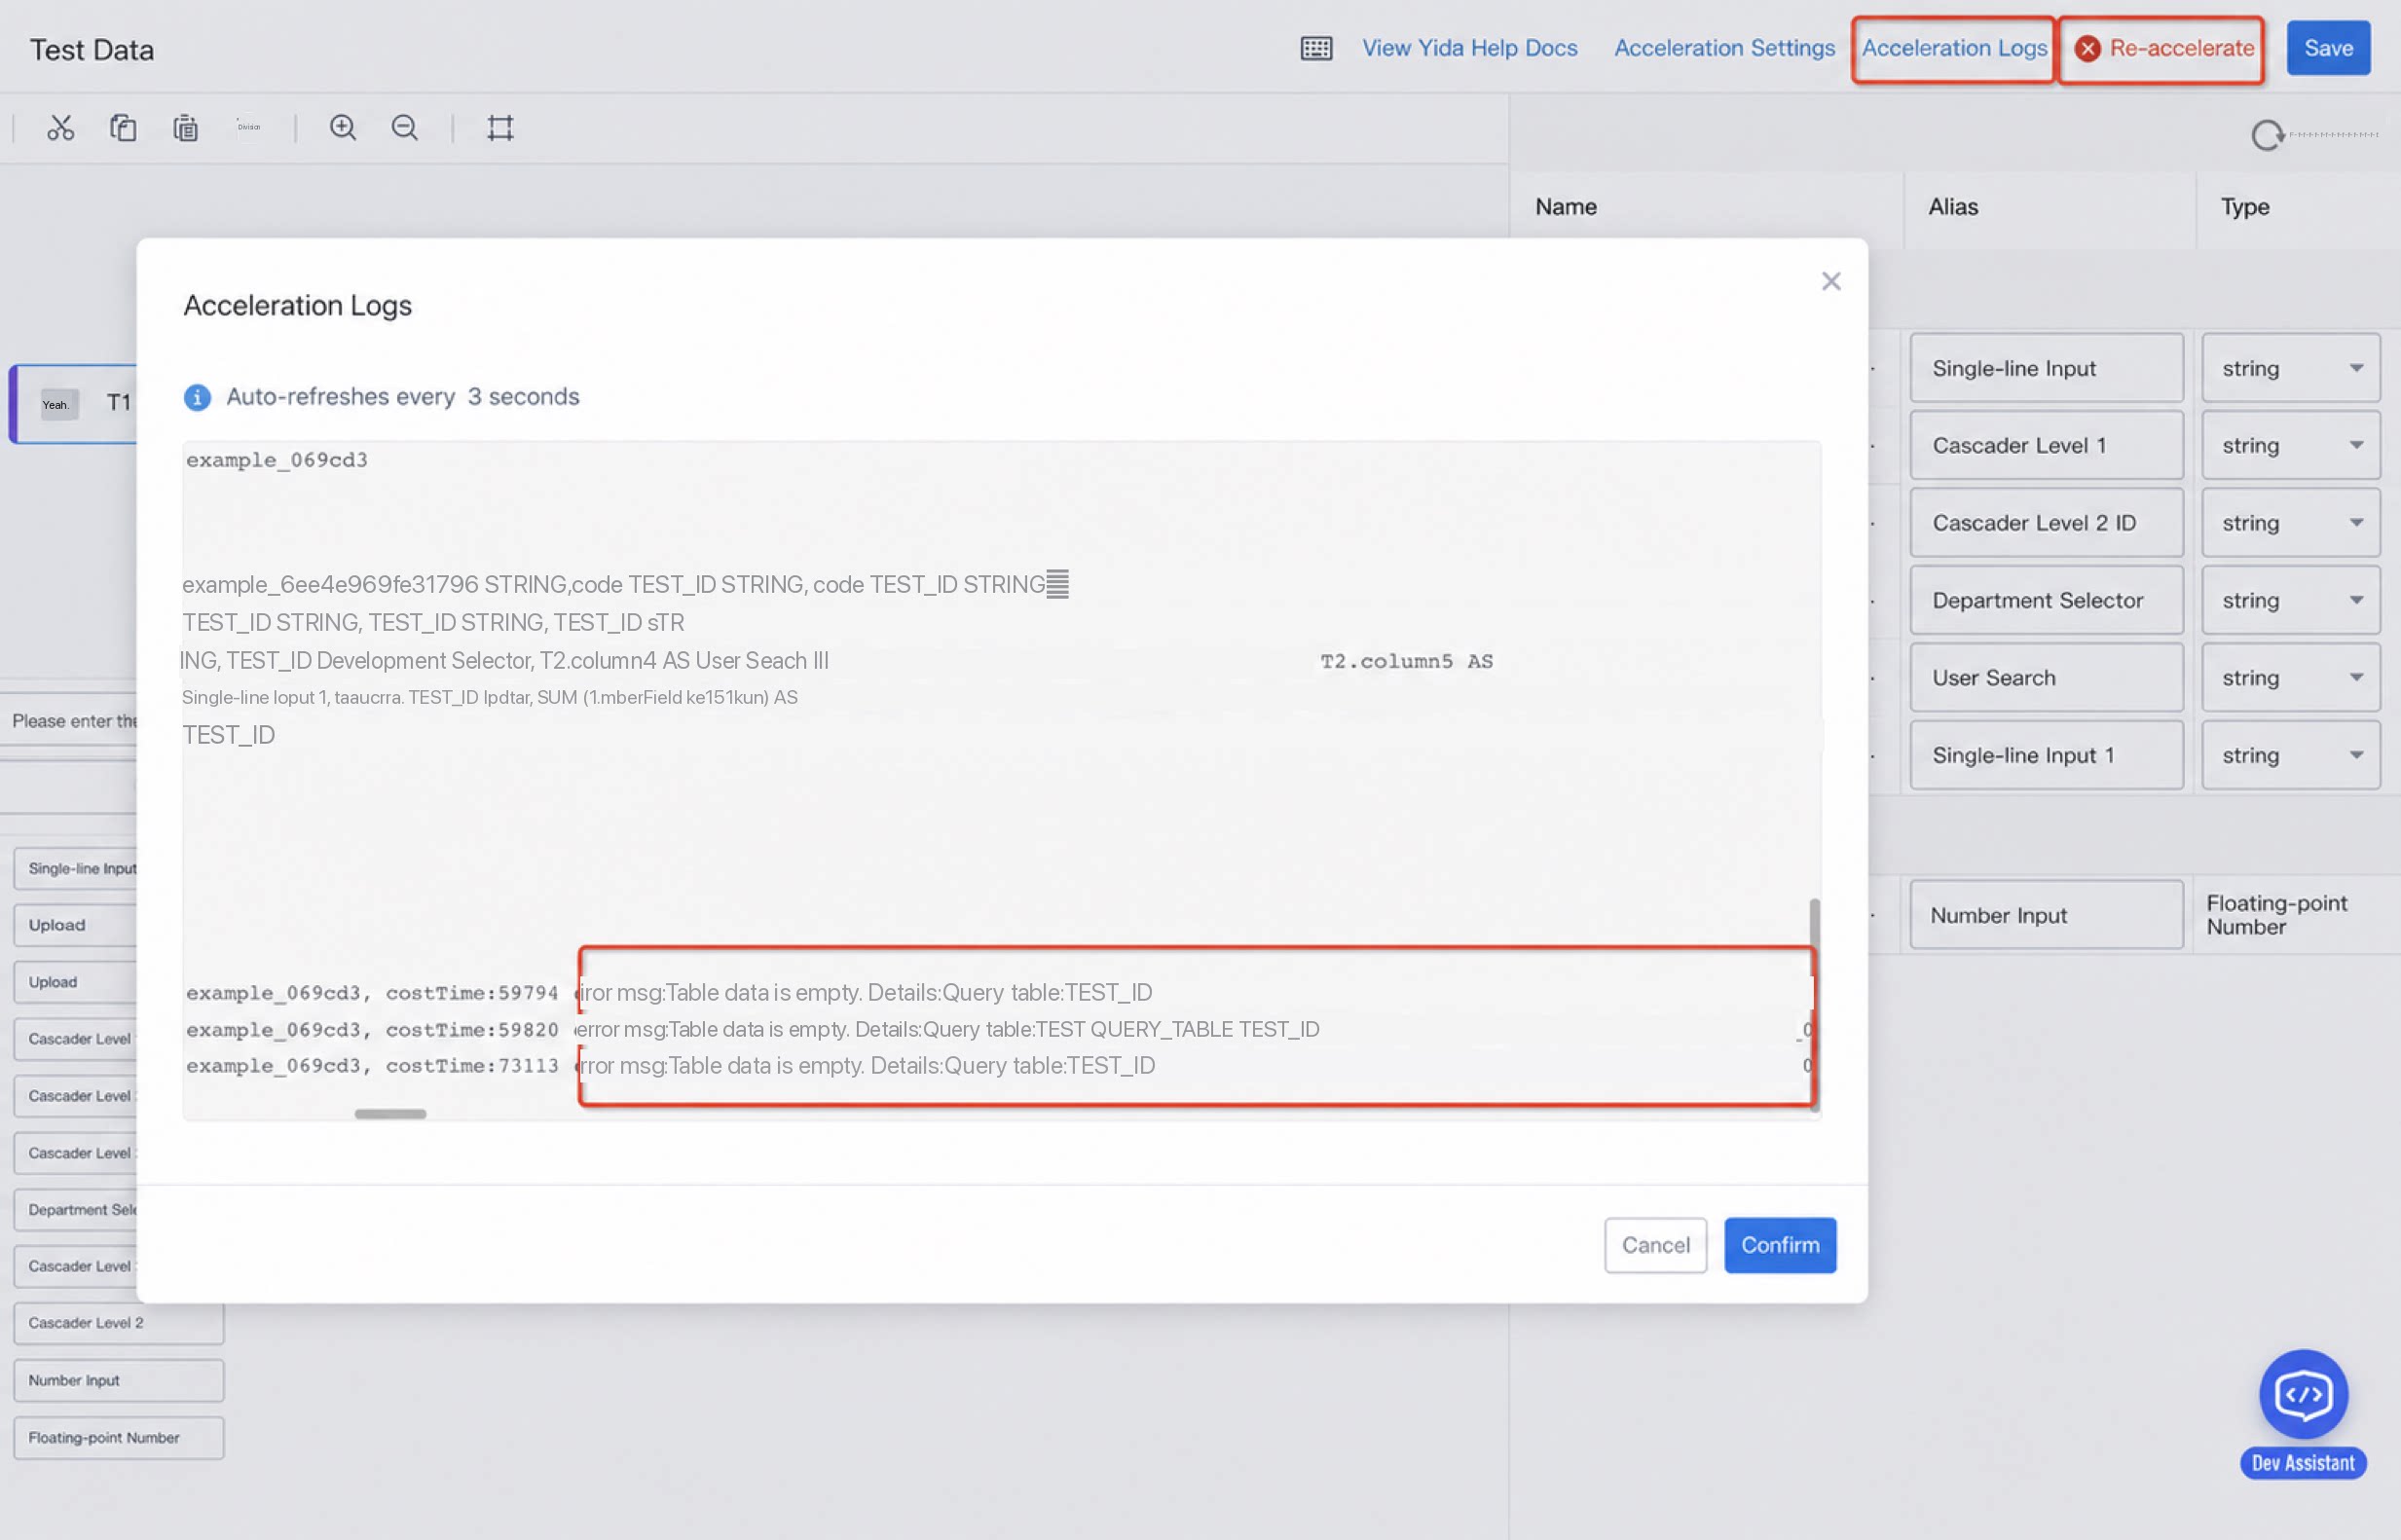
4.1 Why did acceleration fail?
4.1 Why did acceleration fail?
Check the acceleration log and scroll to the end to view the failure message.
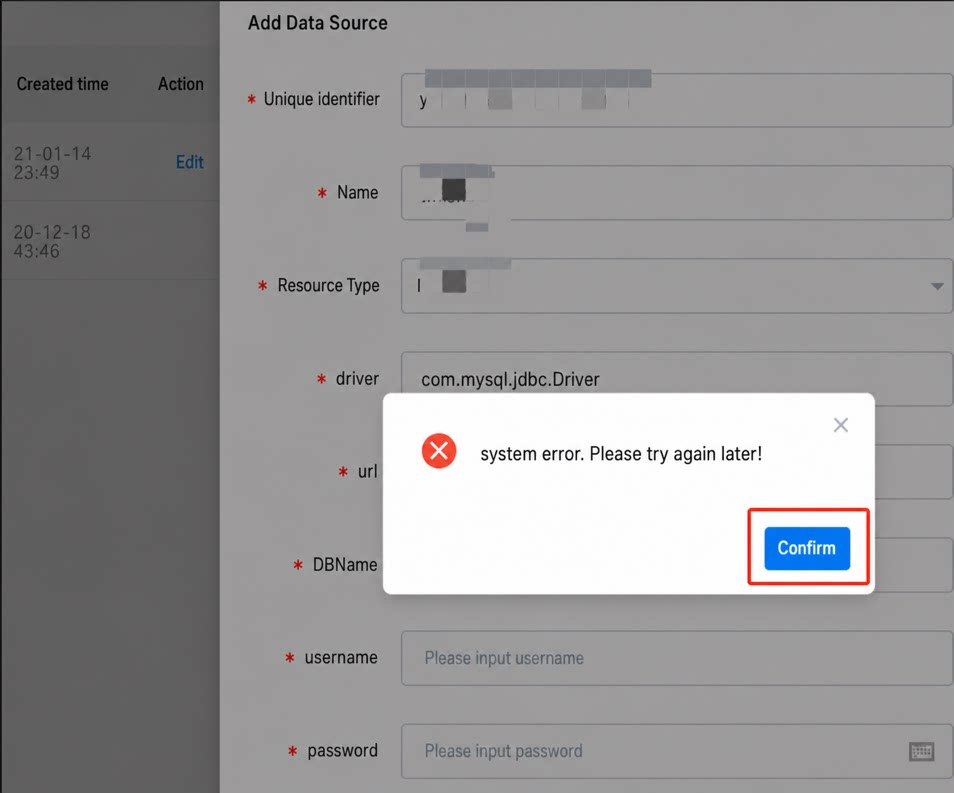
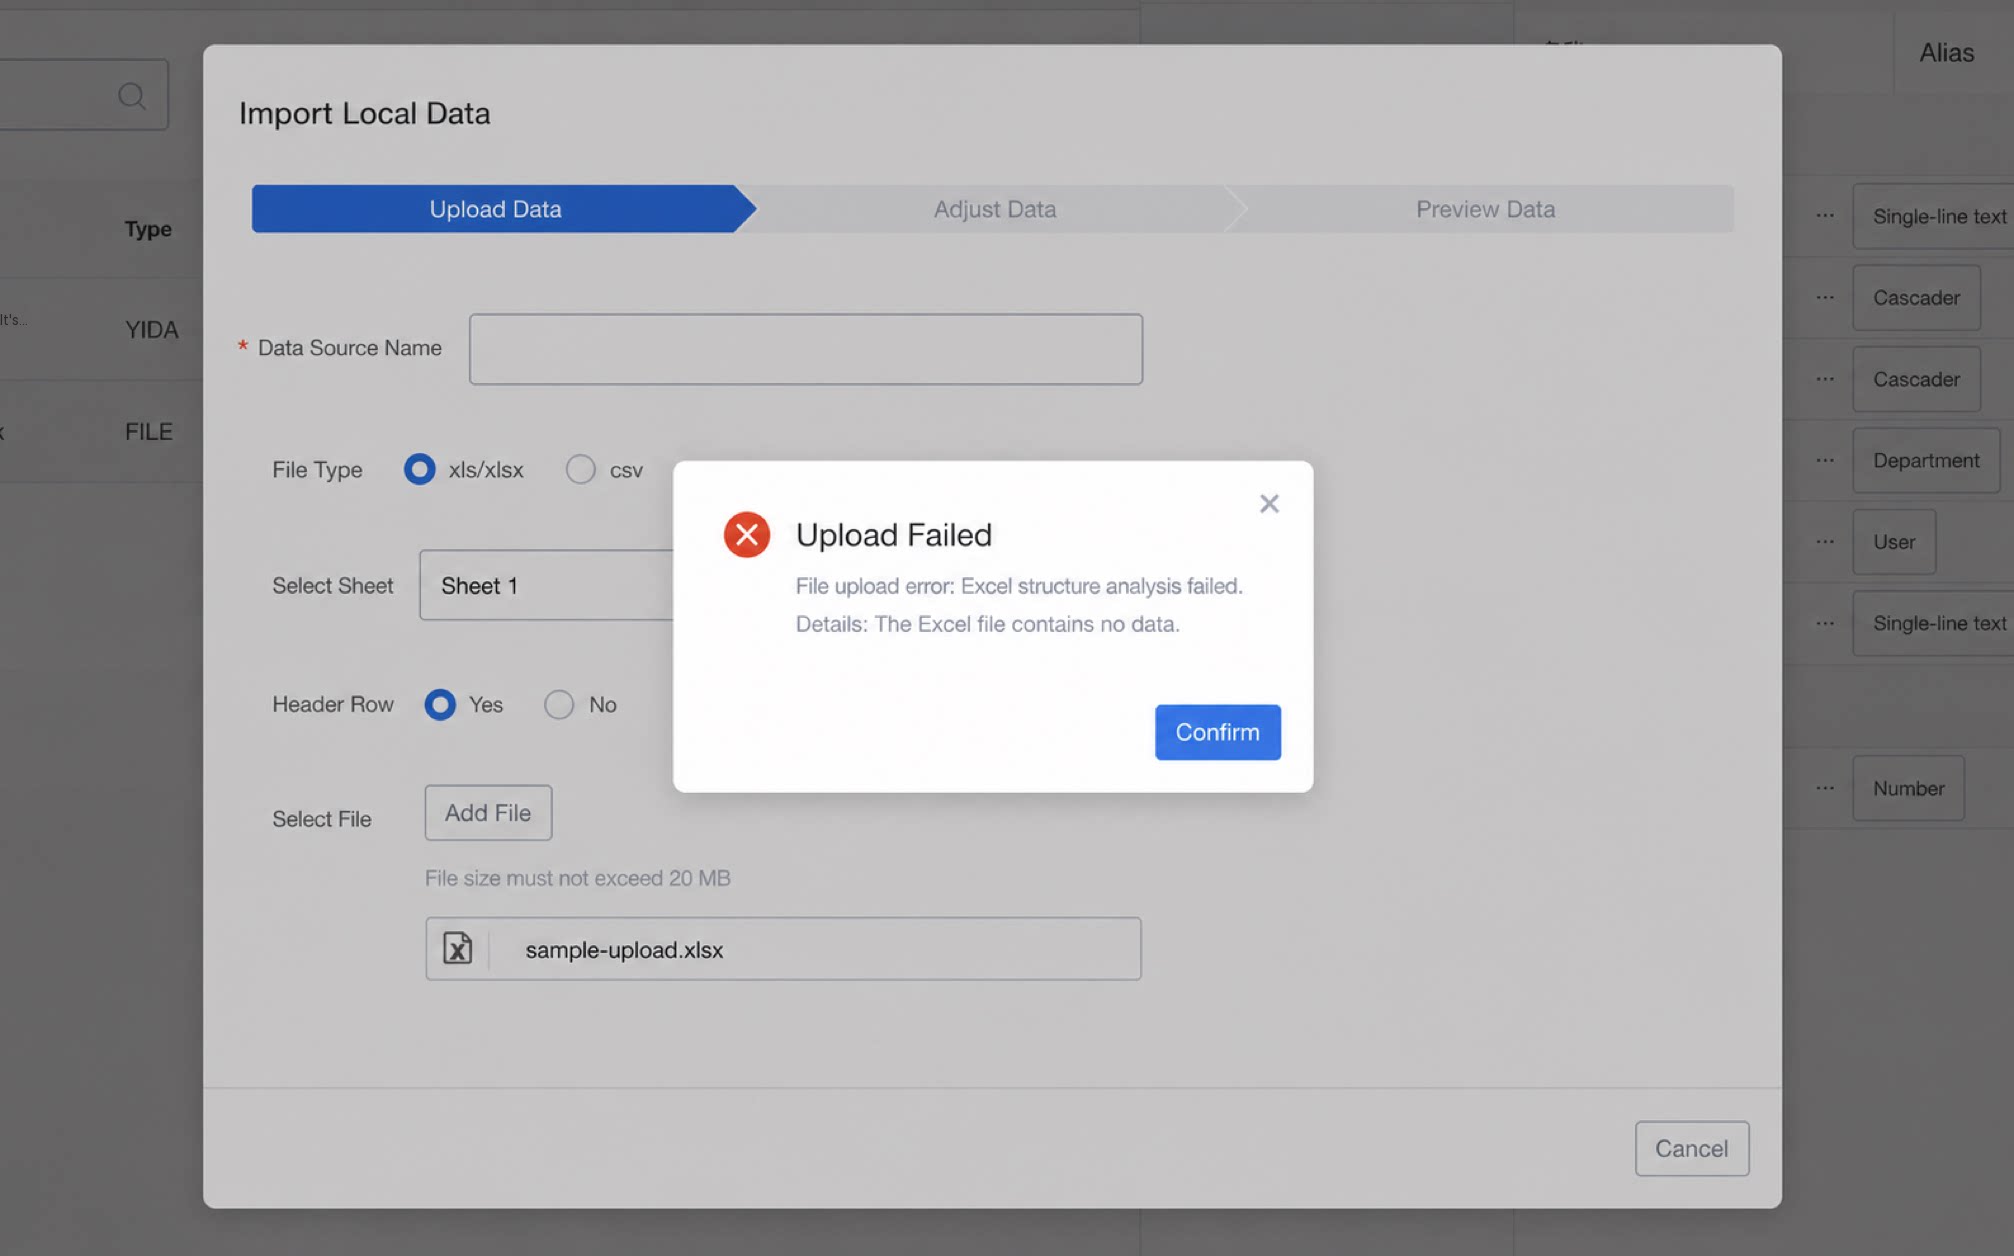
4.2 Why does configuring a data source return an error?
4.2 Why does configuring a data source return an error?
(1) Error 1Cause: The file is empty.Solution: Make sure the file is not empty.Note: If the file does contain content, open the file, save it again, and retry the upload.(2) Error 2Cause 1: Only MySQL 5.7 and earlier versions are currently supported.Cause 2: The MySQL server has an access allowlist configured, and the IP of the server hosting YiDA is not on the allowlist.Solution:
- Change the MySQL version.
- Add the IP of the server hosting YiDA to the MySQL access allowlist.
4.3 Can the default update interval for a MySQL database connected in data preparation be changed?
4.3 Can the default update interval for a MySQL database connected in data preparation be changed?
The data acceleration schedule and interval cannot currently be customized.