Chats
Chats Calendar
 Meetings
 Contacts
 Mail
Mail Docs
Docs Drive
Drive AI Table
 AI Minutes
 Attendance
 Approval
 YiDA
YiDA Admin Console
The OA Approval connector is currently available only on DingTalk Professional edition paired with YiDA Professional edition (Premium) or higher.
Overview of the Approval Connector
- Form event triggers
- App event triggers
Configuration notes:
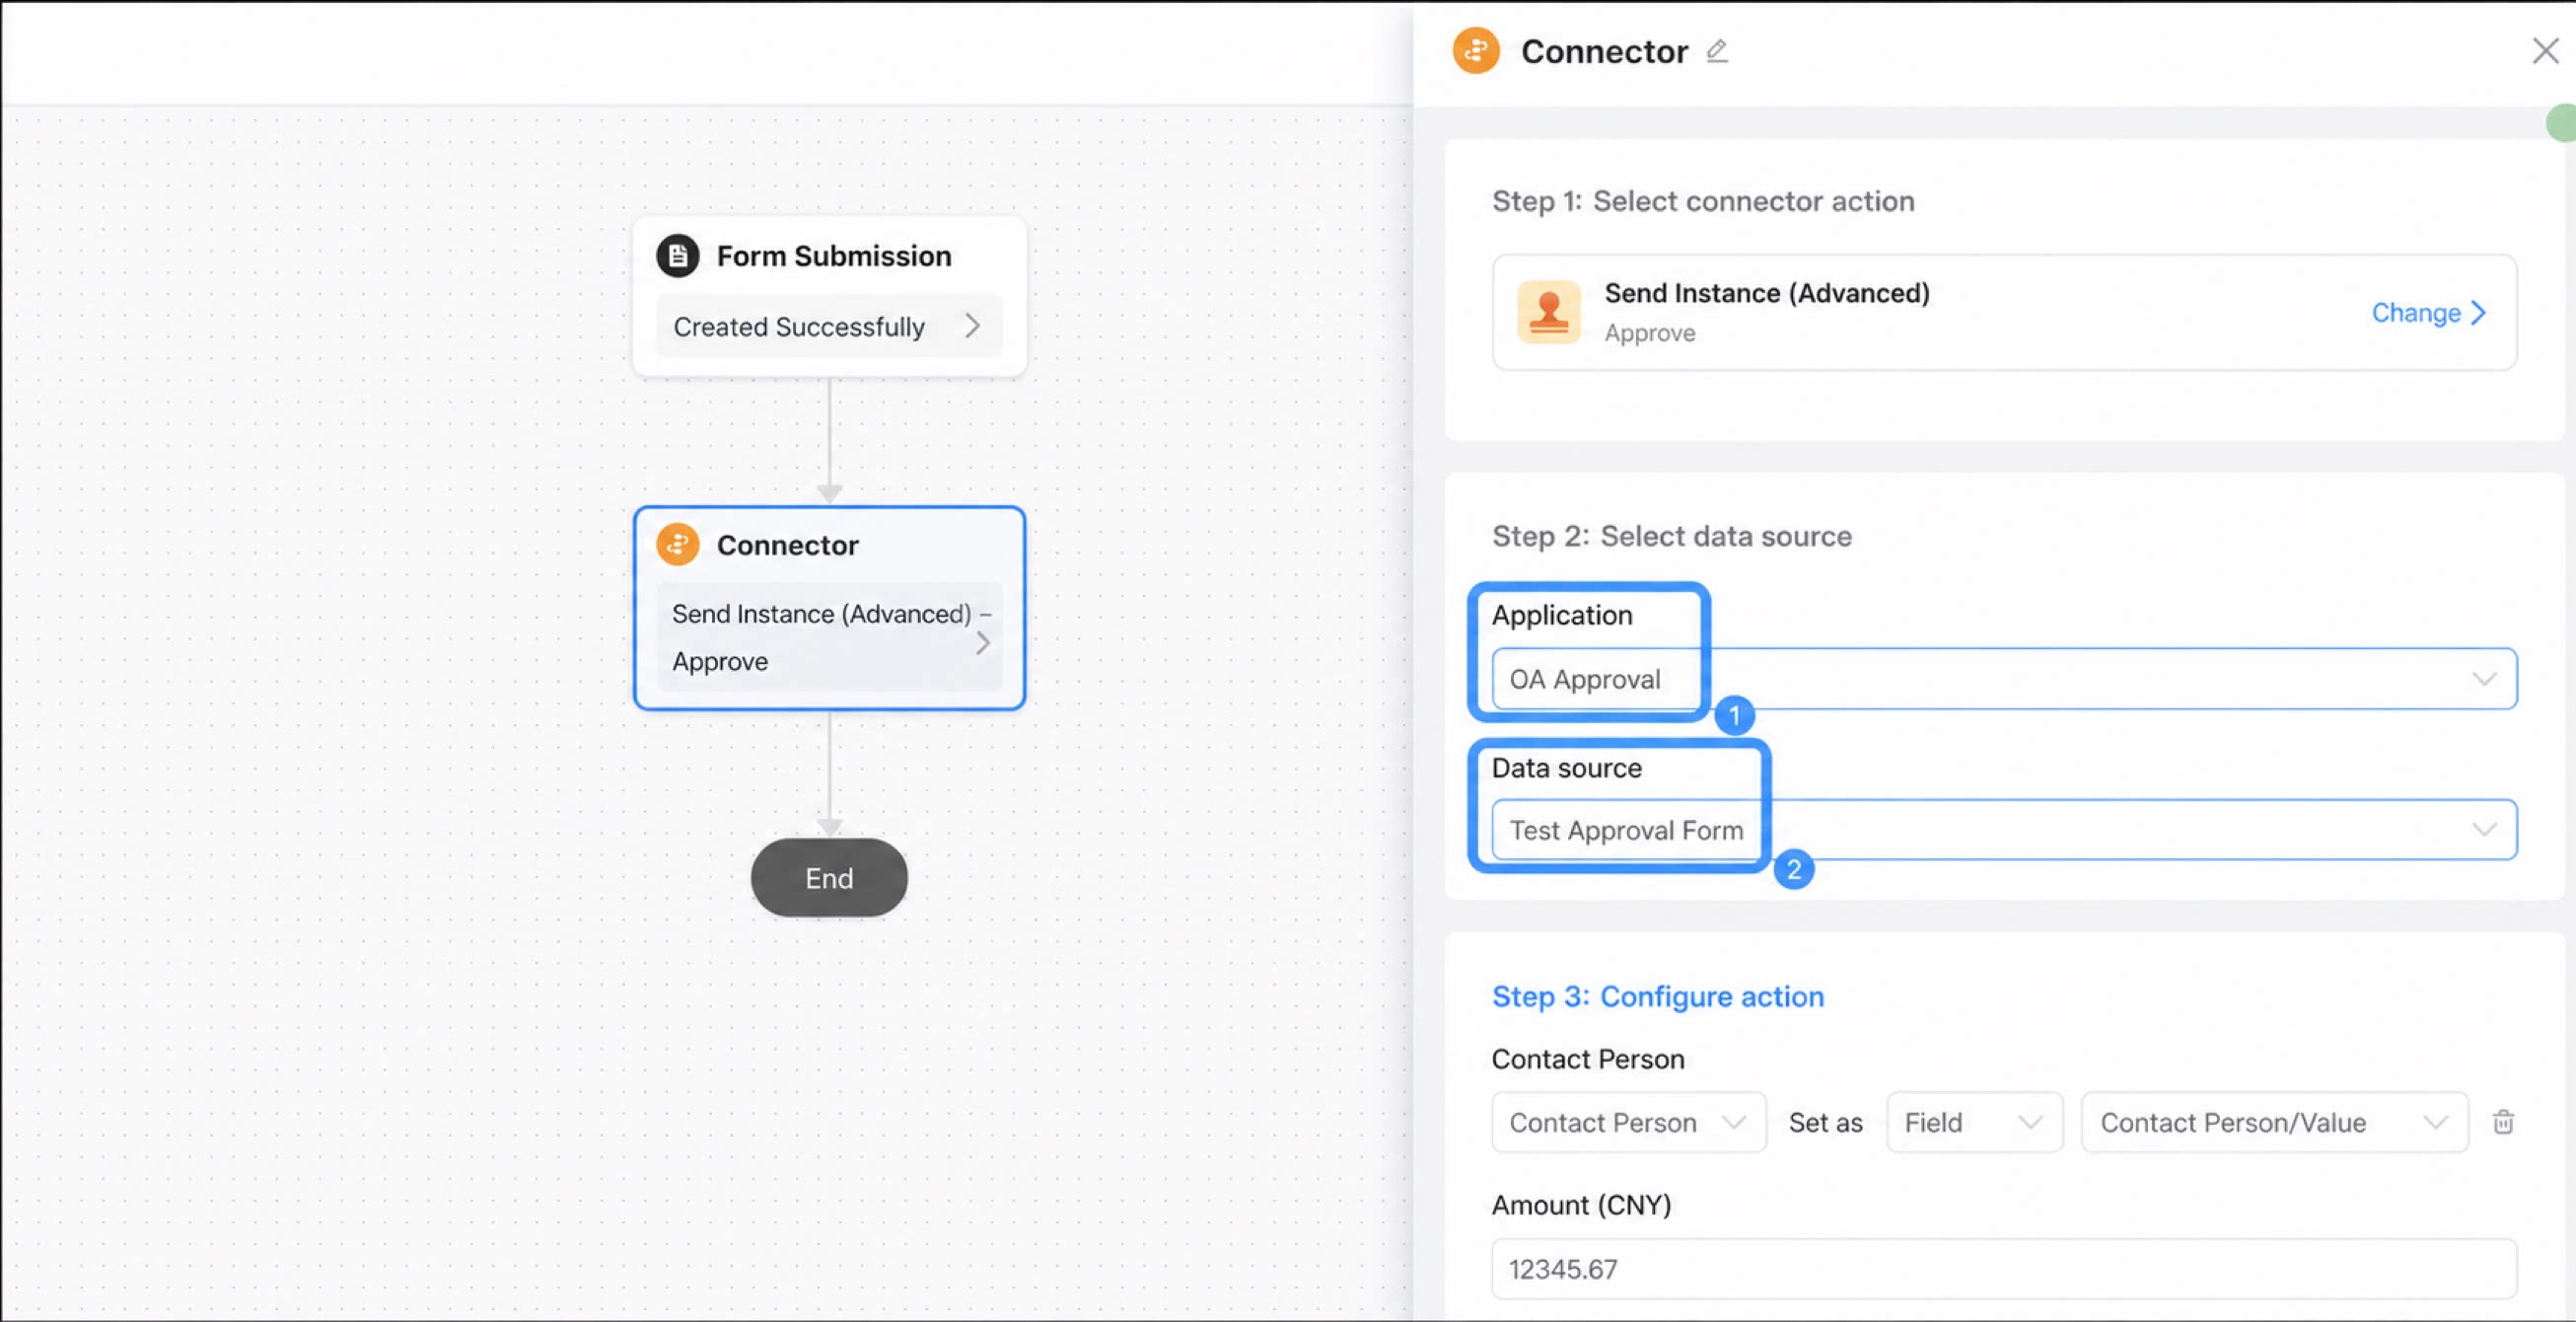
- Select a connector action: enter a name in the search box, or click to browse and locate the connector action you need.
- Select a workflow form: first choose an approval app in DingTalk (such as OA Approval in the image above); this app must be created by the user in DingTalk. Then select the corresponding YiDA form (such as the overtime approval test in the image above).
- Configure the action: bind the YiDA form to the DingTalk app through point-and-click configuration.
Steps
Step 1: Create a Payment Request Workflow in OA Approval
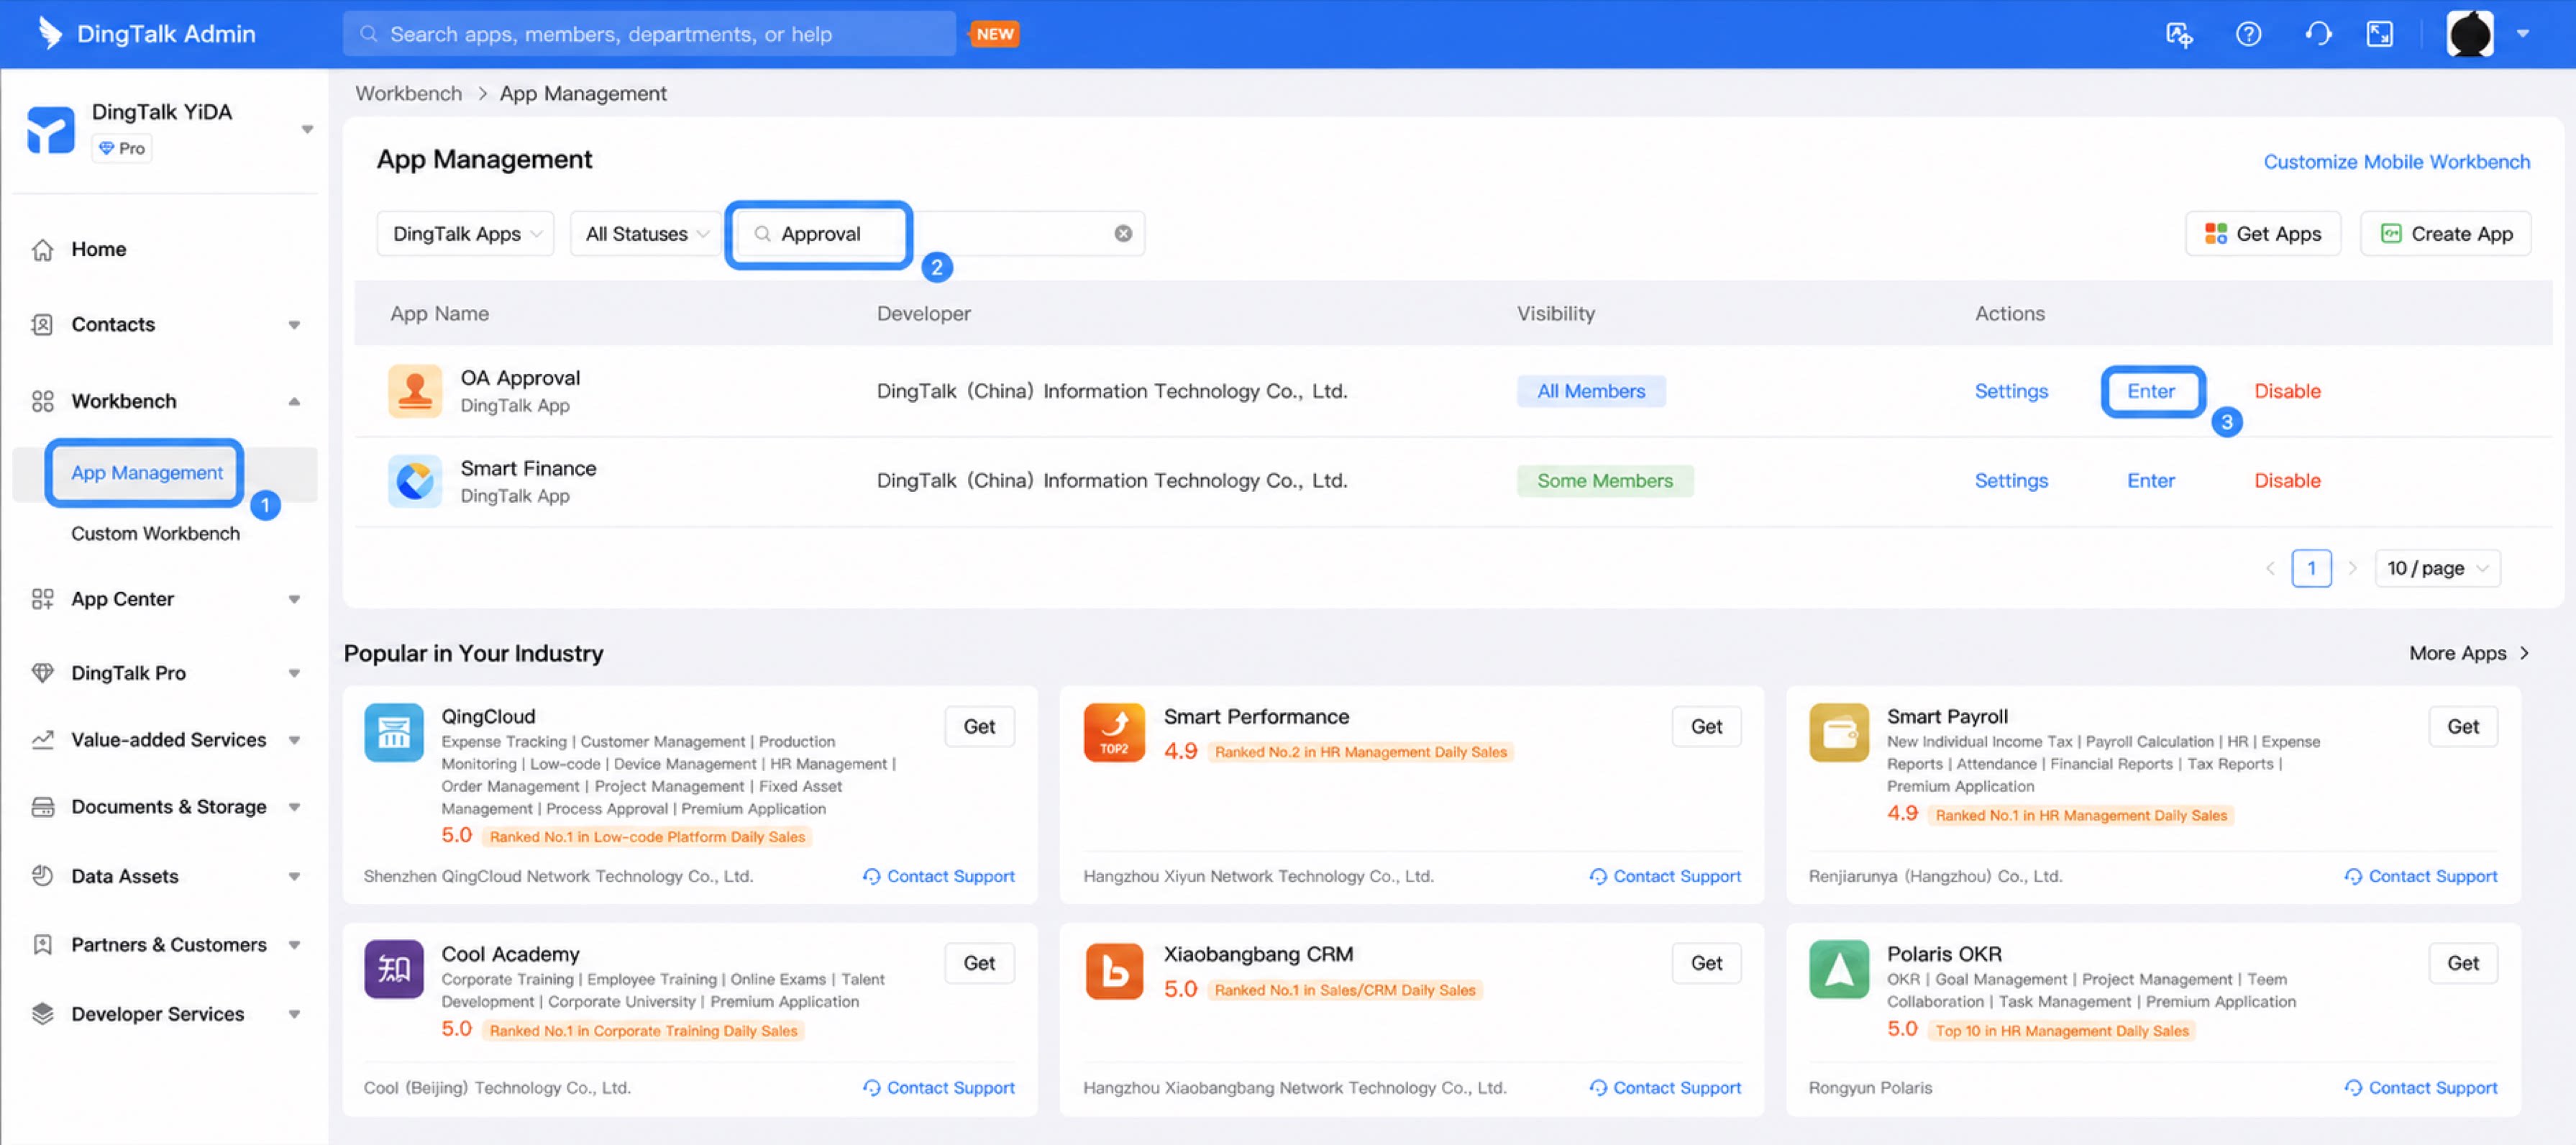
- Sign in to the DingTalk admin console.
- Go to Workbench > App Management, search for Approval in the search box, select OA Approval, and click Enter in the Action column.
1
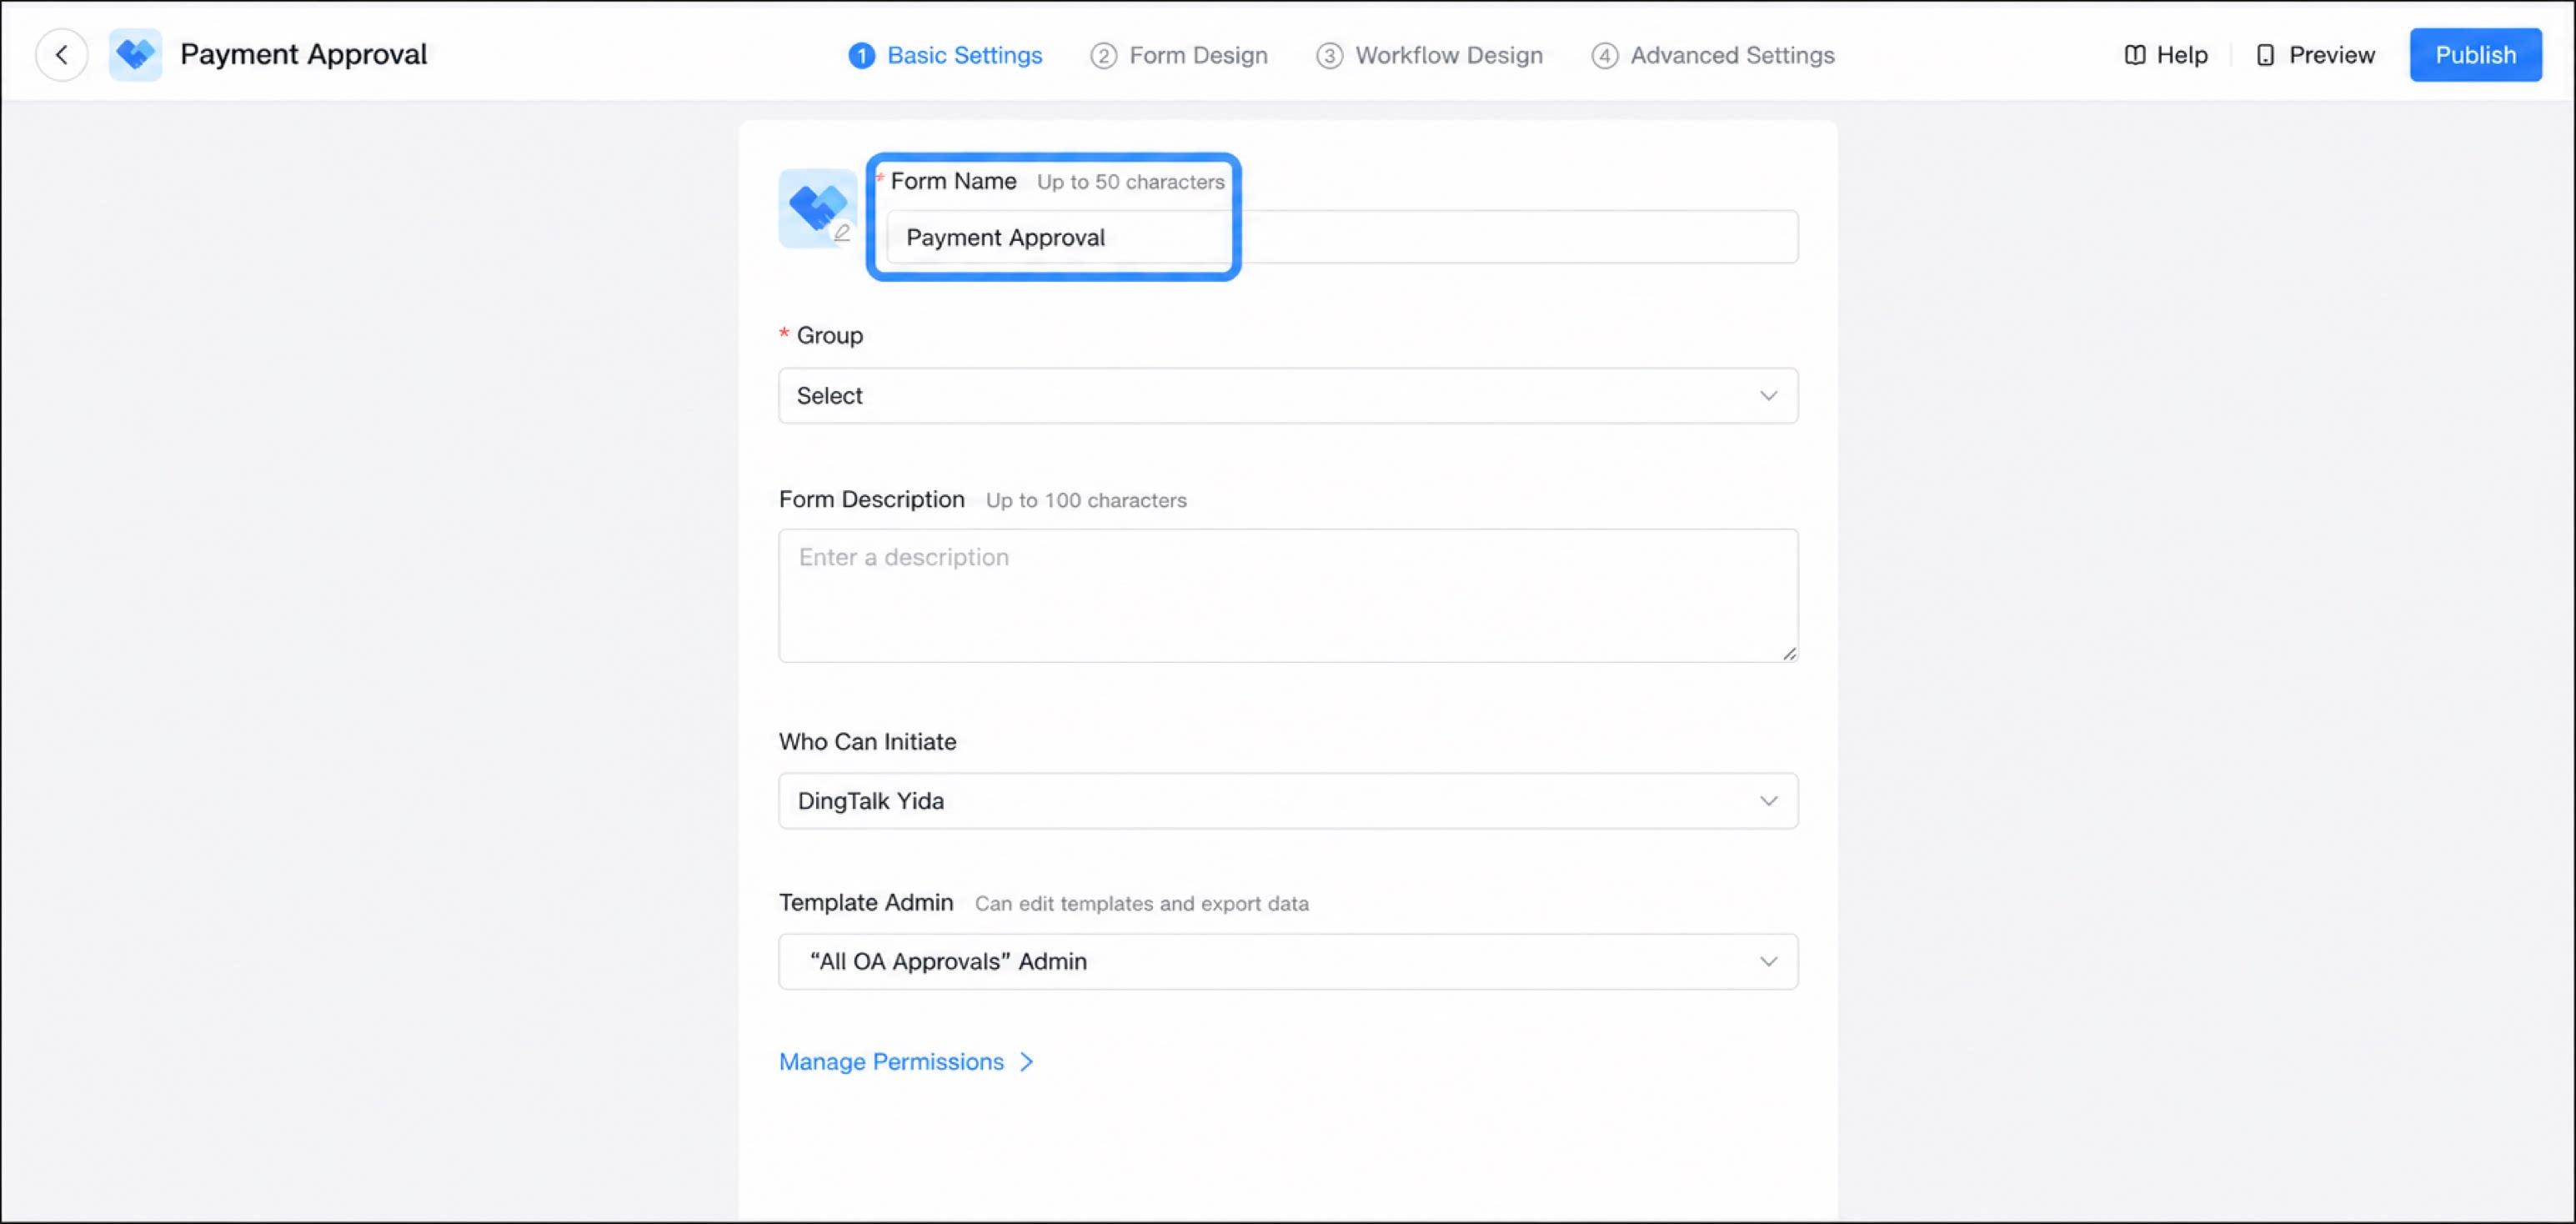
In the OA Approval admin console, click Create new form and select Workflow form
2
Set the form name to Payment approval
3
Click Form design and add the Contact and Amount components to the form
4
Click Publish in the upper-right corner to publish the form
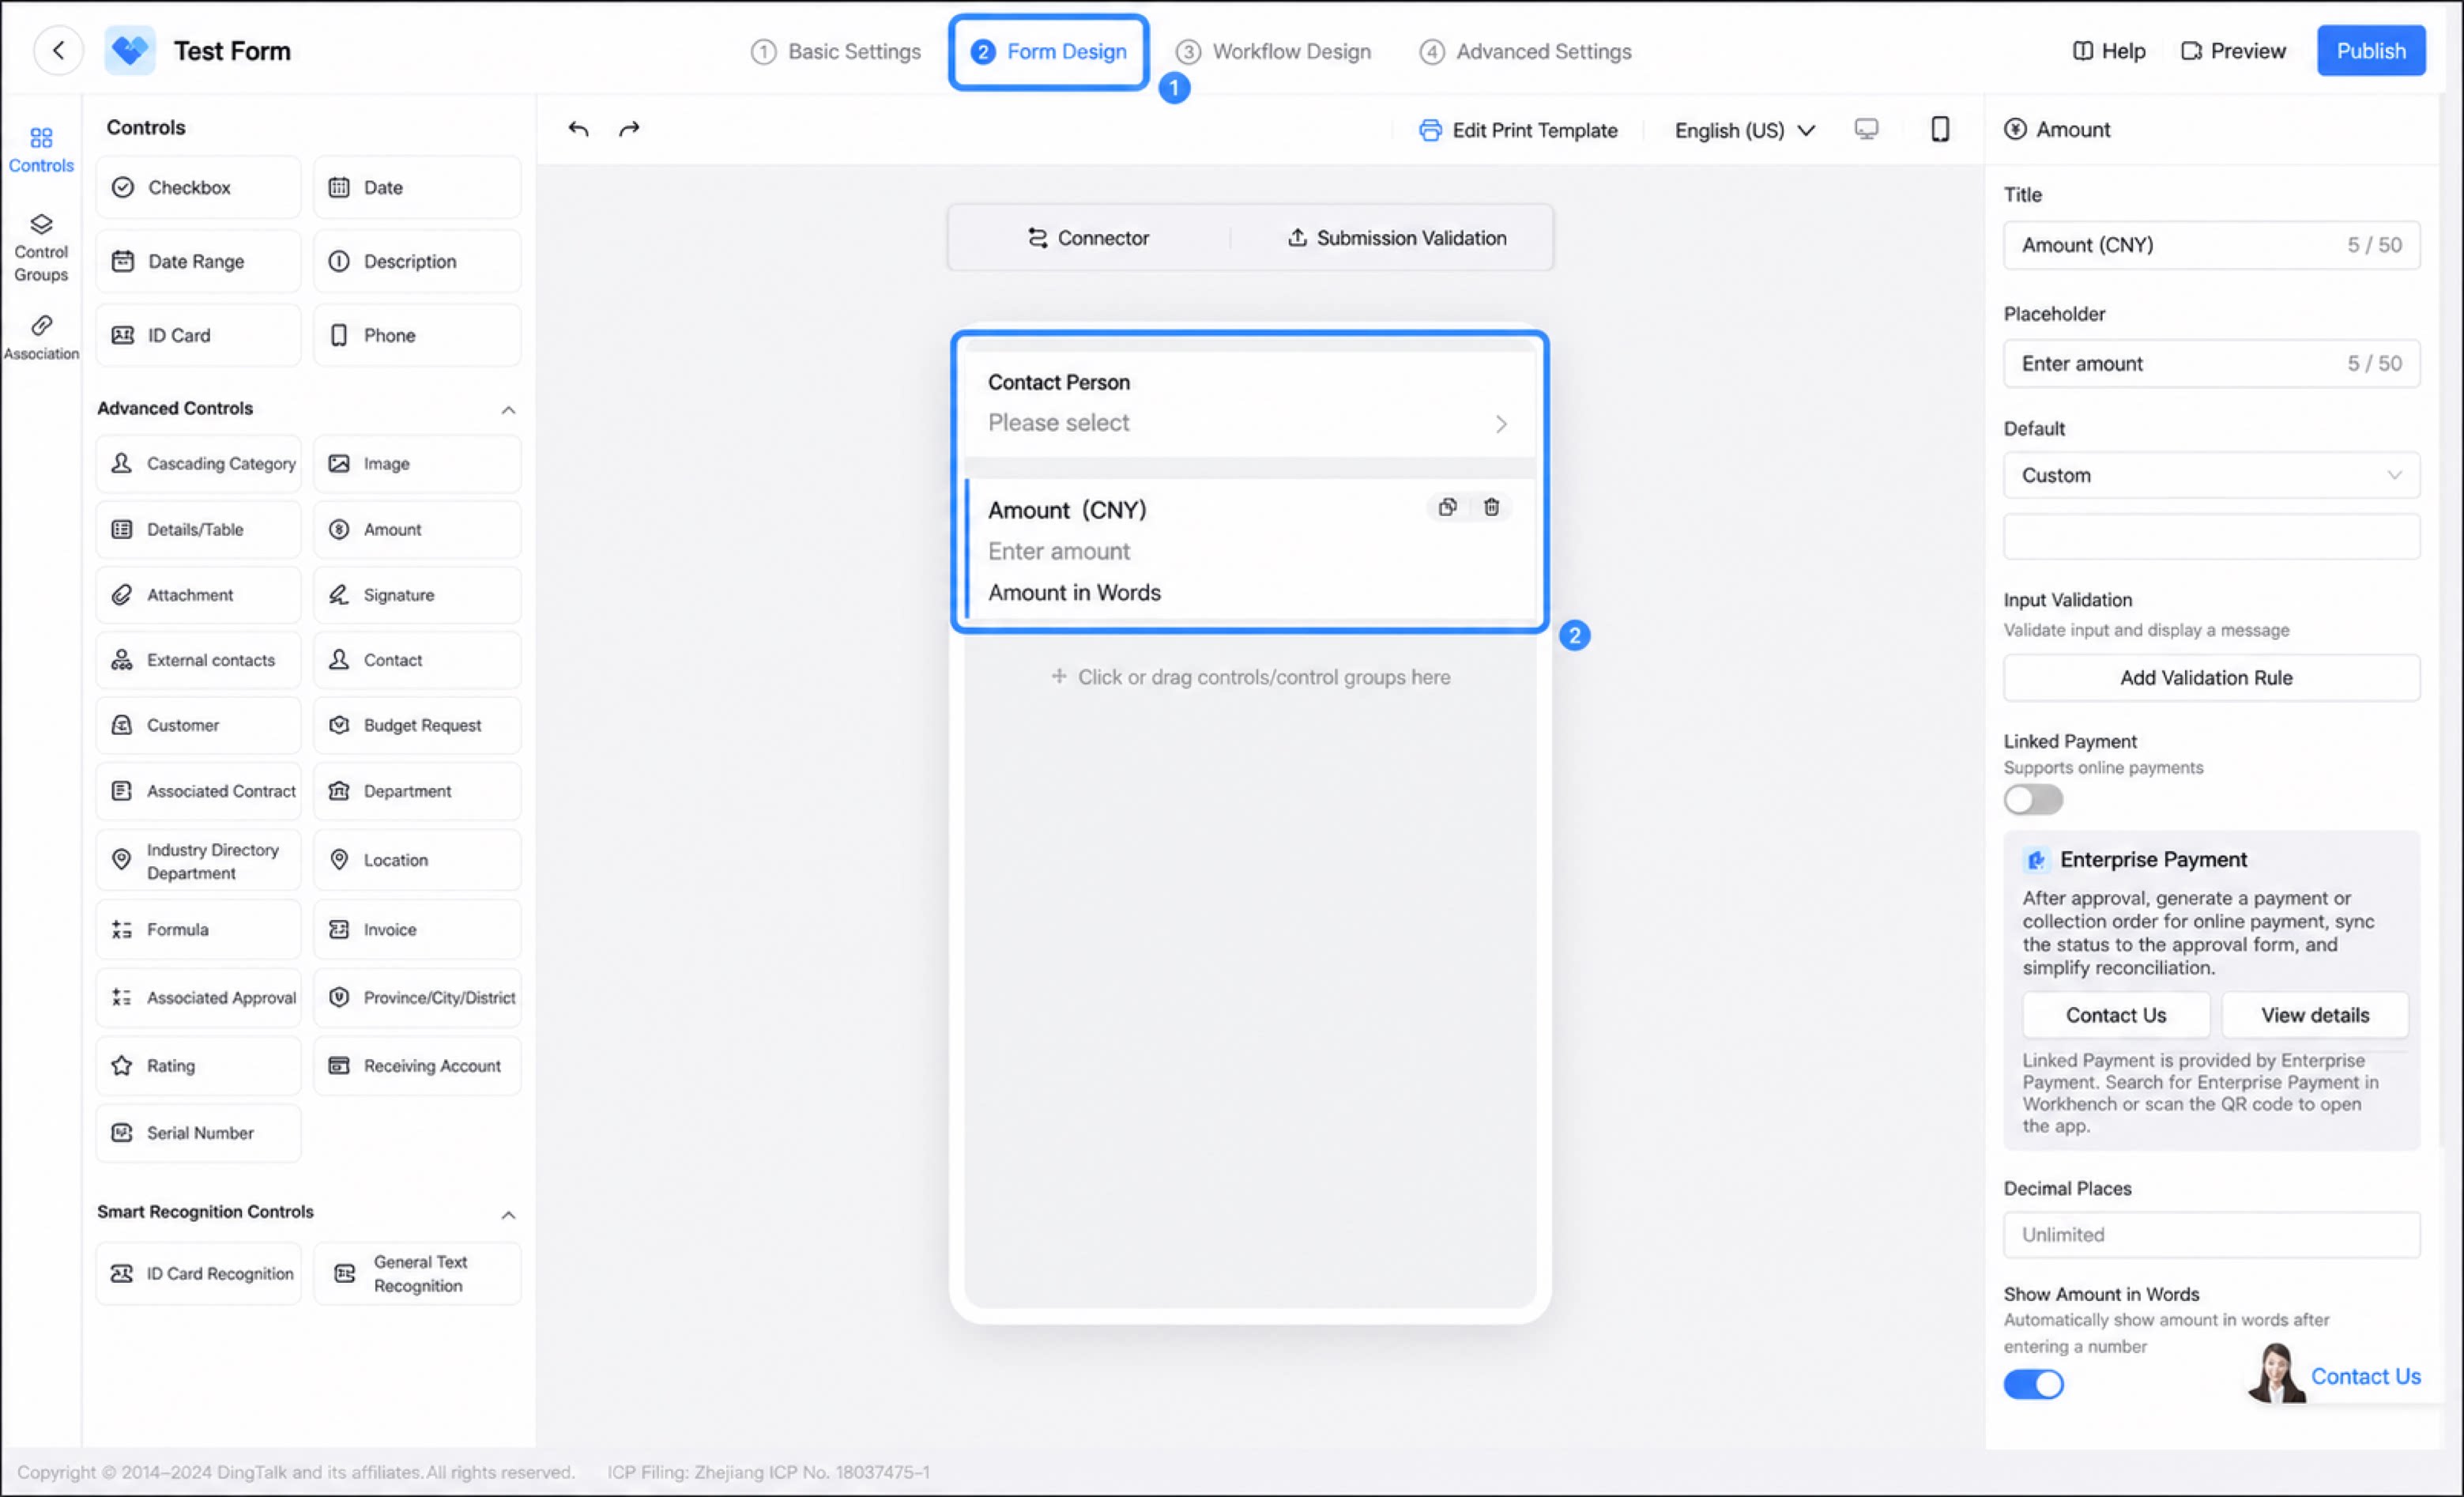
Step 2: Configure the Connector in Integration & Automation
- Sign in to the YiDA workbench. Select the target app and open its Integration & Automation page.
- Select the integration & automation flow you have created and click Edit.
- Move the cursor to the connecting line between steps to bring up the + button, click +, and select Connector.
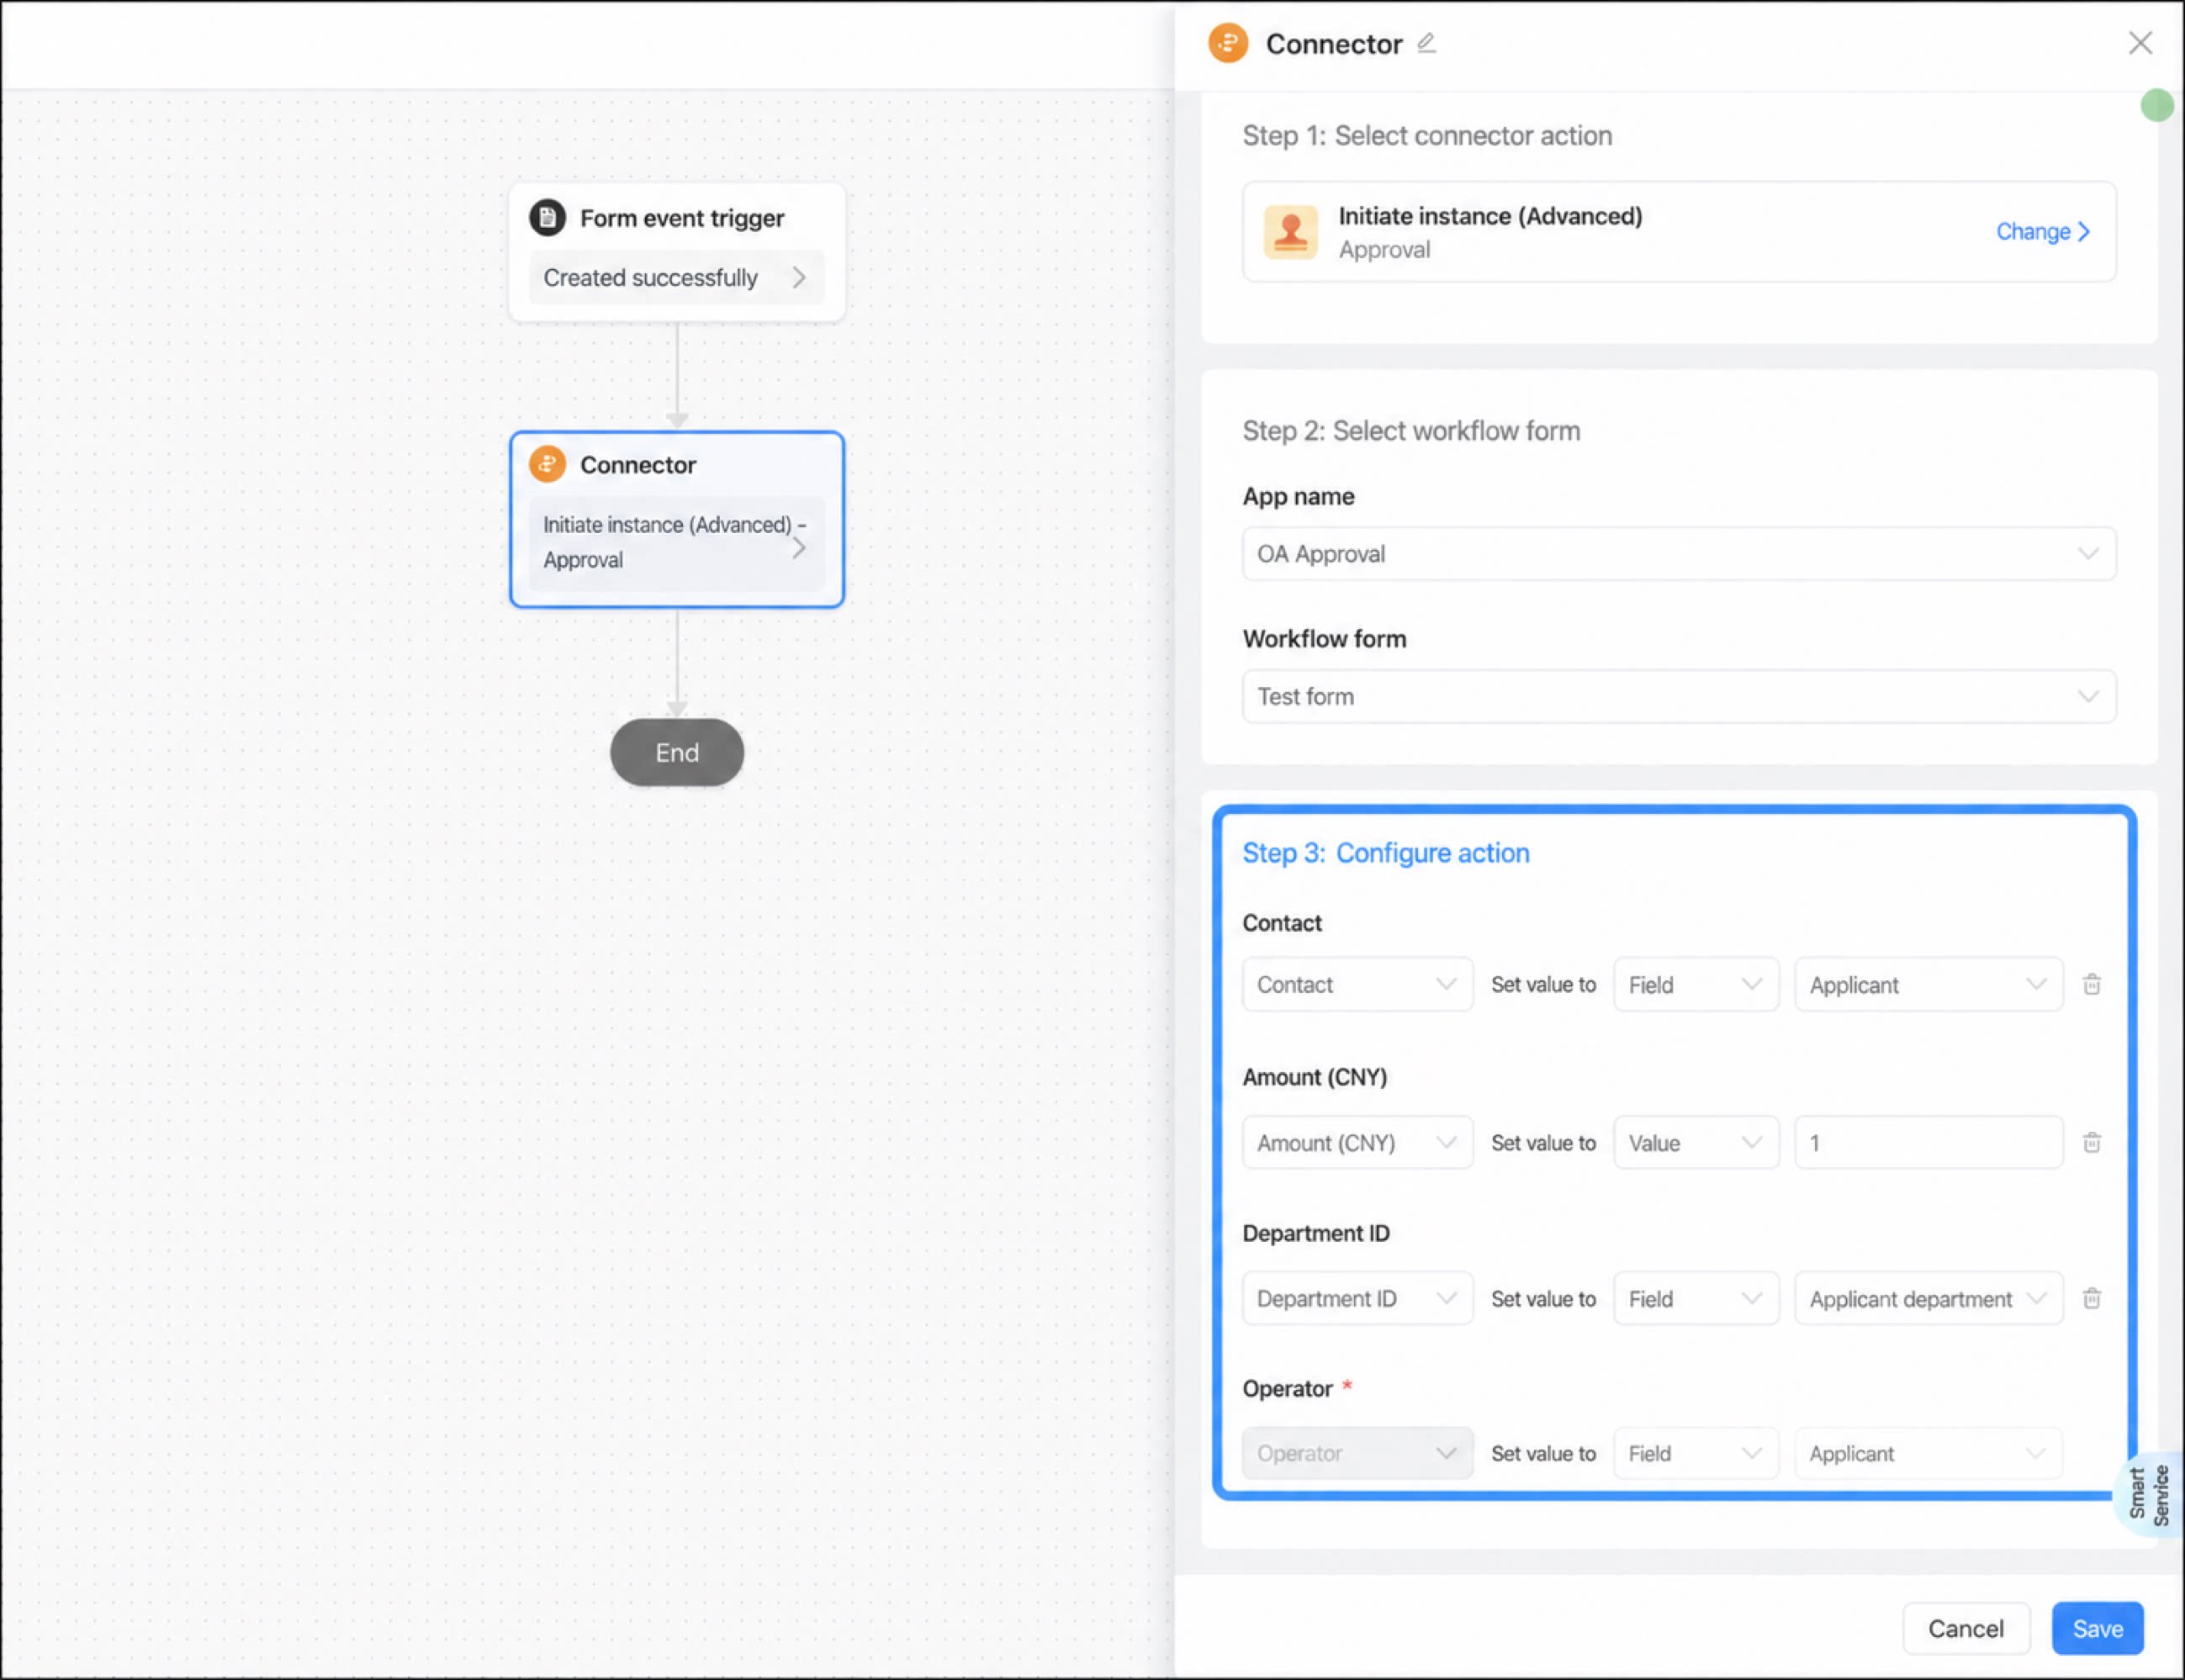
- In the Attribute panel on the right, search for and select the Submit Instance connector.
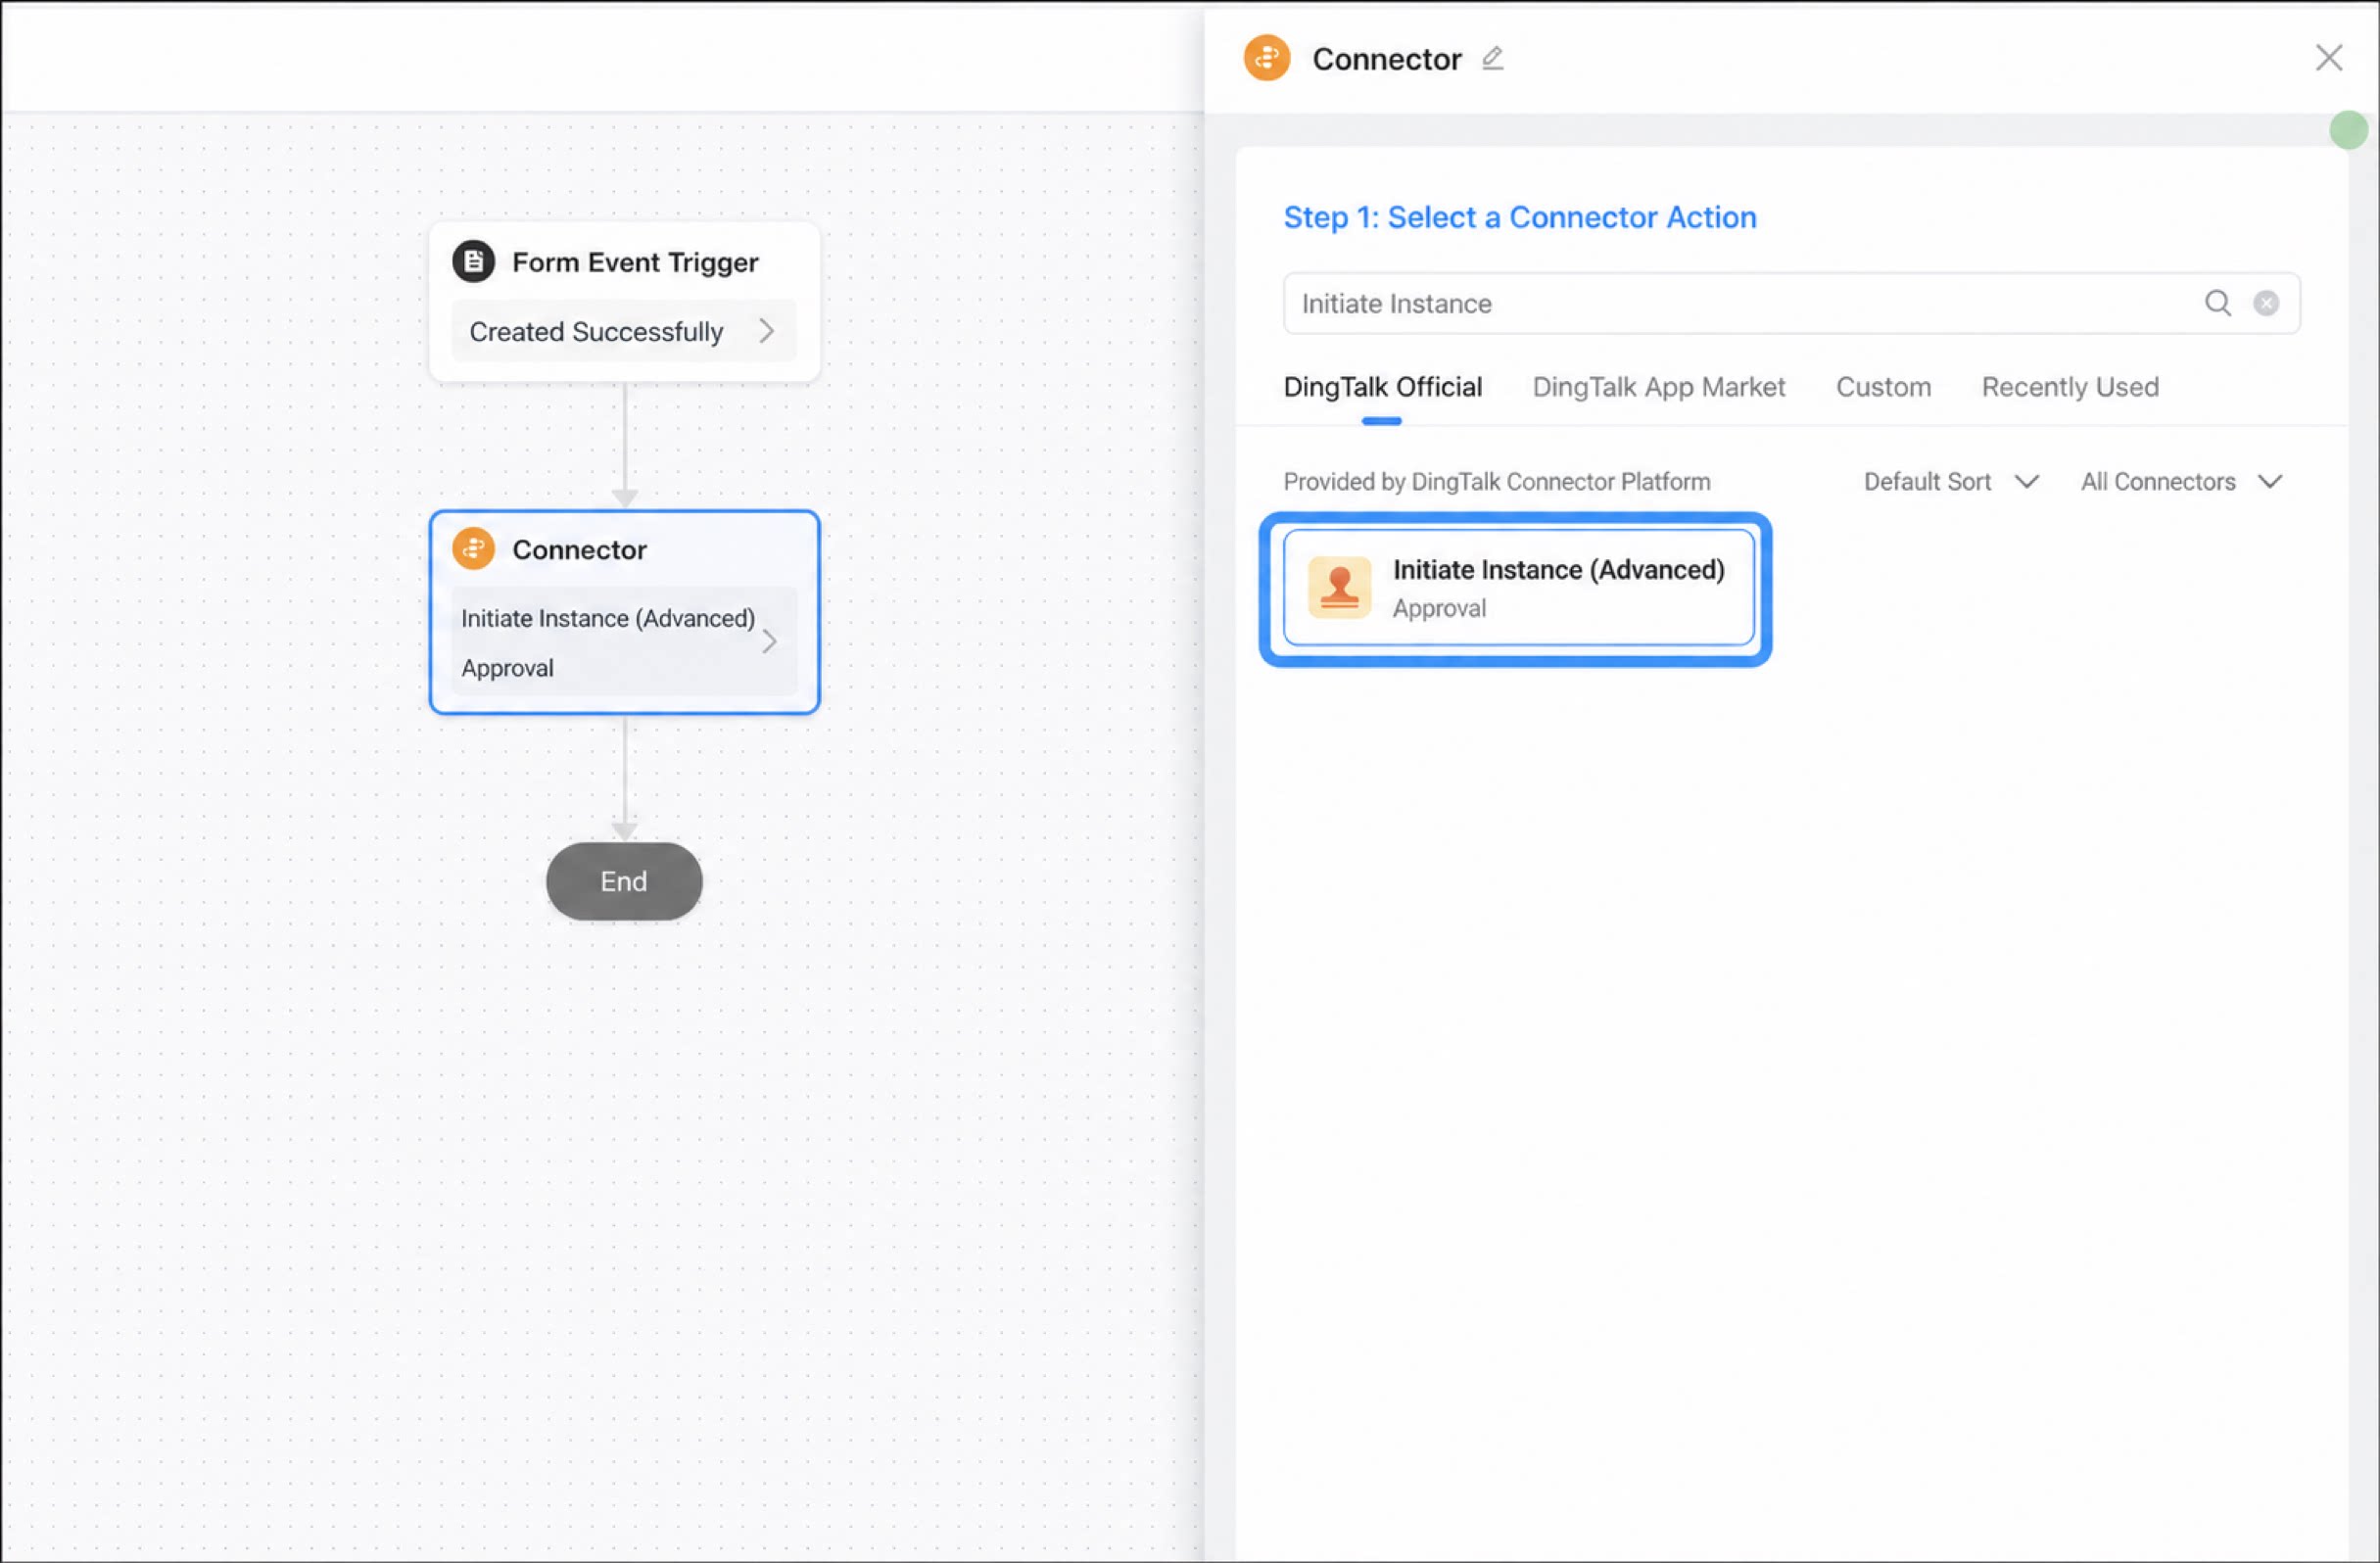
1
Set App name to OA Approval and set Workflow form to the approval form created in the previous step
2
Configure the action
3
After configuration, click Save > Publish