

 Chats
Chats Calendar
 Meetings
 Contacts
 Mail
Mail Docs
Docs Drive
Drive AI Table
 AI Minutes
 Attendance
 Approval
 YiDA
YiDA Admin Console
Preparations
Before using mail notifications in an approval process, add a mail account first. For details, see Mail management.Add a Send Mail Node
- Sign in to the YiDA workbench and click My apps.
- Select the target app to open the App settings page.
- Click Integration & Automation, select an existing flow, and click Edit.
- Move the cursor over the connecting line between two steps. When the + button appears, click it and select Chats node > Send mail.
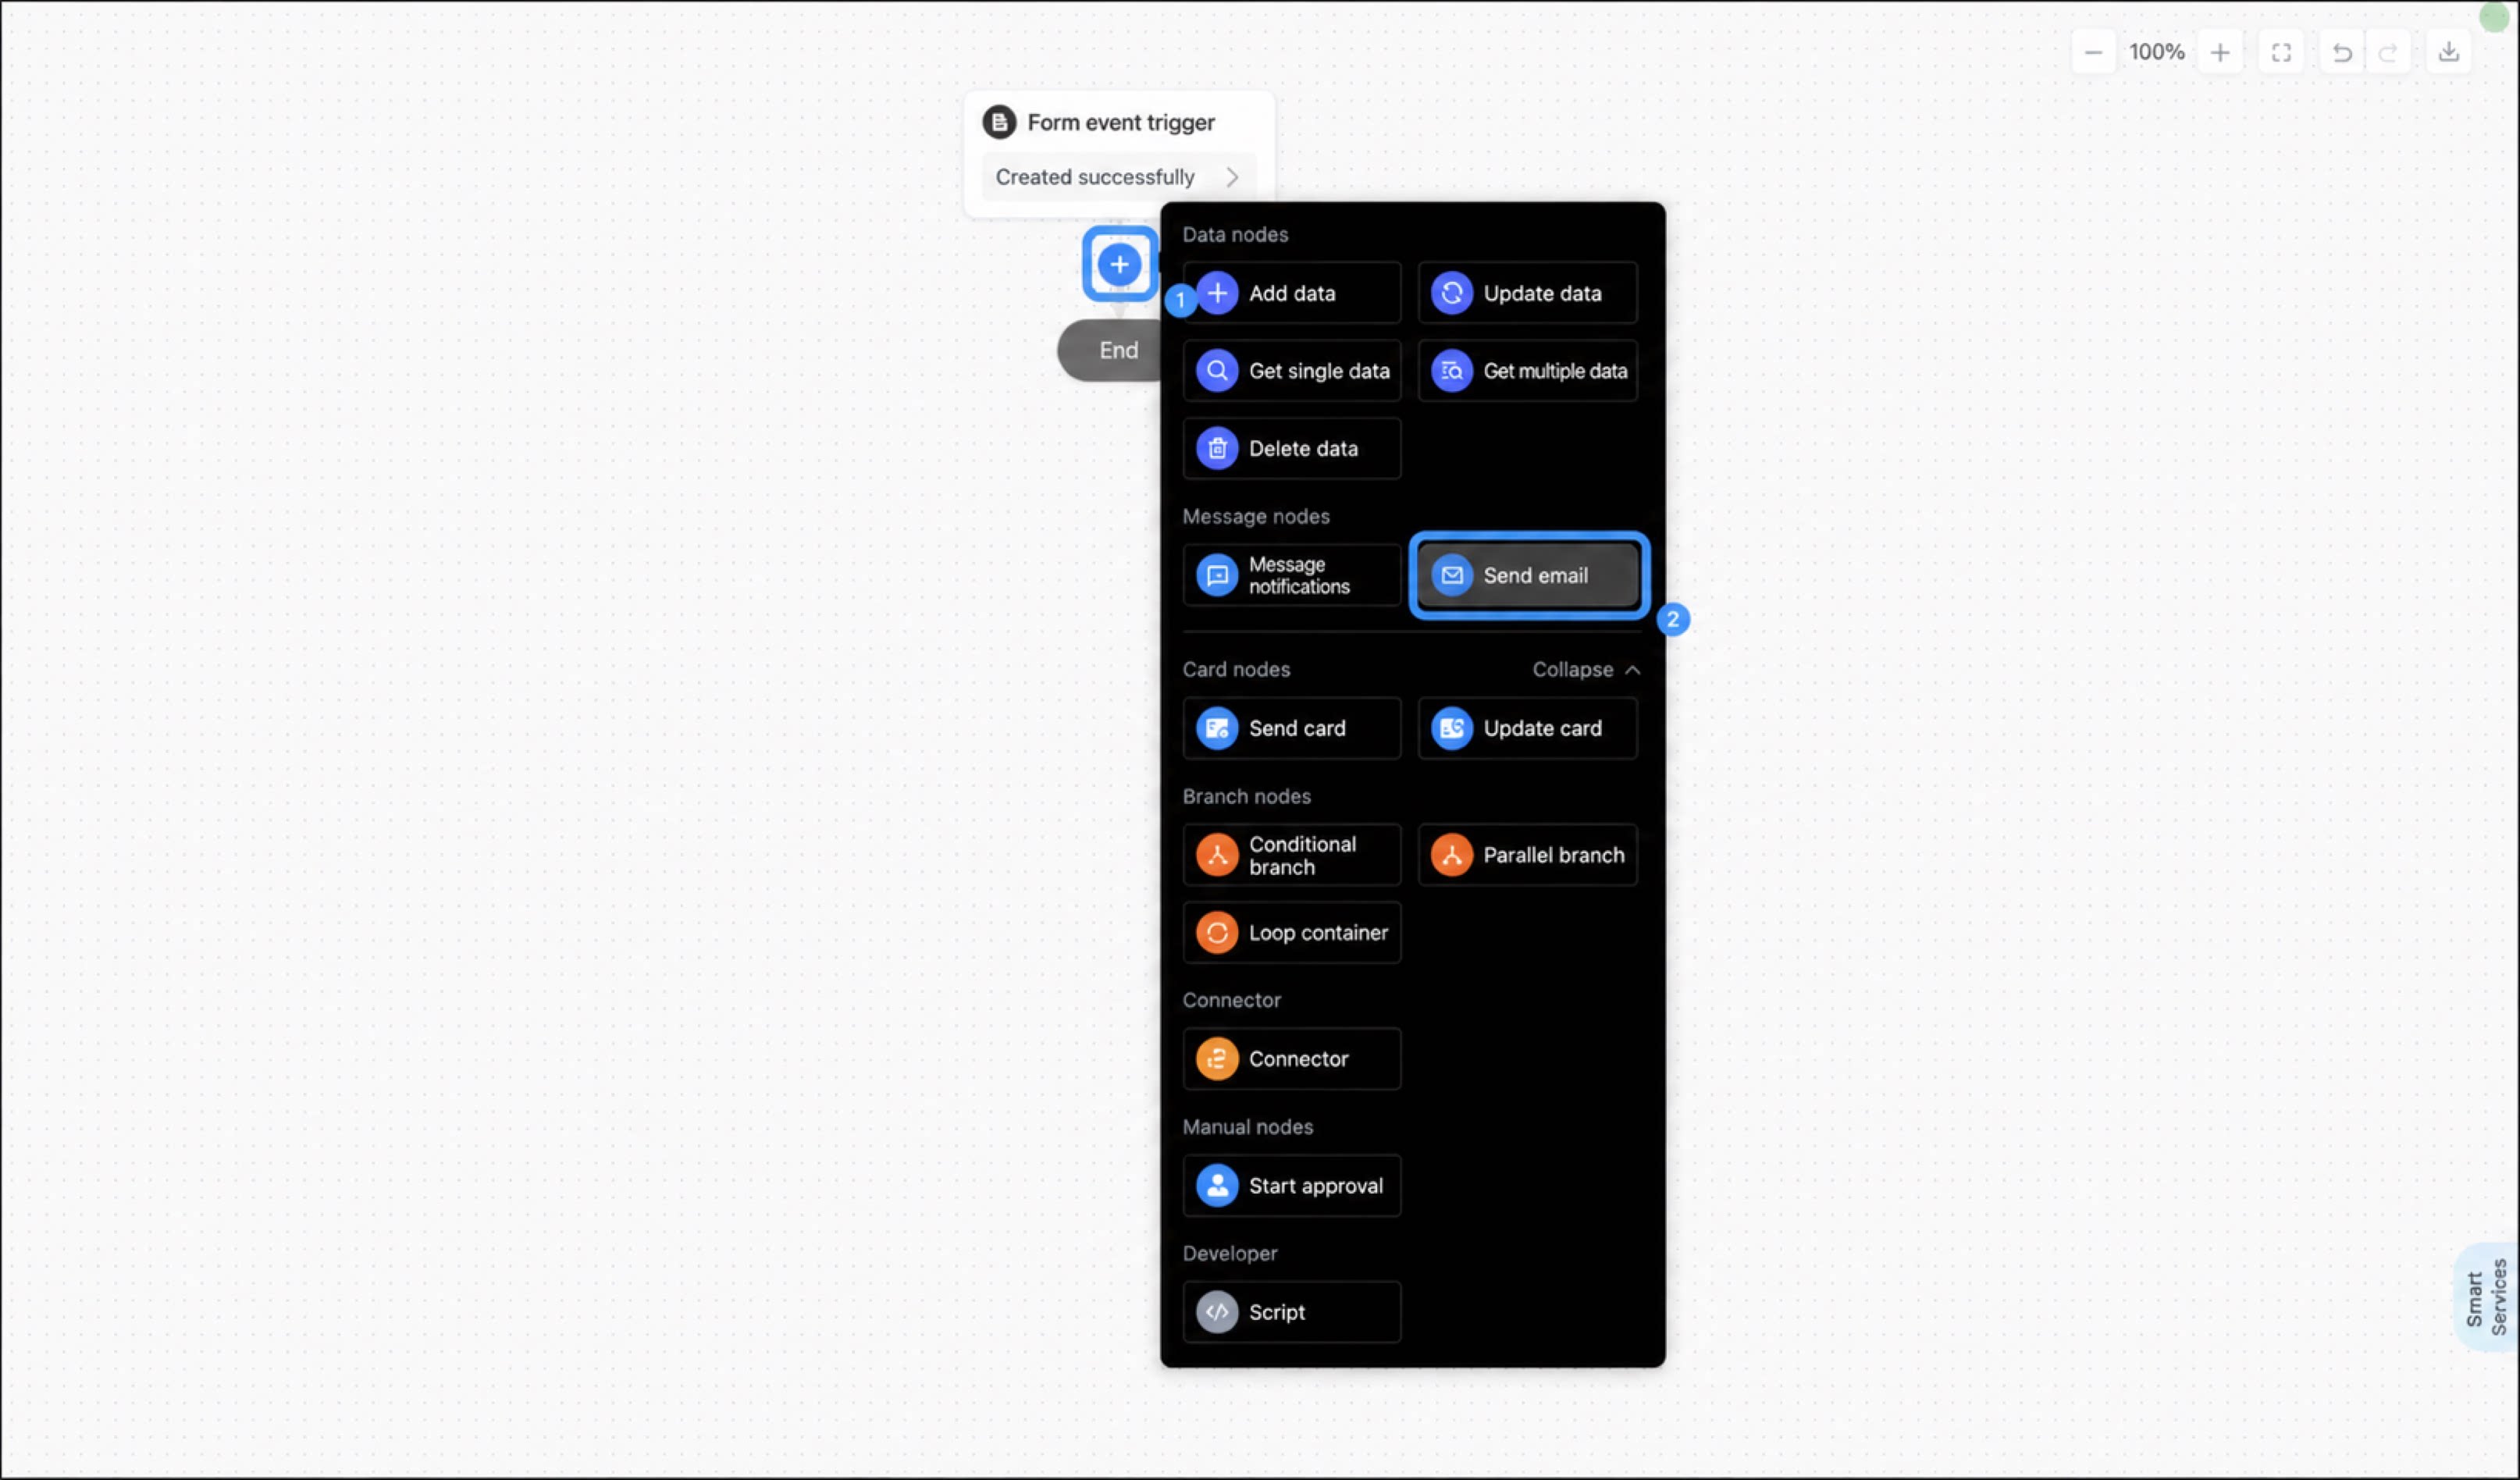
Configure Send Mail
Follow these steps to configure the Send mail node.1
Select the Send mail node and set the mail address in the configuration panel on the right
If you have not added a mail account, click Account management on the right to add one. For details, see Mail management.
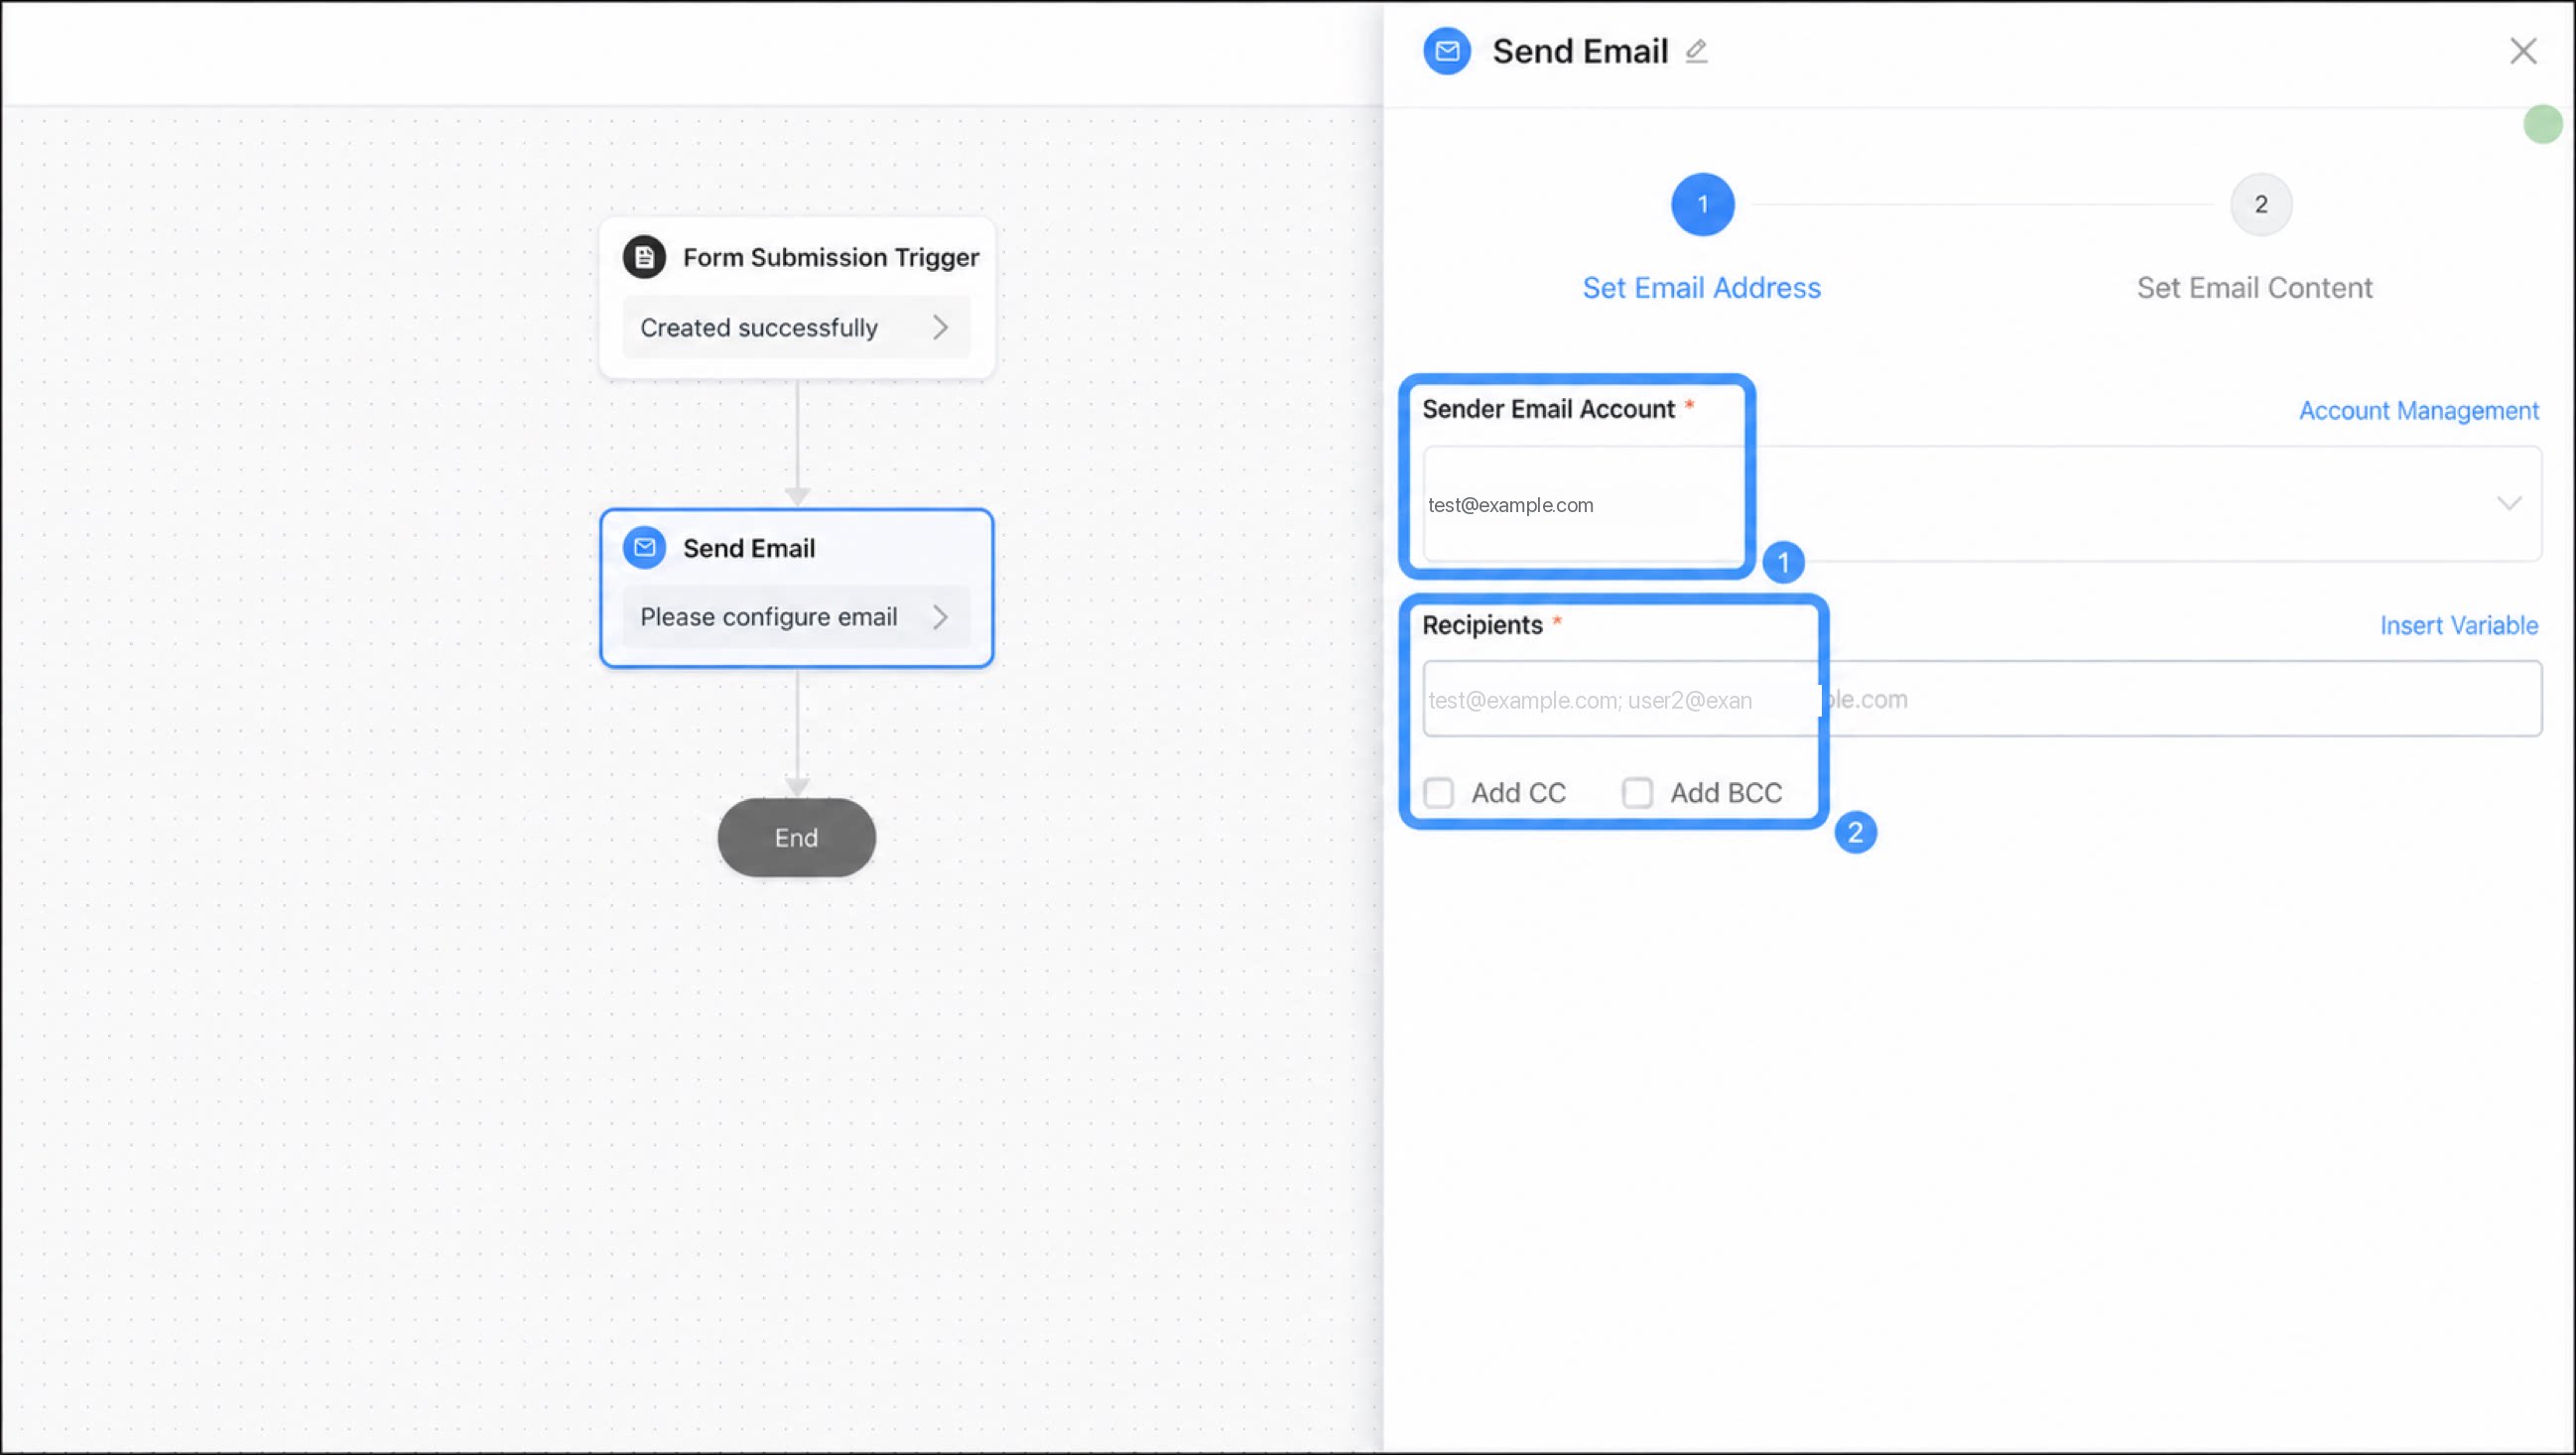
The To field accepts values from form fields.
2
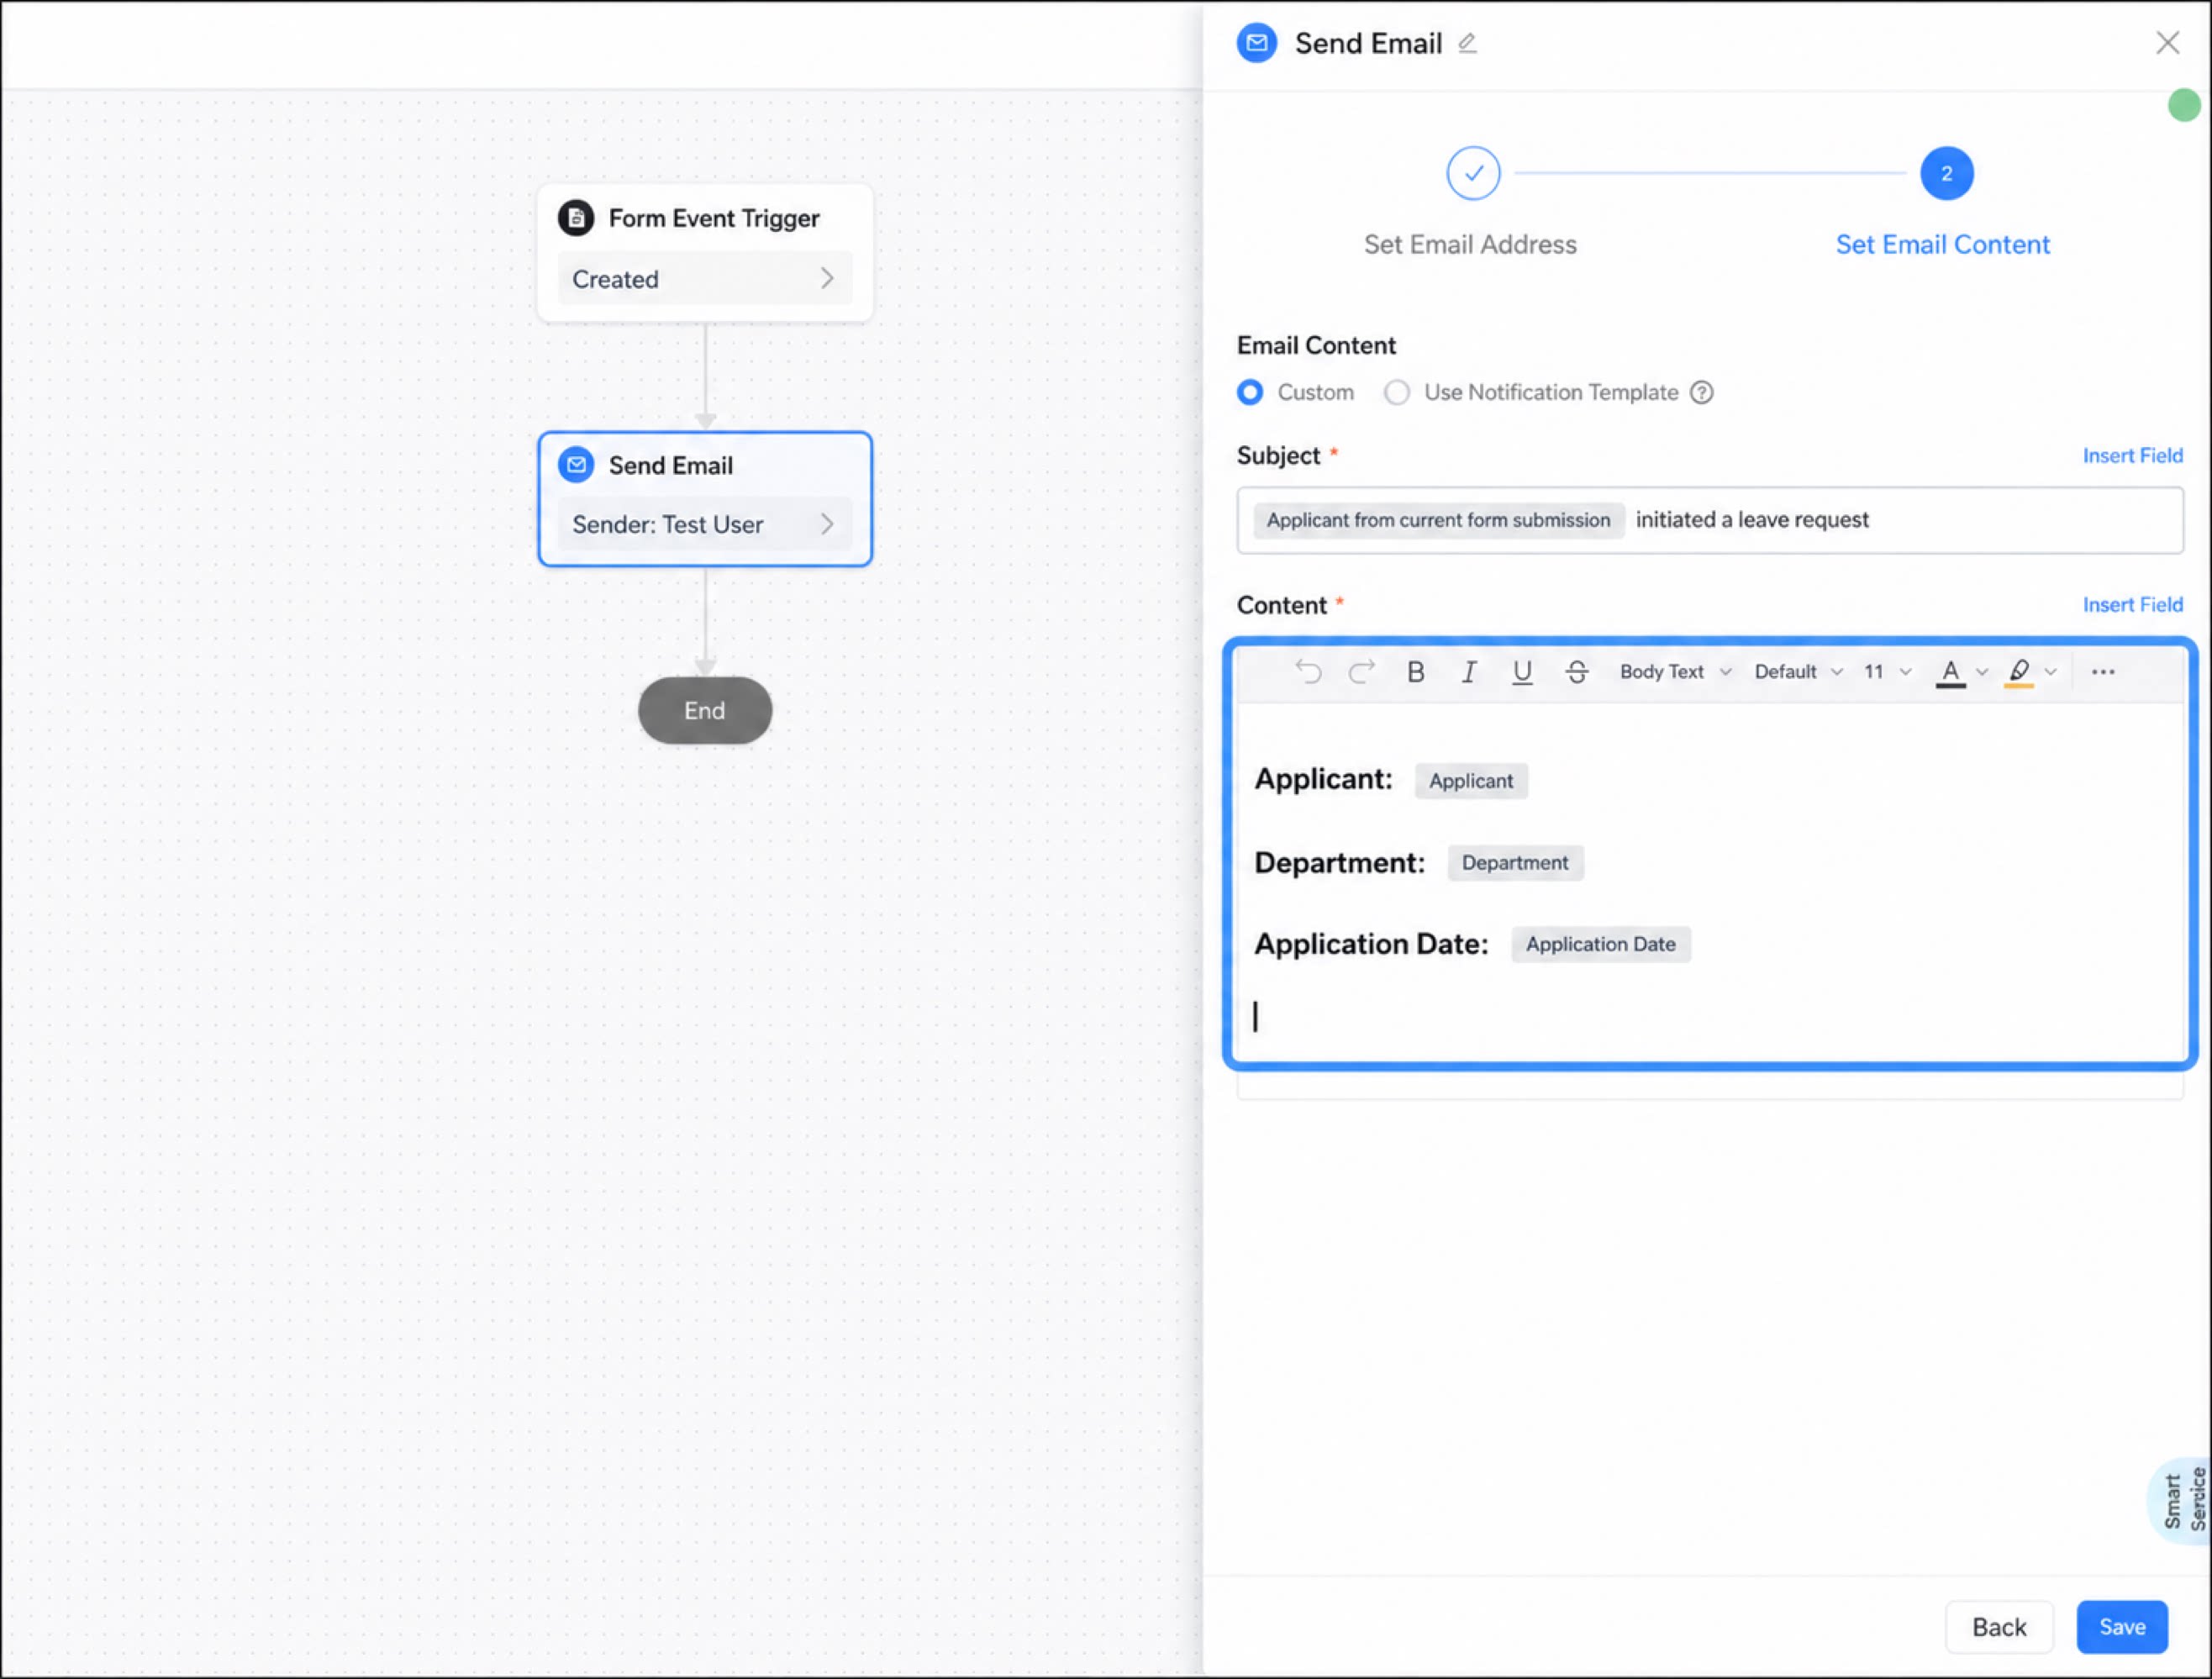
Set the mail content. Two modes are supported: custom content and message template
Form fields can be inserted into the content.
3
Click Save when the configuration is complete
Supported Component Types for Mail
The following table lists the components that support batch data export in mail:| Component type | Component name | Mail reference supported | Data format in mail |
| Common components | Single-line text |
| Text format |
| Multi-line text |
| Text format | |
| Numerical |
| Number format | |
| Rating |
| Number format | |
| Select |
| Text format | |
| Checkbox |
| Text format. All selected options are exported and separated by commas. | |
| Date range |
| Date format | |
| Date |
| Date format | |
| User |
| 1. When “Show user ID” is cleared, only the user name is shown. 2. When “Show user ID” is selected, both the user name and user ID are shown. | |
| Department |
| 1. When “Show full department path” is cleared, only the department name is shown. 2. When “Show full department path” is selected, the full department path is shown. | |
| Image upload |
| Image path. Accessible only after signing in to DingTalk. | |
| Attachment |
| Image path. Accessible only after signing in to DingTalk. | |
| Word template |
| Image path. Accessible only after signing in to DingTalk. | |
| Signature |
| Image path. Accessible only after signing in to DingTalk. | |
| Smart invoice |
| Image path. Accessible only after signing in to DingTalk. | |
| Subform |
| Text format | |
| Premium components | Dropdown select |
| Selected option |
| Dropdown multiselect |
| All selected options are exported and separated by commas. | |
| Cascading select |
| Text format | |
| Country/Region |
| Text format | |
| Address |
| Text format | |
| Location |
| Text format | |
| Associated form |
| Text format, field + instance ID | |
| Serial number |
| Text format | |
| Organization |
| Text format | |
| UnionPay | ❌ Not supported | / | |
| Budget control | ❌ Not supported | / | |
| Group | ❌ Not supported | / | |
| Associated query | ❌ Not supported | / | |
| Rich Text | ❌ Not supported | / | |
| Image and text | ❌ Not supported | / | |
| Common components | ID number | ❌ Not supported | Not supported in mail export to protect privacy. |
| Phone number | ❌ Not supported | Not supported in mail export to protect privacy. |