Chats
Chats Calendar
 Meetings
 Contacts
 Mail
Mail Docs
Docs Drive
Drive AI Table
 AI Minutes
 Attendance
 Approval
 YiDA
YiDA Admin Console
1. Use Case
Enter a piece of text and get its translation in the target language. Mutual translation between Chinese, English, and Japanese is supported.2. Steps
2.1 Step 1: Design the Forms
Create two forms: one for entering the text to translate, and one for receiving the translation result.2.1.1 Create the Input Form
Steps:- Create a form and name it “Translation document”.
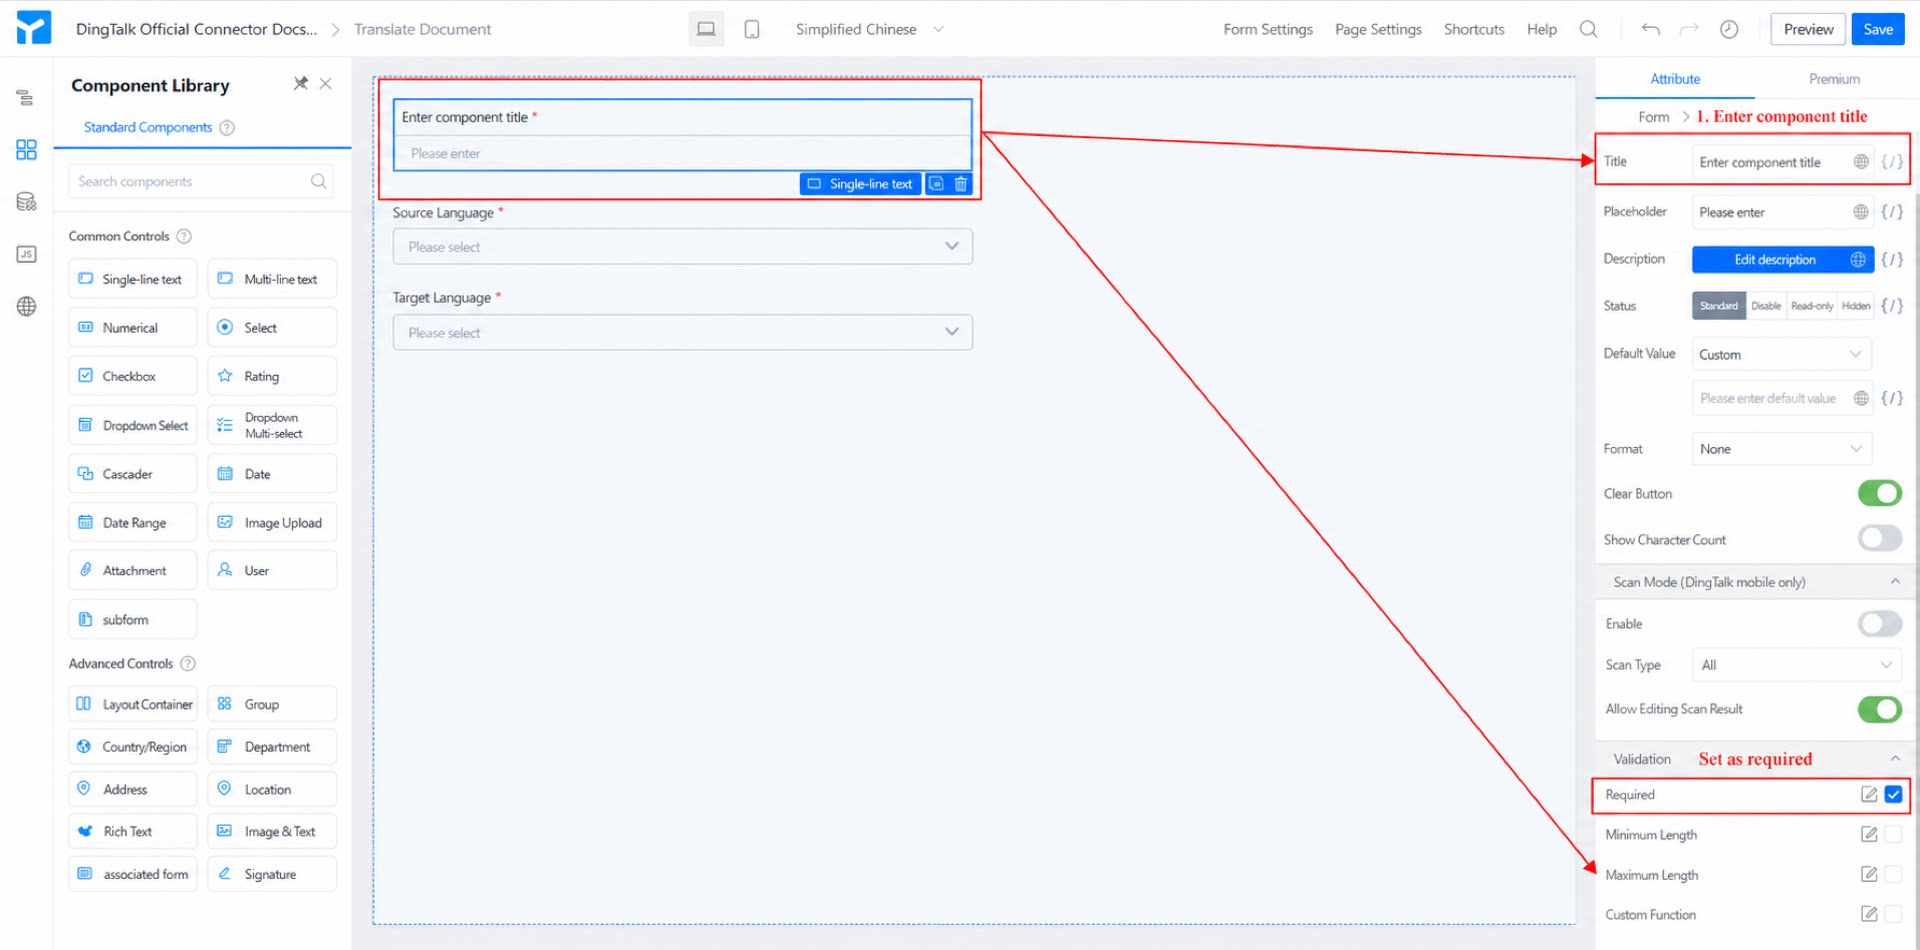
- Add a Single-line text component, name it “Text to translate”, and set it as required. (See Figure 2.1-1.)
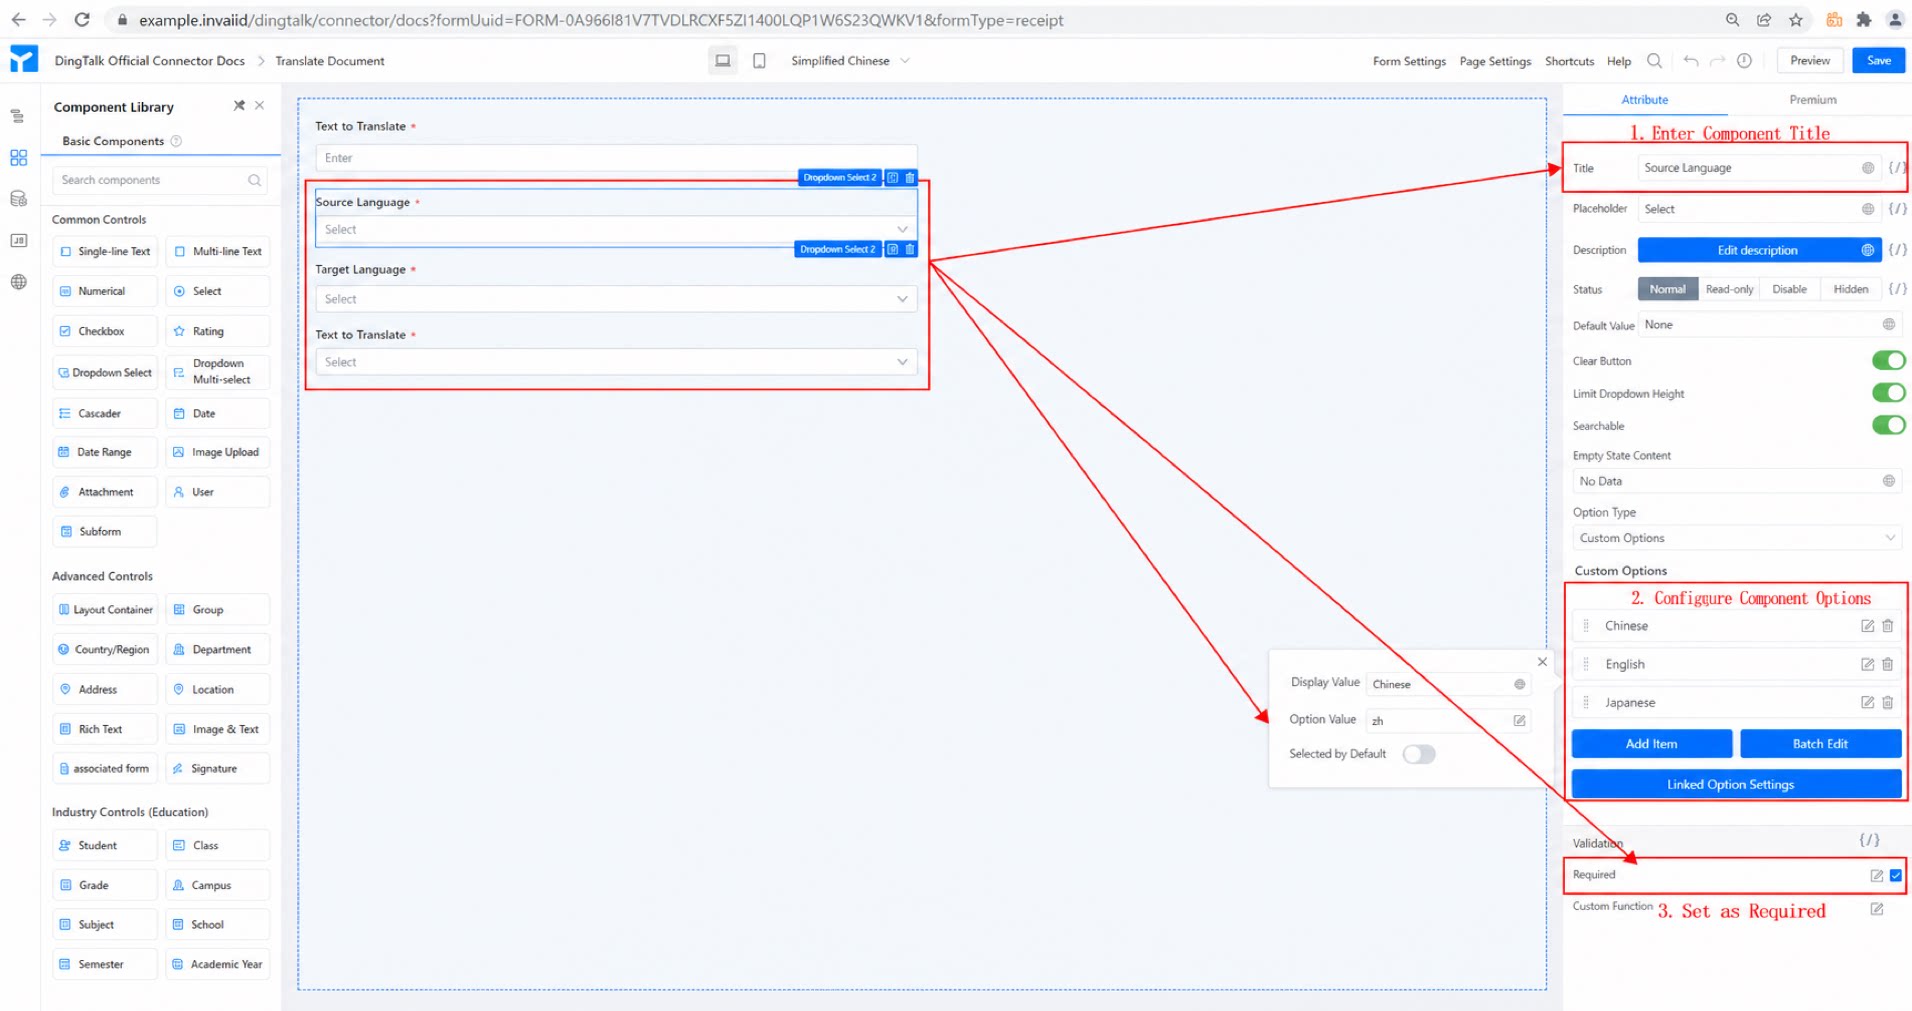
- Add two Select components, name them “Source language” and “Target language”, and set both as required. Define the option content as a custom list. The mapping between the display value and the option value is shown in the table below. (See Figure 2.1-2.)
| Select component display value and option value mapping | |
| Display value | Option value |
| Chinese | zh |
| English | en |
| Japanese | ja |
- Click Save in the upper-right corner of the page.
2.1.2 Create the Receiving Form
Steps:- Create a form and name it “AI translation result”.
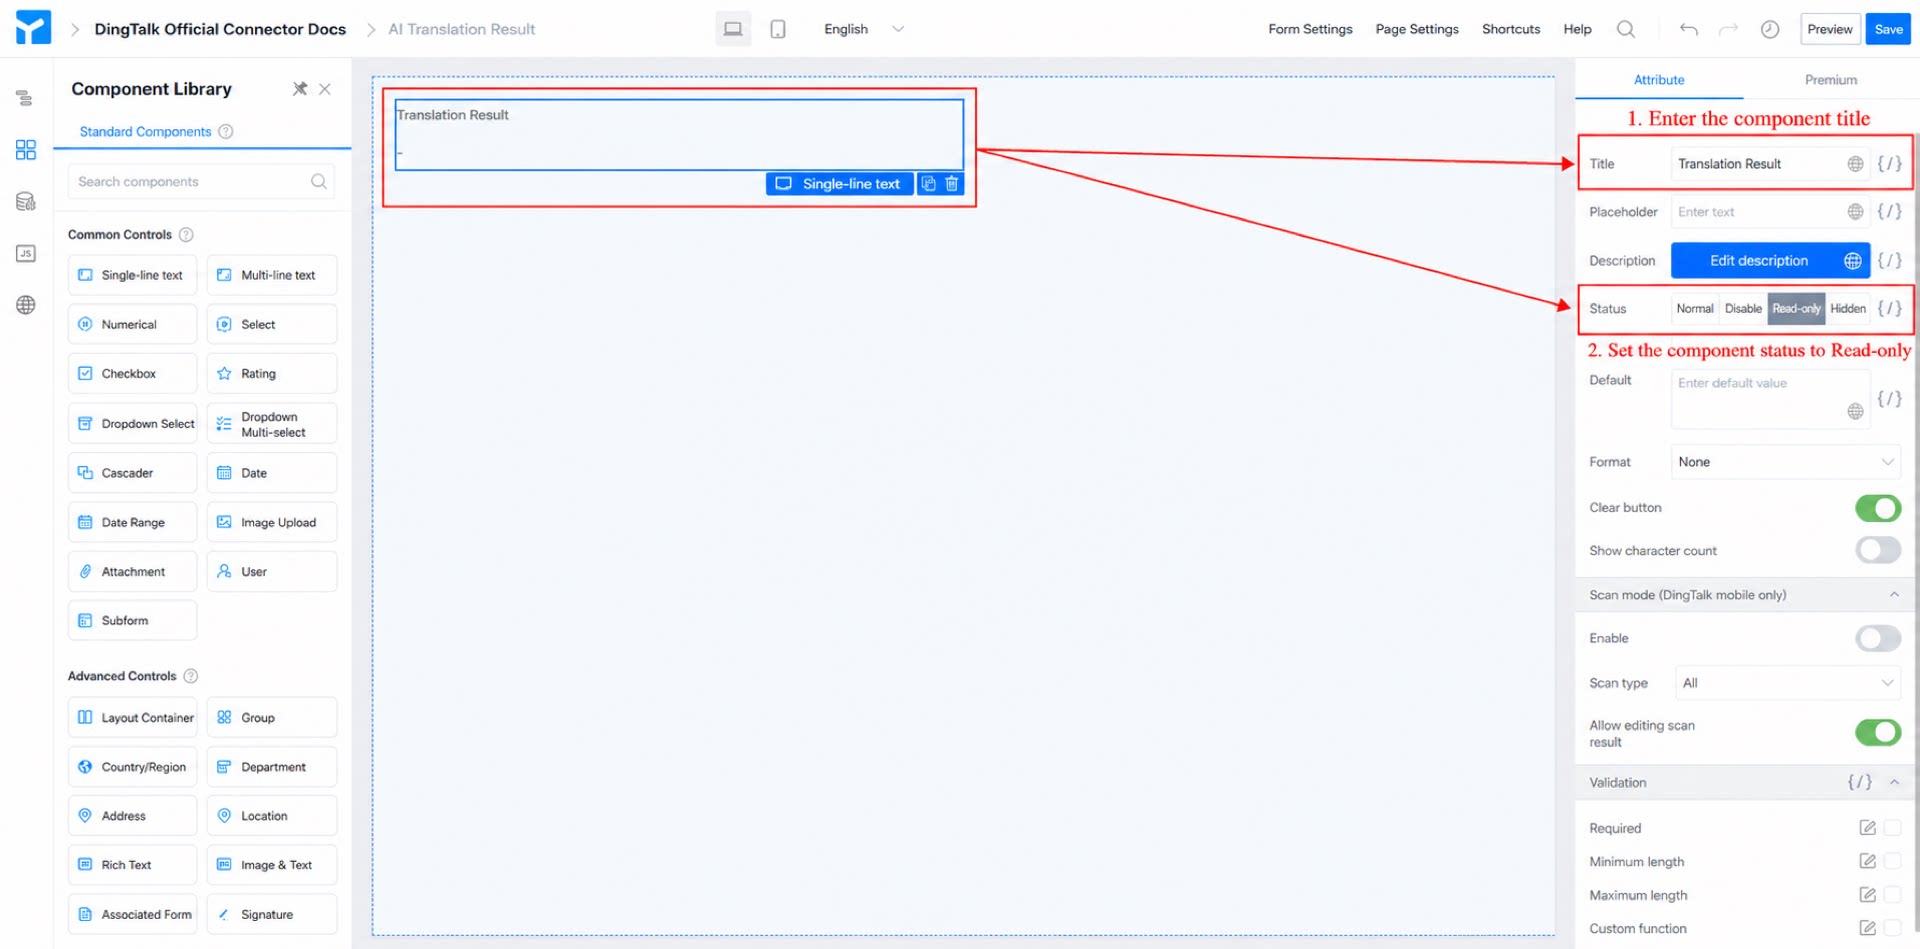
- Add a Single-line text component and name it “Translation result”. (See Figure 2.1-3.)
- Click Save in the upper-right corner of the page.
2.2 Step 2: Configure the Connector
For a detailed introduction to YiDA connectors, see Integration & Automation - Connector.
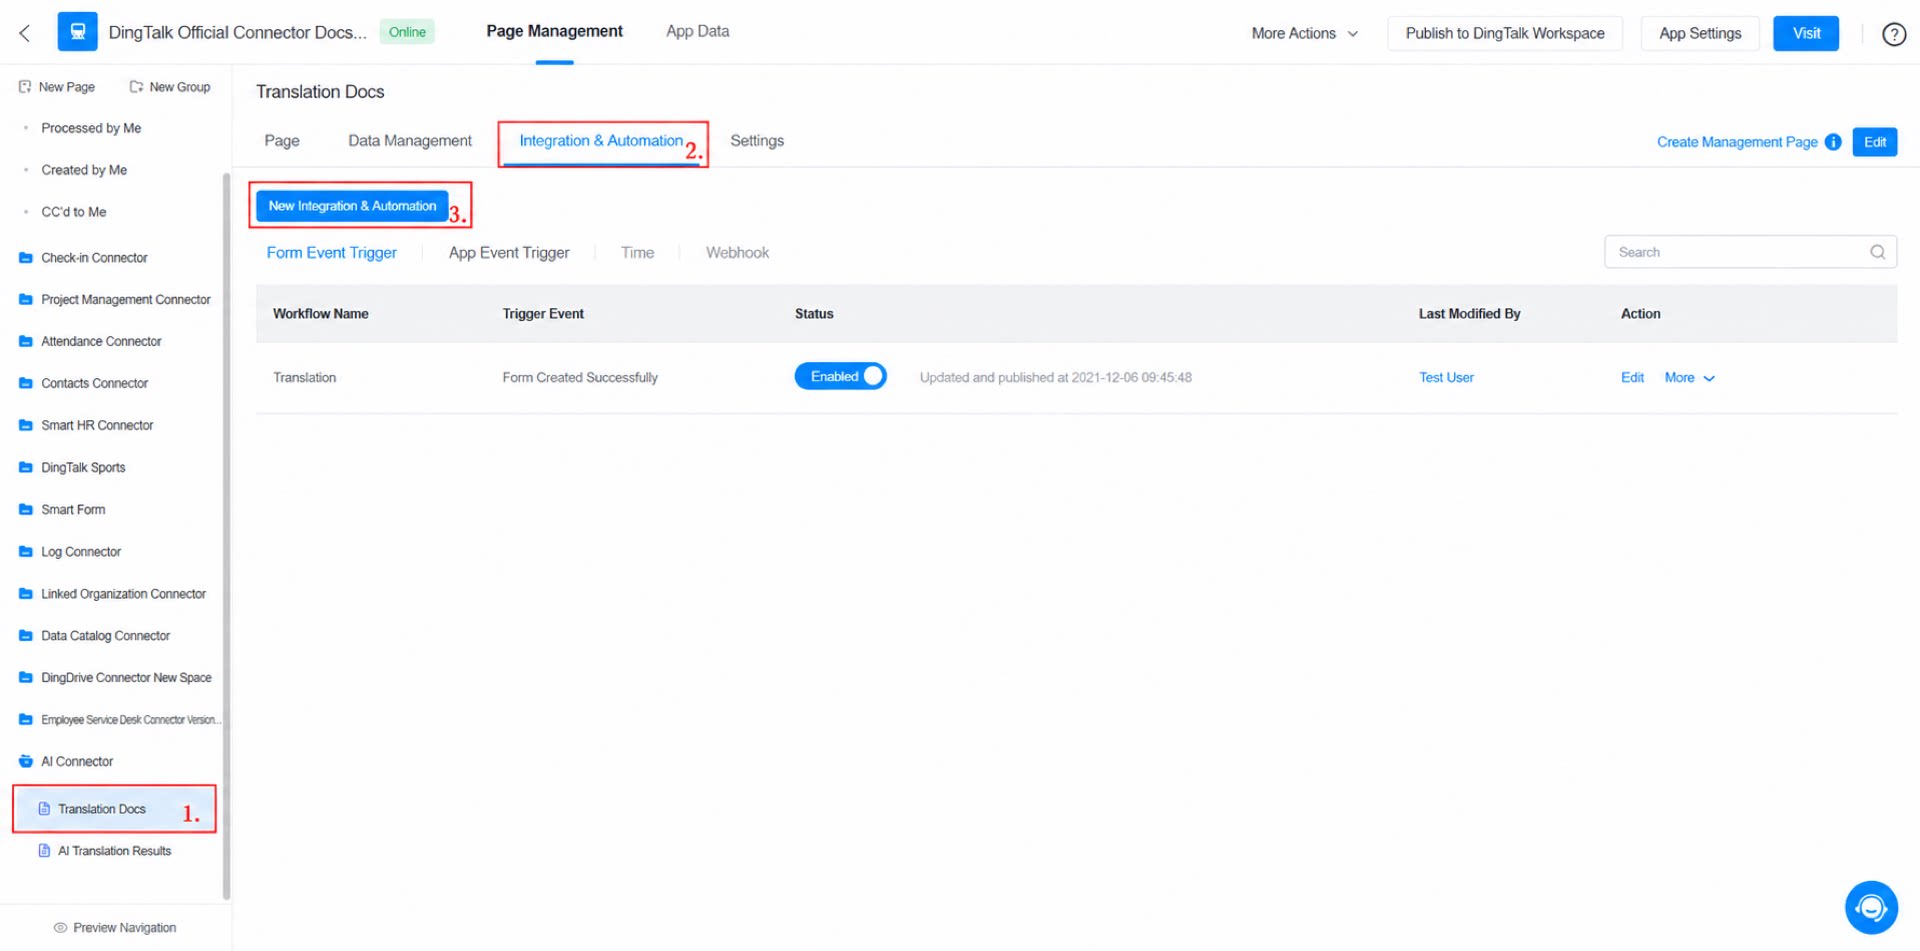
- In the admin console, open the “Translation document” form, go to Integration & Automation, and click Create Integration & Automation. (See Figure 2.2-1.)
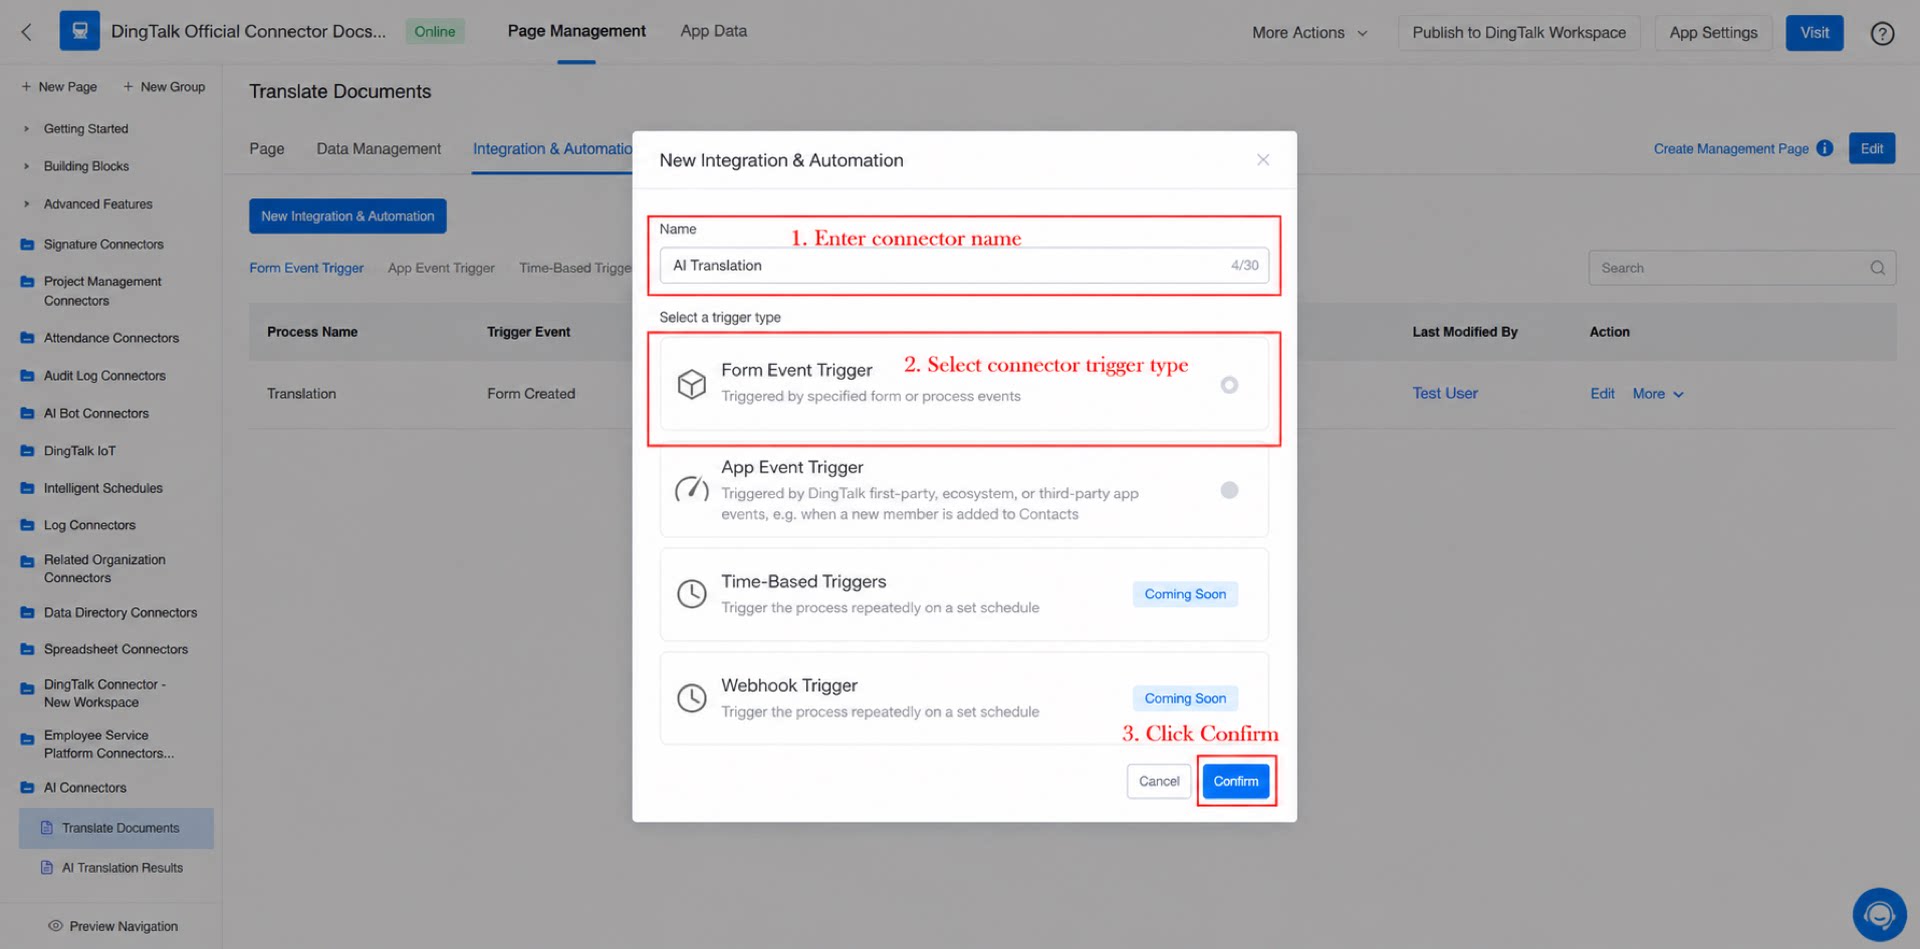
- Name the connector “AI translation”, set the trigger type to Form event trigger, and click Save. (See Figure 2.2-2.)
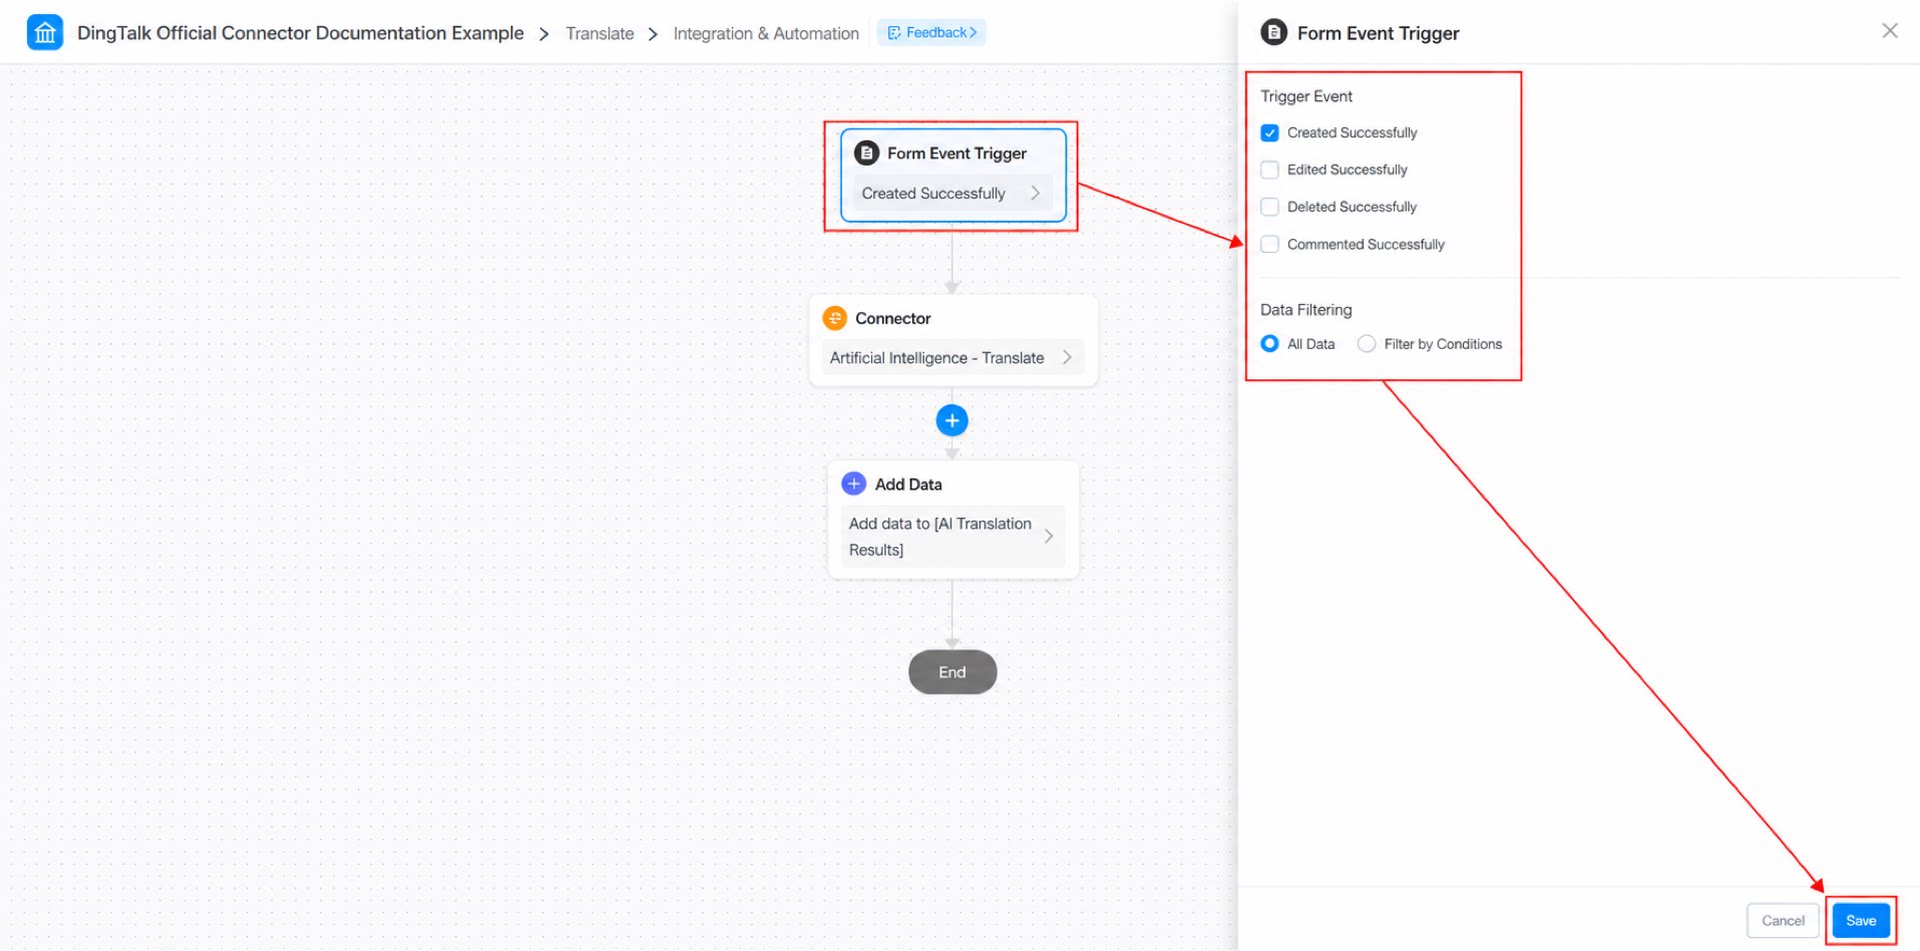
- Configure the form event trigger: set the trigger event to Create success and the data filter to All data, then click Save. (See Figure 2.2-3.)
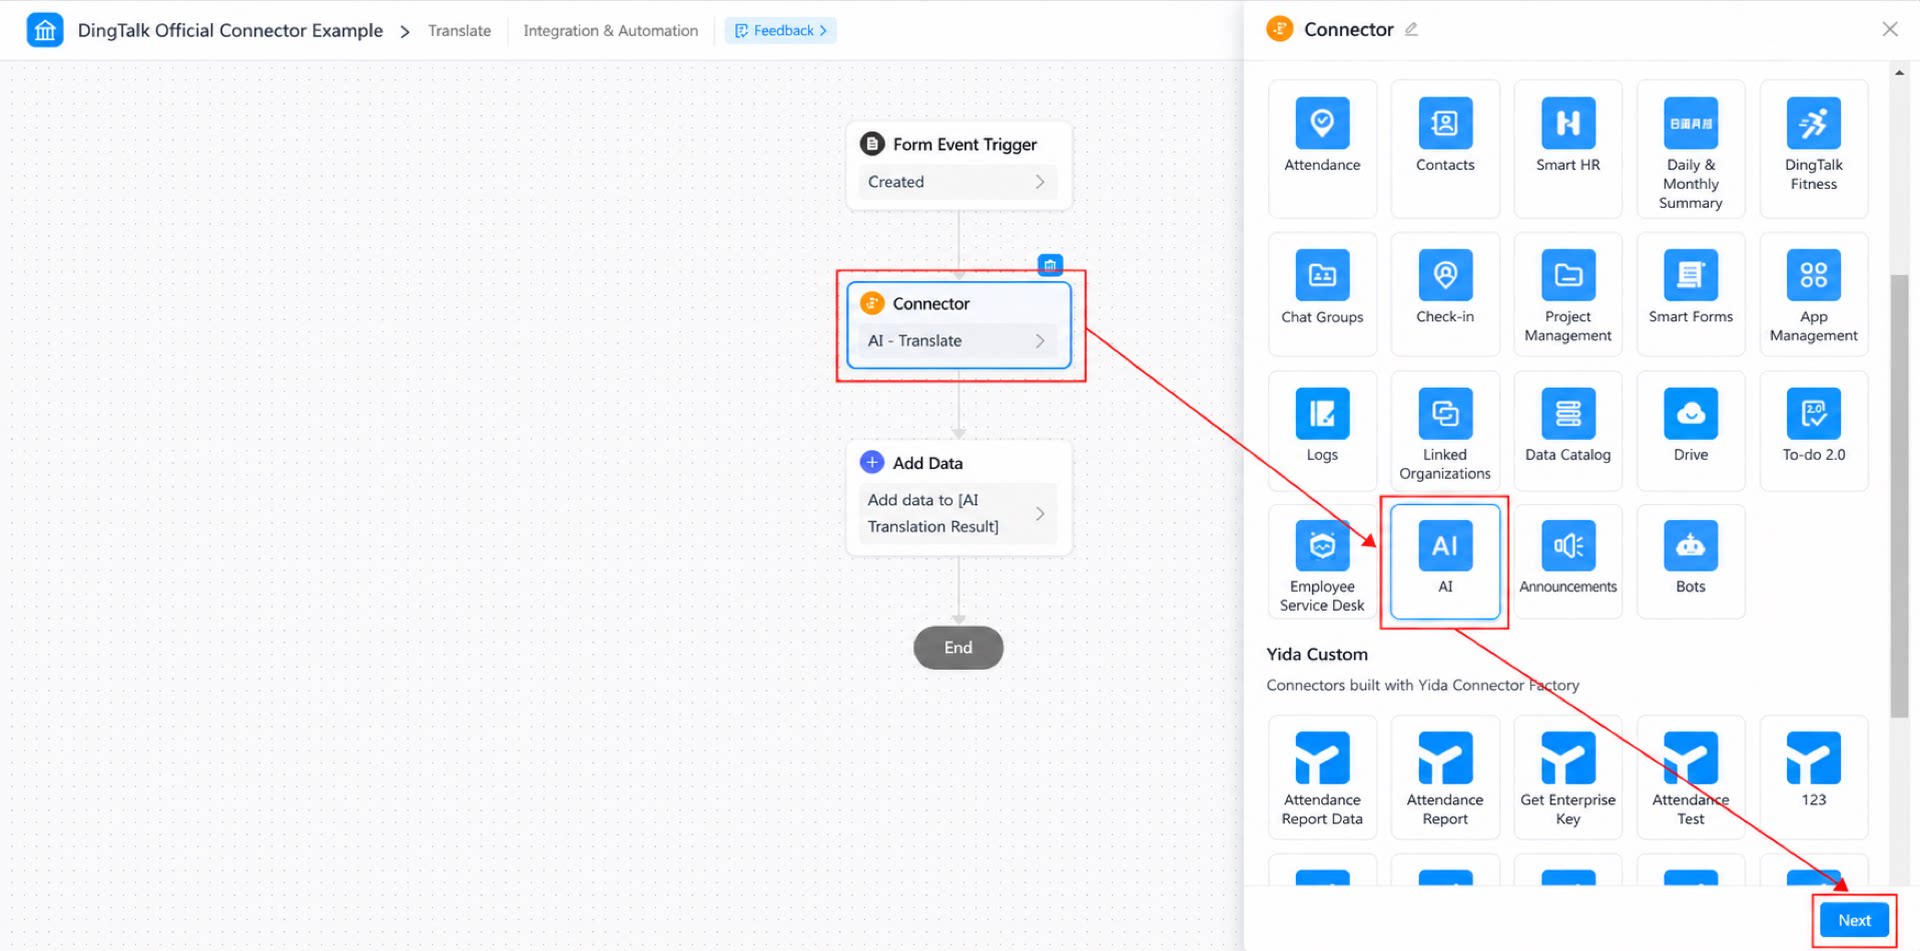
- Select the connector app: choose the “Artificial intelligence” app, then click Next. (See Figure 2.2-4.)
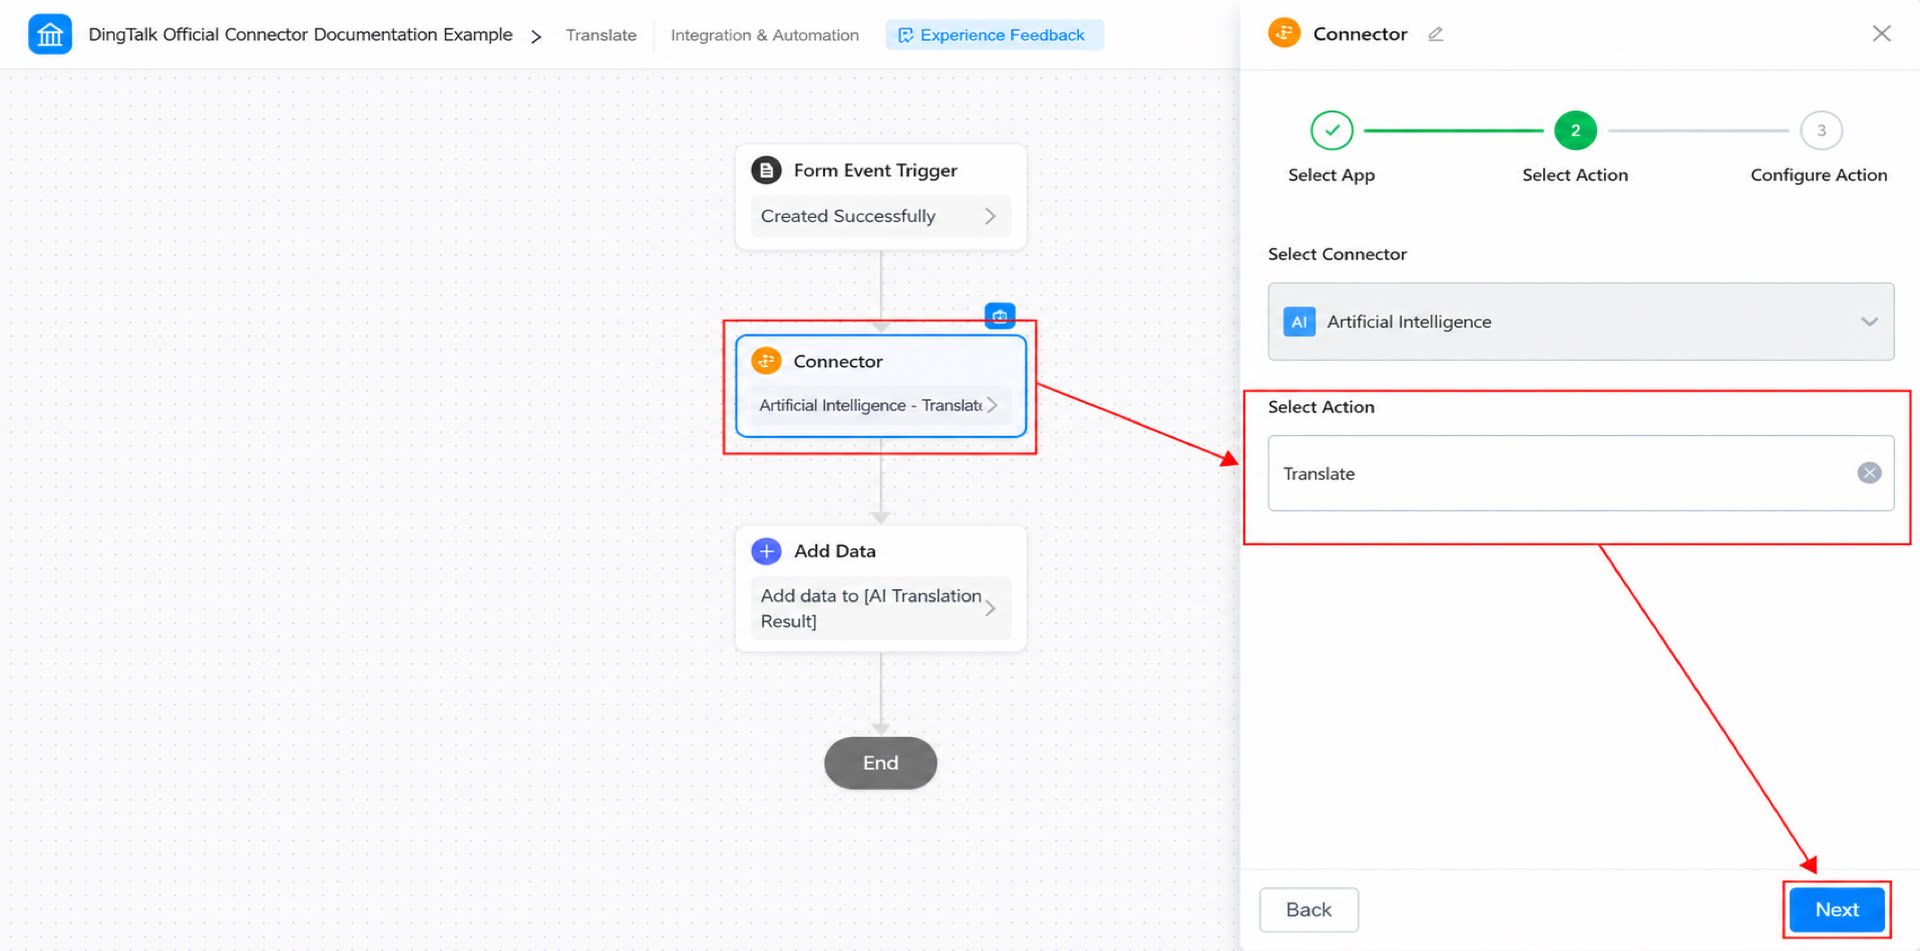
- Select the connector action: choose the “Translate” action, then click Next. (See Figure 2.2-5.)
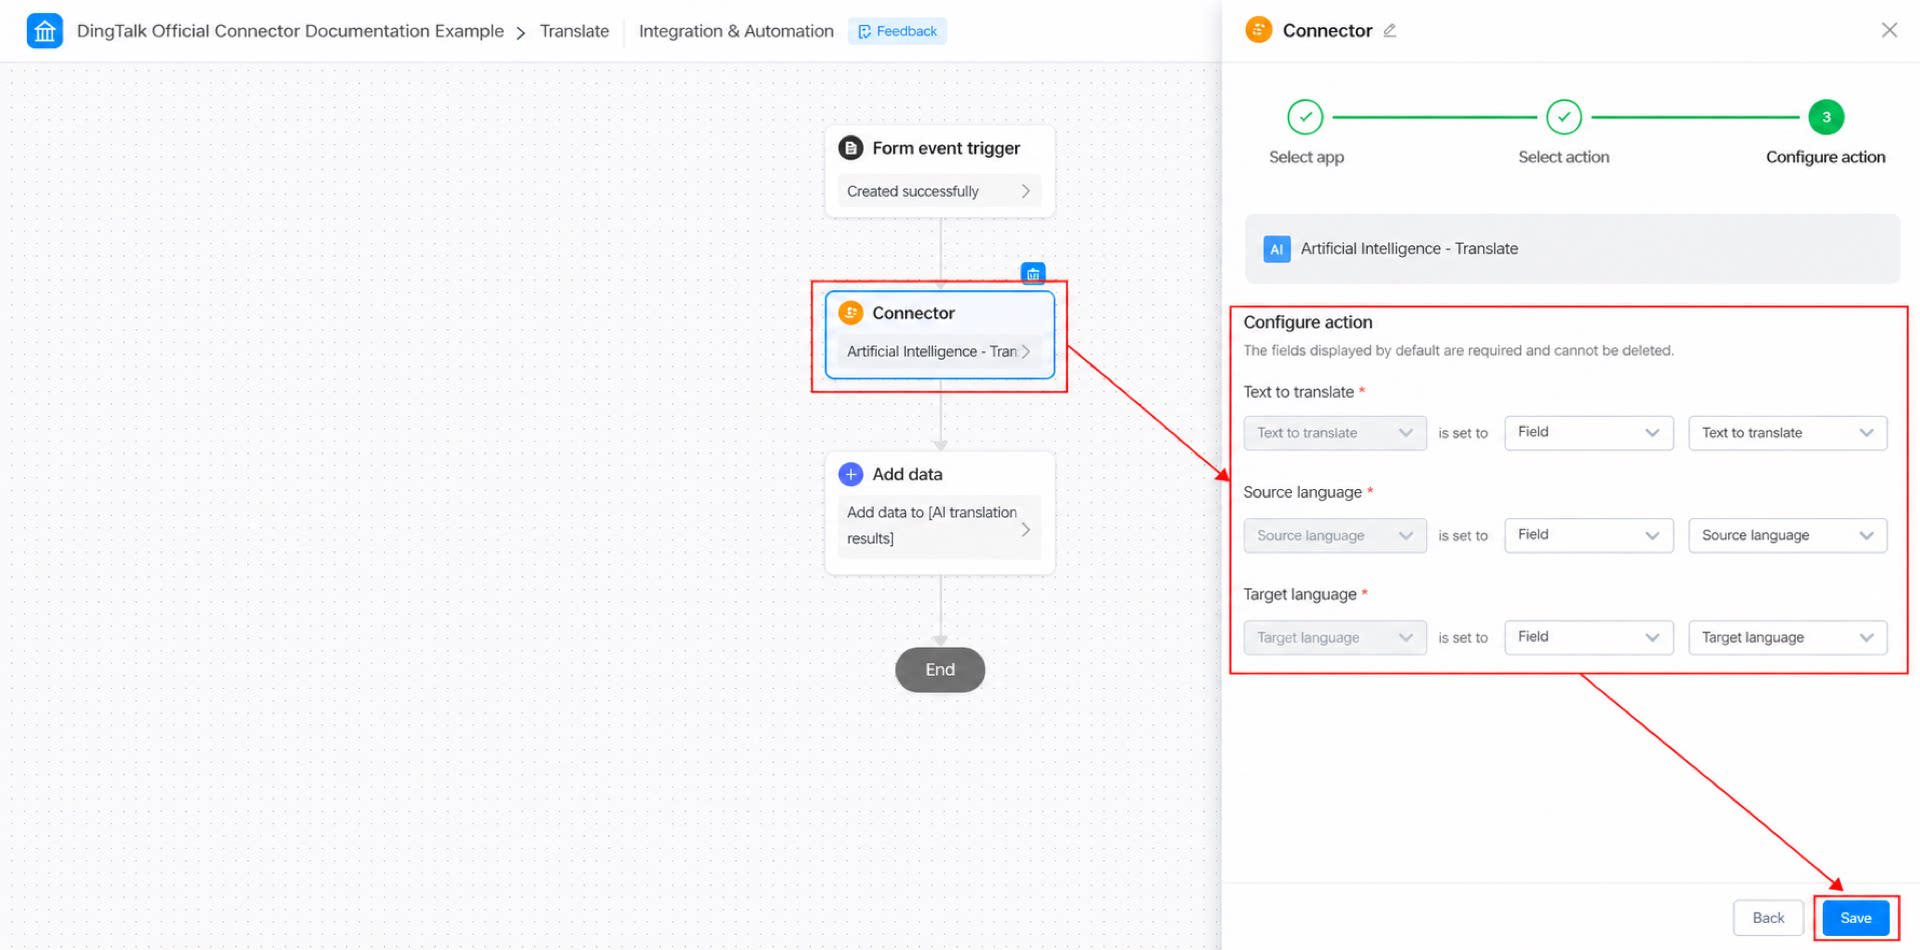
- Configure the connector action, then click Save. (See Figure 2.2-6.)
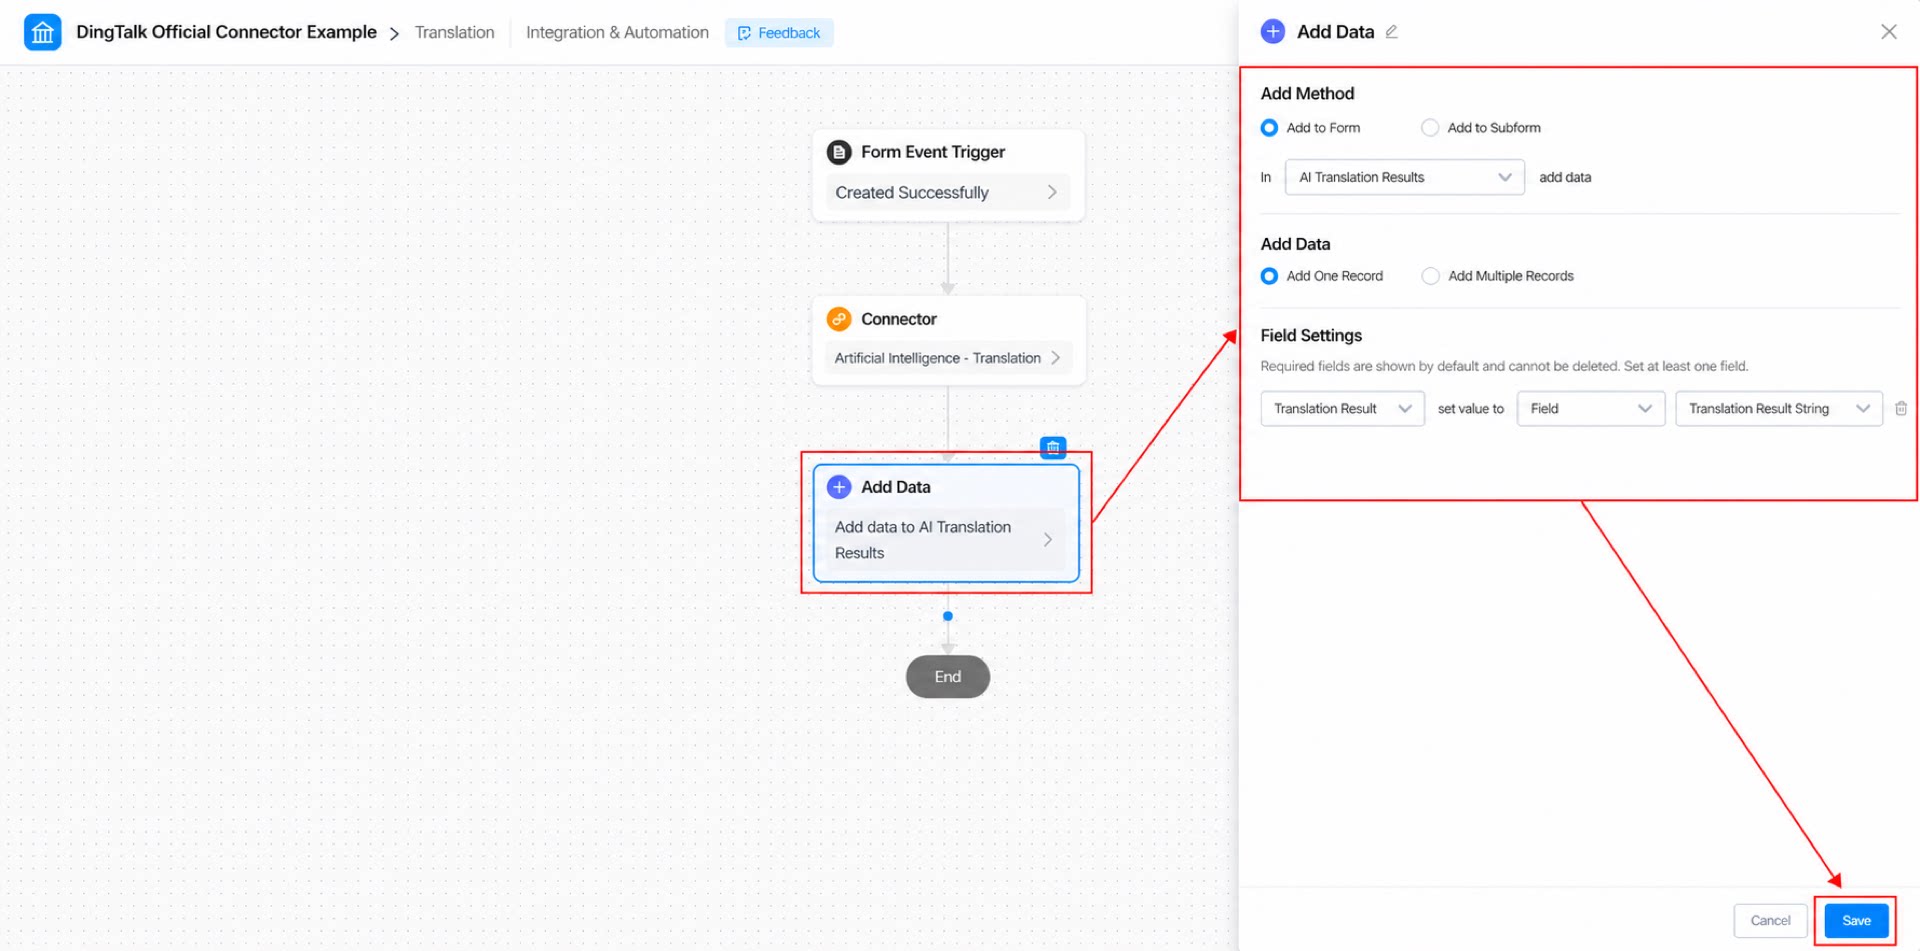
- Add and configure the Create data node. (See Figure 2.2-7.)
- Click Save in the upper-right corner, then click Publish.
2.3 Step 3: Submit the Form
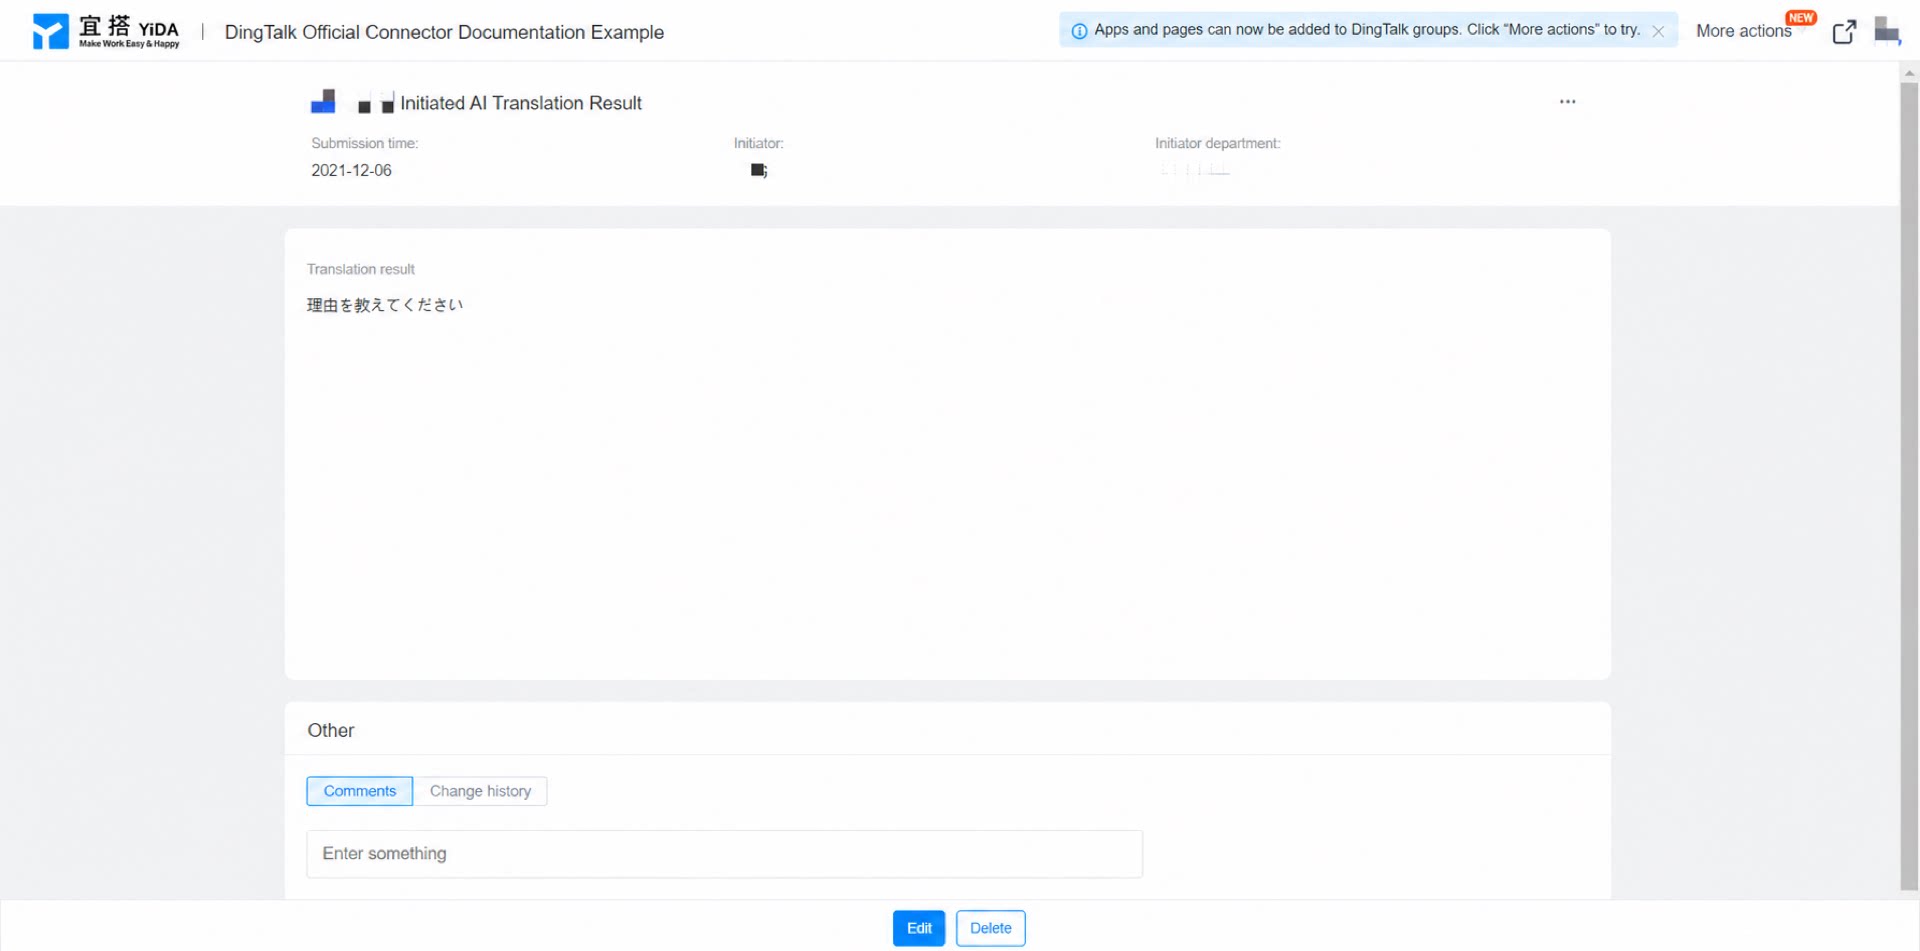
Submit data through the “Translation document” form to trigger the connector. You can view the translation result in the “AI translation result” form. (See Figure 2.3-1.)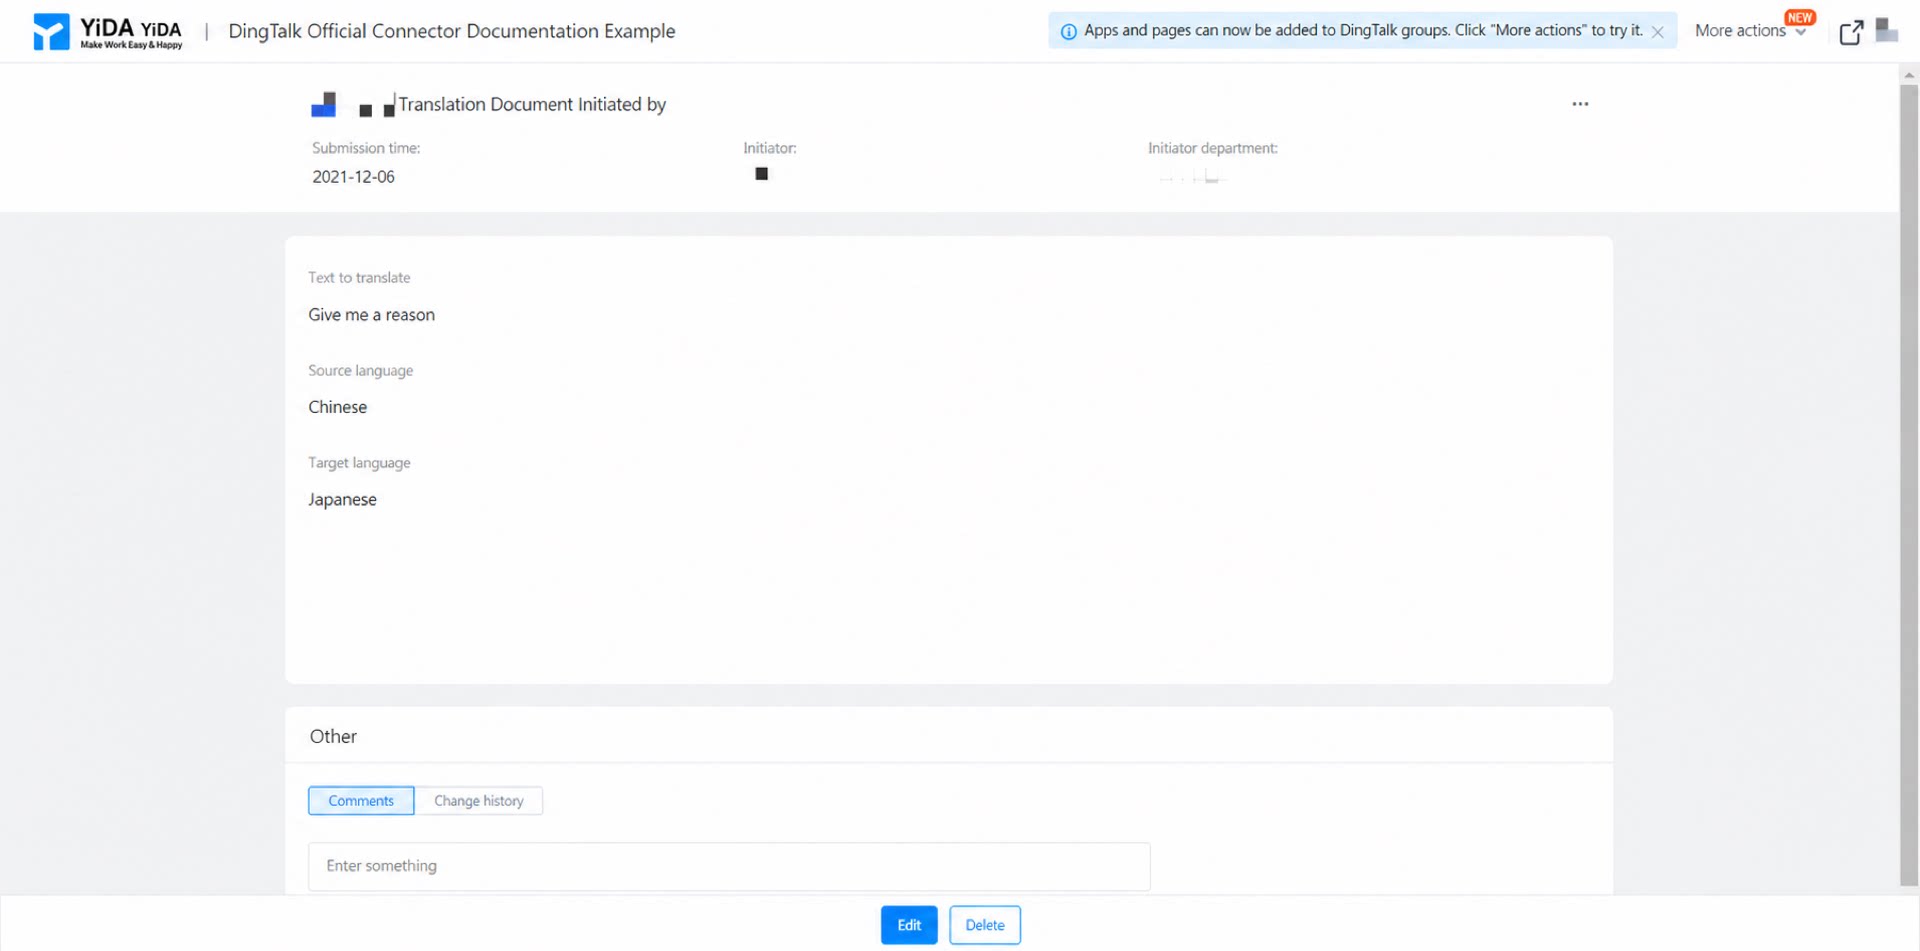
3. Result