Chats
Chats Calendar
 Meetings
 Contacts
 Mail
Mail Docs
Docs Drive
Drive AI Table
 AI Minutes
 Attendance
 Approval
 YiDA
YiDA Admin Console
1. Use Case
This connector automates announcement publishing so admins no longer need to manually create announcements in the DingTalk admin console each time.2. Steps
2.1 Step 1: Design the Form
Create a form and fill in the announcement content and settings. Steps: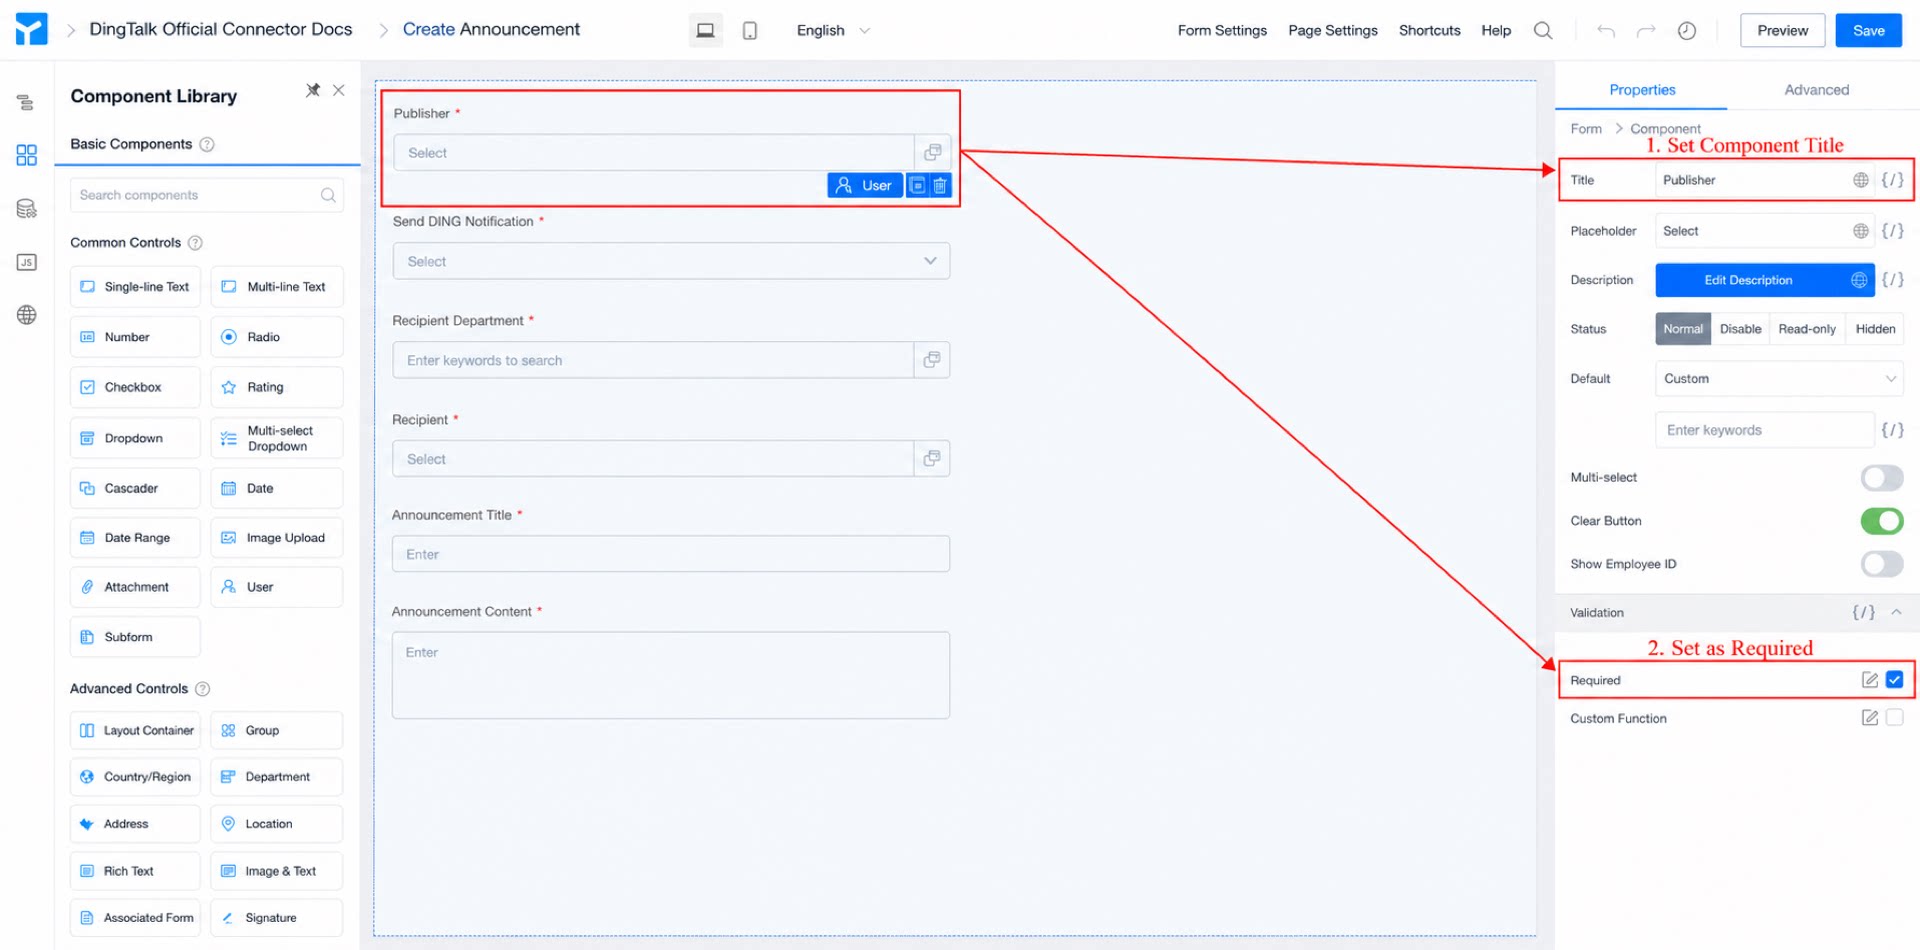
- Create a form named “Create Announcement”.
- Add a member component, name it “Publisher”, and set it as required. (See Figure 2.1-1.)
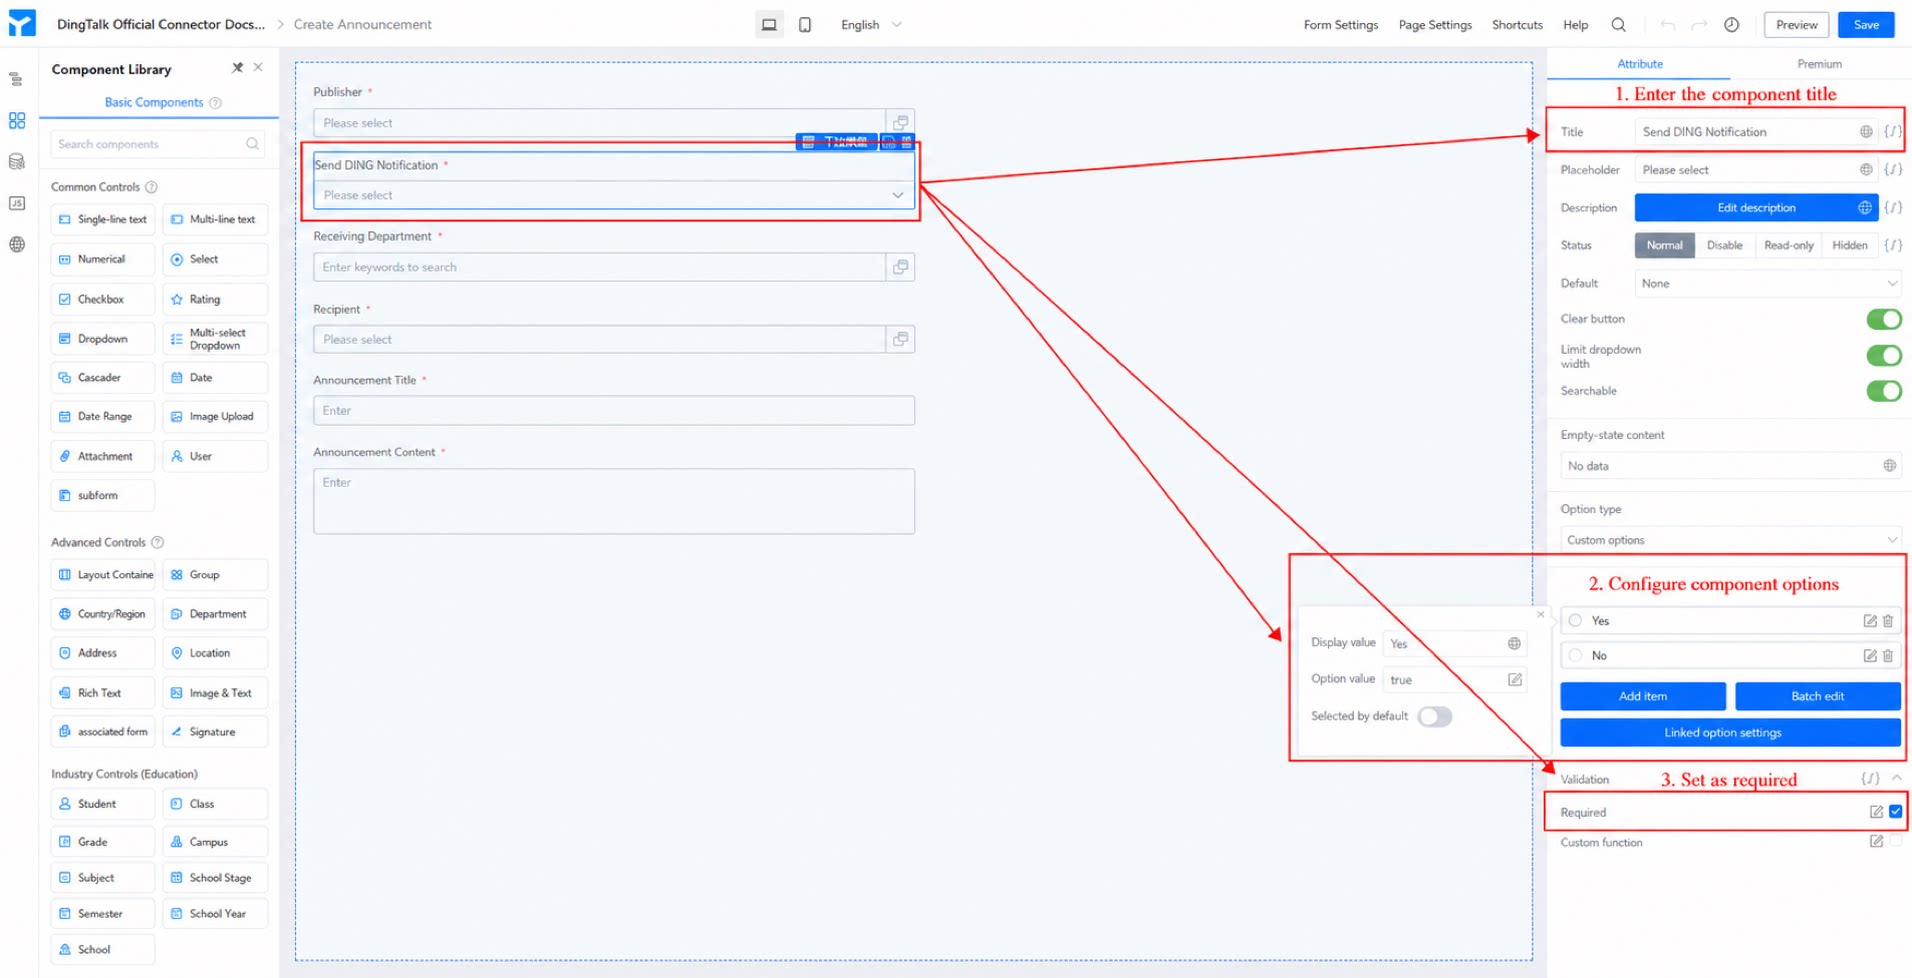
- Add a Select dropdown component named “Send DING Notification”. Add two custom options: “Display value: Yes, Option value: true” and “Display value: No, Option value: false”. Set it as required. (See Figure 2.1-2.)
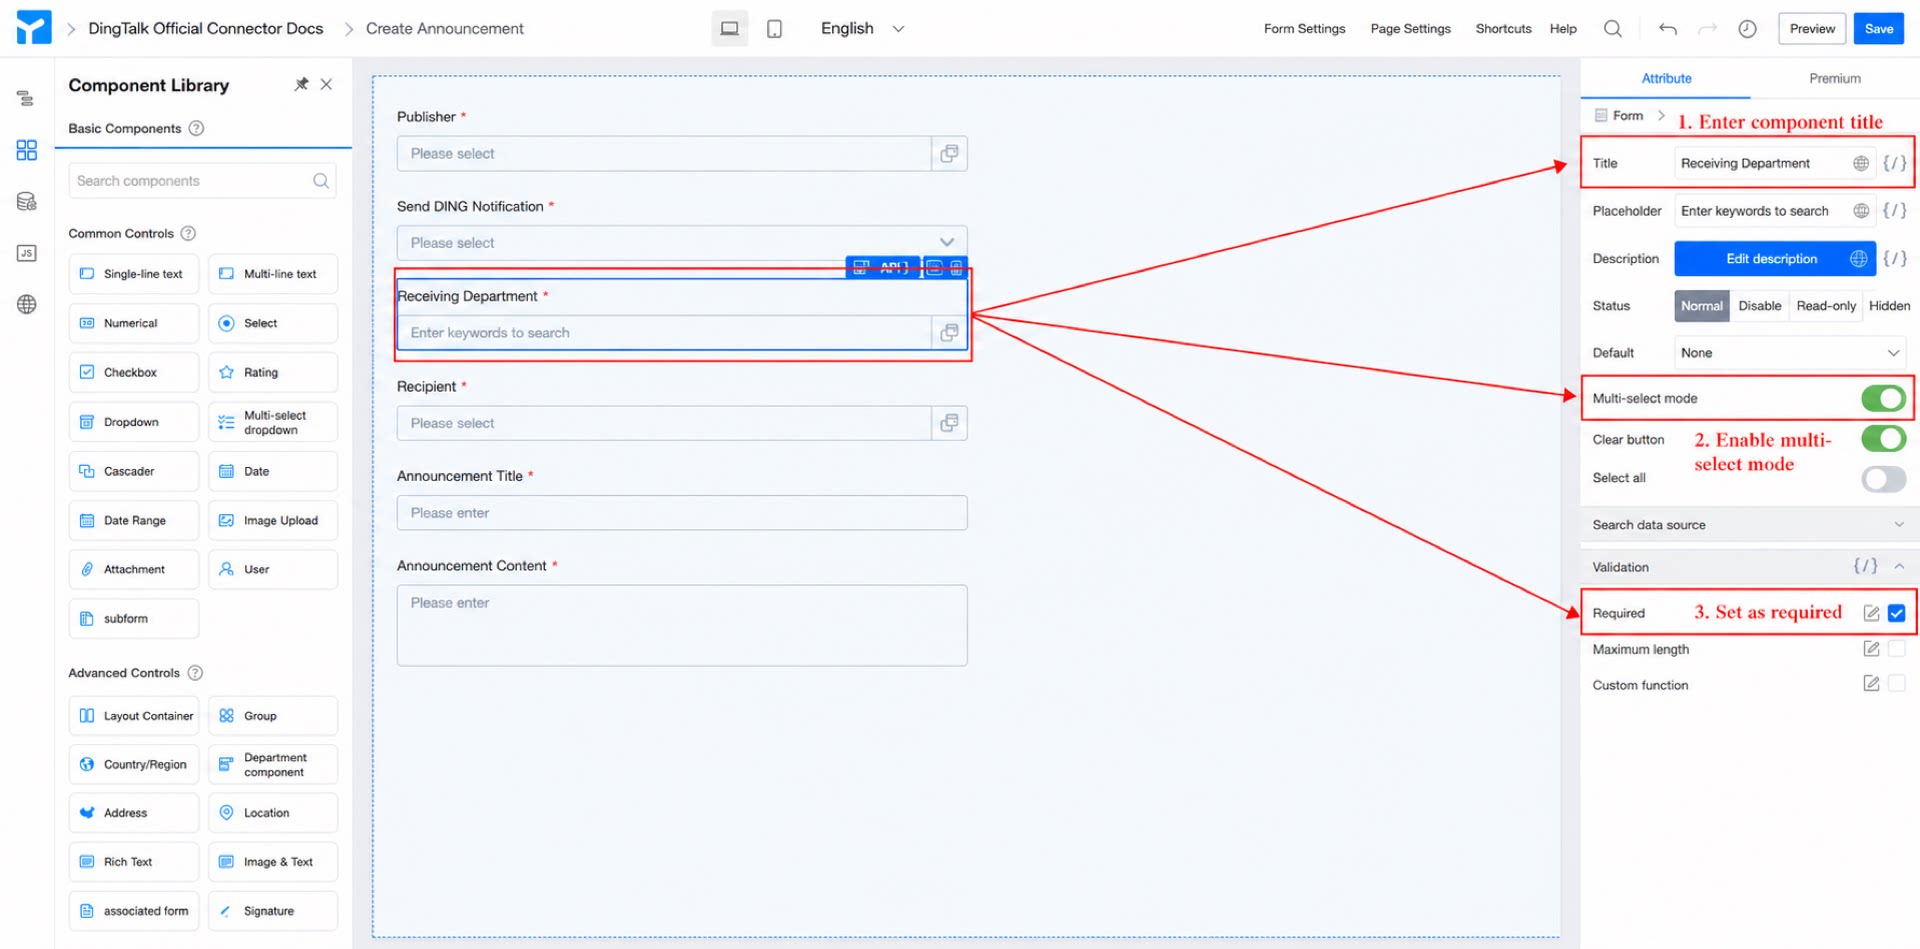
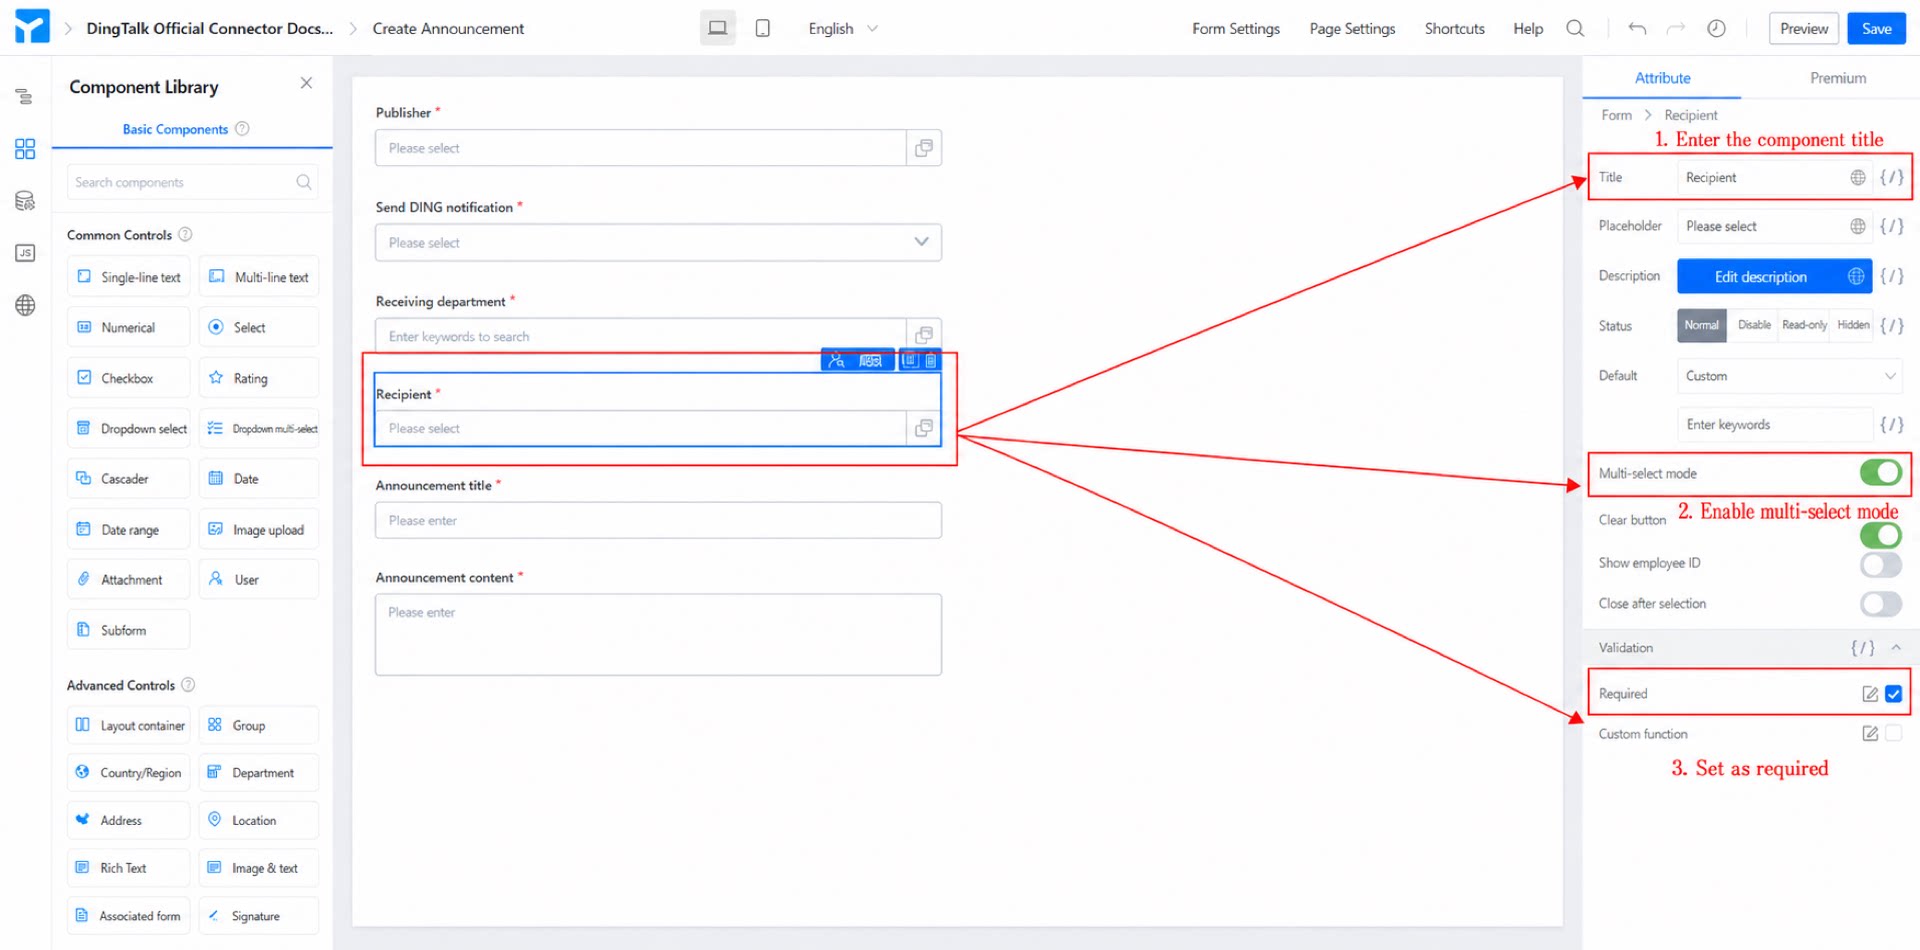
- Add a department component, name it “Recipient Departments”, enable Multiselect mode, and set it as required. (See Figure 2.1-3.)
- Add a member component, name it “Recipient Users”, enable Multiselect mode, and set it as required. (See Figure 2.1-4.)
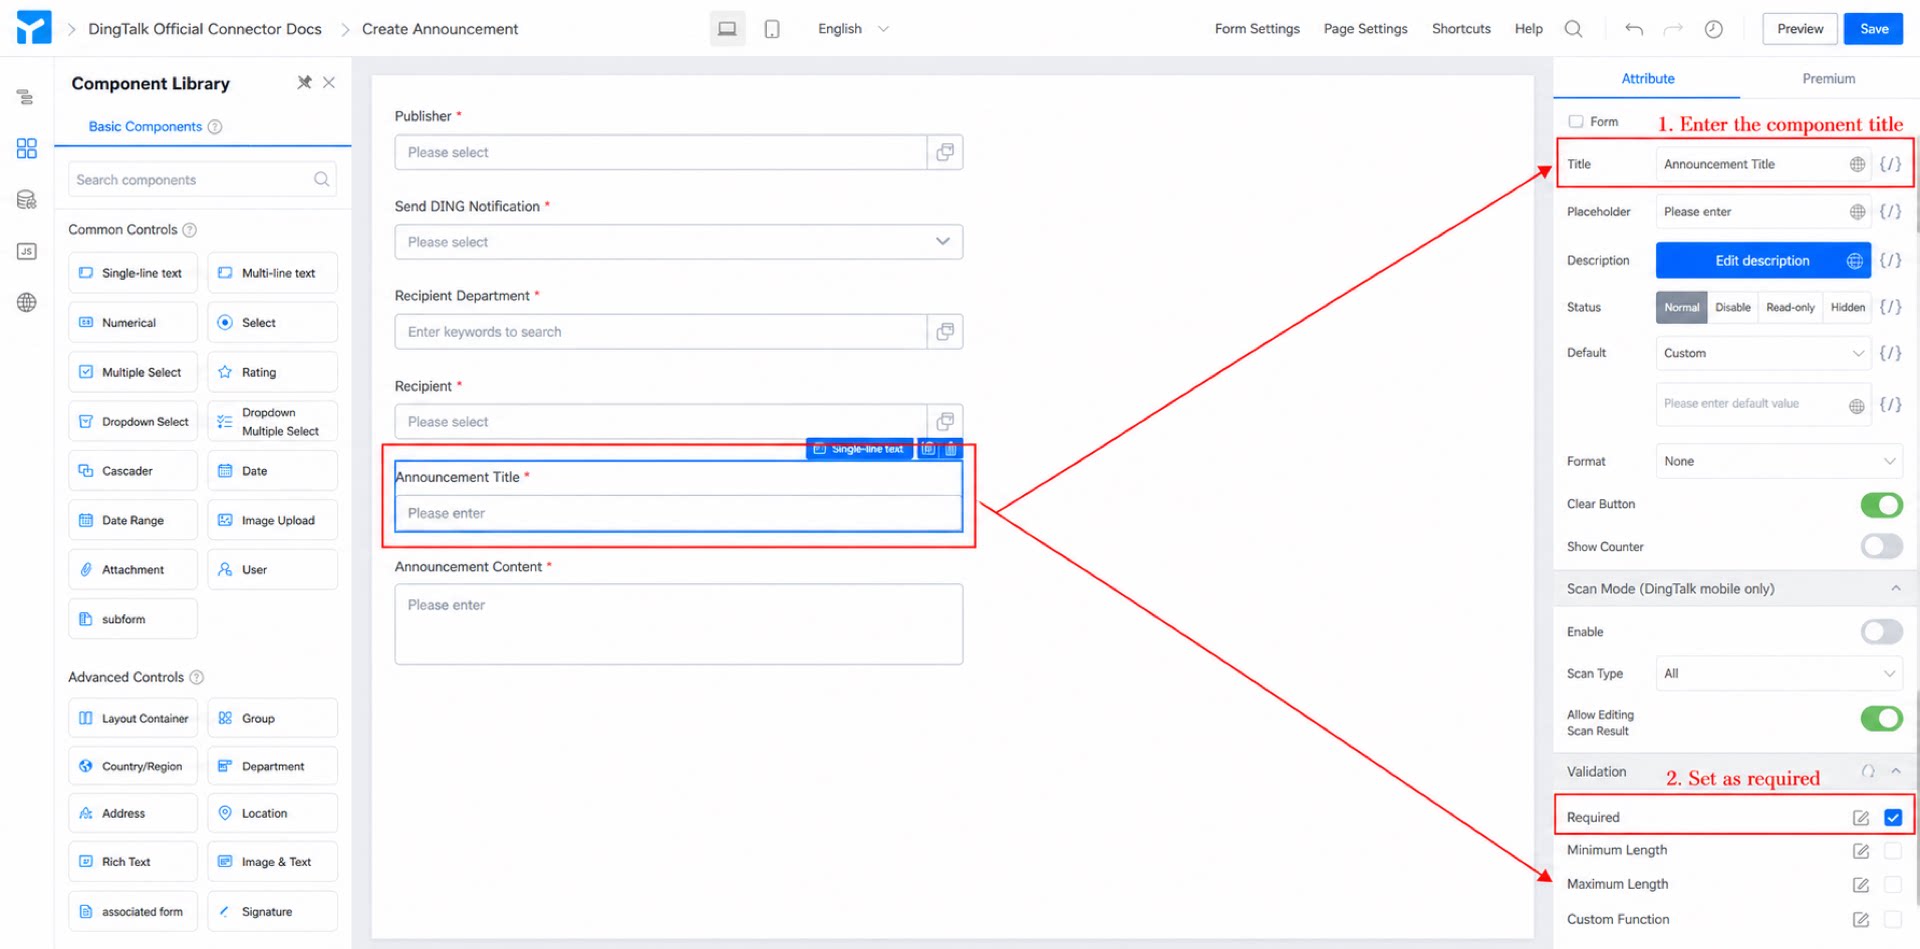
- Add a Single-line text component, name it “Announcement Title”, and set it as required. (See Figure 2.1-5.)
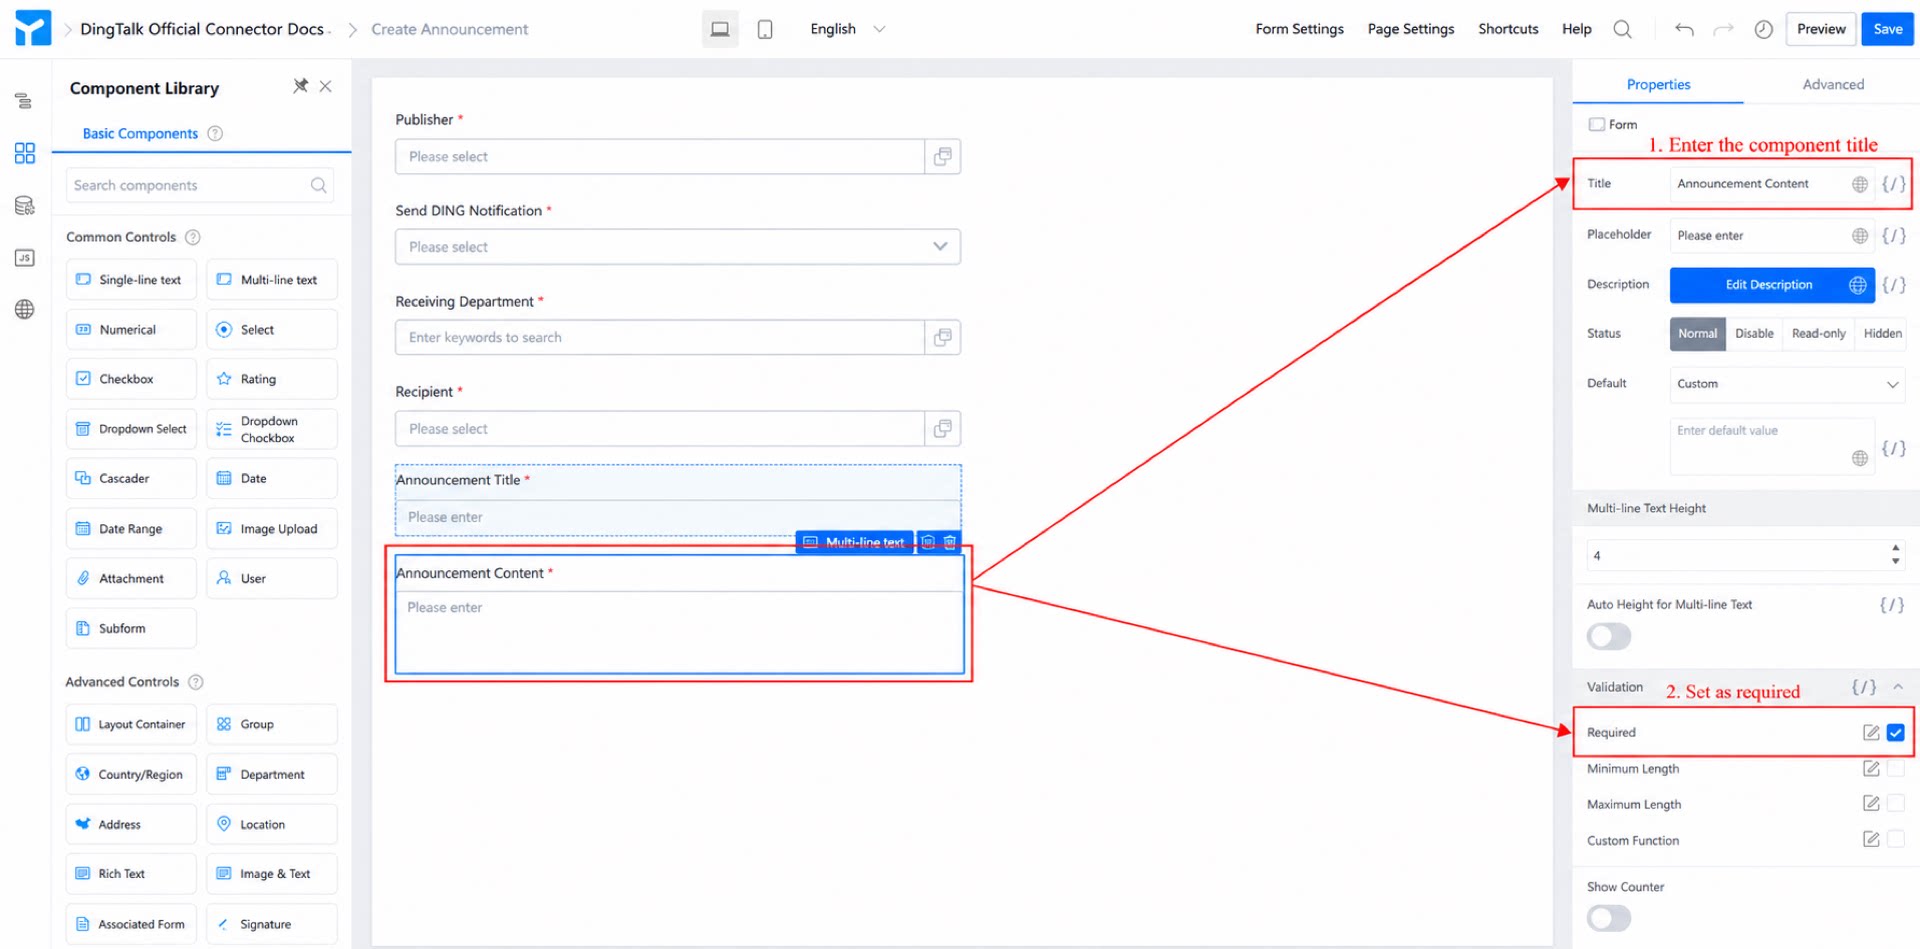
- Add a Multi-line text component, name it “Announcement Content”, and set it as required. (See Figure 2.1-6.)
- Click Save in the upper-right corner of the page.
2.2 Step 2: Configure the Connector
For a detailed introduction to YiDA connectors, see Integration & Automation - Connectors.
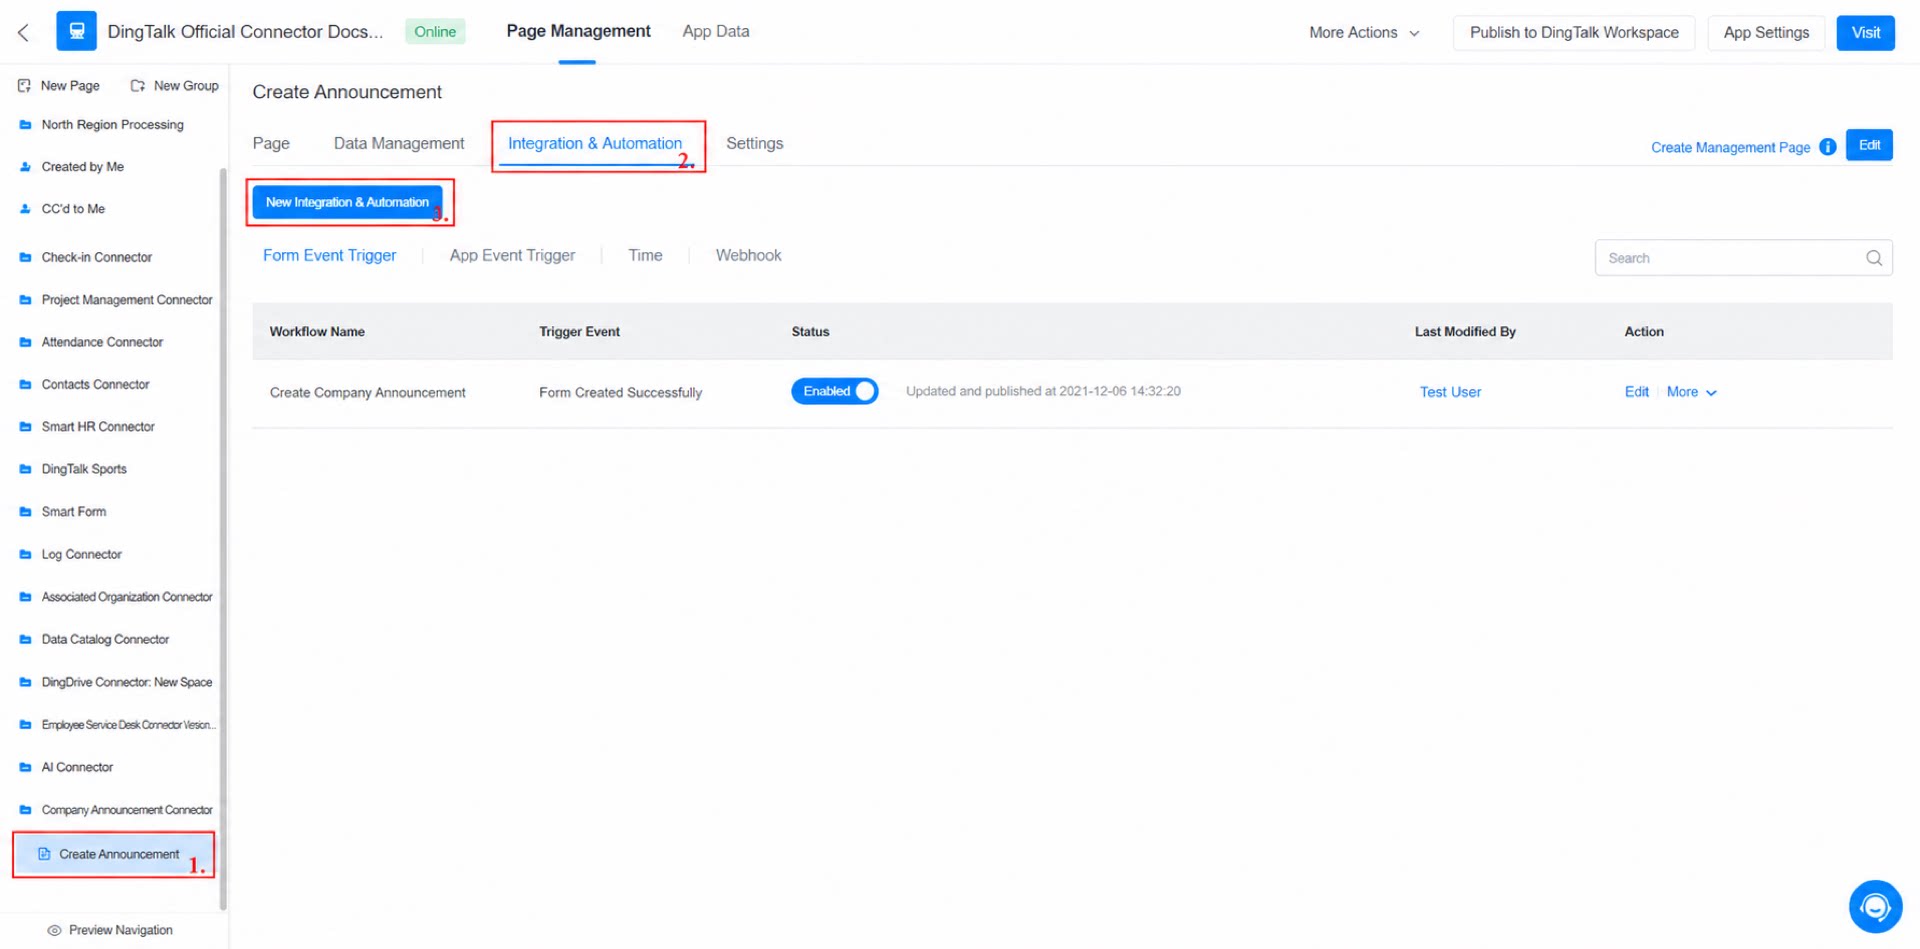
- Go to the admin console >> “Create Announcement” form >> Integration & Automation >> Create Integration & Automation. (See Figure 2.2-1.)
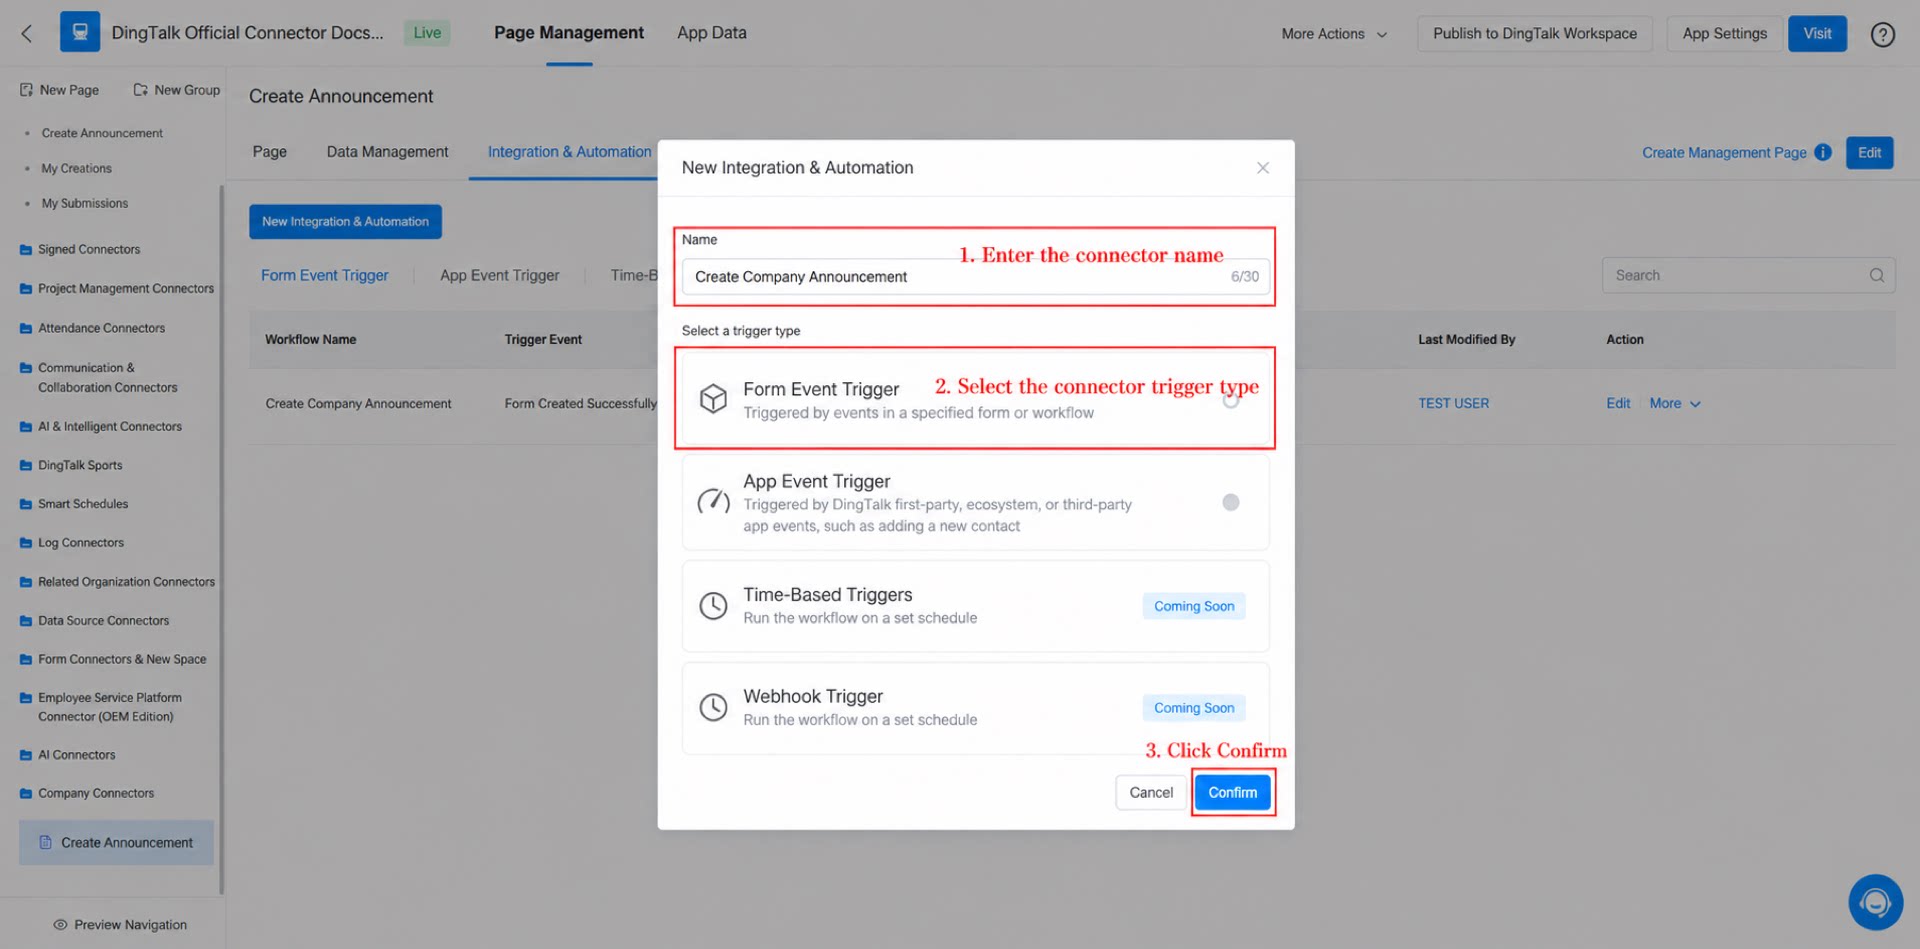
- Name the connector “Create Announcement”, set Trigger type to “Form event trigger”, and click Save. (See Figure 2.2-2.)
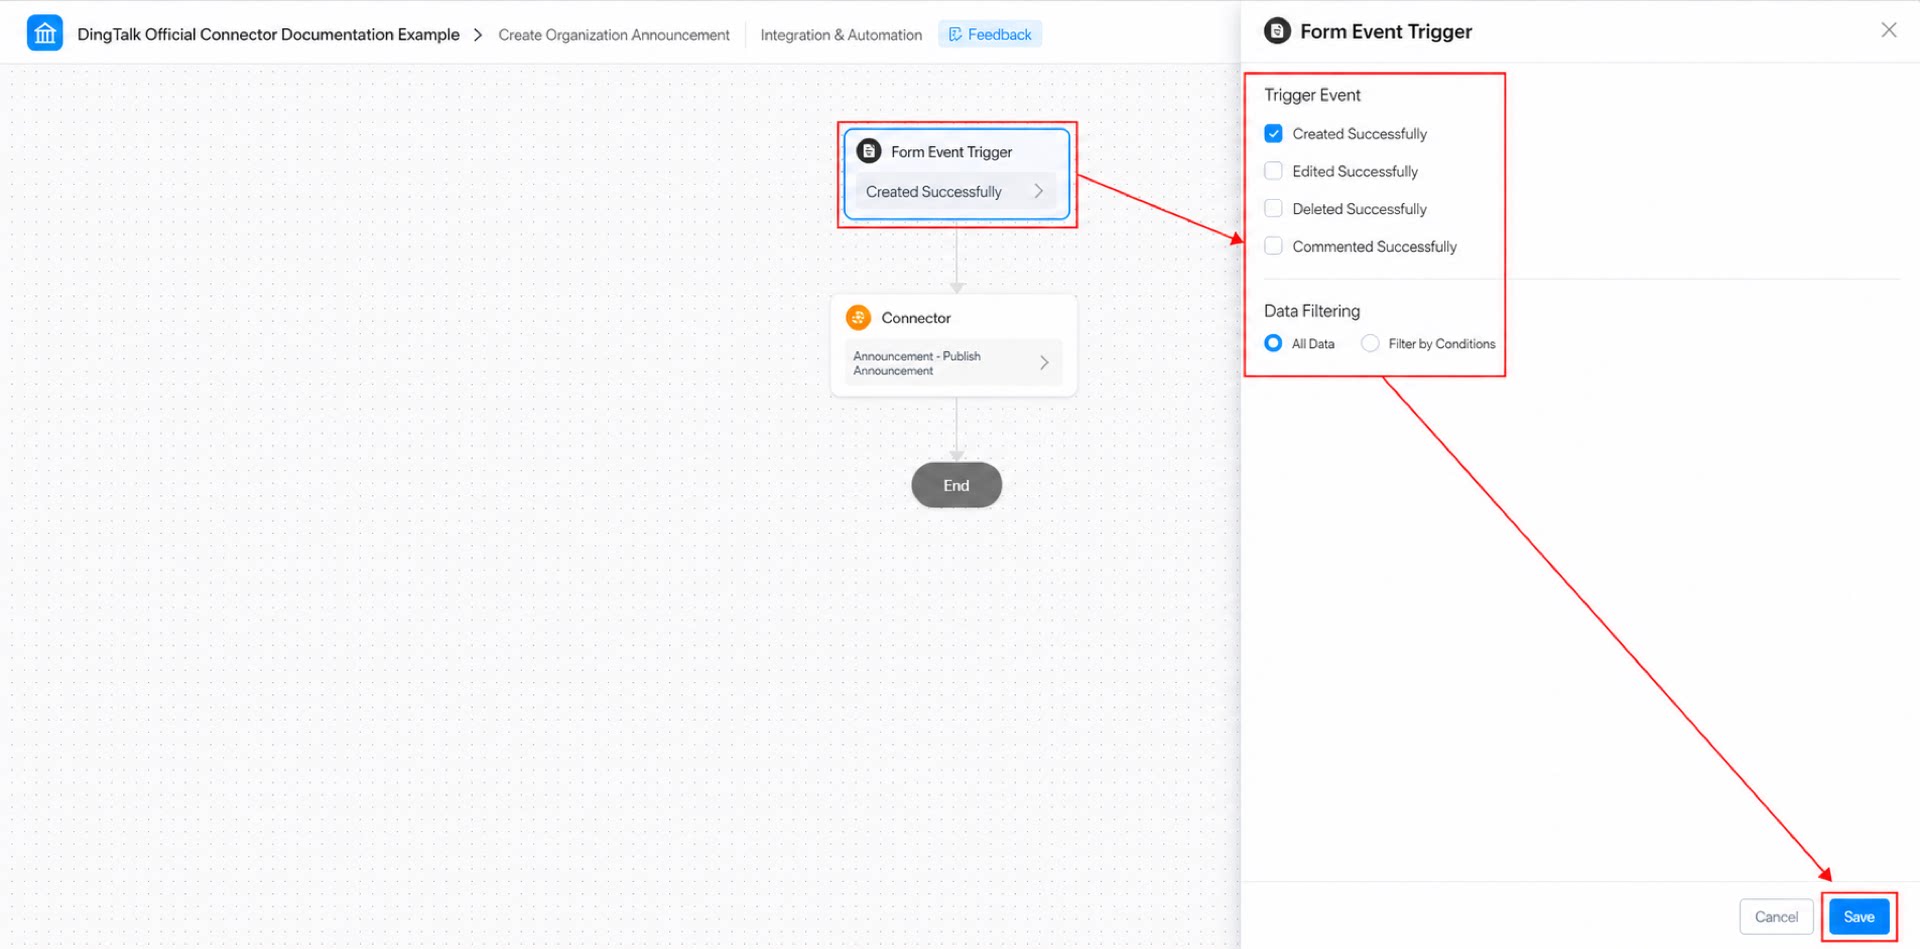
- Configure the form event trigger: set the trigger event to Create success, set the data filter to All data, and click Save. (See Figure 2.2-3.)
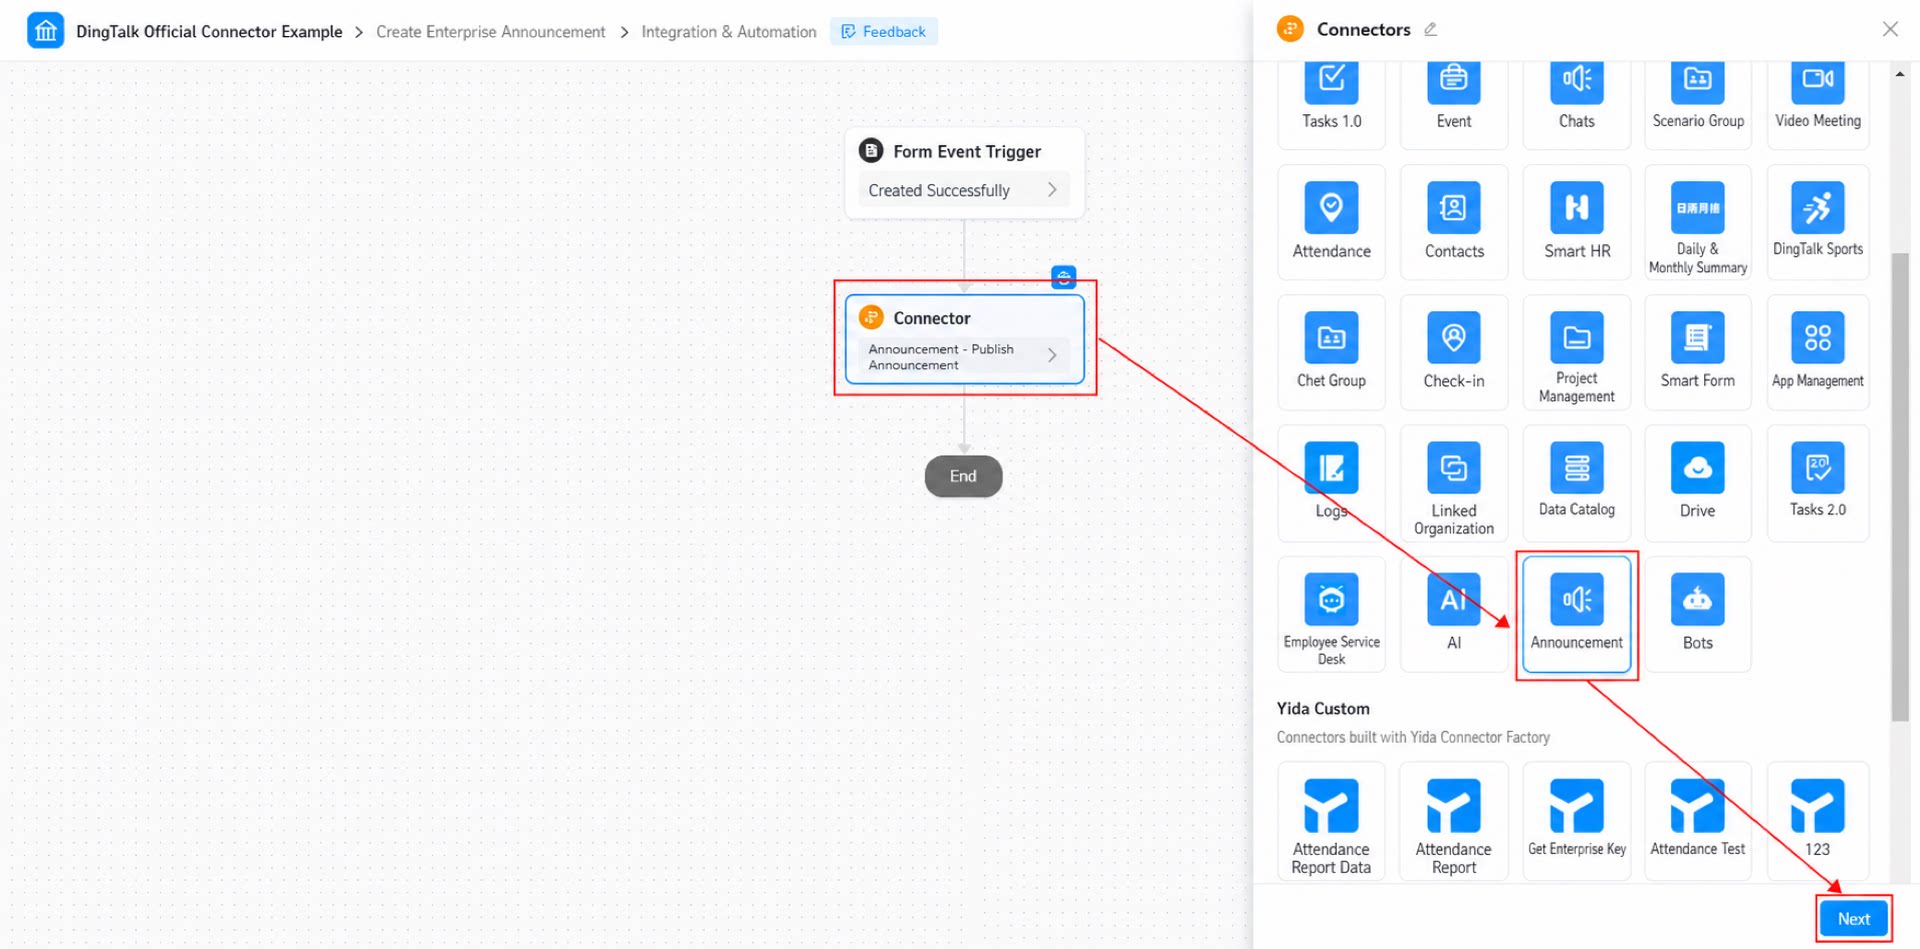
- Select the connector app: choose the “Announcement” app and click Next. (See Figure 2.2-4.)
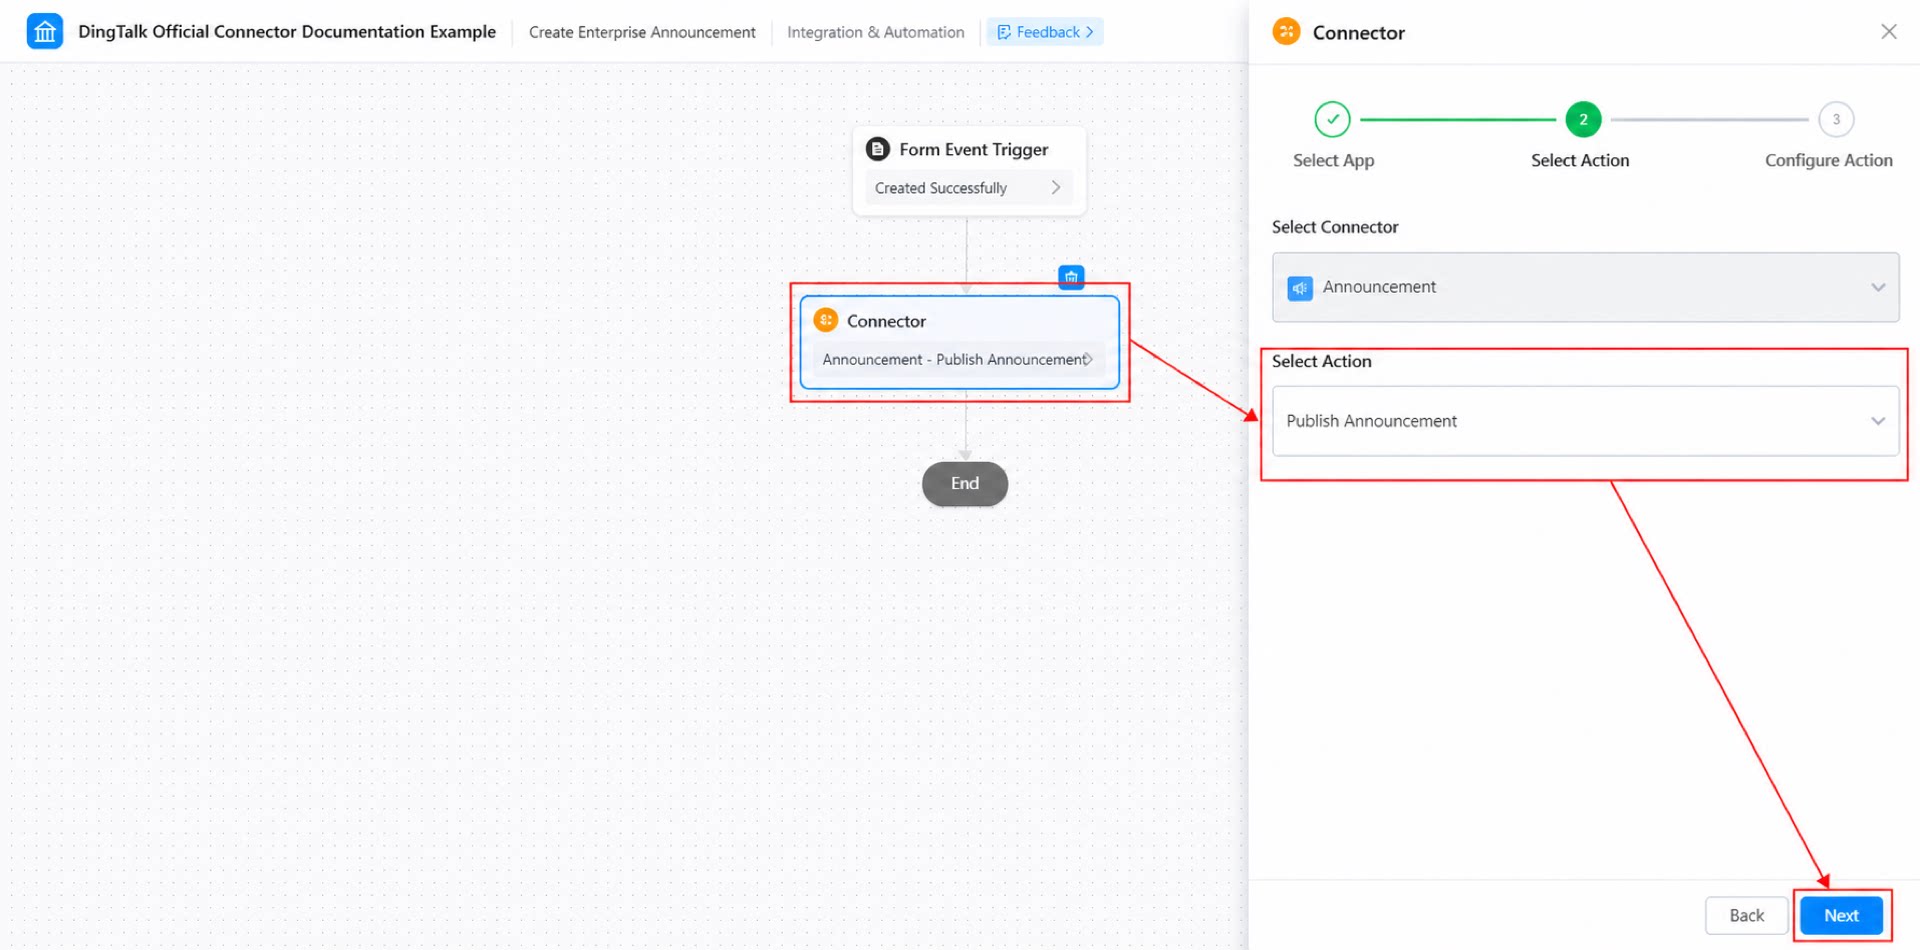
- Select the connector action: choose the “Publish announcement” action and click Next. (See Figure 2.2-5.)
- Configure the connector action and click Save. (See Figure 2.2-6.)
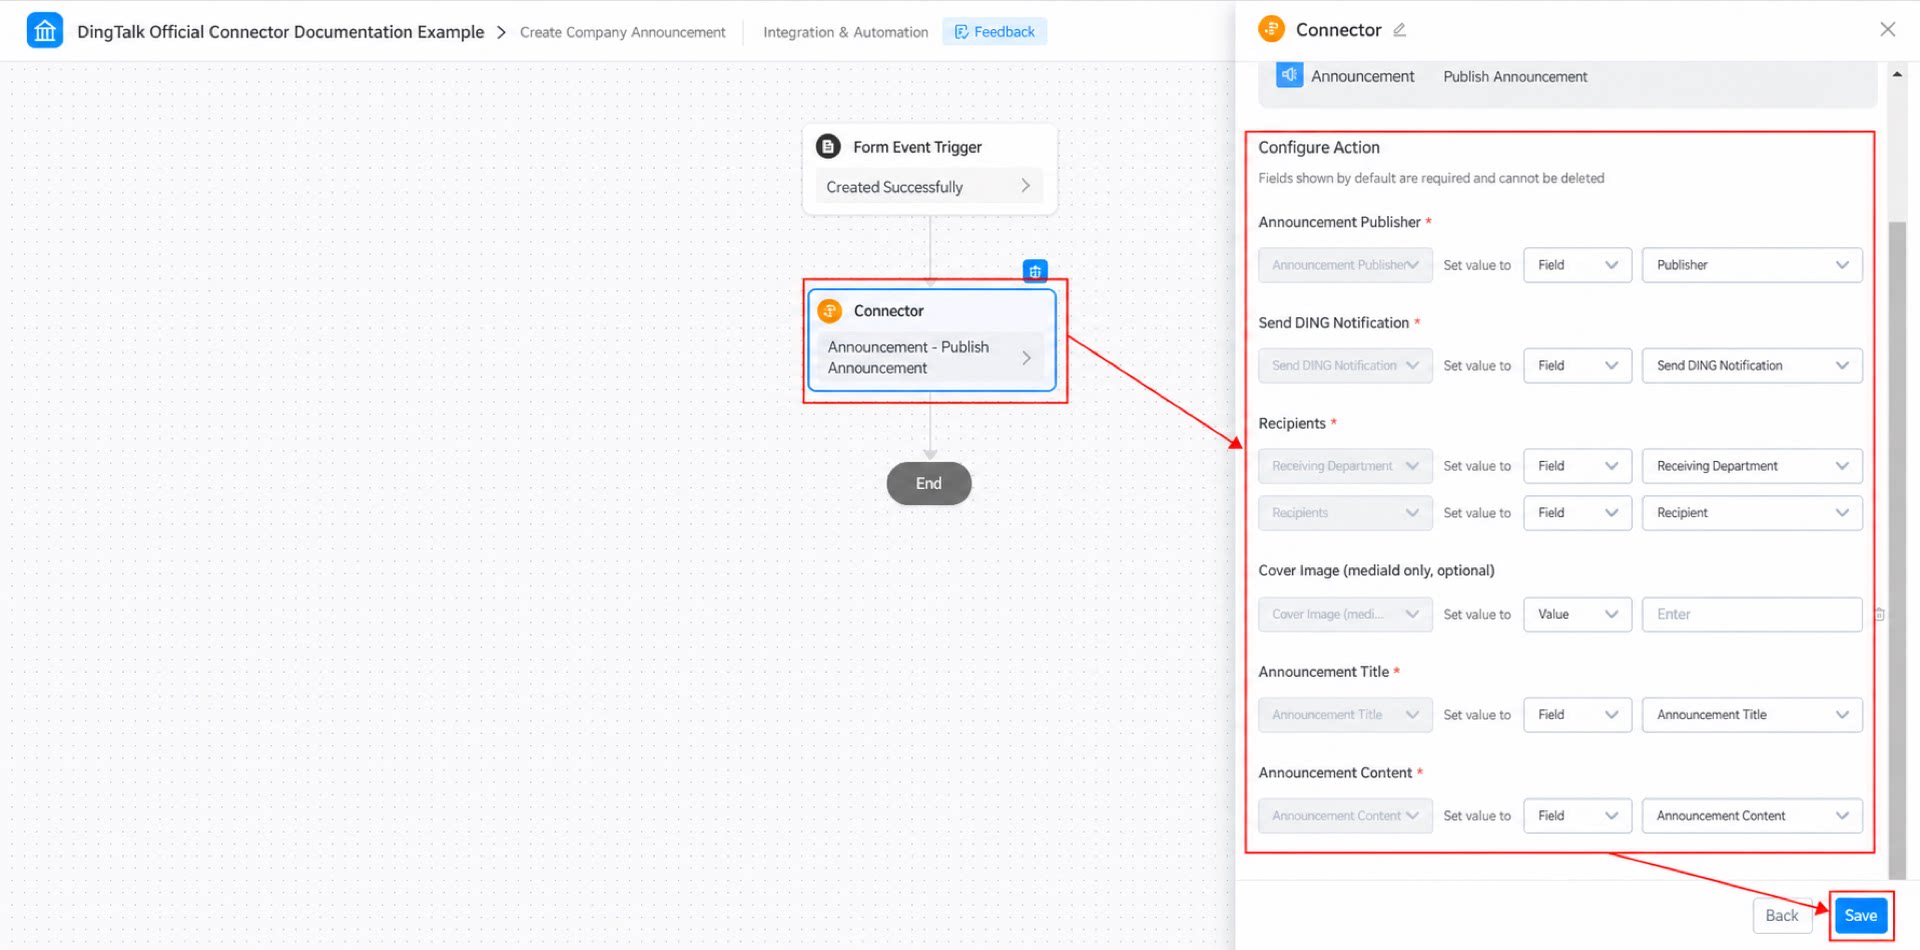
- Click Save in the upper-right corner of the page, and then click Publish.
2.3 Step 3: Submit the Form
Submit the “Create Announcement” form data to trigger the connector. (See Figure 2.3-1.)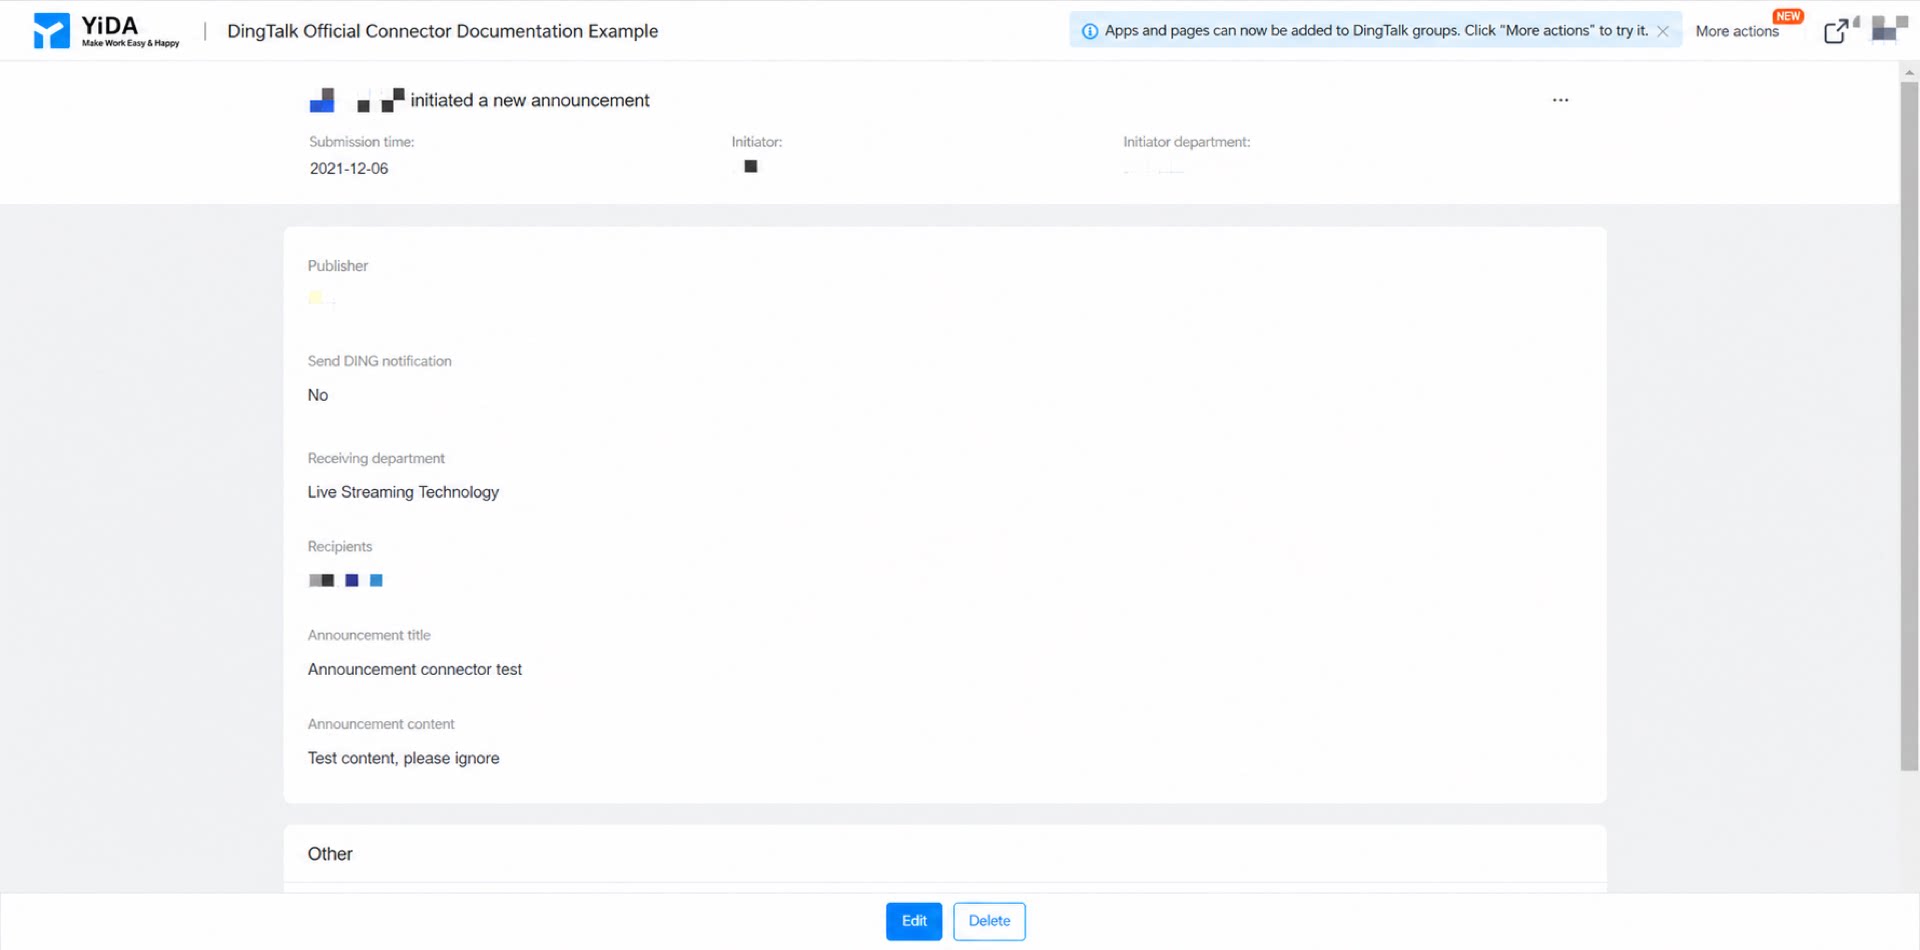
3. Result
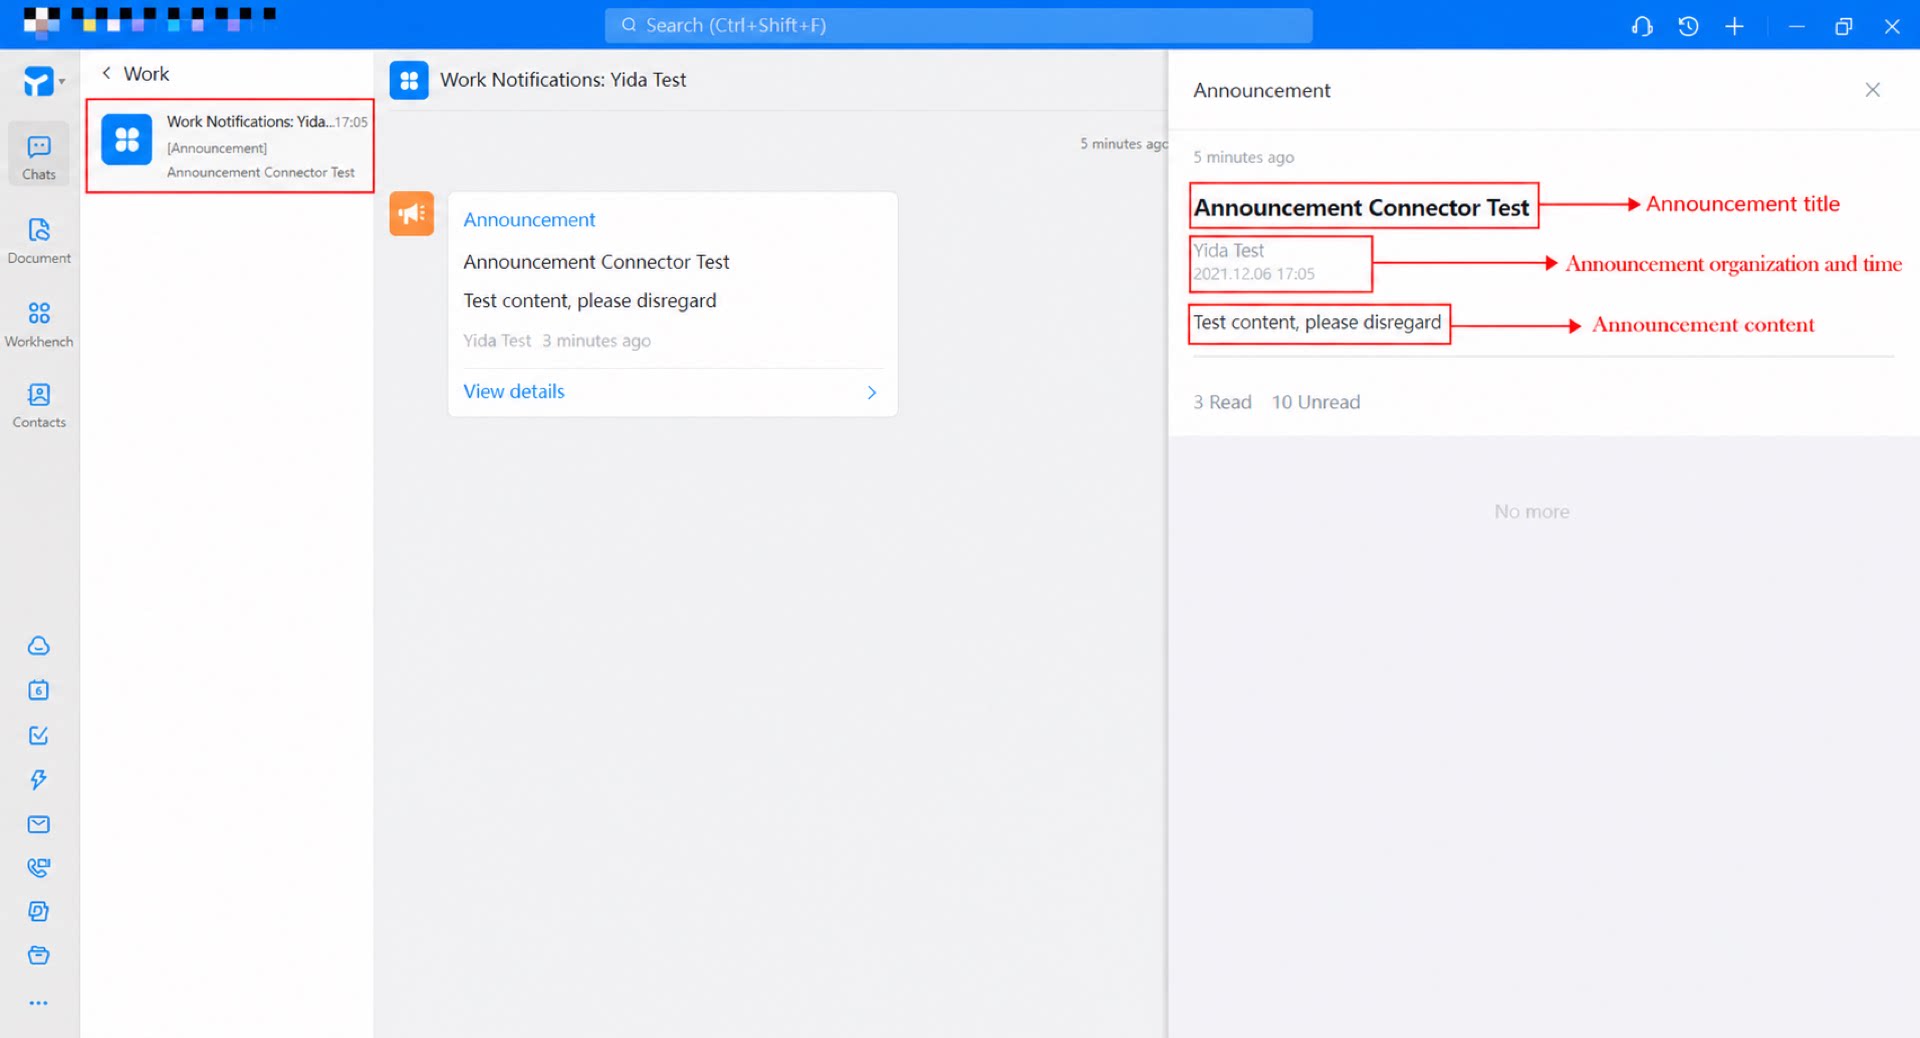
Path to view: DingTalk Chats >> Work >> Work Notifications >> Announcements >> View details