Chats
Chats Calendar
 Meetings
 Contacts
 Mail
Mail Docs
Docs Drive
Drive AI Table
 AI Minutes
 Attendance
 Approval
 YiDA
YiDA Admin Console
Use Case
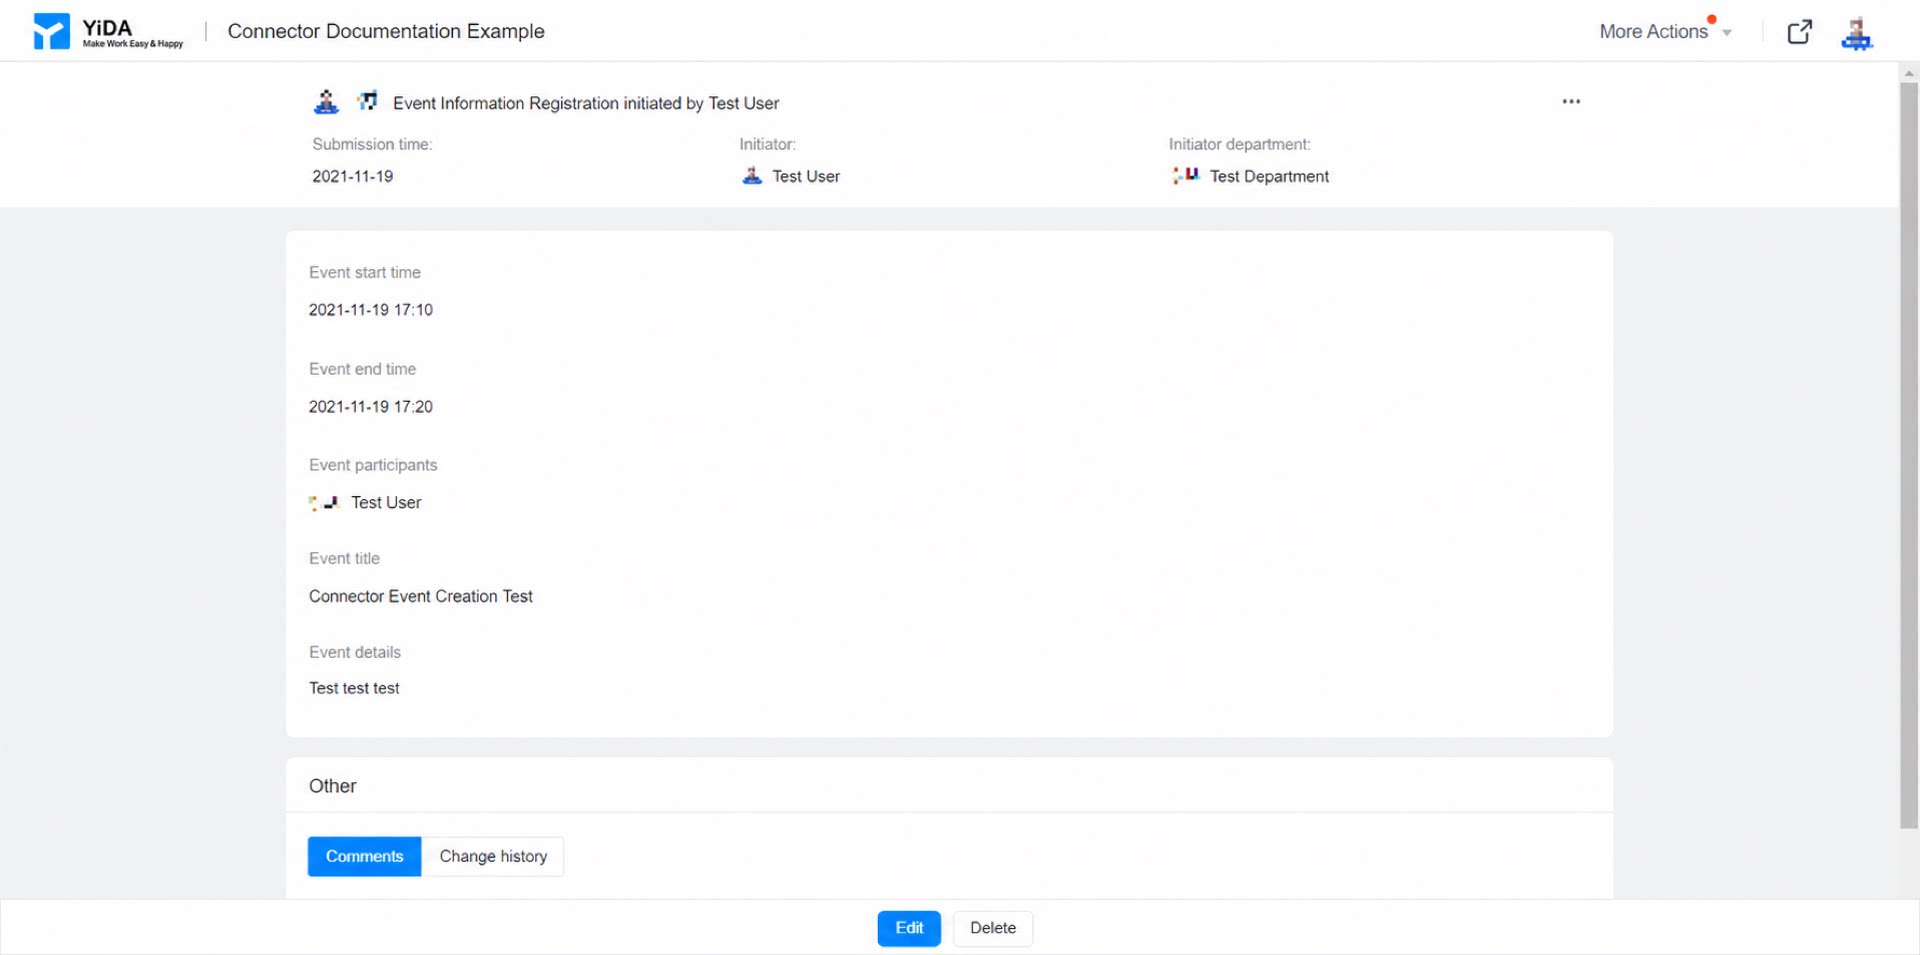
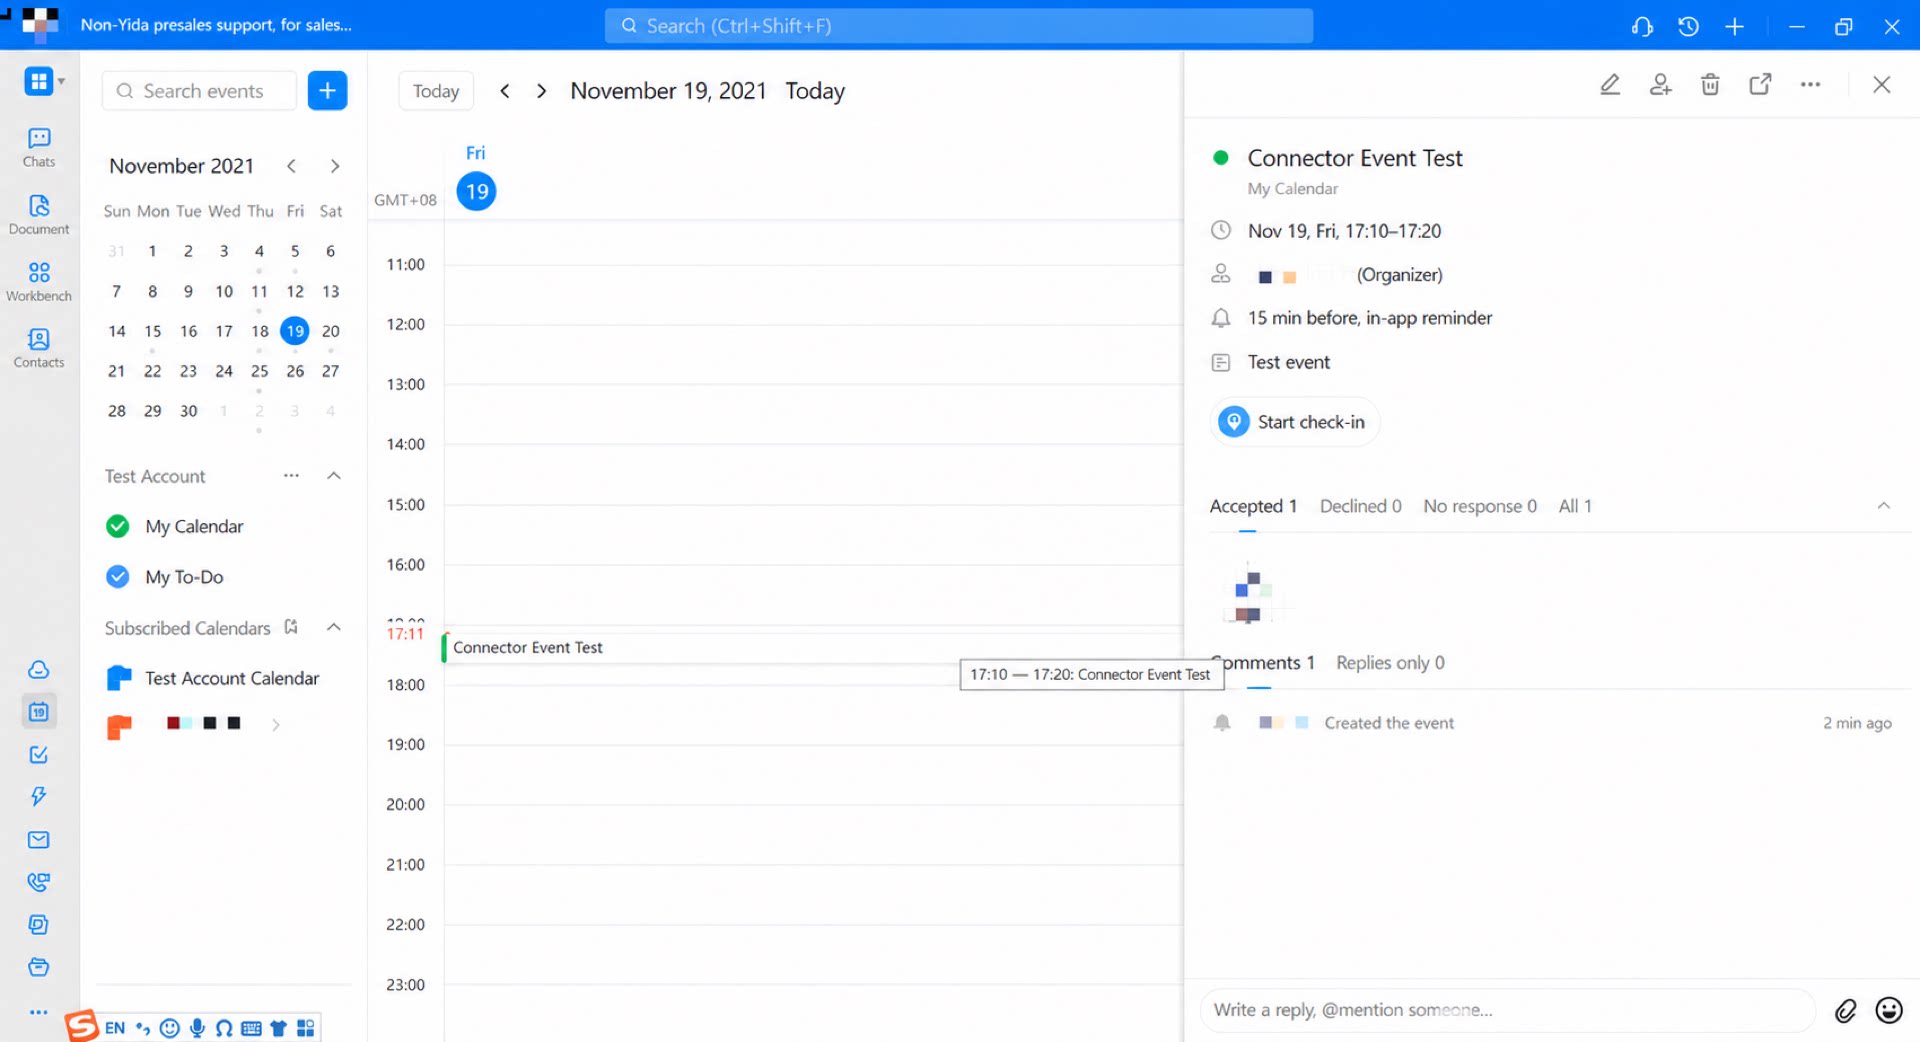
For example, a company holds a company-wide summary meeting at the end of every month, and preparation must be done in advance. Members of the meeting organizing group need to create events for themselves as reminders. By filling out and submitting a YiDA form, an event can now be created for them in DingTalk automatically. To-Do items can also be written into the DingTalk Calendar and displayed there.Result
Step 1: Create and Configure the Form
Create a form to capture event-related information and serve as the data source that triggers the connector. Steps: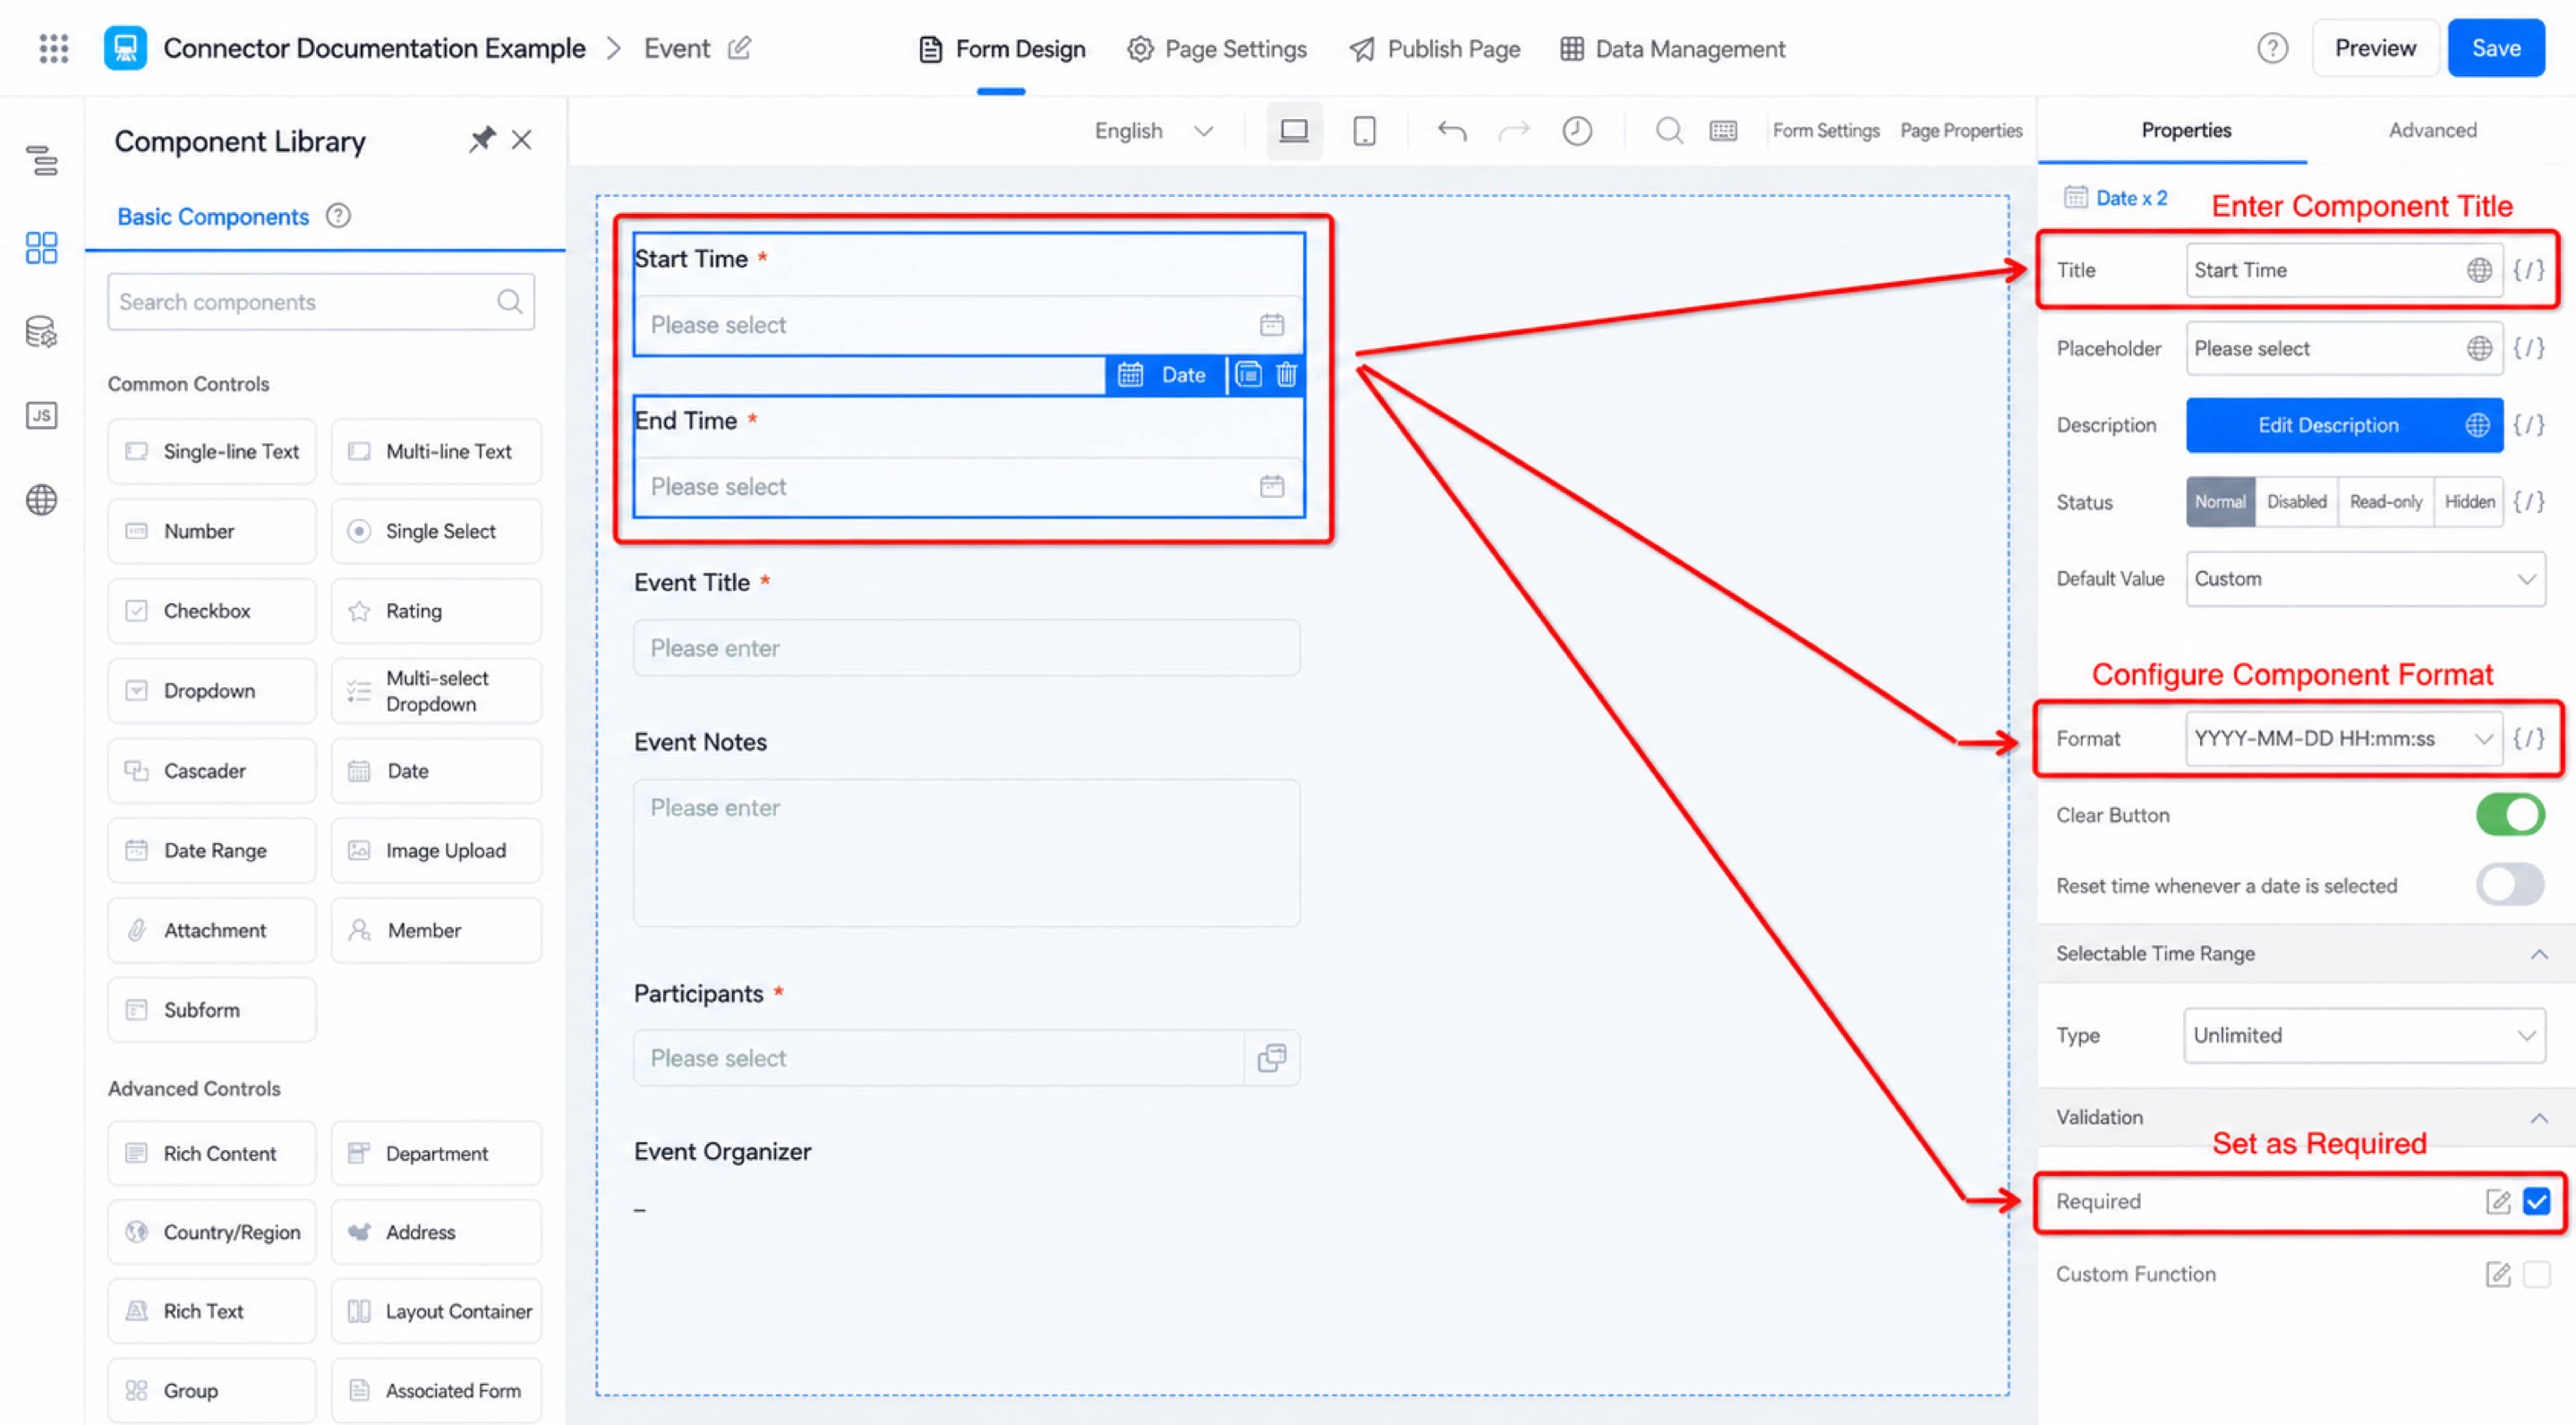
- Create a new form named “Event Information Registration”.
- Add two Date components inside the form, named “Event Start Time” and “Event End Time”. Set the format to “yyyy-MM-dd HH:mm” and mark both as required. (See Figure 2.1-1)
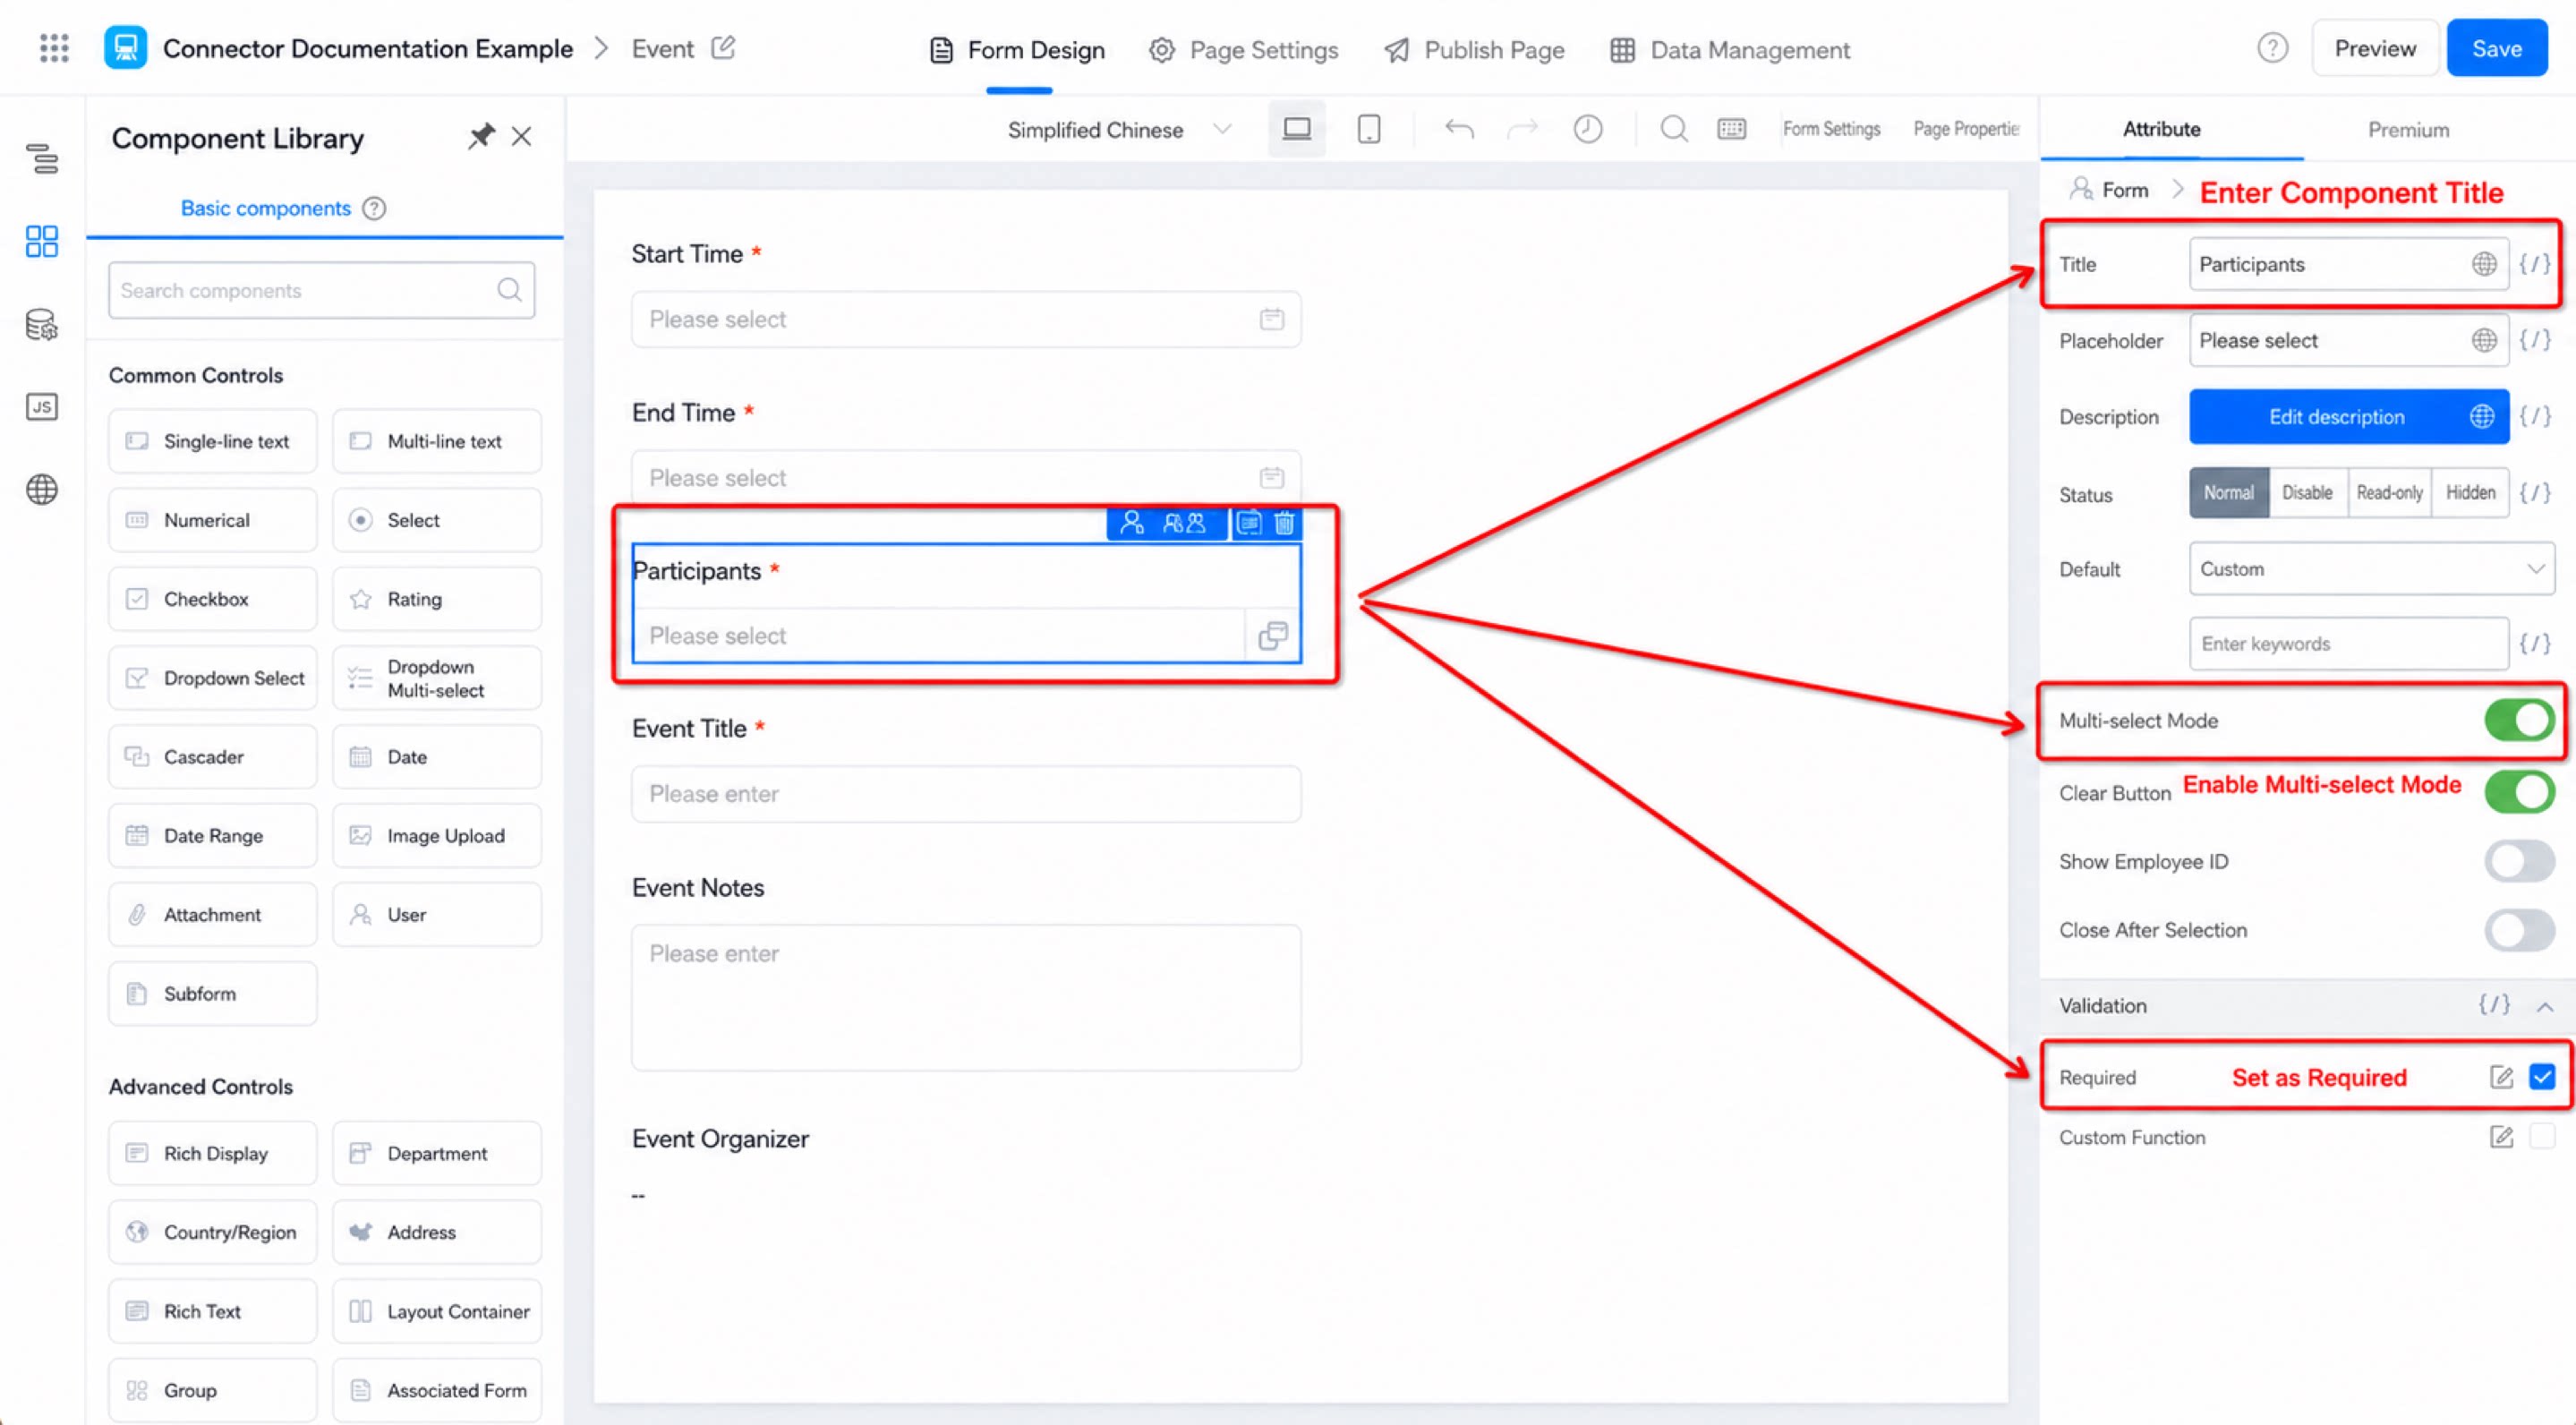
- Add a member component named “Participants”, enable multi-select mode, and mark it as required. (See Figure 2.1-2)
- Add a Single-line text component named “Event Title” and mark it as required. (See Figure 2.1-3)
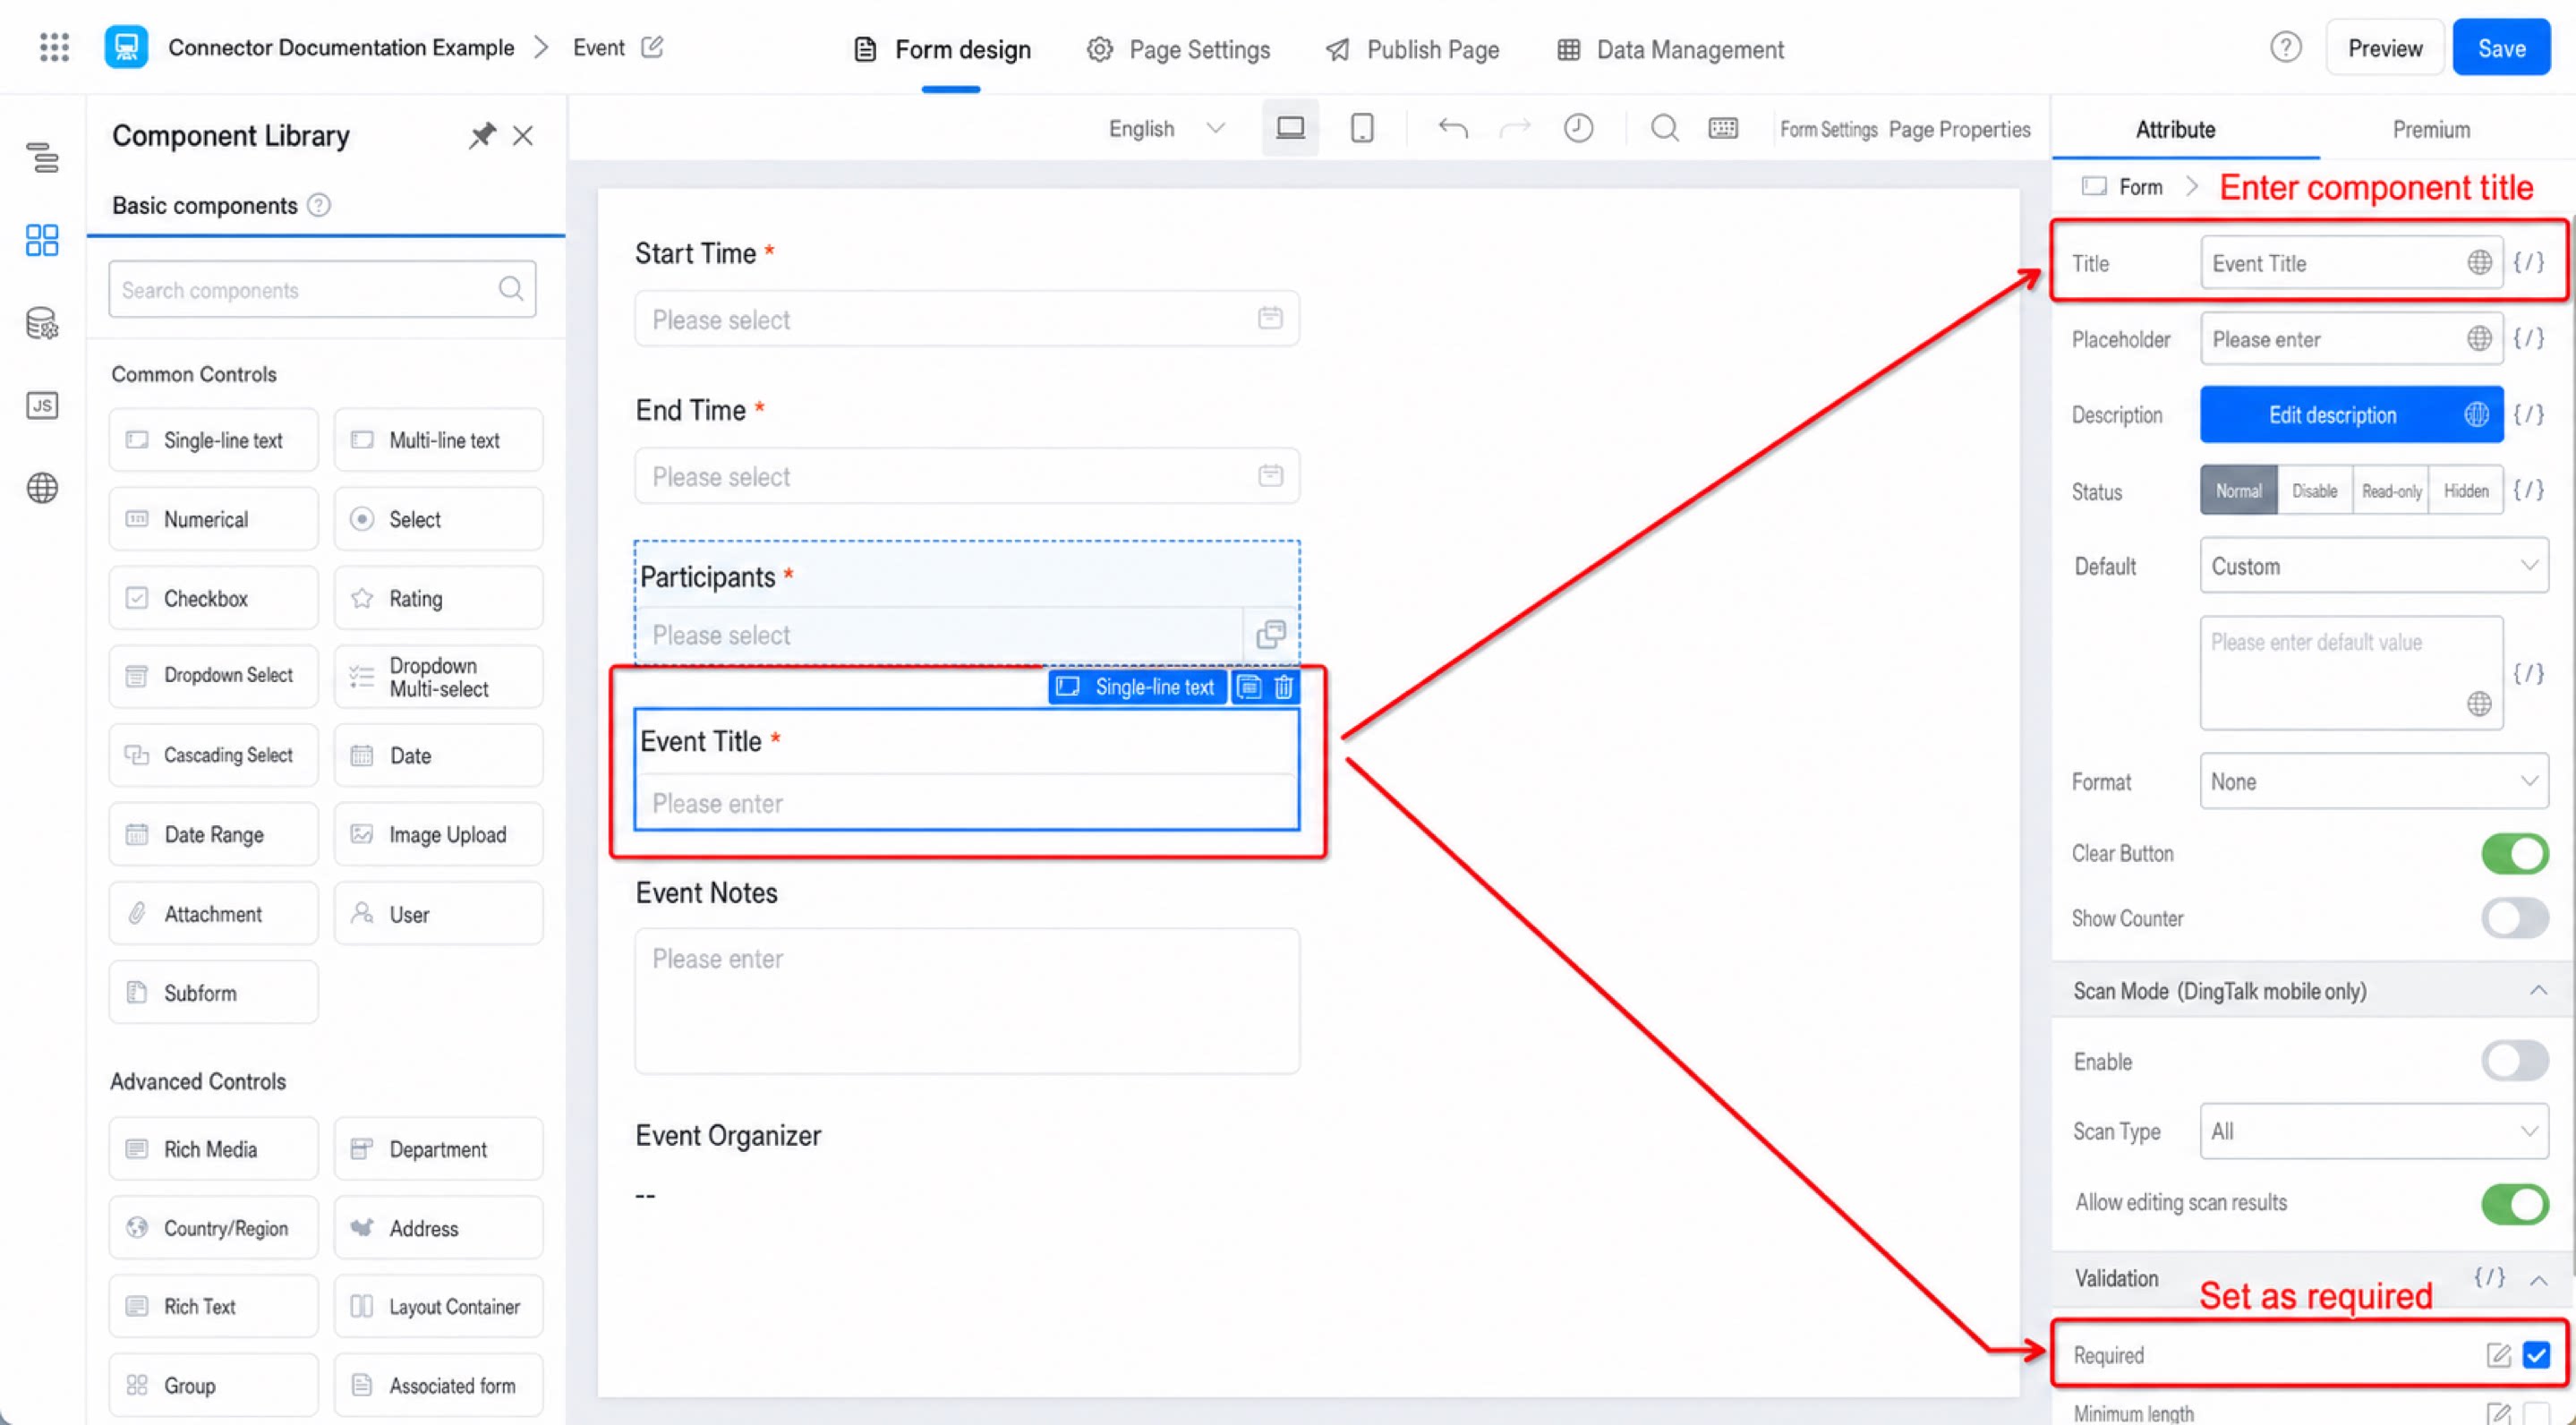
- Add a Multi-line text component named “Event Alias”. (See Figure 2.1-4)
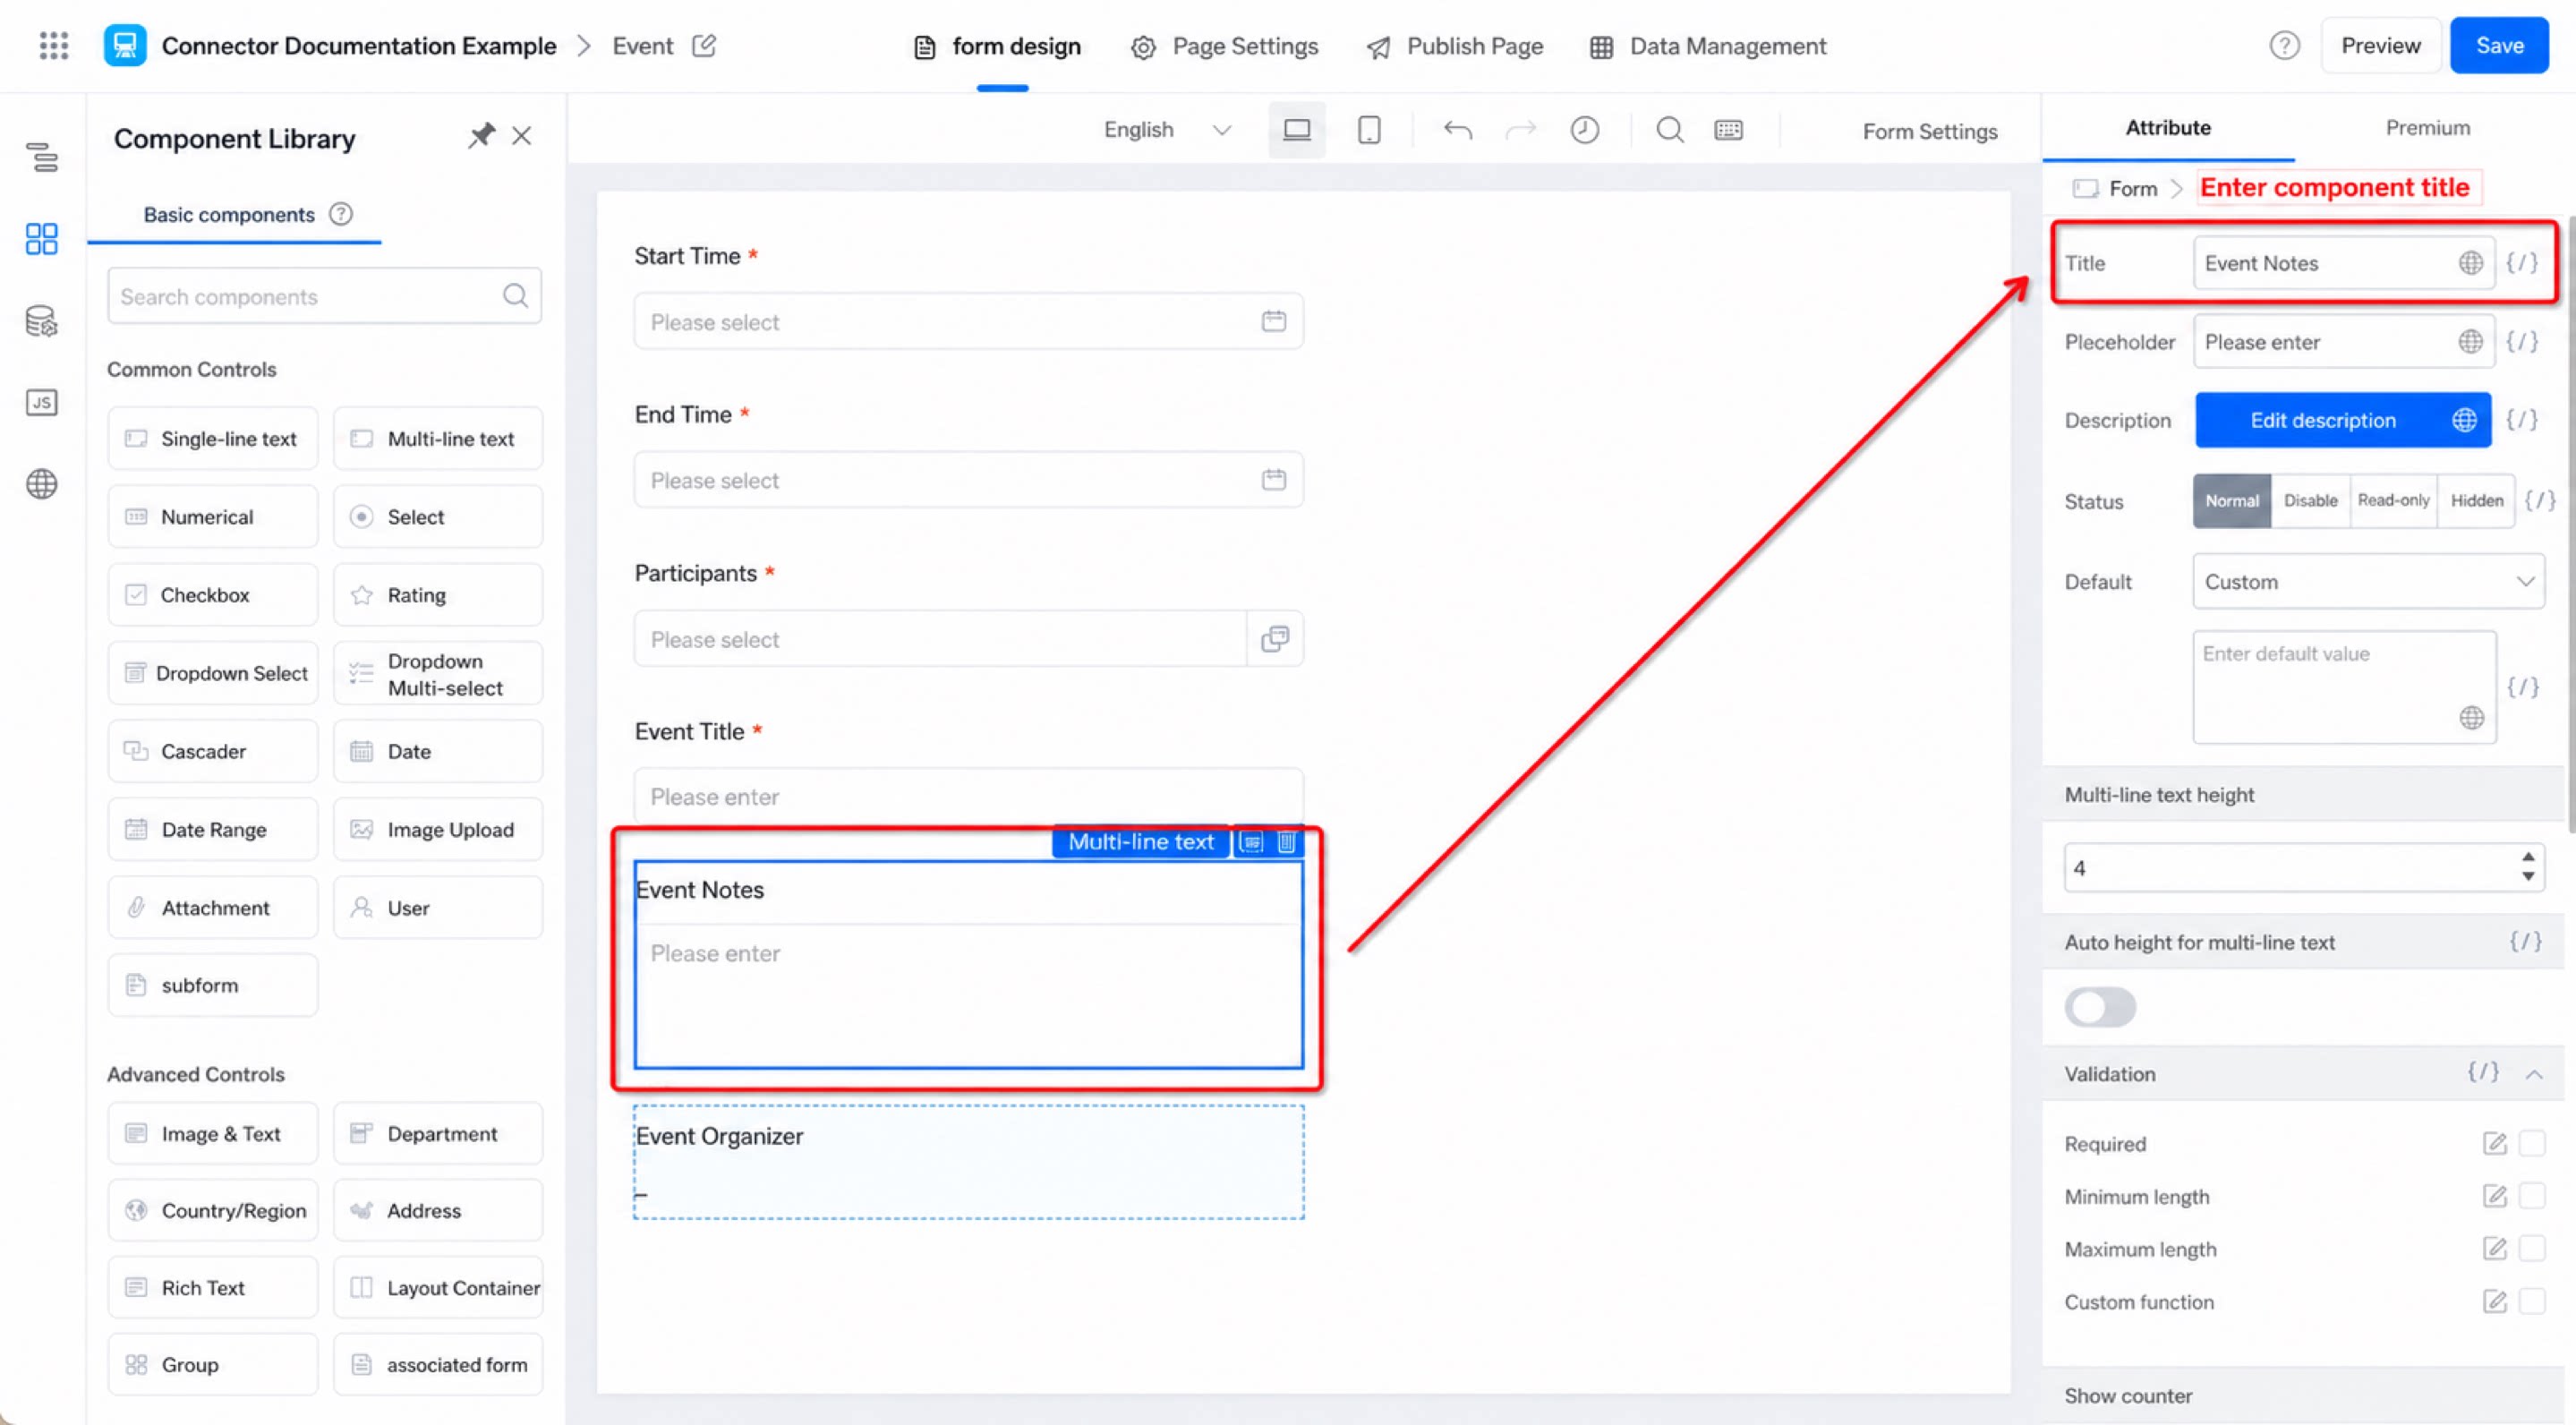
- Add a member component named “Event Organizer”, set its state to Read-only, set the Default value to Formula, add the USER() formula in the formula editor dialog, mark it as required, and then click Save. (See Figure 2.1-5)
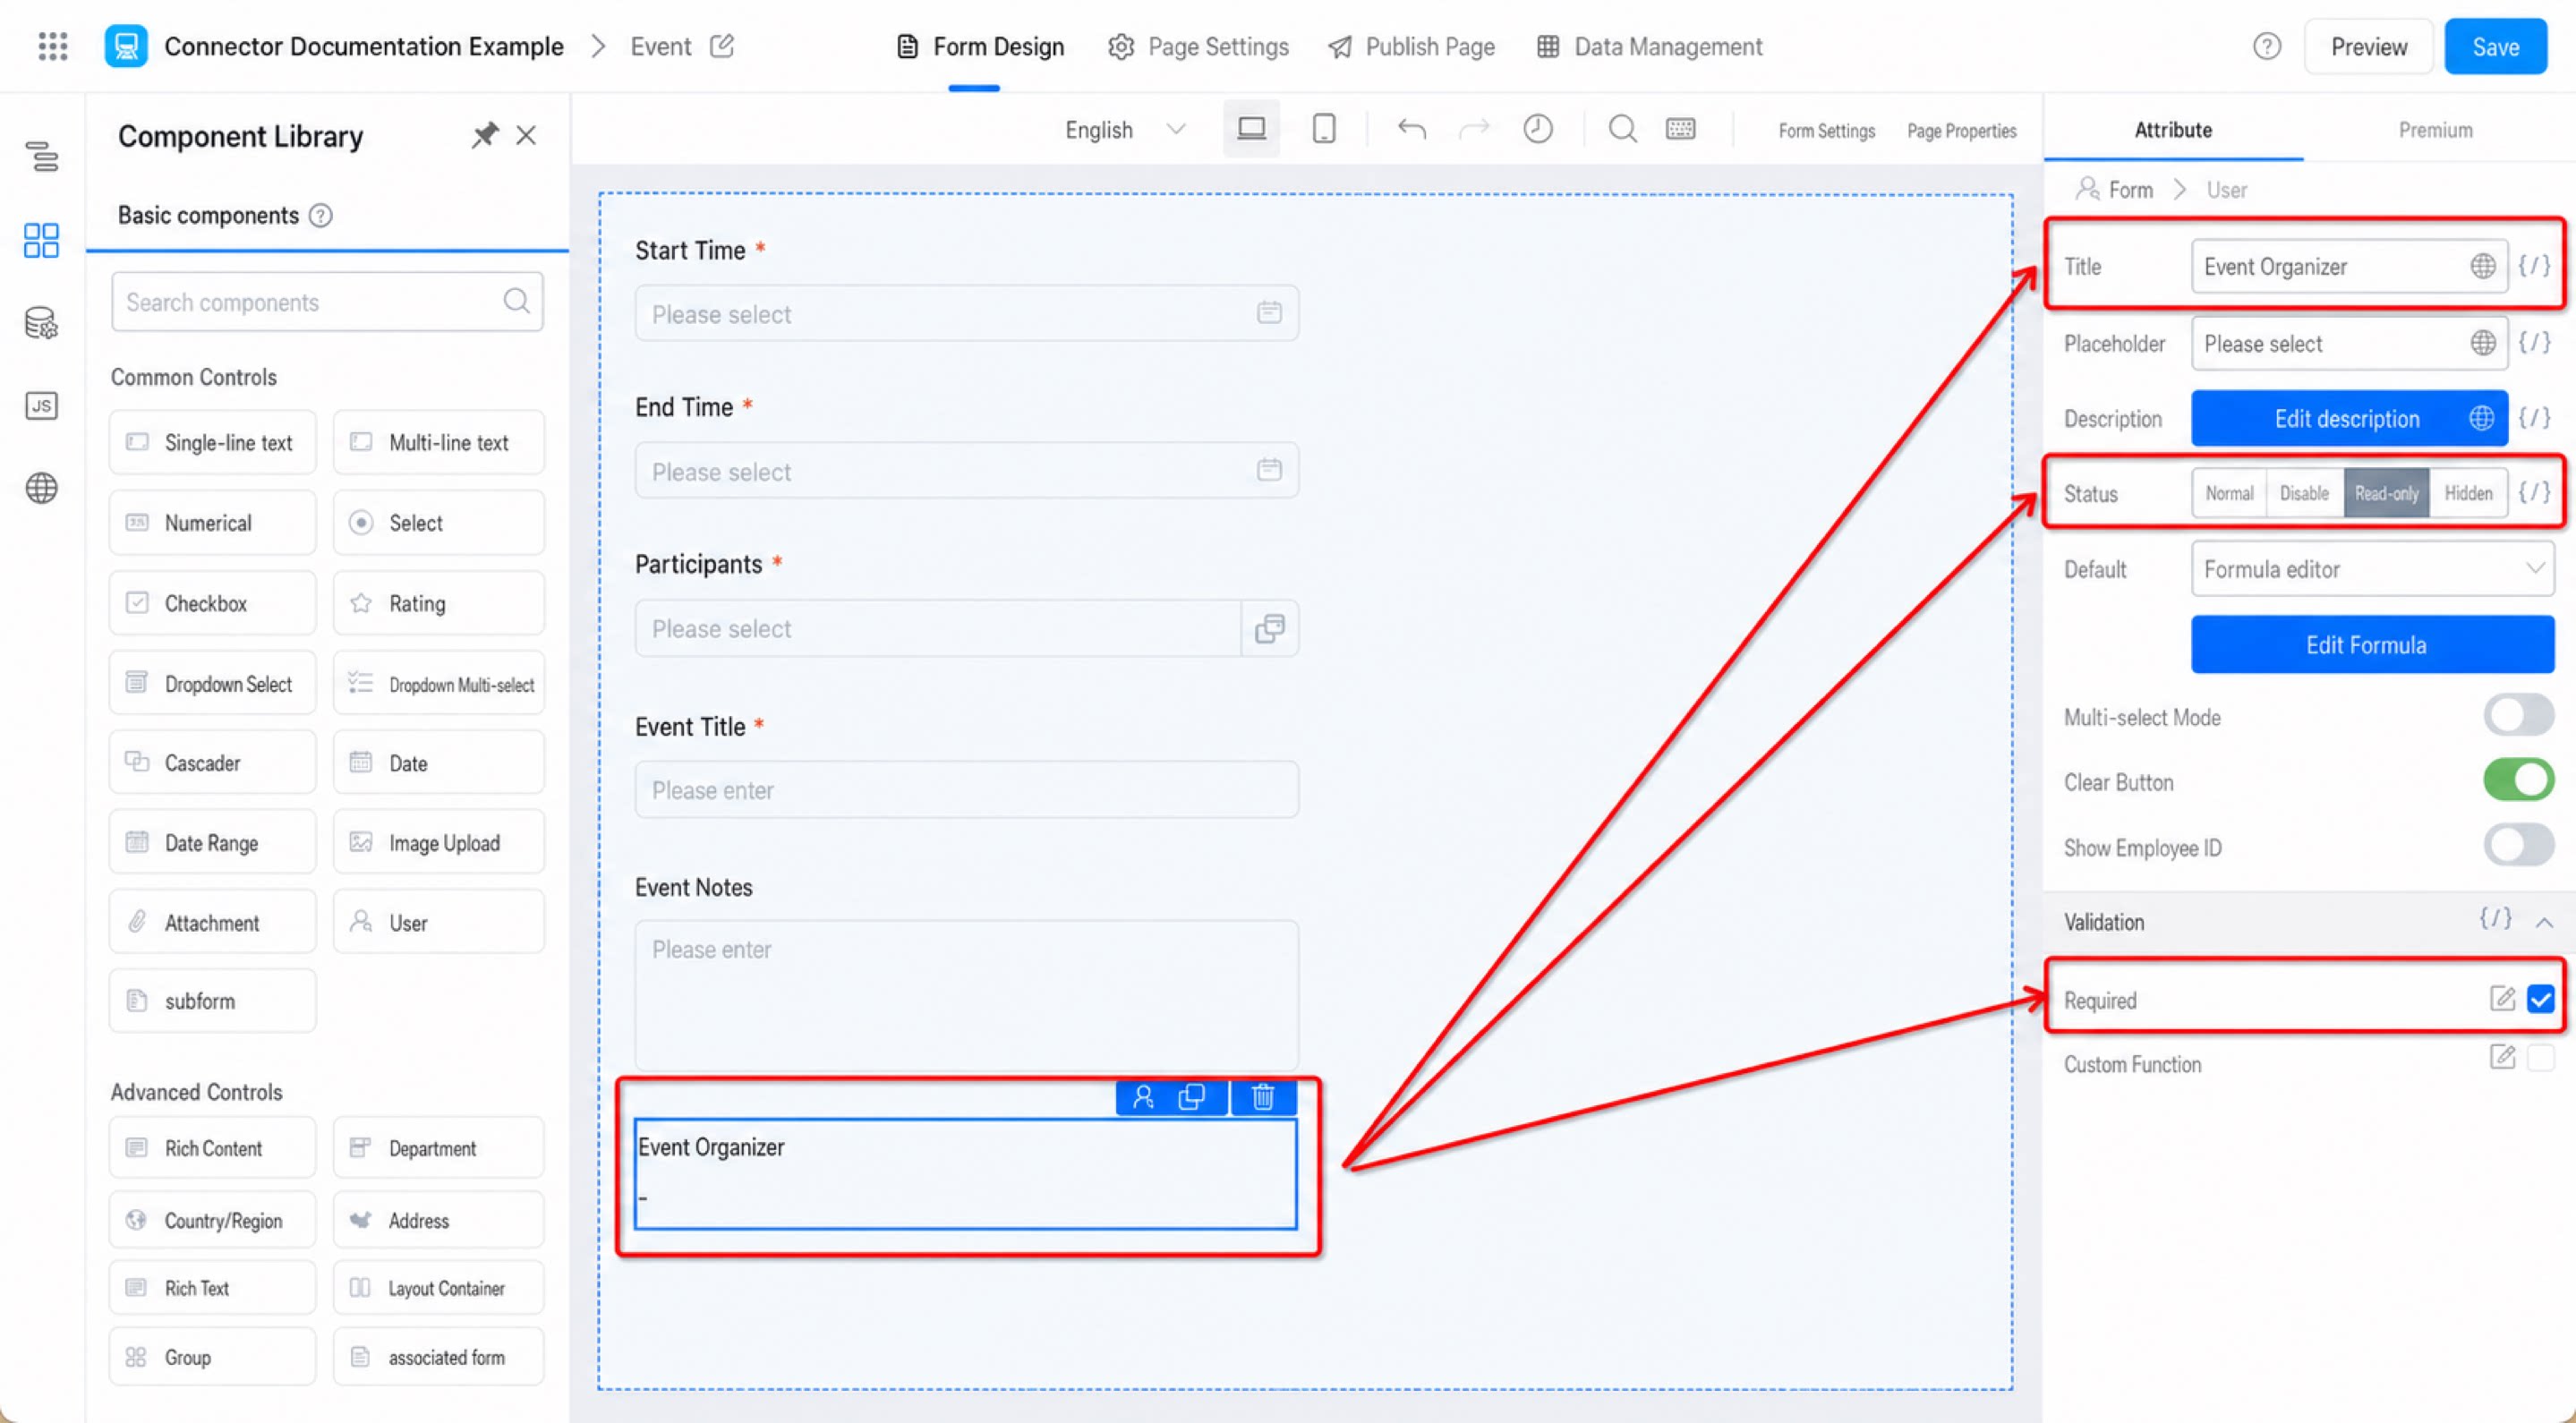
Step 2: Create an Integration & Automation
When the form is submitted, the system automatically initiates an event for the specified users, so you need to configure a connector. Steps:- Backend management page >> Integration & Automation >> Create Integration & Automation >> Create from blank. (See Figure 2.2-1)
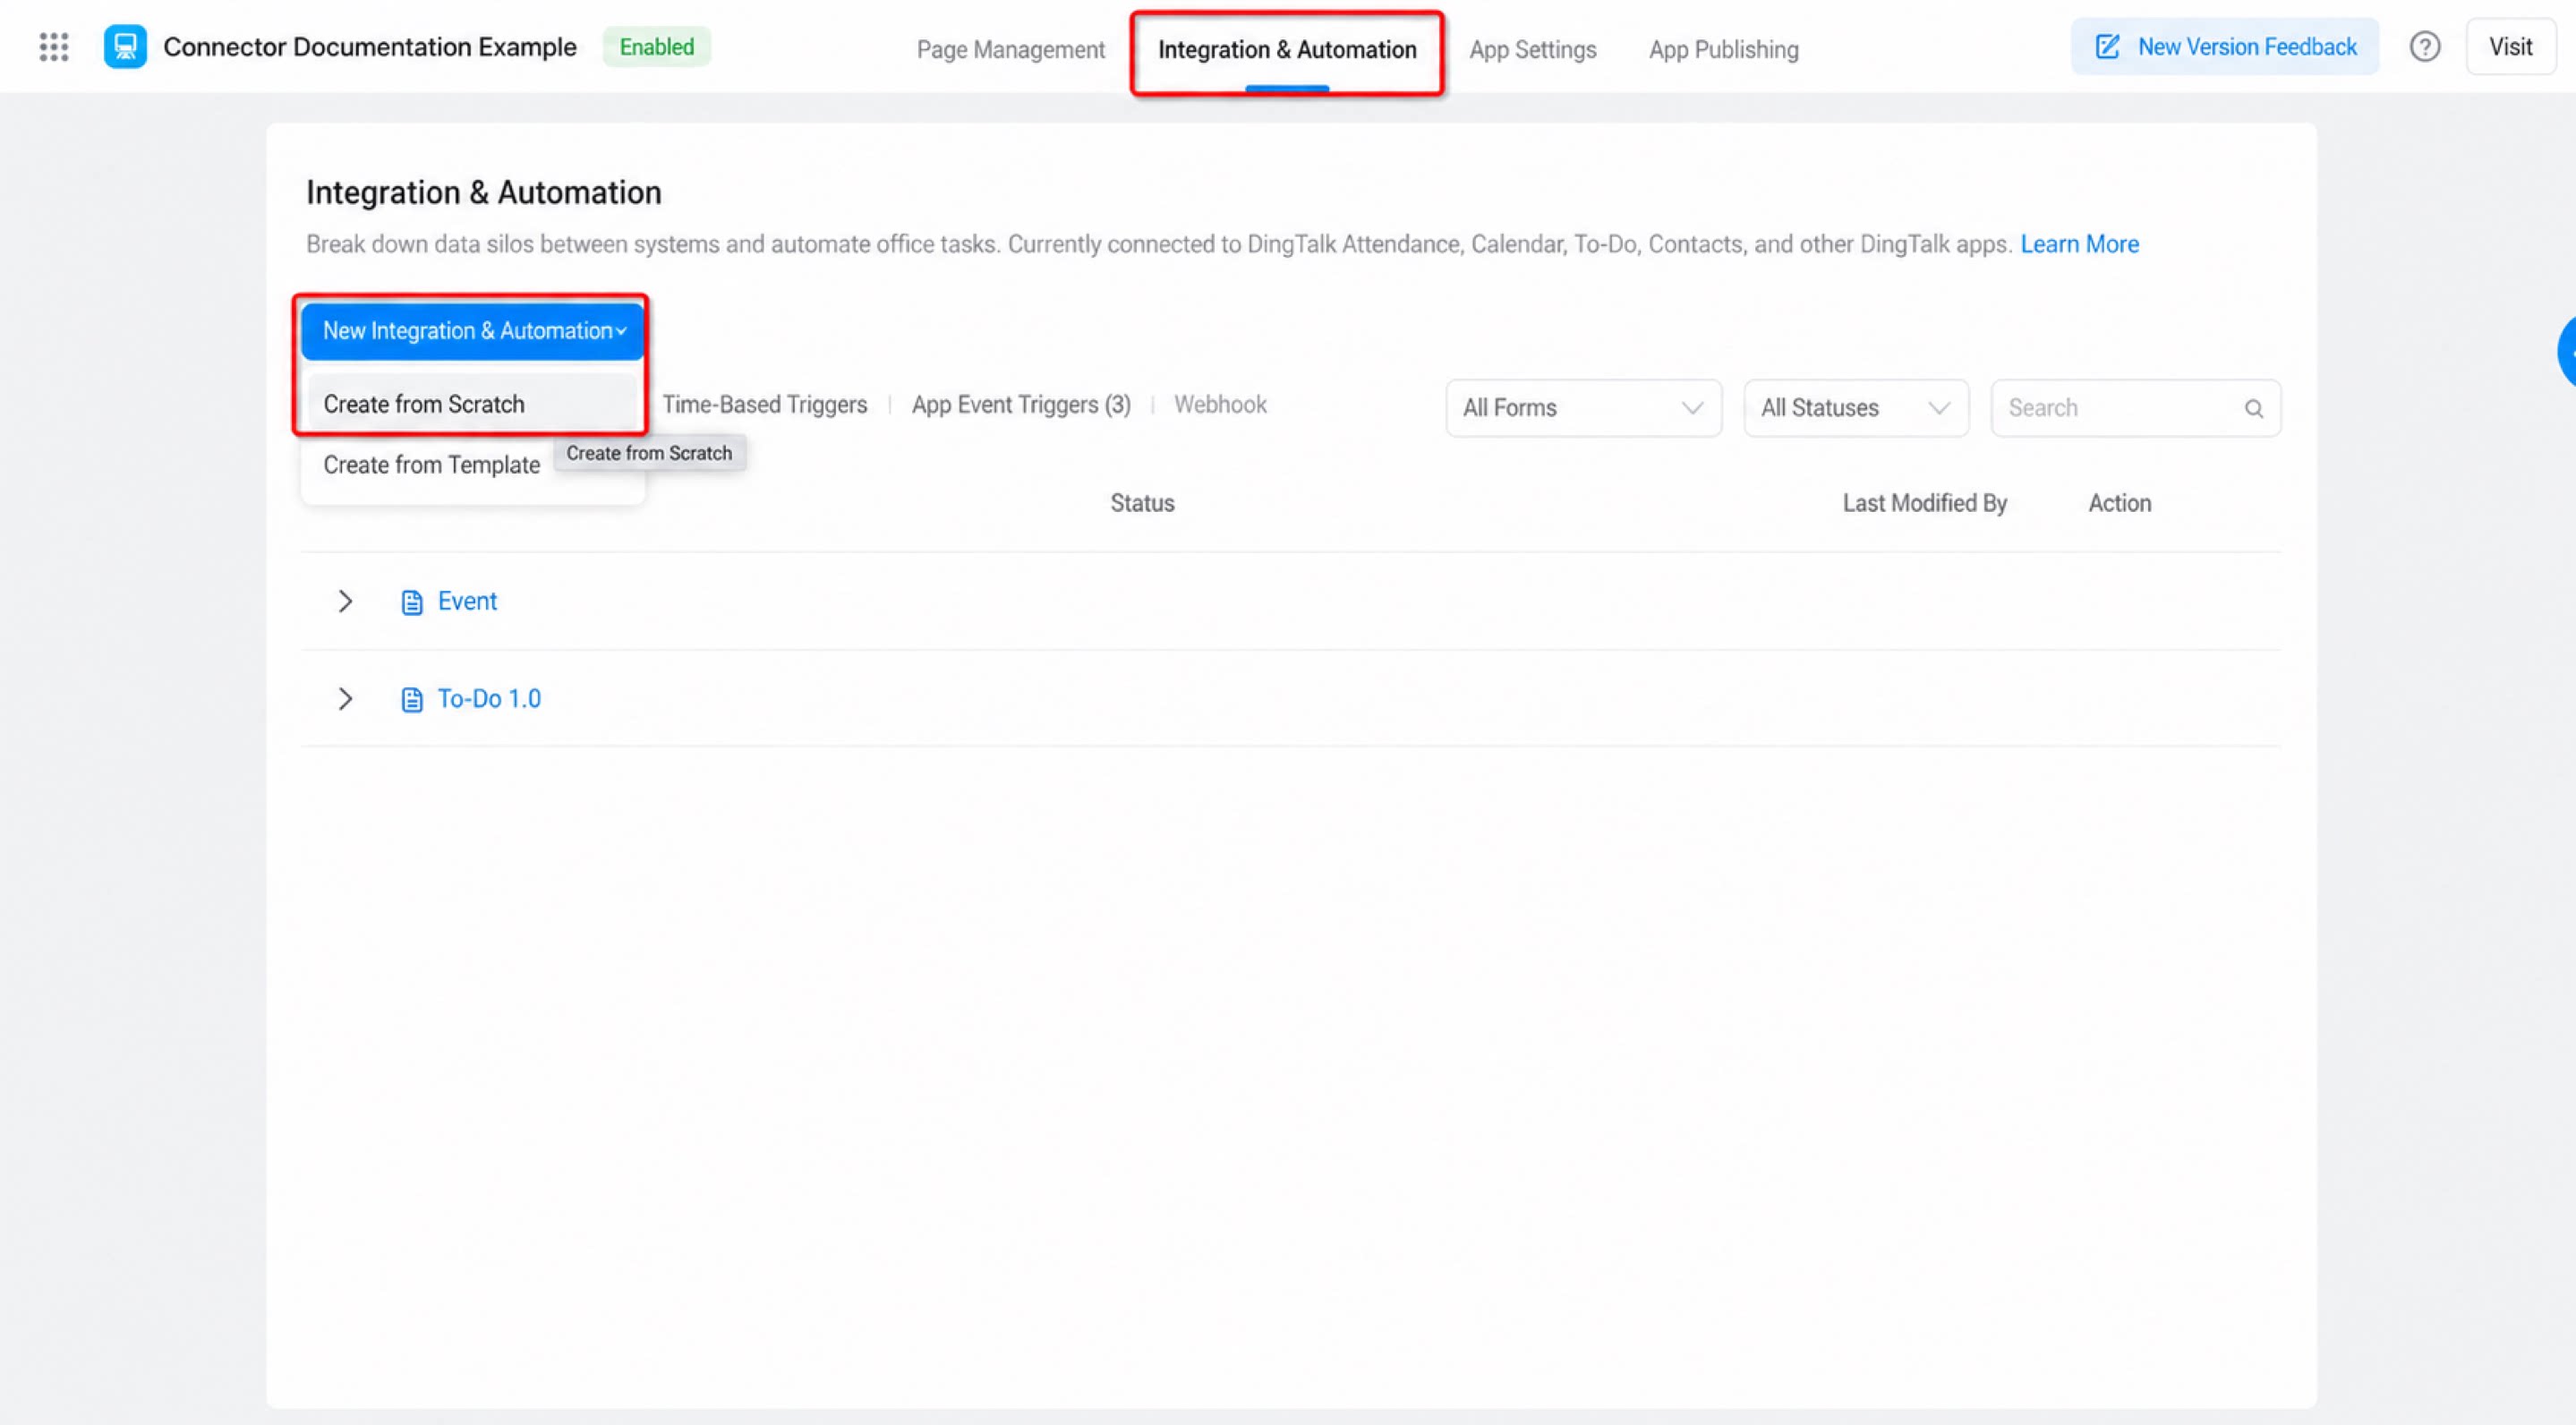
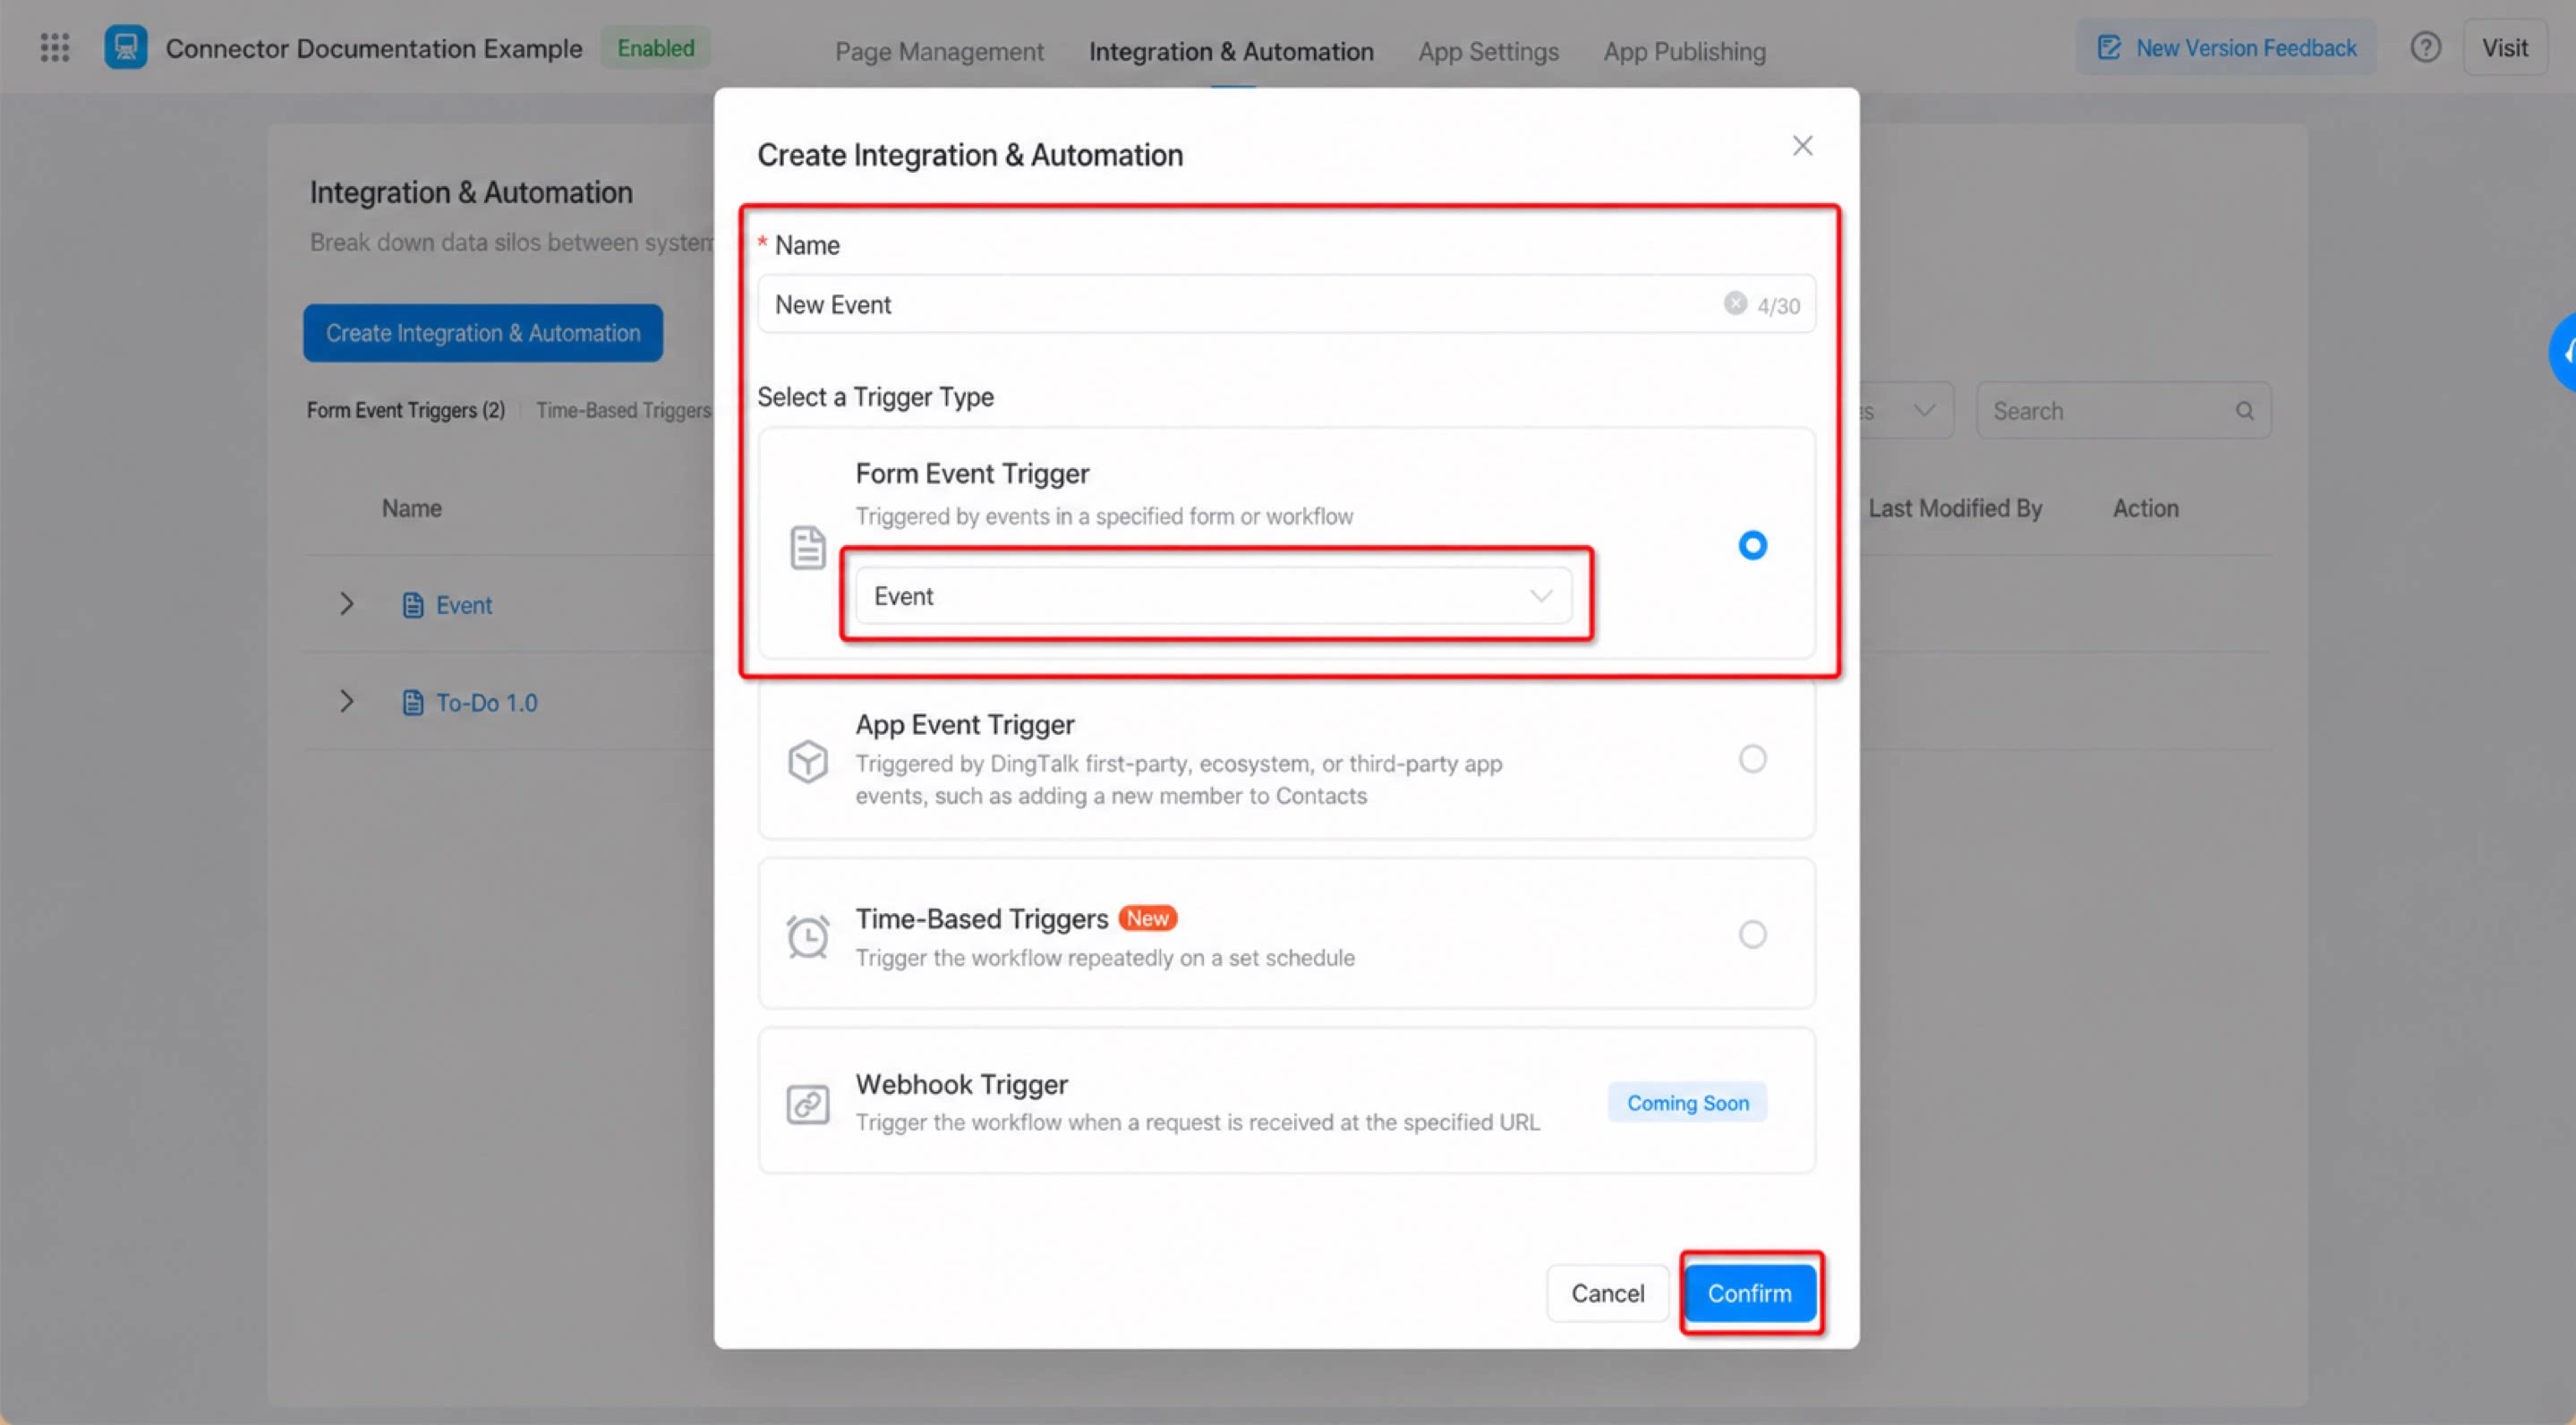
- Create Integration & Automation >> name the connector “New Event” >> under the form event trigger type, select the “Event” form >> click Confirm. (See Figure 2.2-2)
Step 3: Configure the Integration & Automation
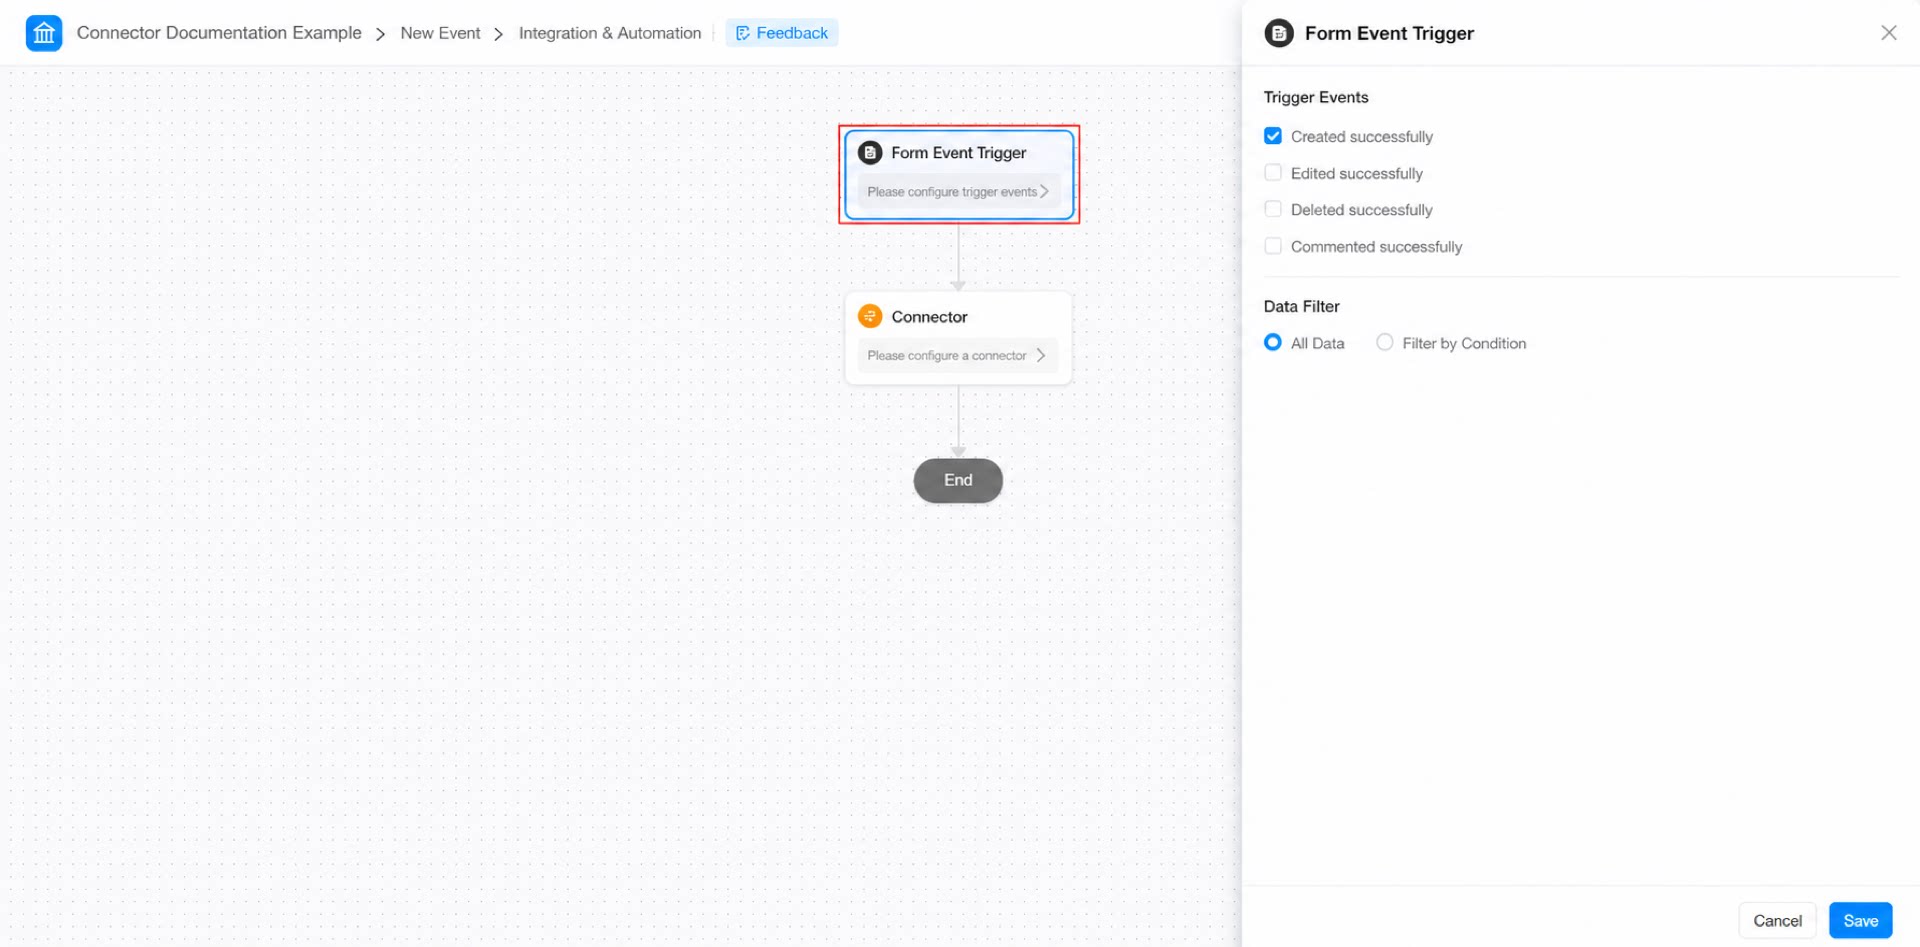
- Select “Form event trigger”, set the trigger event to “Create Success”, and set data filtering to “All data”. Then click Save in the lower-right corner. (See Figure 2.2-3)
- Configure the “Connector” node. Under Select App, select “Event”, and then click Next. (See Figure 2.2-4)
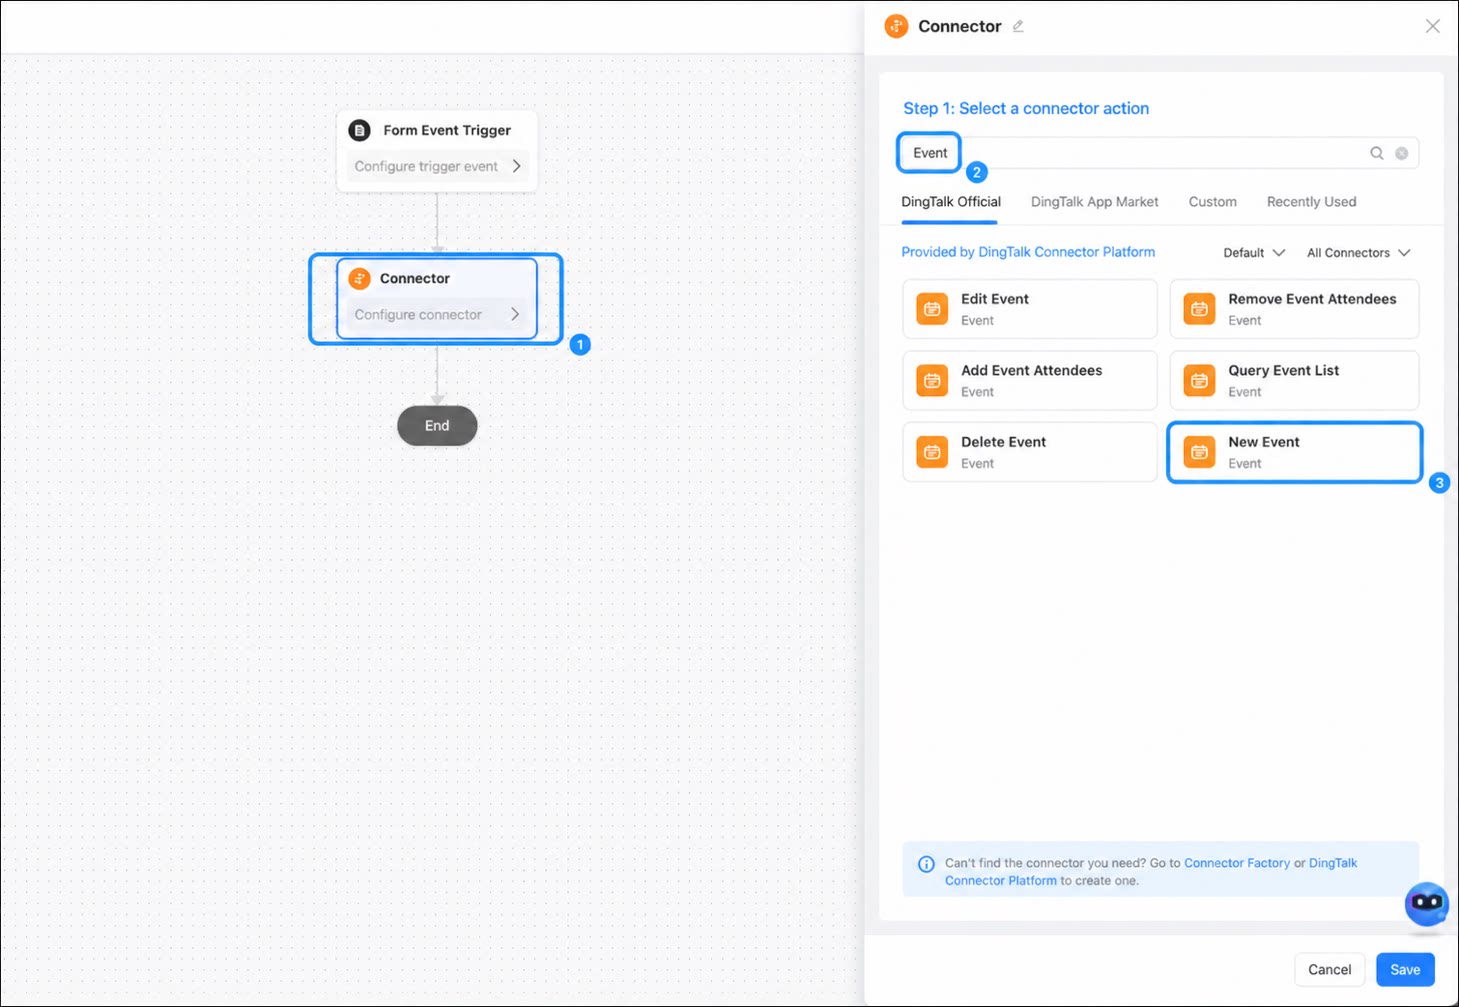
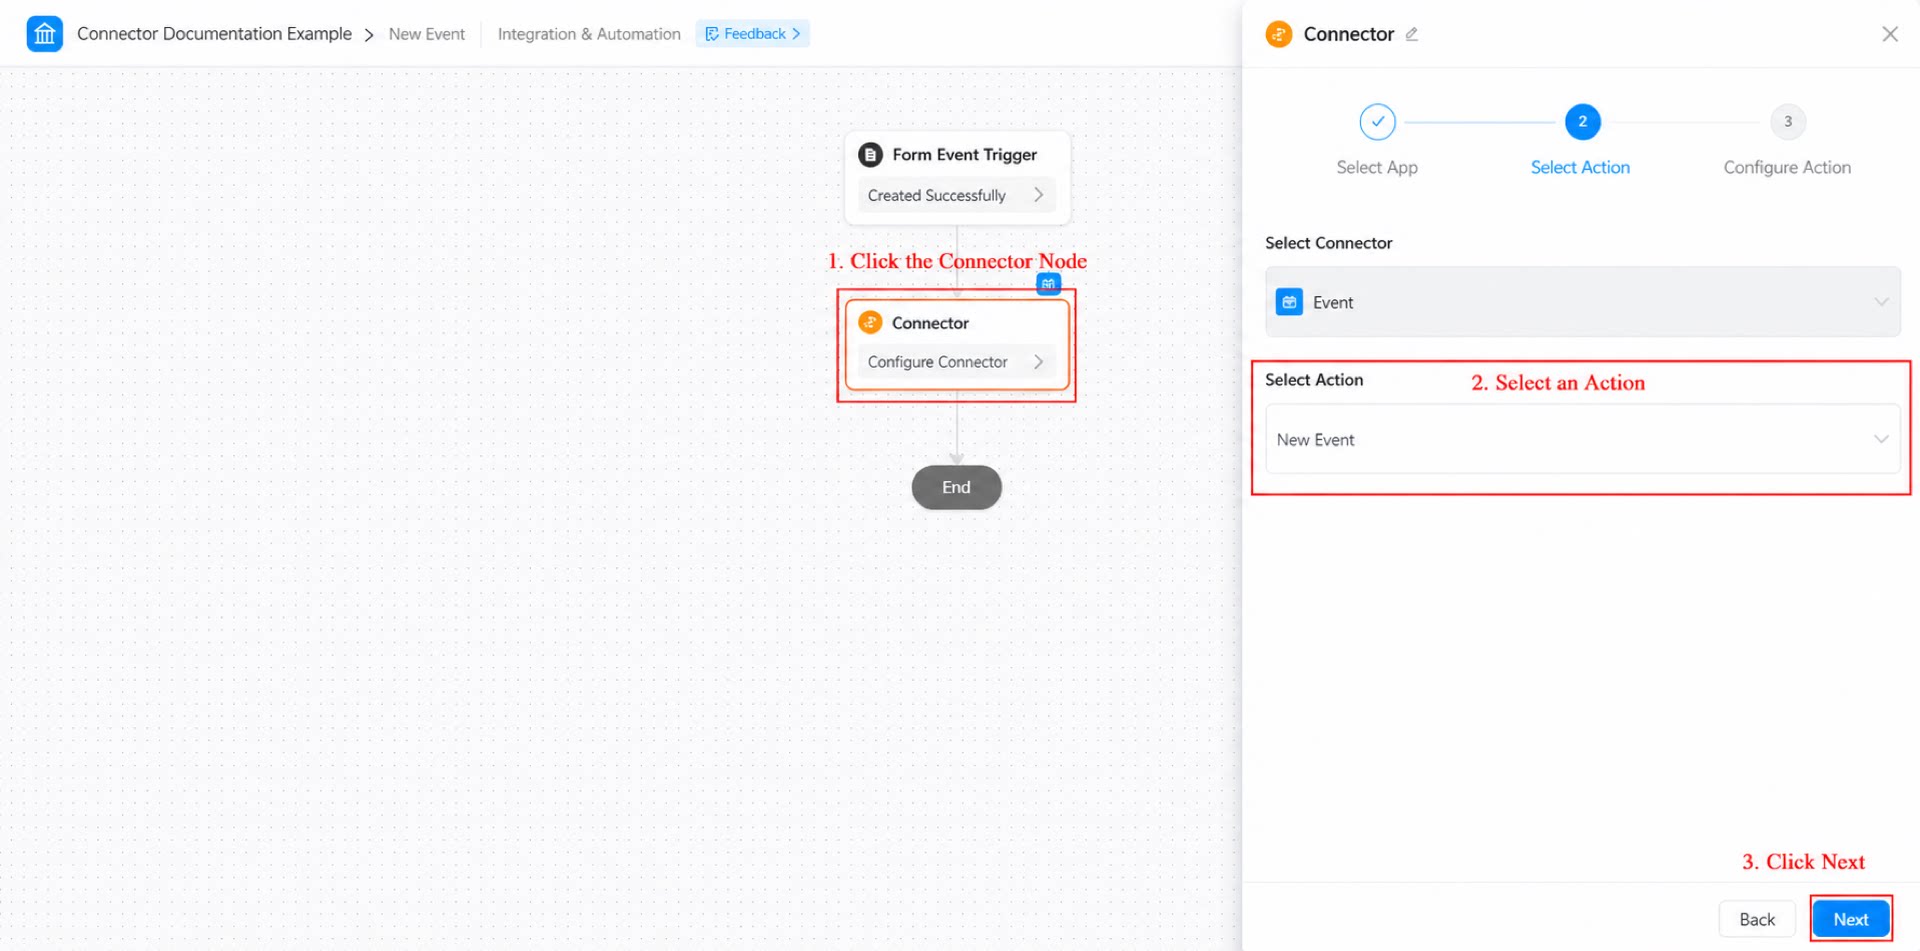
- Under Select Execute Action, select the “New Event” action, and then click Next. (See Figure 2.2-5)
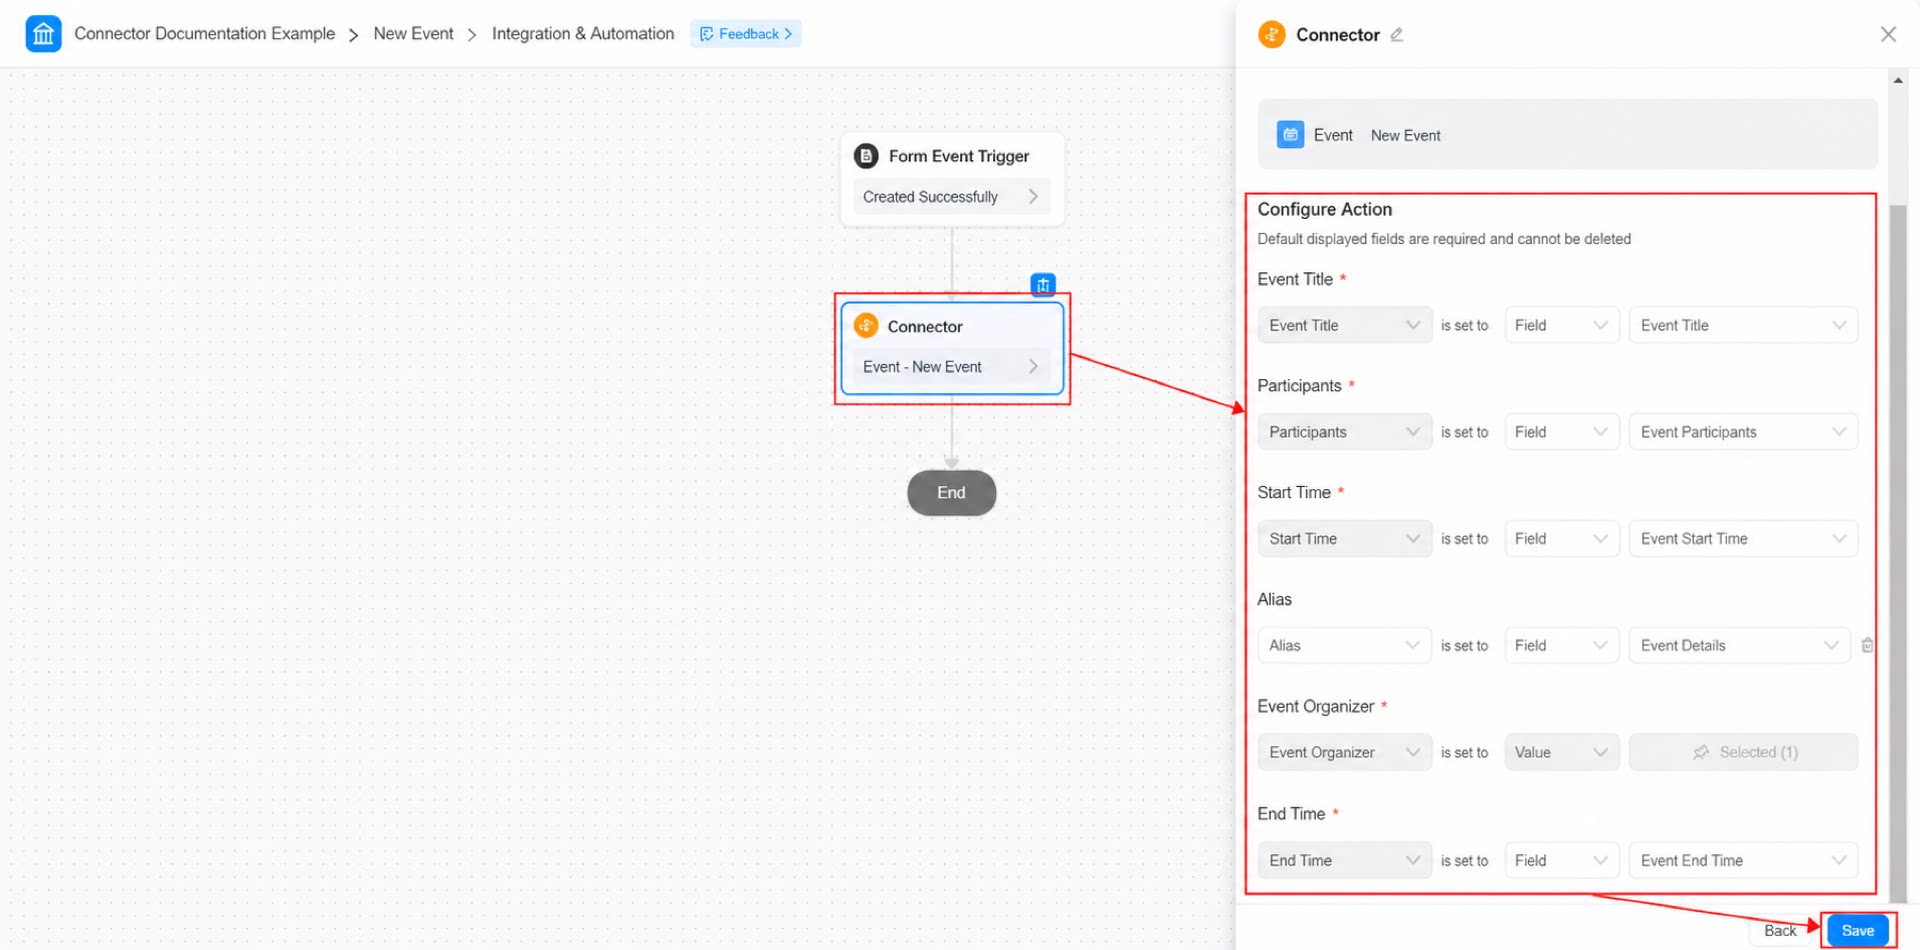
- Under Configure Execute Action, configure each field, and then click Save. (See Figure 2.2-6)
- Click Save in the upper-right corner of the page, and then click Publish.
Step 4: Configure the To-Do Content
The steps above complete the feature configuration. Next, simply submit the form to trigger the connector, which creates an event for the specified users at the specified time and closes it at the specified time. Steps: Fill in the form and click Submit. (See Figure 2-3)