Chats
Chats Calendar
 Meetings
 Contacts
 Mail
Mail Docs
Docs Drive
Drive AI Table
 AI Minutes
 Attendance
 Approval
 YiDA
YiDA Admin Console
Step 1: Create and Configure the Form
Create a form to capture the relevant information. This form serves as the data source that triggers the connector. Steps:- Create a form and name it “Create Group Chat”.
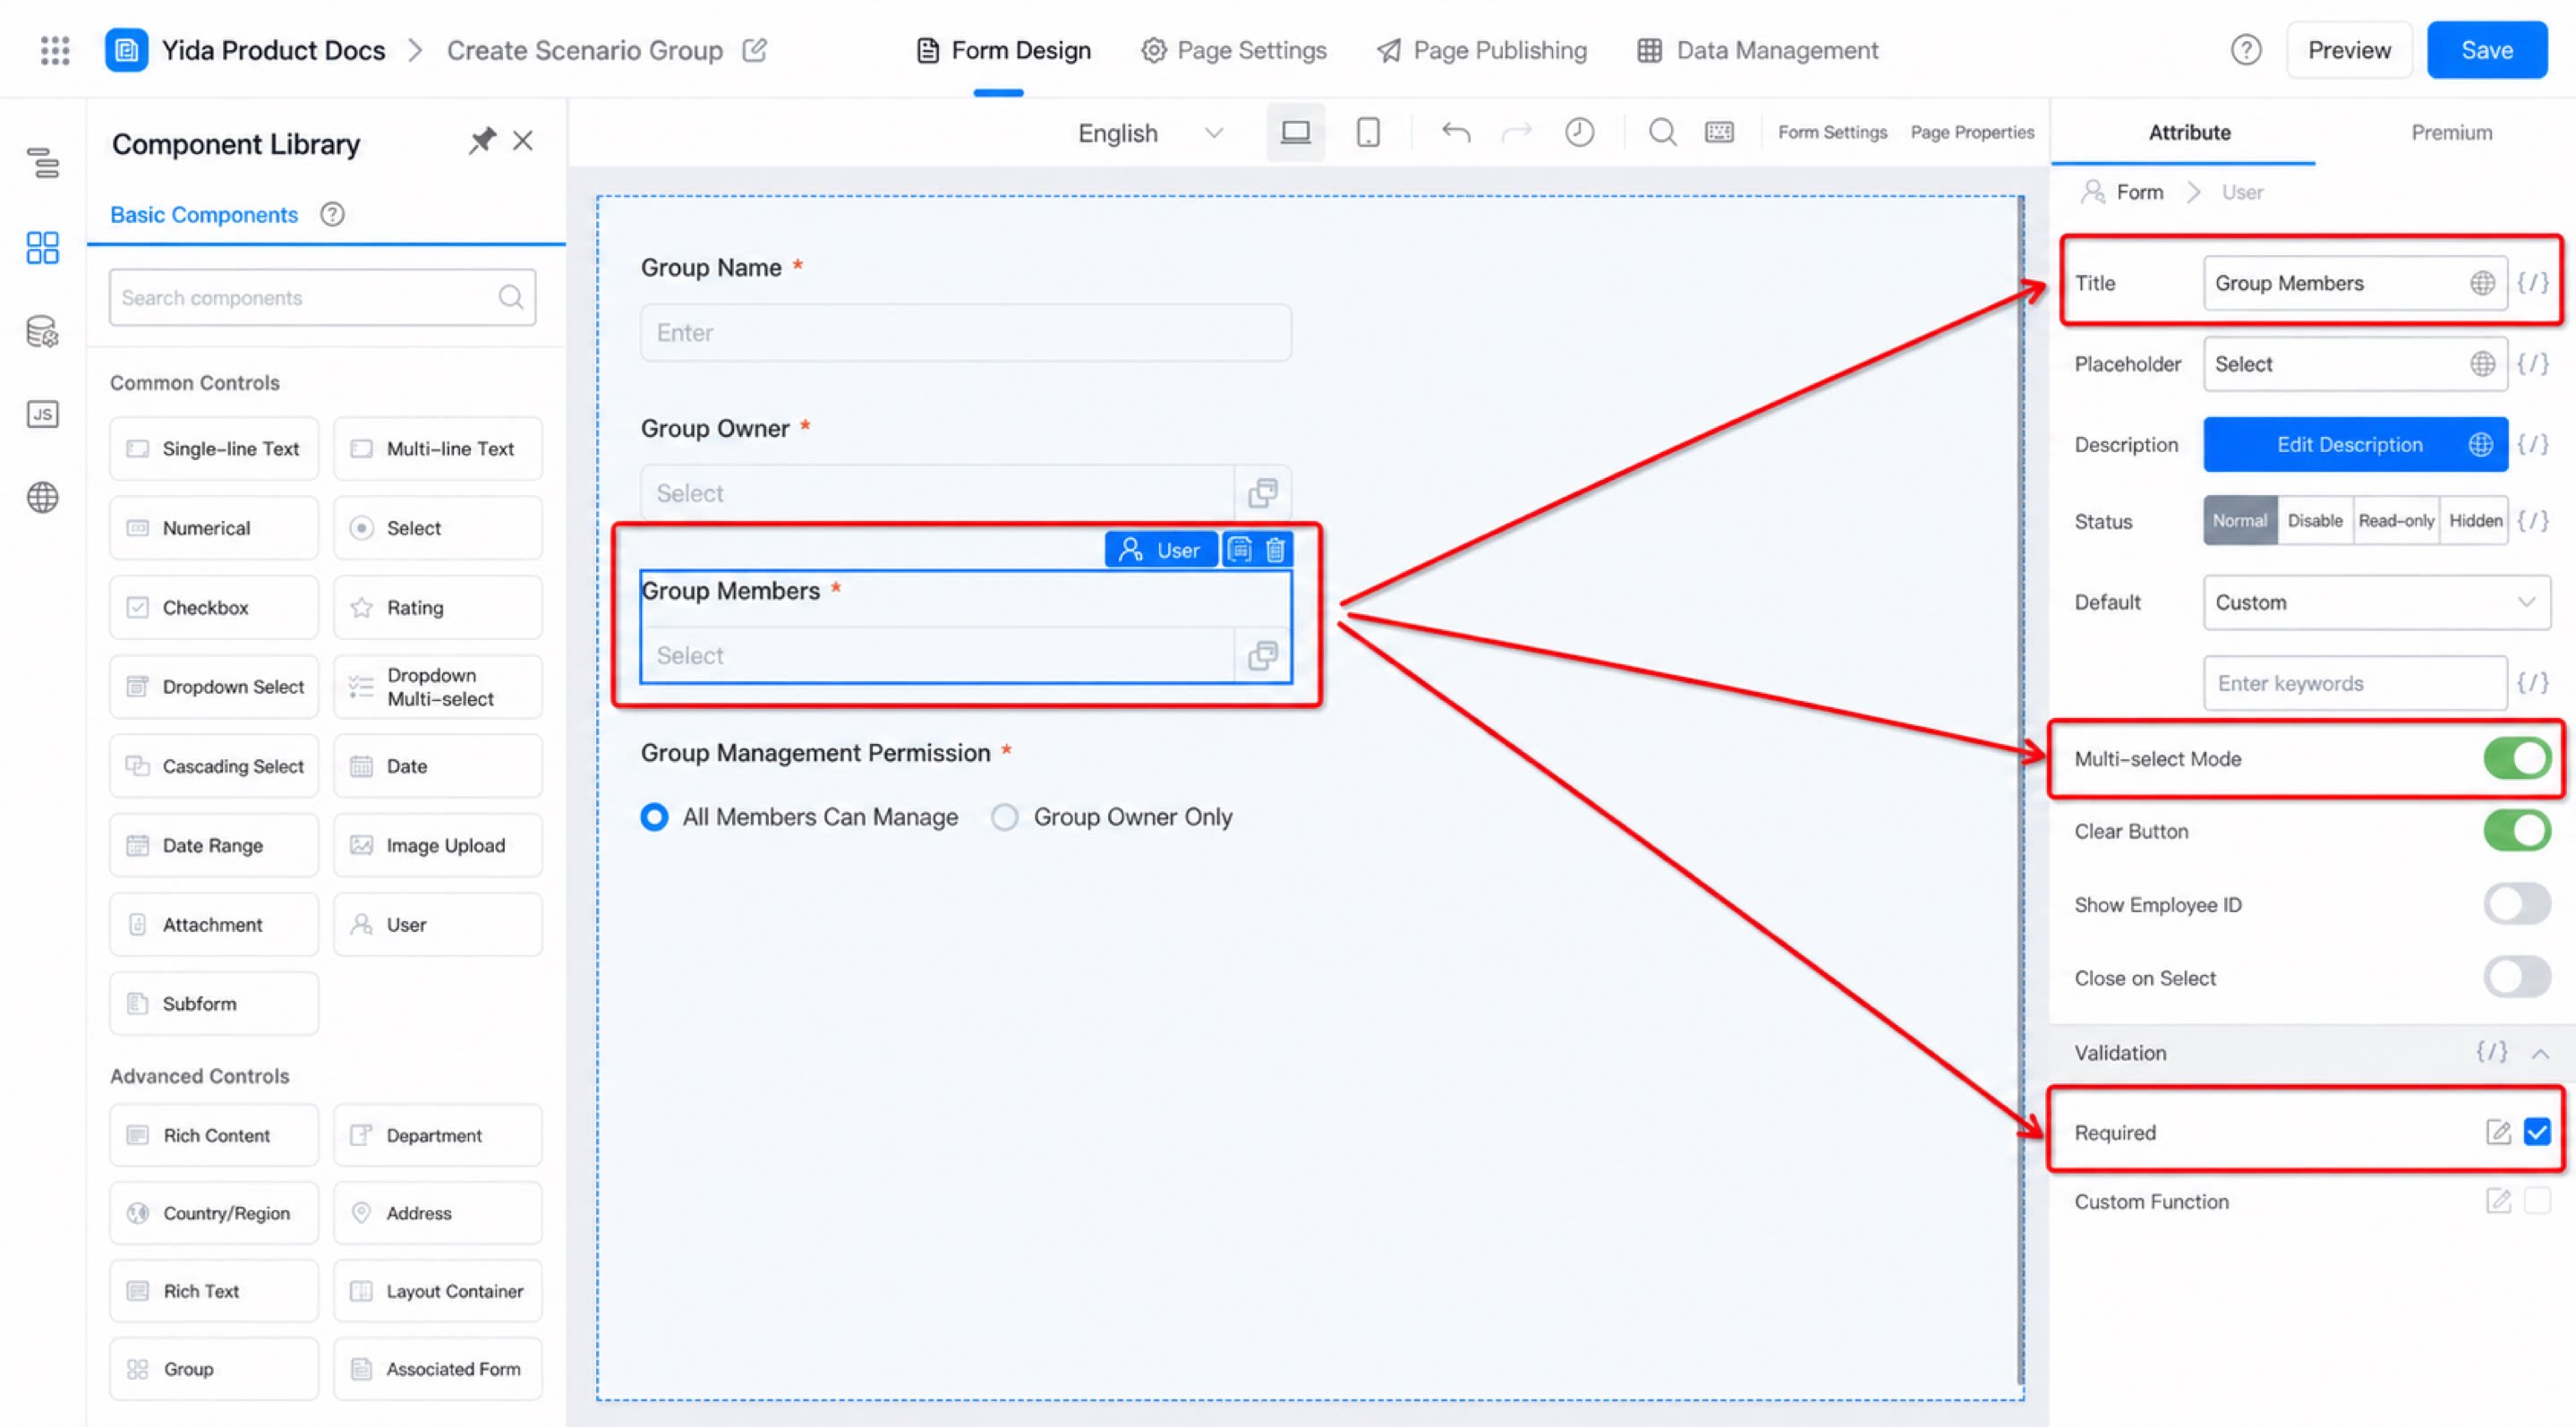
- Add a member component to the form, mark it as required, and enable multi-select.
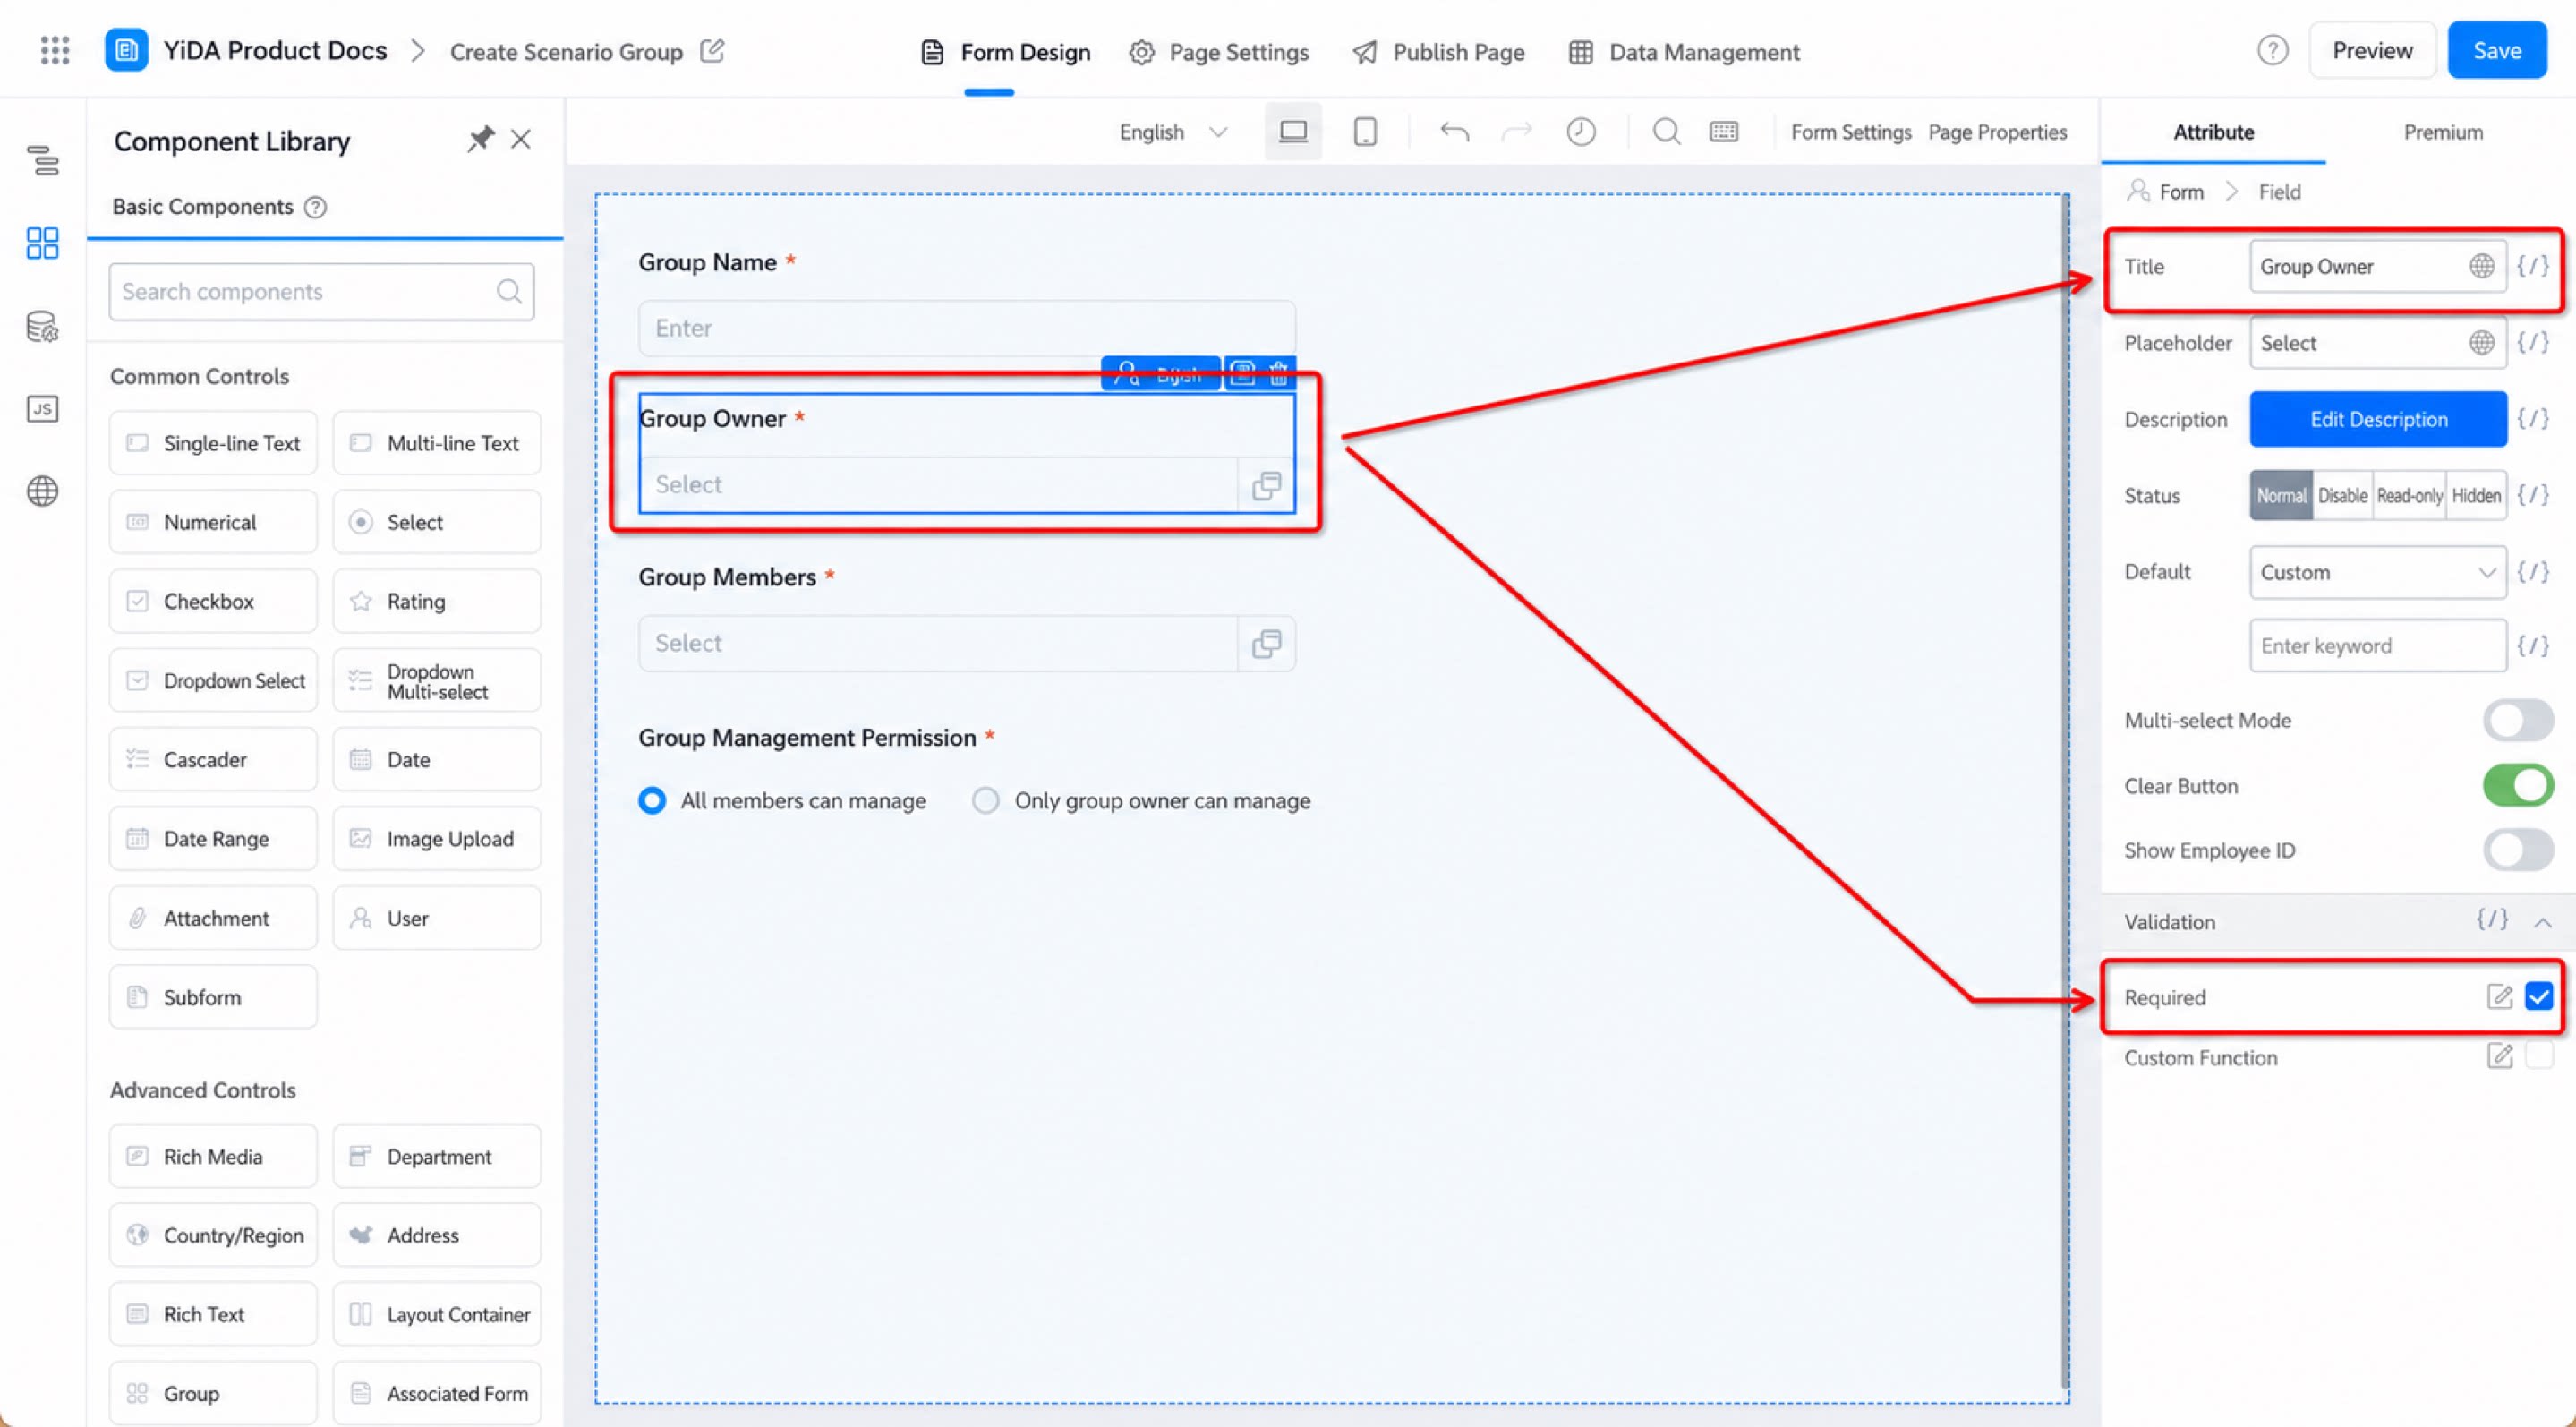
- Add another member component, name it “Select Group Owner”, and mark it as required.
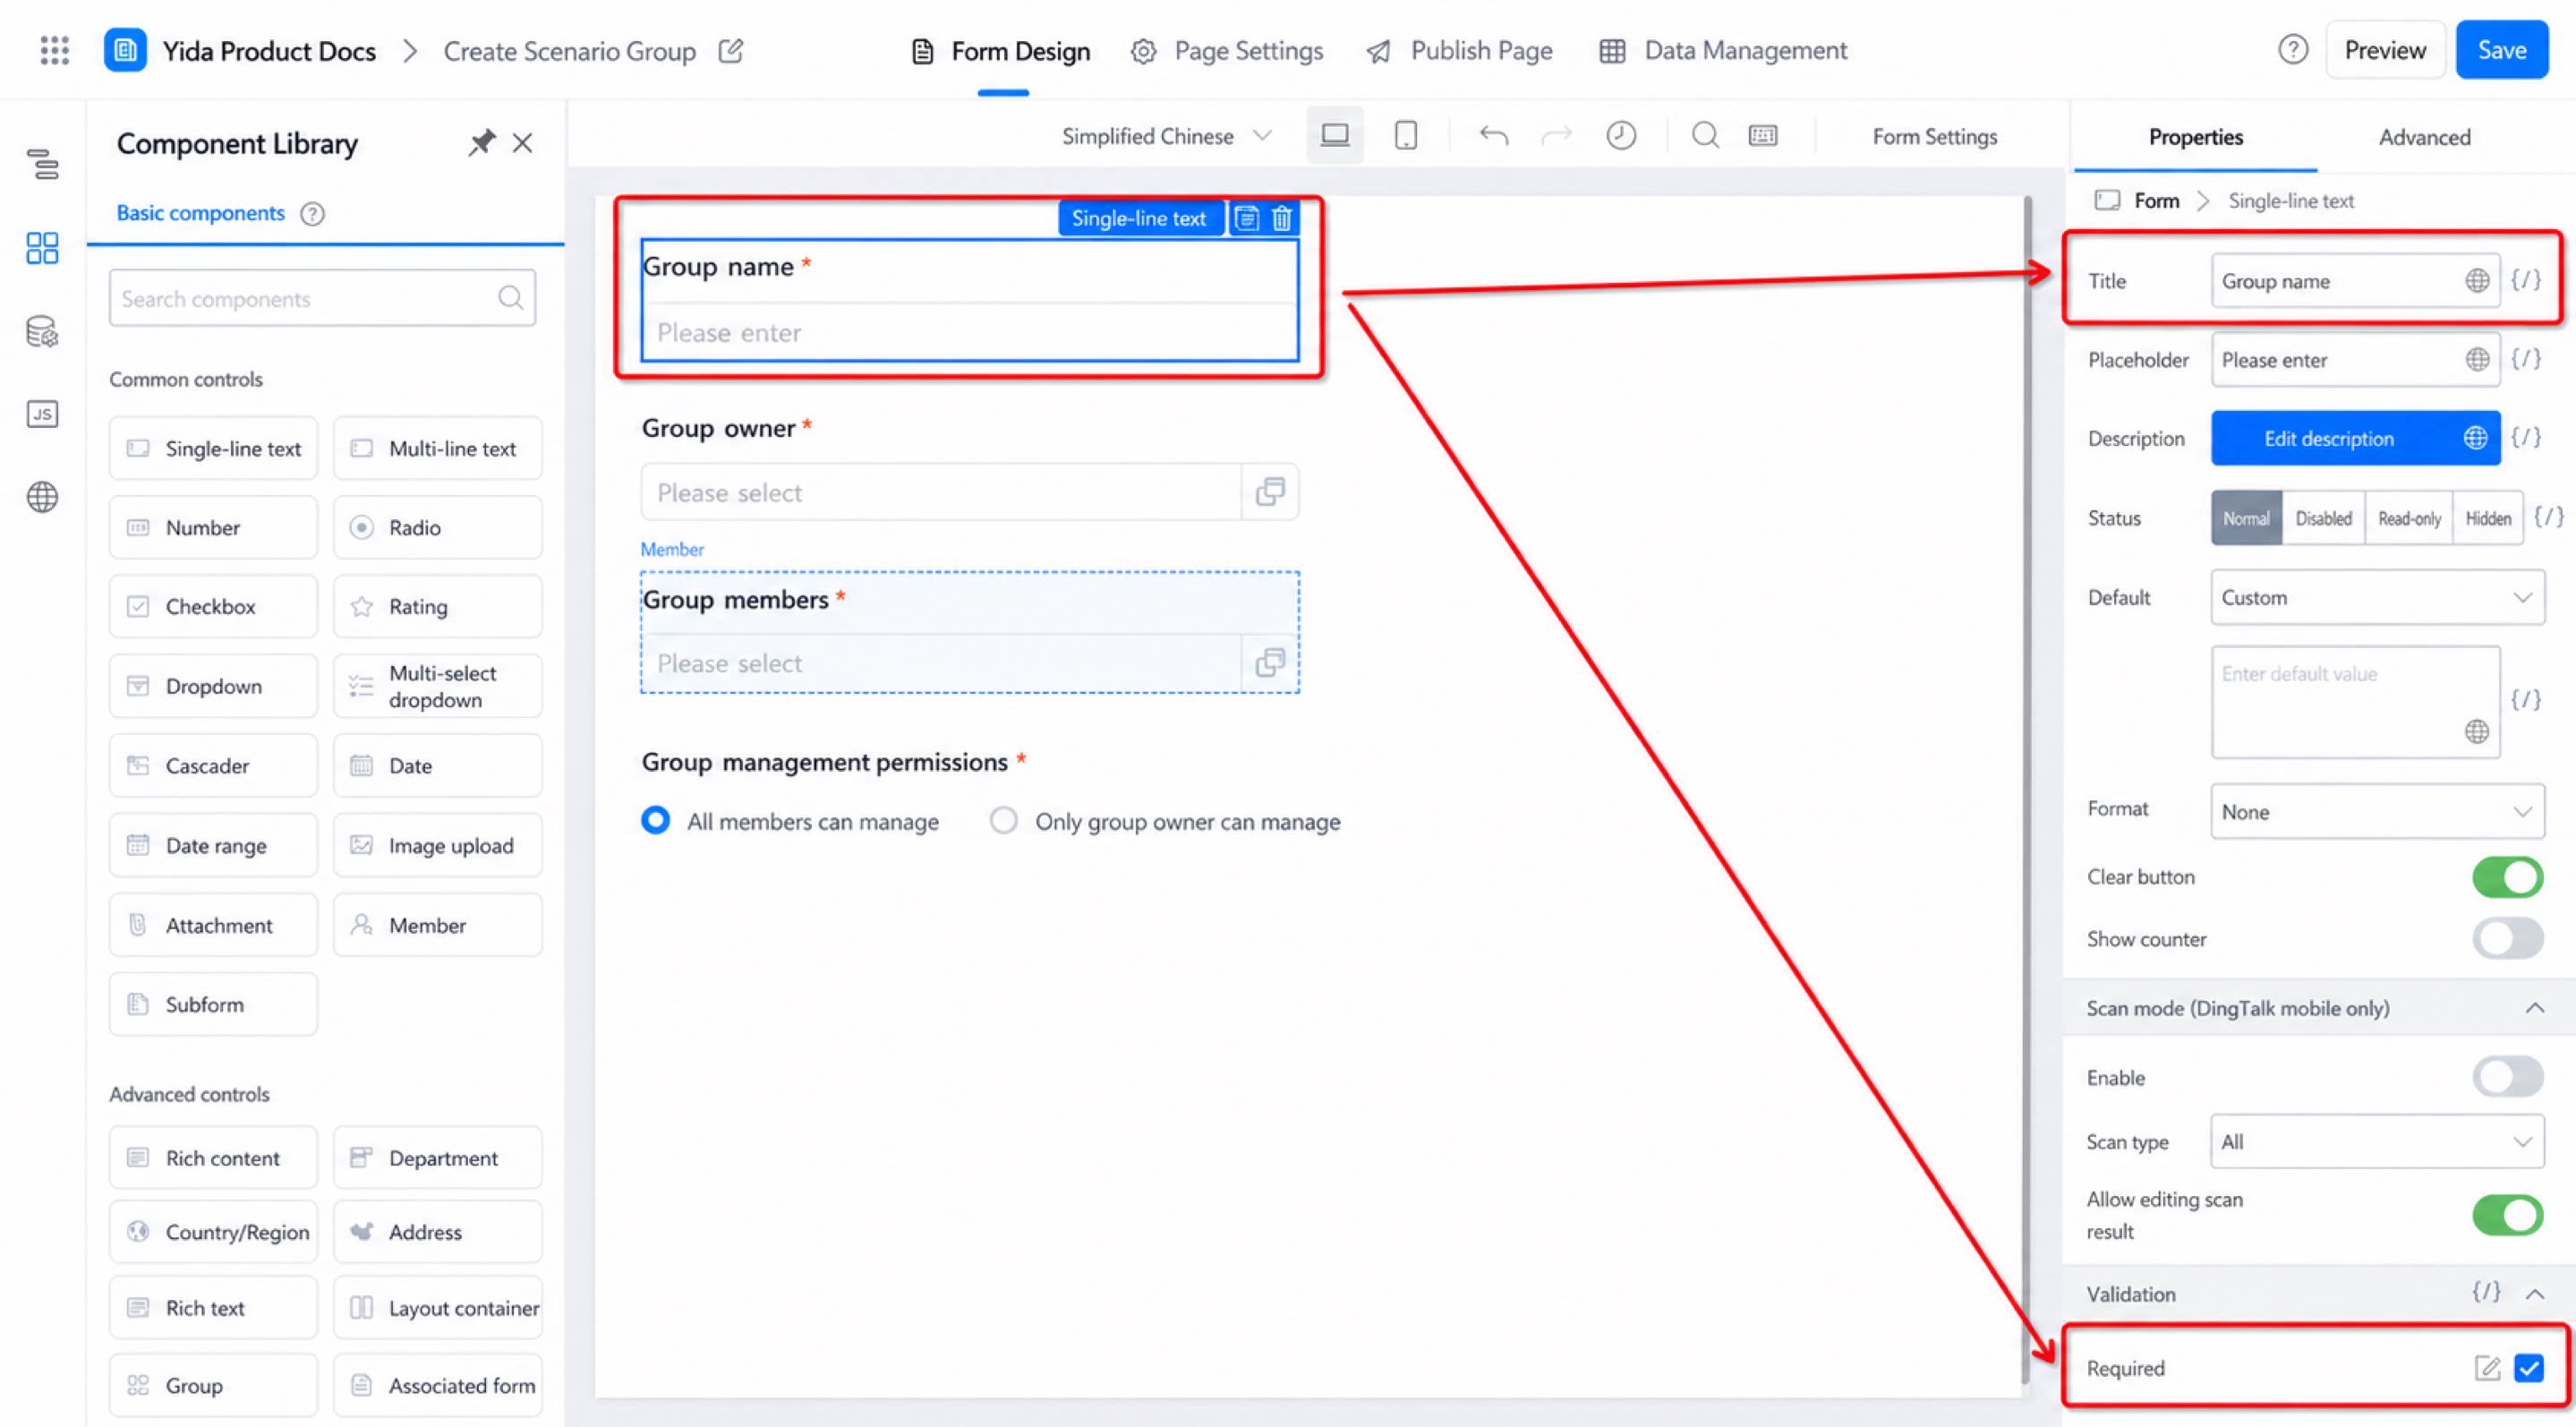
- Add a Single-line text component, name it “Event Title”, and mark it as required.
1
Step 1
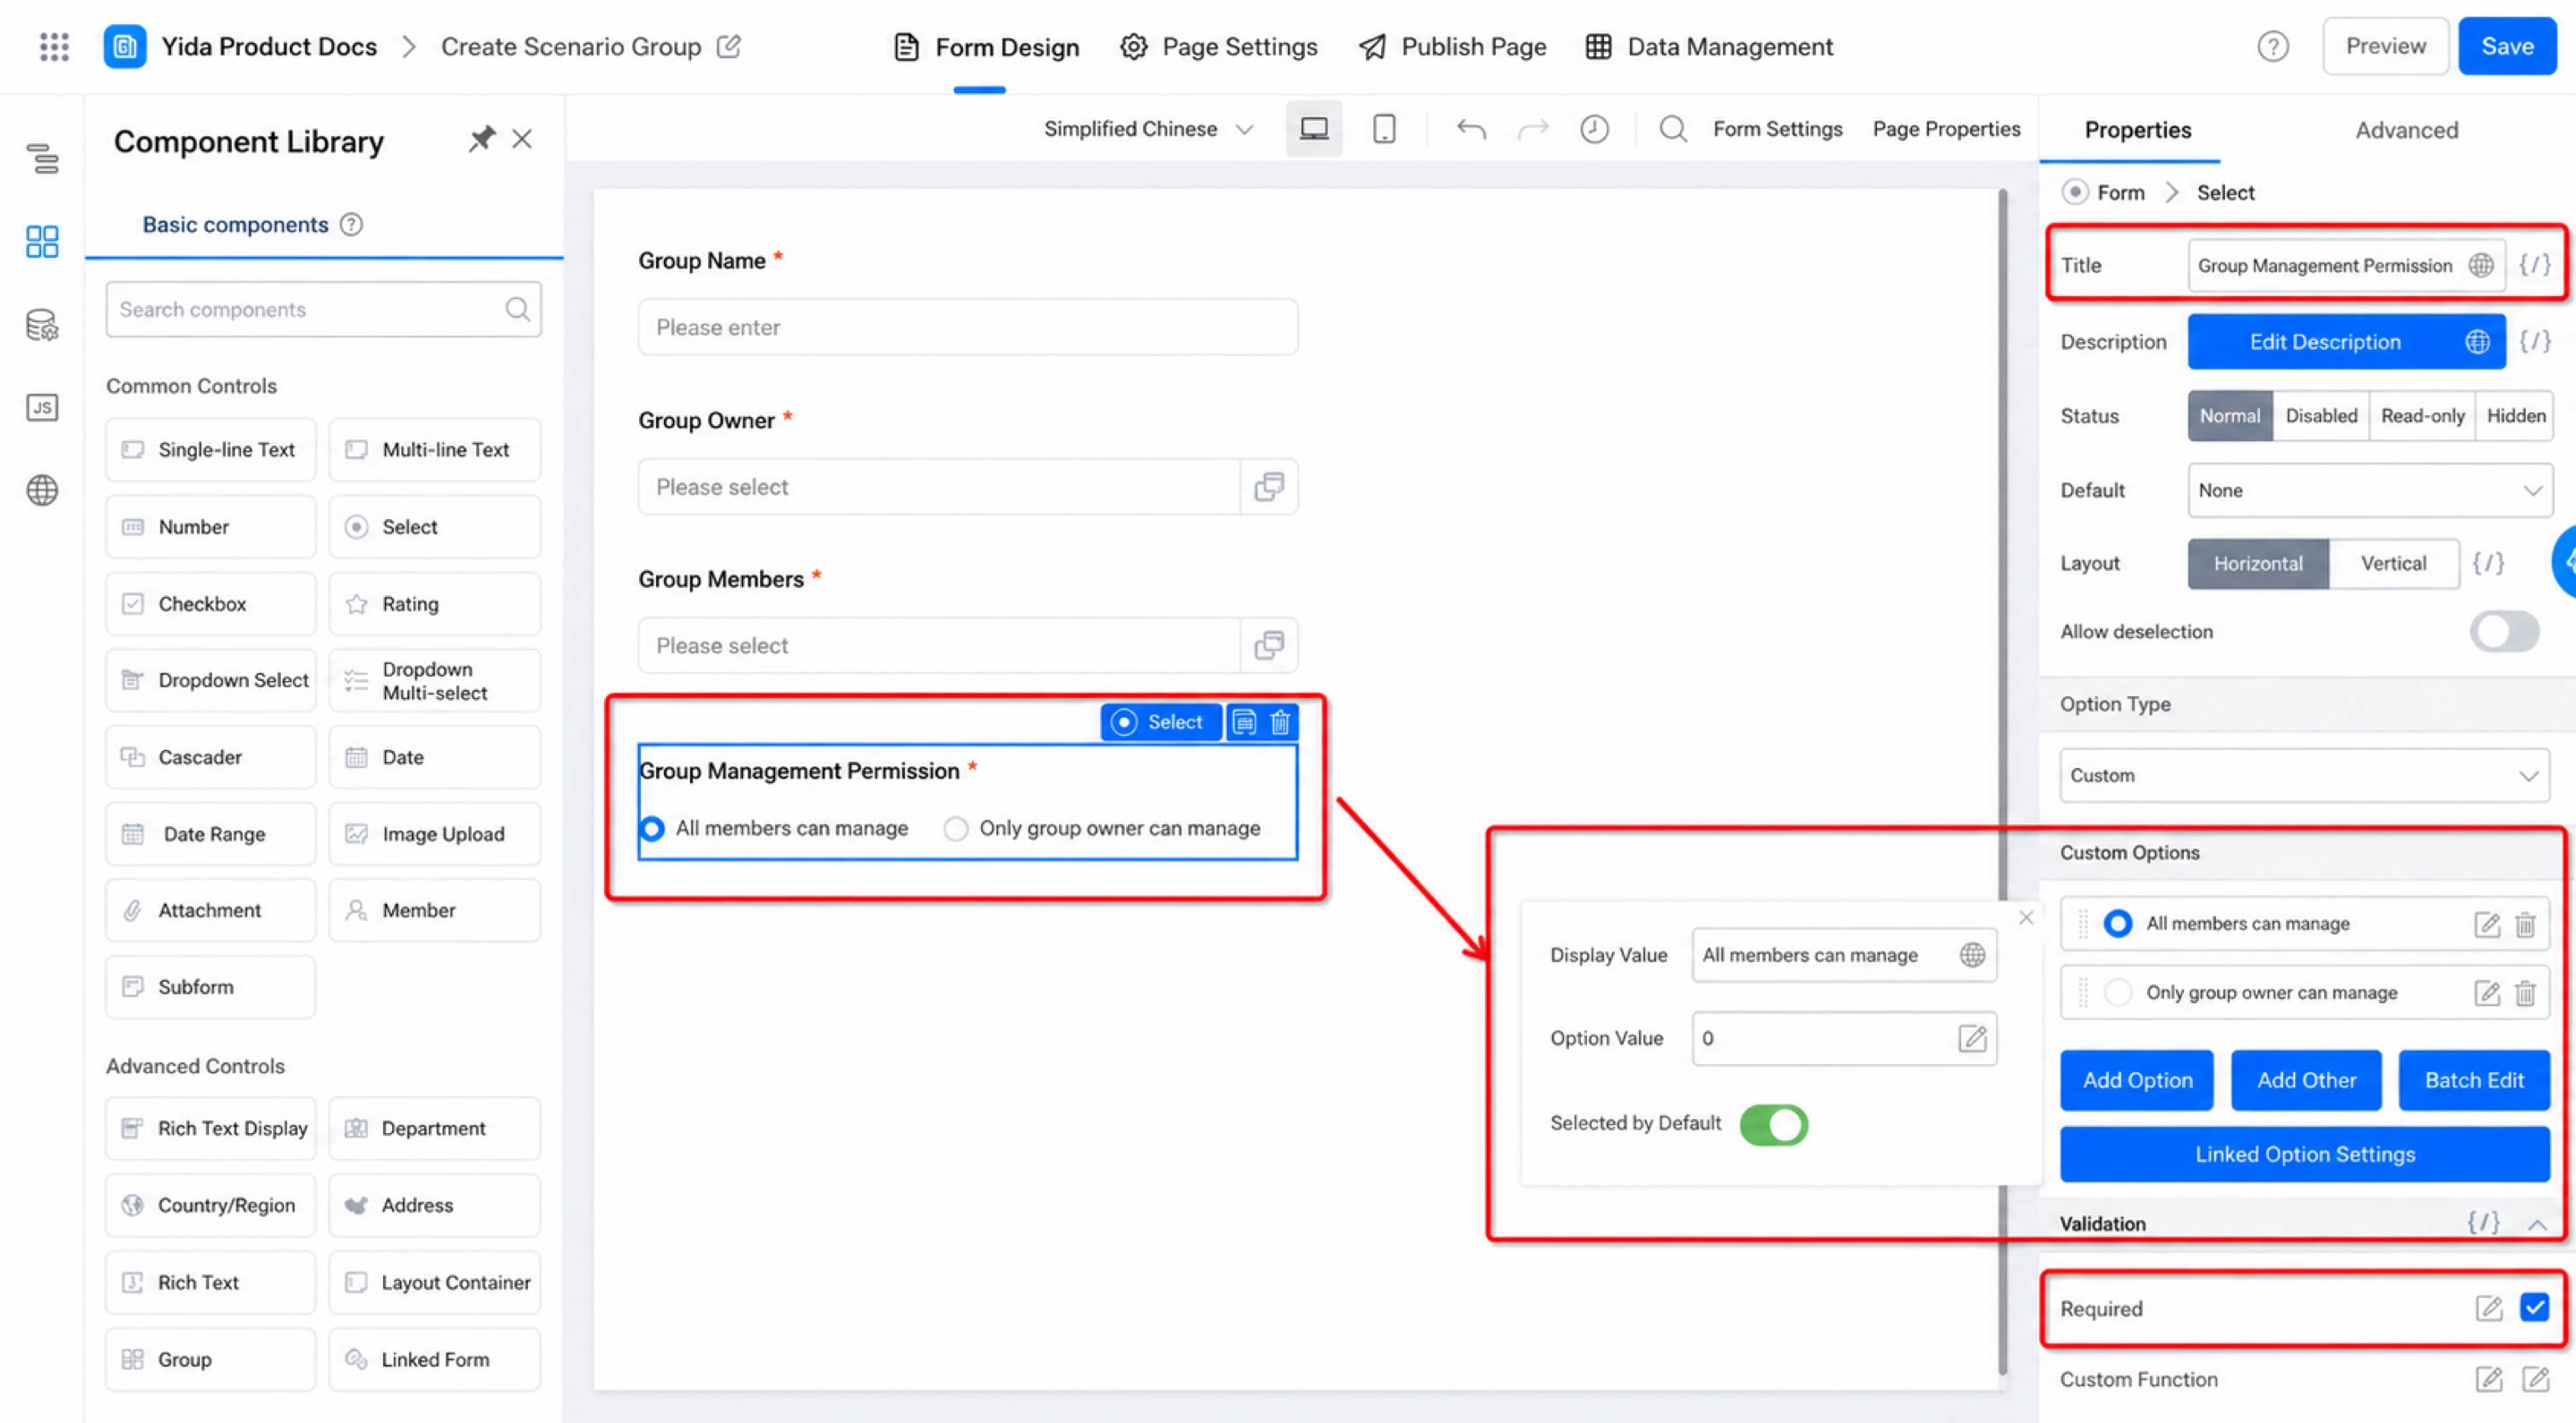
Add a Select component and name it “Group Chat Management Permissions”. Set the option value of “Everyone can manage” to “0” and enable it as the default selection. Set the option value of “Only group owner can manage” to “1” and enable required validation.
2
Click the Save button in the upper-right corner
Step 2: Create Integration & Automation
Further reading: For a detailed introduction to connectors, see Integration & Automation - Connectors.
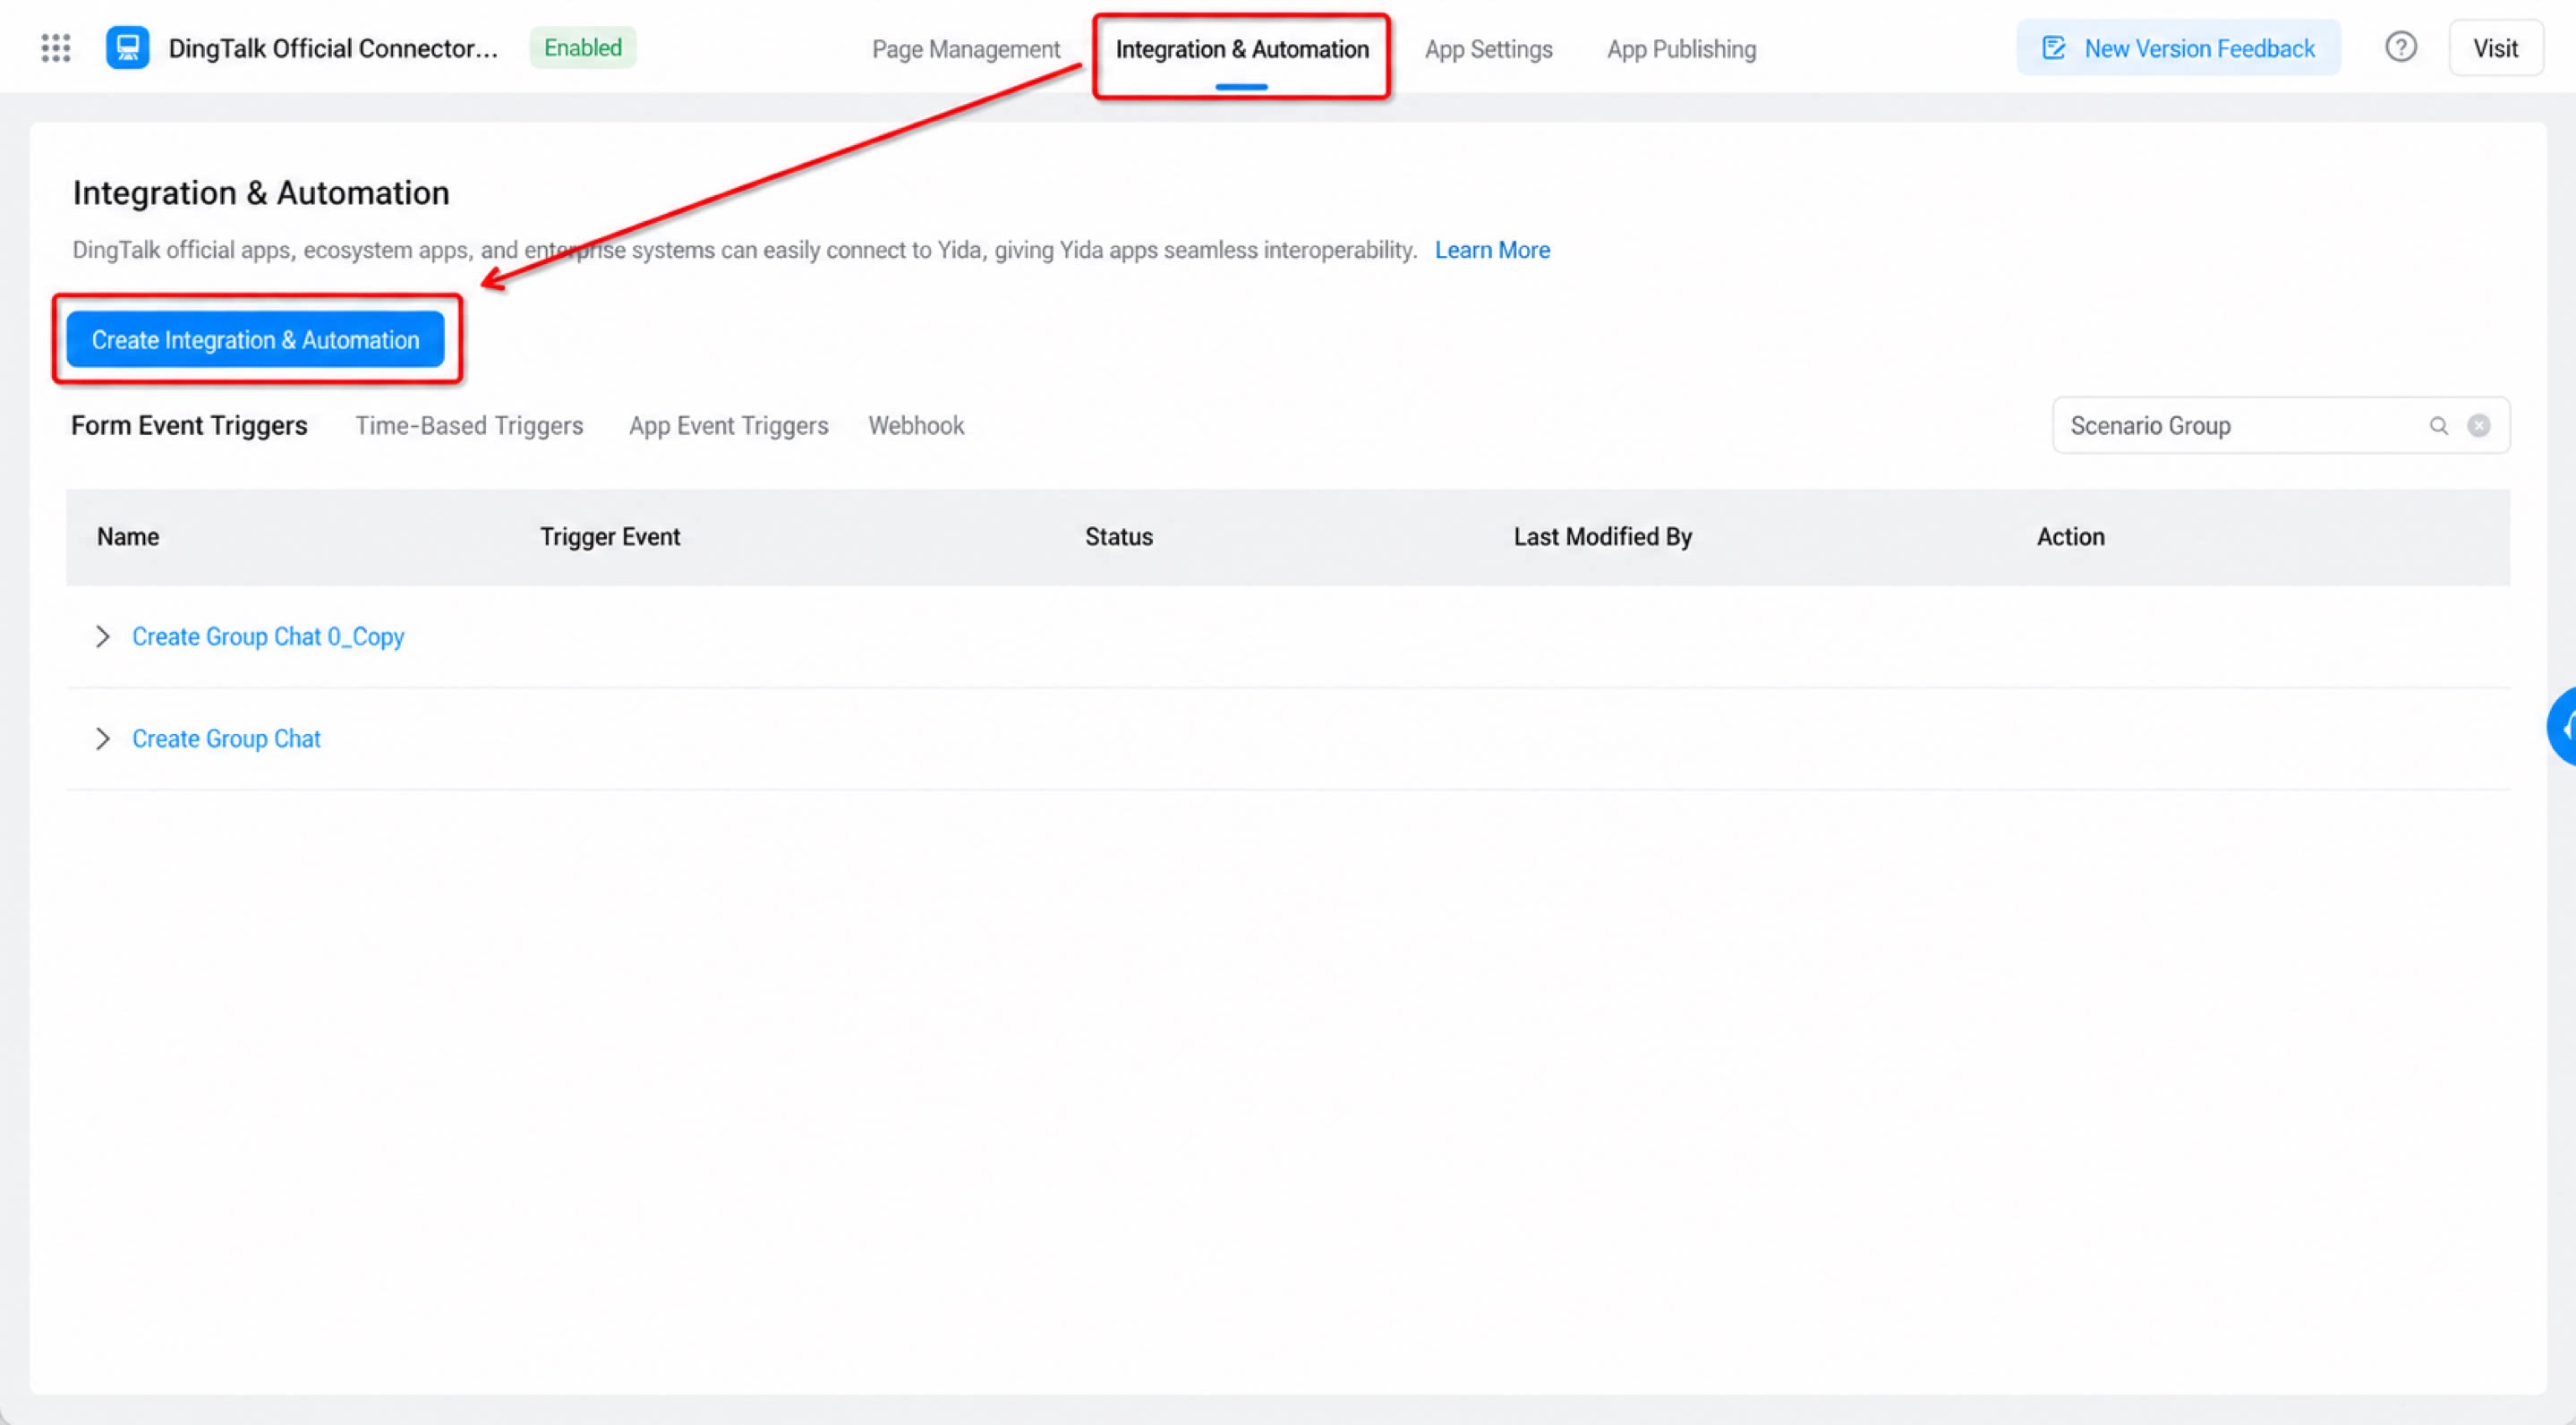
- Go to the admin console >> Integration & Automation >> “Create Integration & Automation”.
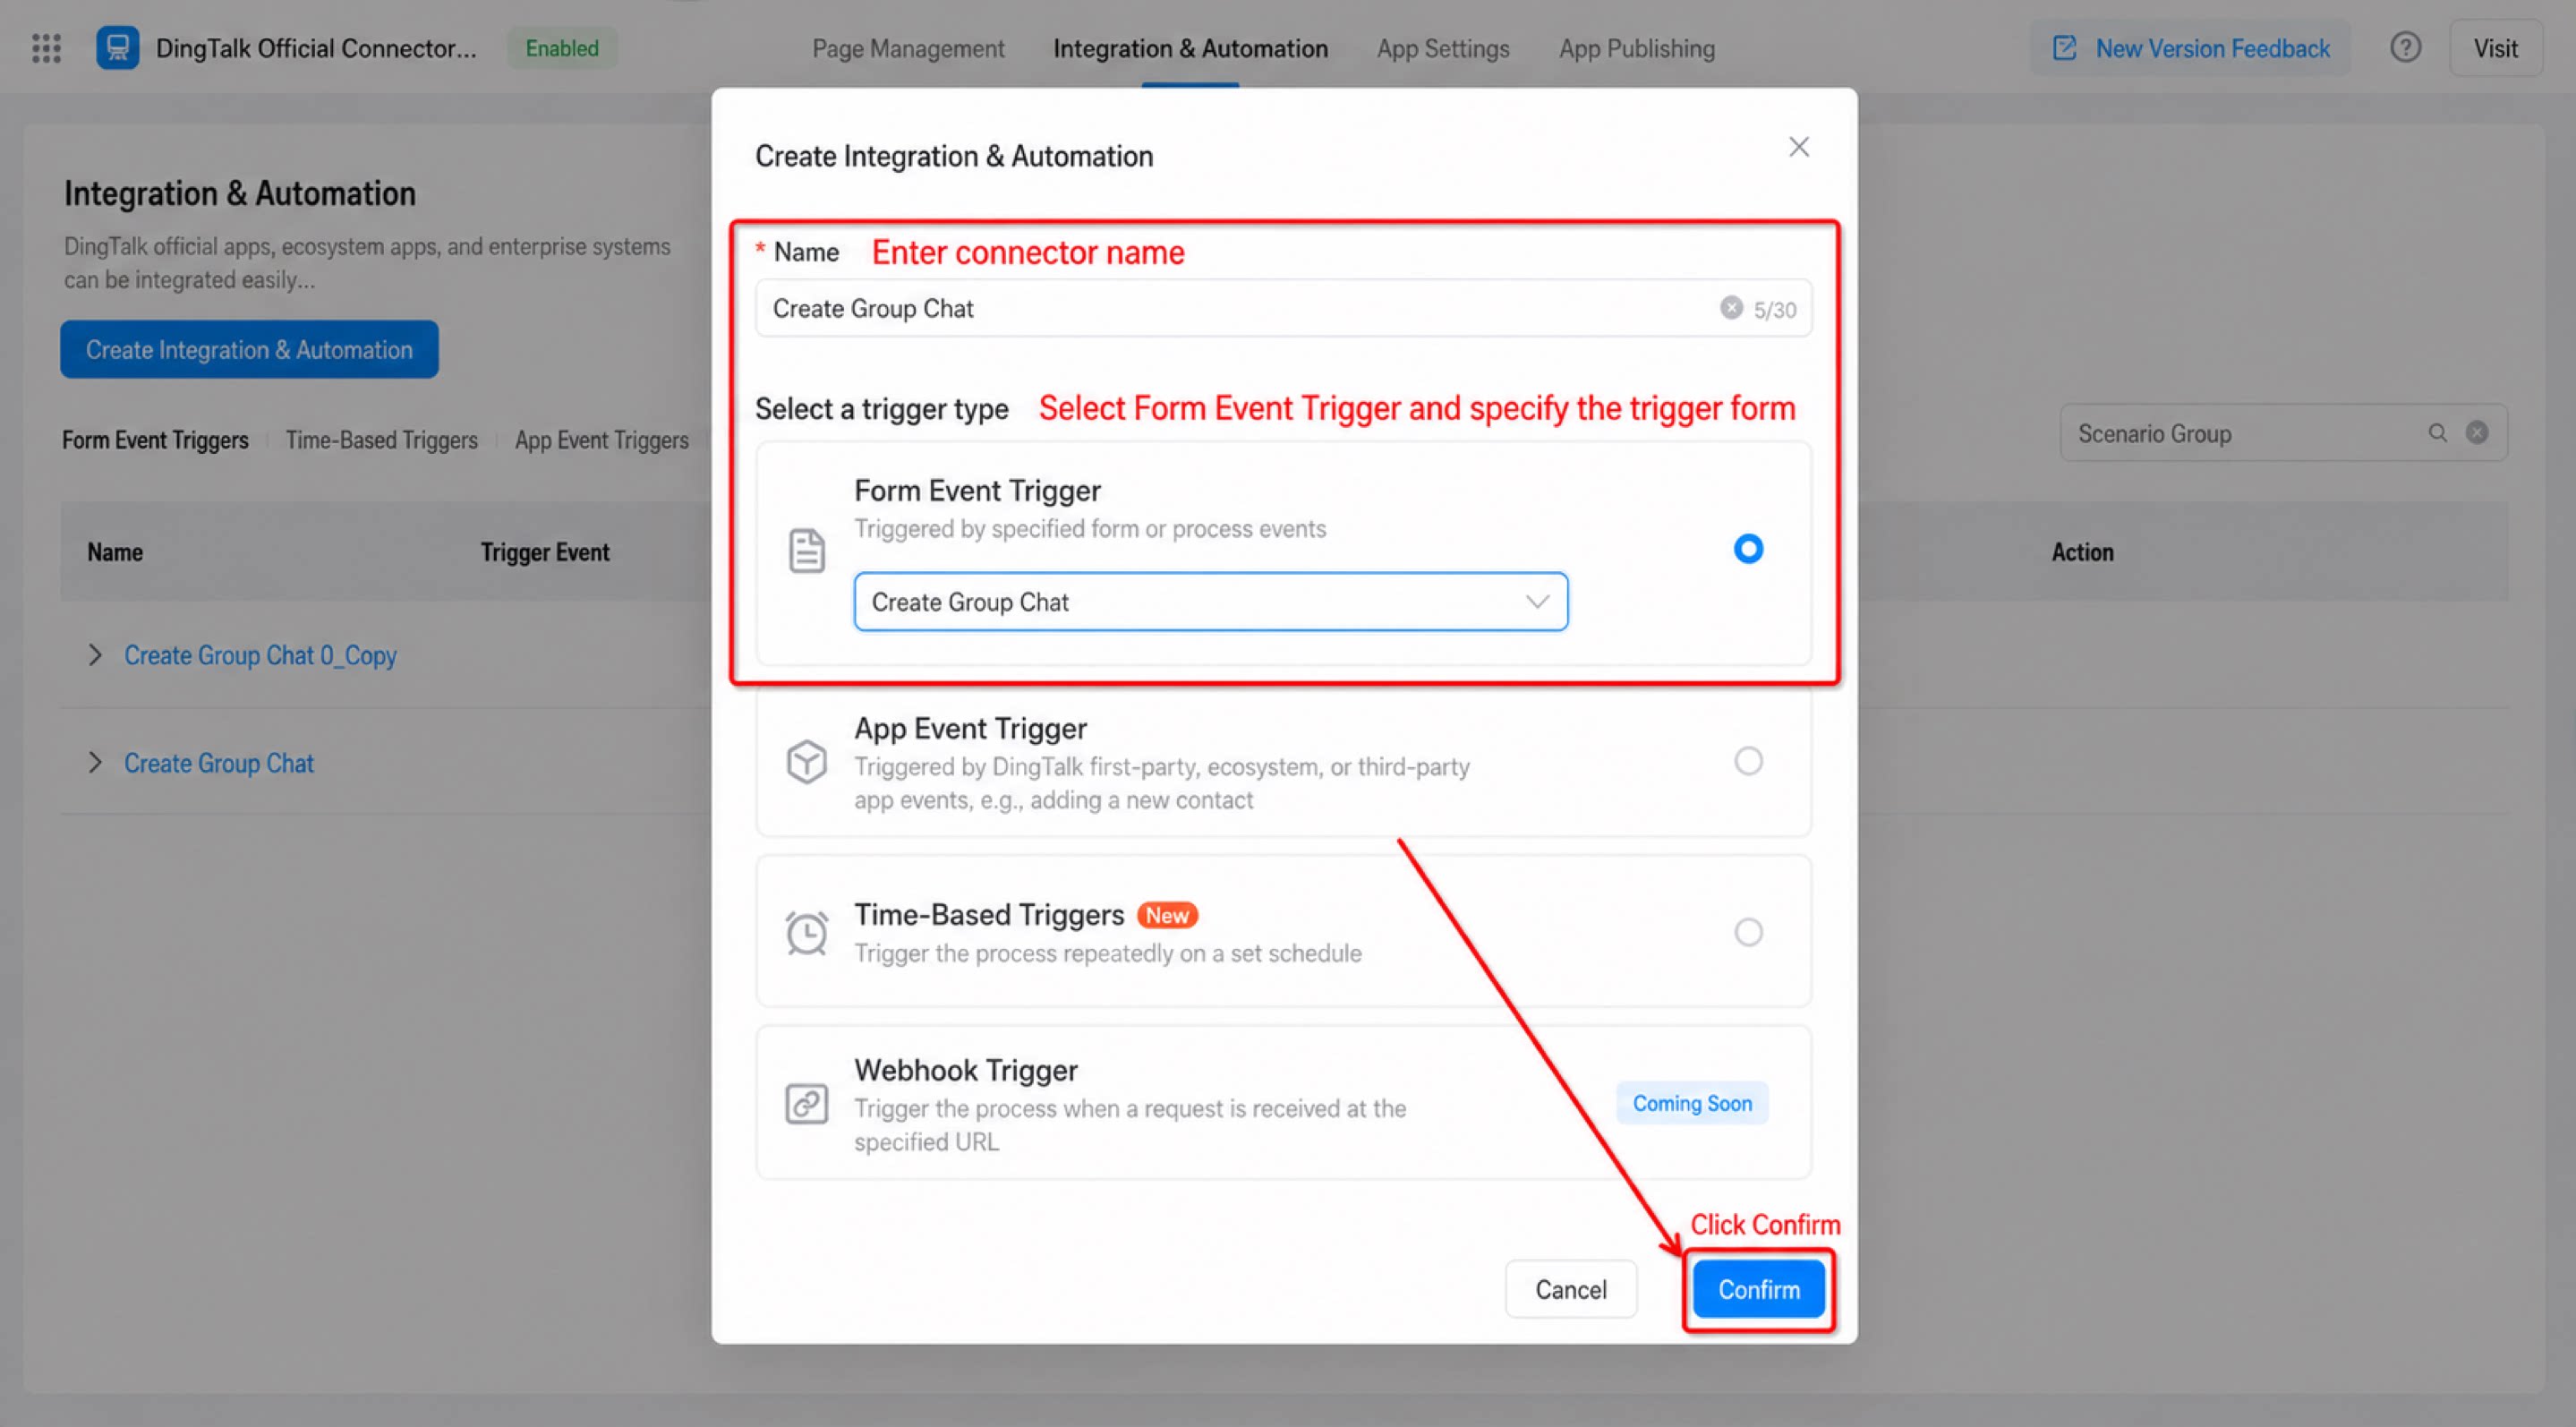
- In the “Create Integration & Automation” dialog >> name the connector “Create Scenario Group” >> select “Form event trigger” as the trigger type and specify the trigger form >> click Confirm.
Step 3: Configure Integration & Automation
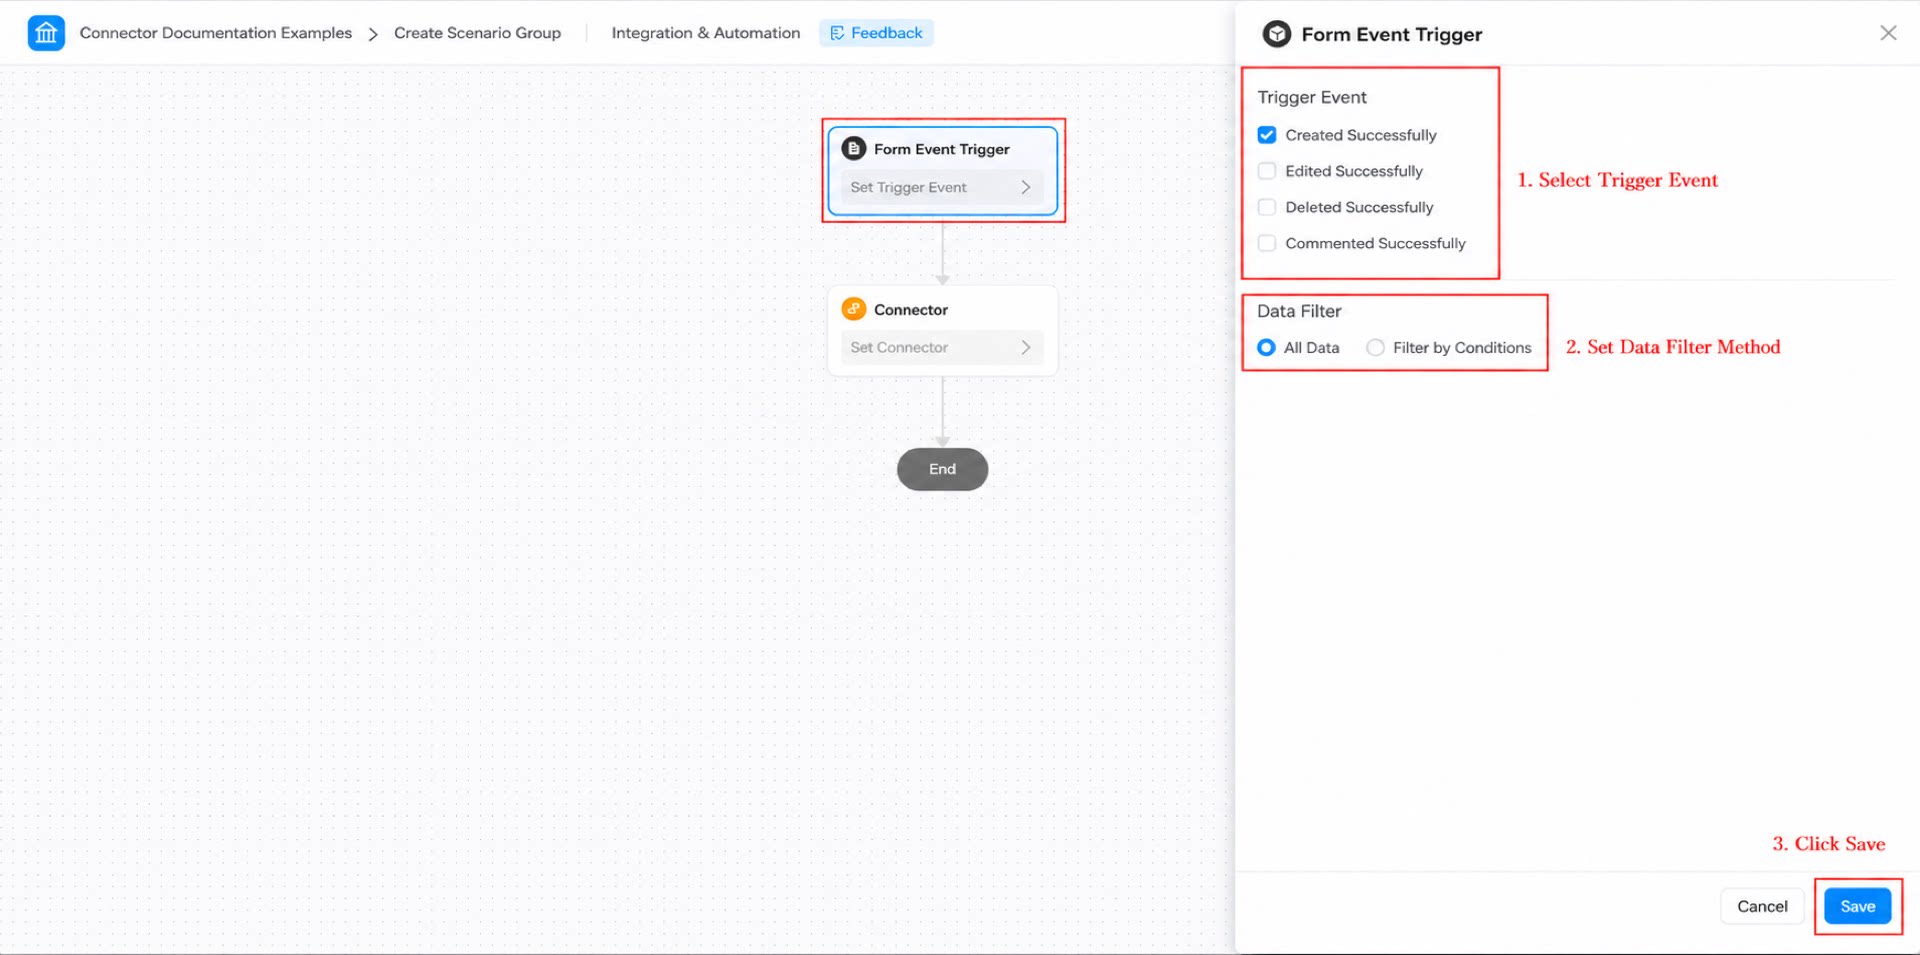
Configure the Form Trigger Event
Steps: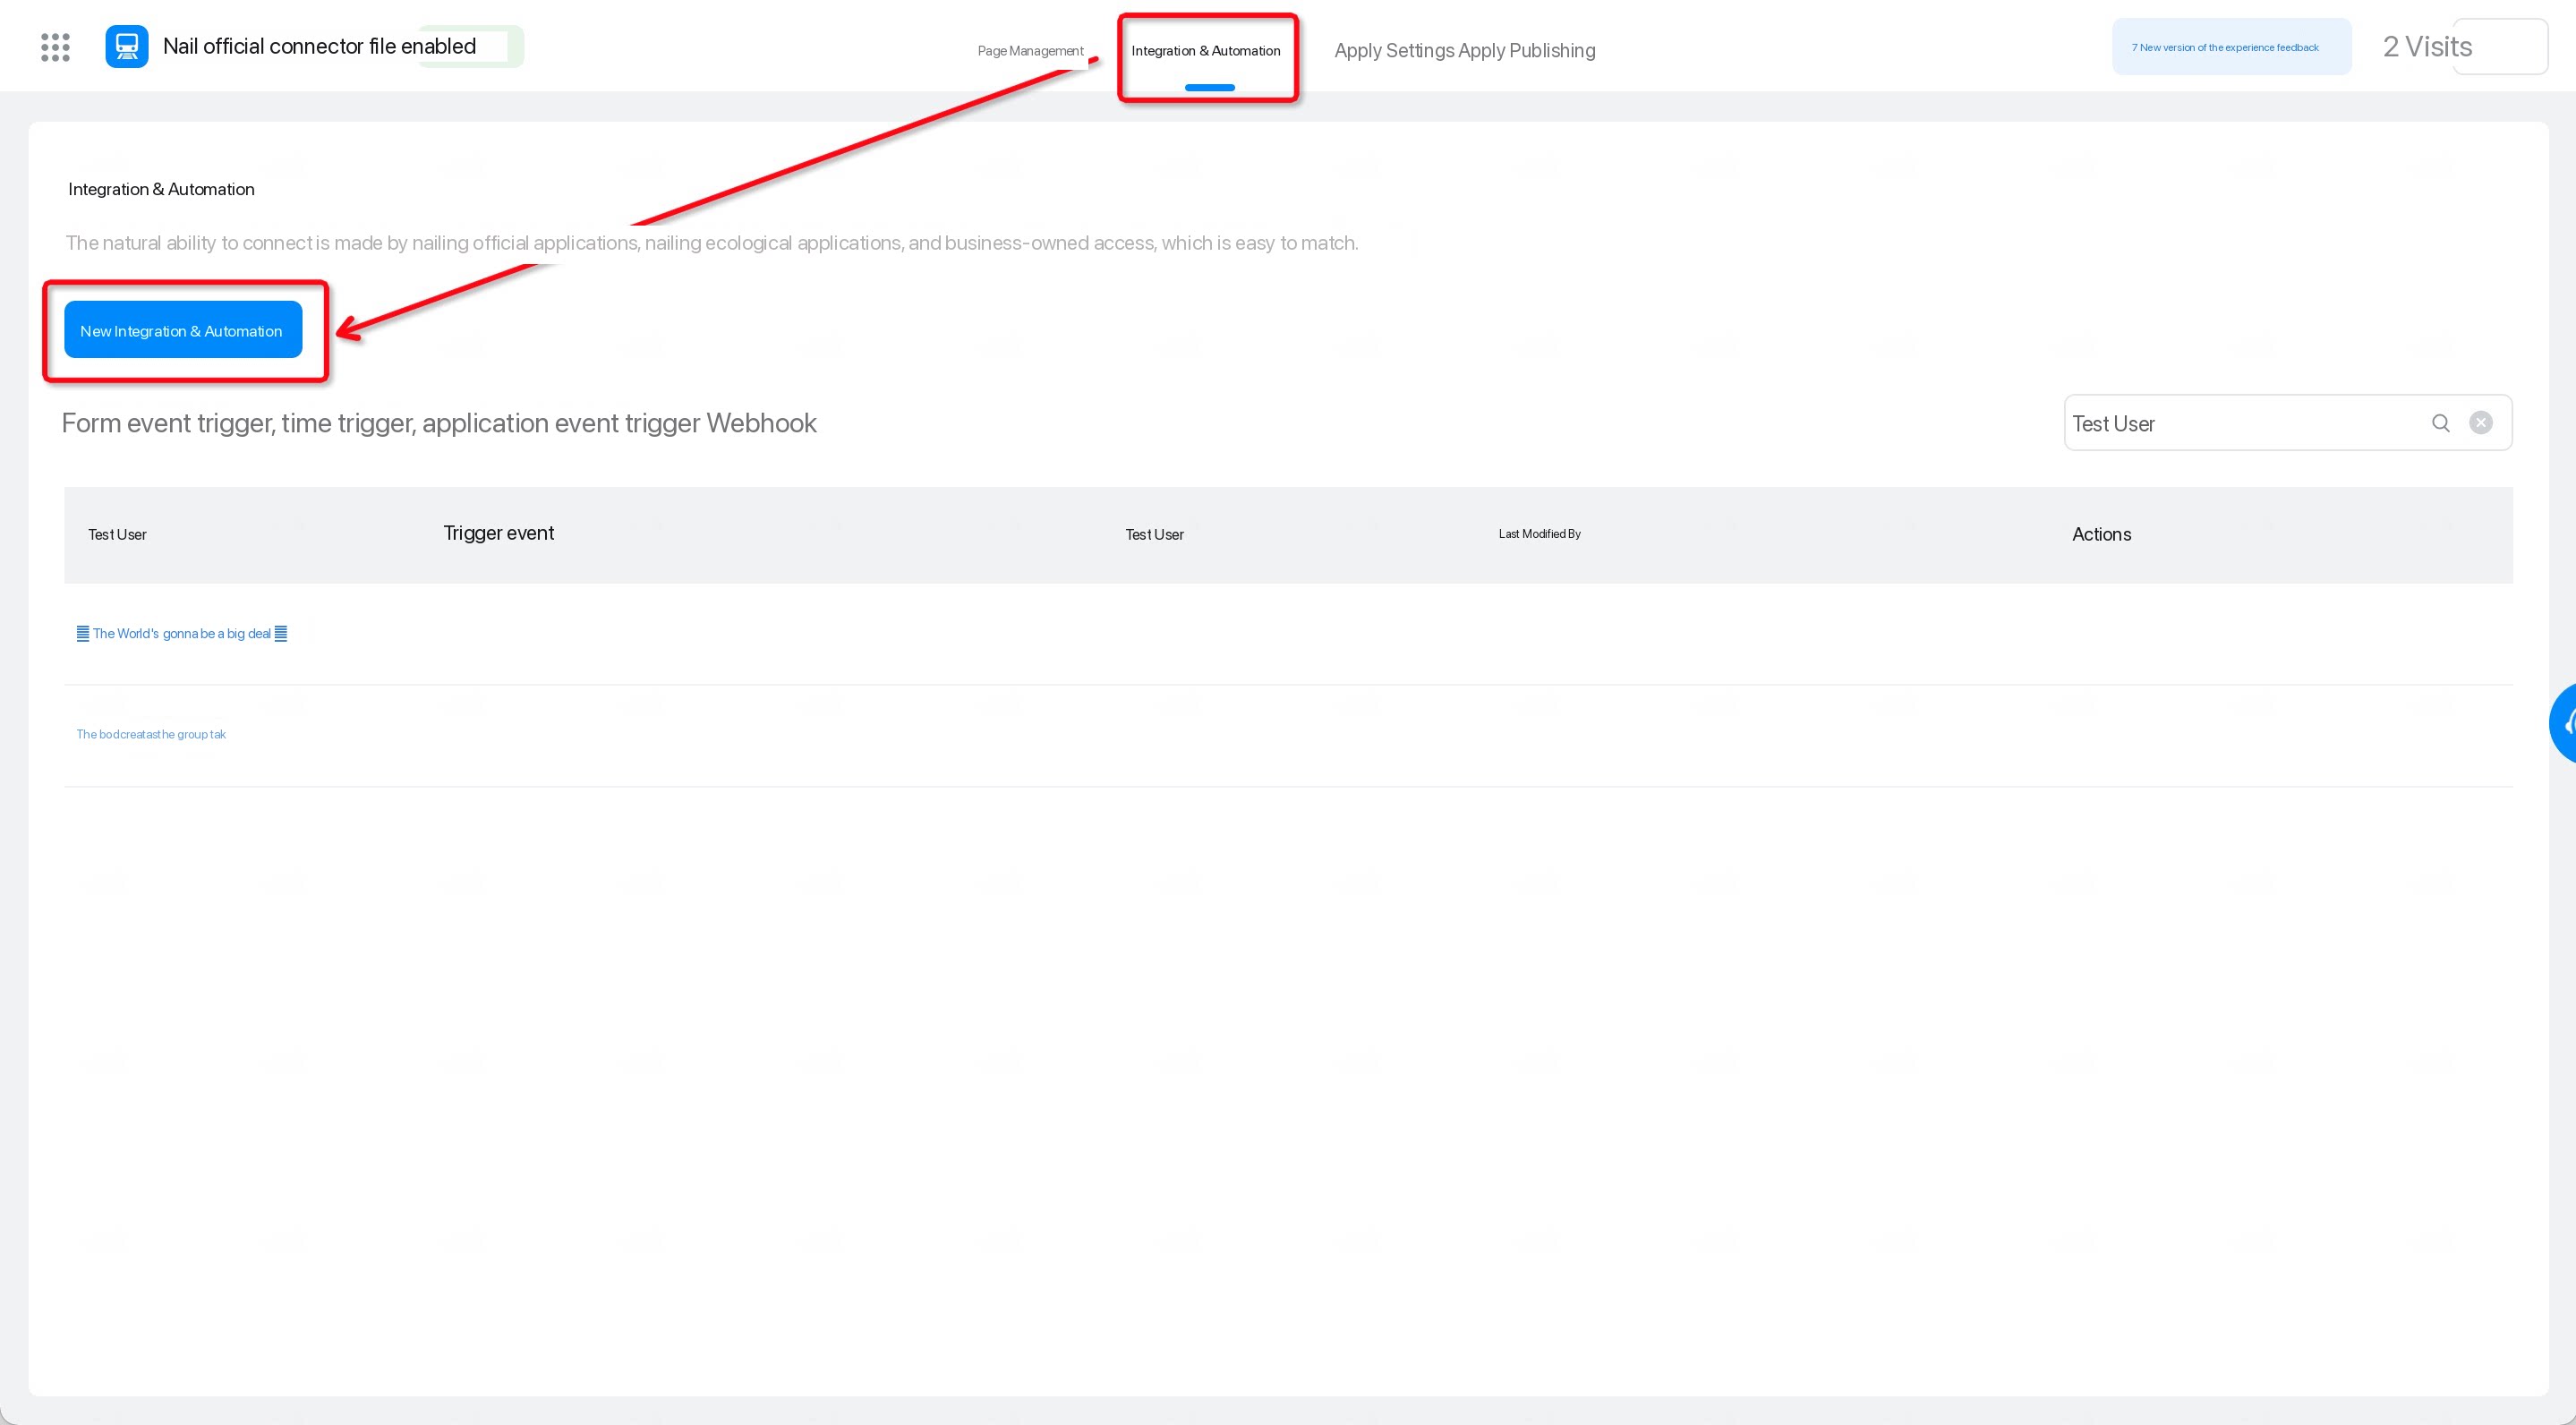
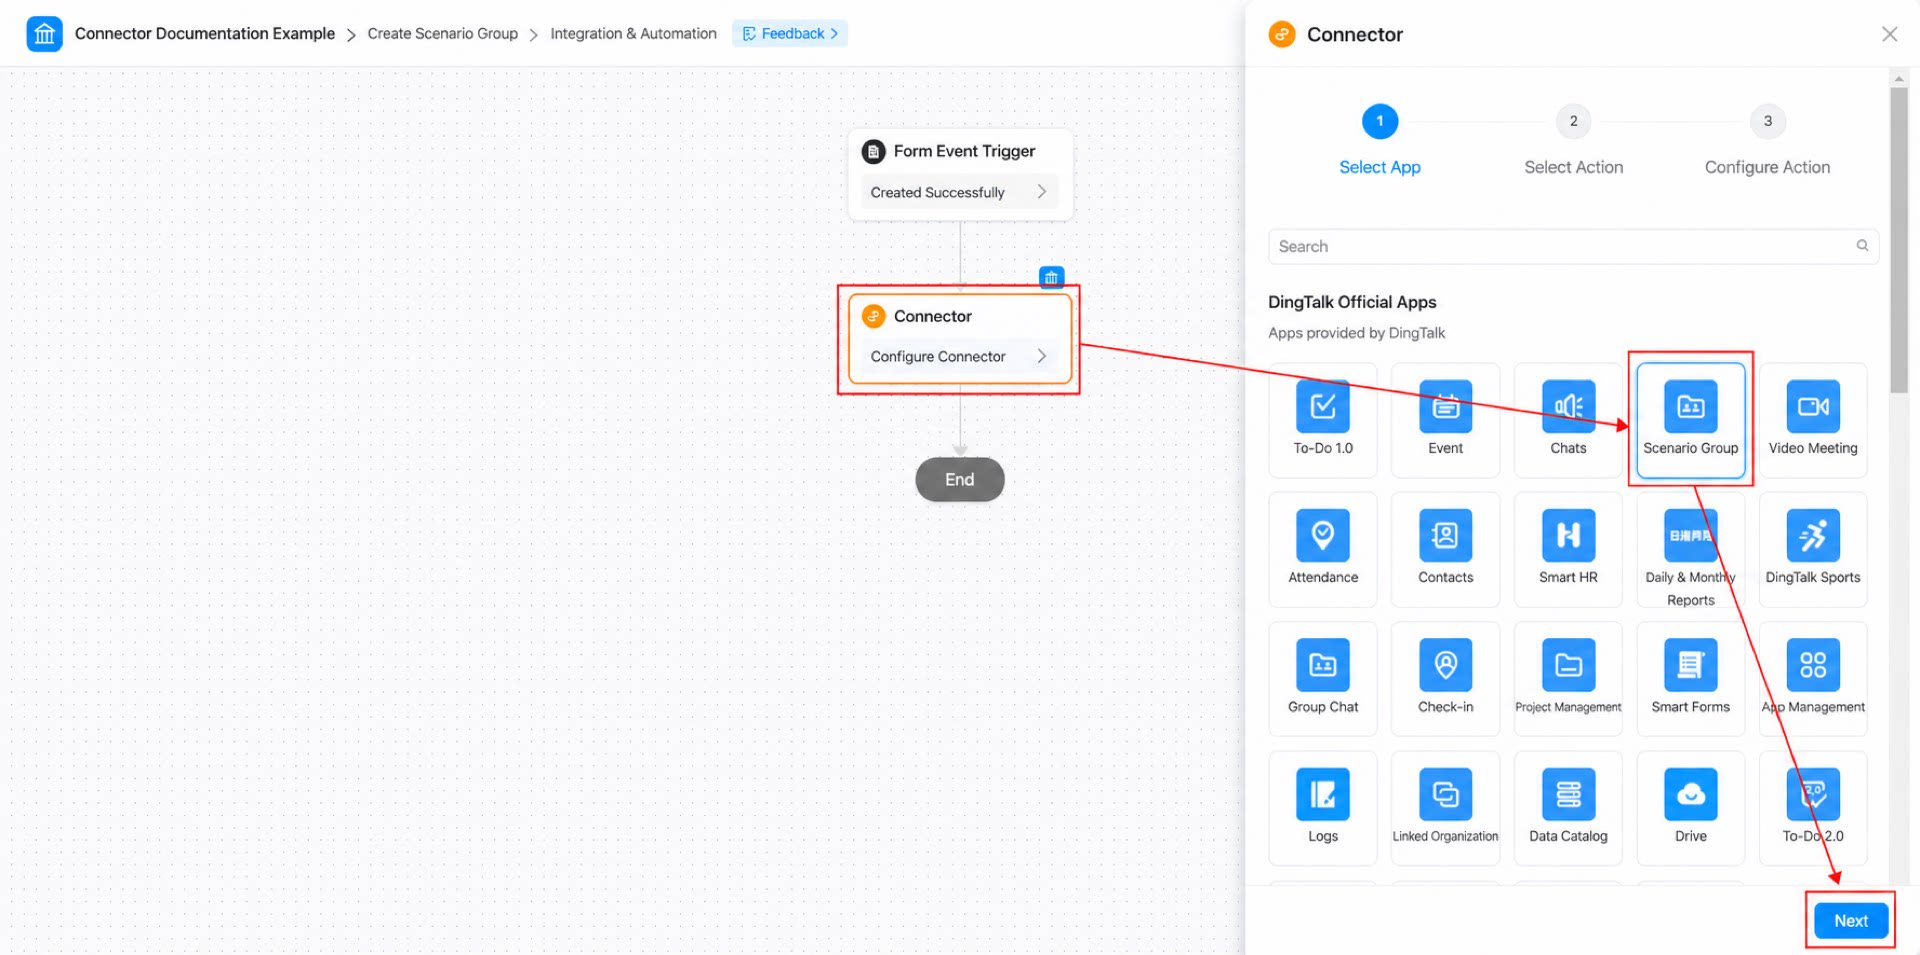
Configure the Connector
Steps:- Configure the “Connector” node. Under Select app, select “Scenario Group”, then click Next.
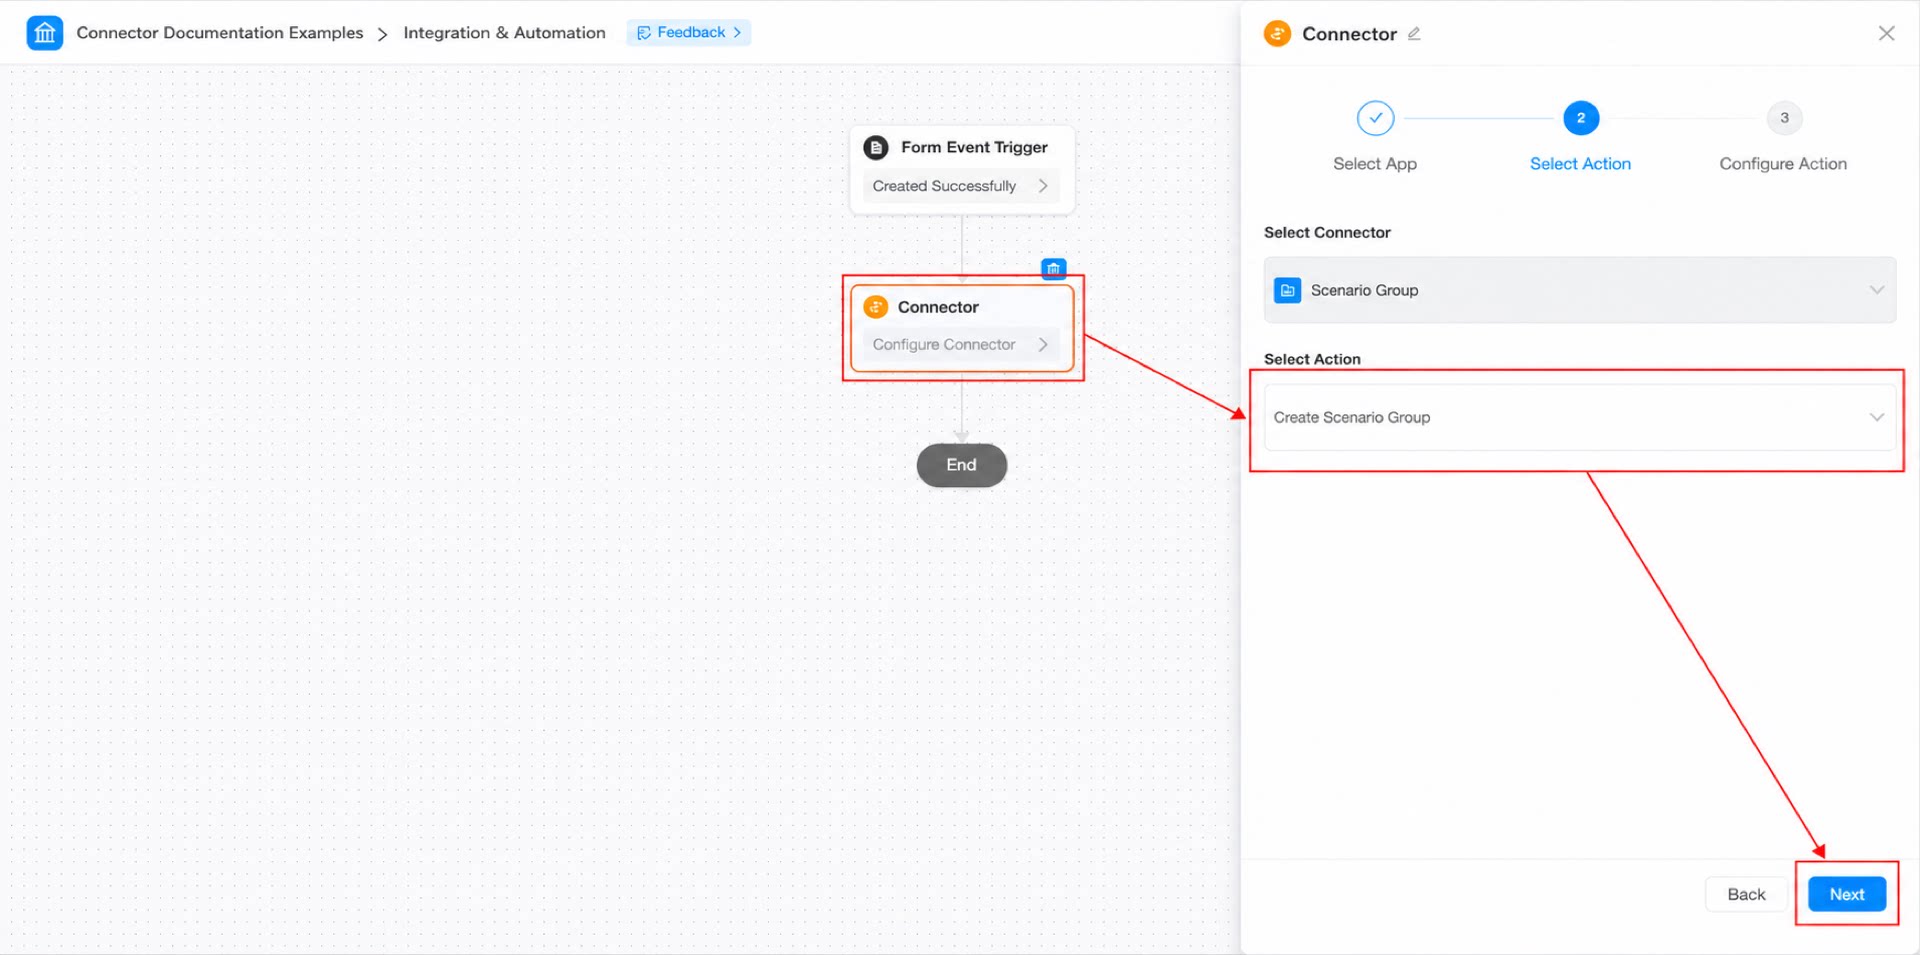
- Under Select action, select the “Create Scenario Group” action, then click Next.
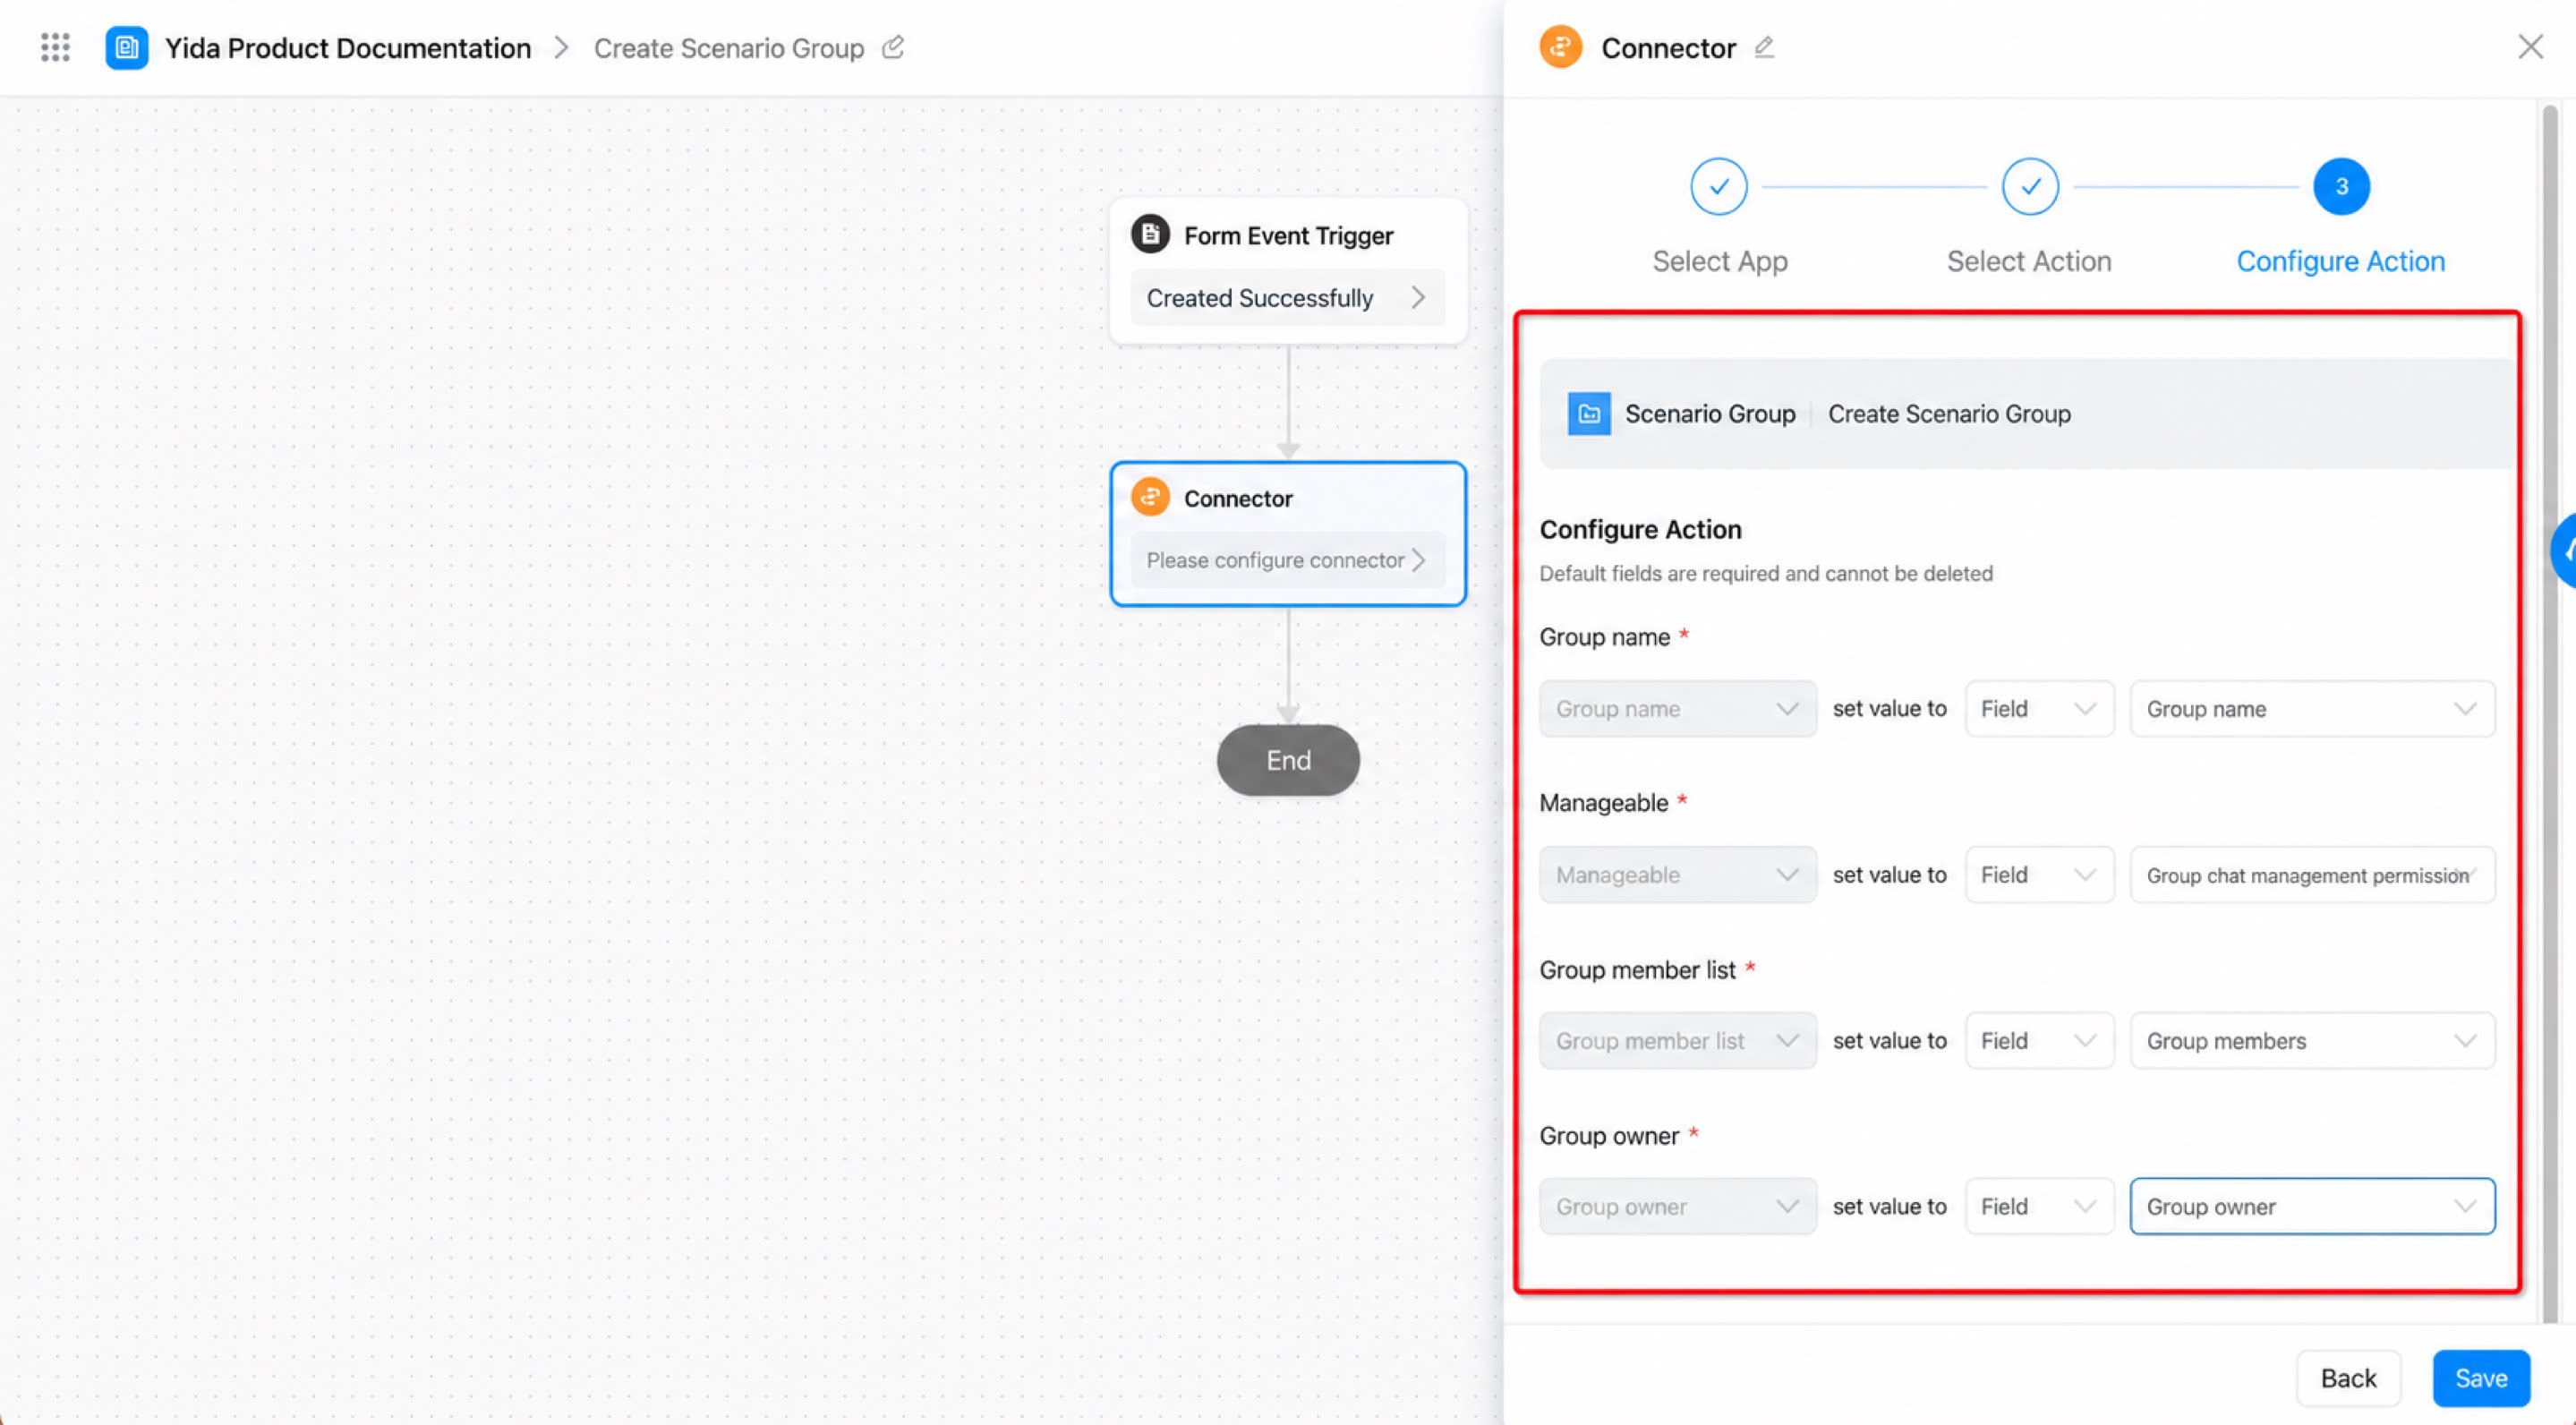
- Under Configure action, complete each configuration item, then click Save.
- Click the “Save” button in the upper-right corner of the page, then click the “Publish” button.
Step 3: Configure To-Do Task Content
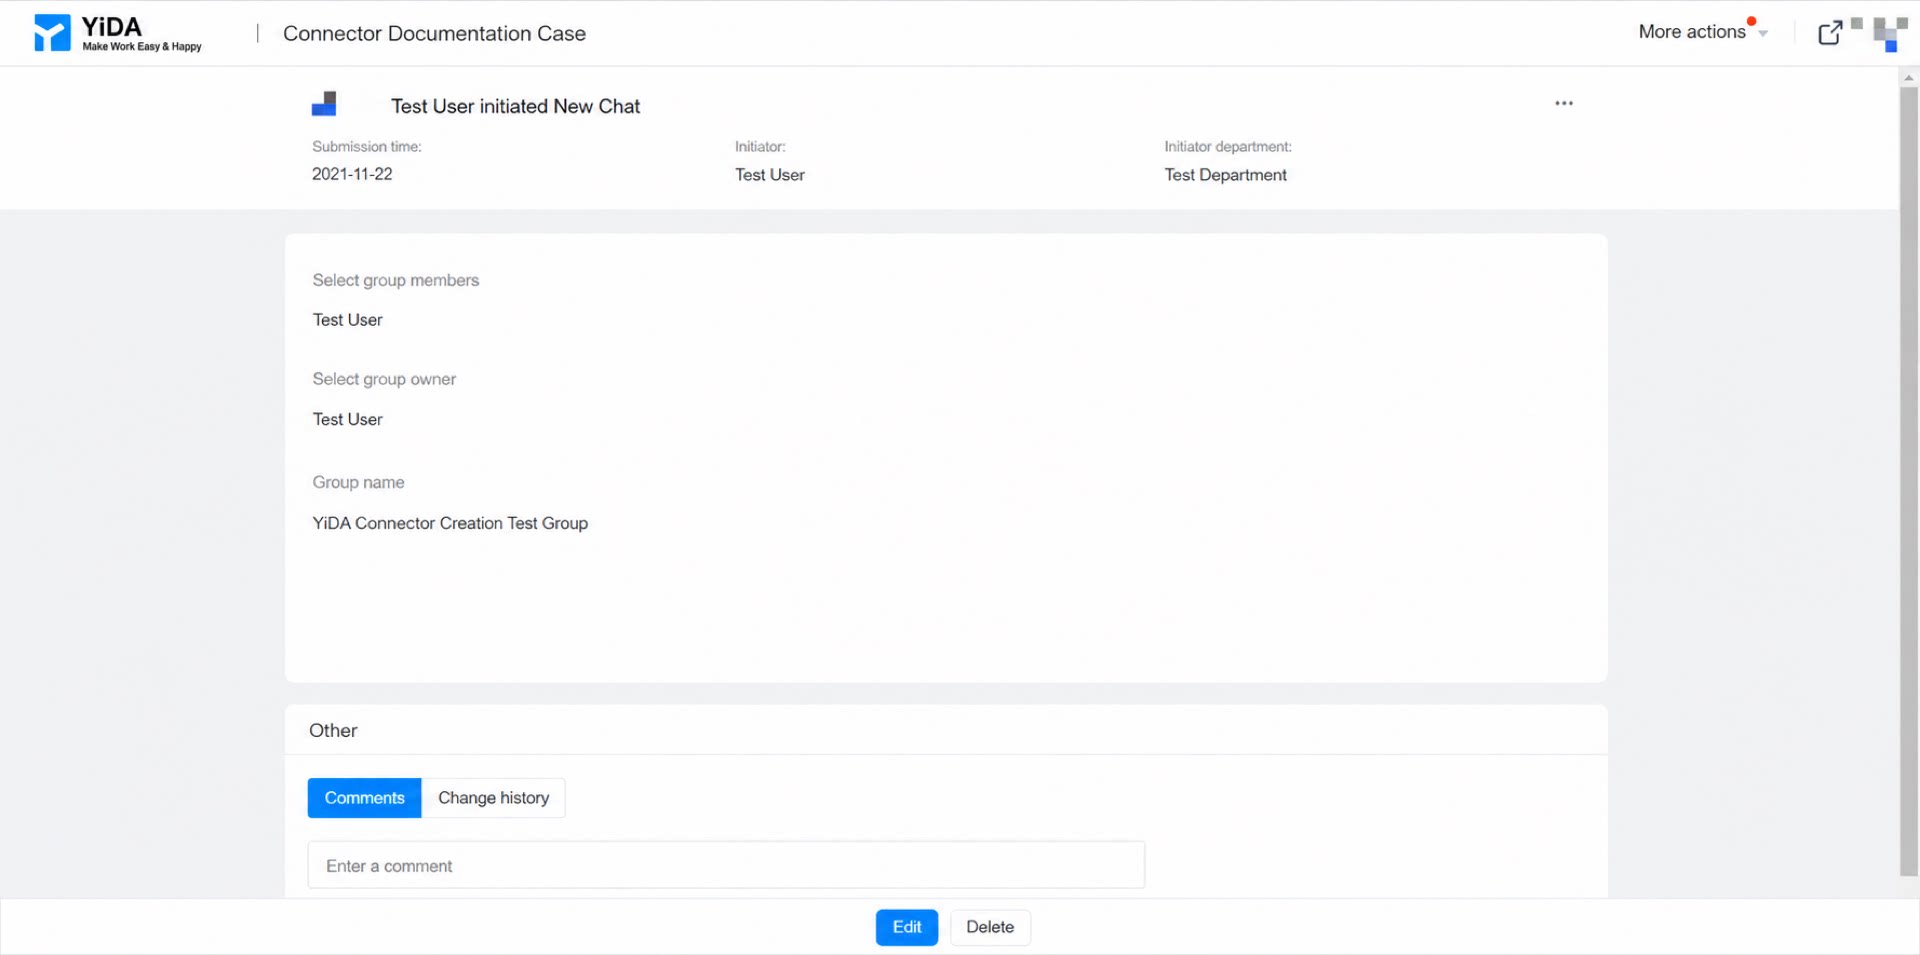
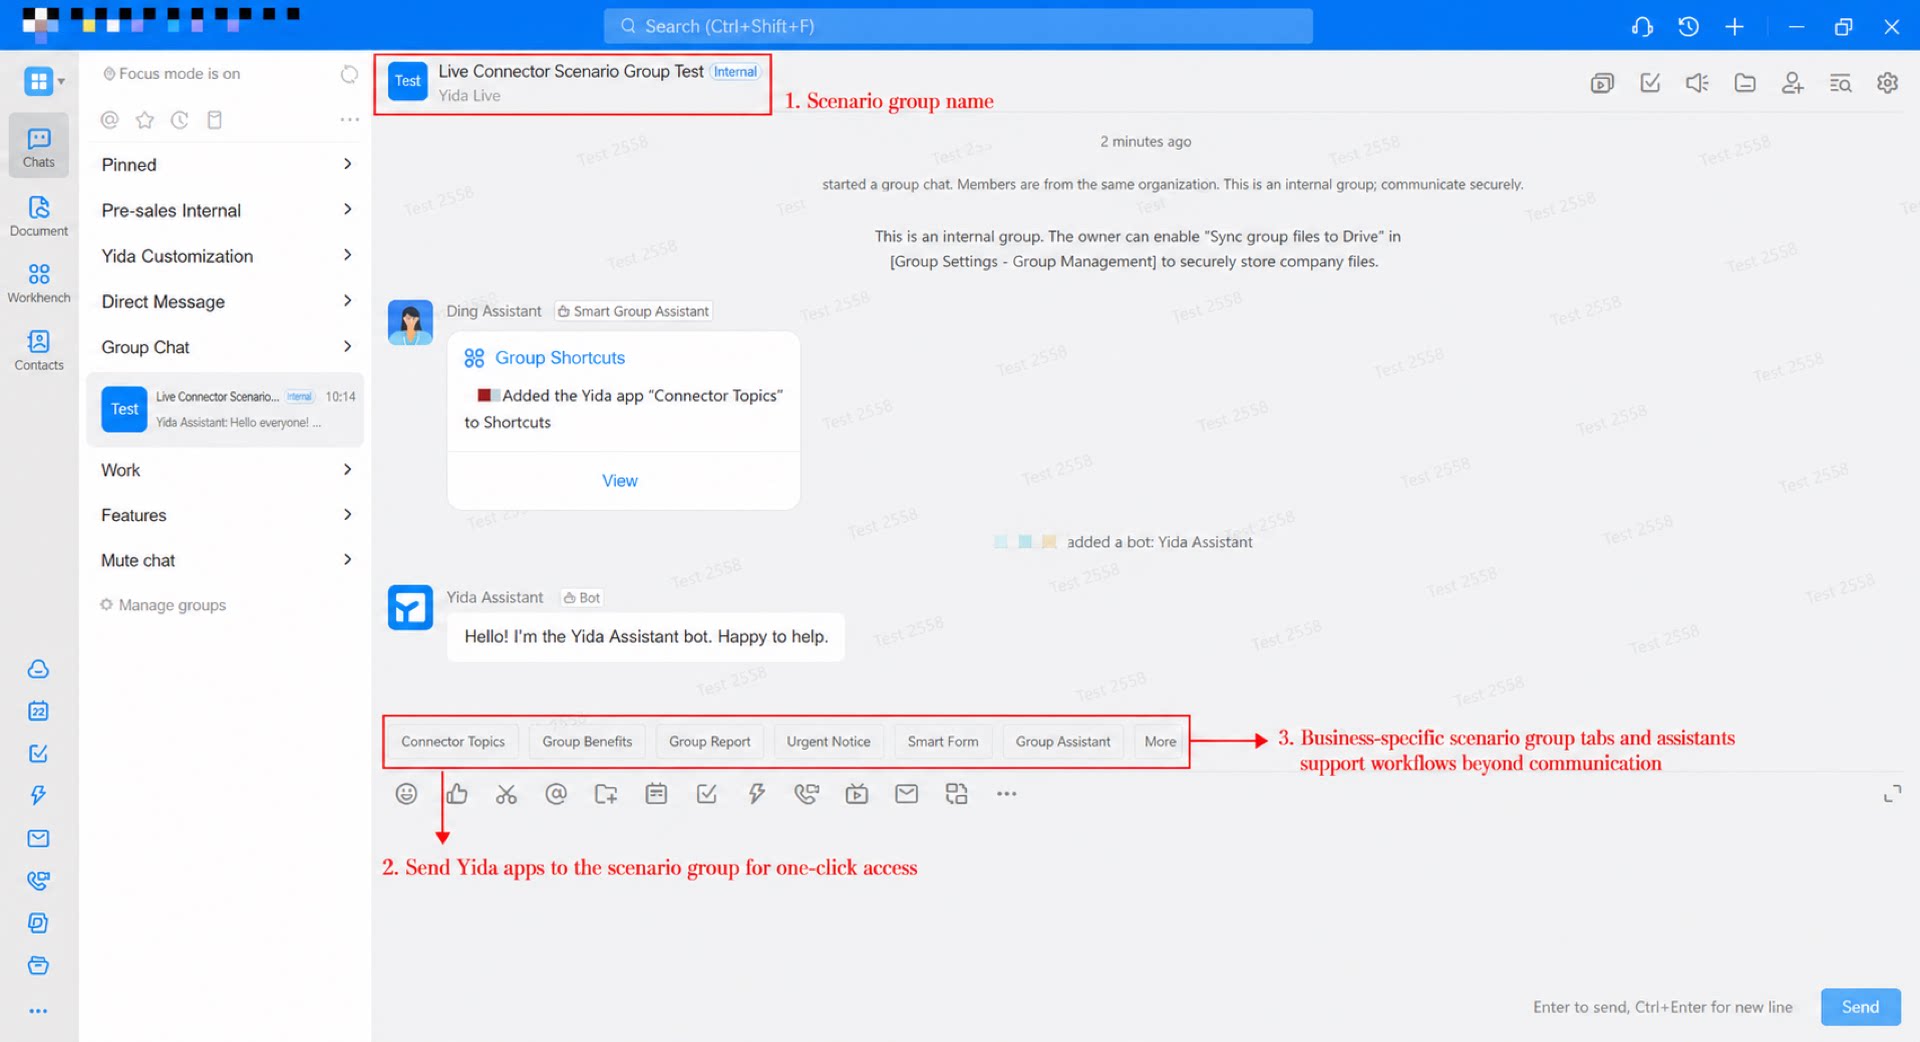
Once the two steps above are complete, the group chat creation feature is ready. Next, submit the form to trigger the connector and automatically create a group chat in DingTalk. Steps: