Chats
Chats Calendar
 Meetings
 Contacts
 Mail
Mail Docs
Docs Drive
Drive AI Table
 AI Minutes
 Attendance
 Approval
 YiDA
YiDA Admin Console
Use Case
When a user completes a task in YiDA, or reaches a specific metric identified through data analysis, and needs to notify group members, use a YiDA connector to send a message to a DingTalk group chat.Procedure
Step 1: Create the Base Table
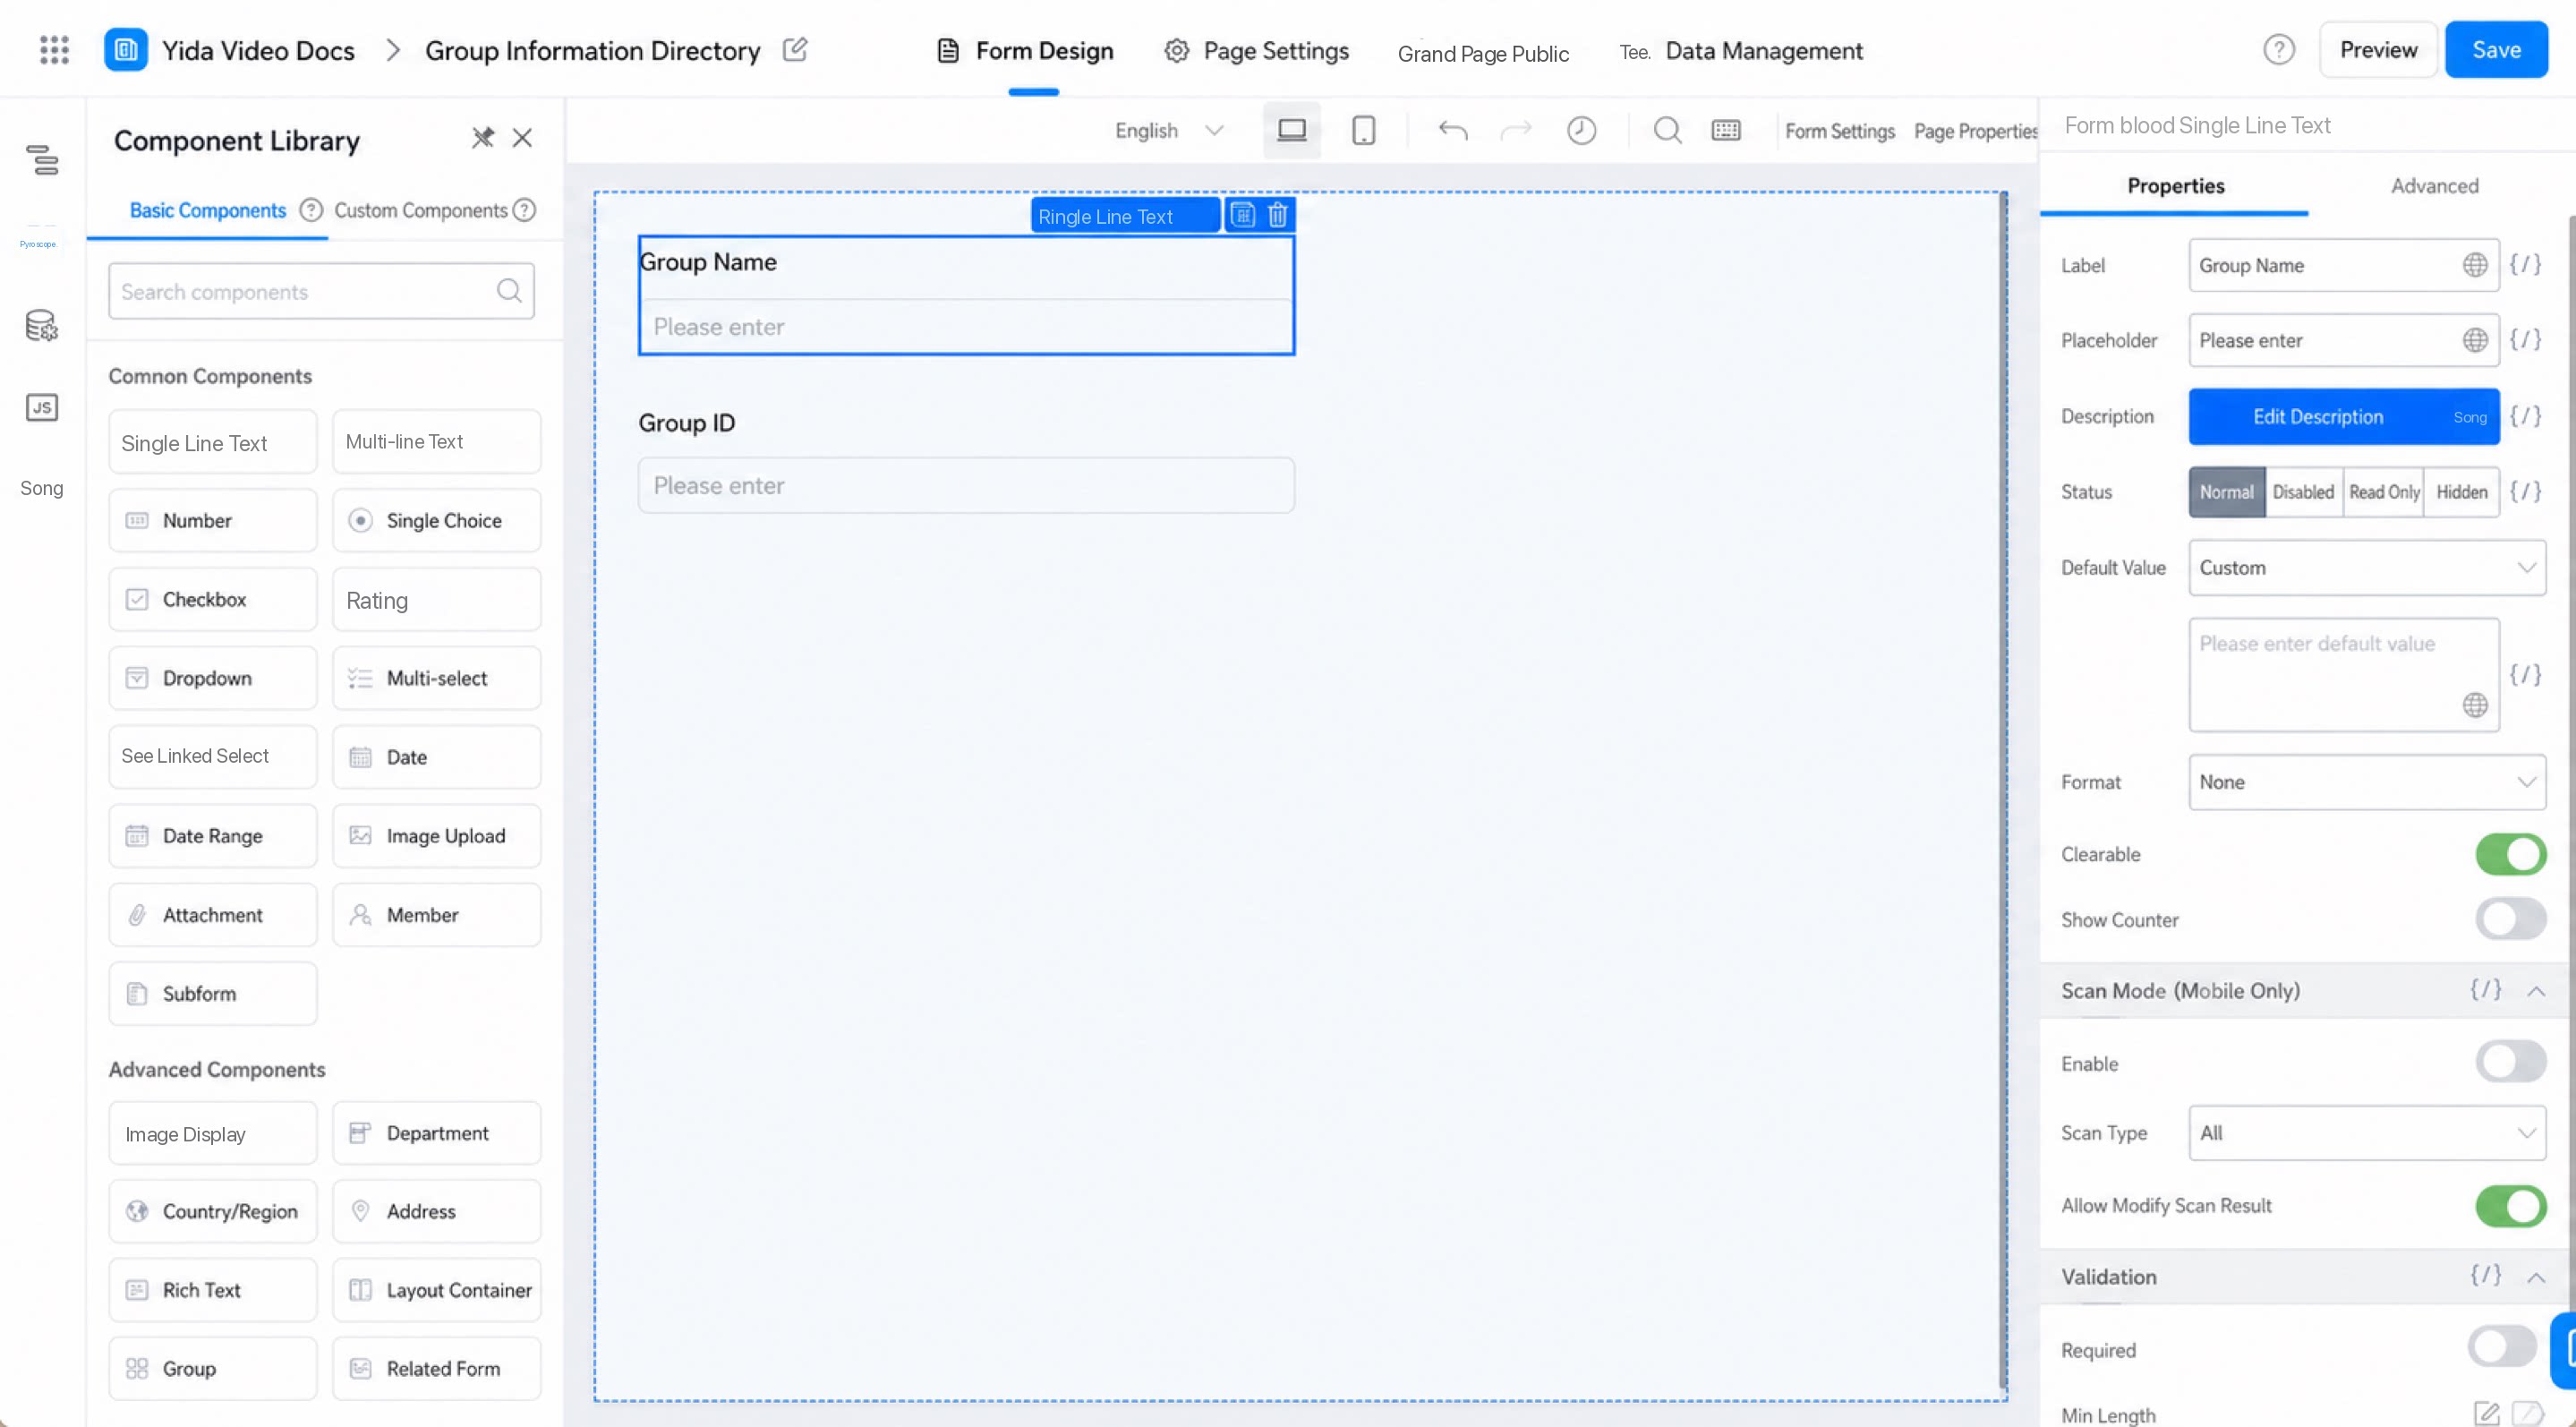
Create a form to record information about group chats created through the connector, including the group name and group ID. Procedure:- Create a regular form and name it “Group Info Record Table”.
- Add two Single-line text components and name them “Group name” and “Group ID”. (See Figure 2.1-1.)
- Click Save in the upper-right corner of the page.
Step 2: Retrieve Group Chat Information
With the base table “Group Info Record Table” ready, modify the connector that creates group chats so that the group chat information is automatically written into the “Group Info Record Table”. Procedure:- Edit the Integration & Automation flow named “New Chat”, add an “Add data” node to the flow, and configure it. (See Figure 2.2-1.)
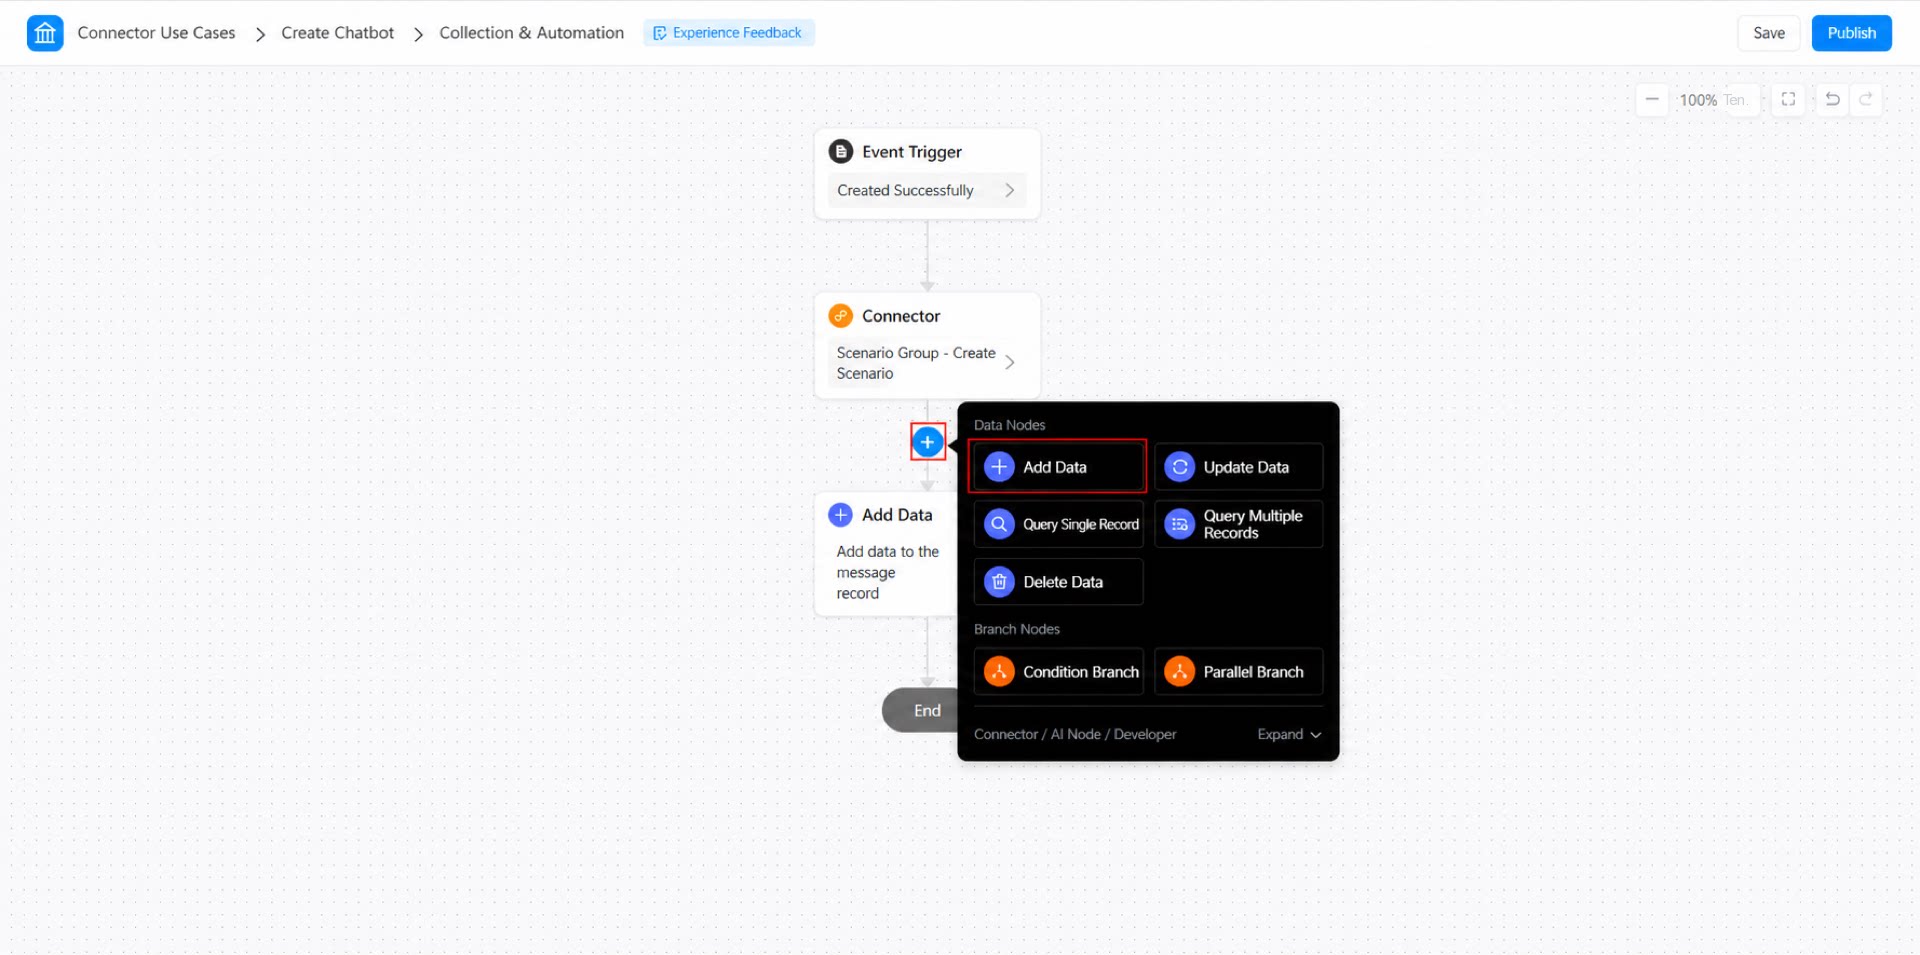
Note: This step ensures that whenever a scenario group is created through the “New Chat” form, the group information is automatically added to the “Group Chat Info Entry” form, providing a data source for subsequent operations.
- Configure the “Add data” node: set the add method to “Add in form”, select “Group Info Record Table” as the form, set the add data option to “Add a single record”, and then configure the fields.
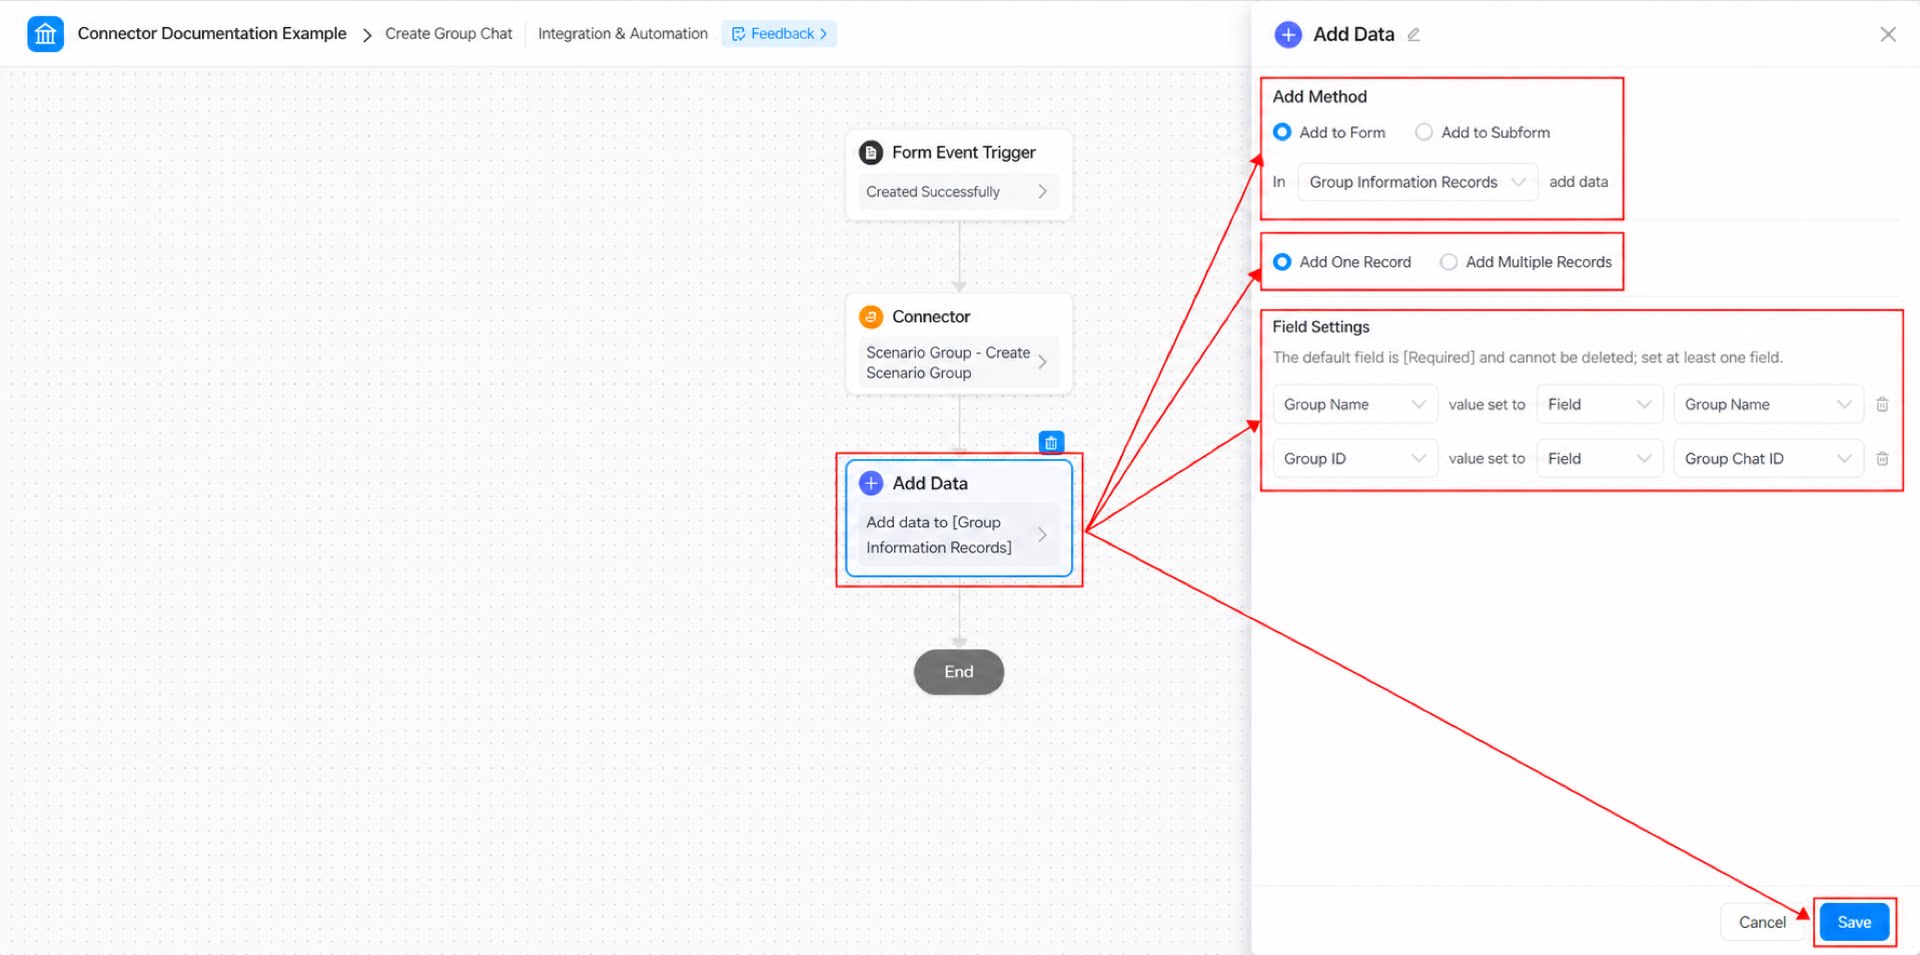
- Click Save in the upper-right corner, then click Publish.
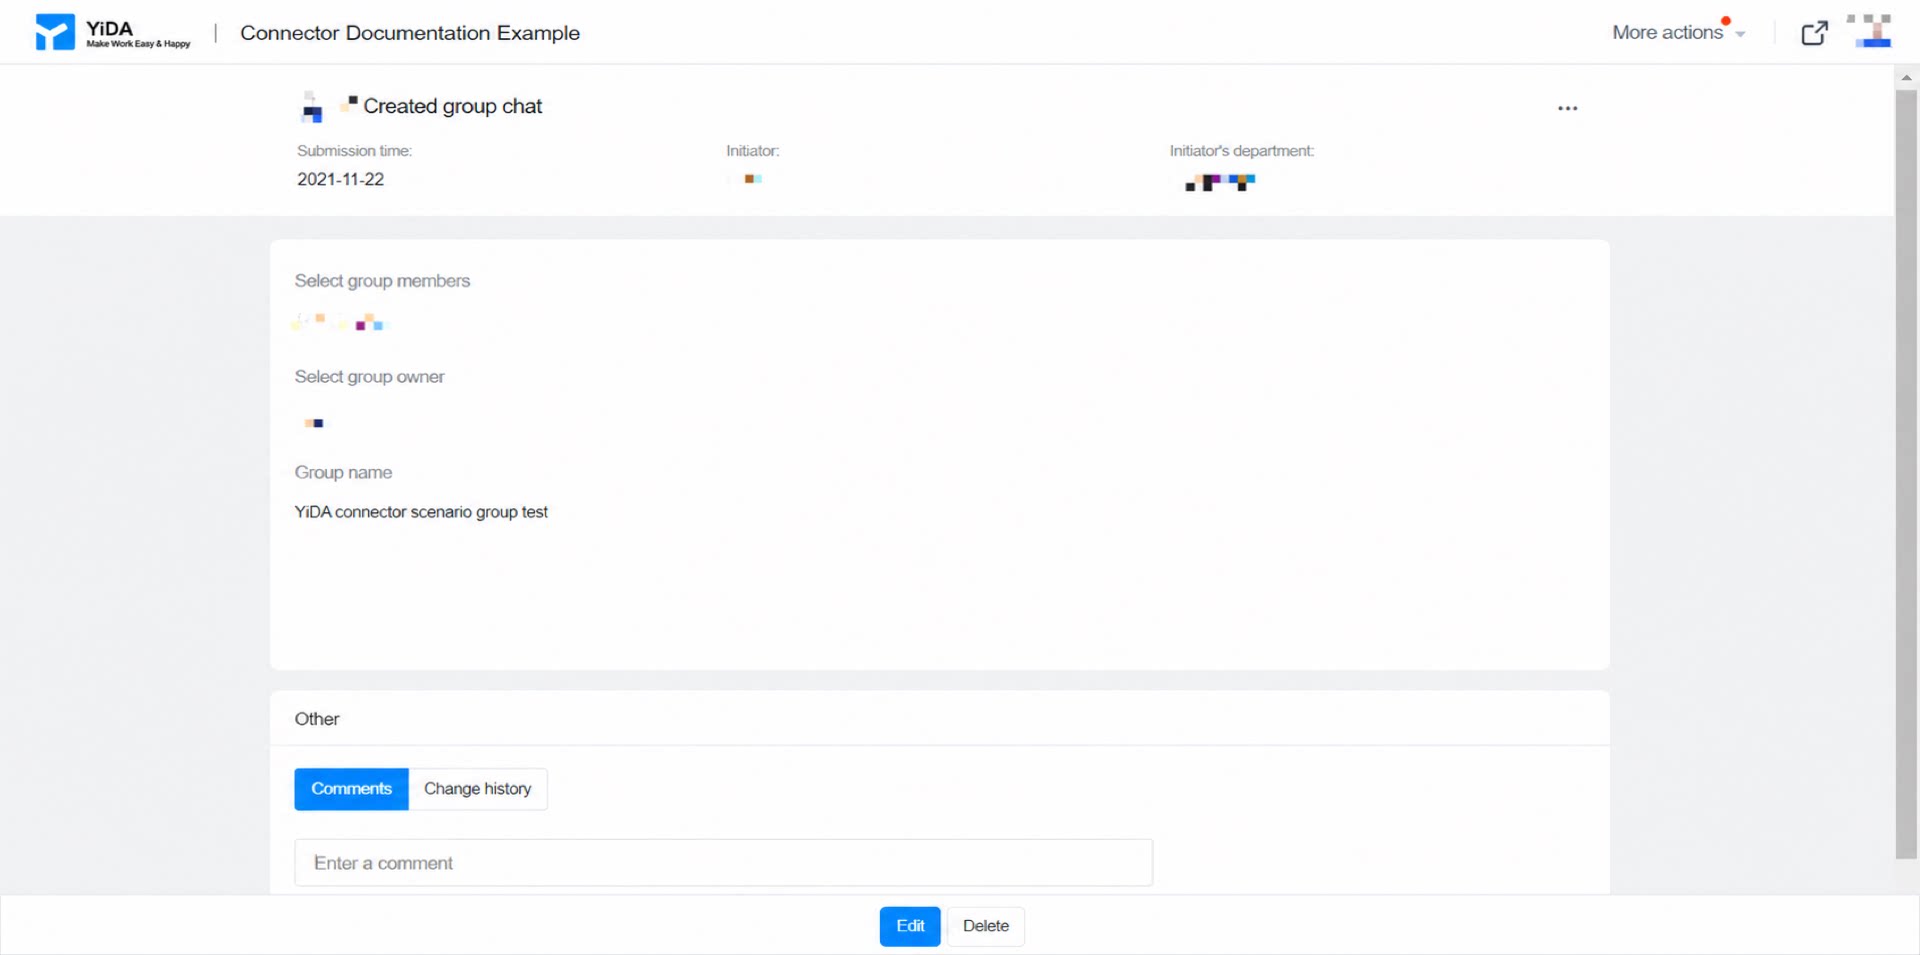
- Submit data through the “New Chat” form for later use. (See Figure 2.2-3.)
Step 3: Create the Form to Send Group Messages
Create a form named “Group Message Content Entry Table” to capture message content. Procedure:- Create a form and name it “Group Message Content Entry Table”.
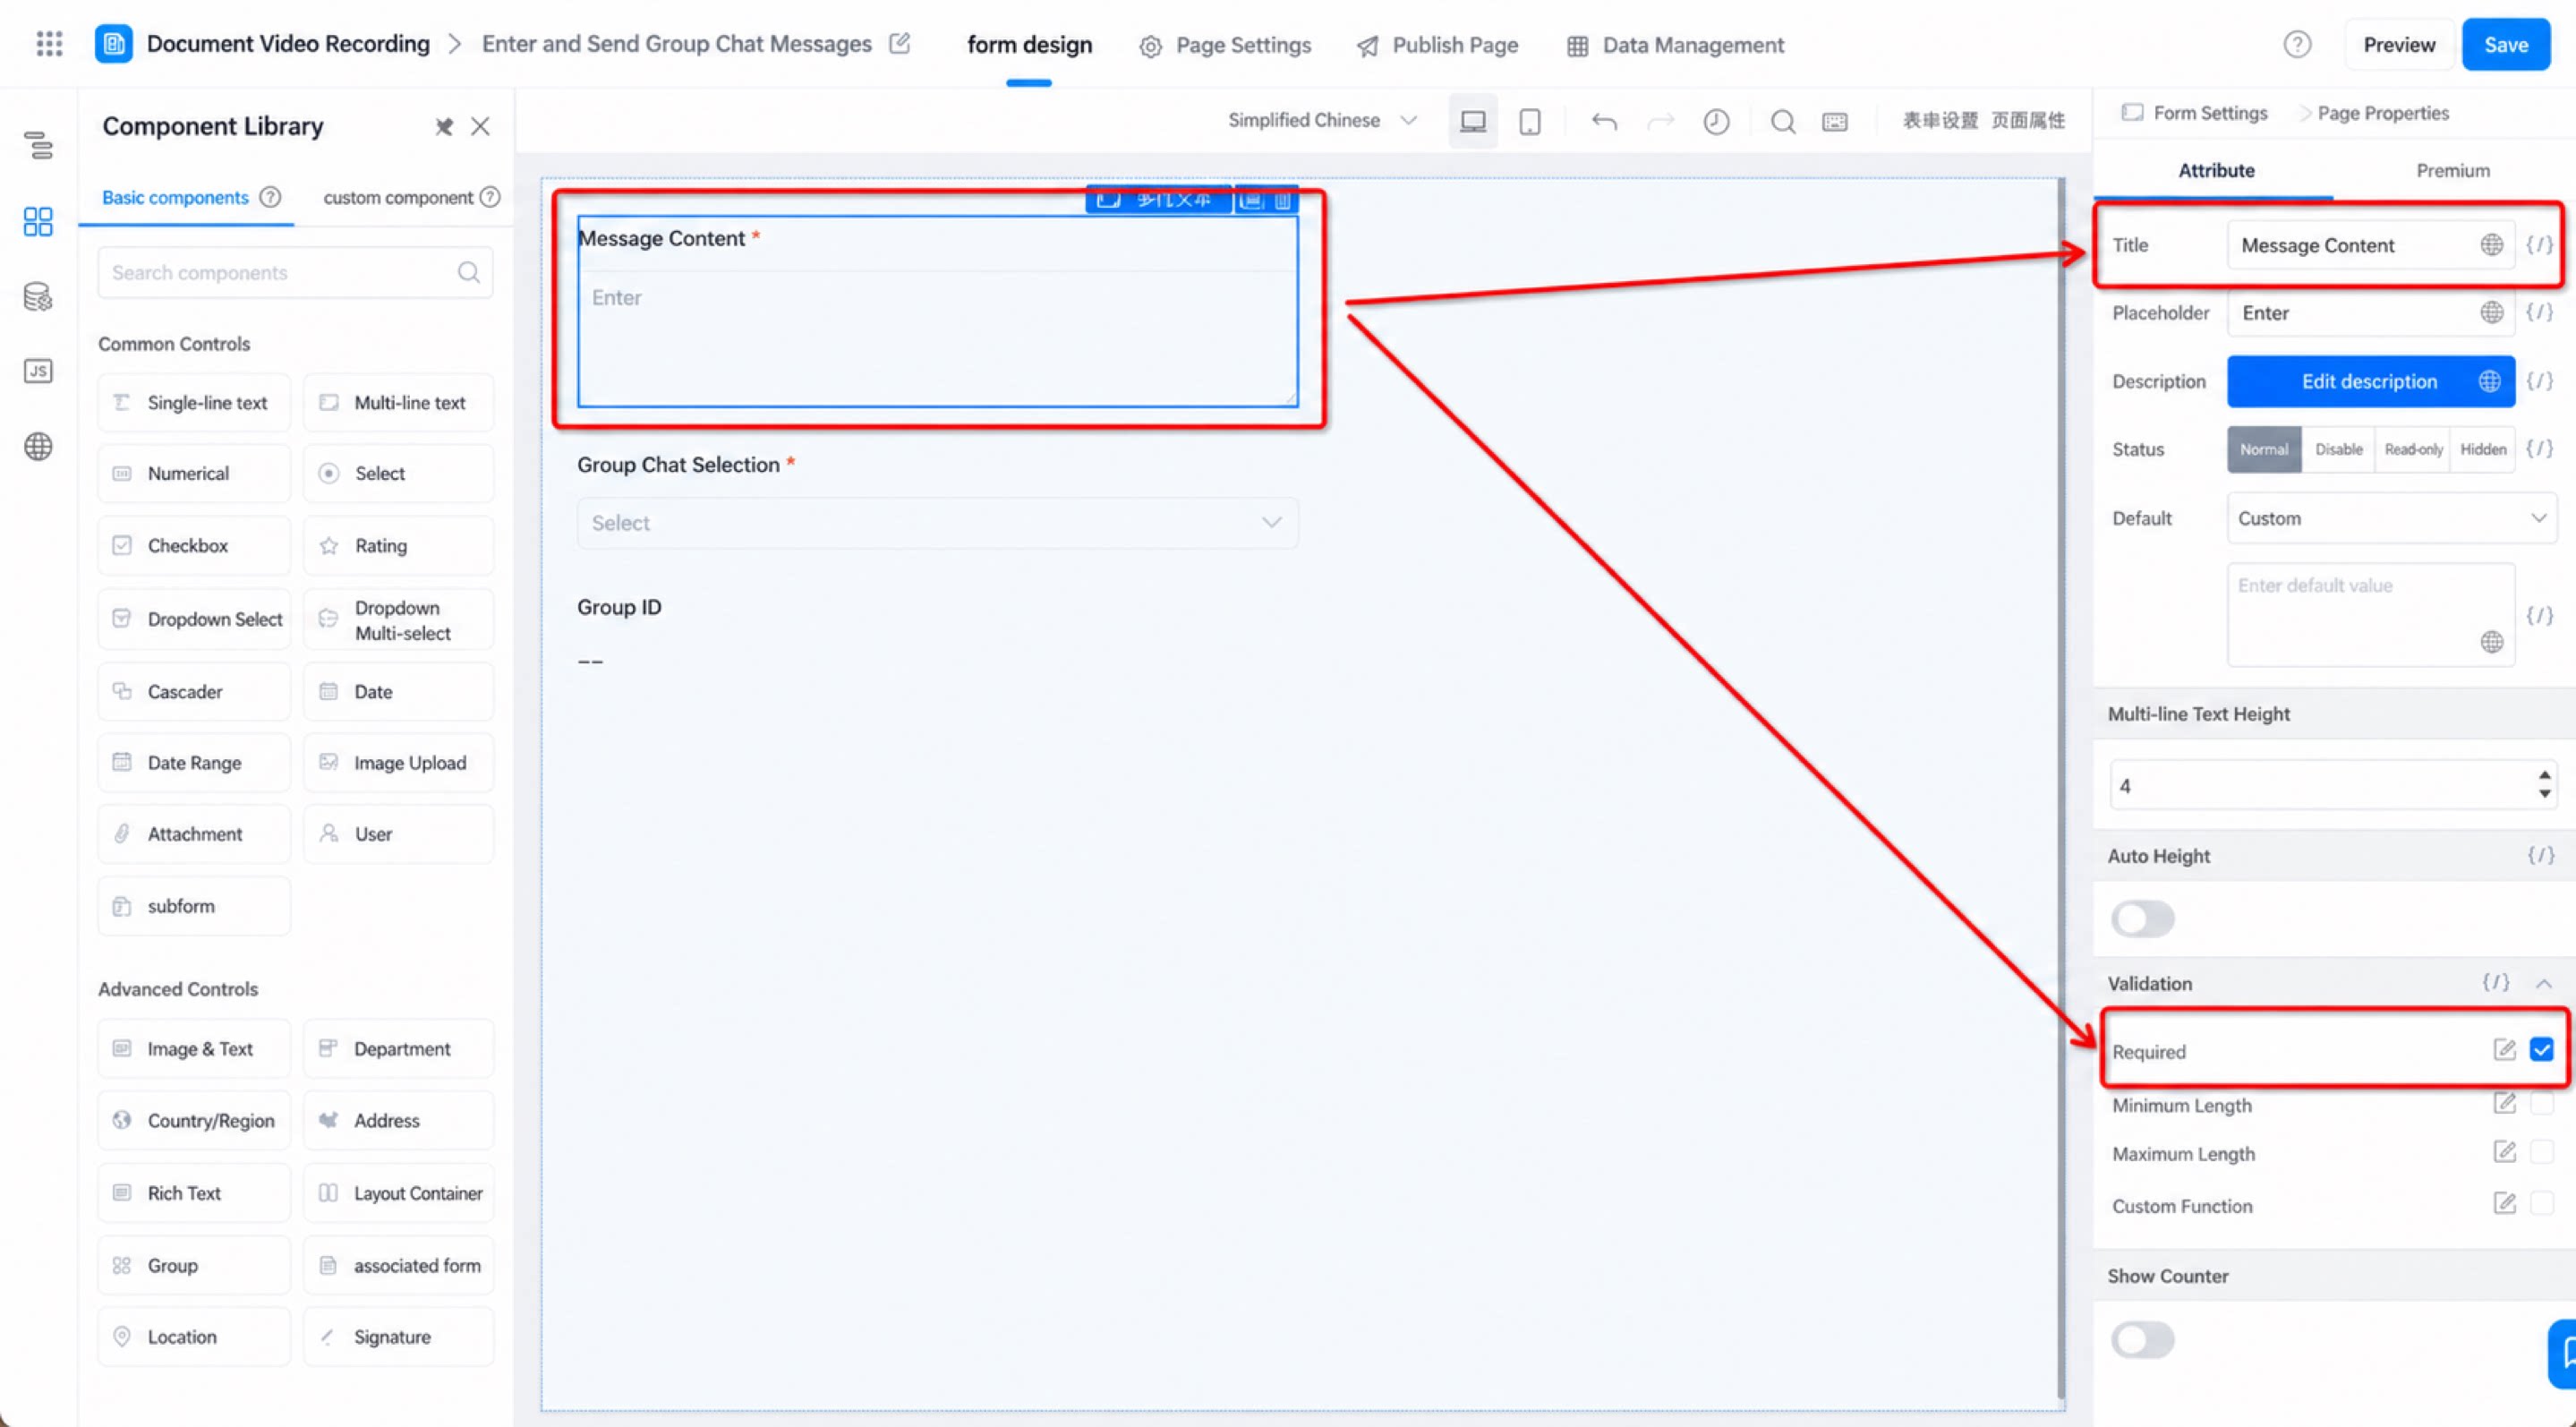
- Add a Multi-line text component, name it “Message content”, and set it as Required. (See Figure 2.3-1.)
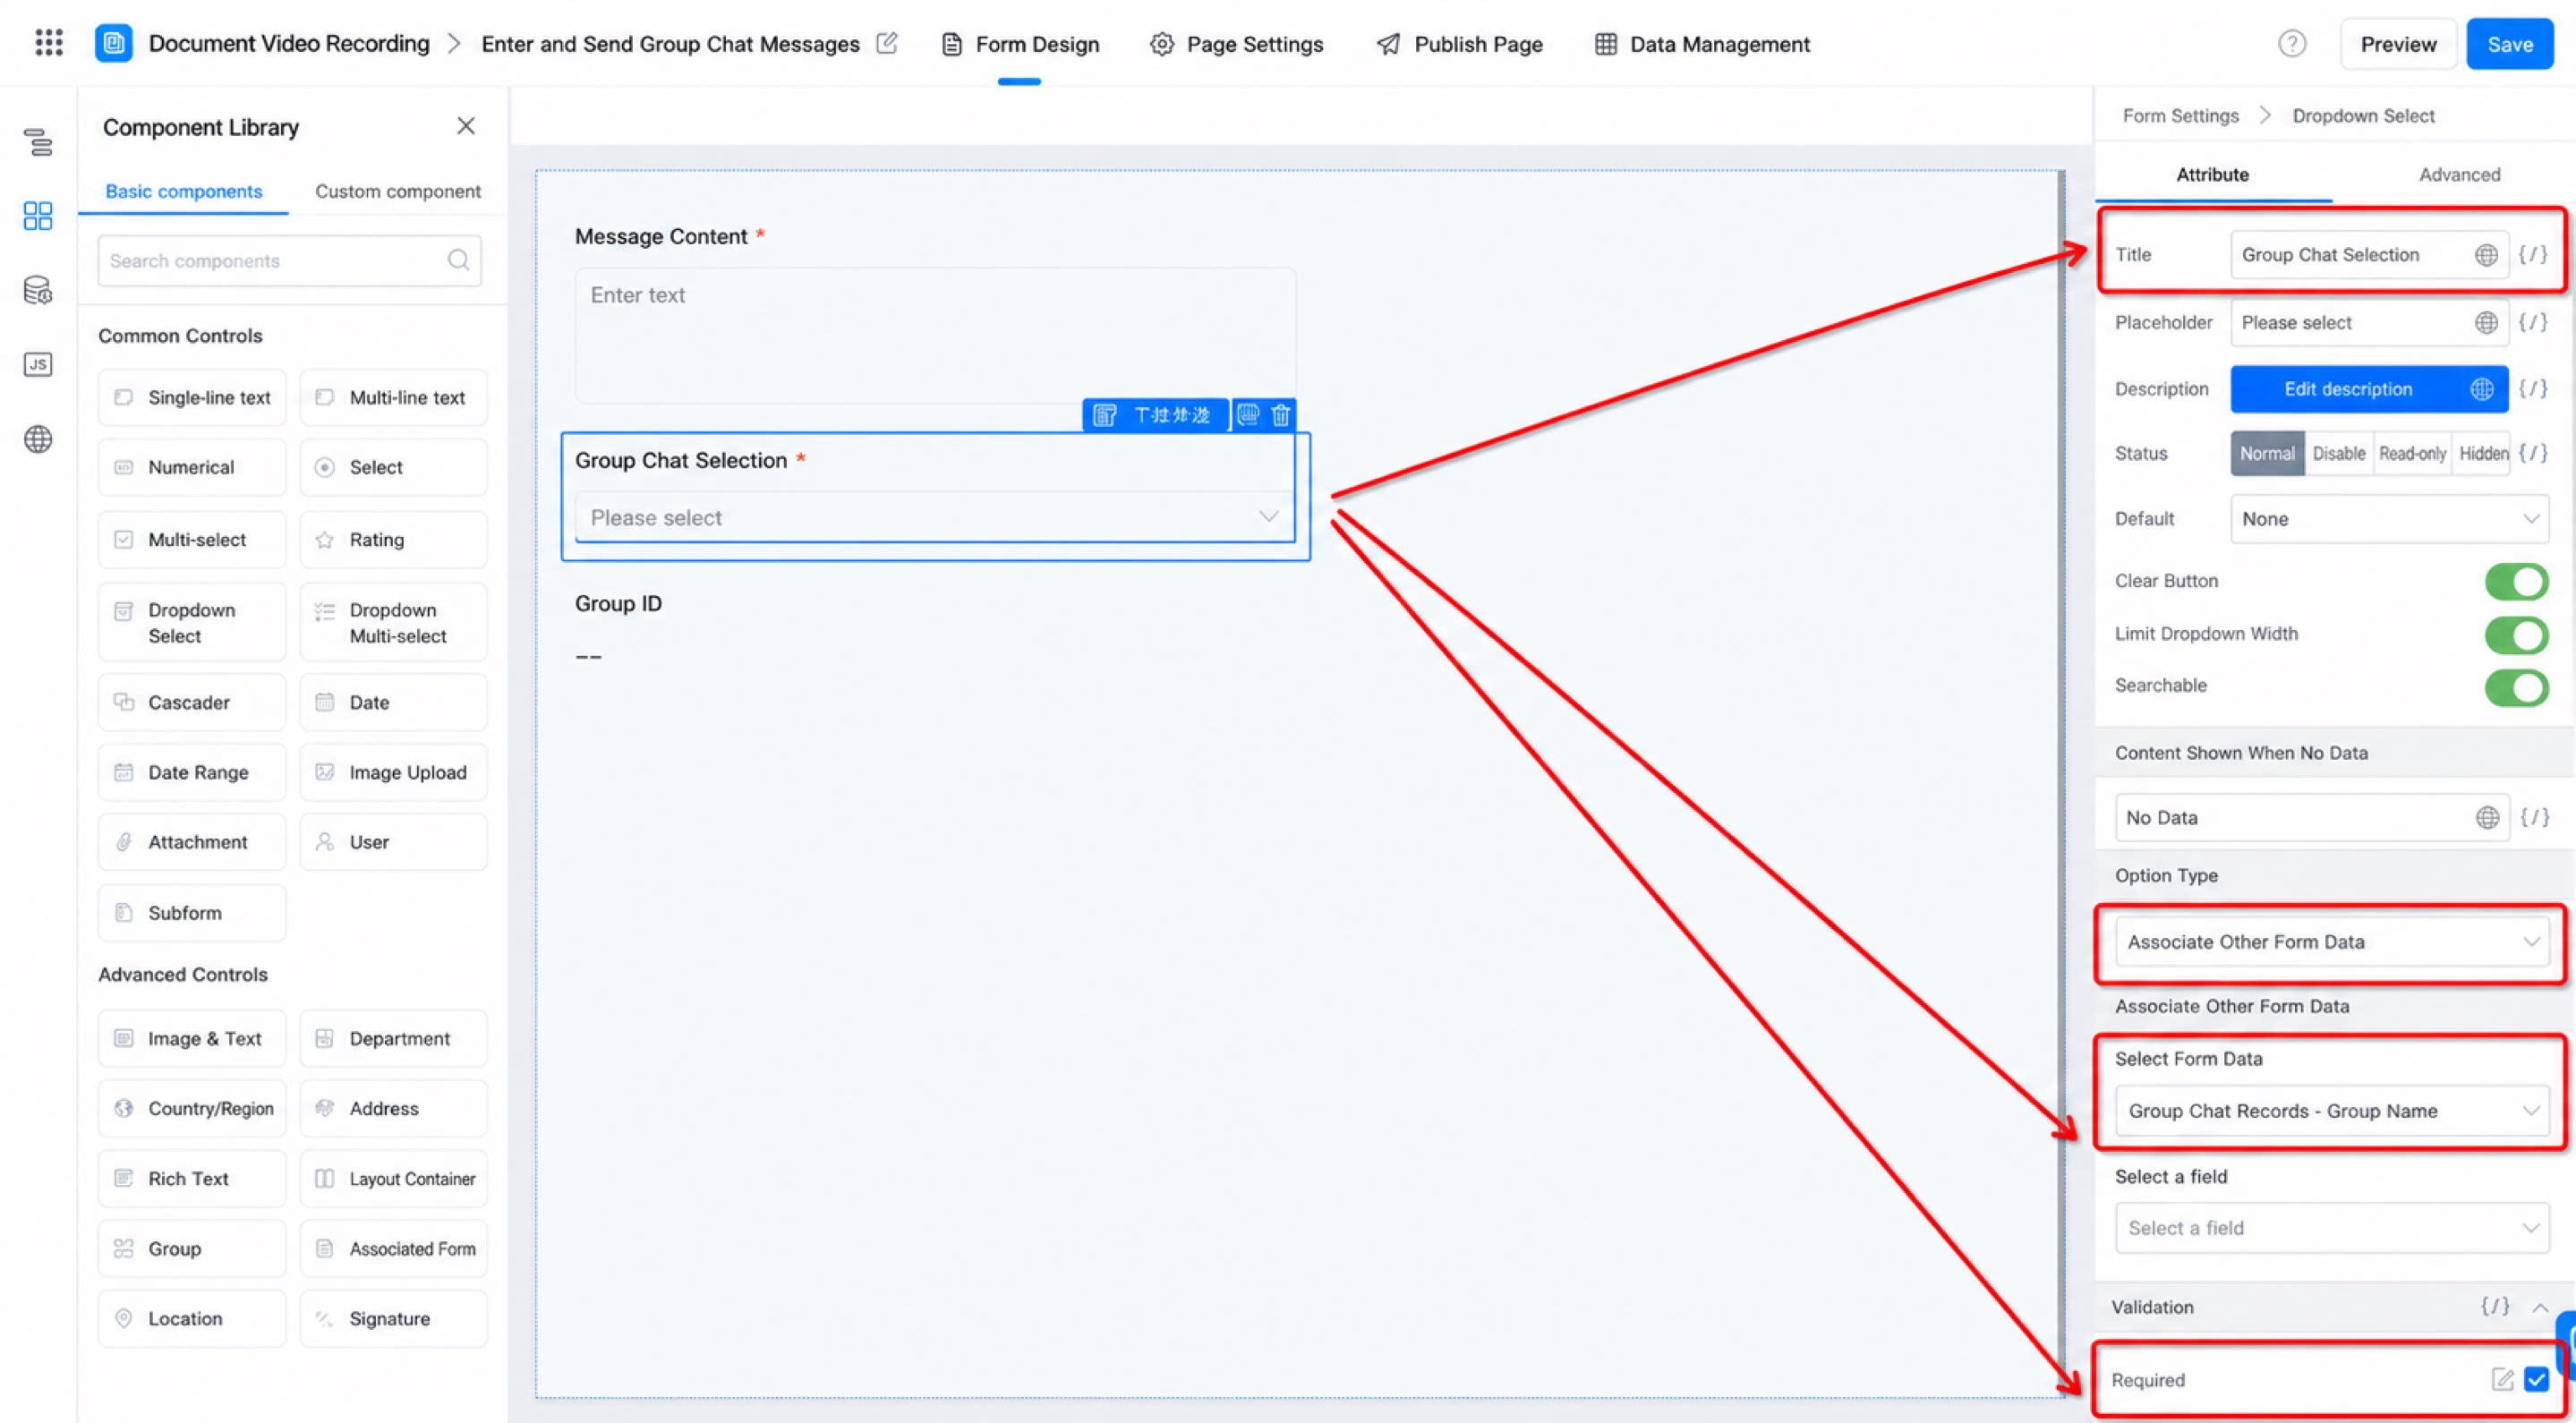
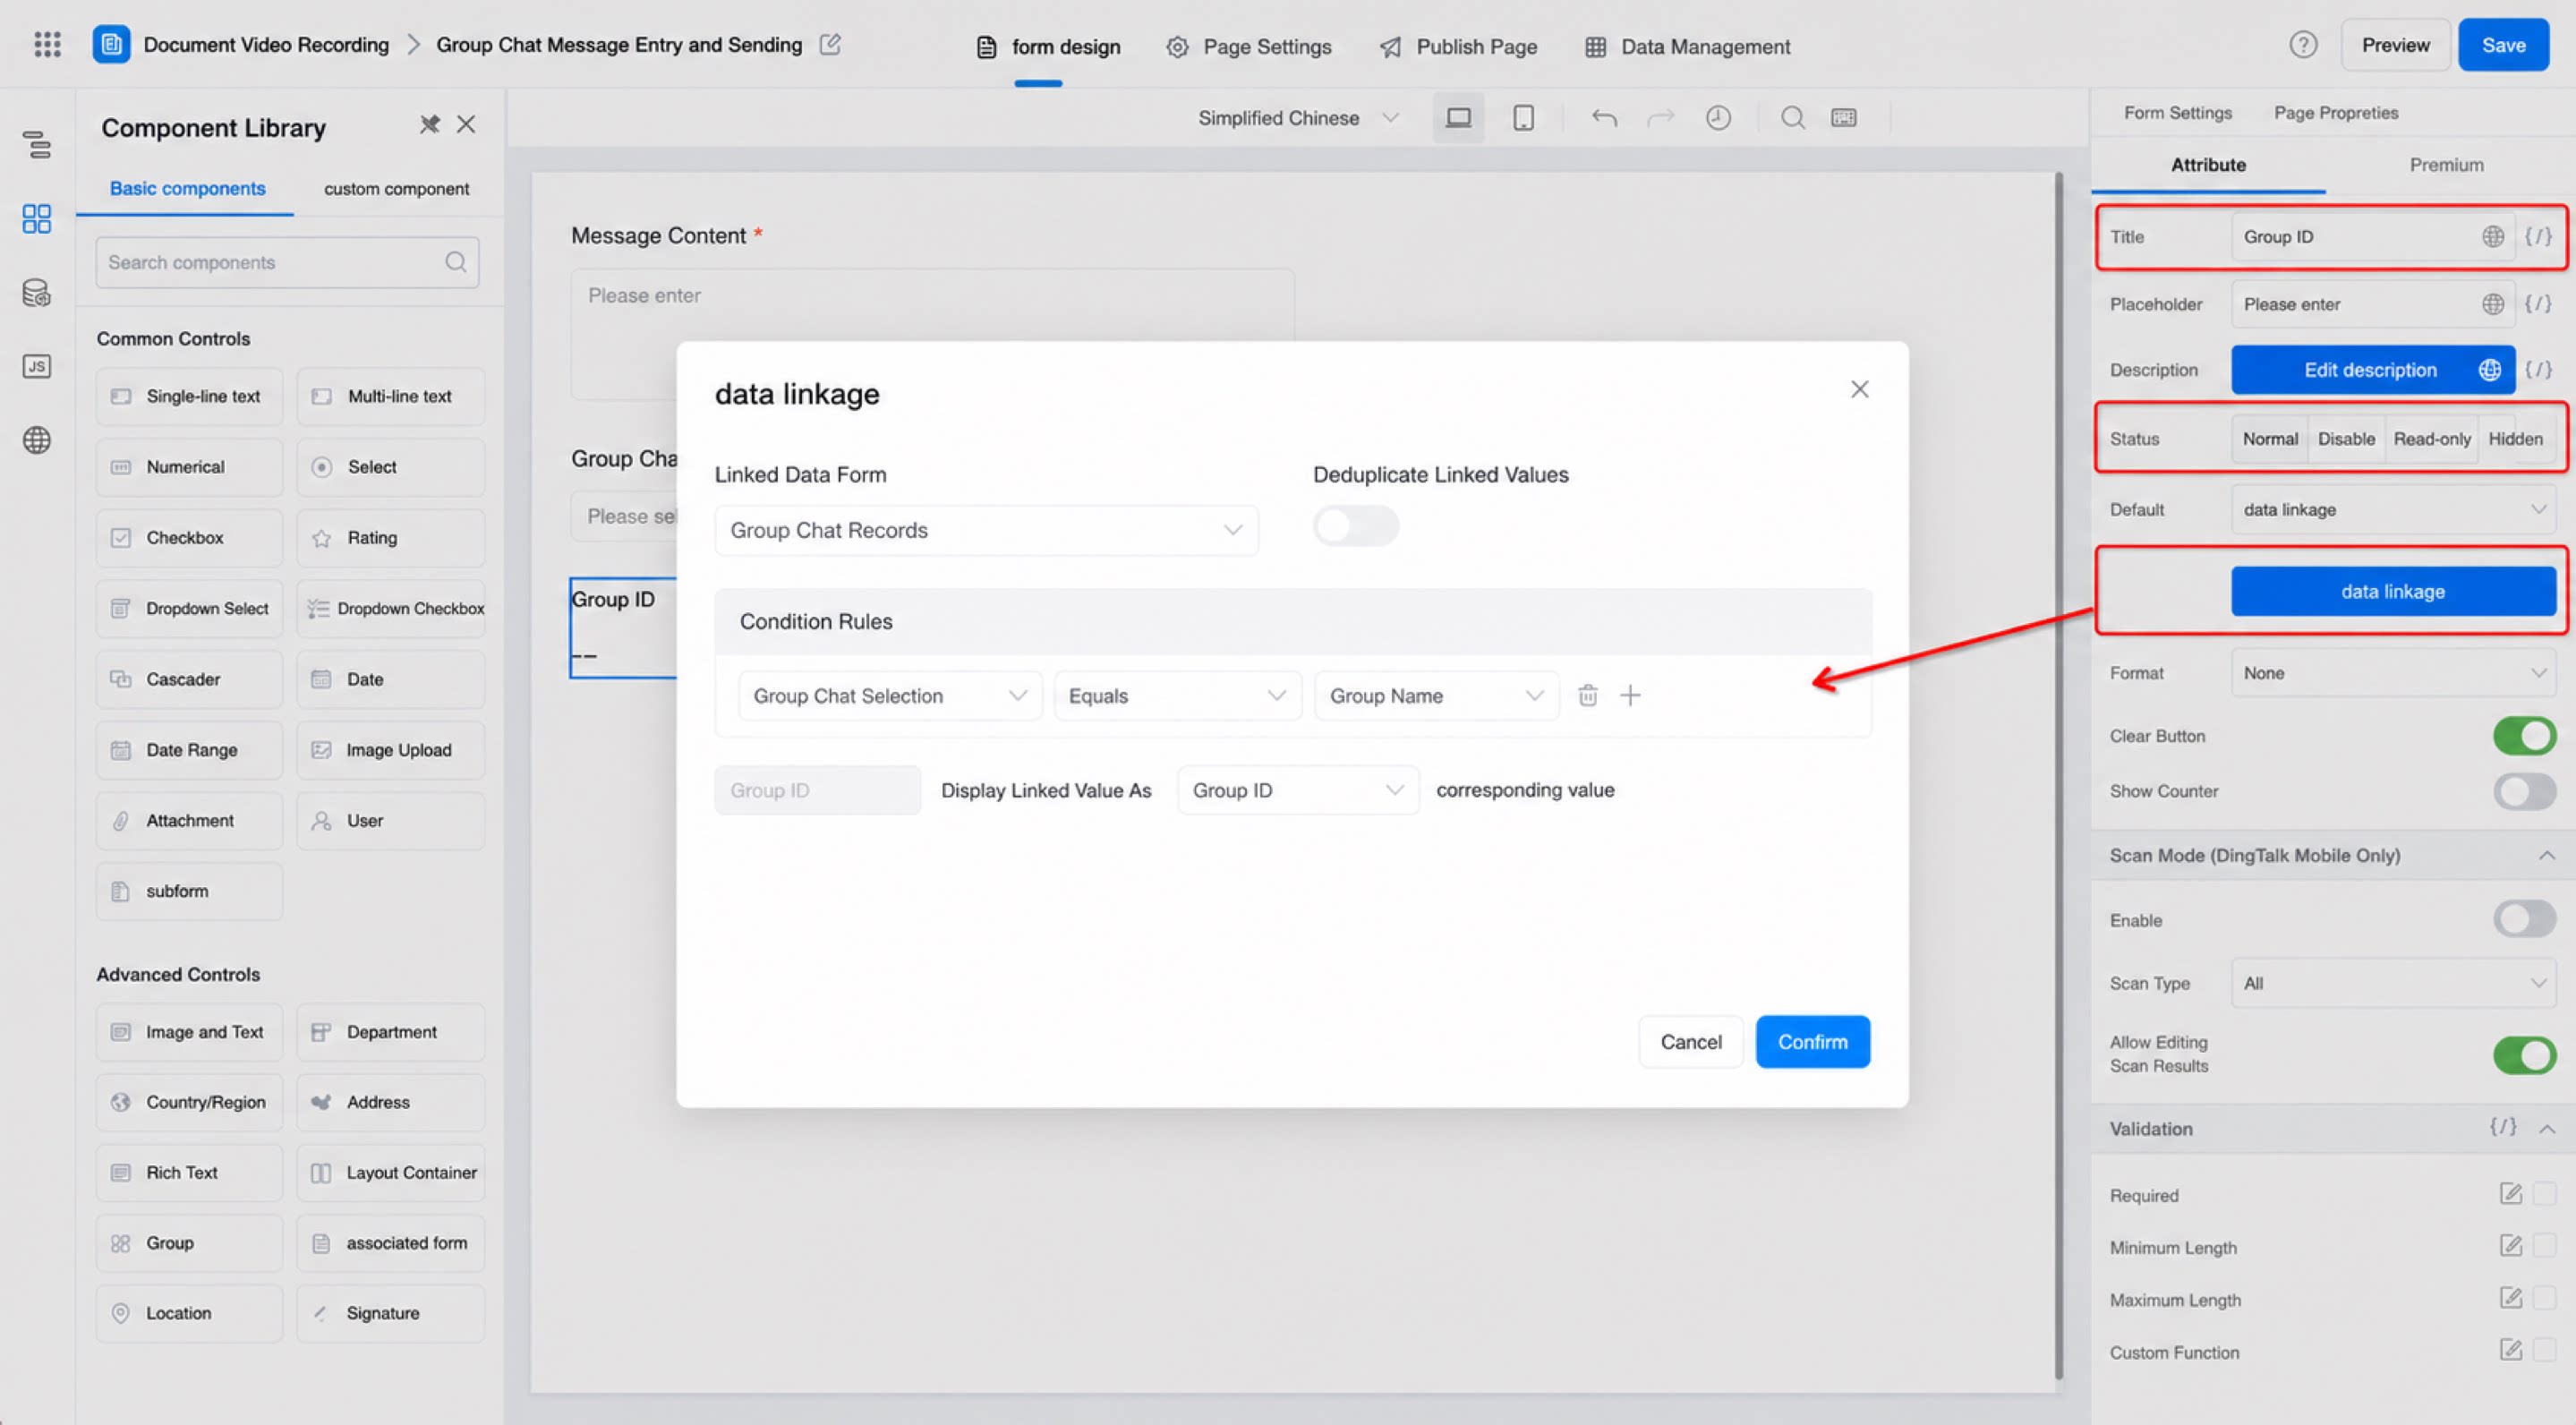
- Add a Dropdown Select component, name it “Select group chat”, set the option type to “Associate with data from another form”, and select “Group Info Record Table - Group name” as the form data. (See Figure 2.3-2.)
- Add a Single-line text component, name it “Group ID”, set its status to Read-only, and configure the Default to “data linkage” to associate it with the “Group Info Record Table”. This ensures that when the value of the “Select group chat” component matches a “Group name” entry in the “Group Info Record Table”, the “Group ID” field in the “Group Message Content Entry Table” is populated with the corresponding “Group ID” value from the “Group Info Record Table”. (See Figure 2.3-3.)
- Click Save in the upper-right corner.
Step 4: Create the Integration & Automation Flow
For an introduction to connectors, see: Integration & Automation - Connector
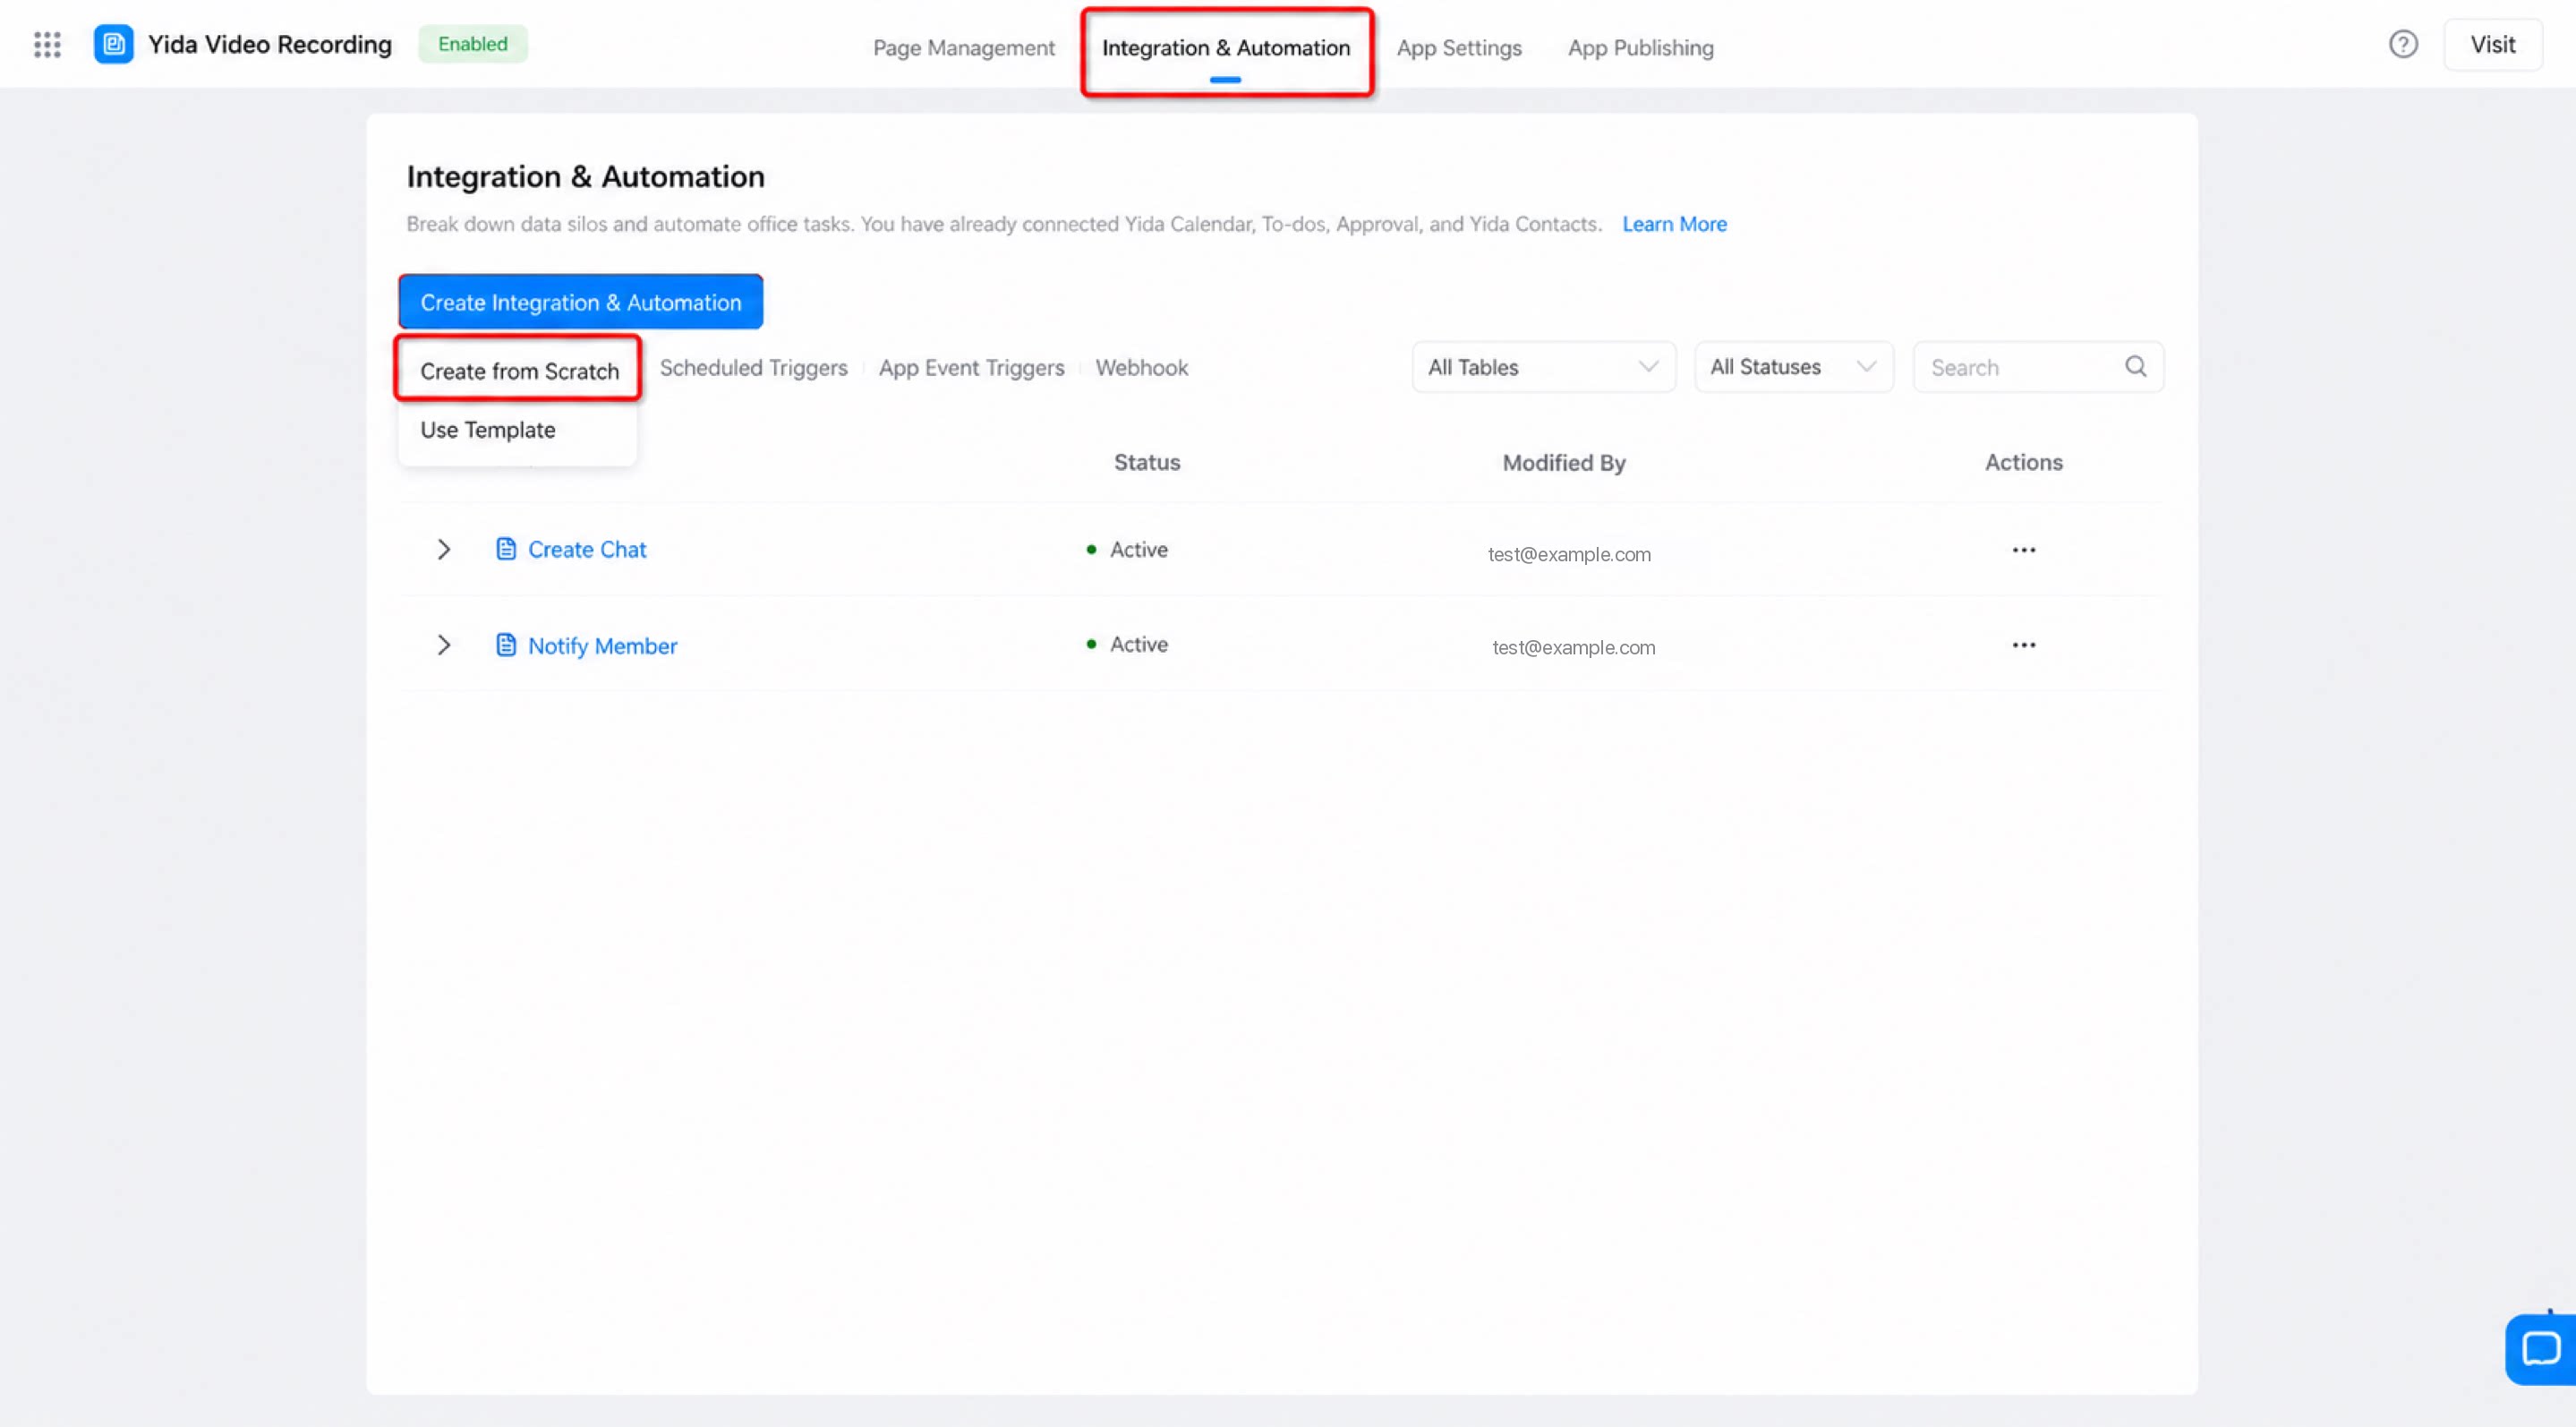
- In the admin console, click Integration & Automation at the top of the page, then click Create from blank under Create Integration & Automation. (See Figure 2.4-1.)
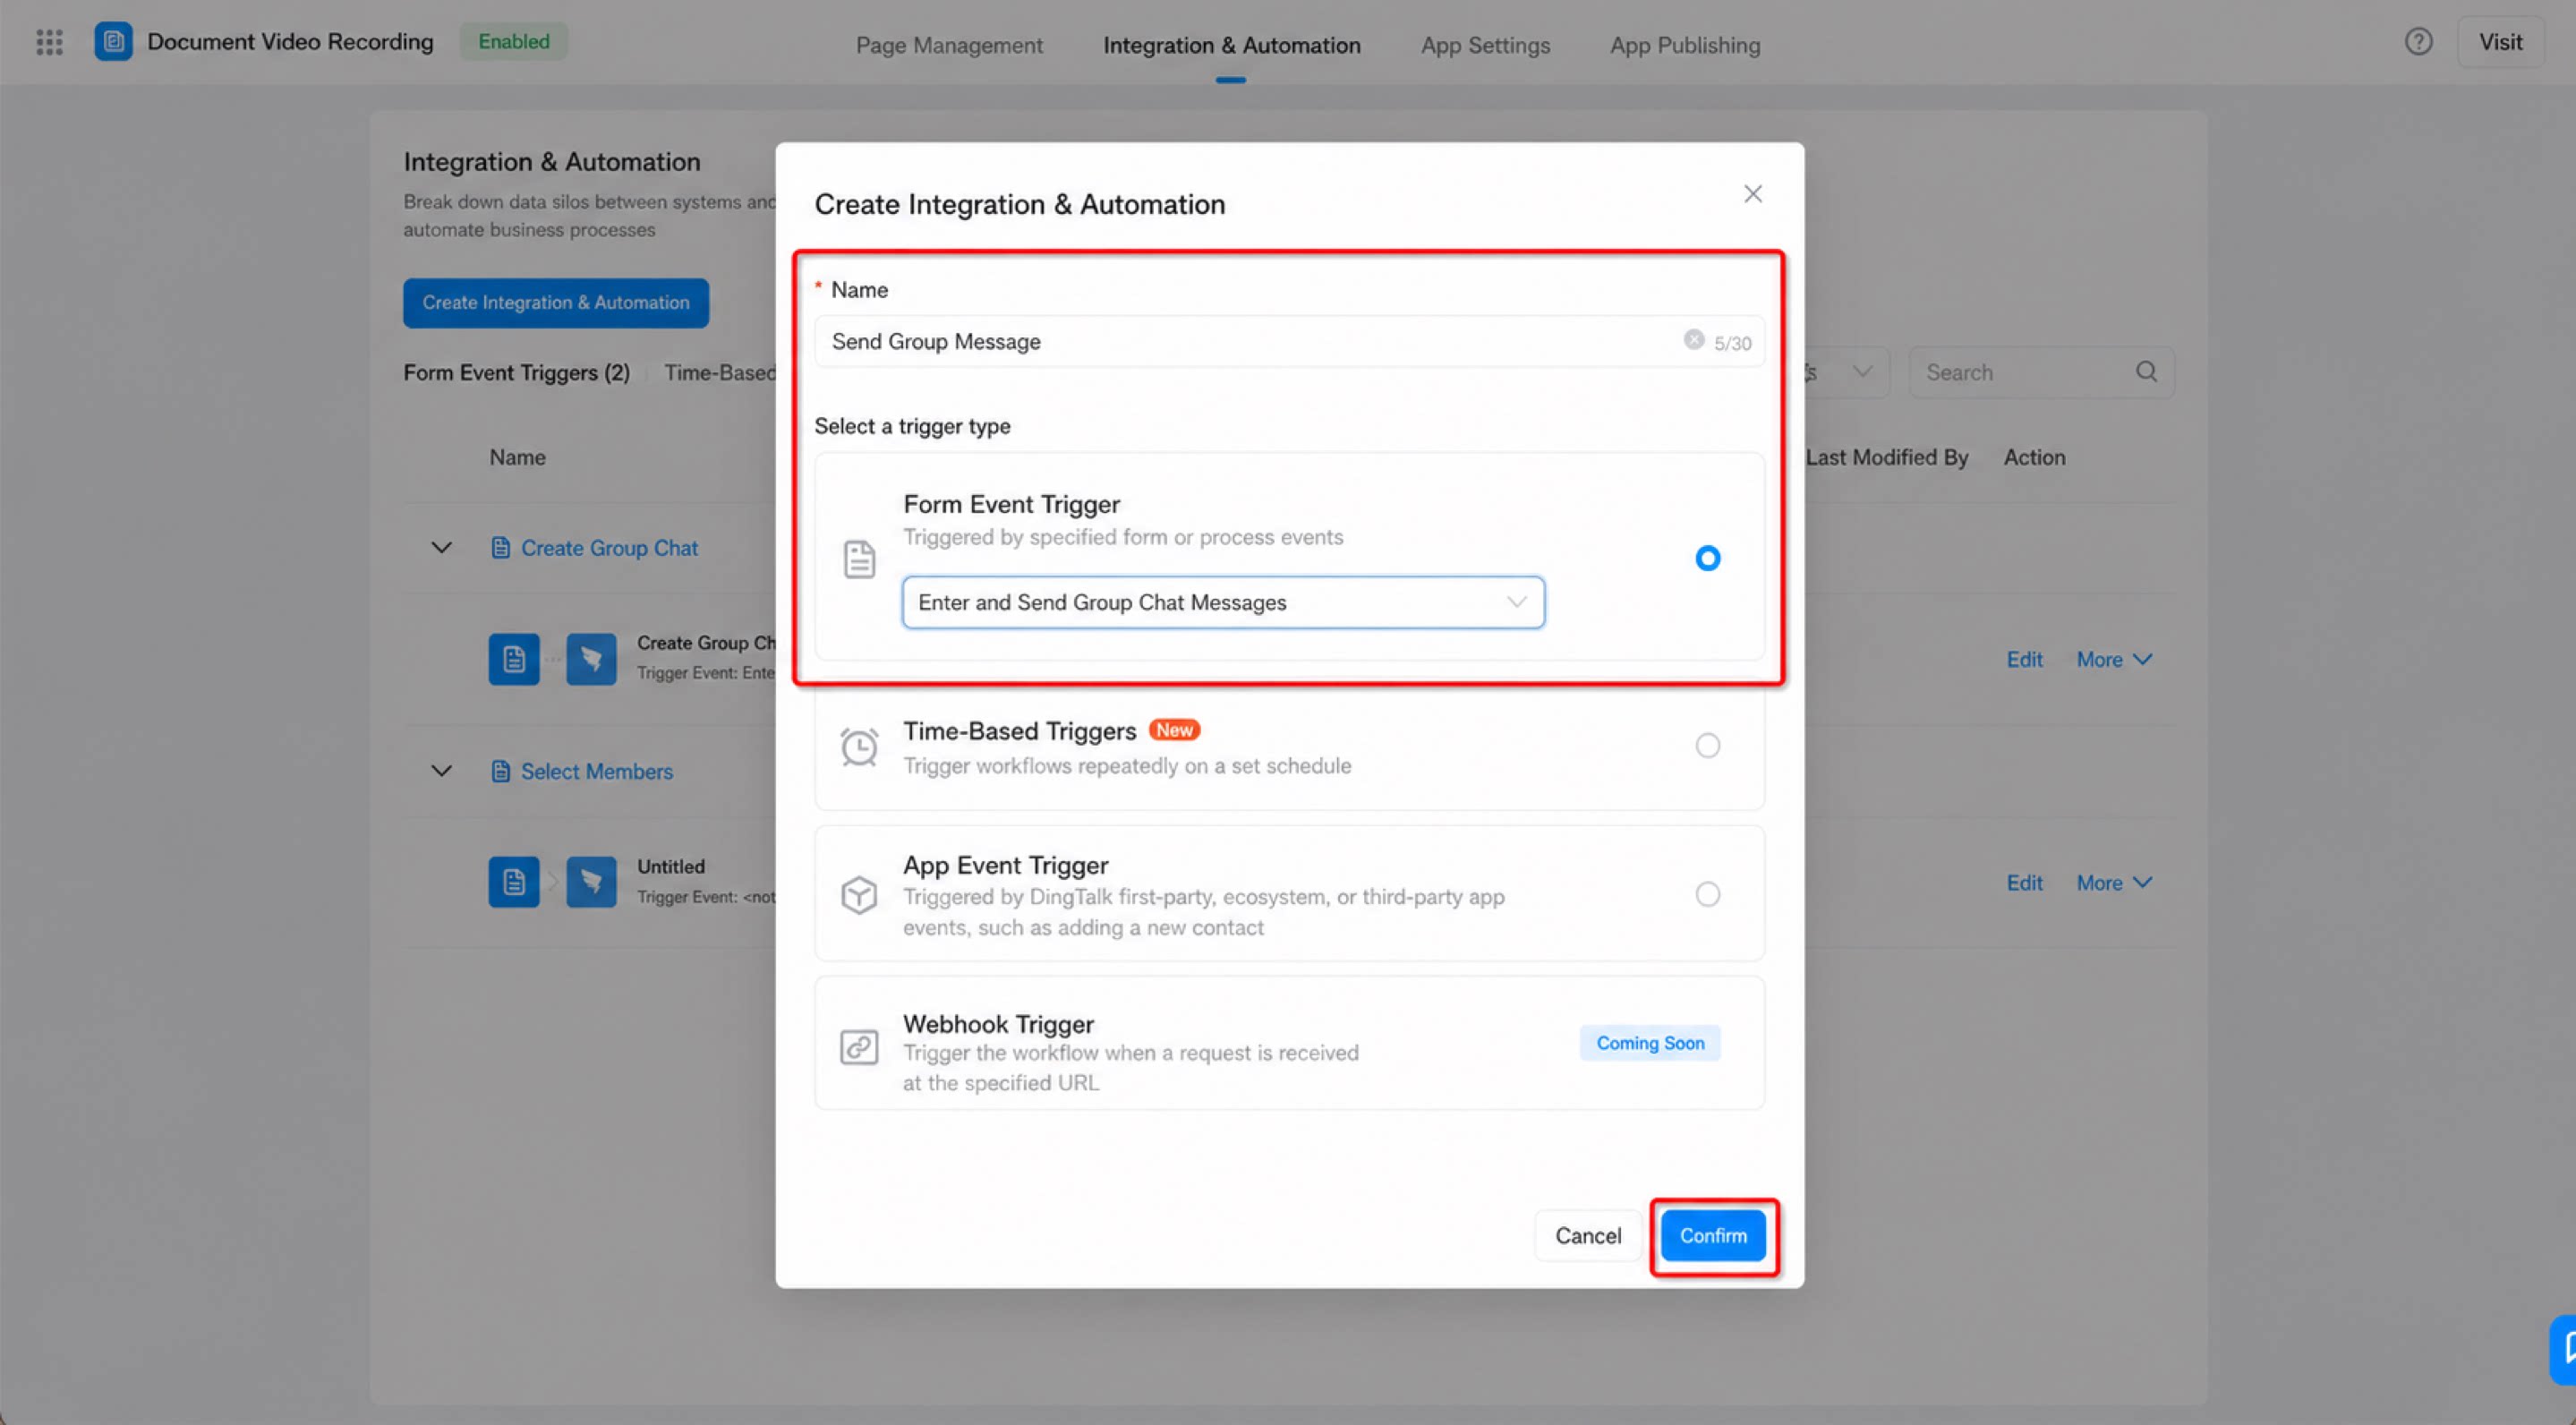
- Set the Integration & Automation name to “Send group message”, set the Trigger type to “Form event trigger”, and click Confirm. (See Figure 2.4-2.)
Step 5: Configure the Integration & Automation Flow
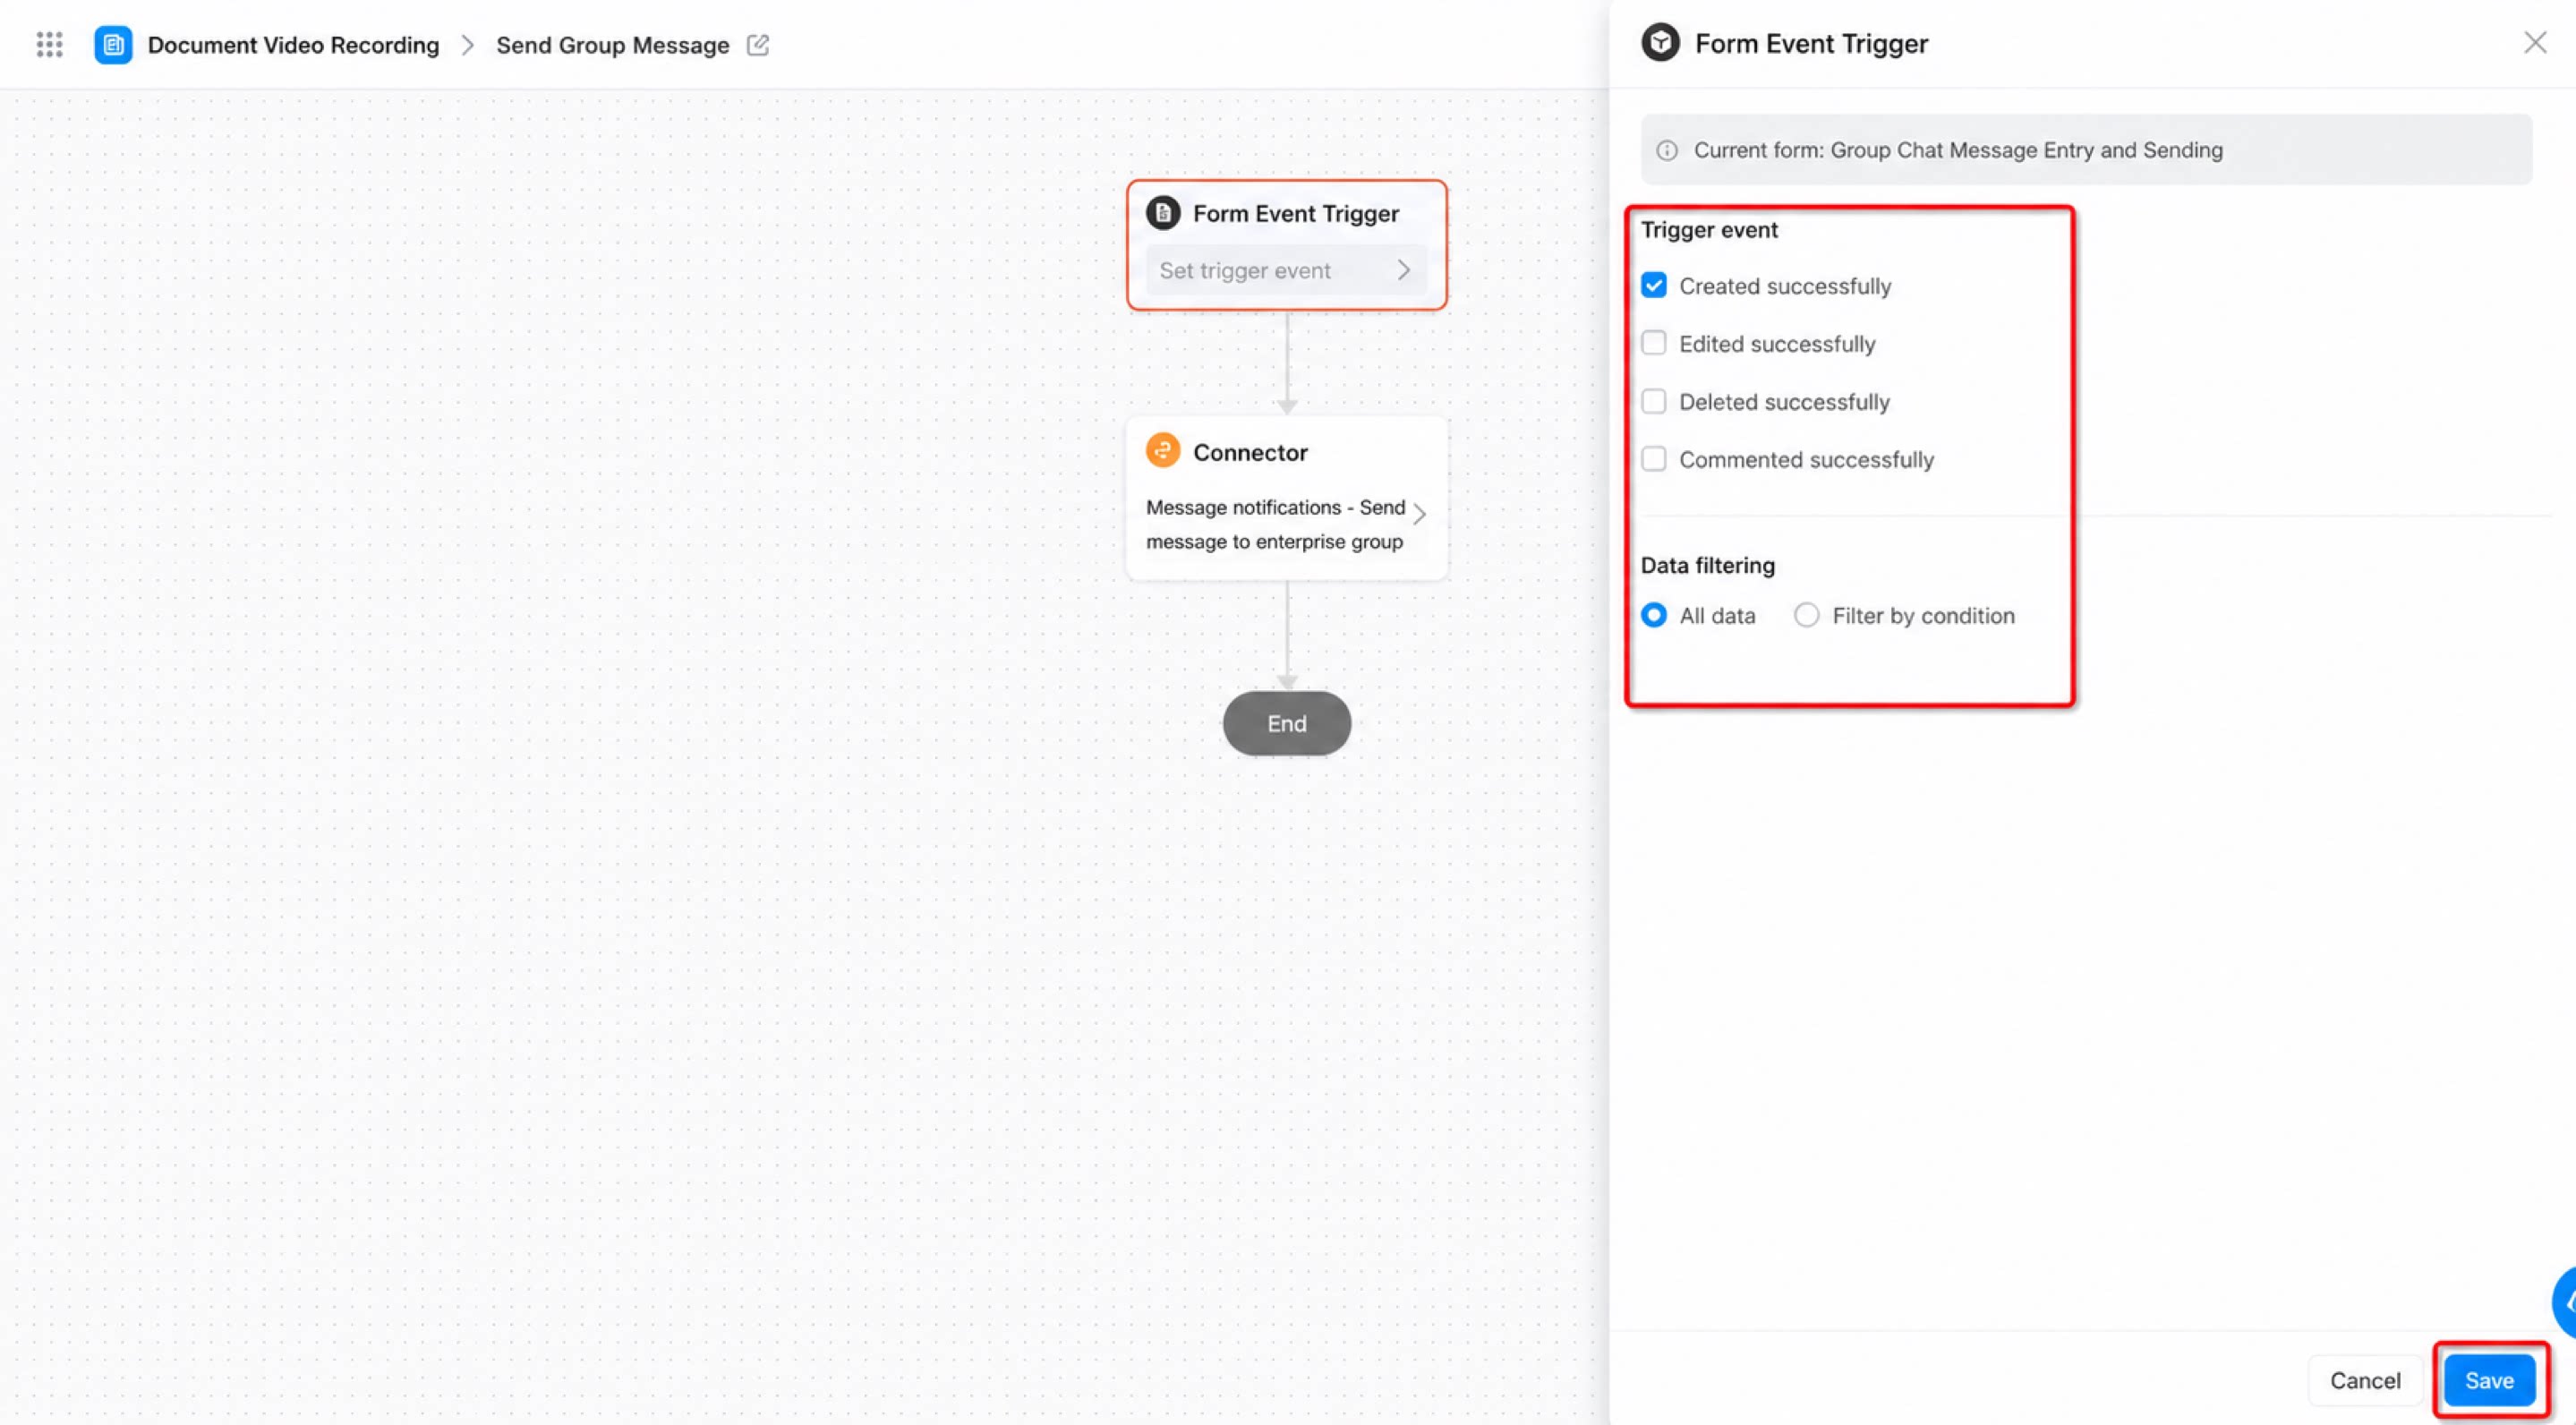
Procedure:- Click the “Form event trigger” node. On the right, select “Create success” as the trigger event and “All data” for the data filter, then click Save. (See Figure 2.4-3.)
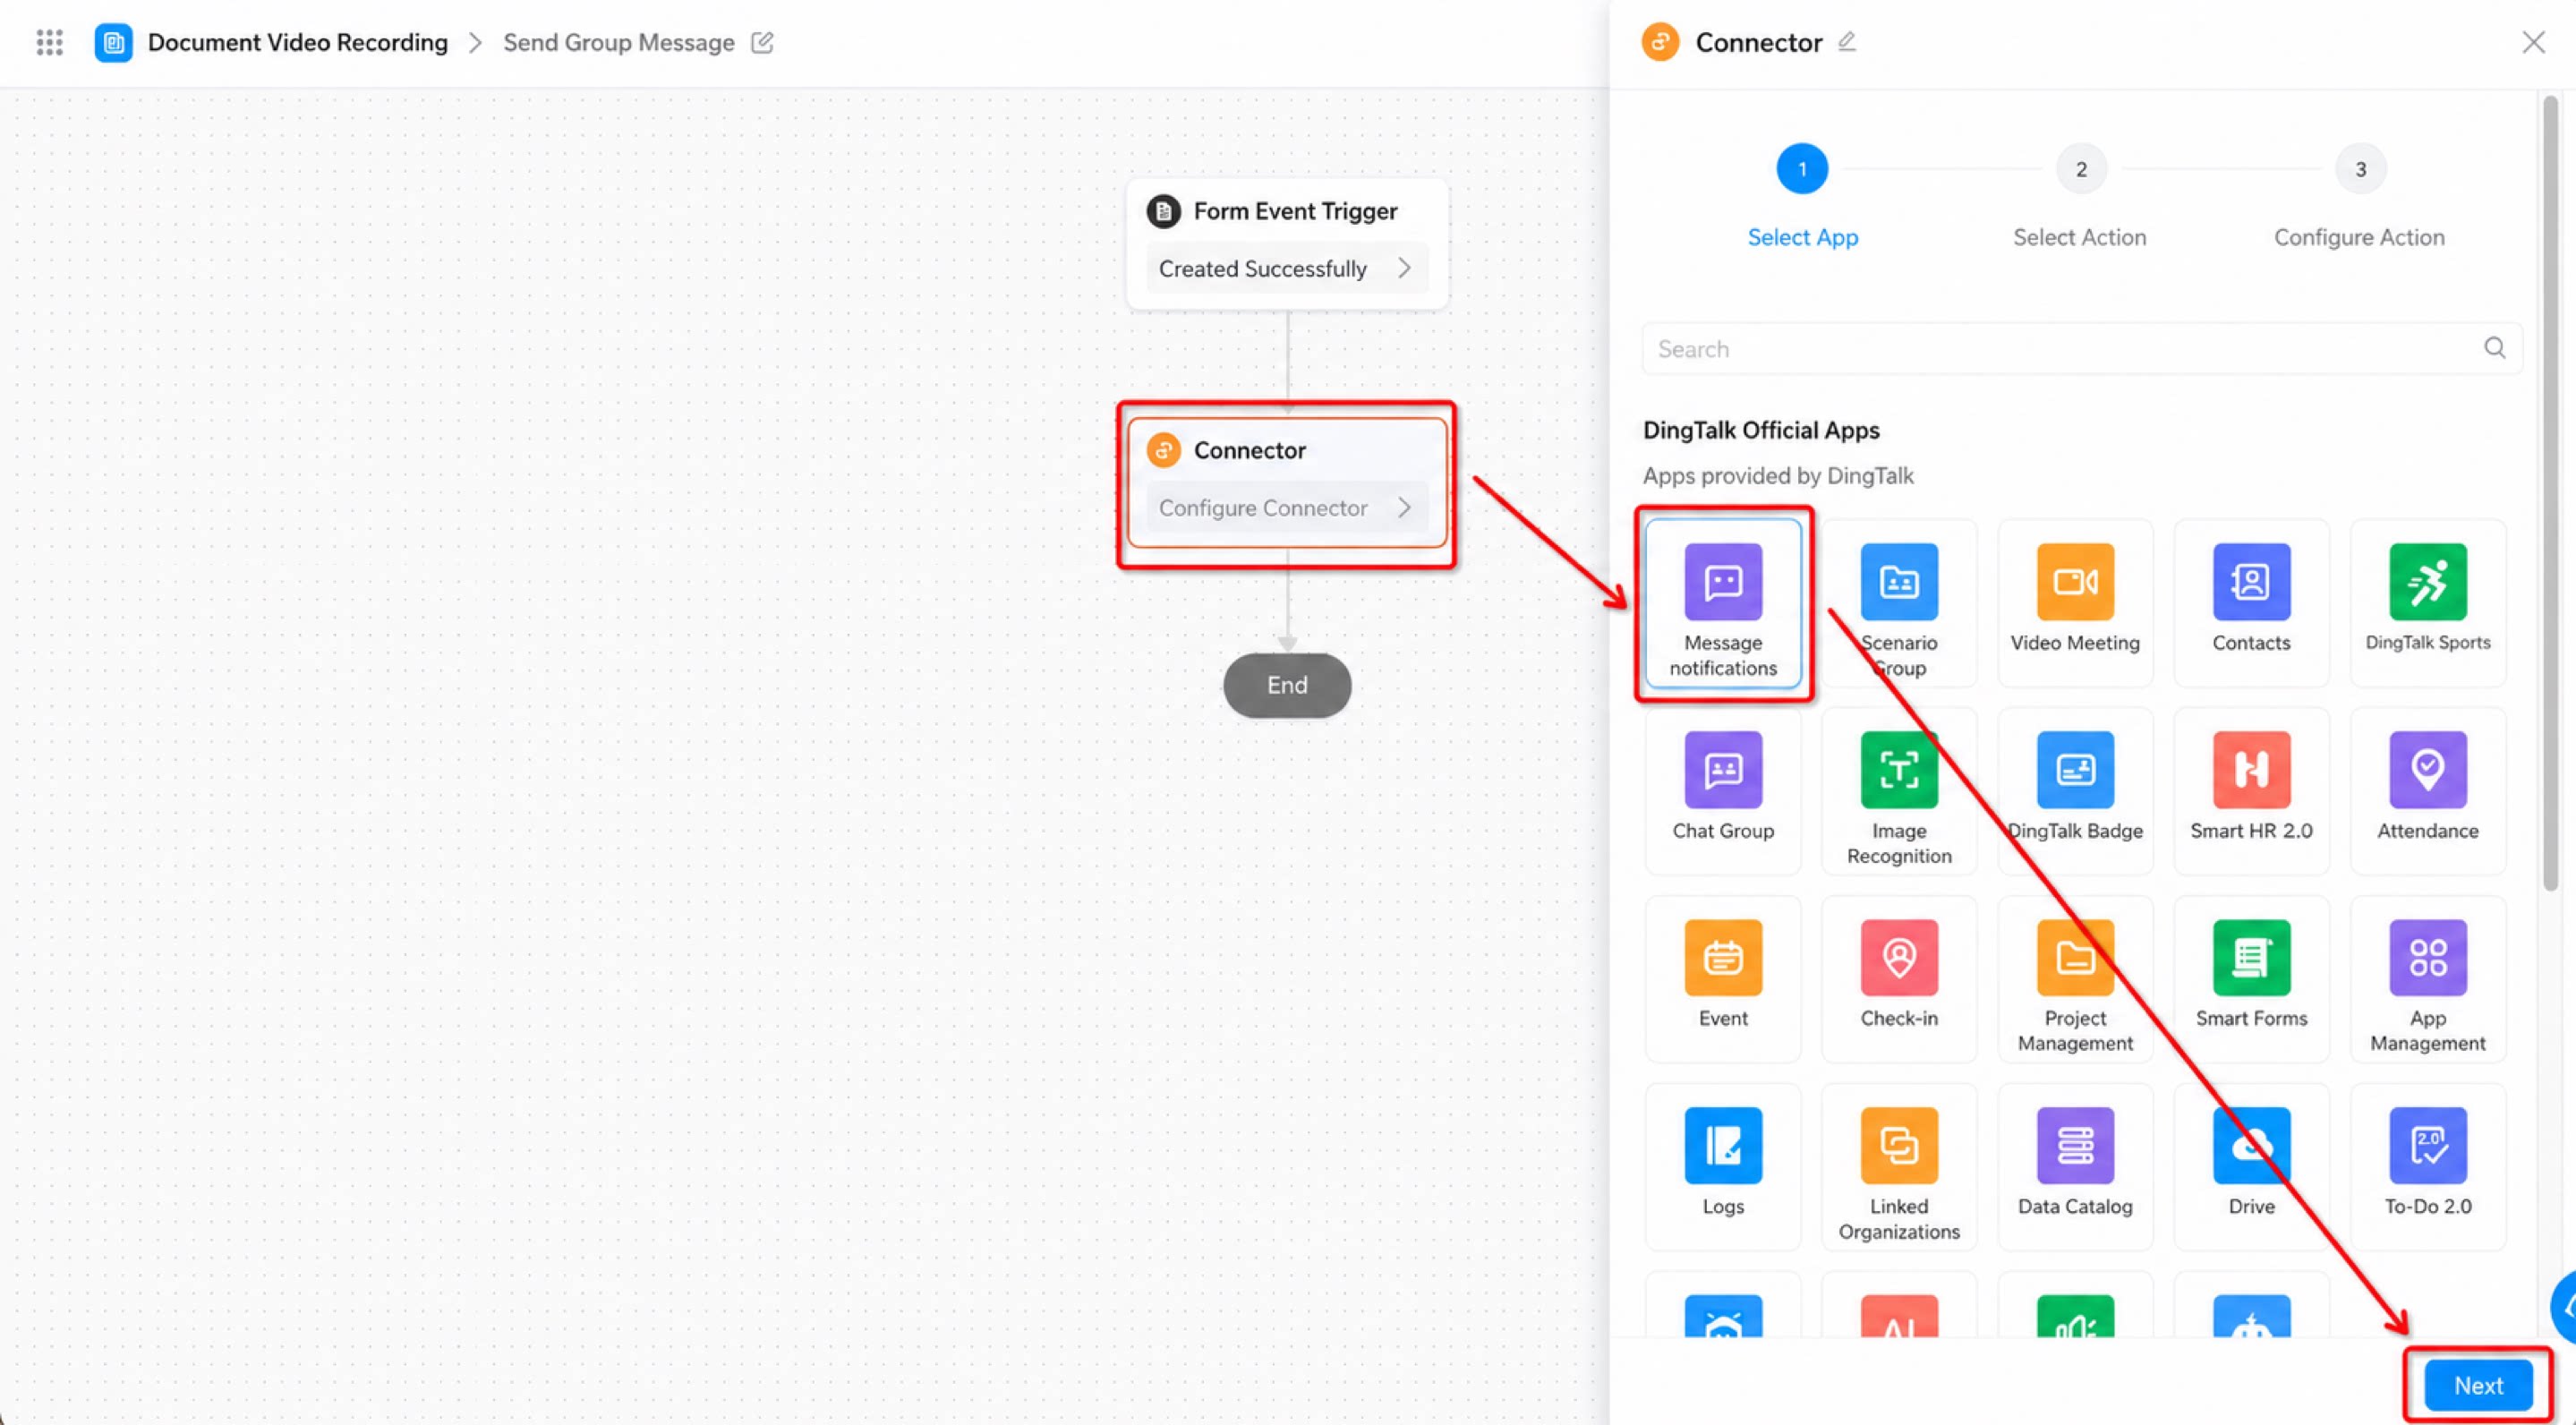
- Click the “Connector” node. On the right, select the “Chats” DingTalk official app, then click Next. (See Figure 2.4-4.)
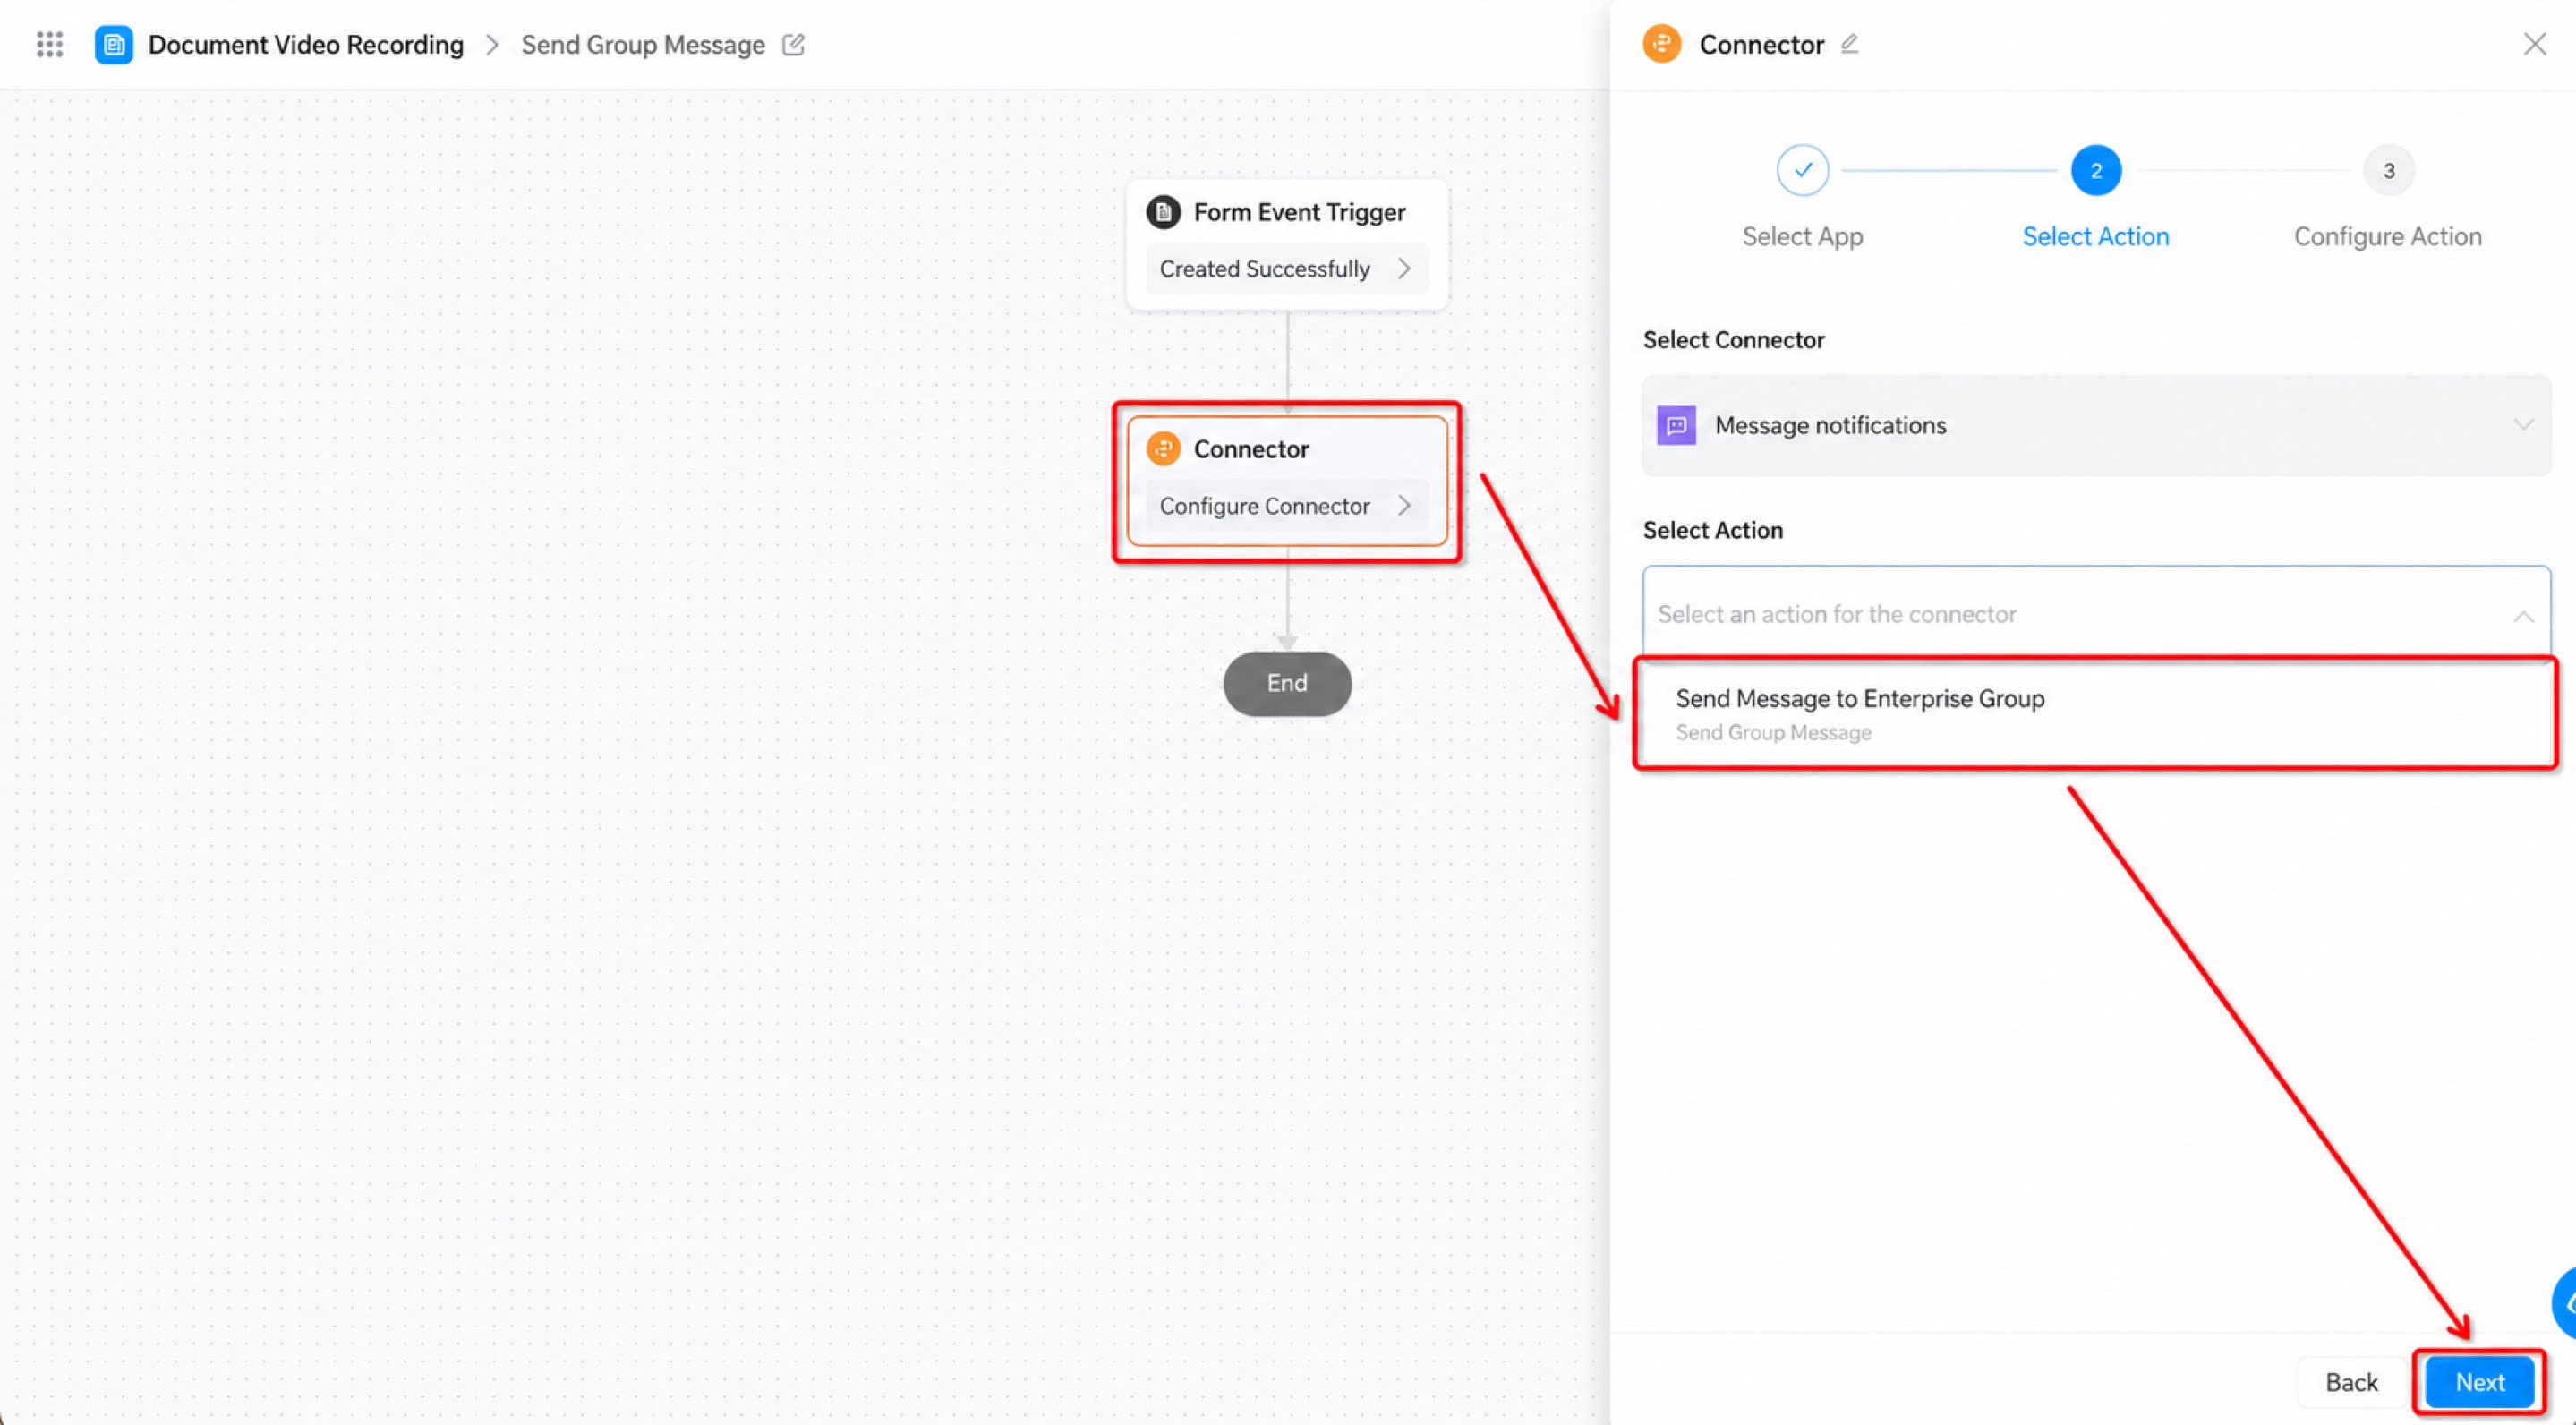
- Select “Send message to organization group” as the action, then click Next. (See Figure 2.4-5.)
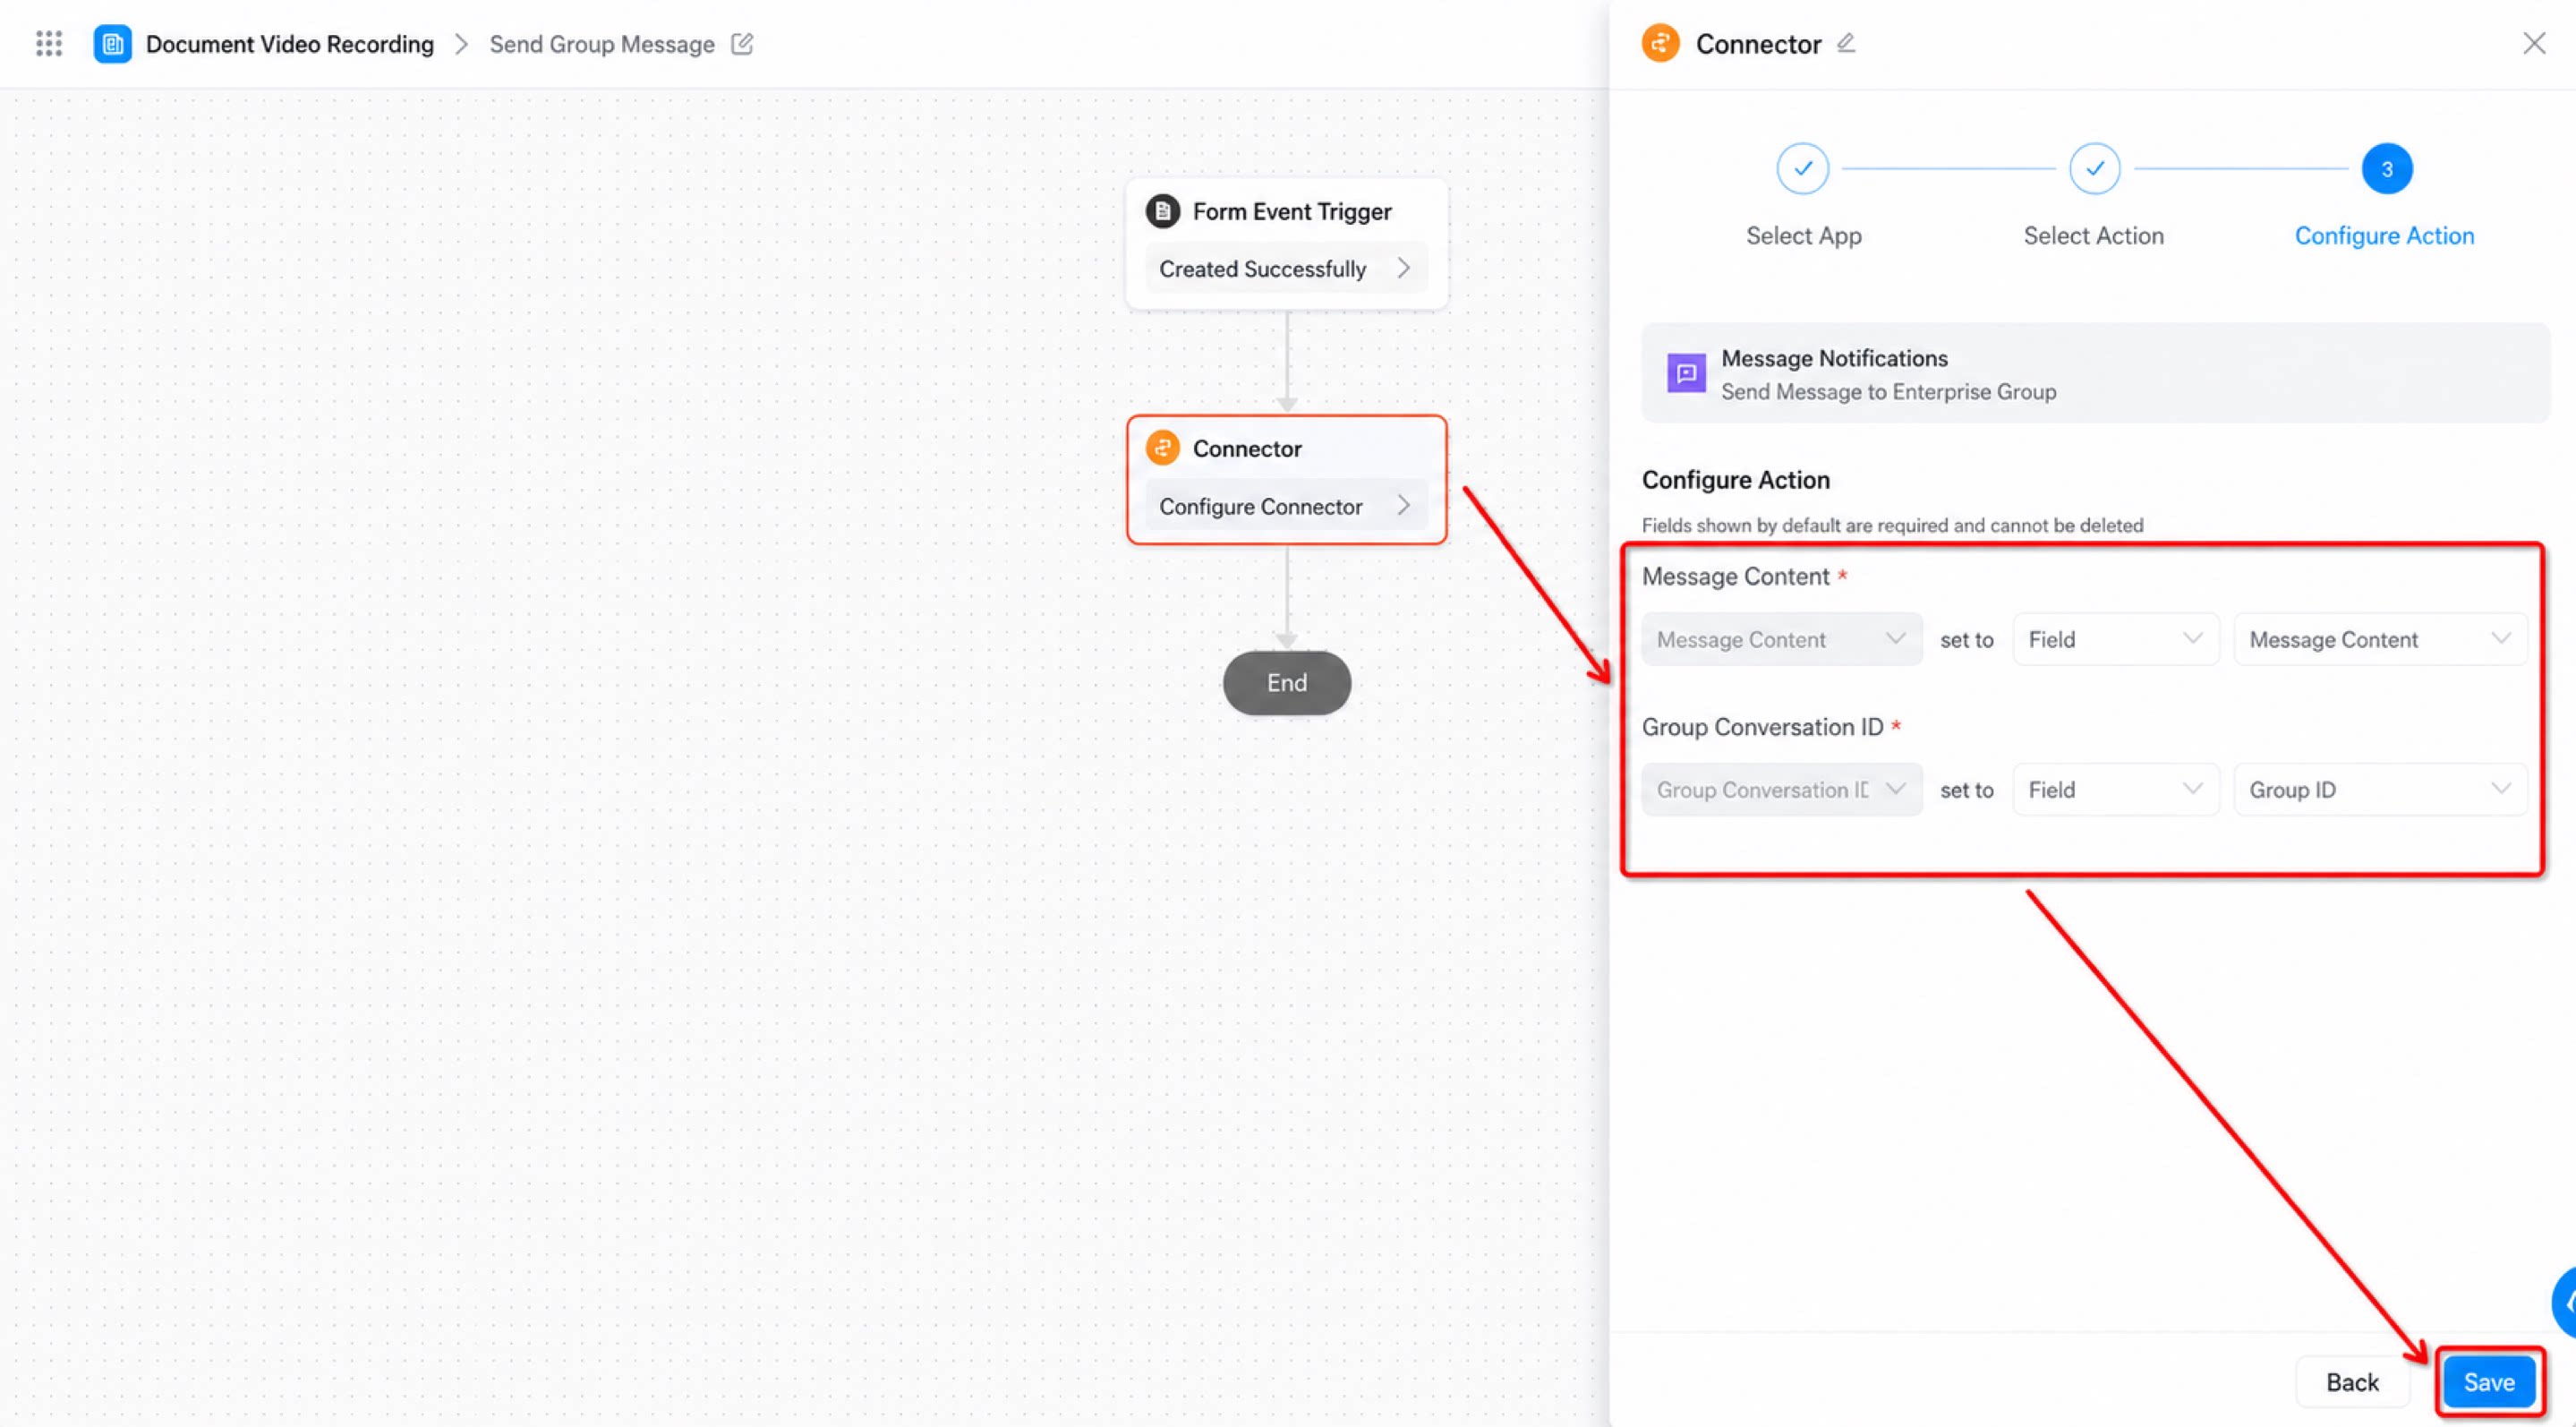
- Configure the action, then click Save. (See Figure 2.4-6.)
- Click Save in the upper-right corner, then click Publish.
Step 6: Fill in and Submit the Group Message Content
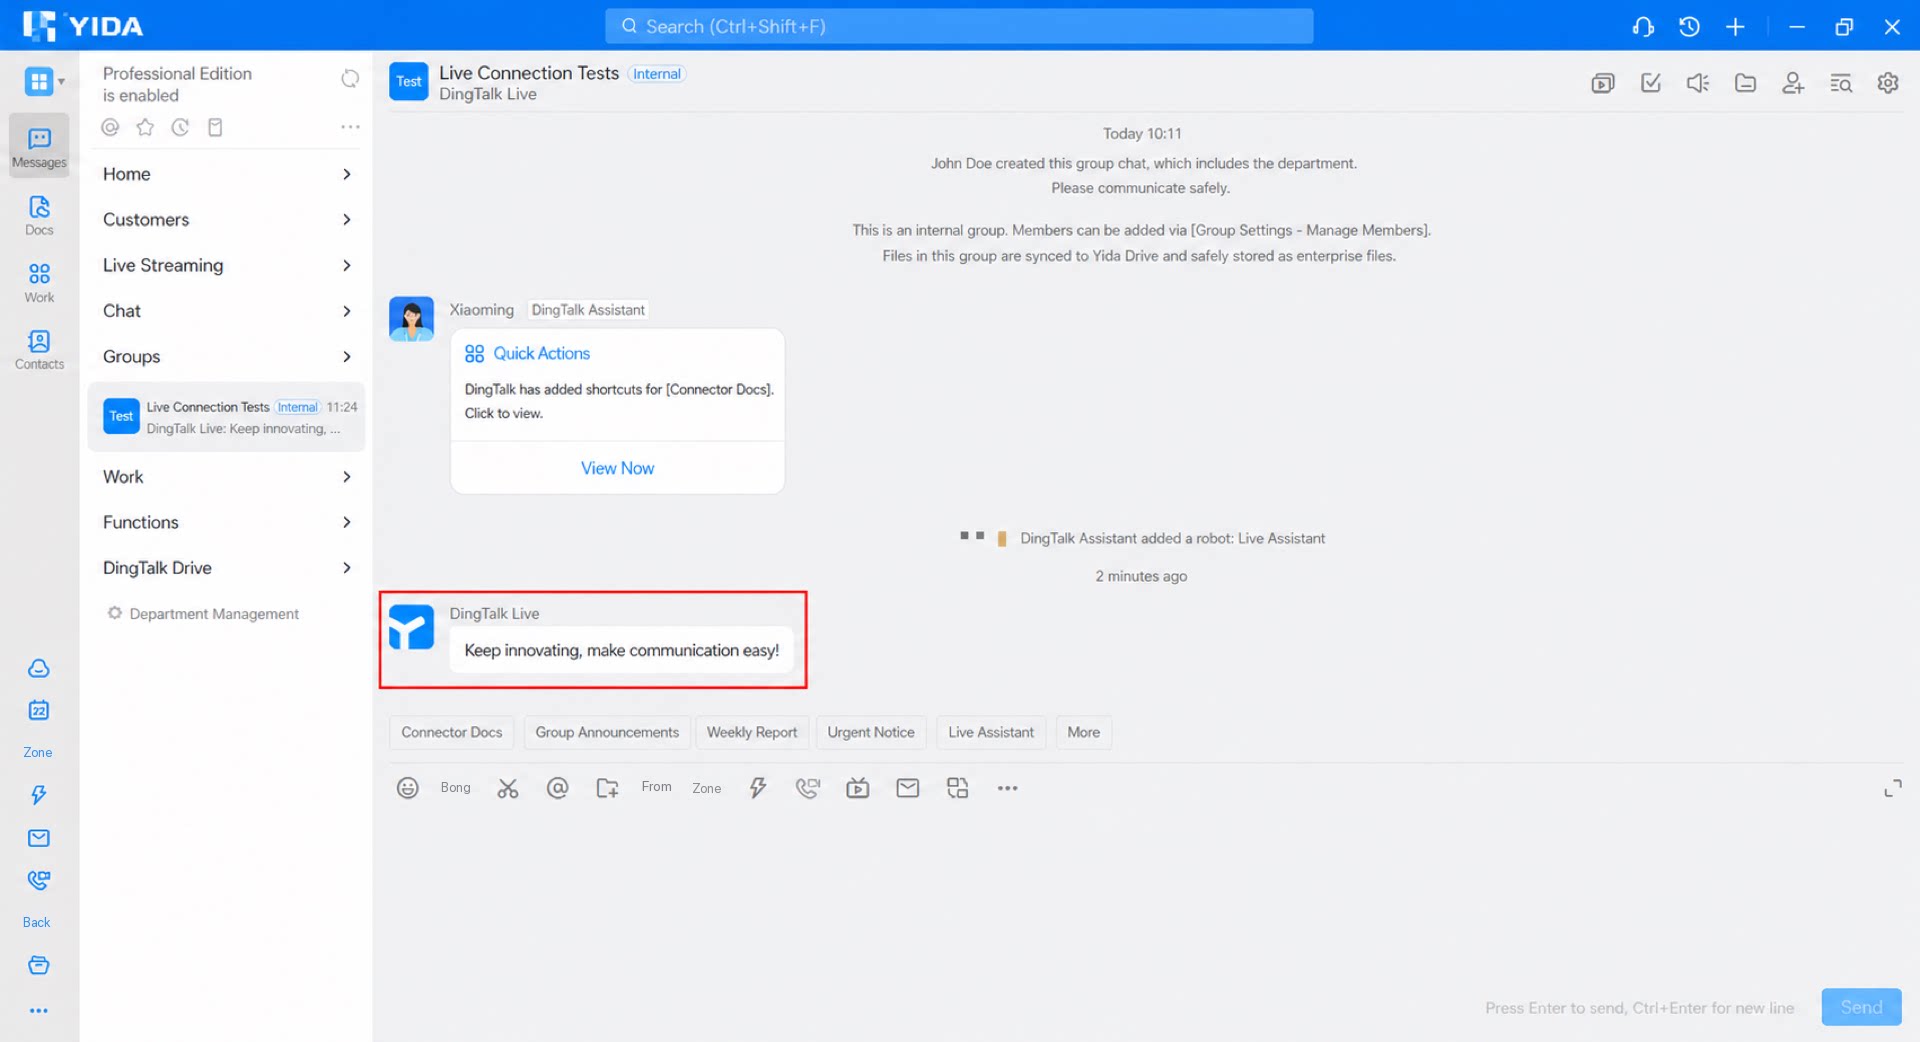
Configuration and data preparation are now complete. Submit the form to trigger the connector and send a message to the specified group chat. Procedure: Fill in the form and click Submit. (See Figure 2.5-1.)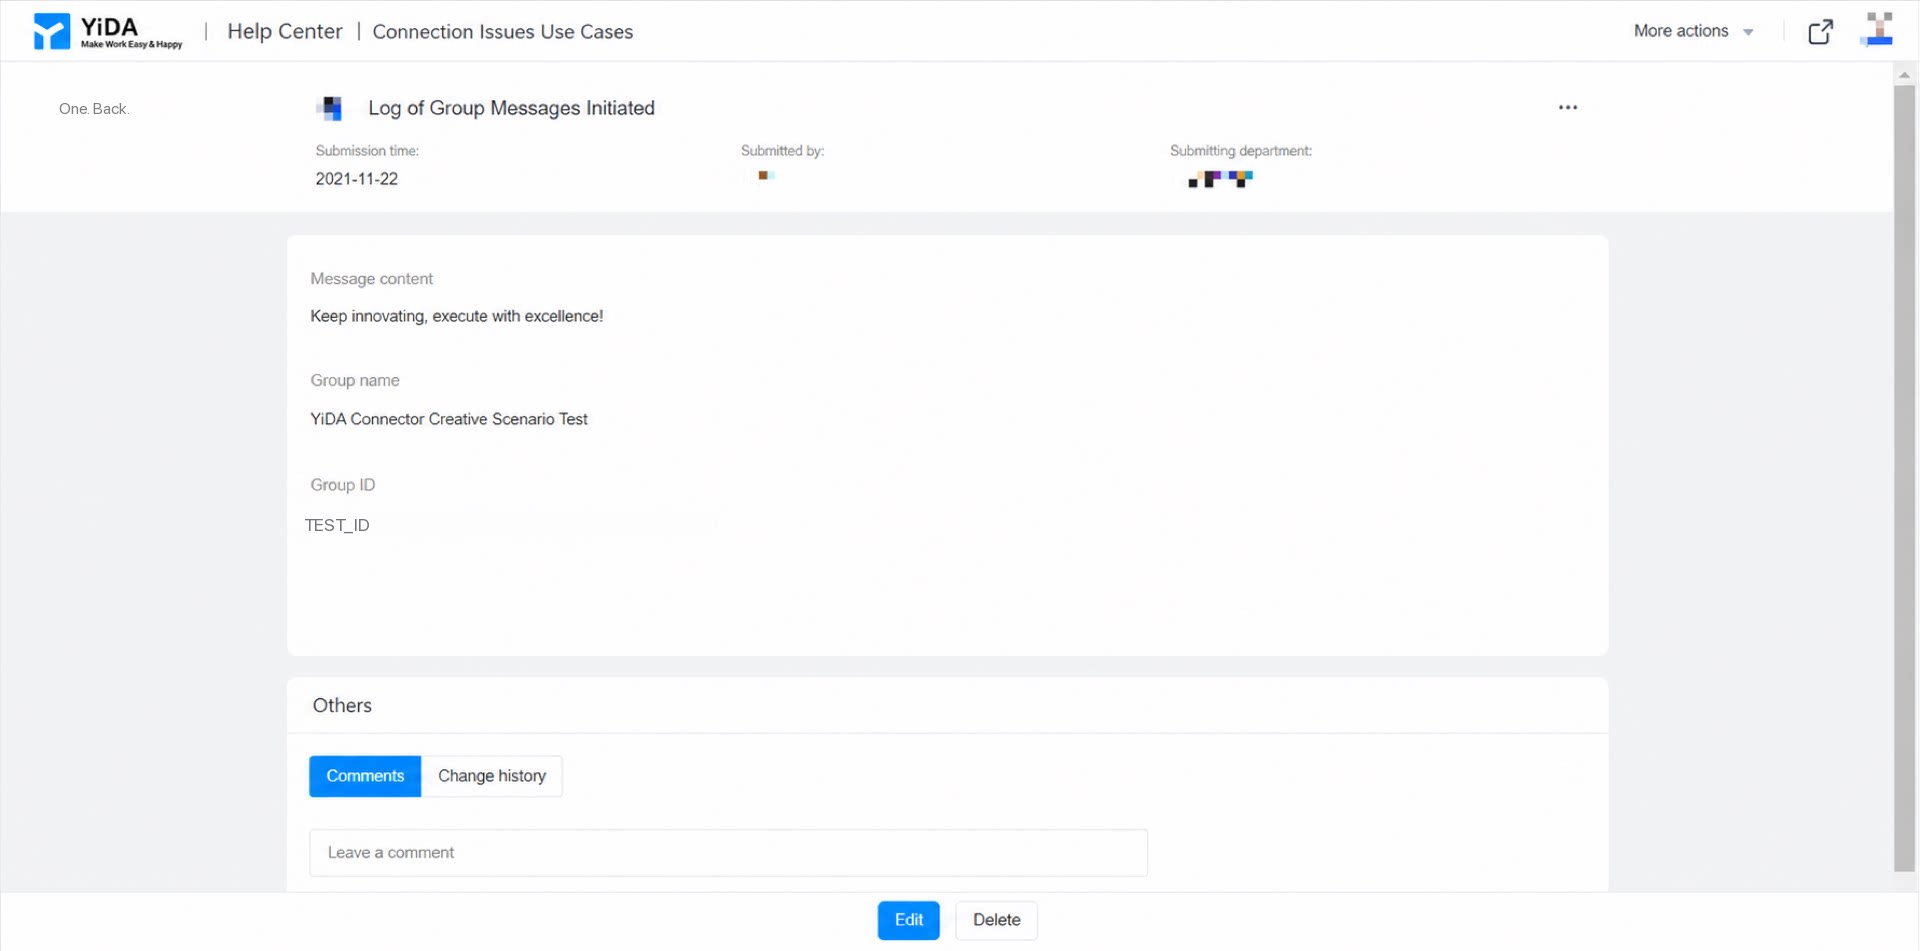
Result