Chats
Chats Calendar
 Meetings
 Contacts
 Mail
Mail Docs
Docs Drive
Drive AI Table
 AI Minutes
 Attendance
 Approval
 YiDA
YiDA Admin Console
Feature Overview
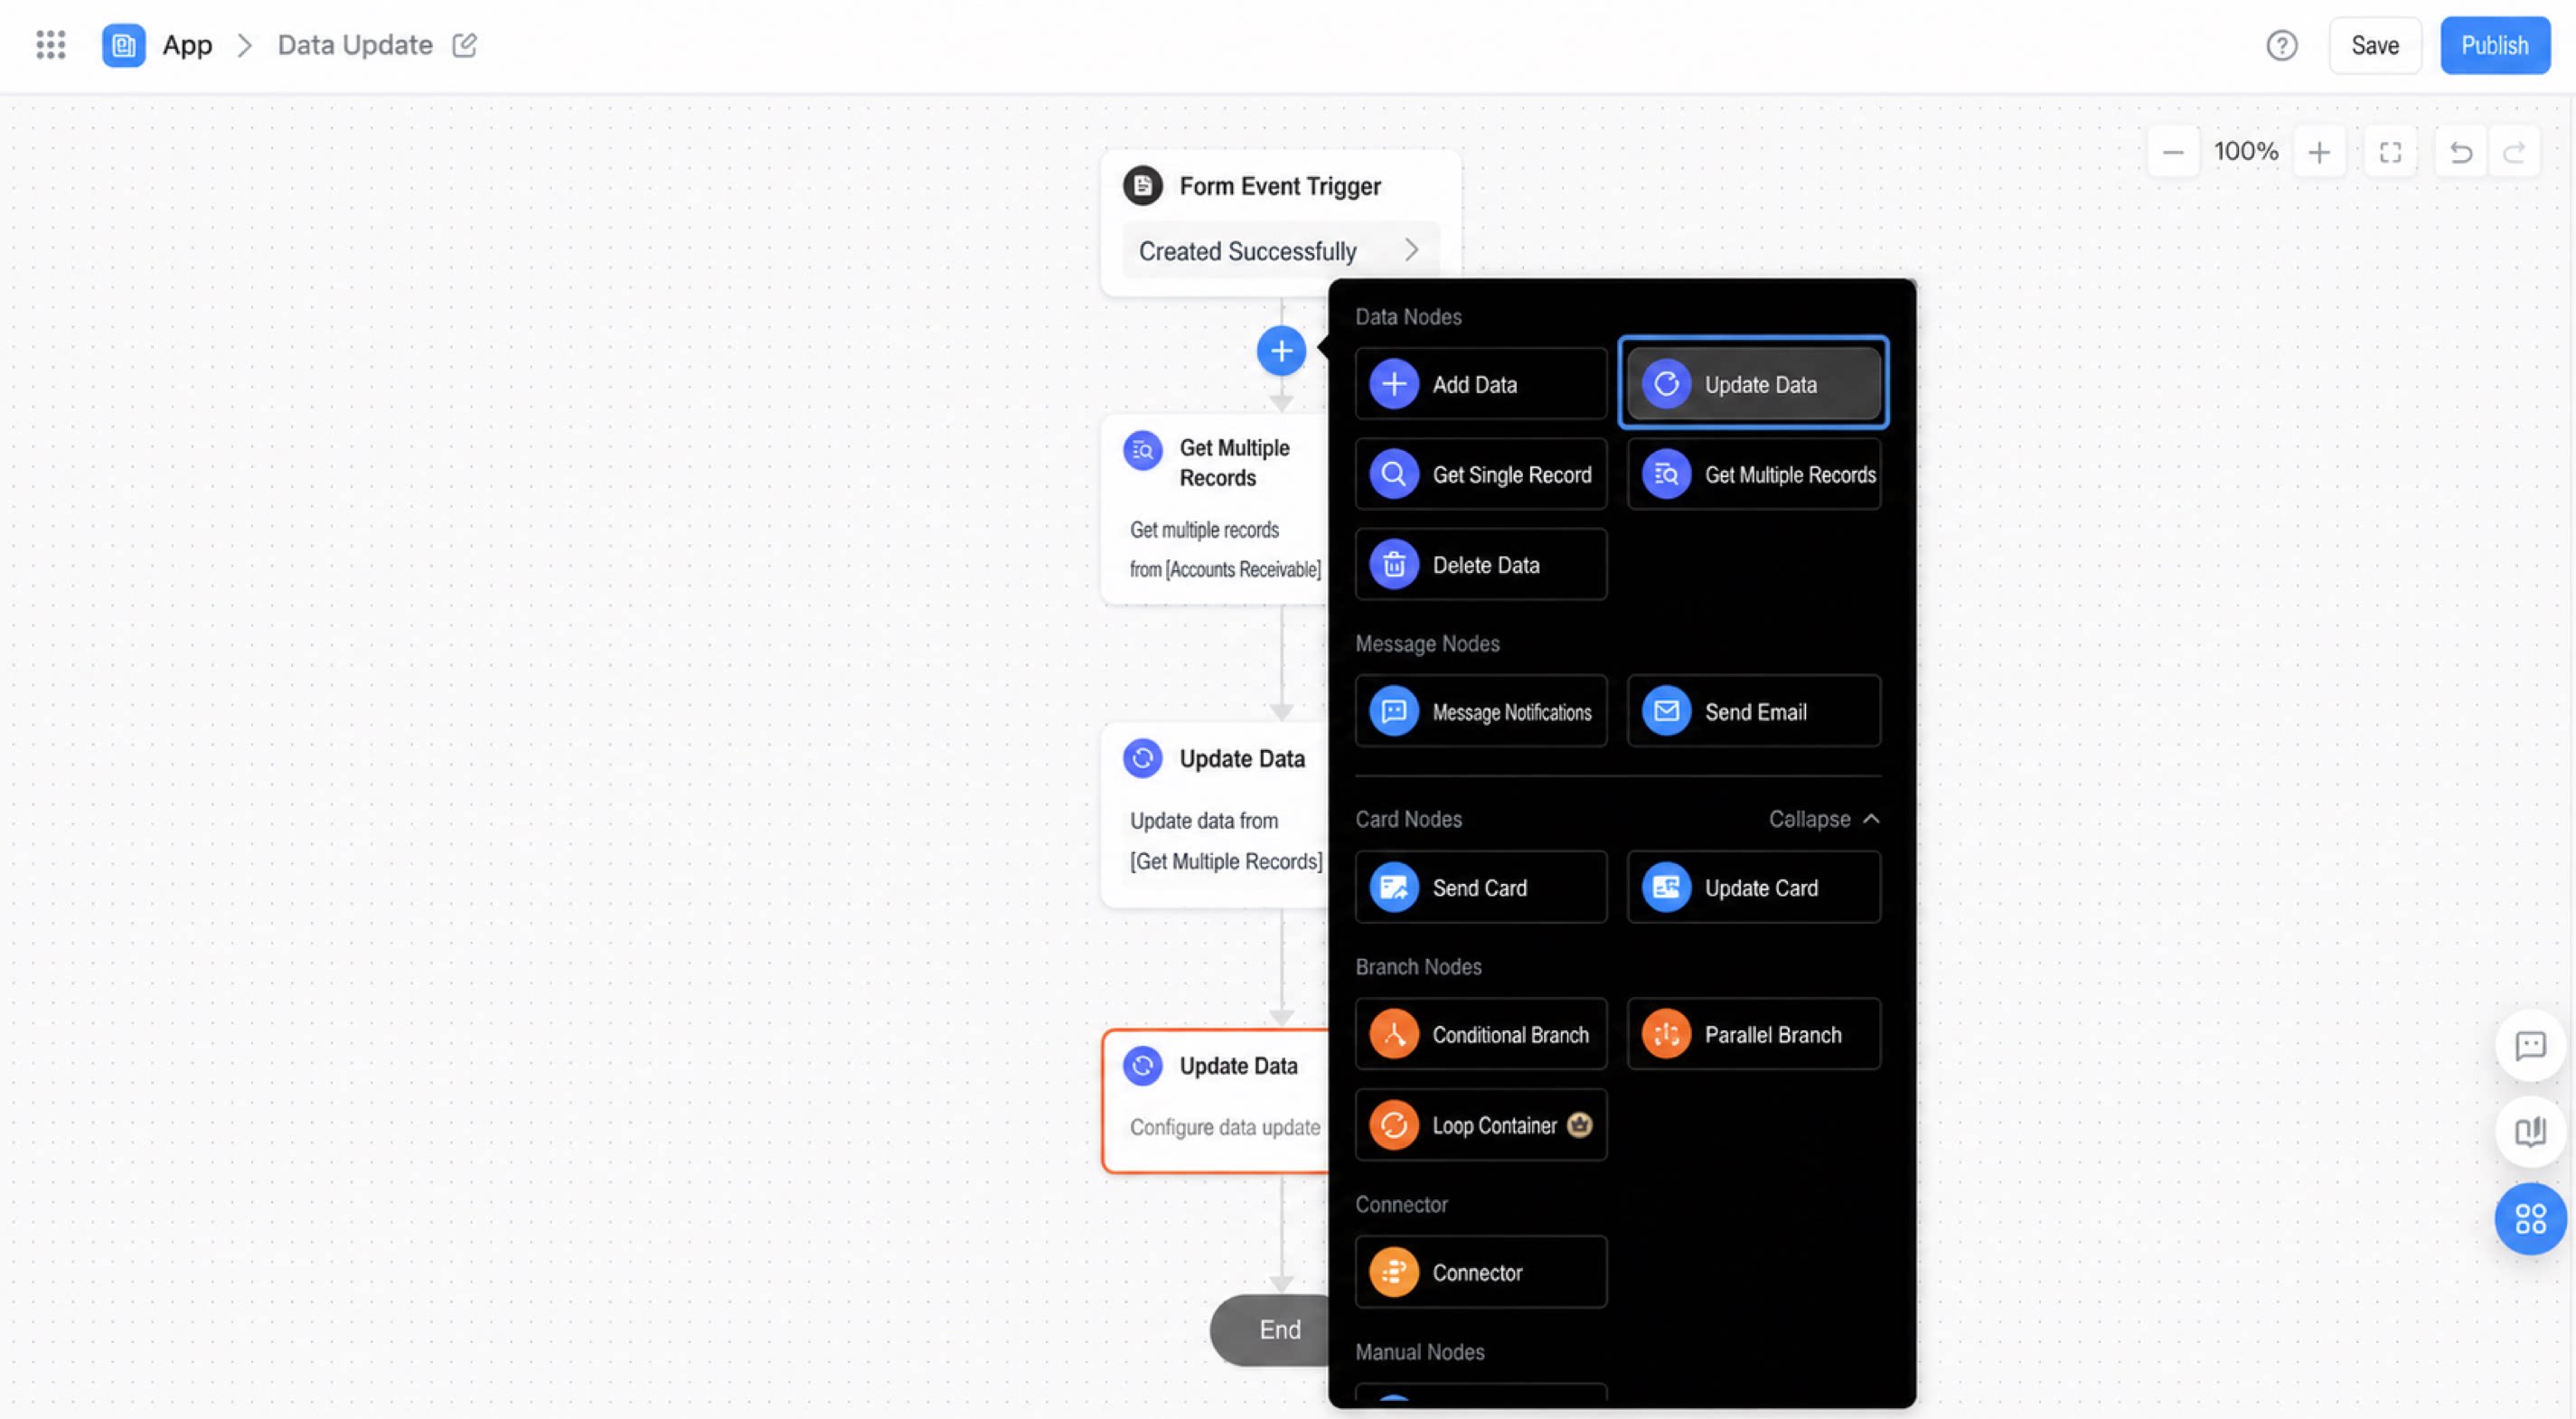
The update data node supports two update modes: Update form data directly and Update form data by node.- Update form data directly: updates the main table or subform of a regular form based on the configured matching rules. The source table can be a regular form or a workflow form. This mode focuses on direct updates.
- Update form data by node: updates the data retrieved by a Get single record or Get multiple records node. This mode focuses on retrieving data first, then updating it.
Use Scenarios
Updating form data directly has a per-update limit, but you can follow the same configuration approach as business rules to update one subform from another. Updating form data by node works the same as the original update node and can update a batch of filtered records. The following is an example of updating form data directly: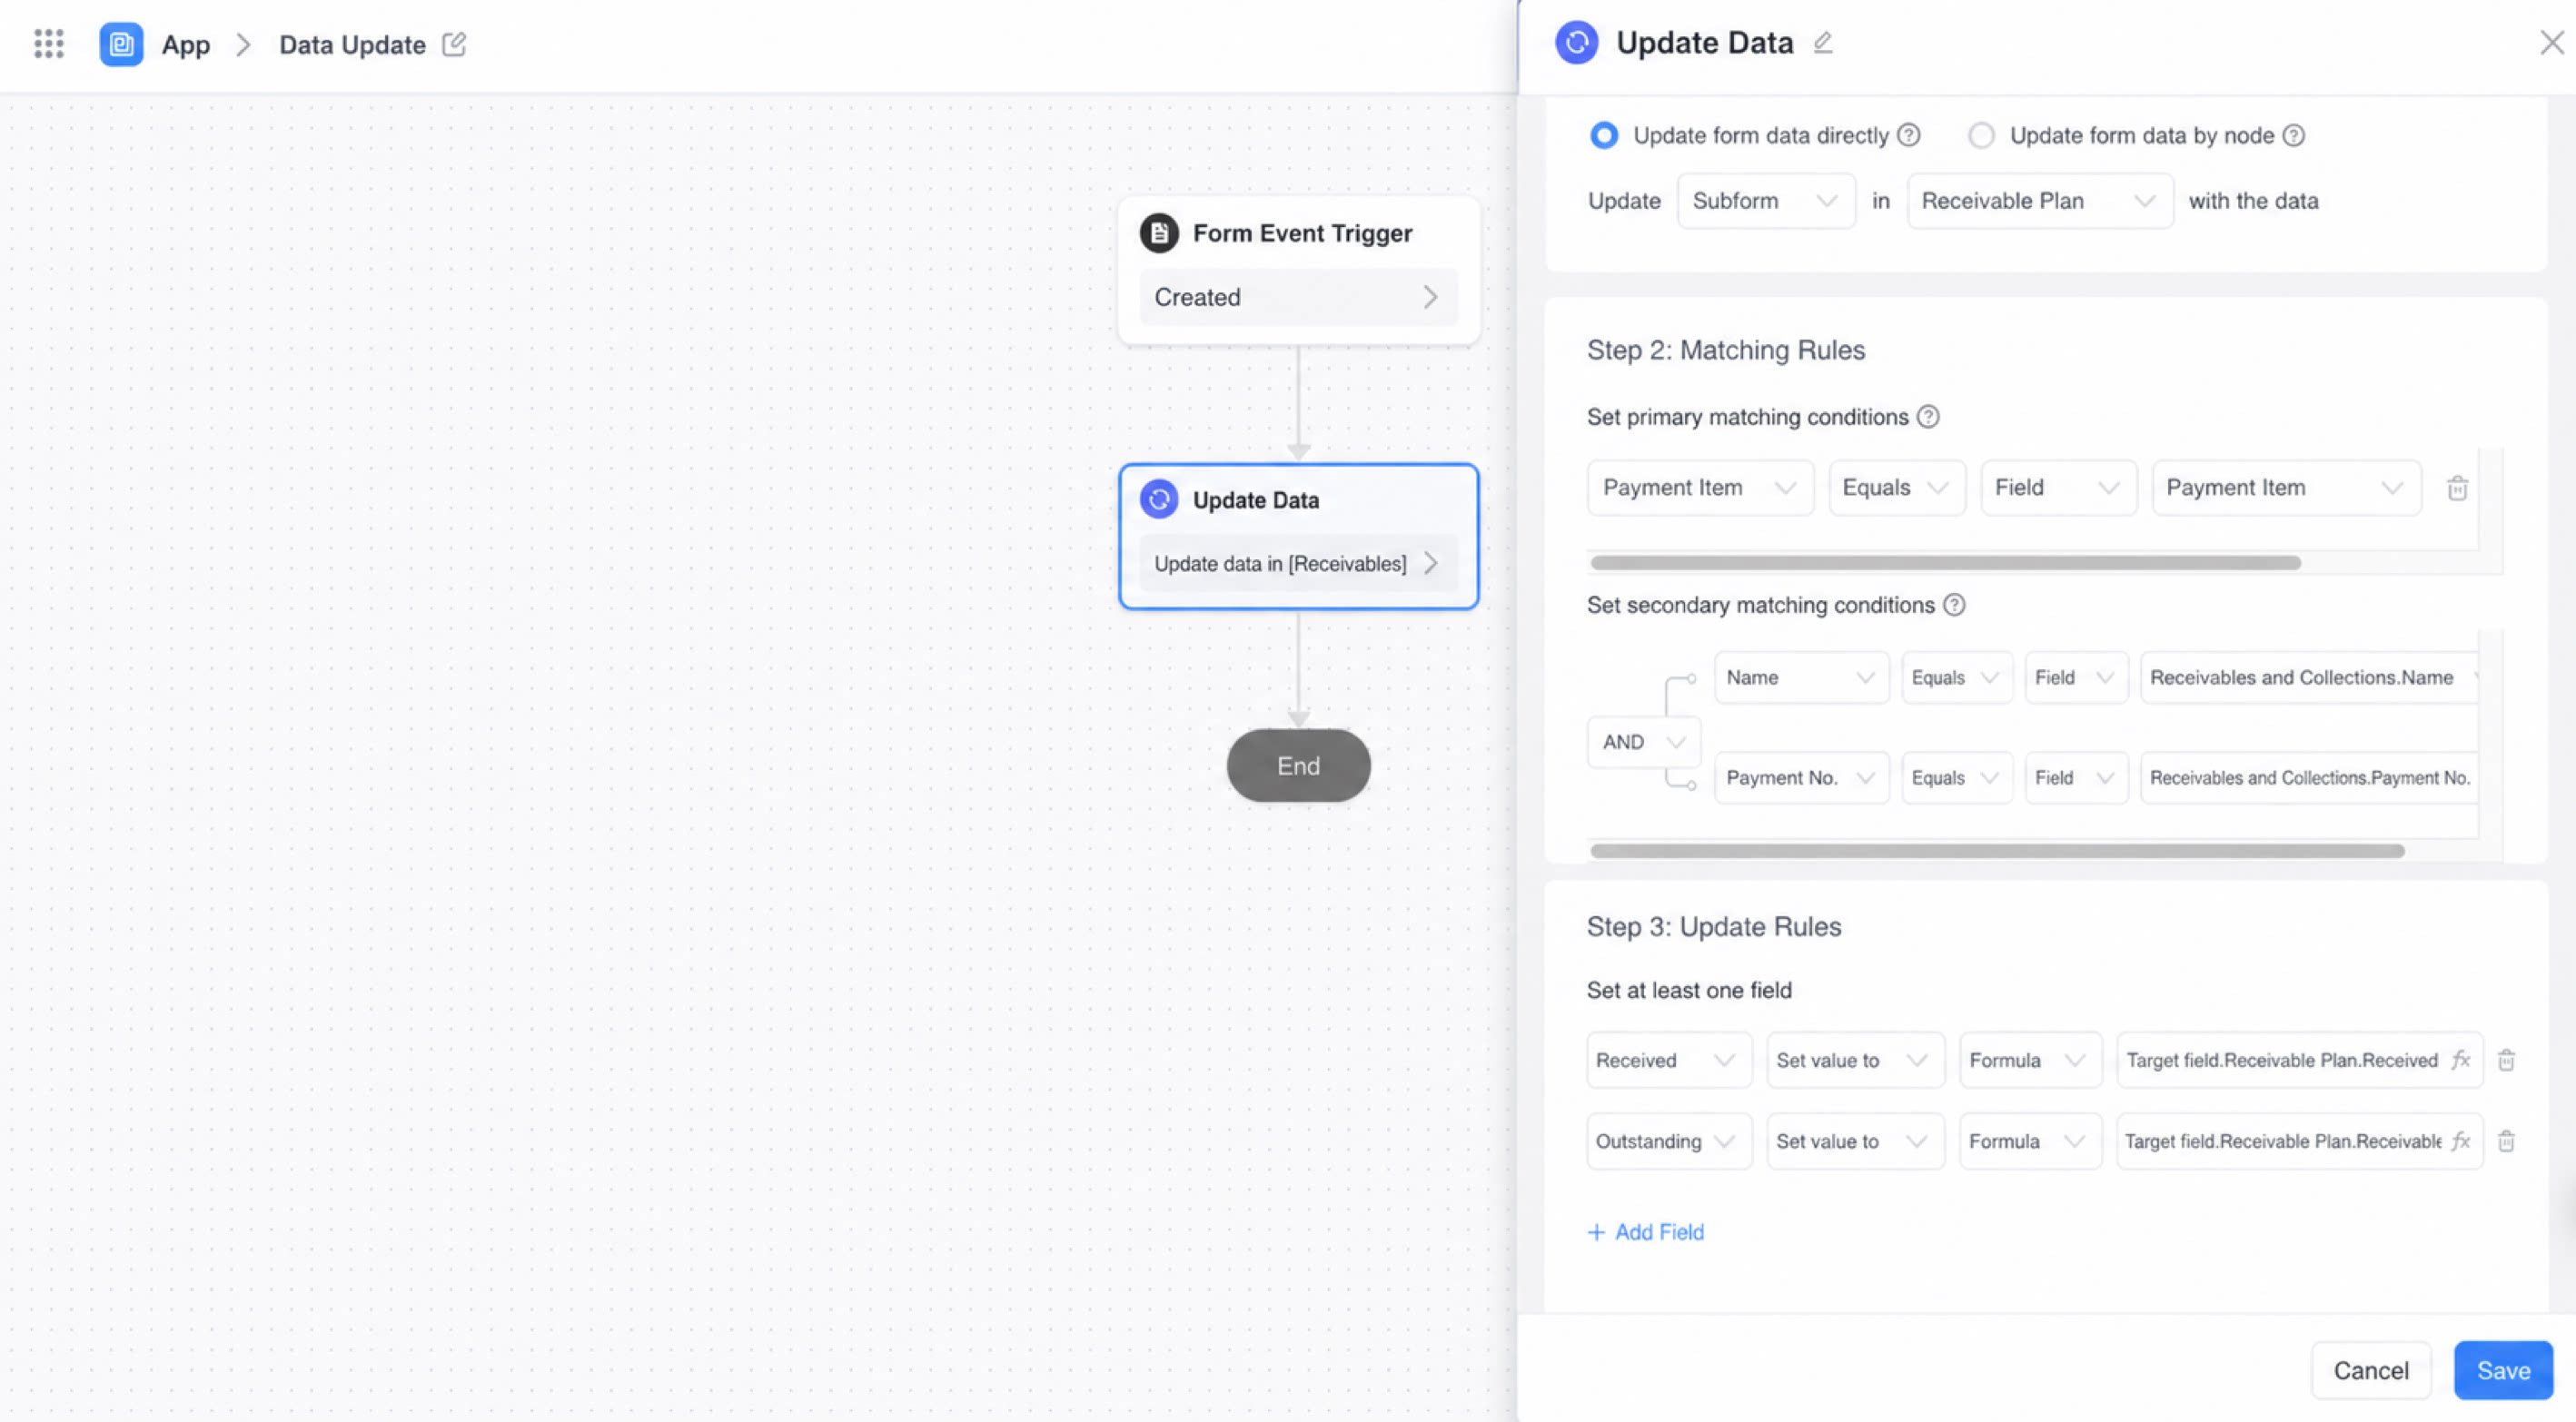
Steps
Update Form Data Directly
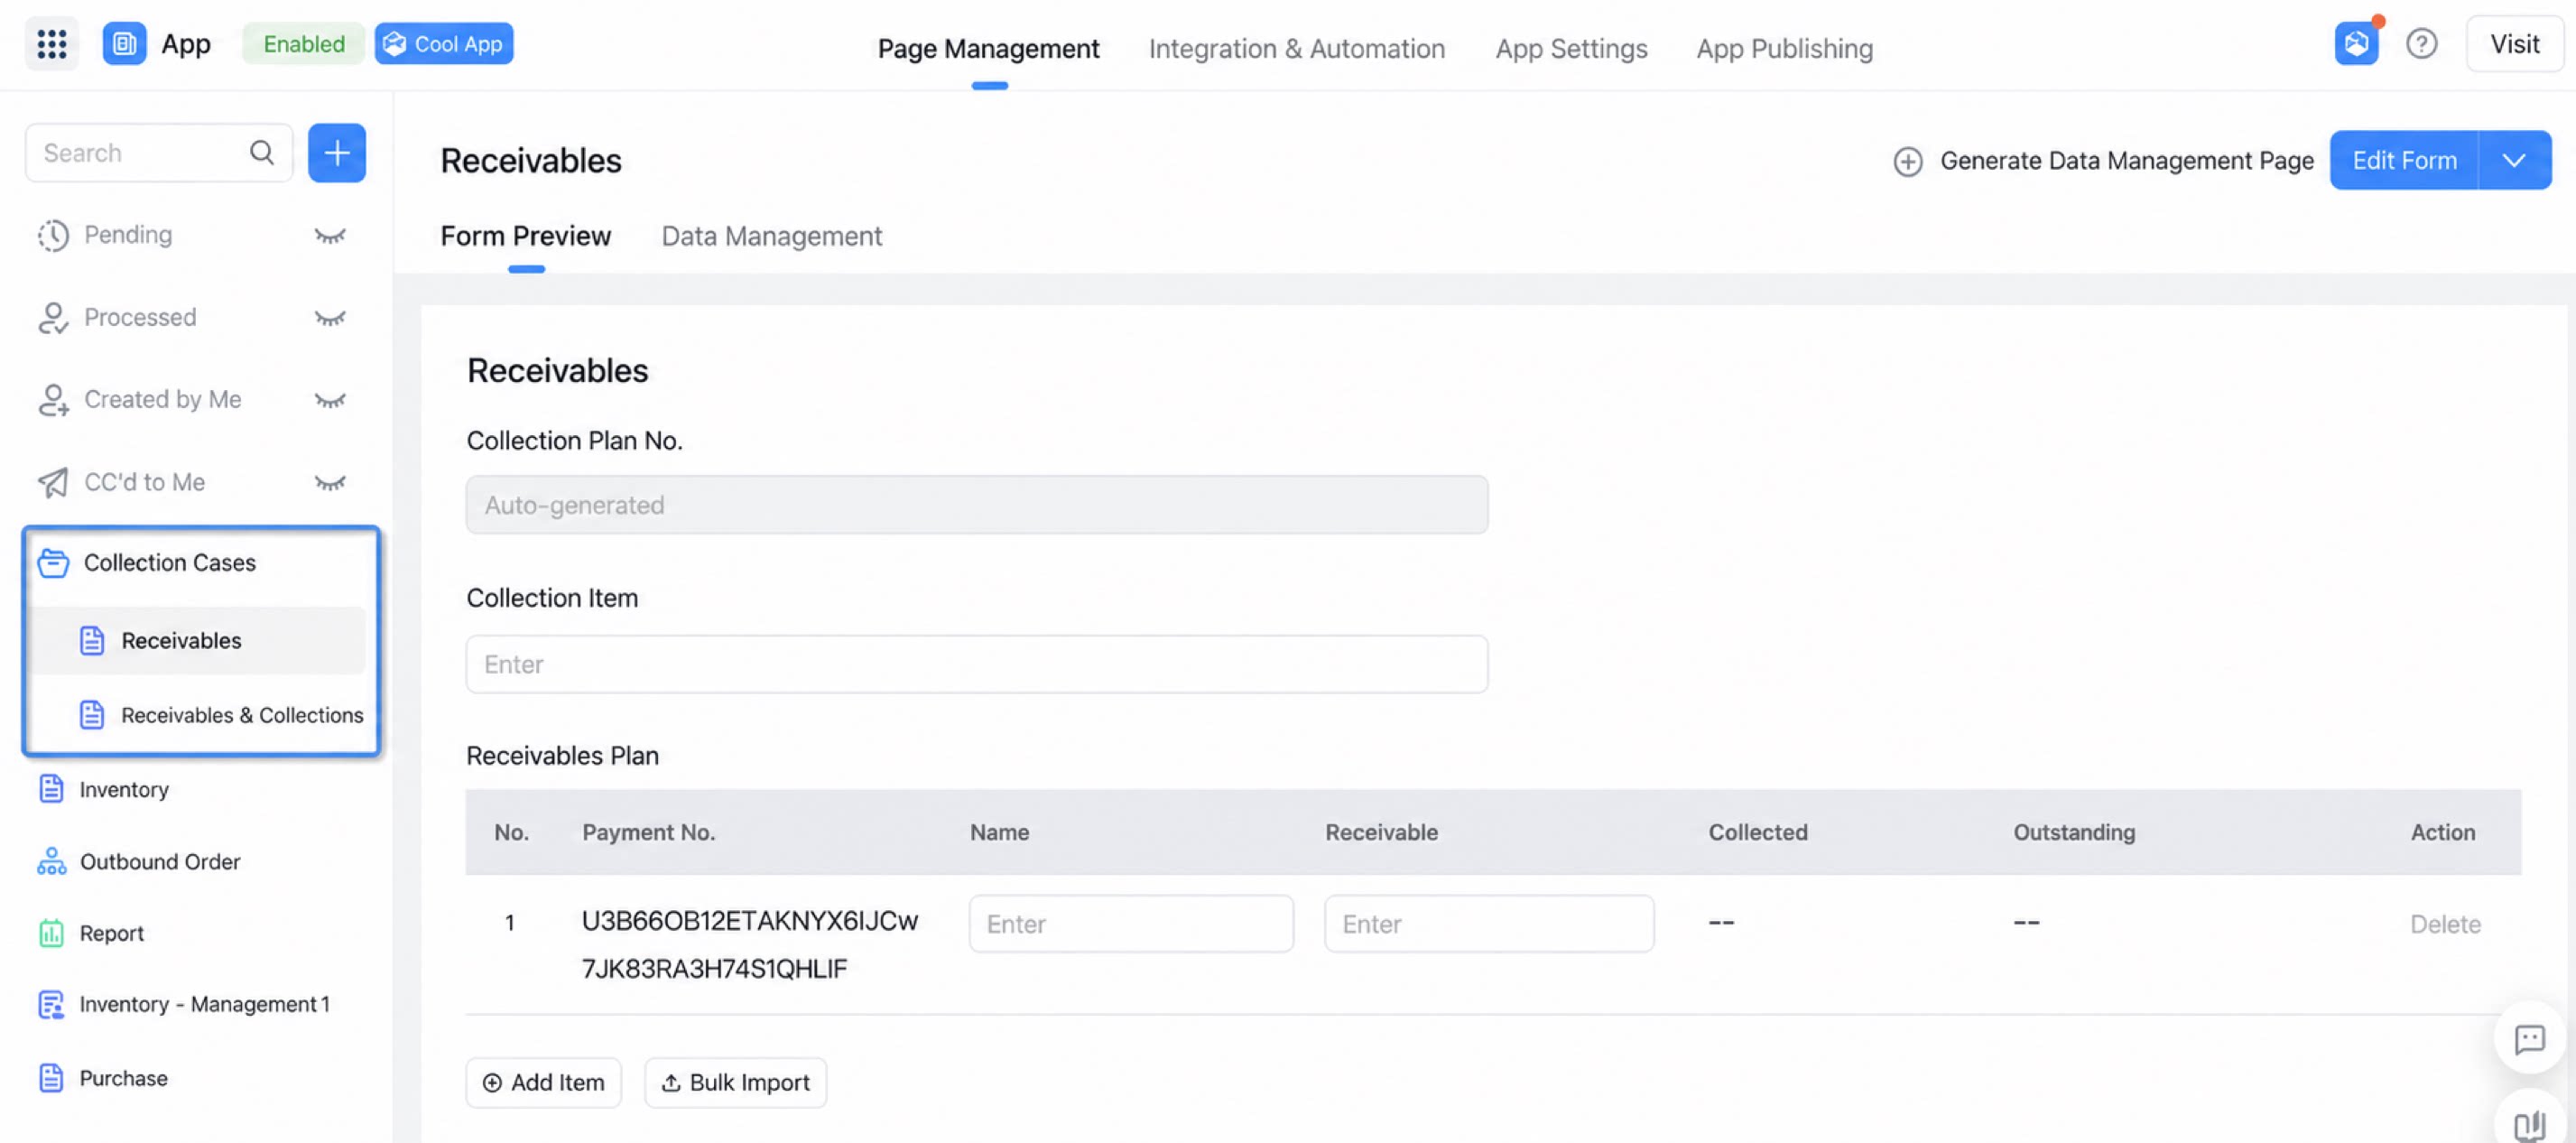
- Sign in to the YiDA workbench and click My Apps.
- Select the app you need and go to the App Settings page.
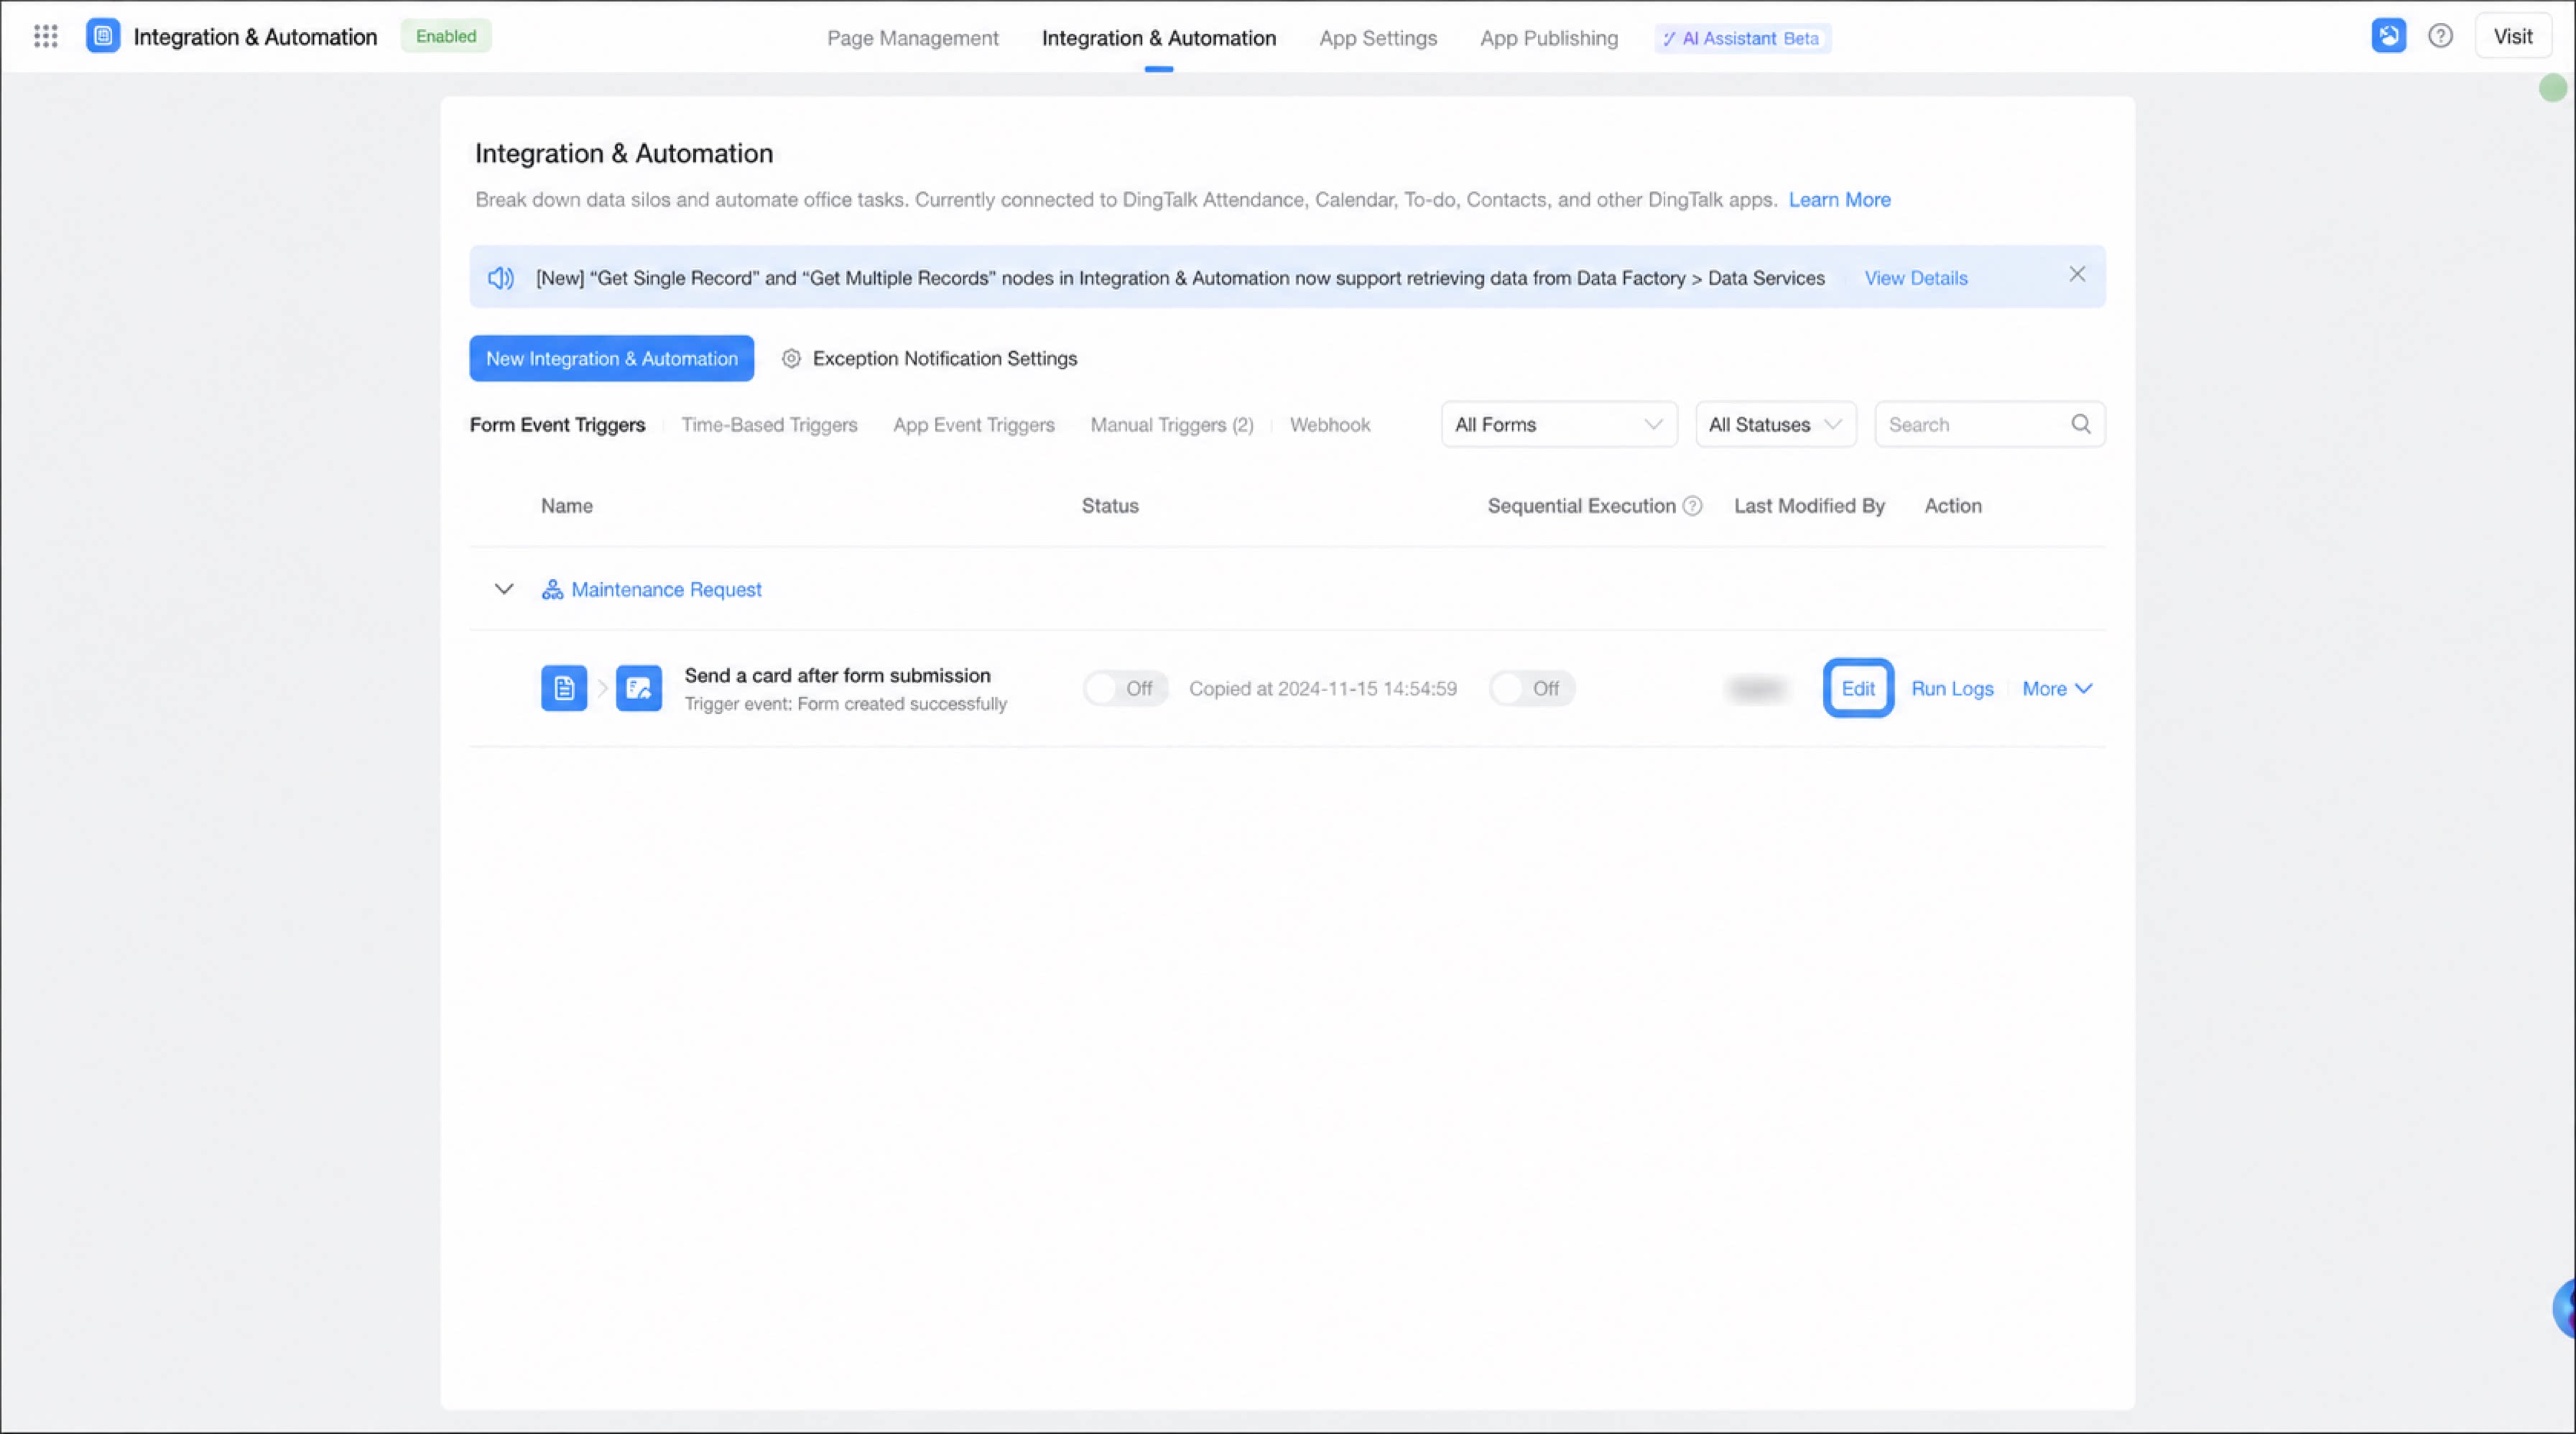
- Click Integration & Automation, select the integration & automation flow you created, and click Edit.
- Move the cursor over the connector line of the approval node. A + button appears. Click + and select the Update Data node.
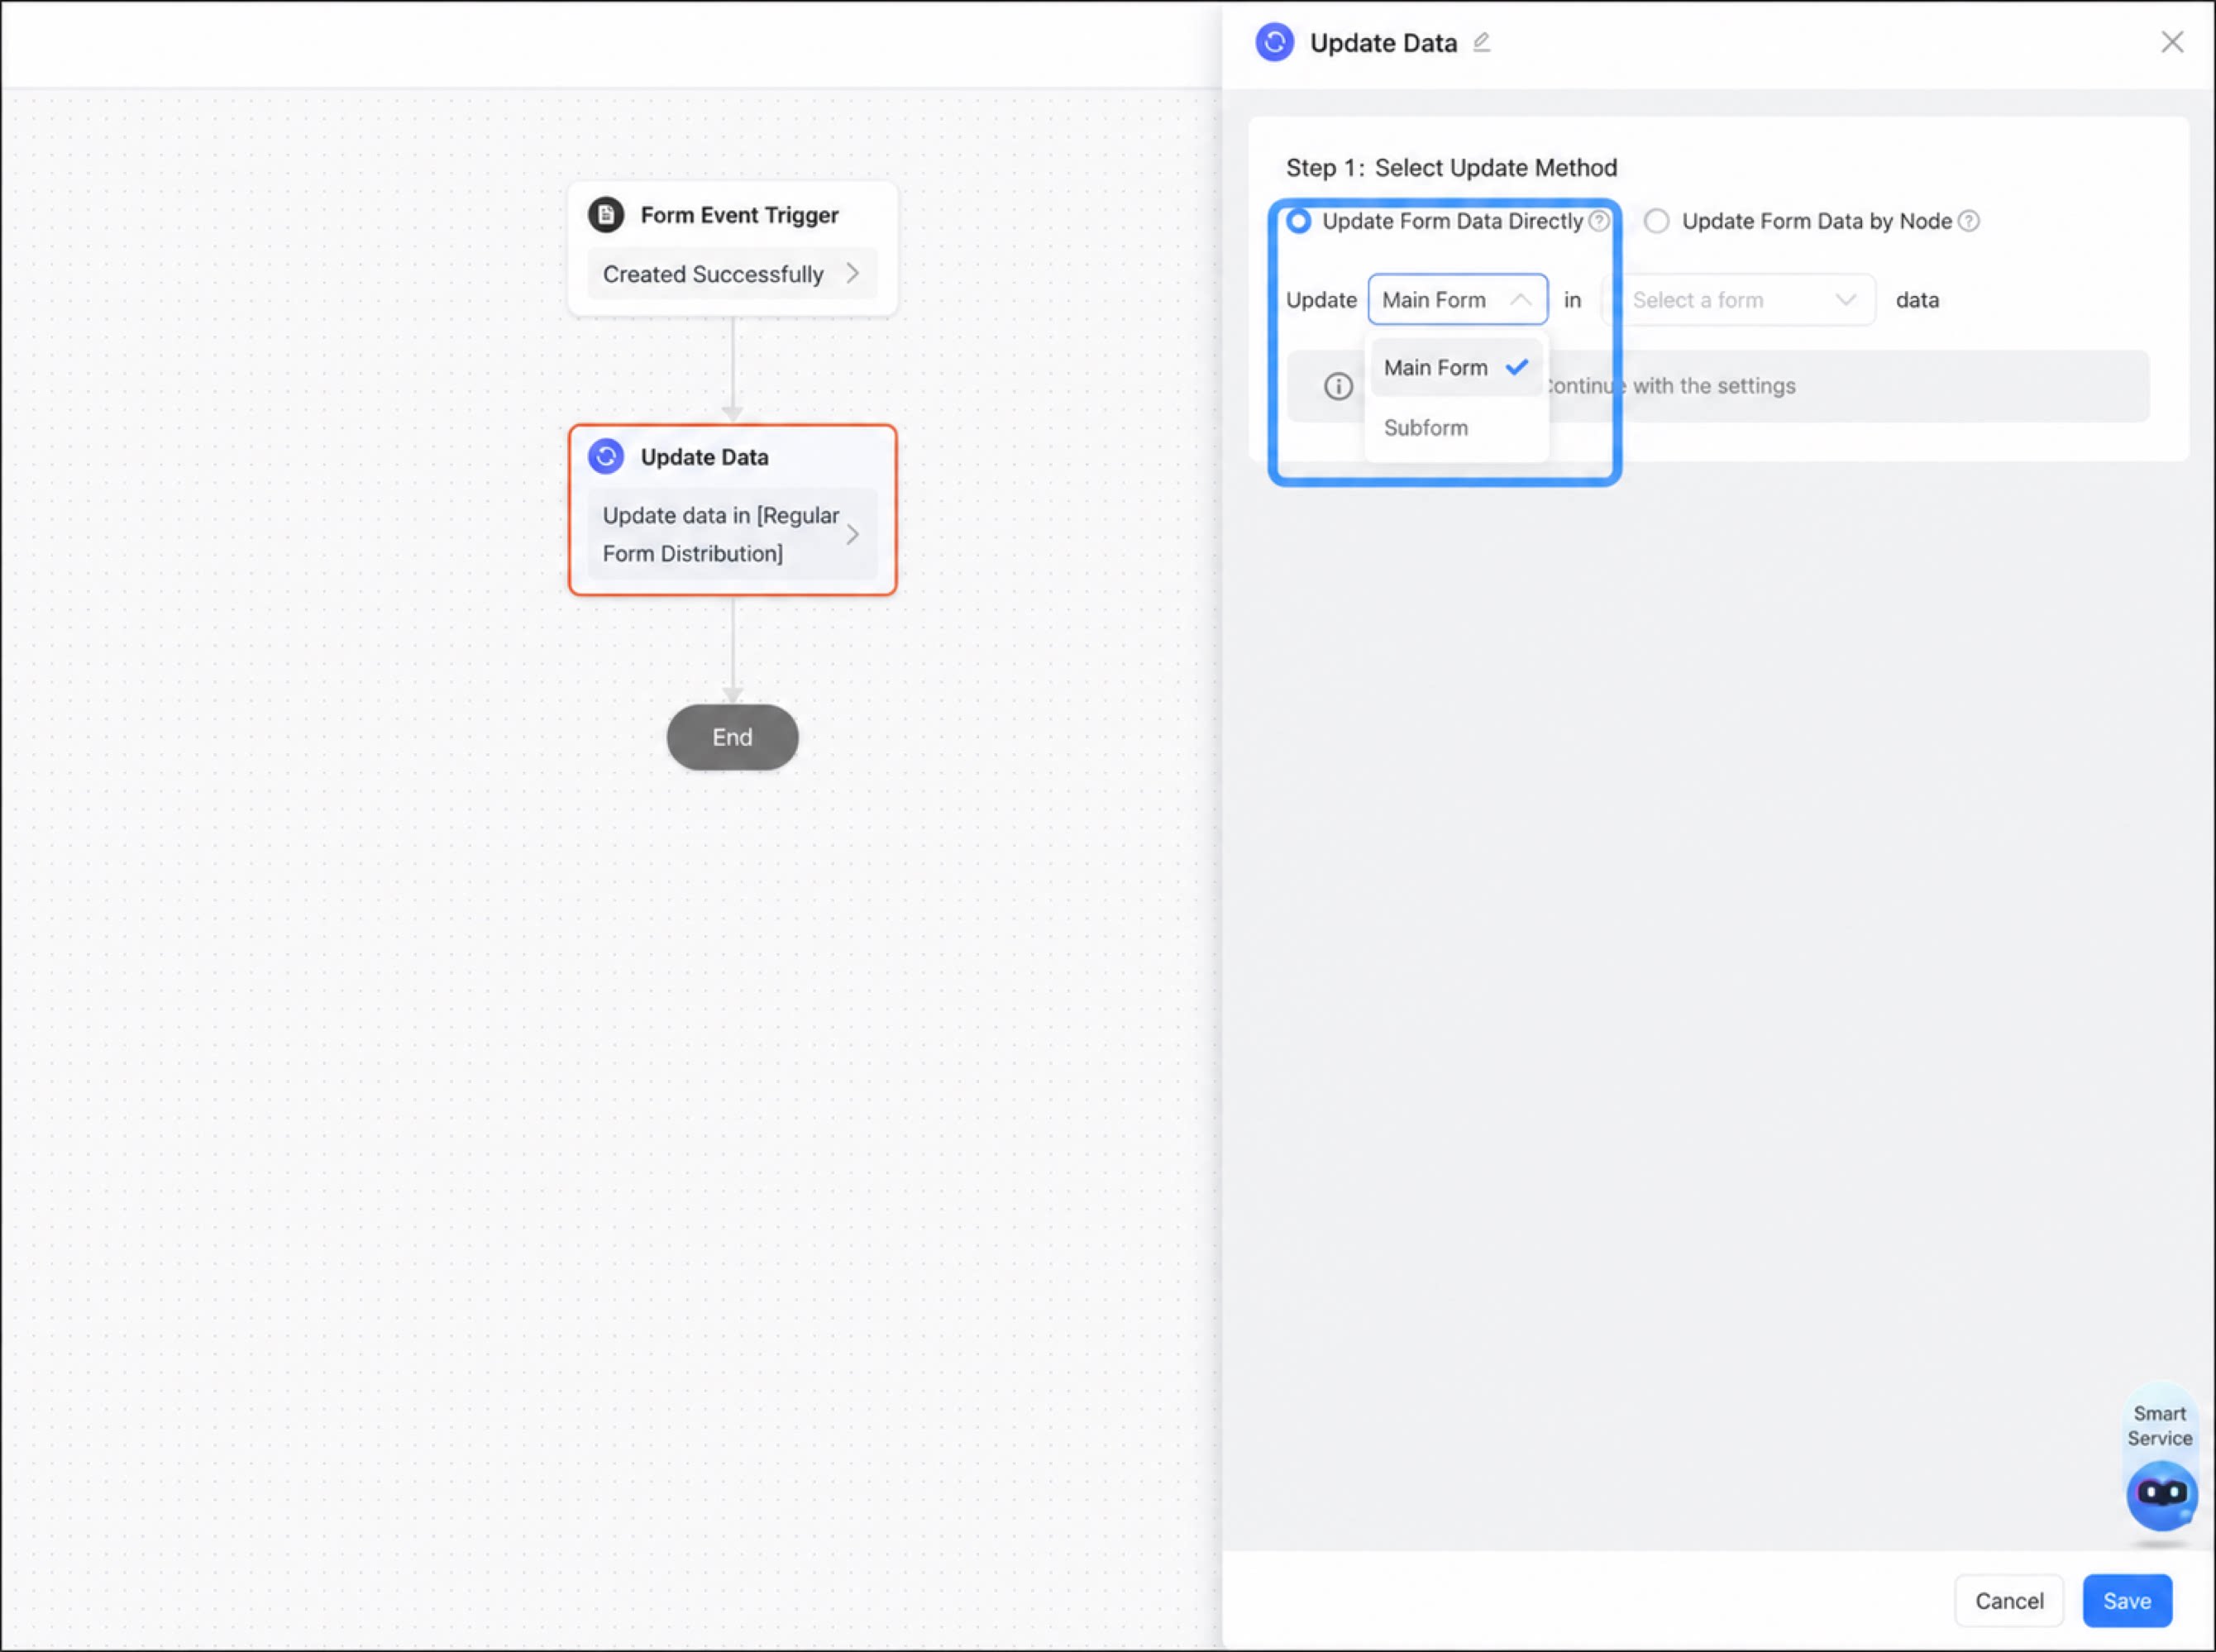
- In the configuration panel on the right, select Update form data directly, then click to select the target table type.
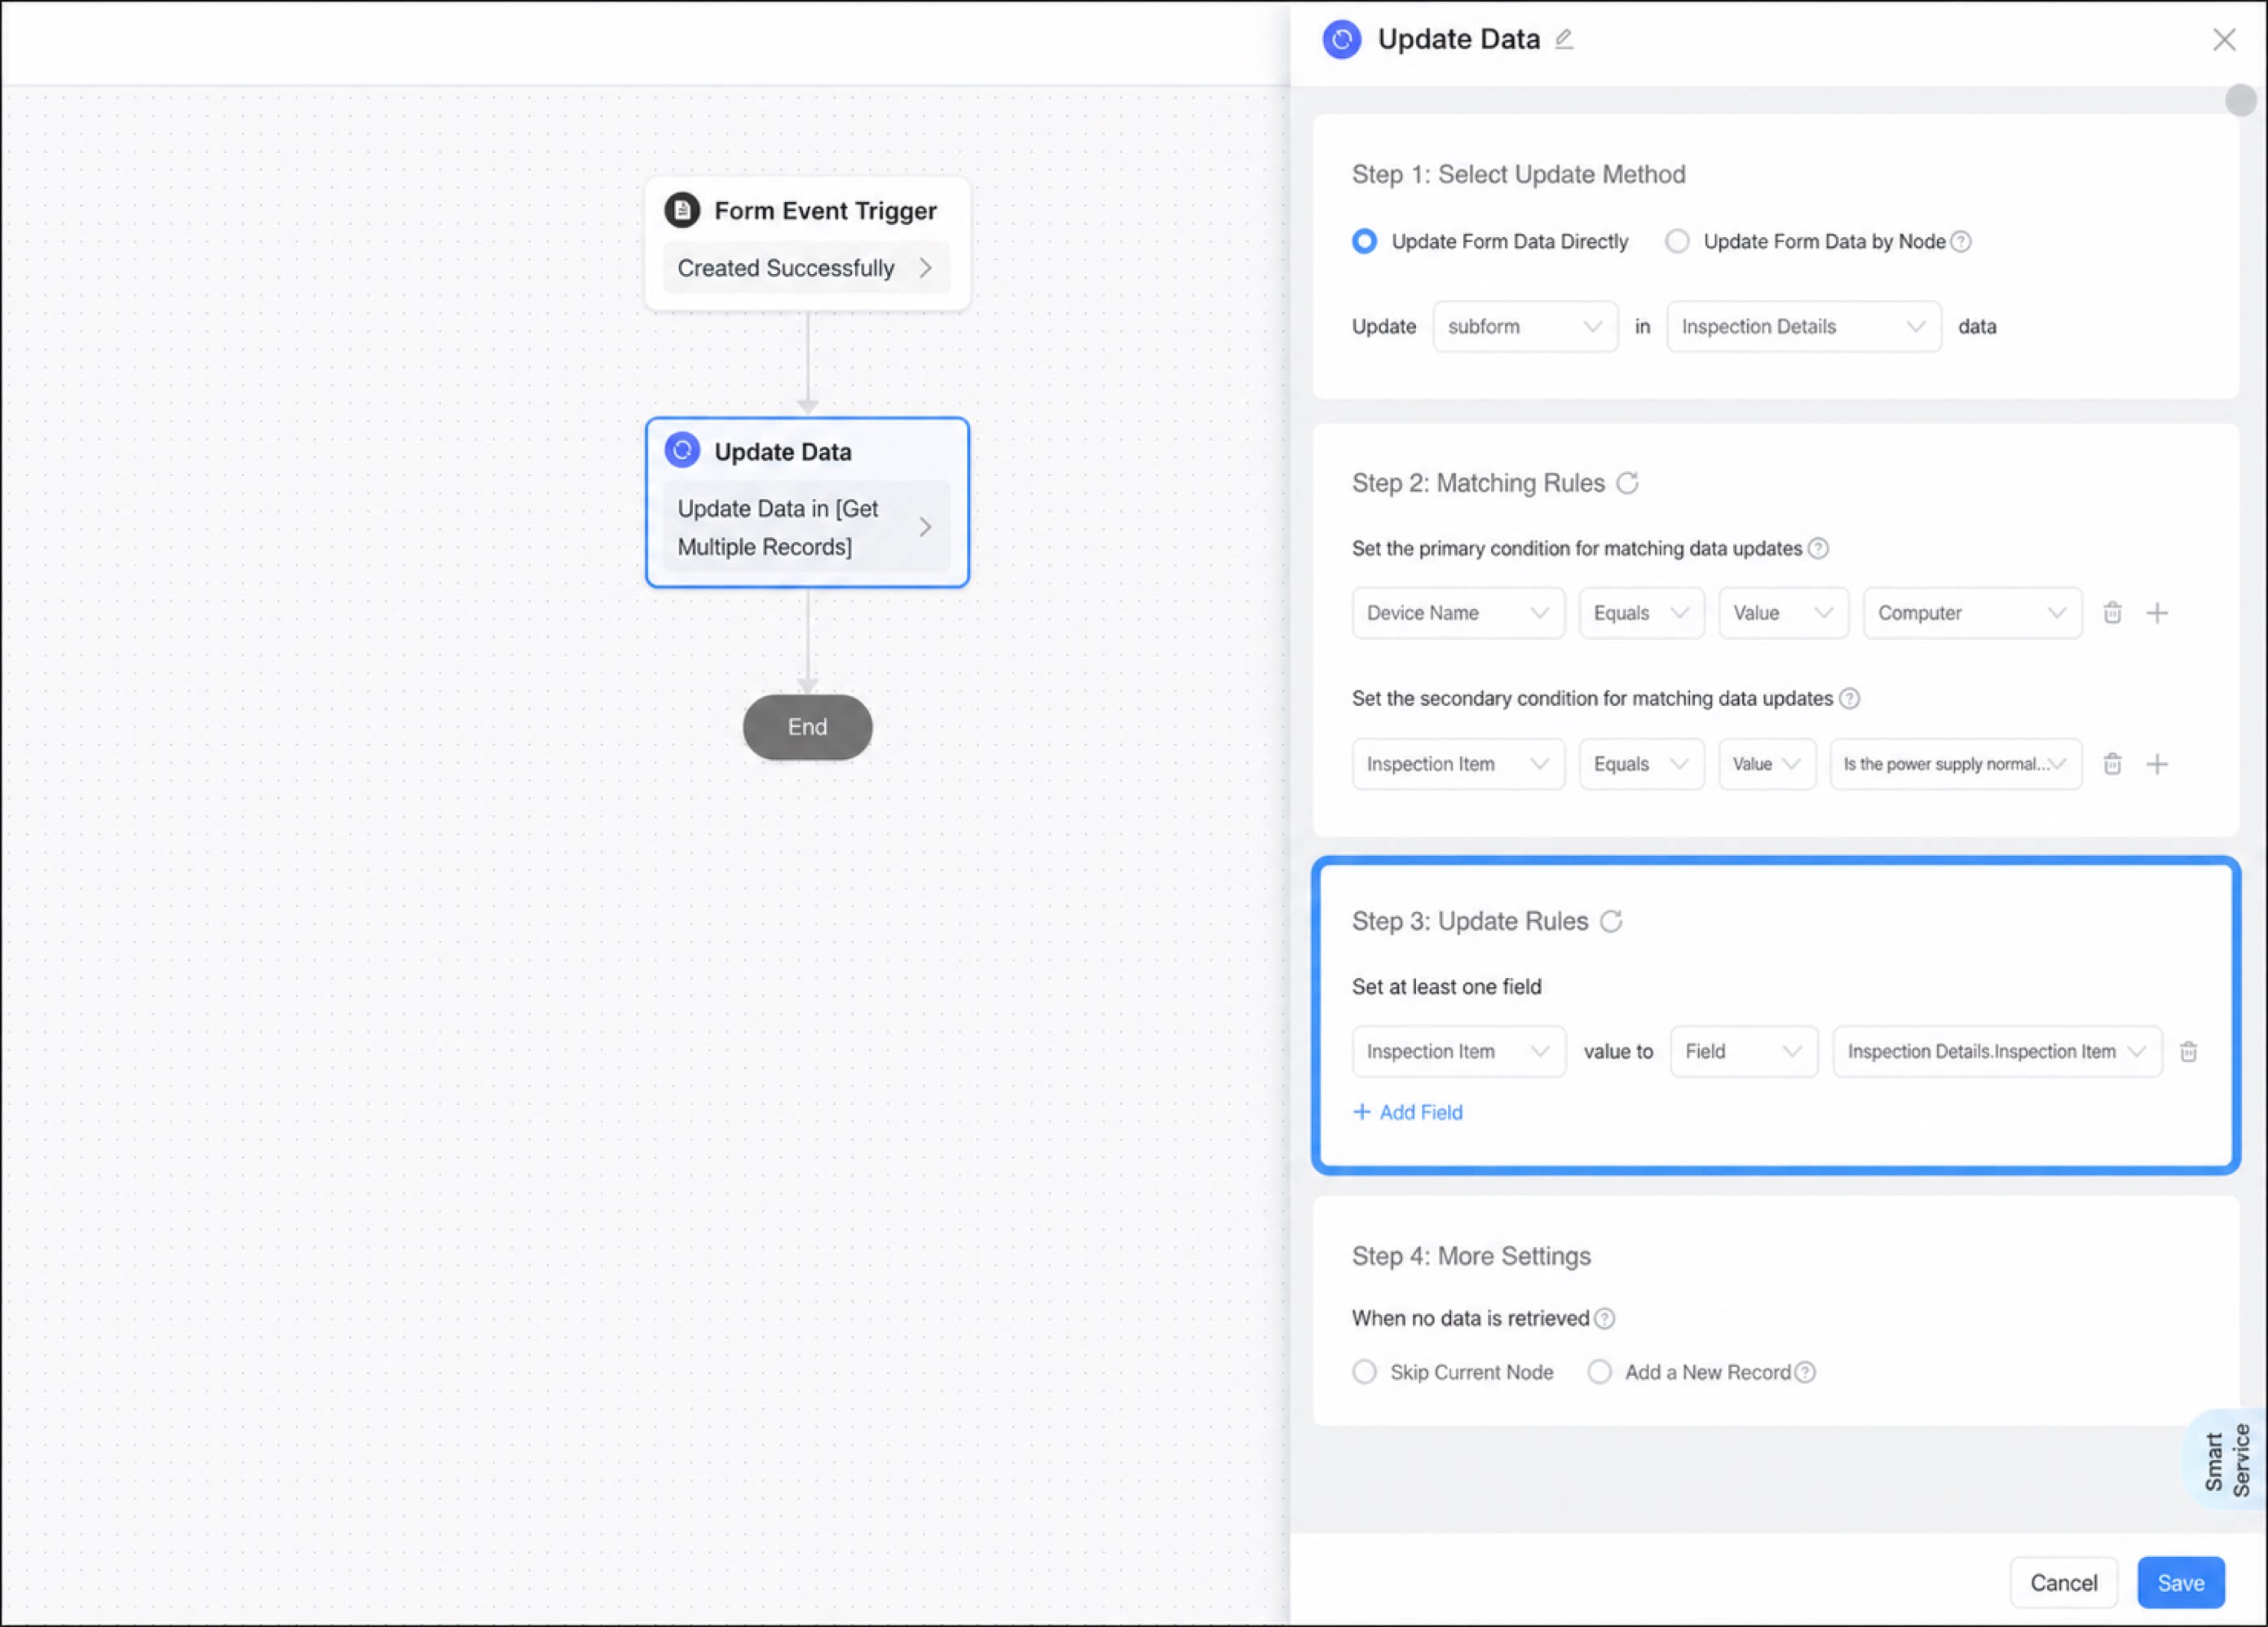
- Configure the matching rules for the data update.
- Components that support matching: Single-line text, Multi-line text, Select, Dropdown select, Date, and Serial number. For the detailed mapping, see Component rule details. Other components are not supported yet.
- For data that meets the primary condition, up to 100 records can be matched. Records beyond 100 are not updated.
1
Configure the update rules for the data update
- Only components of the same type can assign values to each other. Supported components include Single-line text, Multi-line text, Numerical, Select, Dropdown select, Checkbox, Dropdown multi-select, Cascade select, Date, Date range, Image upload, Attachment, User, and Address. For the detailed mapping, see Update rule details. Other components are not supported yet.
- Direct updates support up to 100 records for the main form and 50 records for the subform. Exceeding the limit causes an error and the submission fails. Sorting is not supported; records are updated in the order they are matched.
2
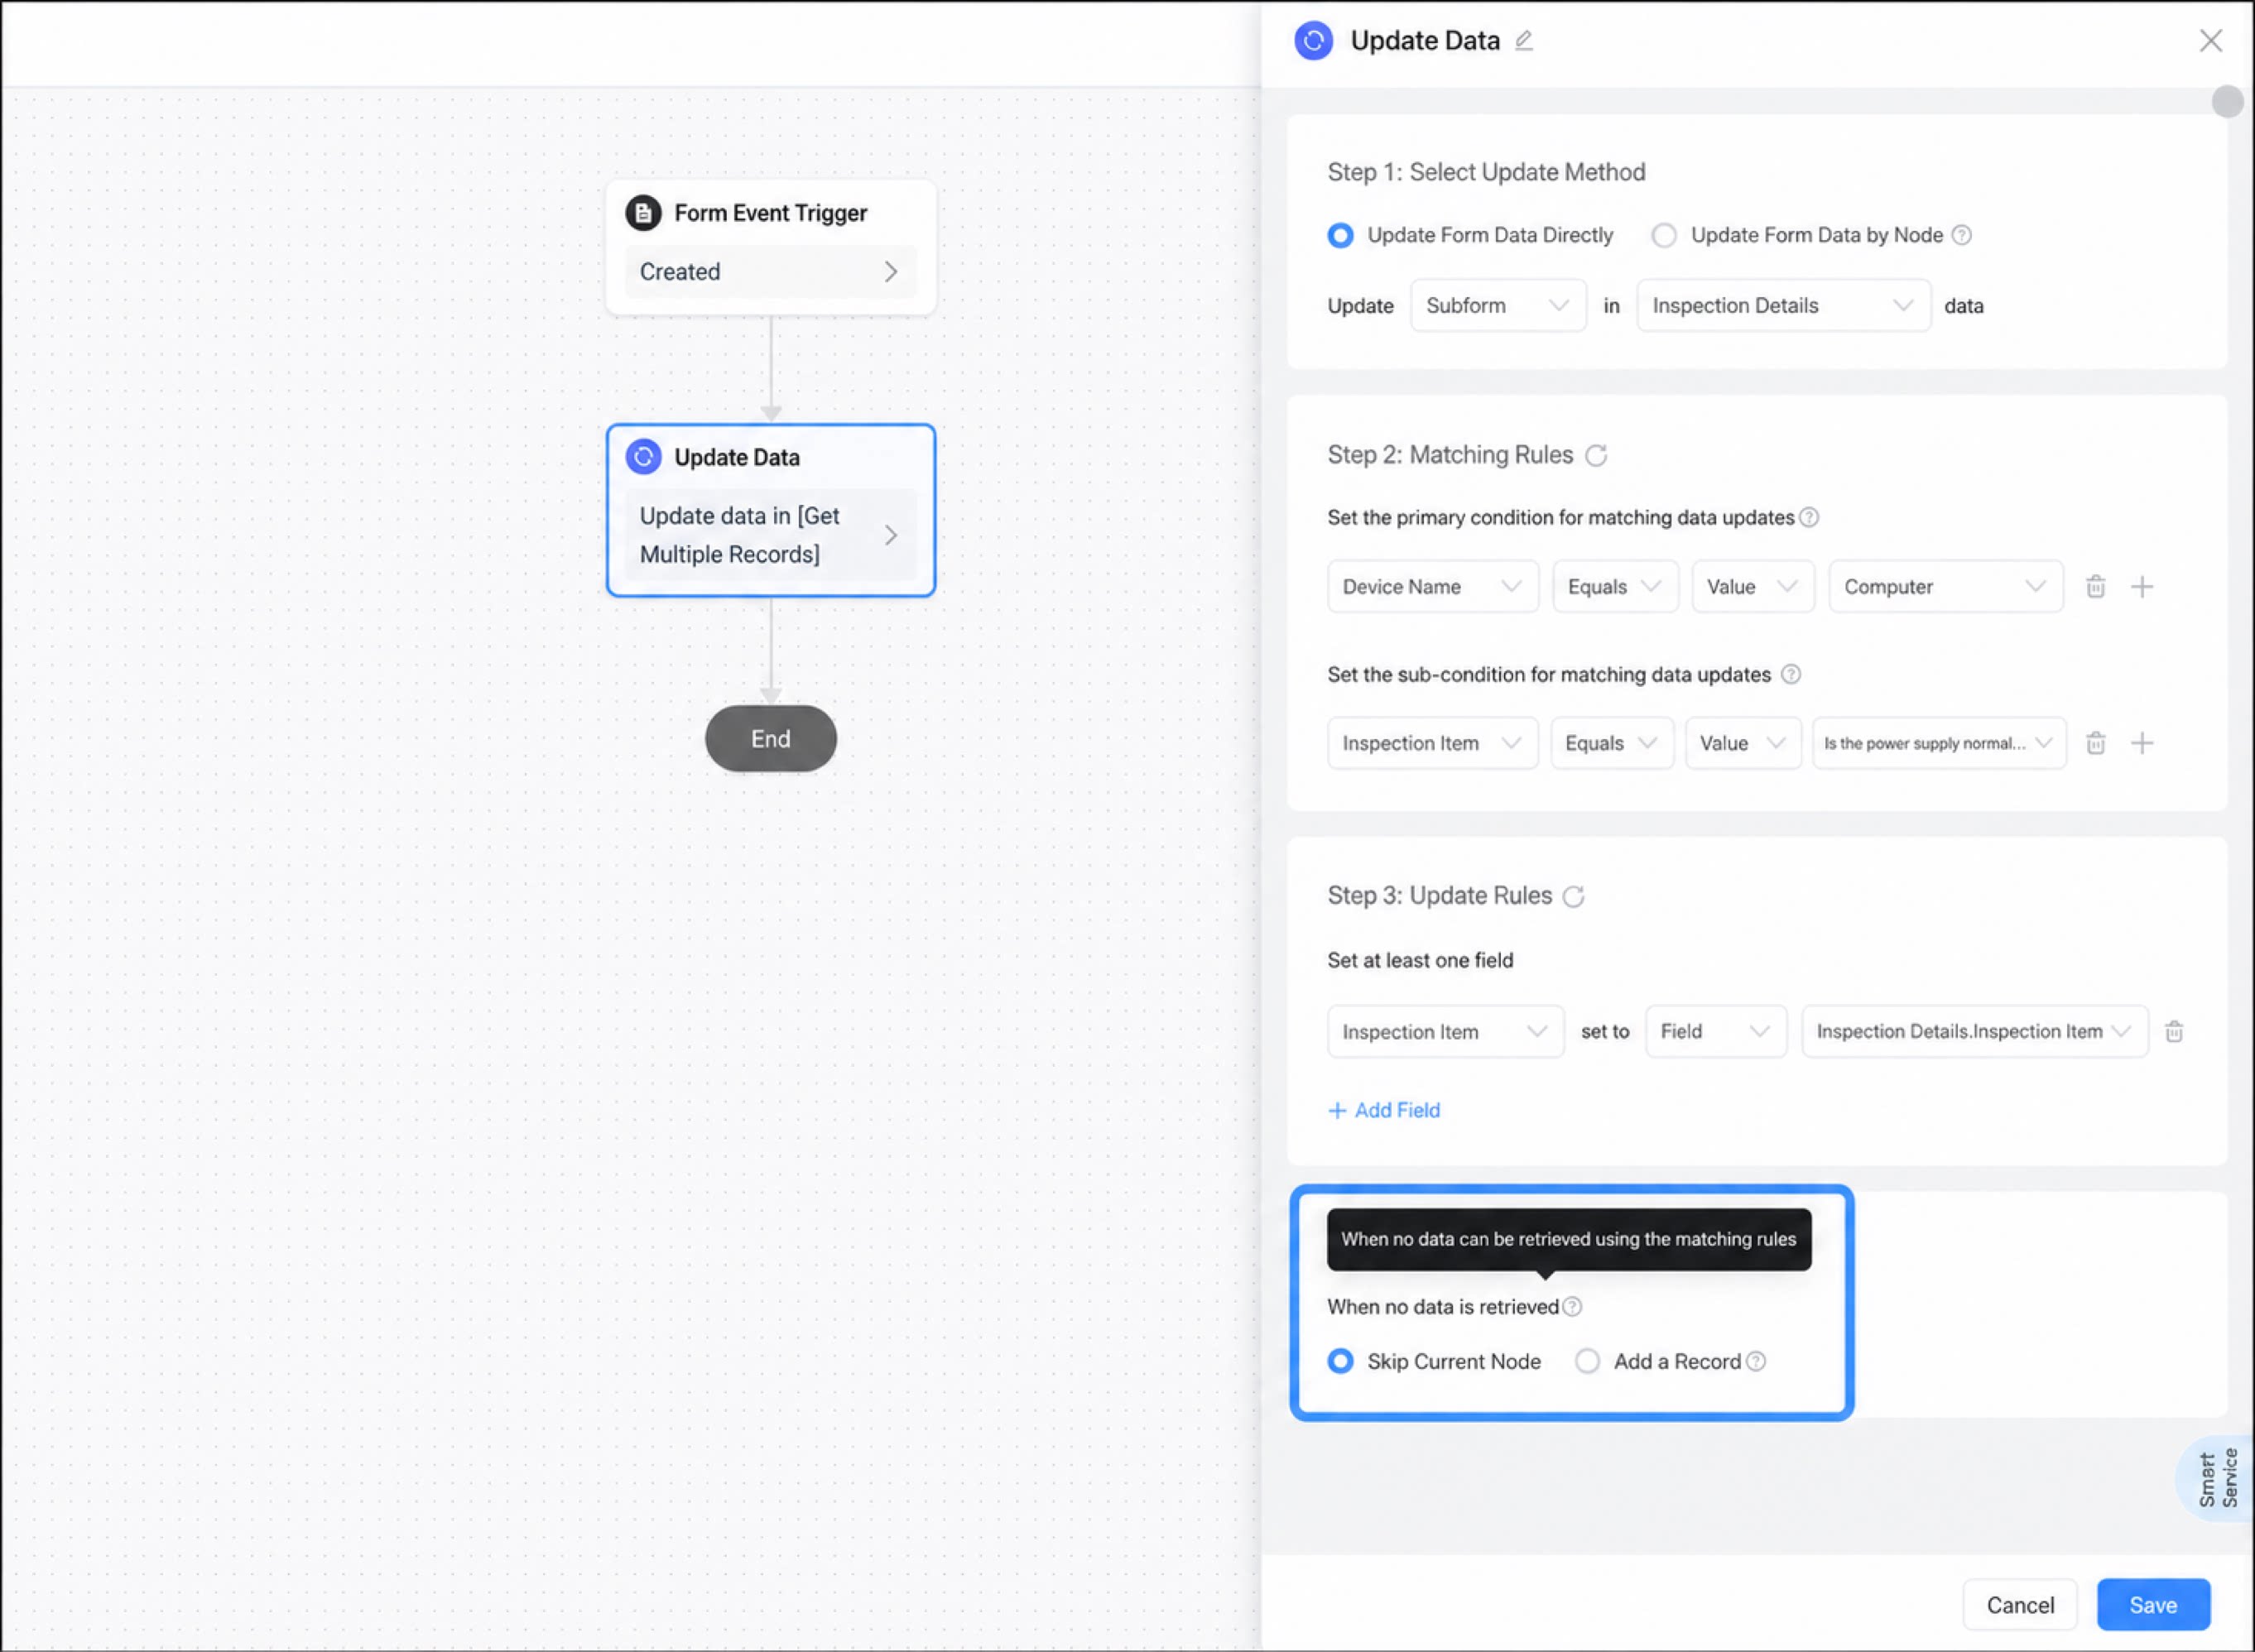
Configure the rule for when no data is matched. You can select Skip current node or Add a record
3
Click Save to complete the configuration
Update Form Data by Node
If you select Update form data by node, you must retrieve data before this node. For details, see Get single record or Get multiple records.- Sign in to the YiDA workbench and click My Apps.
- Select the app you need and go to the App Settings page.
- Click Integration & Automation, select the integration & automation flow you created, and click Edit.
- Move the cursor over the connector line of the approval node. A + button appears. Click + and select the Update Data node.
- In the configuration panel on the right, select Update form data by node, then select the data to update.
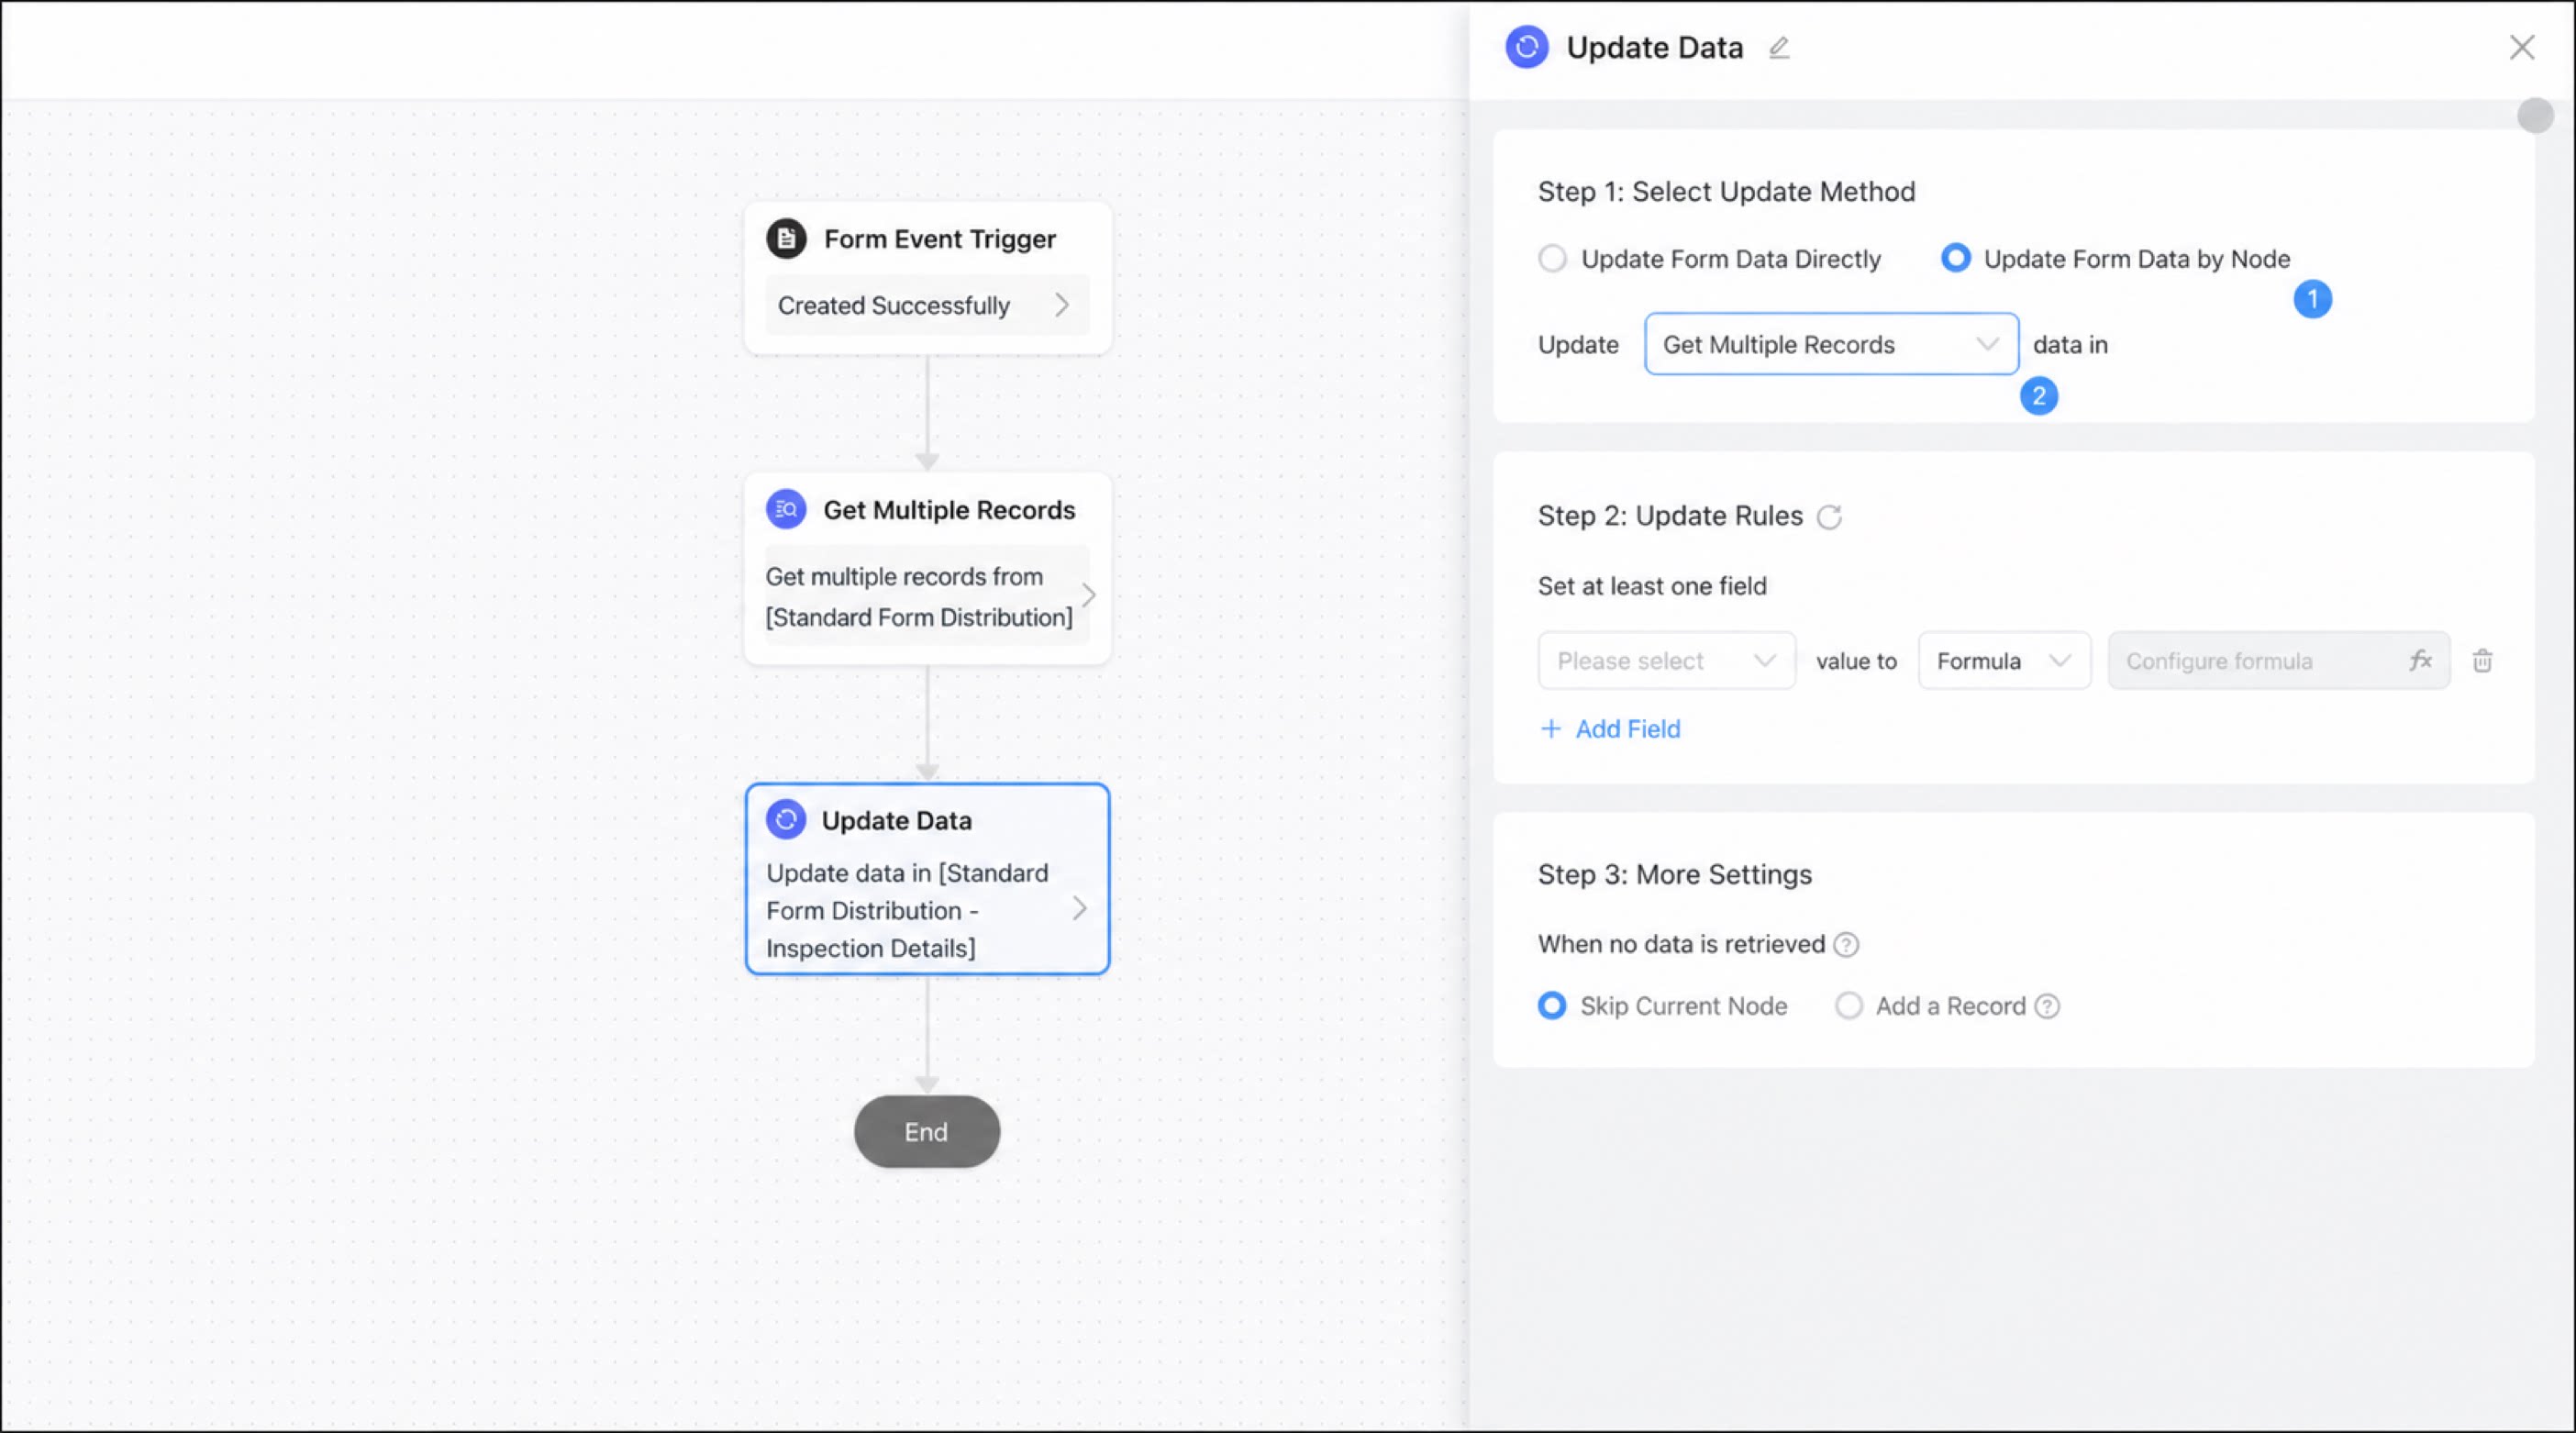
1
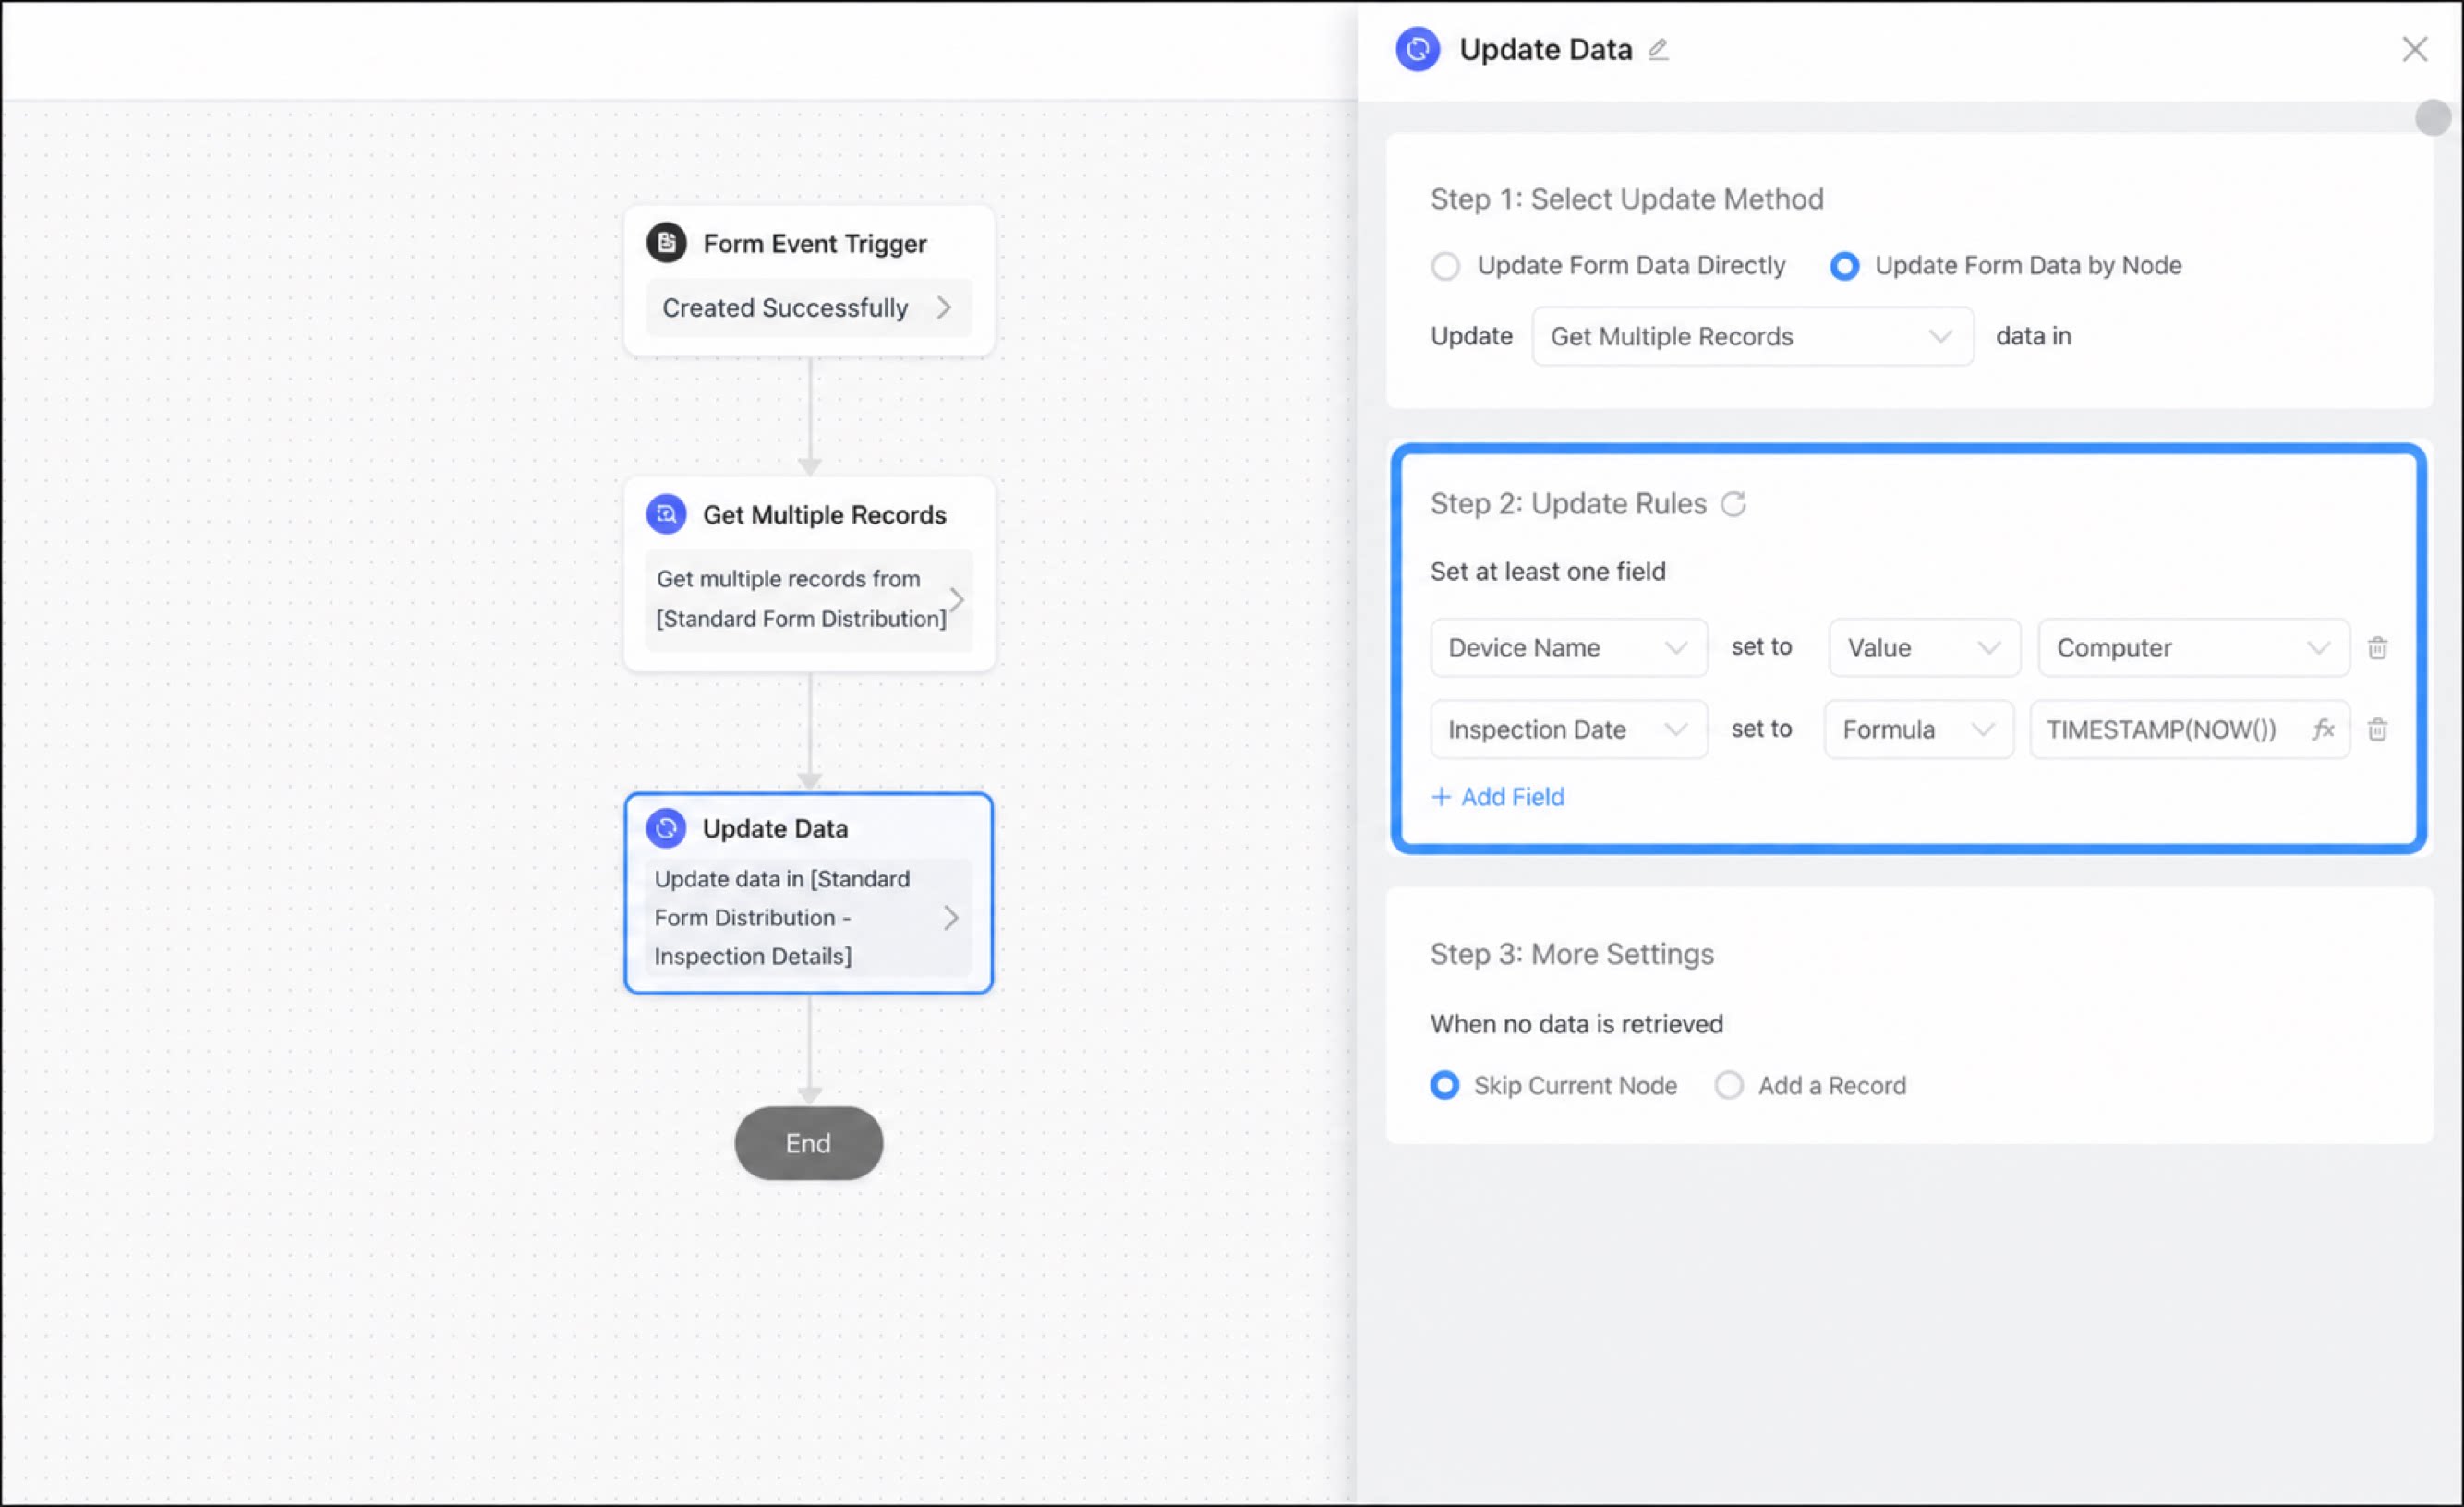
Select the update rules. Select the target table fields on the left and configure the matching update rules on the right
Note: the number of records that can be updated depends on the number of records retrieved.
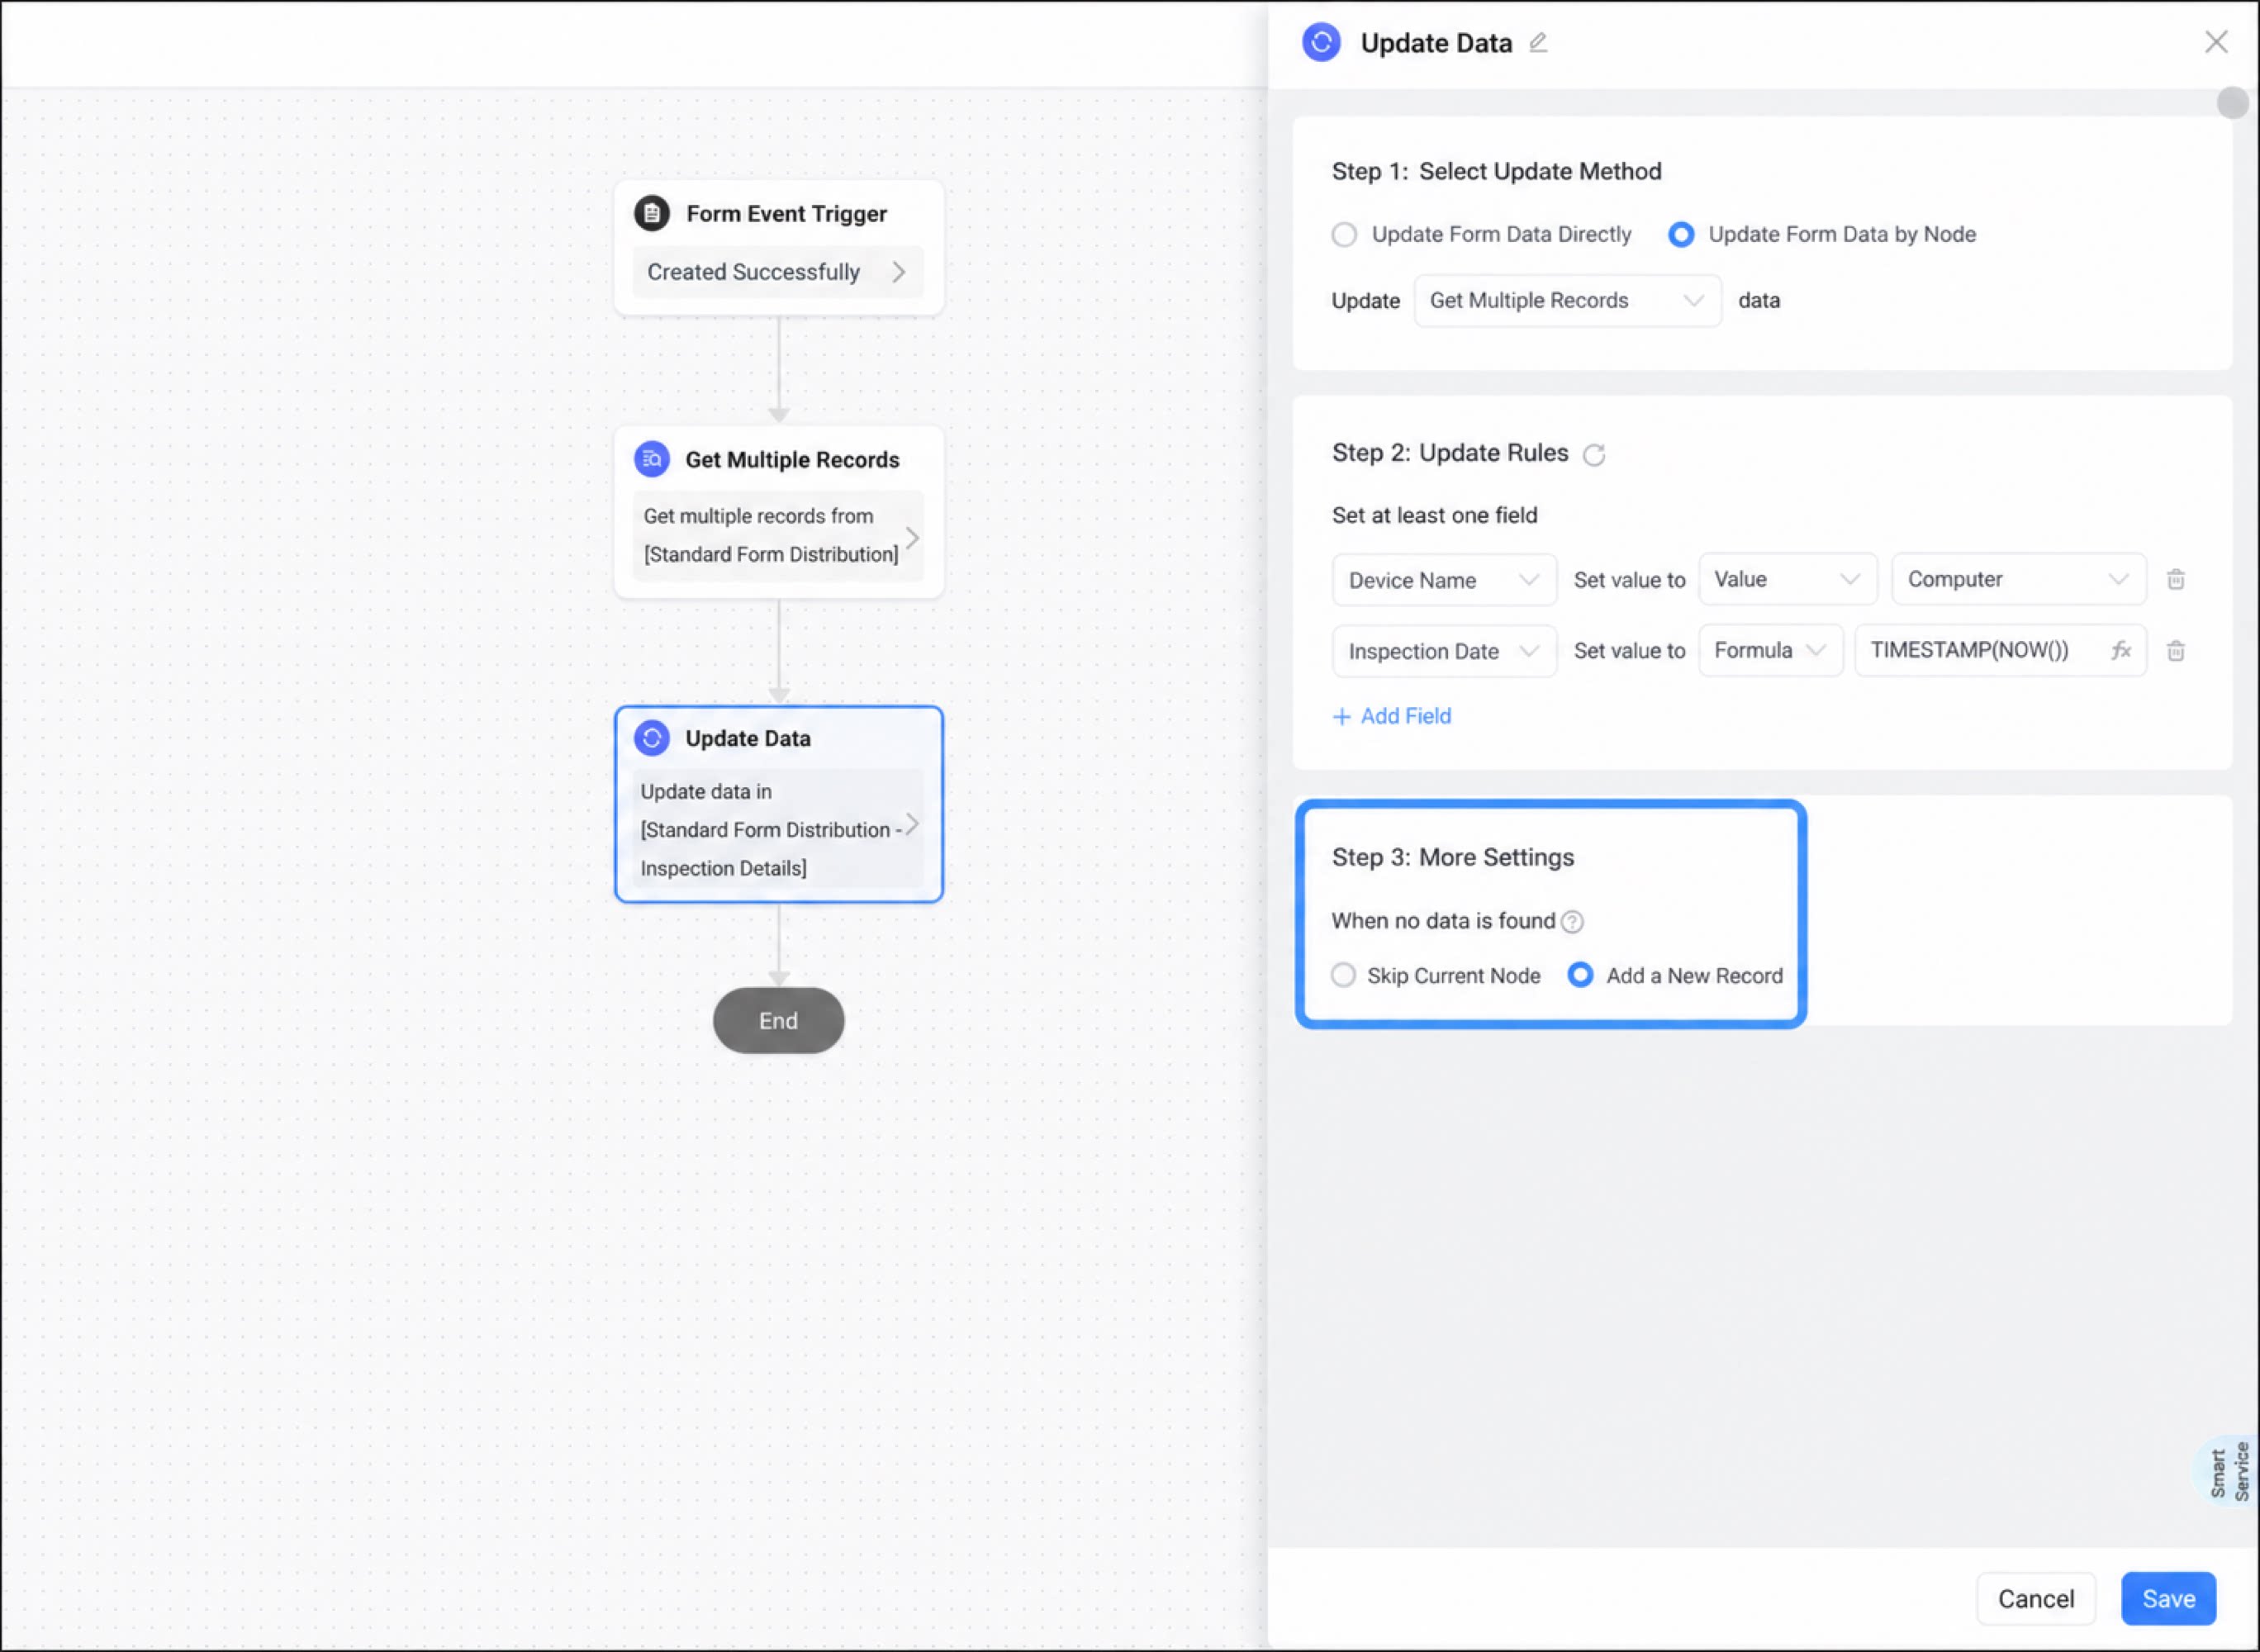
2
Configure the rule for when no data is matched. You can select Skip current node or Add a record
3
Click Save to complete the configuration
Configuration Boundaries
Matching Rule Details
Update Rule Details
⚠️Note: The three fields Last approver, Last approval time, and Last approval comment are generated only during manual approval. They are not generated when the system executes automatically.
FAQ
Q: How do I interpret the parameters on the left and right sides of the update rules?