Chats
Chats Calendar
 Meetings
 Contacts
 Mail
Mail Docs
Docs Drive
Drive AI Table
 AI Minutes
 Attendance
 Approval
 YiDA
YiDA Admin Console
Use Case
Manually removing departed employees from Contacts is time-consuming and error-prone; this connector automates the cleanup as soon as the departure form is submitted.Demo
Go to DingTalk Admin Console > User activity statistics > View departed employees. Create a form, then create and configure the Contacts connector for it. Once configured, submitting the form completes the data integration between the YiDA form and DingTalk Contacts.Step 1: Create and Configure the Form
Steps:- Create a new form and name it “Employee Departure Record.”
- Add a member component, name it “Specified User,” and set it as required. (See Figure 2.1-6.)
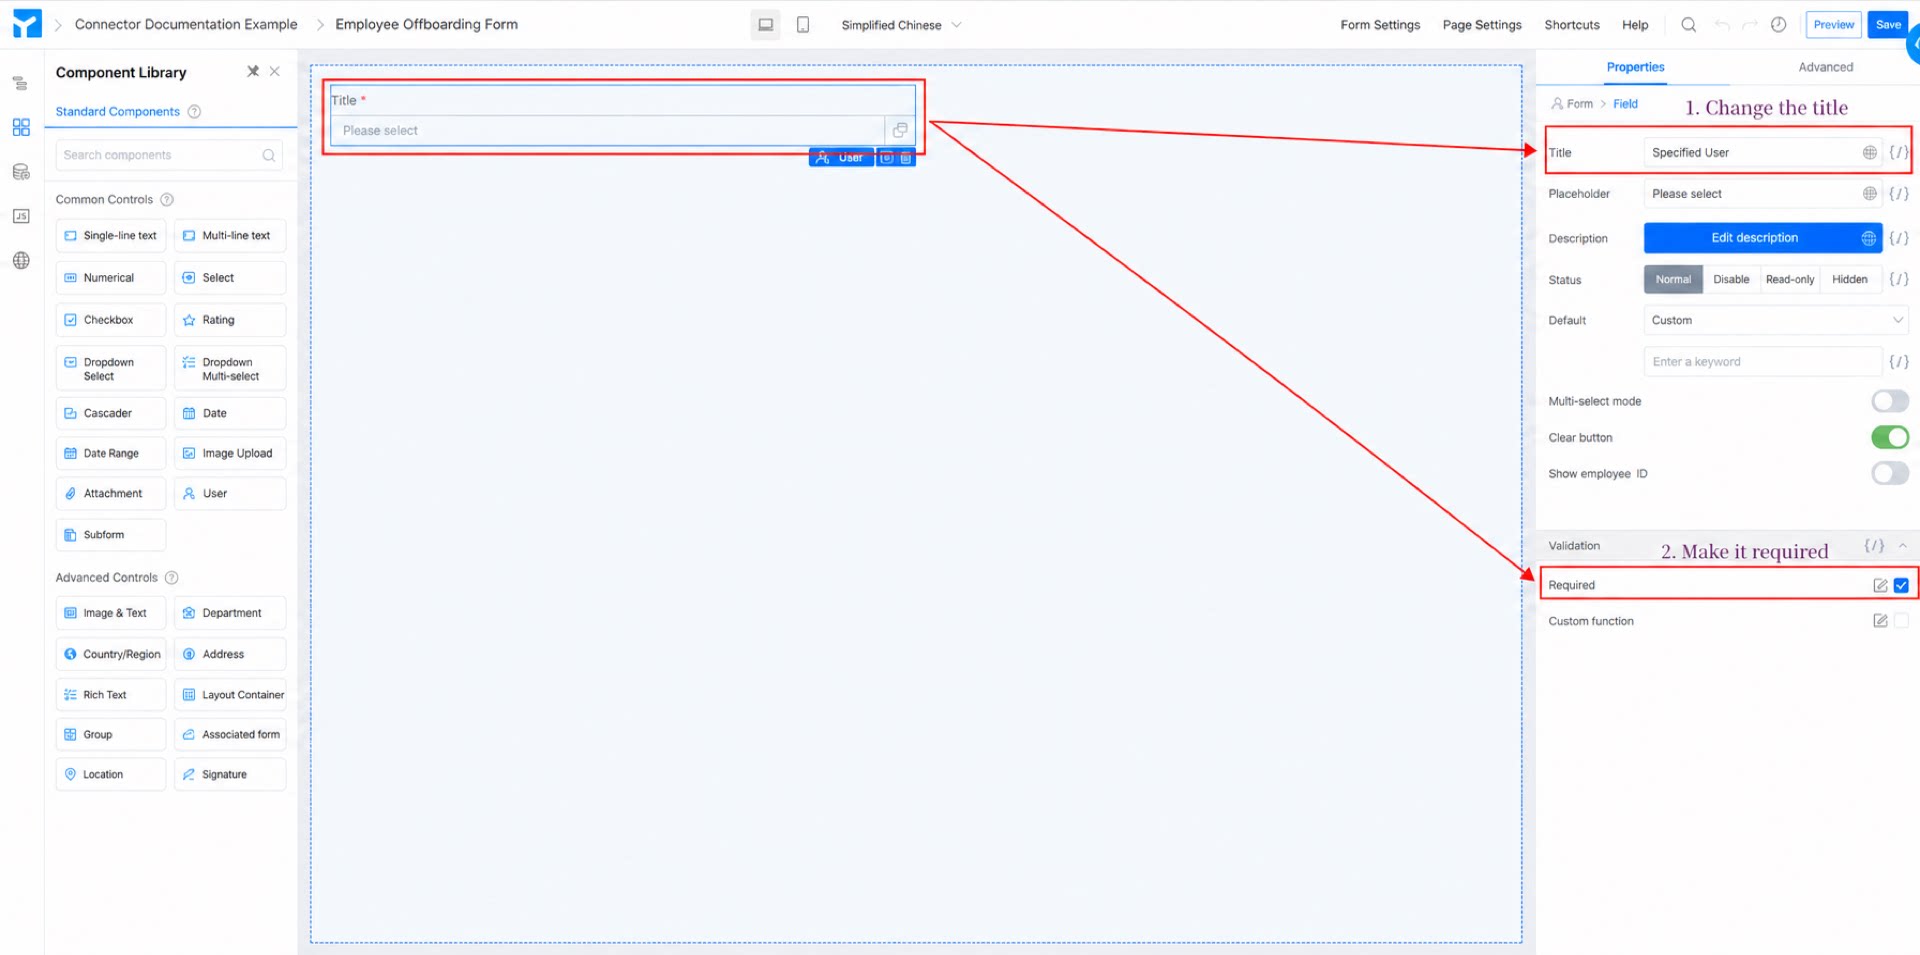
- Click Save in the upper-right corner of the page.
Step 2: Add and Configure the Connector for the “Employee Departure Record” Form
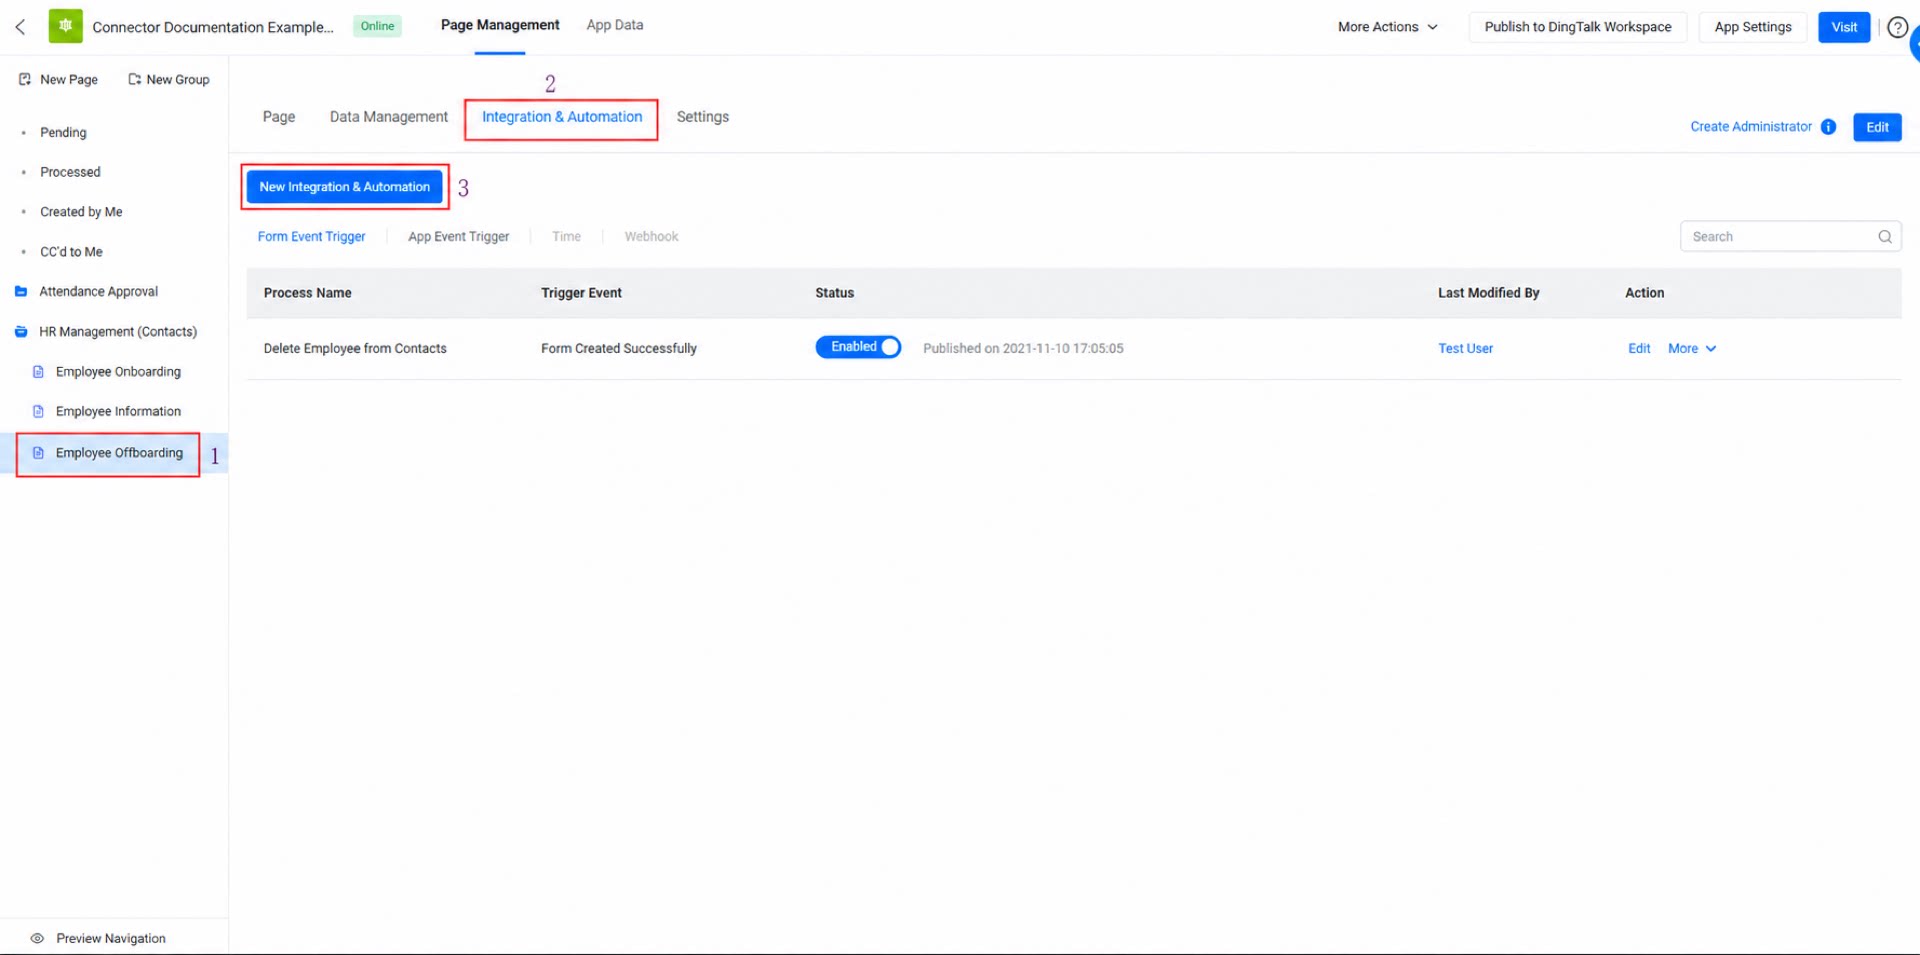
The previous step built the “Employee Departure Record” form and laid the data foundation for invoking the connector. Next, configure the form connector to enable communication between YiDA and DingTalk Contacts. Steps:- On the admin console page, select the “Employee Departure Record” form, click Integration & Automation at the top of the page, and then click Create Integration & Automation. (See Figure 2.2-1.)
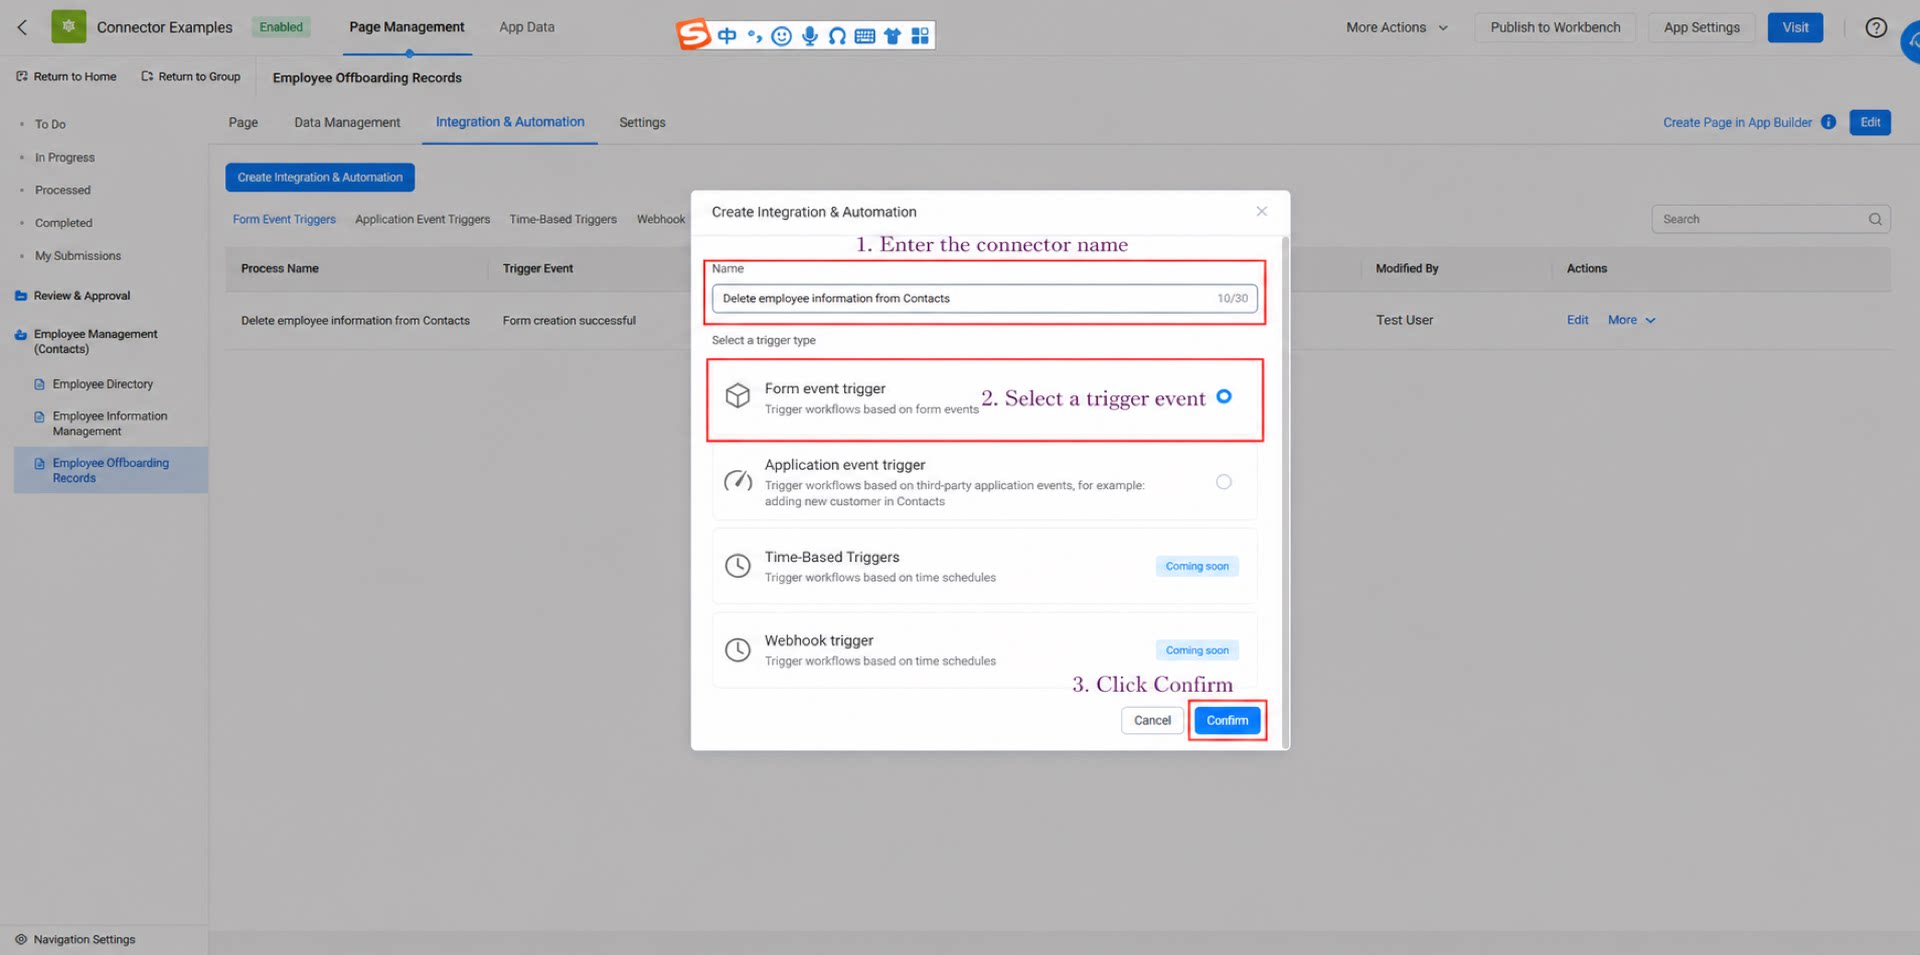
- Enter “Delete employee from Contacts” as the connector name, select Form event trigger as the trigger type, and click Confirm.
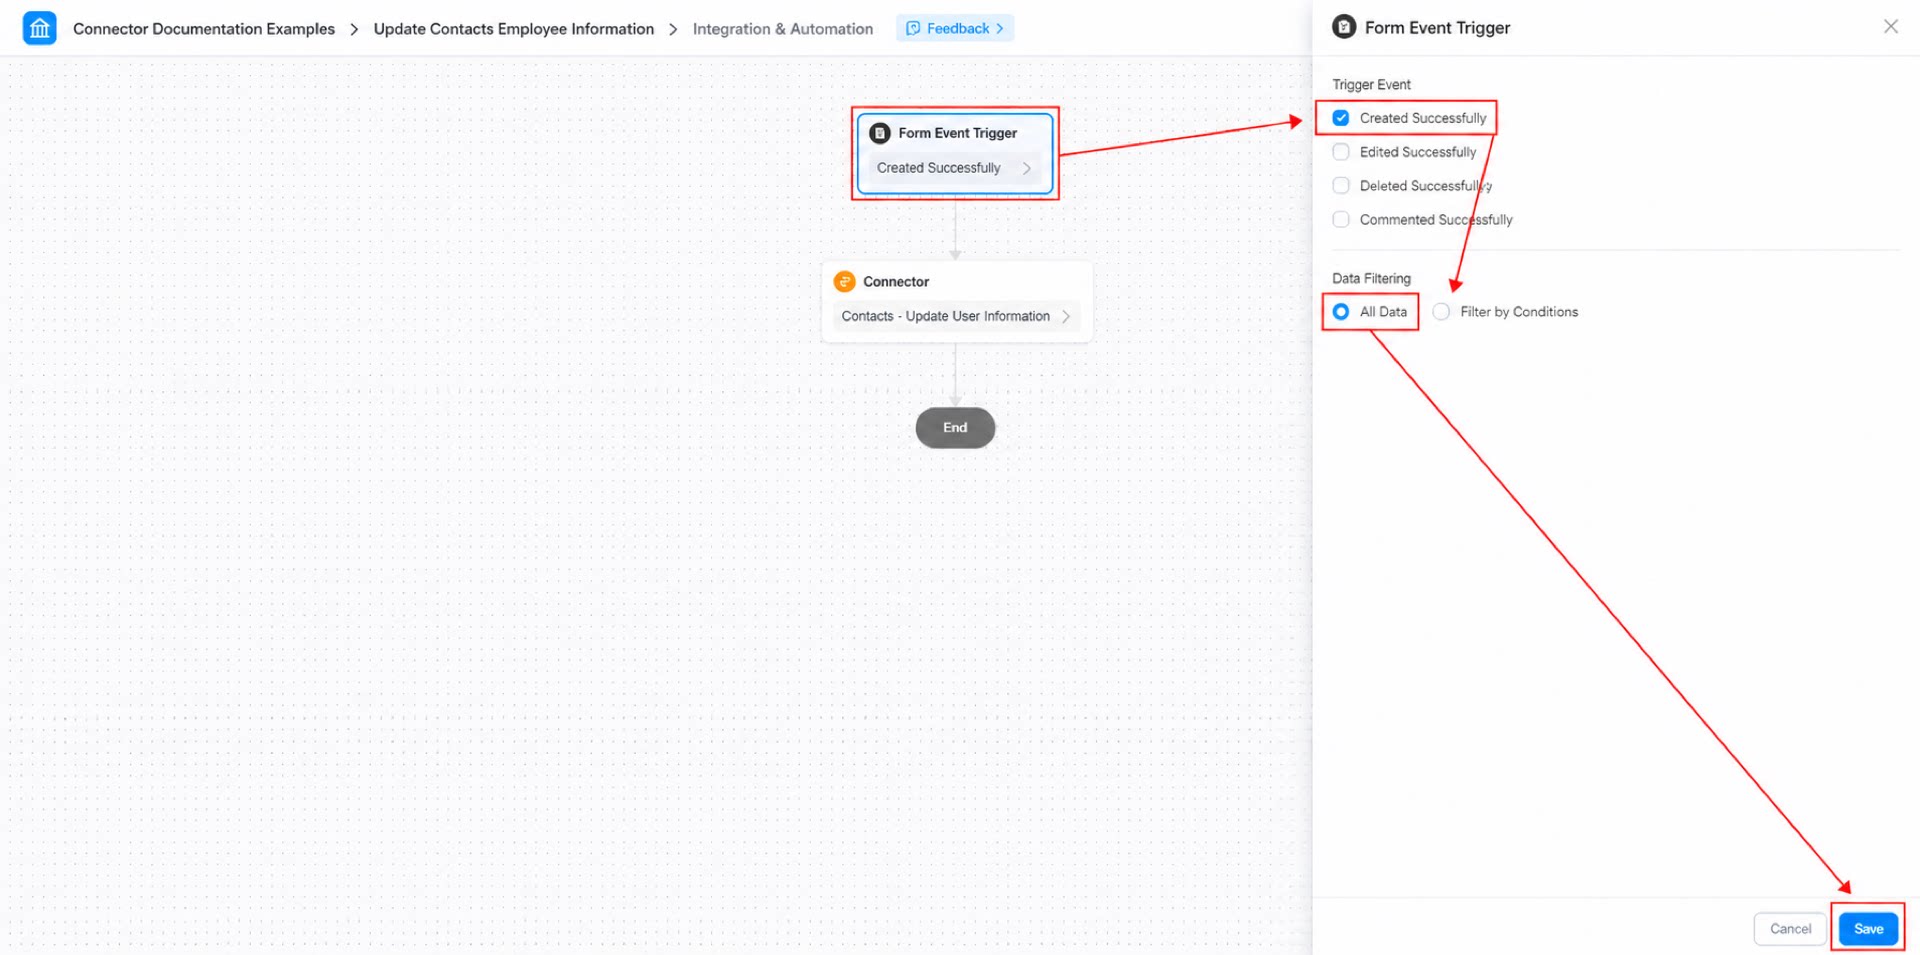
- Configure the form event trigger: set the event trigger to Create success, set the data filter to All data, and click Save.
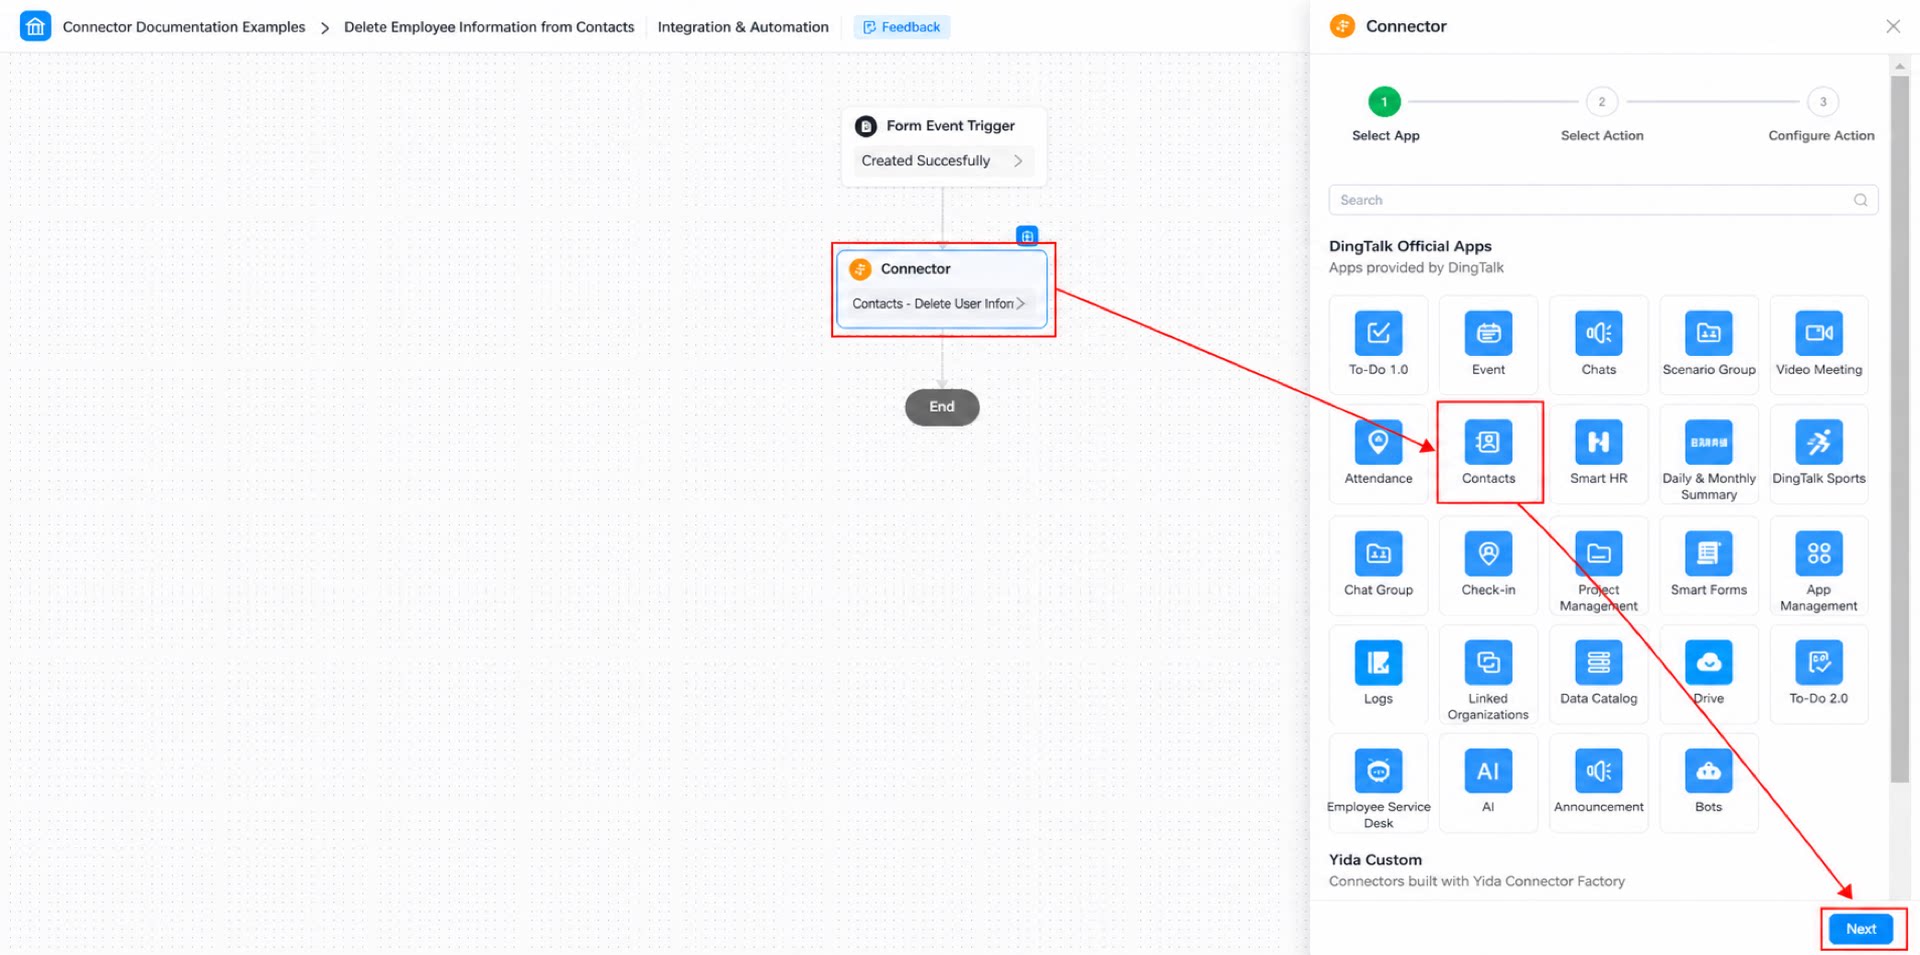
- Select the connector app. (See Figure 2.2-4.)
- Set the action to Delete user information. (See Figure 2.2-5.)
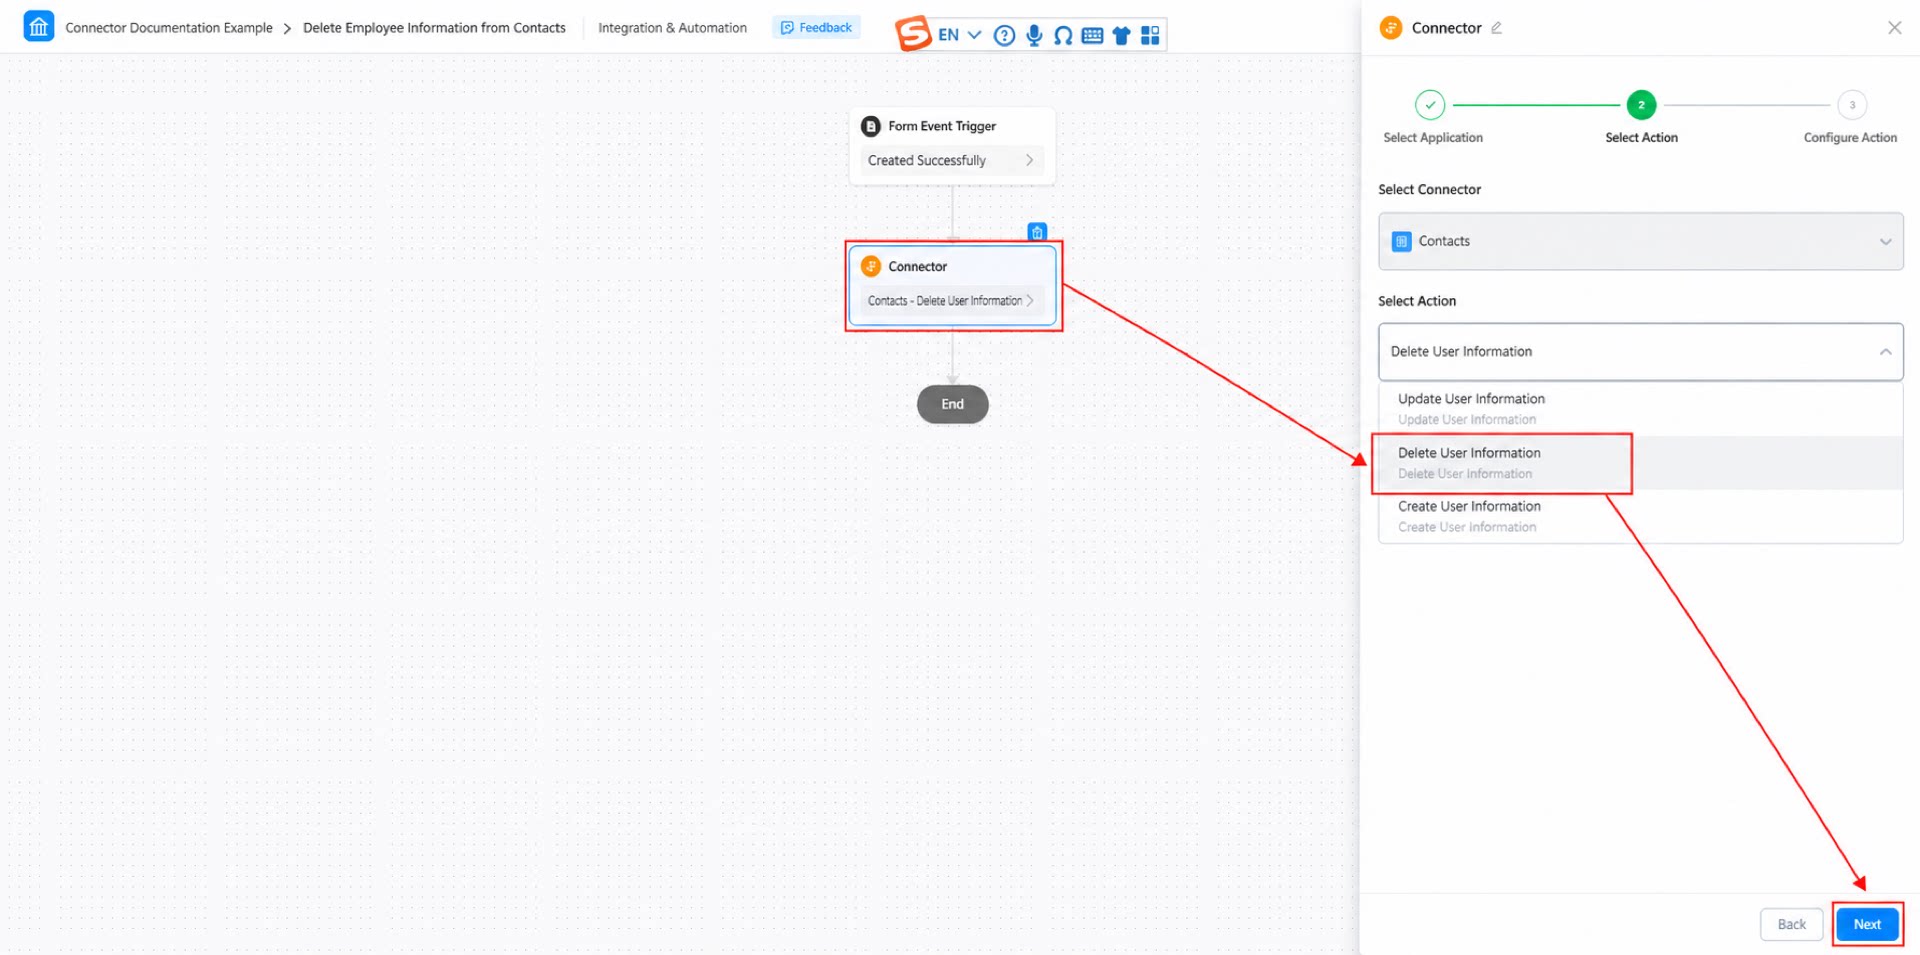
- Configure the action. (See Figure 2.2-6.)
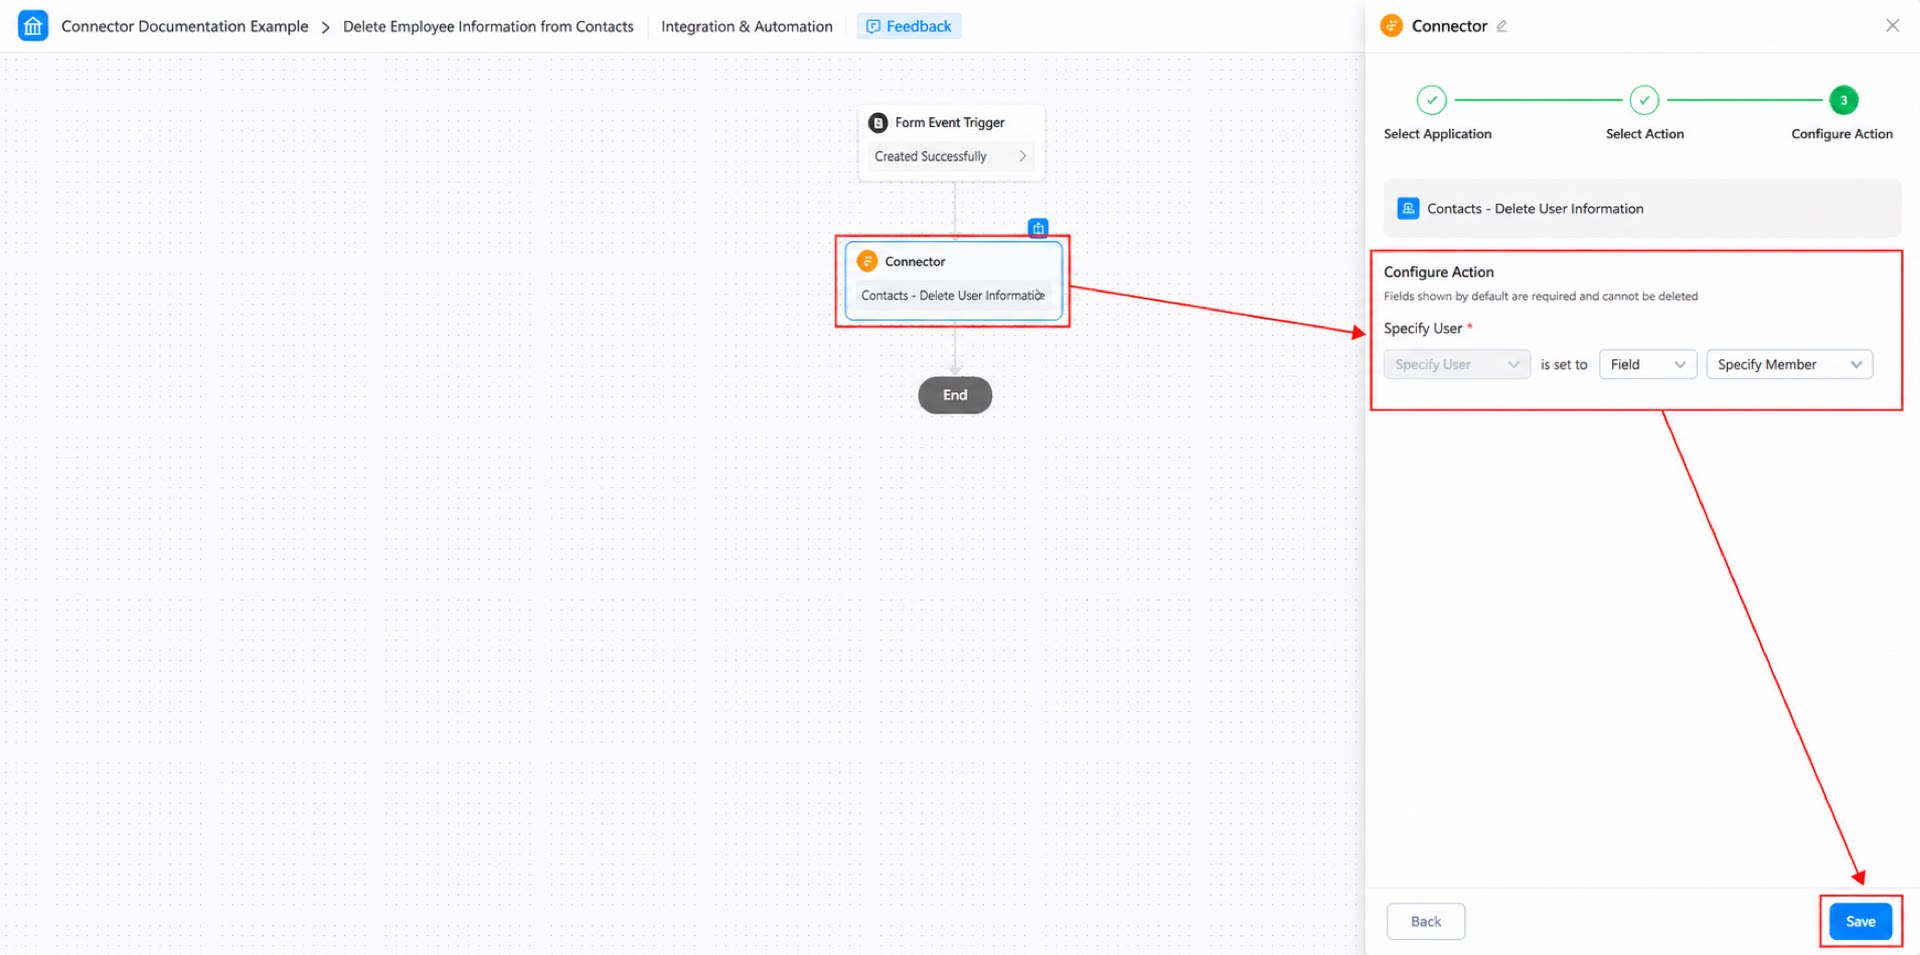
- Click Save at the top of the page, and then click Publish.
Step 3: Submit the Form to Invoke the Connector
Steps 1 and 2 completed the form build and connector configuration. Next, submit the form to invoke the connector and automatically update user information in DingTalk Contacts. Steps: Fill in the “Employee Departure Record” form and submit it. (See Figure 2.3-1.)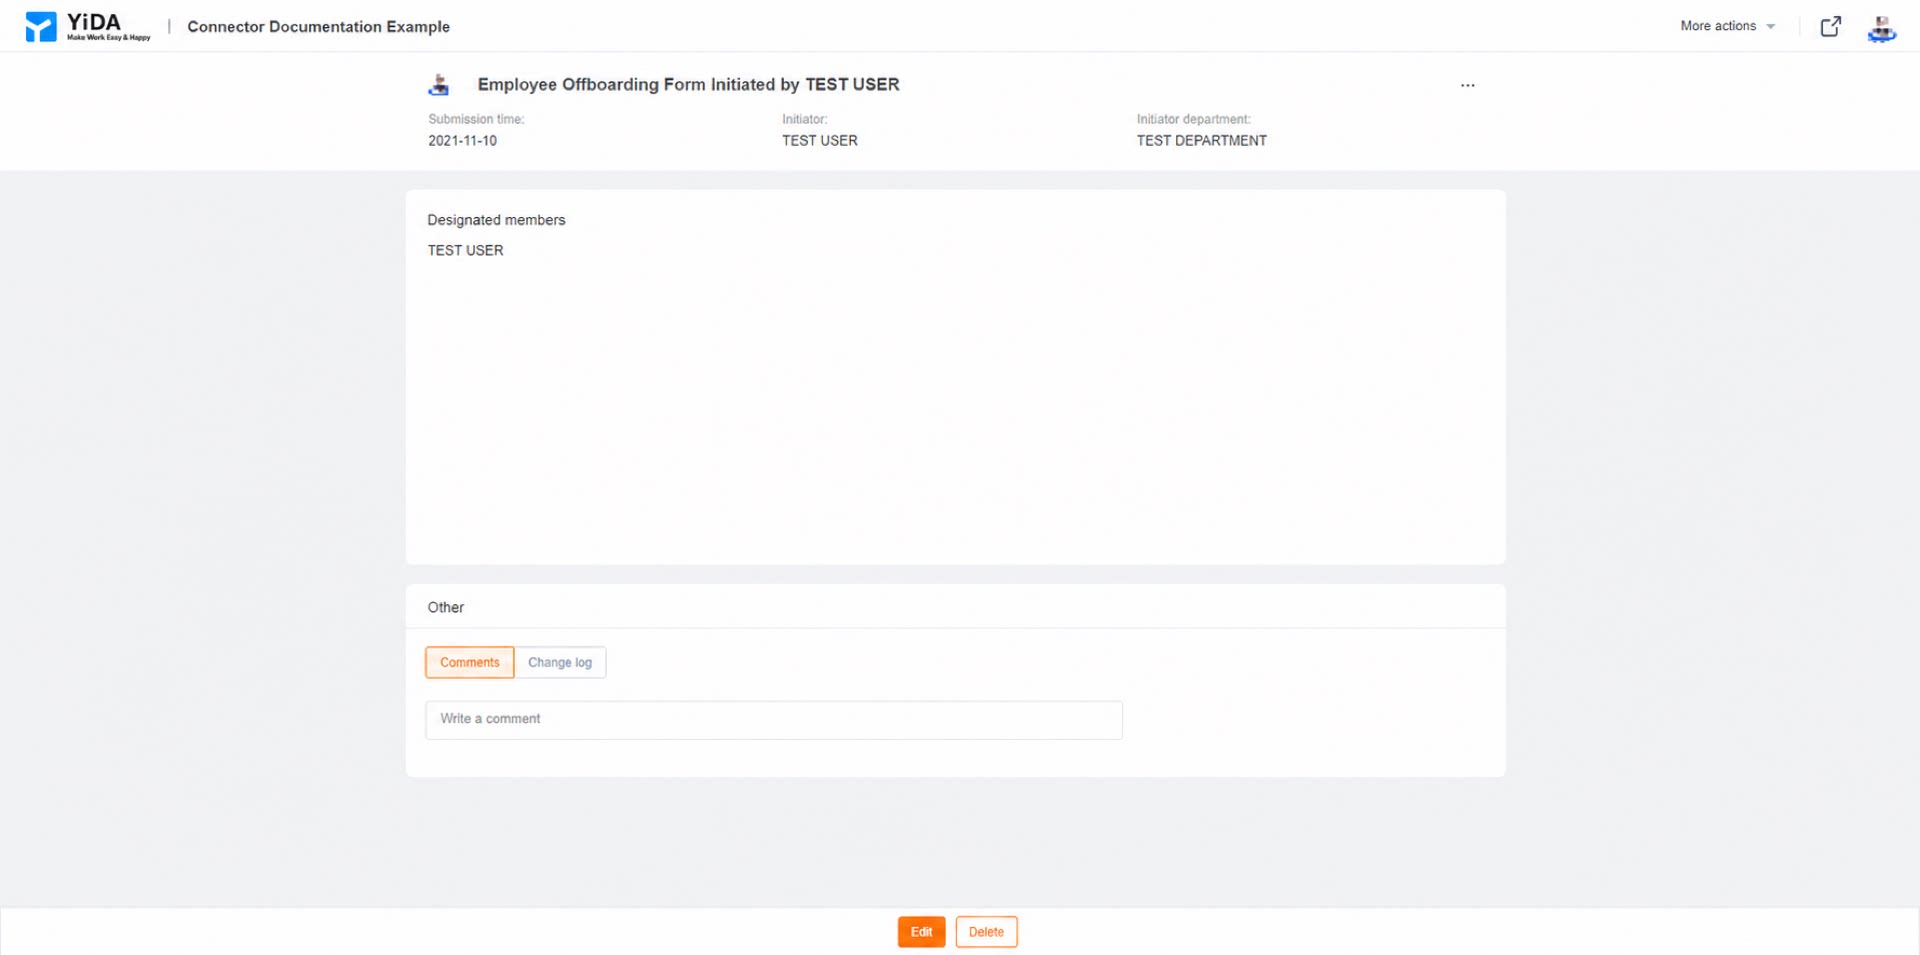
FAQ
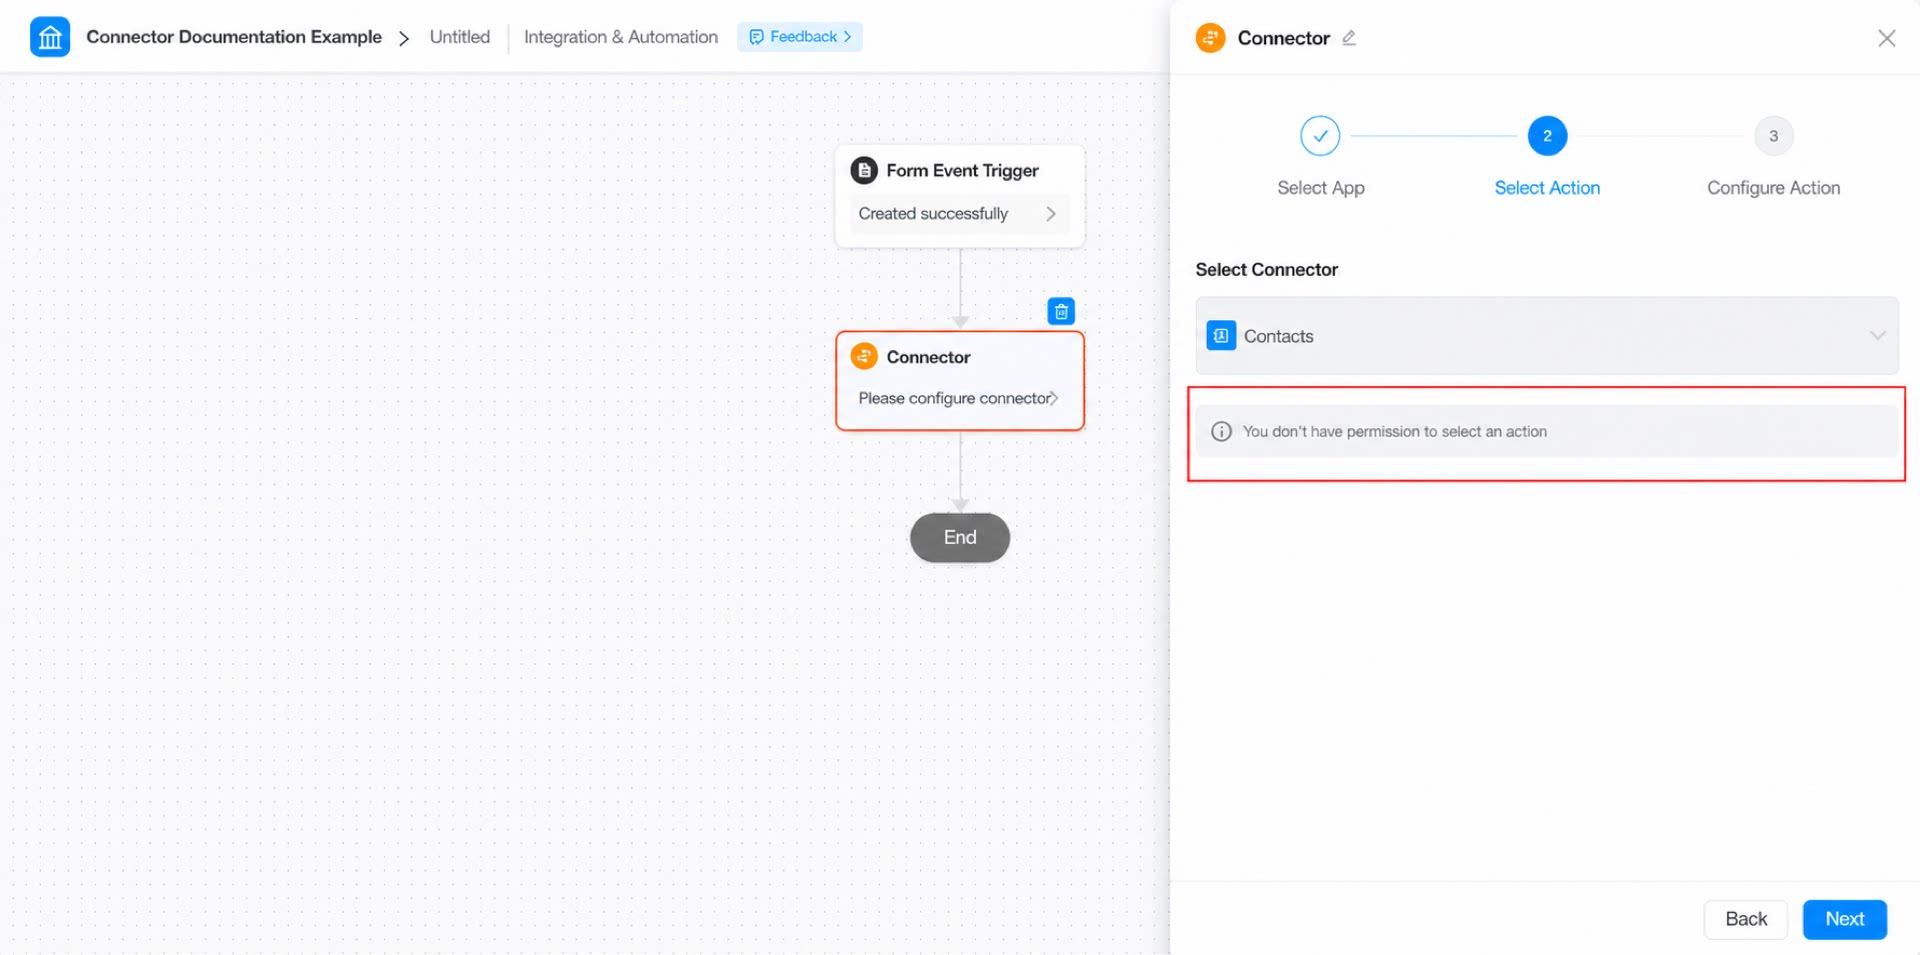
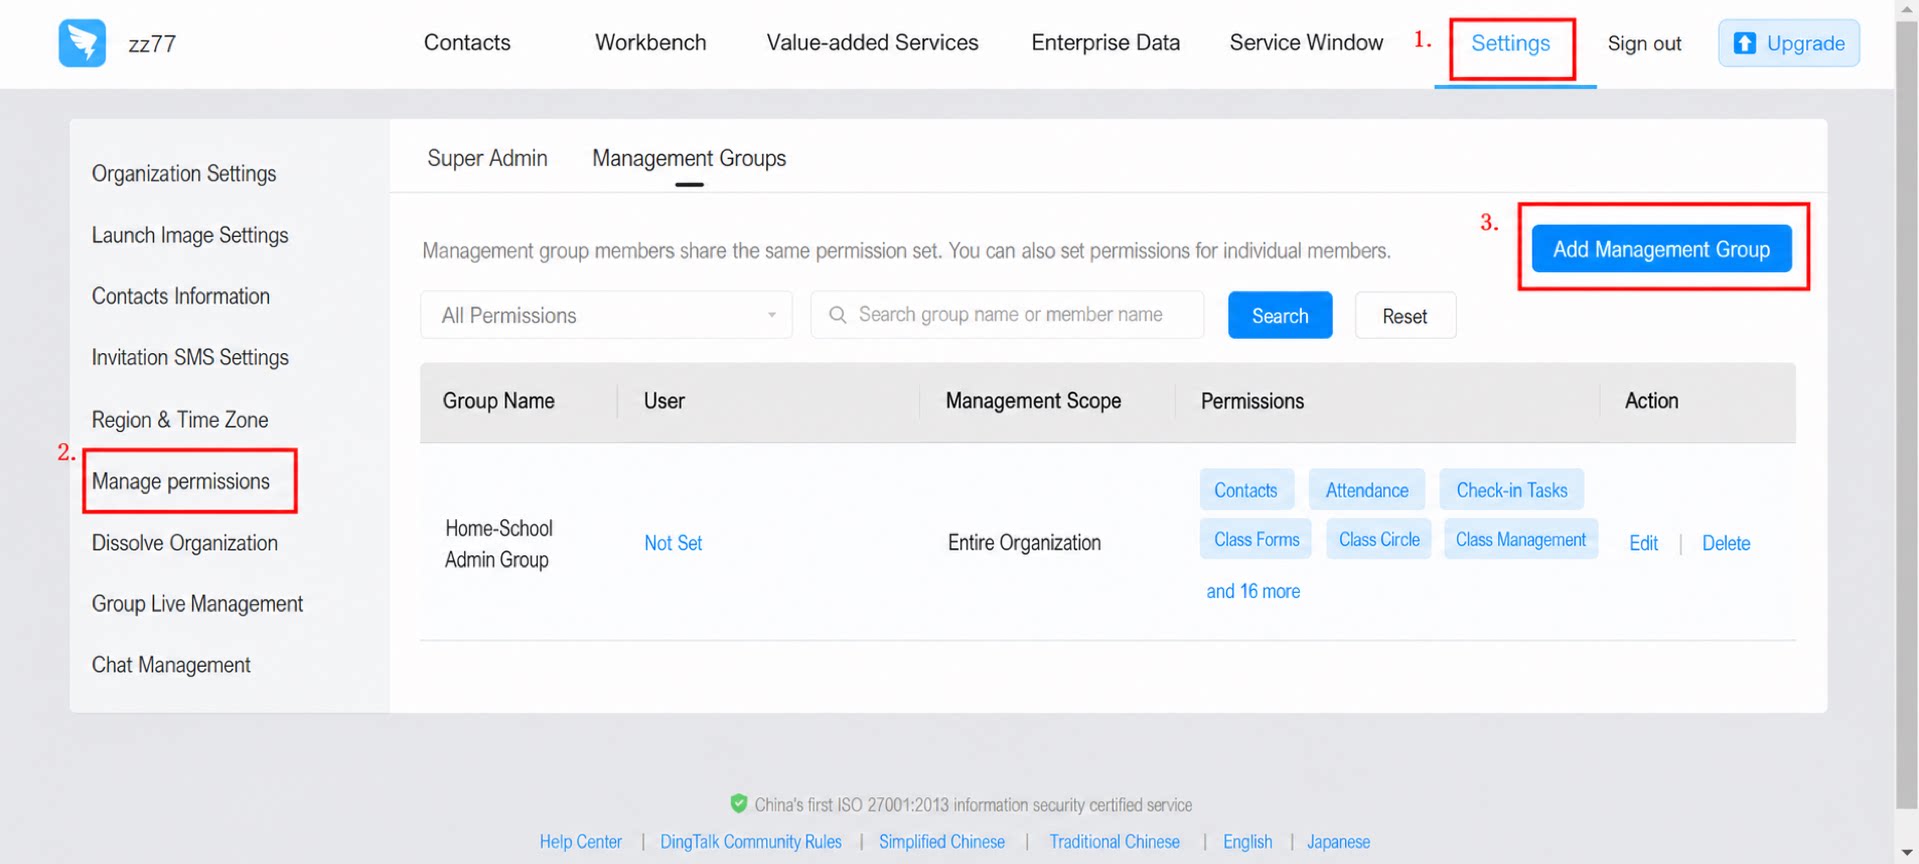
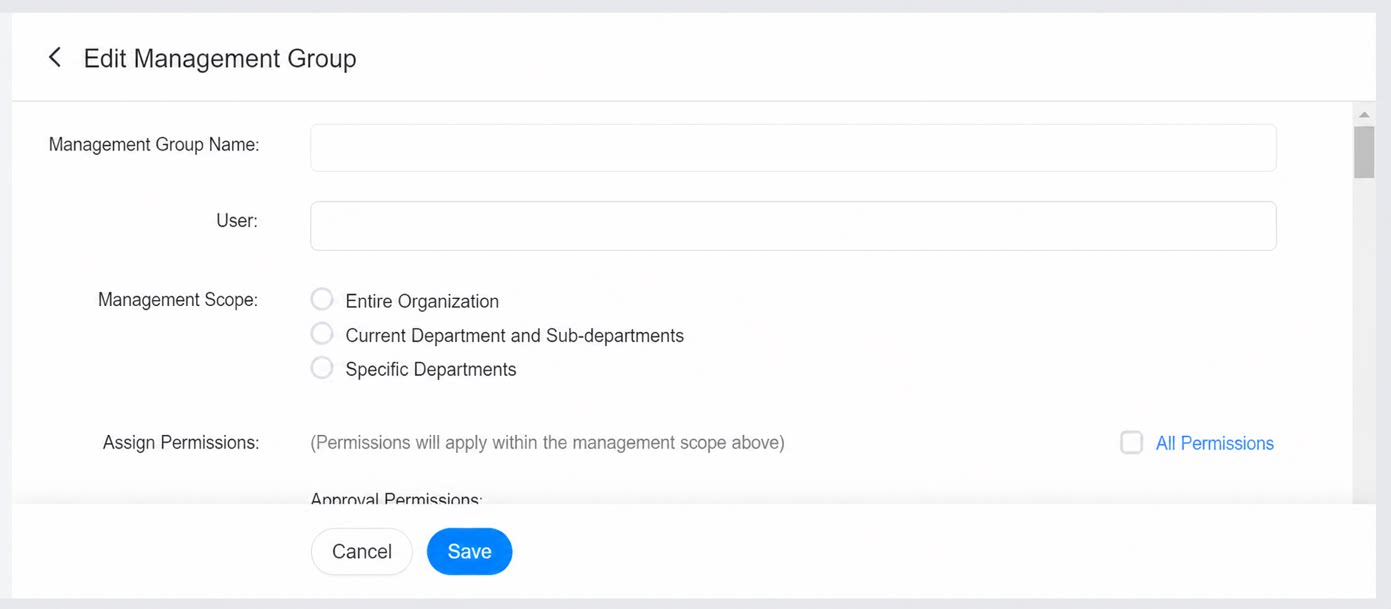
Q: Why do I get a “no permission” message when selecting an action for the Contacts connector?