Chats
Chats Calendar
 Meetings
 Contacts
 Mail
Mail Docs
Docs Drive
Drive AI Table
 AI Minutes
 Attendance
 Approval
 YiDA
YiDA Admin Console
1. Use Case
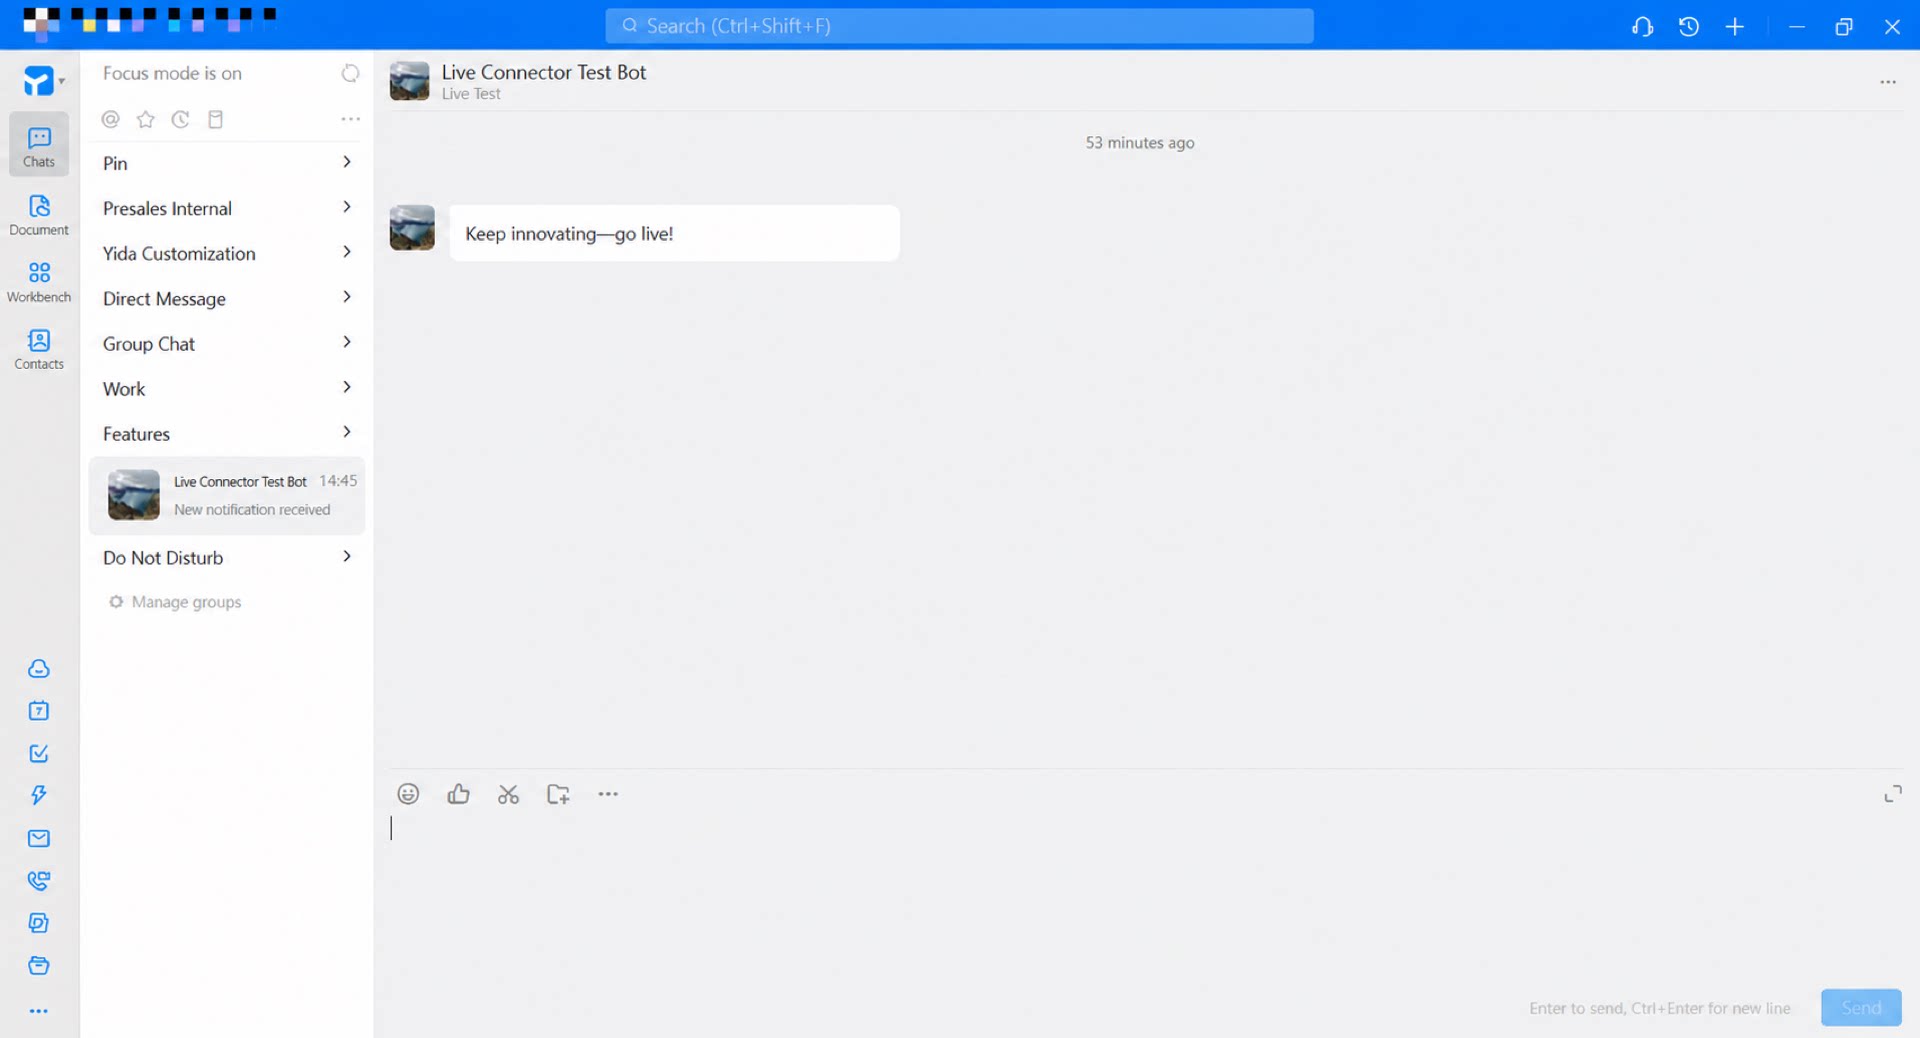
When a user submits the form, the connector automatically triggers the custom bot to push a notification message to the selected recipients, eliminating the need for manual follow-up.2. Procedure
2.1 Step 1: Design the Form
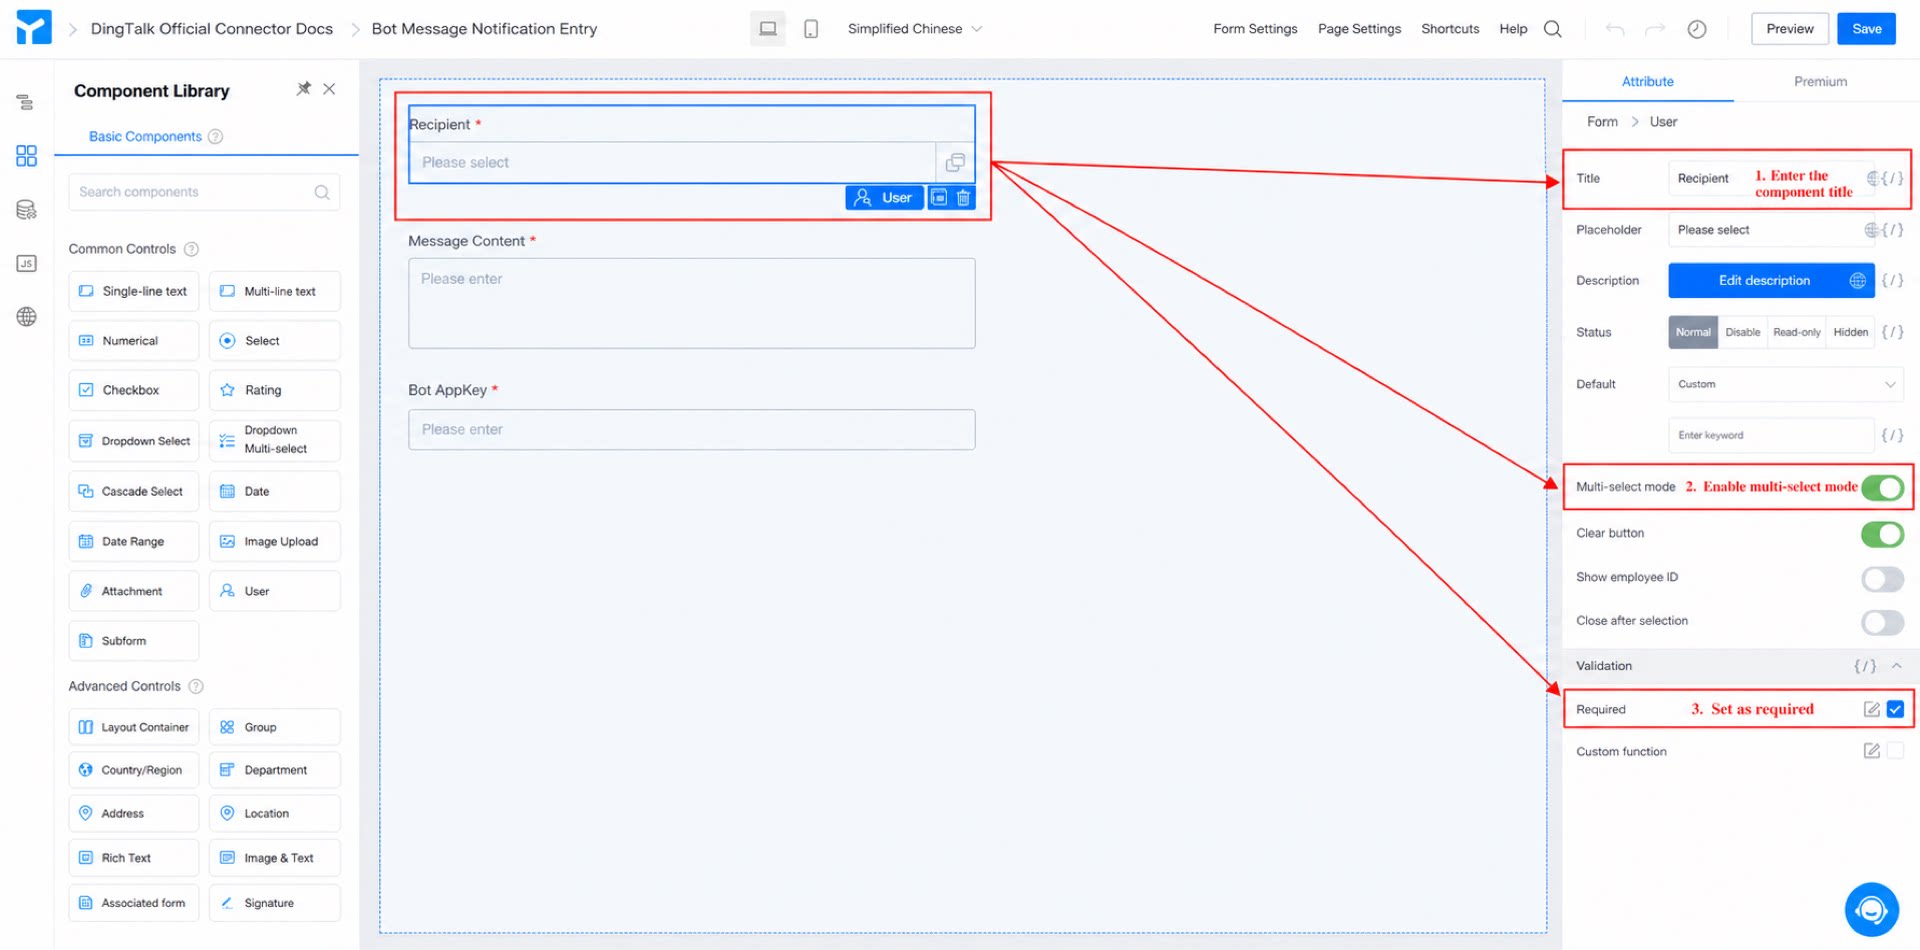
Create a form and add the fields required for the message notification. Steps:- Create a form and name it “Bot message notification entry”.
- Add a member component, name it “Recipient”, enable Multiselect mode, and mark it as required. (See Figure 2.1-1.)
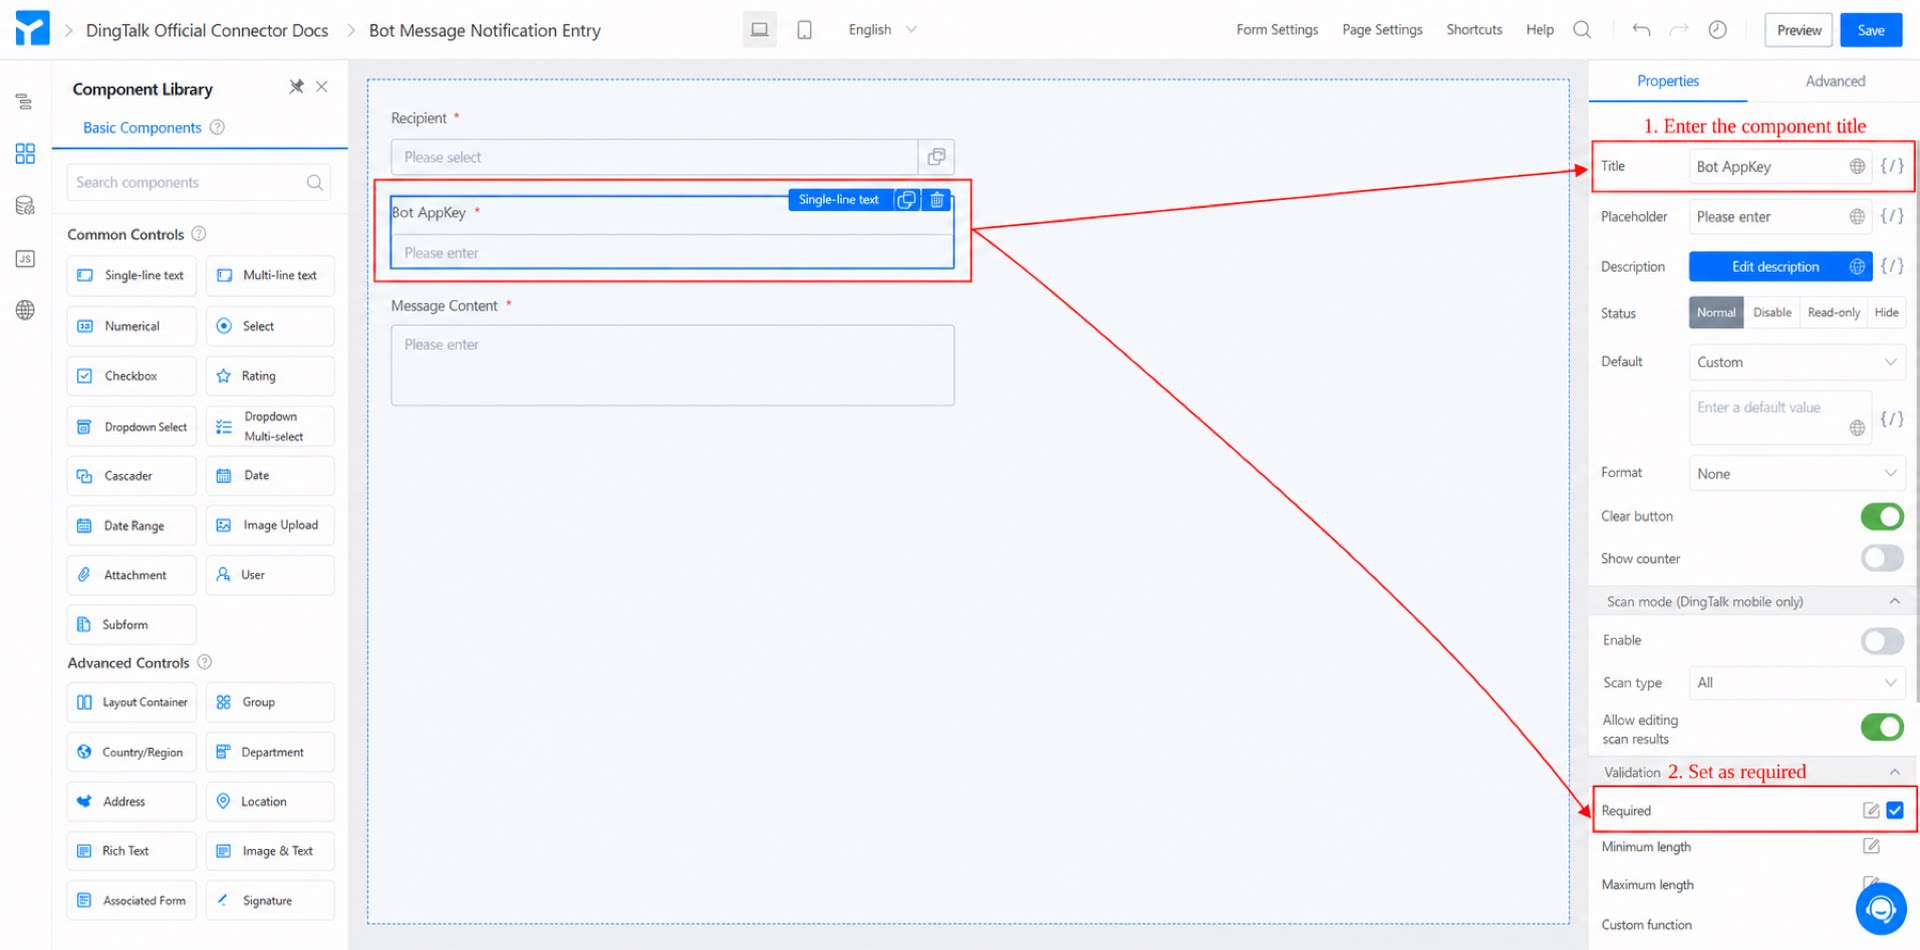
- Add a Single-line text component, name it “Bot App Key”, and mark it as required. (See Figure 2.1-5.)
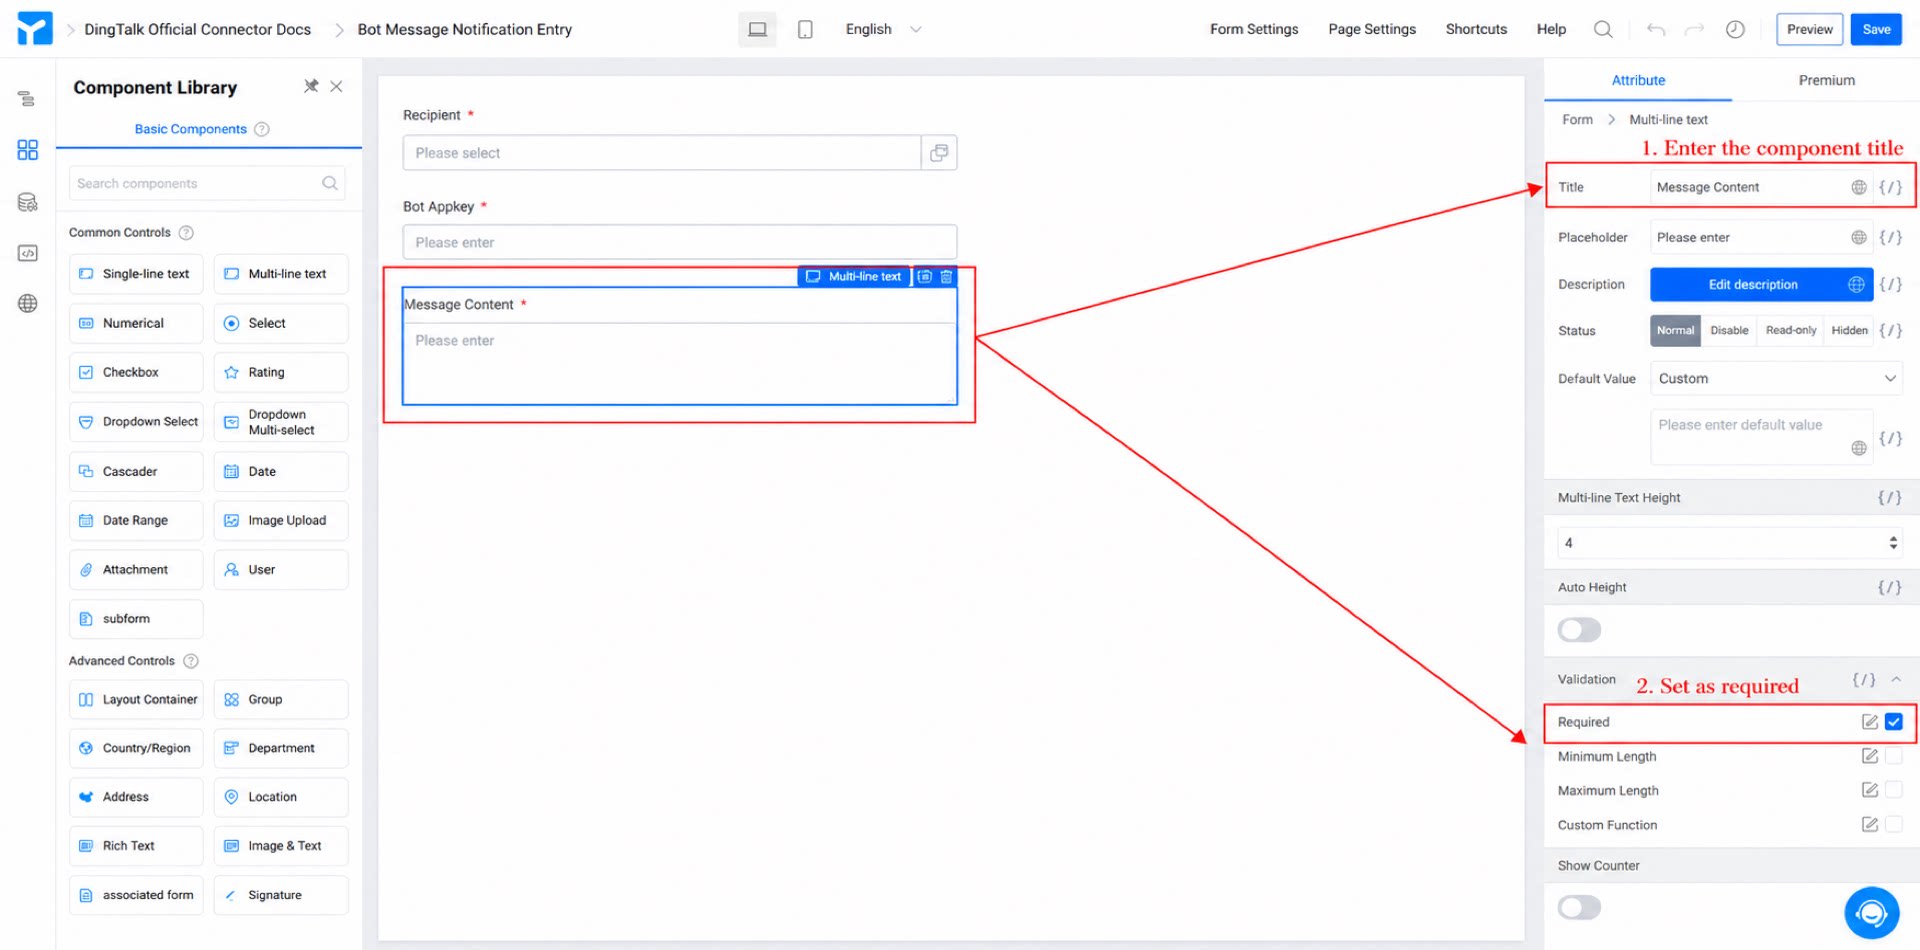
- Add a Multi-line text component, name it “Message content”, and mark it as required. (See Figure 2.1-6.)
- Click Save in the upper-right corner of the page.
2.2 Step 2: Configure the Connector
For a full introduction to YiDA connectors, see: Integration & Automation - Connector.
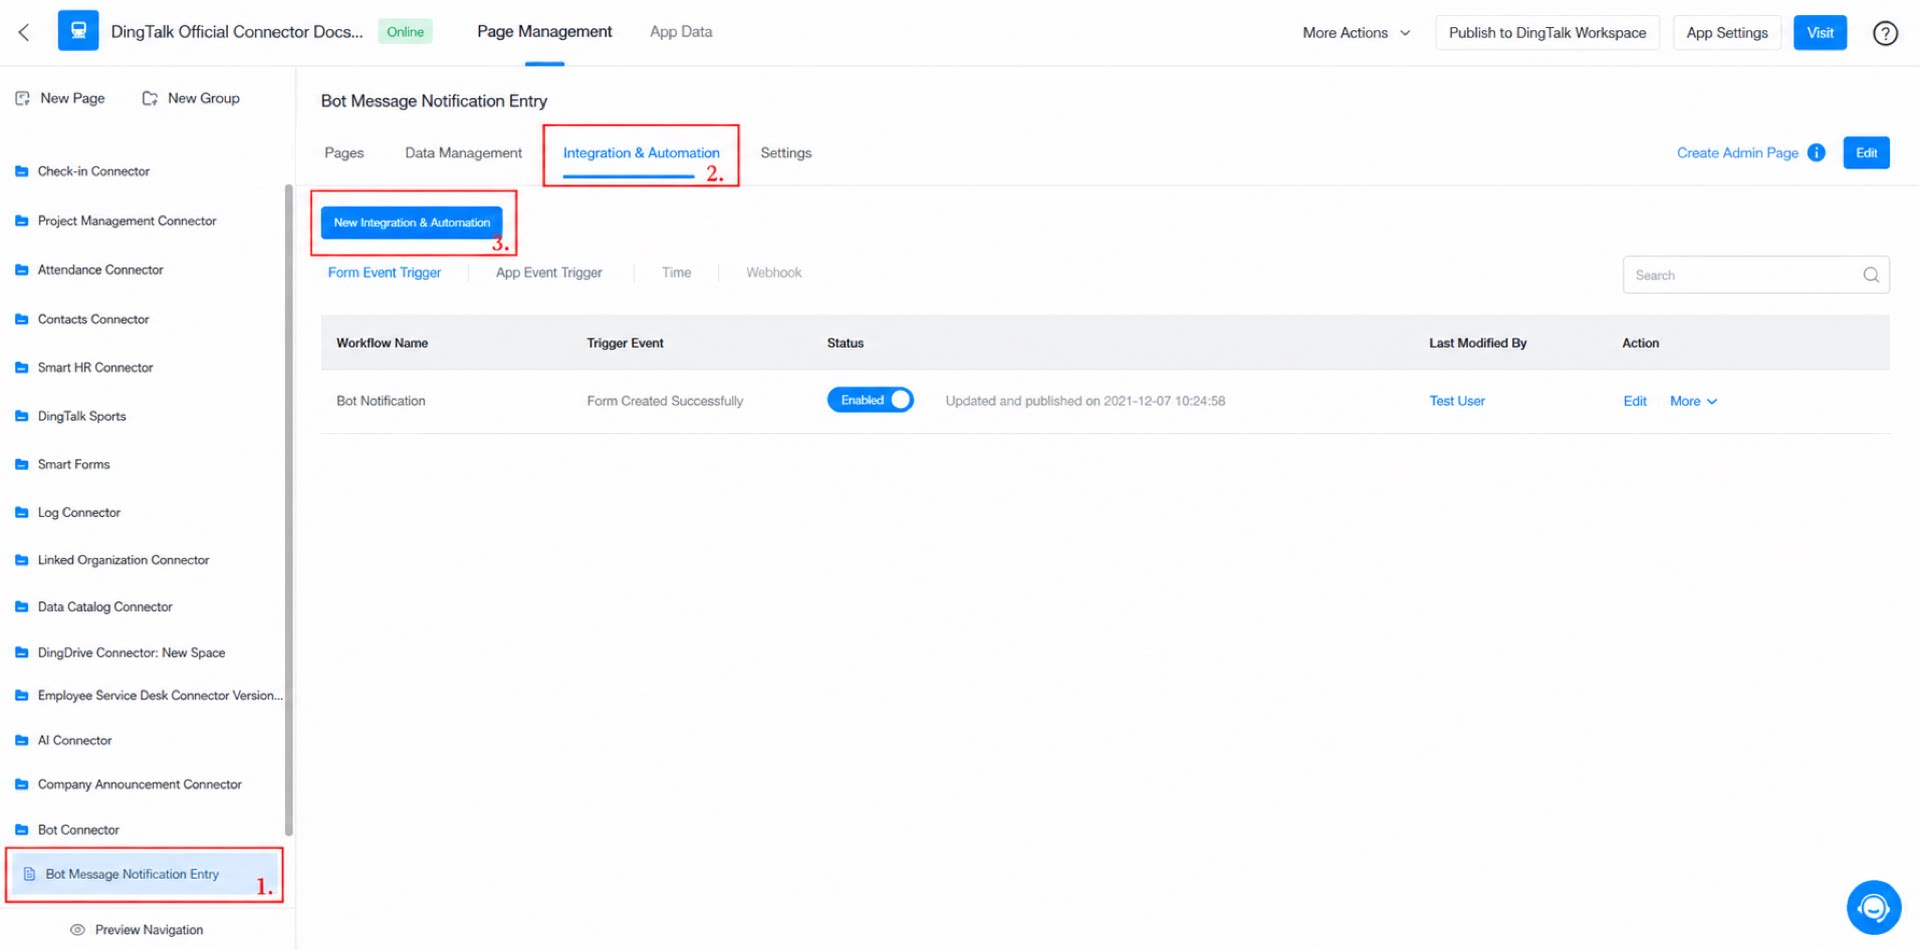
- Go to the admin console > “Bot message notification entry” form > Integration & Automation > Create Integration & Automation. (See Figure 2.2-1.)
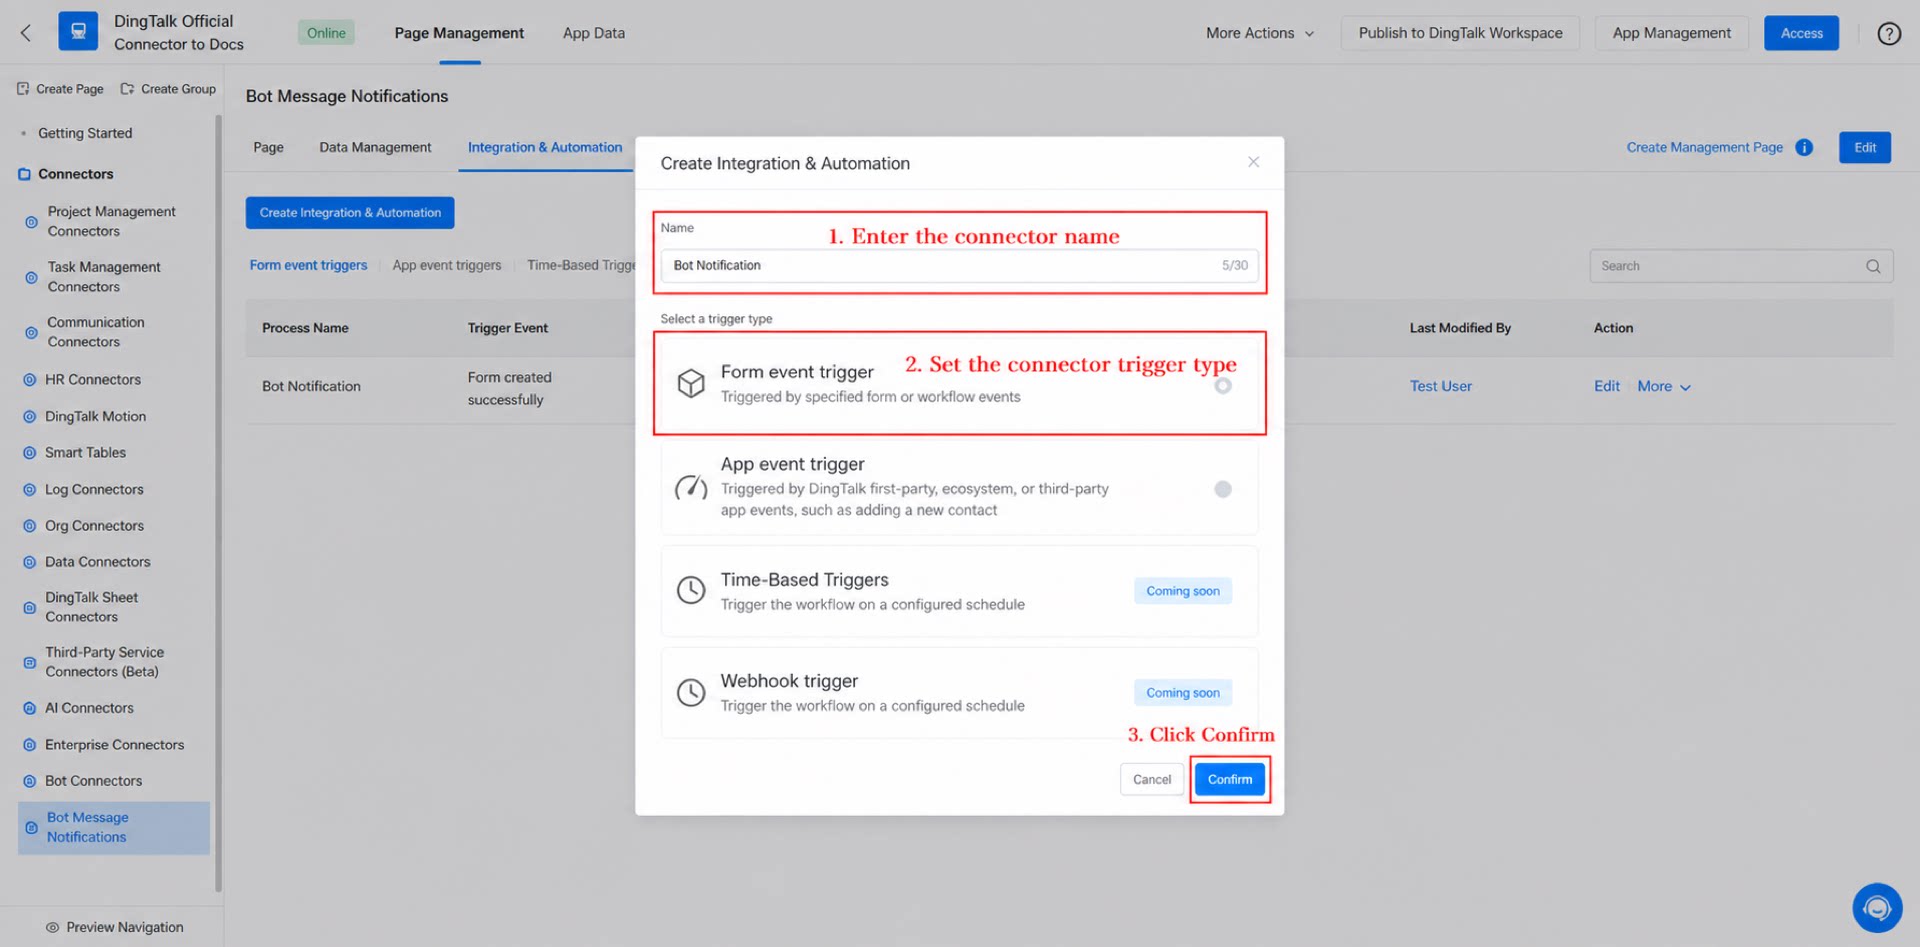
- Name the connector “Bot notification”, set the trigger type to Form event trigger, and click Save. (See Figure 2.2-2.)
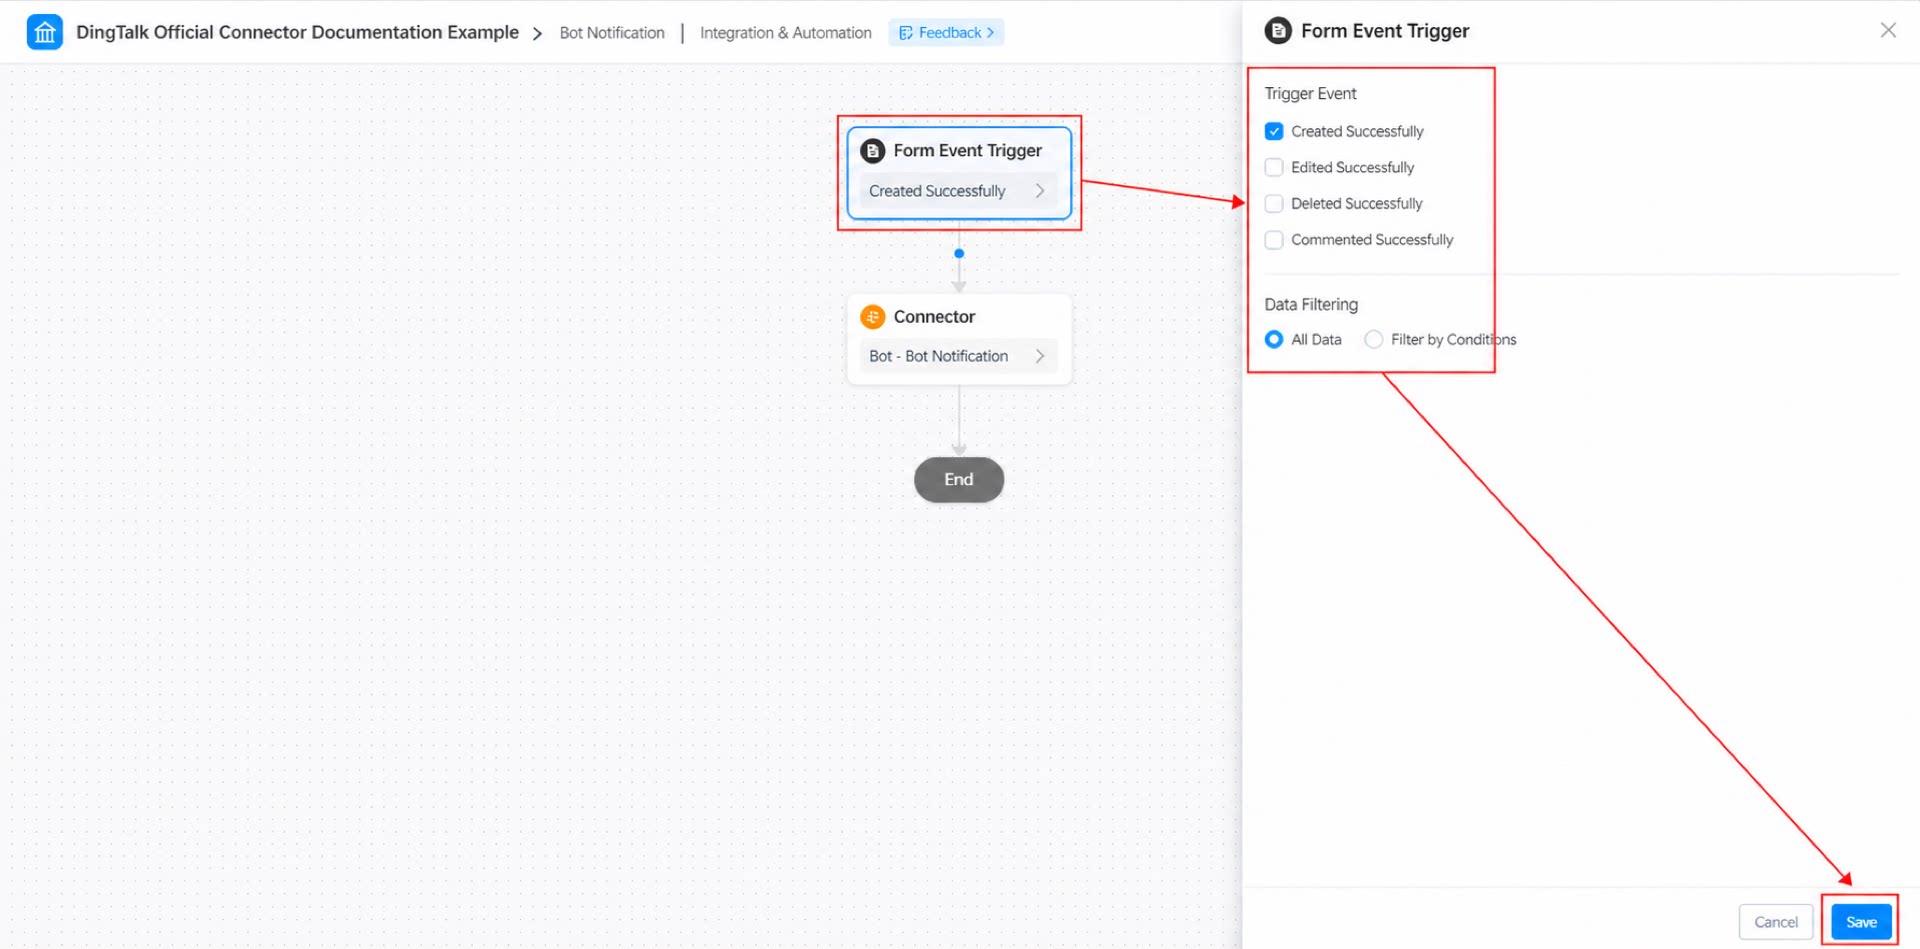
- Configure the form event trigger: set the trigger event to Create succeeded and the data filter to All data, then click Save. (See Figure 2.2-3.)
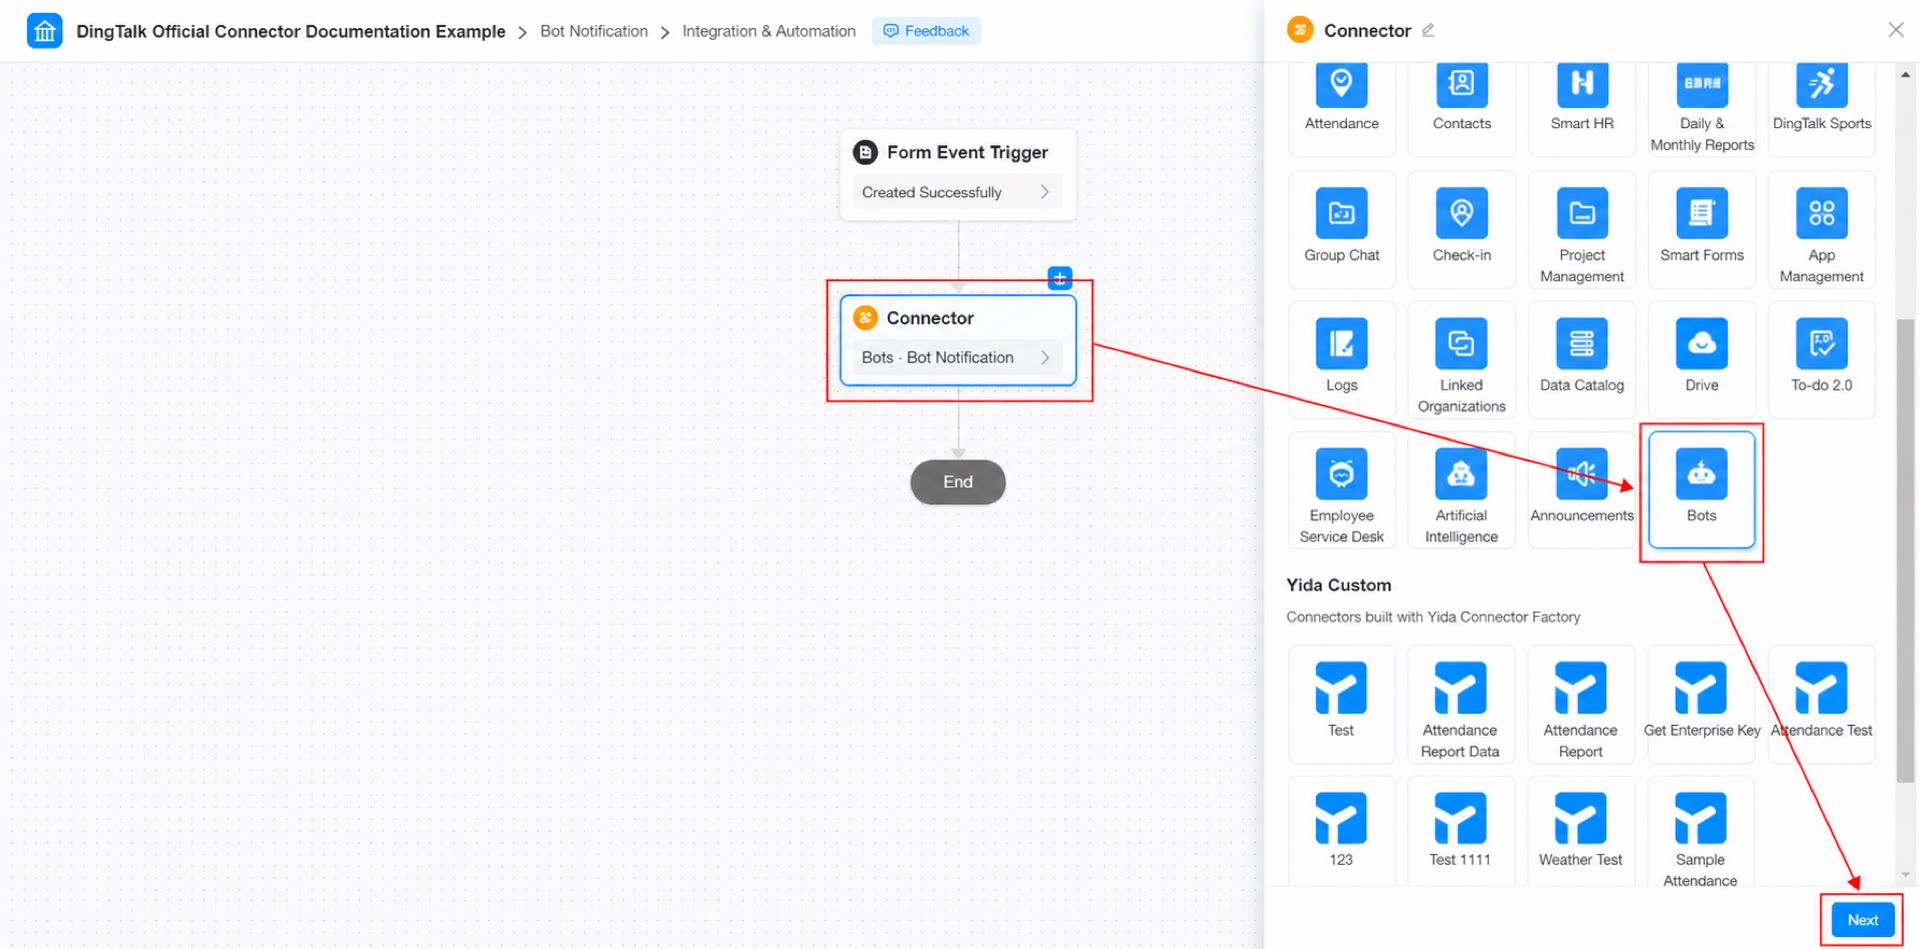
- Select the connector app: choose the “Bots” app and click Next. (See Figure 2.2-4.)
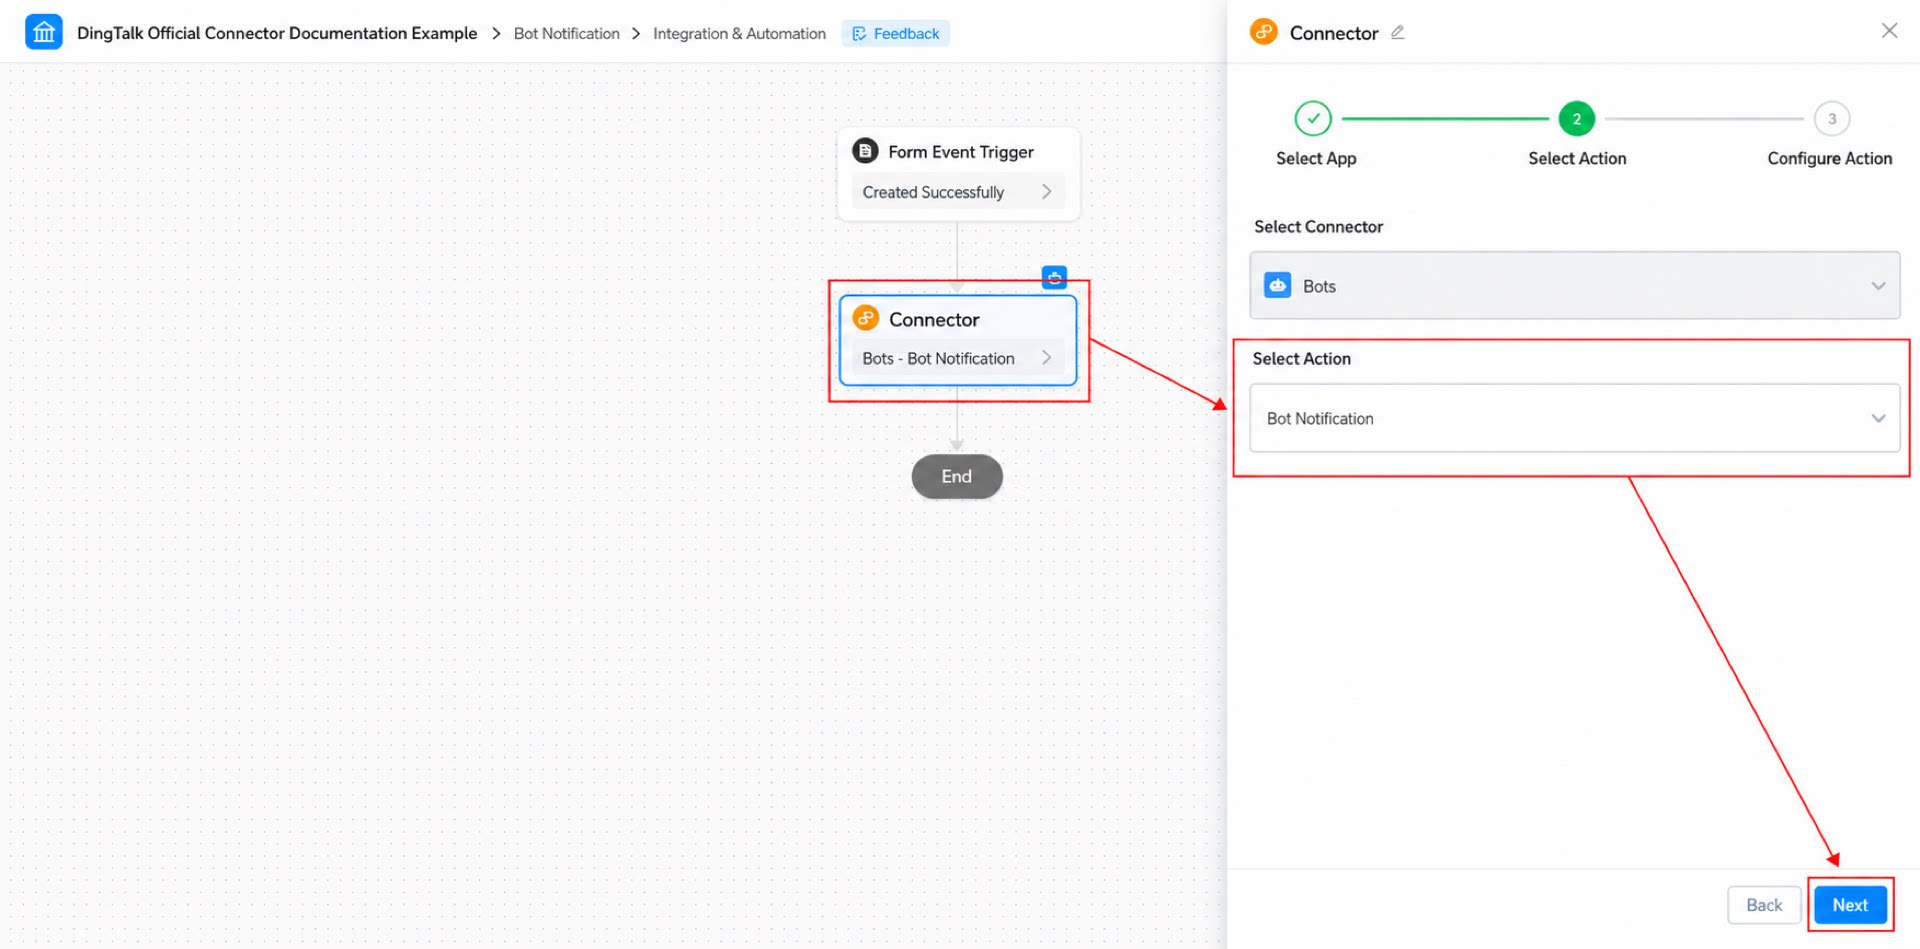
- Select the connector action: choose the “Bot notification” action and click Next. (See Figure 2.2-5.)
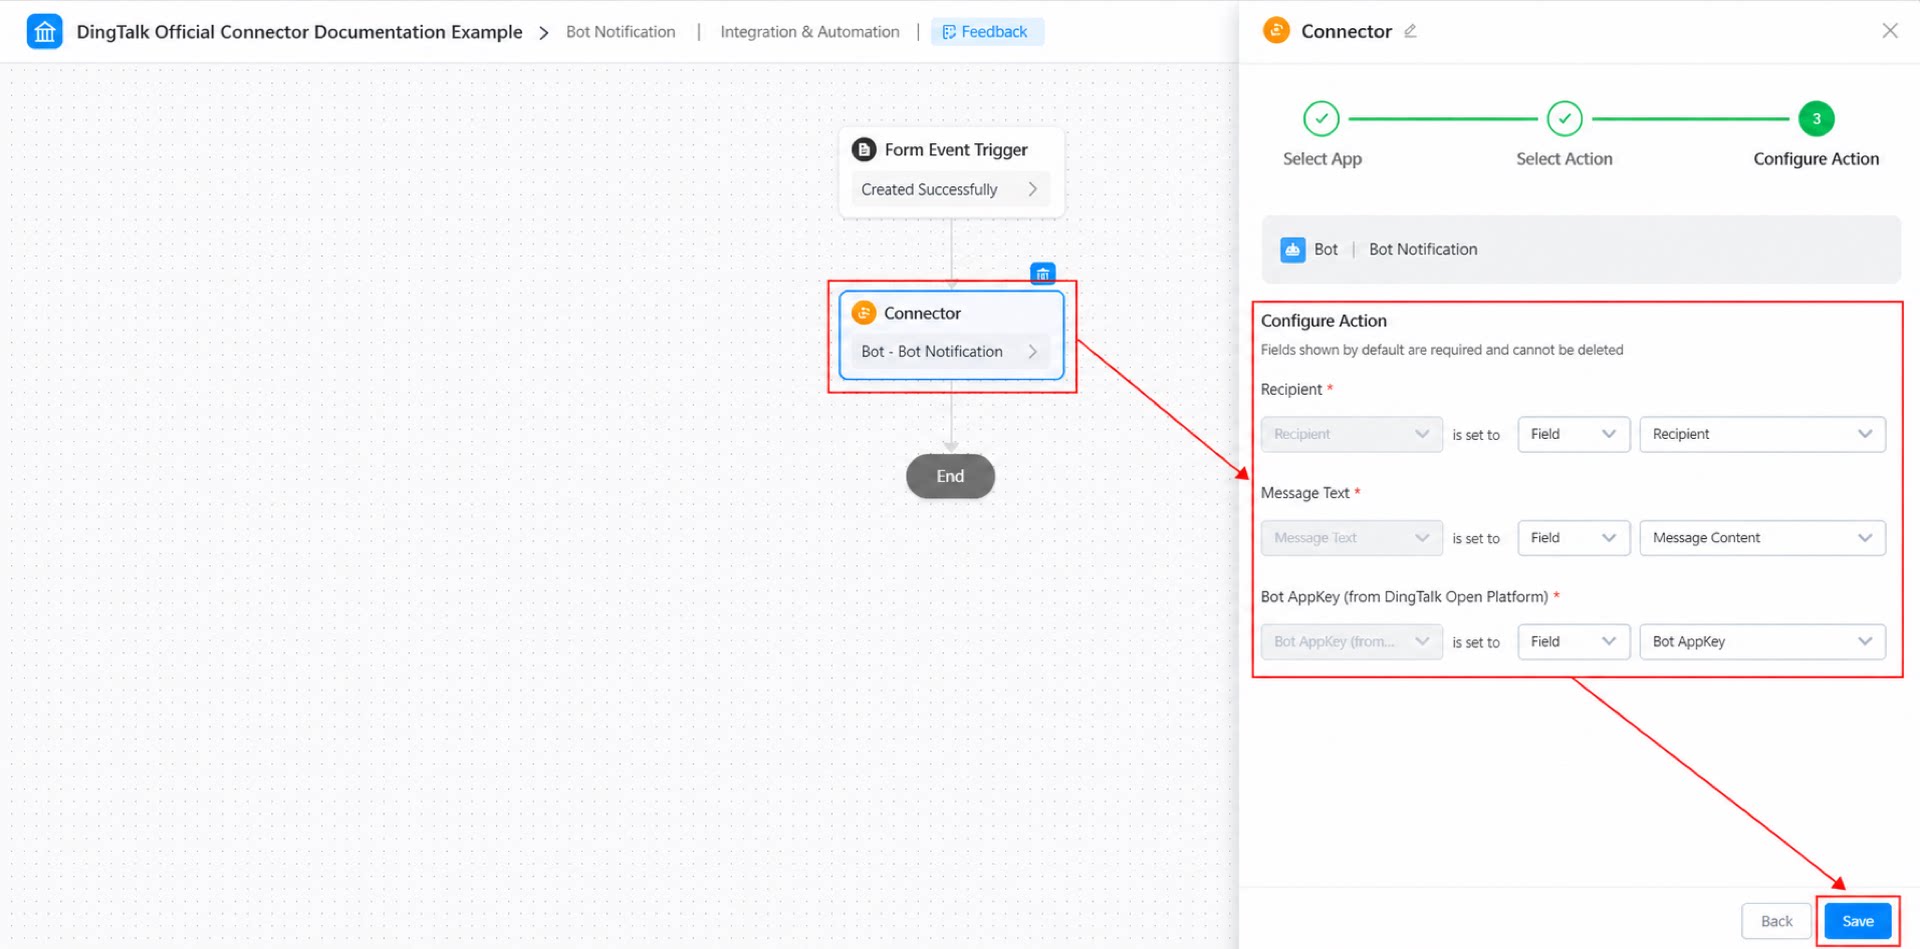
- Configure the connector action and click Save. (See Figure 2.2-6.)
- Click Save in the upper-right corner of the page, then click Publish.
2.3 Step 3: Submit the Form
Submit data through the “Bot message notification entry” form to trigger the connector. (See Figure 2.3-1.)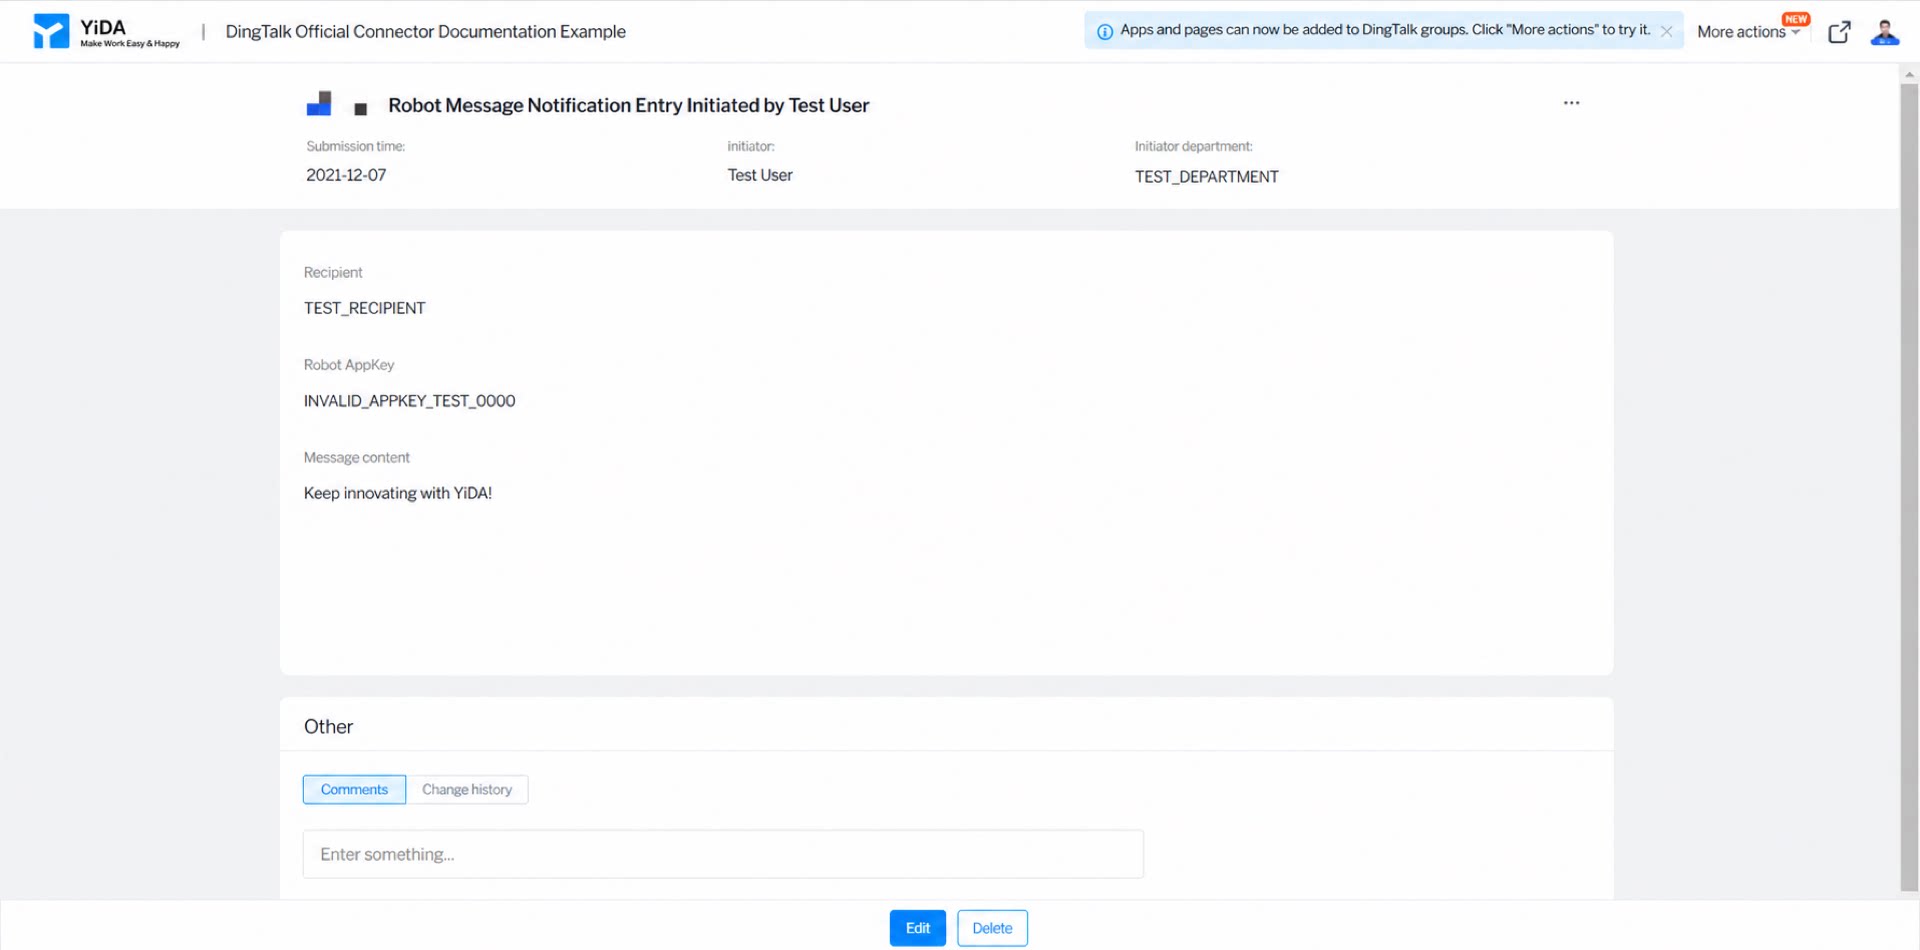
3. Result