Chats
Chats Calendar
 Meetings
 Contacts
 Mail
Mail Docs
Docs Drive
Drive AI Table
 AI Minutes
 Attendance
 Approval
 YiDA
YiDA Admin Console
1. Use Case
Use this connector in day-to-day attendance to notify the system when an approval is granted. Currently, only leave requests are supported. For example, if an employee is scheduled to work from 8:00 to 18:00 today and submits a leave request through a YiDA workflow form that the approver approves, calling this connector will notify DingTalk Attendance that the employee does not need to clock in today, will not be marked as absent, and the clock-in status will be shown as On leave.2. Steps
2.1 Step 1: Create and Configure the Workflow Form
Create a workflow form as the carrier for leave approval, and configure the workflow steps to prepare for calling the connector later.2.1.1 Create the Workflow Form
Steps:- Create a new form and name it “Leave Request”.
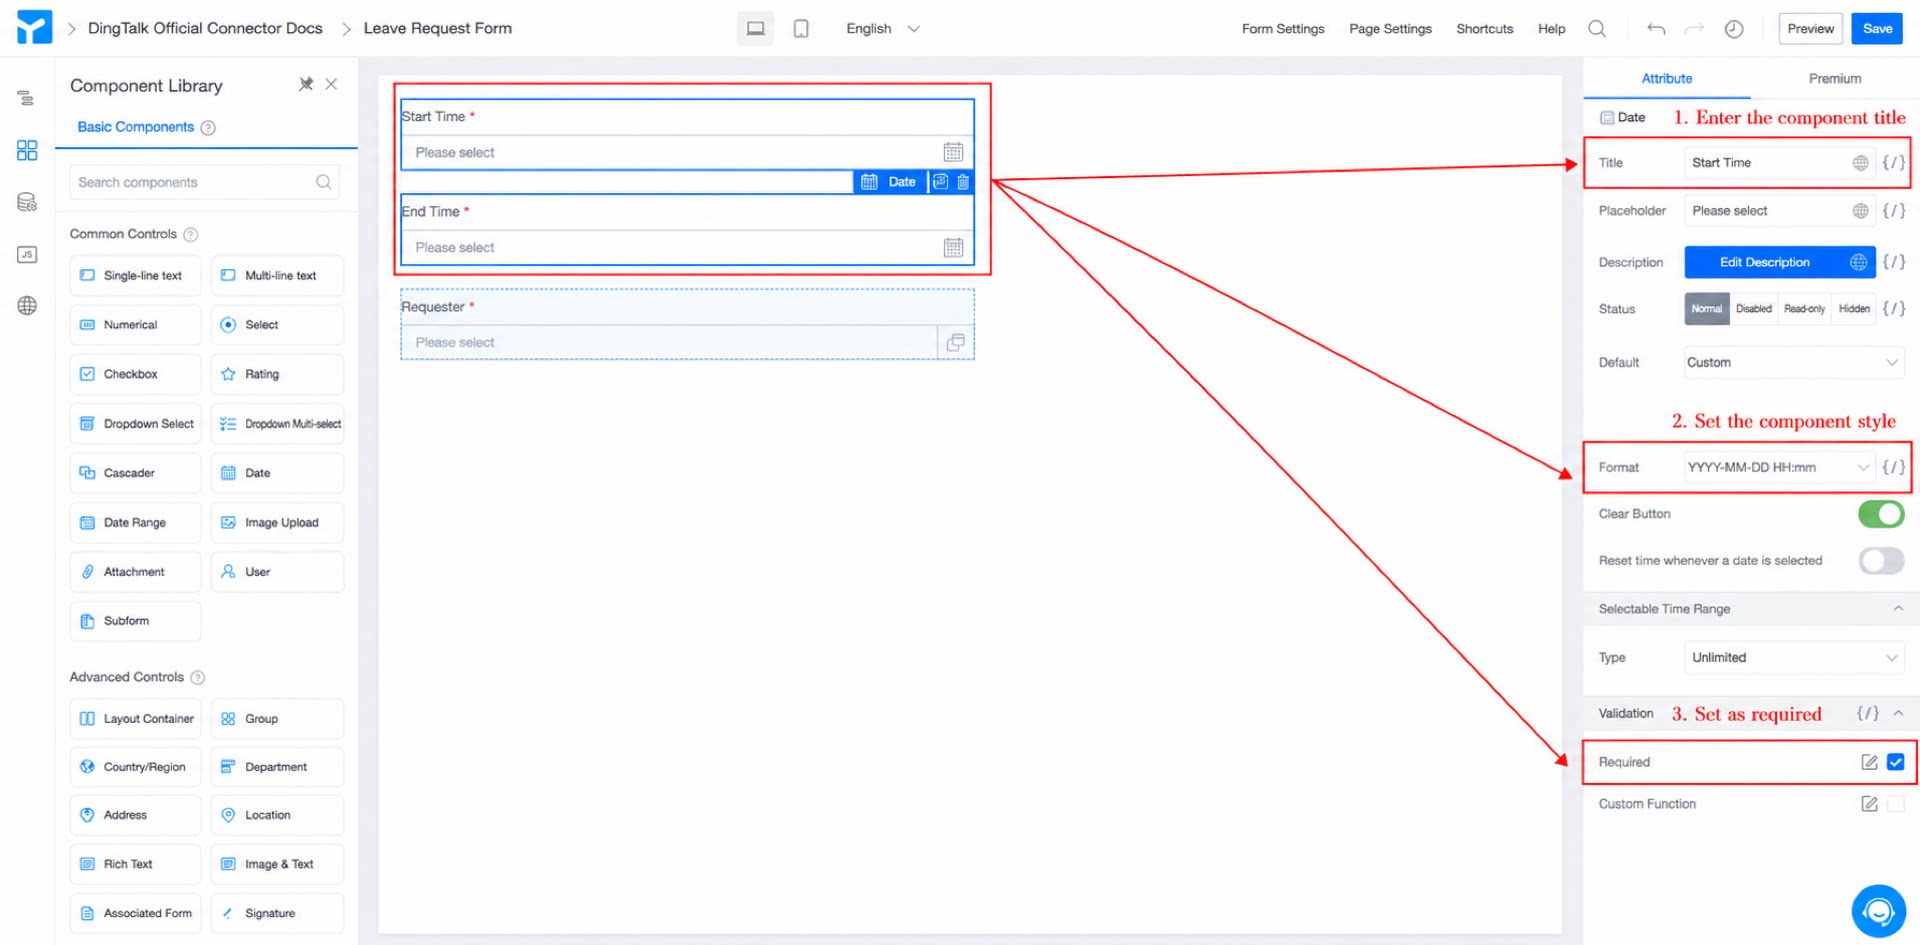
- Add two date components, name them “Leave Start Time” and “Leave End Time”, set them as Required, and set the date format to “YYYY-MM-DD HH:mm”. (See Figure 2.1-1.)
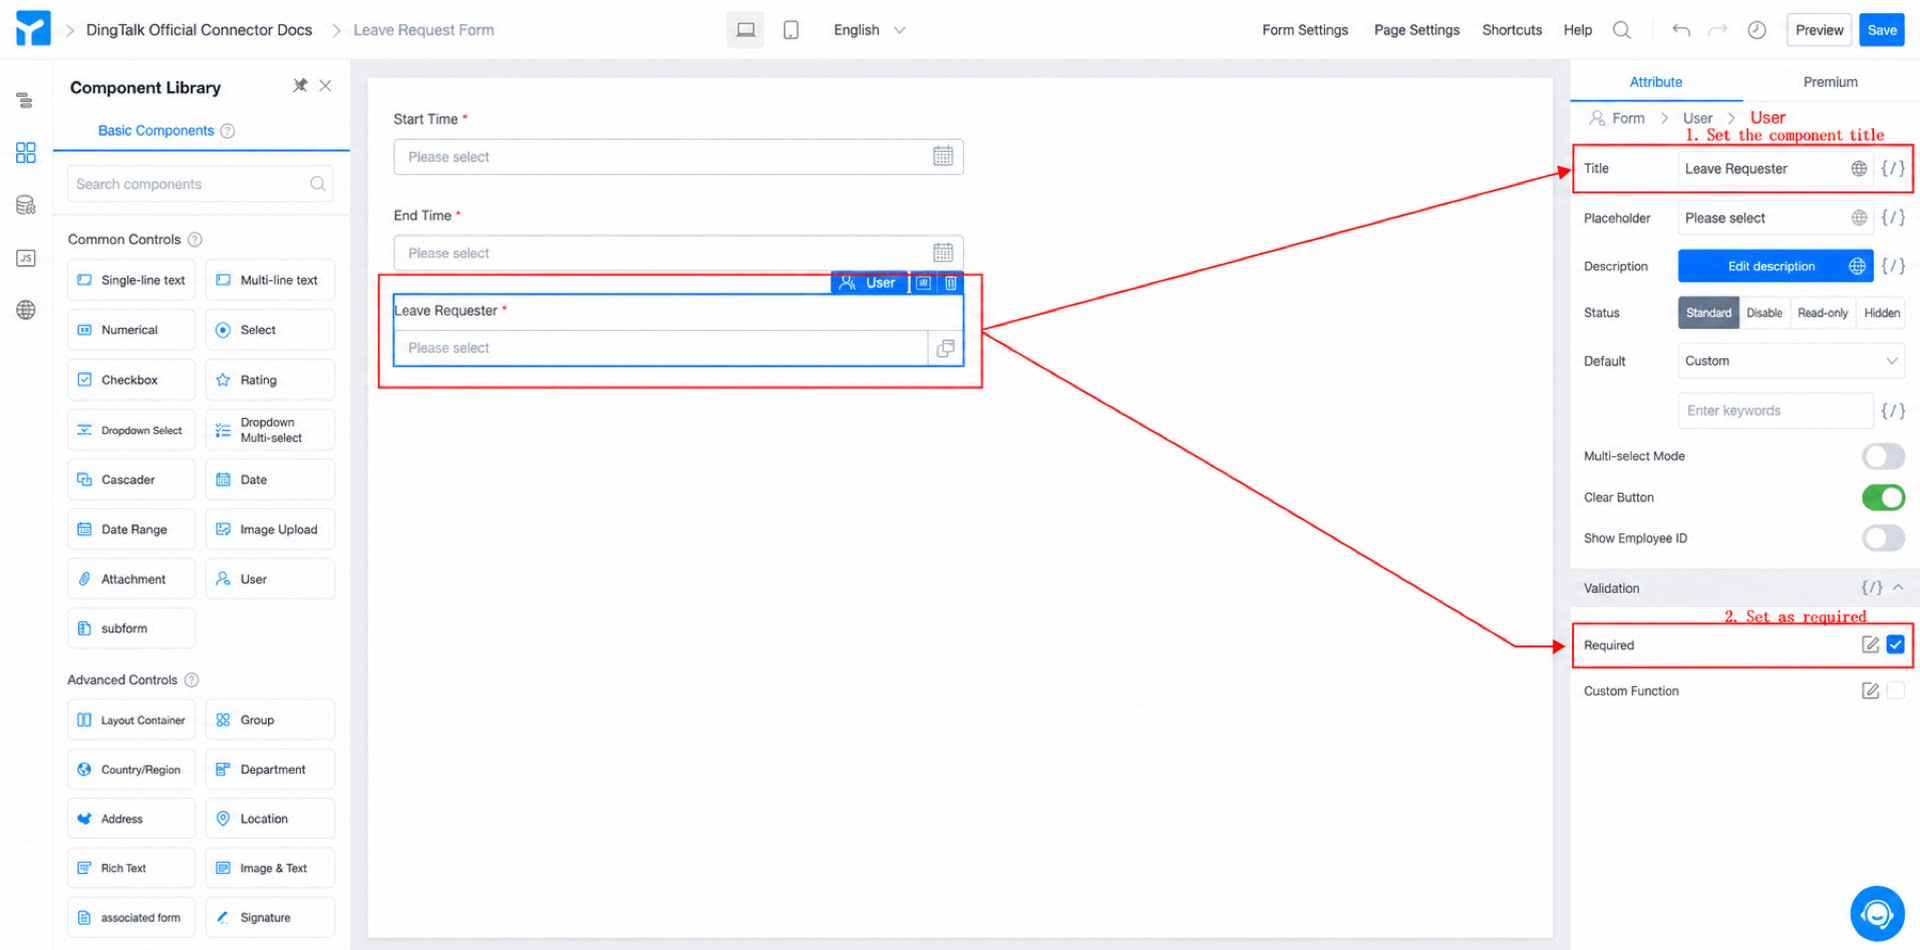
- Add a member component, name it “Requester”, set it as Required, set the Default value to Formula edit, and select the formula “USER()” to automatically retrieve the currently signed-in user. (See Figure 2.1-2.)
- Click Save in the upper-right corner of the form.
2.1.2 Workflow Design
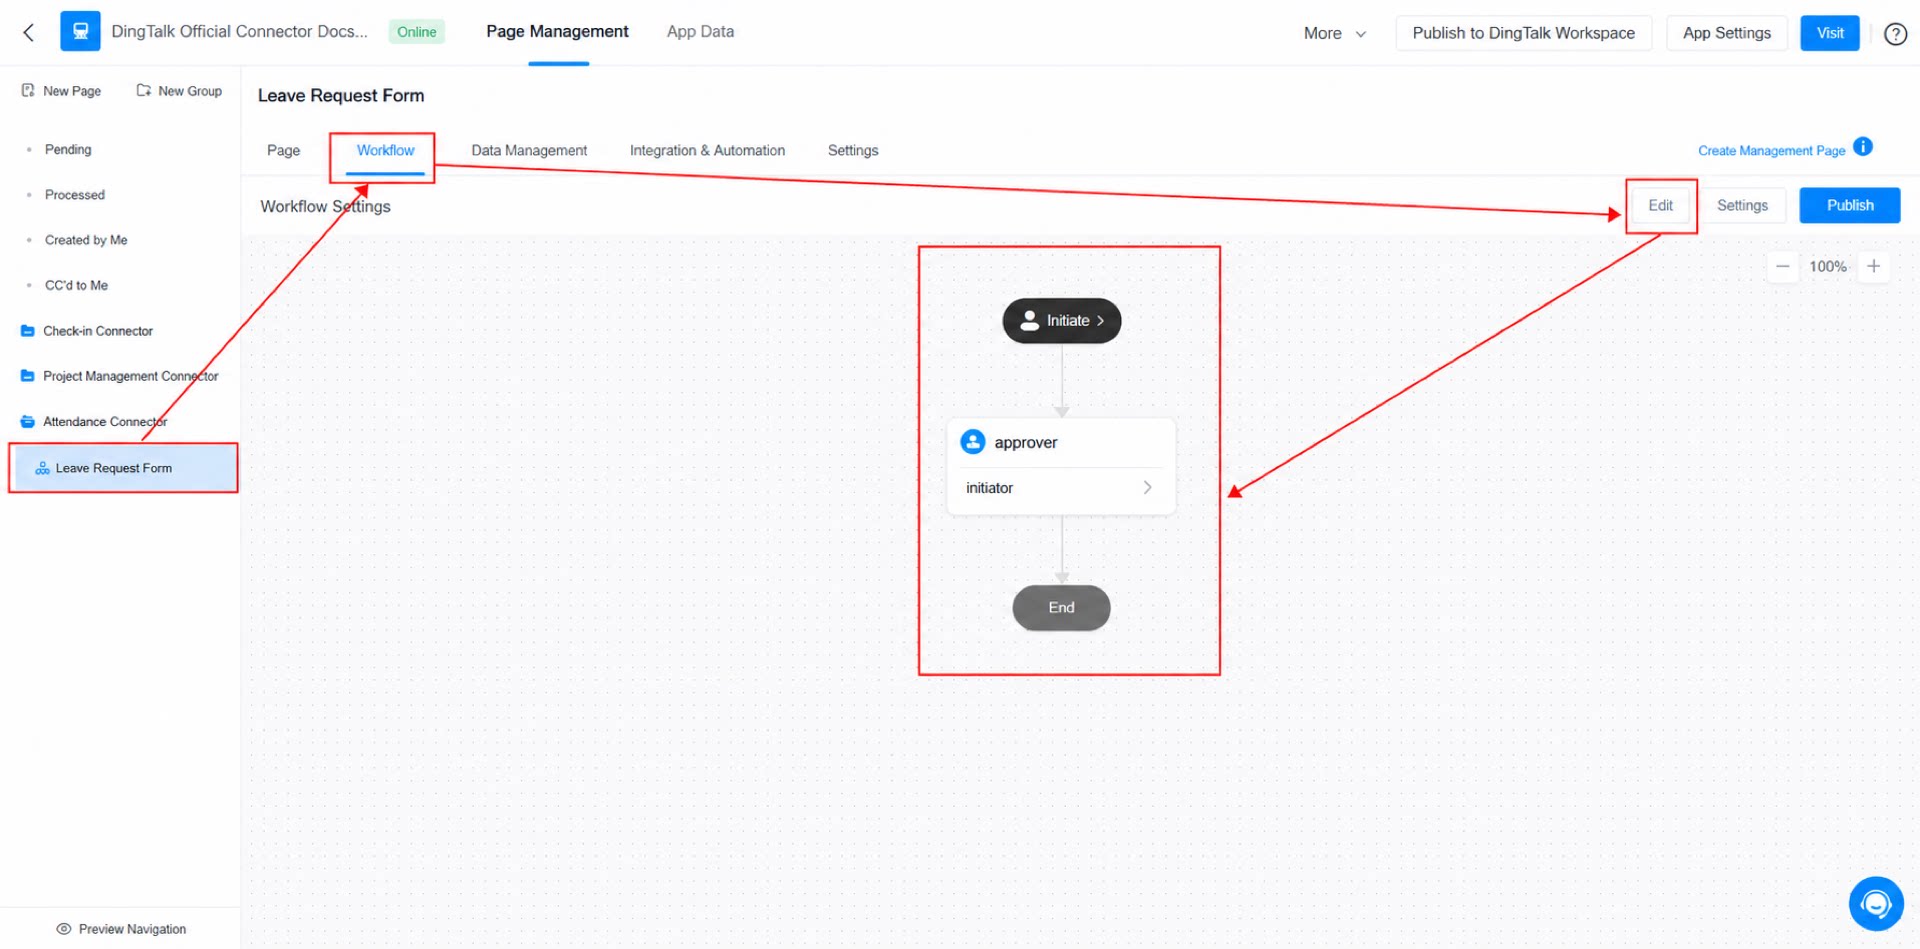
Steps:- On the admin backend page, select the “Leave Request” workflow form, click “Workflow” at the top of the page, click Edit, and set the approver to the requester. Click Save, and then click Publish. (See Figure 2.1-3.)
2.2 Step 2: Create and Configure the Connector
For an introduction to the YiDA connector, see: Integration & Automation - Connector
2.2.1 Create the Connector
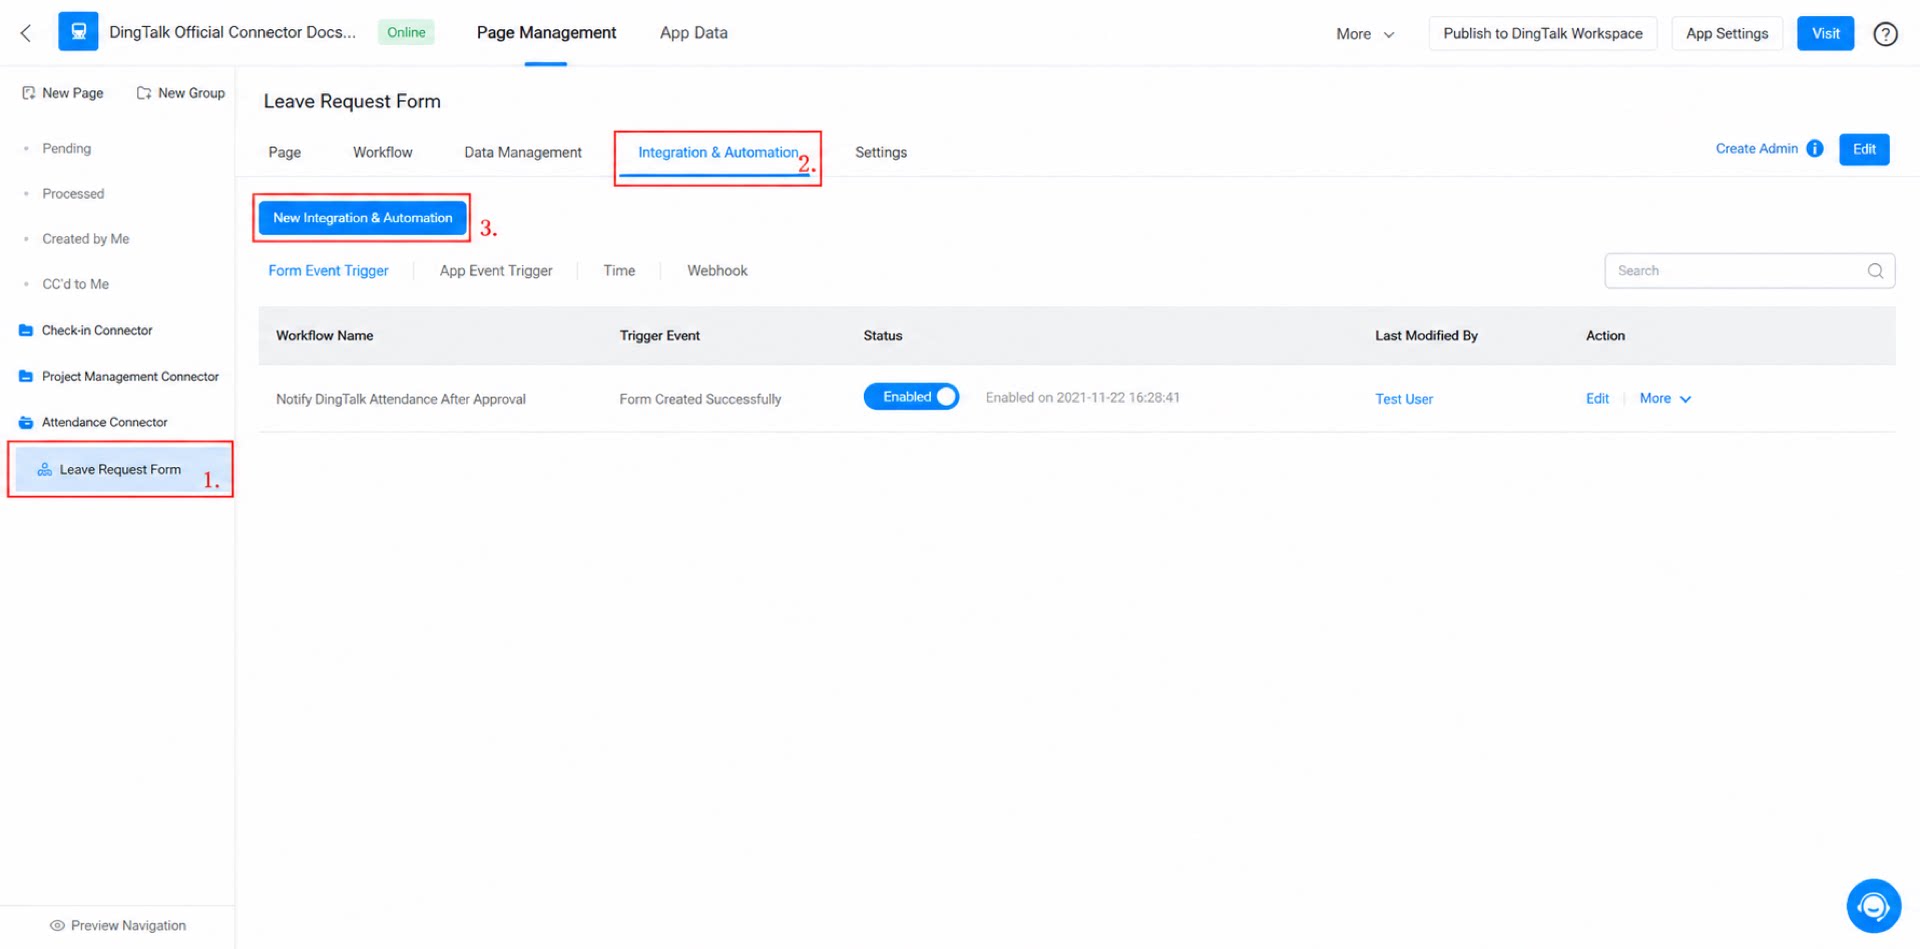
Steps:- On the edit page of the “Leave Request” form, click “Page Design” at the top, select “Integration & Automation” on the left, and click the “Create Integration & Automation” button. (See Figure 2.2-1.)
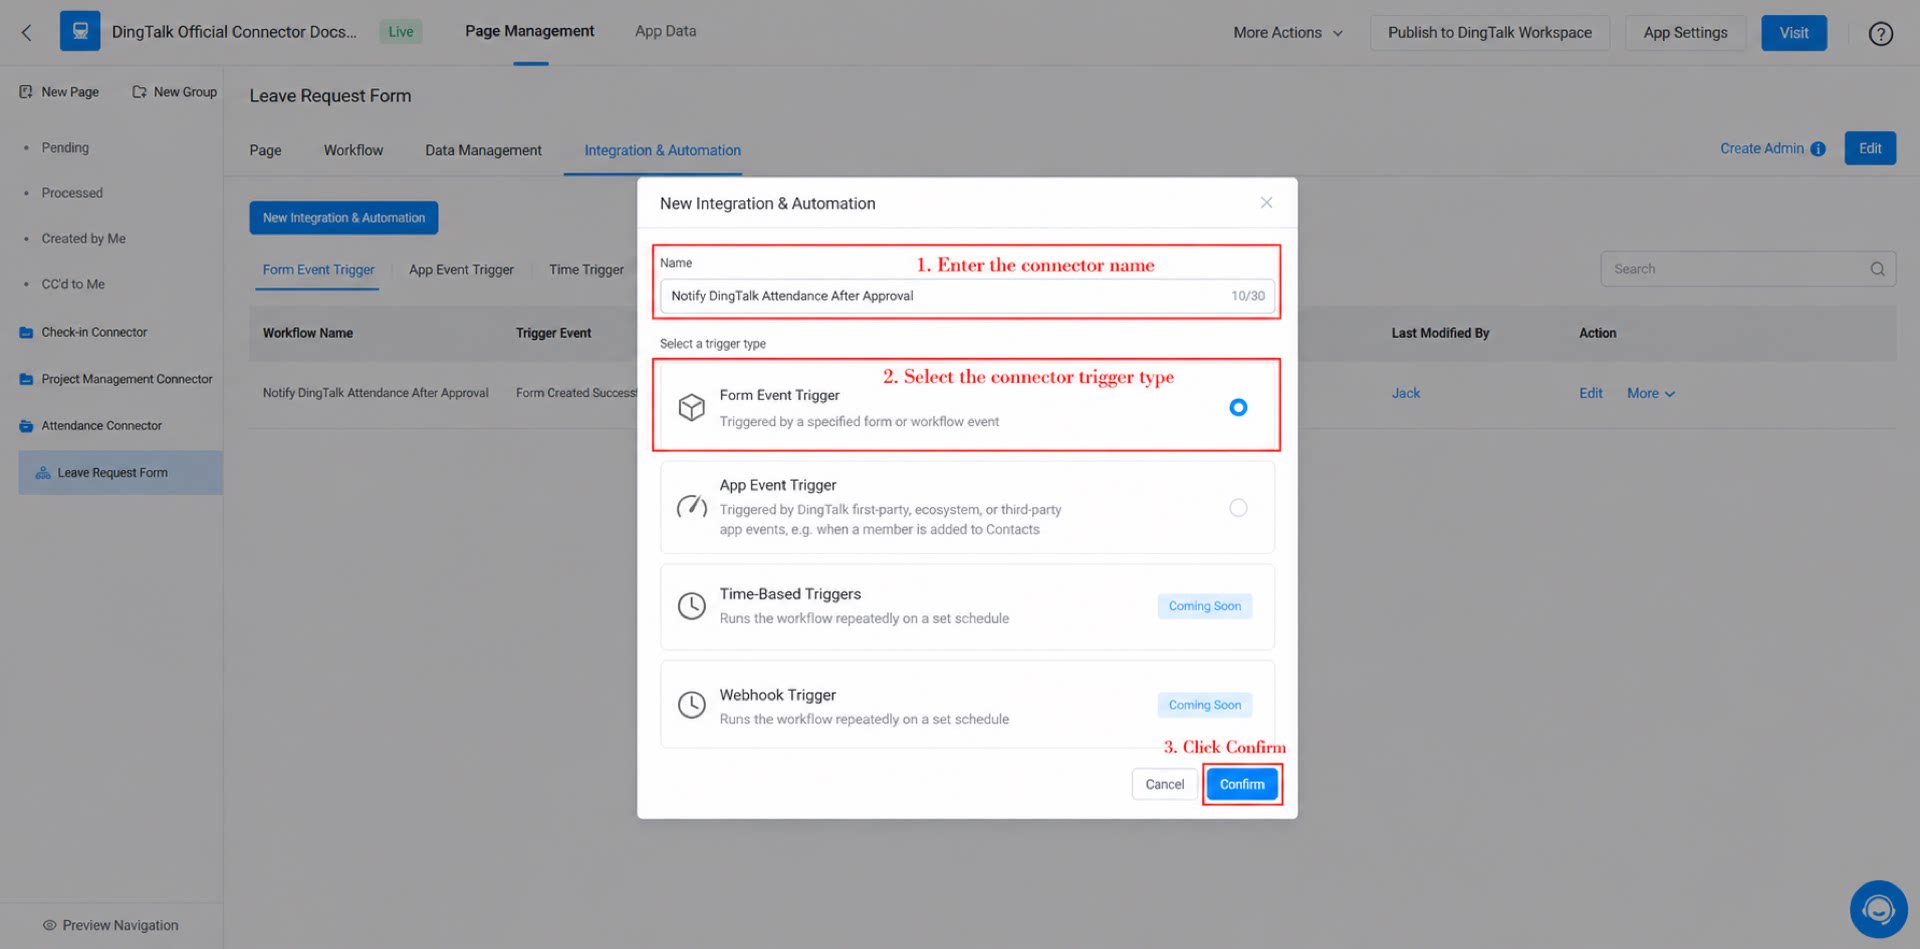
- Name the connector “Attendance”, set the Trigger type to “Form event trigger”, and click Confirm.
2.2.2 Configure the Connector
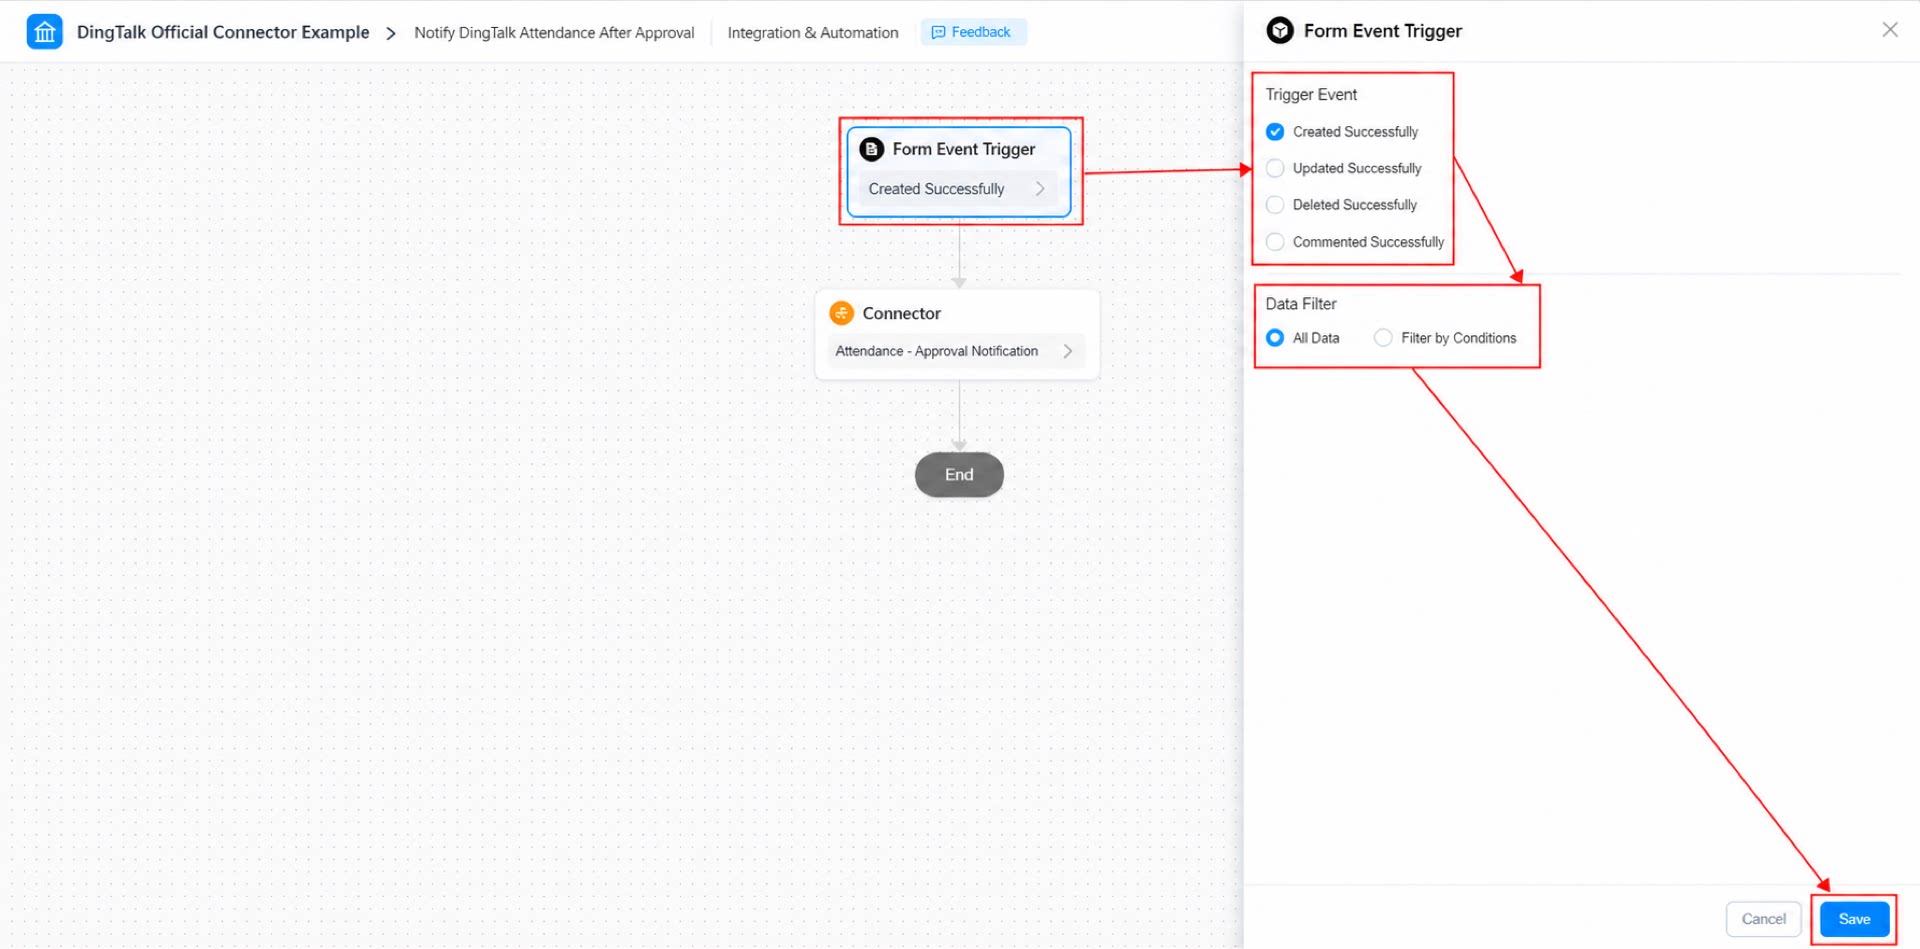
Steps:- Select “Form event trigger”, set the trigger event to “Create Success”, set the data filter to “All data”, and click Save. (See Figure 2.2-4.)
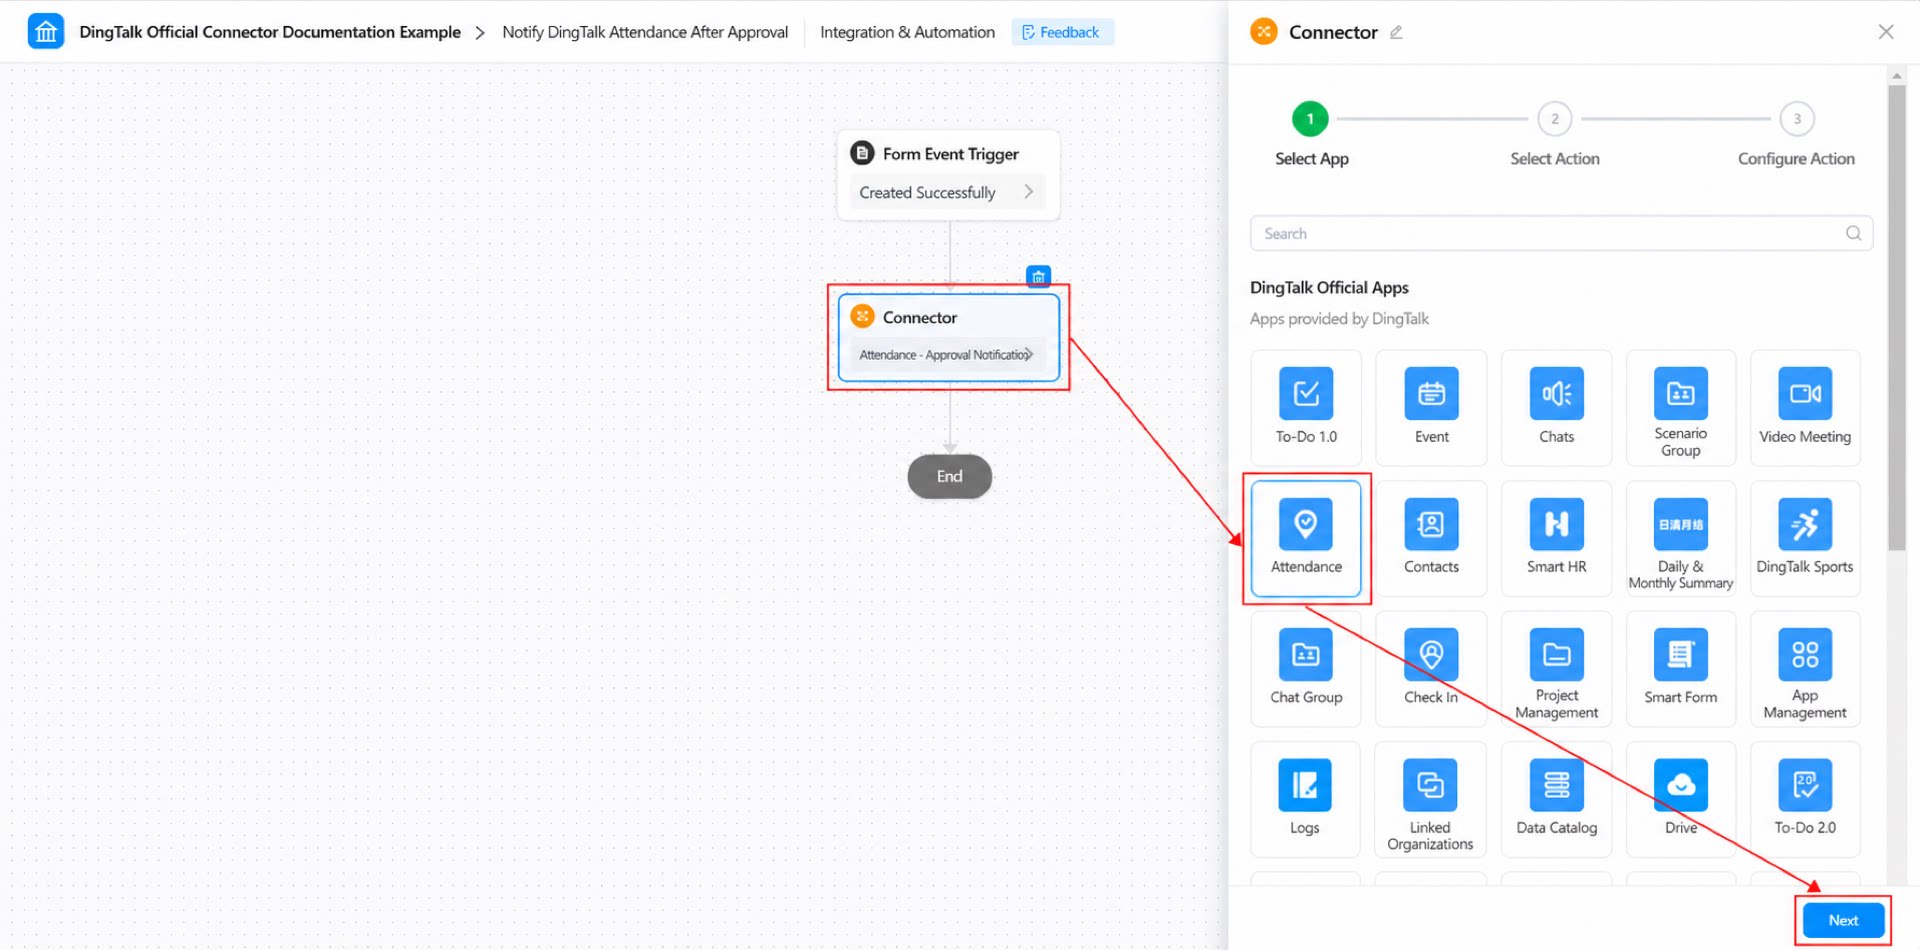
- Select “Connector”, select the “Attendance” app, and click Next. (See Figure 2.2-5.)
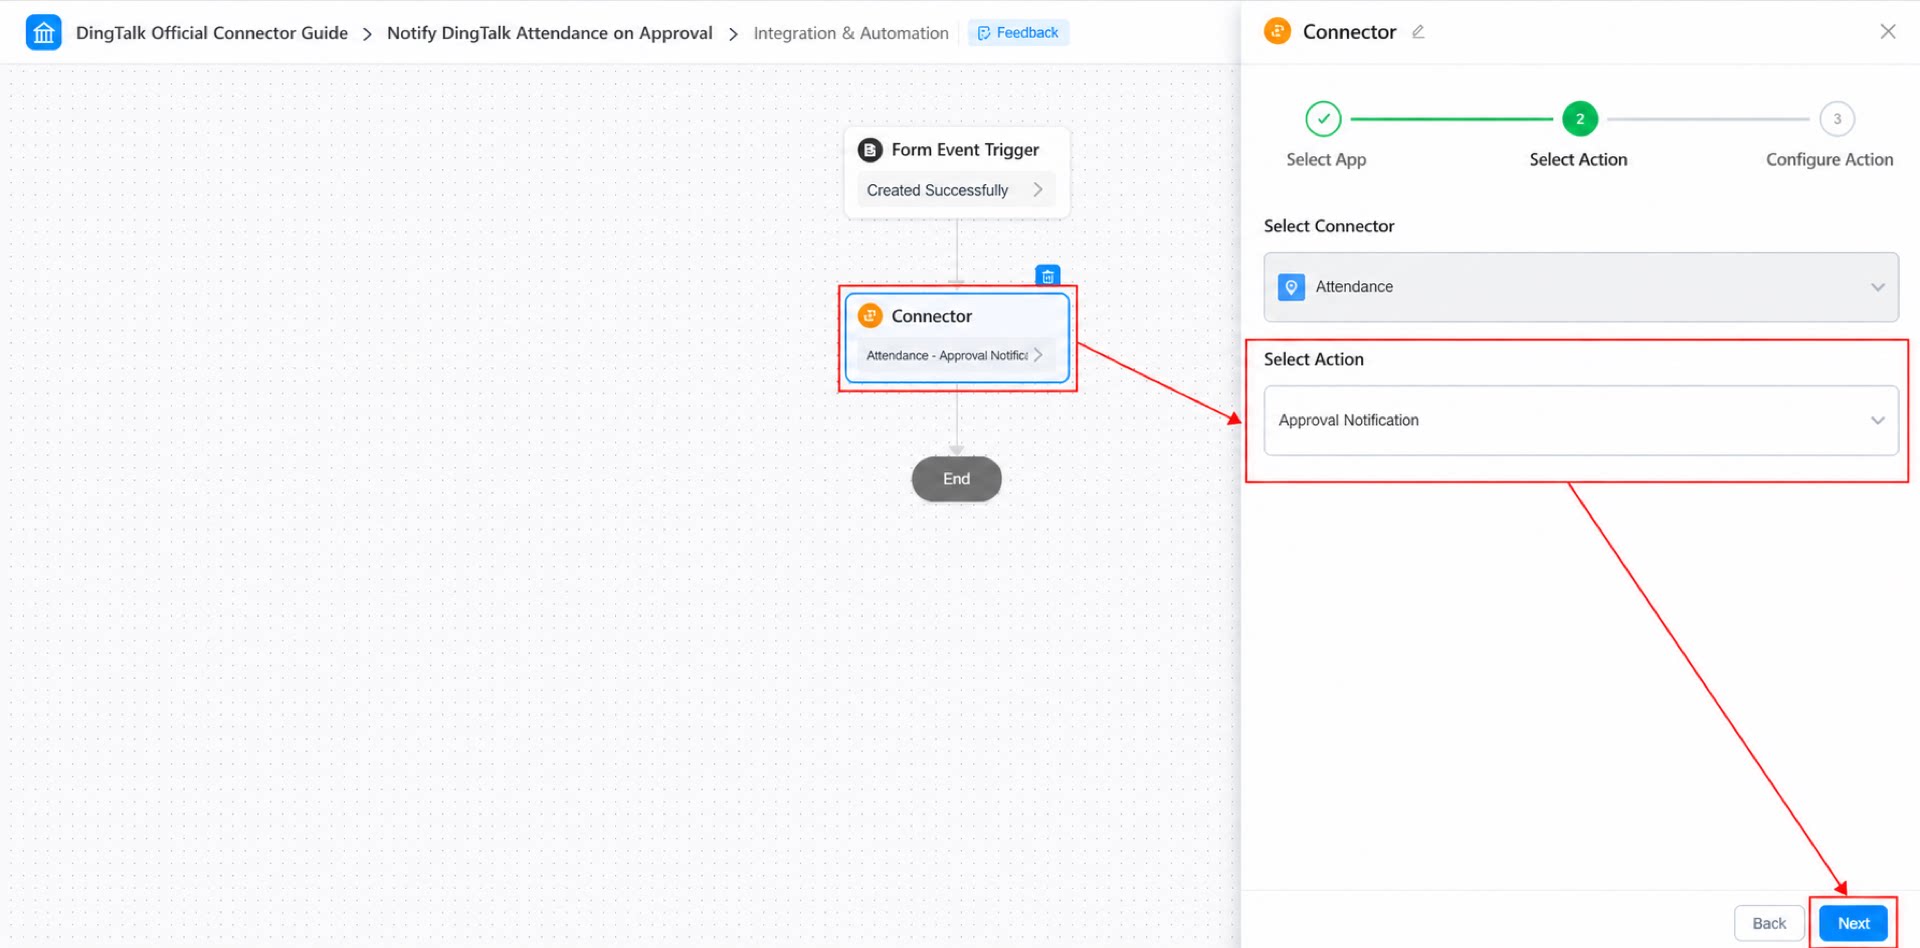
- Under Actions, select “Notify Approval Granted” and click Next. (See Figure 2.2-6.)
- Configure the action. (See Figure 2.2-7.)
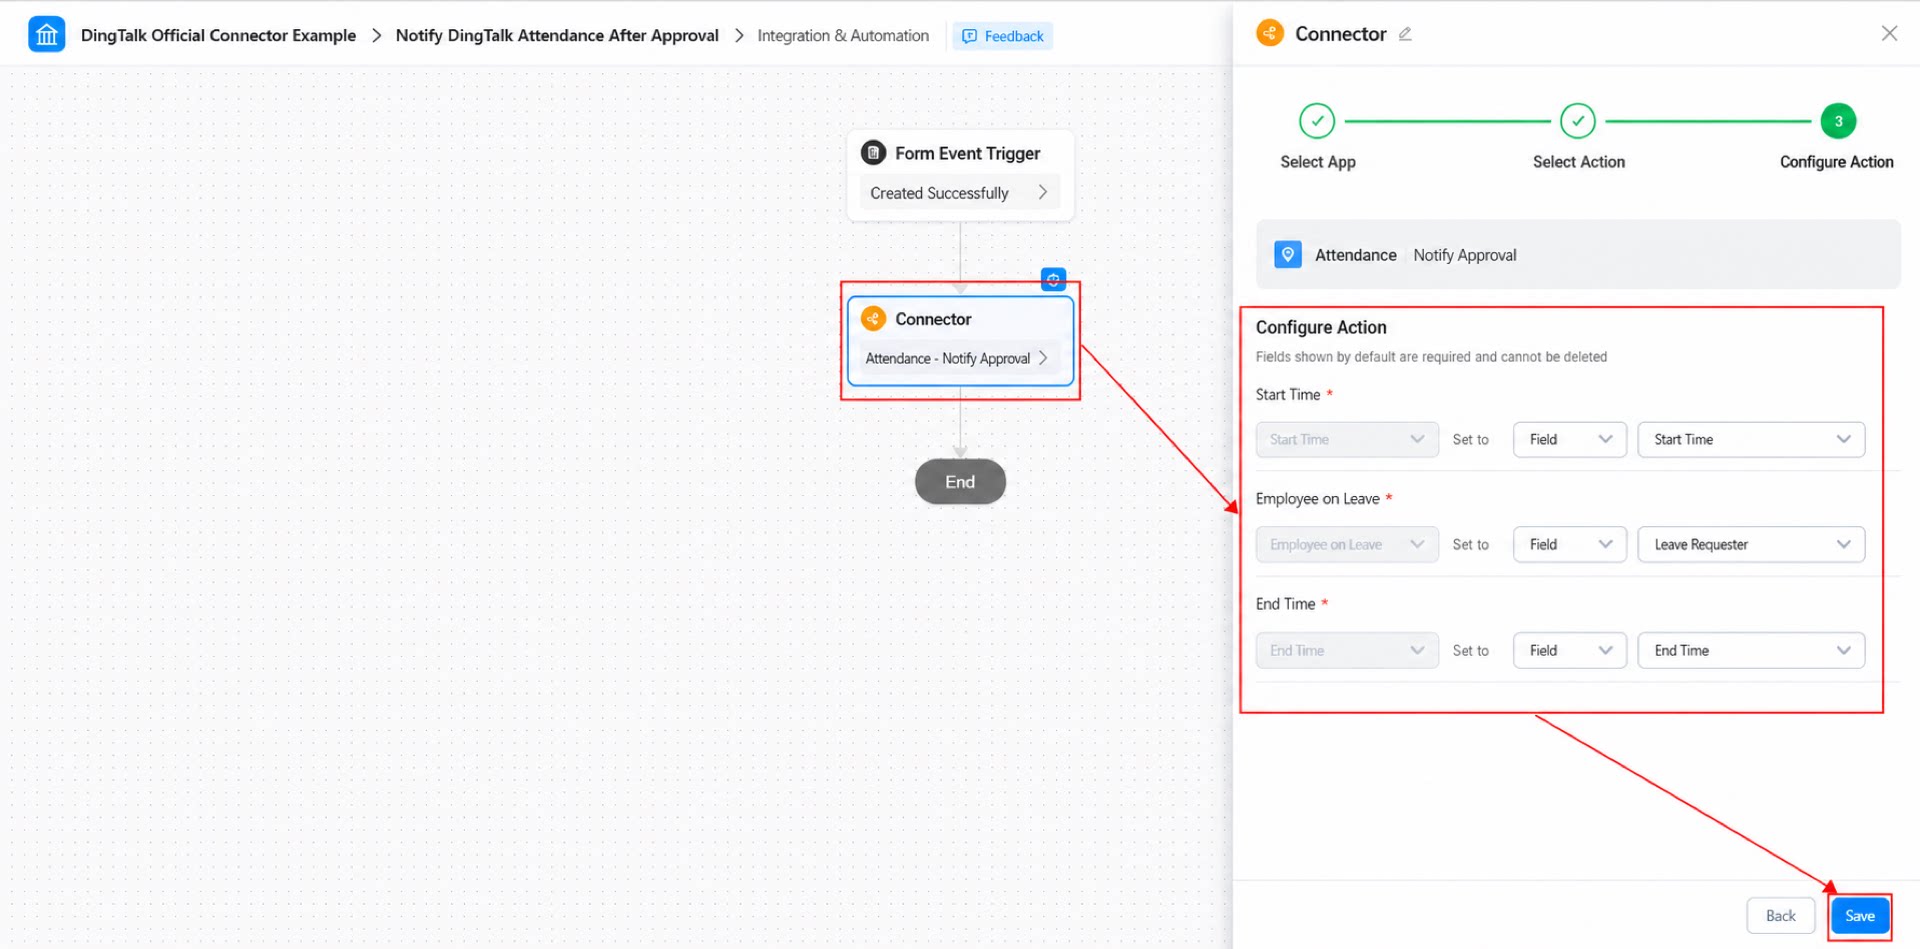
- Click Save in the upper-right corner, and then click Publish.
2.3 Step 3: Submit Form Data
After completing the two steps above, the connector configuration is complete. Now, submit a “Leave Request” workflow approval to trigger the connector and send a notification once the request is approved. (See Figure 2.3-1.)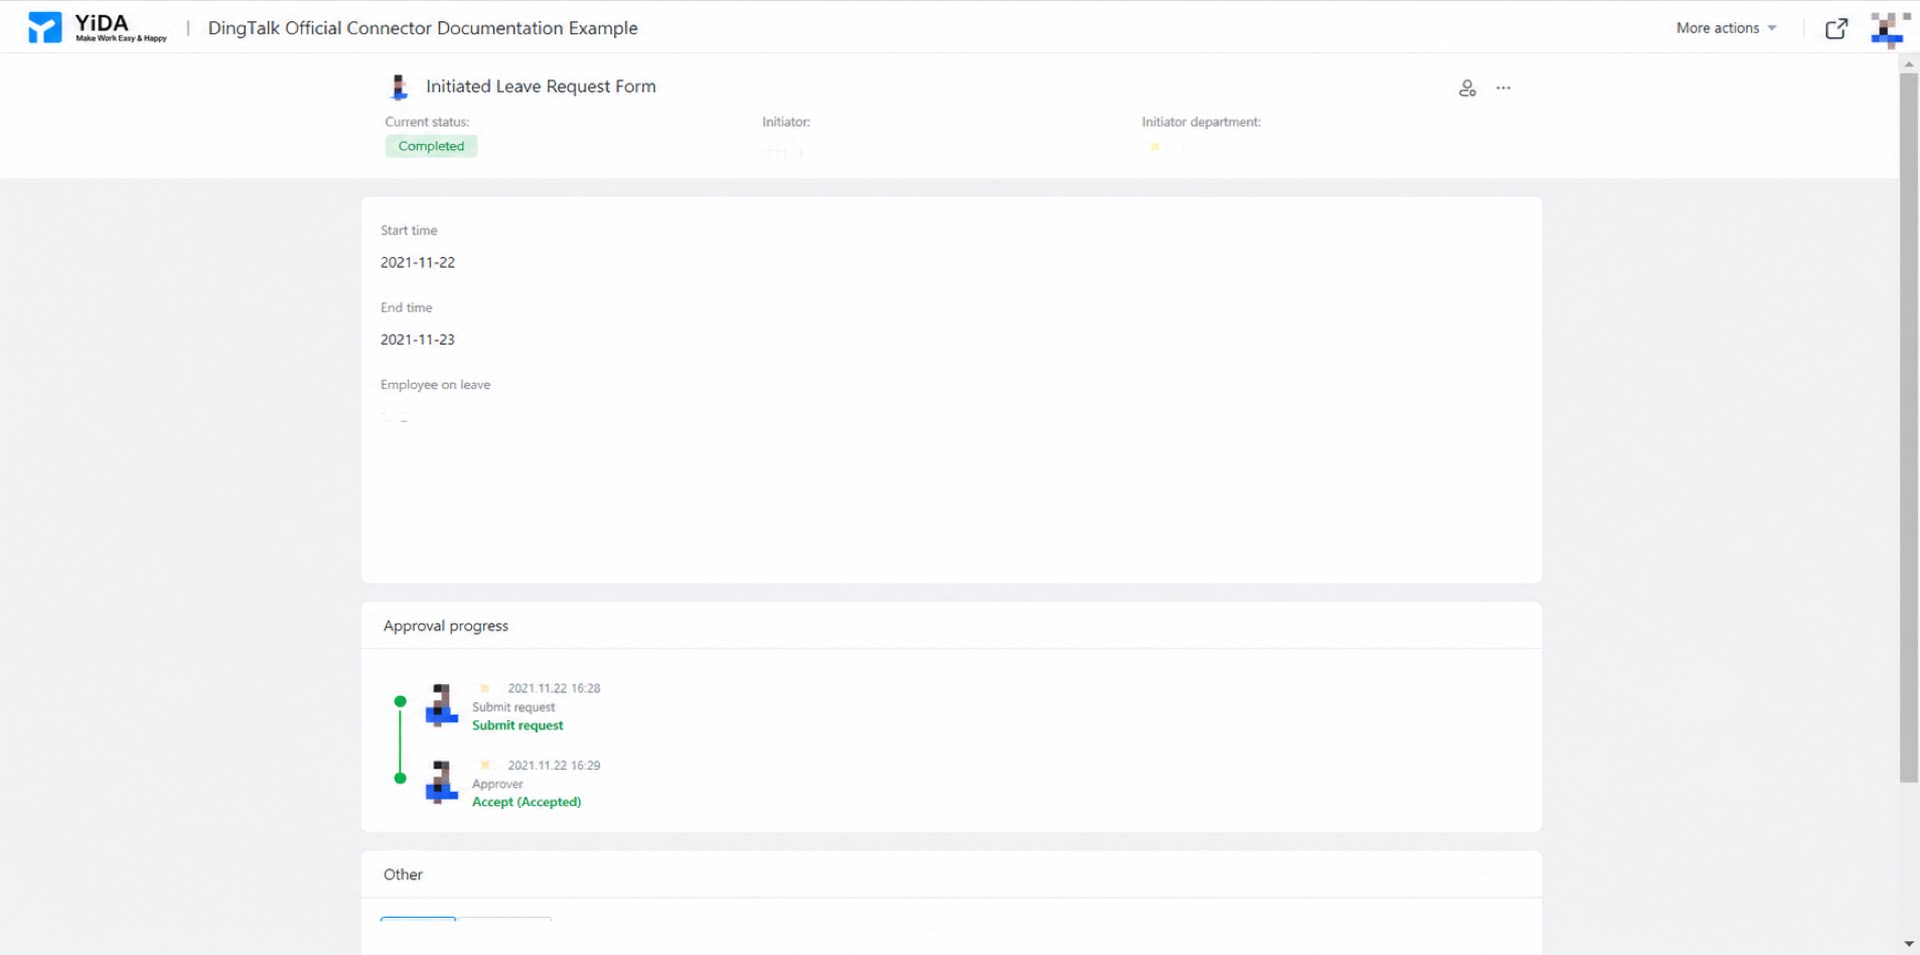
3. Result
Desktop: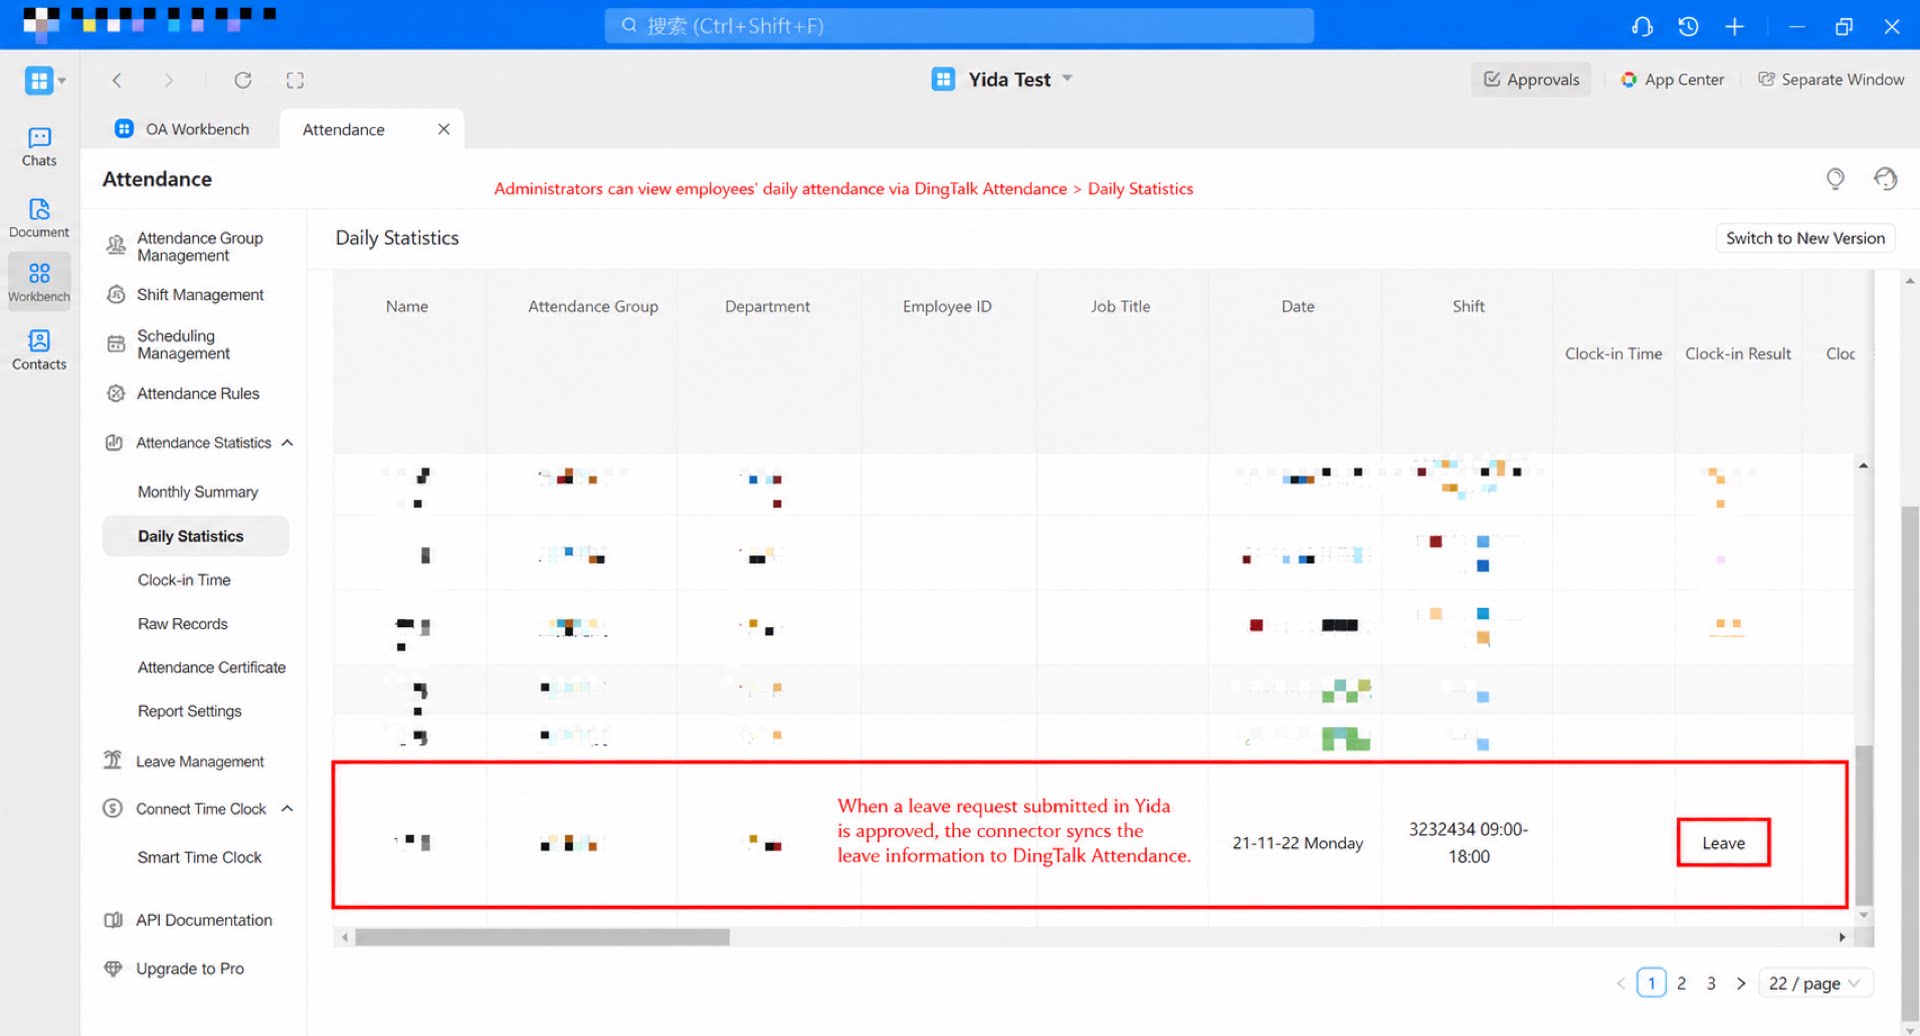
4. FAQ
4.1 How to Become a DingTalk Organization Admin
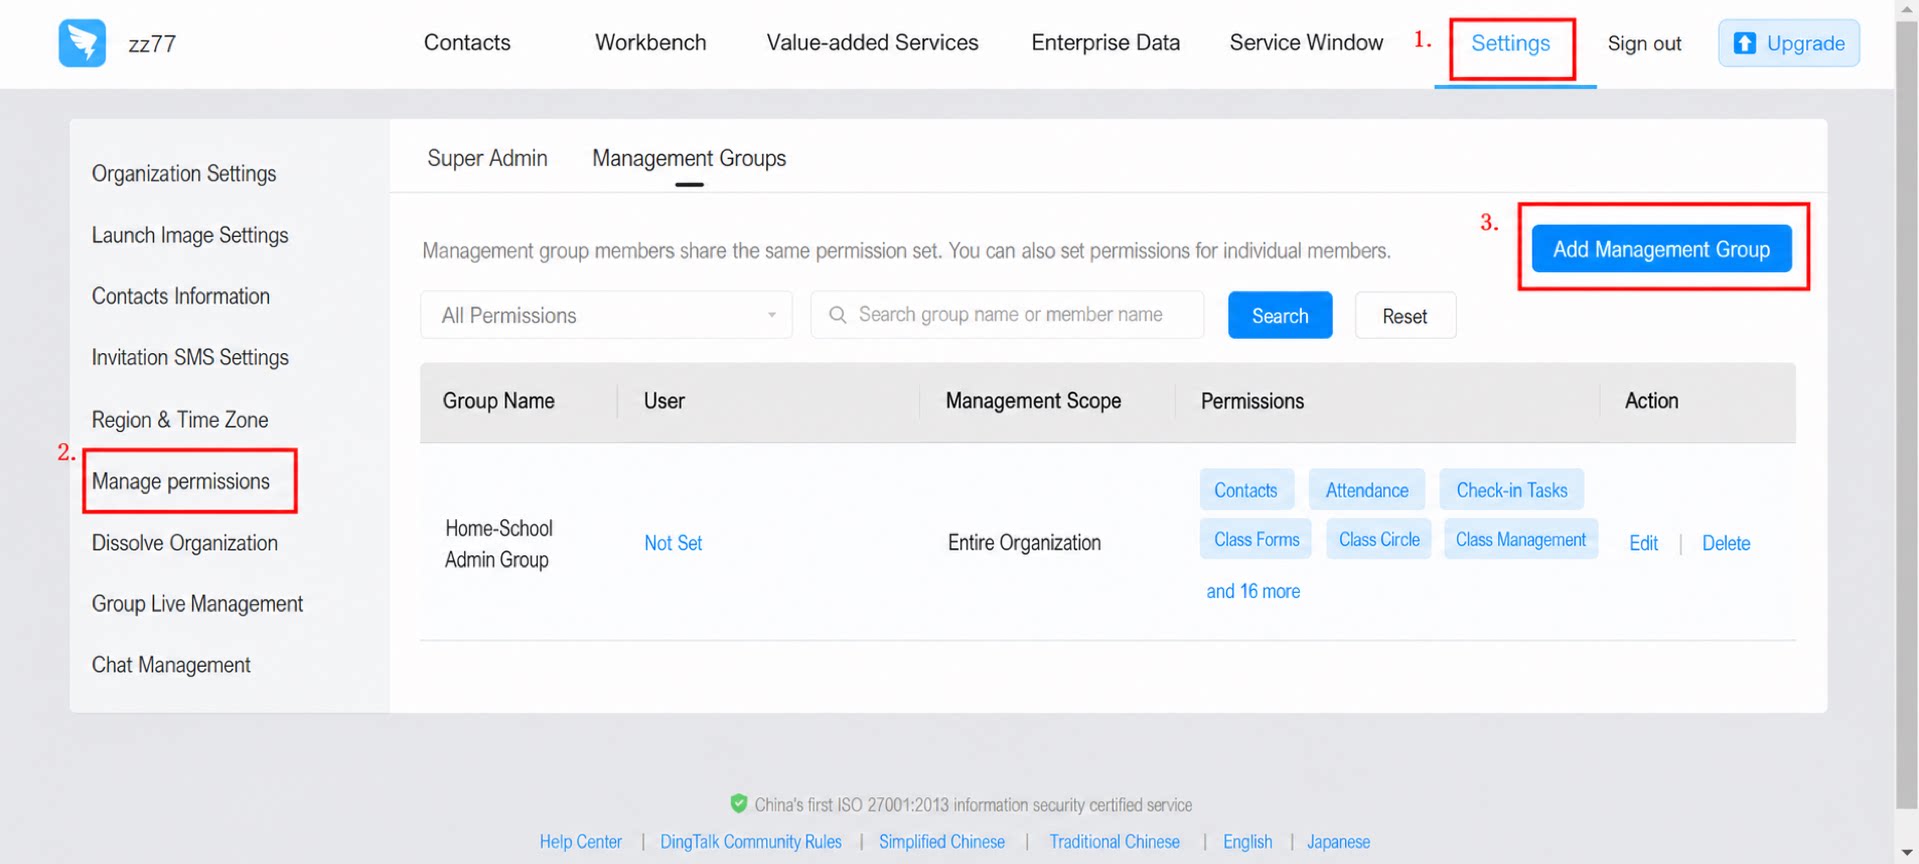
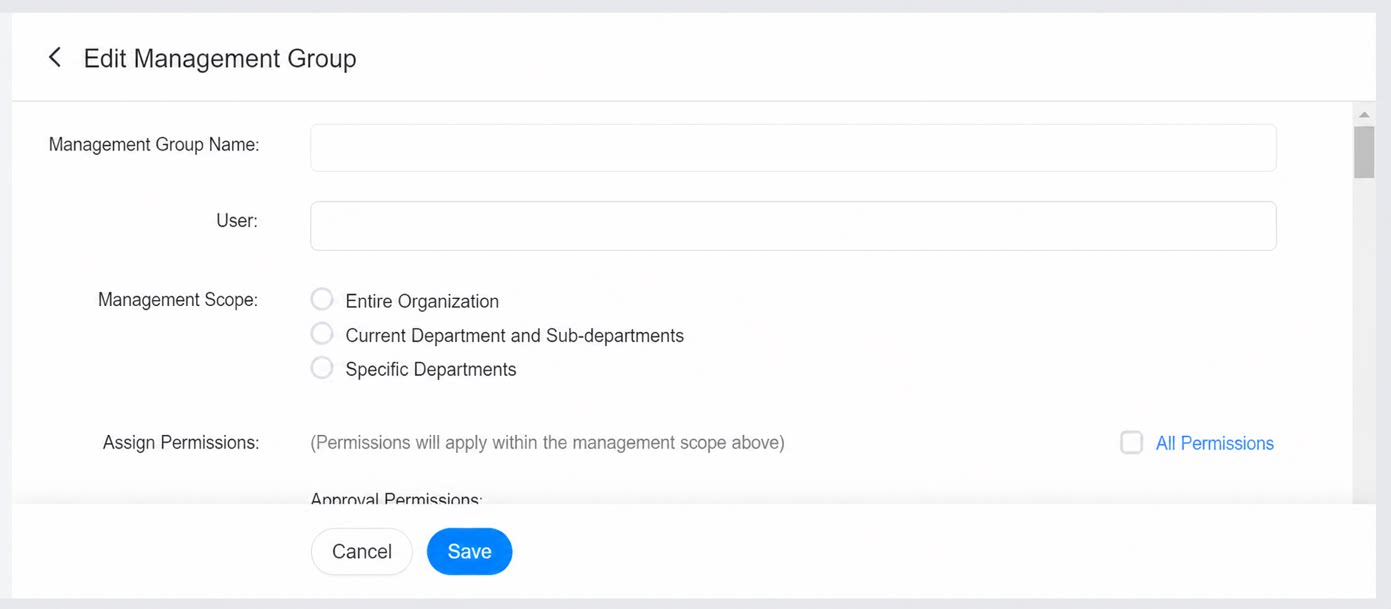
Answer: To become a DingTalk Admin, contact the Super Admin who created the organization to set it up. Path: DingTalk Admin Console >> Settings >> Permissions >> Admin Group >> Add Admin Group. (See Figures 4.1-1 and 4.1-2.)