

 Chats
Chats Calendar
 Meetings
 Contacts
 Mail
Mail Docs
Docs Drive
Drive AI Table
 AI Minutes
 Attendance
 Approval
 YiDA
YiDA Admin Console
Prerequisites
Before you begin, create an app. For detailed steps, see Create an app.Process Overview
In this article, you create two regular forms: one to record query results, and one to trigger the connector. The steps are as follows:- Step 1: Create the query result form
- Step 2: Create the check-in query form
- Step 3: Configure integration & automation
- Step 4: Receive data in the query result form
- Step 5: Test and verify
Expected Result
The final result achieved in this article is shown below.Step 1: Create the Query Result Form
- Sign in to the YiDA workbench, select the target app, and click to open the app editing page.
- Click + > Create regular form, select Create blank page, and rename the form to Query Result.
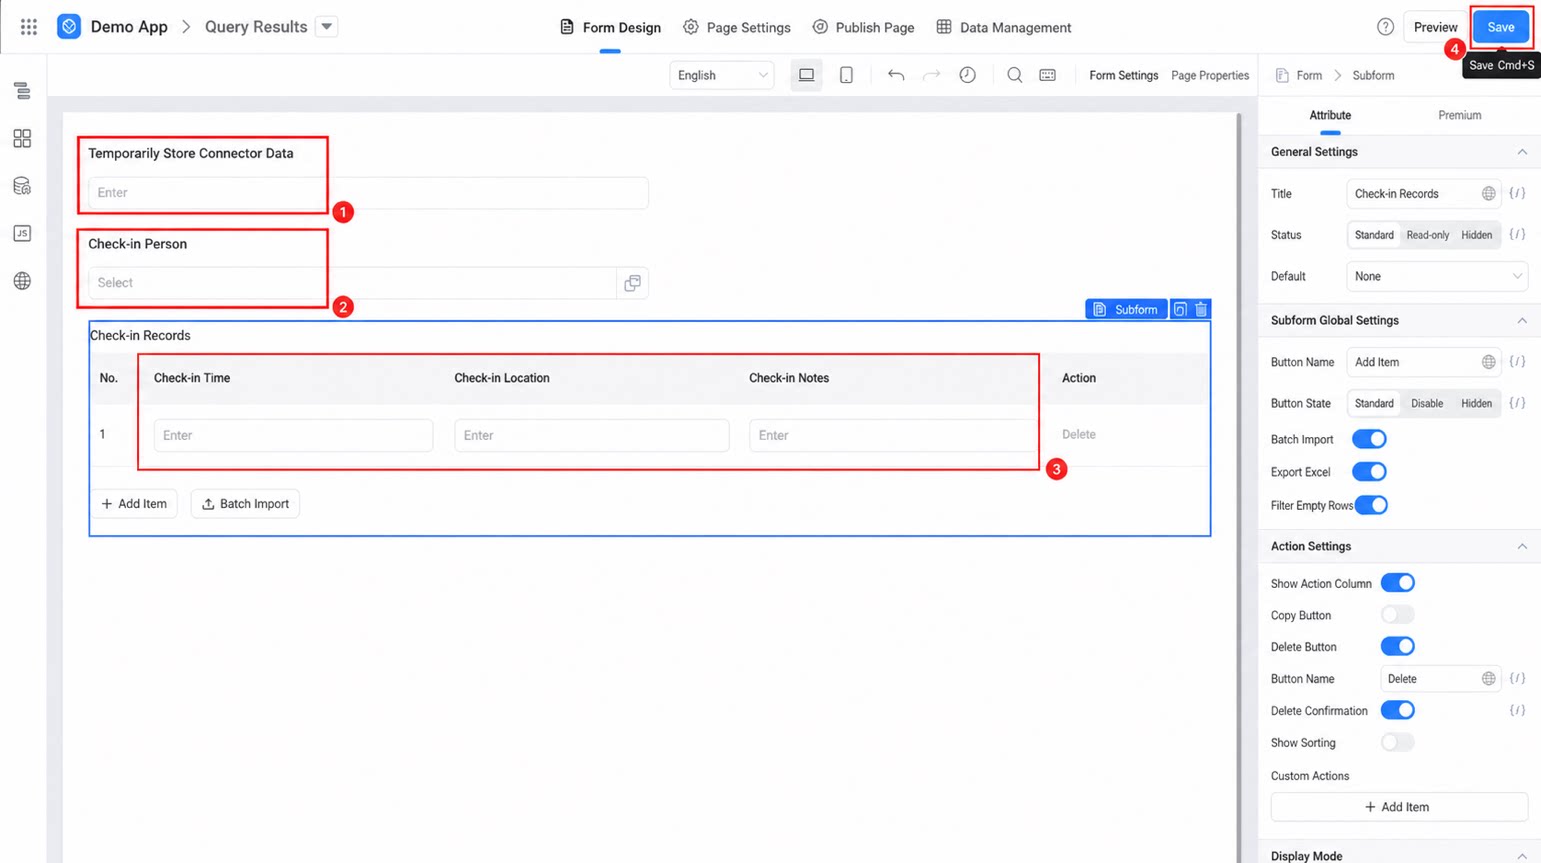
- Drag a Single-line text component, a Subform component, and a User component into the central canvas area.
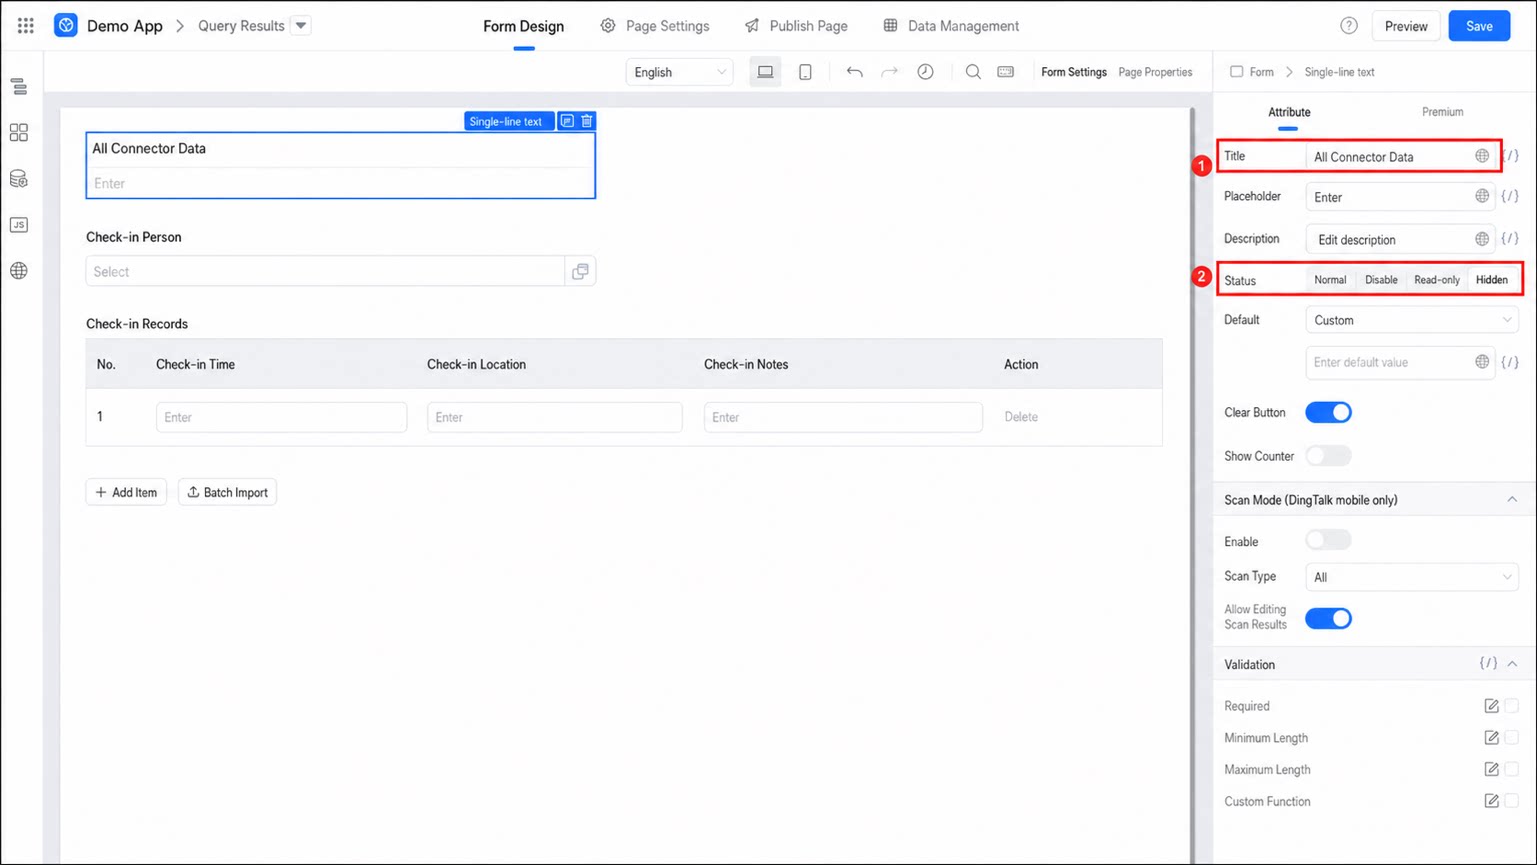
- Rename the User component to Check-in User.
- Rename the Single-line text component to Connector Data Buffer, and set its visibility to Hidden.
- Rename the Subform component to Check-in Records.
- Drag three Single-line text components into the Subform component.
- Rename the three Single-line text components to Check-in Time, Check-in Location, and Check-in Alias.
- Click Save in the upper-right corner to finish the configuration.
Step 2: Create the Check-In Query Form
- On the app editing page, click + > Create workflow form, select Create blank page, and rename the form to Check-in Query.
- Drag two Date components and one member component into the central canvas area.
- Rename the two Date components to Start Time and End Time, set the validation rule to Required, and set the format to YYYY-MM-DD HH:mm:ss.
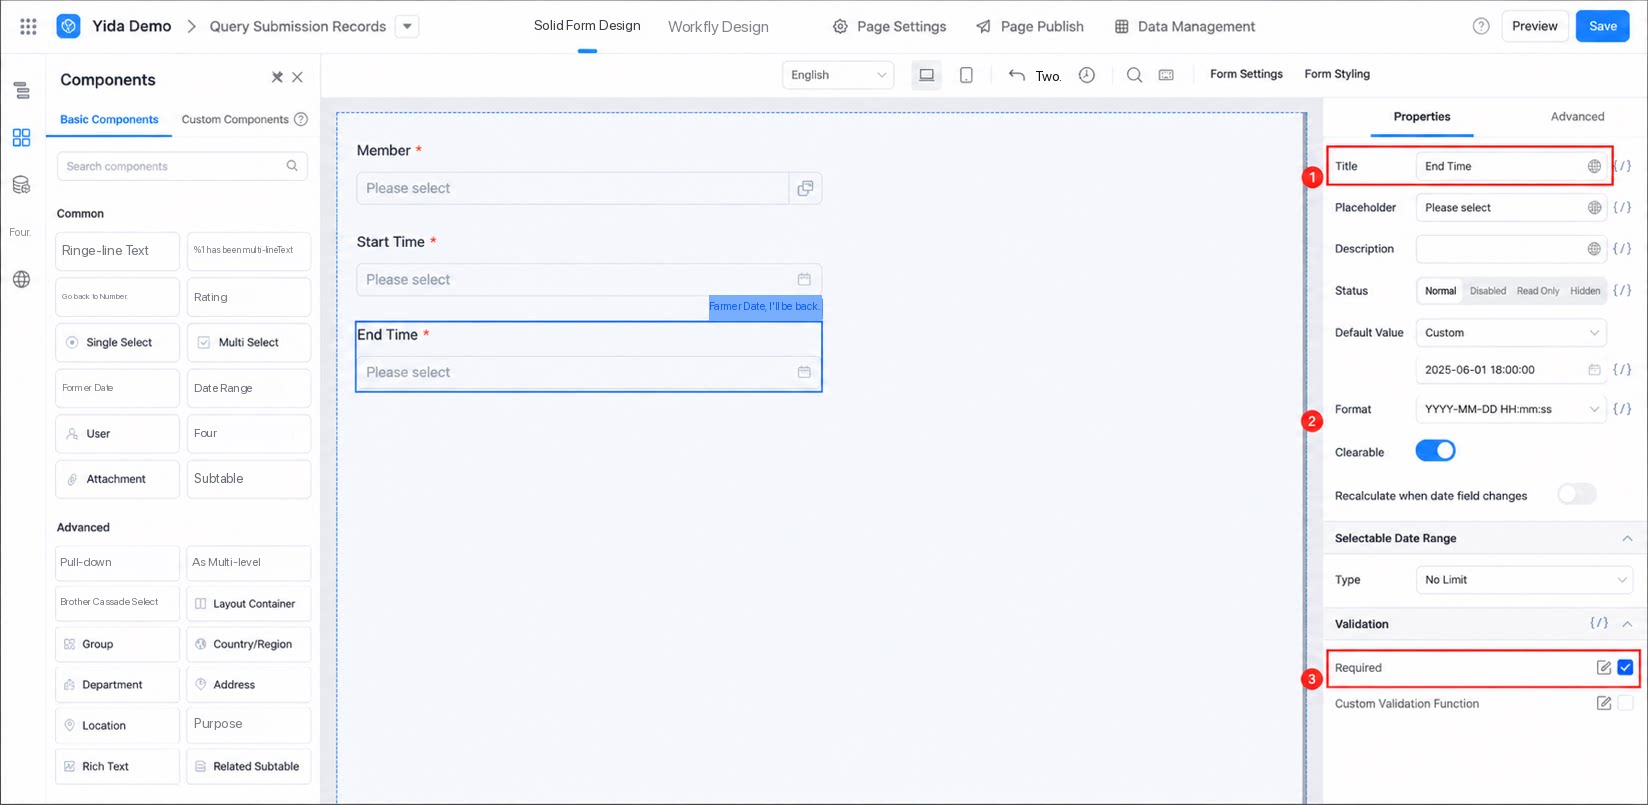
- Rename the User component to Check-in User and set the validation rule to Required.
- Click Save in the upper-right corner to finish the basic form configuration.
Step 3: Configure Integration & Automation
- Return to the app editing page and click Integration & Automation at the top.
- Click Create Integration & Automation and select Create from blank.
-
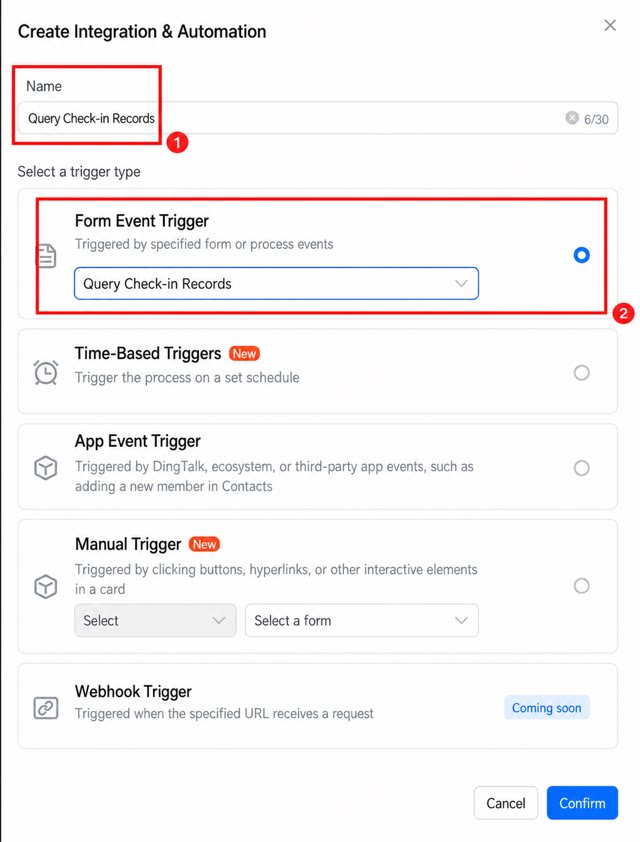
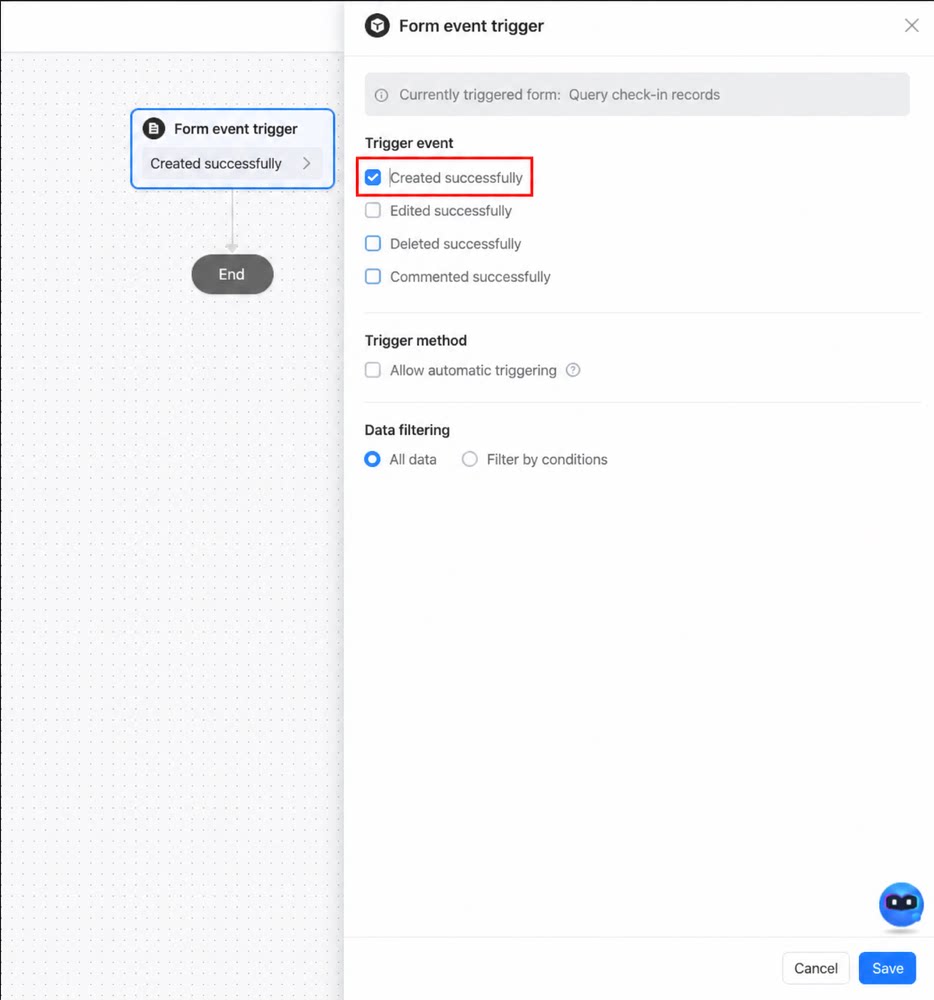
In the dialog box, enter a name for the integration & automation, select Form event trigger as the trigger type, and select the check-in query form created in Step 2 as the form.
1
Click Form event trigger, select Create success as the trigger event, and click Save
2
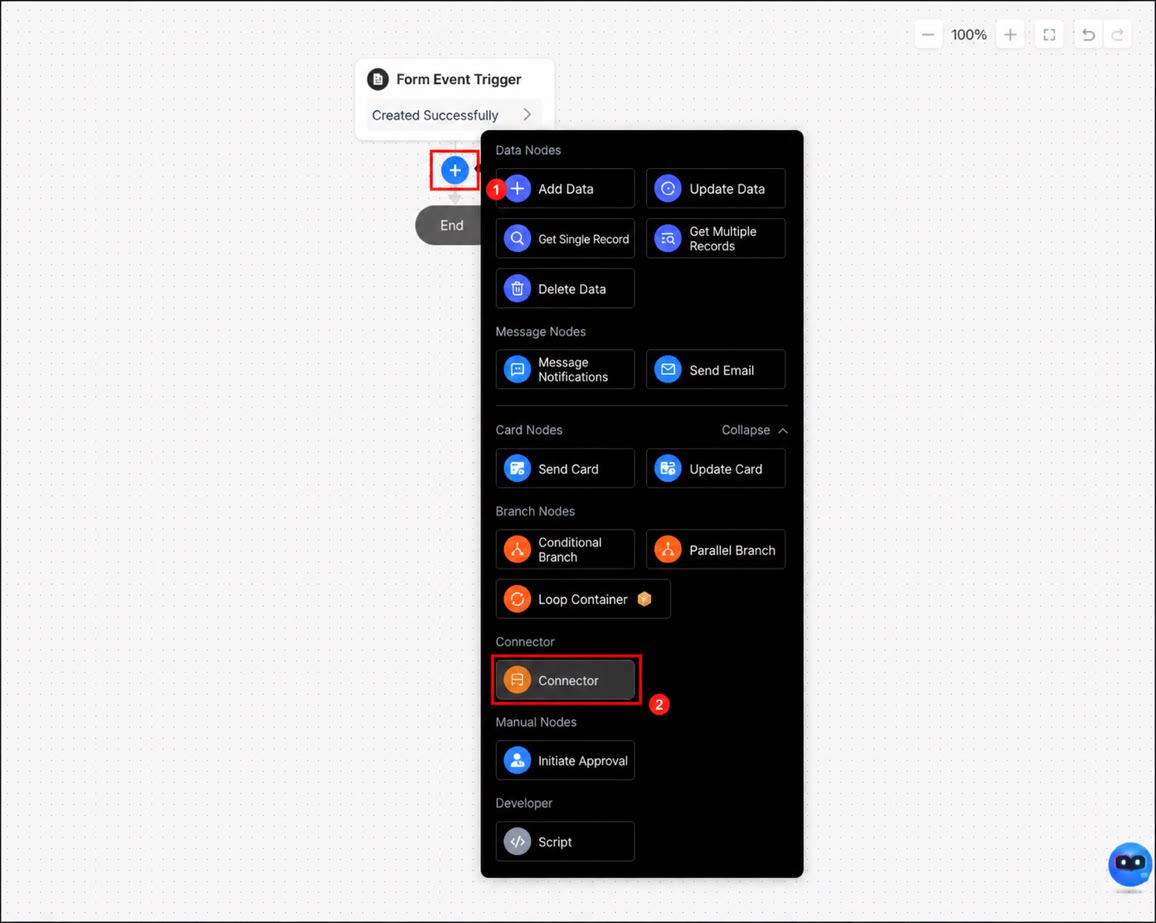
Click the + icon below the form trigger event and select Connector
Hover the cursor below the trigger event to reveal the
+ icon.3
Follow the steps below to configure the Connector node
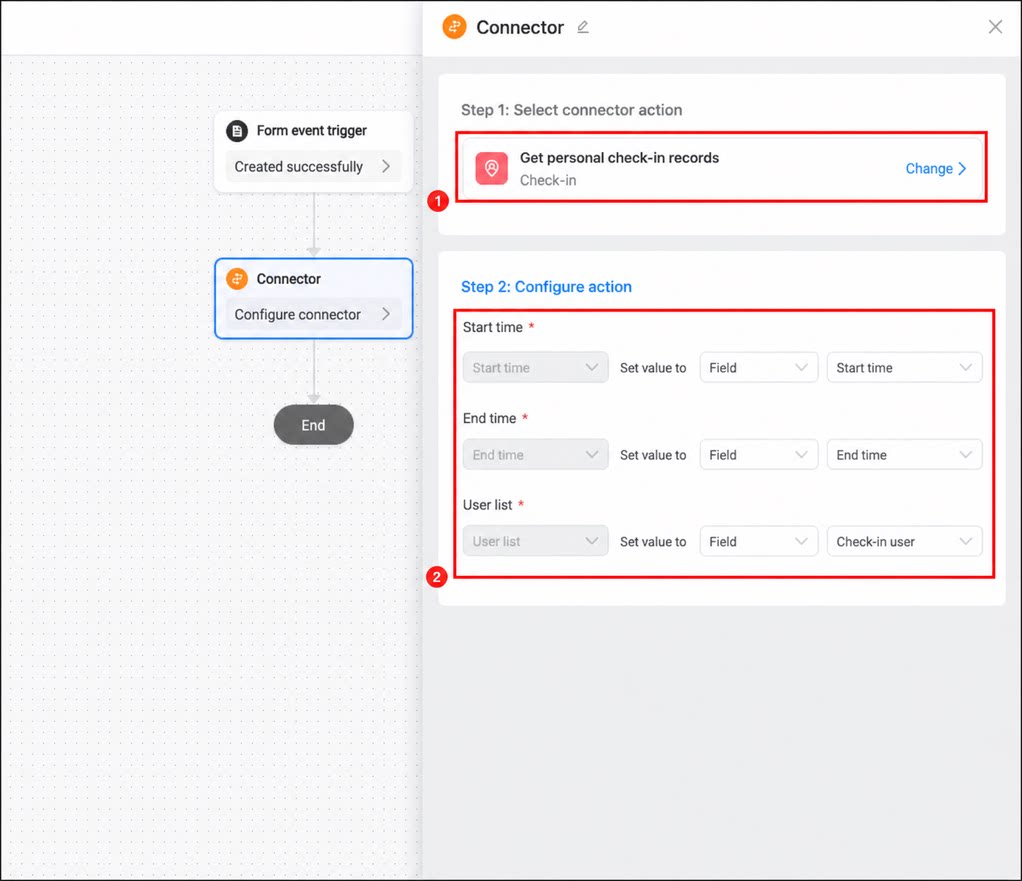
- Click the + icon below the Connector node and add a Script node.
- Follow the steps below to configure the script node.
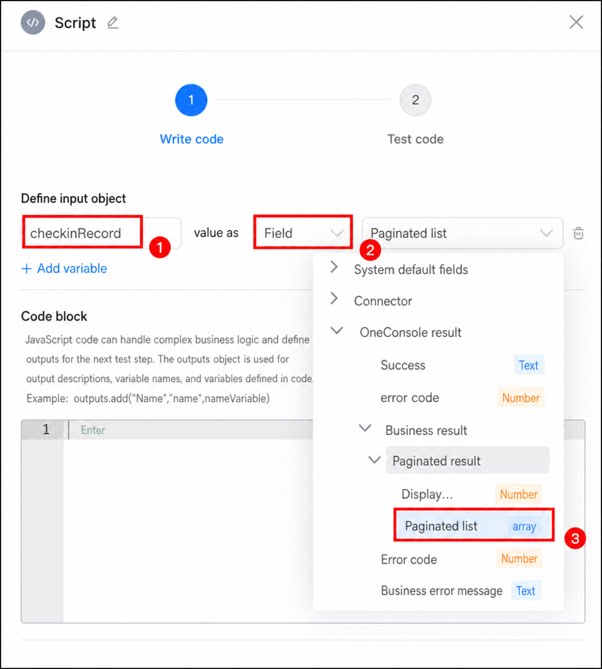
1
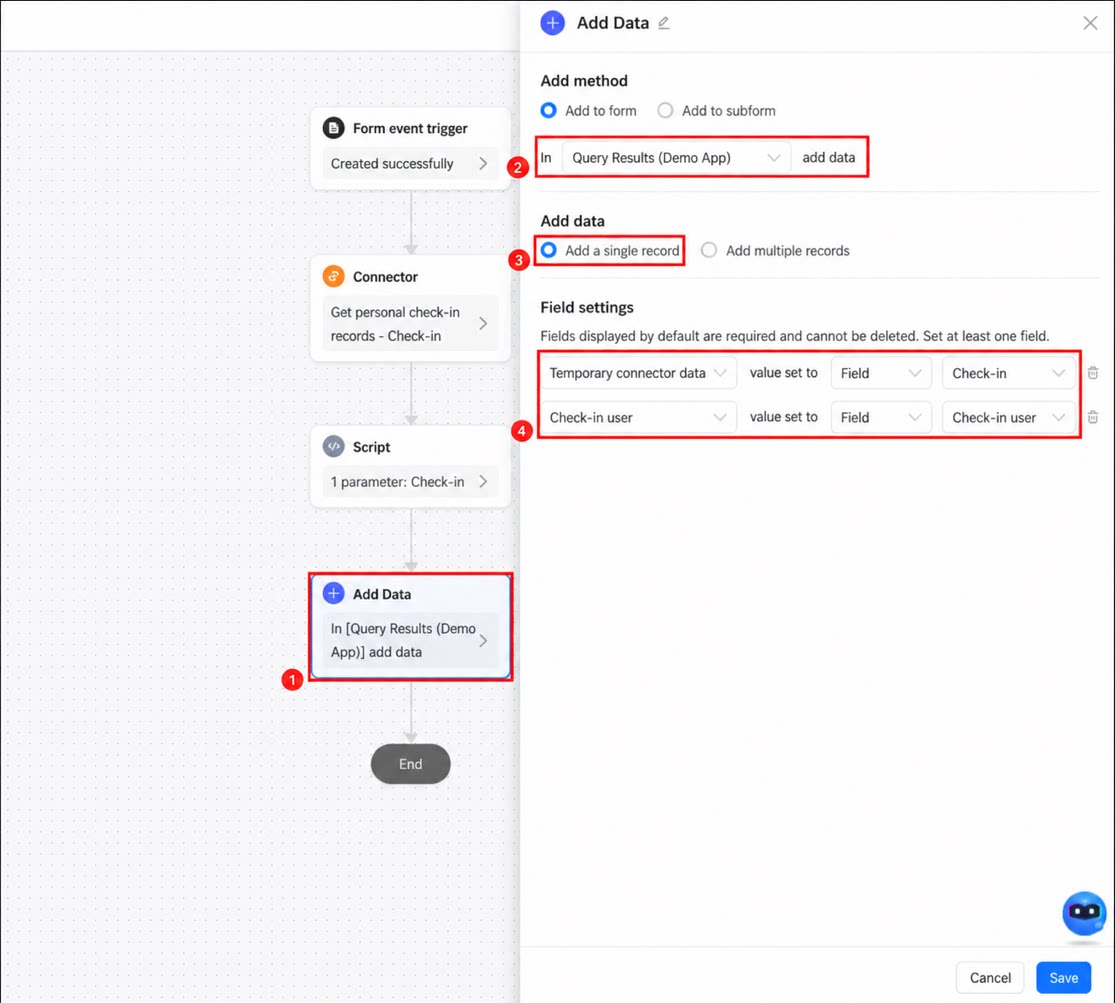
Click the + icon below the Script node, add a Create data node, and then follow the steps below to configure it
2
Click Publish in the upper-right corner to finish the configuration
Step 4: Receive Data in the Query Result Form
- Open the editing page of the query result form.
- Open the JS Action Panel, add the following code, and modify it according to the comments.
- Click Save in the upper-right corner to finish the configuration.
Step 5: Test and Verify
- Open the app editing page, click the Query Result form, and click Generate data management page on the right.
- Set the Page Name and Group for the data management page.
- Click Access in the upper-right corner to open the app.
- Click Check-in Query, enter the check-in user information and time range to query, and click Submit.
- Open the data management page of the result form to view the results.
Related Documentation
- Integration & Automation
- Create a form
- Form components
- Get user check-in records
- Script node