Chats
Chats Calendar
 Meetings
 Contacts
 Mail
Mail Docs
Docs Drive
Drive AI Table
 AI Minutes
 Attendance
 Approval
 YiDA
YiDA Admin Console
Step 1: Create and Configure the Form
Create a form as the entry point for meeting booking information and prepare the data for the connector that follows. Steps:- Create a new form and name it “Video Meeting Booking”.
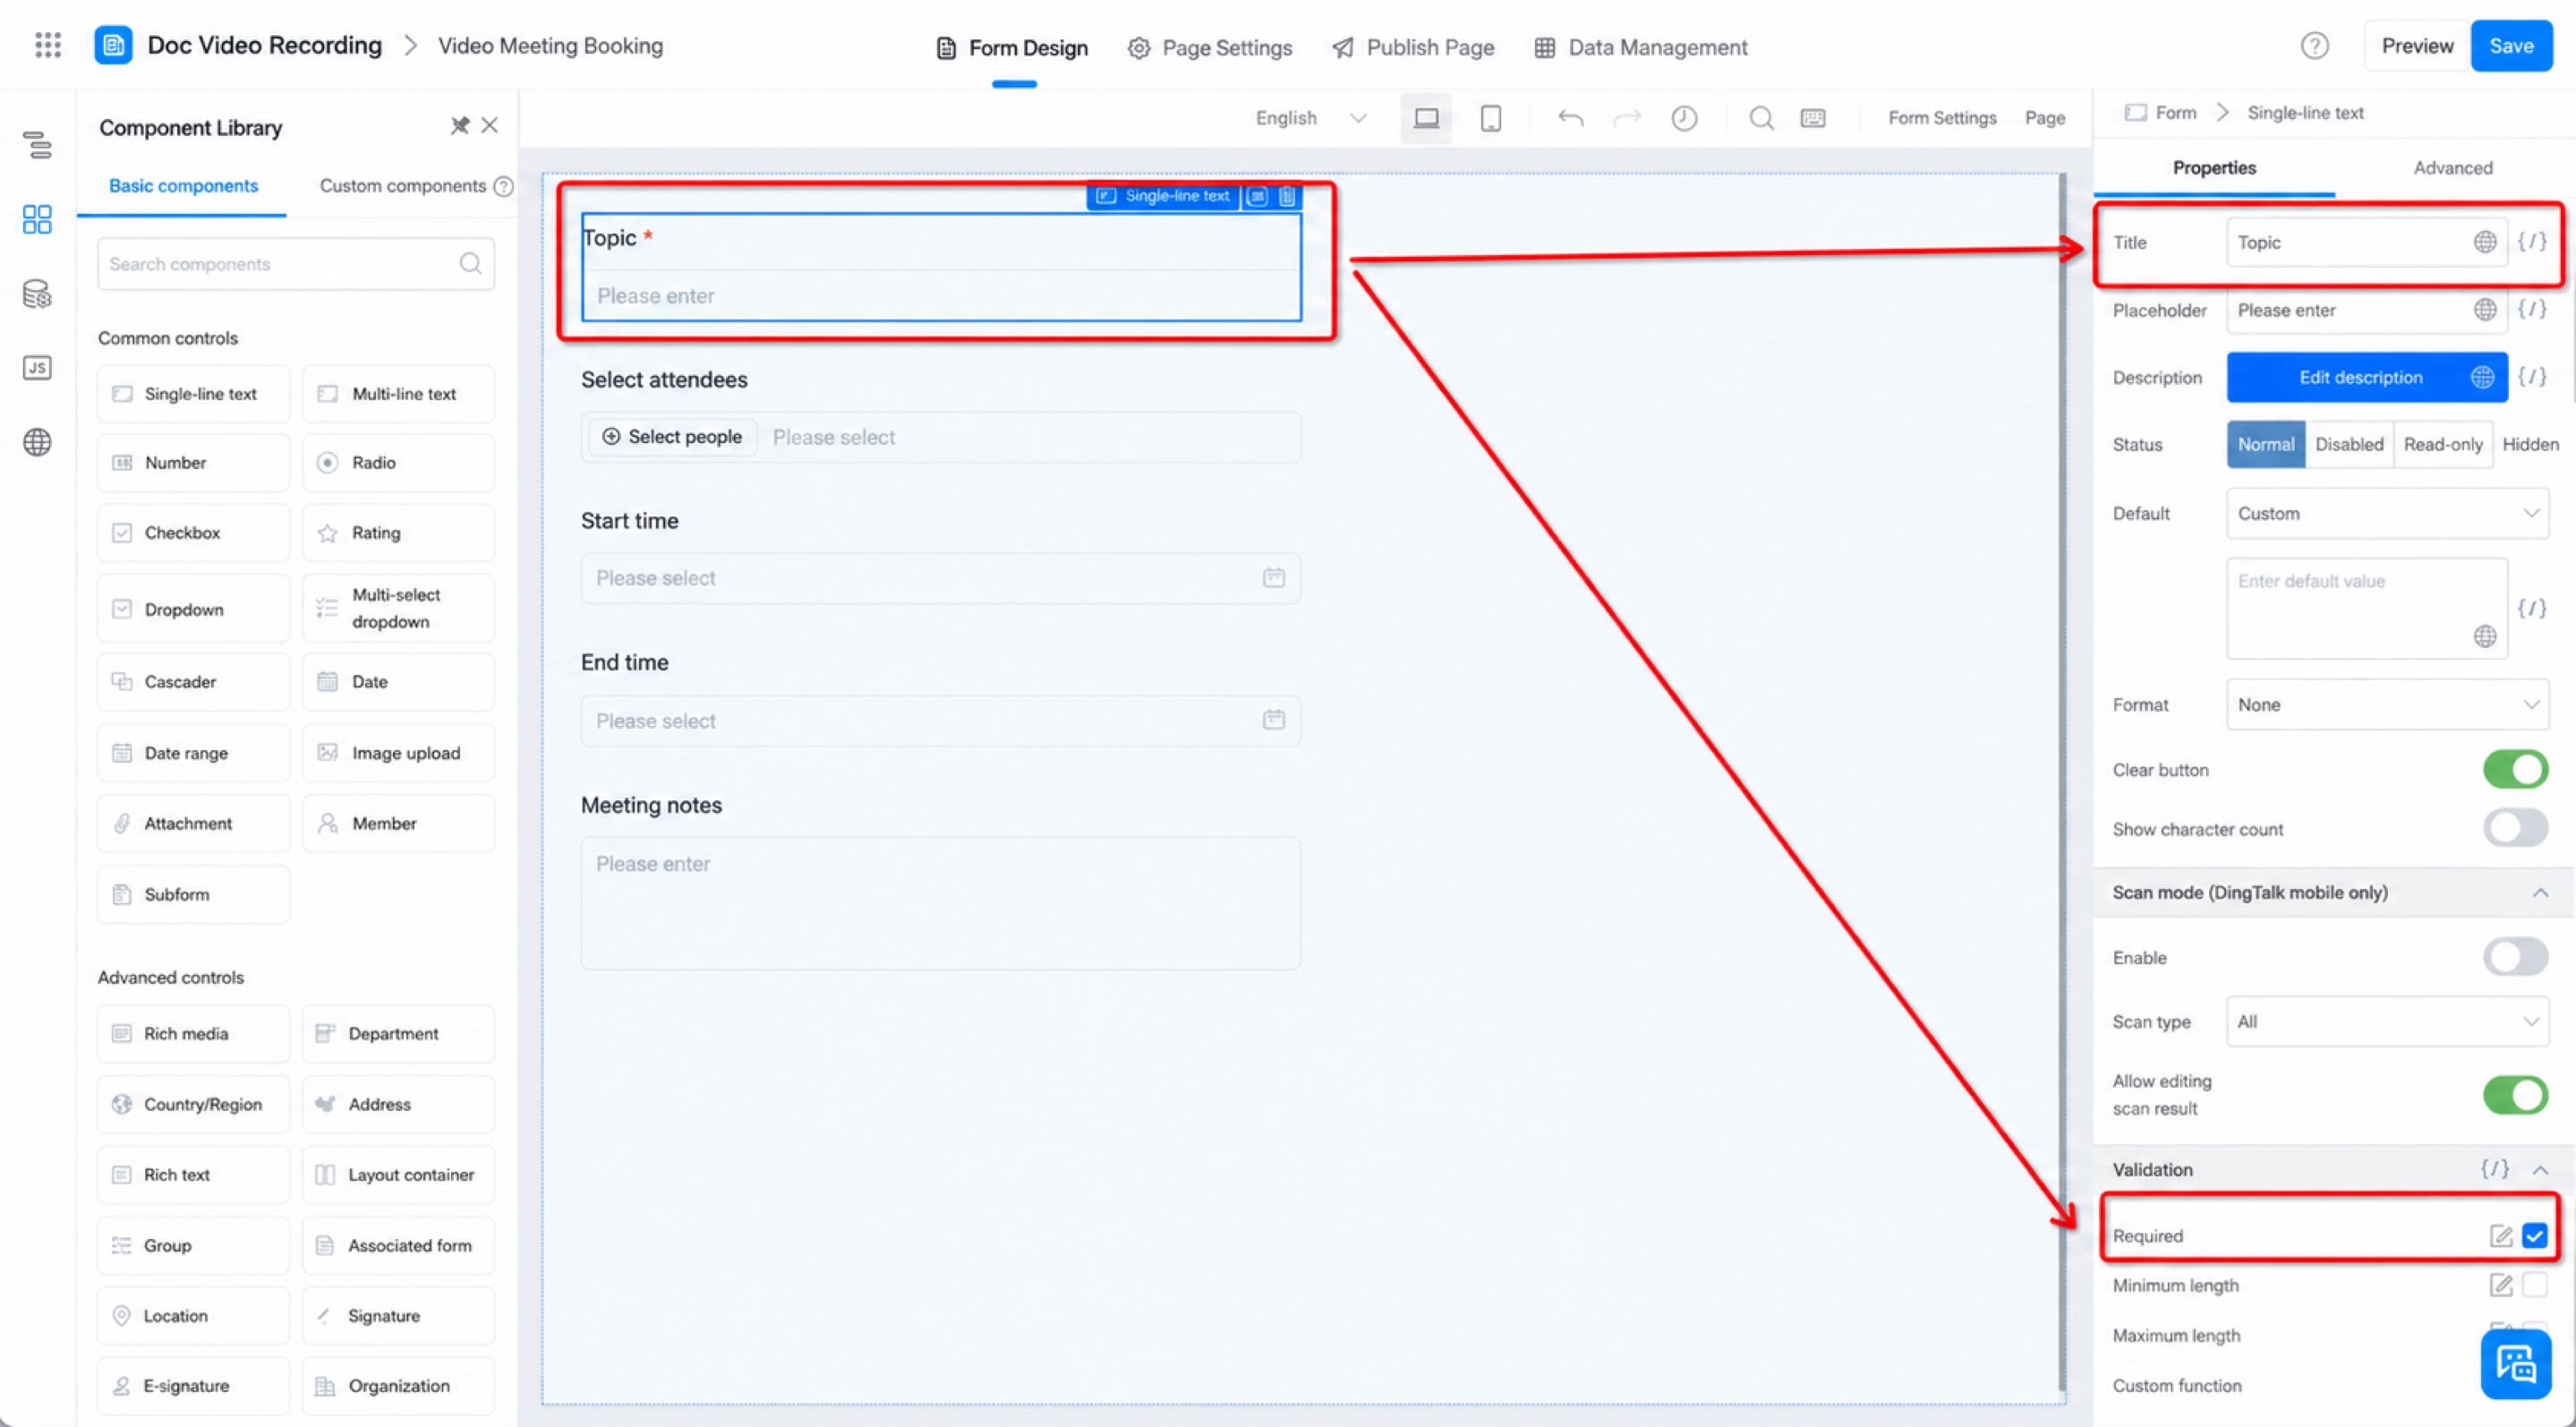
- Add a Single-line text component, name it “Topic”, and set it as Required. (See Figure 2.1-1)
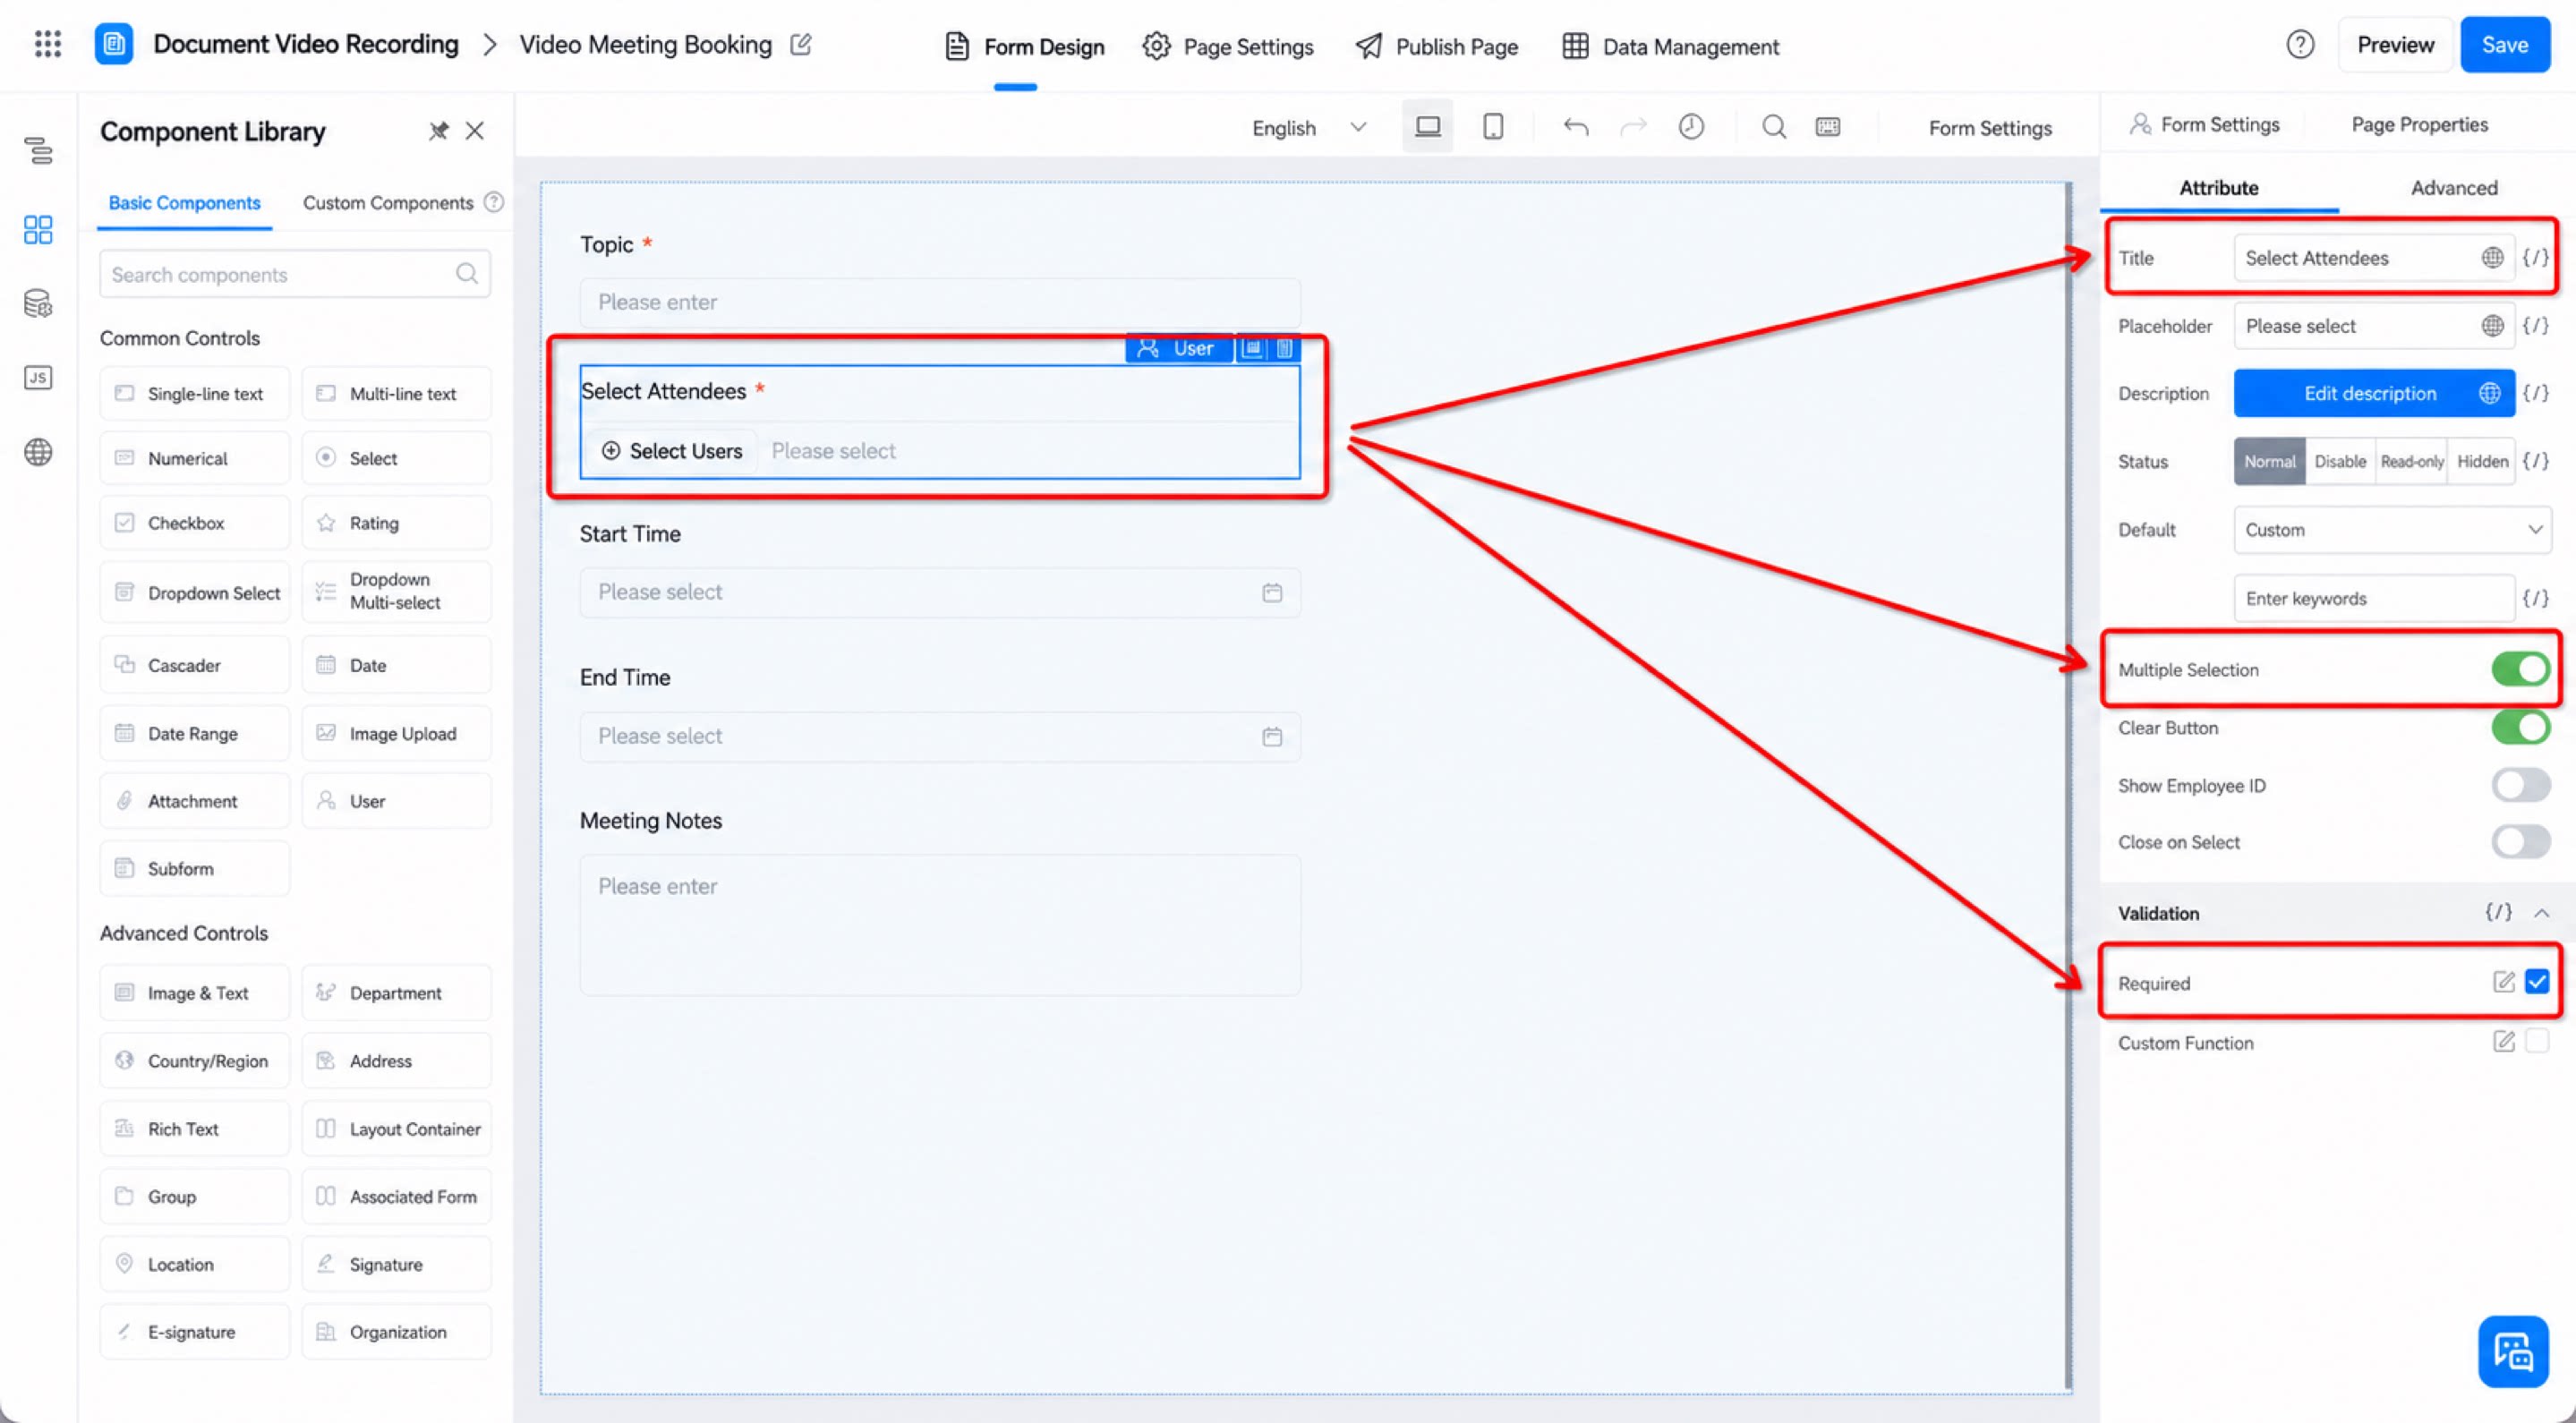
- Add a member component, name it “Select Members”, set it as Required, and enable Multiselect mode. (See Figure 2.1-2)
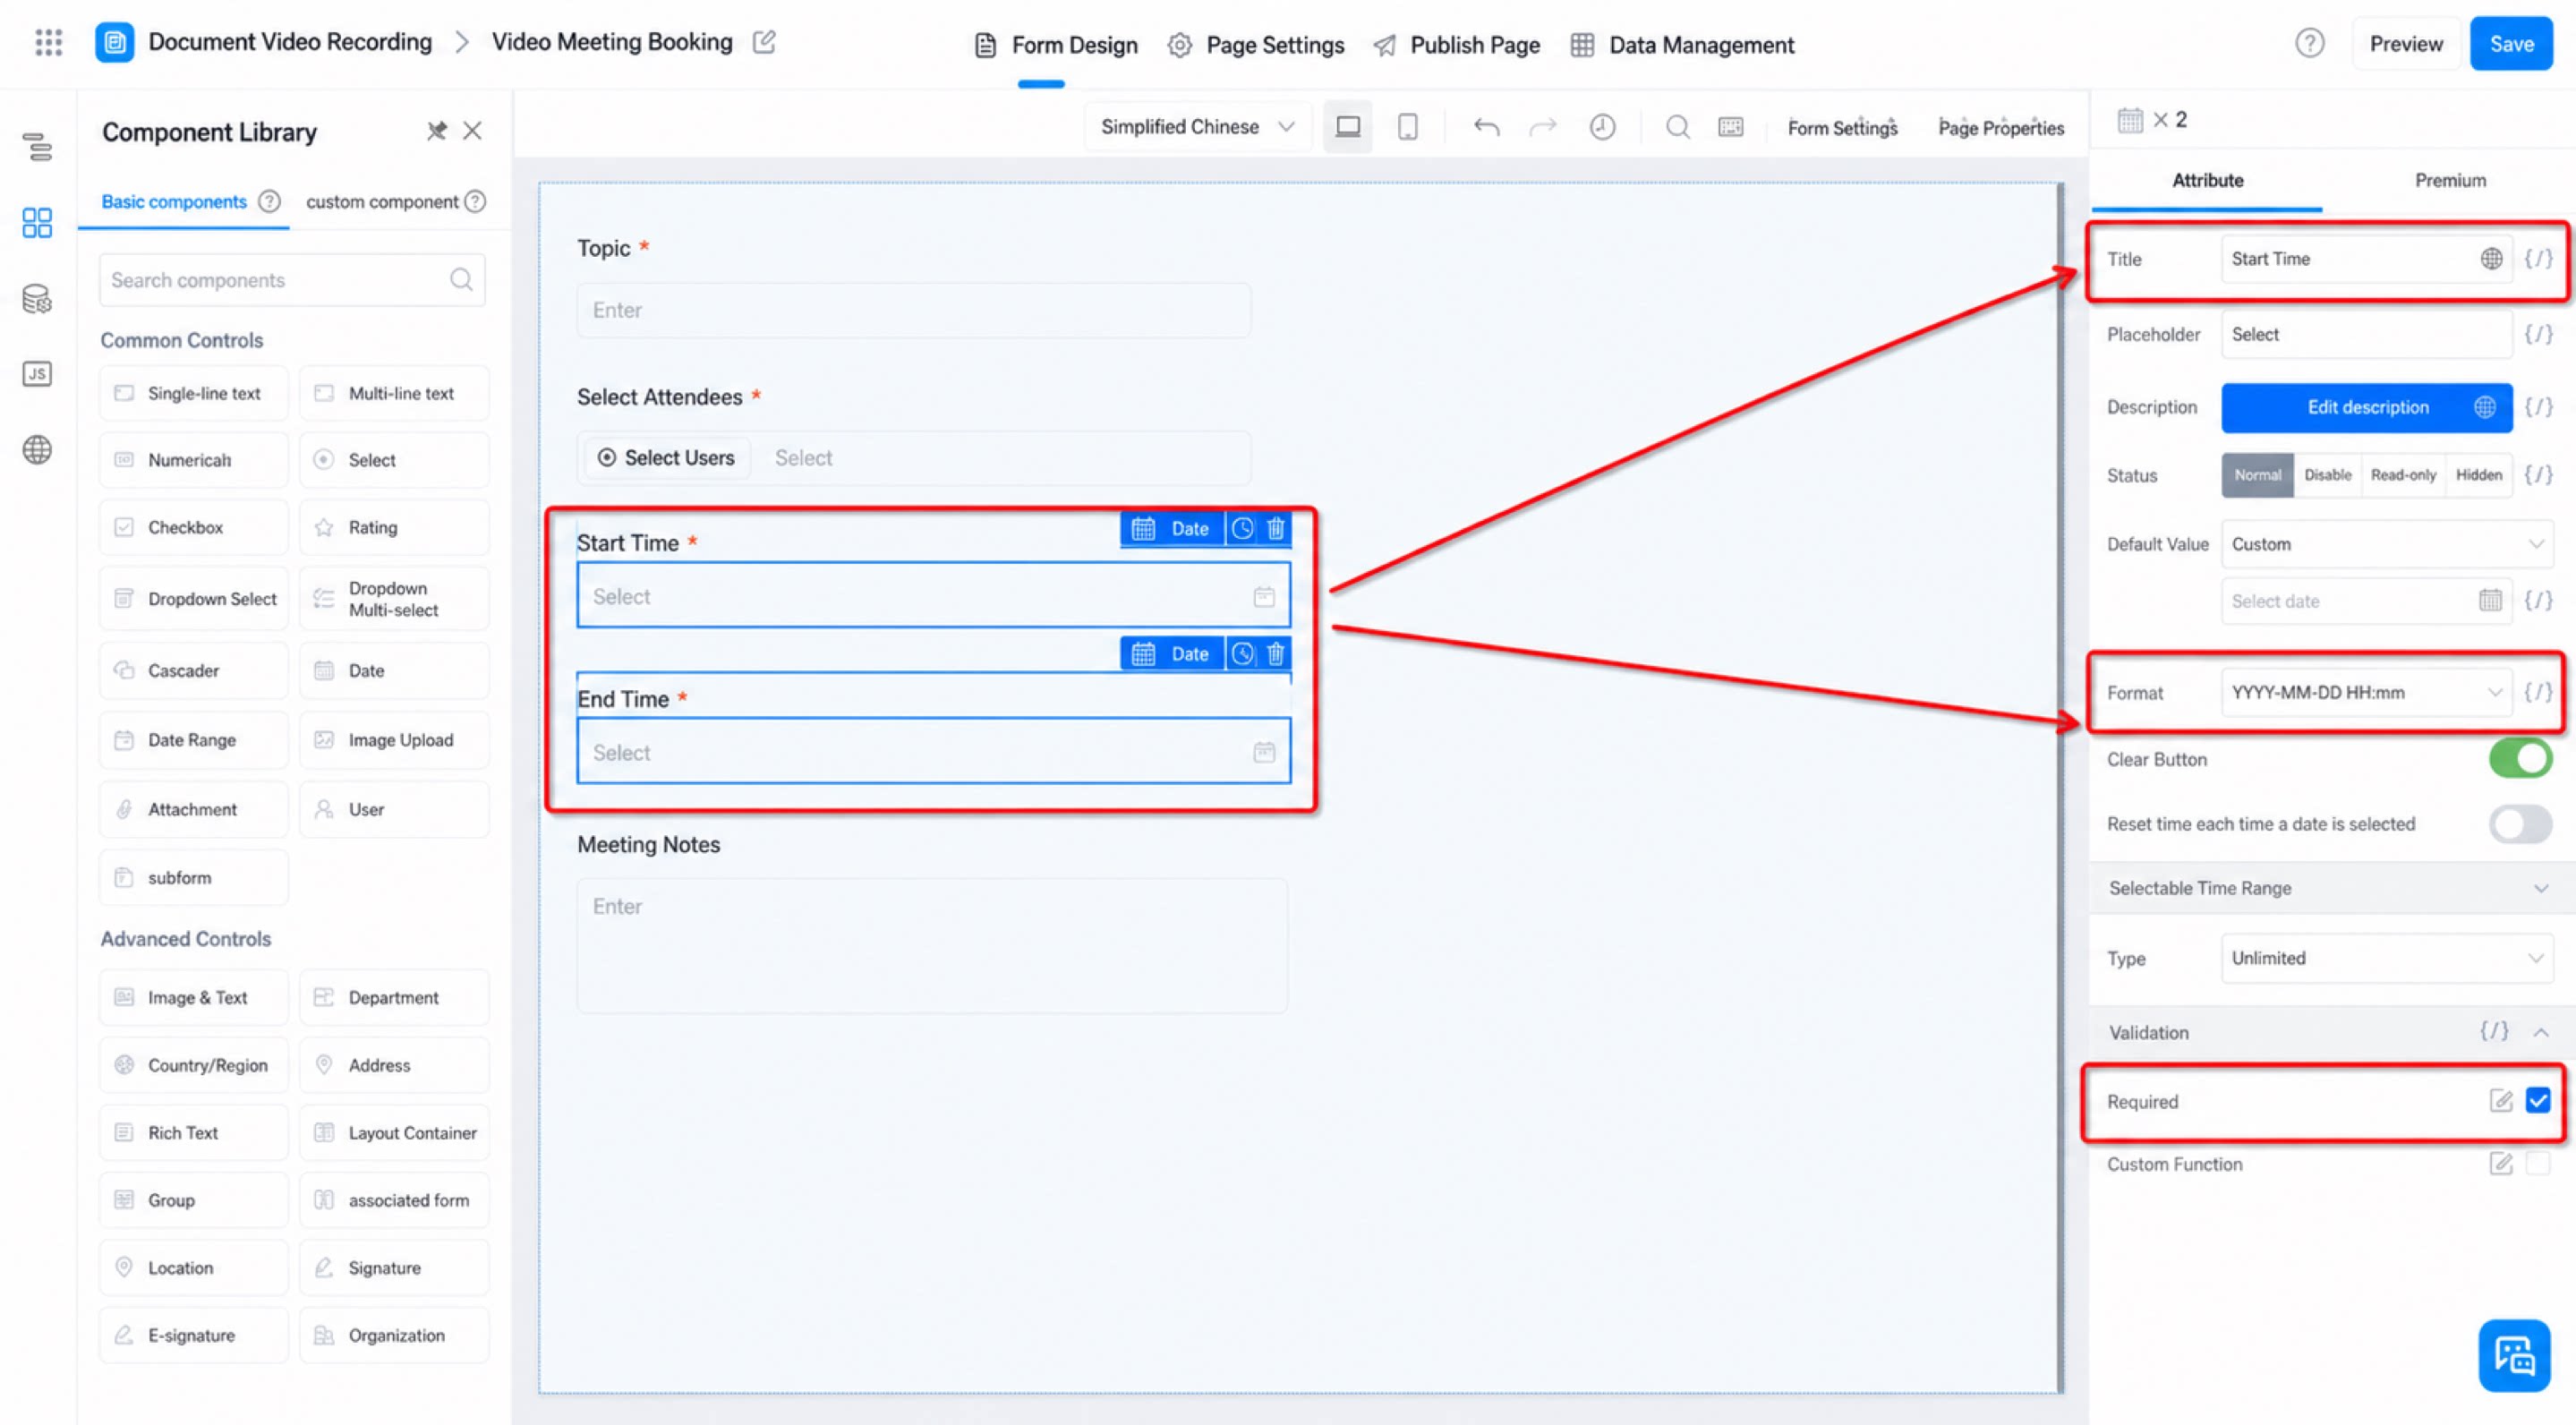
- Add two Date components, name them “Start Time” and “End Time”, set them as Required, and set the format to “YYYY-MM-DD HH:mm”. (See Figure 2.1-3)
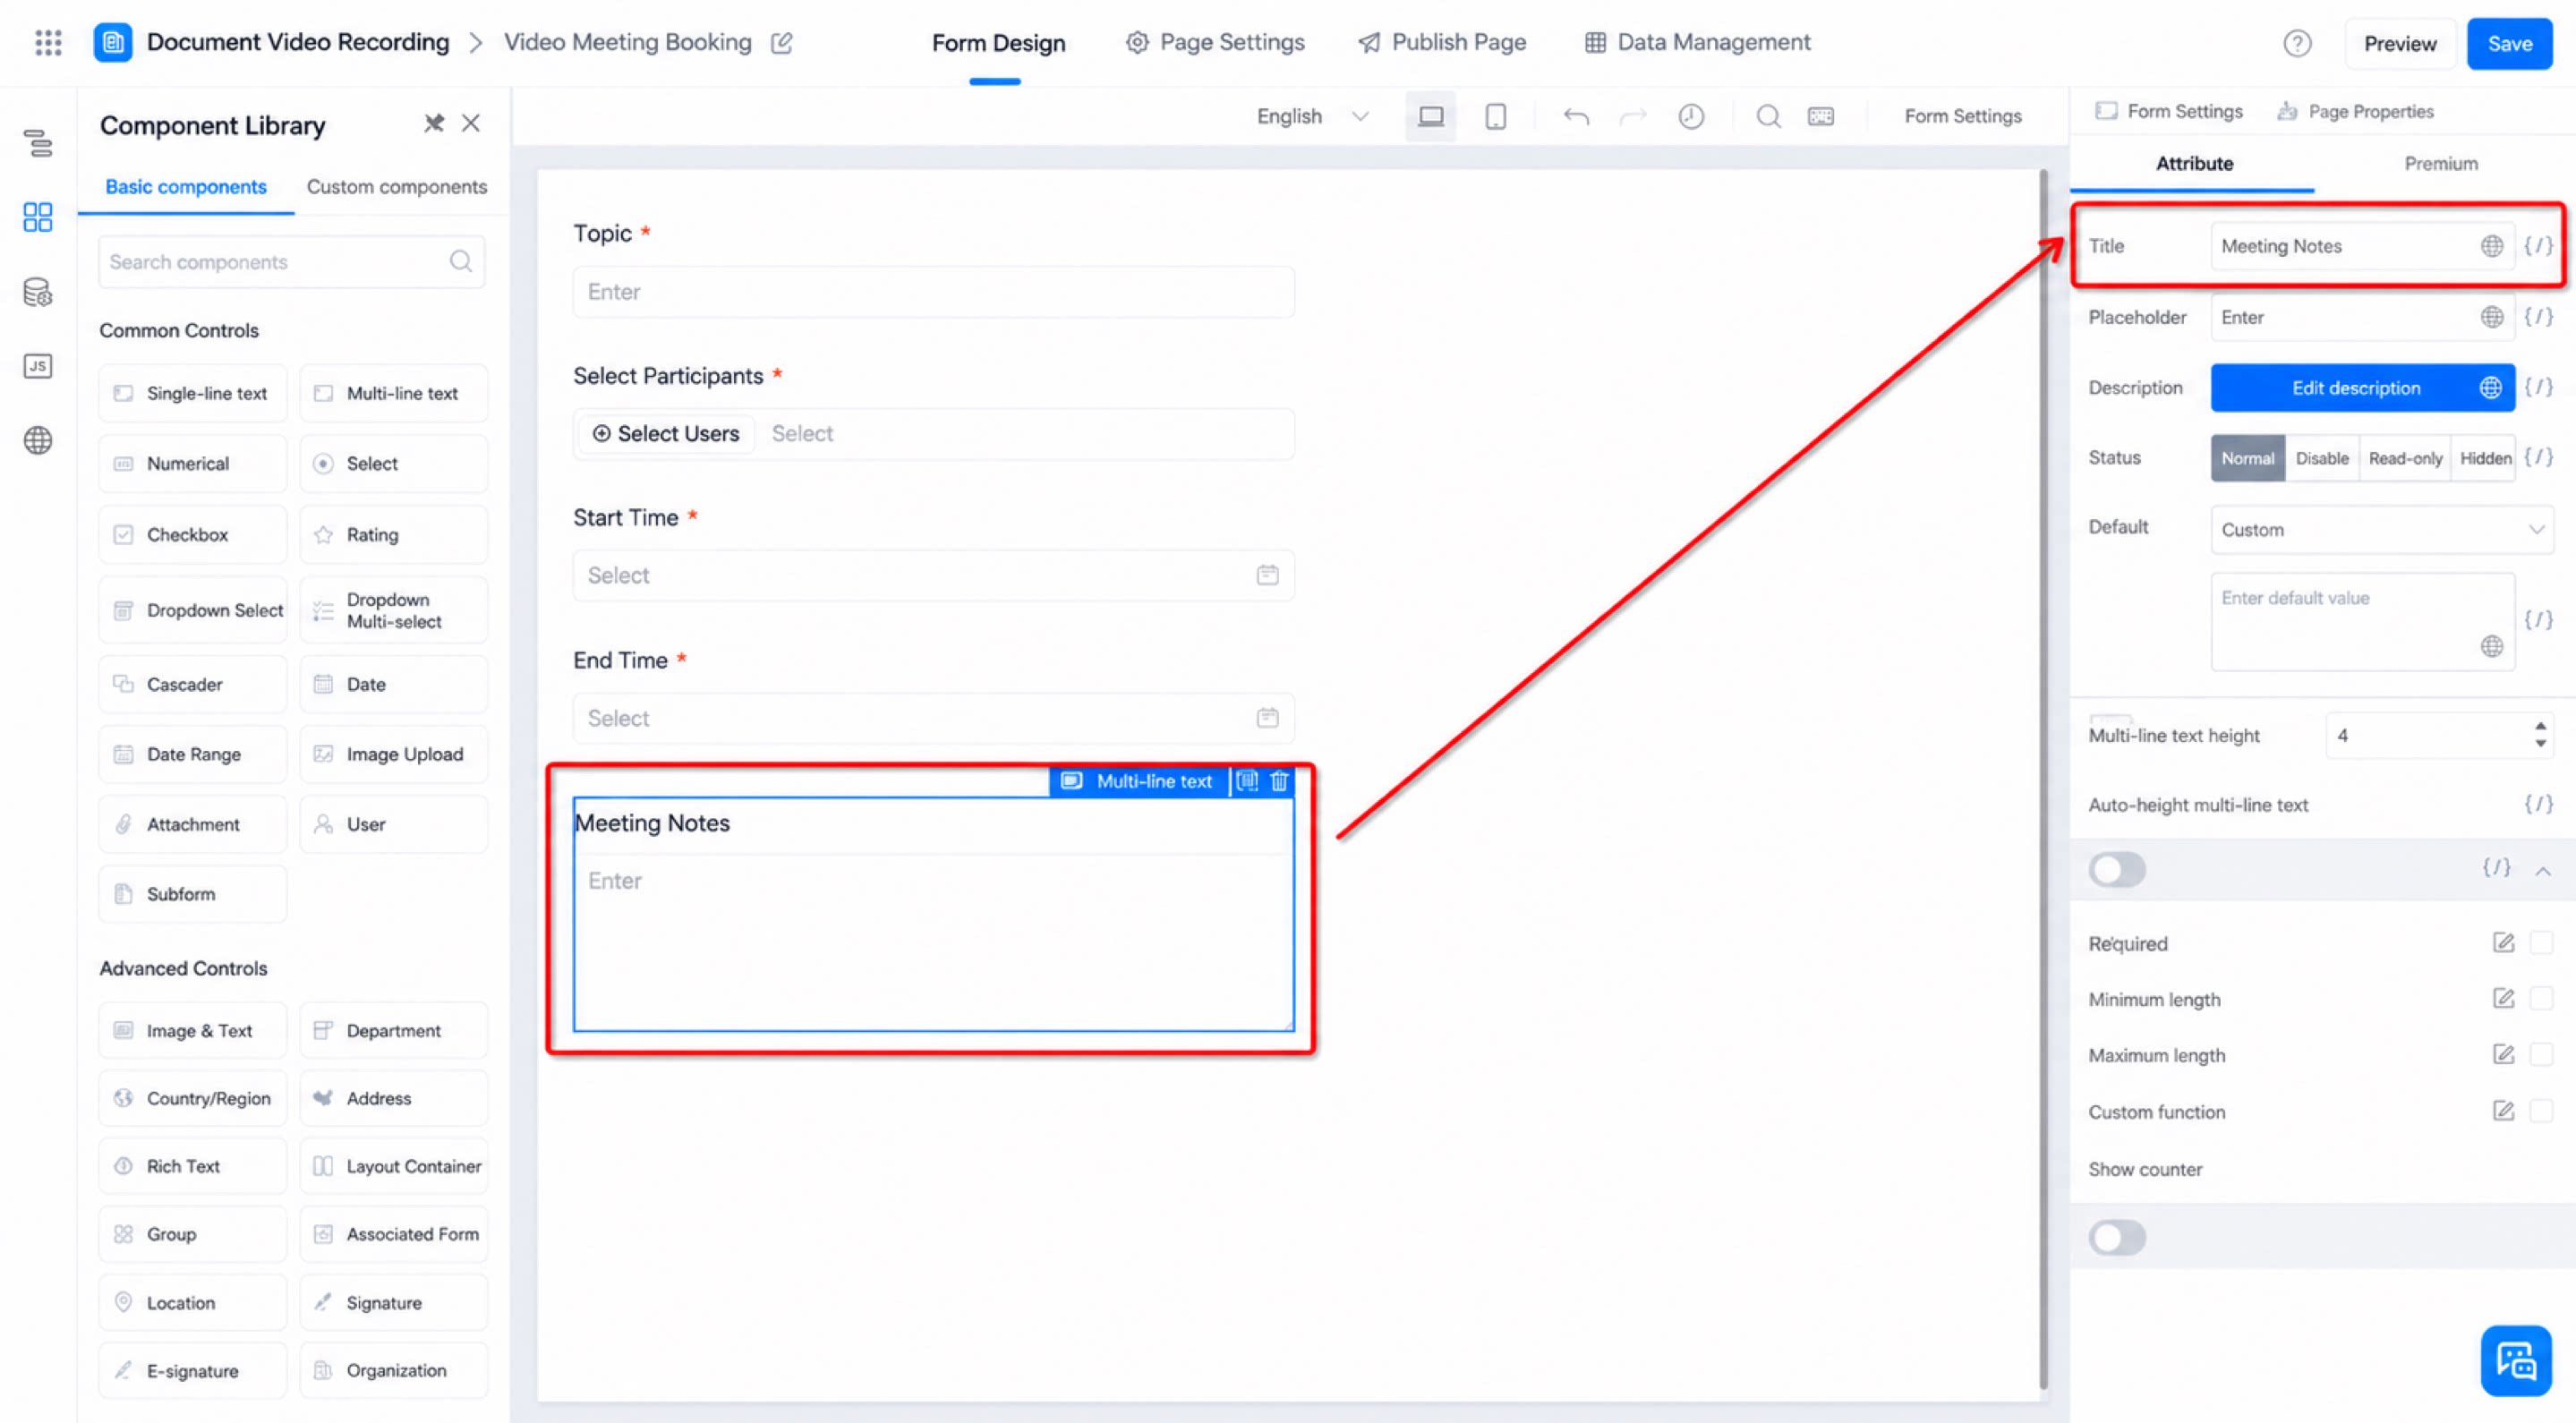
- Add a Multi-line text component and name it “Meeting Alias”. (See Figure 2.1-4)
- Click Save in the upper-right corner of the form.
Step 2: Create and Configure the Connector

For an introduction to YiDA Connector, see Integration & Automation - Connector.
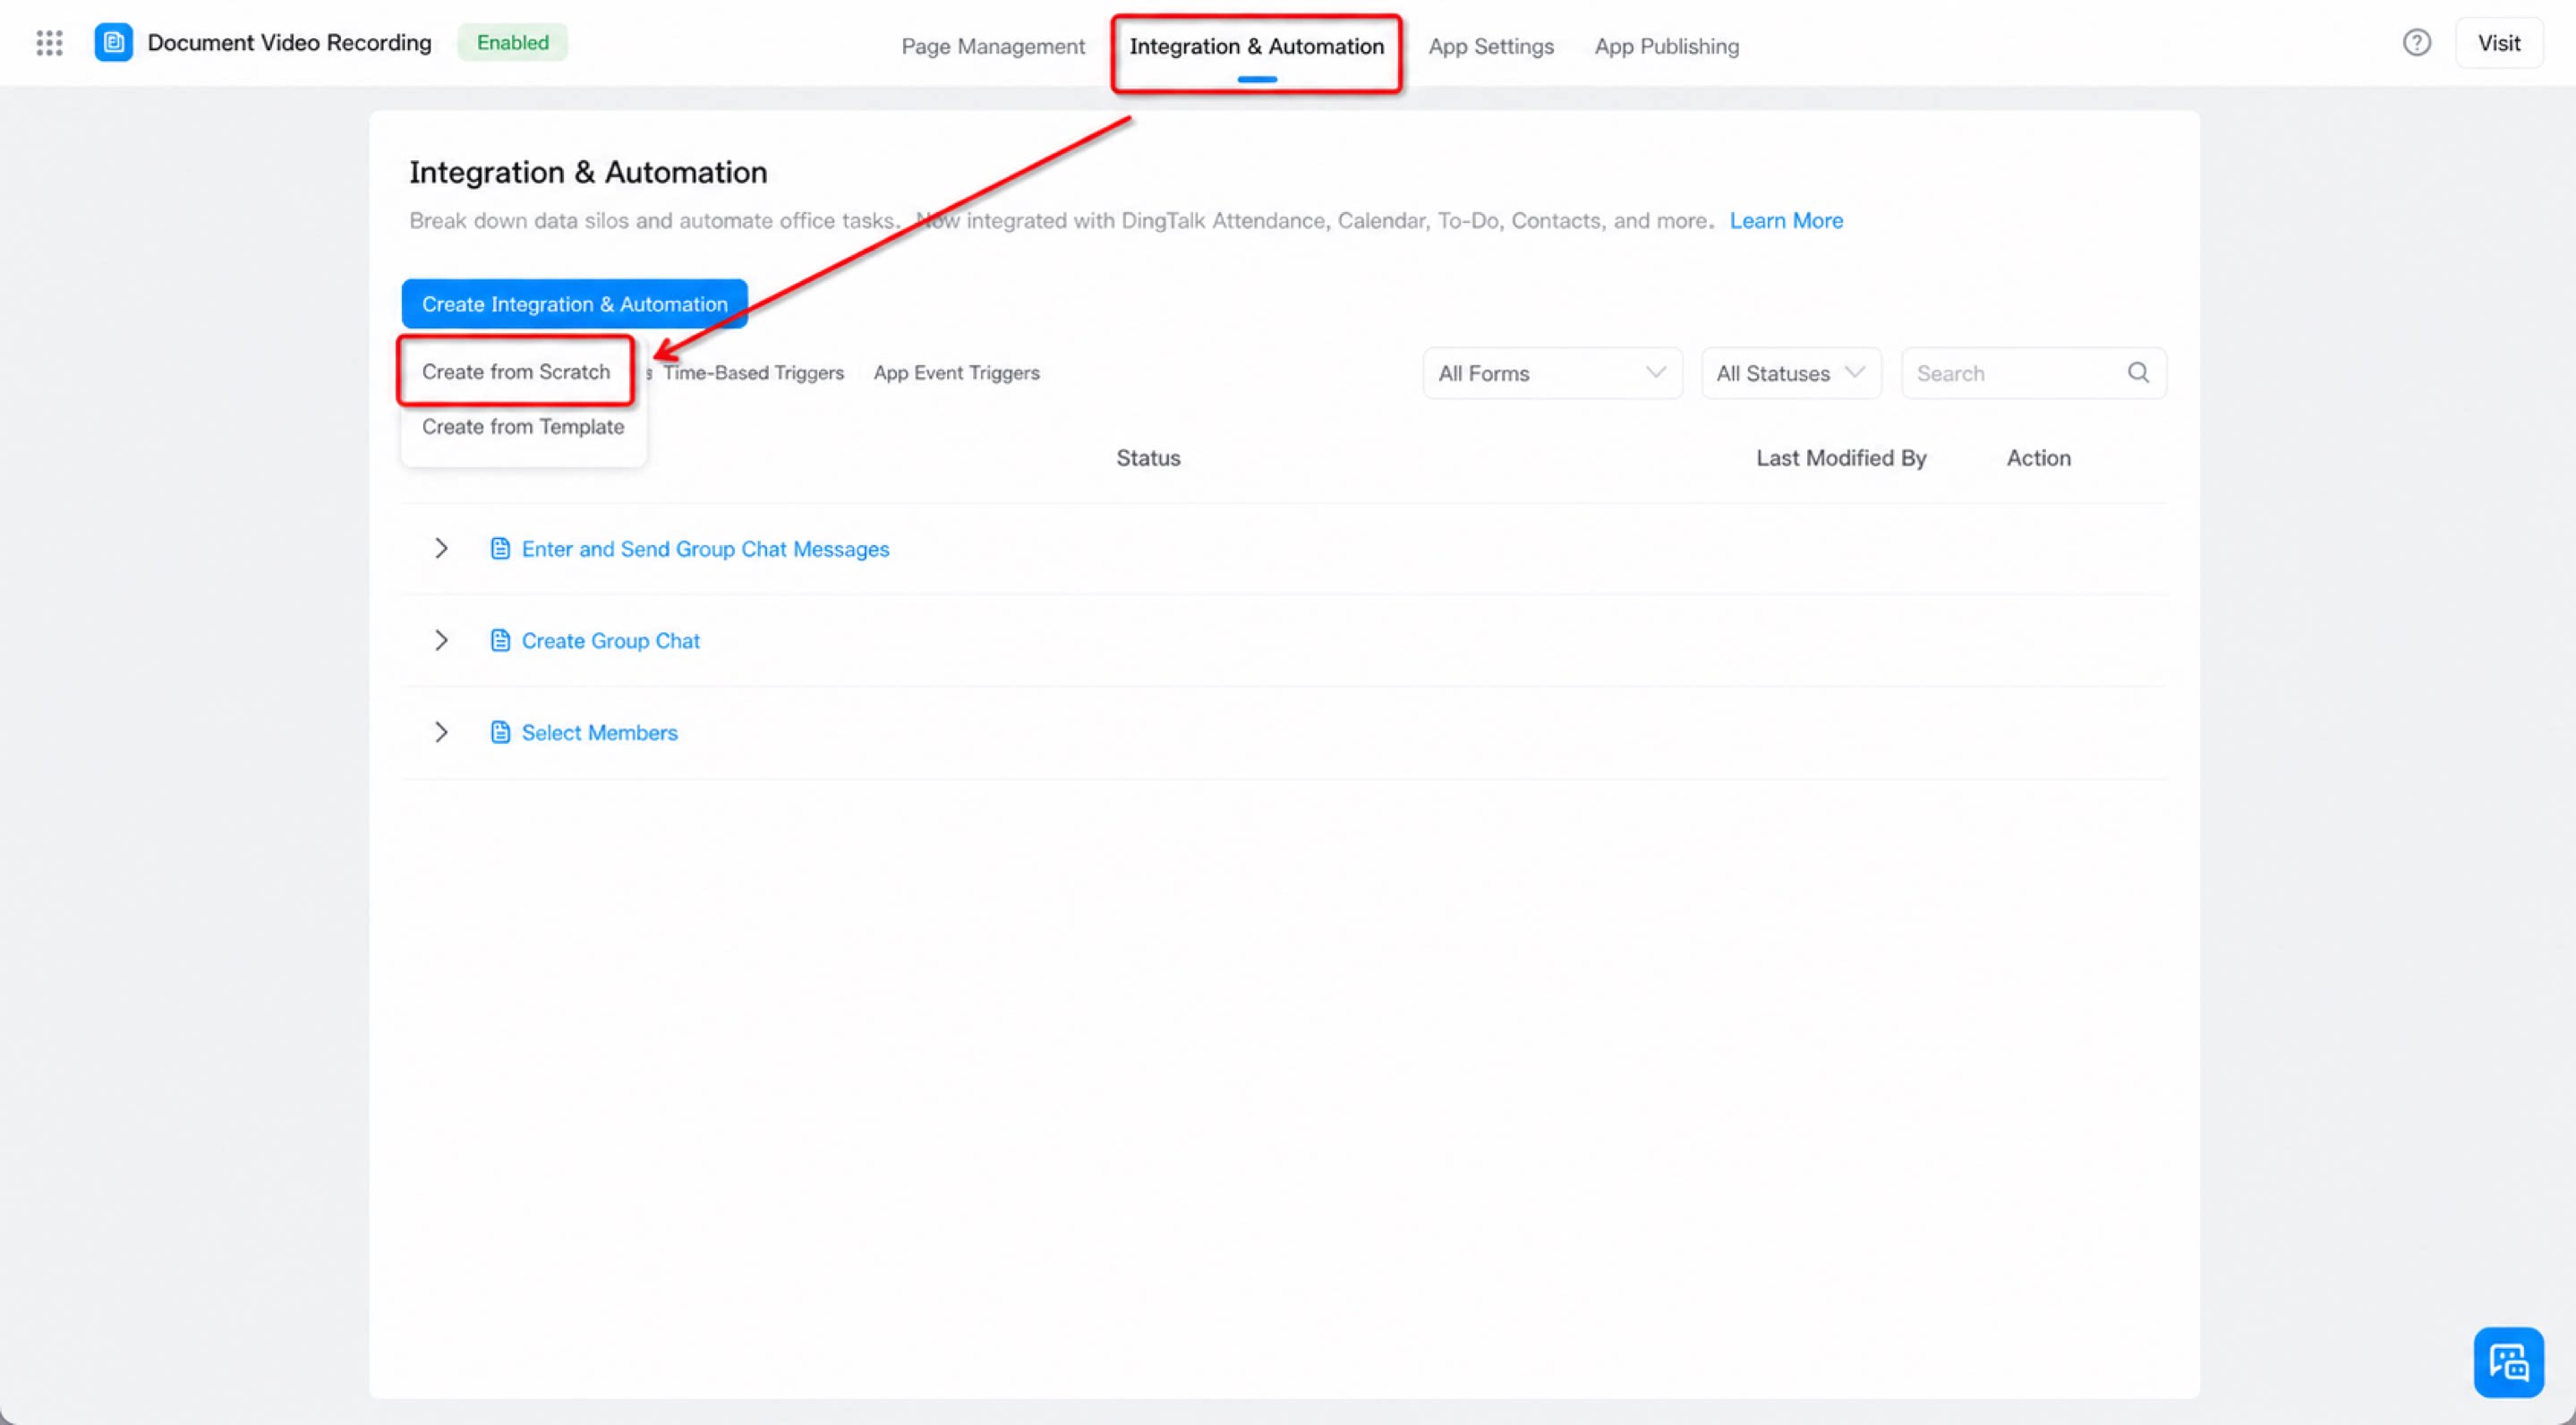
- On the admin page, click Integration & Automation at the top to open the feature area, then click Create from Blank under the Create Integration & Automation button. (See Figure 2.2-1)
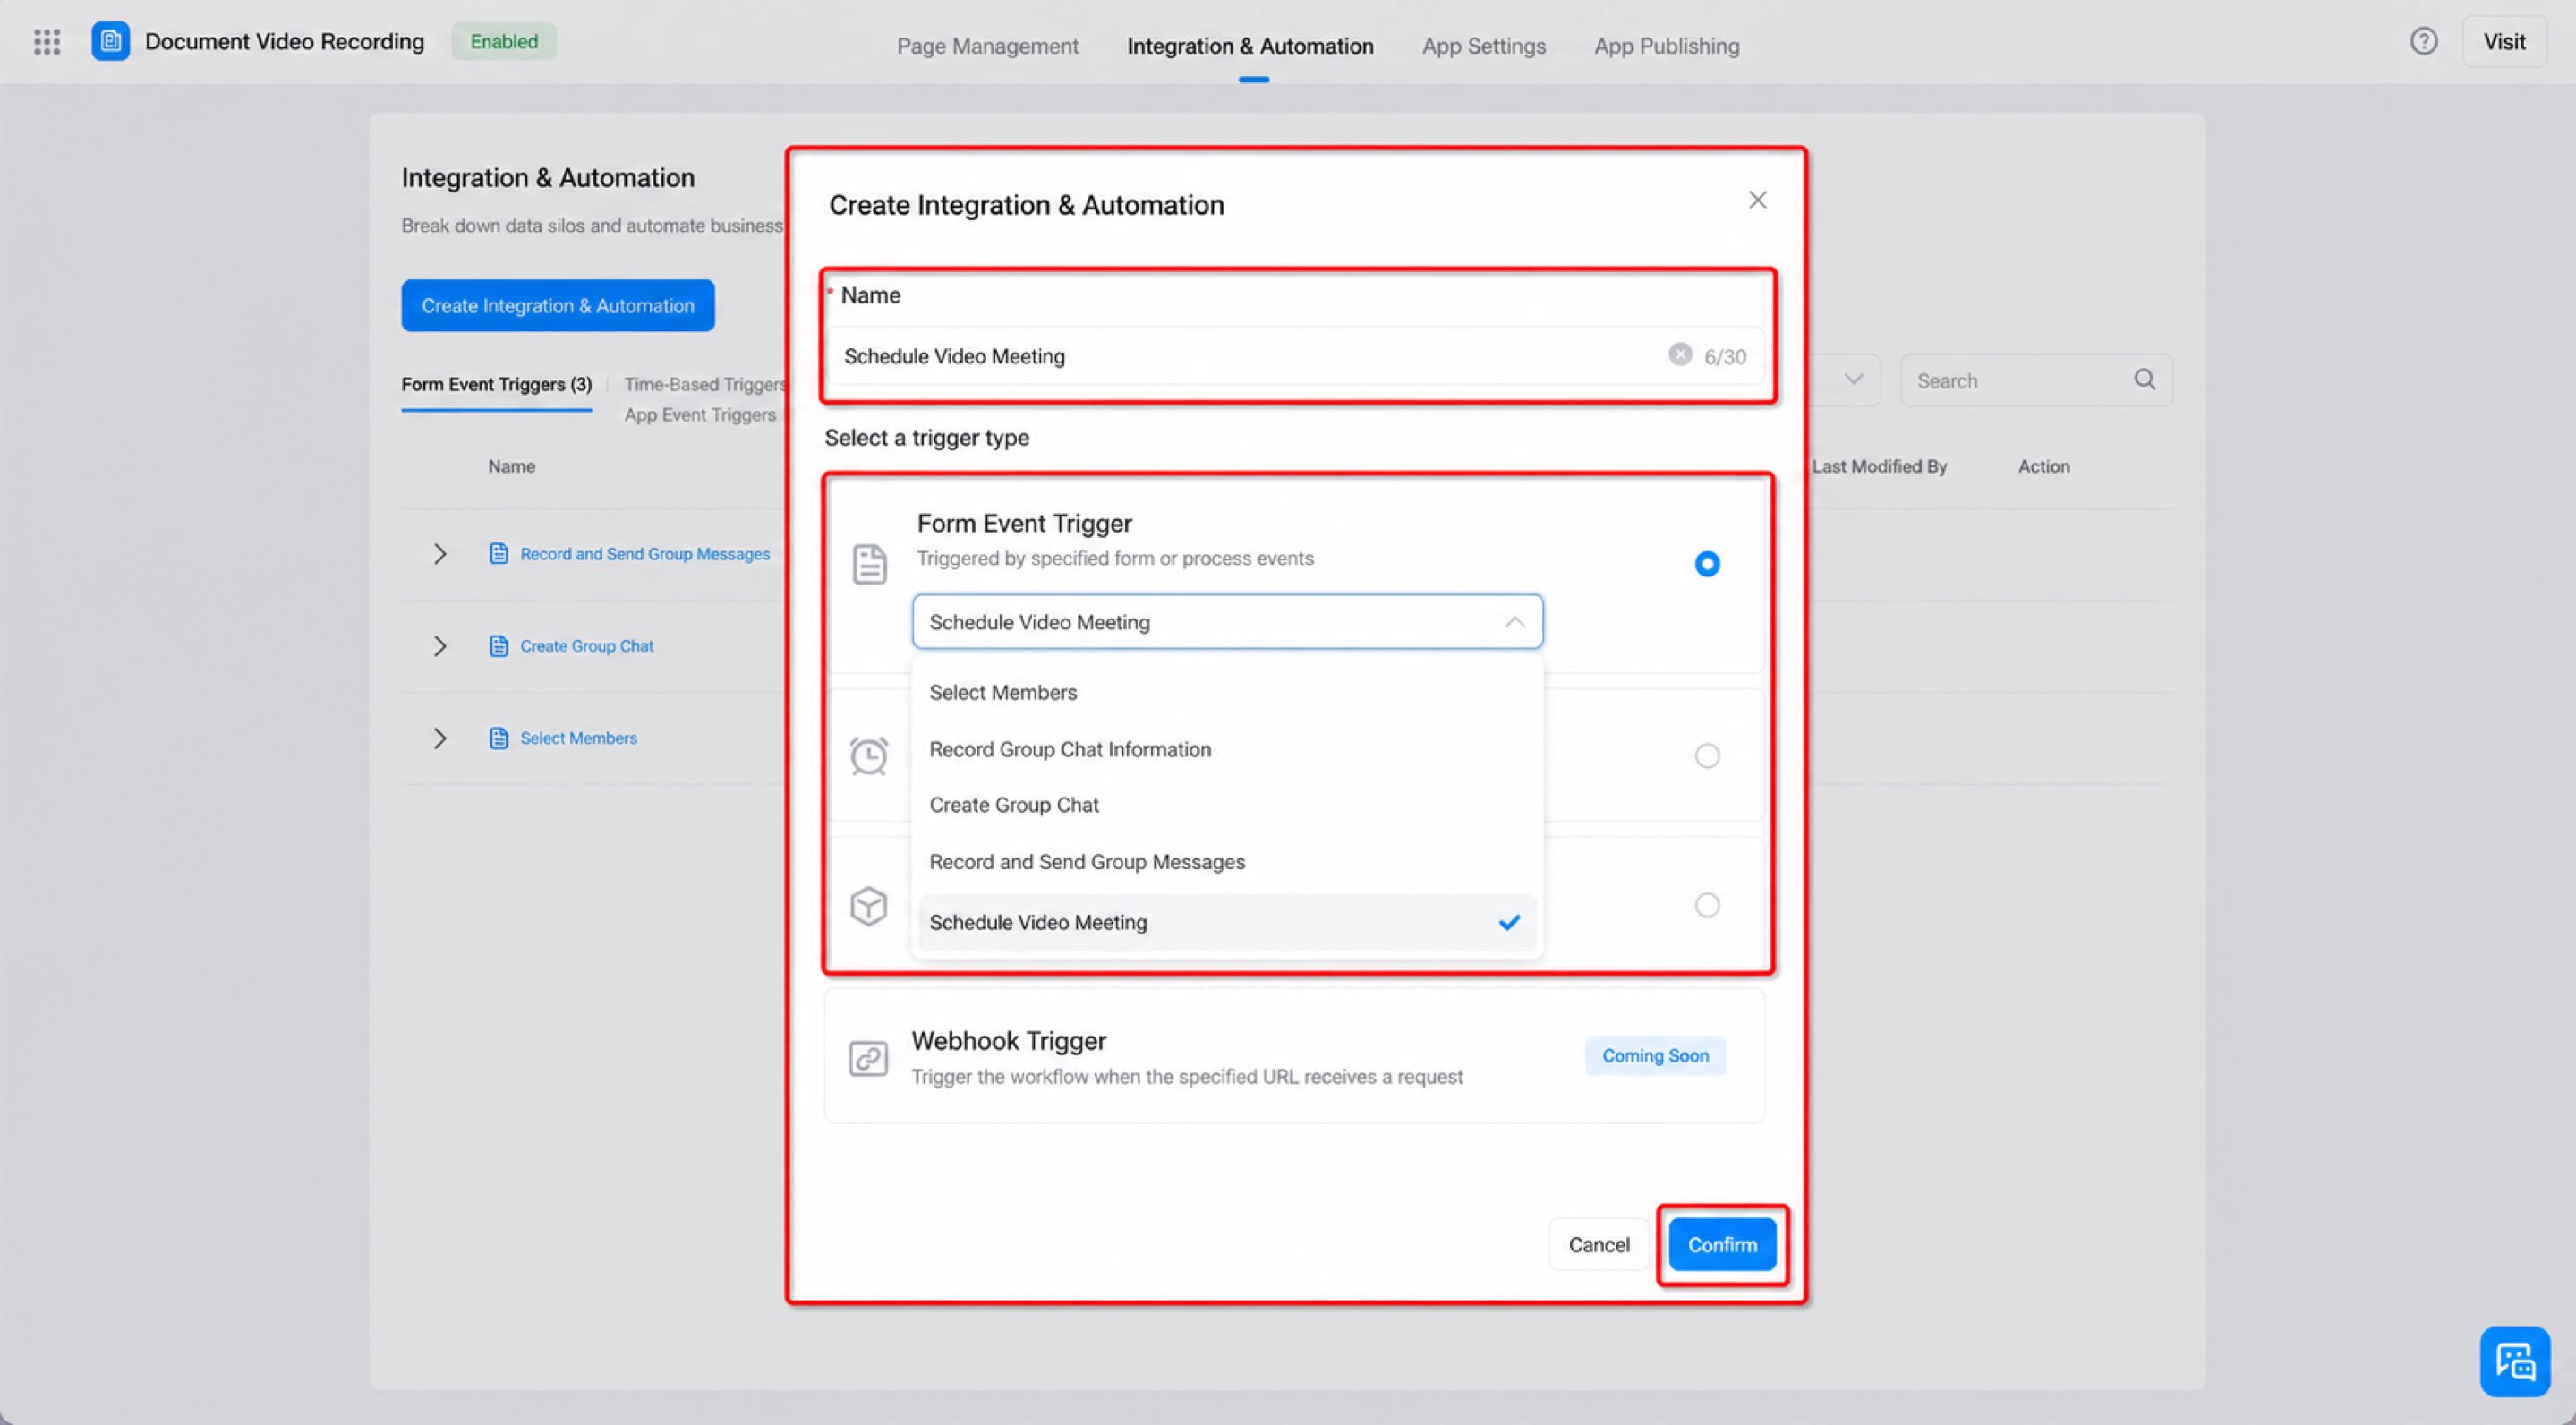
- Name the connector “Book Video Meeting”, set the Trigger type to “Form Event Trigger”, select “Video Meeting Booking” as the trigger form, and click Confirm. (See Figure 2.2-2)
Step 3: Configure the Connector
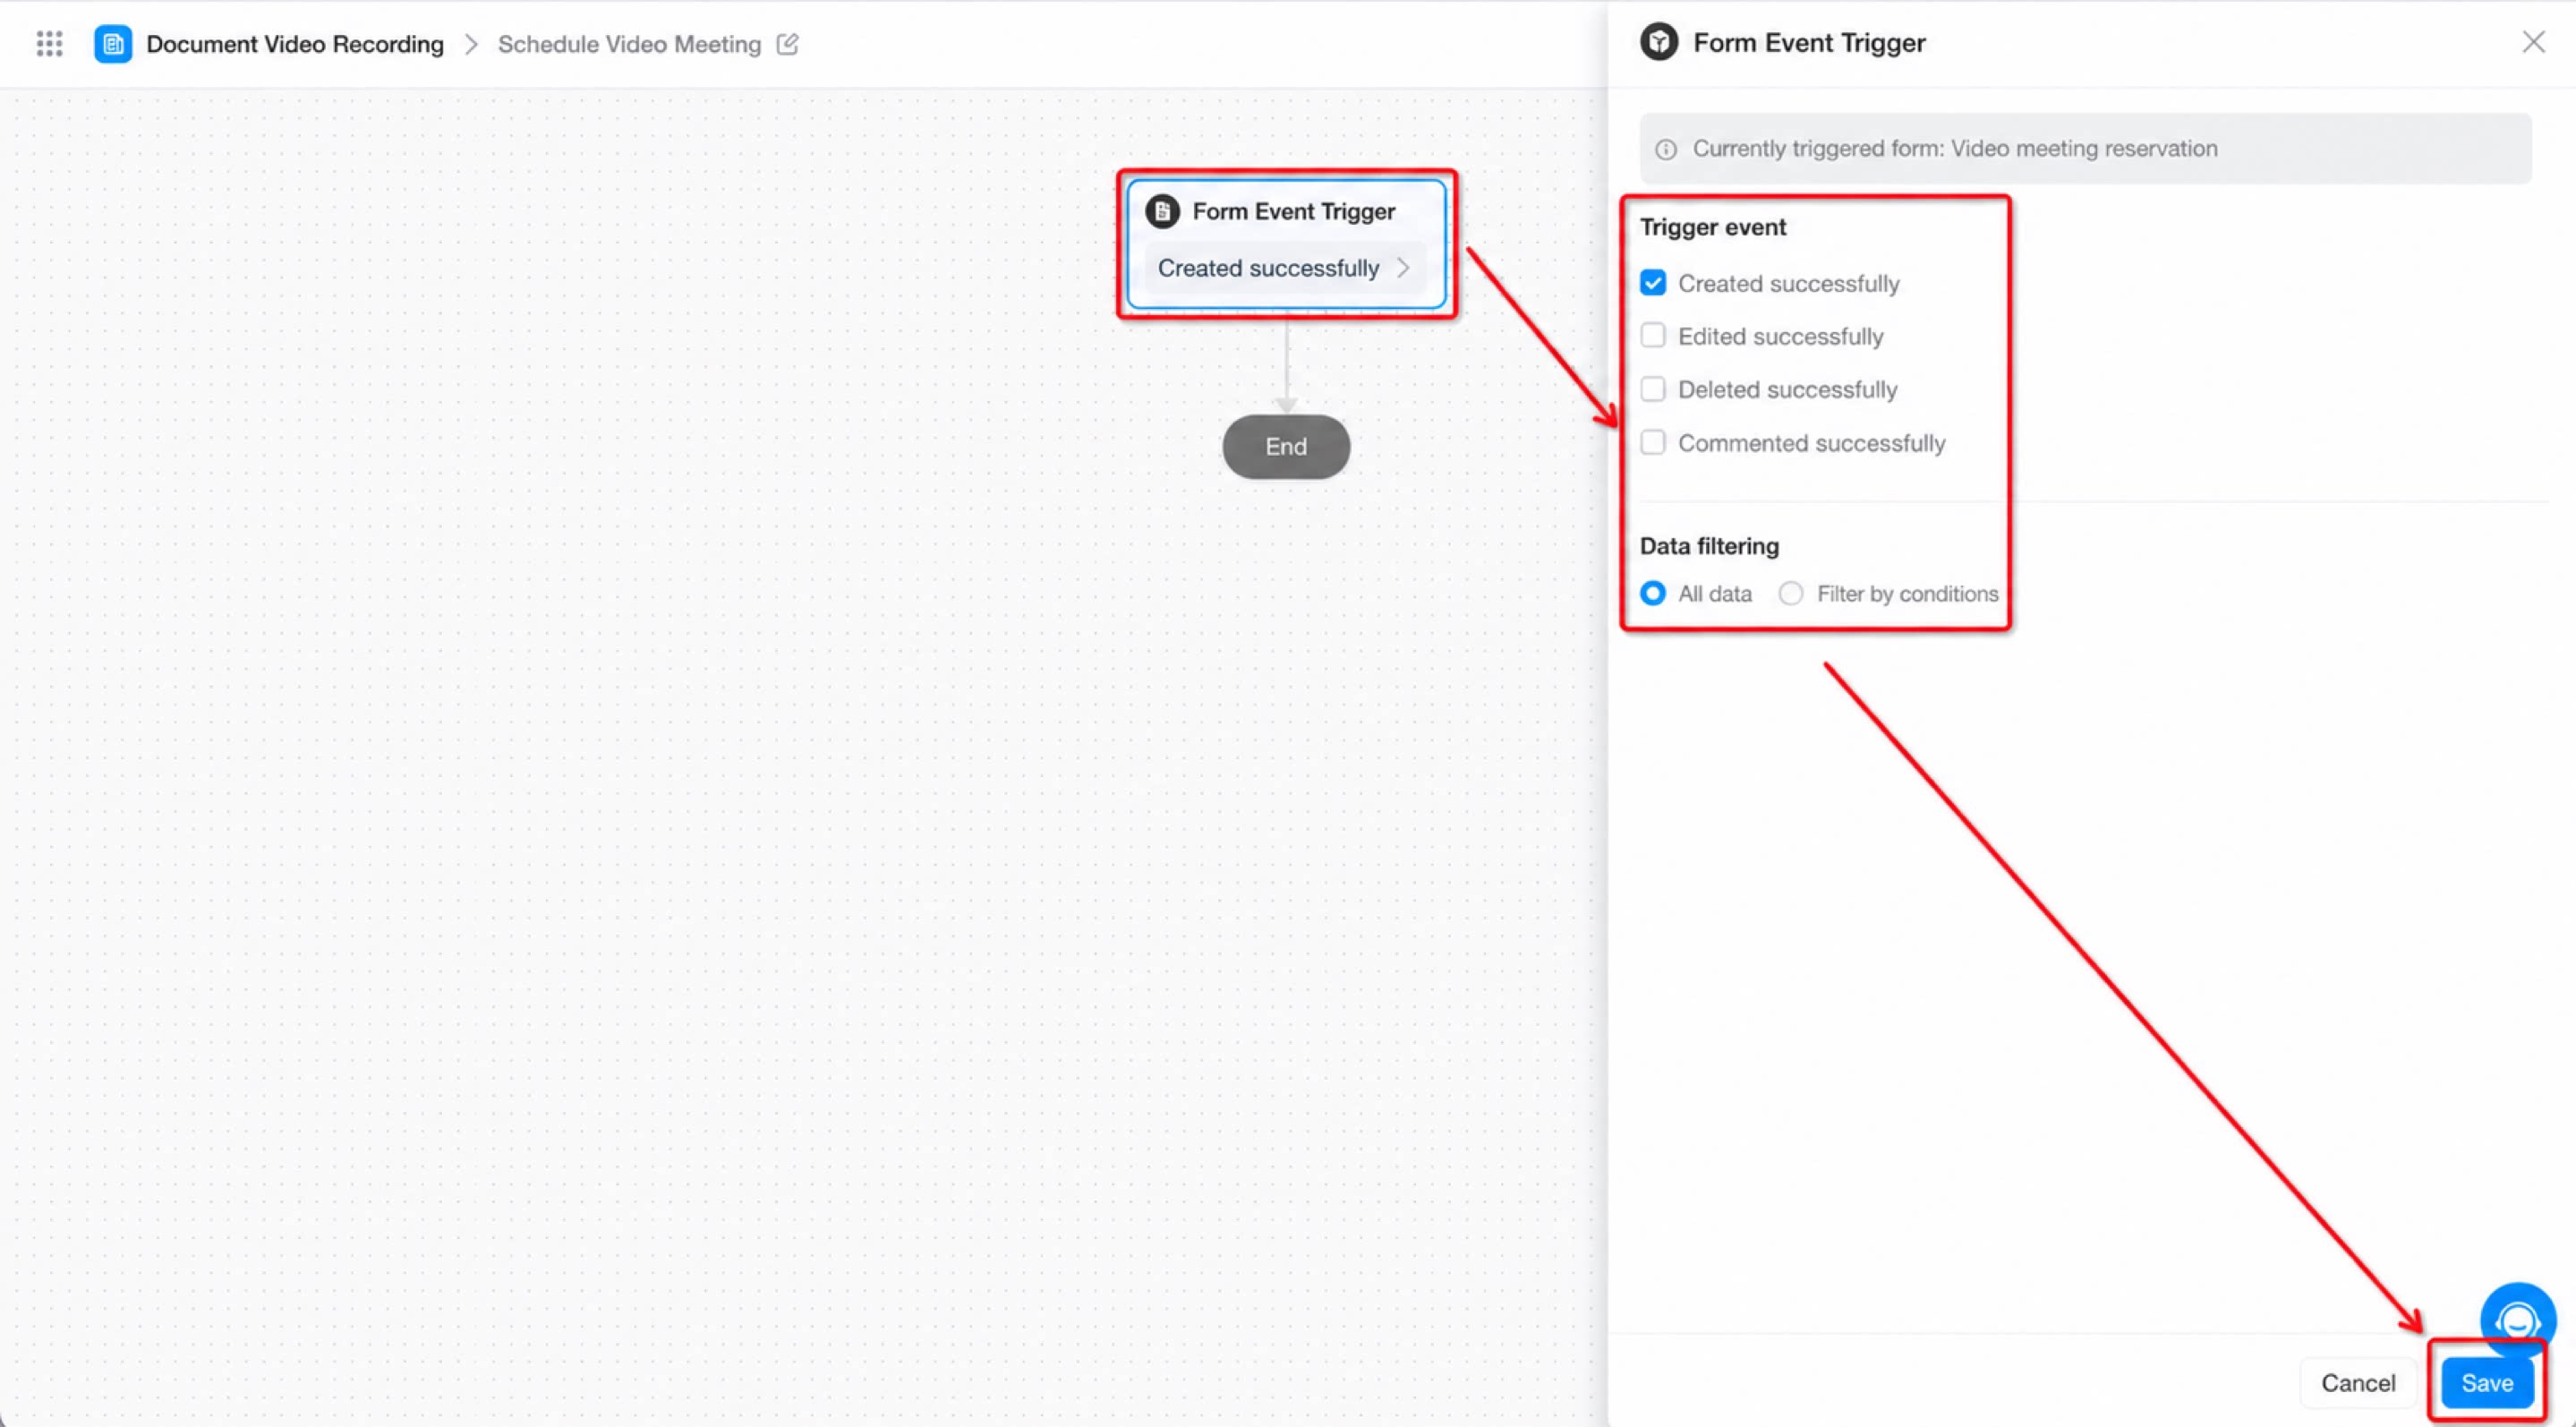
Steps:- Select “Form Event Trigger”, set the trigger event to “Create Success”, set data filtering to “All Data”, and click Save. (See Figure 2.2-4)
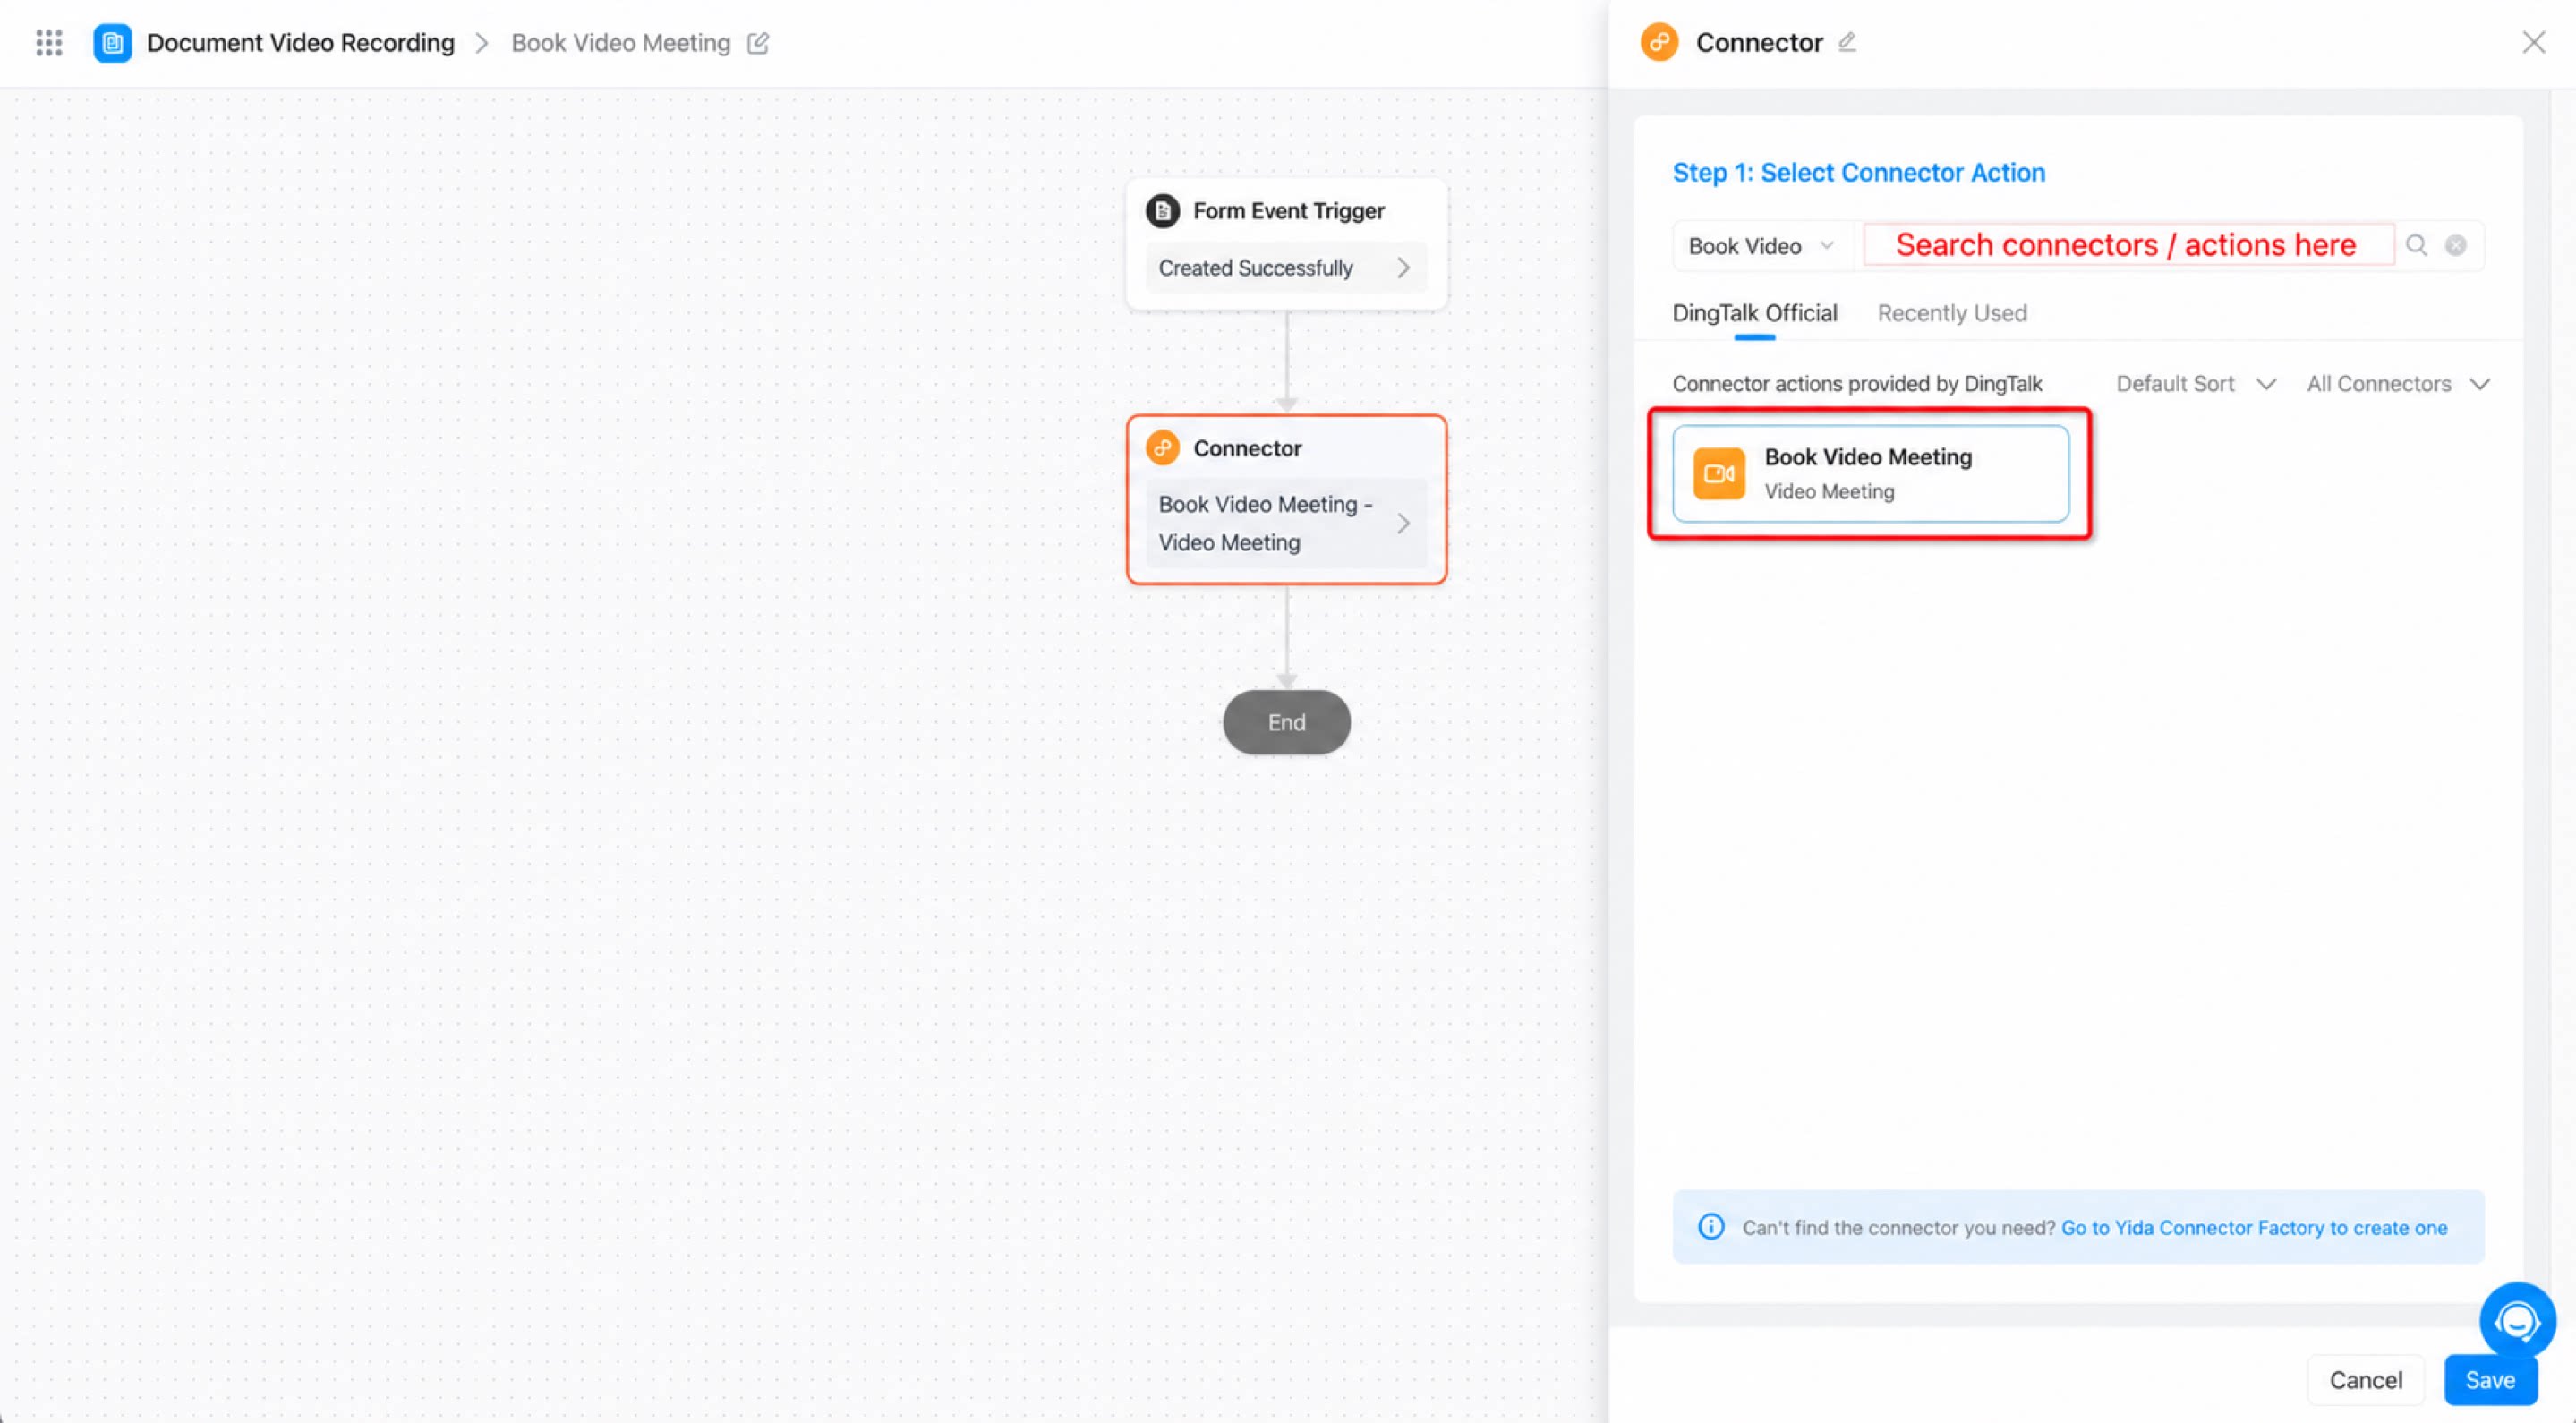
- Select “Connector”, then choose the “Book Video Meeting” action of the “Video Meeting” app. (See Figure 2.2-5)
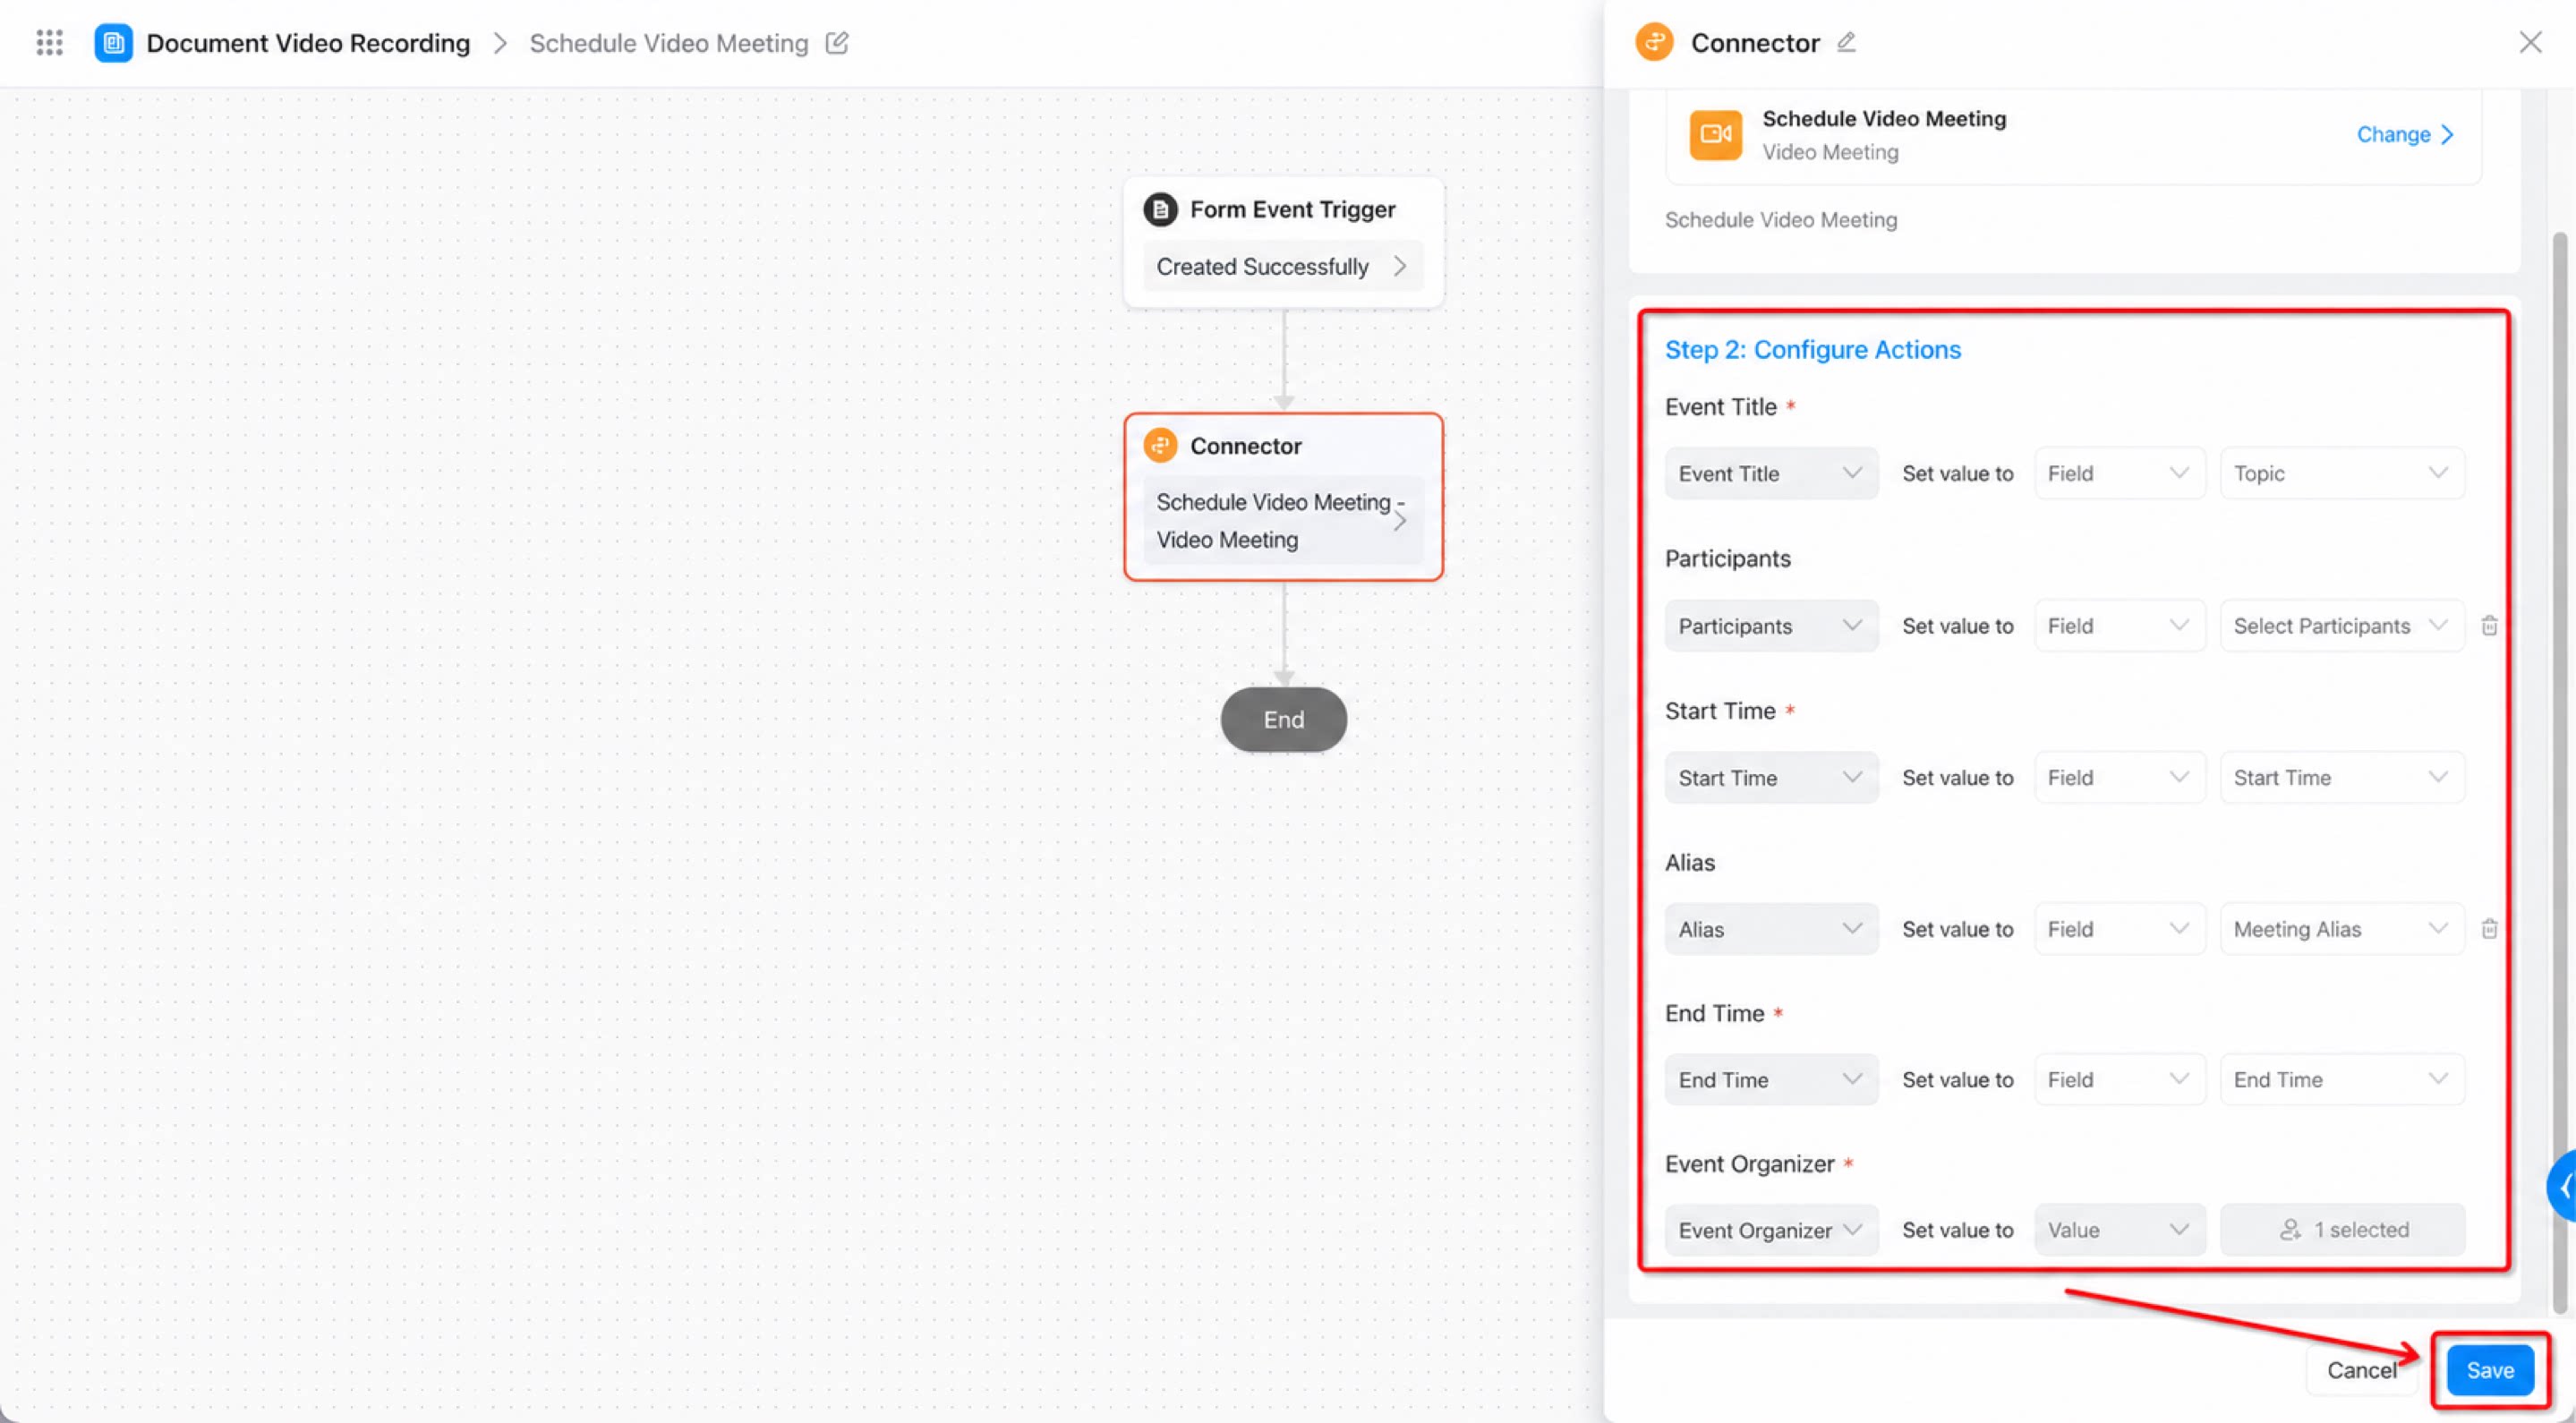
- In the action selection area, select the “Book Video Meeting” action and configure it. When done, click Save. (See Figure 2.2-6)
- Click Save in the upper-right corner of the page, then click Publish.
Step 4: Submit Form Data
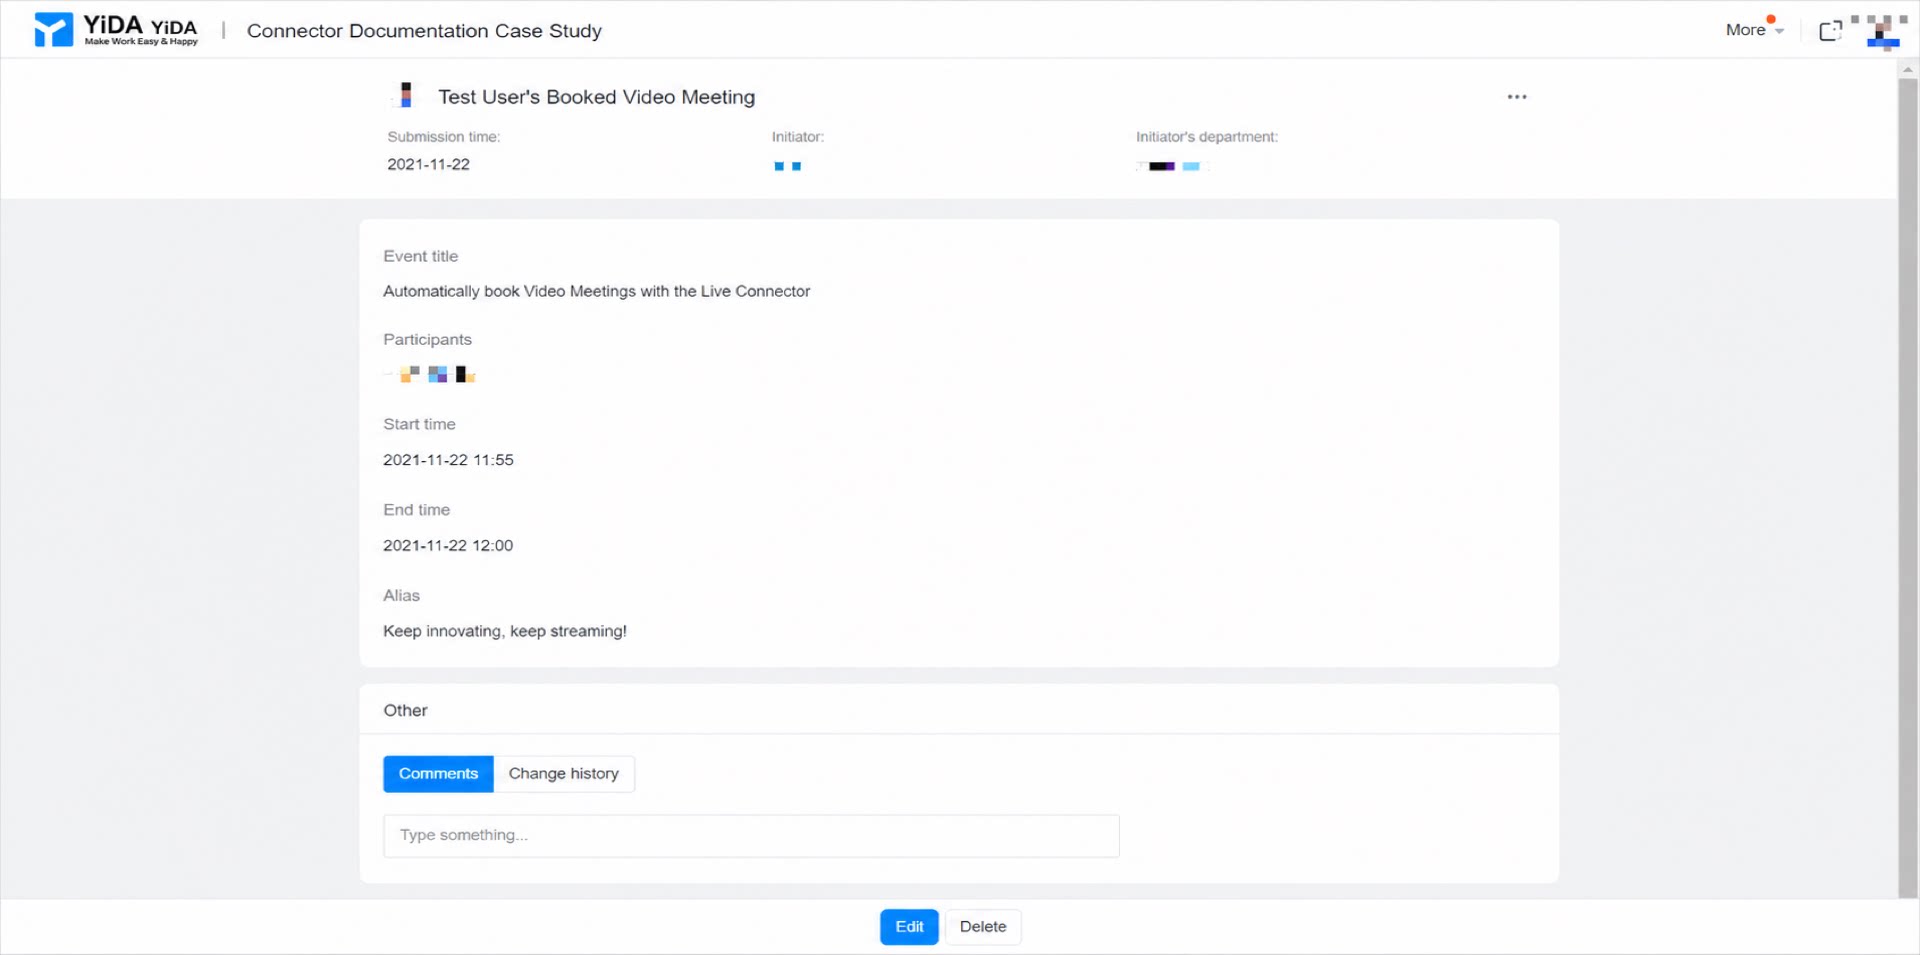
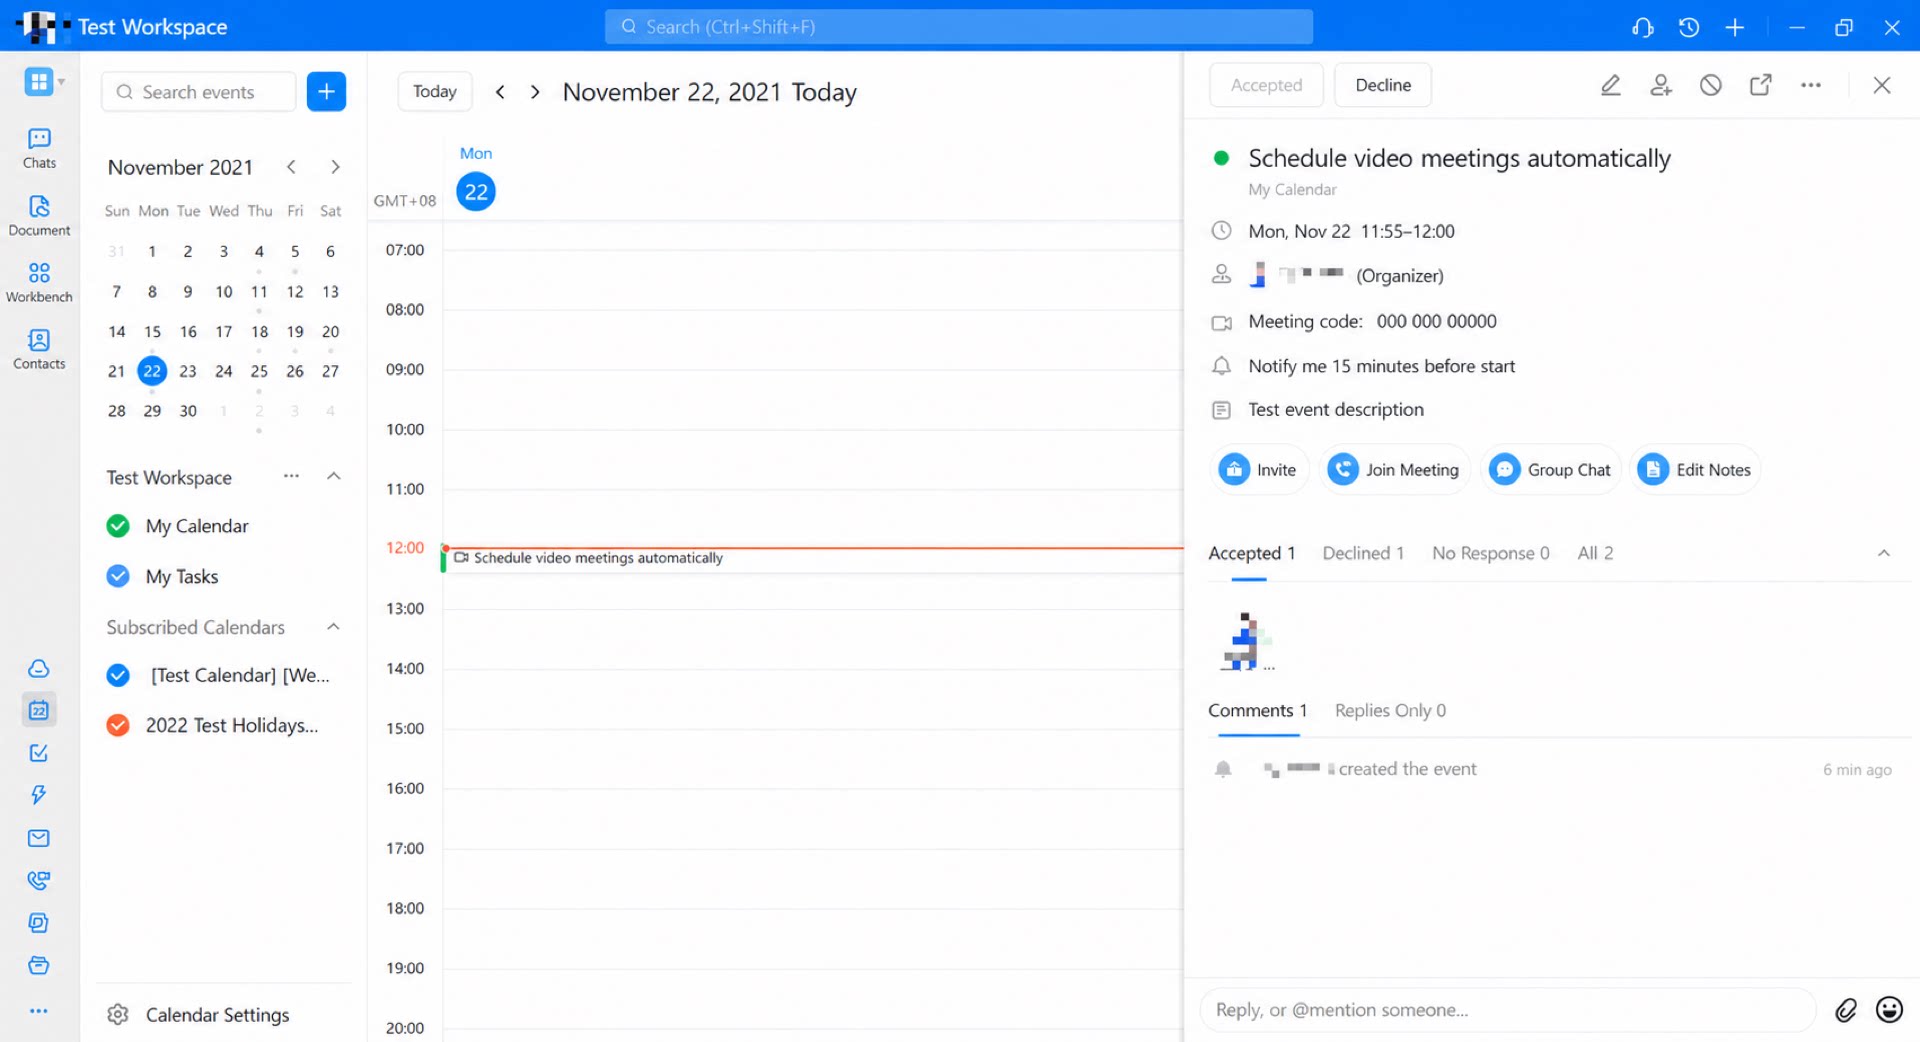
After completing the steps above, the connector is fully configured. Now submit data through the “Video Meeting Booking” form to trigger the connector and automatically book a video meeting. (See Figure 2.3-1)